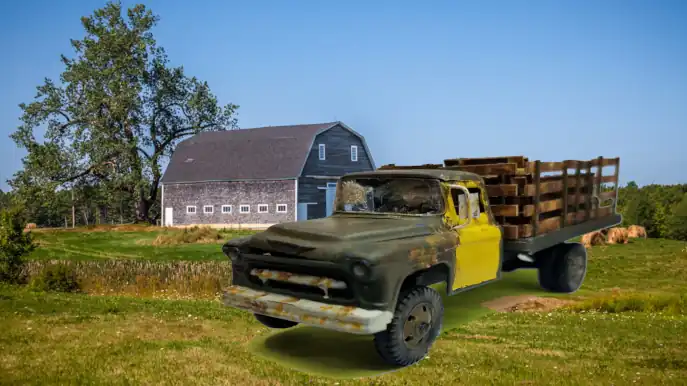
The following are problems and issues I found with the
Atlantis 1955 Chevy 2-Ton Stake Body Truck. I placed links to photos
and my YouTube videos at the bottom of this page.
Before we get started I want to say that I've always liked Atlantis
kits...and still do. I also hope that the problems I had were just
in this kit and that others are better.
This was a fun build in some ways, but in many other ways it was a
disappointment. Very few of the parts fit without some modifications,
which is fine, especially if you're like me and enjoy scratch building.
The worse part of the kit was assembling the body. No matter what I
did there are huge gaps at the seams. Some of it came from the
amount of sanding I had to do to fit the body parts together and
other parts seem to be from what I think are badly worn molds where it
could be seen the plastic did not fill.
-
When dry fitting the multi piece cab (7- pieces), it was already
apparent that there would be a lot of sanding and filling to
get the pieces to fit properly. It was also apparent that some
pieces had voids in the plastic, most likely caused by very old
molds, or a problem in the manufacturing process or a combination
of all and/or other manufacturing processes.
More on this later.
-
The bed stake rails have deep ejector pin marks on every slat.
It's too bad because they have a nice textured wood grain
molded into them. Filling the ejector pin marks and sanding
them smooth will, I'm sure, remove the wood grain texture. I took
care of this by scratch building my own stakes using styrene and
balsa wood.
-
The front of the frame had to be modified so that the front
grill, bumper and half the front fender assembly would fit
properly. (See photo #30)
-
As mentioned before, there are large gaps in the body pieces after assembling
the seven different pieces together. These gaps are even
worse than what I noticed during dry fitting, and actually,
much more sanding, scrapping and filing had to be done to
get them to fit the way they do...with the huge gaps.
-
When the seat is installed in its proper location the
back of the cab will not sit flush against the side window
frames. The gap between the cab back piece and the door window
frames is almost 1/4". To solve this I used a Dremel tool and
ground some of the thickness off the back leaner of the seat.
(See photo 36 & 37)
-
The hood will not fit at all. The hood pins on the back of the
hood are too big to fit into the holes in the firewall. I
drilled out the holes in the firewall and the hood would still
not fit. I then cut the hood pins off and filed them out of
the curvature of the hood. The hood now went into the
approximate location but I still had to sand the left and
right sides to make it fit in-between the front fenders. When
the hood finally fit between the fenders and against the body
under the windshield, it would not close all they. I found that
the air cleaner on the engine is too high and it's hitting
the hood. The engine and air cleaner are in the location
specified by the instructions and by the tooling marks on model
but it's still too high. I'm leaving it like that. Thank
goodness I'm making an old beat-up farm truck or this
kit would have gone in the salvage bin of parts that can
be repurposed for other things.
-
The rear axles were too short to accommodate the dual wheels. To
solve this problem, I used and over sized drill bit on the back
side of the inside wheel to make the back side of the wheel
thinner. It still wasn't enough to allow the duel wheels to fit
on the axles. I took a piece of brass rod that fit the axle
opening of the wheels, placed two wheels on the rod and glued
the duel wheels together. After the glue dried, I then glued
the duel wheels on the rear axle.
-
The left front wheel and tire will not set flush even though
the frame is level. It's off the ground by about 3/16" and
when I tried to fix it it through everything else out of
perspective.
YouTube and Rumble Playlists

YouTube playlist for my build of the 1955 Chevy 2-Ton Stake Body Truck

Rumble playlist for my build of the 1955 Chevy 2-Ton Stake Body Truck
Skip's Messy Workbench ⇔ All rights reserved ⇔ Copyright © 2023-2024
Skip's Messy Workbench
⇔ Last updated: August 16, 2025


