The 1955 Chevrolet 2-Ton Stake Body Truck. I picked this because:
I wanted to build a a truck, other than a pickup.
I wanted something easy with low parts count because I had just
finished a rather large, intense build.
I built Atantis kits in the past and they were easy and pretty
much fell together, looking good at the end.
And...I wanted to practice rusting and weathering, and painting wood grain.
Well...this kit was a disaster!!! The cleanup was never ending and
what's worse, very few parts fit. I should have realized that when
the research showed that the molds were most likely the original, 1955
Revell molds.
Thankfully I was planning to do it a beater, because otherwise, with all
the problems, it would have ended up in the land fill.
This is two version of the box art for the 1955 Chevy 2-Ton
Stake Body. The top photo is the box art for the Atlantis
2020 release of the kit. The bottom photo is the box art for
the original Revell 1955 release.
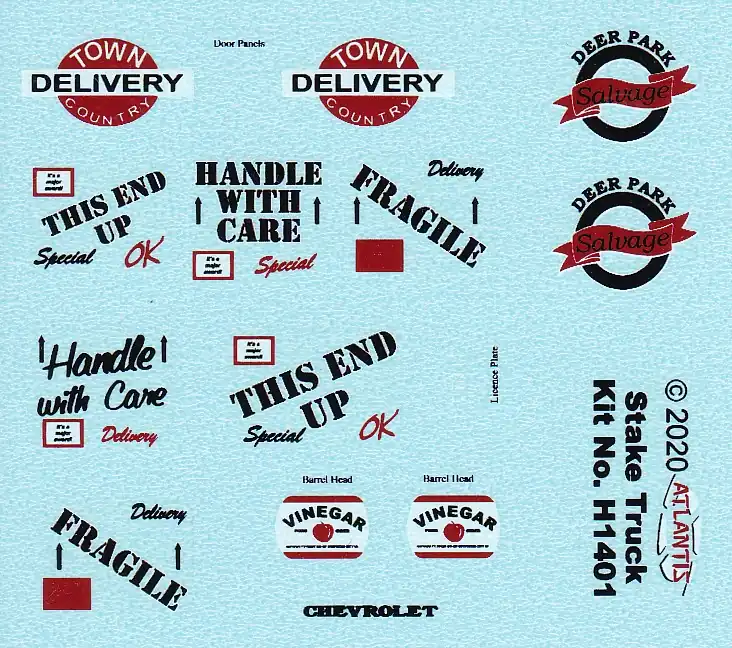
Decal sheet. This image is larger than the actual decal
sheet. If you would like a copy of the decal sheet in its
actual size that can be printed,
click this link.
The image will open in a new tab or window, then right click
the image and select Save Image As... . I'm not sure how to
do this on a Mac or Linux...sorry.
The actual size of the sheet should be (Width x Height):
760 x 673 pixels, 2.533"(64.35mm) x 2.243"(56.98mm), with
a resolution of 300 x 300 ppi. After downloading the image,
open it in your image editor and check the size to insure
it is as stated. This size keeps everything to the original
1:48 scale. Of course you can scale it to any scale you need,
provided the resolution is still good.
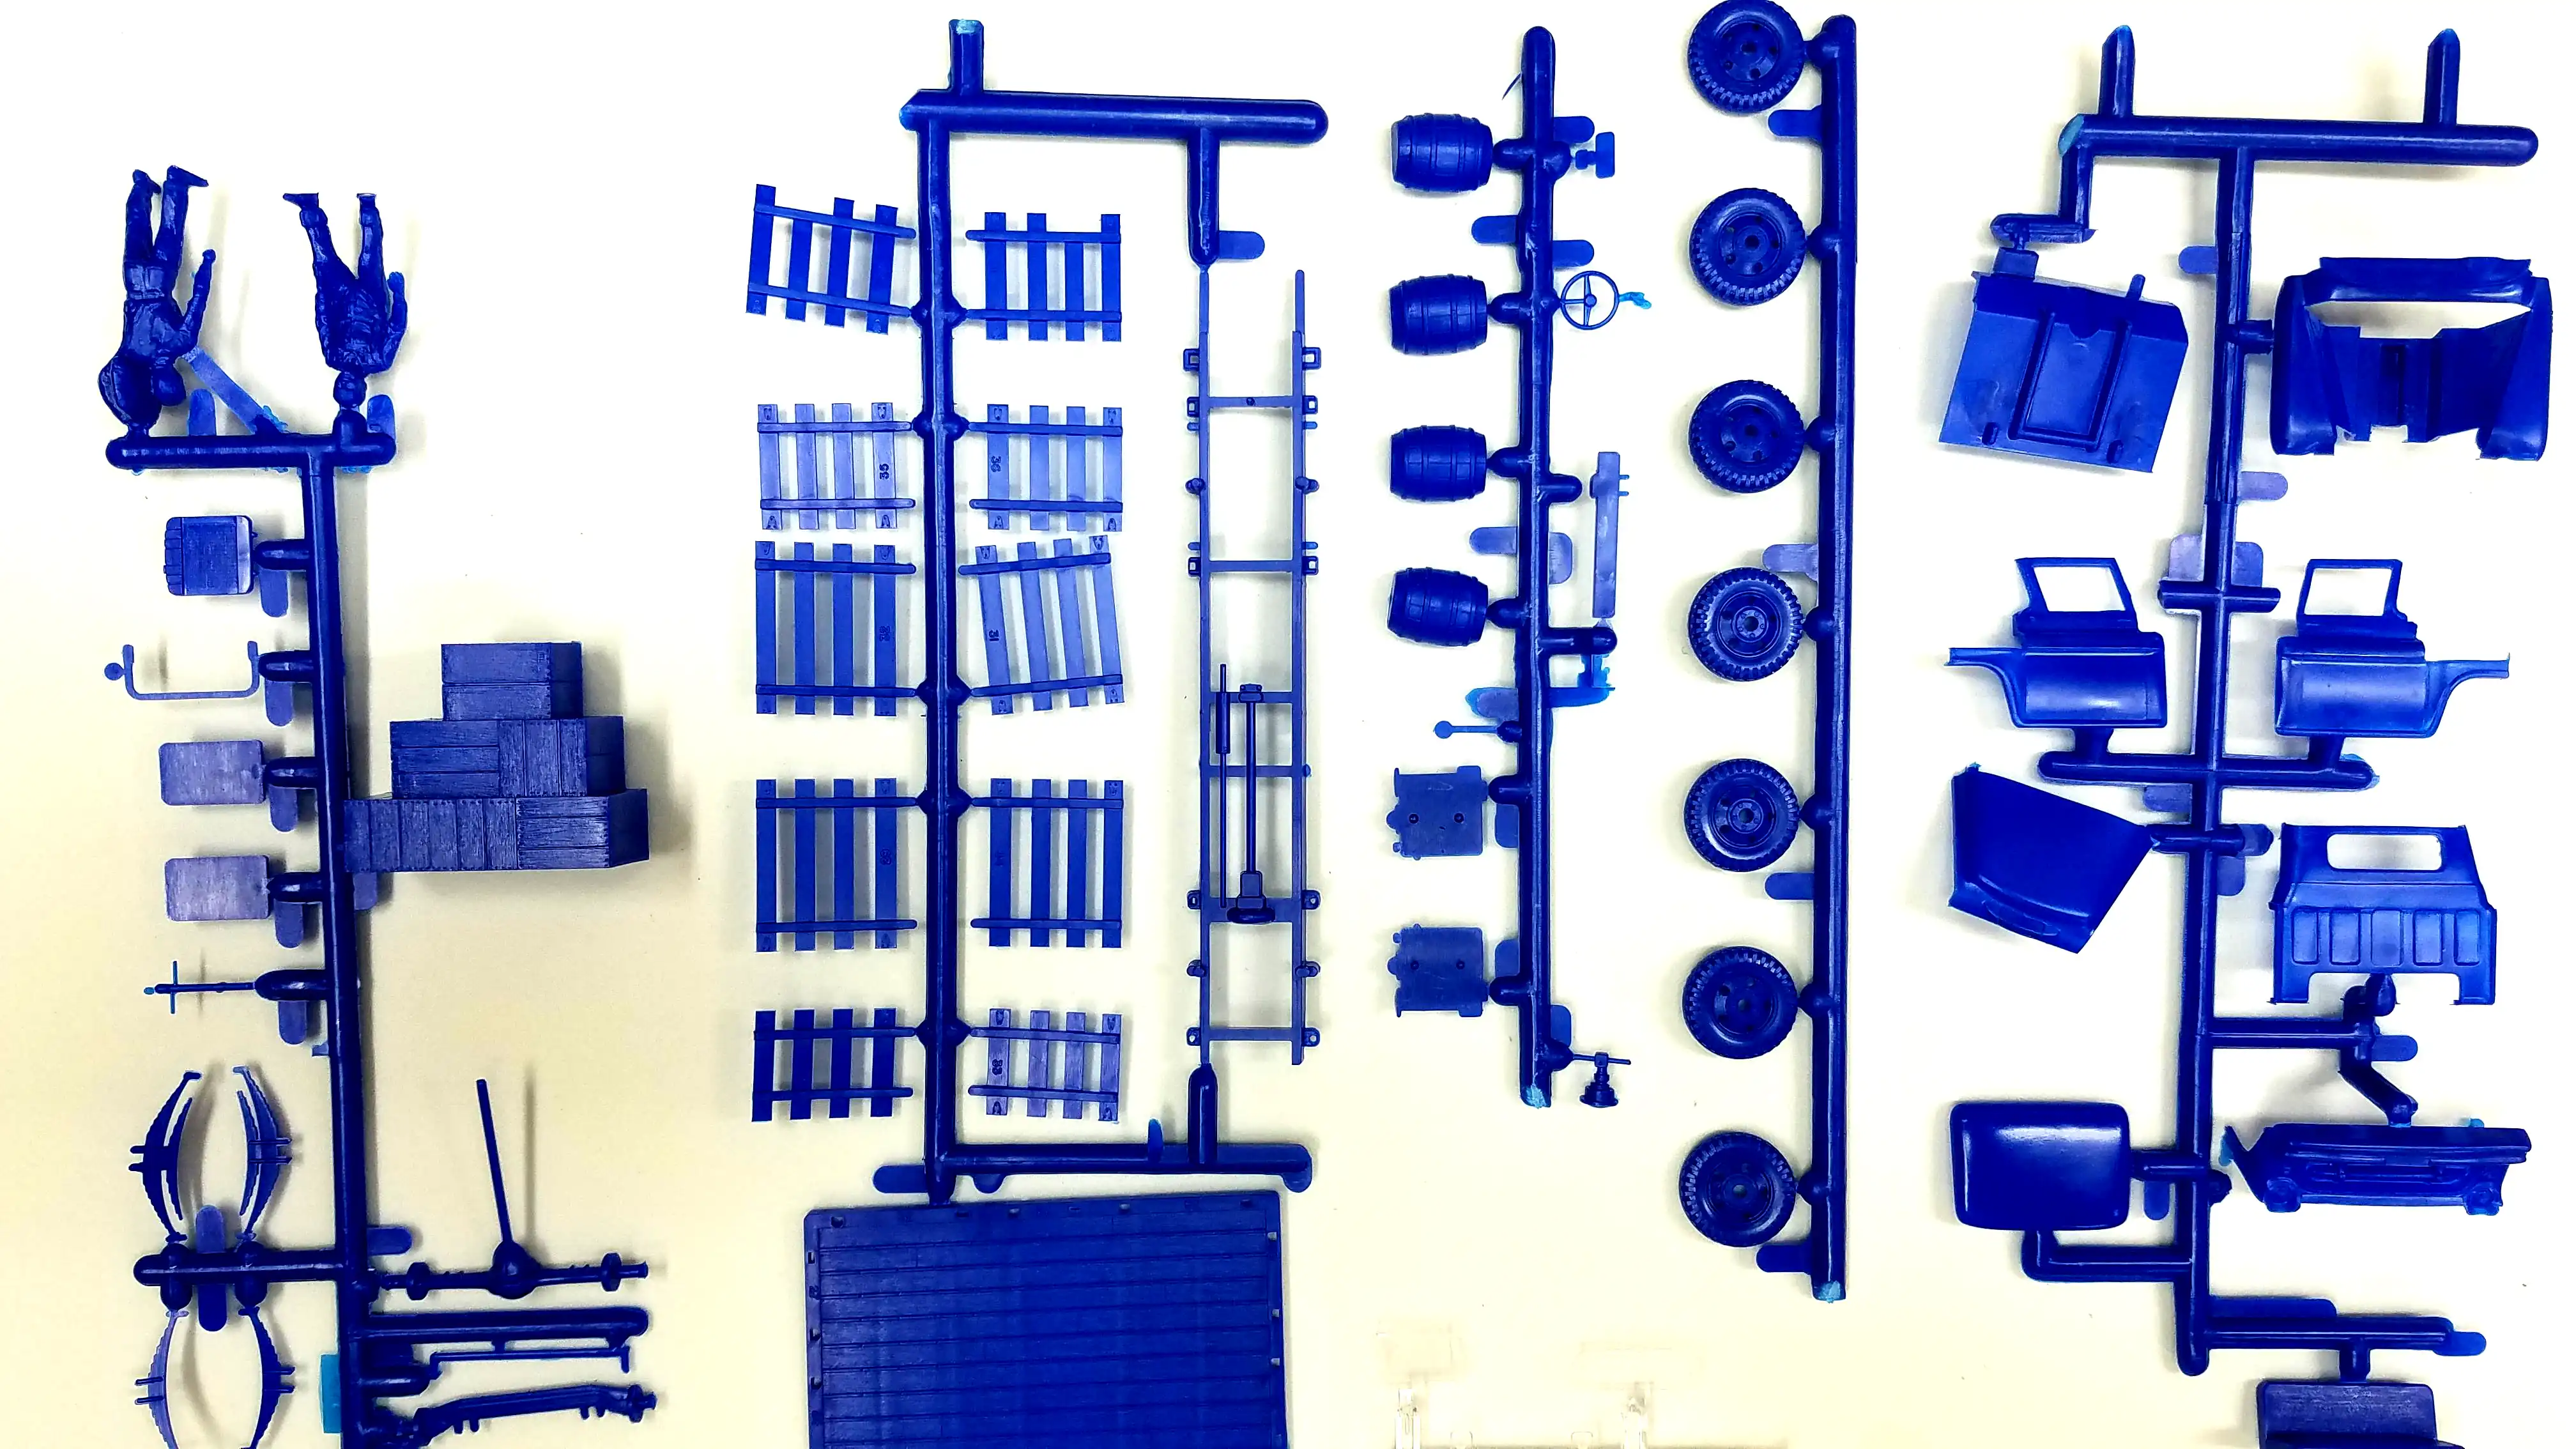
All the parts have been removed from the sprues. They have not
been cleaned up yet. There is quite-a-bit of flash on the
parts, but I would expect that given the molds are fairly
old. According to
Scalemates
the molds are from the 1955 Revell original release. But then
Scalemates is not 100% accurate.
It looks like there might be some filler needed on the
body parts. I'll show that and address that later.
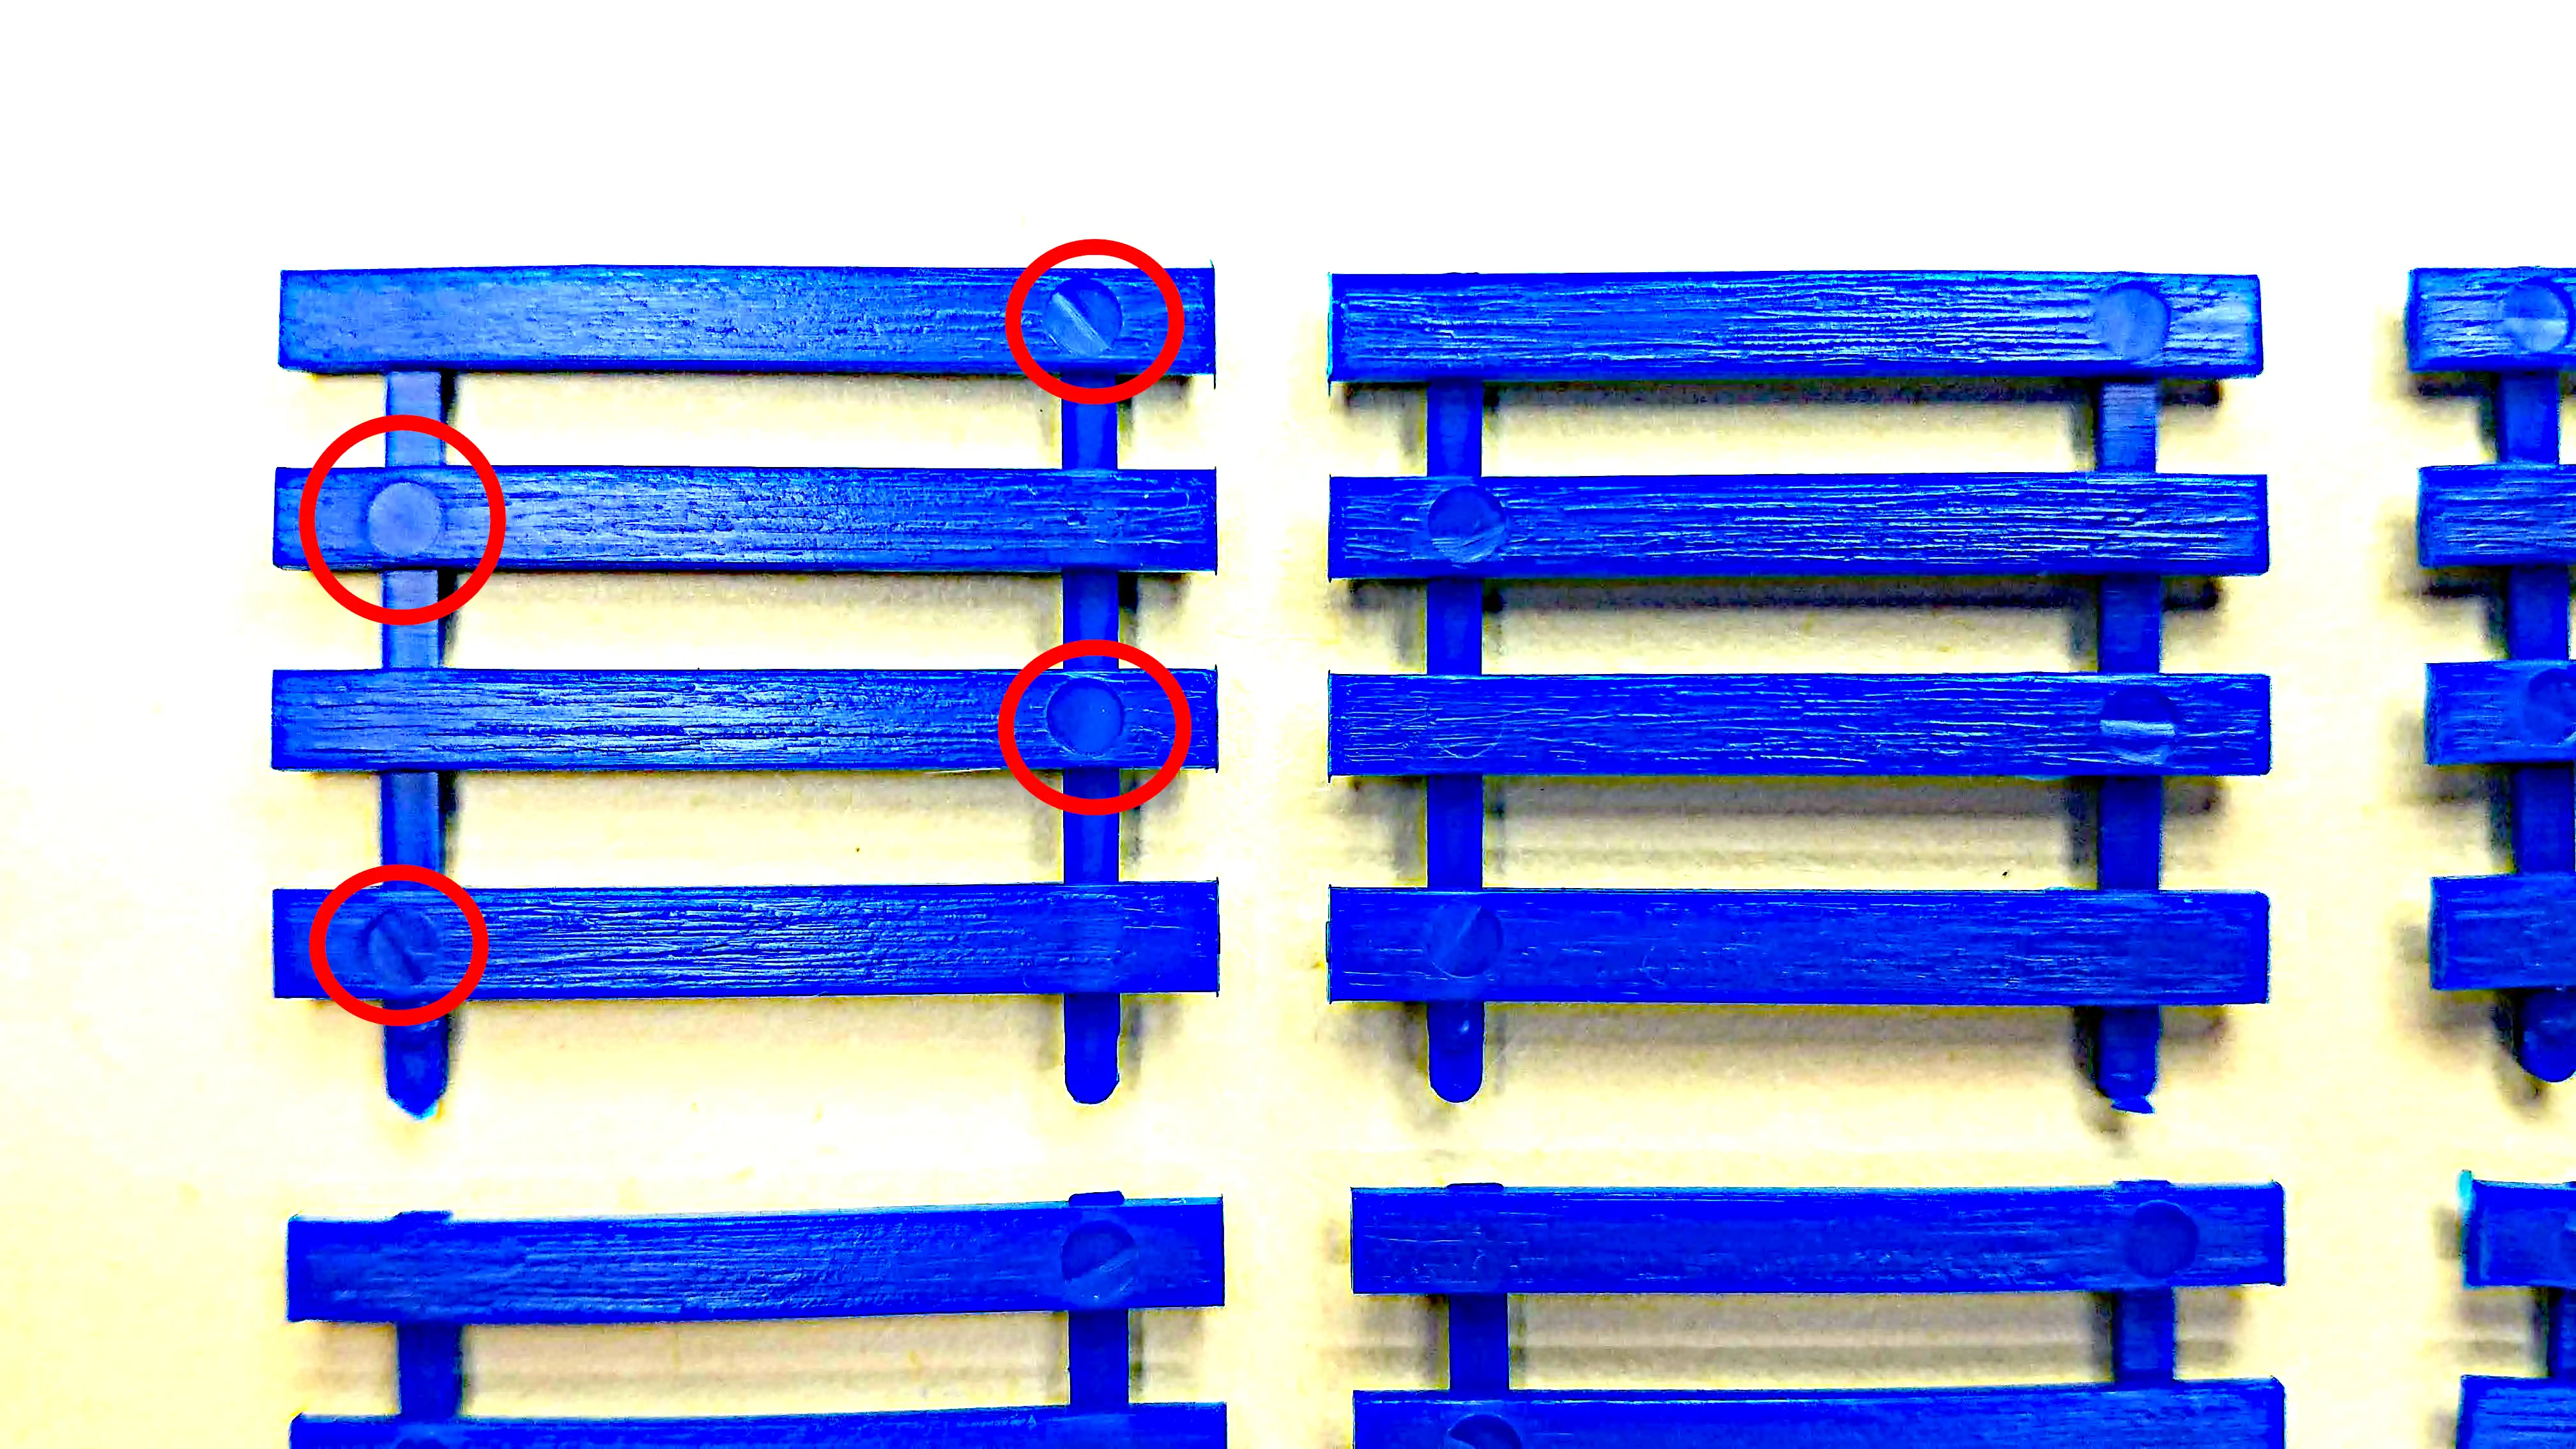
This is a close up of some of the stake rails. Even though
there is a nice wood grain texture on them, every one of
the rails have ejector pin marks as I've circled on one of
them. I guess I could fill them, but I'm sure the sanding
of the putty will also take some of the wood grain away.
I could possibly make them look like the bolts holding the
wood slats to the rails, but I'm sure the bolts would not
be that big. As I said in my introduction video, I'm fairly
sure I'll be scratch building all of them from real wood.
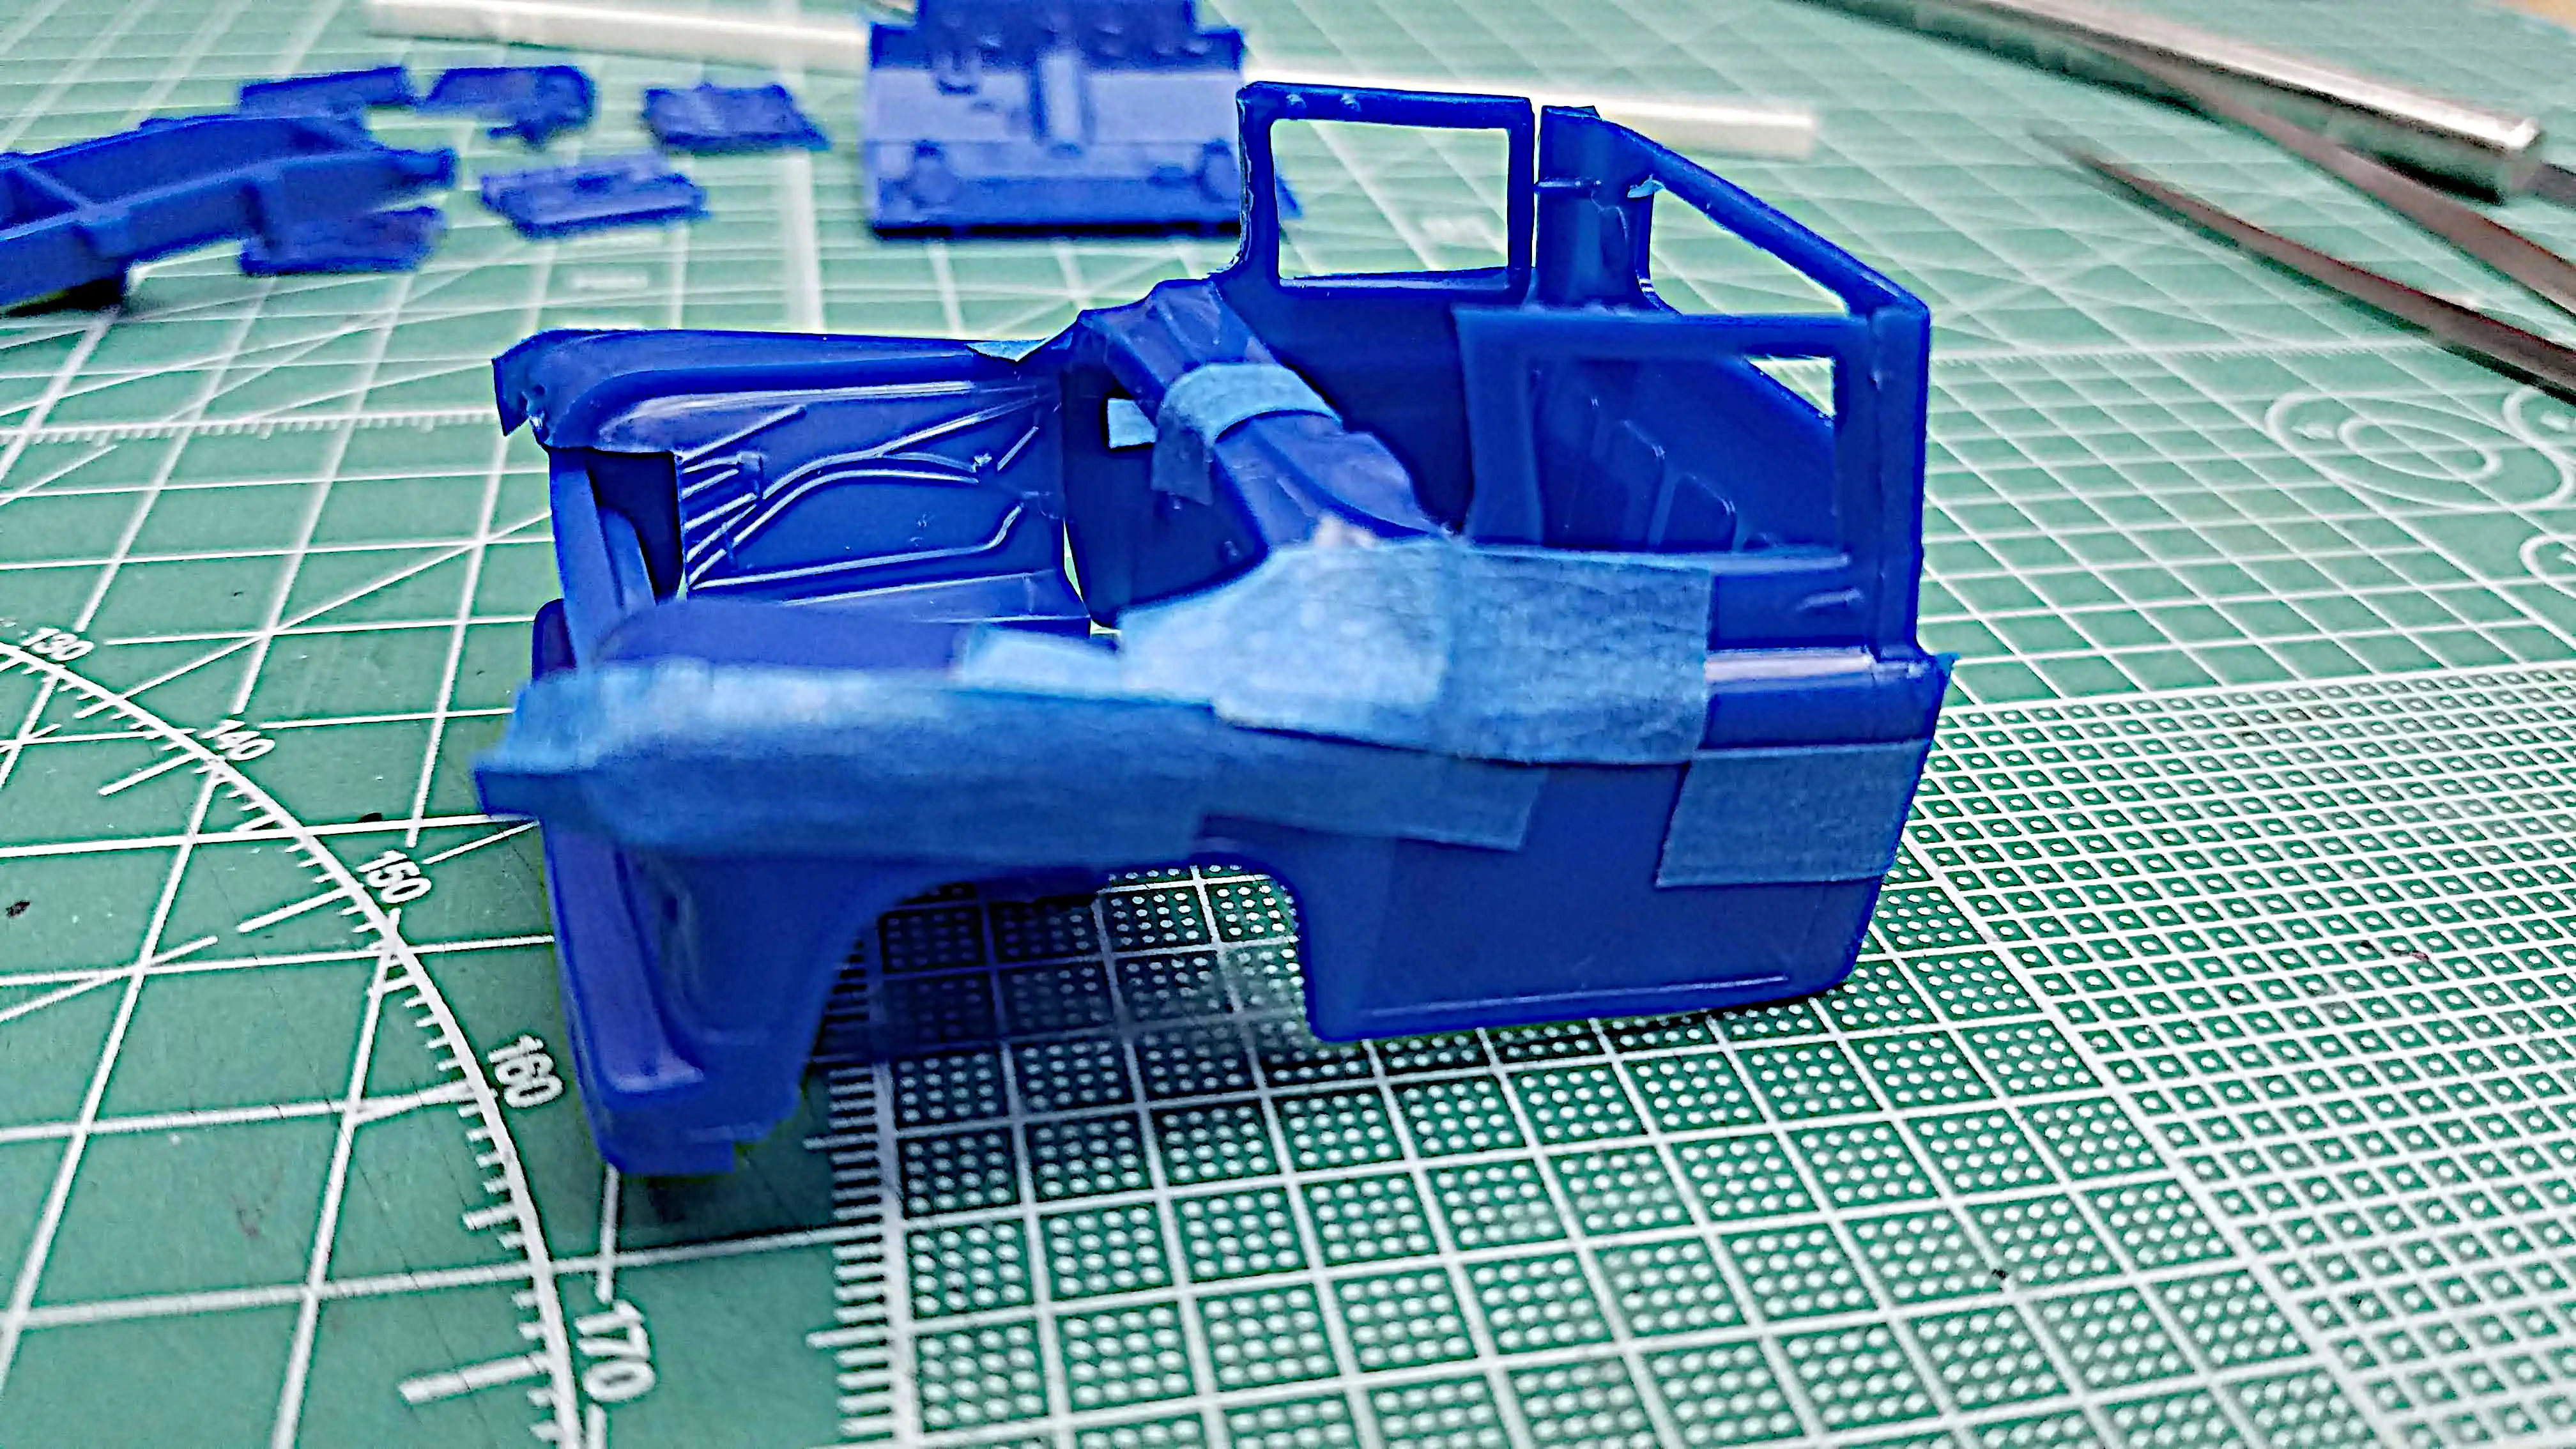
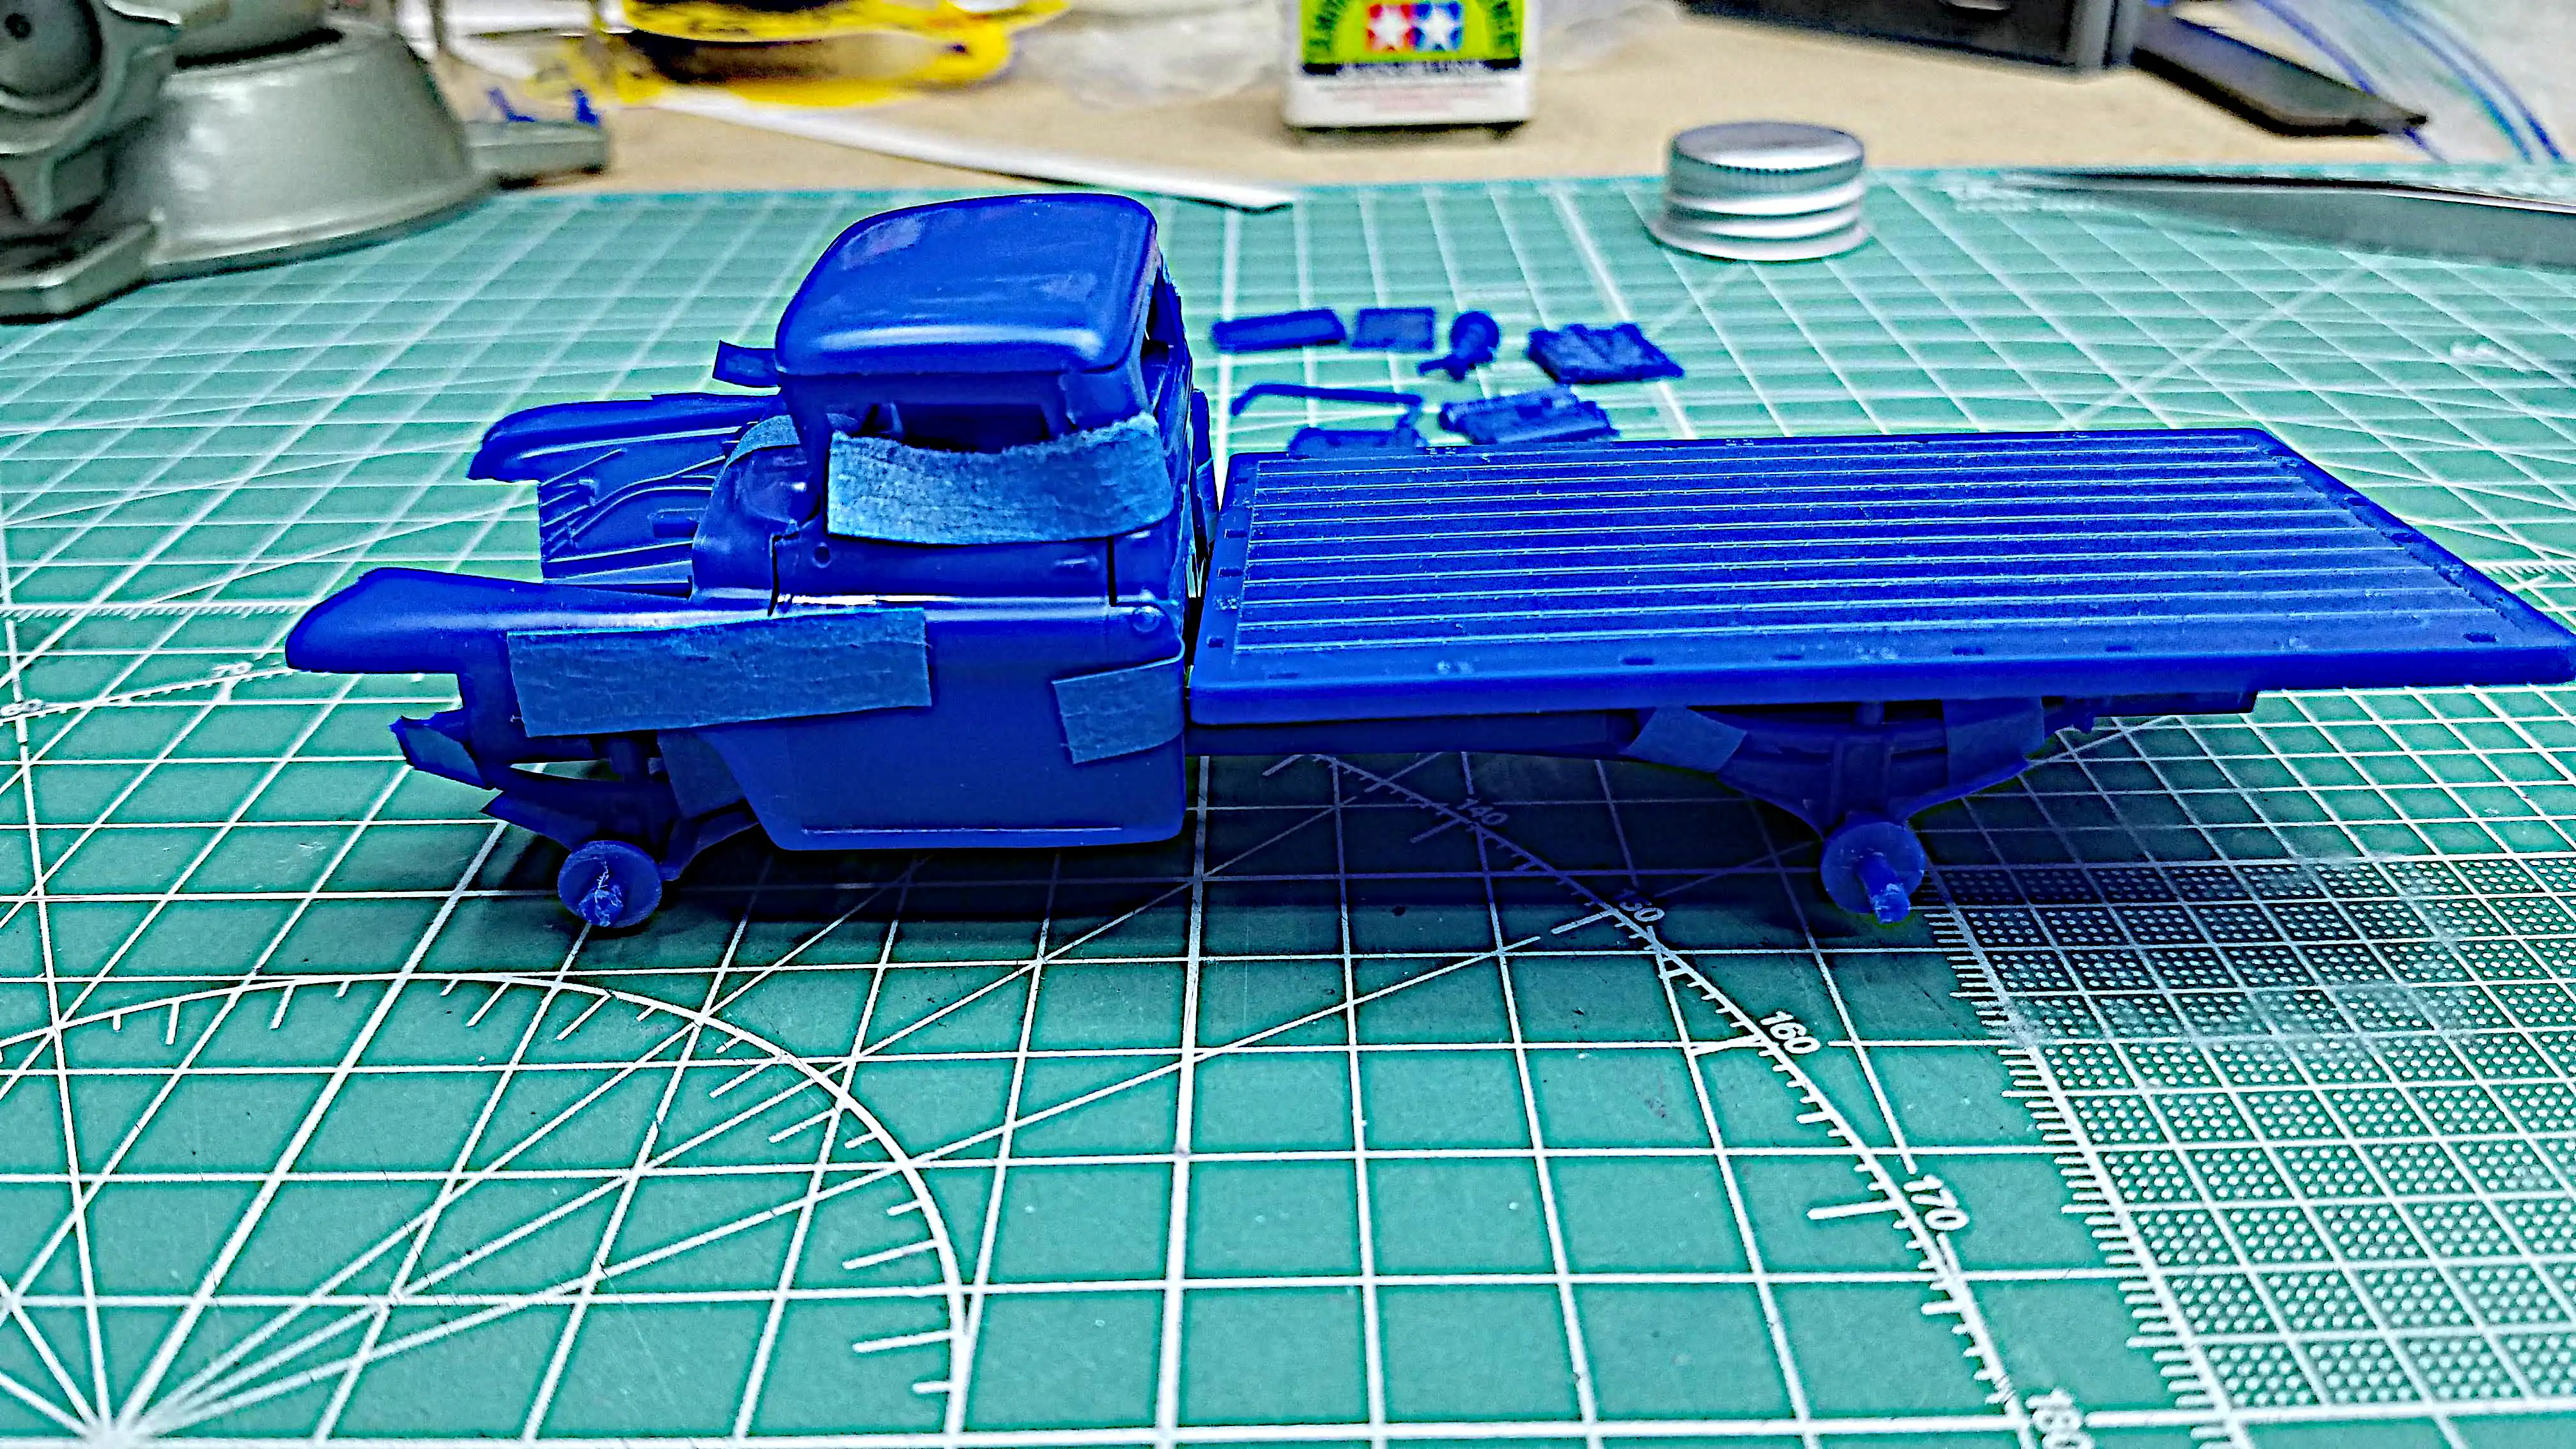
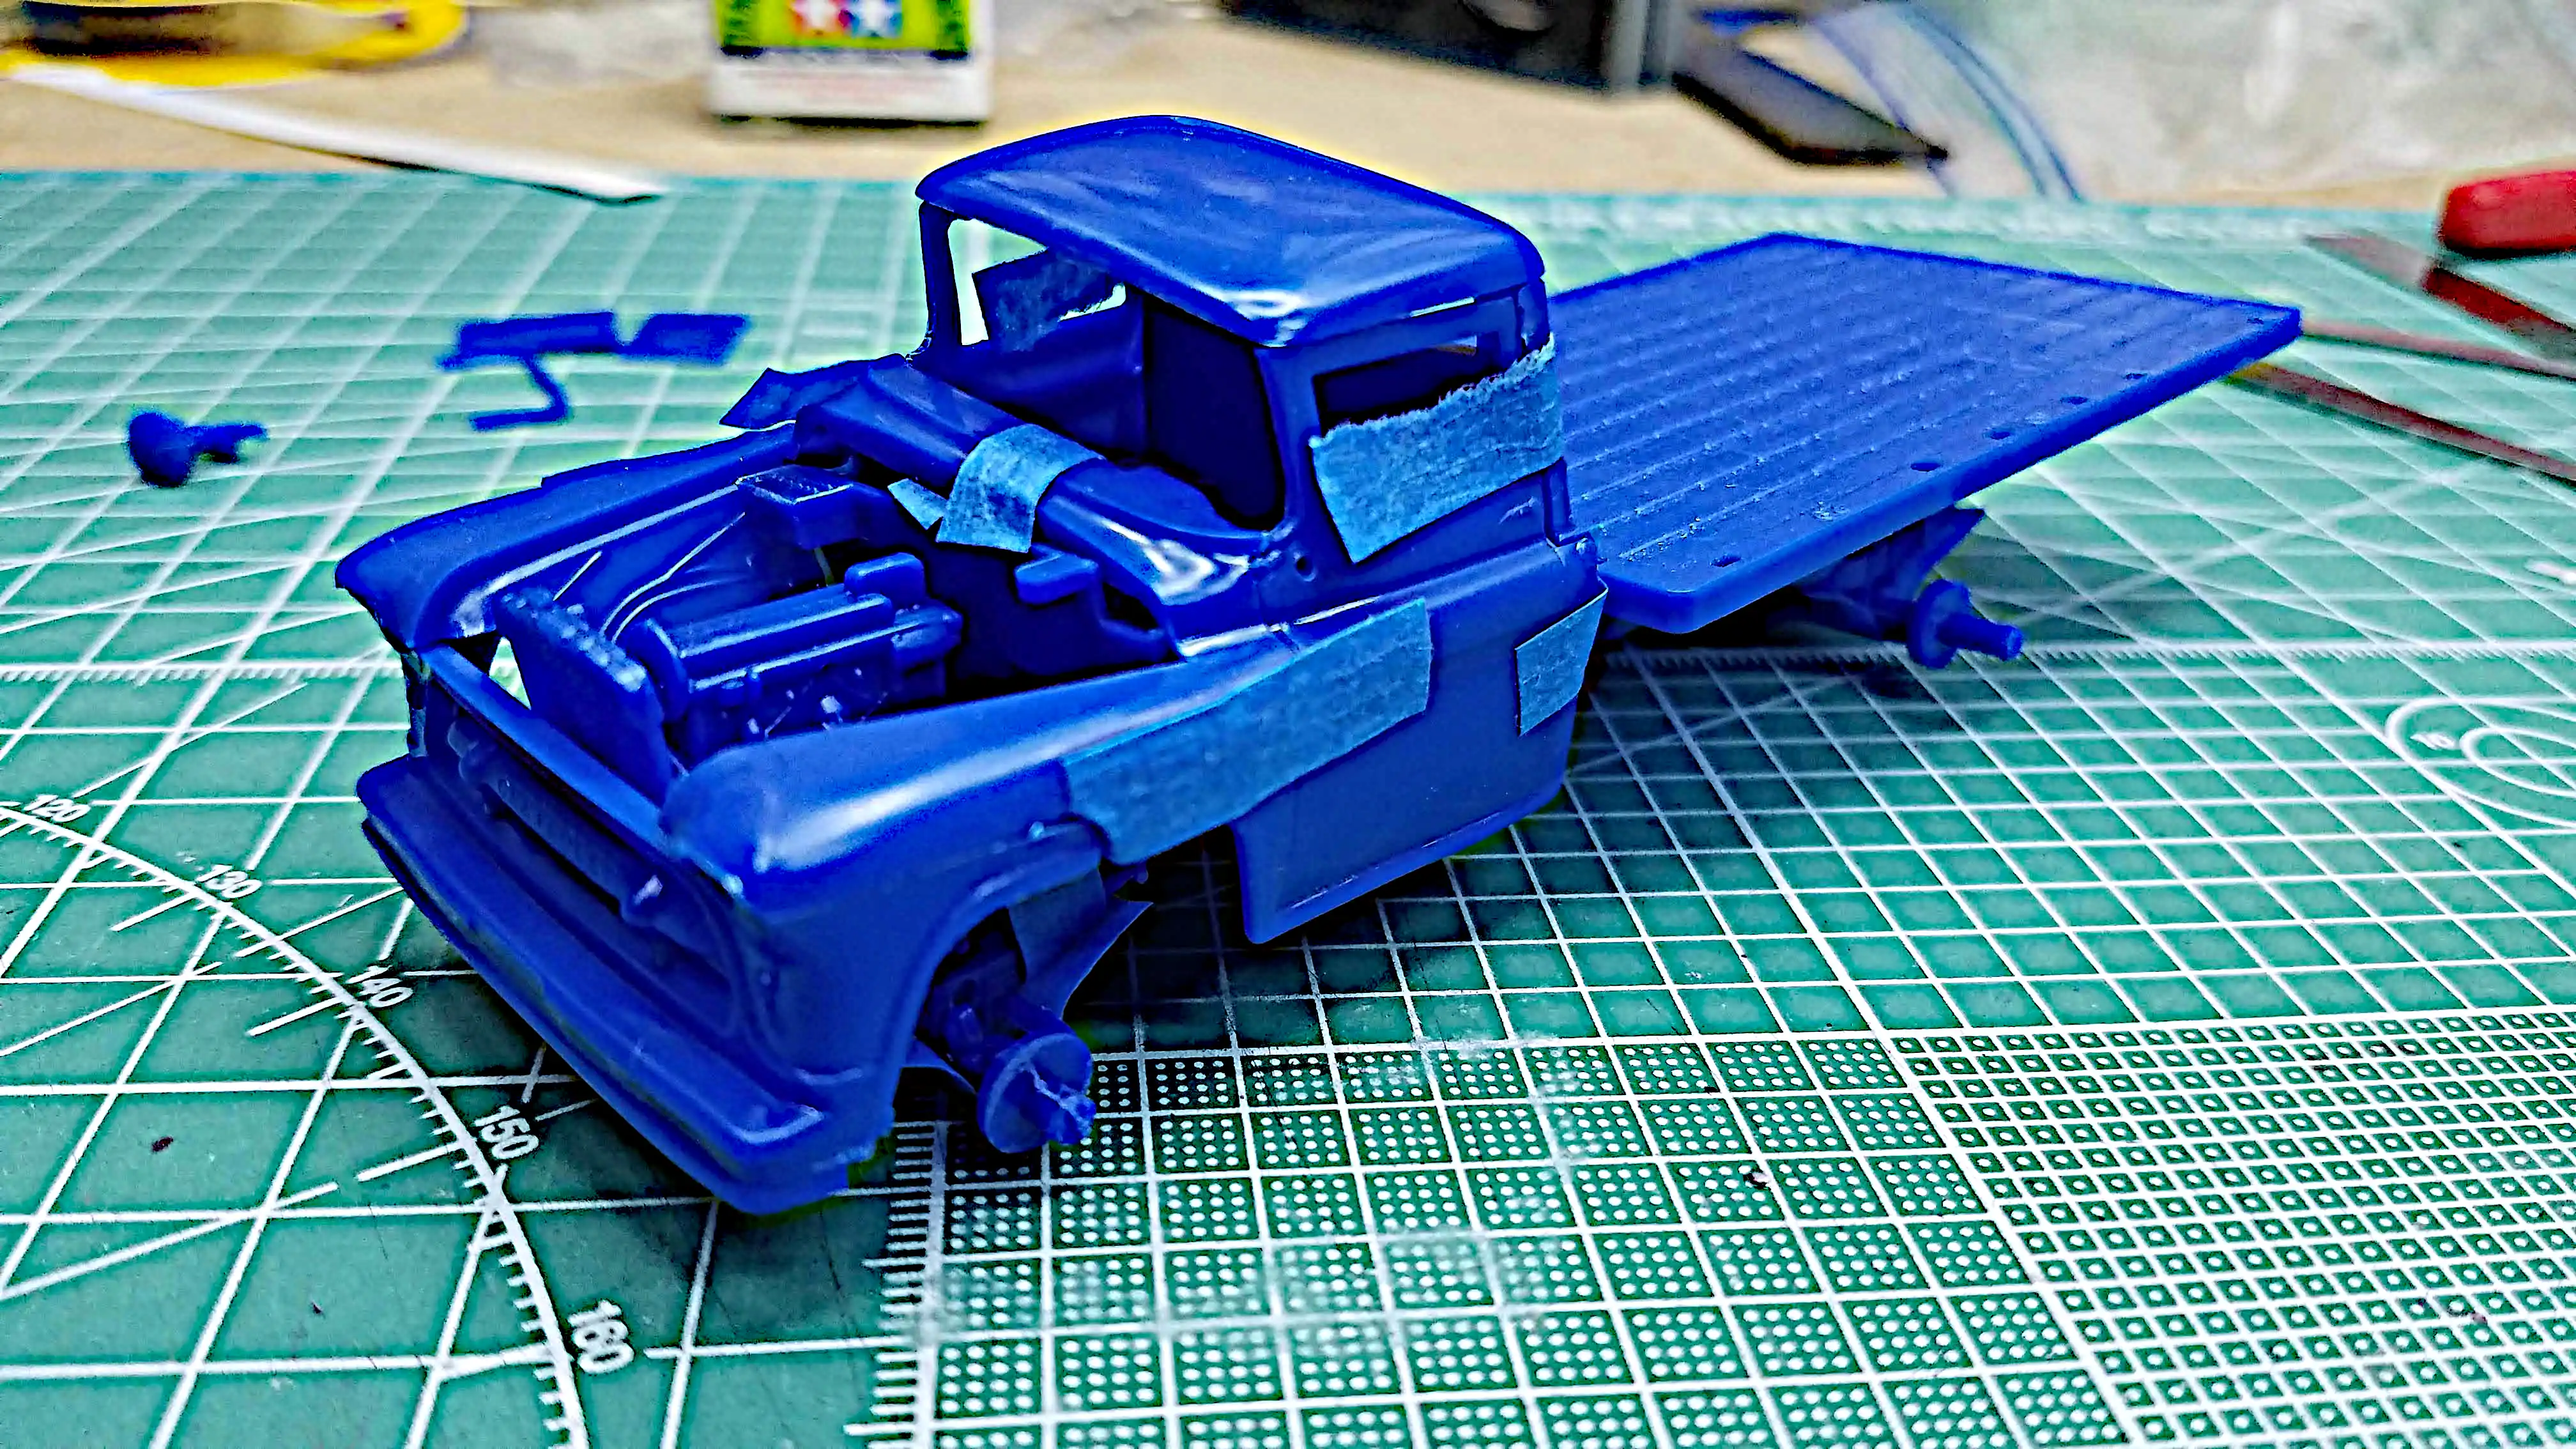
The cab of the truck is 7-pieces. The instructions tell
you to assemble parts of the body on the frame. However, to
be able to paint the entire cab I thought it would be better
to assemble the cab first and place it on the frame after
painting, just like you would normally do in other kits.
This image shows the cab being dry fitted together.
Step 01 and Step 02 is below the photo of my mocked up cab.
If you'd like to view the instructions provided for assembling
the cab click the links for Instruction Step 01 and Step 02.
SPOILER ALERT!:
Having the cab pre assembled does not seem to be a viable
option. With the body pre assembled, it looks like the cab
will not be able to be placed on the frame and over the
interior floor. The reason is because the front of the
frame needs to be guided into two alignment points on the
inside of the front bumper and than the back of the body
lowered down over the interior floor to the frame.
However, because of the way the battery is molded in, the
body will not have enough clearance and can not be lowered. The
other thing is that if the seat is install first, the body
will not clear the back of the seat while pivoting down to
the frame. If the body [could] be lowered into position,
with the roof off, (which is also a separate piece), the
seat will not fit through the roof opening of the cab.
Therefore, I'll be painting all the cab pieces and
assembling them after painting. I guess it's a good thing
I was planning on making this an old beat-up farm truck
because any screw-ups on my part will just feed into the
cab being beat-up.
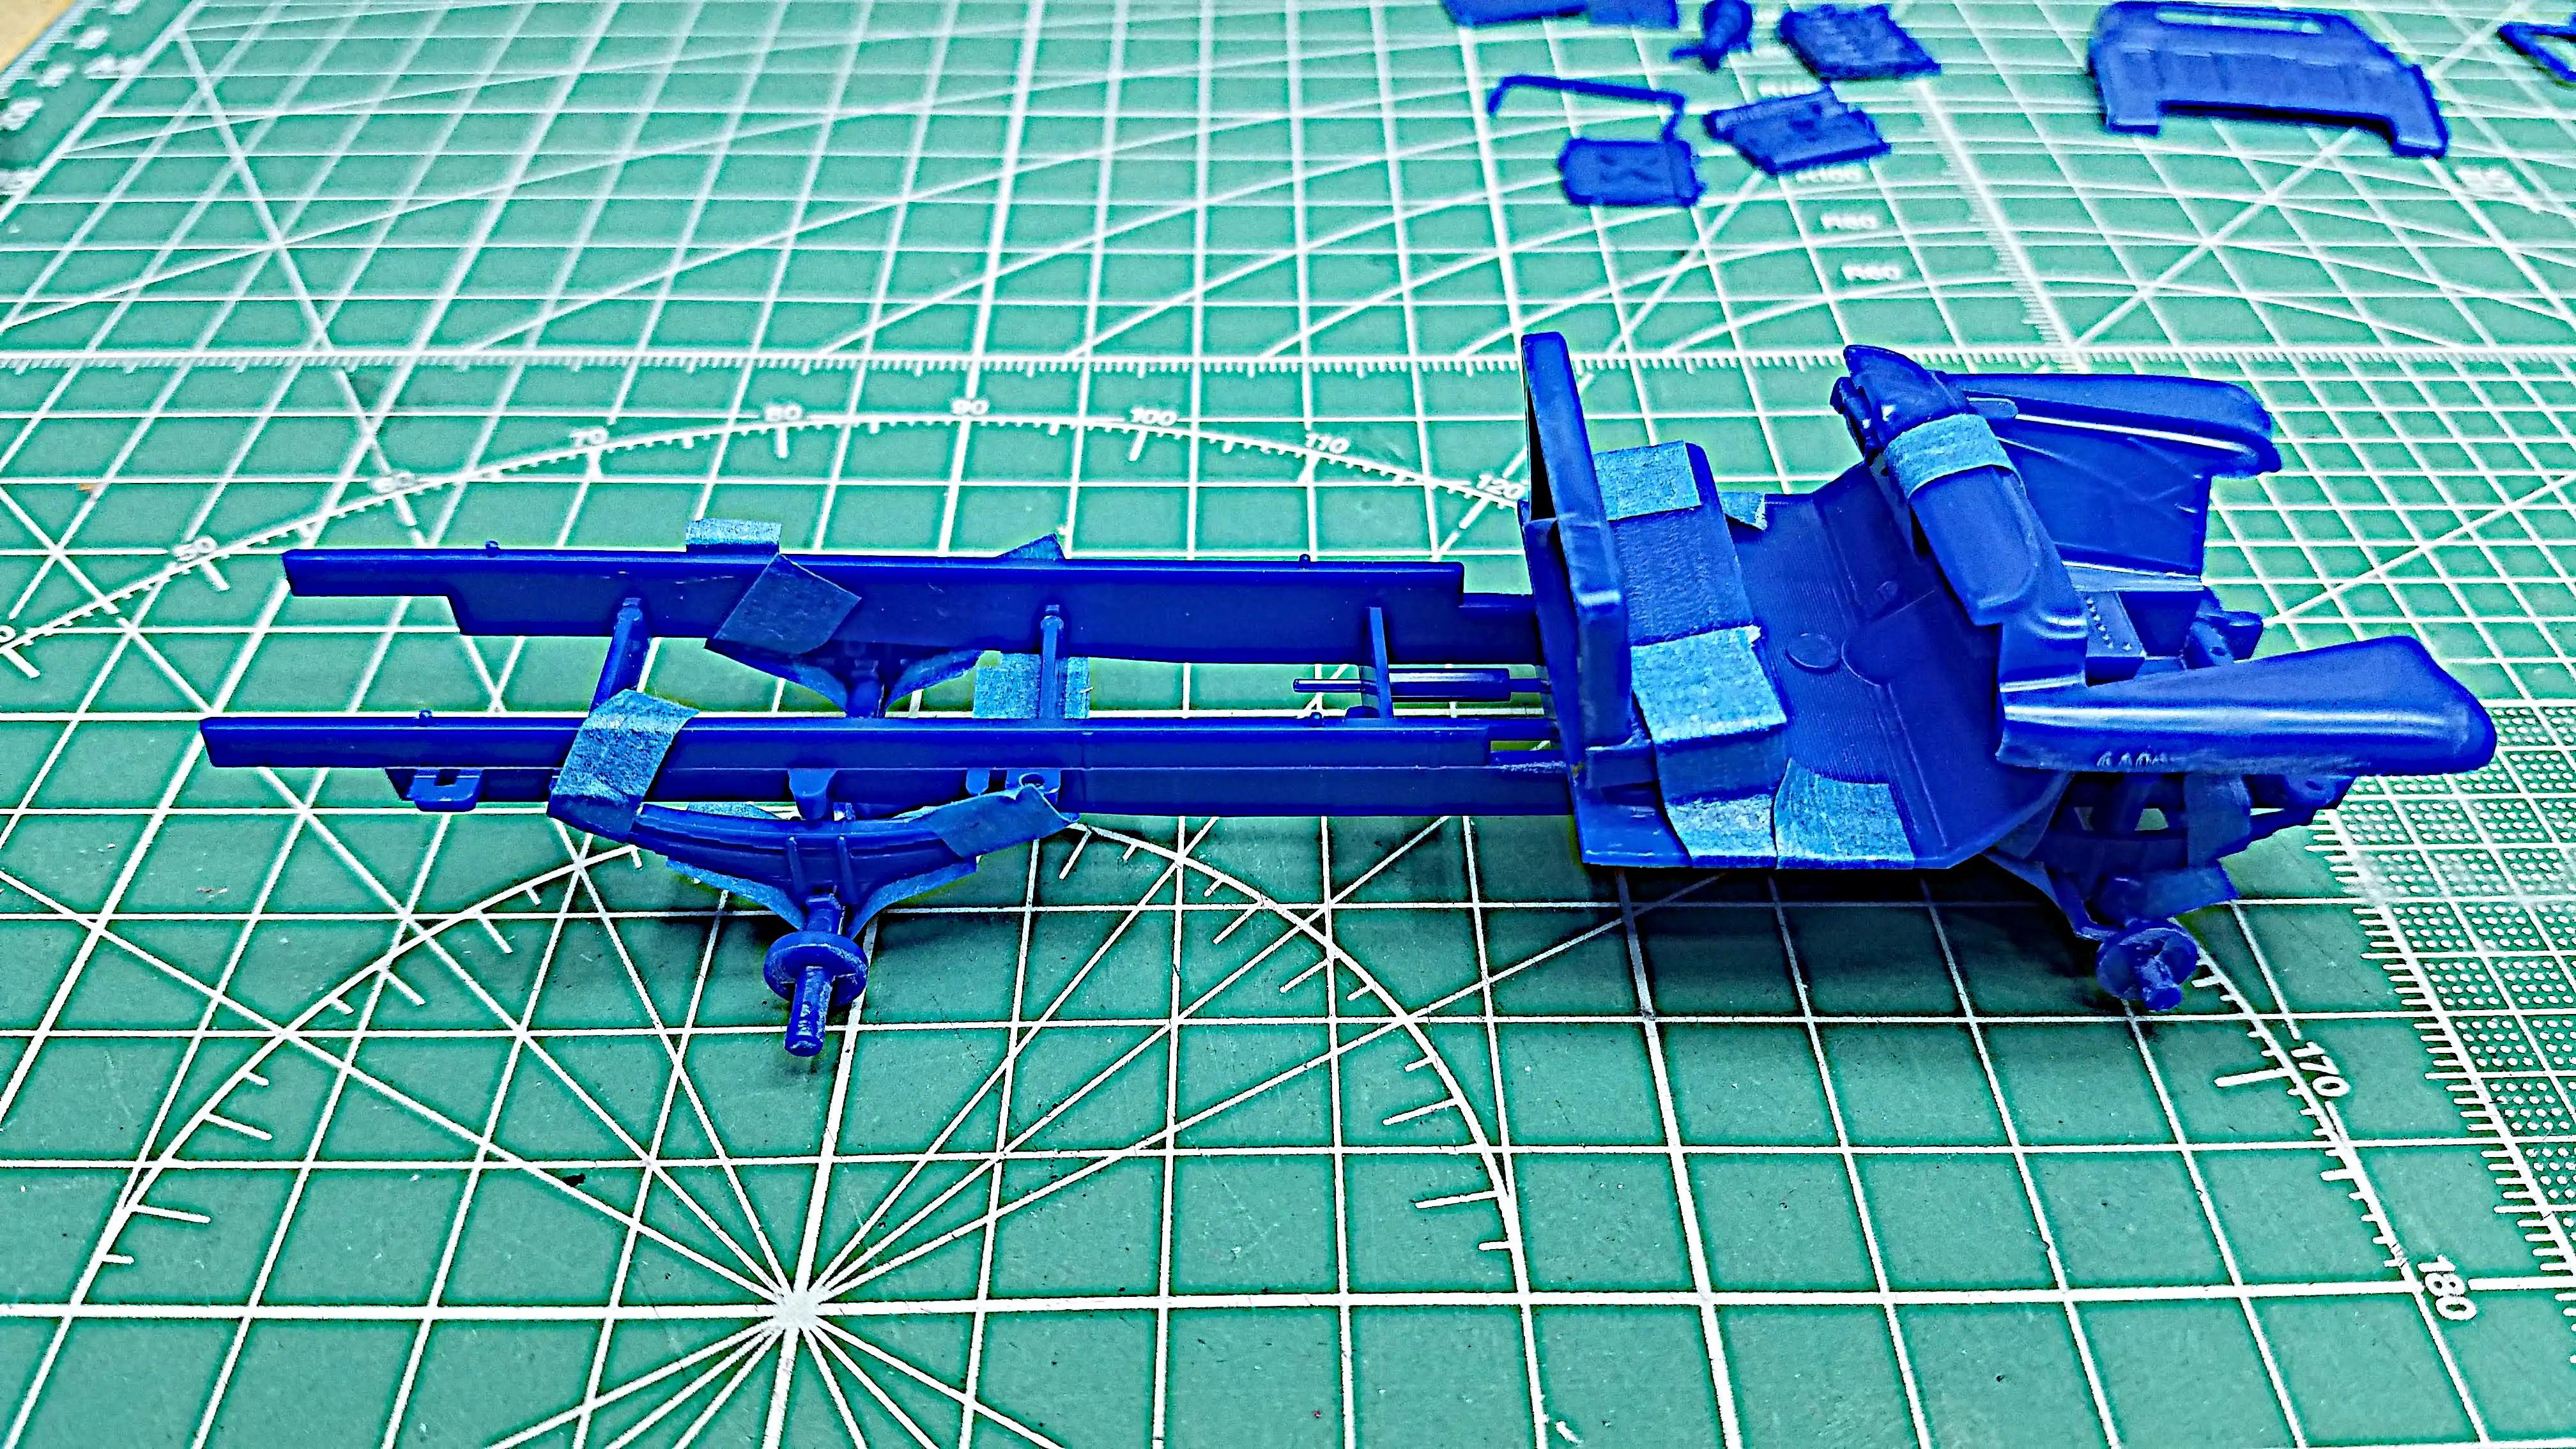
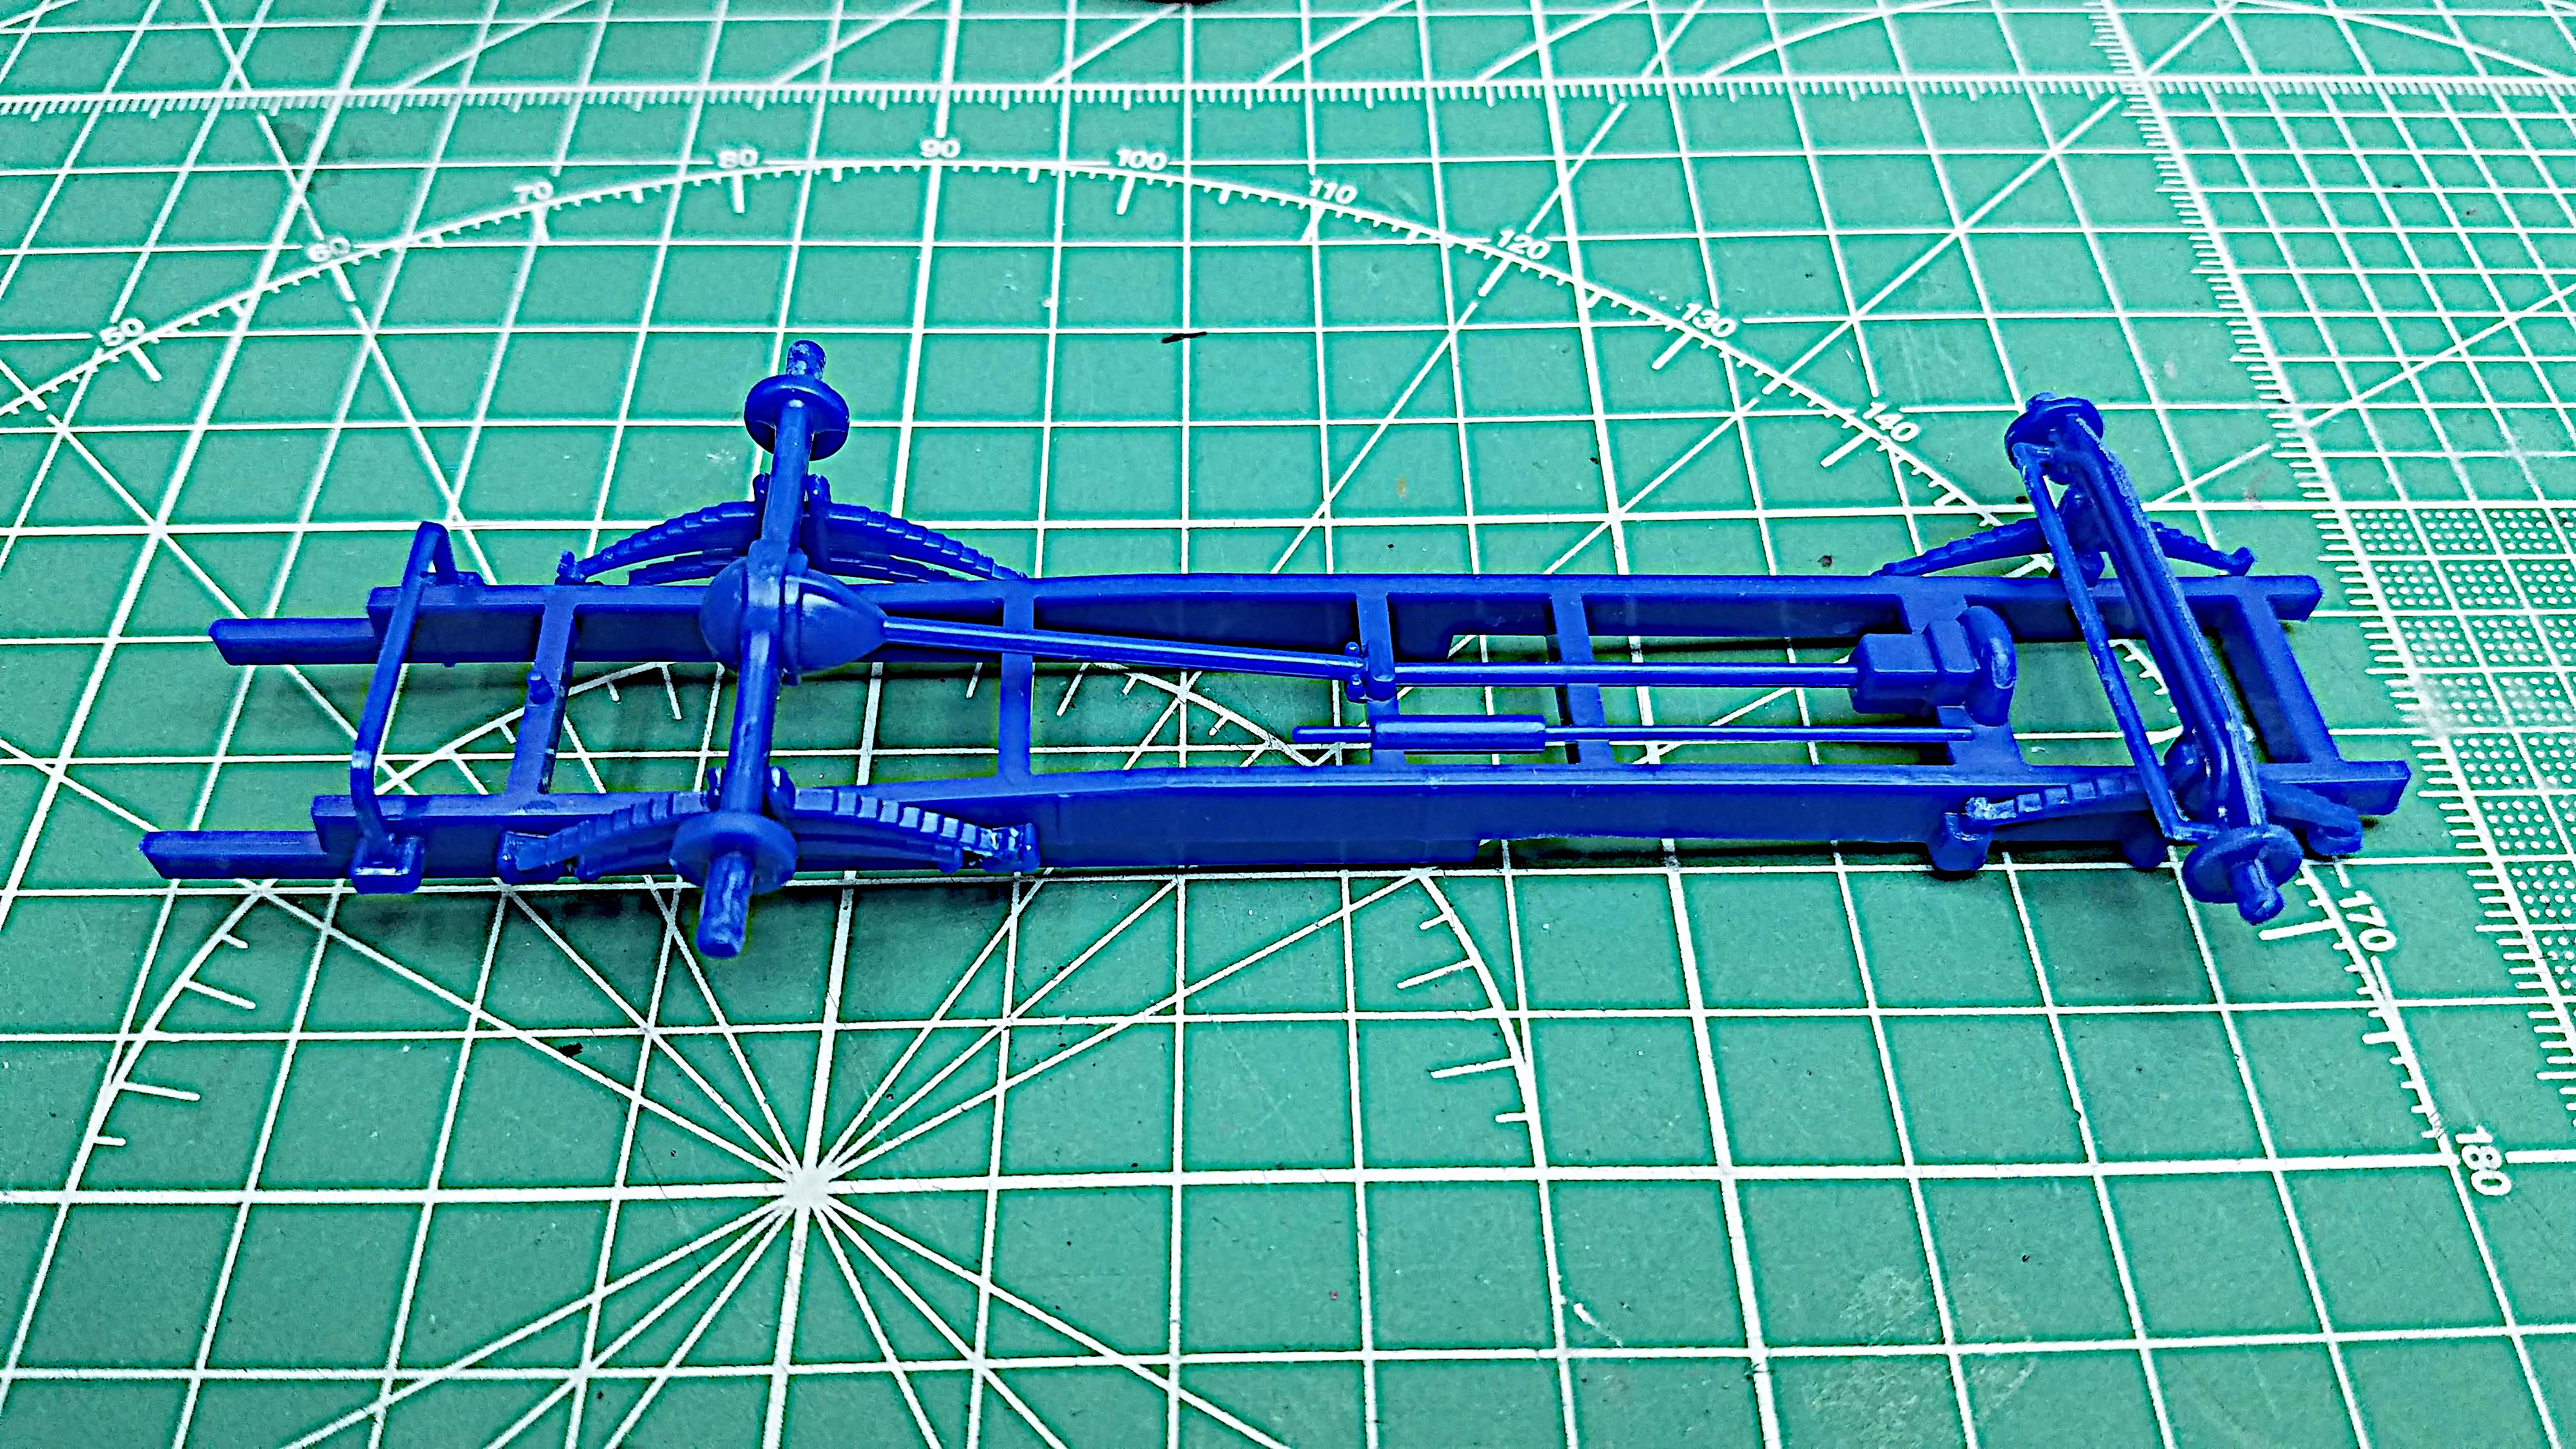
In this photo I'm dry fitting the front and rear leaf springs.
The front and rear axles. The floor pan, seat and front fender-
dashboard assembly. I placed steps 1 and 3 from the instructions
below this photo. In step 3, the bed of the truck is already
installed; however, I'm not putting the bed in place yet. I
have some modifications I want to make to the bed. I'll cover
these modifications in upcoming photos and an upcoming YouTube
video.
If you'd like to view the instructions provided for assembling
the cab click the links for Instruction Step 01 and Step 02.
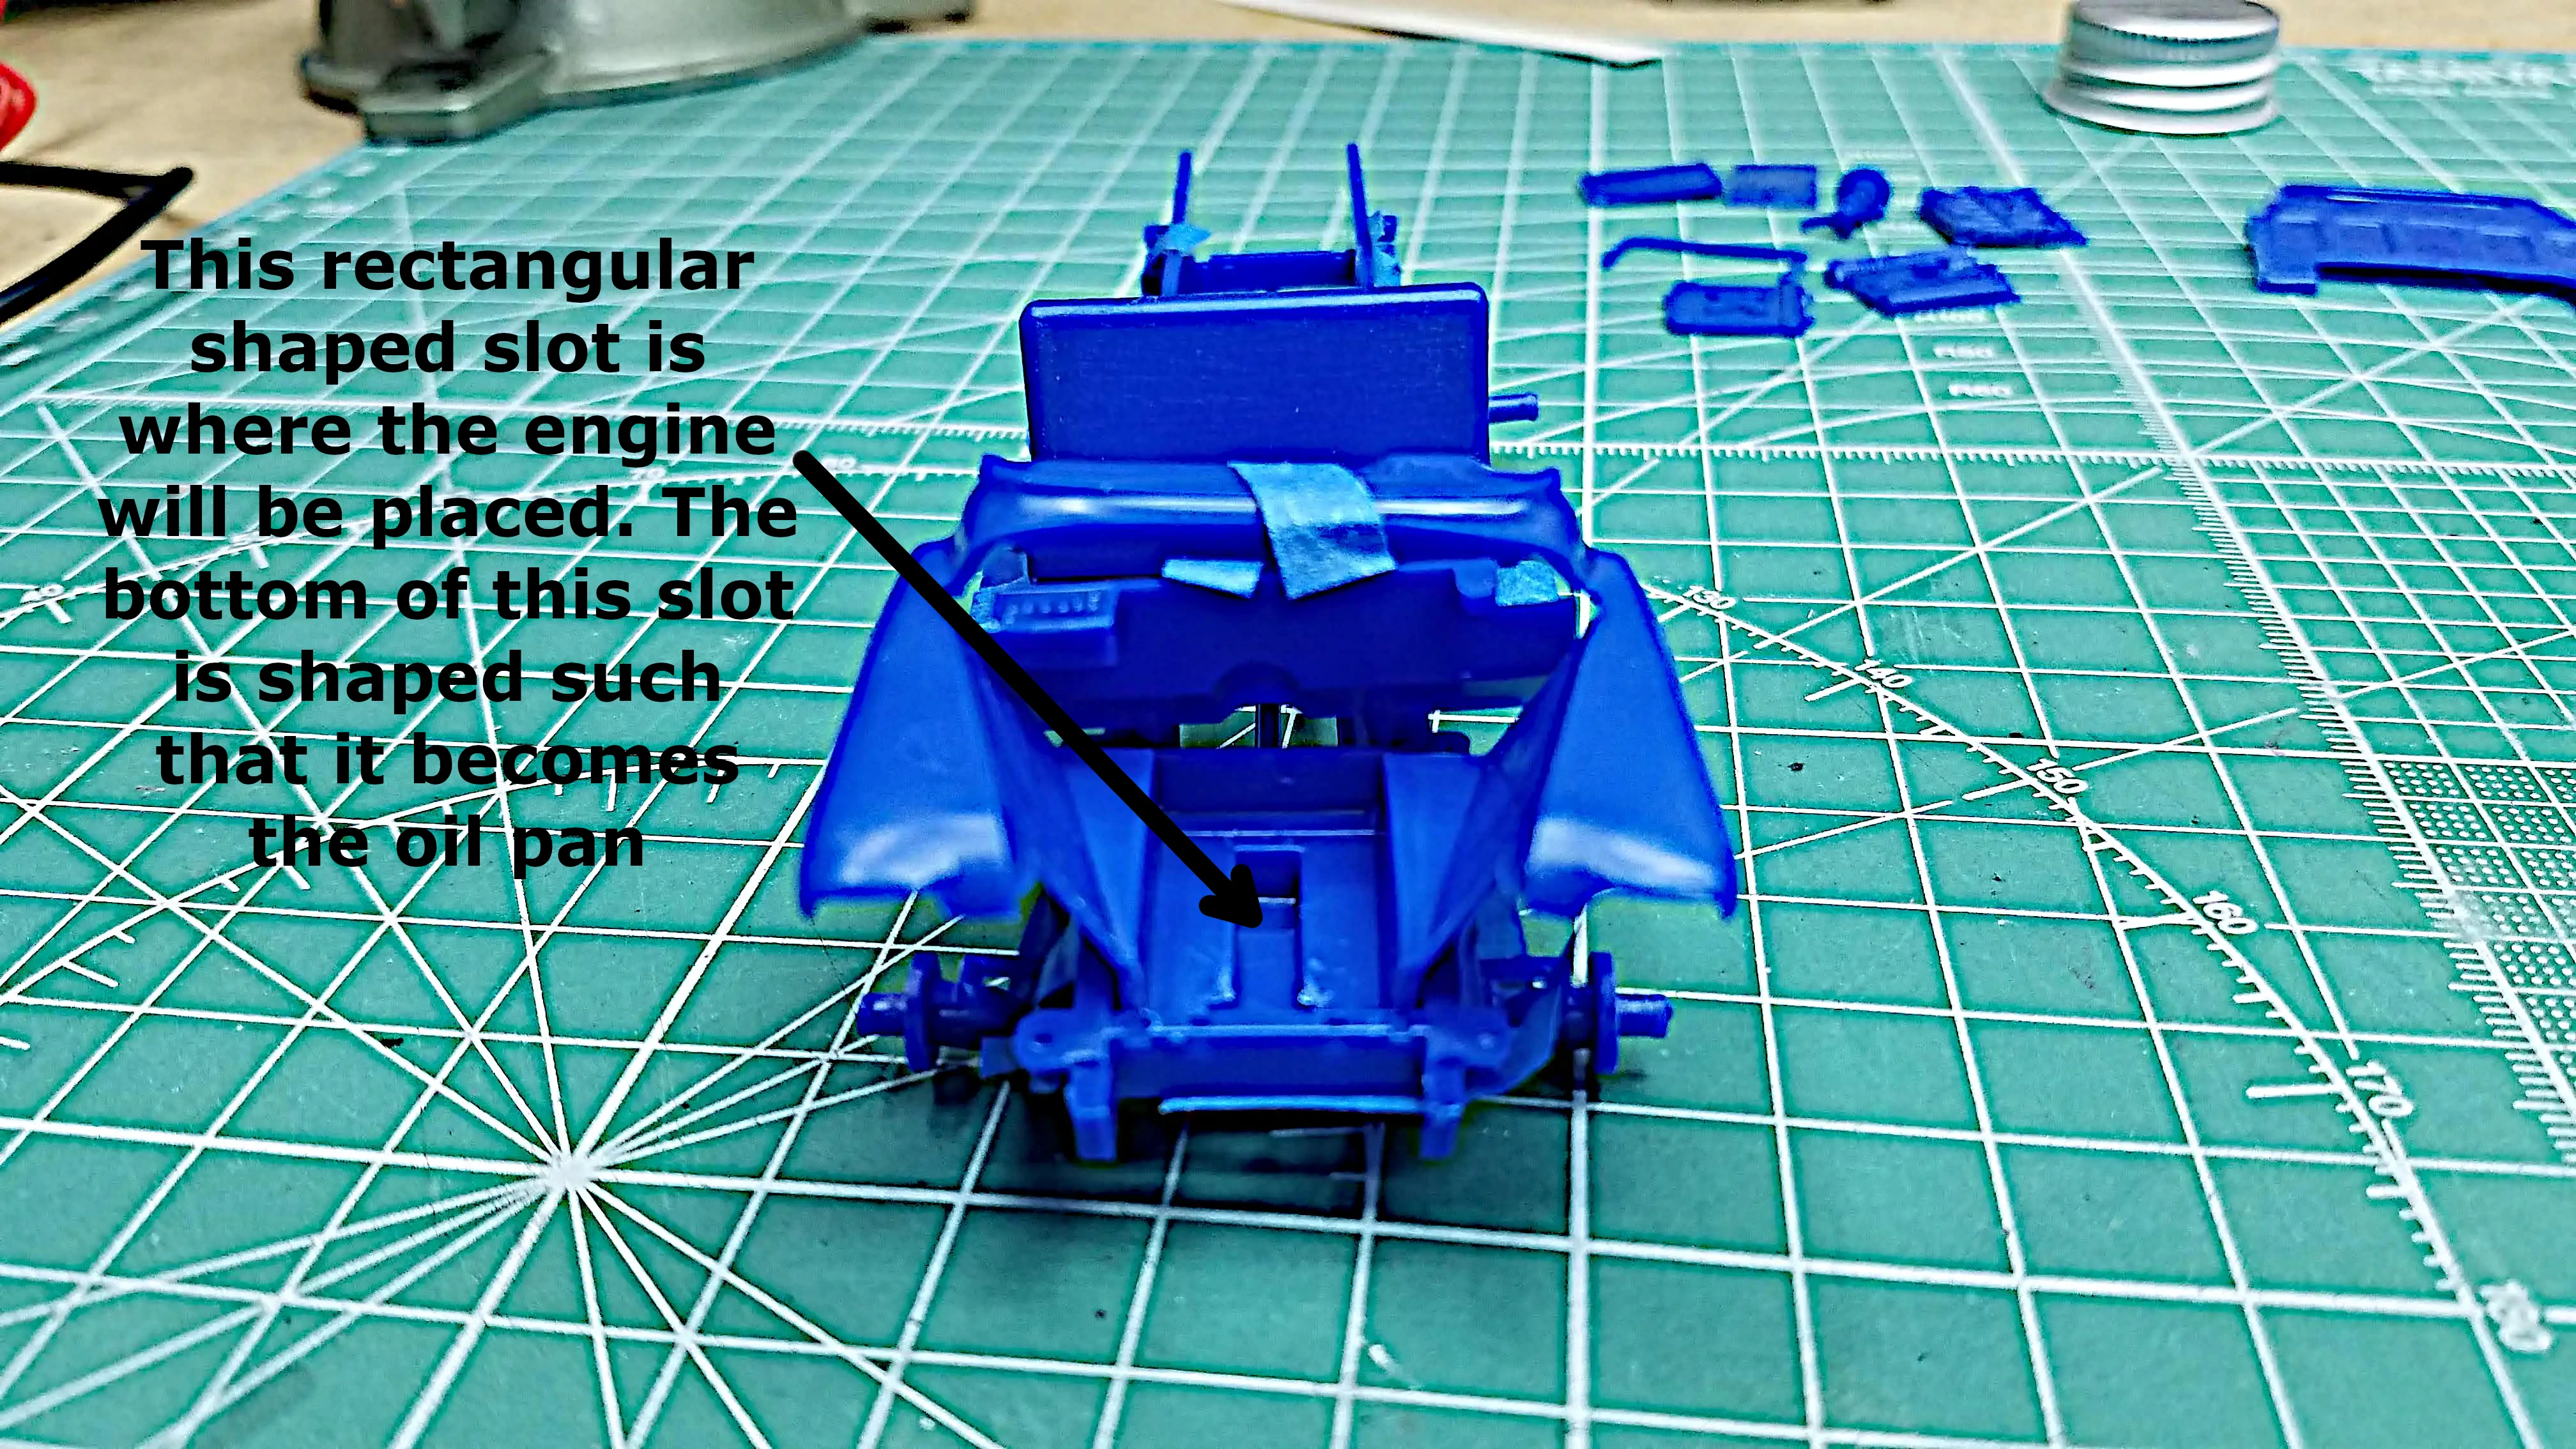
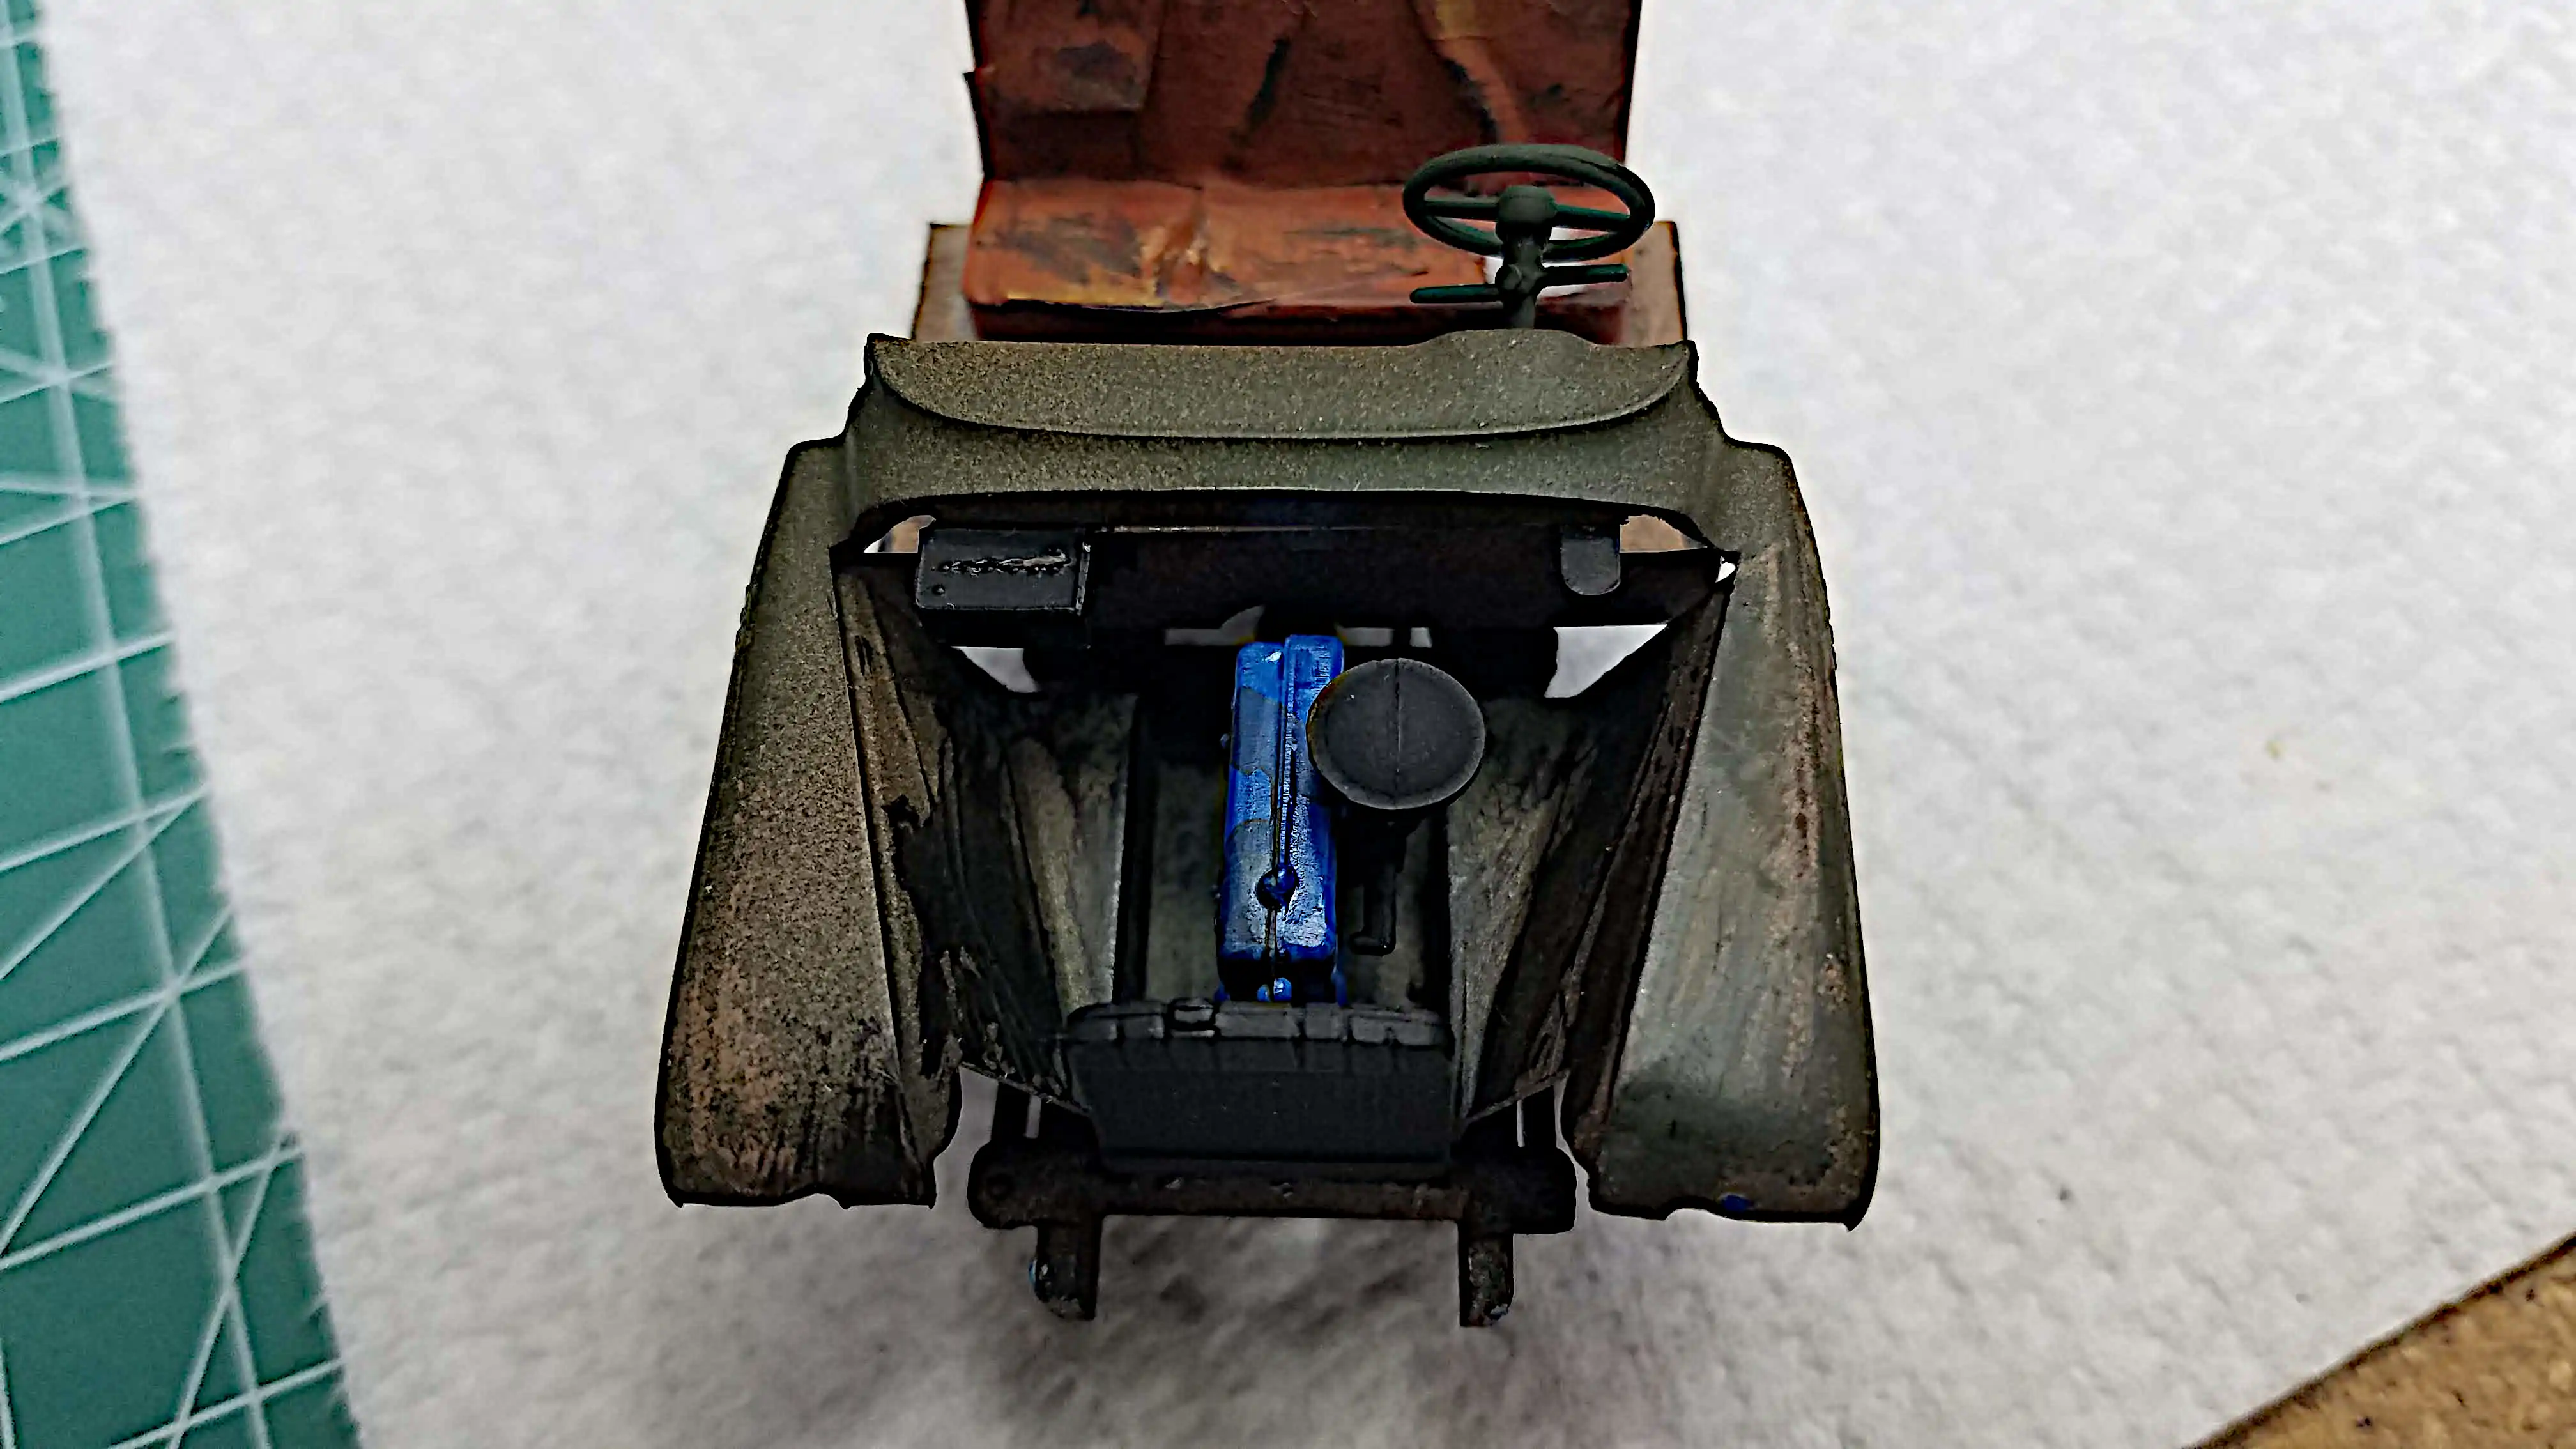
Front view of dry fitting of the suspension, axles, front
fender and dashboard assembly. Note the battery on the left.
It is molded into the fender, firewall and dashboard
assemble and is one of the items that will not allow a
preassembled cab to be placed onto the frame. Yes...maybe I
could have cut the battery off and reinstalled it later, but
at this time I'm just going to proceed with how the
instructions say to assemble the parts.
The smaller rectangular 'slot' in the bottom of the front
fender assembly is where the engine will be placed. The bottom
of that 'slot' is shaped like an oil pan.
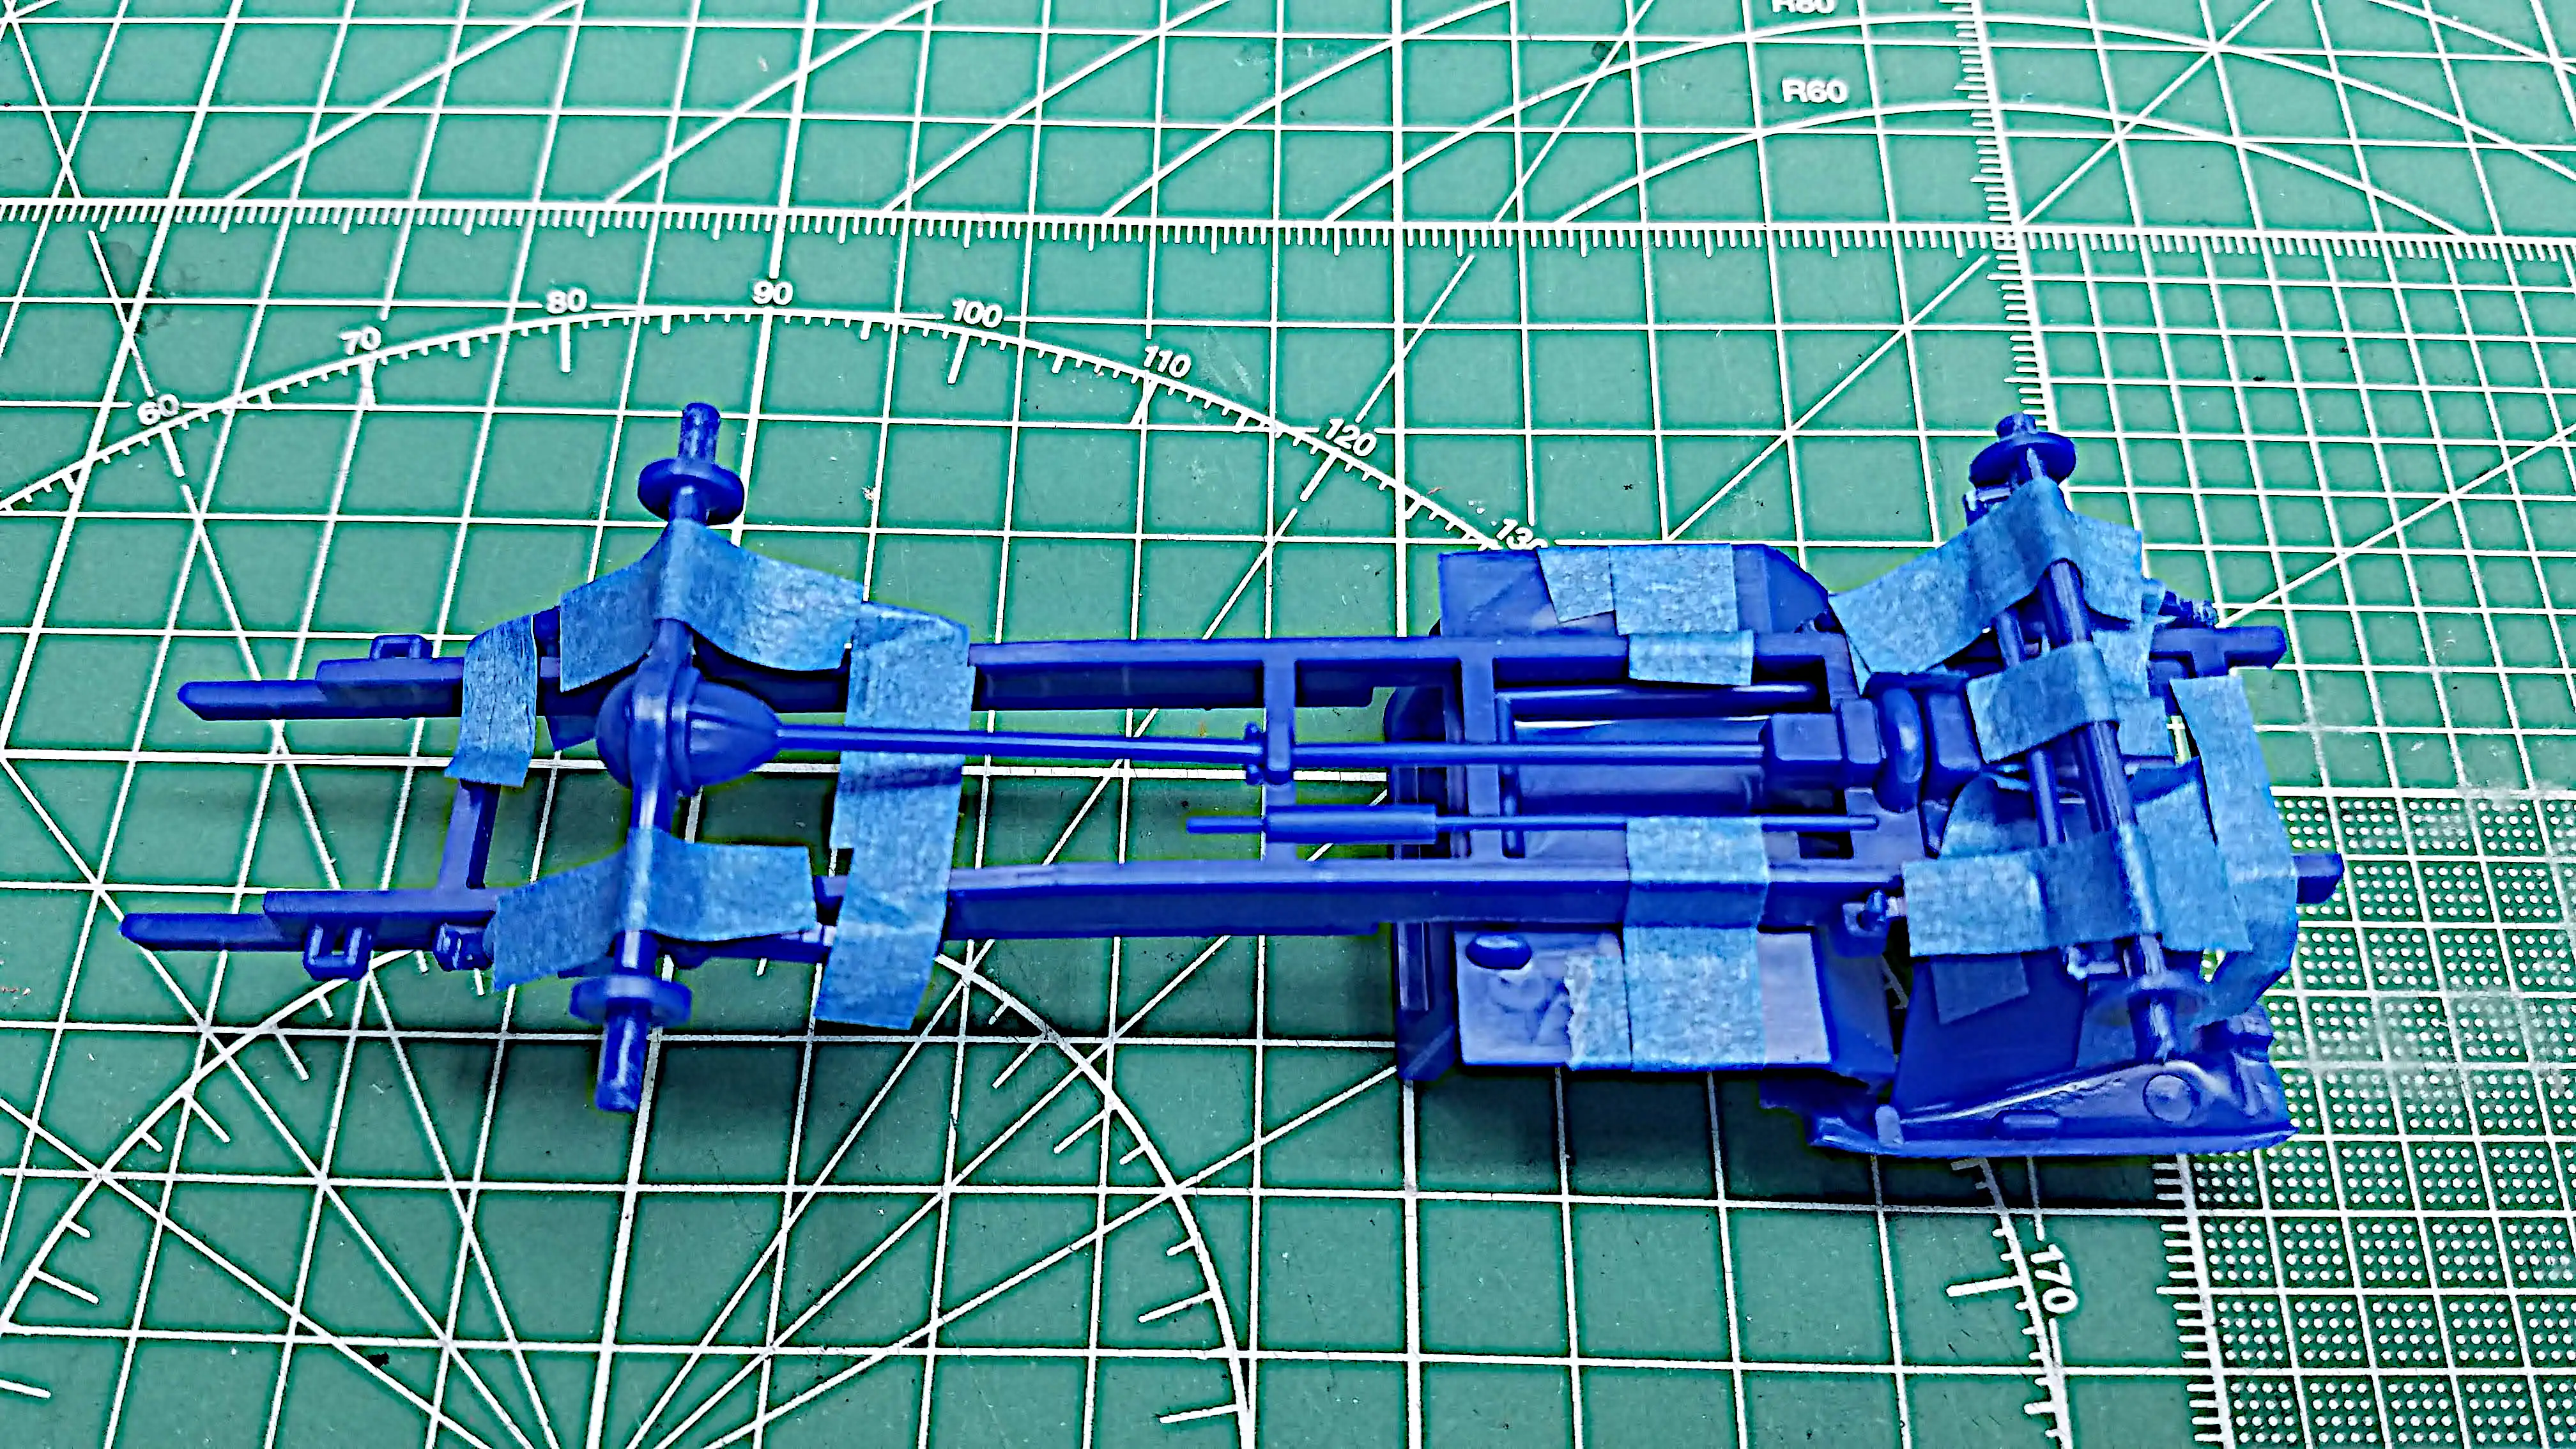
I'm actually lying a-bit because I will be gluing the
suspension and axles in place so that I can paint
the frame as an assemble. The instructions don't have
the suspension and axles being installed until step 03
of 04.
The engine, radiator and front bumper have been added to the
dry fit.
Not shown in this photo; however, the hood is going to have
a lot of fit issues. I might have to work that misfit into
the theme of a beat-up farm truck?
I glued up all the parts that are part of the frame that will
be painted the same color. Here, it's ready for primer and
will then be layered with rust colors and covered with flat
black.
The dashboard is molded into the front fender assembly. I
glued the 'very under detailed instrument cluster' in
position in the dashboard so that after priming can be
painted the body color.
Most of these parts are cab parts. Both sides will be primed
and then layered with rust colors and topped with the final
body color, which I think will be forest green. Since I'm
planning to make this truck a real farm beater it might be
hard to tell what the original color is/was.
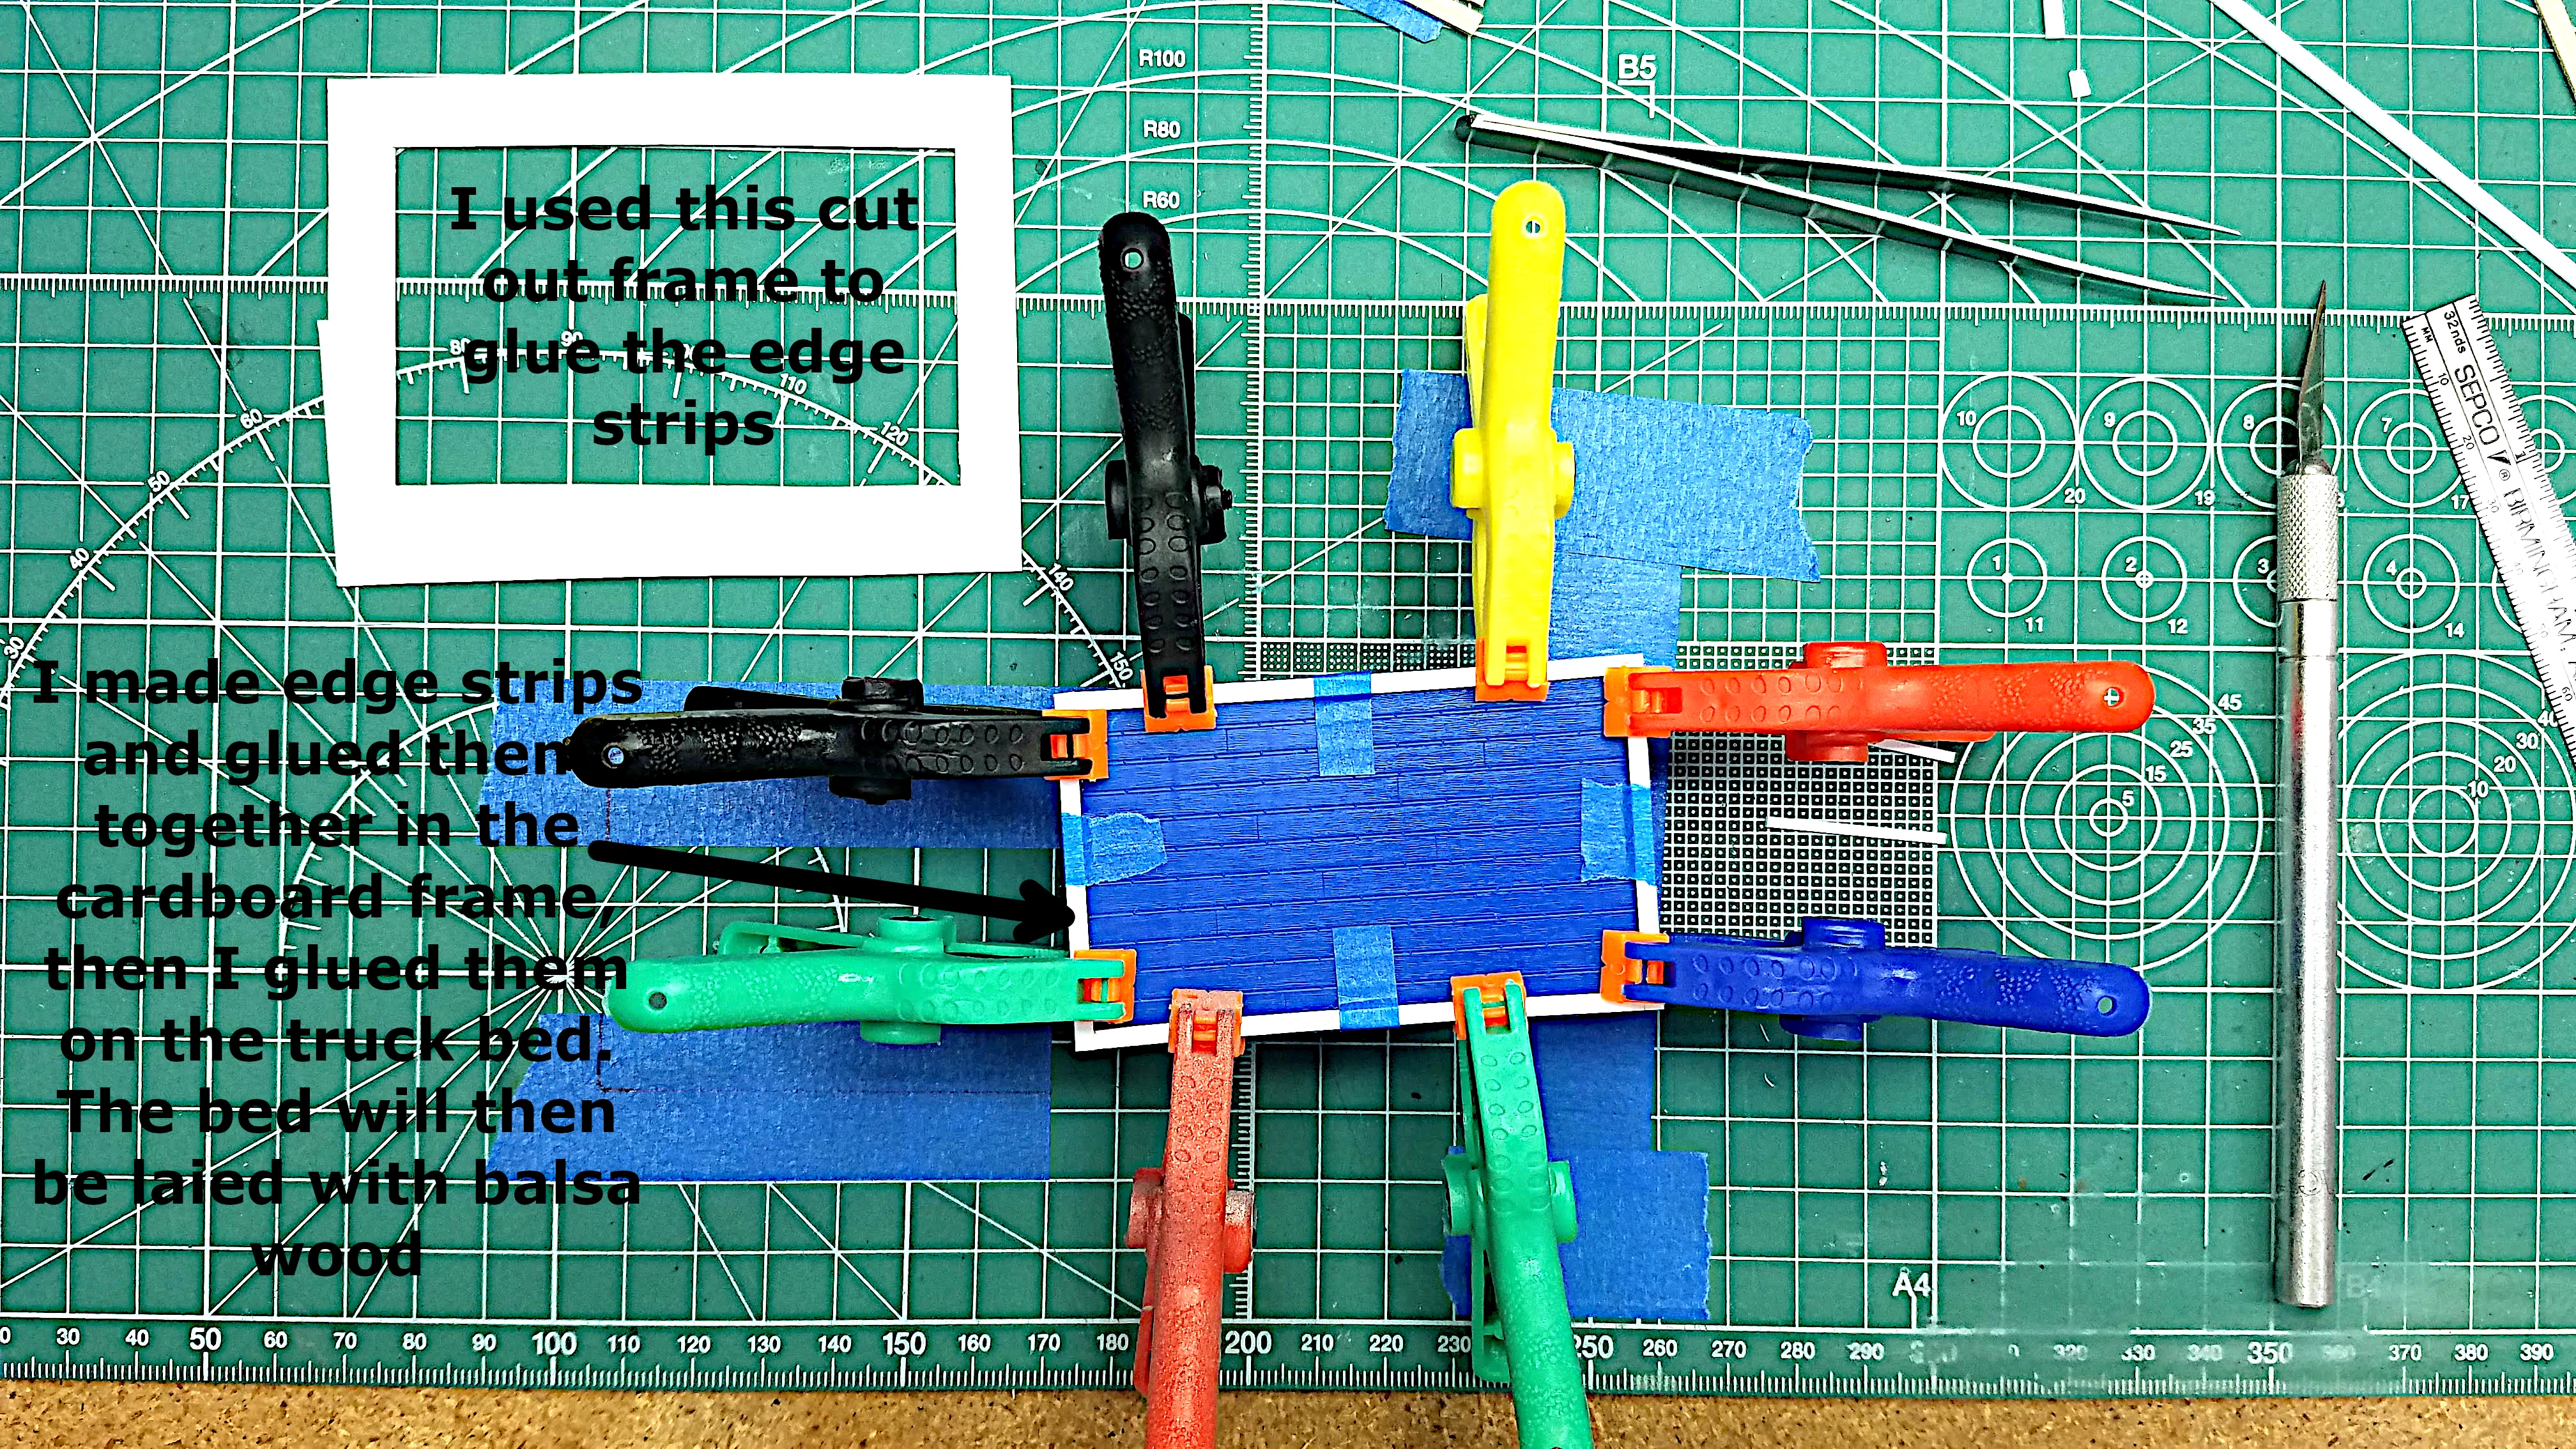
I'm modifying the bed by adding a new edge strip and then will
fill the interior with balsa wood strips. The reason is that
the bed has some molding dents and valleys that show the
bottom support ribs, but also so that I can make the bed look
really beat up and stained. See my YouTube video Part 02.
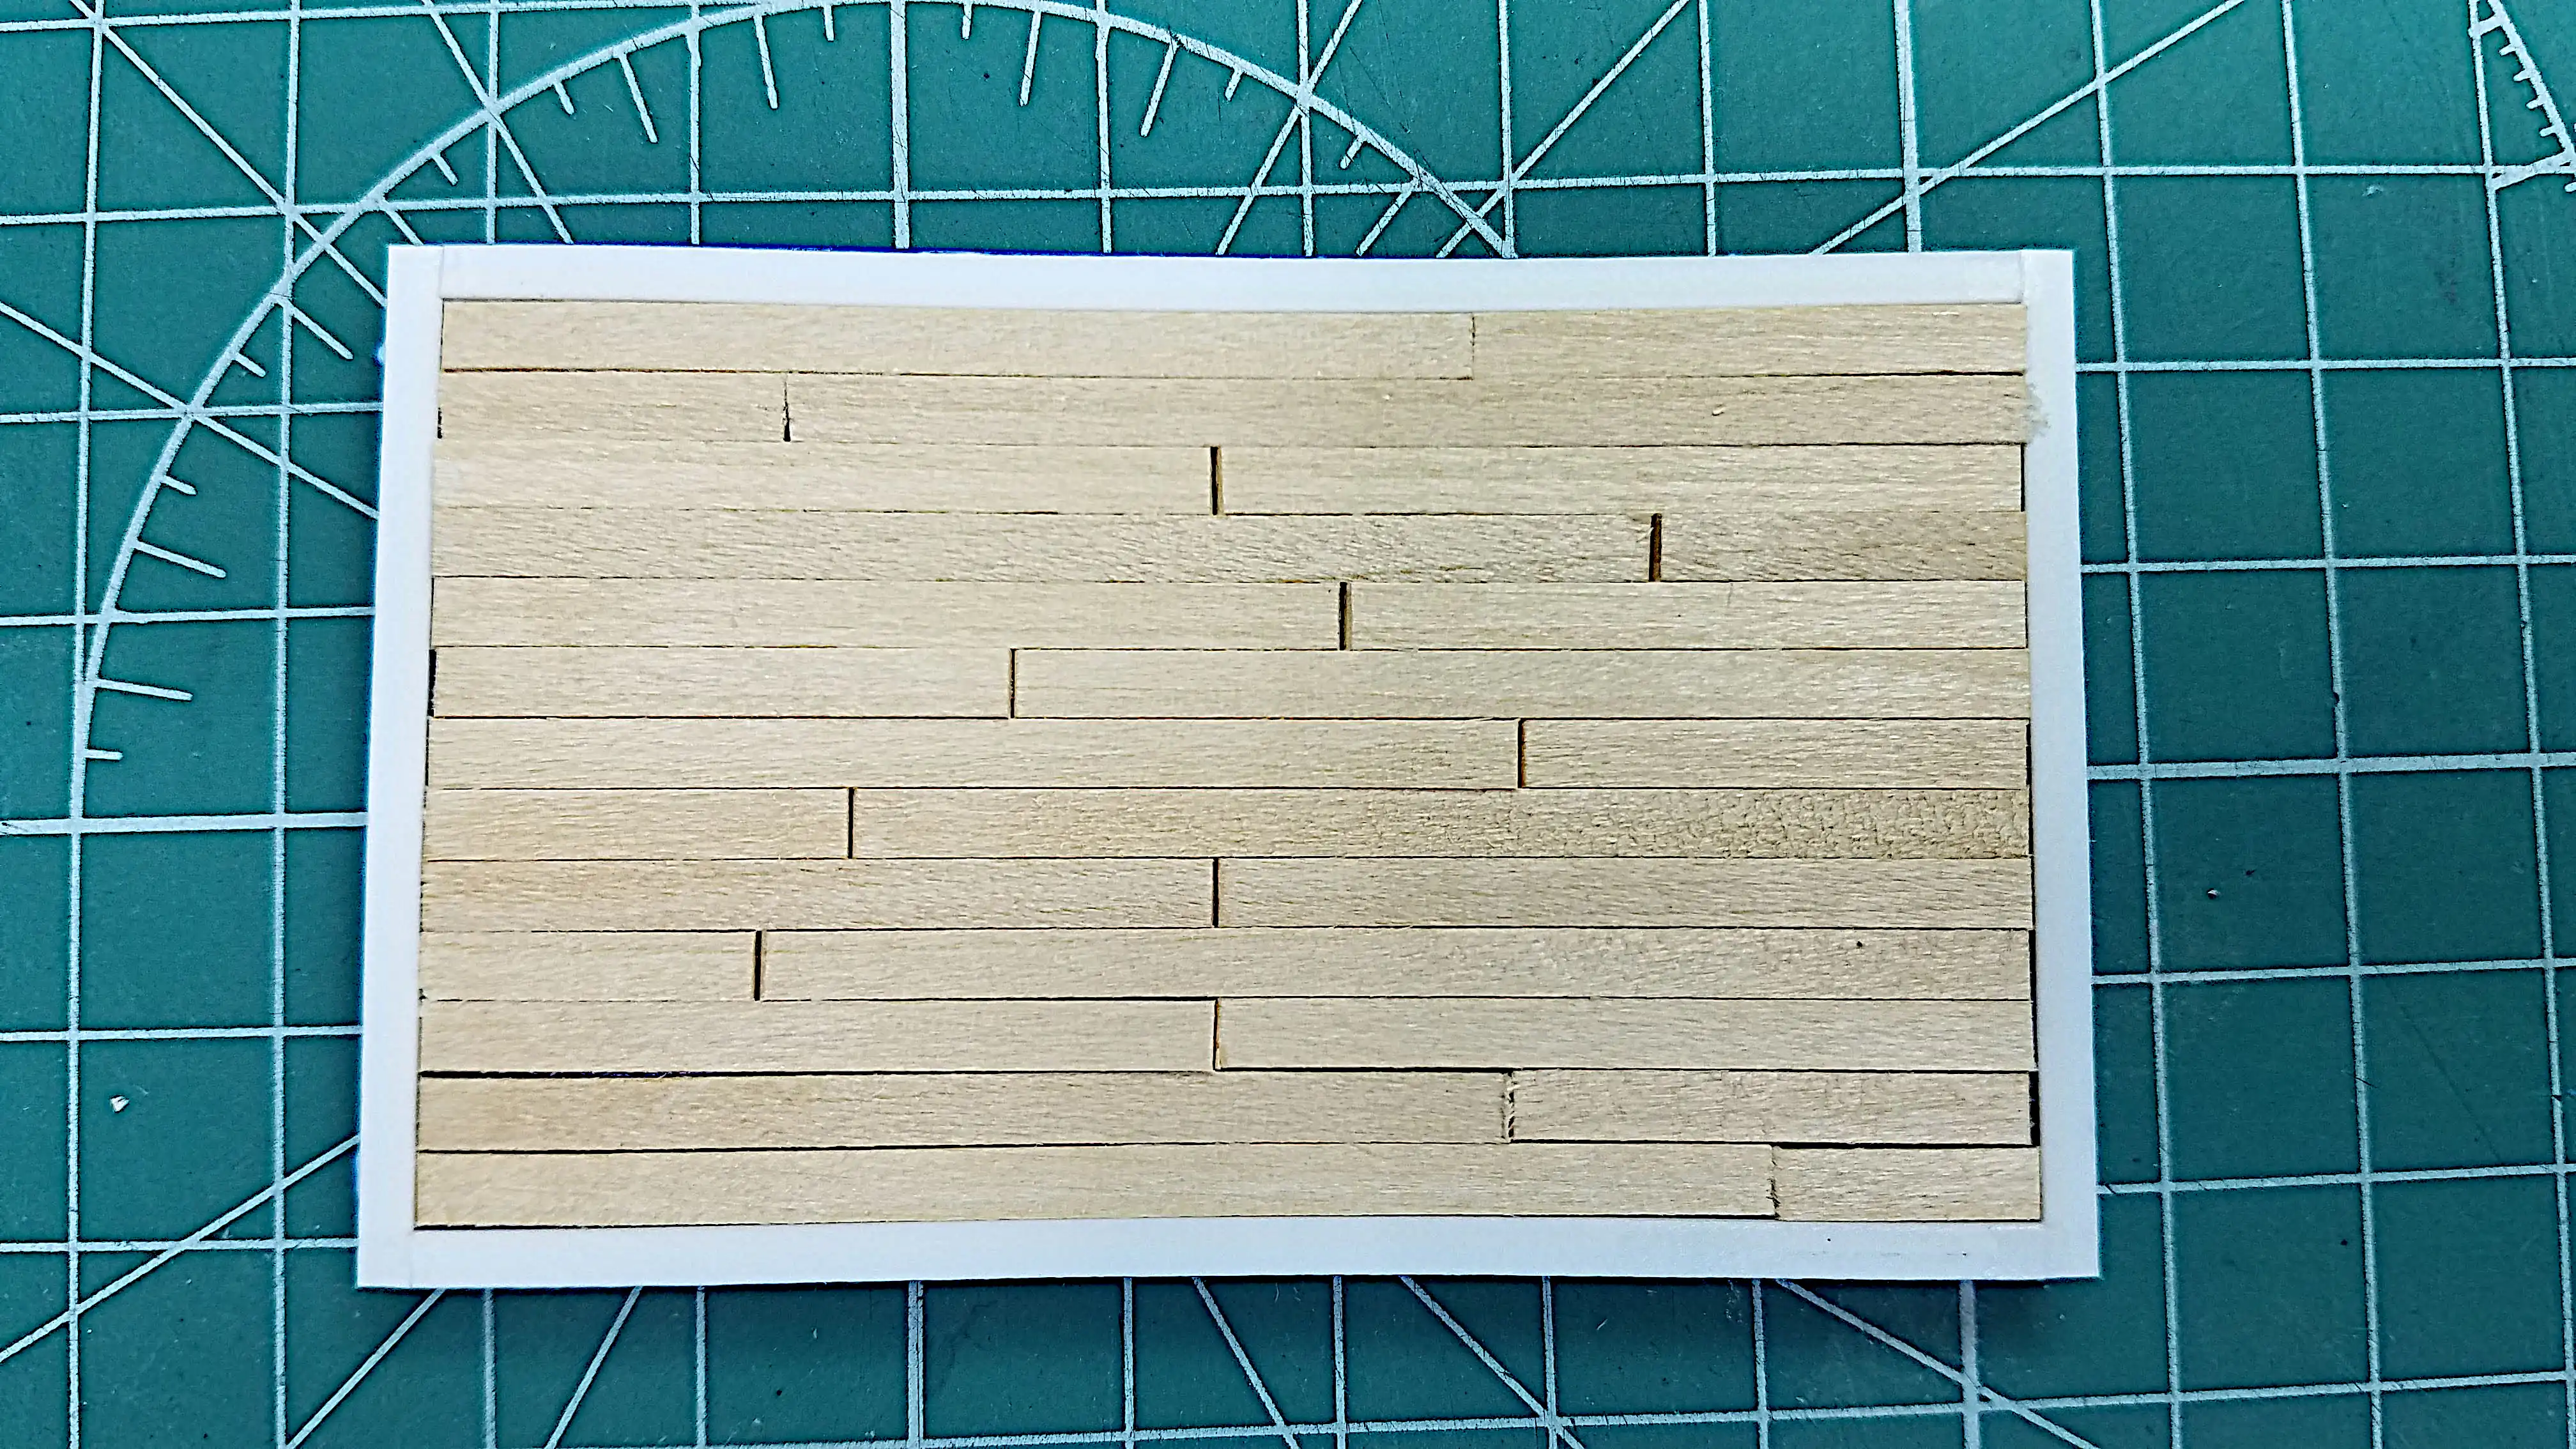
All the bed wooden slats have been cut and fitted. I used
Northeastern Scale Lumber Co.,
#HOSCAL31011 for the bed and
a combination of
Northeastern Scale Lumber Co.
#HOSCAL31211 and #HOSCAL31011 for the side stakes. This
lumber is marked as being HO scale lumber and are
supposedly HO-Gauge 3" x 12" and 3" x 10" respectively; however,
unless I'm wrong, the scale is actually OO-Gauge. When I
measured a 3" x 10" it measures 0.038" x 0.124", and when
I measured a 3" x 12" it measured 0.038" x 0.145". To
determine the actual scale simply divide the real size
by the scaled size. In this case:
The 3" x 10"
3" / 0.038" = 79.94 Scale
10" / 1.24" = 80.65 Scale
The 3" x 12"
3" / 0.38" = 79.94 Scale
12" / 0.145" = 82.76 Scale
The closest popular scale would be 1:76 which is OO - Scale.
The same lumber, in 1:48 scale would be:
0.38" * 48 = 1.824"
0.124" * 48 = 5.952"
0.145" * 48 = 6.96"
The closest real lumber sizes would be:
2 x 6 which actually measures 1-1/2" x 5-1/4"
2 x 8 which actually measures 1-1/2" x 7-1/4"
I made two jigs. The one on the left is for making the wider
of the side stakes and the one on the right is for cutting
all the stake posts to the same length.
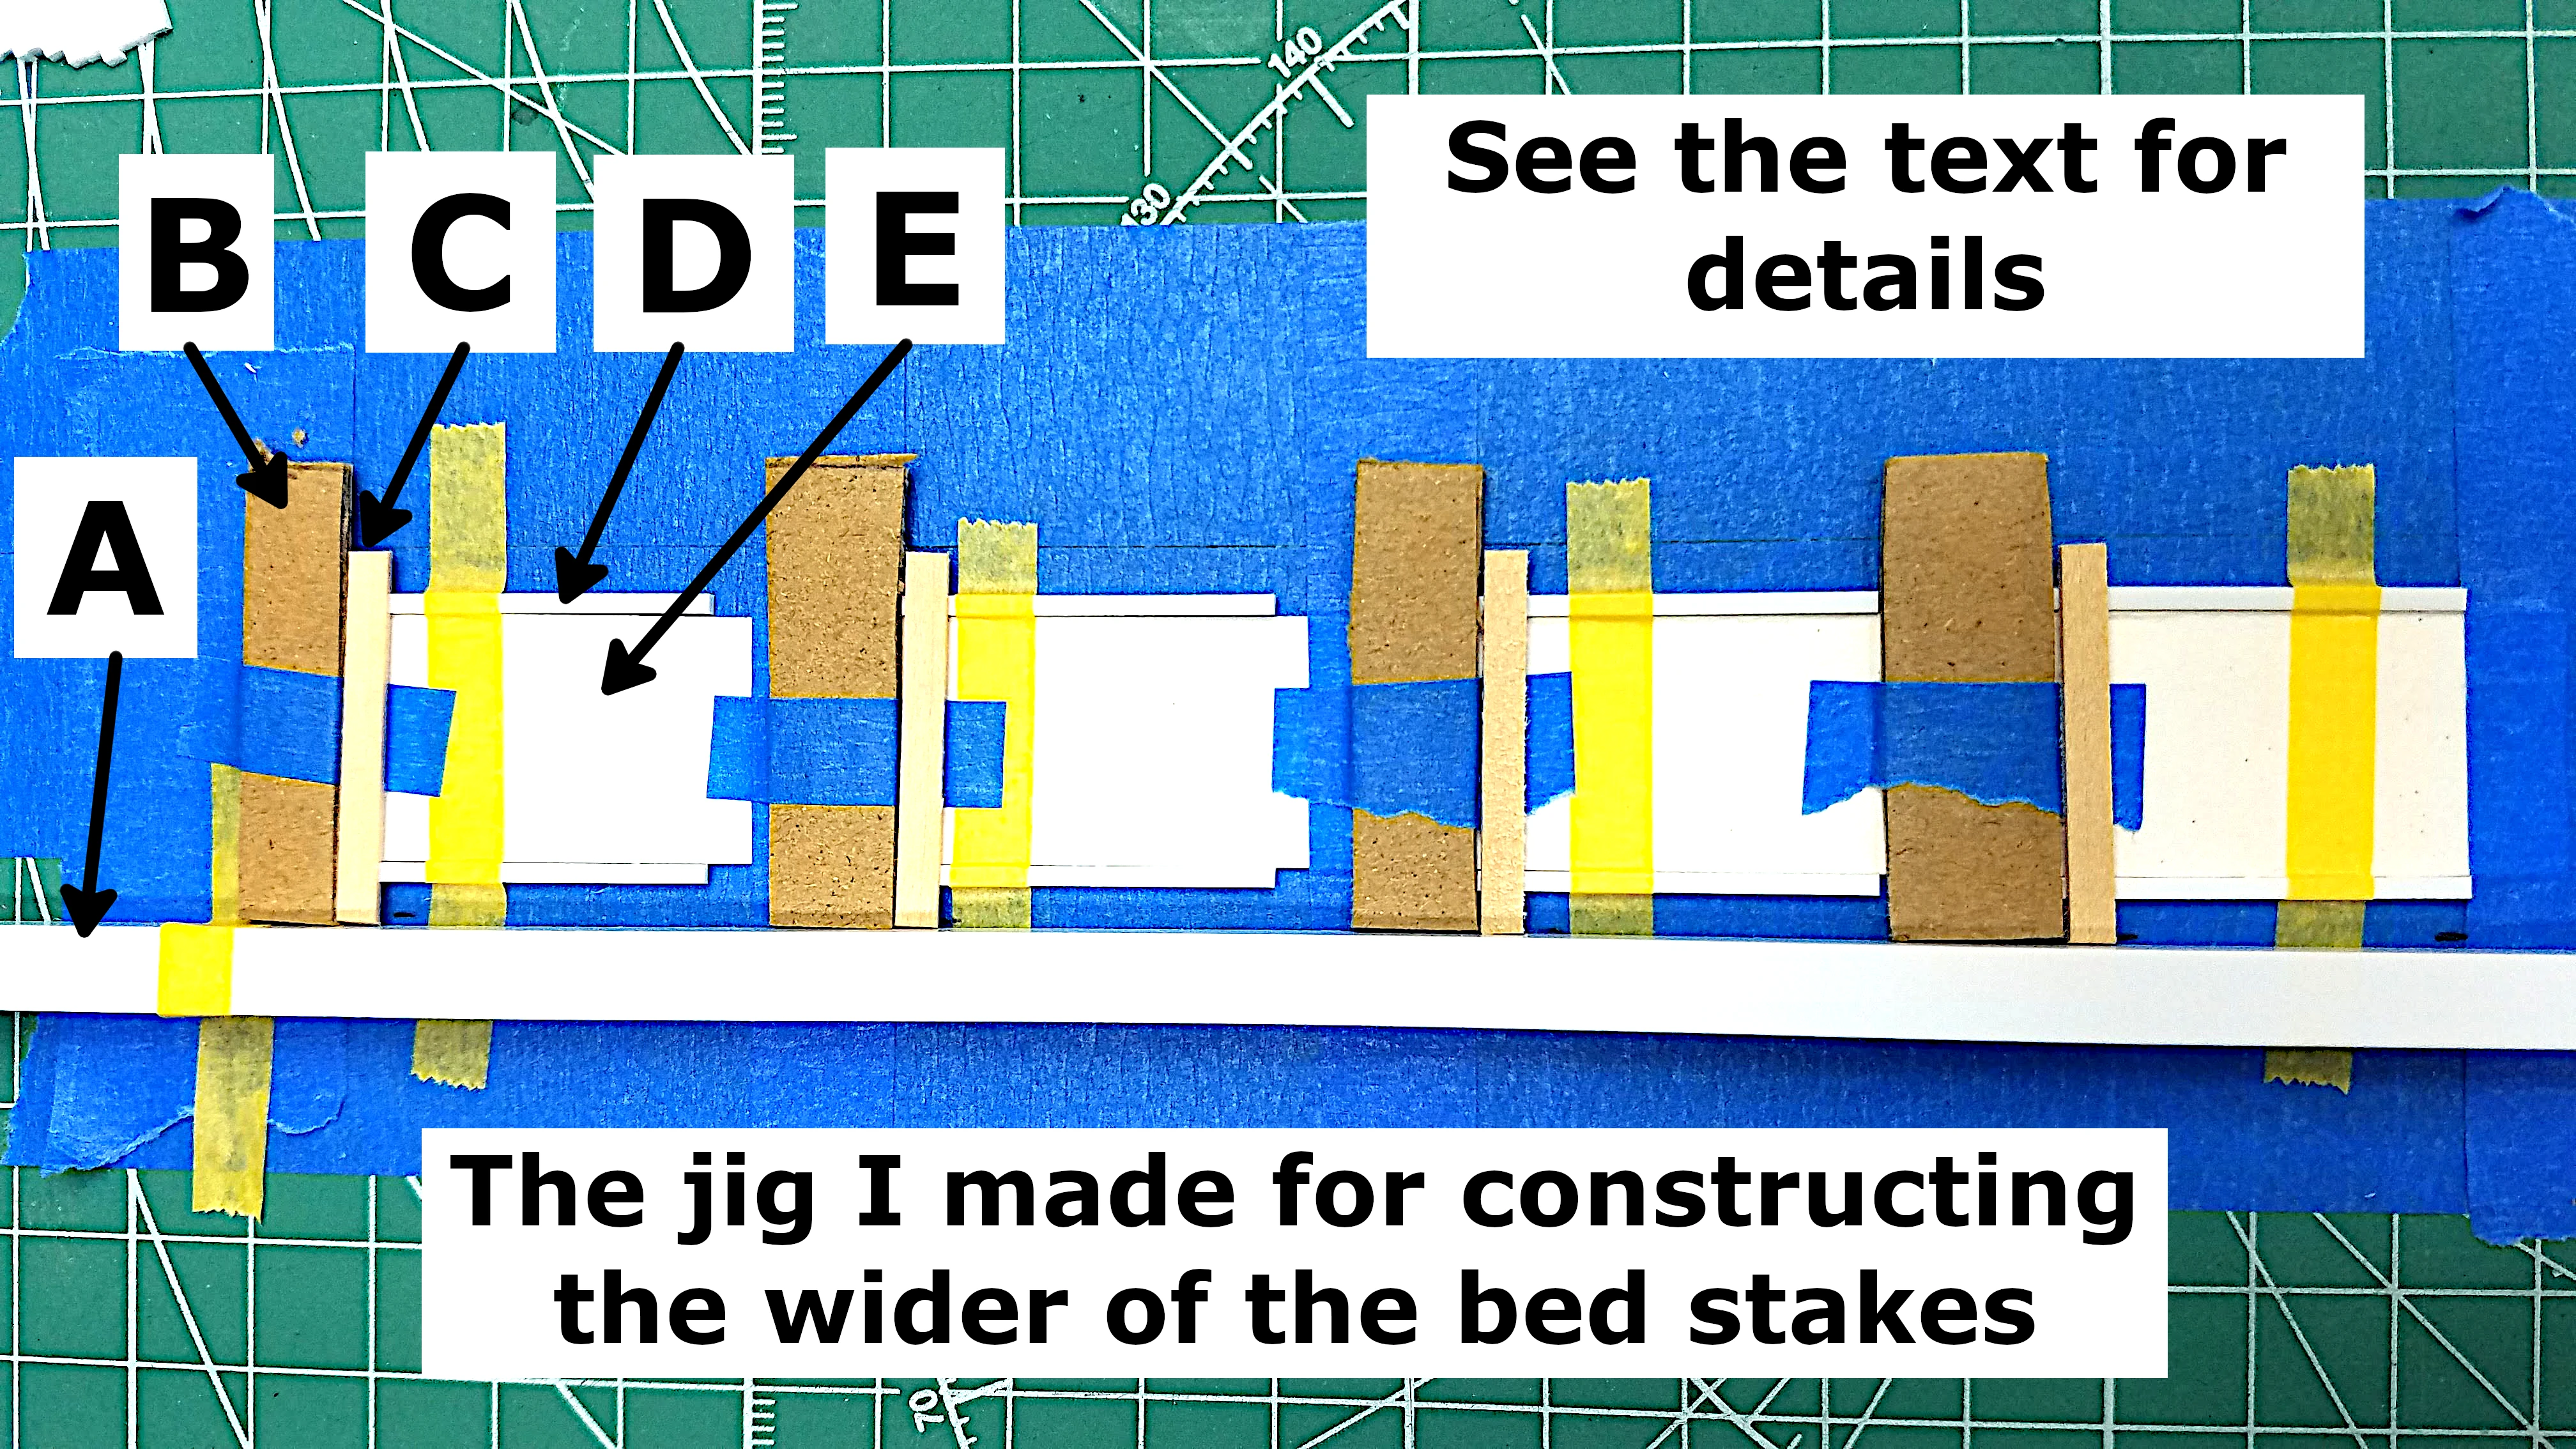
The photo below is a partial view of the type of jig I made to
scratch build the stakes for the bed. Part 03 of my YouTube
Video includes a description of how I used this jig and
other parts of the assembly.
I used a 1/4" x 1/4" piece of square stock for the left
edge. The wooden slats would than be placed on the stakes
"D" and aligned against the 1/4" rail.
I cut small pieces of cardboard to act as a top guide for
placing the top wooden slat on the stake poles "D".
I needed something that would be thicker than the
height of the wooden slats and the stake and the cardboard
worked great. The top wooden slat can than be place on
the stakes, against the cardboard guide and the left rail.
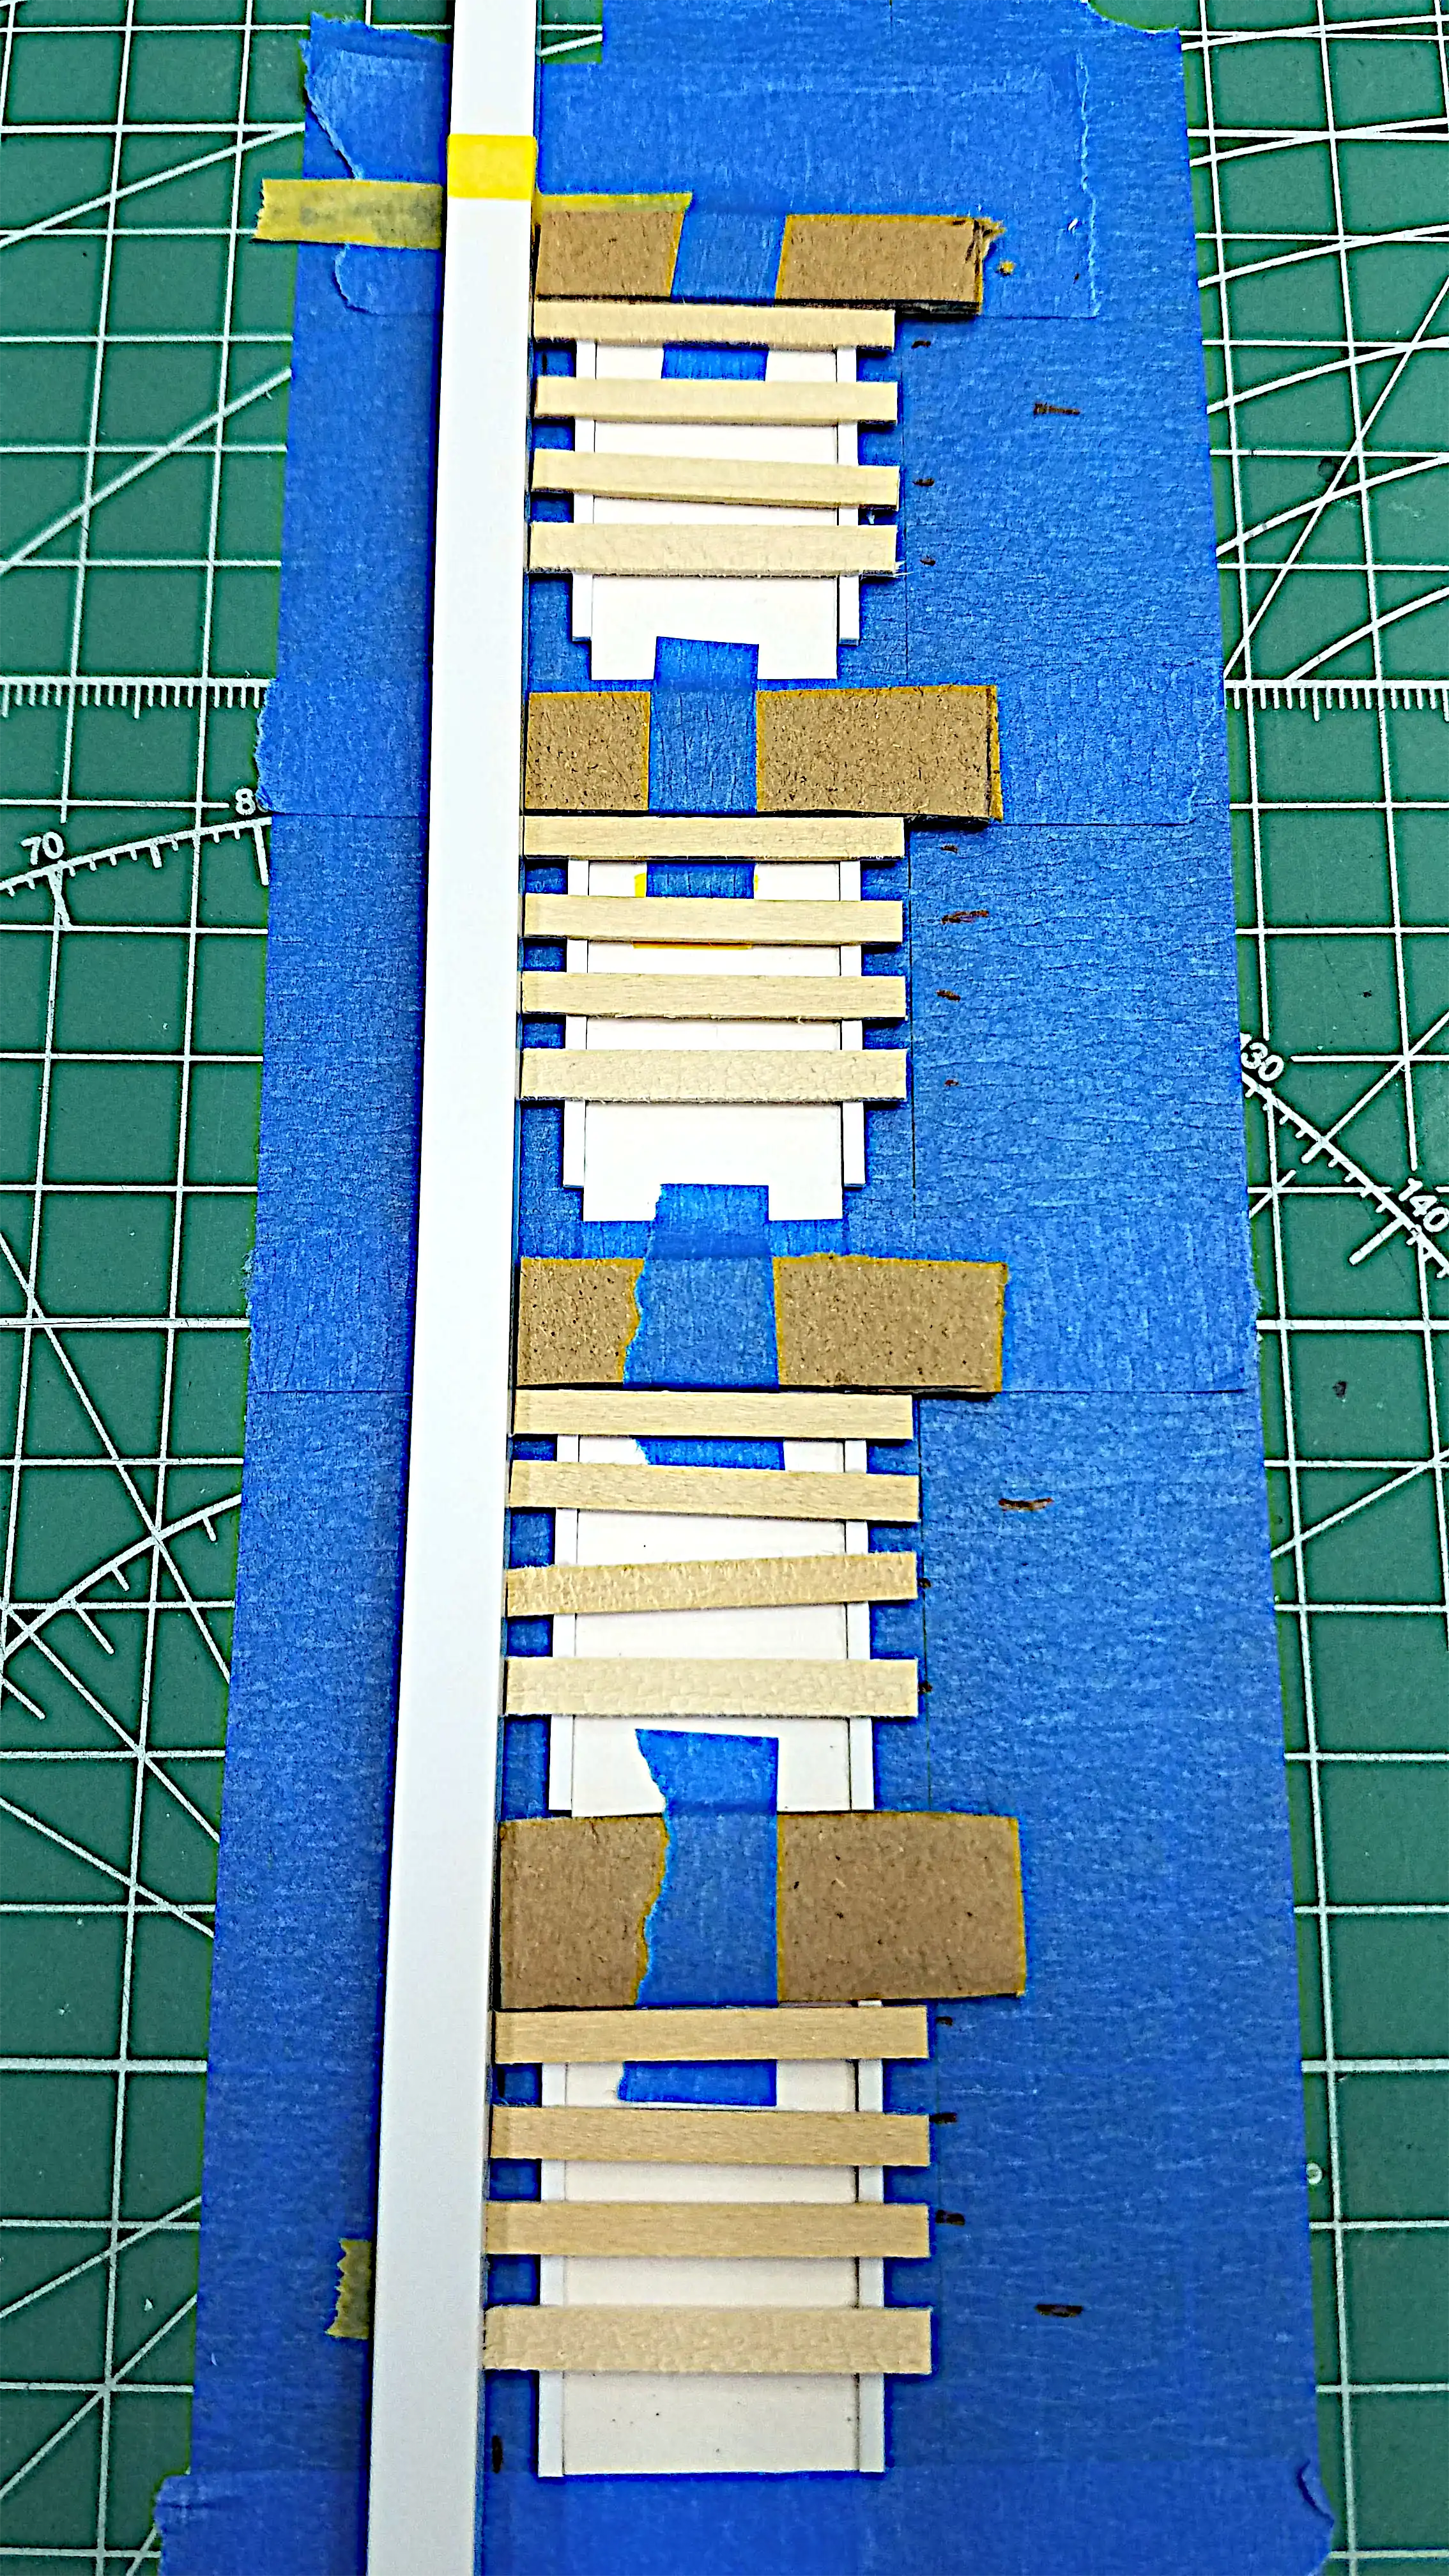
The top wooden slat in place.
One of two stakes per stake rack.
I cut a strip of cardboard the width of the space between
the stake posts. This cardboard had to be rigid and thinner
then the thickness of the stakes so that the slats can be
glued to the stakes. This allowed me to place the stakes on
either side of the strip, tape them in place and have
them the correct spacing.
I then used Gorilla Super Glue Gel XL to glue the wooden slats
to the styrene stakes. The Gel Super Glue does not soak into
the balsa wood yet securely adheres the two different materials
together.
I marked the center location of each of the other wooden slats.
When placing the slats I did not get too fussy because I want
to show the fact that this truck has been heavily used and
repaired in the field while being used. Some of them will show
that they were held onto the stake with bailing wire.
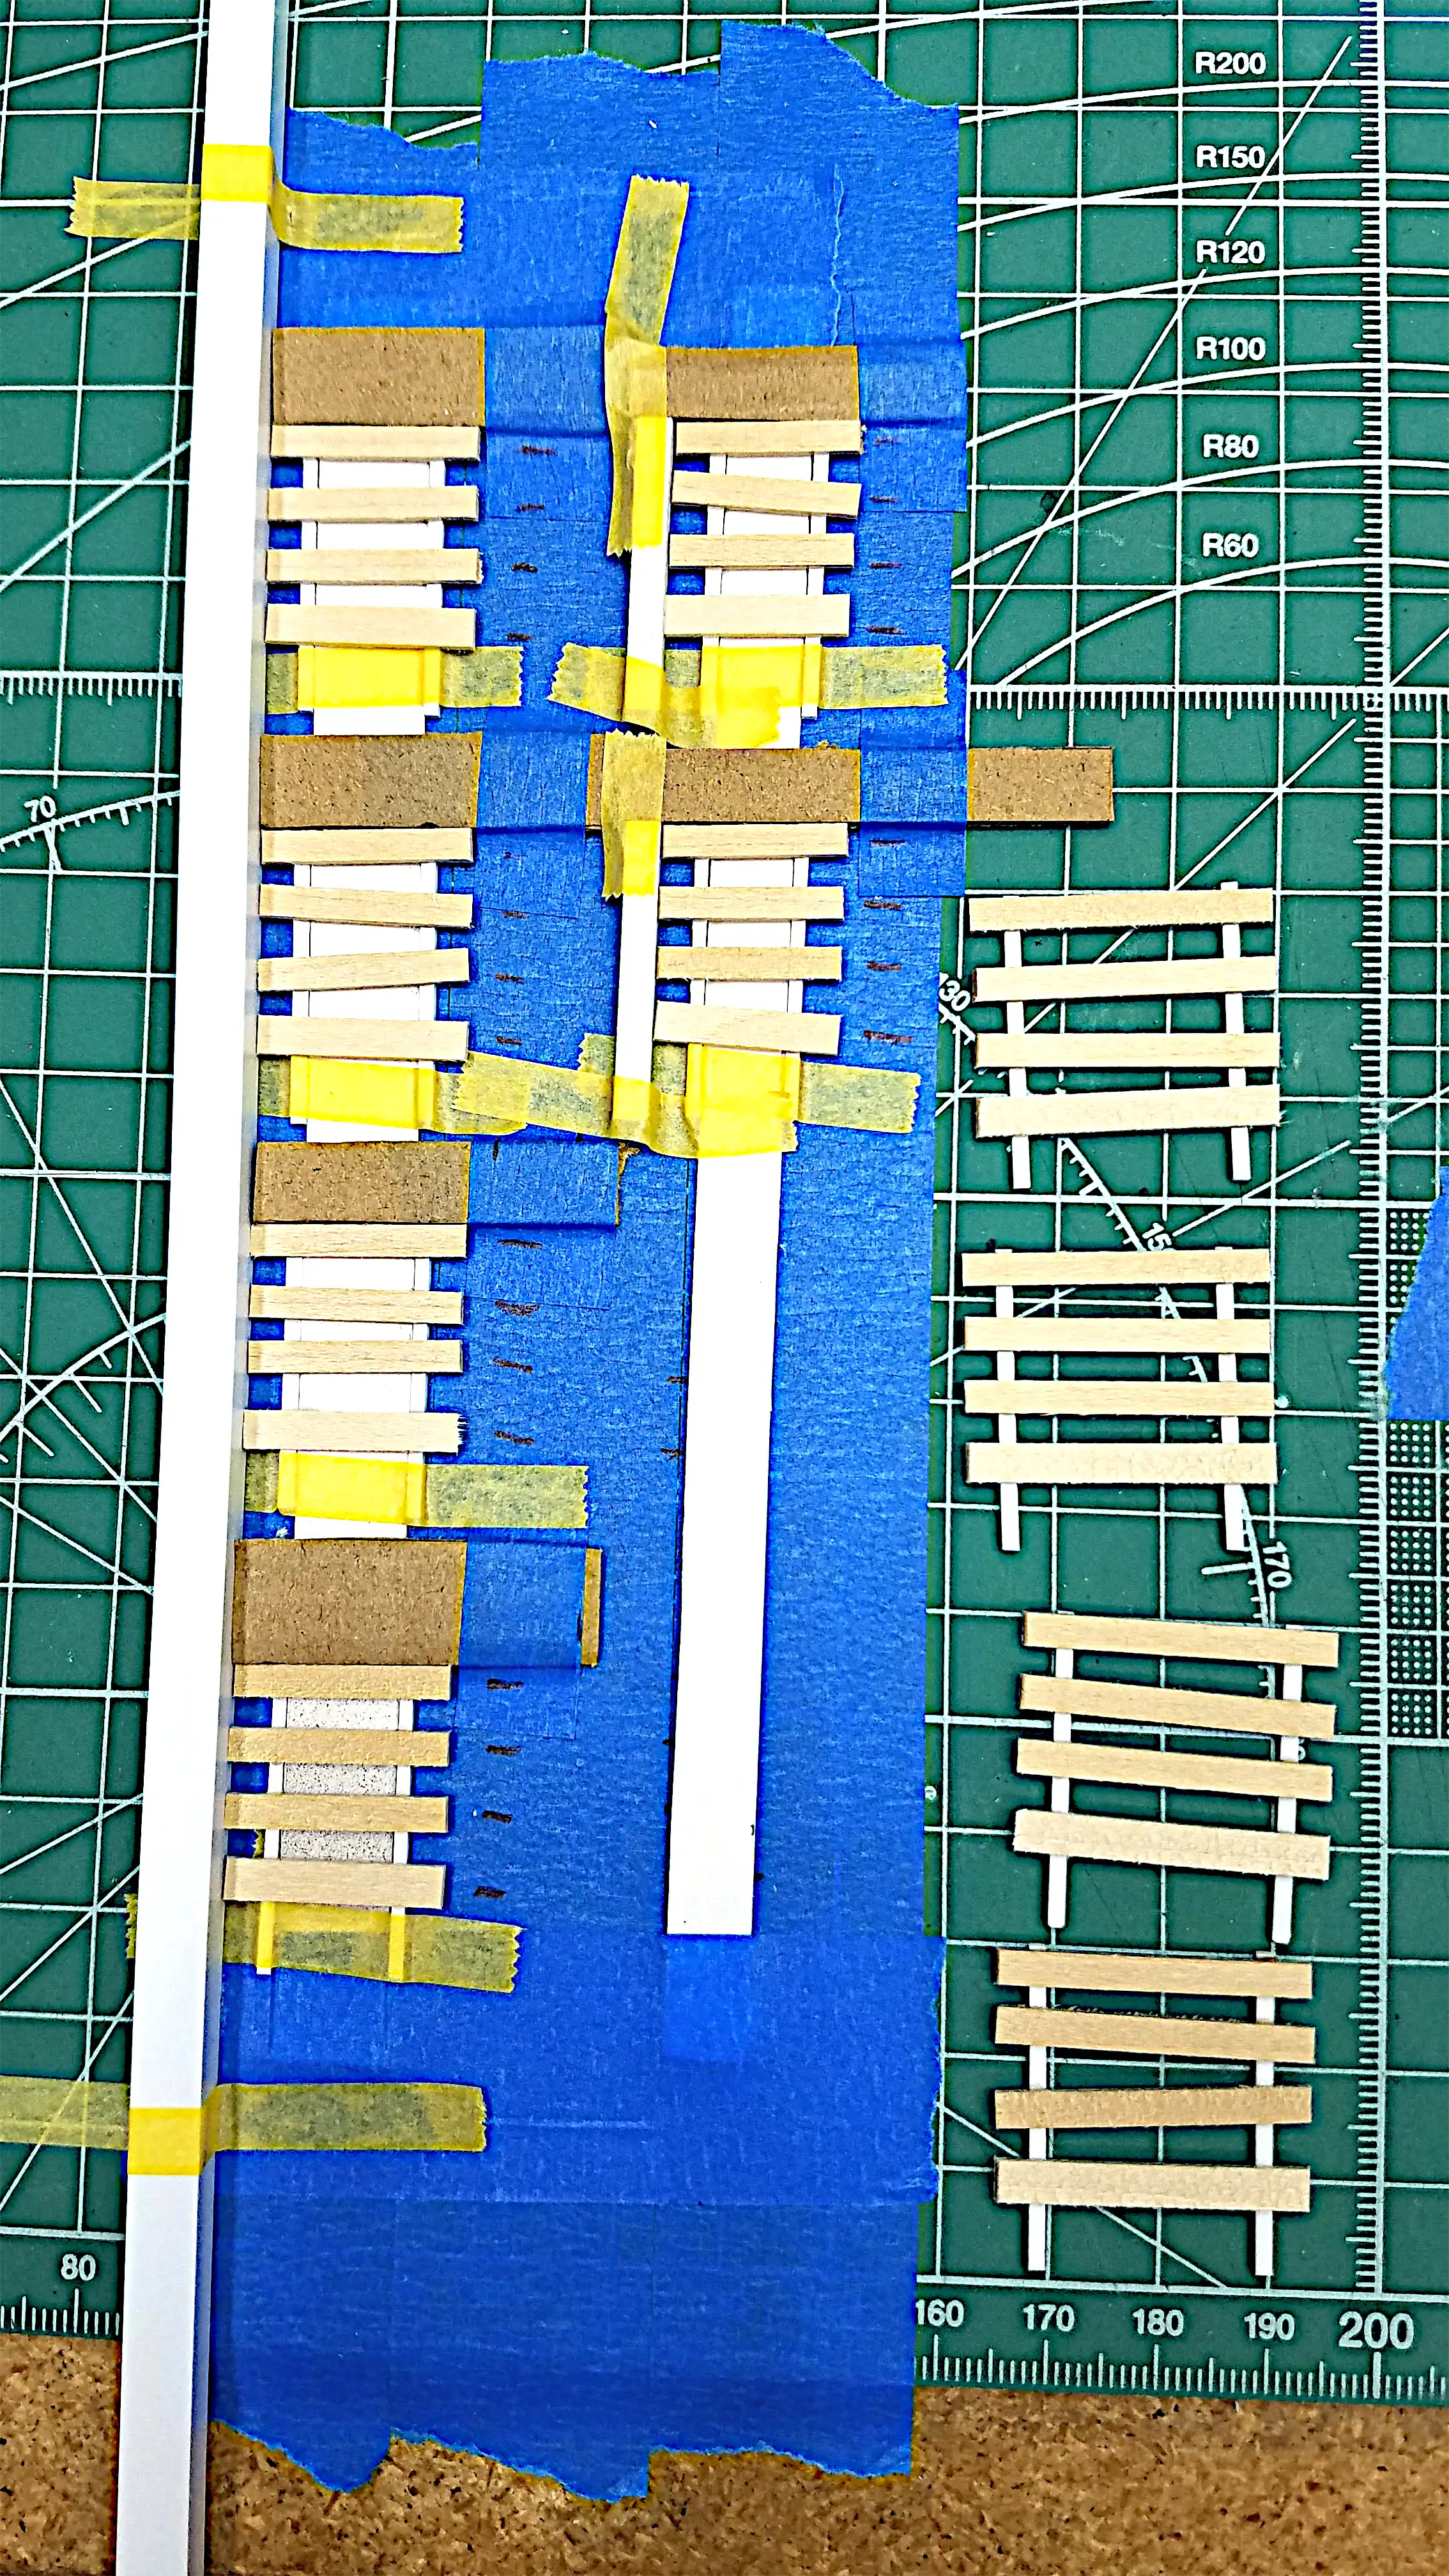
Two more jigs were made. One for the medium width stakes and
one for the small width stakes. The wider of the stakes are
shown completed, but not painted.
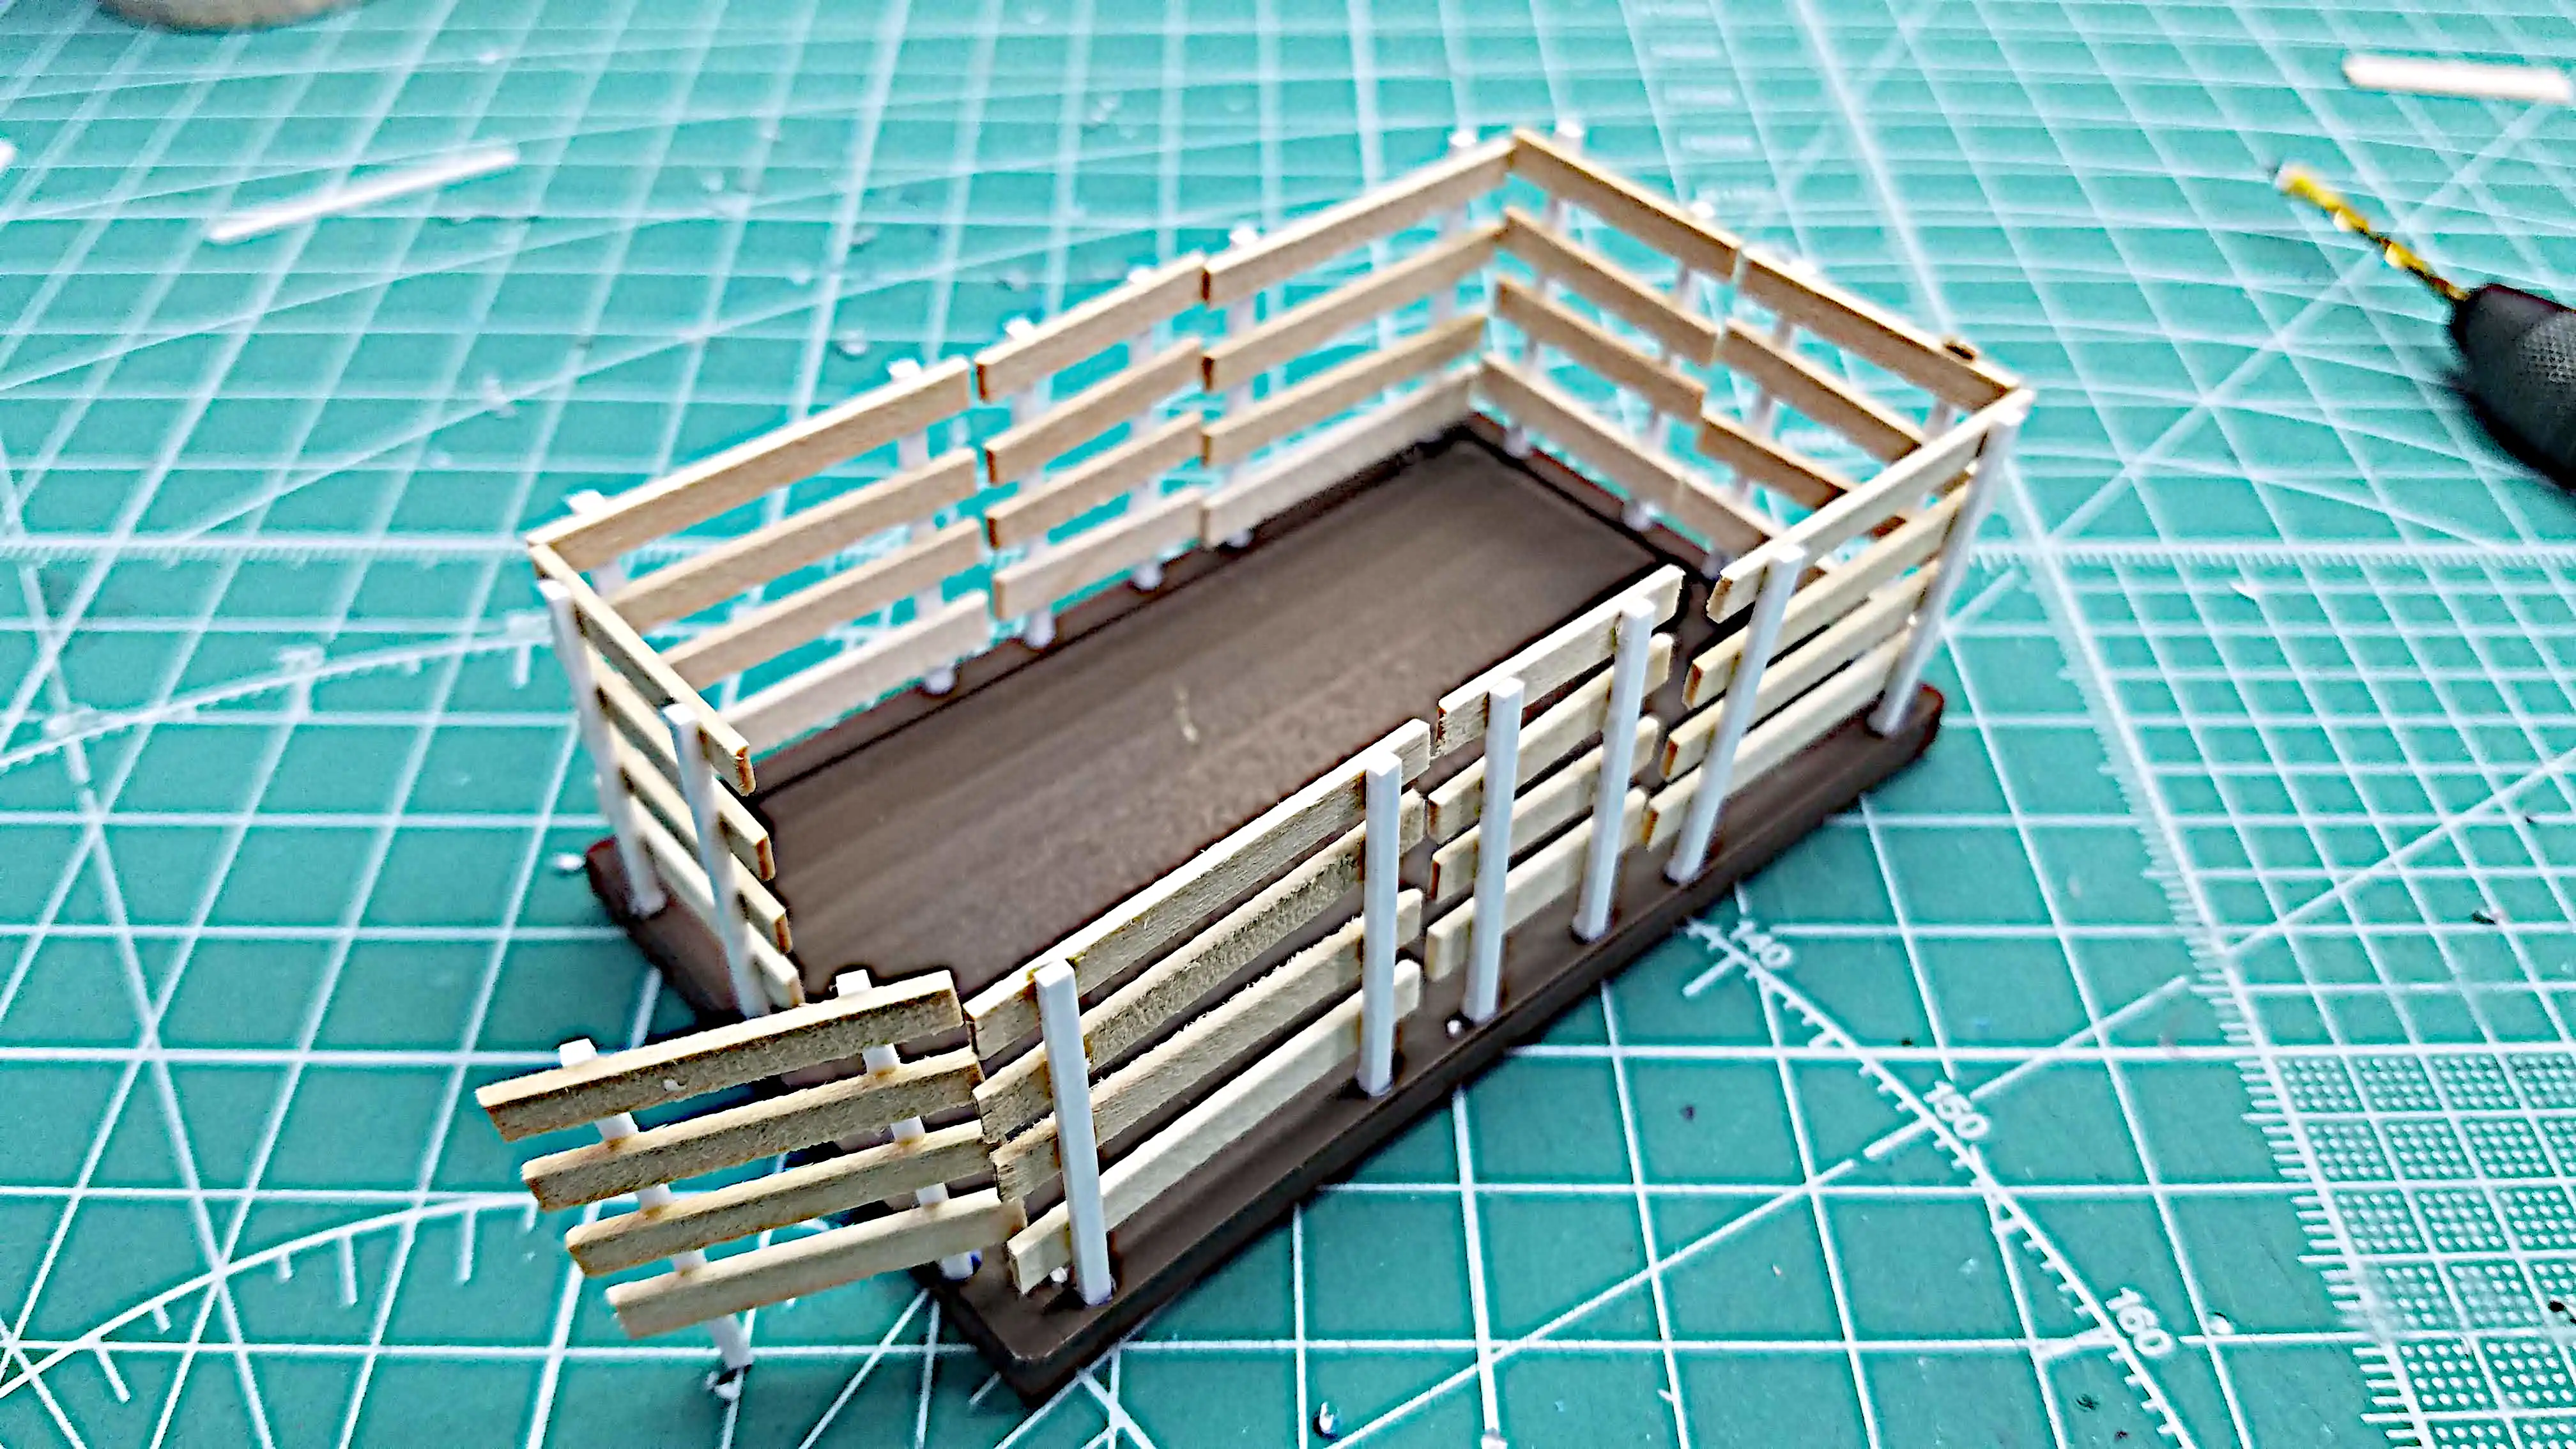
The finished stakes are dry fitted onto the bed. the bed still
has tape coving the the wooden floor so that when I glue the
wood decking down it is against plastic and not paint.
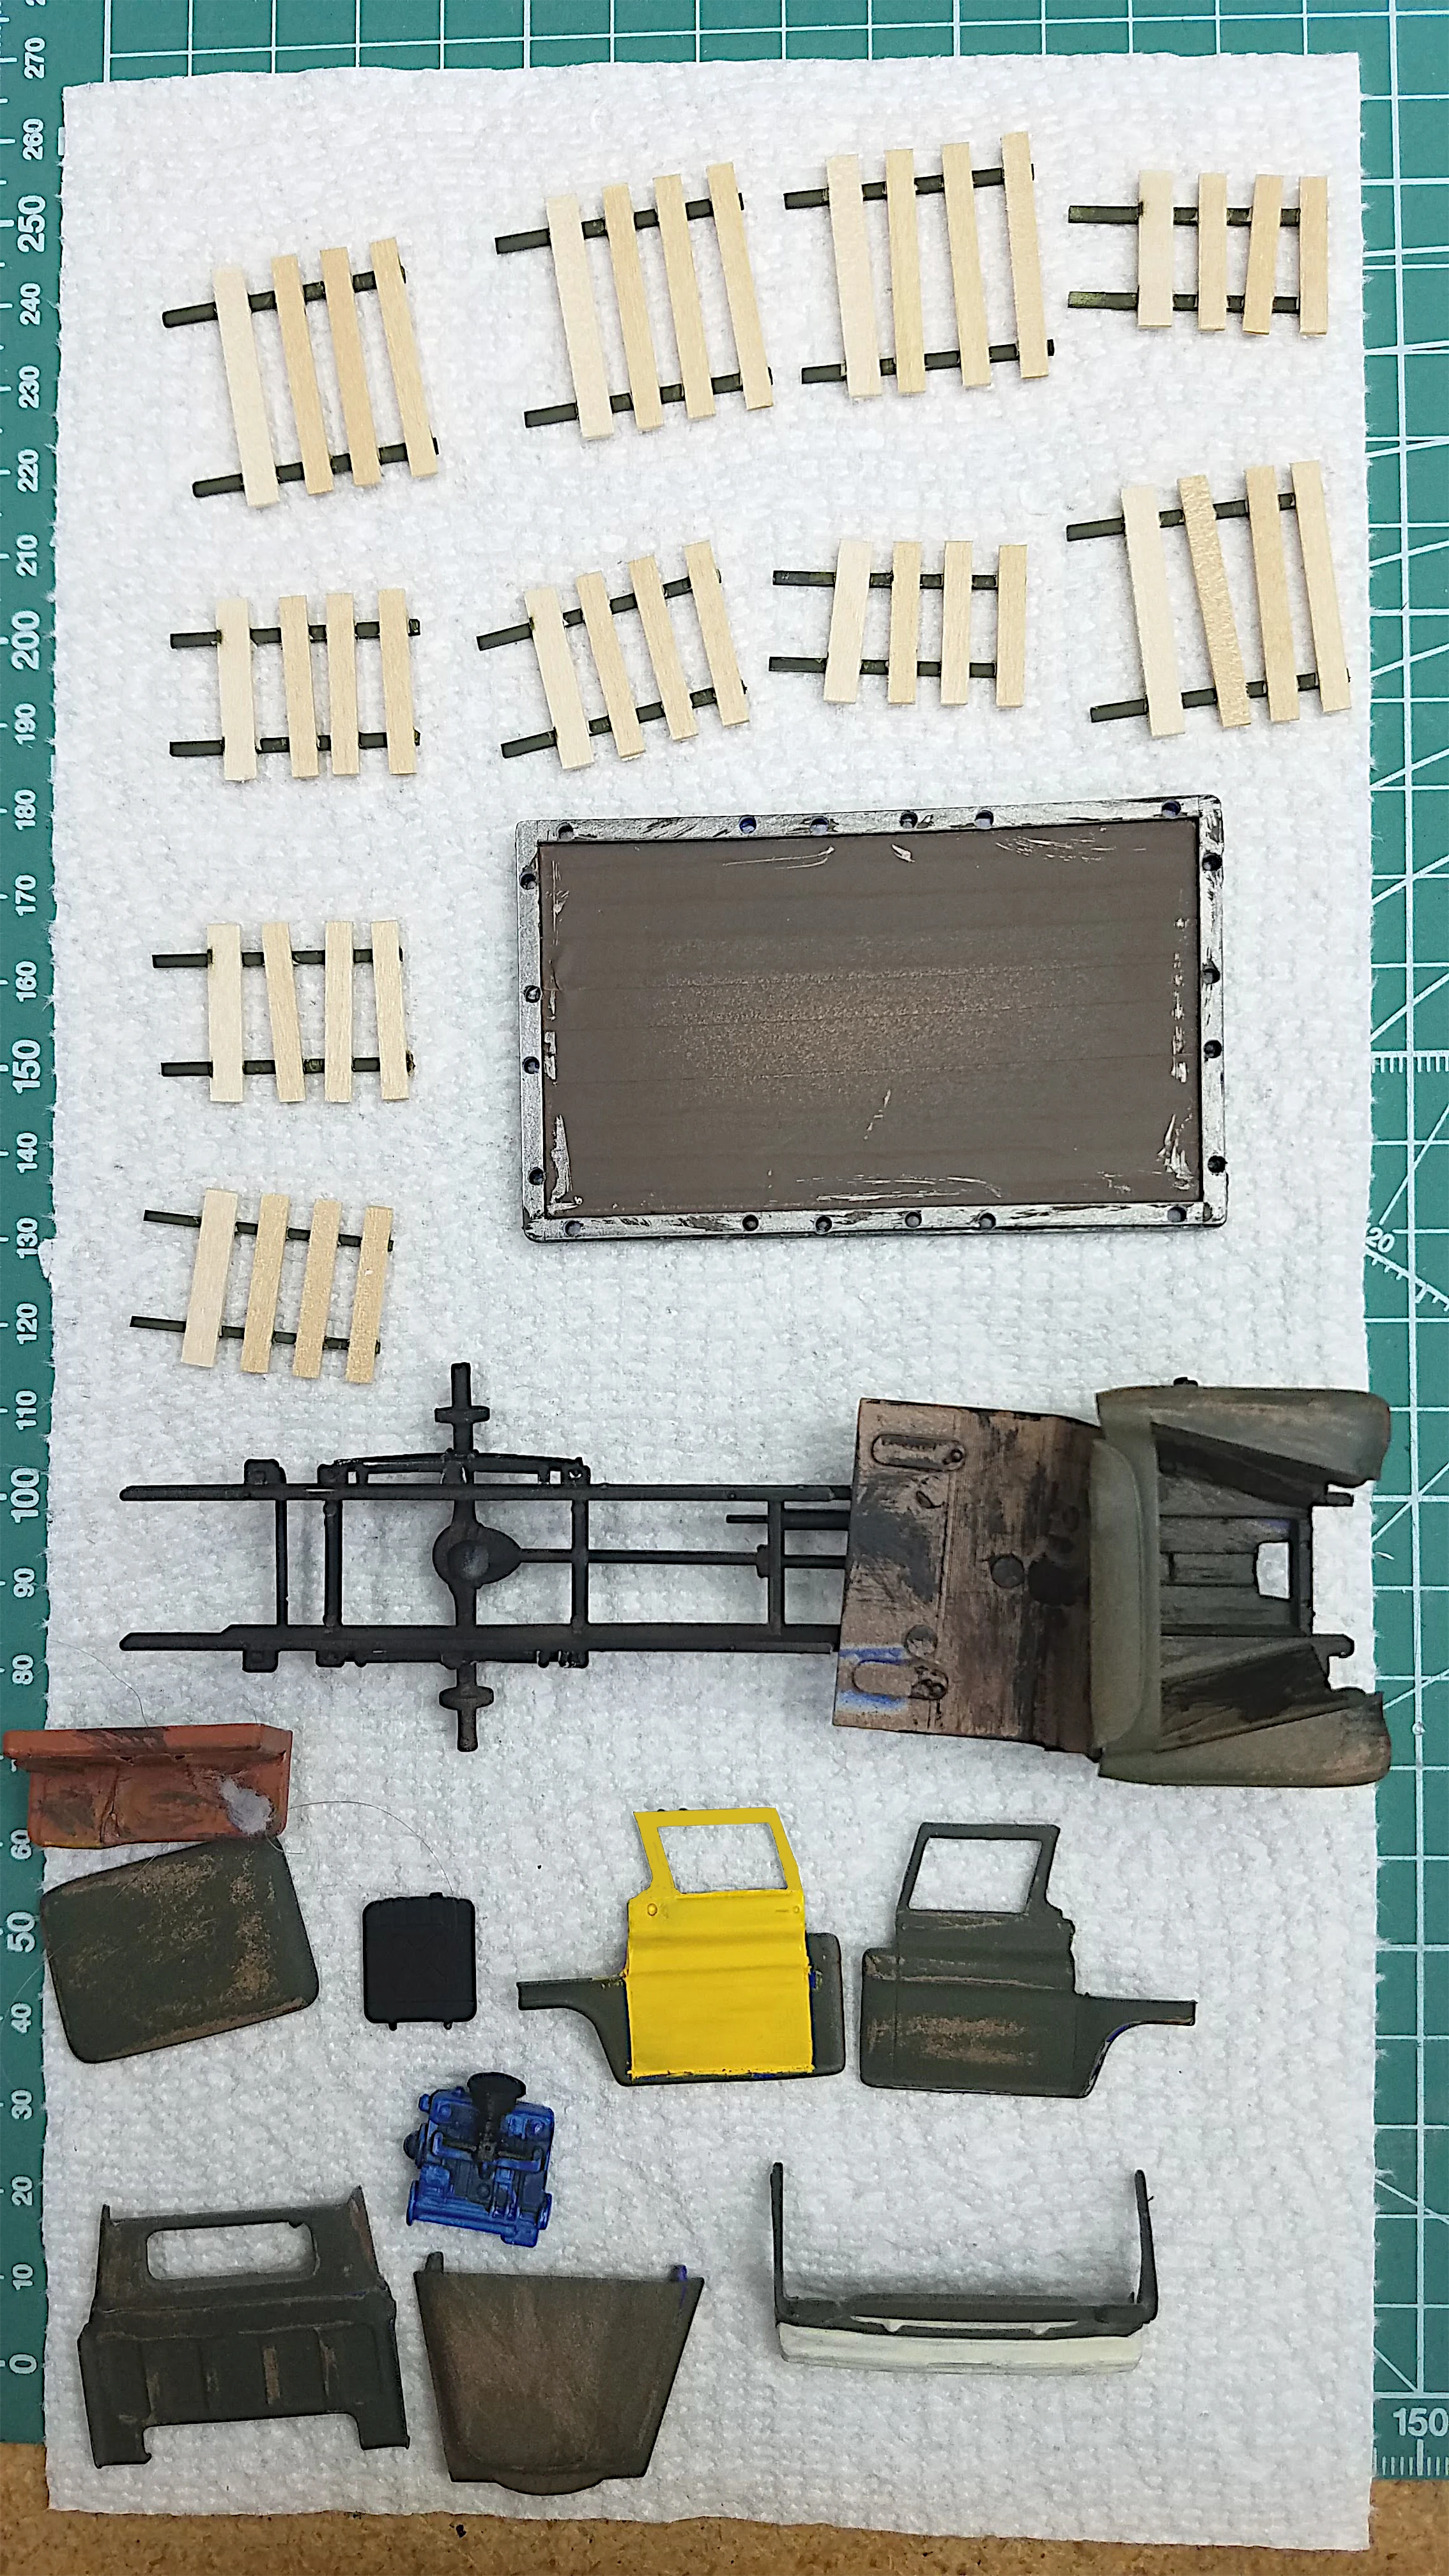
All the parts except the wheels and tires. The wood on the
stakes and the bed still need to be painted. The bed still
has masking tape coving the bed surface so that when I
install the wood strips they will be glued to plastic and
not paint. Also, the stake posts have been painted the body
color.
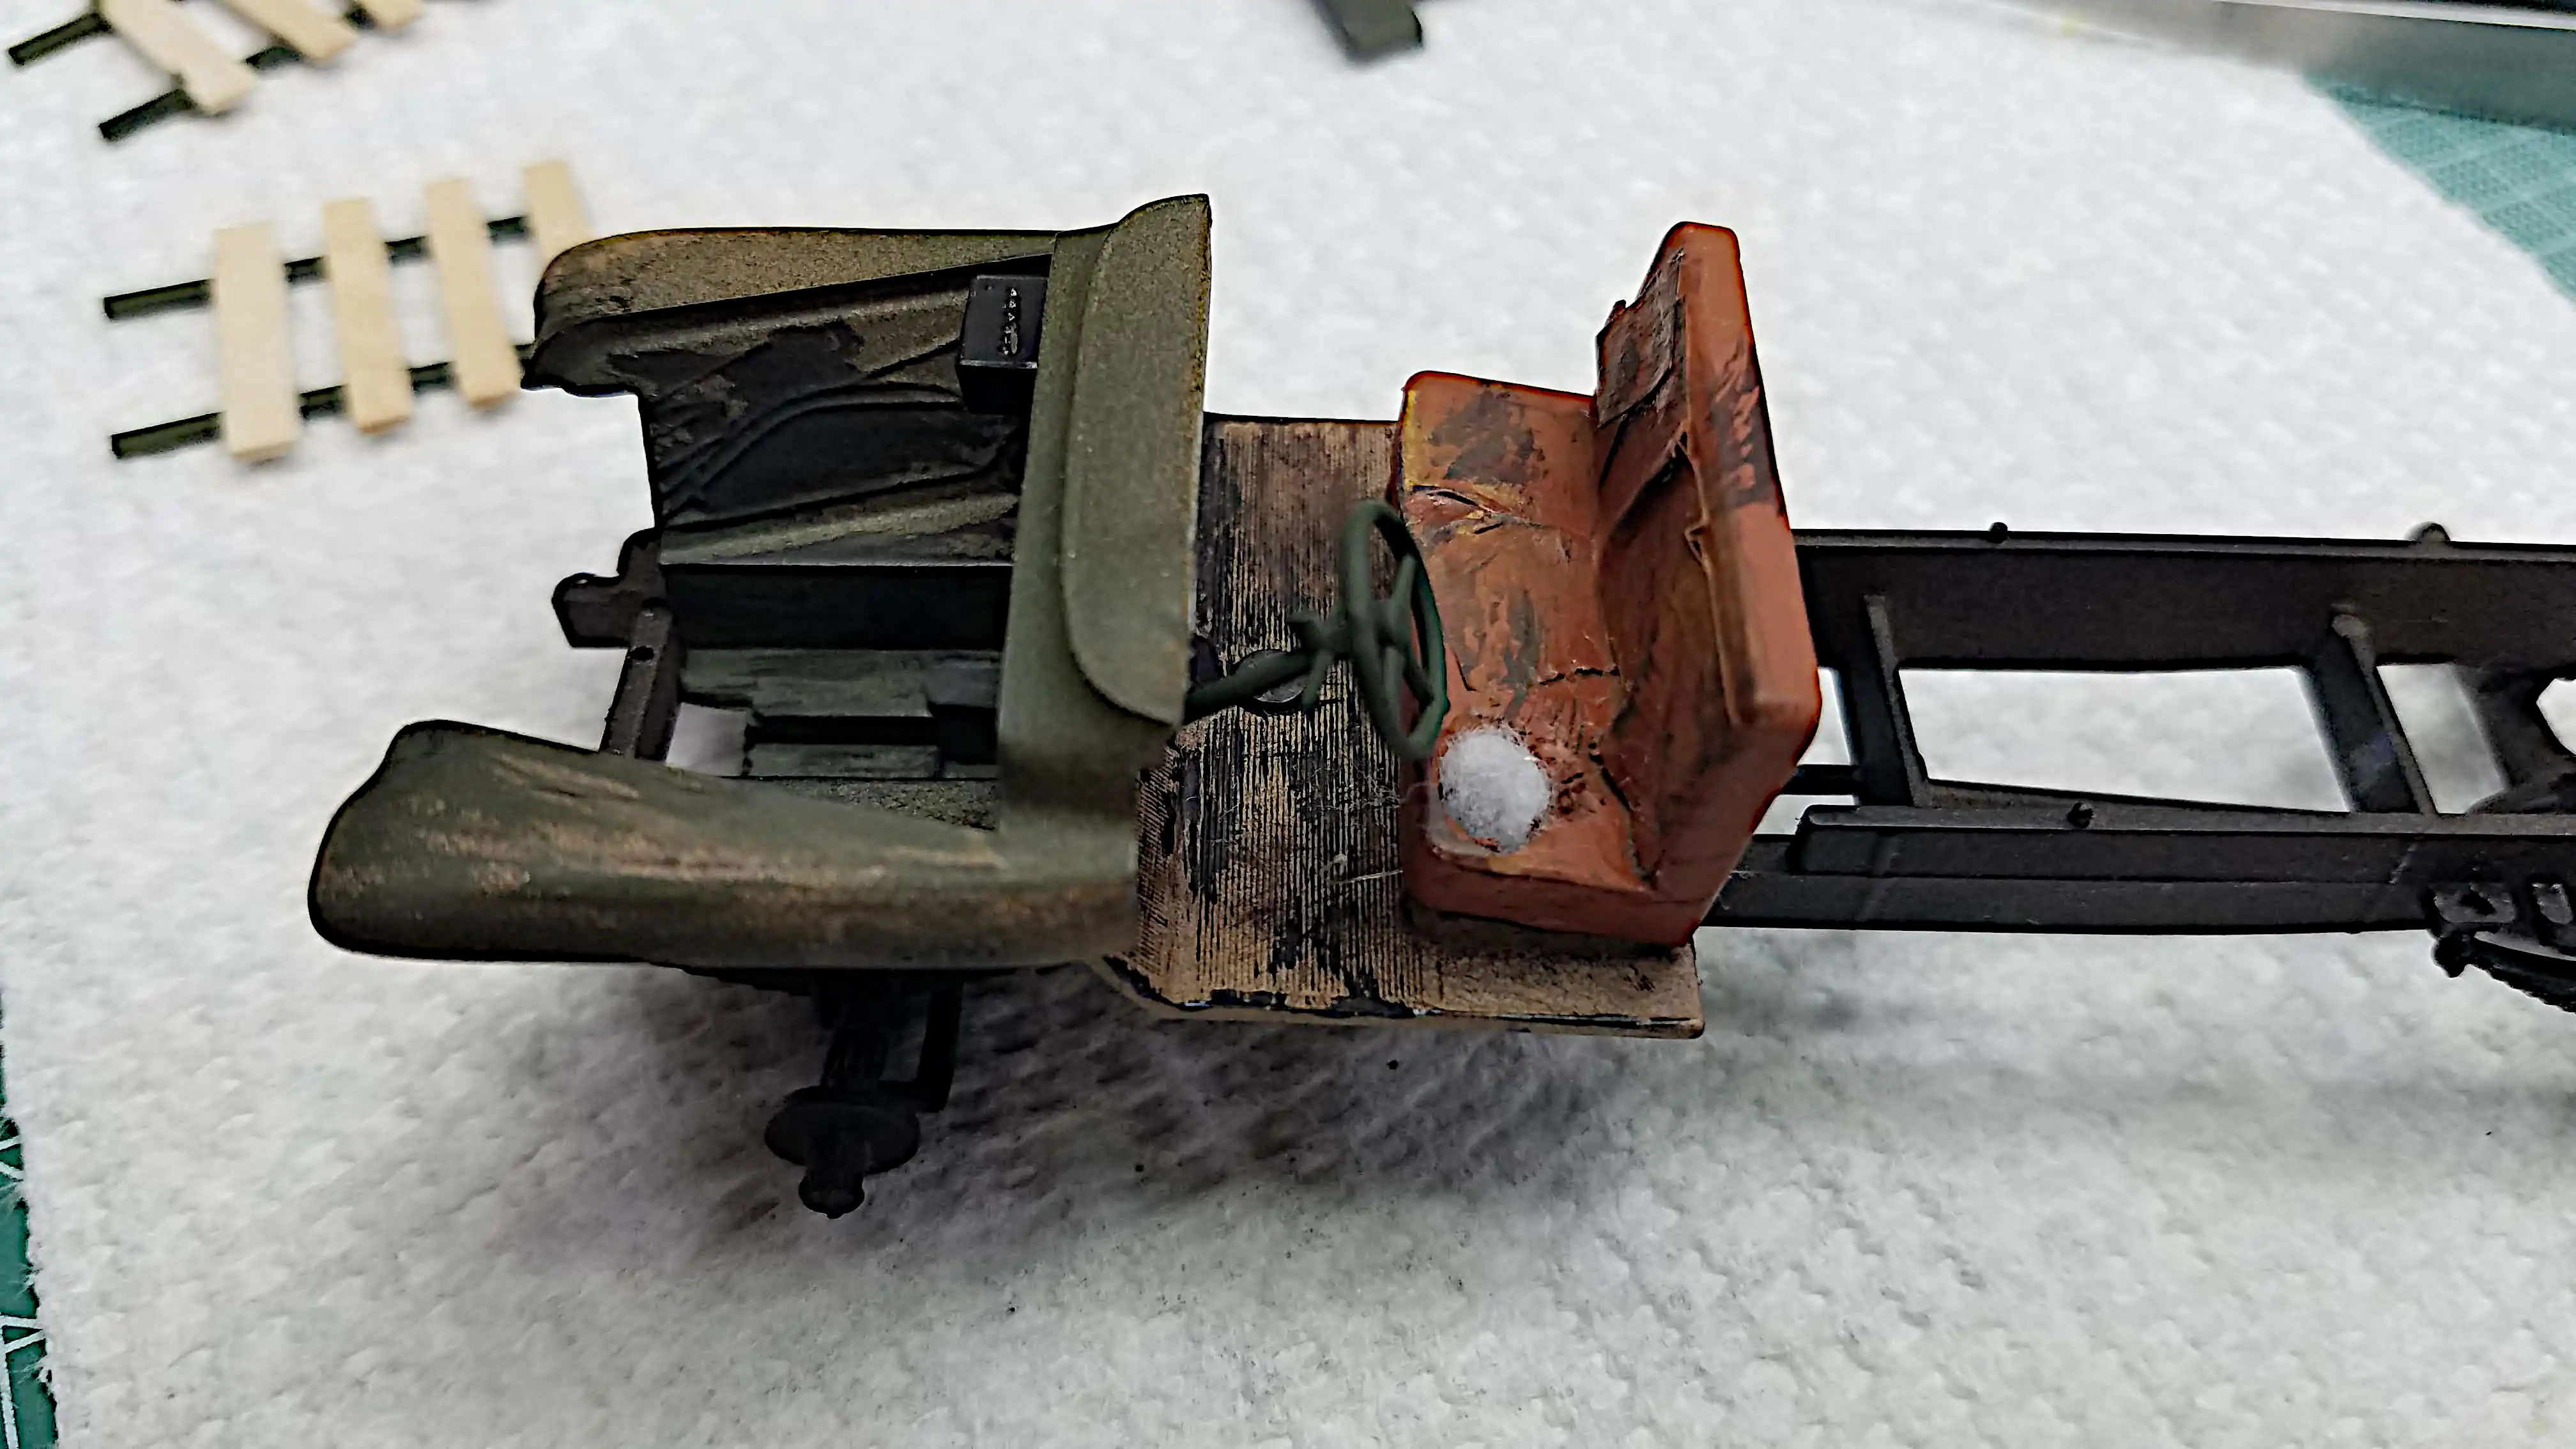
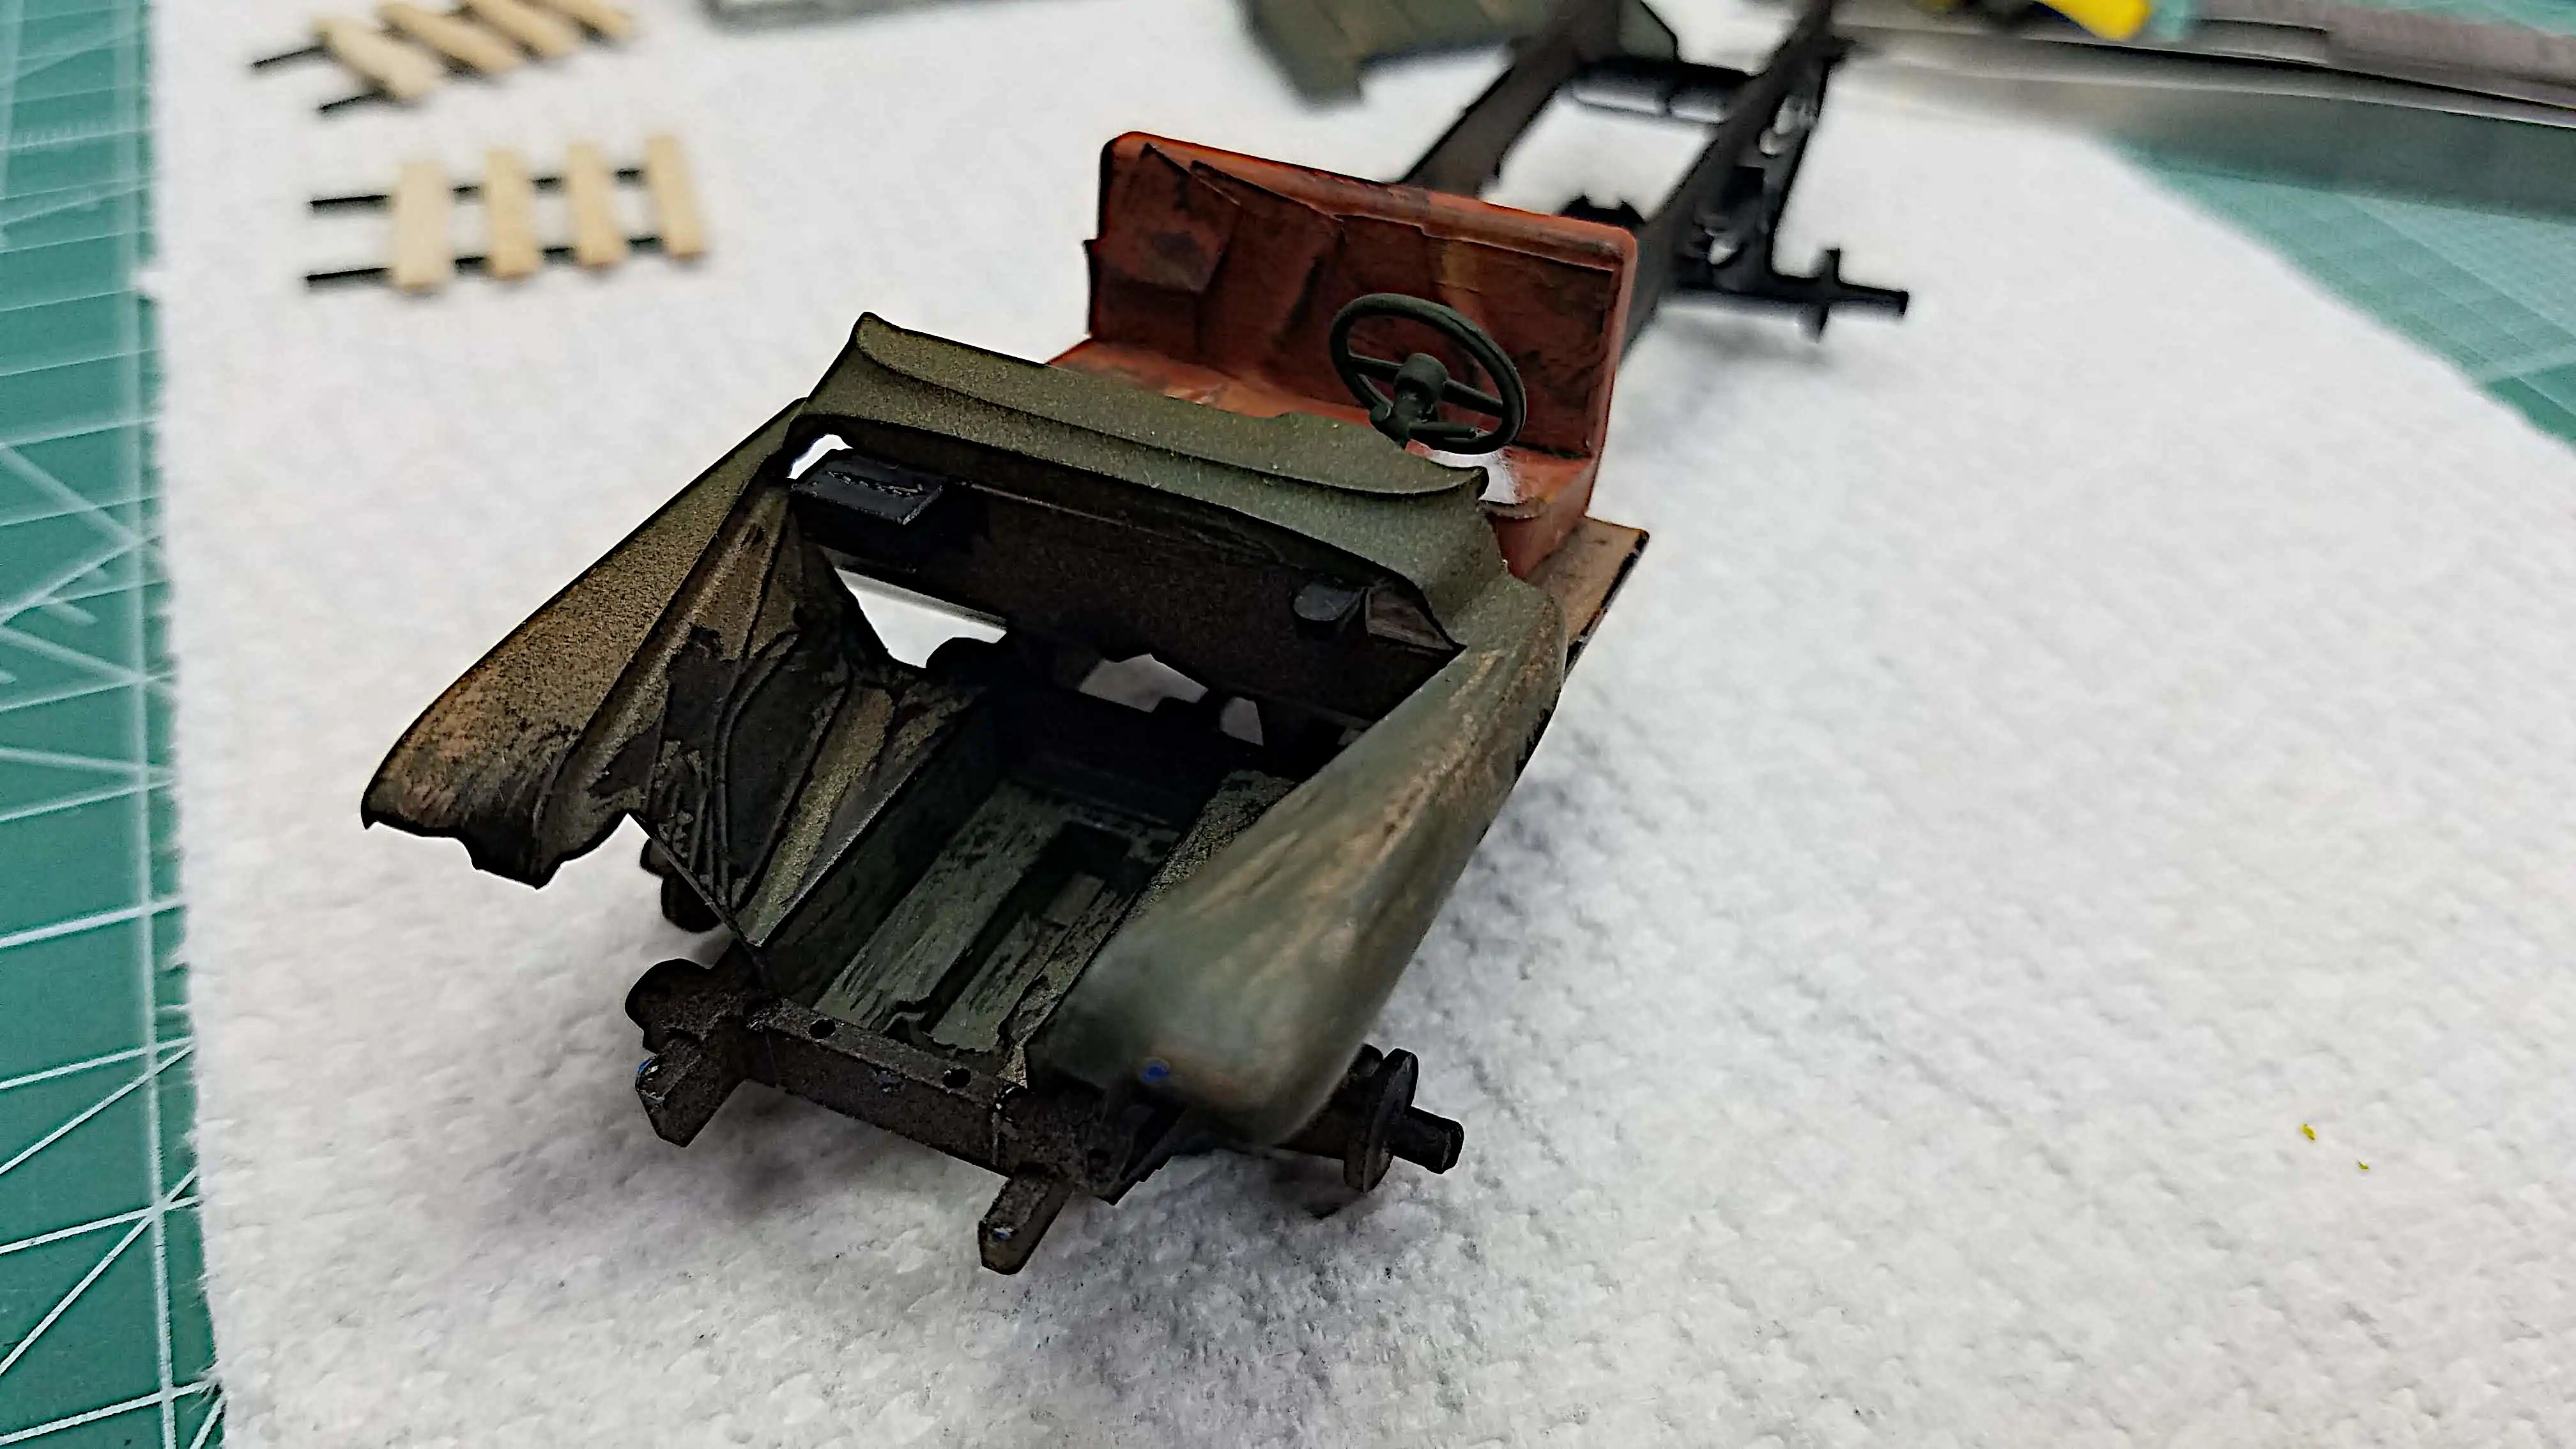
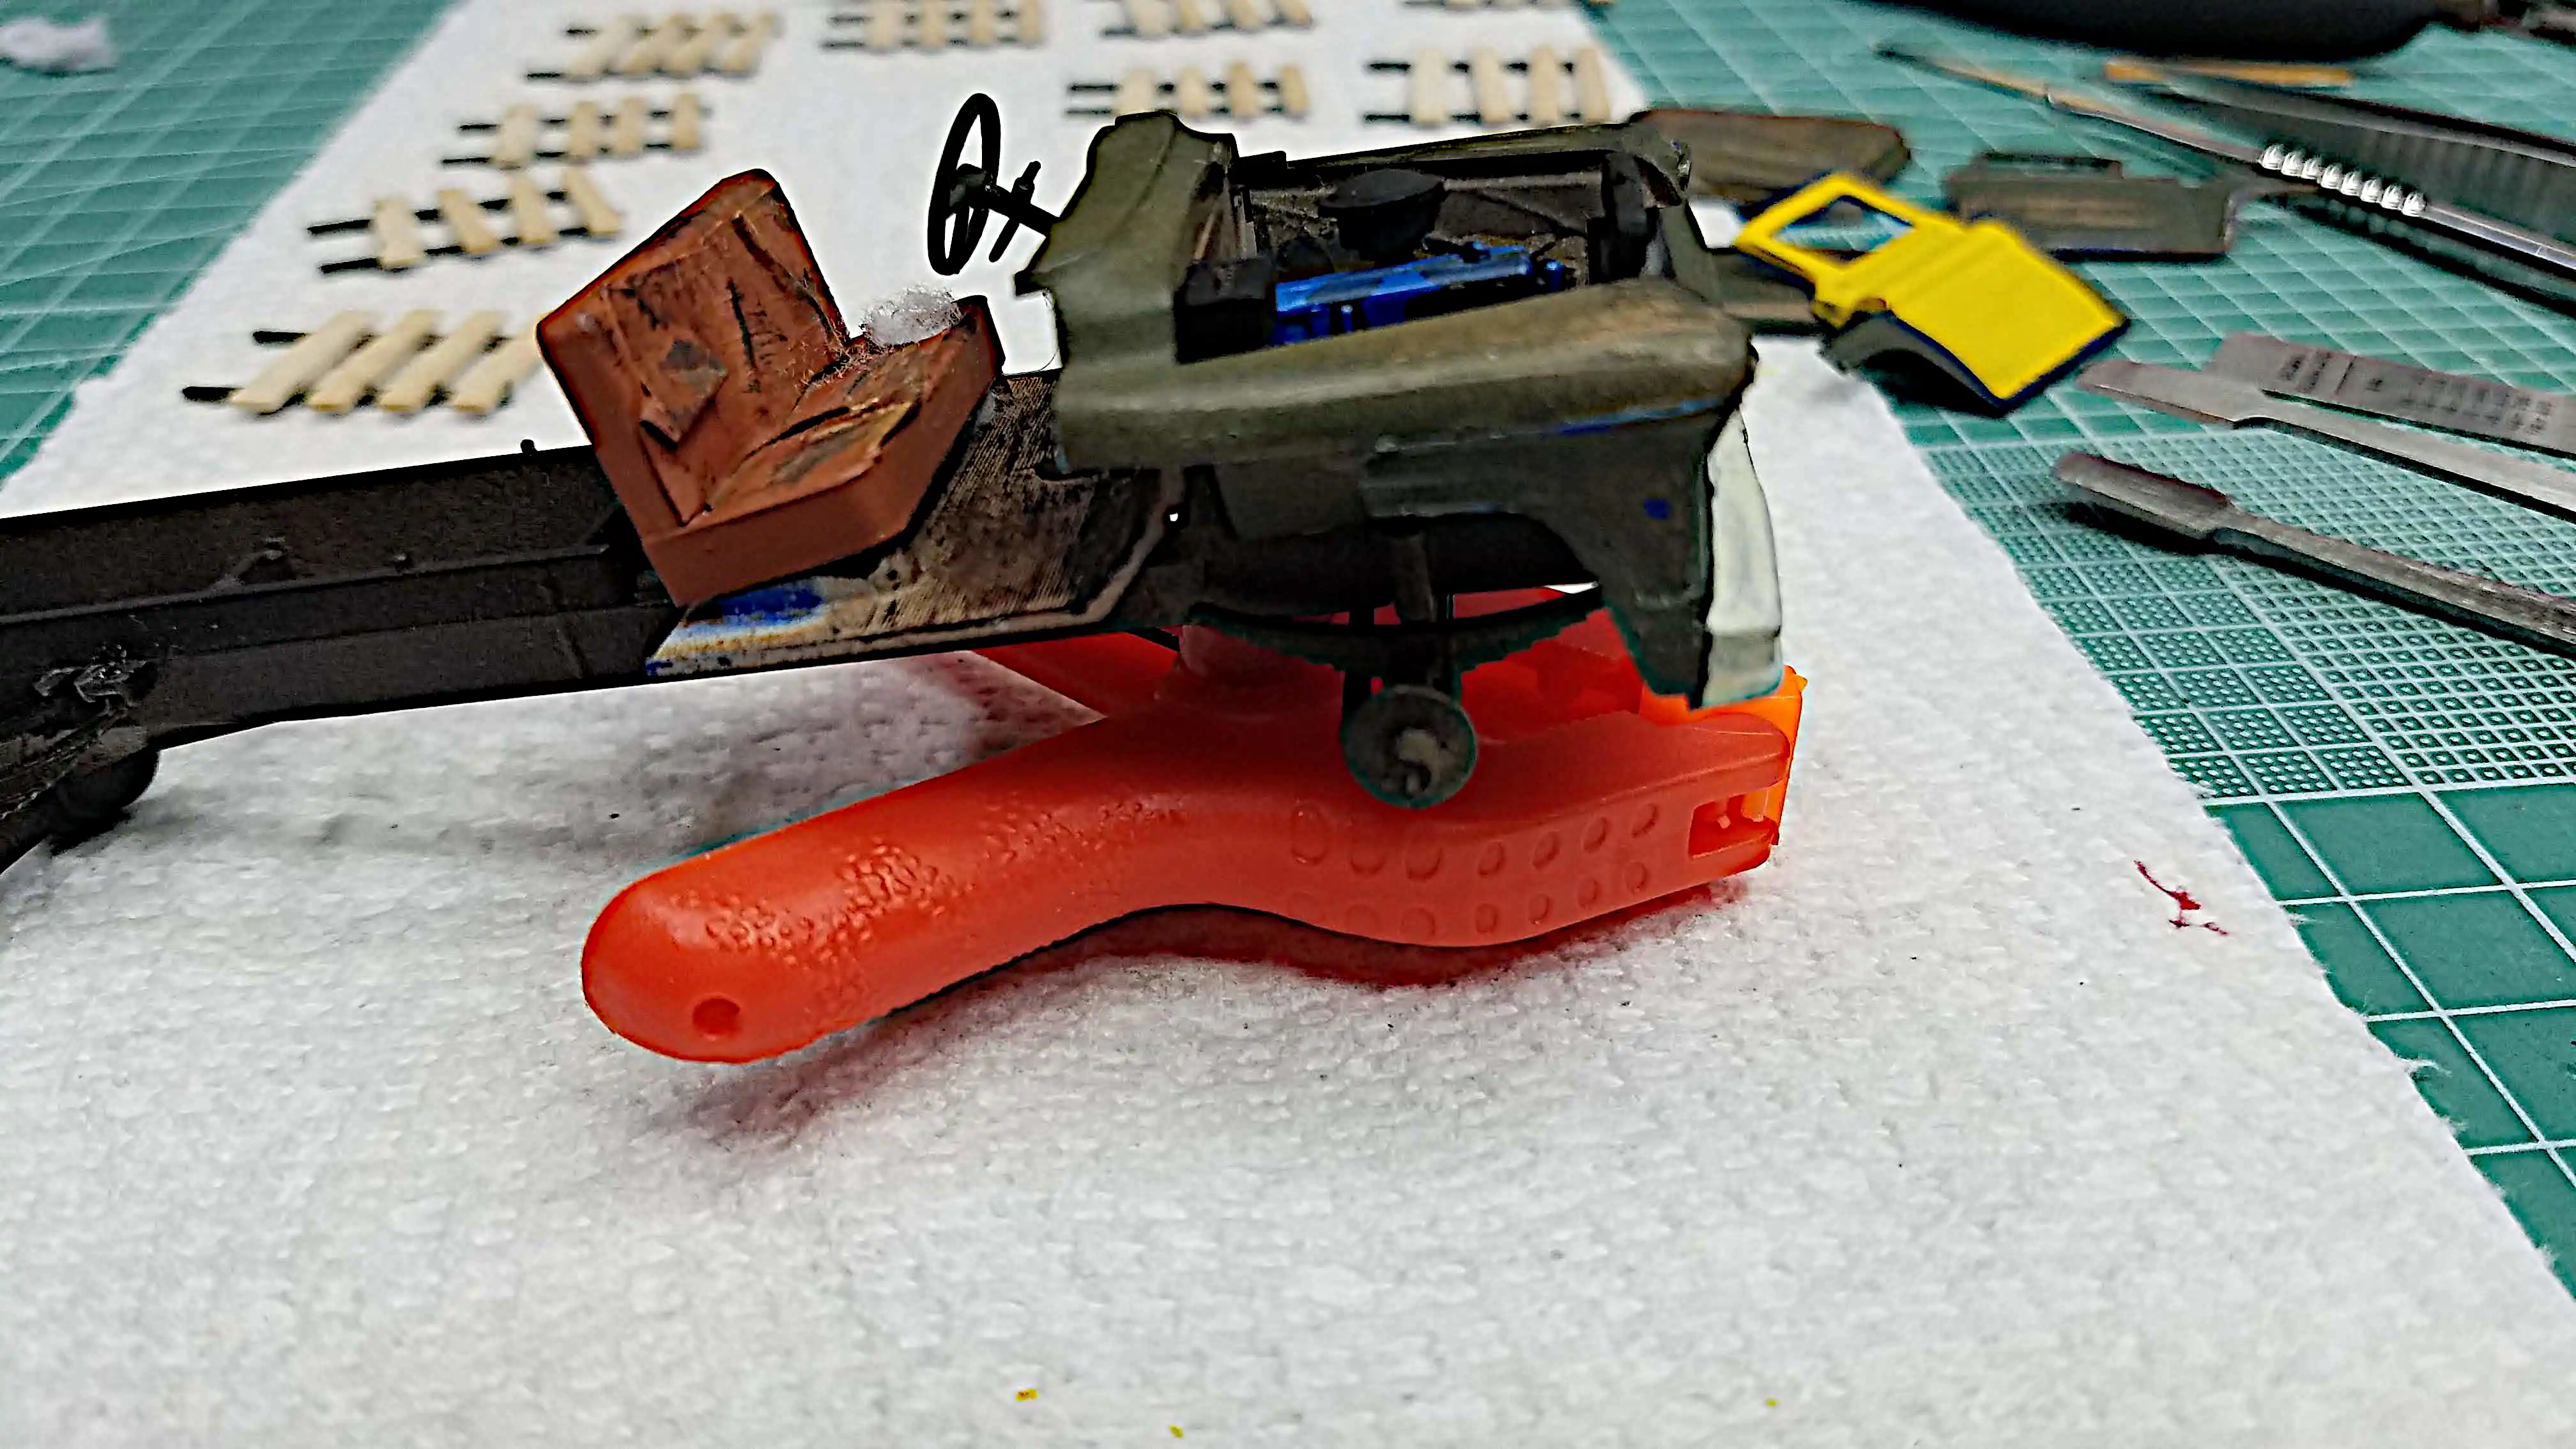
The interior floor, seat, steer column and wheel and front
fender assemble are glued in place. This view is of the driver
side. The floor has been dirtied. I used tape on the seat
to show wrinkles and tears. I rough cut a hole on the driver
side seat and used dryer lint to show seat stuffing.
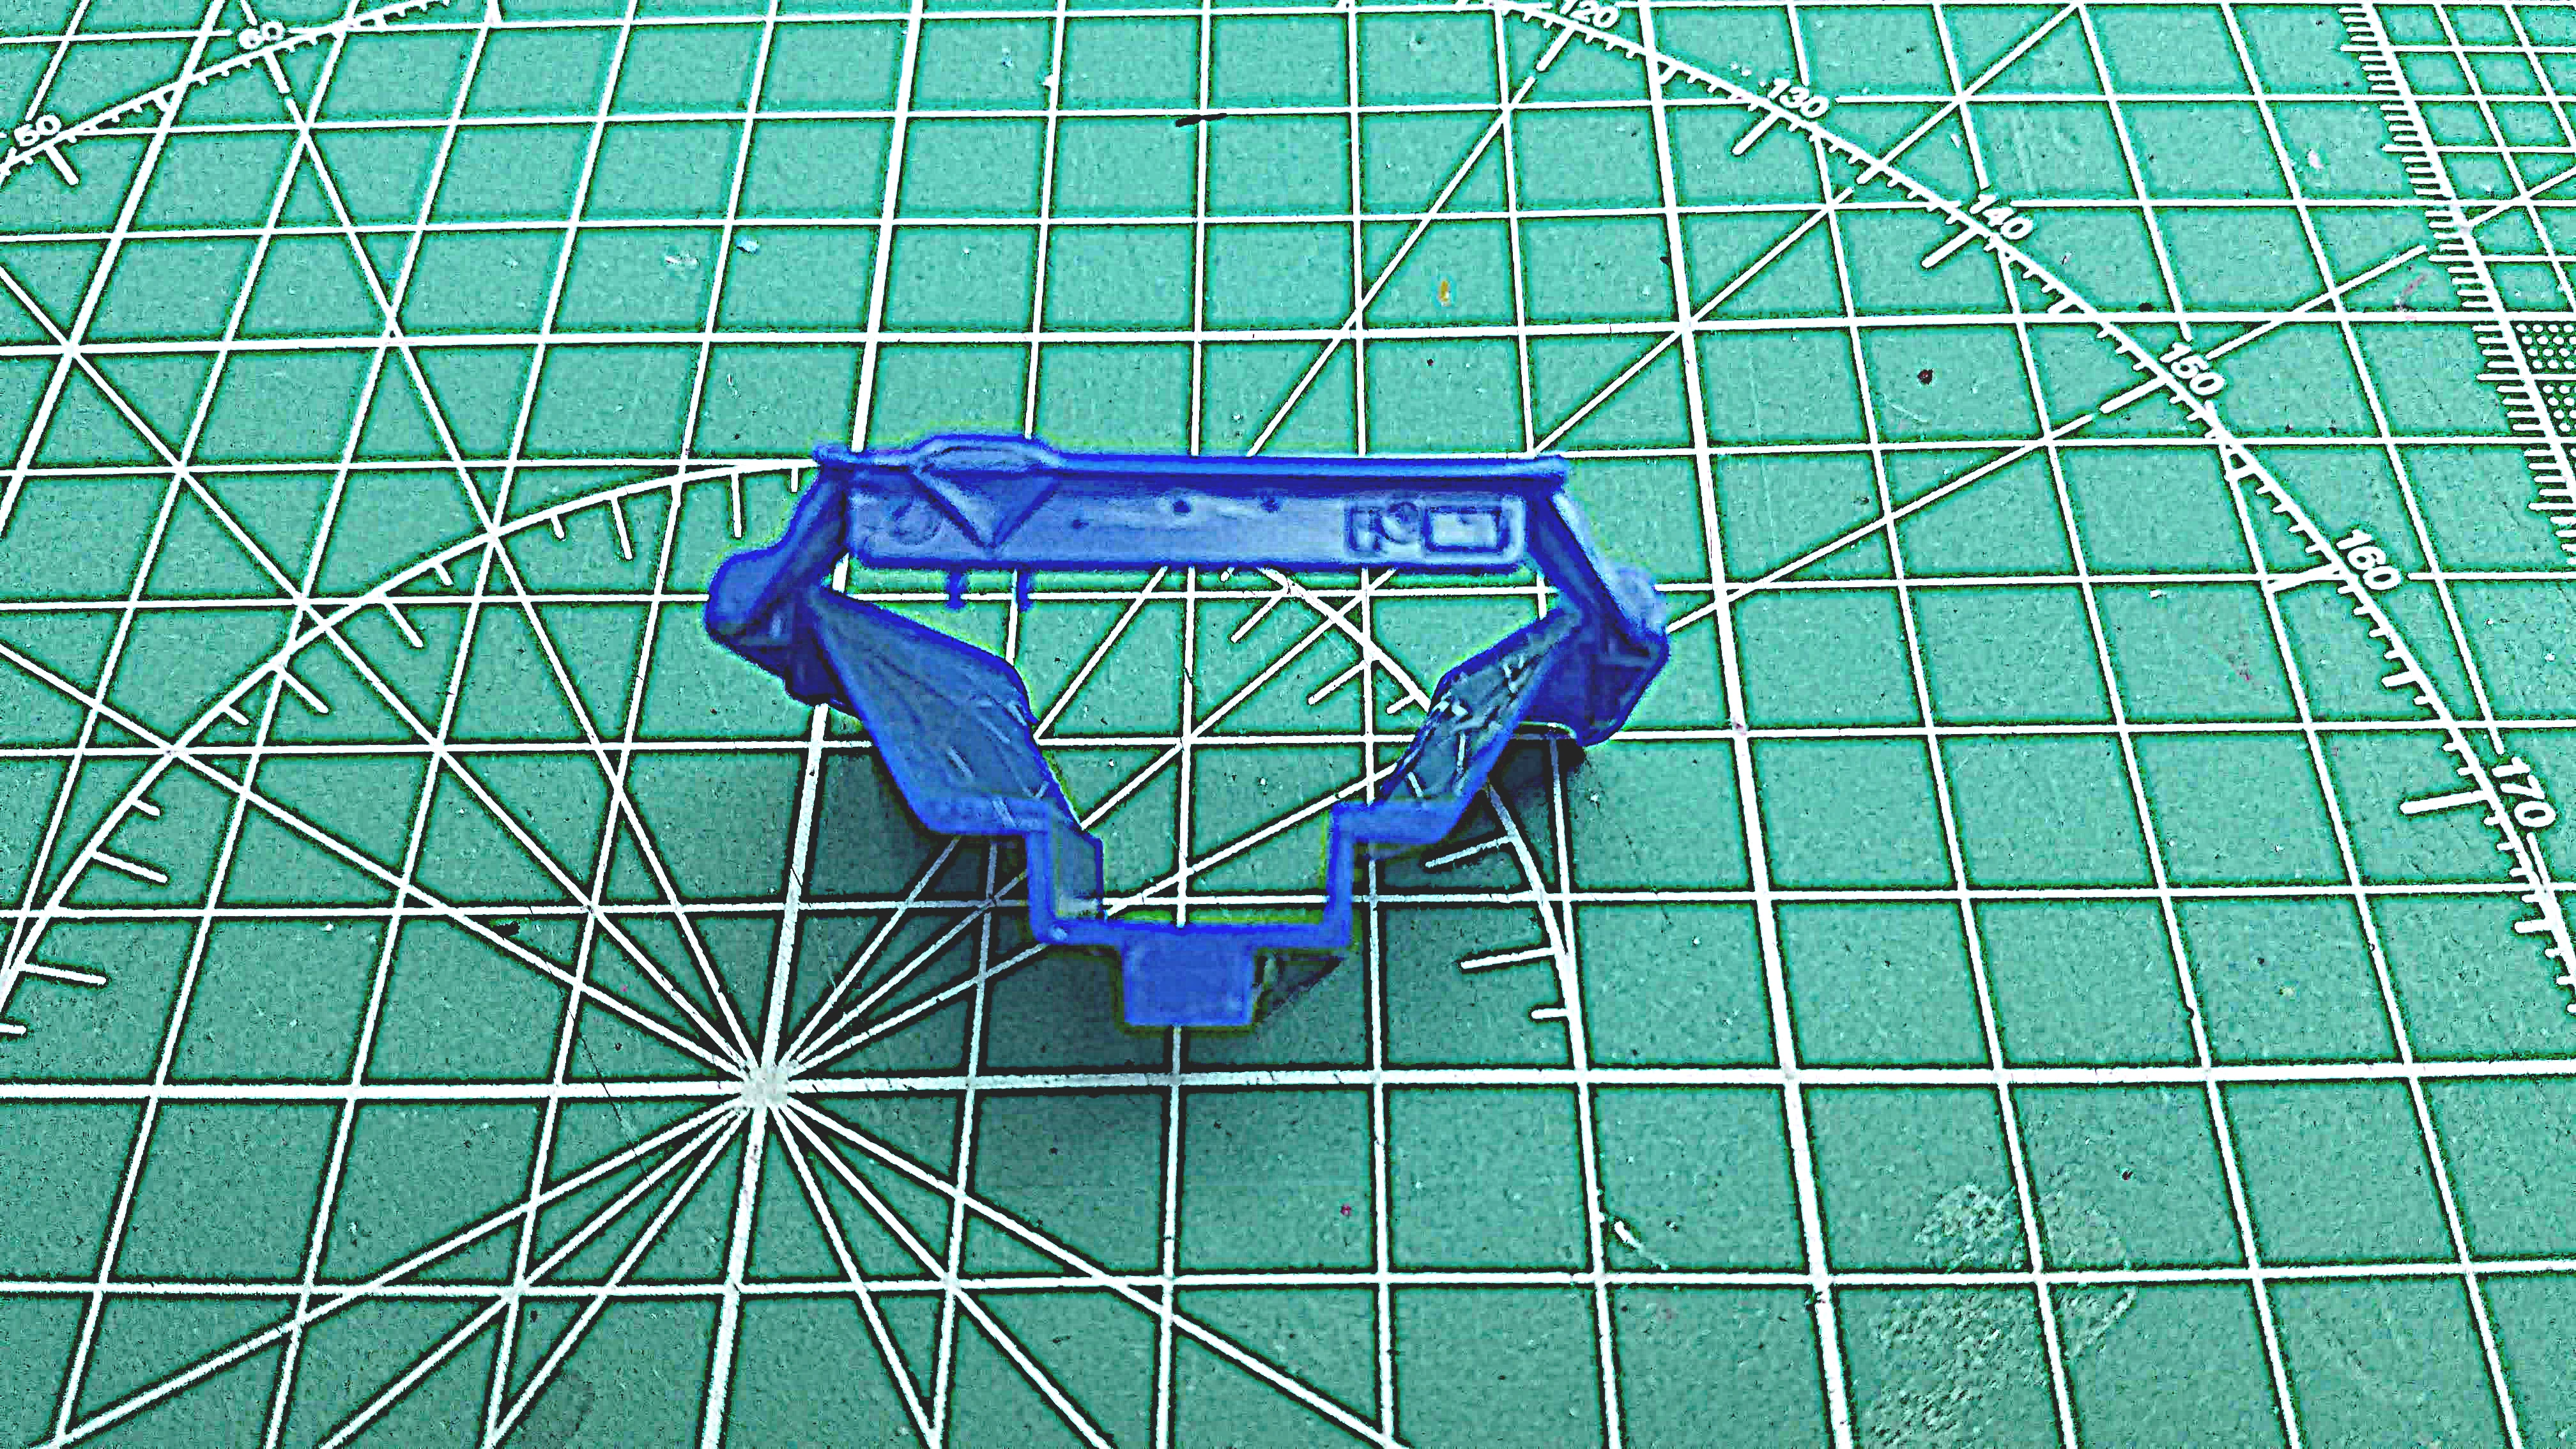
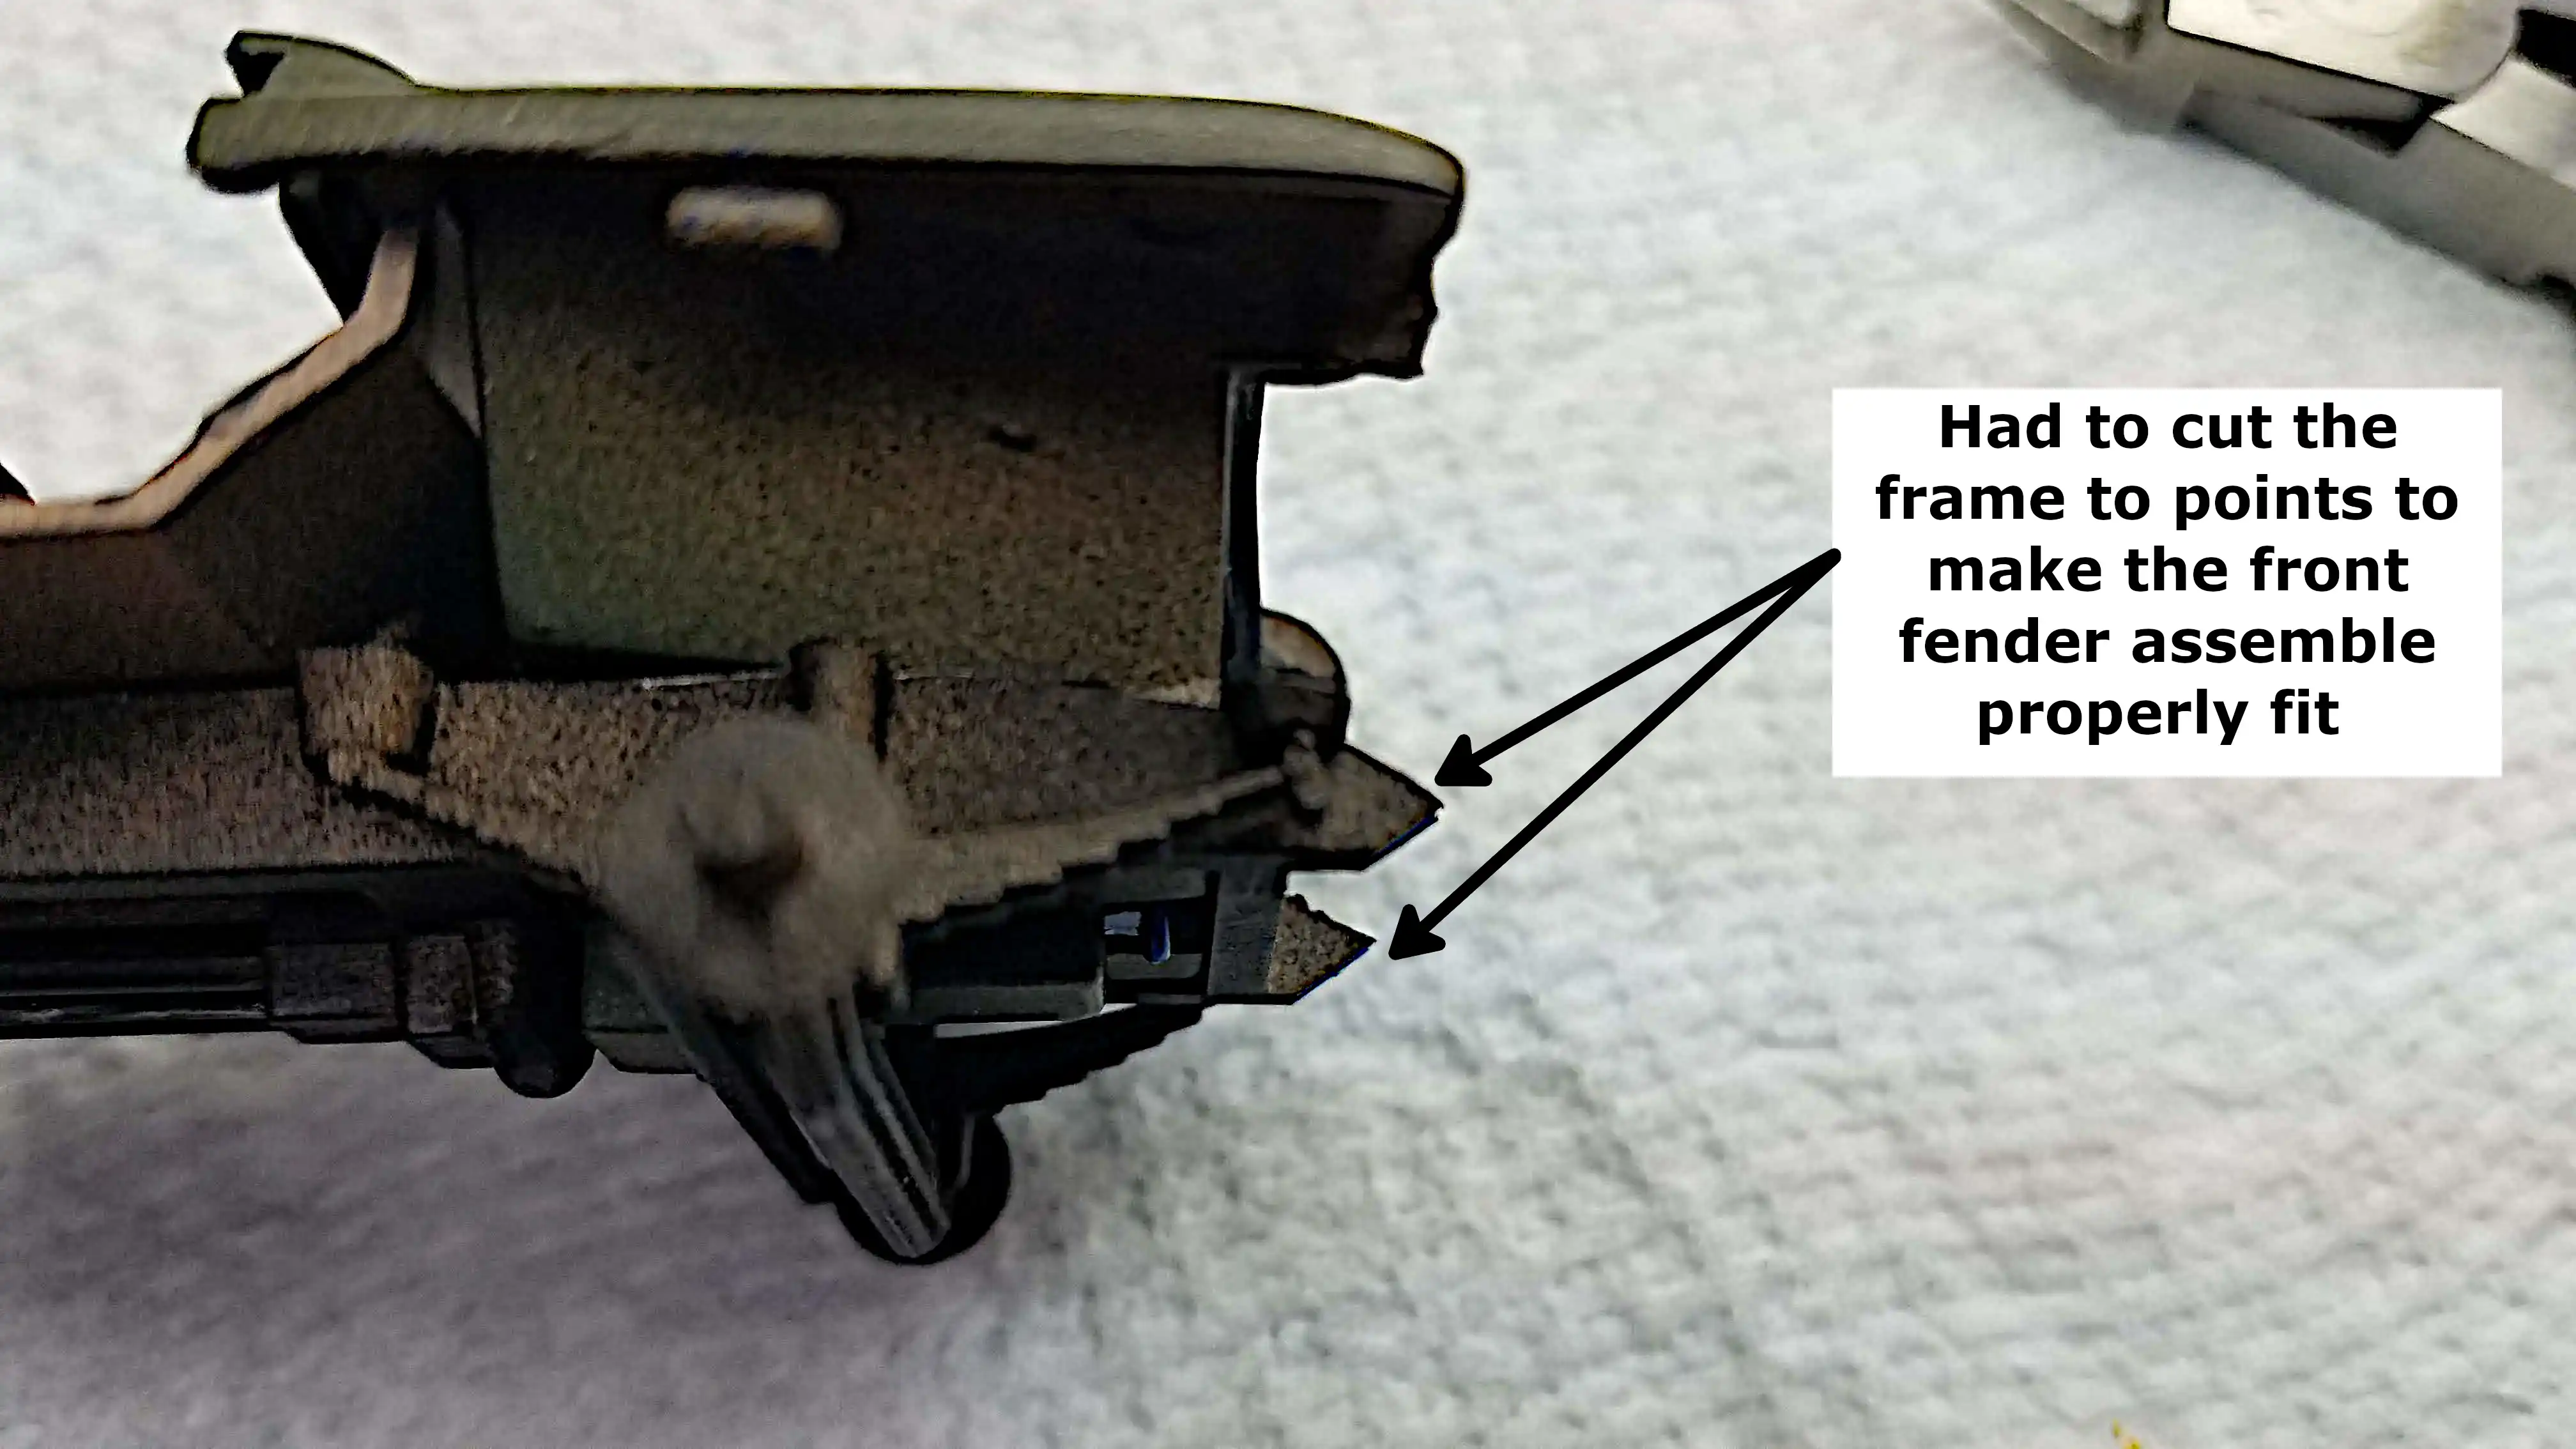
This is the left side of the truck showing the position of
the front fender assembly on the frame and the tab for
fender attachment. I'm also showing that to make the front
grill, bumper and half the front fender to fit, I had to cut
the frame ends as shown.
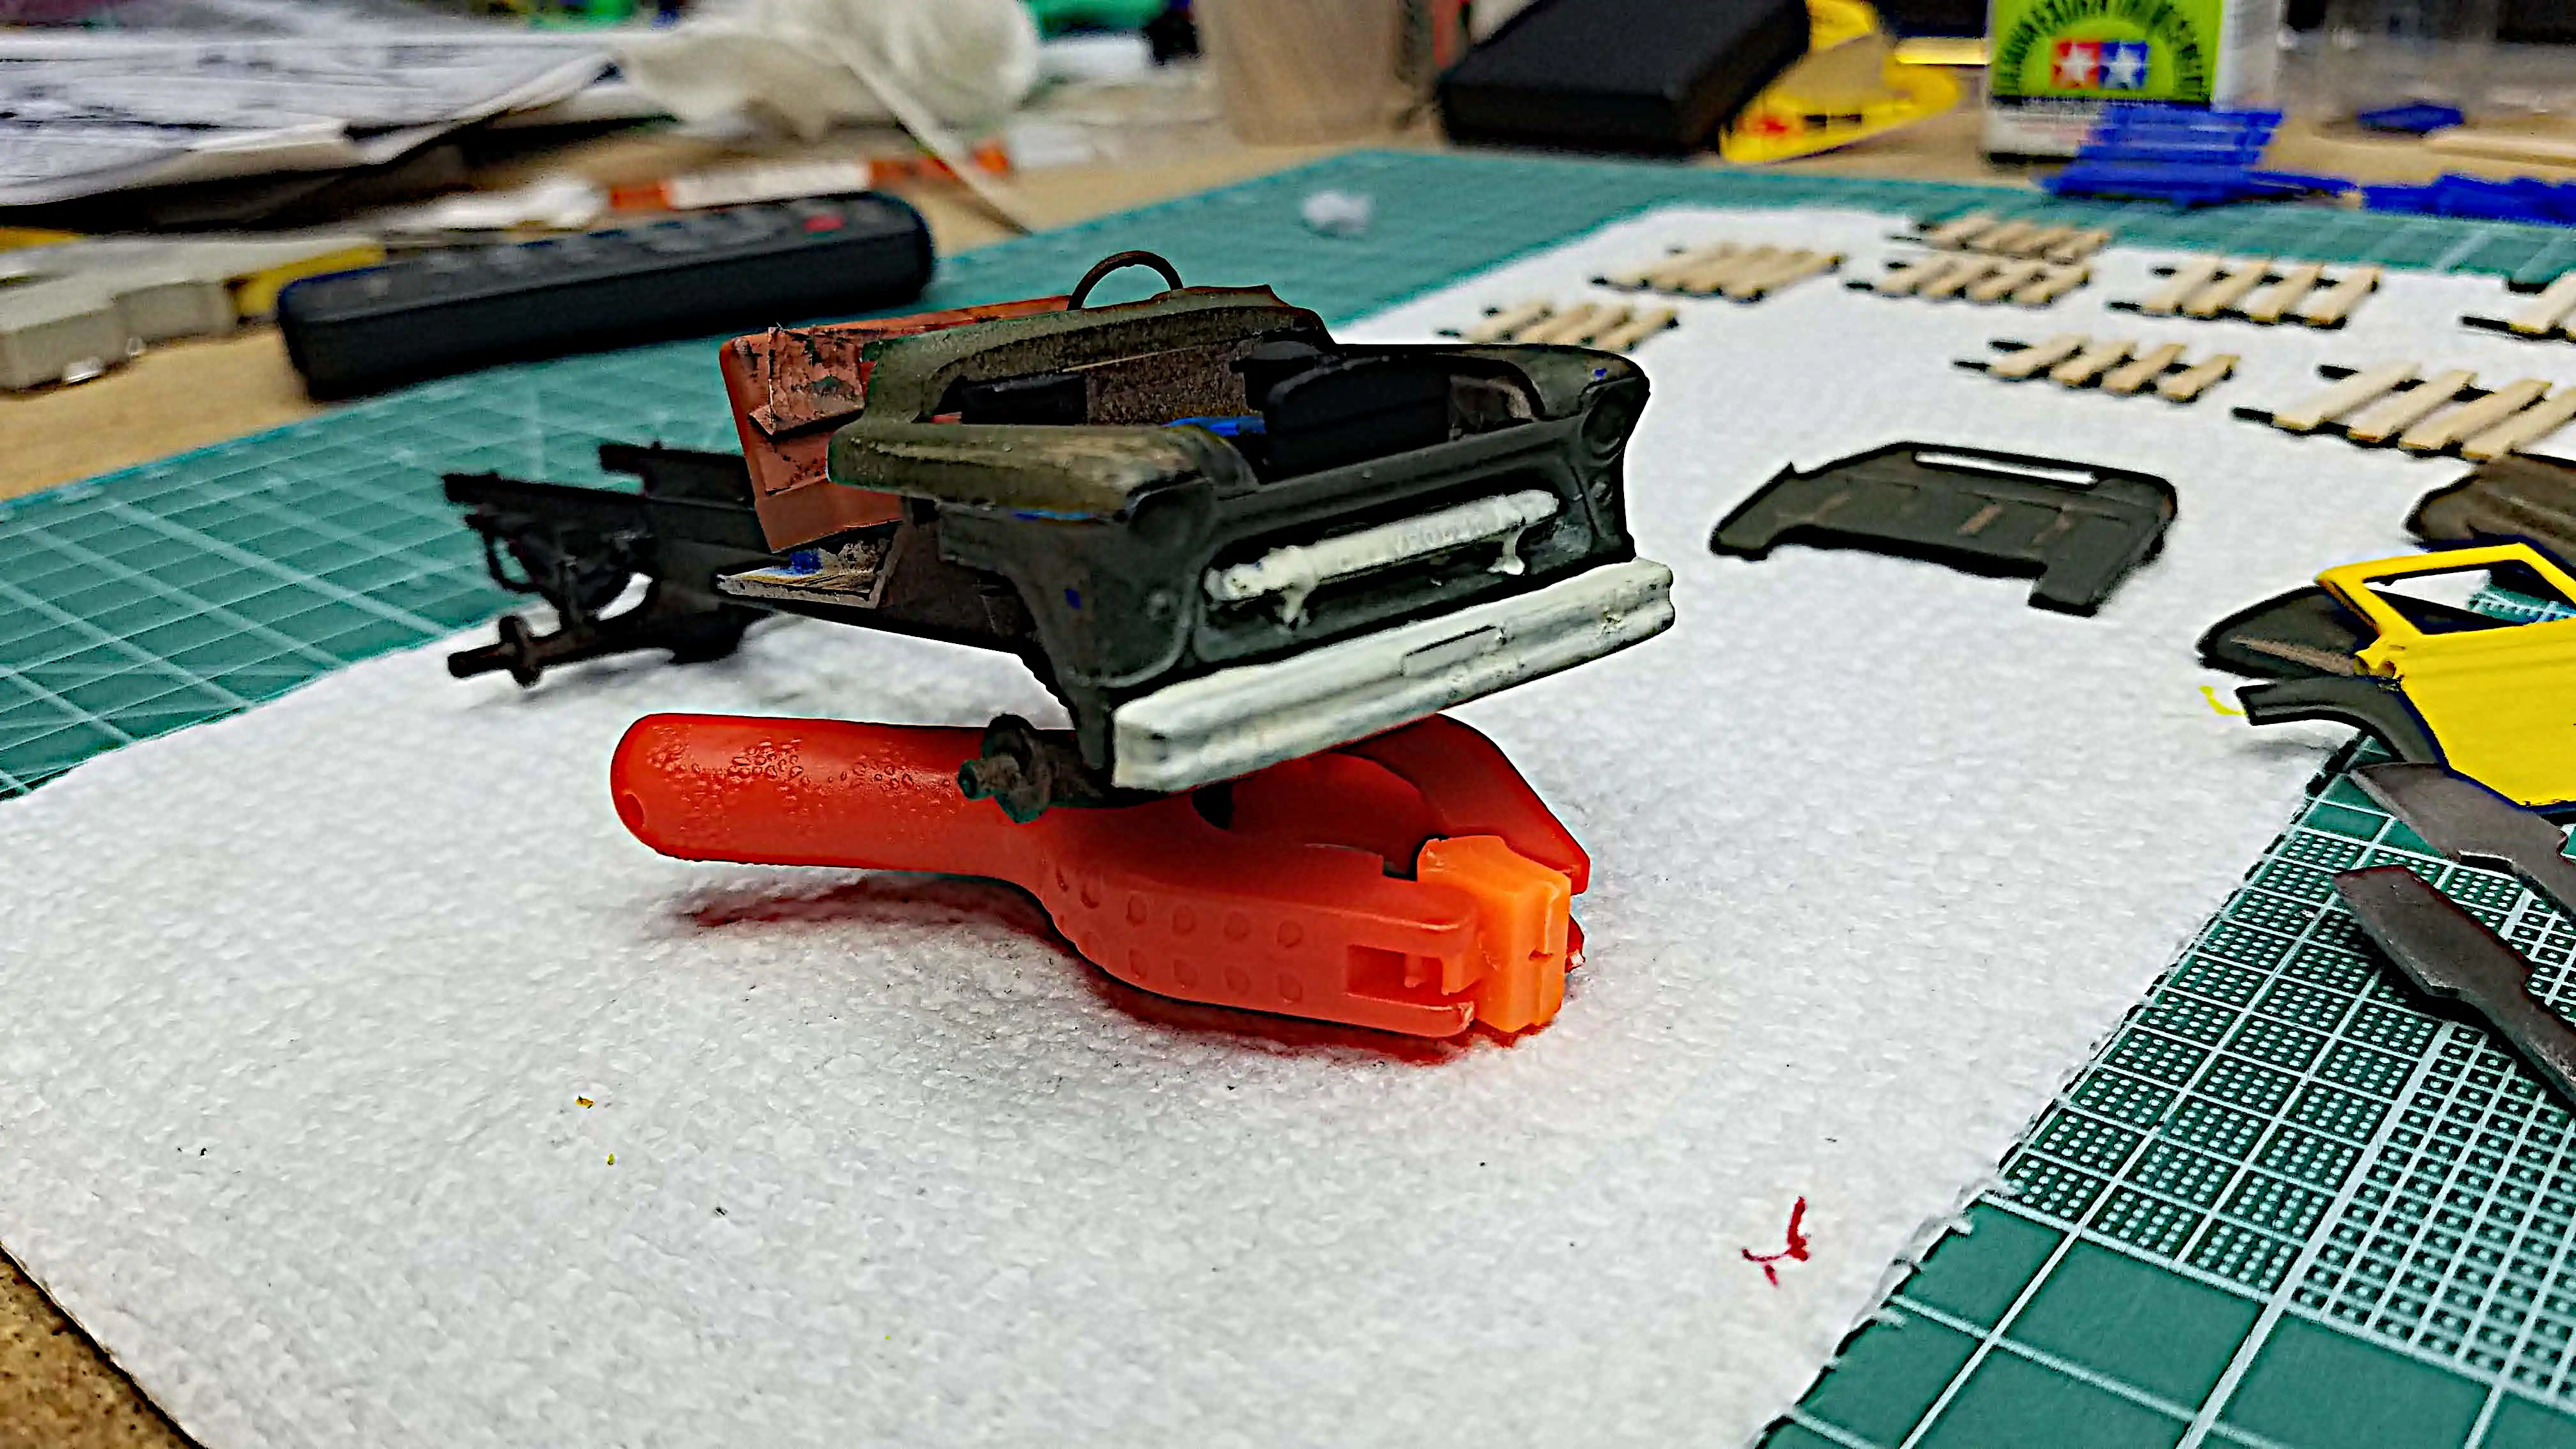
Left side view of the front grill, bumper and half of the front
fender glued in place. I had to make some modifications to the
frame to get this piece to fit properly.
Front grill, bumper and half of the front fender is installed.
You can see that the fit was not easy and some of the original
blue plastic is showing. That will be fixed after the rest of
the cab is assembled.
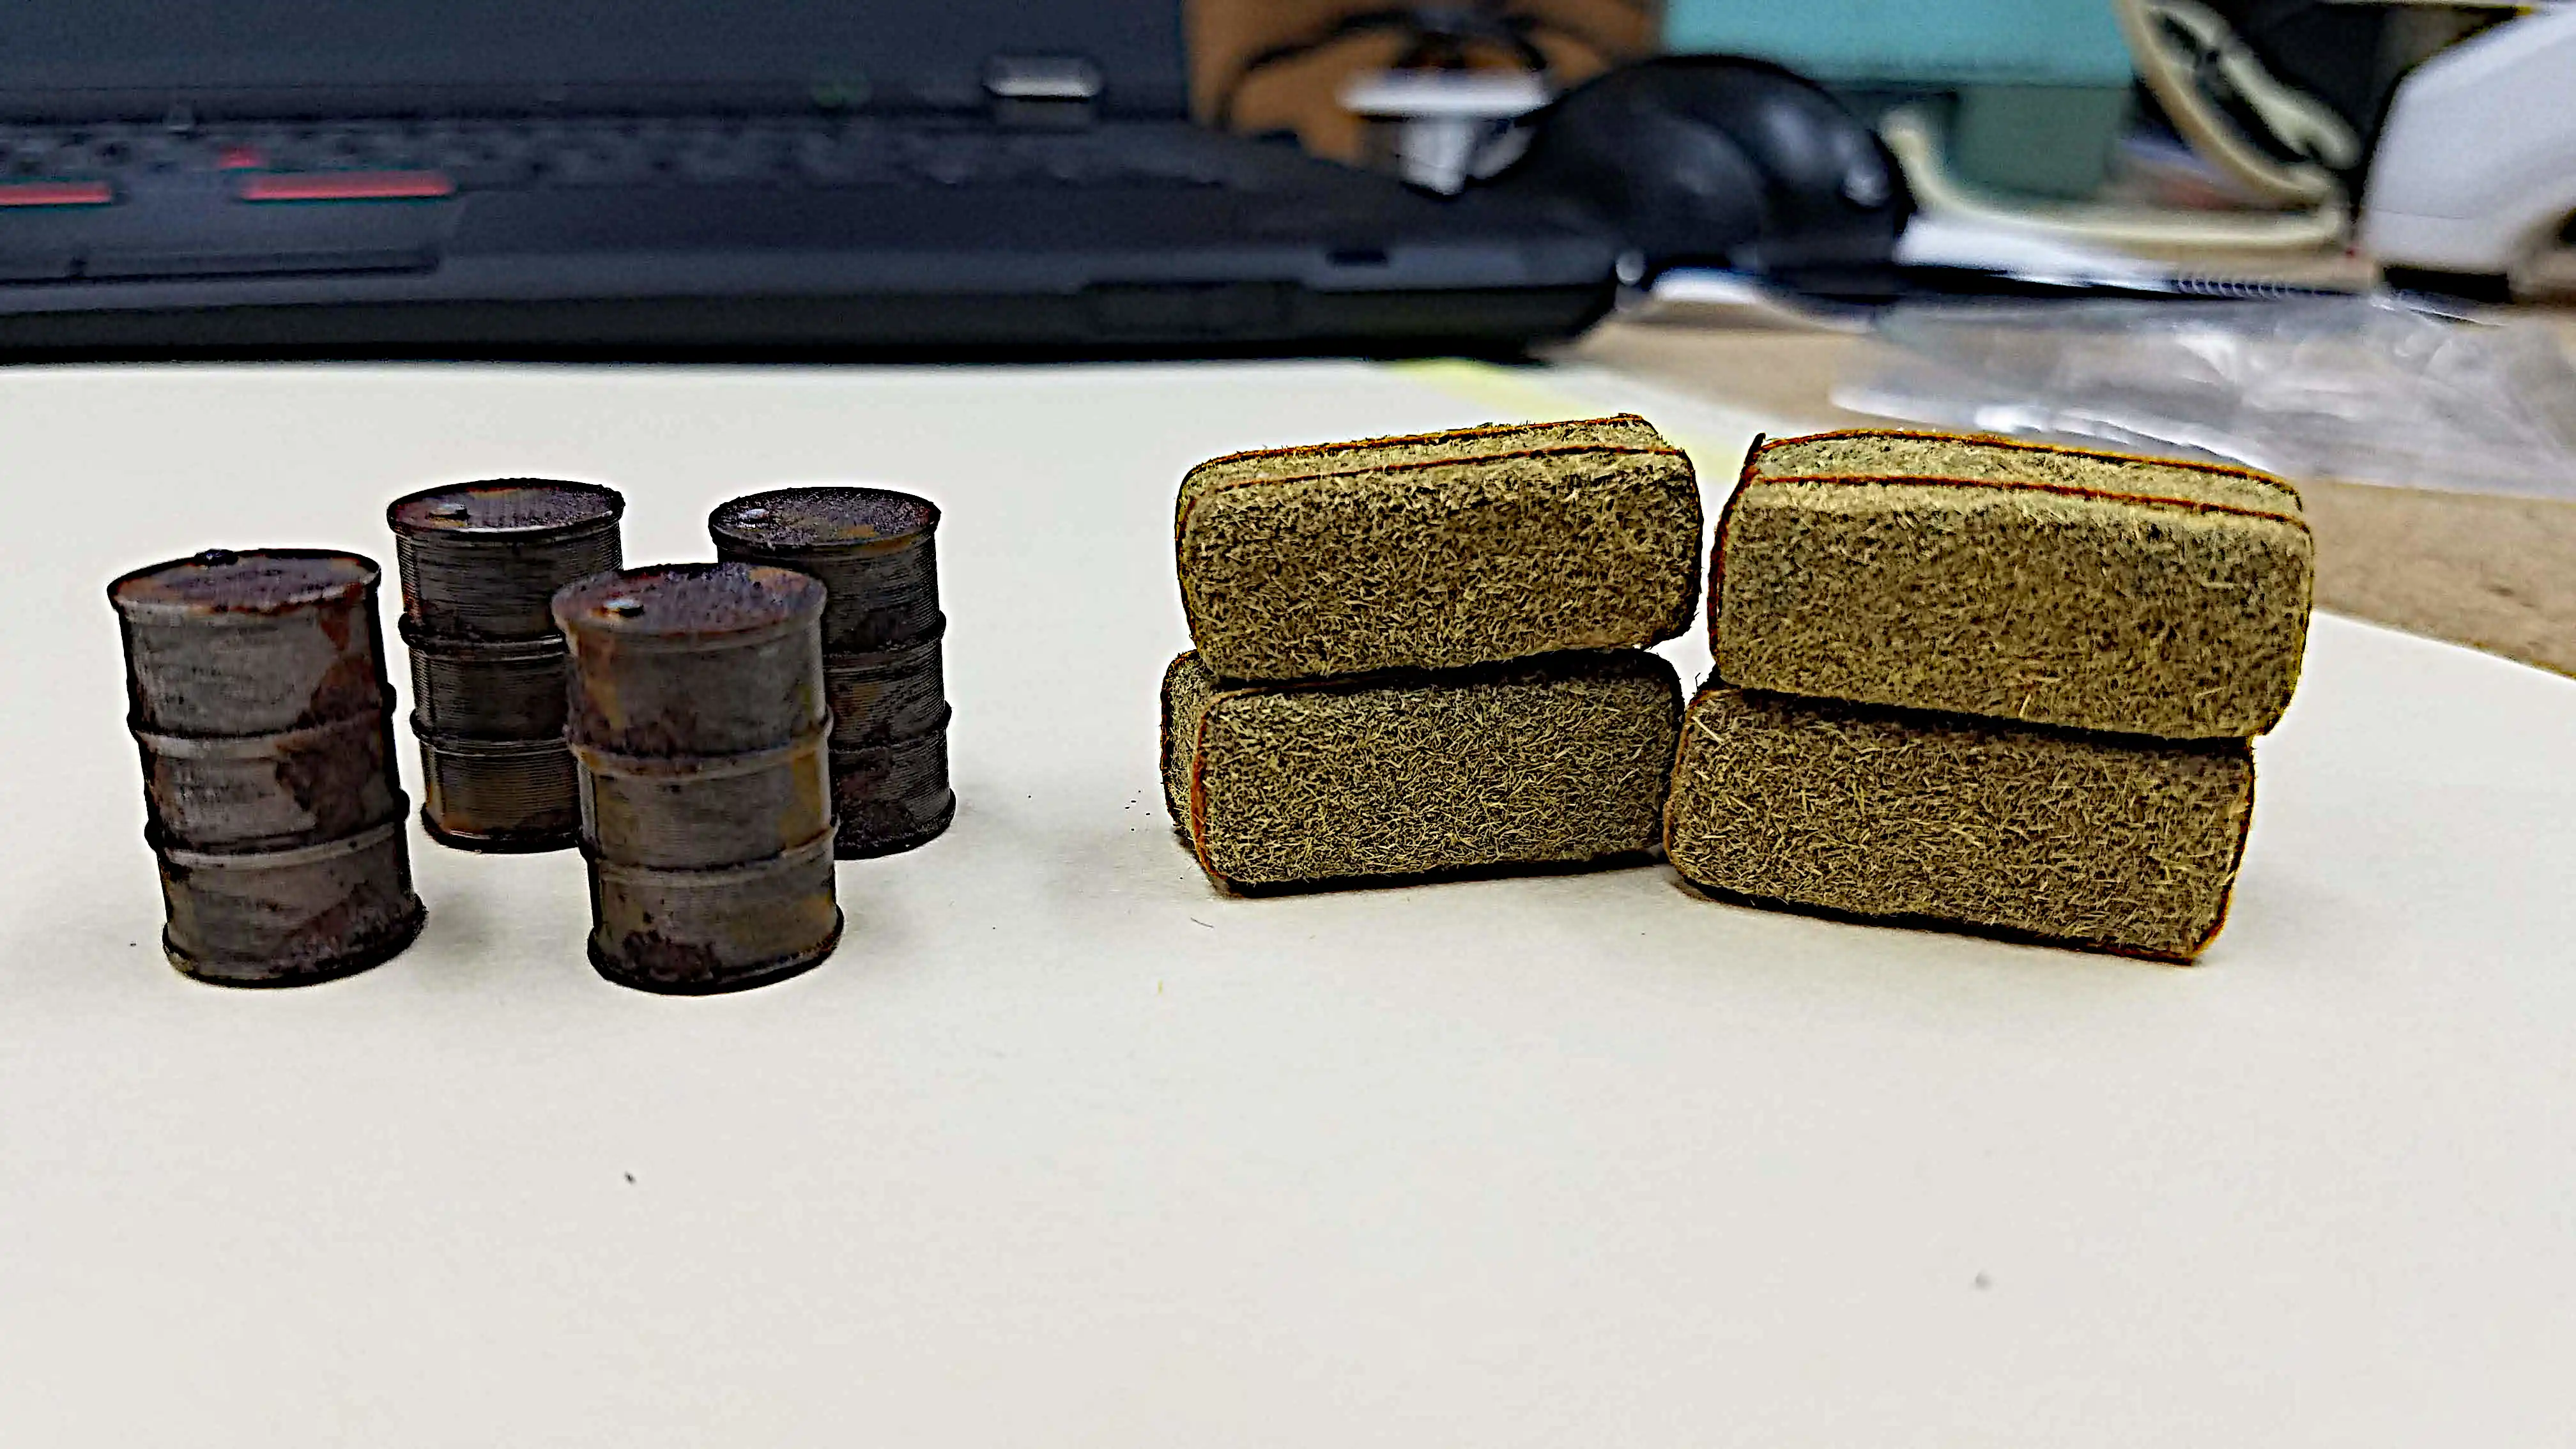
I found these 55-Gallon steel drums and hay bails on
Etsy.
I got lucky to find them in a scale that is equivalent to 1:48.
My research shows that 55-Gallon steel drums are 33-inches tall
and have a 23-inch diameter. For 1:48 scale the model drums
should be:
33" / 48 = 0.6875"
23" / 48 = 0.479"
The model drums measure: 0.692" high x 0.484" diameter; a good
match for placing in the bed of the truck.
I research if there is a standard size for hay bails and found
that there is basically two standard sizes:
Small bails = 14-inches high x 18-inches wide x 36-inches long
large bails = 3-foot high x 3-foot wide x 7-foot to 8-foot long.
The model bails measure:
0.425-inches high x 0.4875-inches wide x 1.046-inches long
These model bails are not 1:48 scale whether using the small or
large bail size. The seem to most likely 1:32 or 1:35 scale using
the actual small bails for a reference, but I'll still use them.
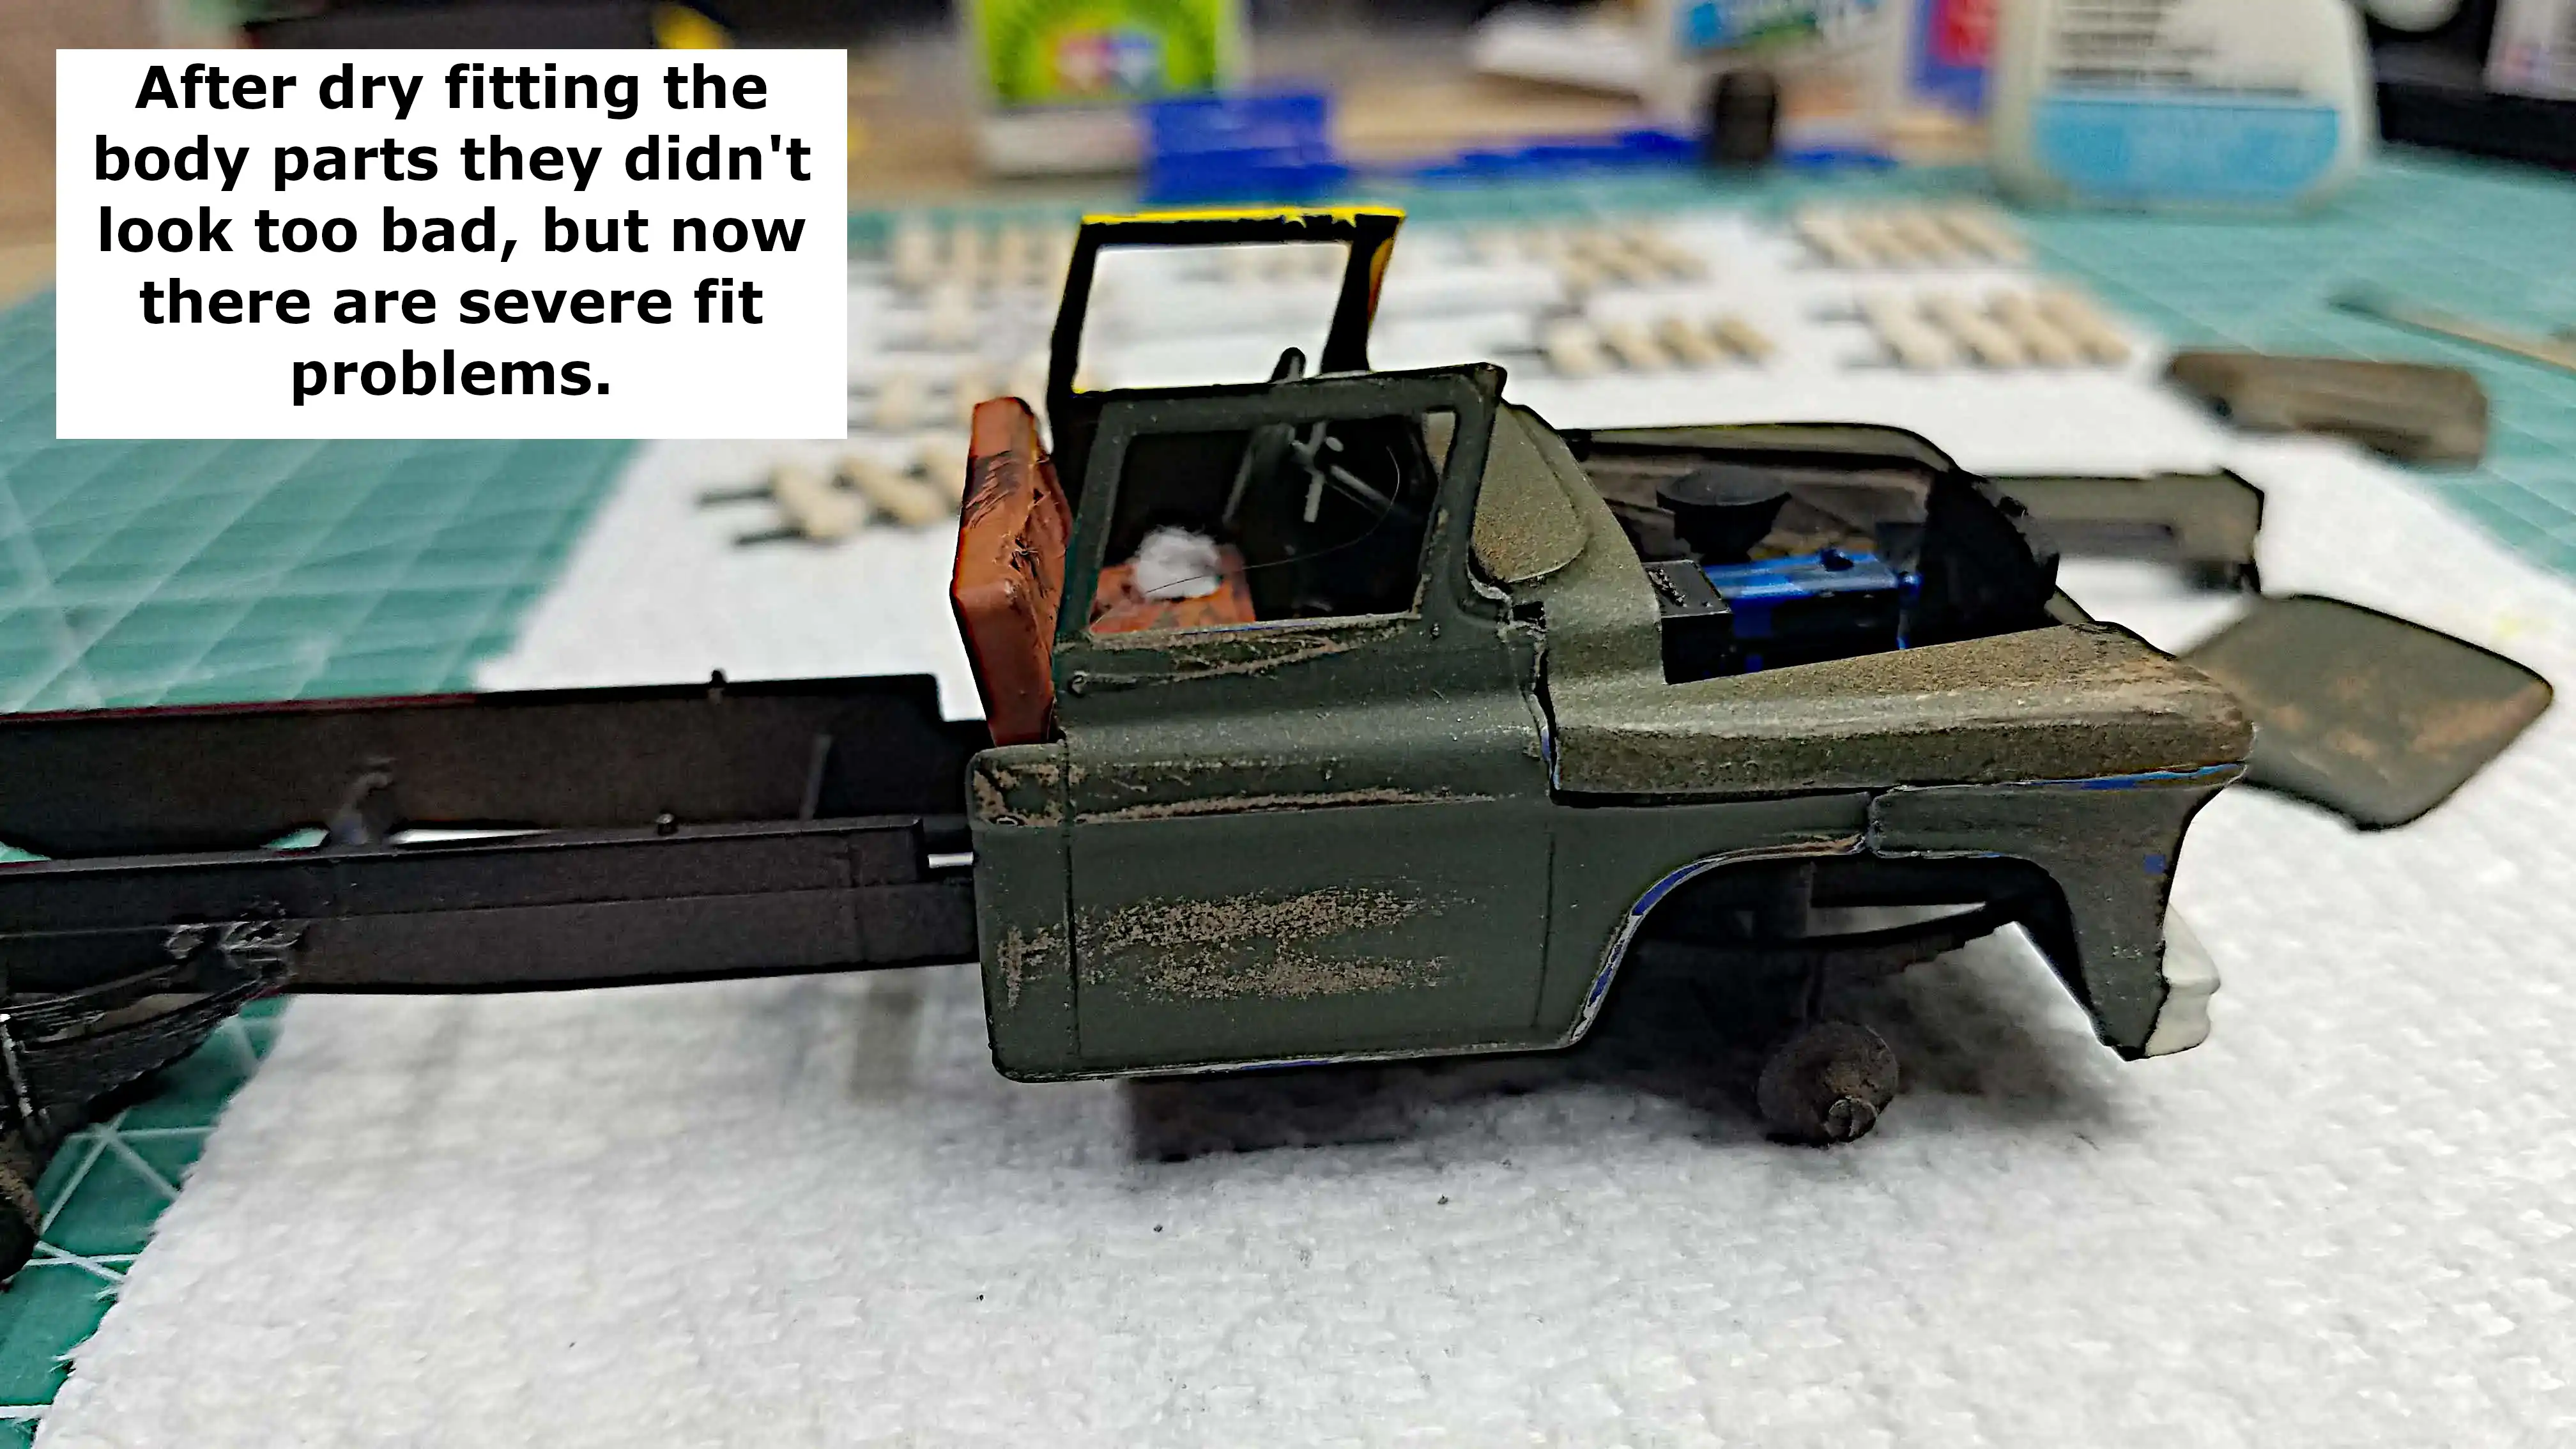
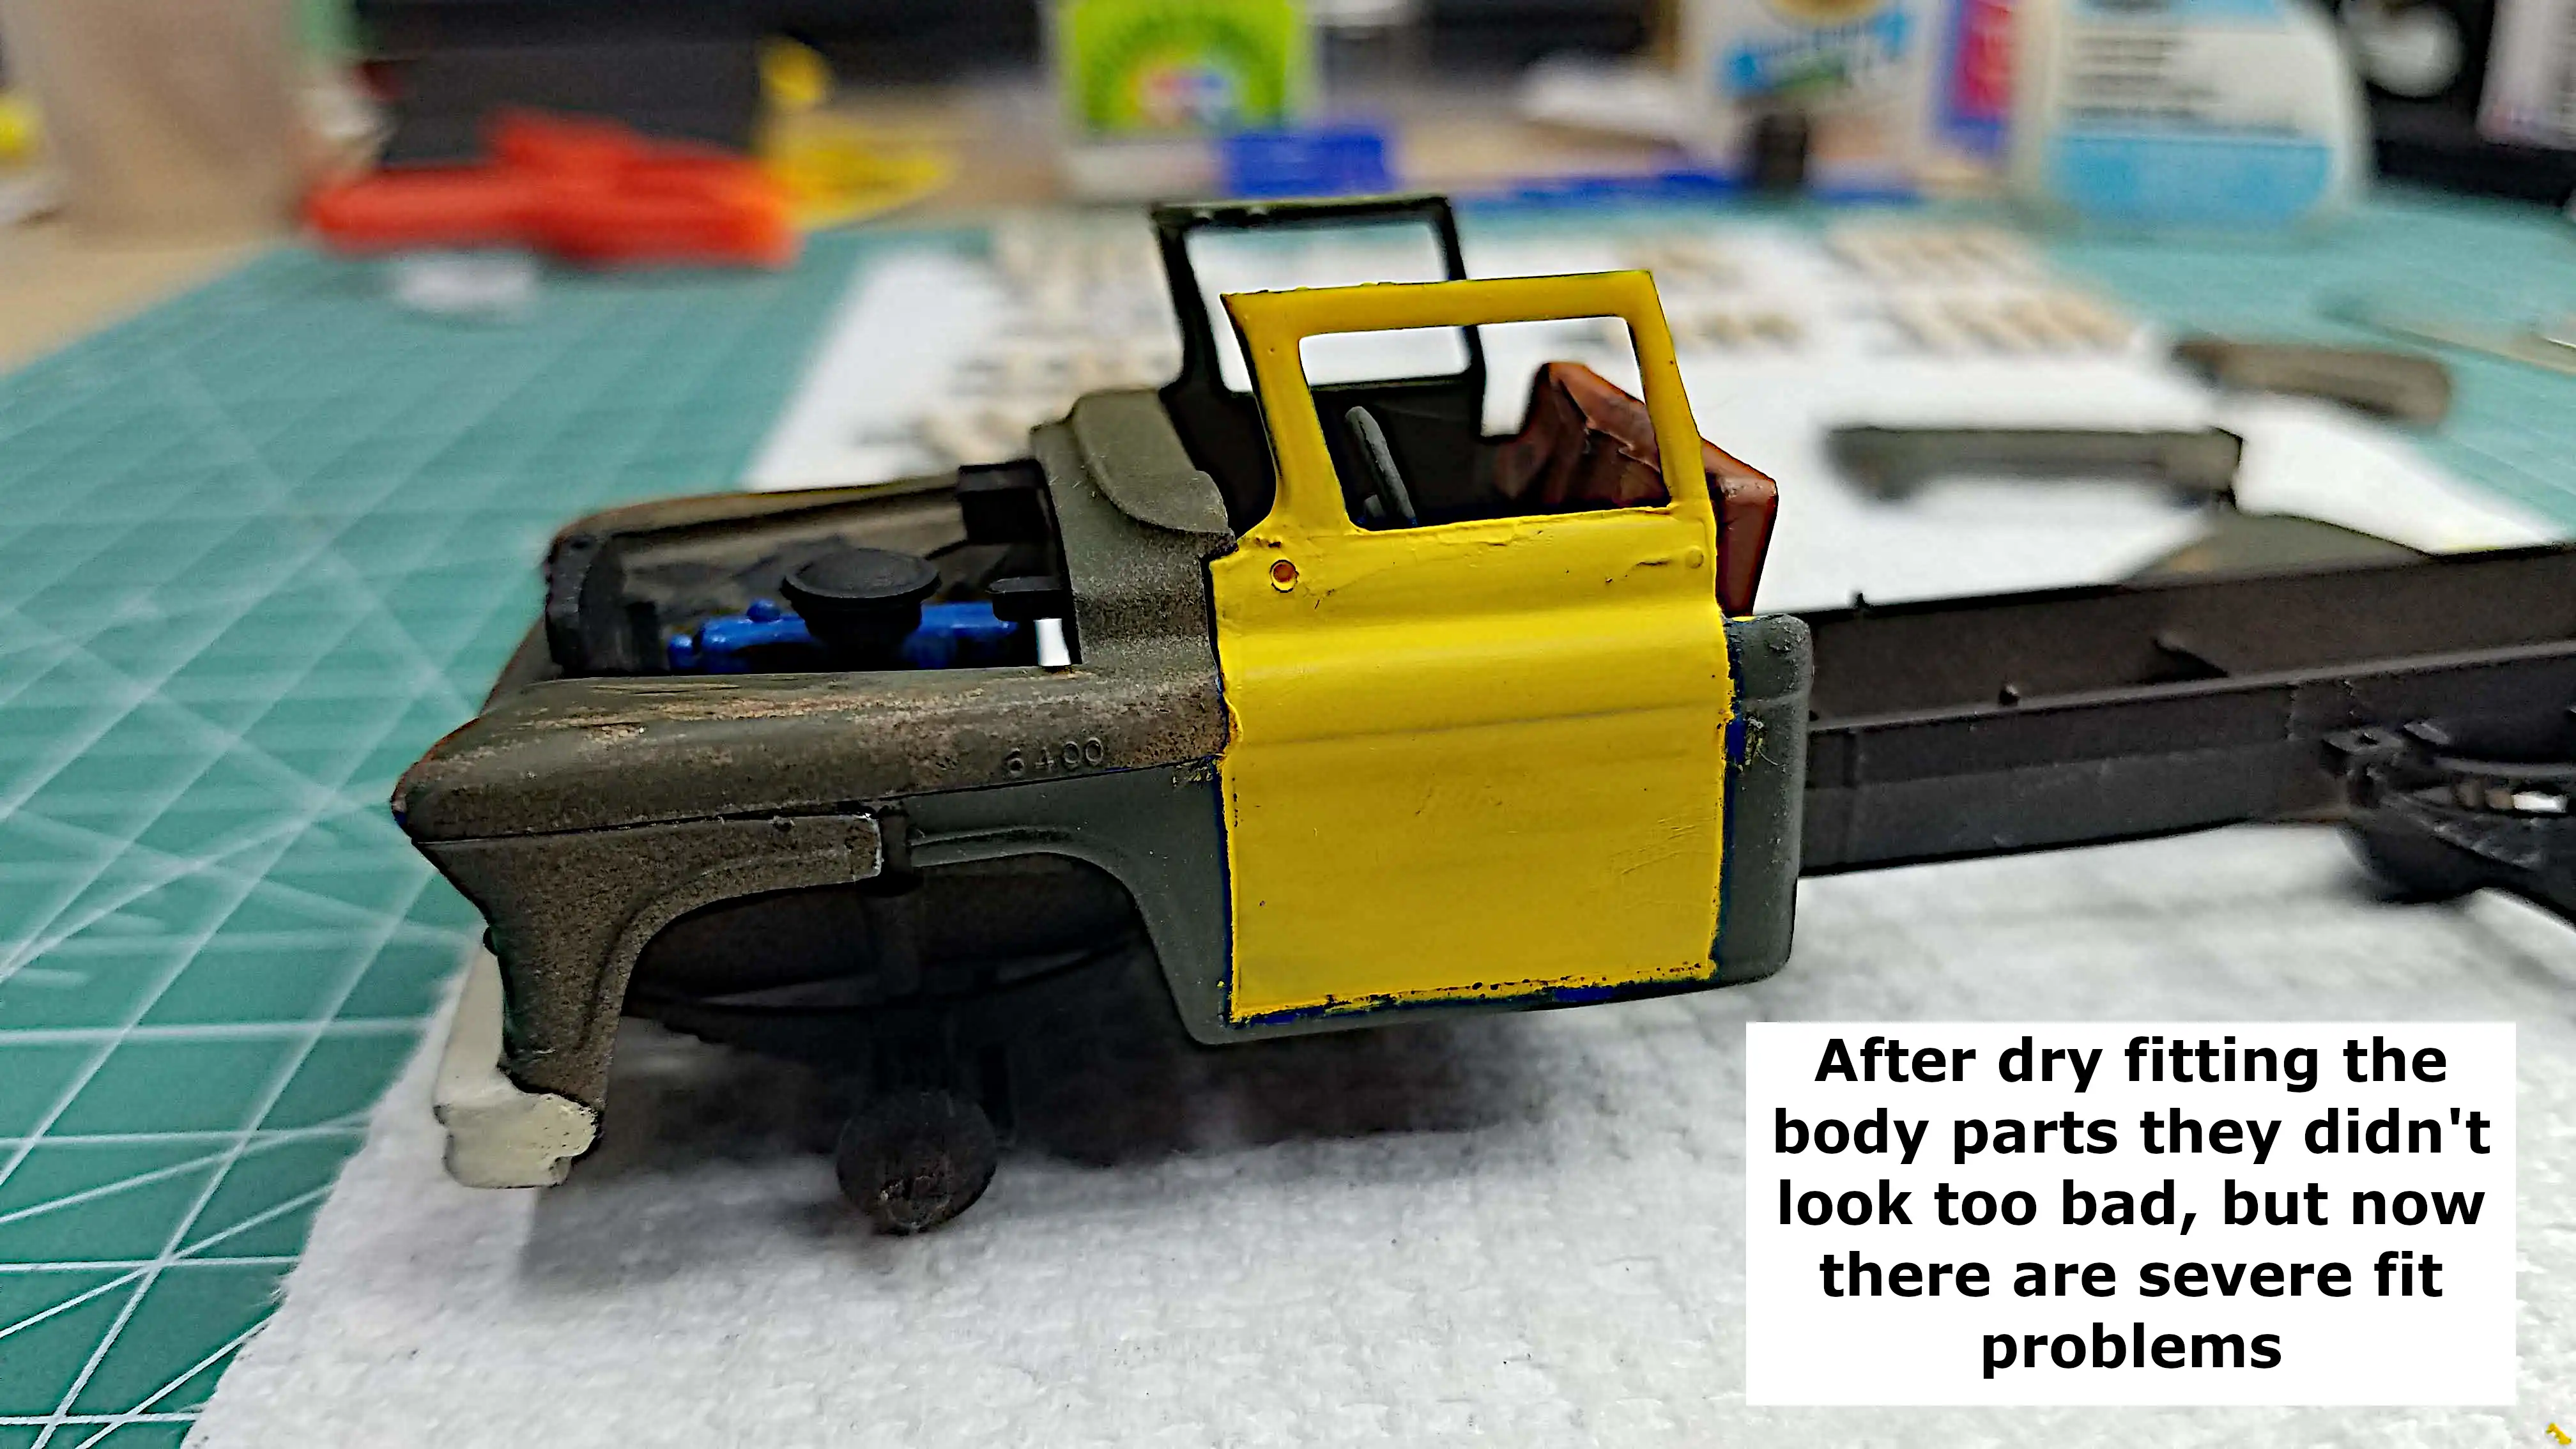
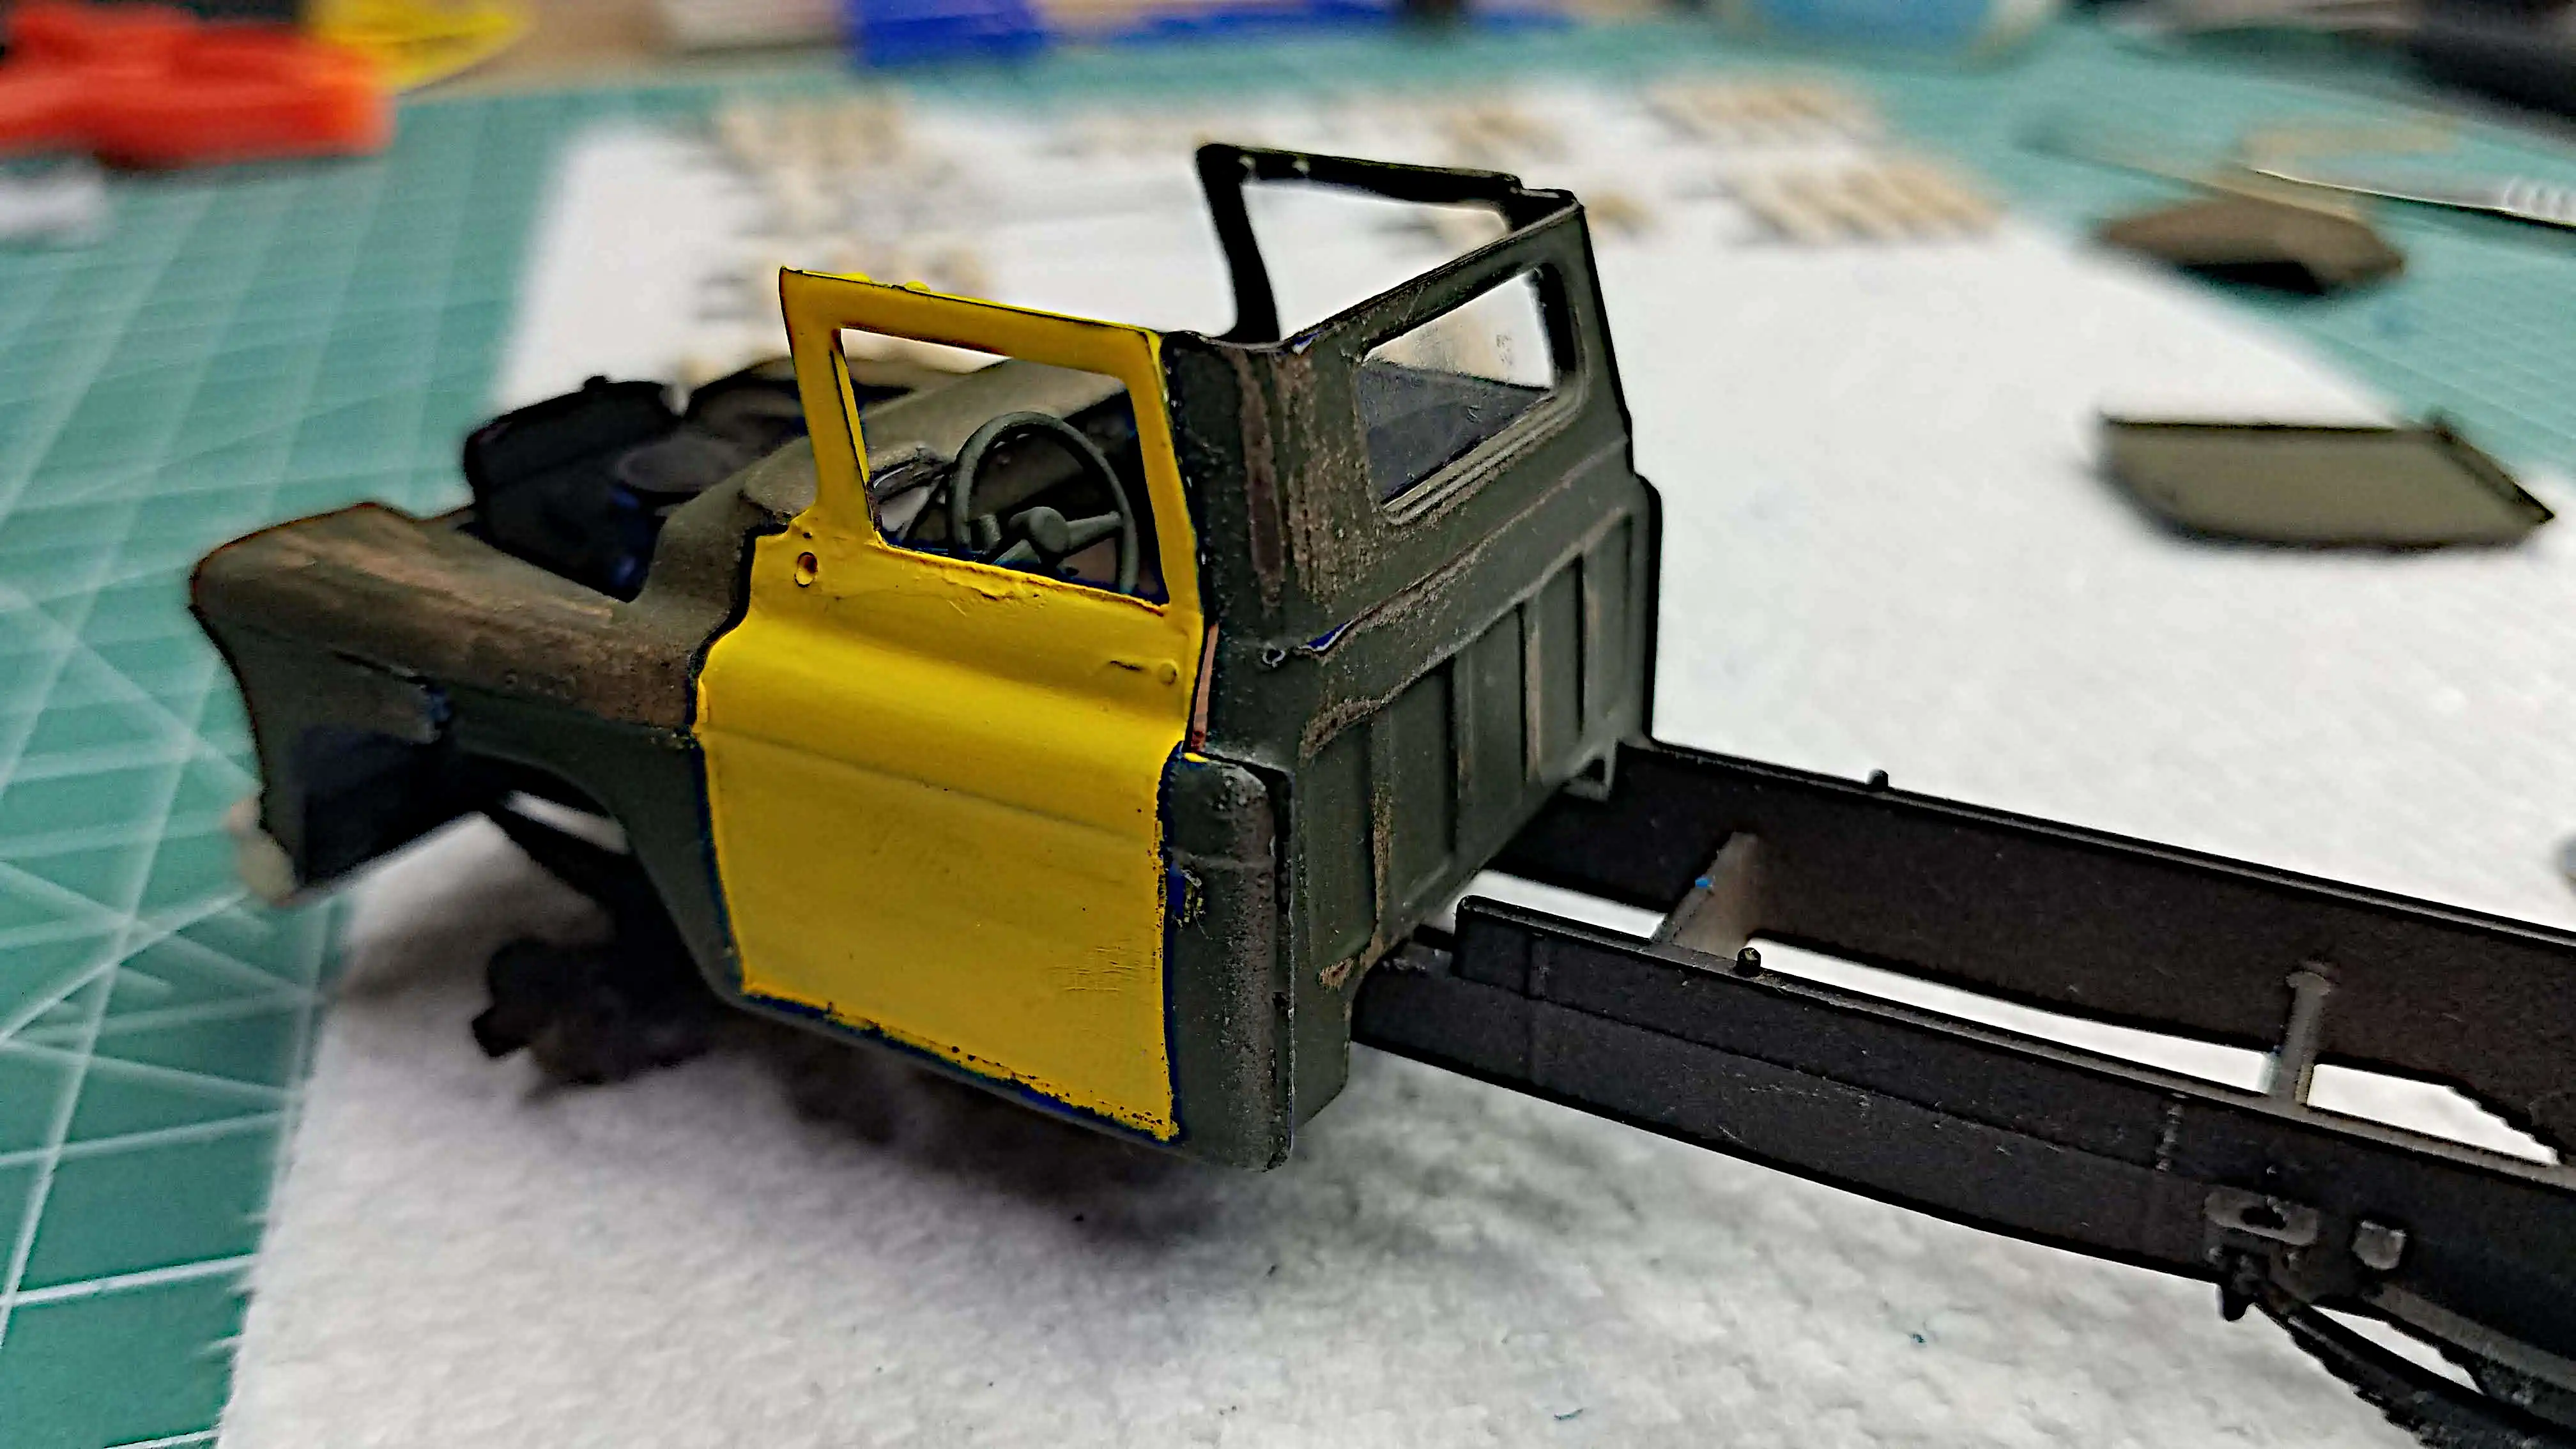
The doors and front bumper and fender assembly are installed.
There are major gaps at the seams, even after dry fitting
looked good; however, I'm sure they came from the amount of
sanding that had to be done to get the pieces to even come
close to mounting.
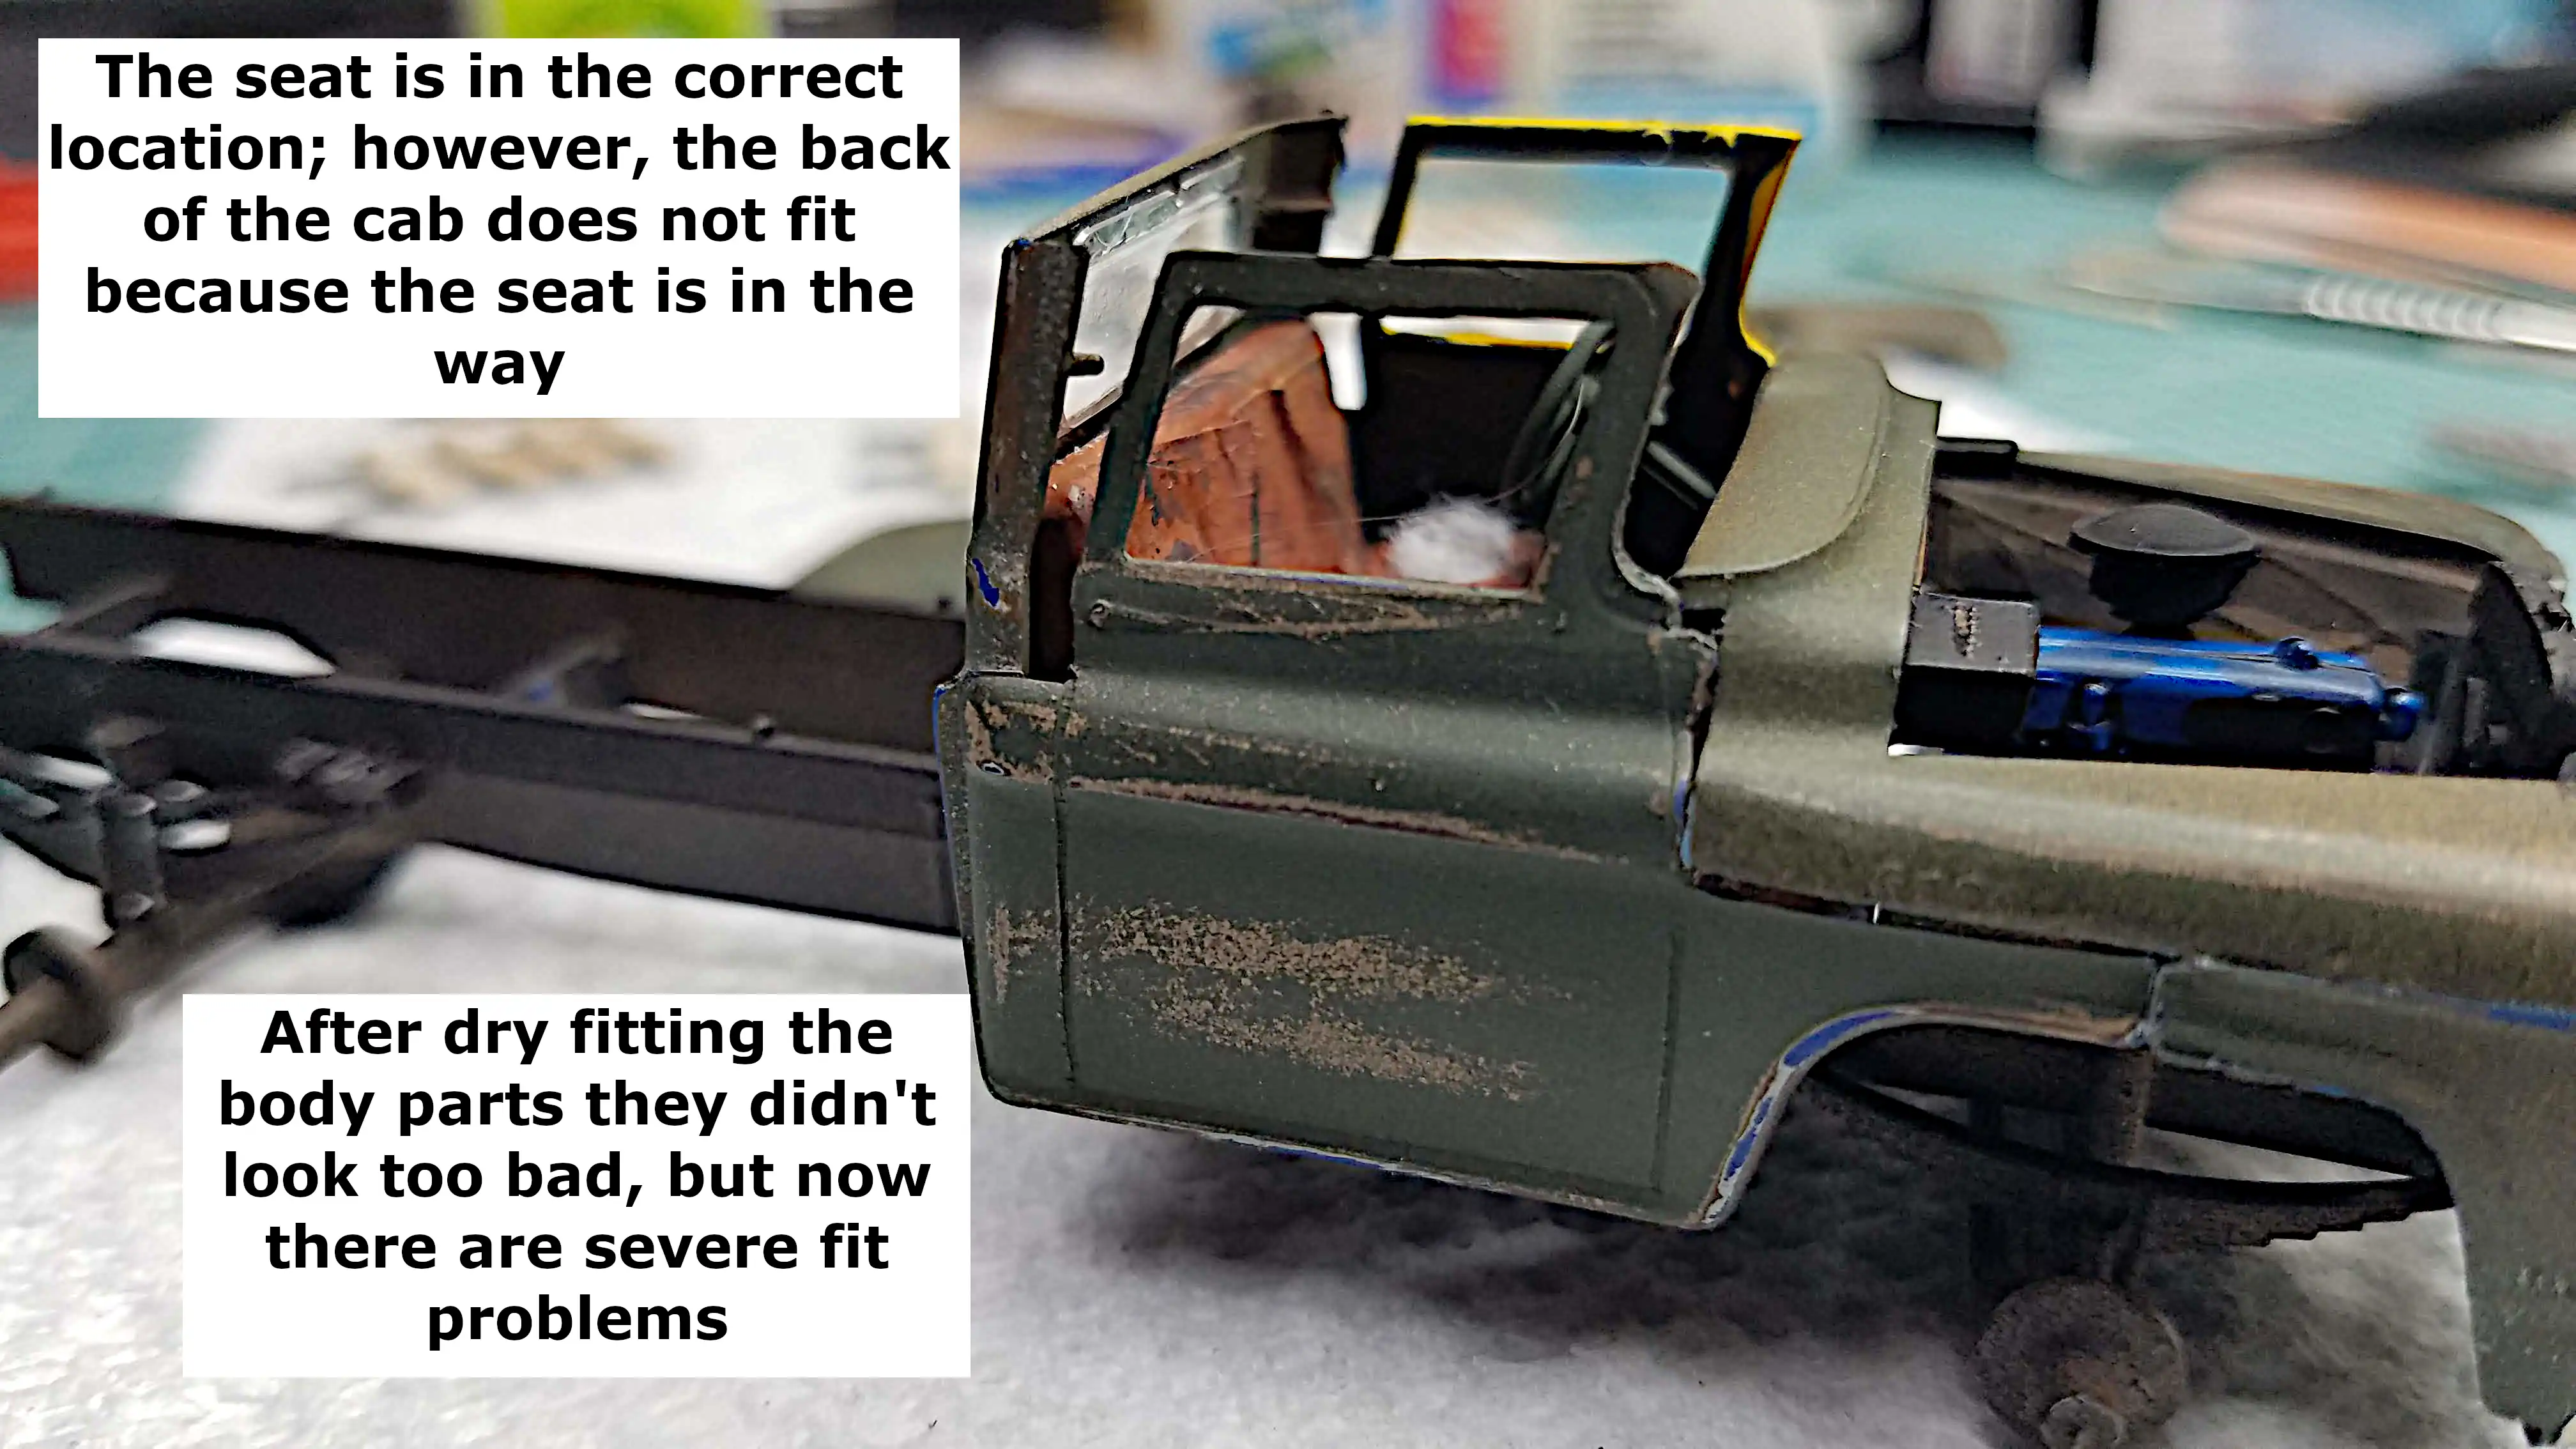
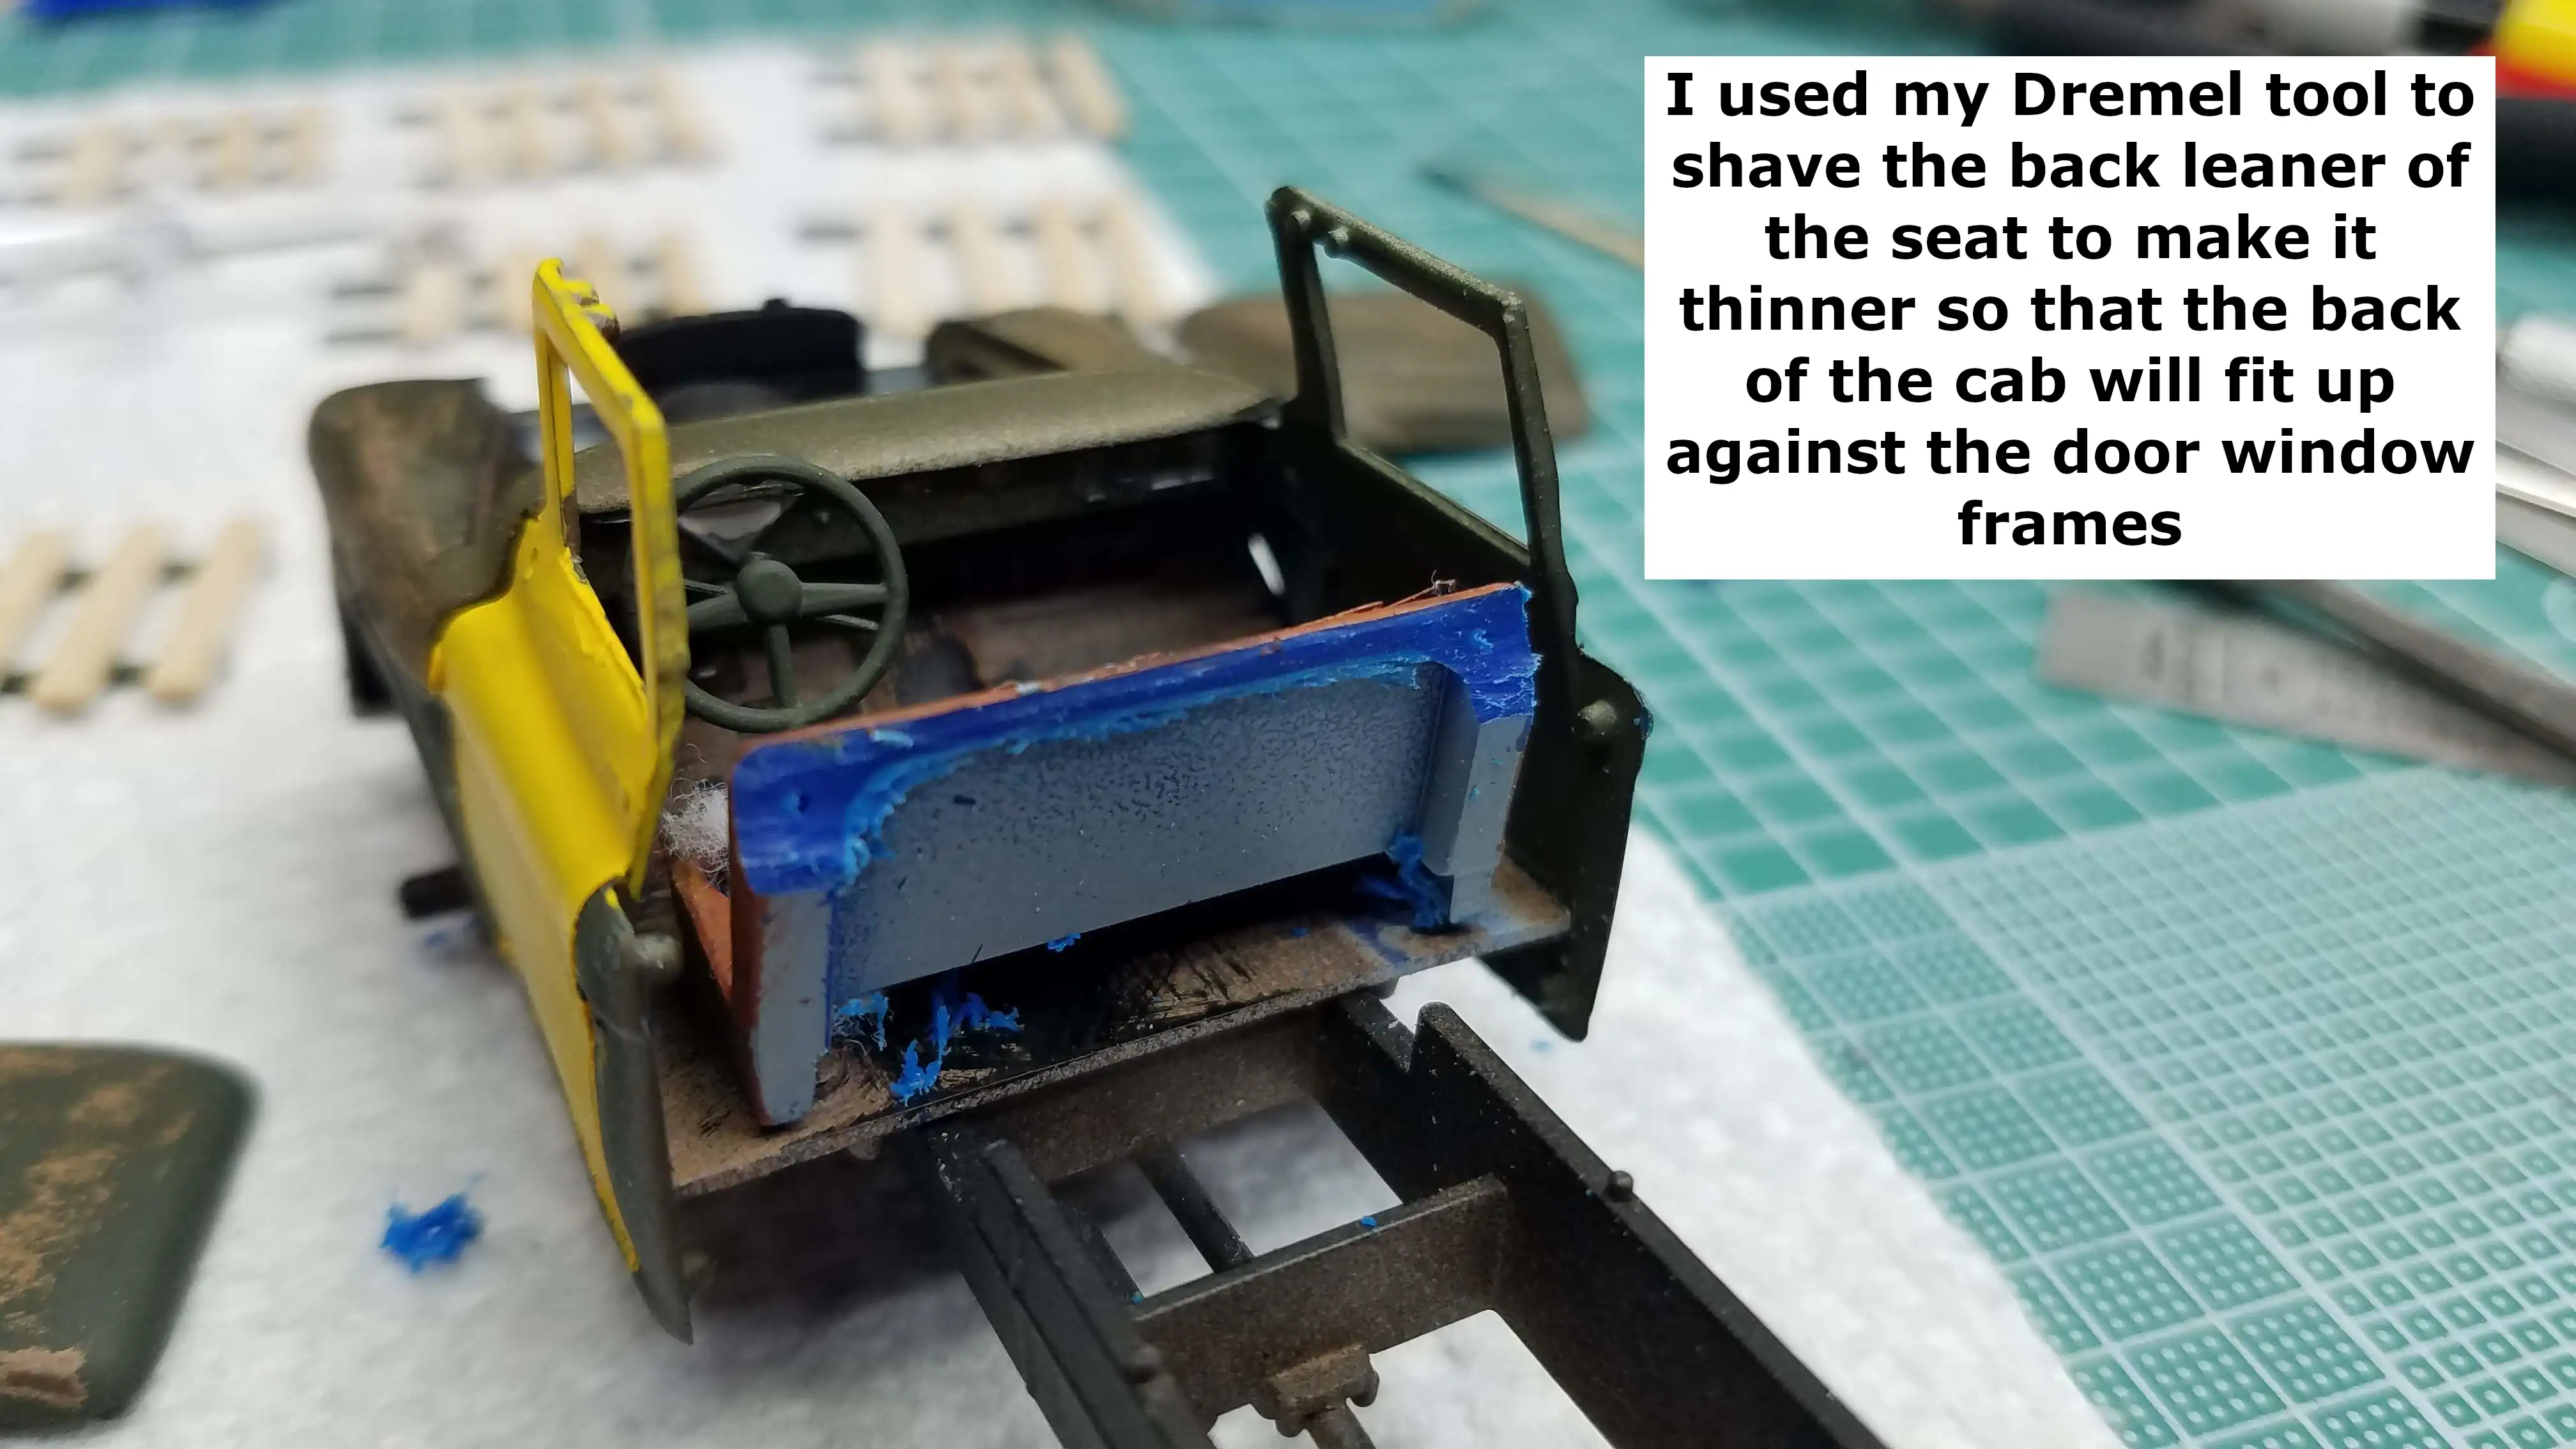
The back of the cab does not fit once the seat is installed.
The seat is in the correct location; actually, all the parts
so far, are in the correct locations; however, the back of the
seat is preventing the back of the cab from being put in place
against the back edge of the door frames.
To get the back of the cab fitted I used my Dremel tool and
ground the back of the seat thinner. It won't be seen when
the back of the cab is finally in the correct position.
The hood will not fit because the rear alignment pins shown
in this photo are not properly sized for the holes provided
in the firewall. I drilled open the firewall holes; however,
the hood still would not fit on. I cut the alignment tabs off
of the hood and now it at least attempts to set on the truck,
but it's not right.
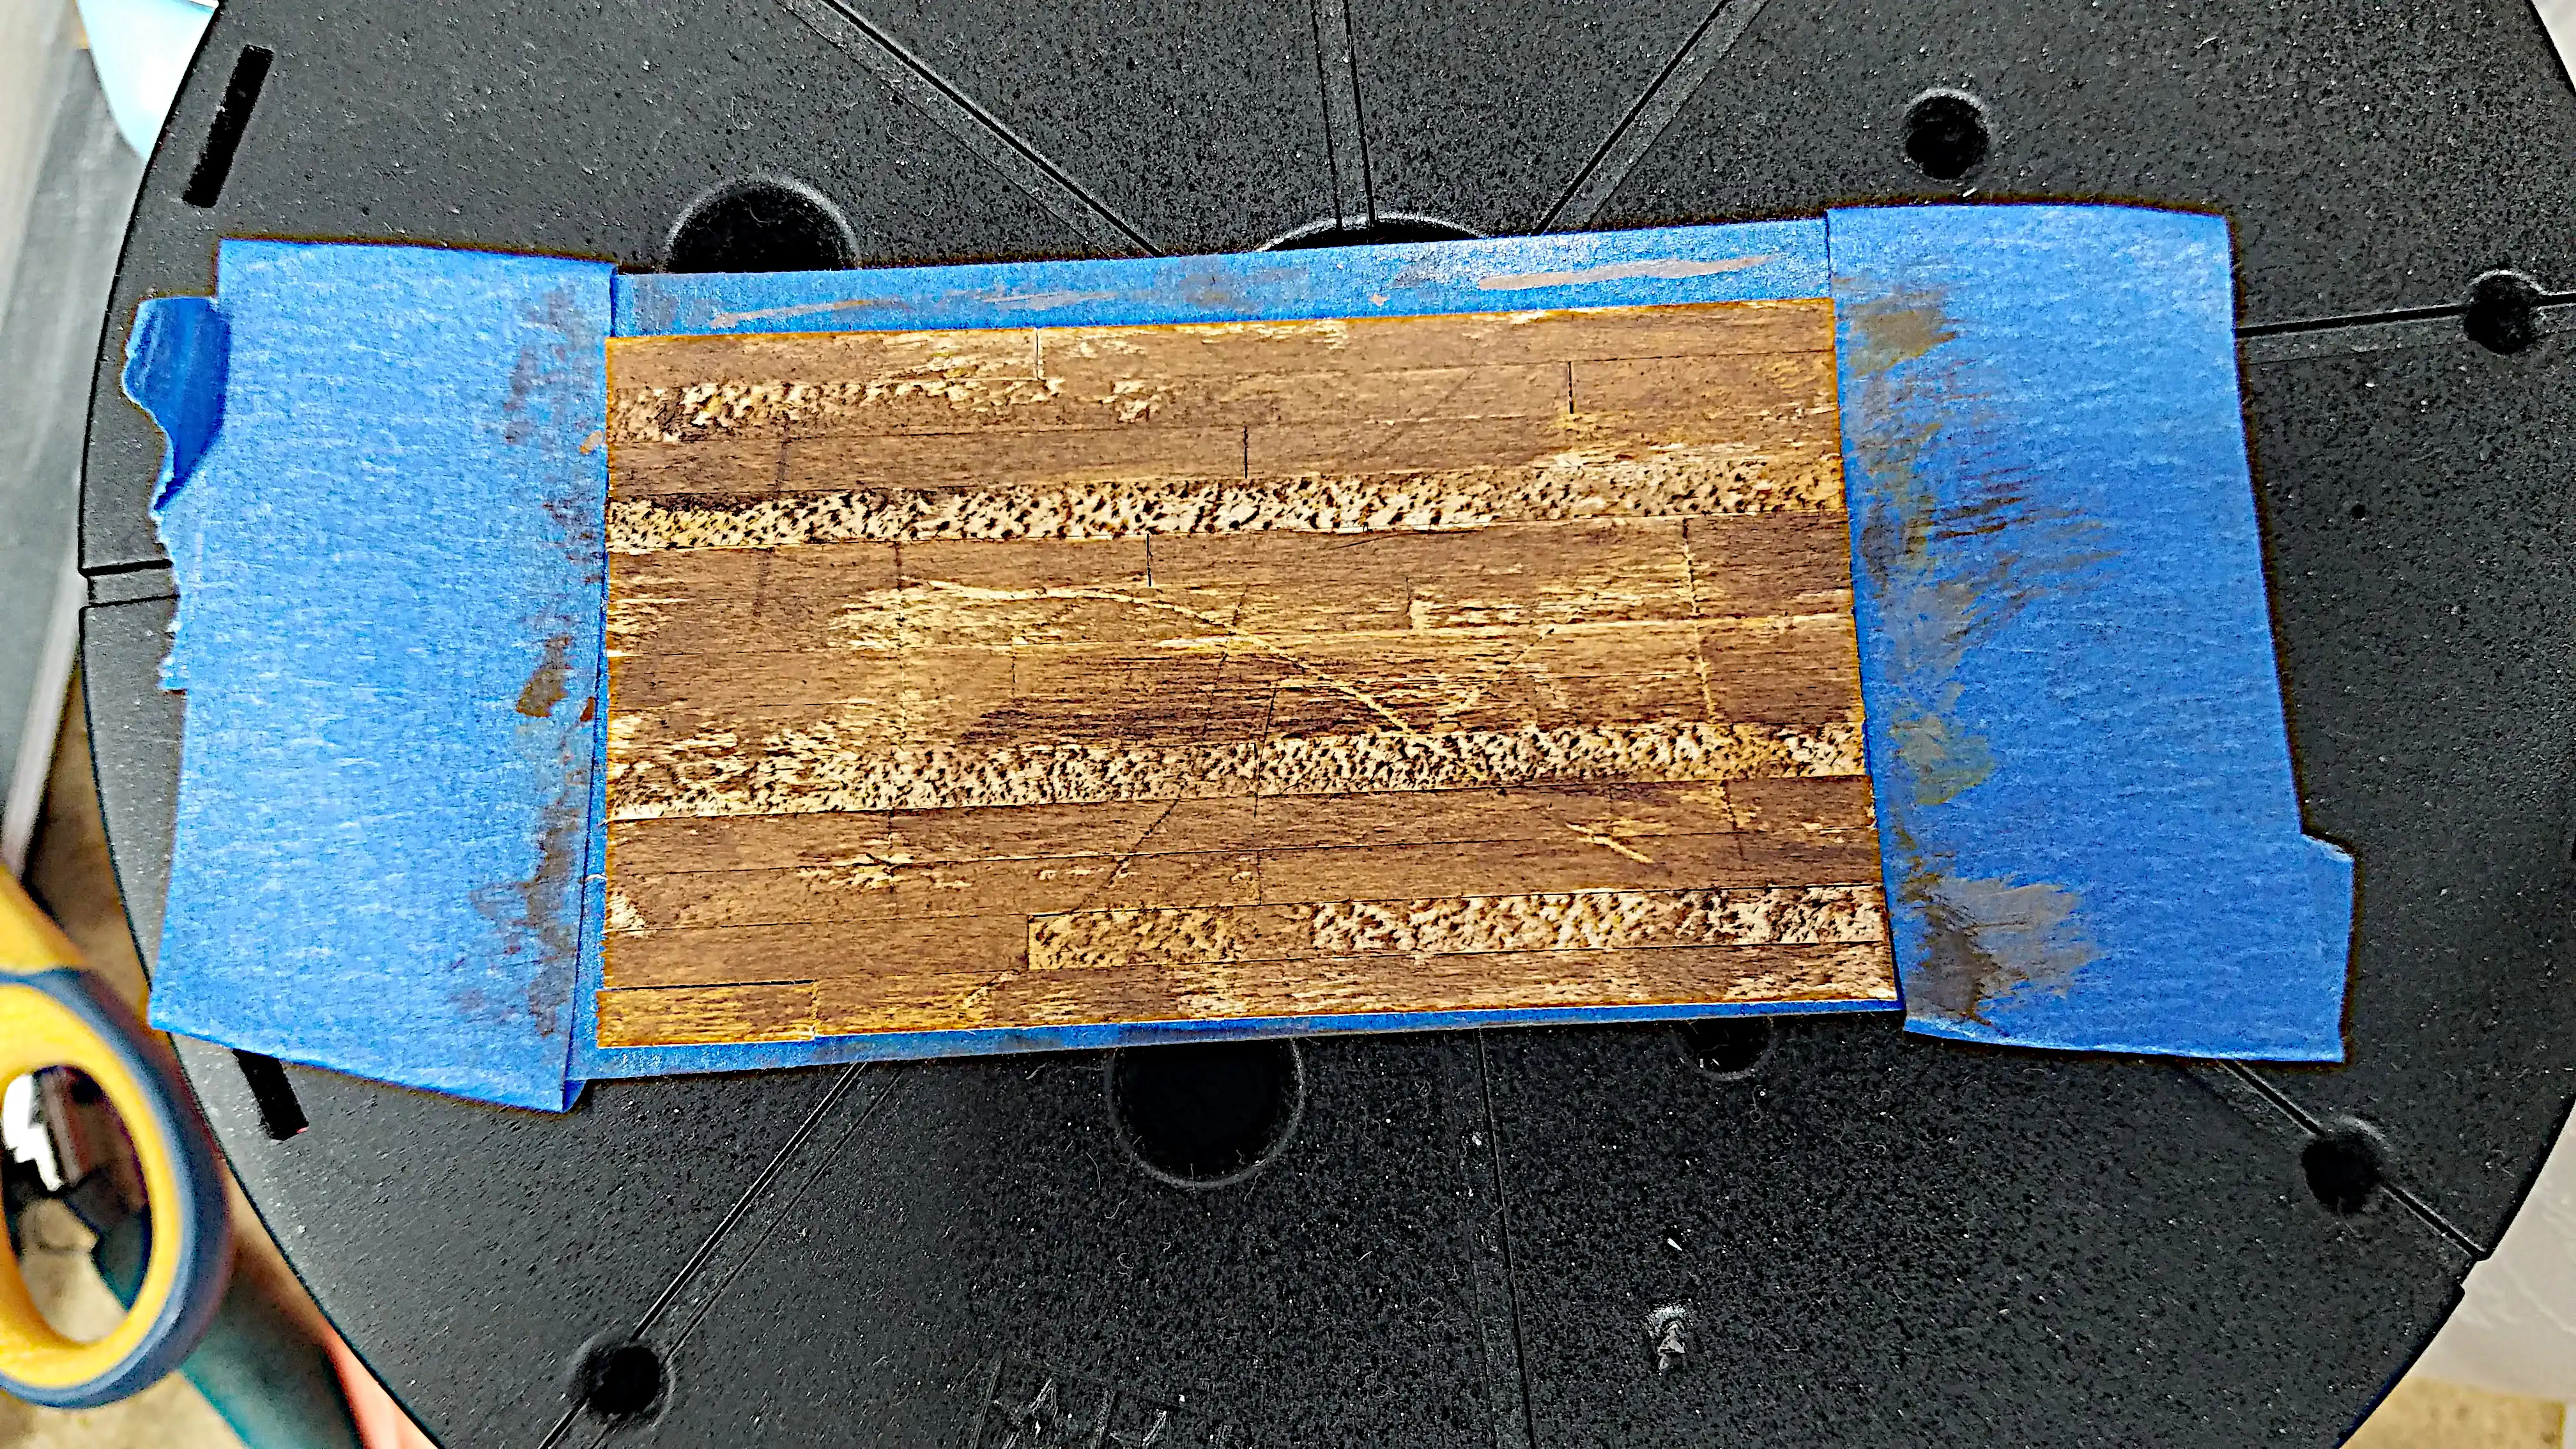
I started painting the wood for the truck bed. I used Vallejo
Model Air paint and thinned it with Vallejo thinner. I then
dry brushed four different colors in this order:
71.077 Wood
71.079 Tan Earth
71.249 NATO Brown
71.042 Dark Brown
I will be adding some sploshes of flat black later to represent
spilled oil and grease.
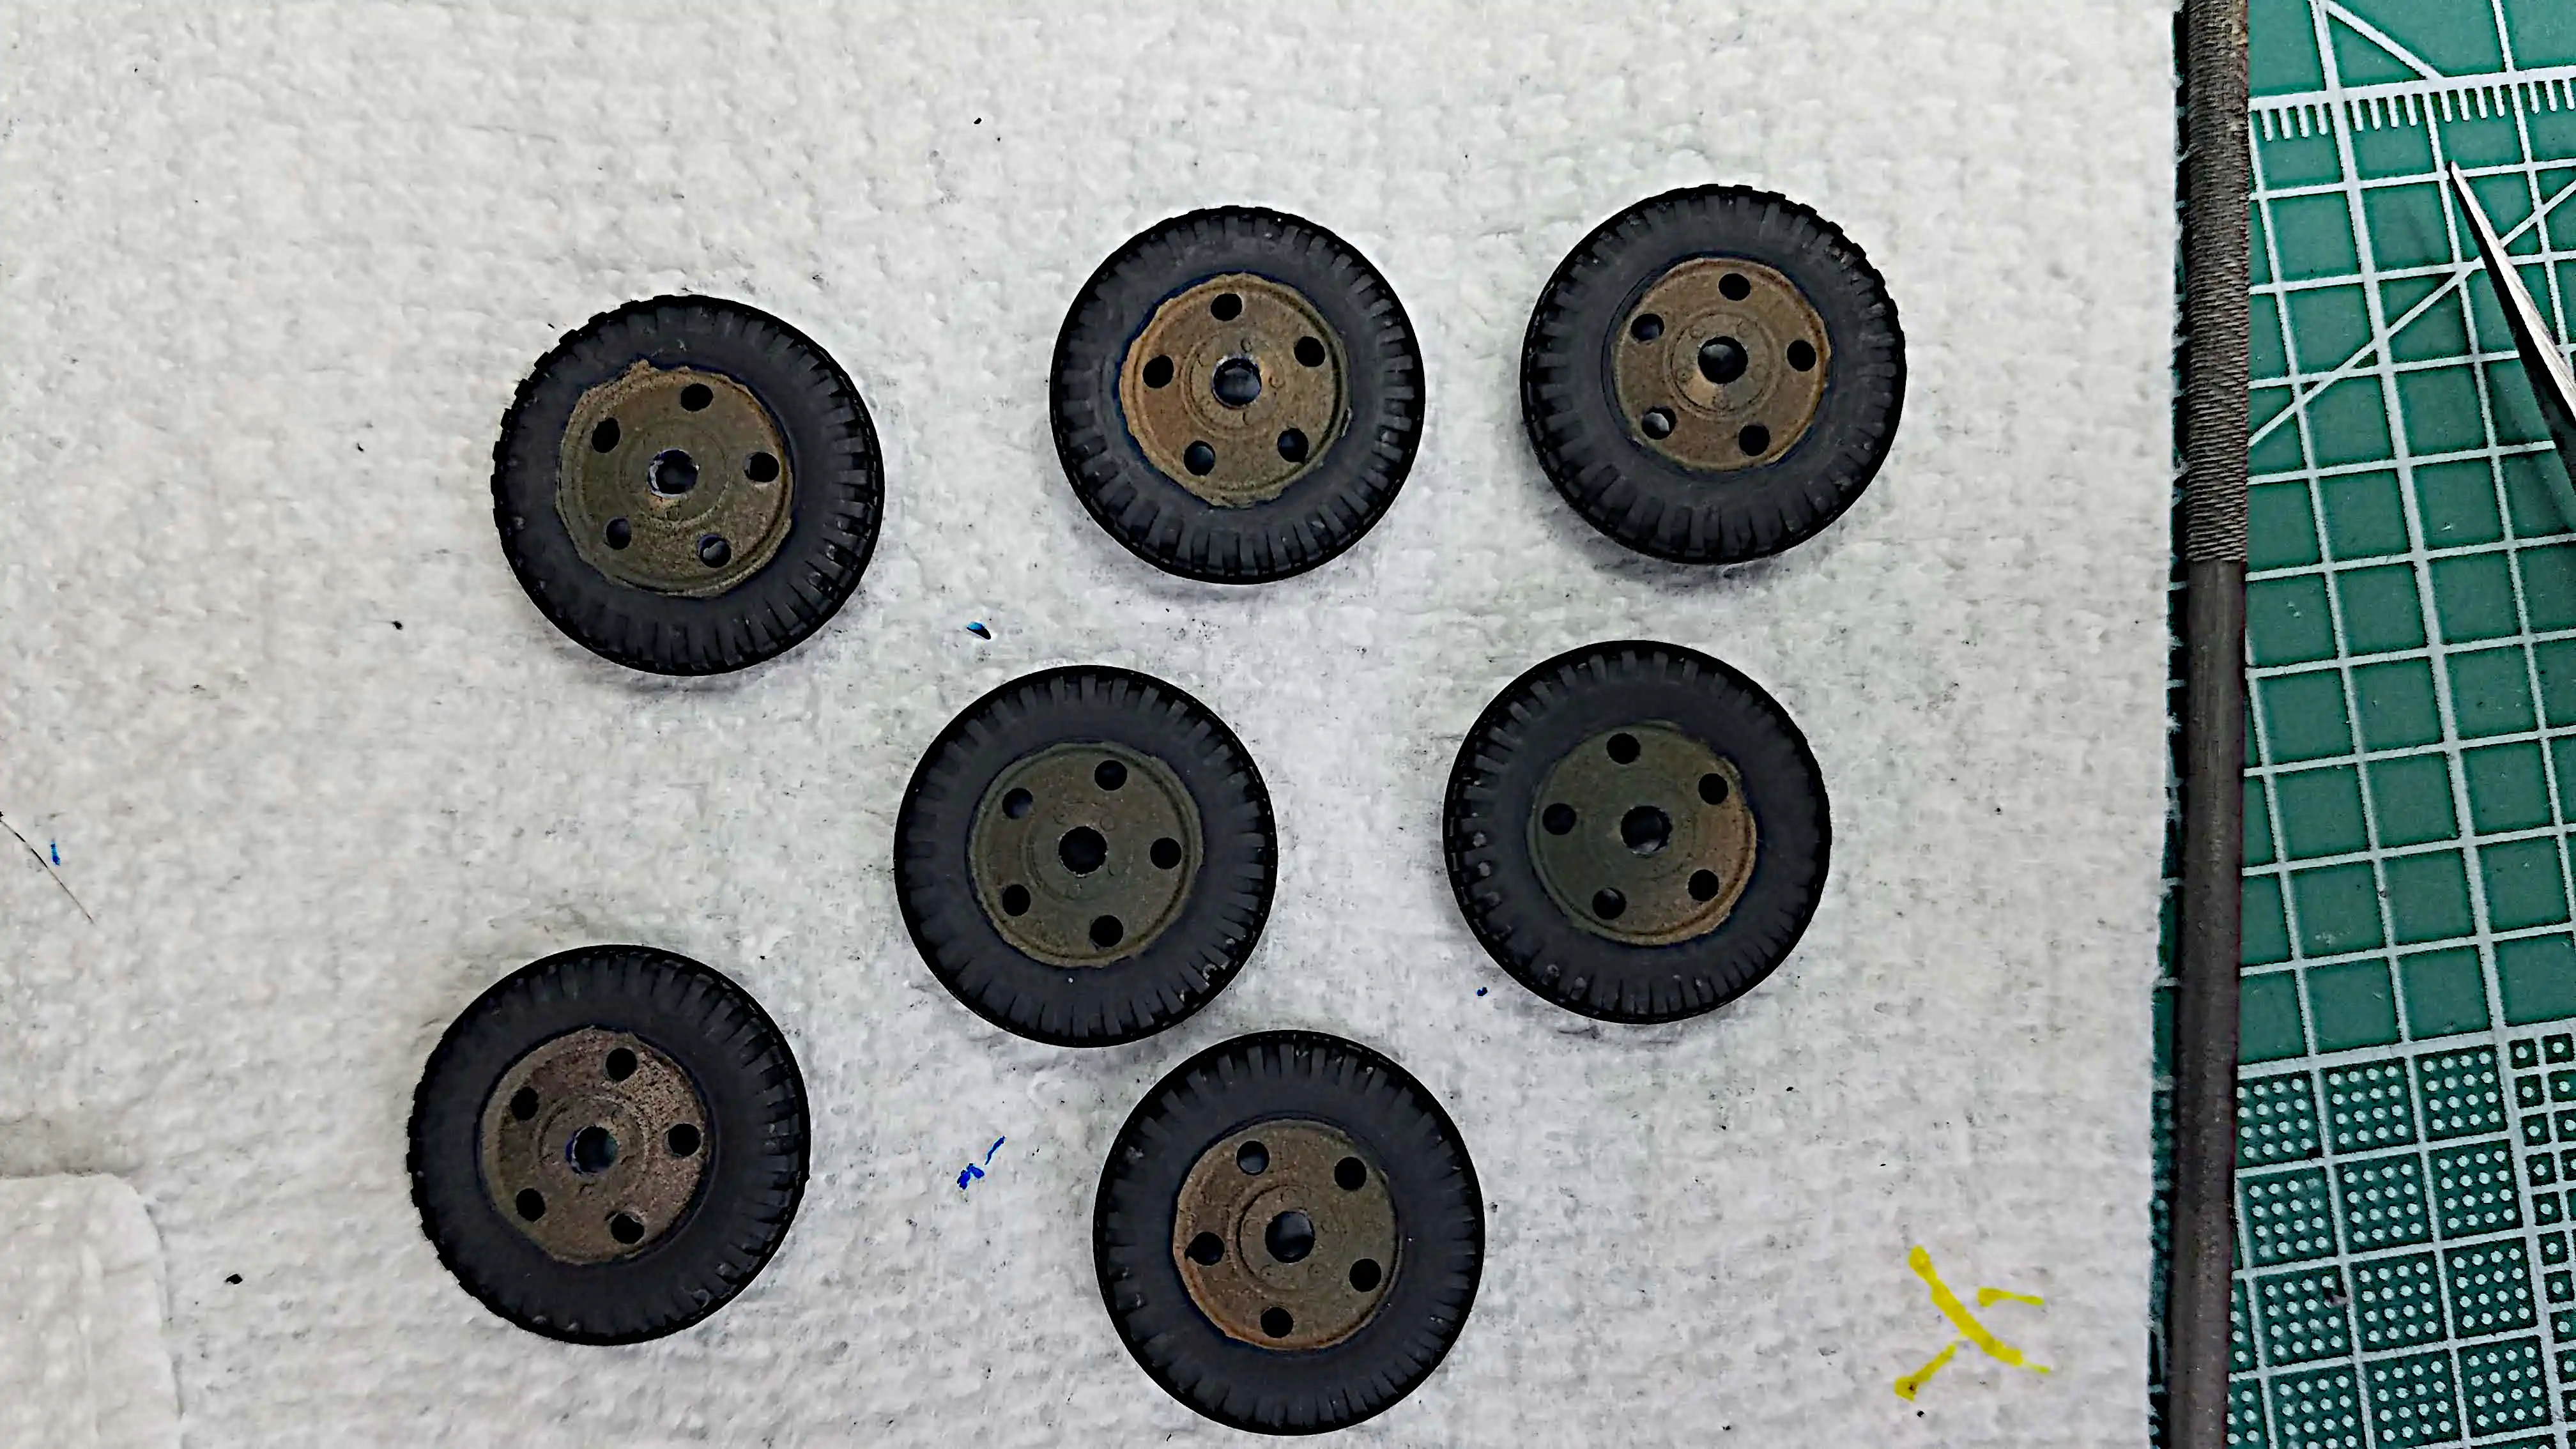
Tires and wheels are painted. The wheels were painted with
the same combination of browns and green as the truck body.
The tires are painted in Tamiya XF-85 Rubber Black. They are
still too pristine for a farm truck and will be dirtied up.
I learned this method from watching a video on
BG's Model Workshop YouTube channel
Check out Bryan's channel, he has a ton of great video's.
I then used several colors of Tamiya panel liner wash to
fill some of the cracks.
Finished truck superimposed on a farm scene. I could not get
the right front tire to set on the ground, and I gave up
because this kit really tired me out with all of it's problems.

 Box art for the Revell 1955 Chevy 2-Ton Stake Body
 Decal sheet
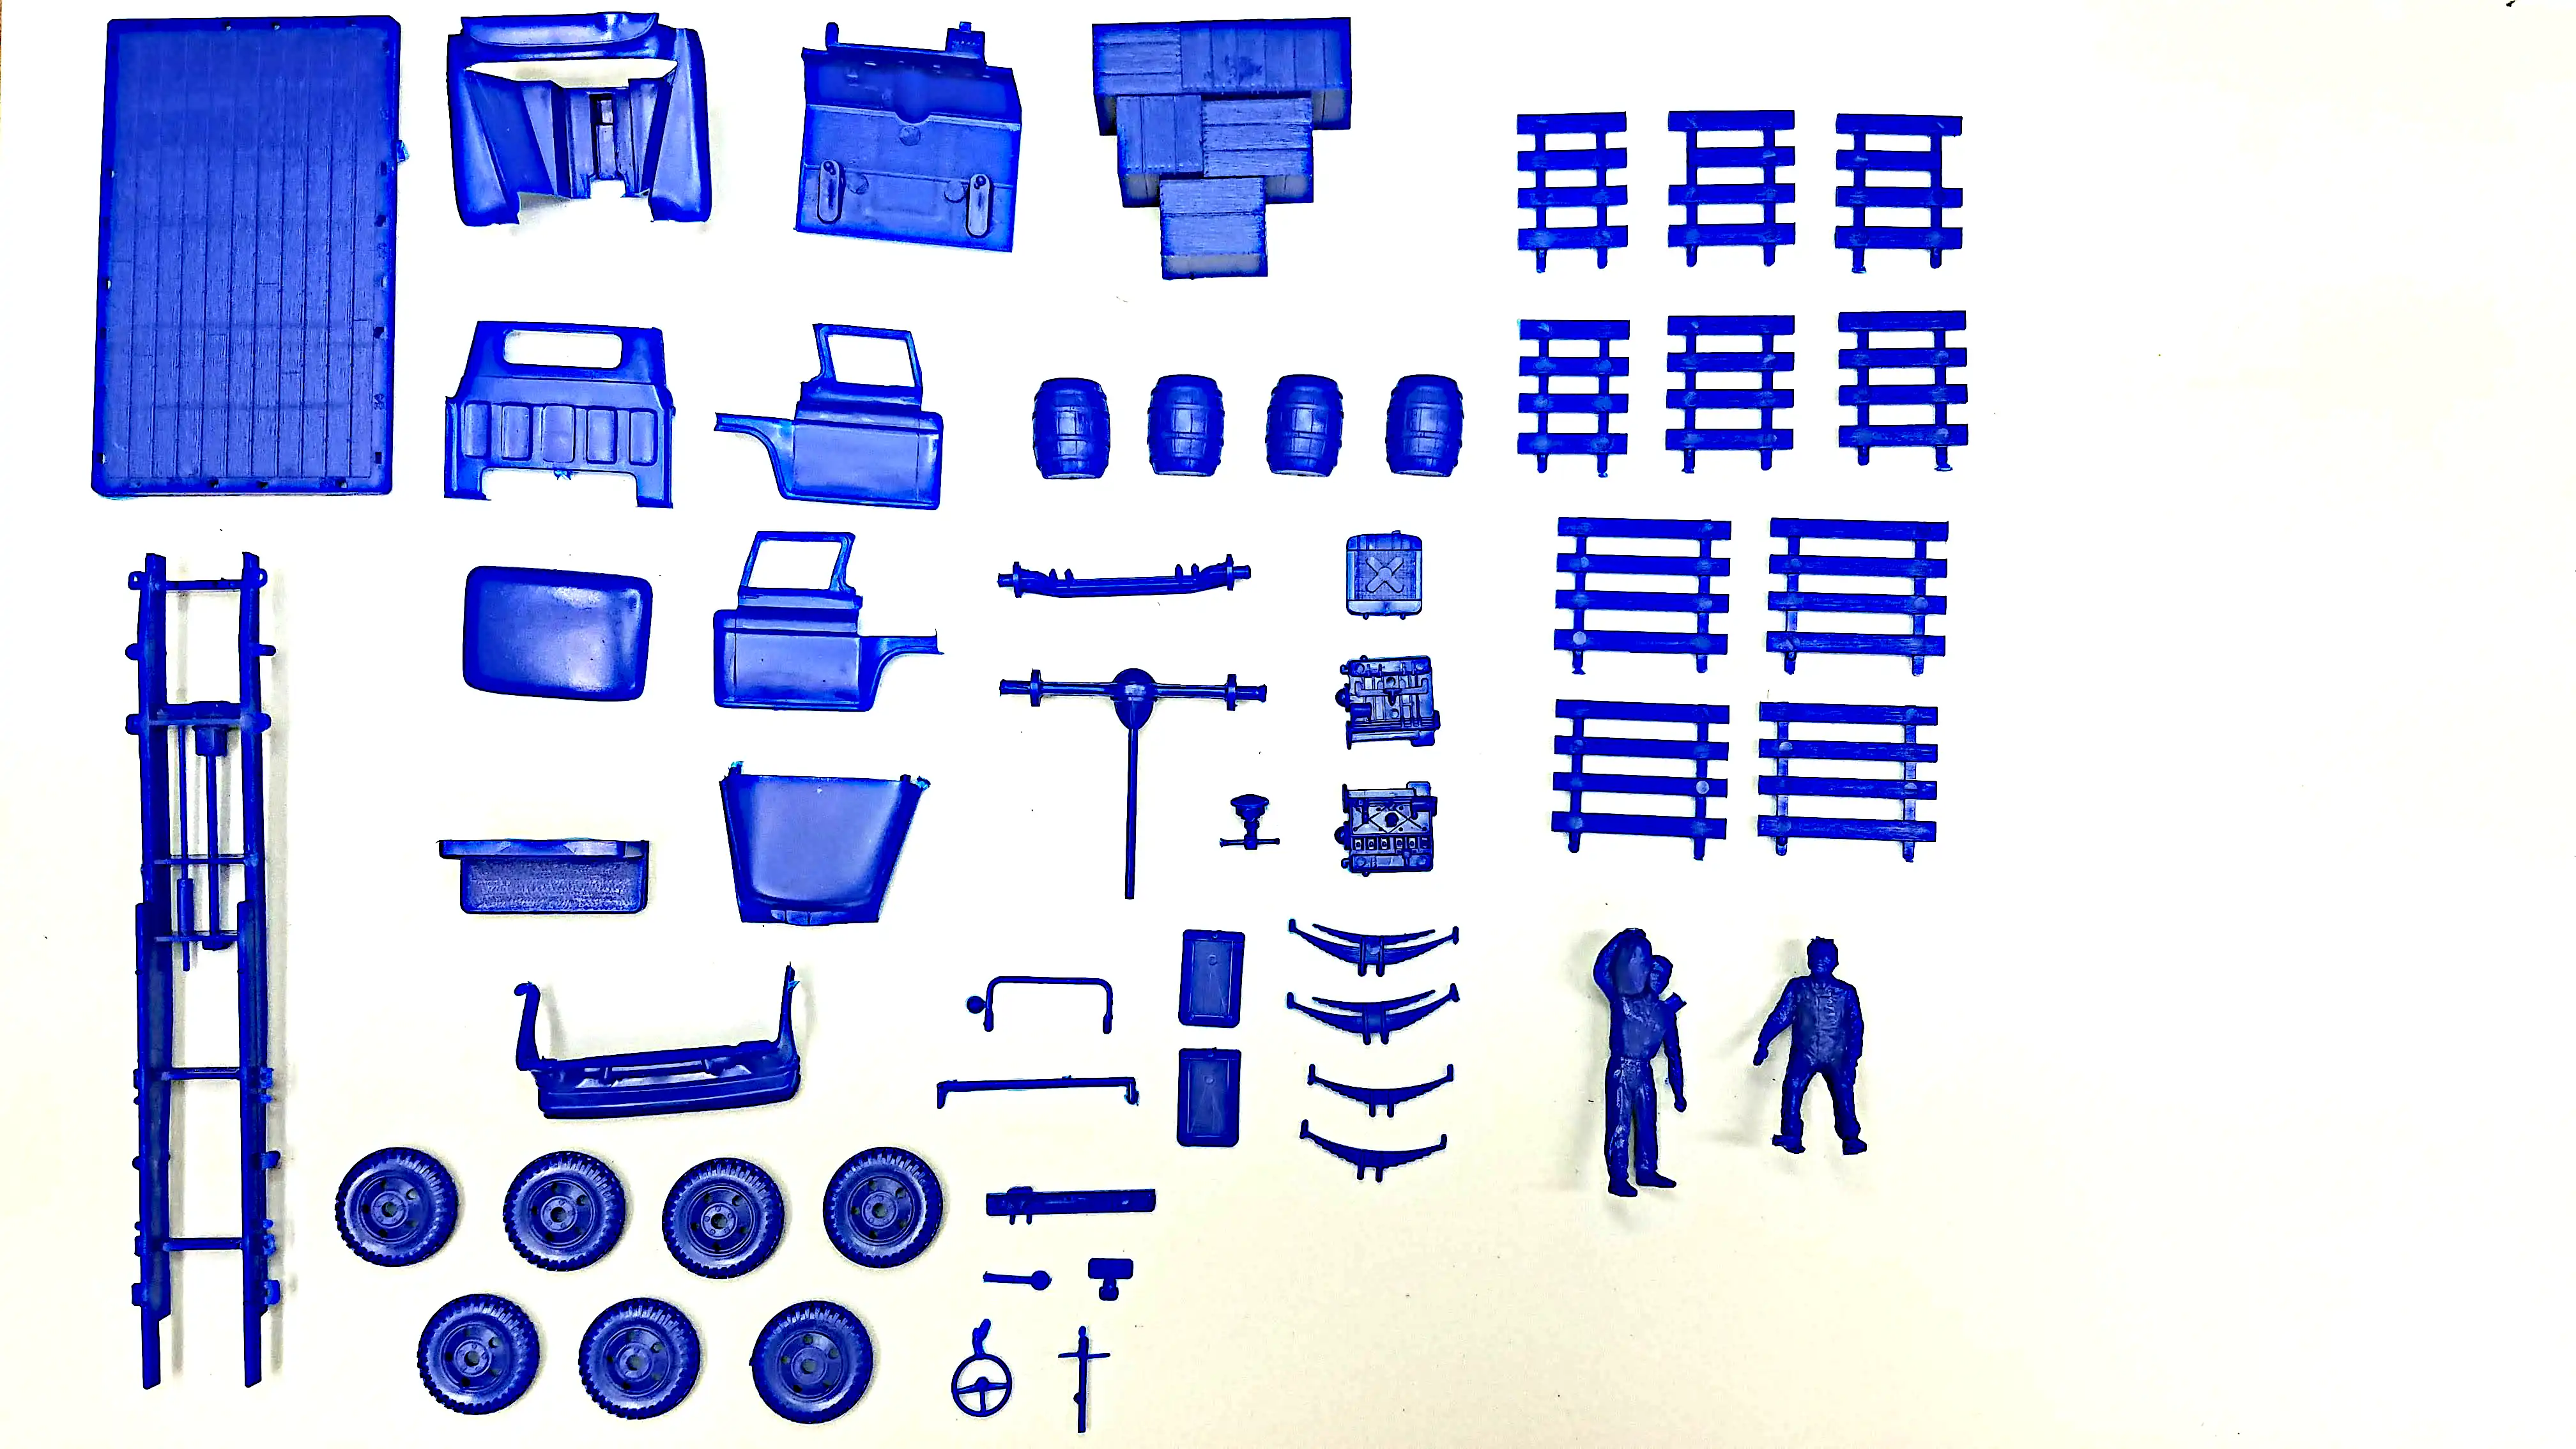
 All the parts in the box
 All parts removed from the sprues
 Stake rails showing mold ejector pin marks
 Truck cab is dry fitted


 Dry fitting suspension, axles, interior floor and front fender assembly

 Bottom view of dry fitting frame components
 Front view of dry fitting frame components
 Dry fitting most of the truck
 Added engine, radiator and front bumper to the dry fit
 Most parts that are part of the frame are glued up and ready for primer
 Instrument cluster installed in the dashboard assembly
 Parts are ready to be primed
 Cab parts are ready to be primed
 Installed a scratch build bed edge frame
 Truck bed wooden deck boards are cut and fitted
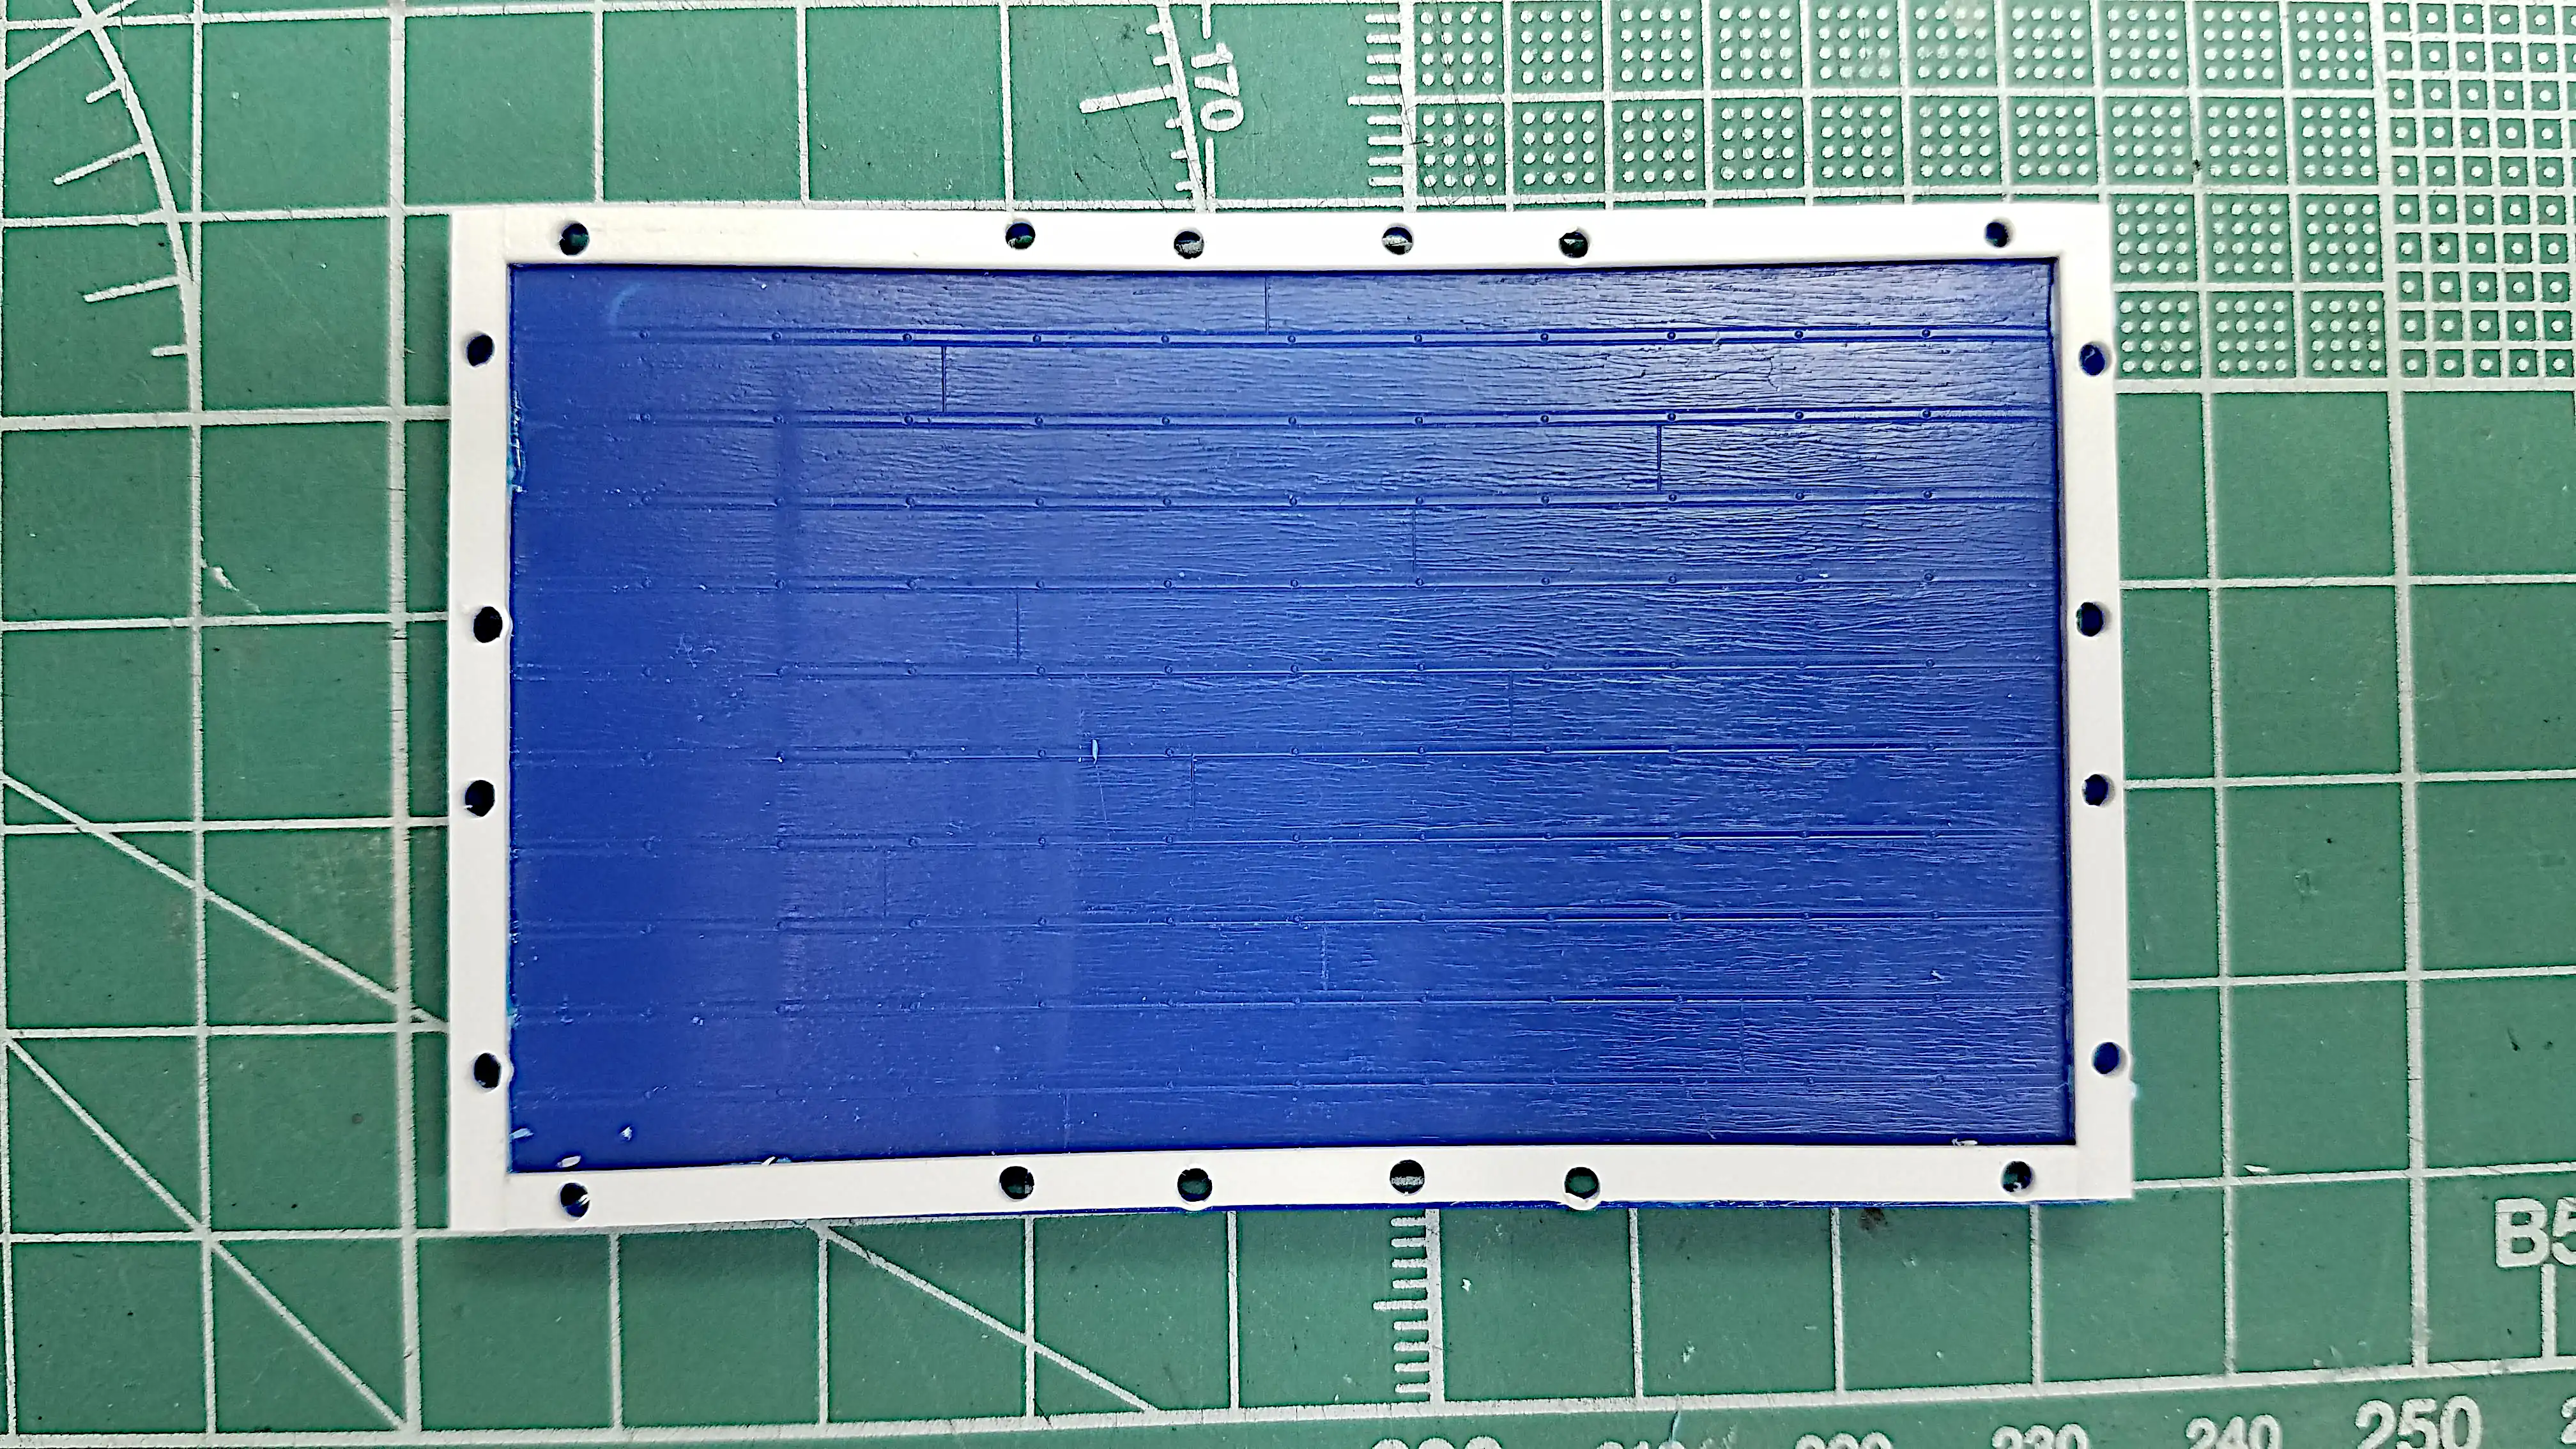
 Holes are drilled on the bed frame for mounting the scratch built stakes
 Jigs made for creating the bed side stakes
 How I created the jig for making the bed side stakes
 Marking where the other slats should be placed
 Another shot of the widest stakes being built
 Jigs for the mid sized and small stakes with wide stakes complete
 Finished stakes dry fitted on the truck bed
 All parts except for tires and wheels
 Interior floor, seat and front fender assembly installed
 Interior floor, seat and front fender assembly installed
 Engine and radiator has been installed
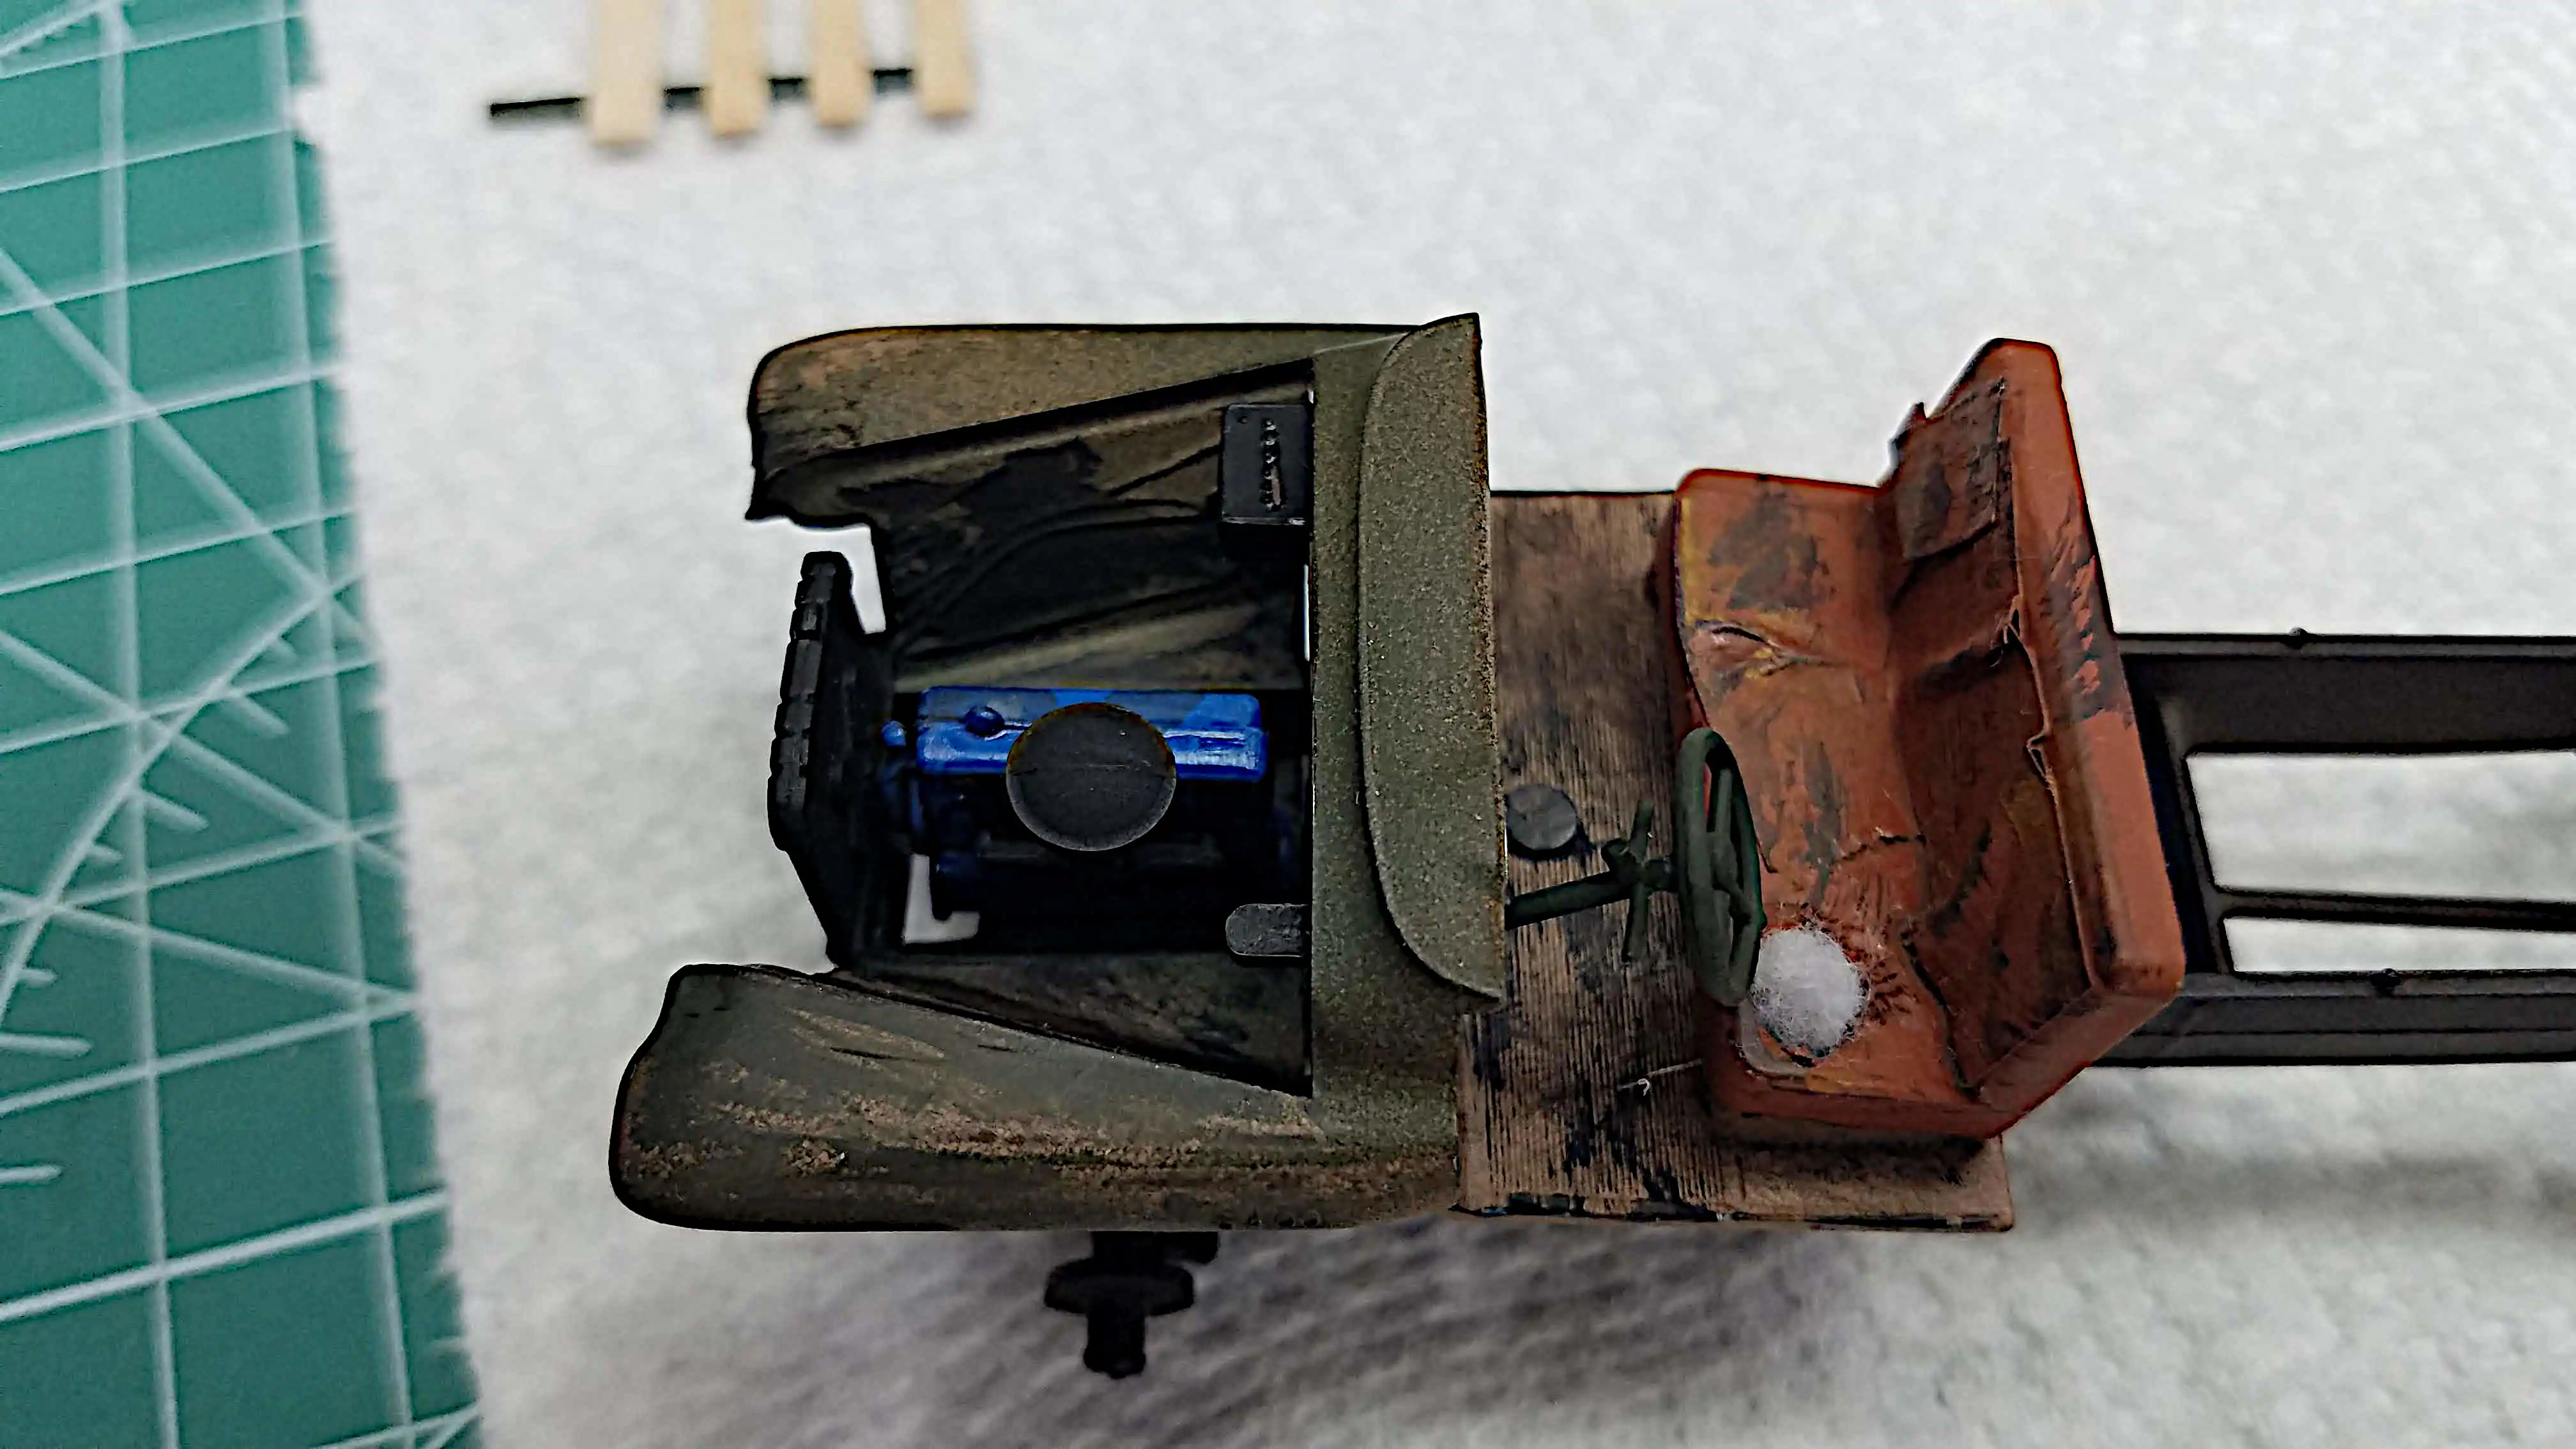 Front view of installed engine and radiator
 Front fender assembly position, right side
 Front grill, bumper and half of front fender installed
 Front grill, bumper and half of front fender installed
 55-Gallon Steel Drums and Hay Bails
 Doors are installed
 Doors are installed
 Back of the cab does not fit
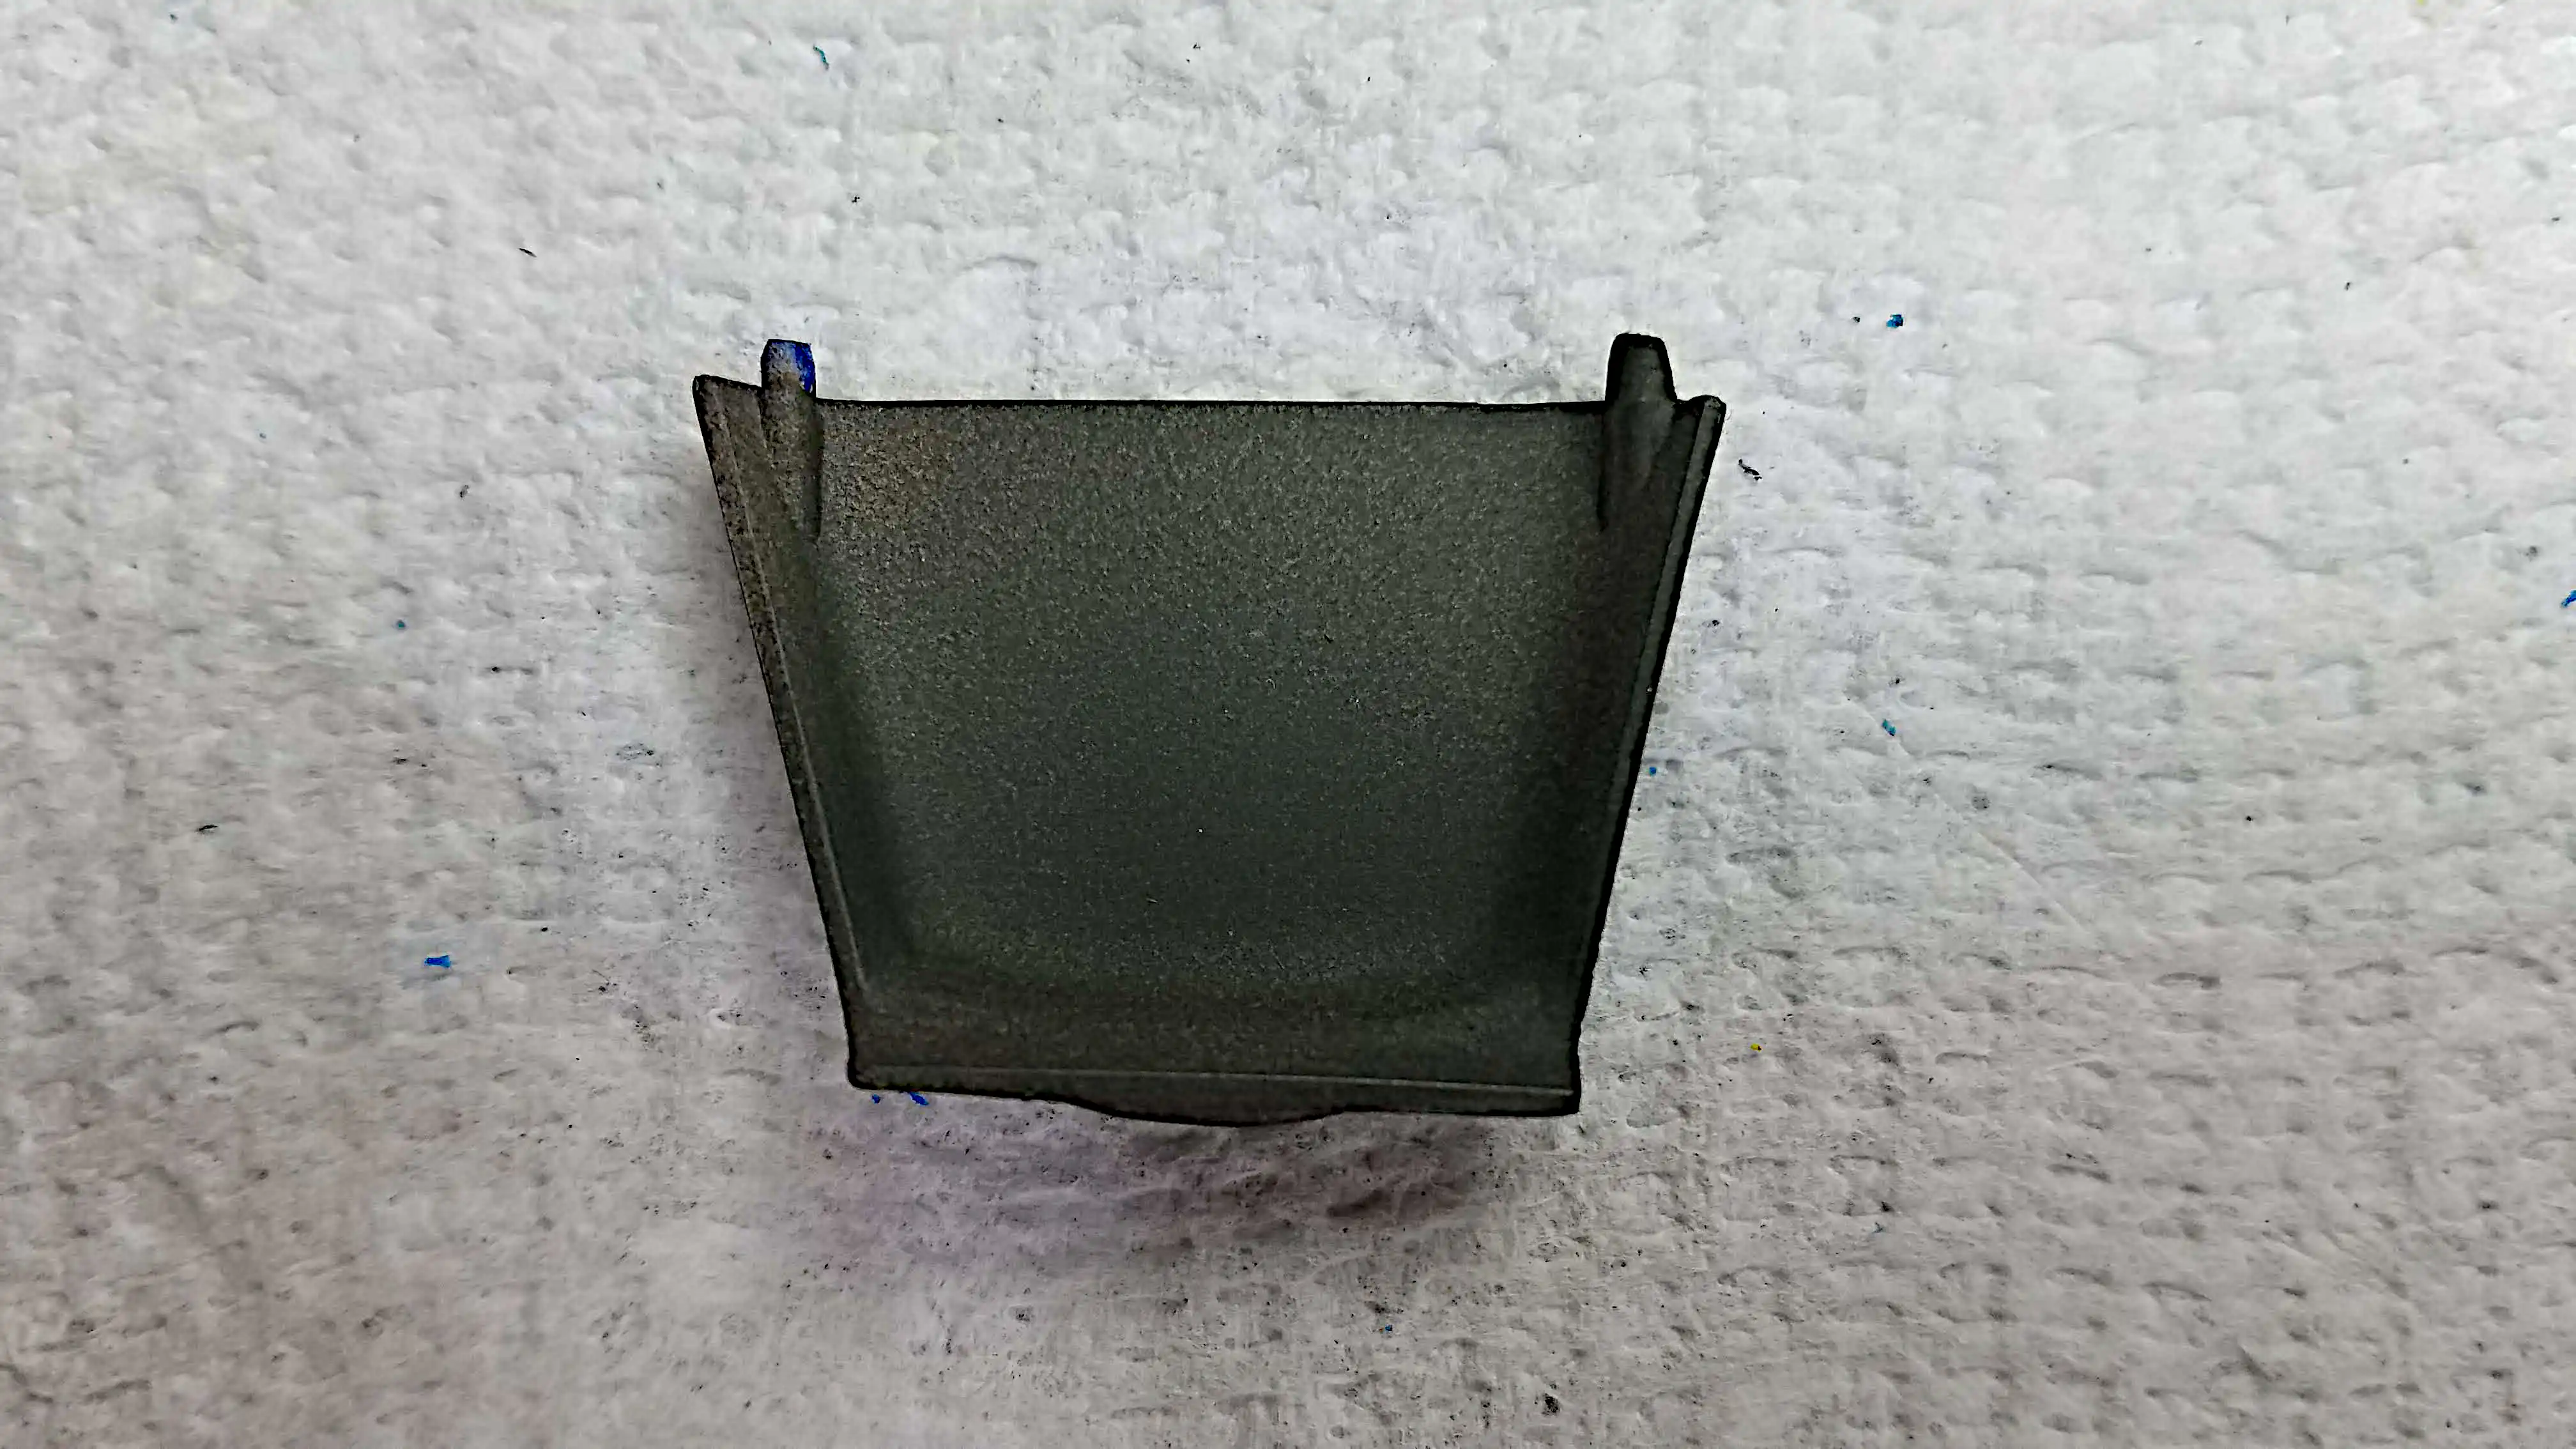
 Ground the back of the seat thinner
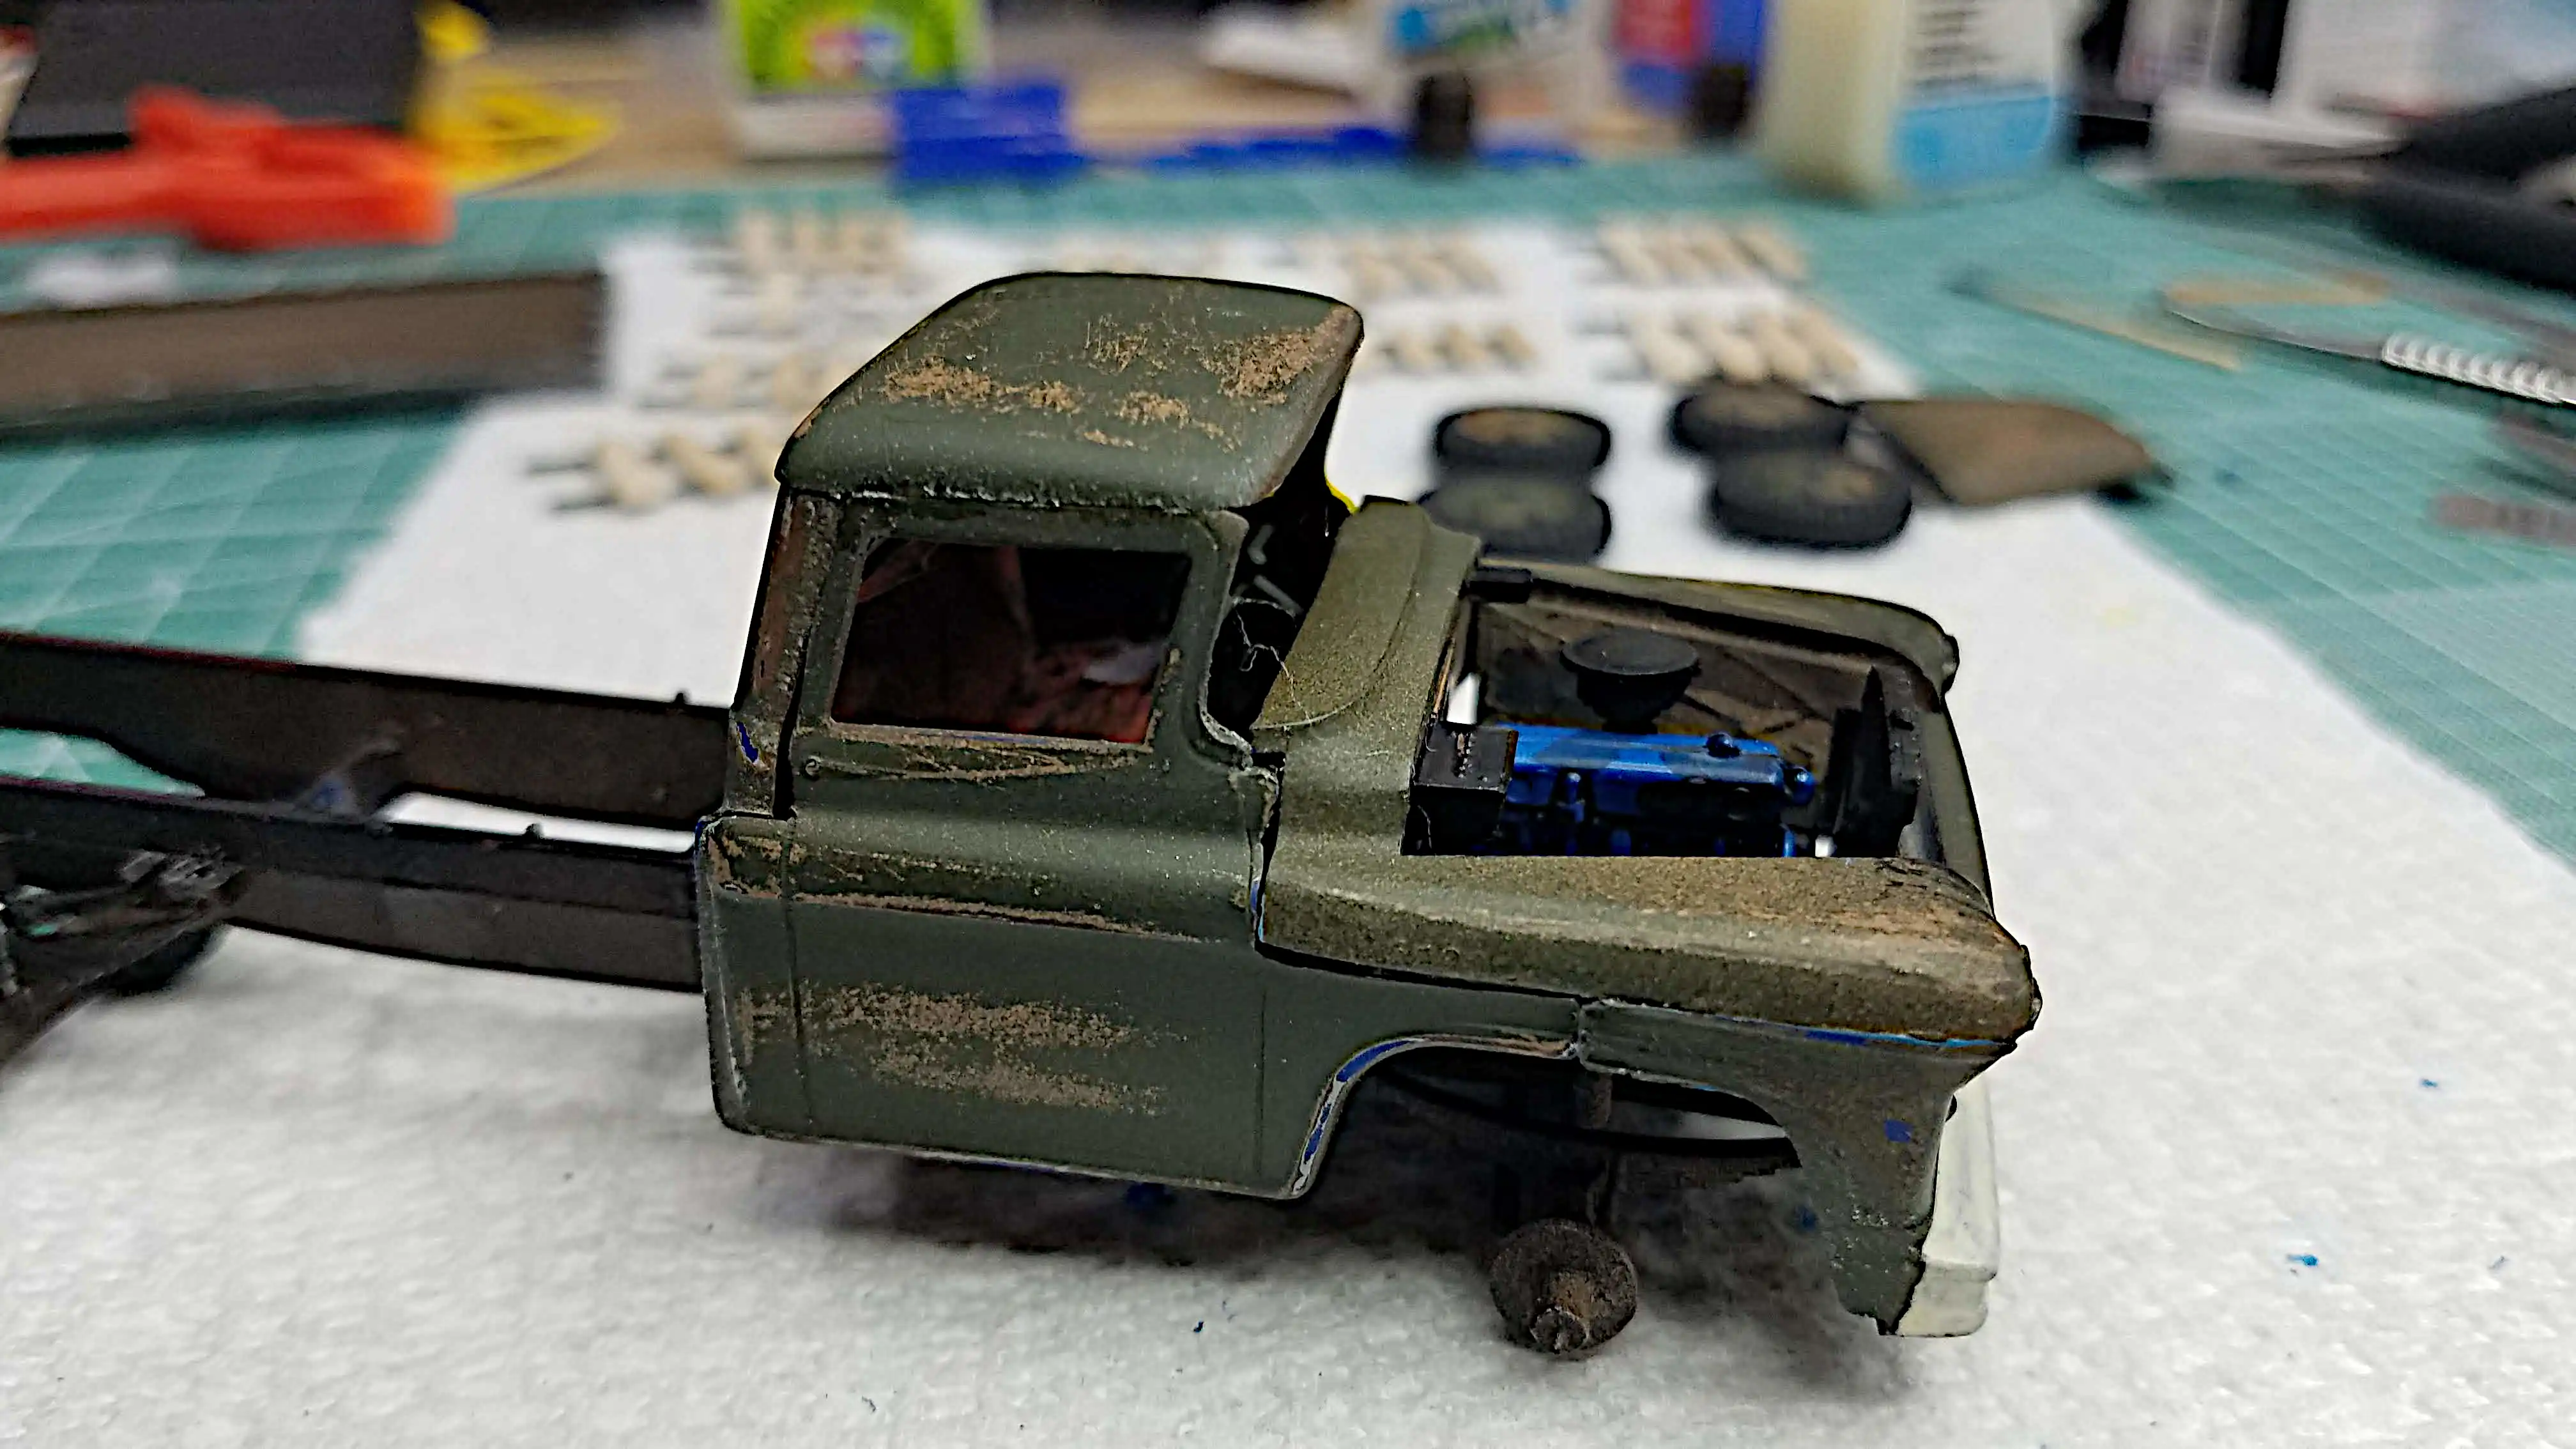
 Back of the cab now fits somewhat correctly
 Cab roof is in place
 Hood had to be modified to even fit improperly
 Painting of truck bed is almost finished
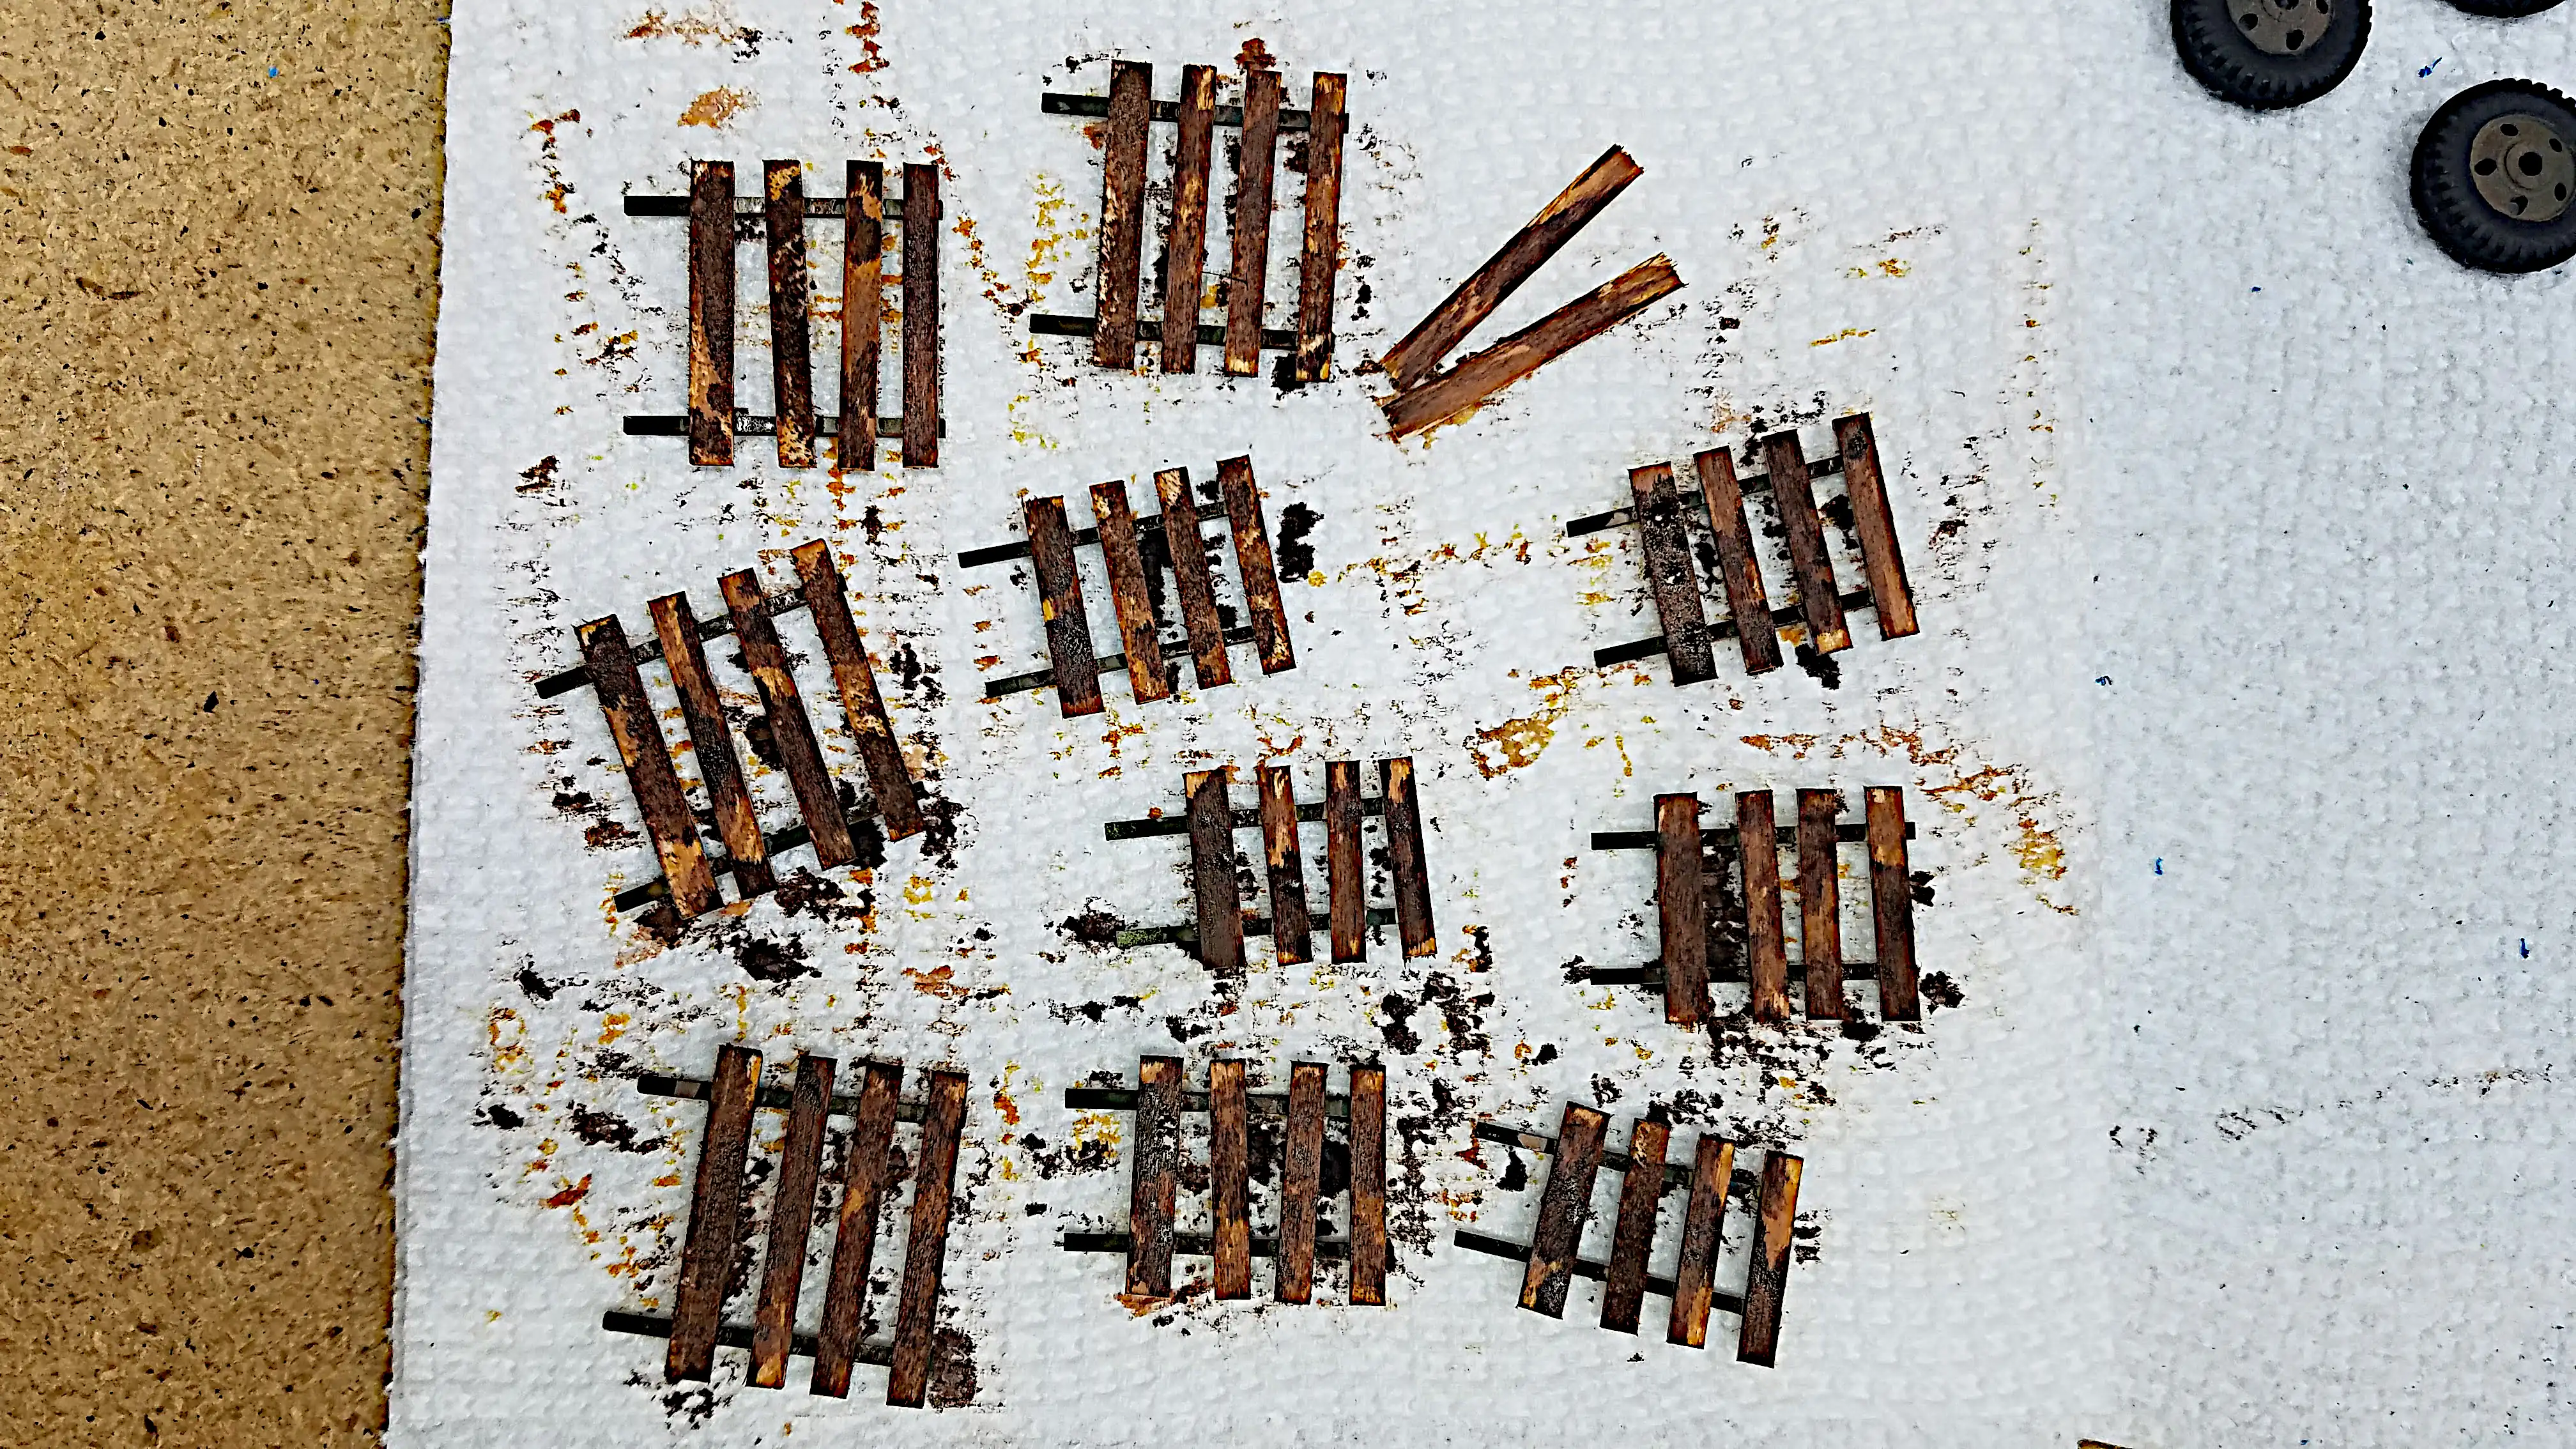
 Wood on the stakes have been painted
 Tires and wheels are painted but not dirtied
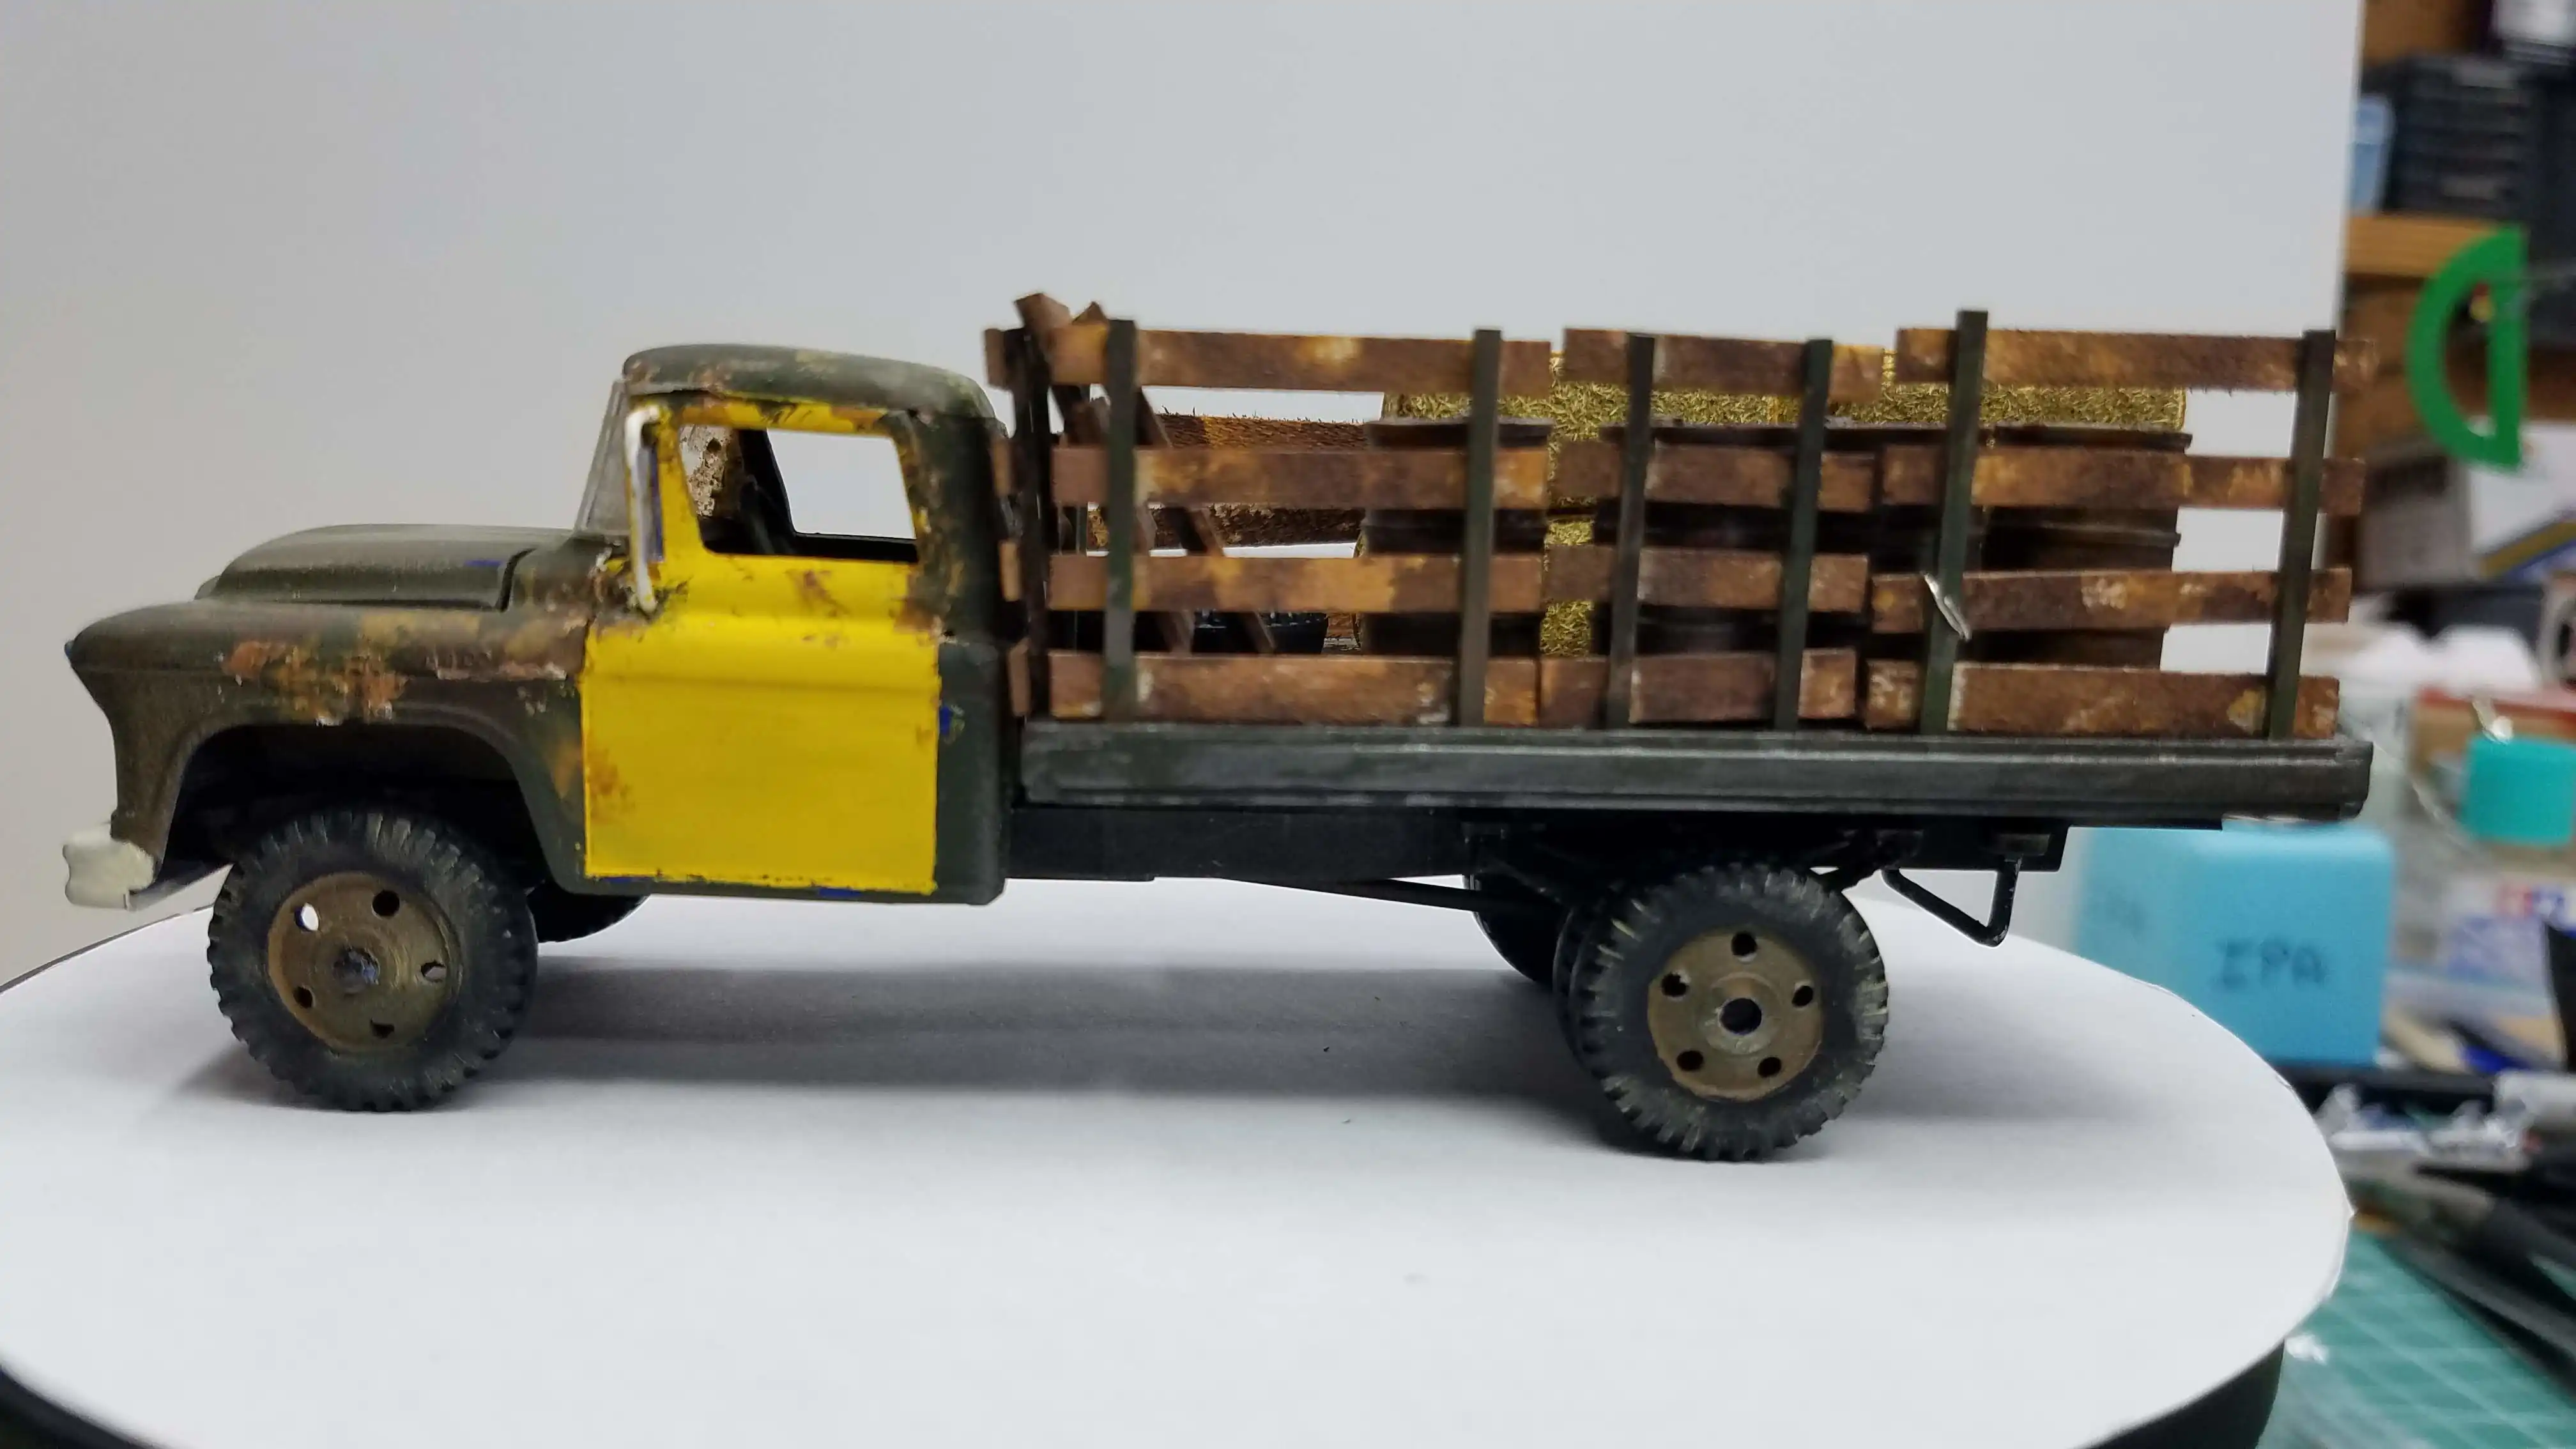
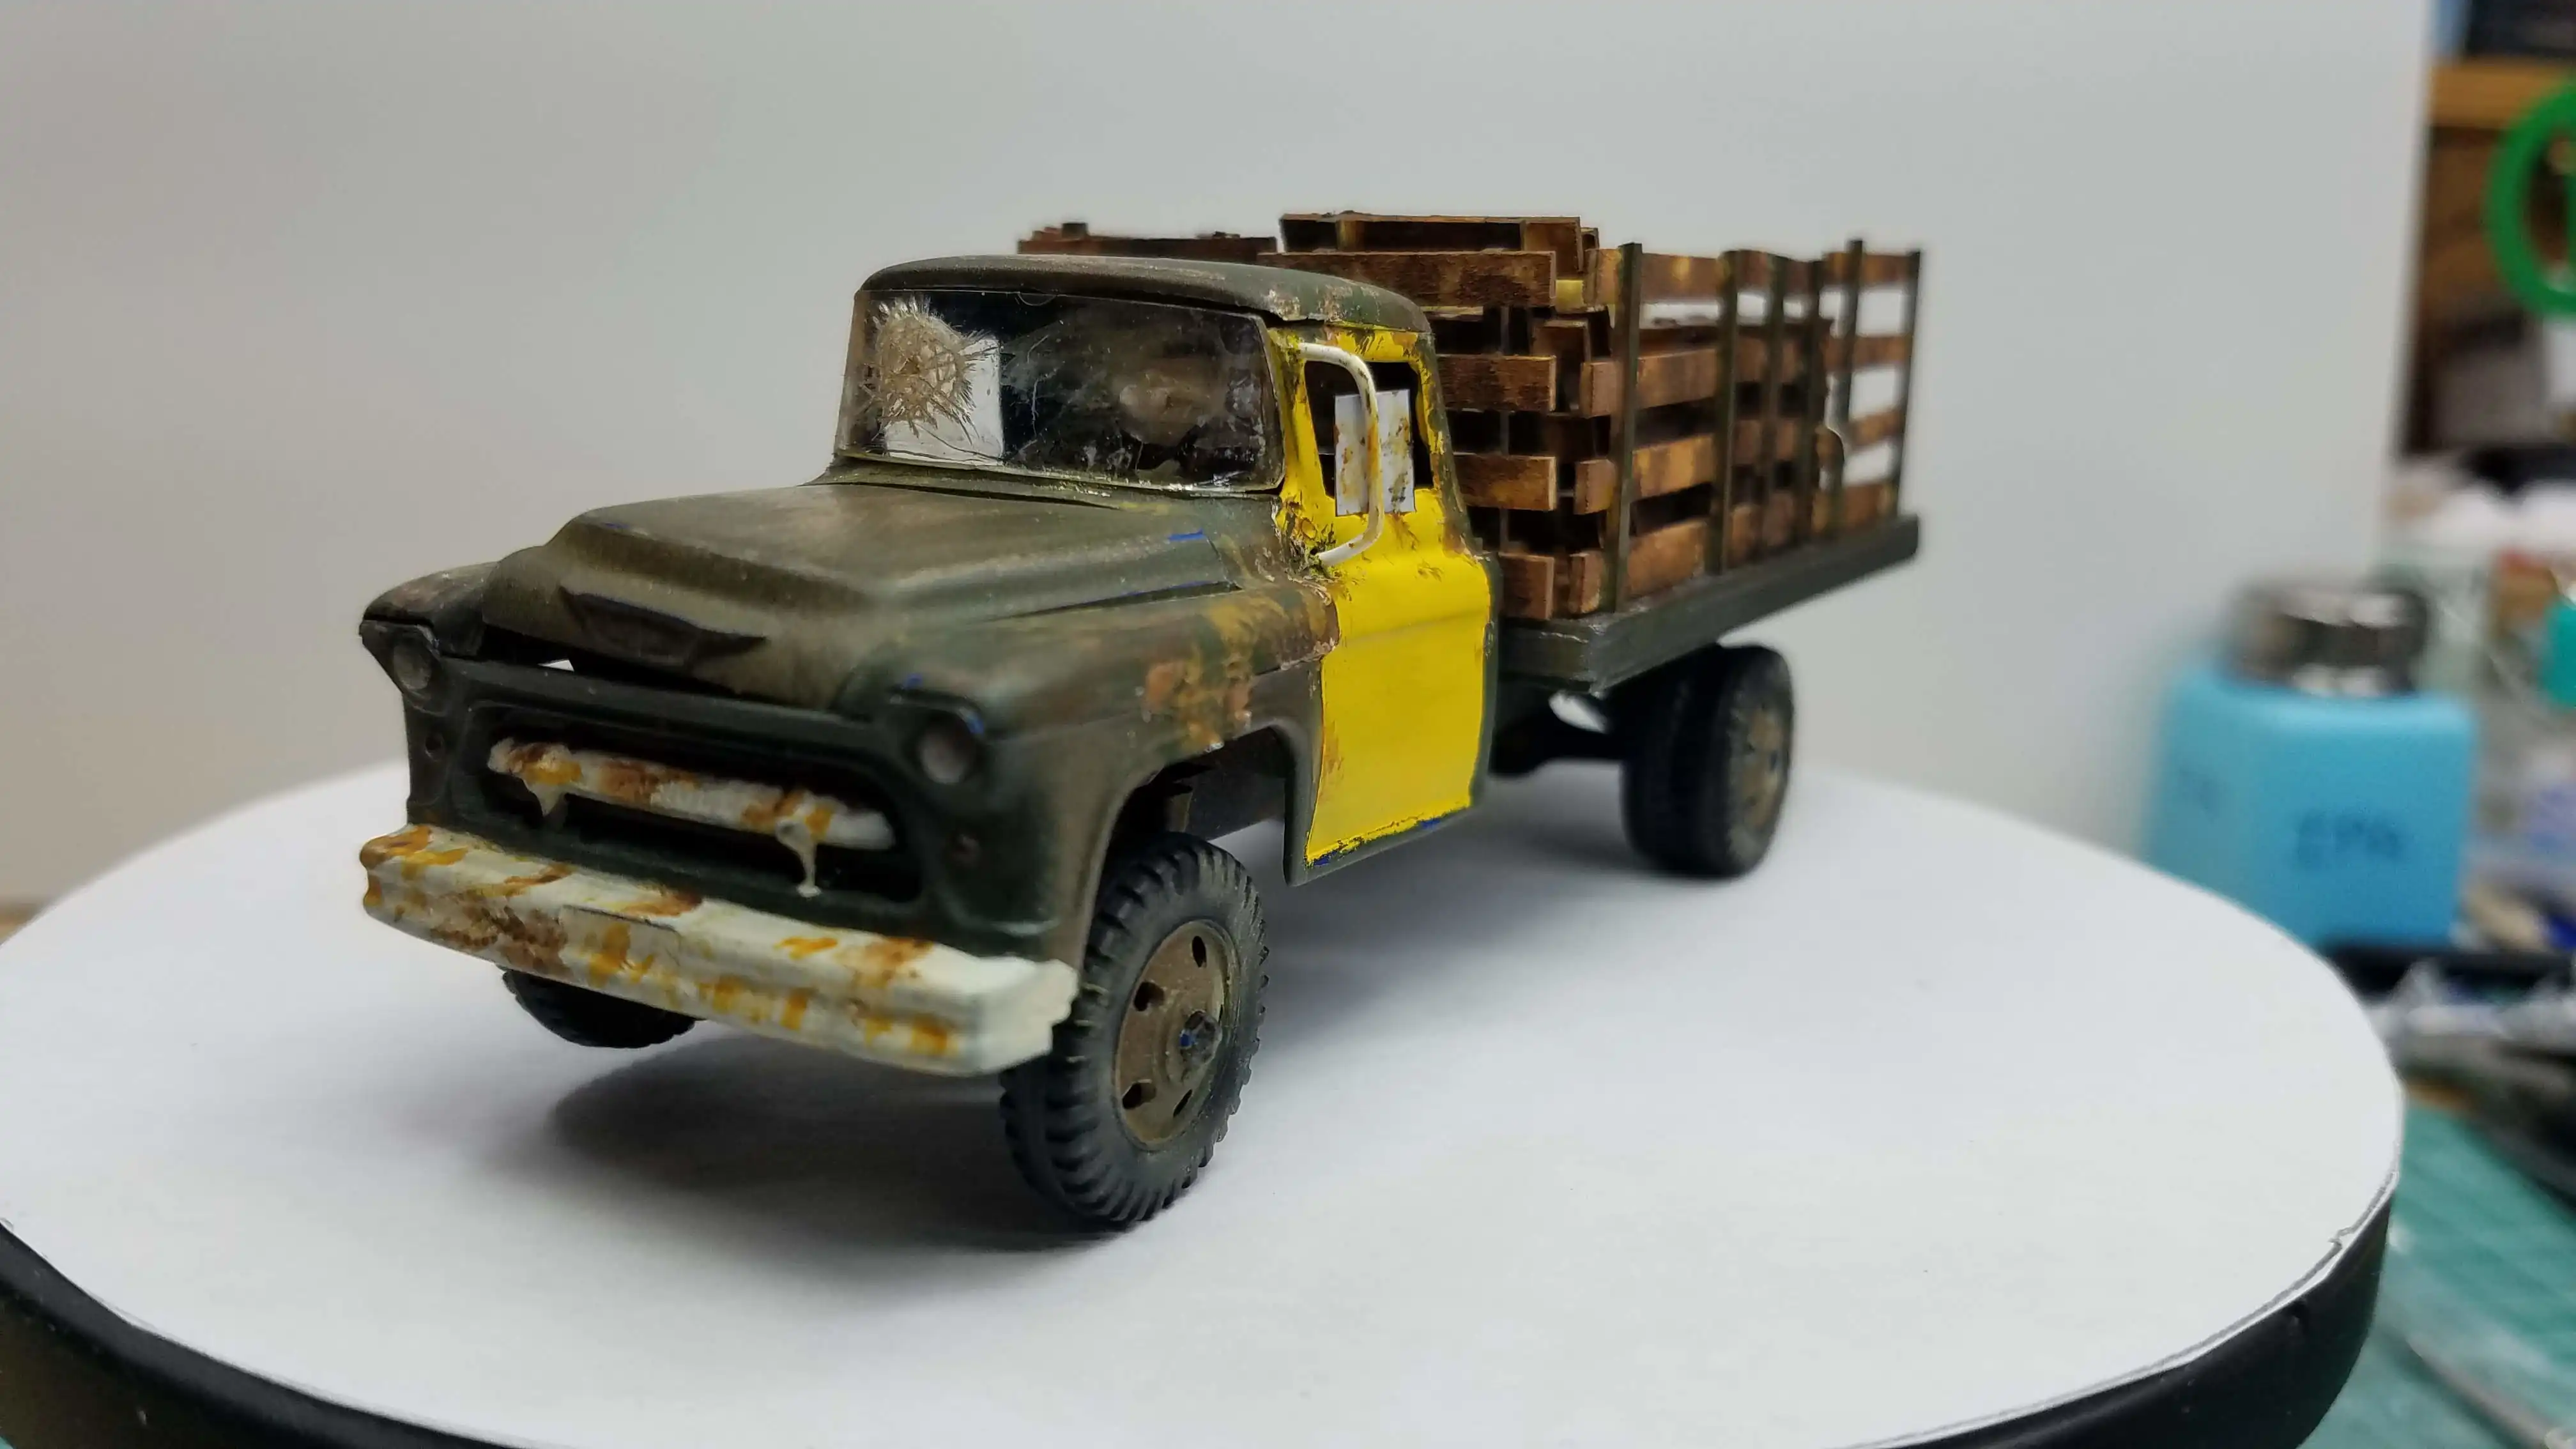
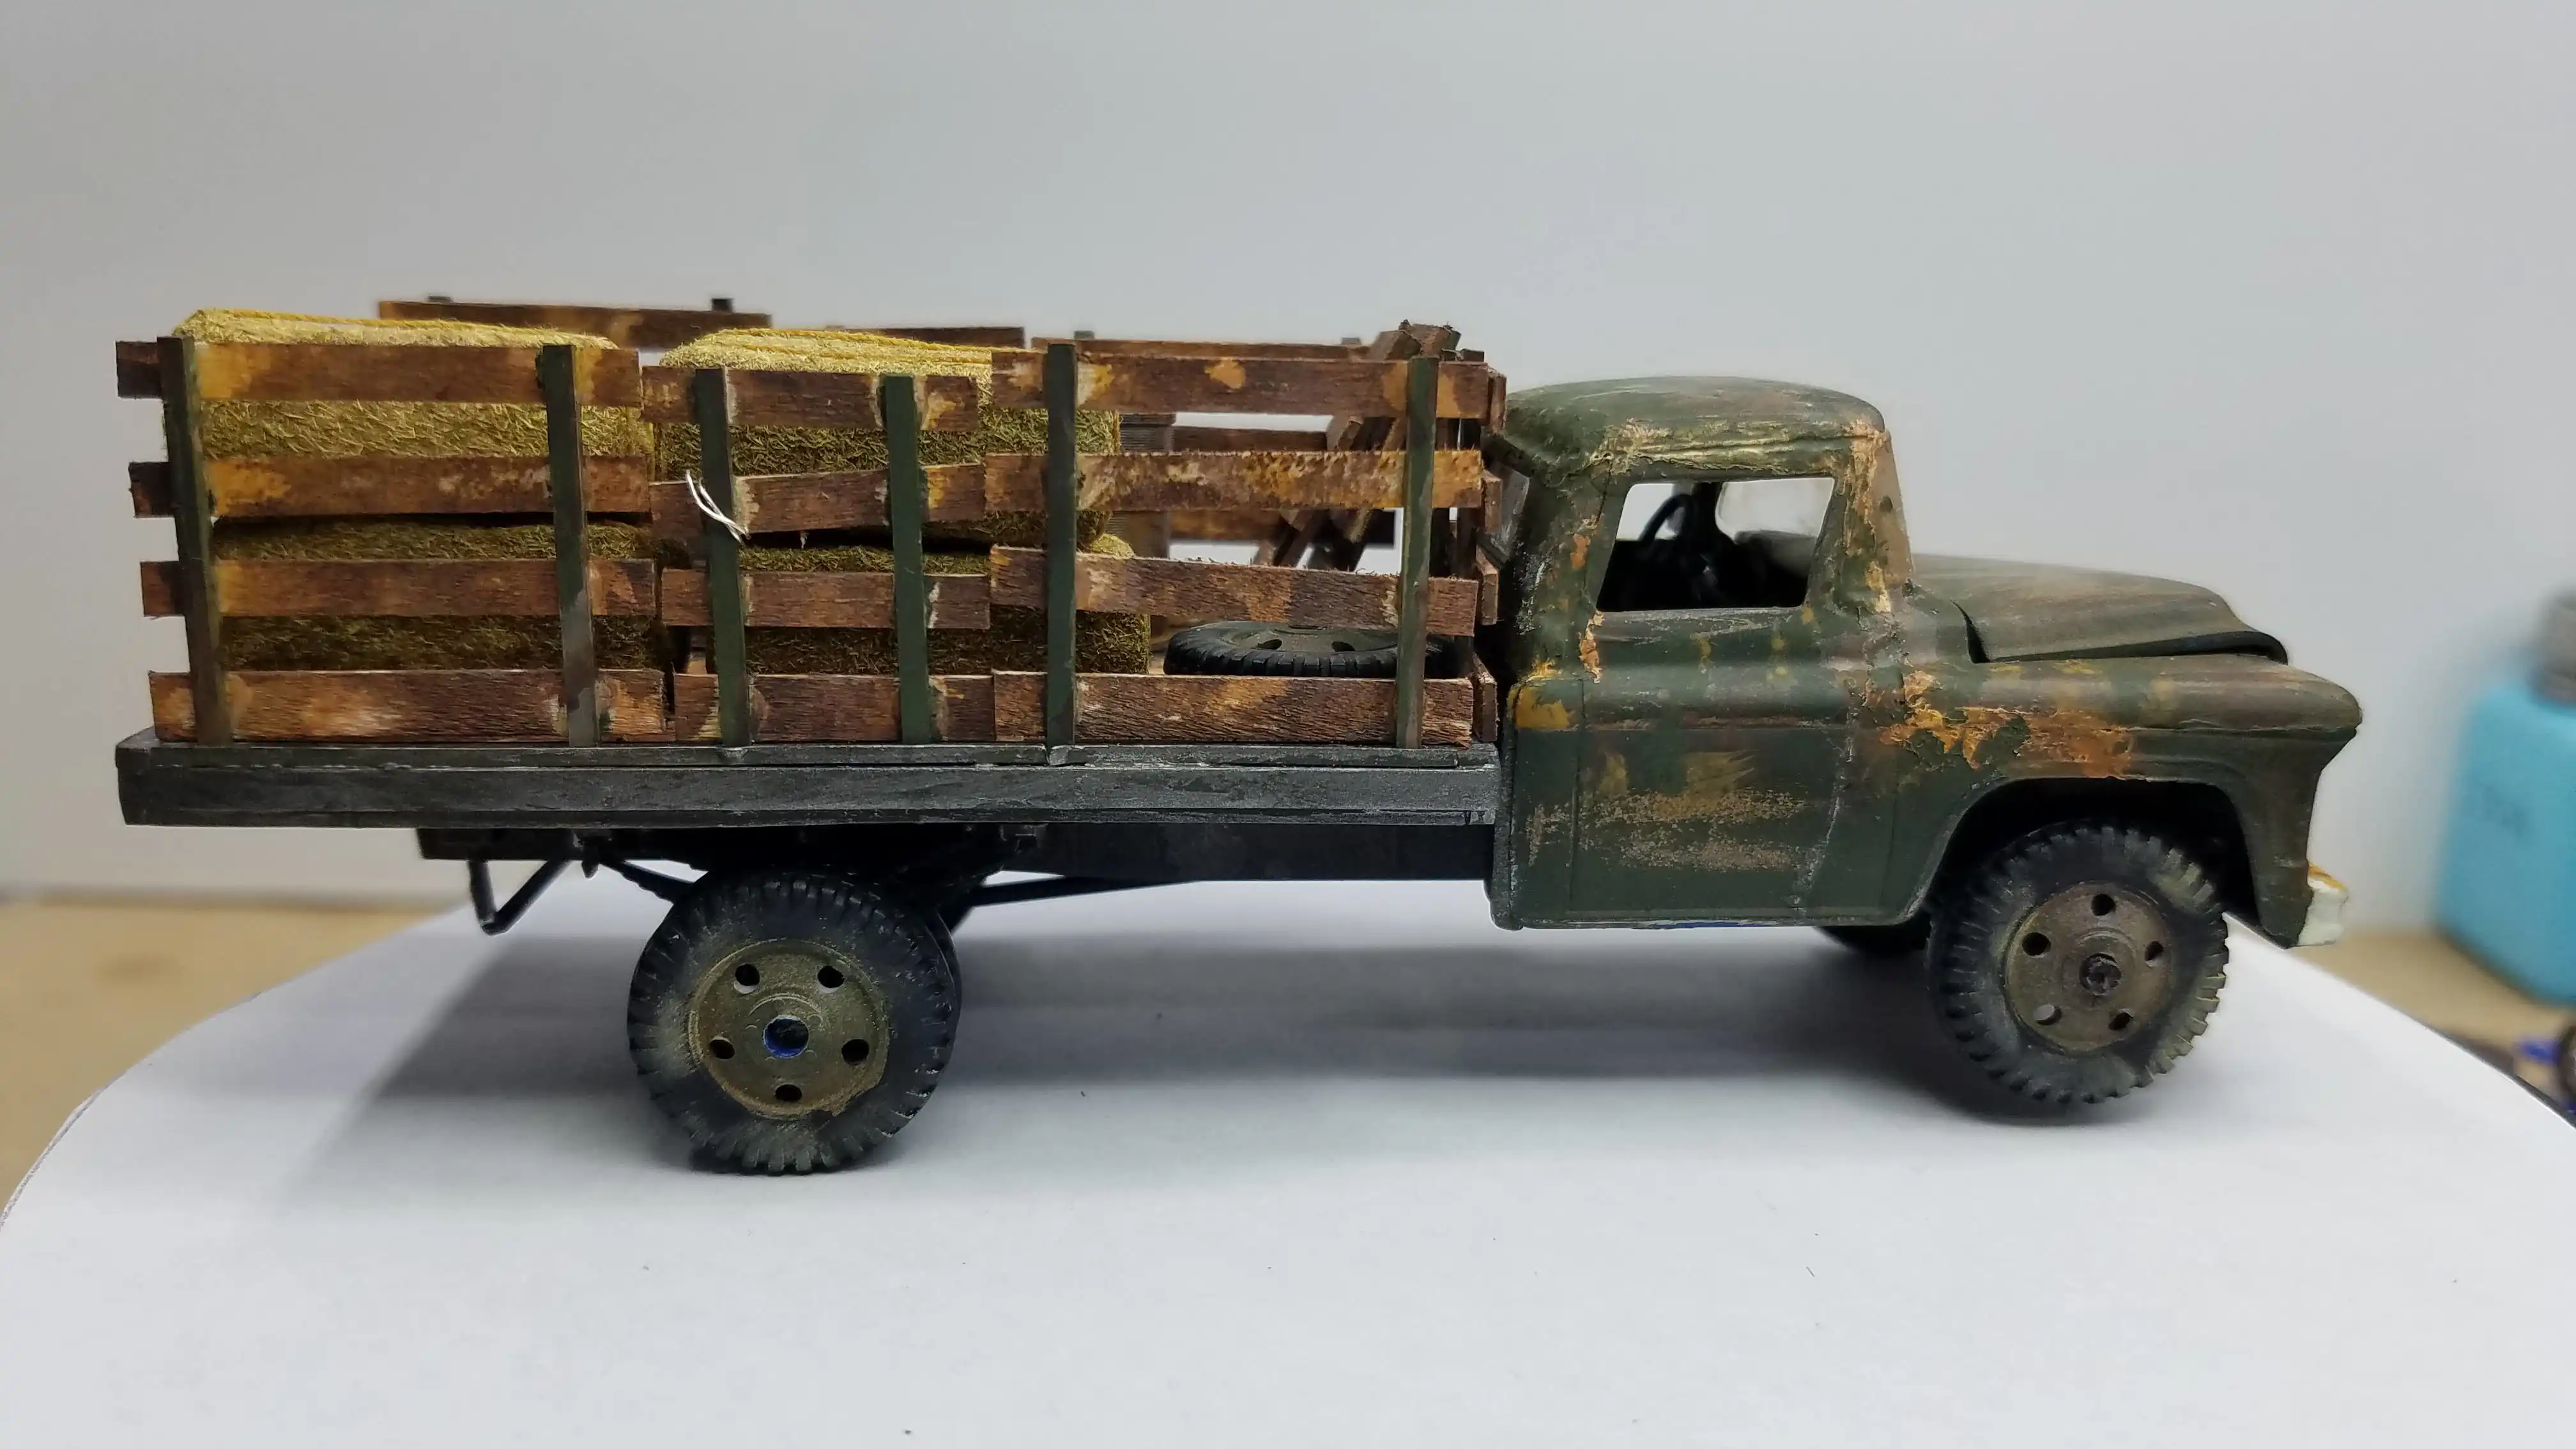
 Finished truck driver side
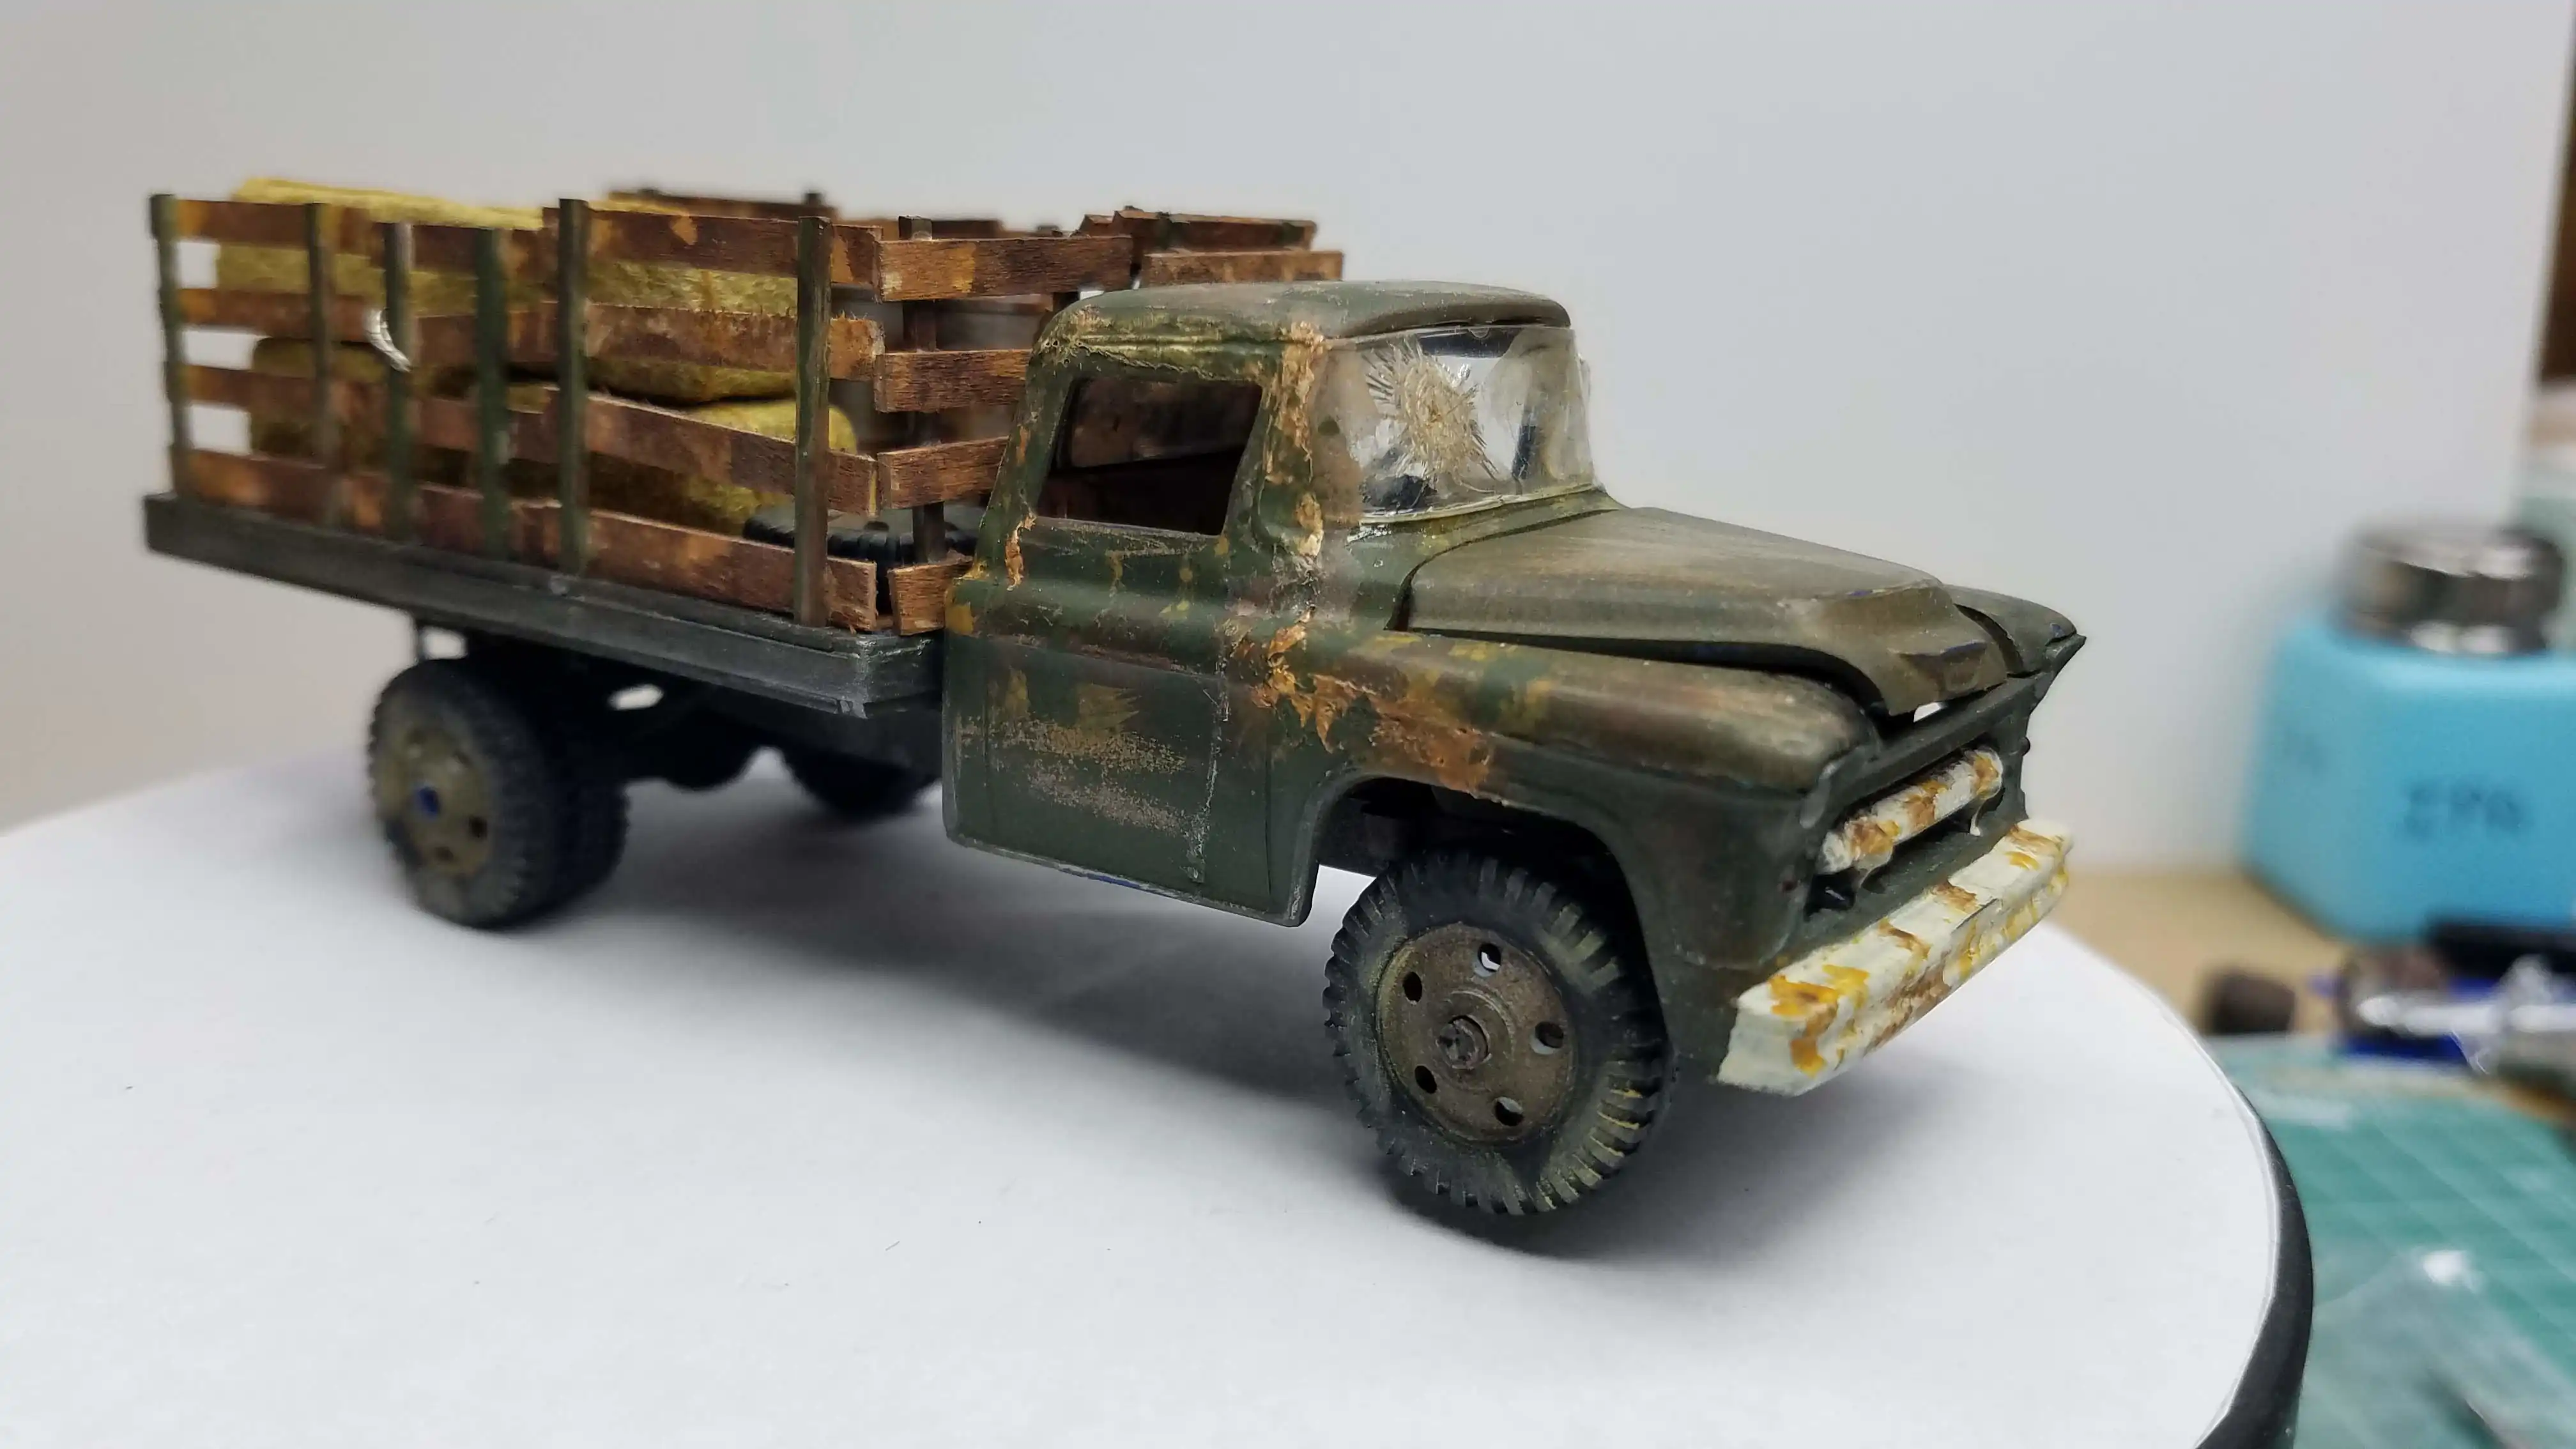
 Finished truck from front left corner
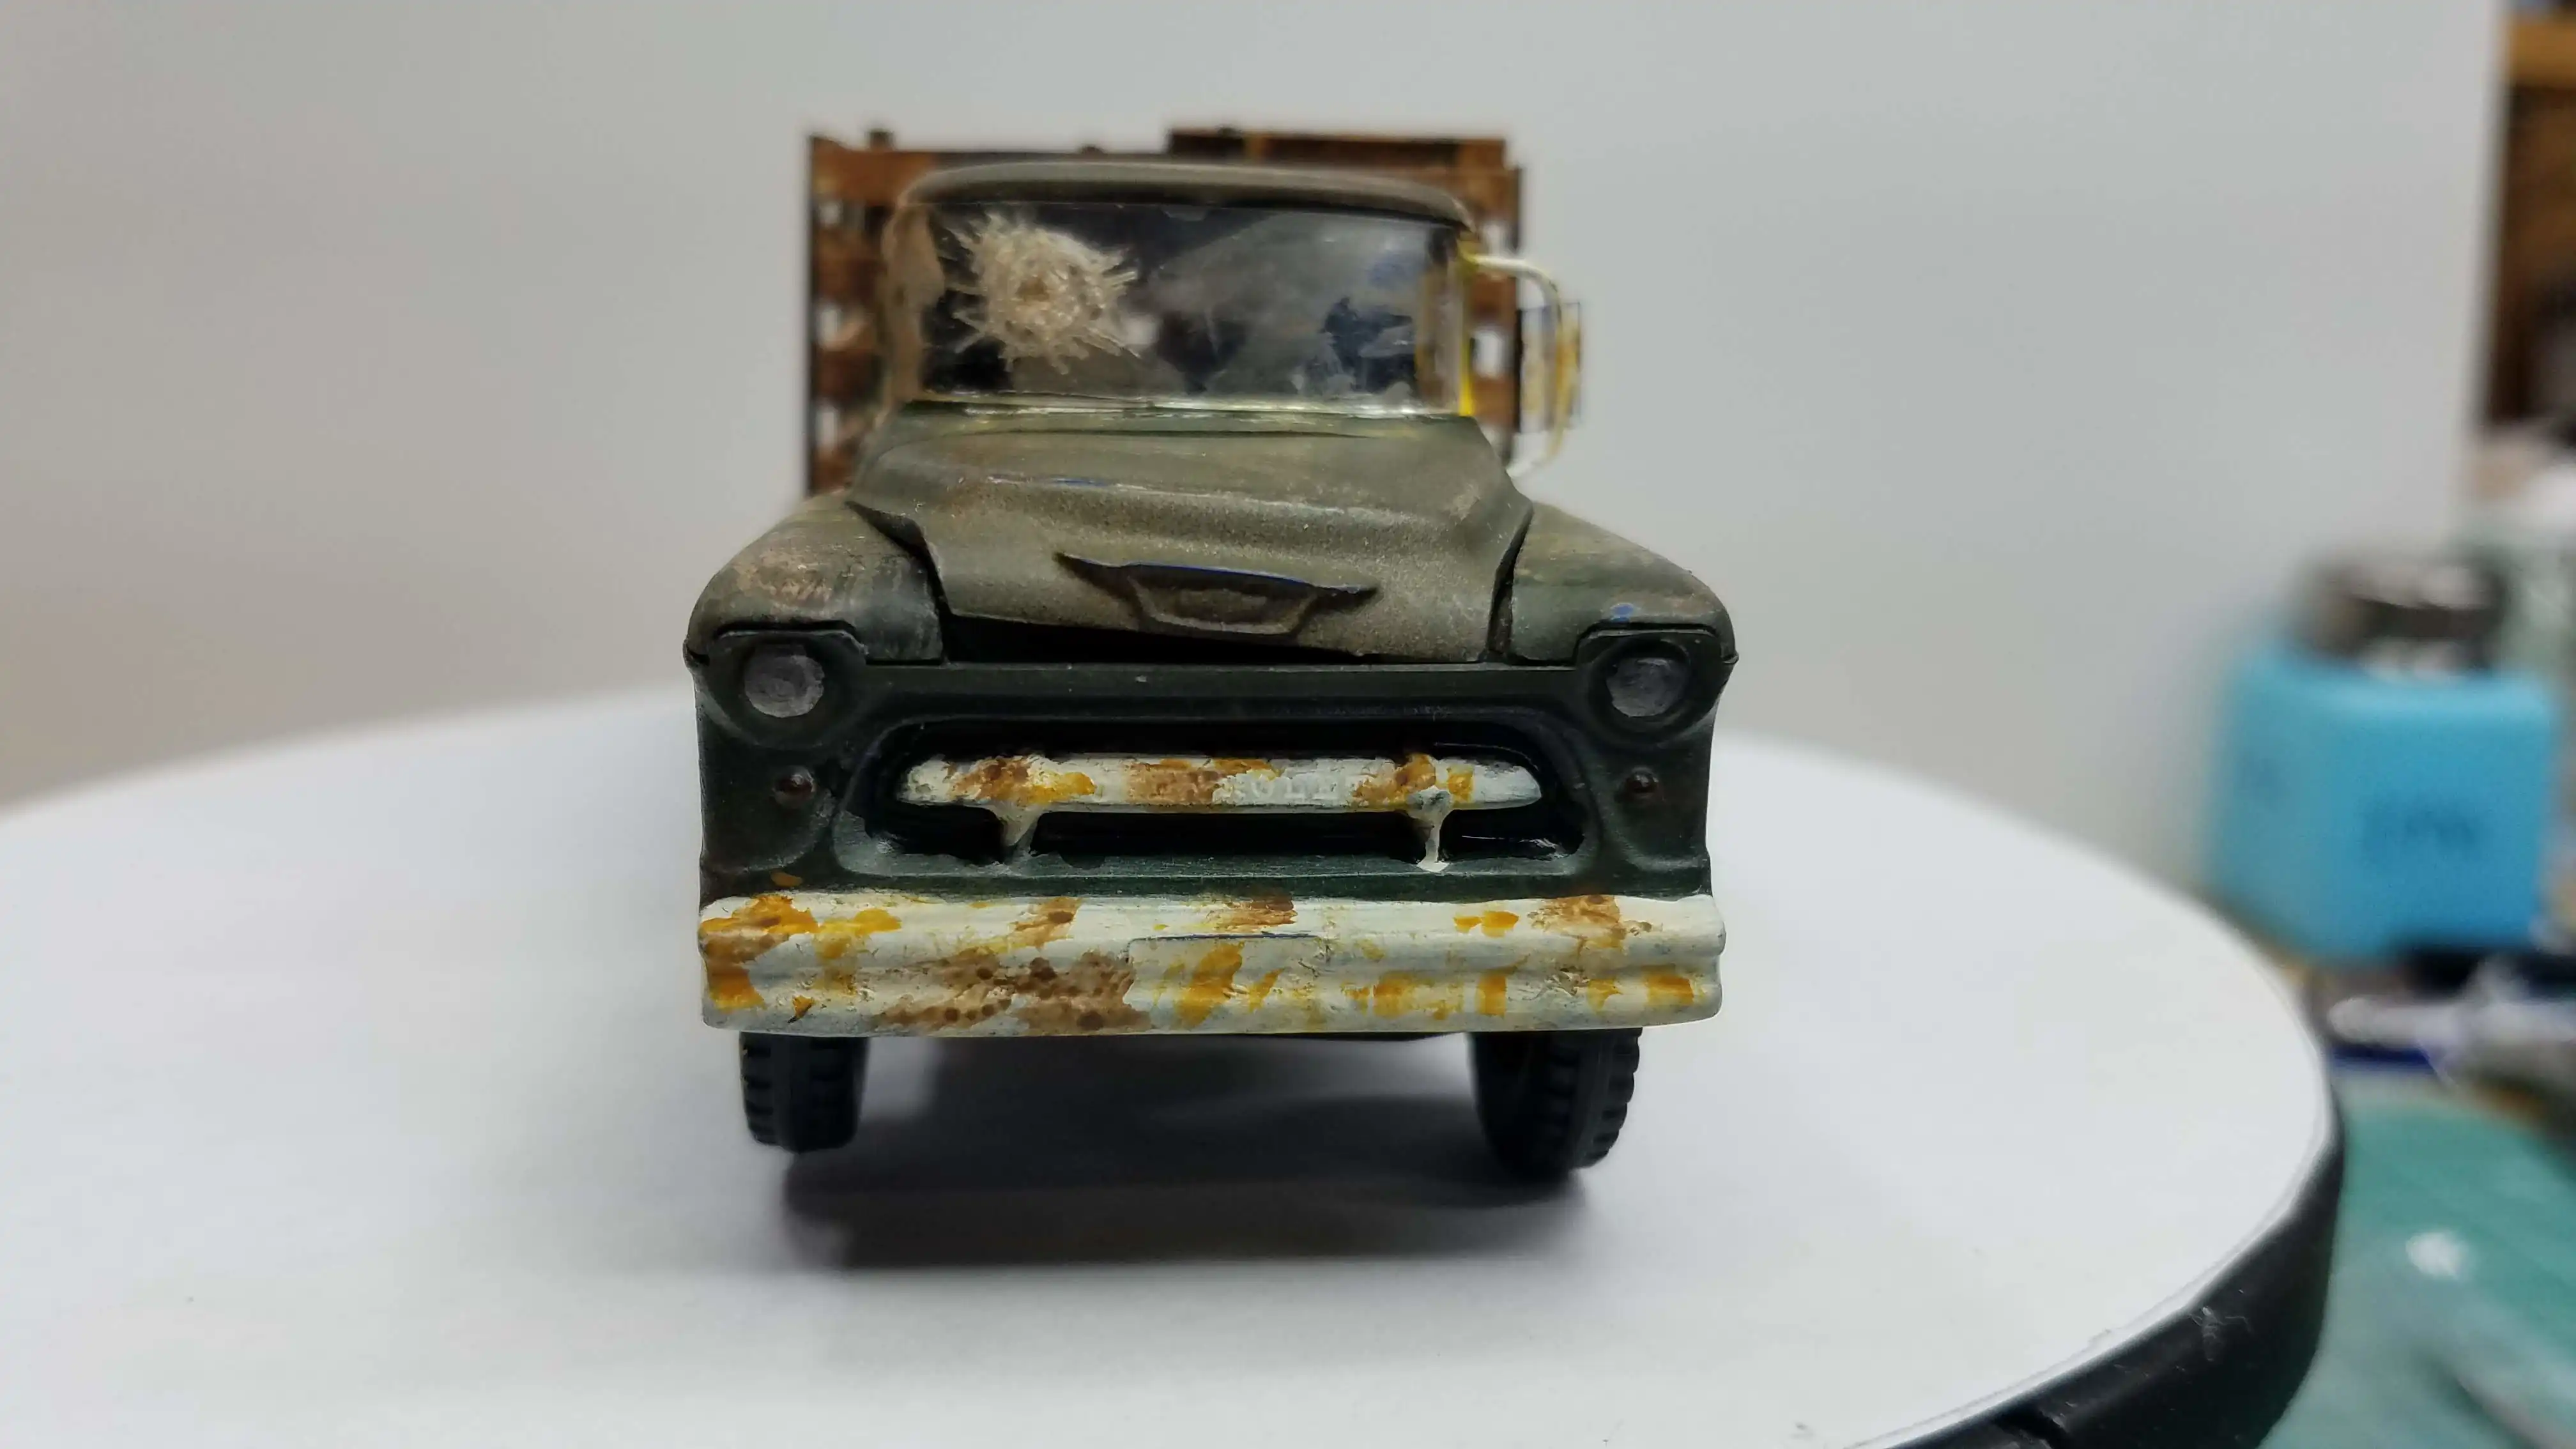
 Finished truck from front
 Finished truck from front right corner
 Finished truck from right side
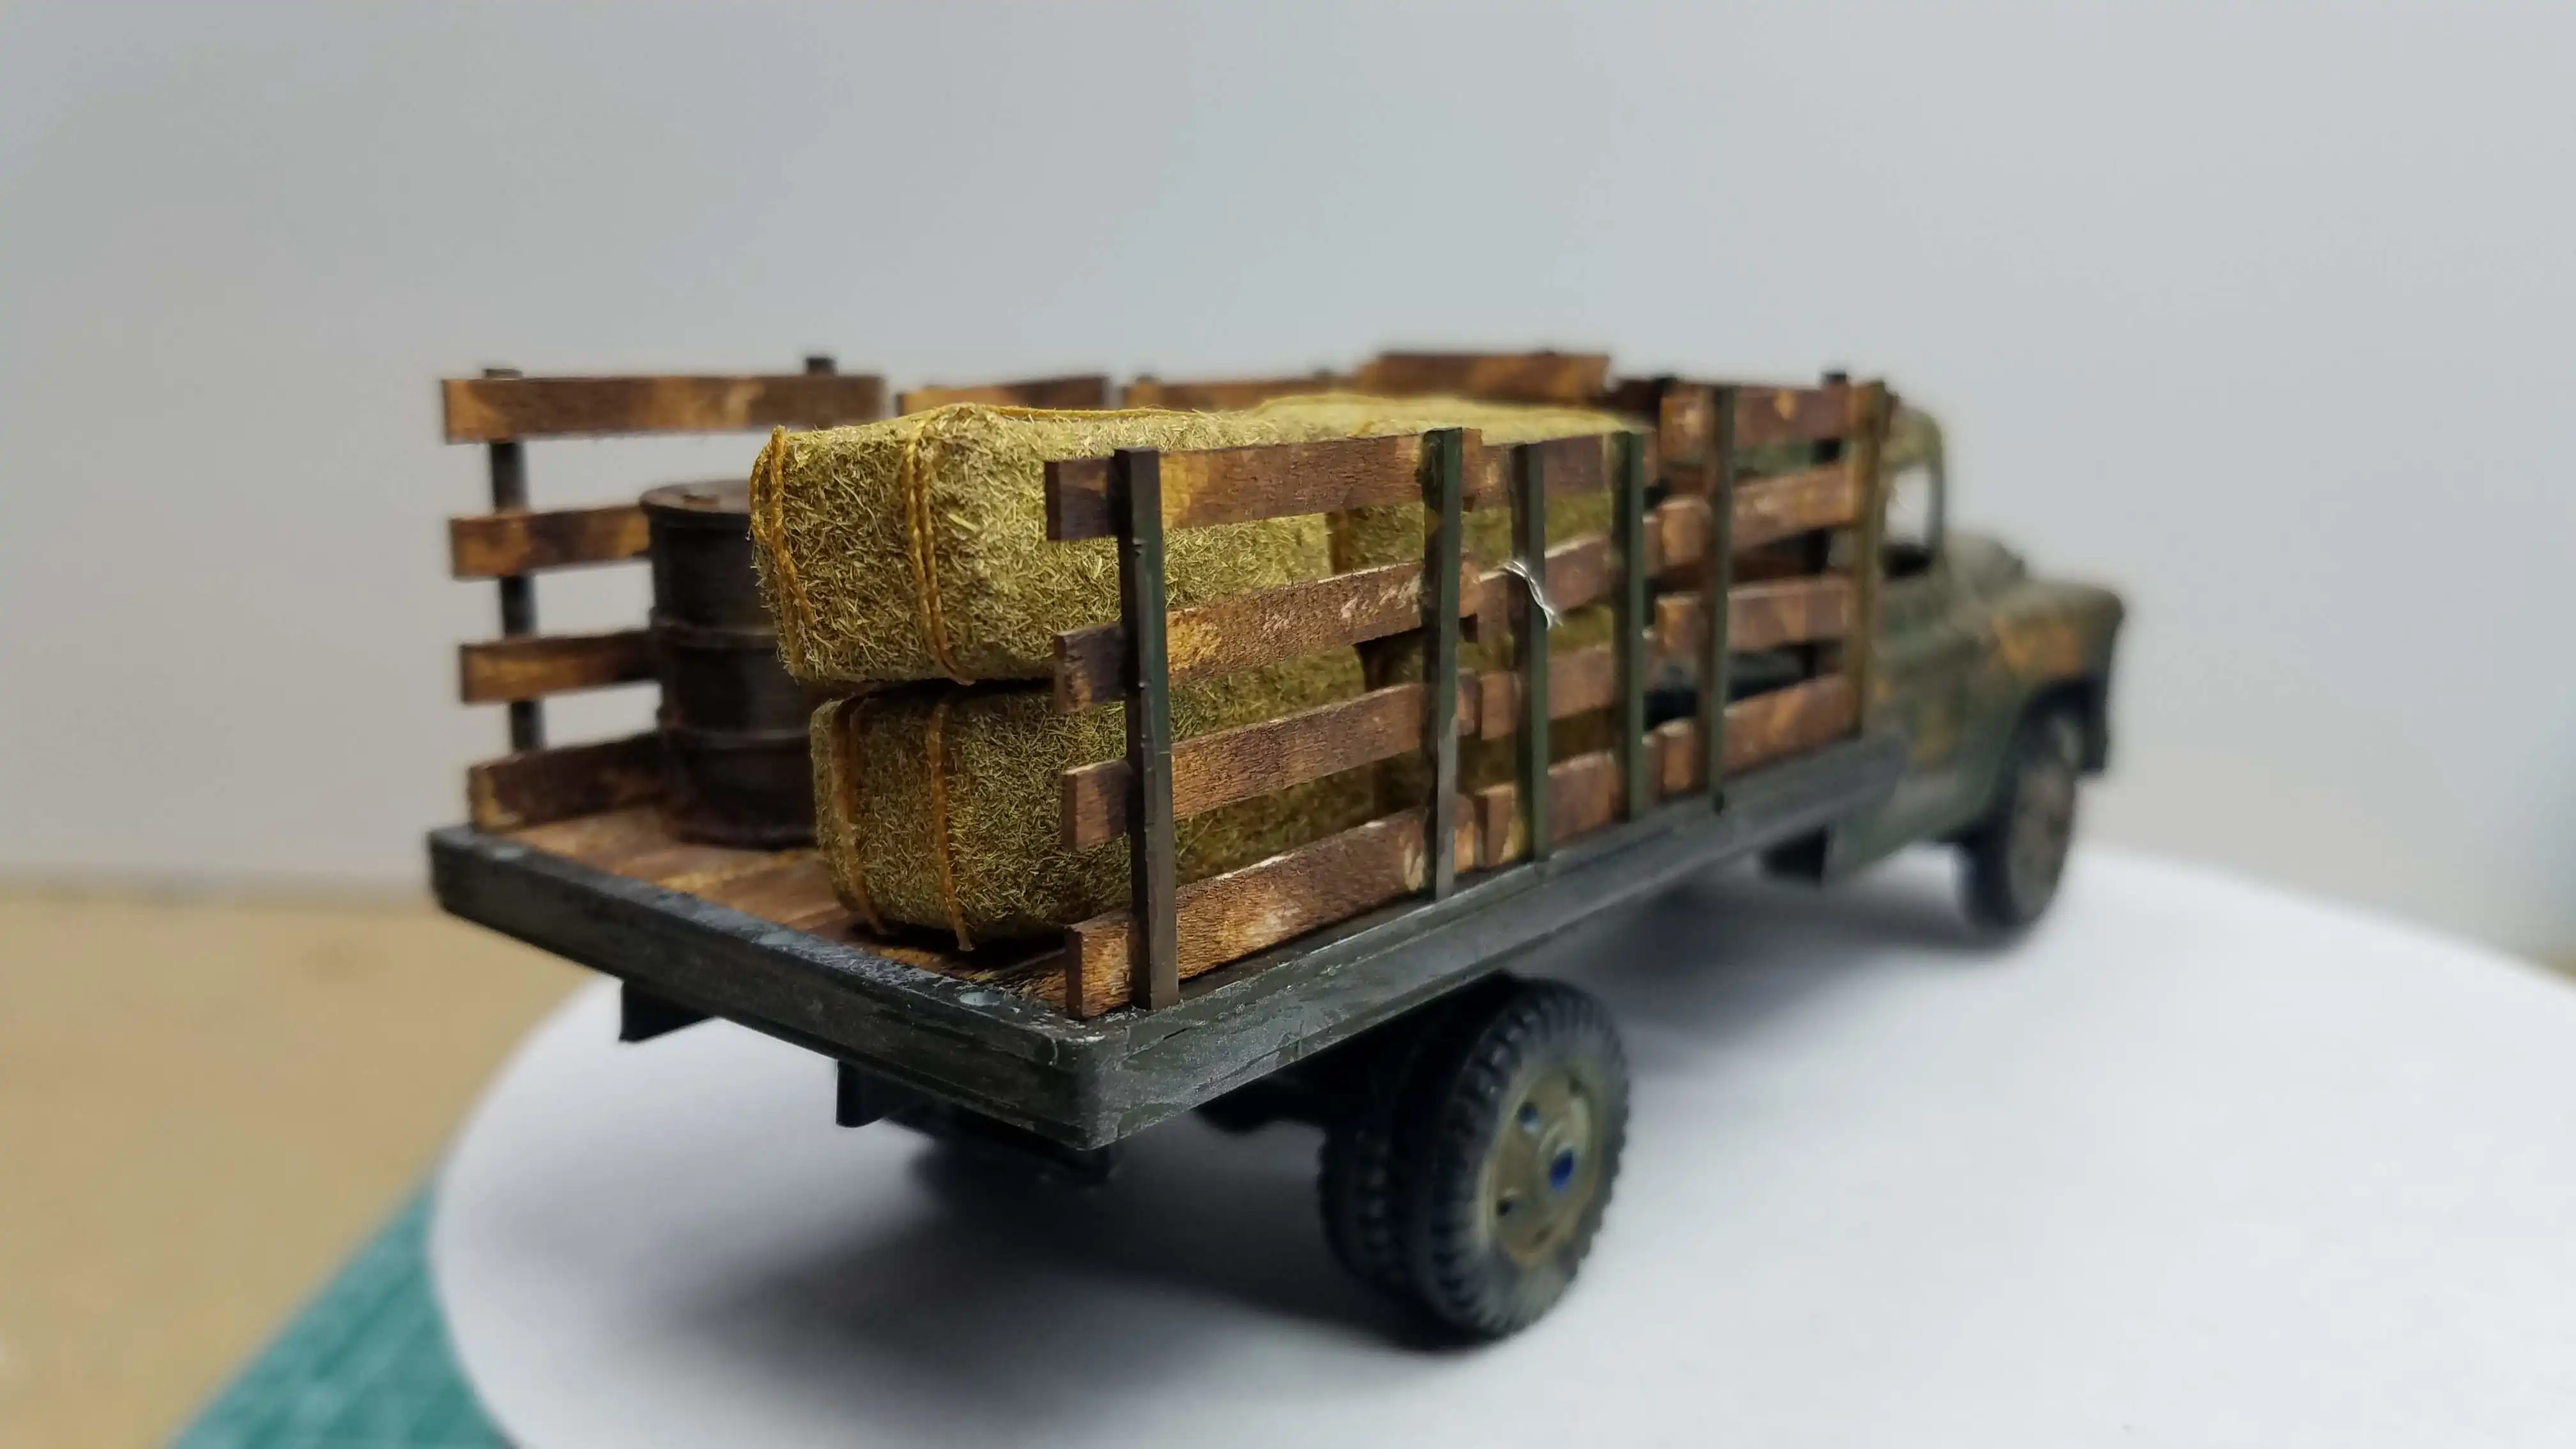
 Finished truck back view
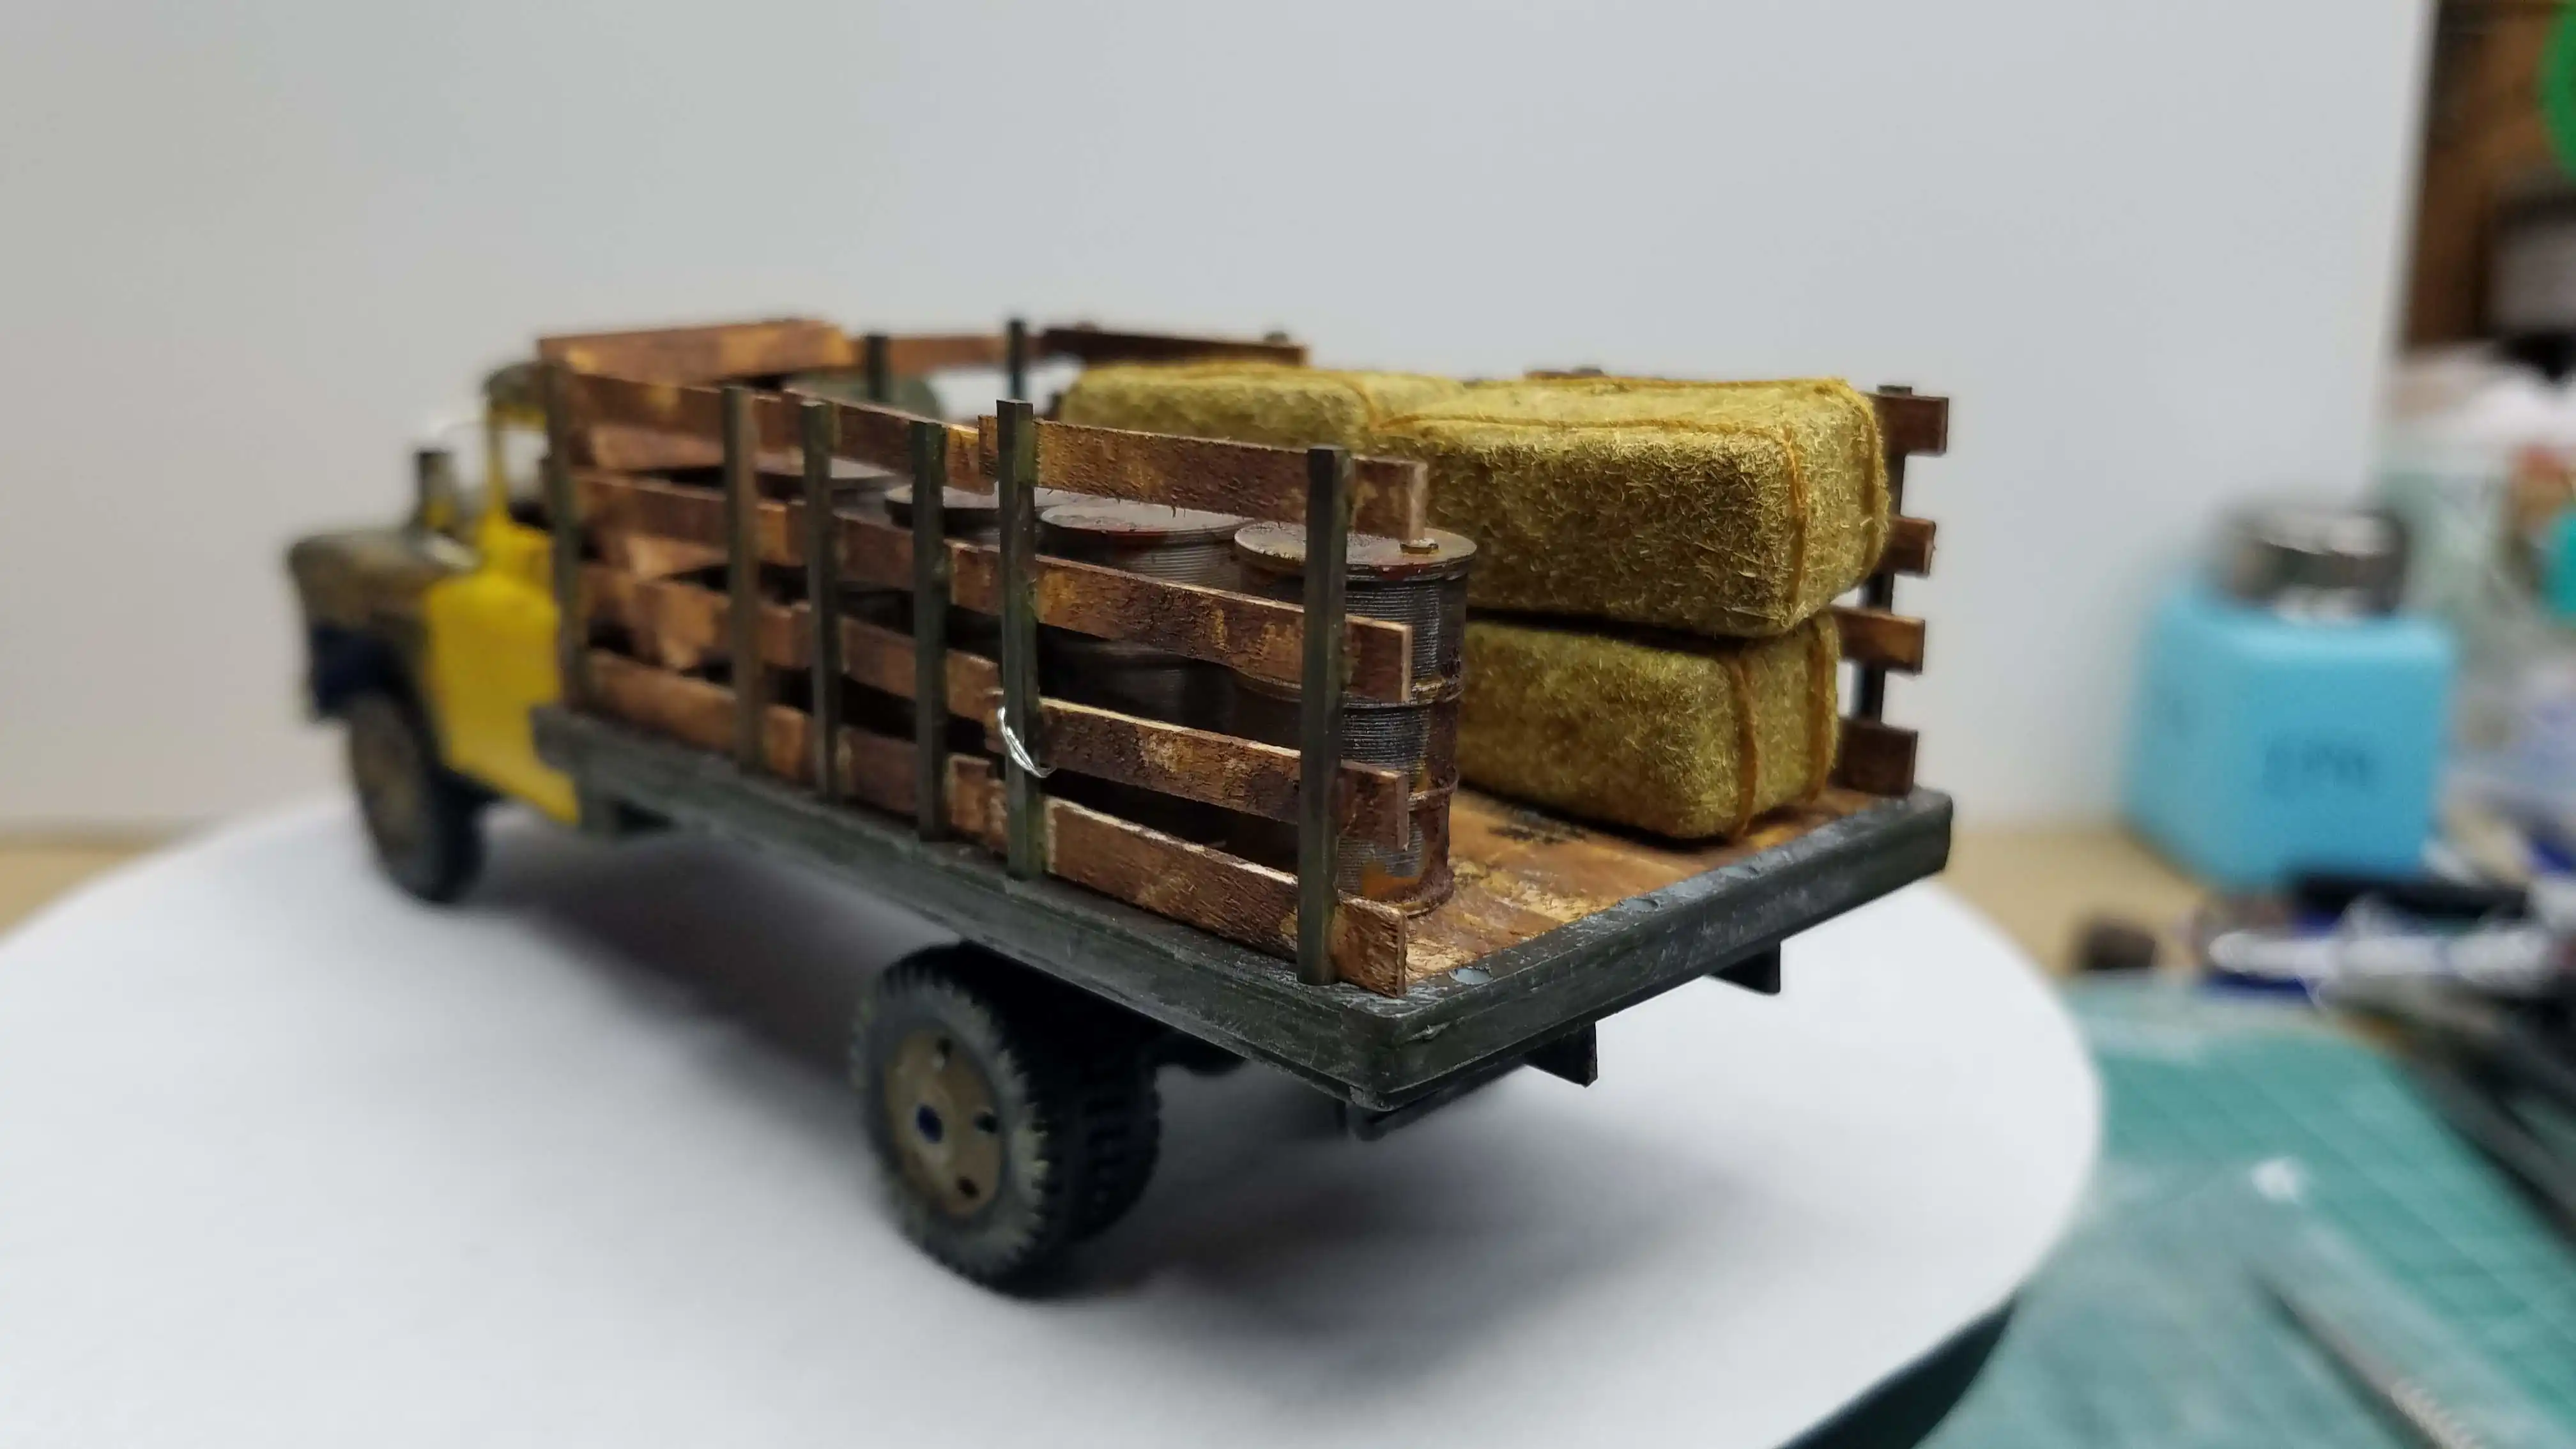
 Finished truck from back right corner
 Finished truck from back left corner
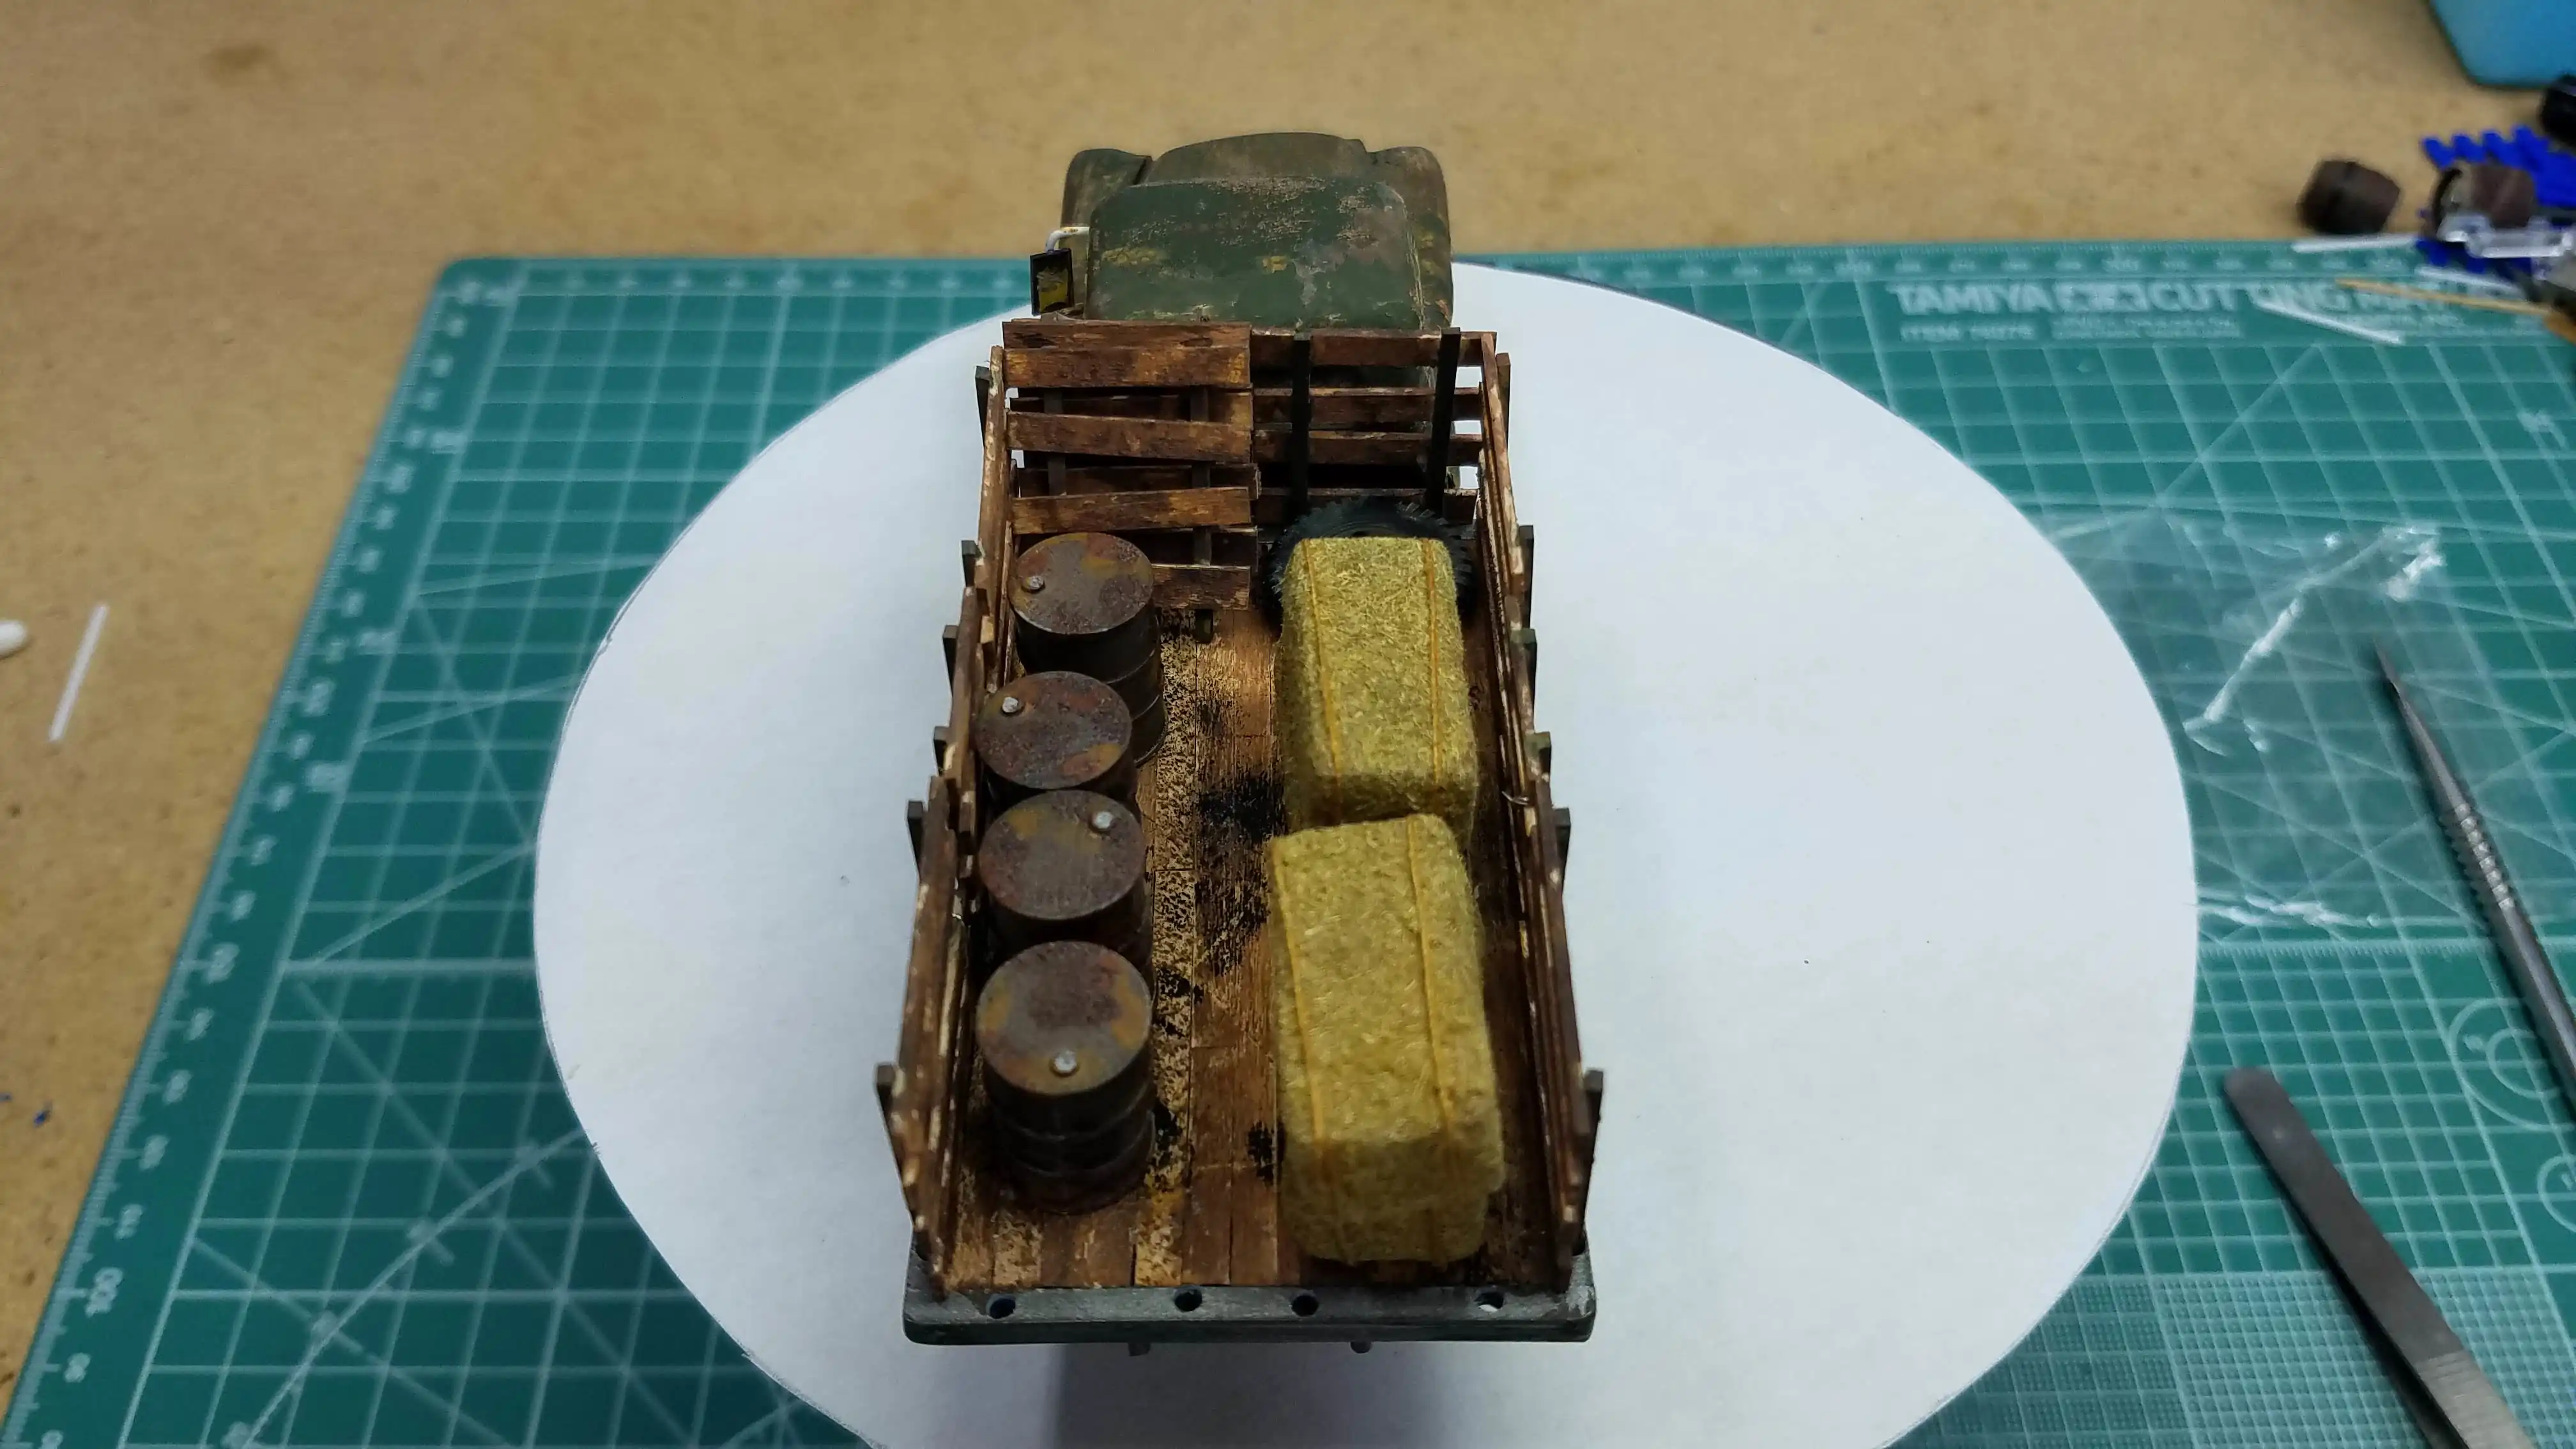
 Finished truck to show cargo on the bed
 Finished truck on the farm
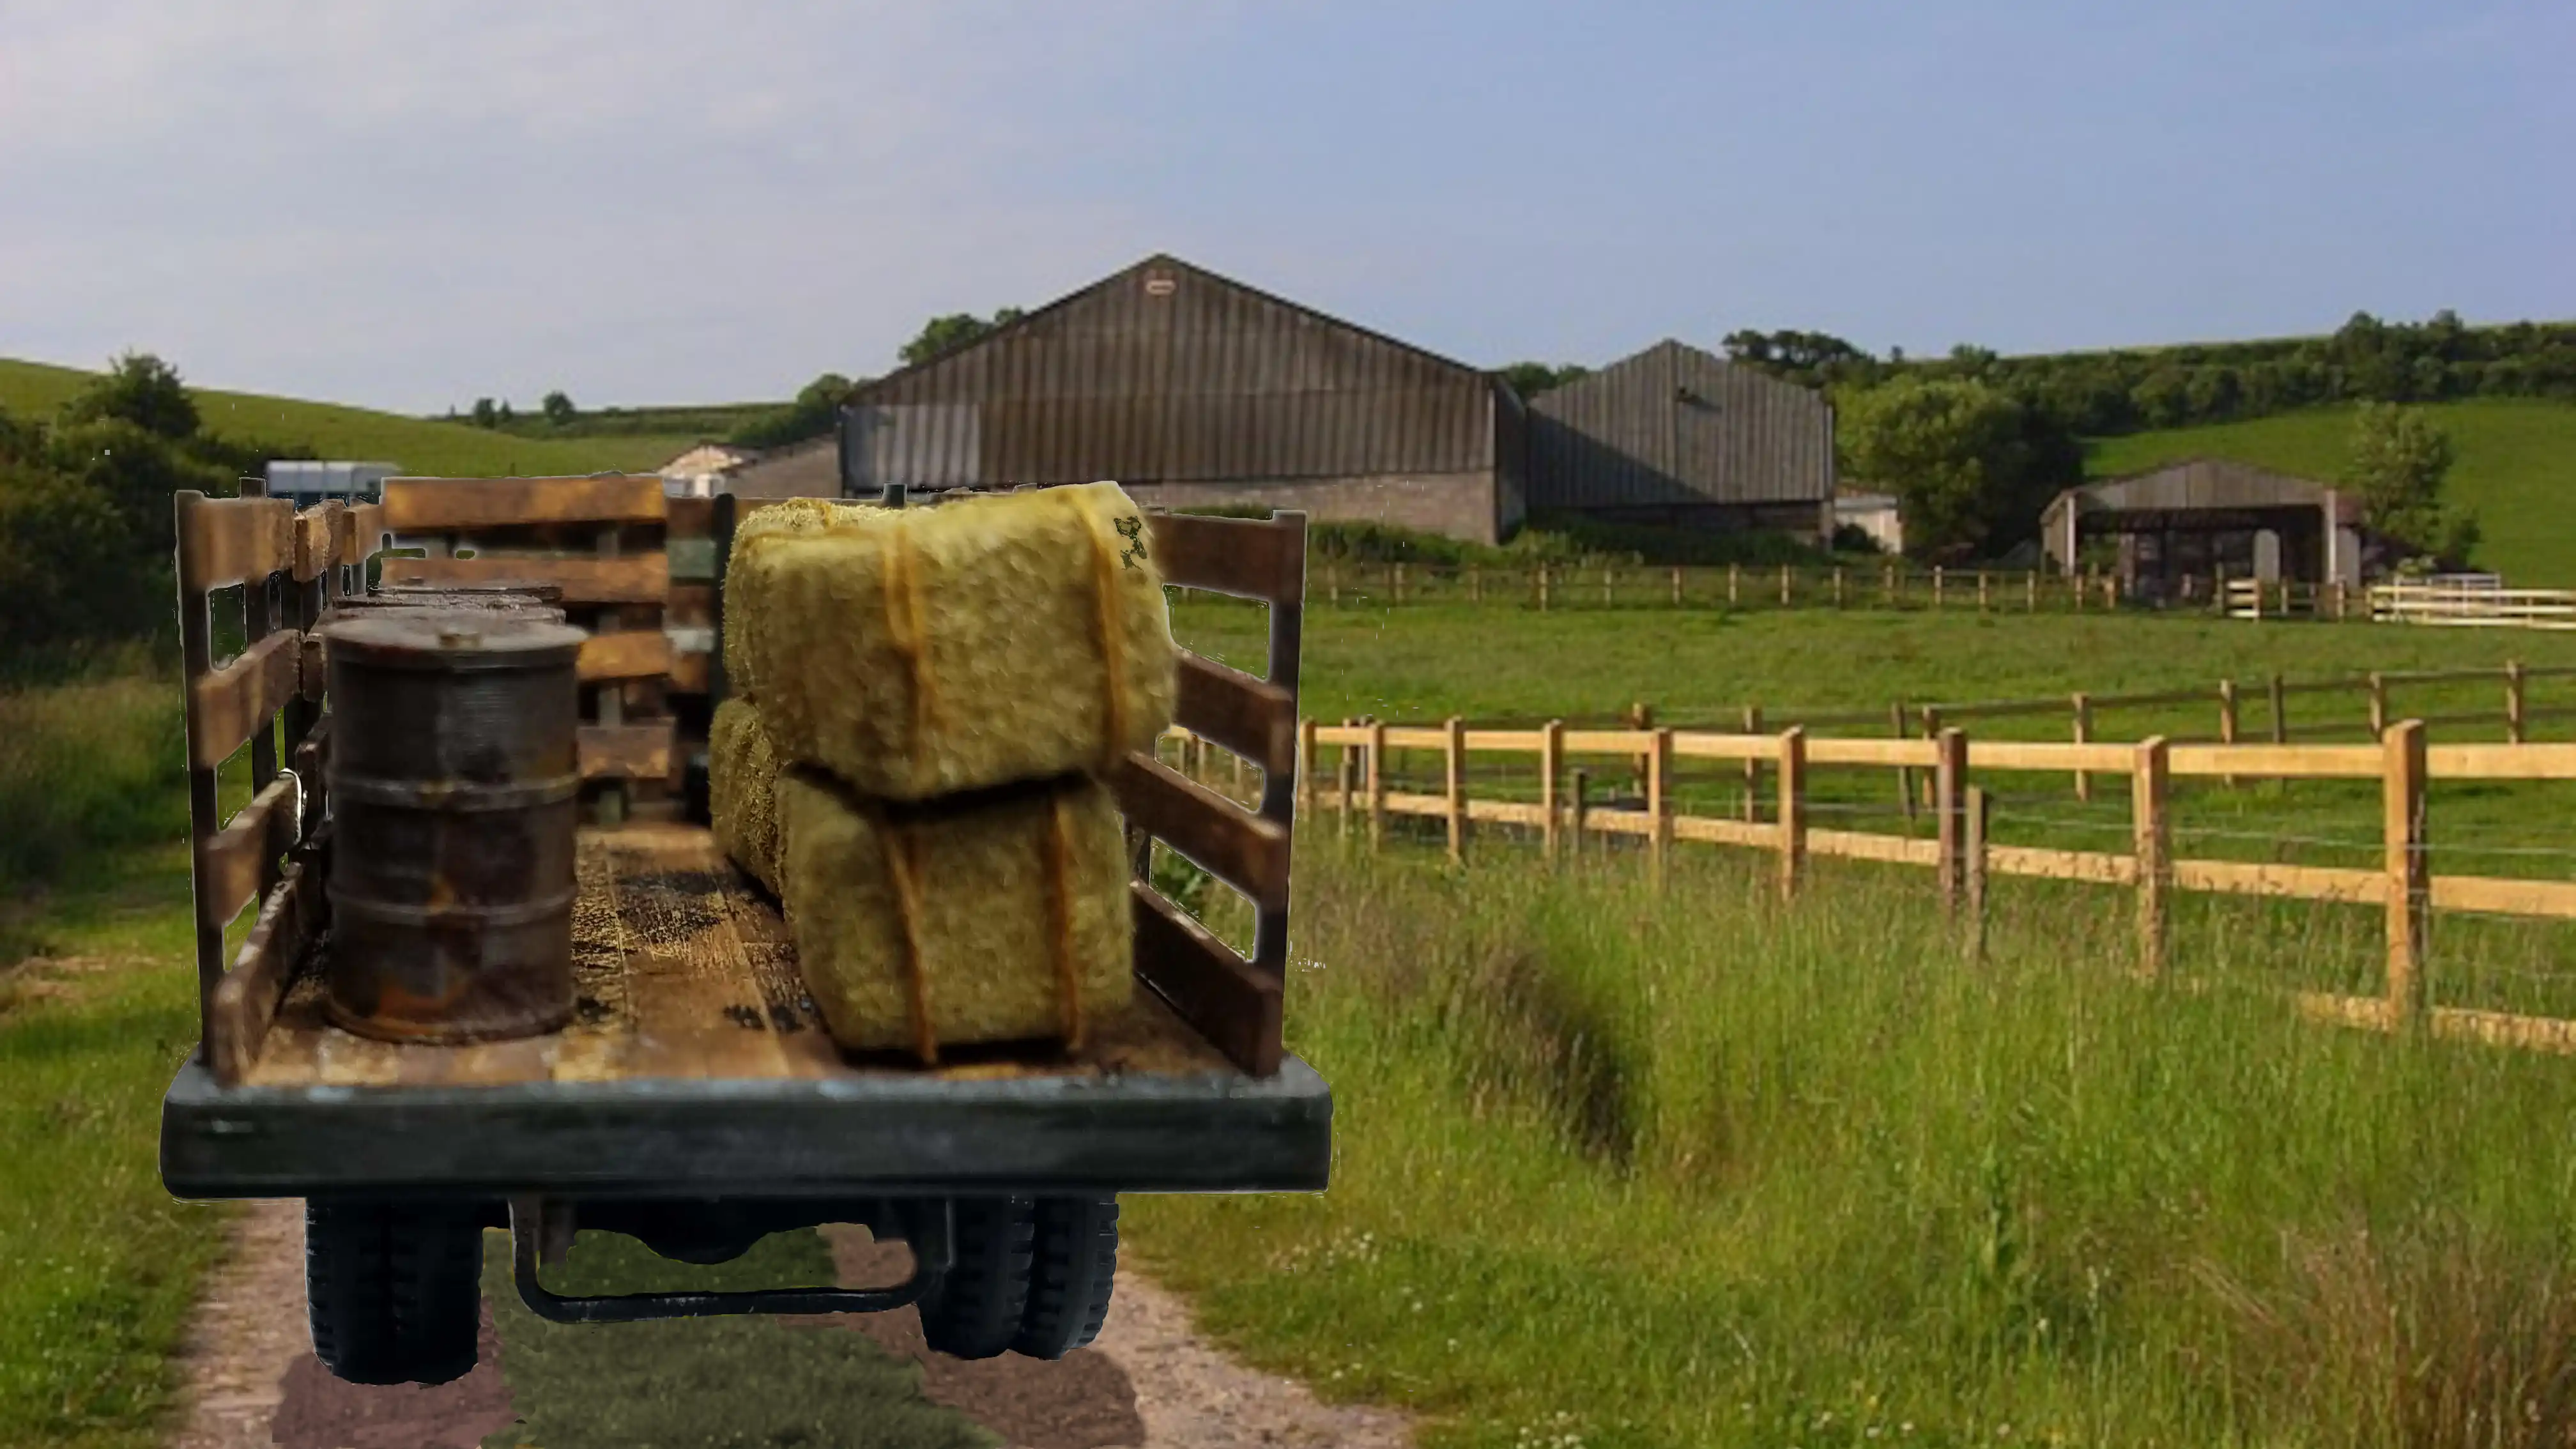 Finished truck returning to the barn

