This page contains a photo journal of my build for the 1969 Camaro
X/28 RS edition or the SS 396 or a combination of the two.
The Revell '69 Camaro is the kit being built
for the Unified Scale Auto Content Creator (USACC) build that
runs from: September 15, 2025 to March 15, 2026.
As of this posting (September 2025) I have not decided how I'm
going to build this kit. I'm not a GM-Chevy guy, but after
doing some preliminary research, I realized there are several
different flavors of the '69 Camaro and I like some things
on each different package.
After the announcement of what we were going build, I stopped at
Hobby Lobby and picked up the "motor City Muscle Z/28 RS" version
(shown in the box art image above). Then I watched the intro video
from Kim Kustom Garage and learned of the SS 396 version. I really
liked that version and found one on Ebay at a reasonable price (box
art shown above). Than...after doing some research on Camaro's,
there are things I like about both versions; therefore, I'm
not sure if I'll do the Z/28 RS or the SS 396 or a combination
of both. Or...I might just build both of them. Like I don't
have enough projects in progress.
So...as of this writing I'm leaning toward showroom quality on
either or both. Stay tuned for my final decision.
UPDATE - JANUARY 05, 2026
As of January 05, 2026 I decided to build the '69 Camaro, out-of-box.
Yes, you read that correctly, out-of-box. The reason is that I have
so many projects on the bench that I really don't have the time to make
any modifications or additions. Okay...I will most likely add spark plug
wires and I might use a 3rd party pulley and belt system, and I do have
the photo etch kit of this car, so I may use some of that, but other
than that. It will be out-of-box and factory show room.
The '69 Camaro came in a variety of colors. I really like the LeMann's
Blue. It's a slightly different shade than shown on the box art. When
the car was ordered with LeMann's Blue the only interior option was
black, and that Okay. As of this writing Tamiya X-15 Metallic Blue looks
like it is a fairly good match to the Camaro LeMann's Blue, so that's
what I'm planning to use.
In each of the photo boxes in the journal is a button labeled 'Display Photo Text'.
Click the 'Display Photo Text' button to display the descriptive text
for the photo. There can also be other links within the text.
At the end of the text is a button to 'Close Text'.
Clicking on; tapping on; any photo will open an enlarged version of that
photo in a new tab or window depending upon how your browser is configured.
Because I'm building out-of-box, I'm planning to
use these tires. It will be a first for me for a
long time because there are so many great 3D
printed tires and wheels.
I bought the photo etch for this kit before I
decided how I was going to build the kit. Even
though I'm building out-of-box, I might use some
of this photo etch. The photo etch kit also contains
dash board gauges.
Before I decided to build this kit out-of-box, I
bought the Single Drive Drive Set from
Model Car Garage (MCG-201).
I will most likely still use this kit because I
really like how they look on the engine.
I bought the 1969 gauge decals on Ebay before I knew a set
came with the photo etch kit. I'll be using the gauges
from one of the sets. I also bought, from Ebay, some PA License
Plates. I live in PA and I always put PA license
plates on my vehicle builds. The plates on this
decal sheet are one of the newer designs for the state
plate, so I will probably still make my own so that
it is from 1969.
99% of of all parts are ready for paint. I would normally
say they are ready for primer; however, I've watched a
few video's that show better results using Tamiya acrylic
on bare plastic. So...as I usually try something that I've
never tried before on the USACC build, I decided not to use
primer and to put the paint directly on the plastic. I'll
start by spraying a very light tac layer and then after it
has dried I'll add at least two final coats. The video's
I watched had samples that were clear coated and samples that
were not, and both had great durability after a week of dry
time. I will most likely use a clear coat on the body parts,
but not the other parts.
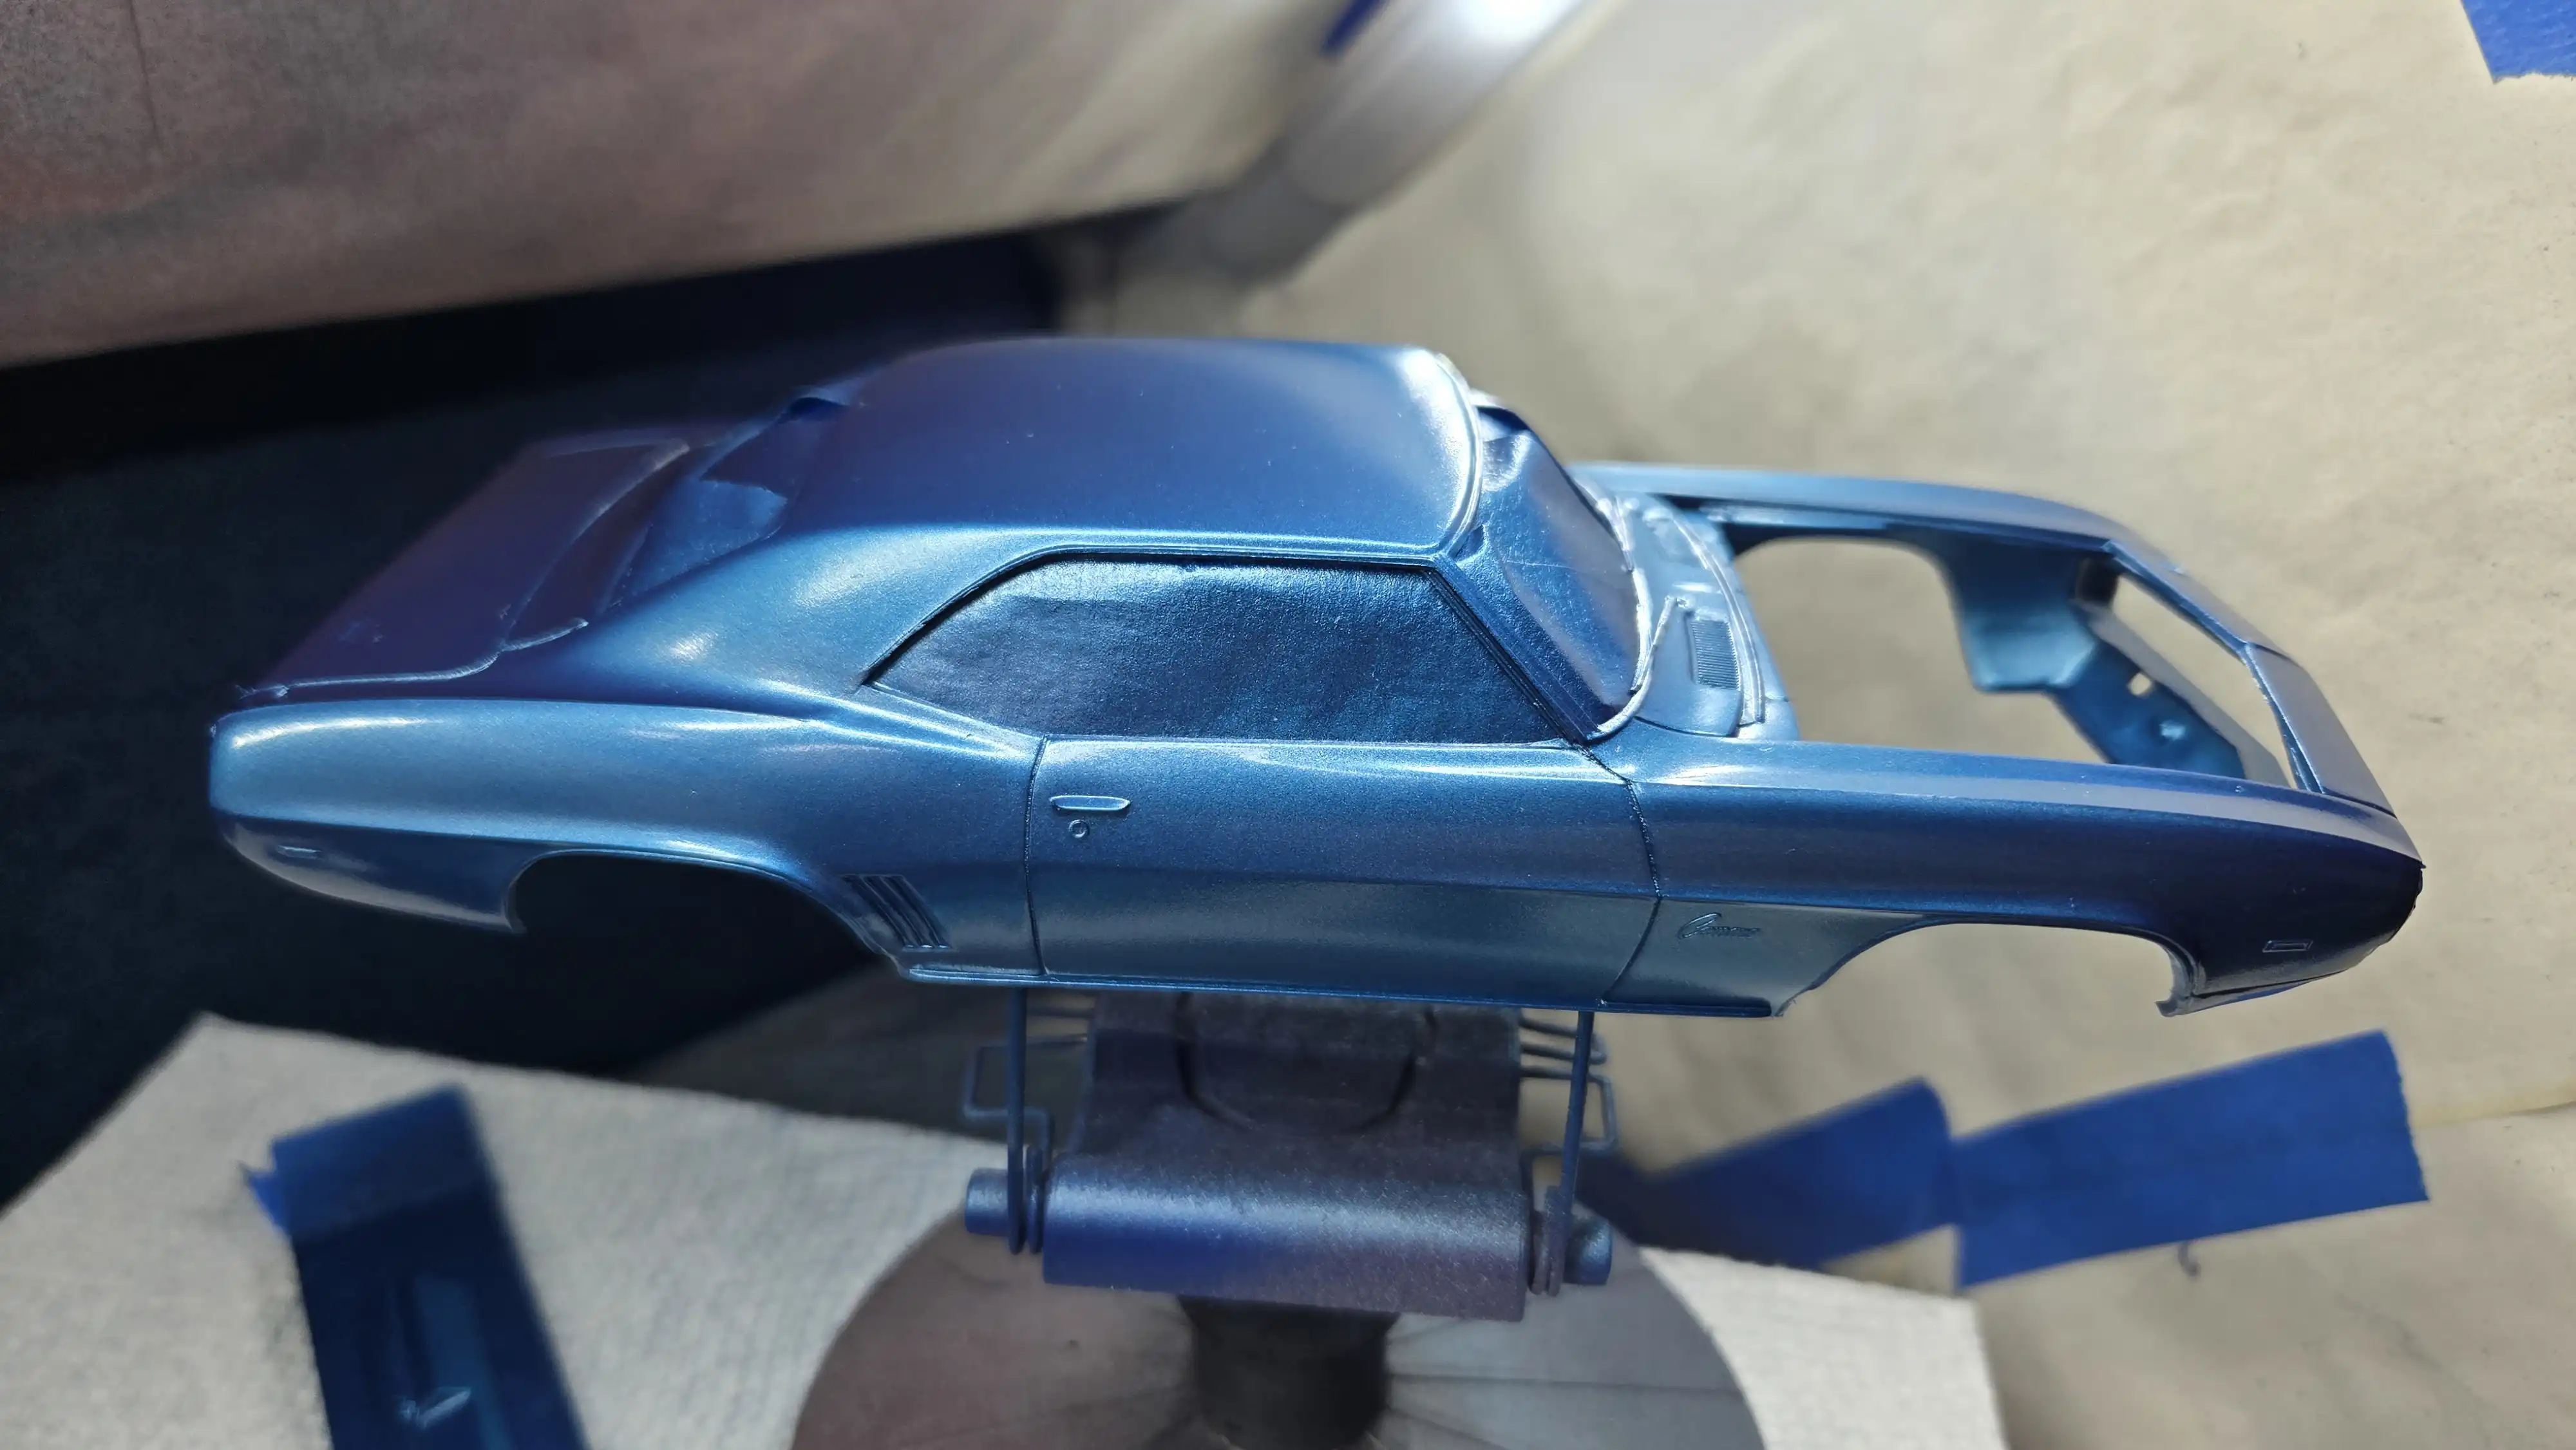
Body parts are in the spray booth being painted. The body and
body parts are painted with Tamiya X-13 Metallic Blue. I did
something different with this build based on the
Barbatos Rex YouTube channel.
He sprayed Tamiya paint from the airbrush
directly on the plastic with no primer and tested the color
accuracy and most importantly, the durability. The color was
much sharper and cleaner and after several days of drying the
durability was excellent. So...all the parts were painted
without priming them and so far I'm very pleased.
The description of the next photo will include more information.
As a side note, Vallejo Metal Color series recommends spraying
on bare plastic without primer and the colors look much better
when not primed.
Although the title of this picture is, "2nd coat", it's really more
than that. According to the Barbatos Rex channel, when not using a
primer, first thin the Tamiya Acrylic paint with Tamiya Acrylic
thinner in a ratio of 60:40 to 50:50, paint:thinner. If a new jar
of Tamiya Acrylic is used, open the jar and top off the jar with
Tamiya Acrylic thinner and thoroughly mix. Mark the jar, 'Airbrush
Ready'. Next, lay down a very light "tact" coat and give a few
minutes to dry to touch. Blowing air on it from the airbrush could
speed up this drying. Then lay down another light coat and let it
dry for a few minutes, then lay down another light coat being sure
the surface is fully covered. Let it dry for a few minutes and then
lay down a heavier coat.
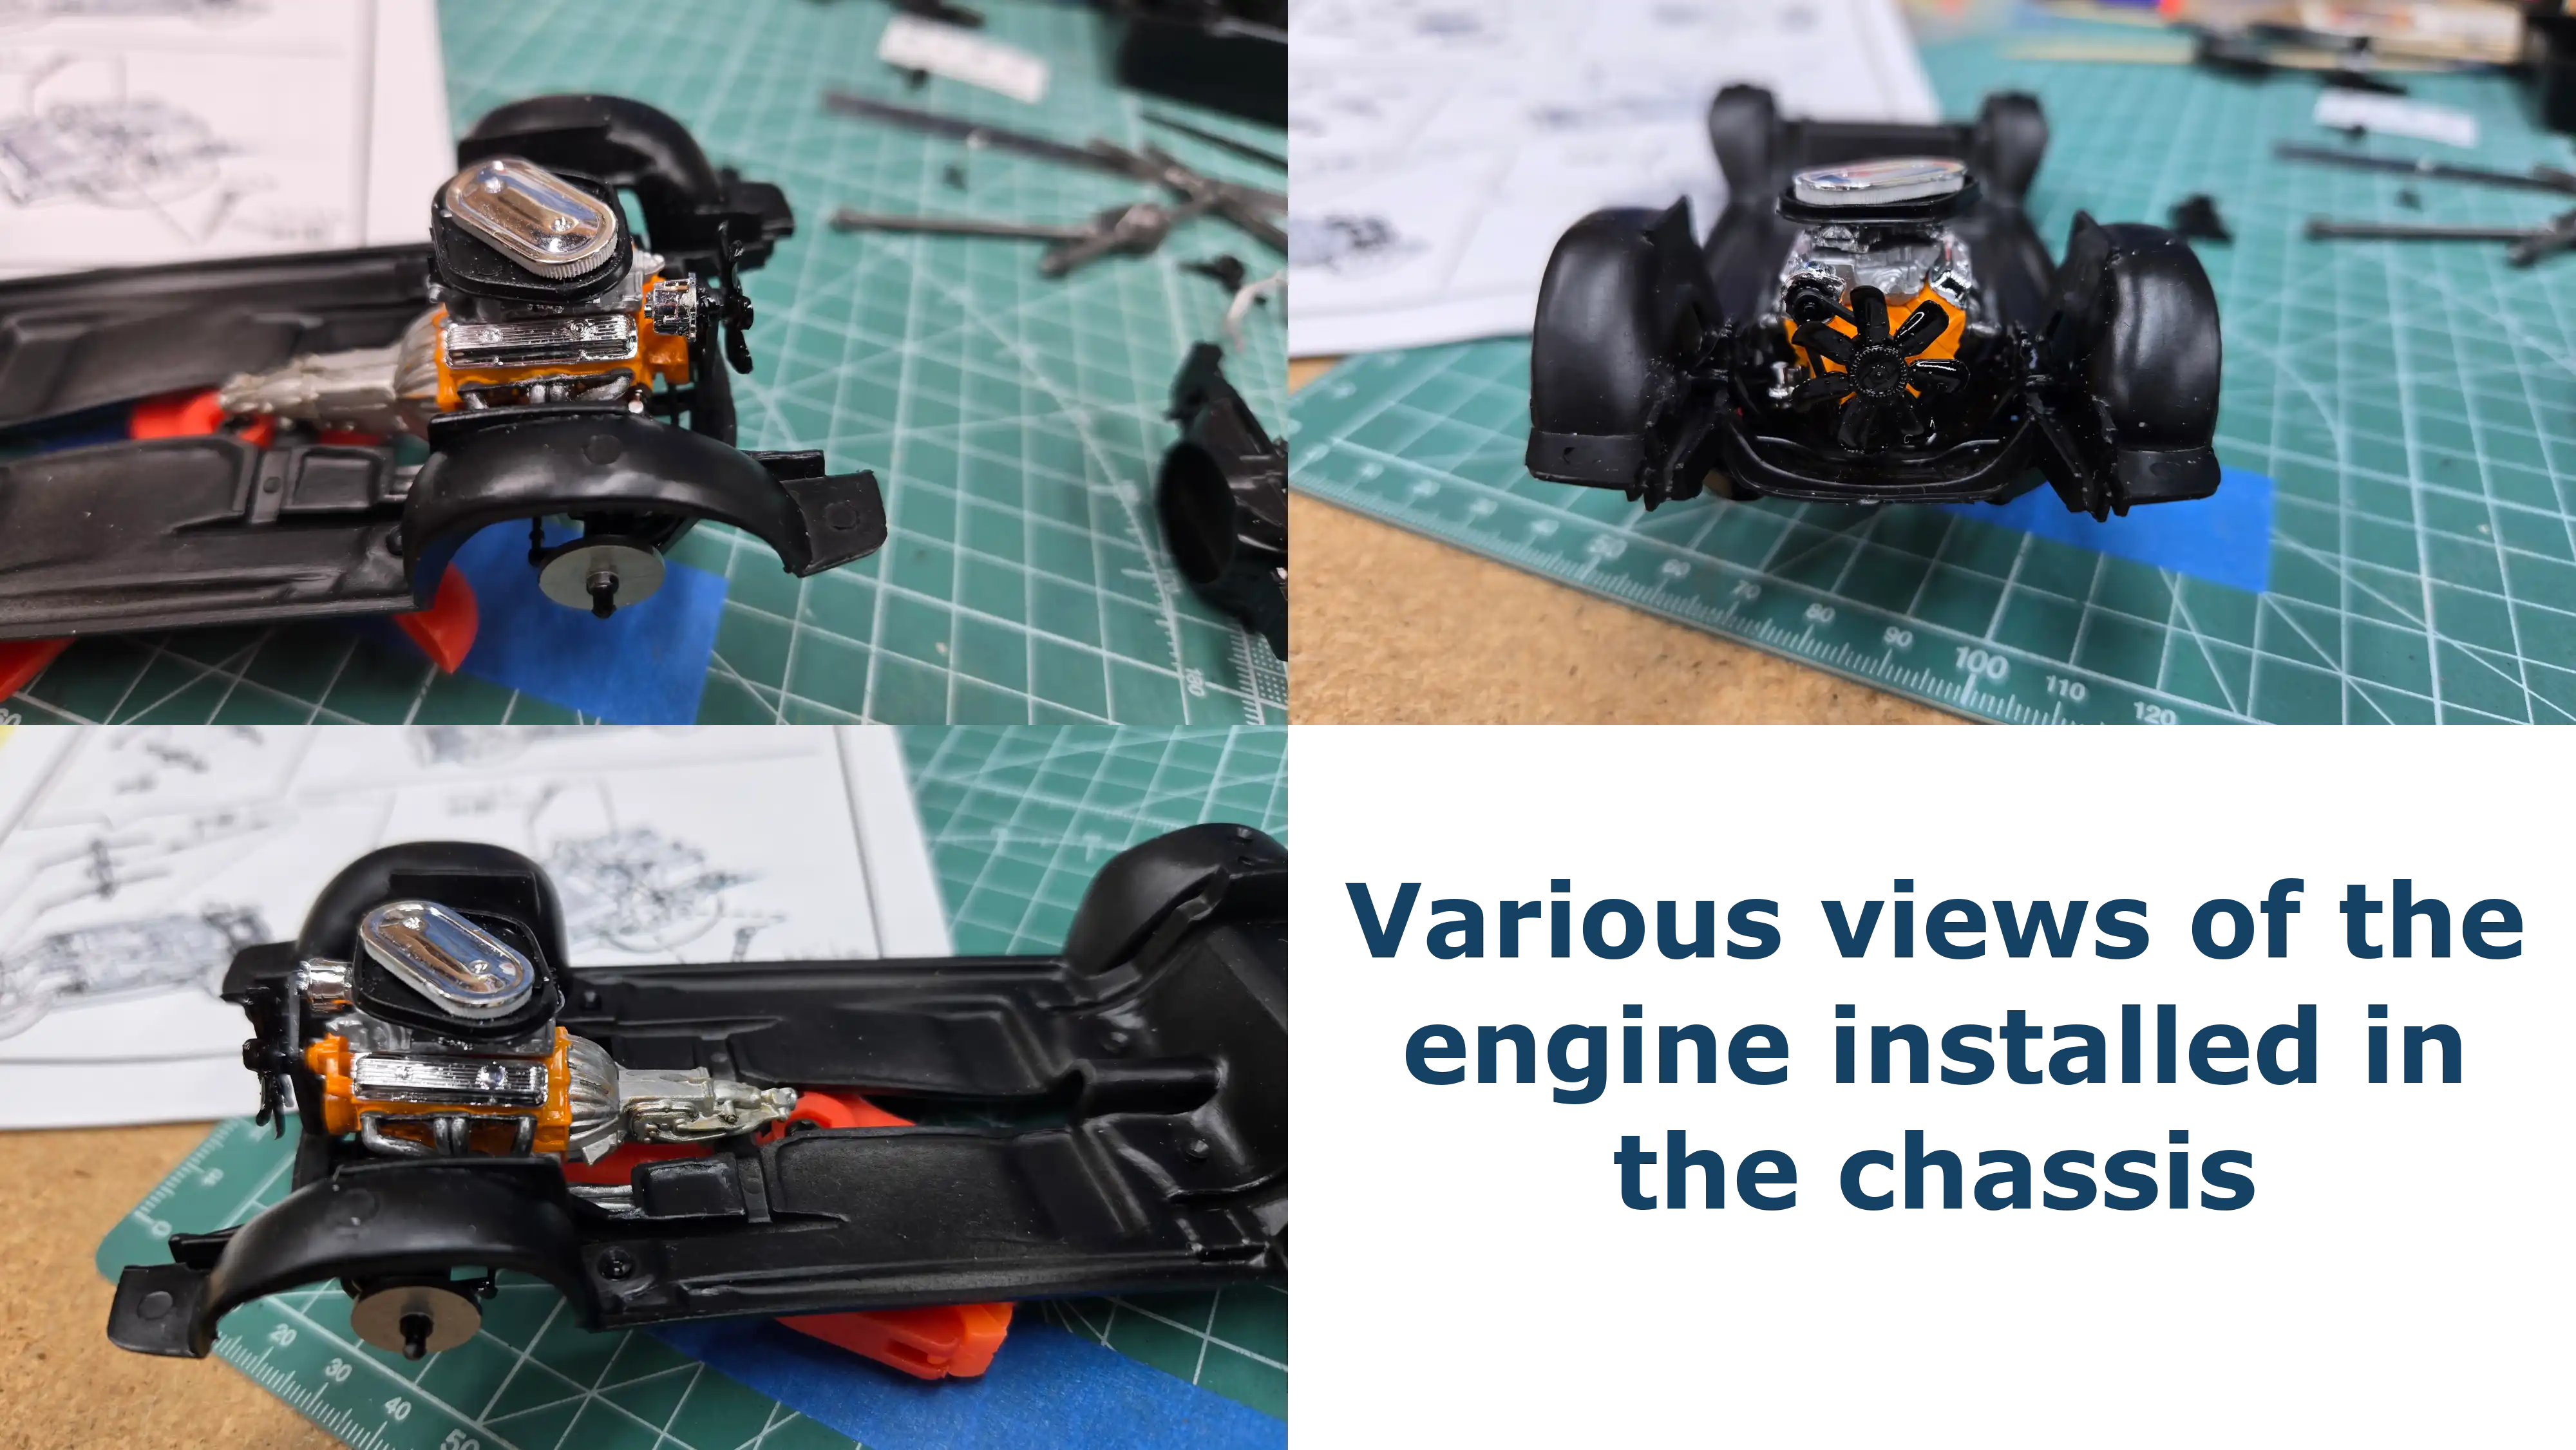
After painting I started assembling the engine. It's from the box.
I didn't strip the chrome and used it off the tree touching up
the connection points with a chrome pen.
Building the engine out of box was difficult for me. I would have
never left the carburetors and fuel pump chrome.
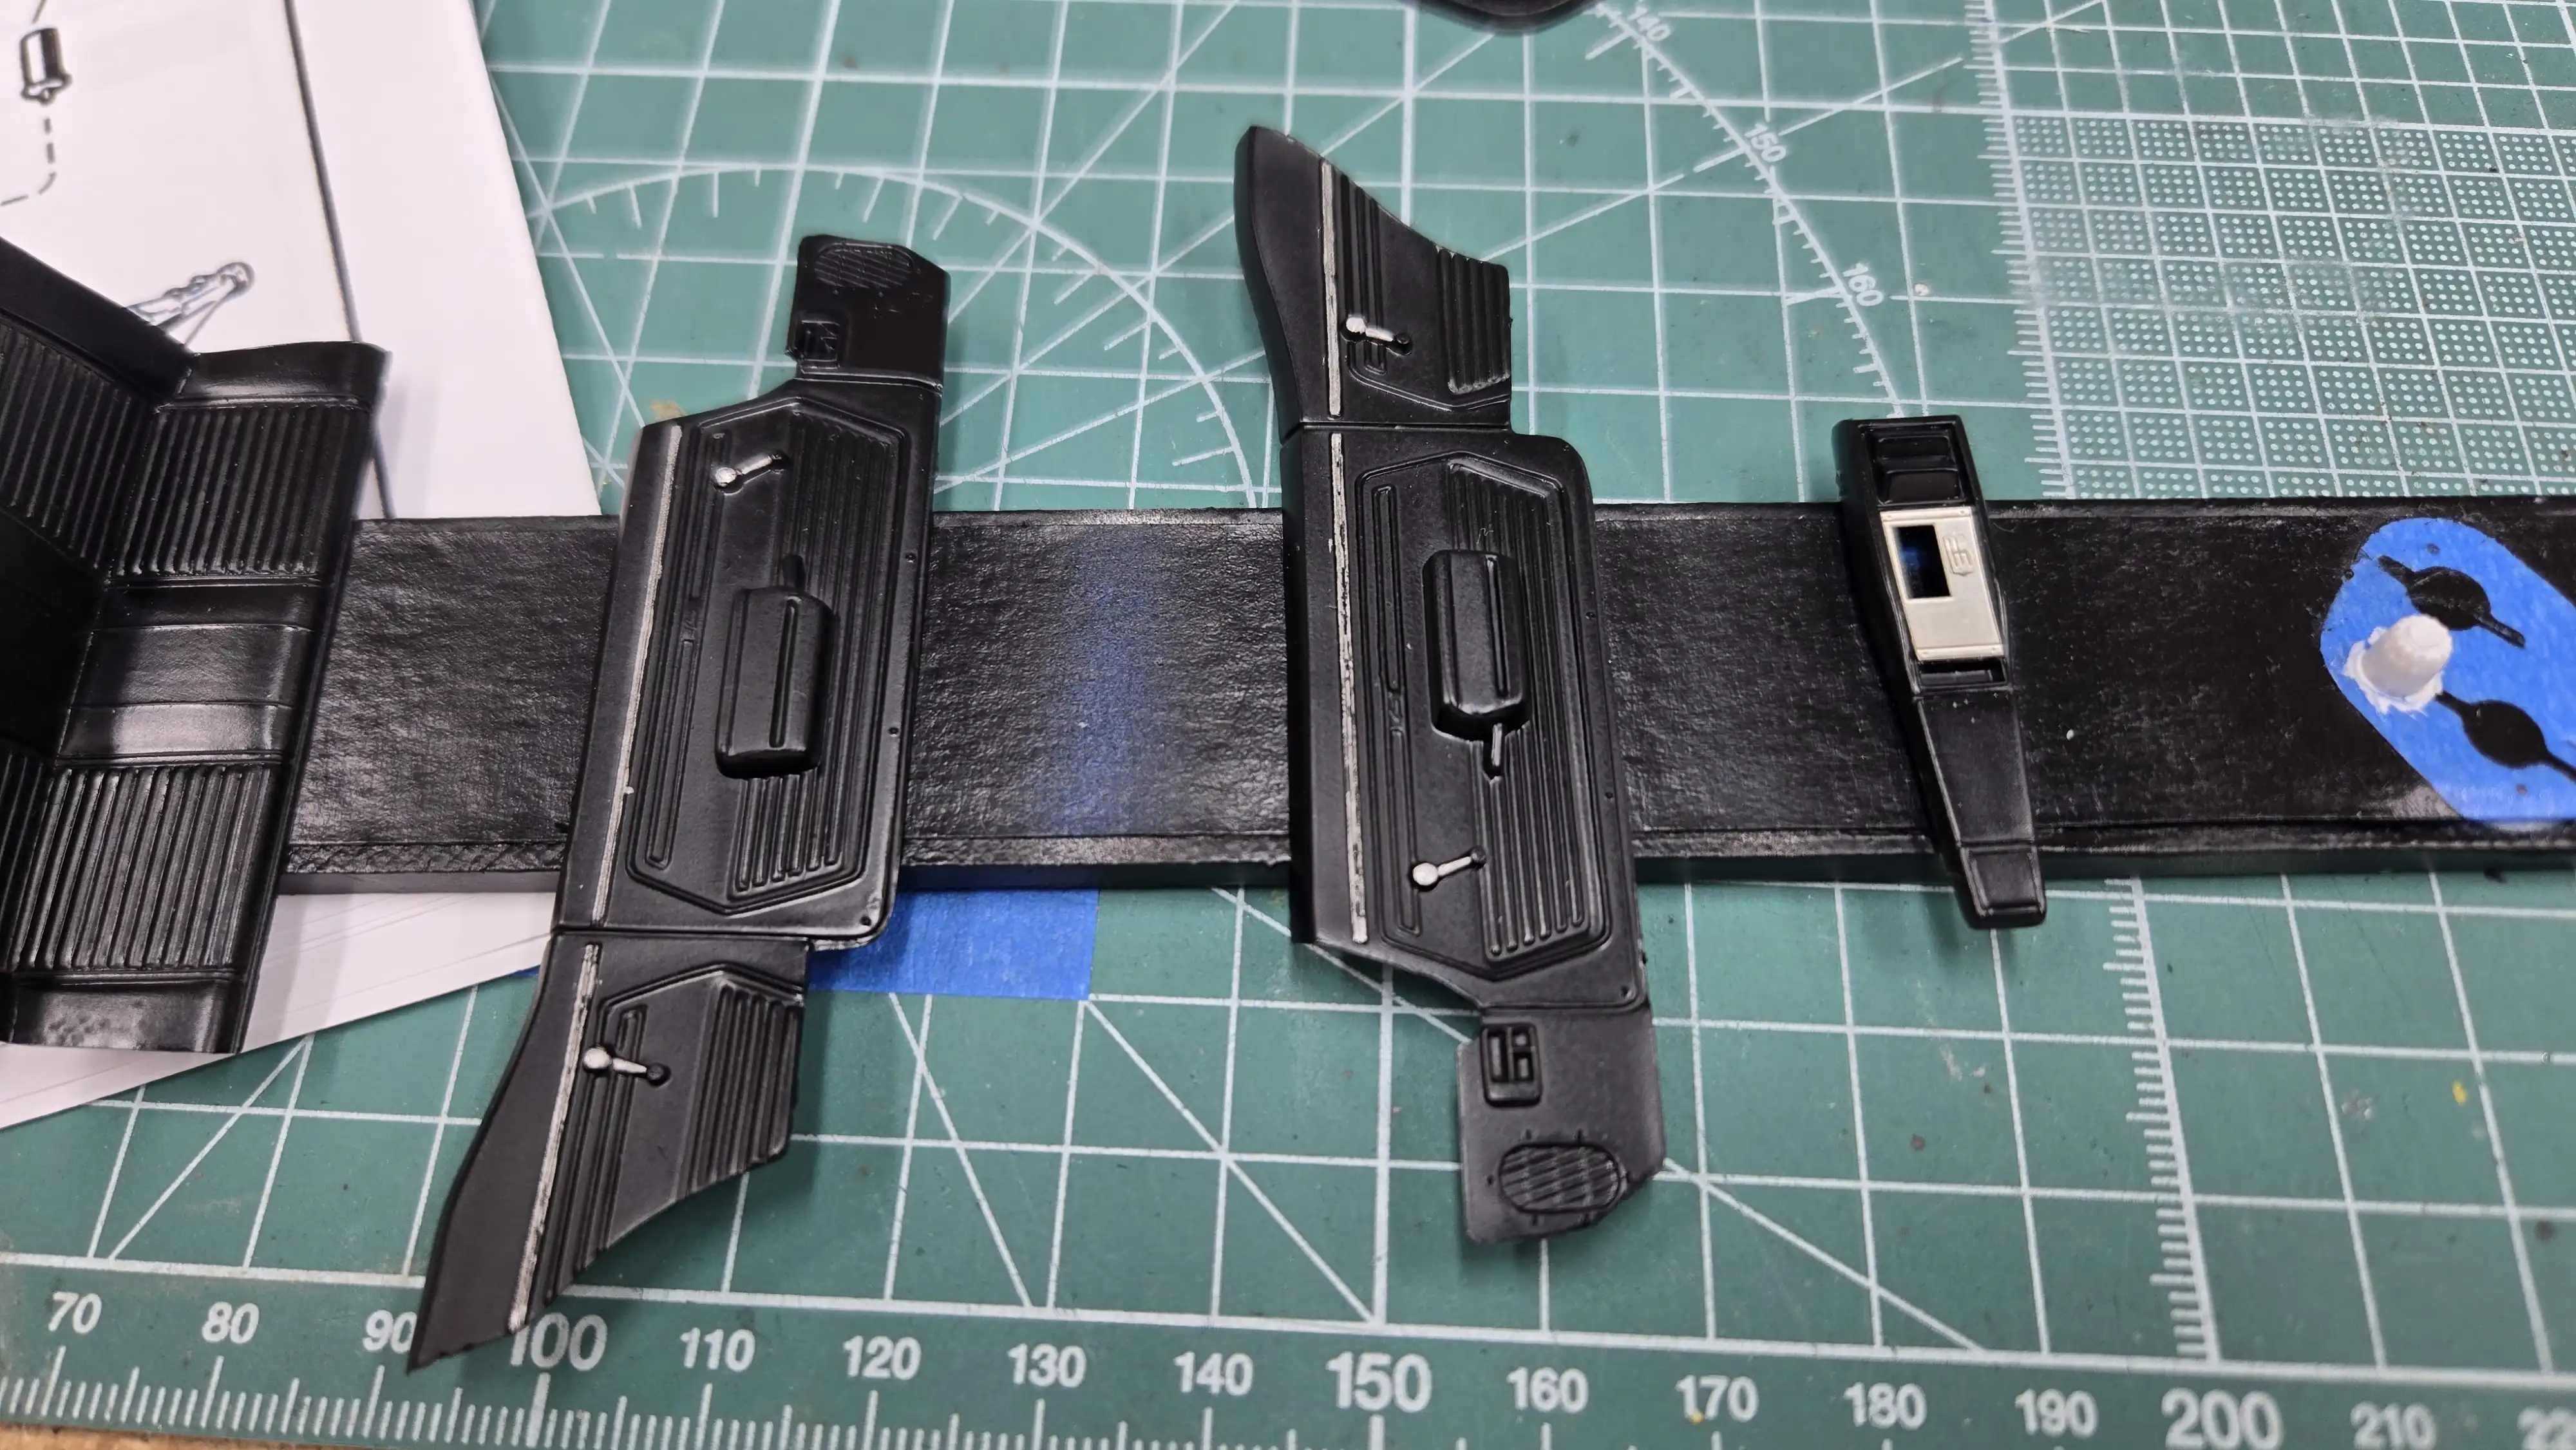
The interior parts are painted and I started detailing
the inside door panels. As of this photo I still have
some work to do on these parts. The center console has
some photo etch installed, but I'm not sure if I'll
be using the console or just have the shifter on the floor?
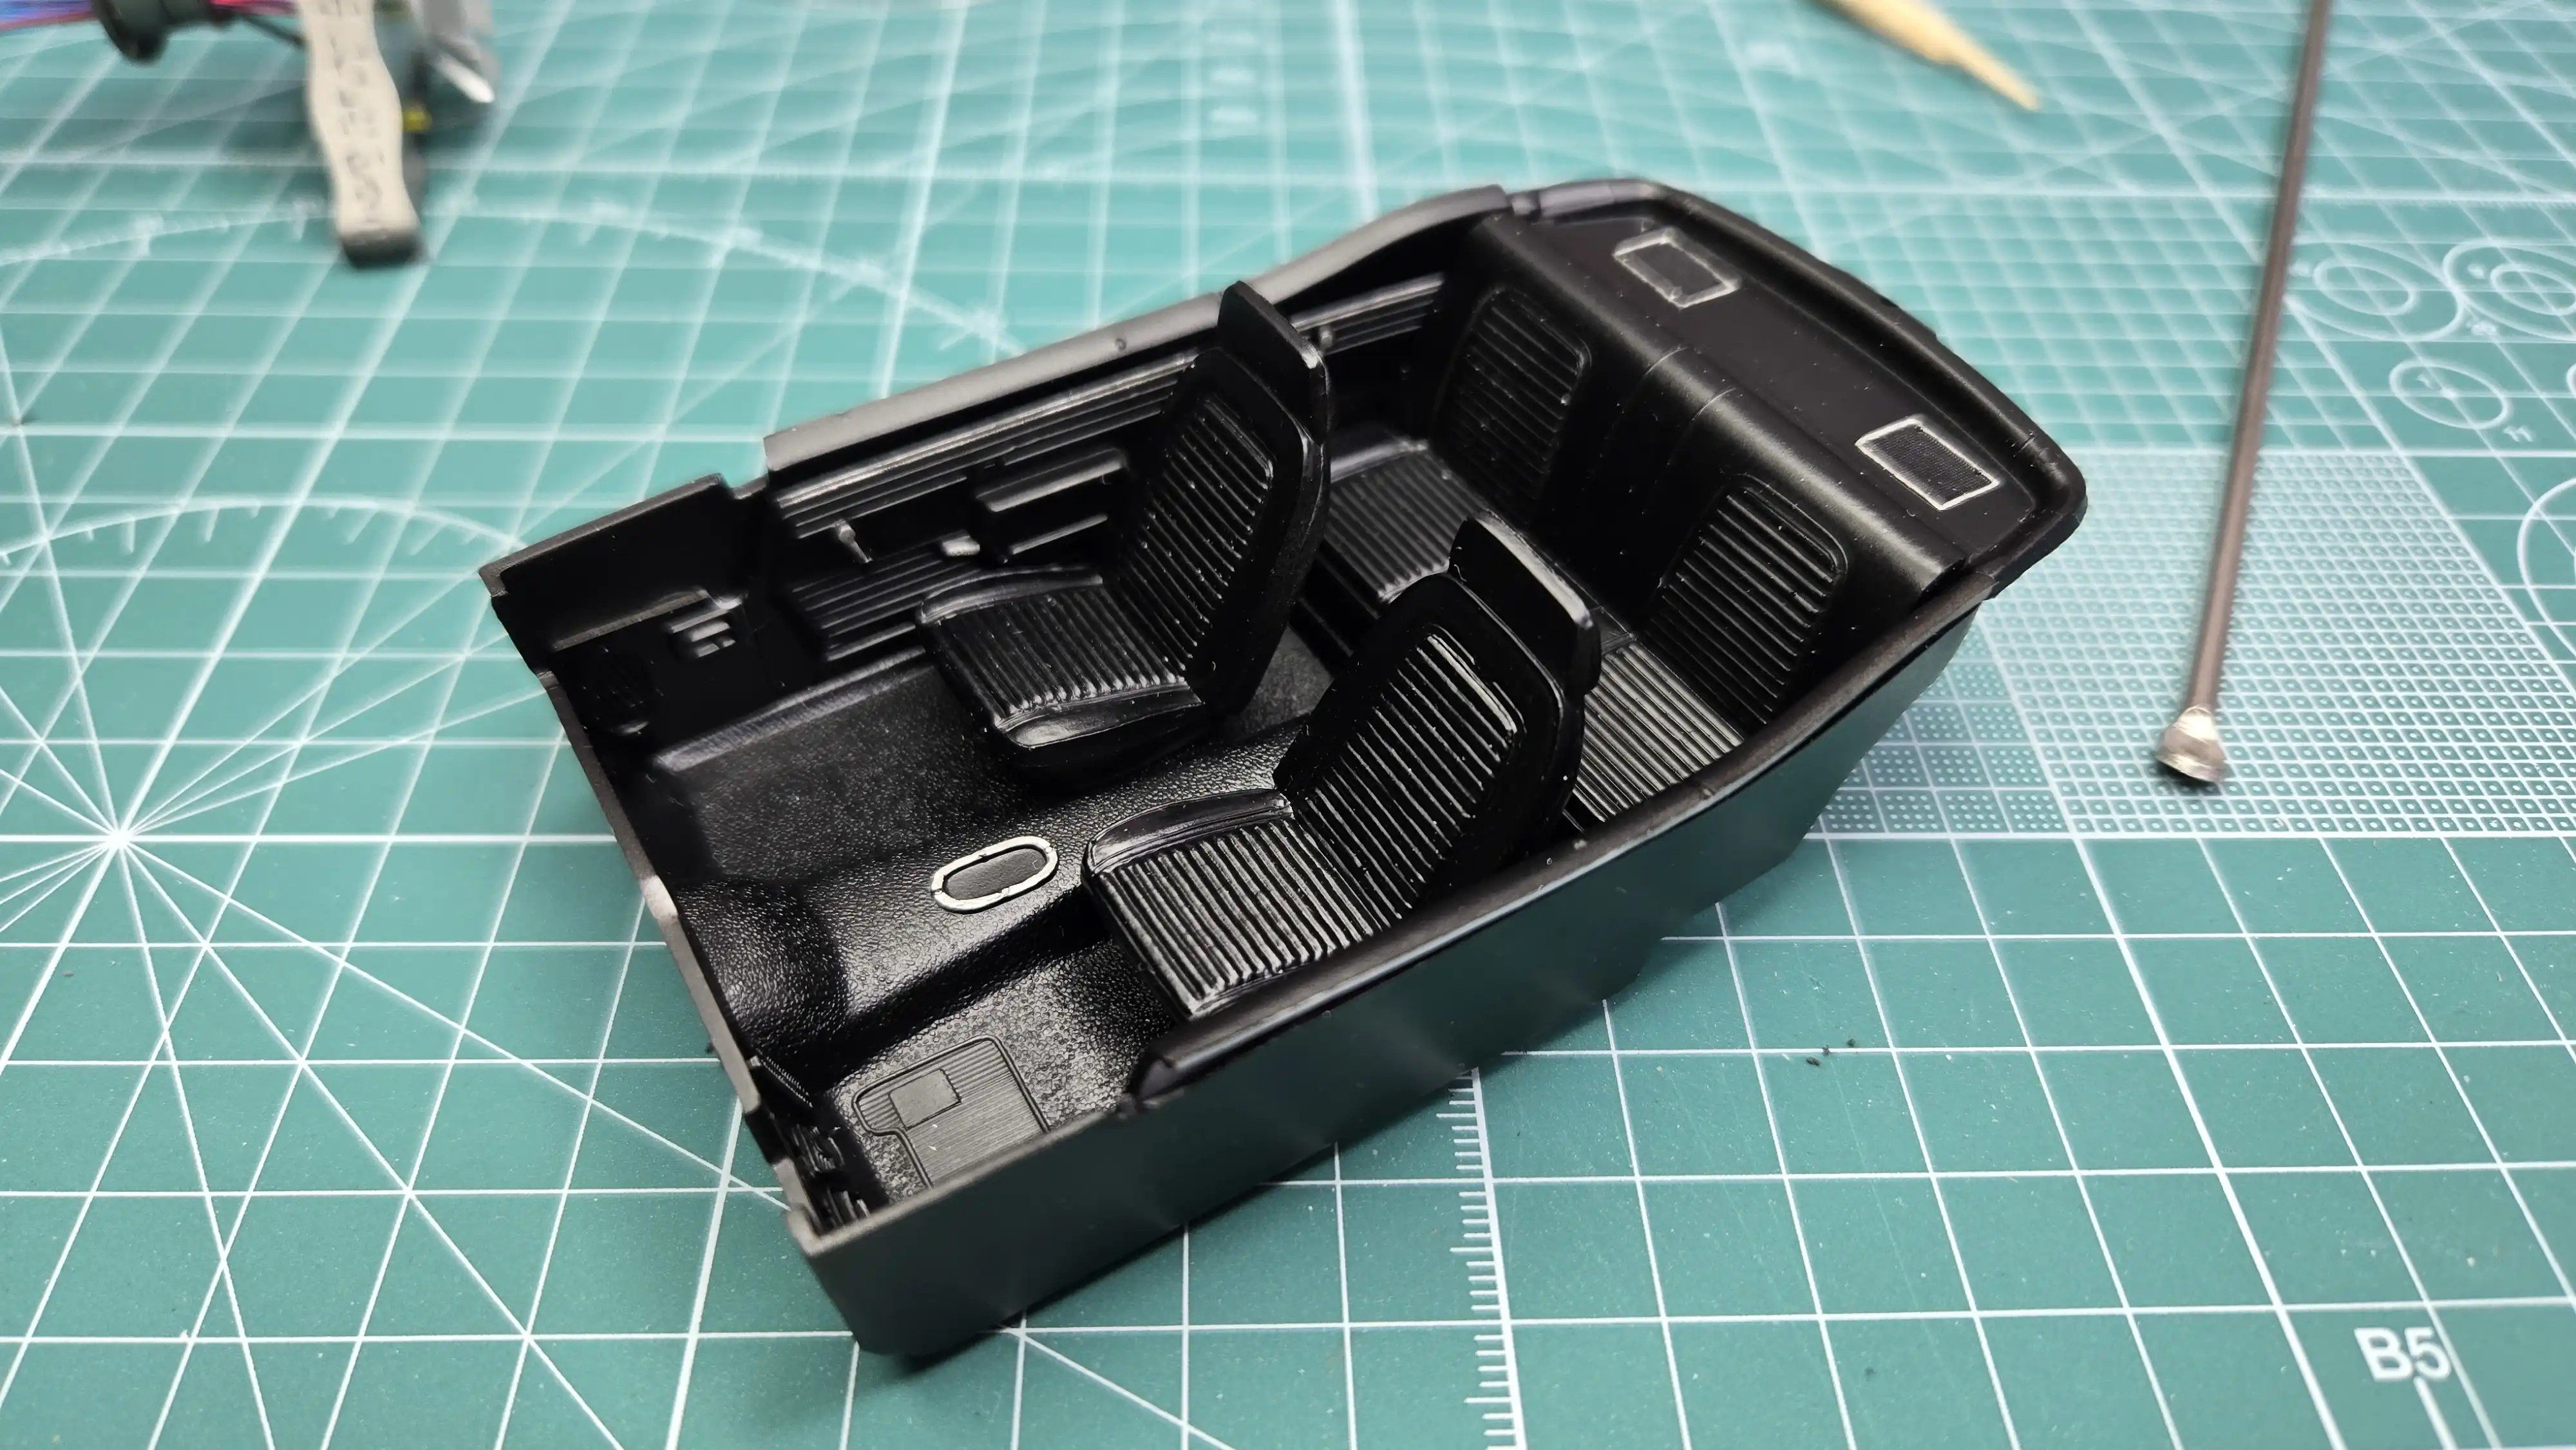
The Camaro interior door panels, front and back seats are installed.
I used a chrome pen to outline the speaker grills and the shifter
location on the hump.
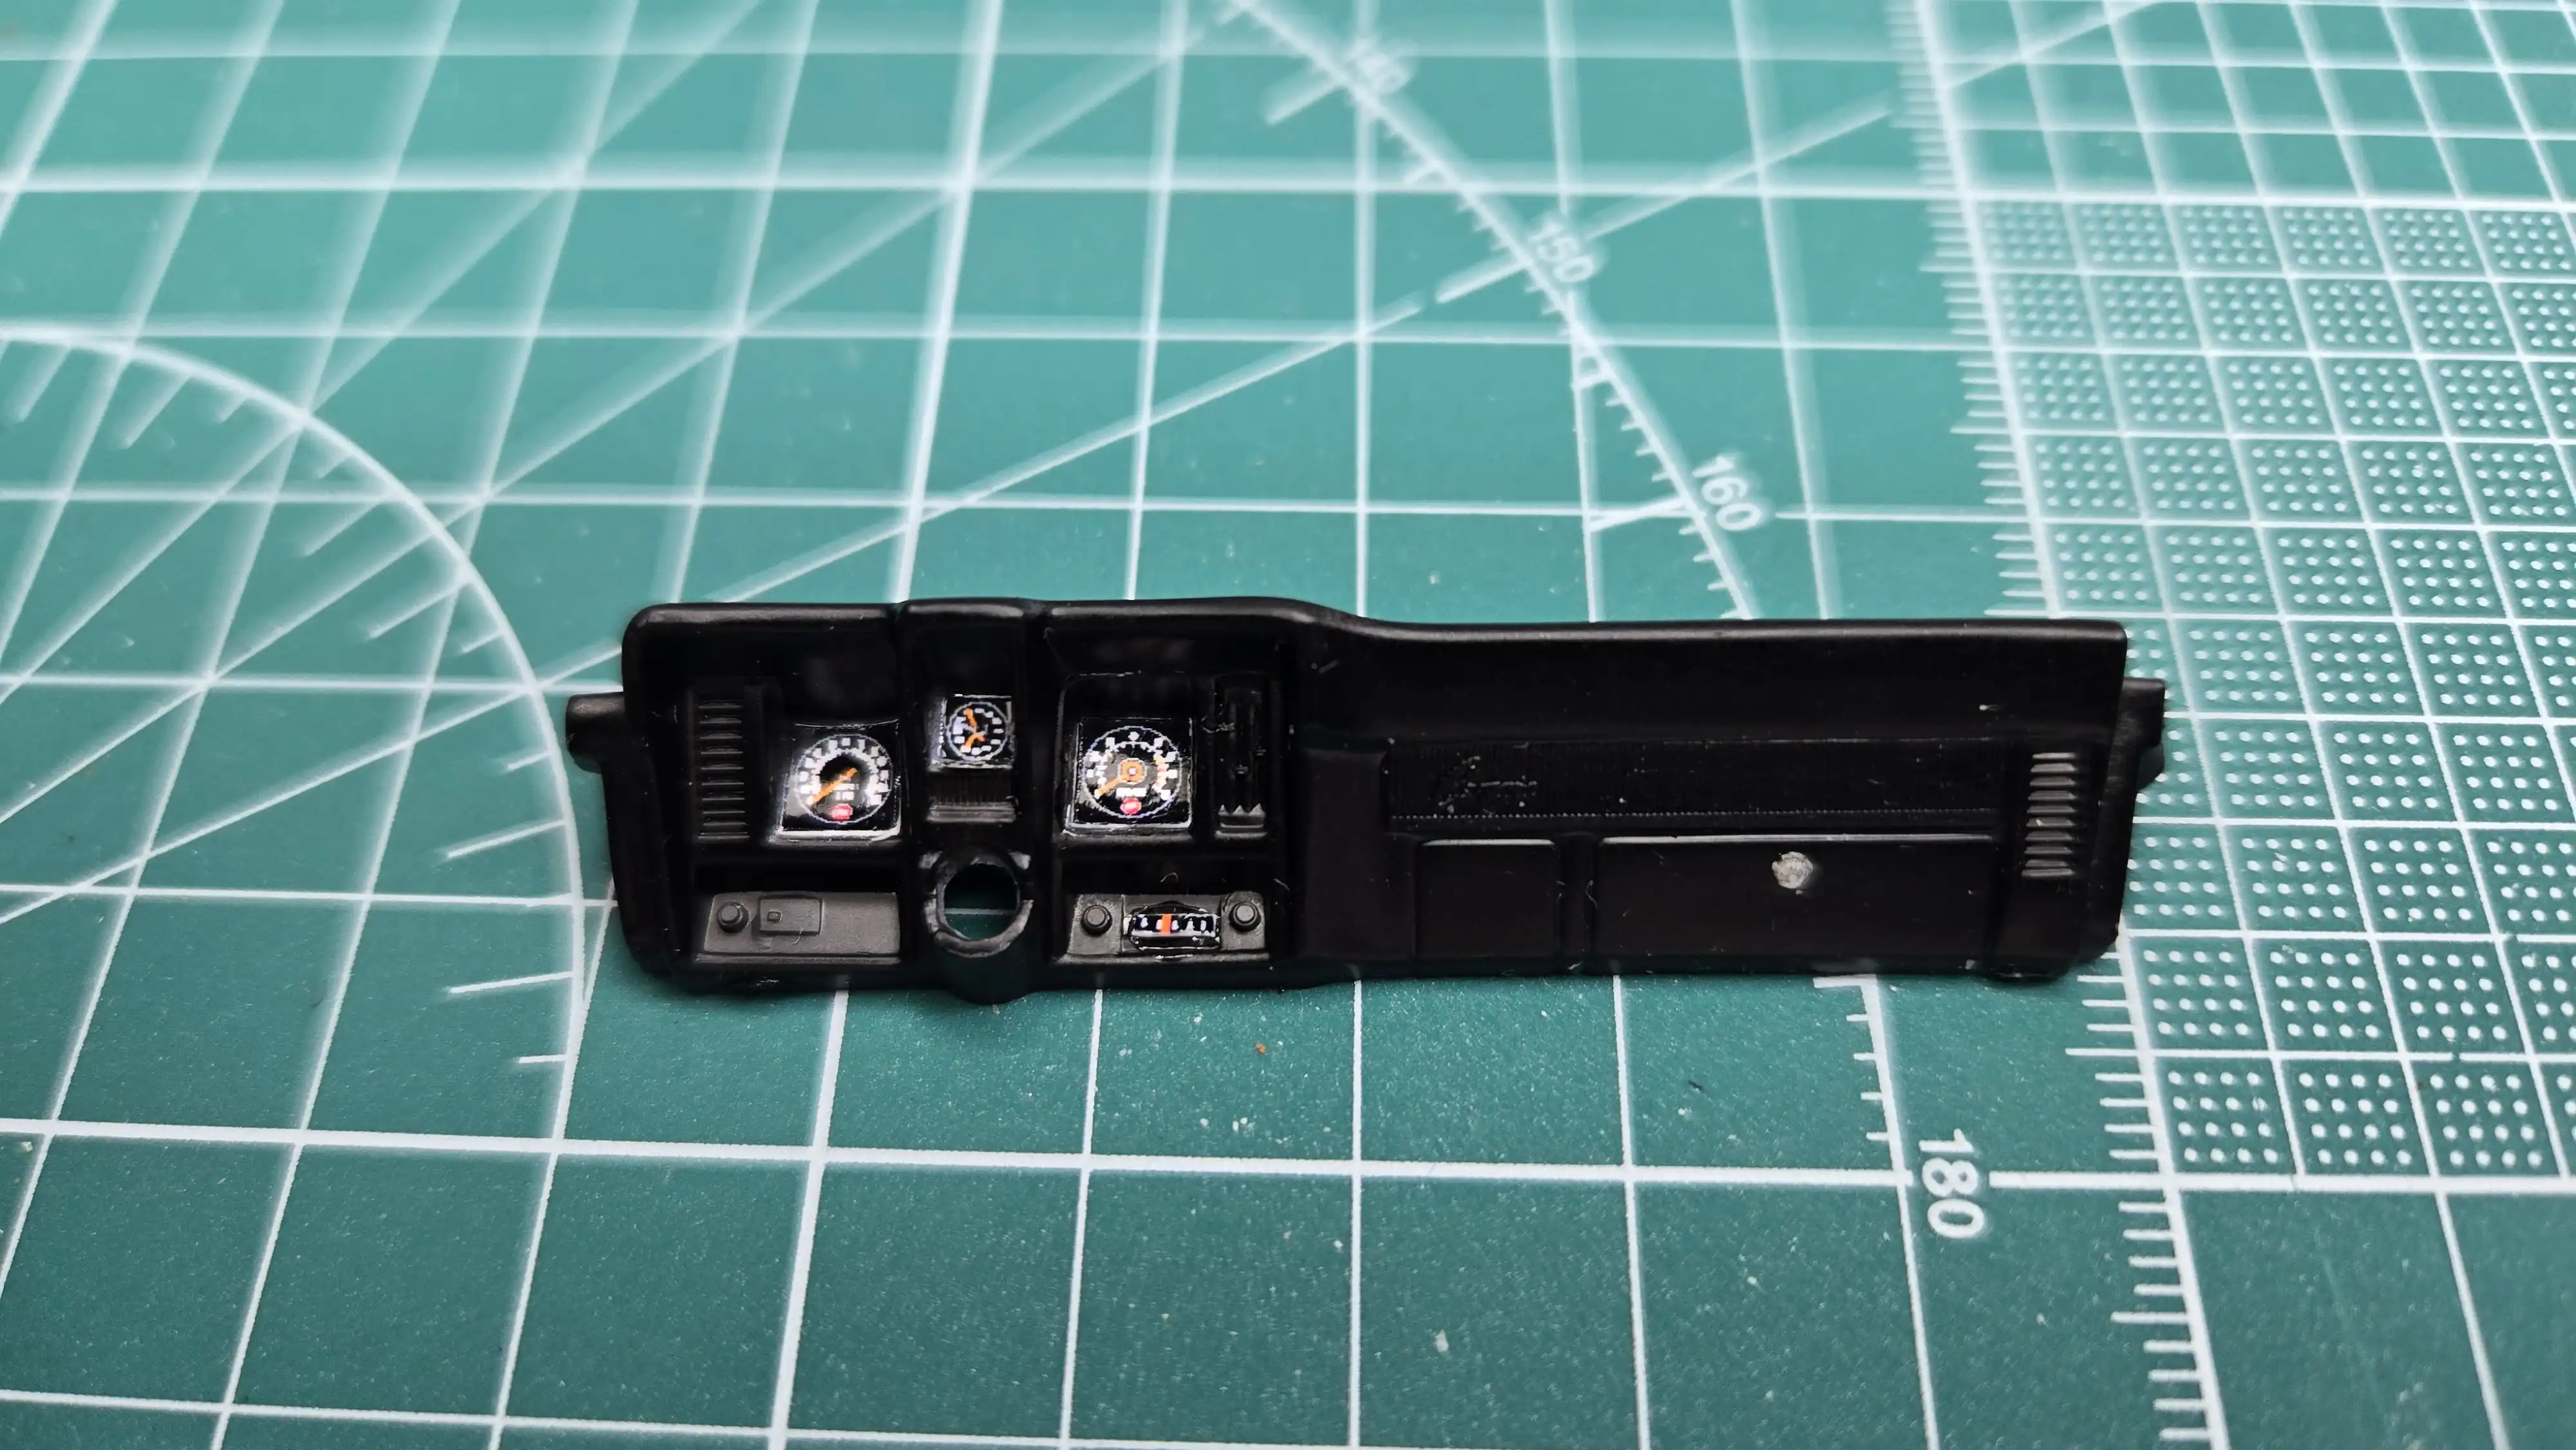
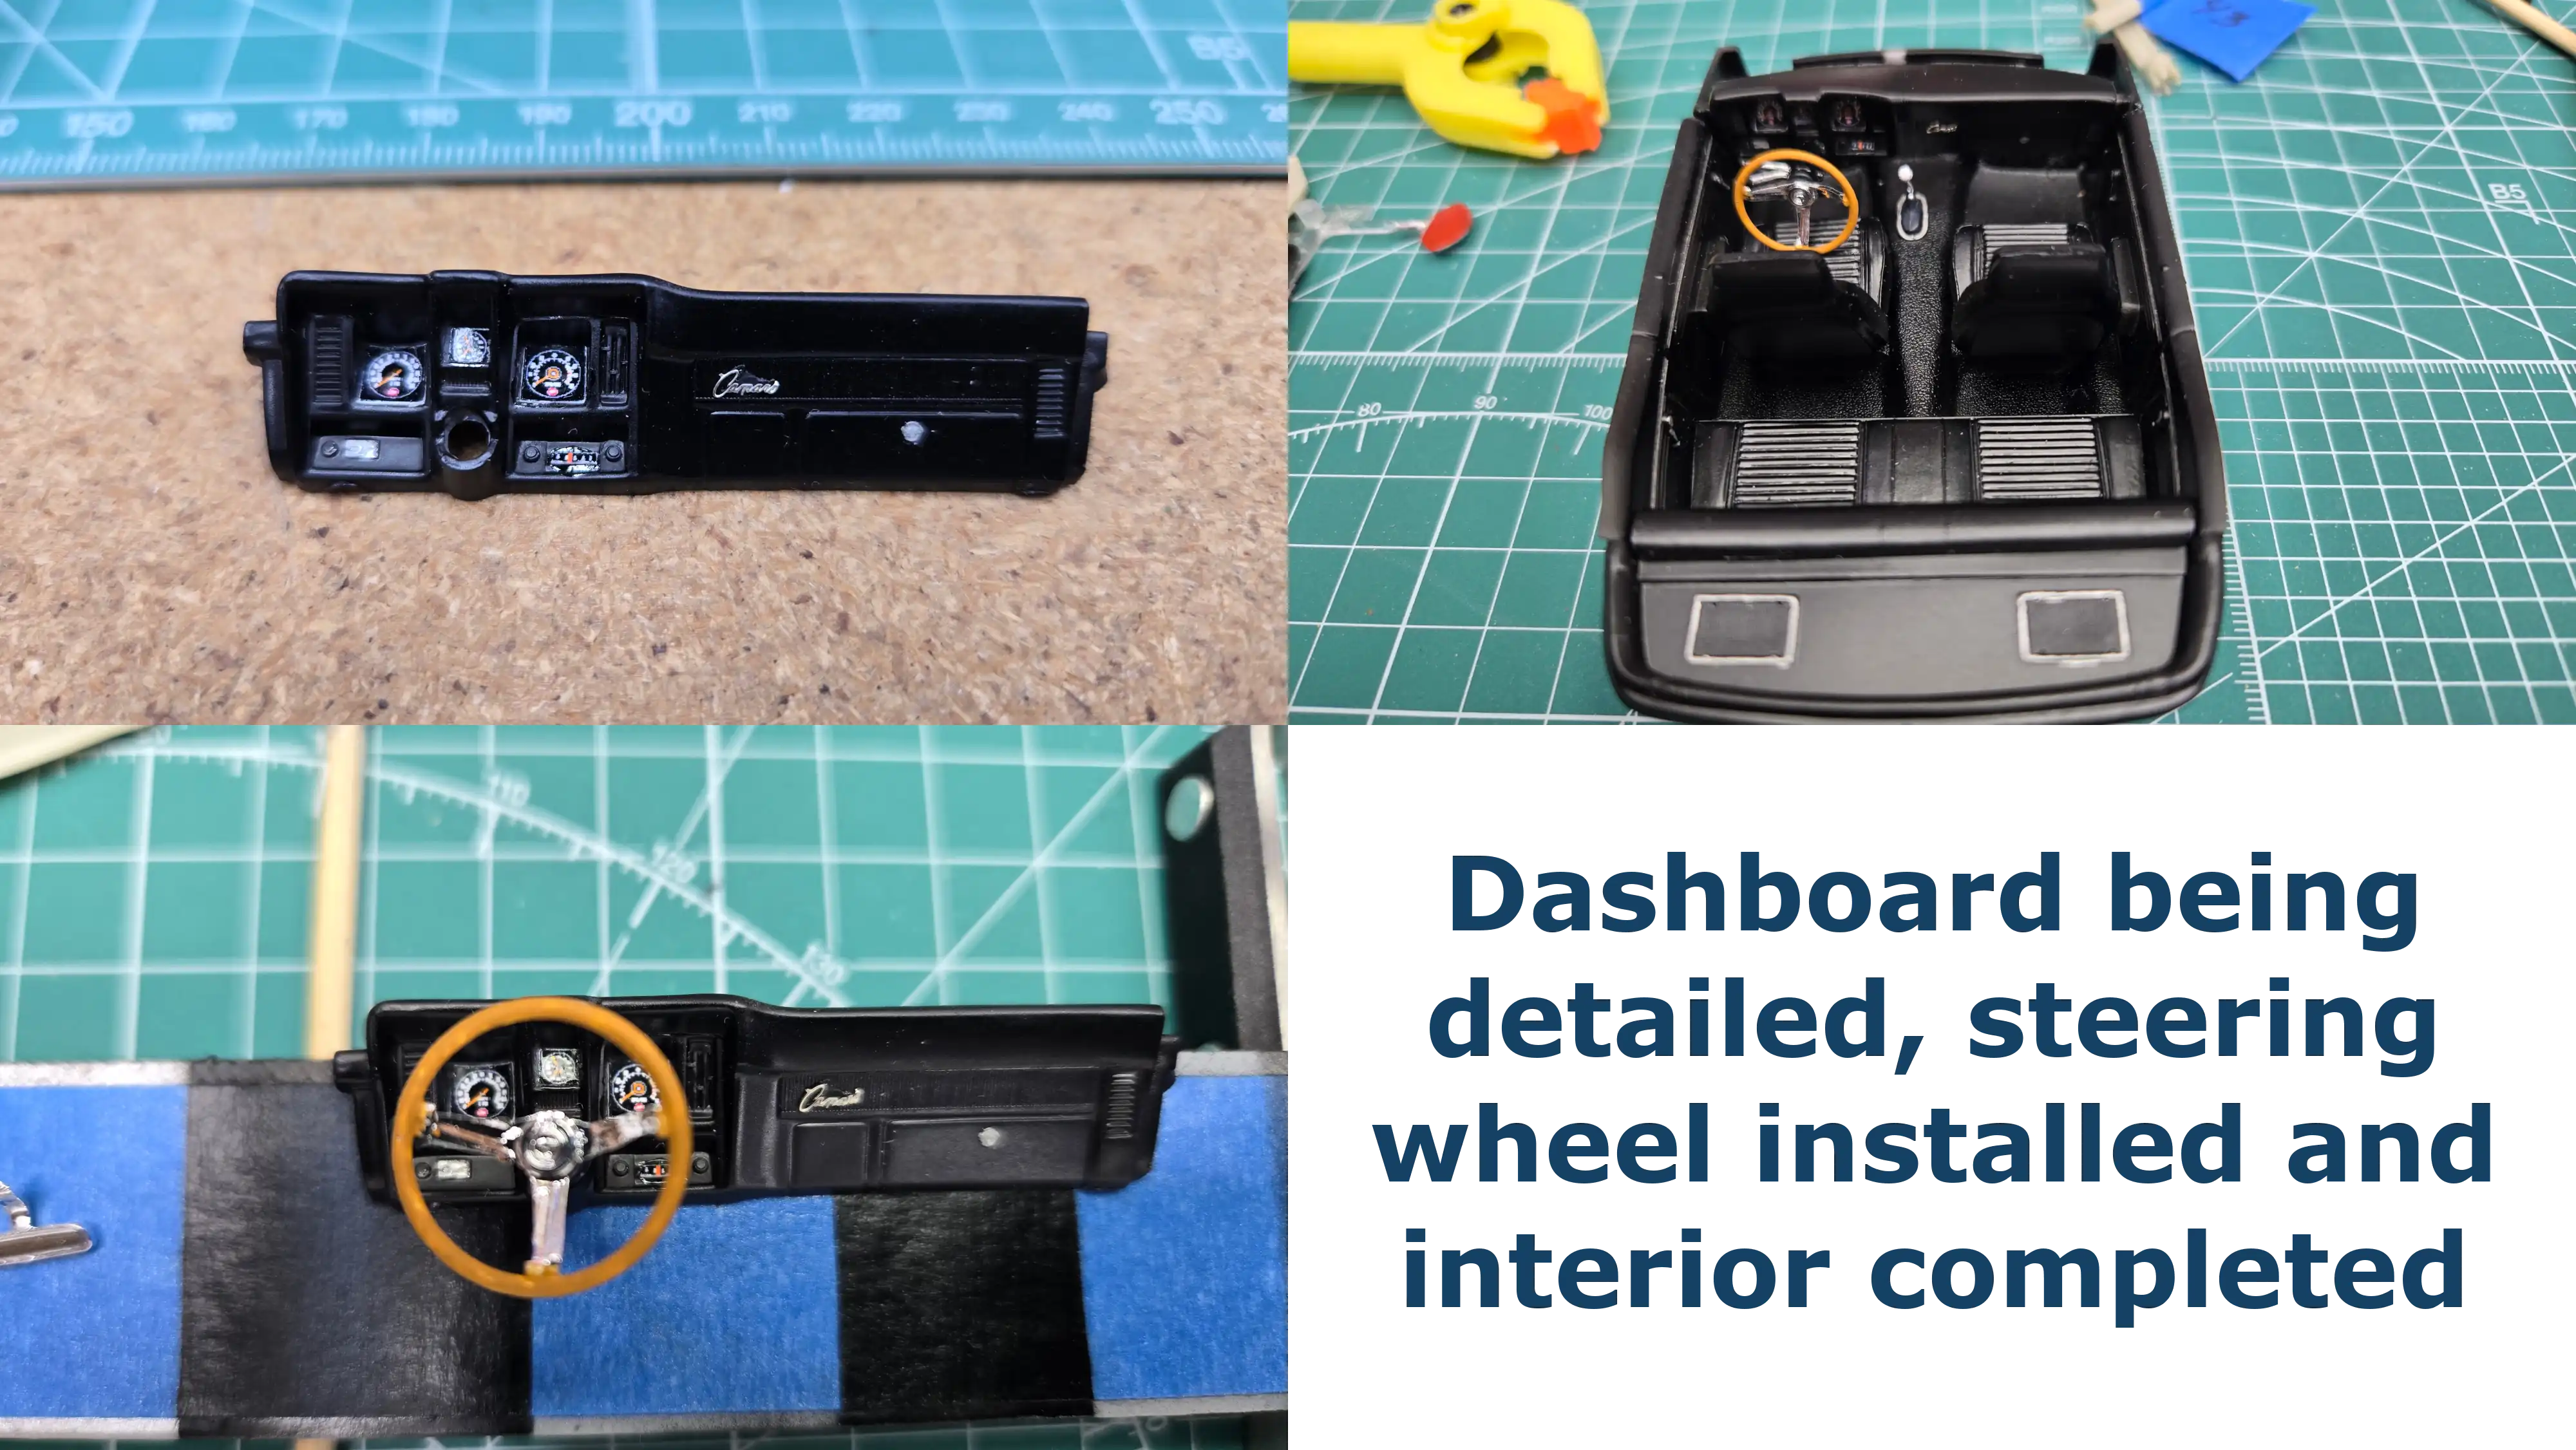
I started detailing the dashboard. I didn't like the gauge decals that
came with the Model Car Garage photo etch, so I used a set of gauge
decals I found on Ebay. I'm thinking of doing the strip above the
glove box in a wood grain, but I'm not sure yet. Also, the Camaro
lettering on the dash should be chrome; however, I don't think I'm
steady enough to chrome it. There are also some items to the lower
lift of the steering wheel that I have to identify before detailing.
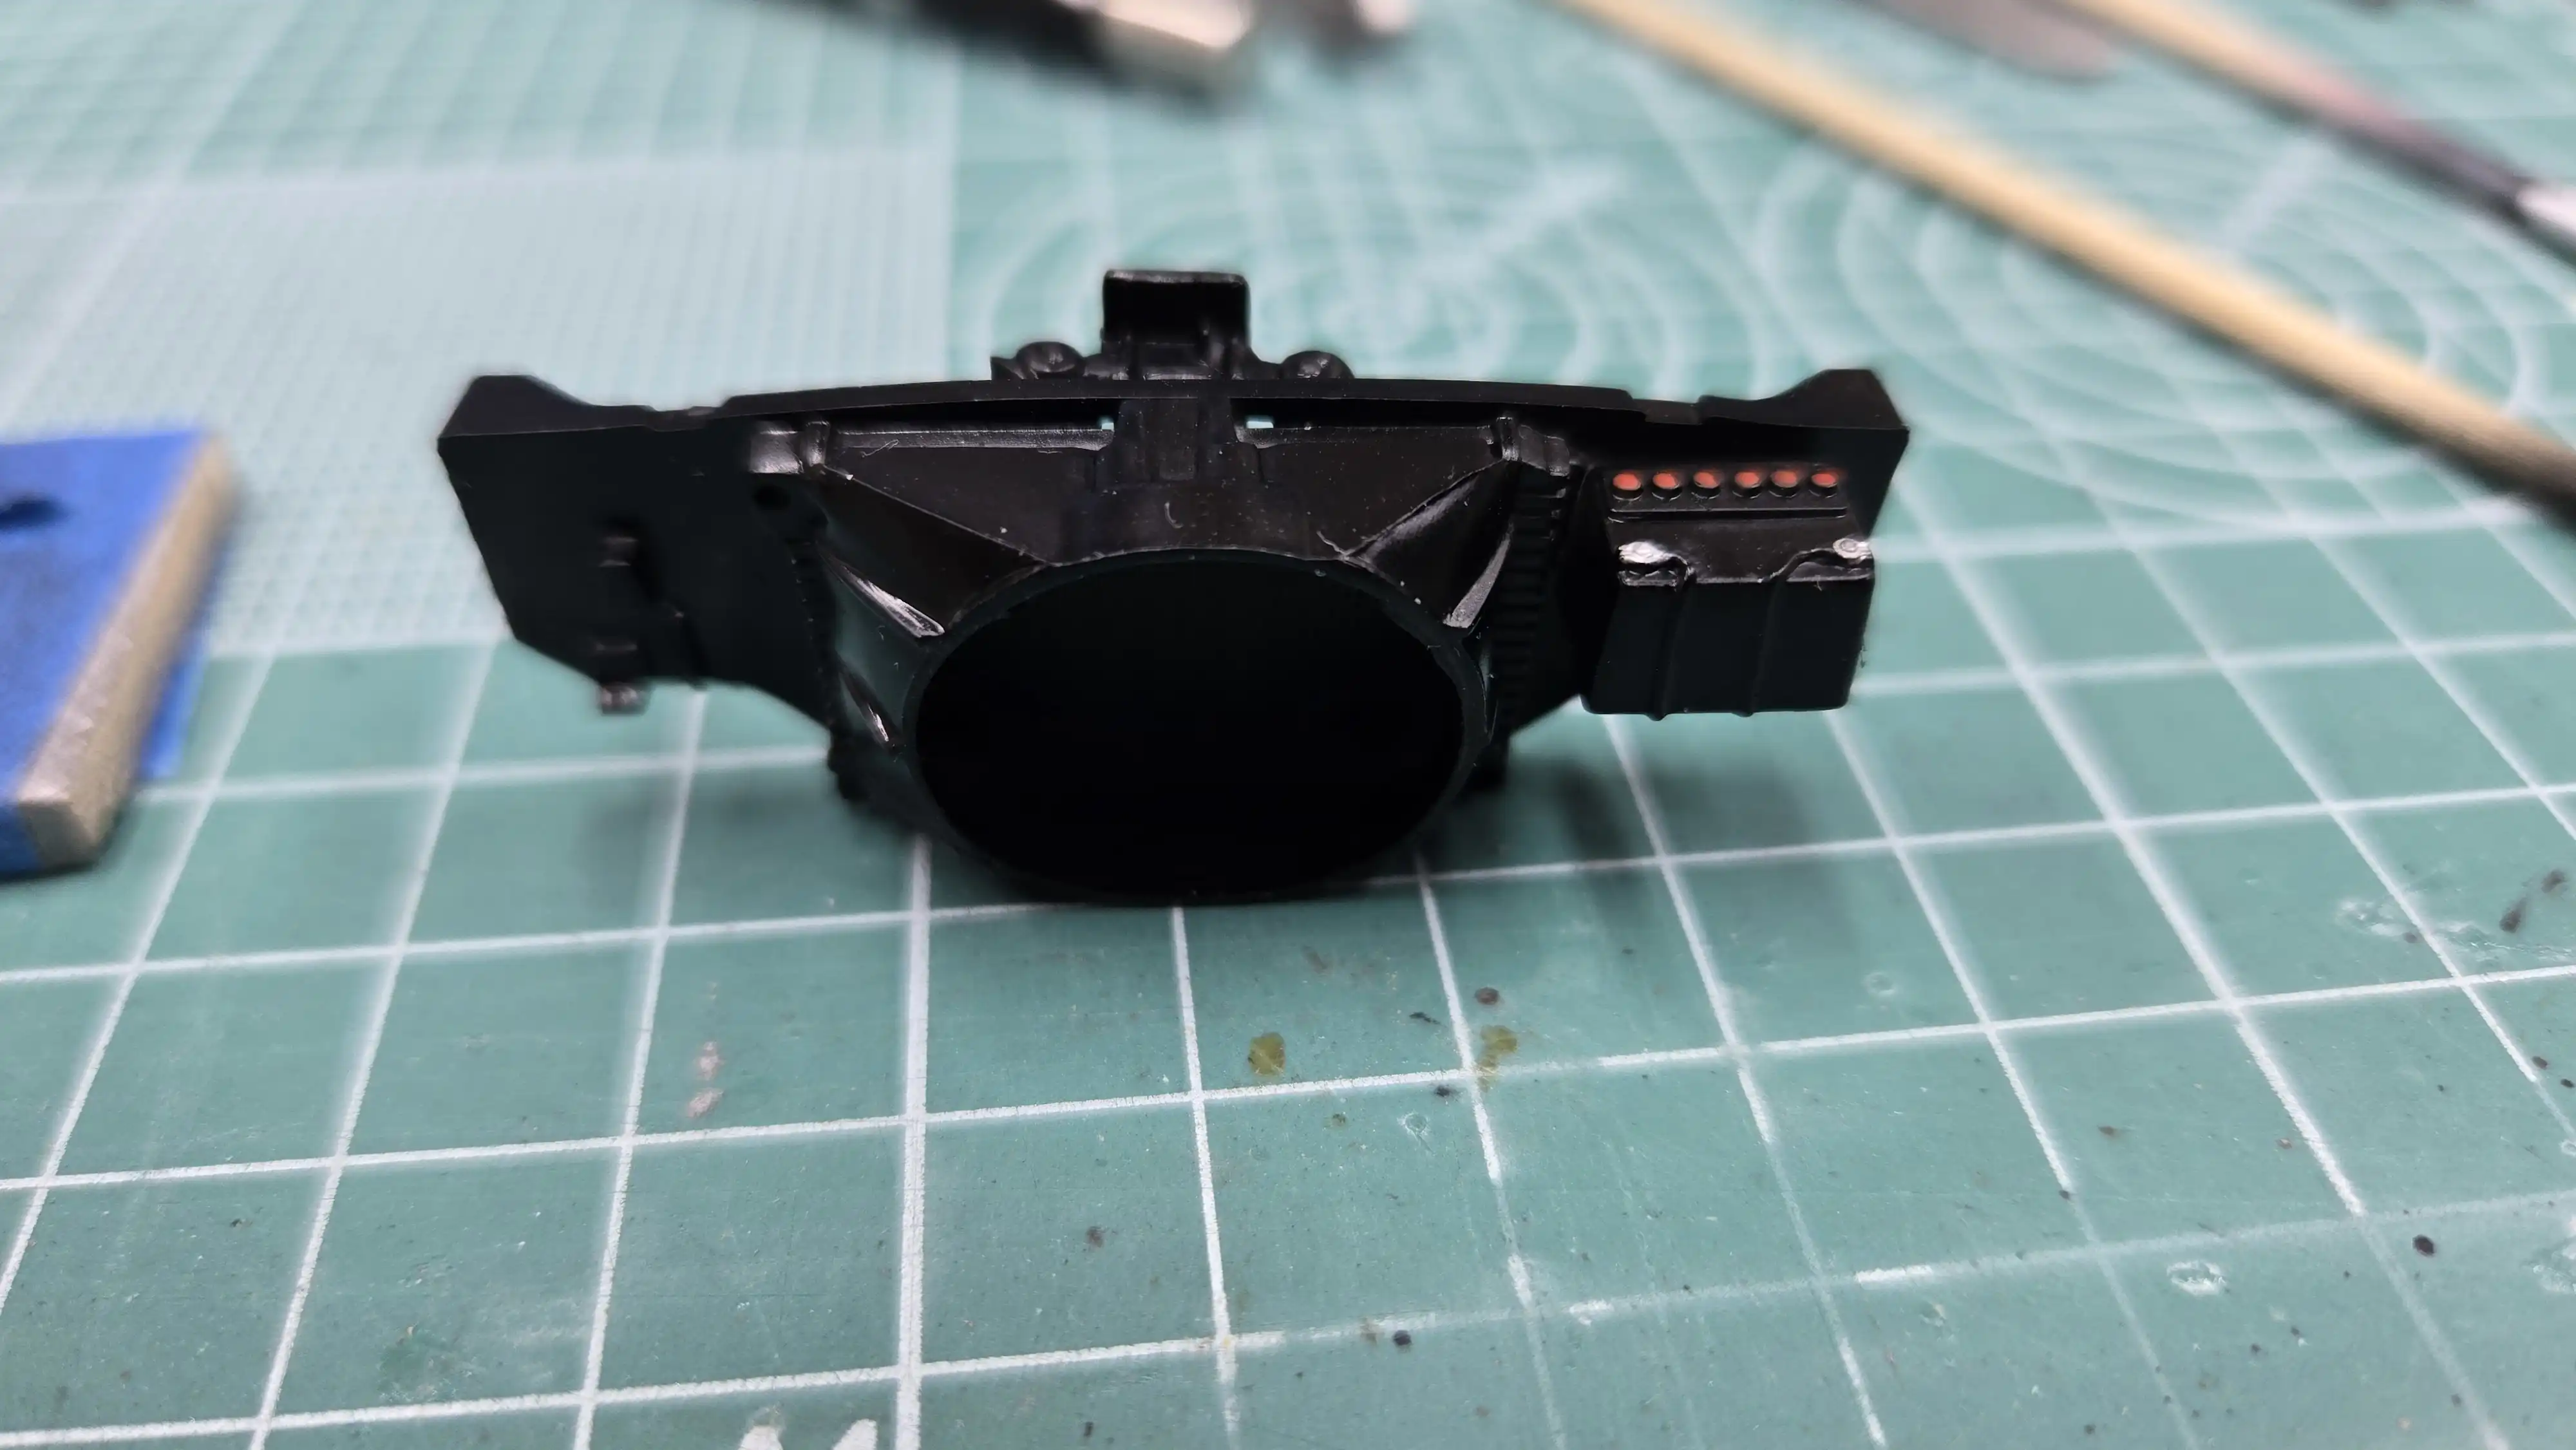
The brake master cylinder and booster are mounted on the firewall.
Since I'm doing this model out-of-box, that's all I'll be doing
to the firewall. I might mount the ignition coil to the firewall
since there isn't enough room to mount it where it should be
on the engine.
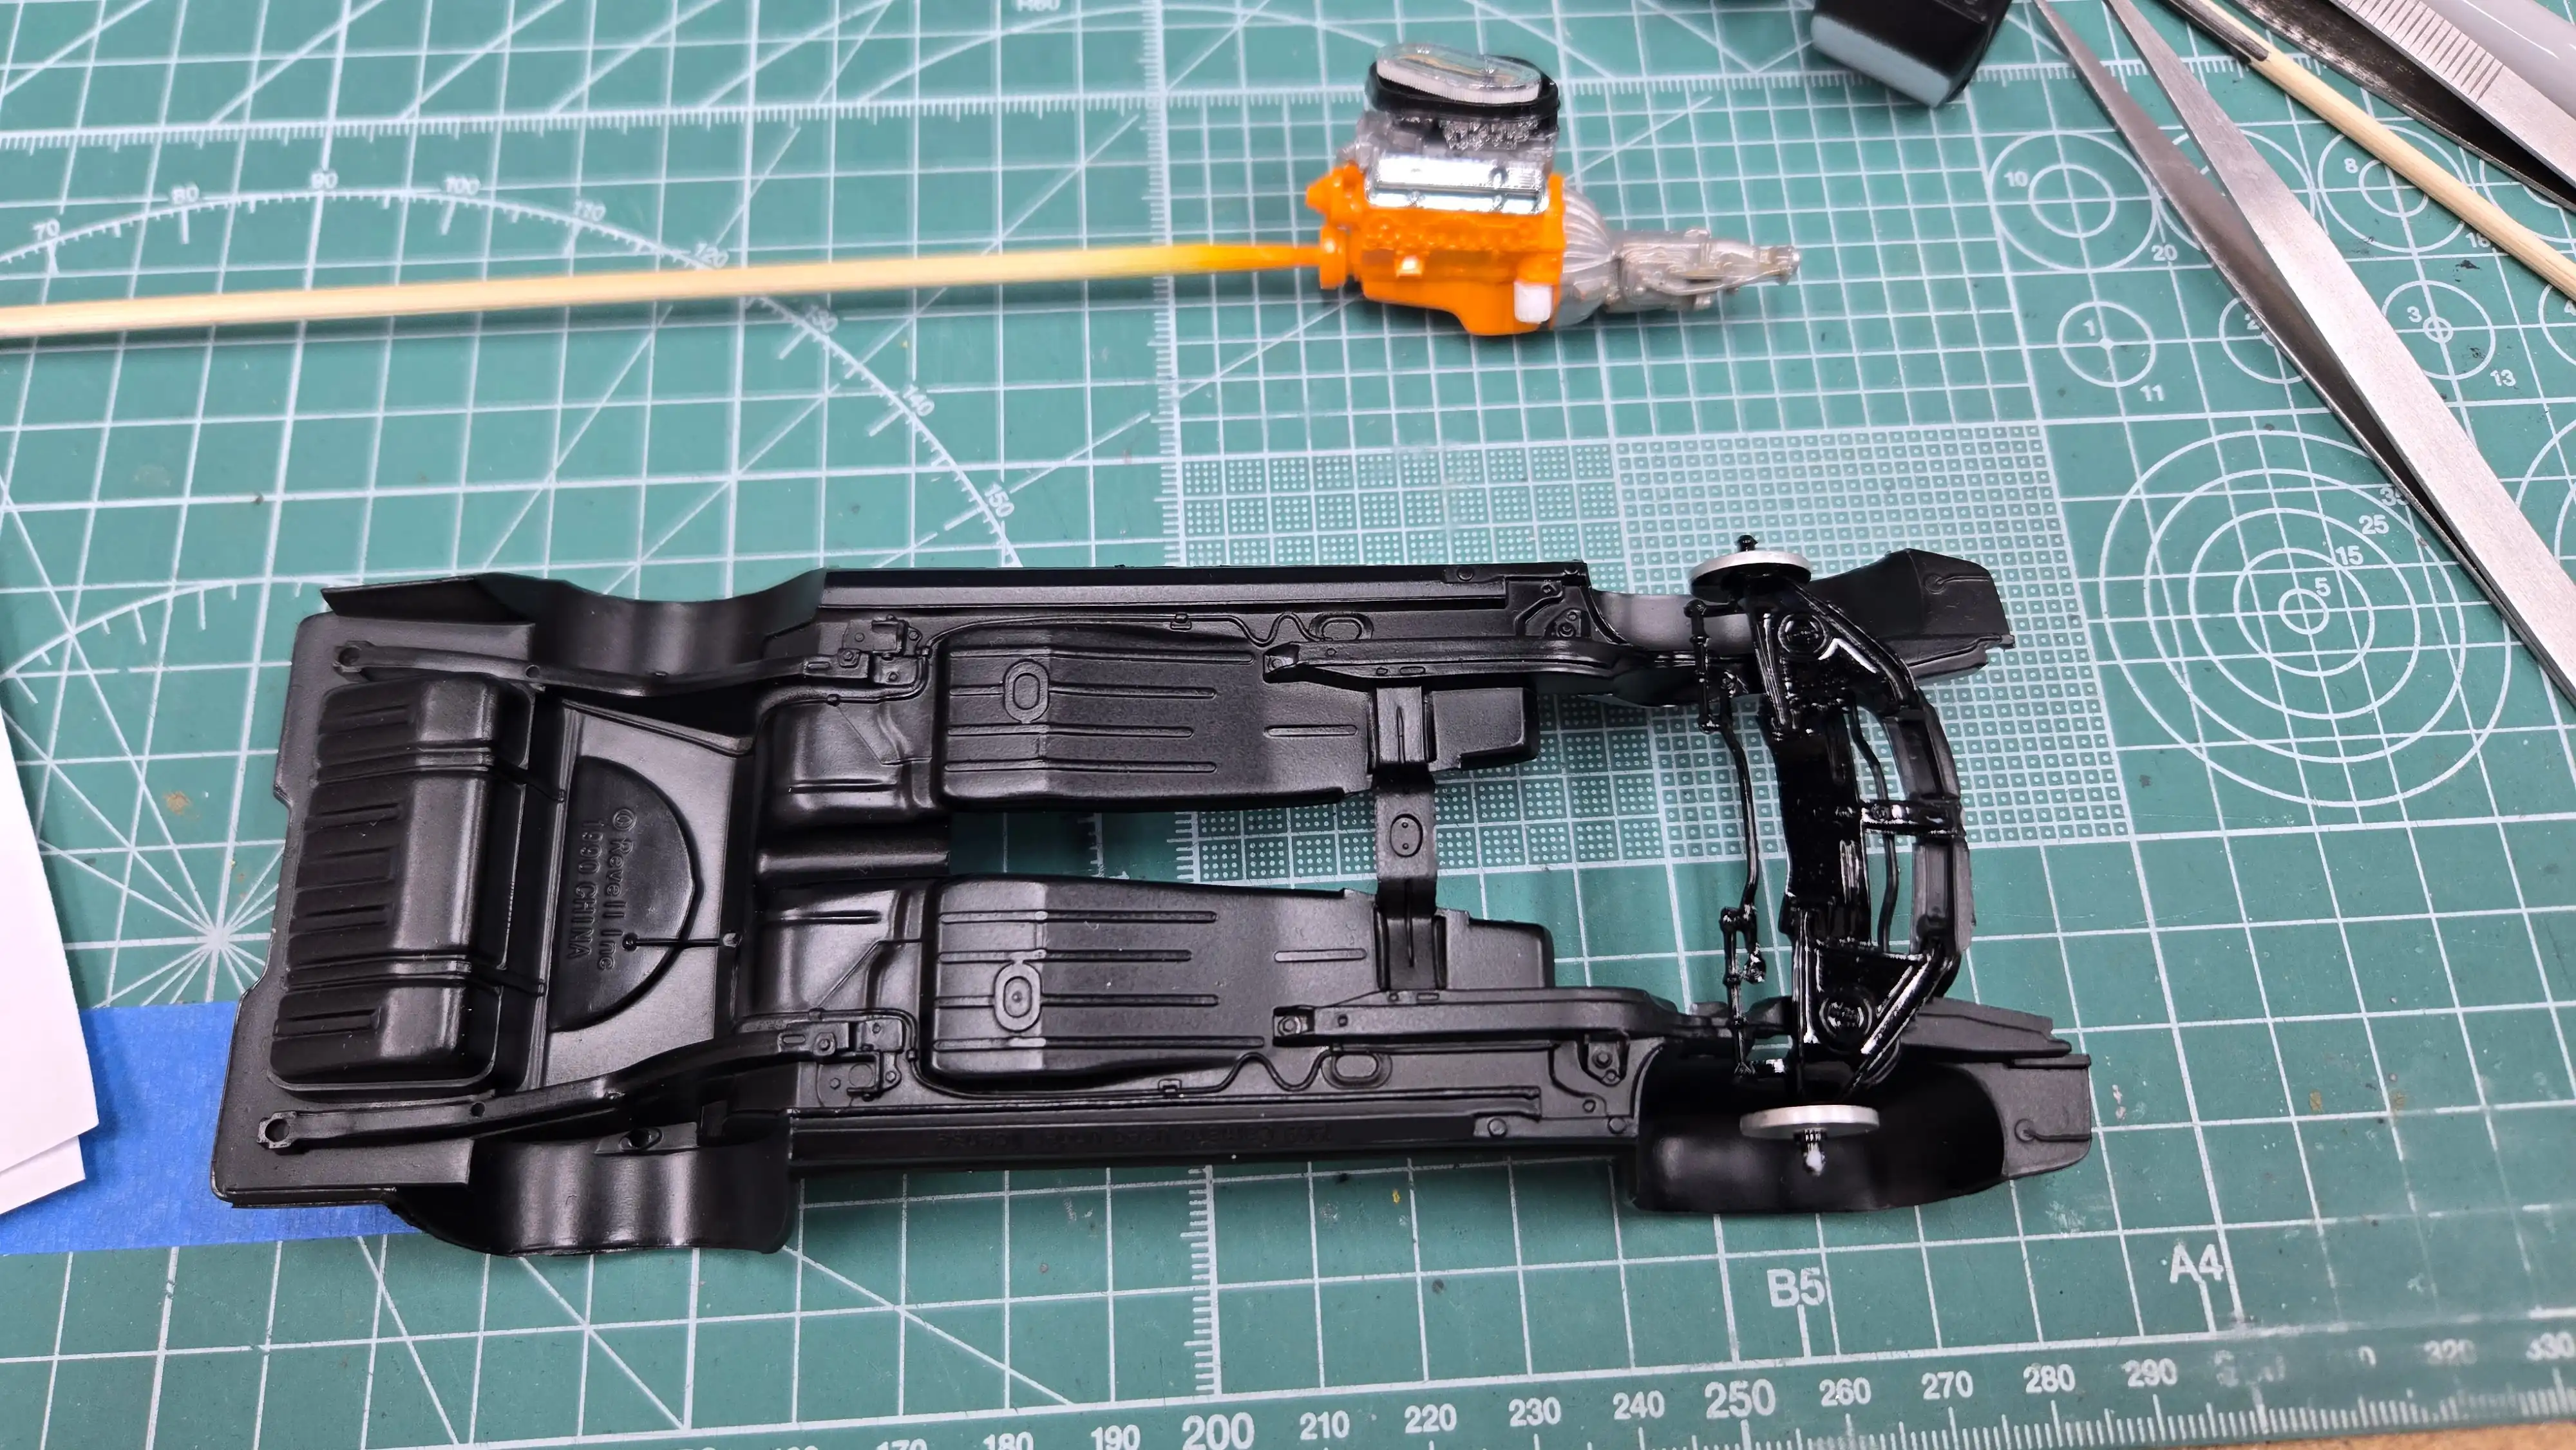
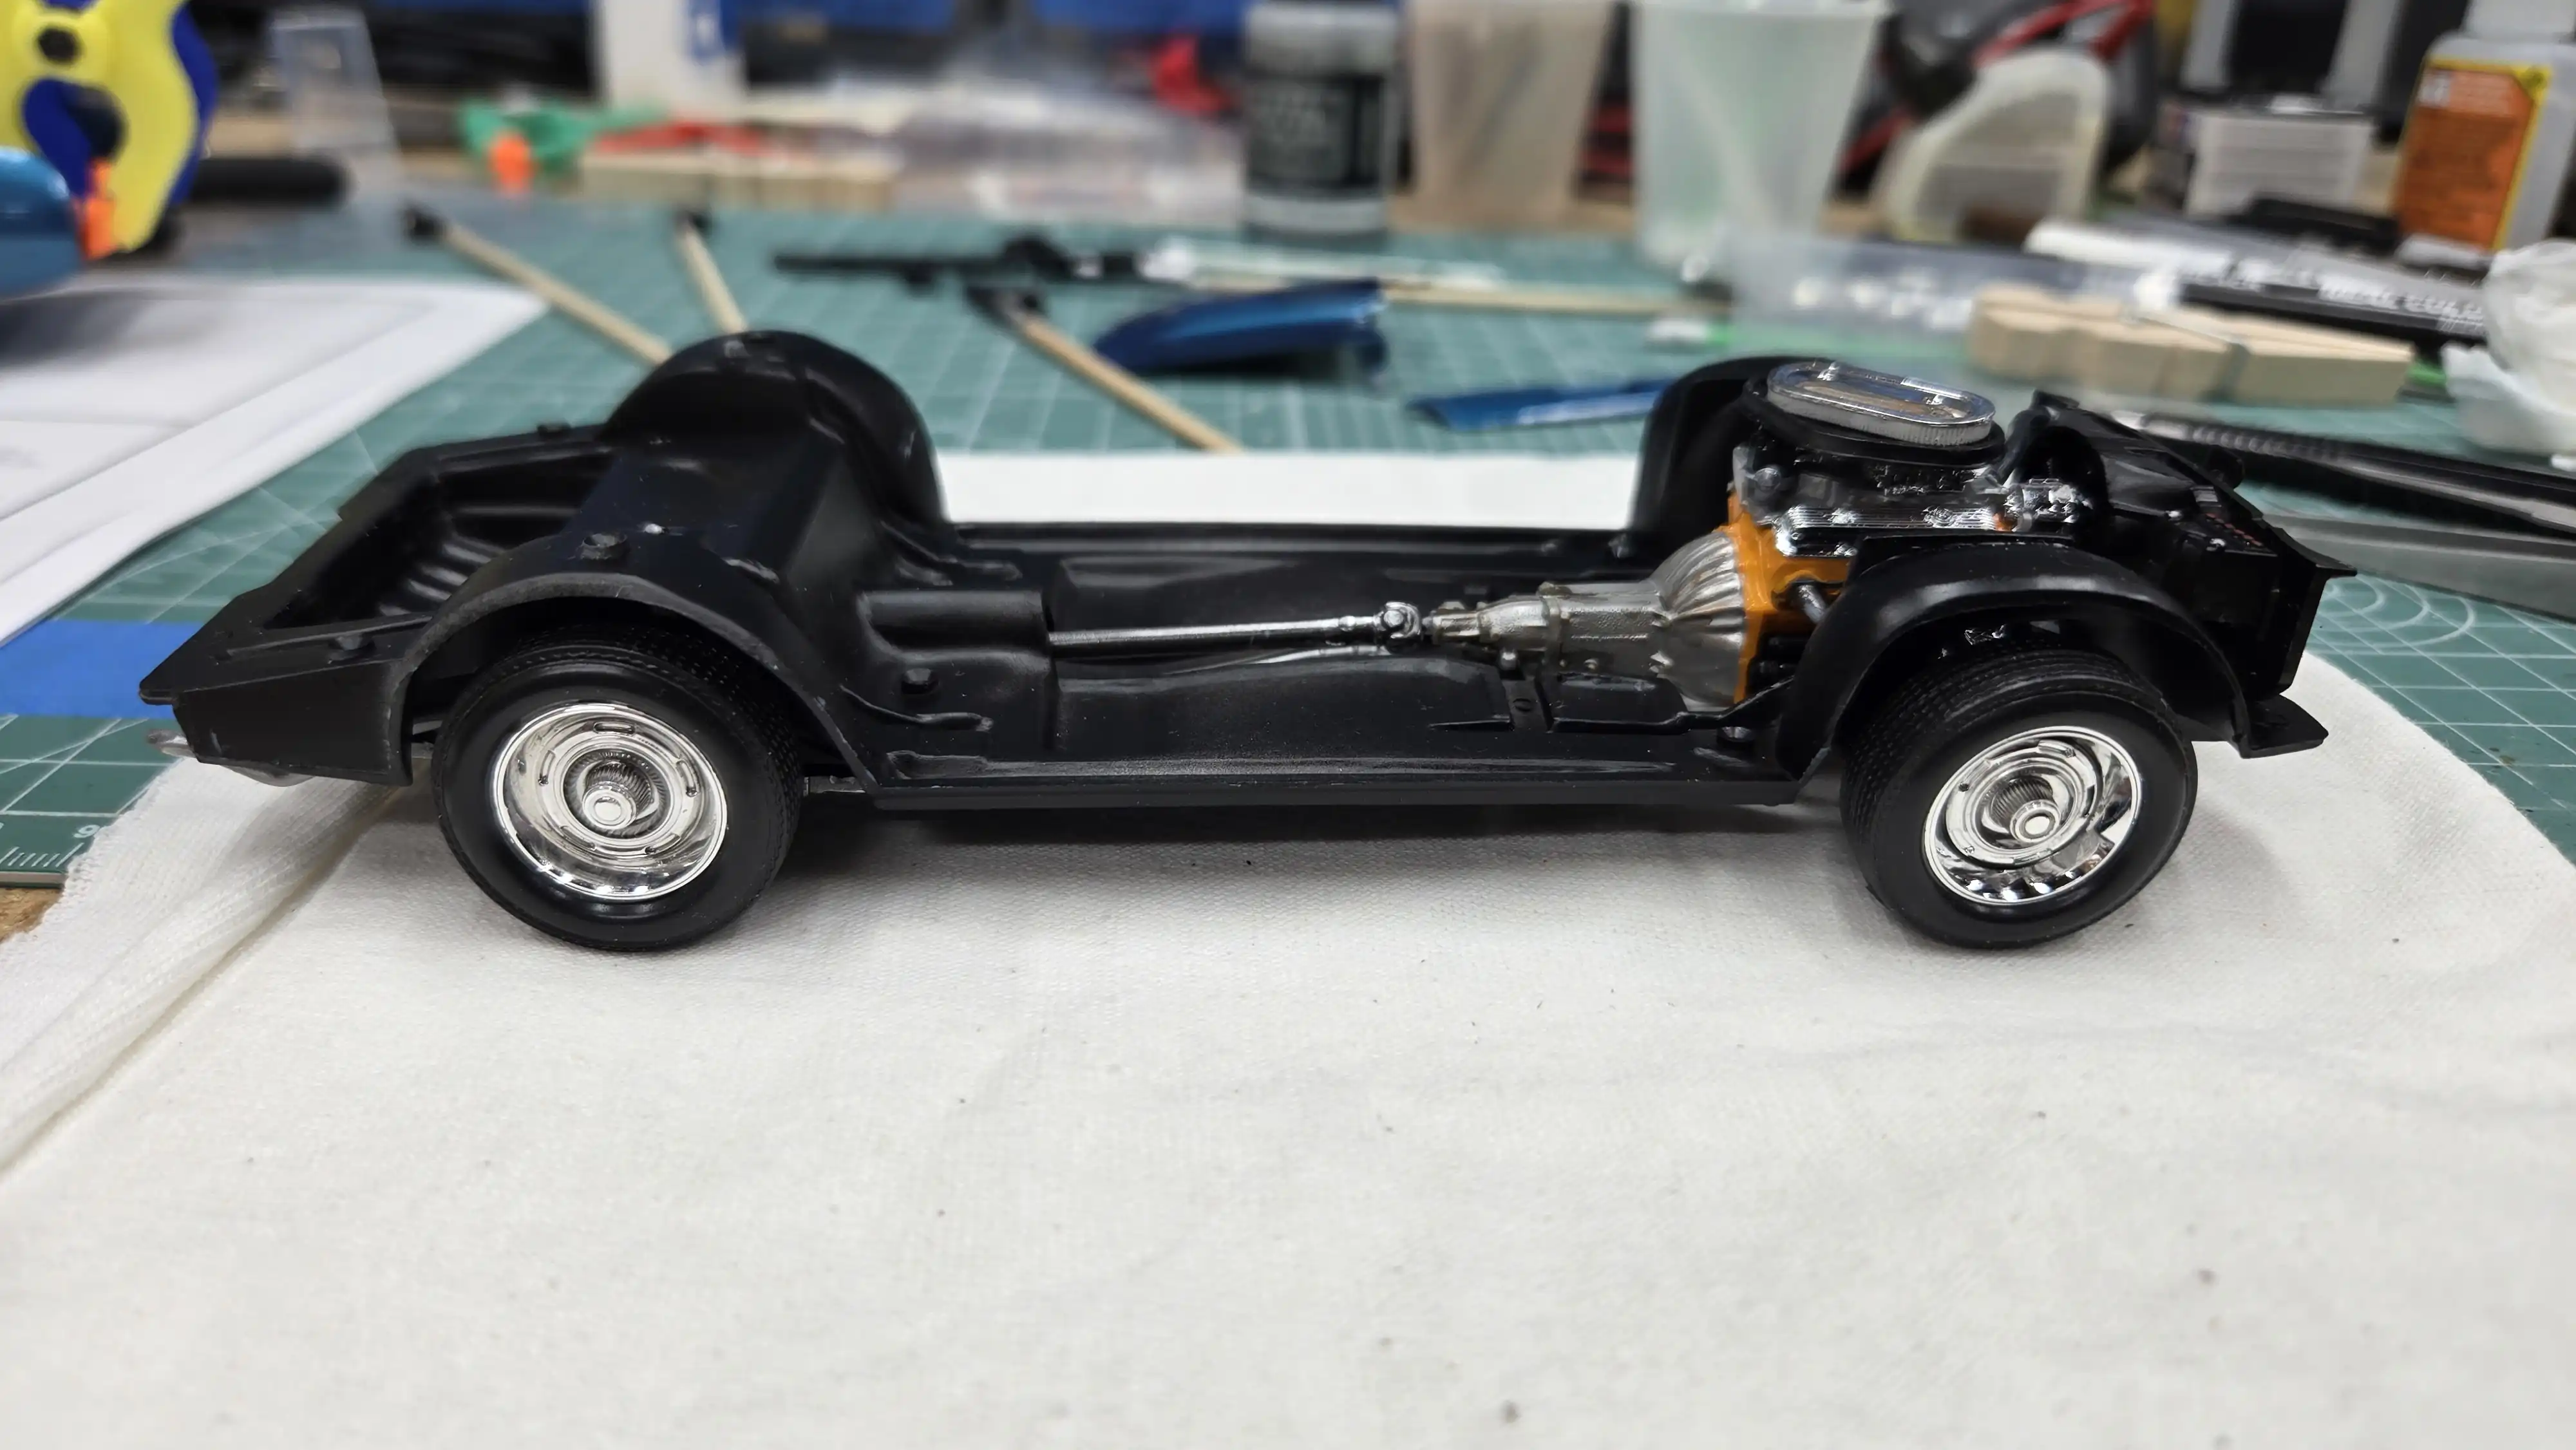
The engine is installed in the chassis. Once the engine
was installed, it was obvious that there is not enough
room to install the steering box or the Upper 'A' Arms.
See my Build Note 01
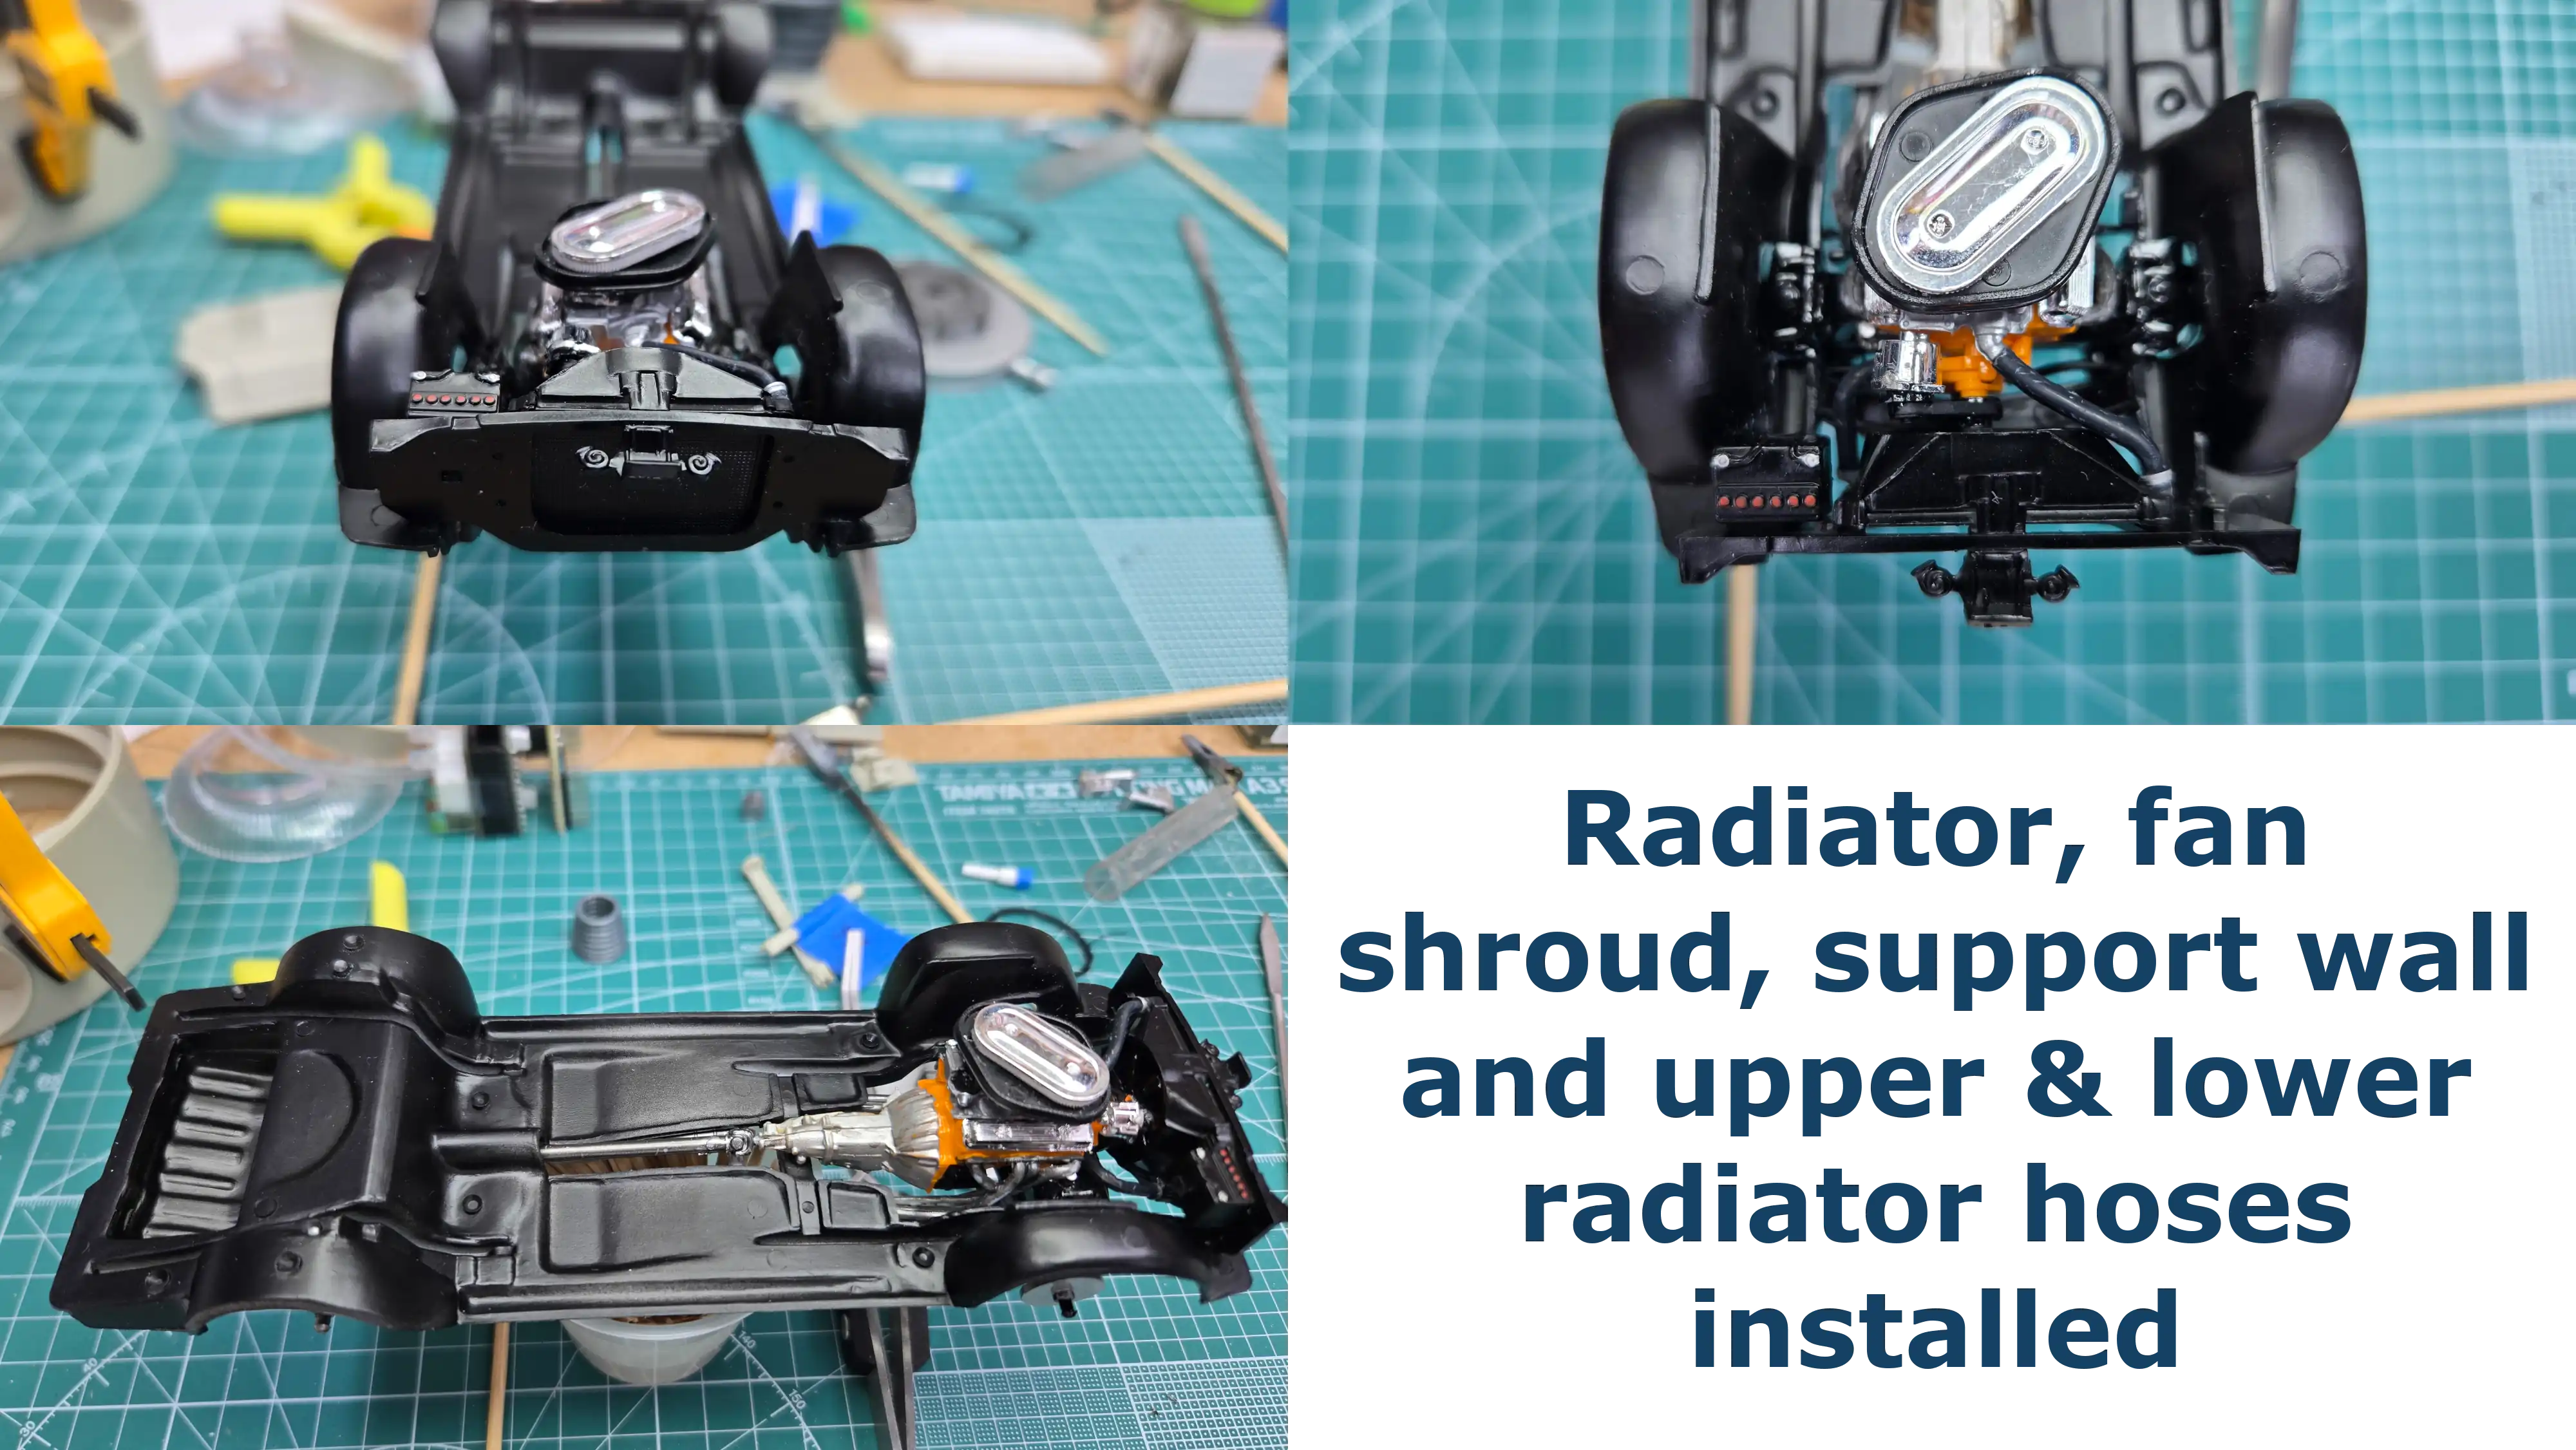
The radiator, fan shroud, support wall and upper & lower
radiator hoses are installed. The instructions look like
the hoses should be attached to the radiator before
the radiator assembly is installed on the frame; however,
I couldn't figure out how to properly align the hoses
to properly fit the engine points. Therefore, I installed
the radiator assembly first, then used a tweezers to
position and glue the hoses in place.
The dashboard is detailed as far as I'm taking it.
I'm just not steady enough to do much more. The
dashboard is then installed in the interior. (In
this photo, the steering wheel looks a-bit tilted
to the left; however, it really isn't.) Although,
it is almost touching the seat. I don't like that,
but once it's in the body, it will be hard to see that.
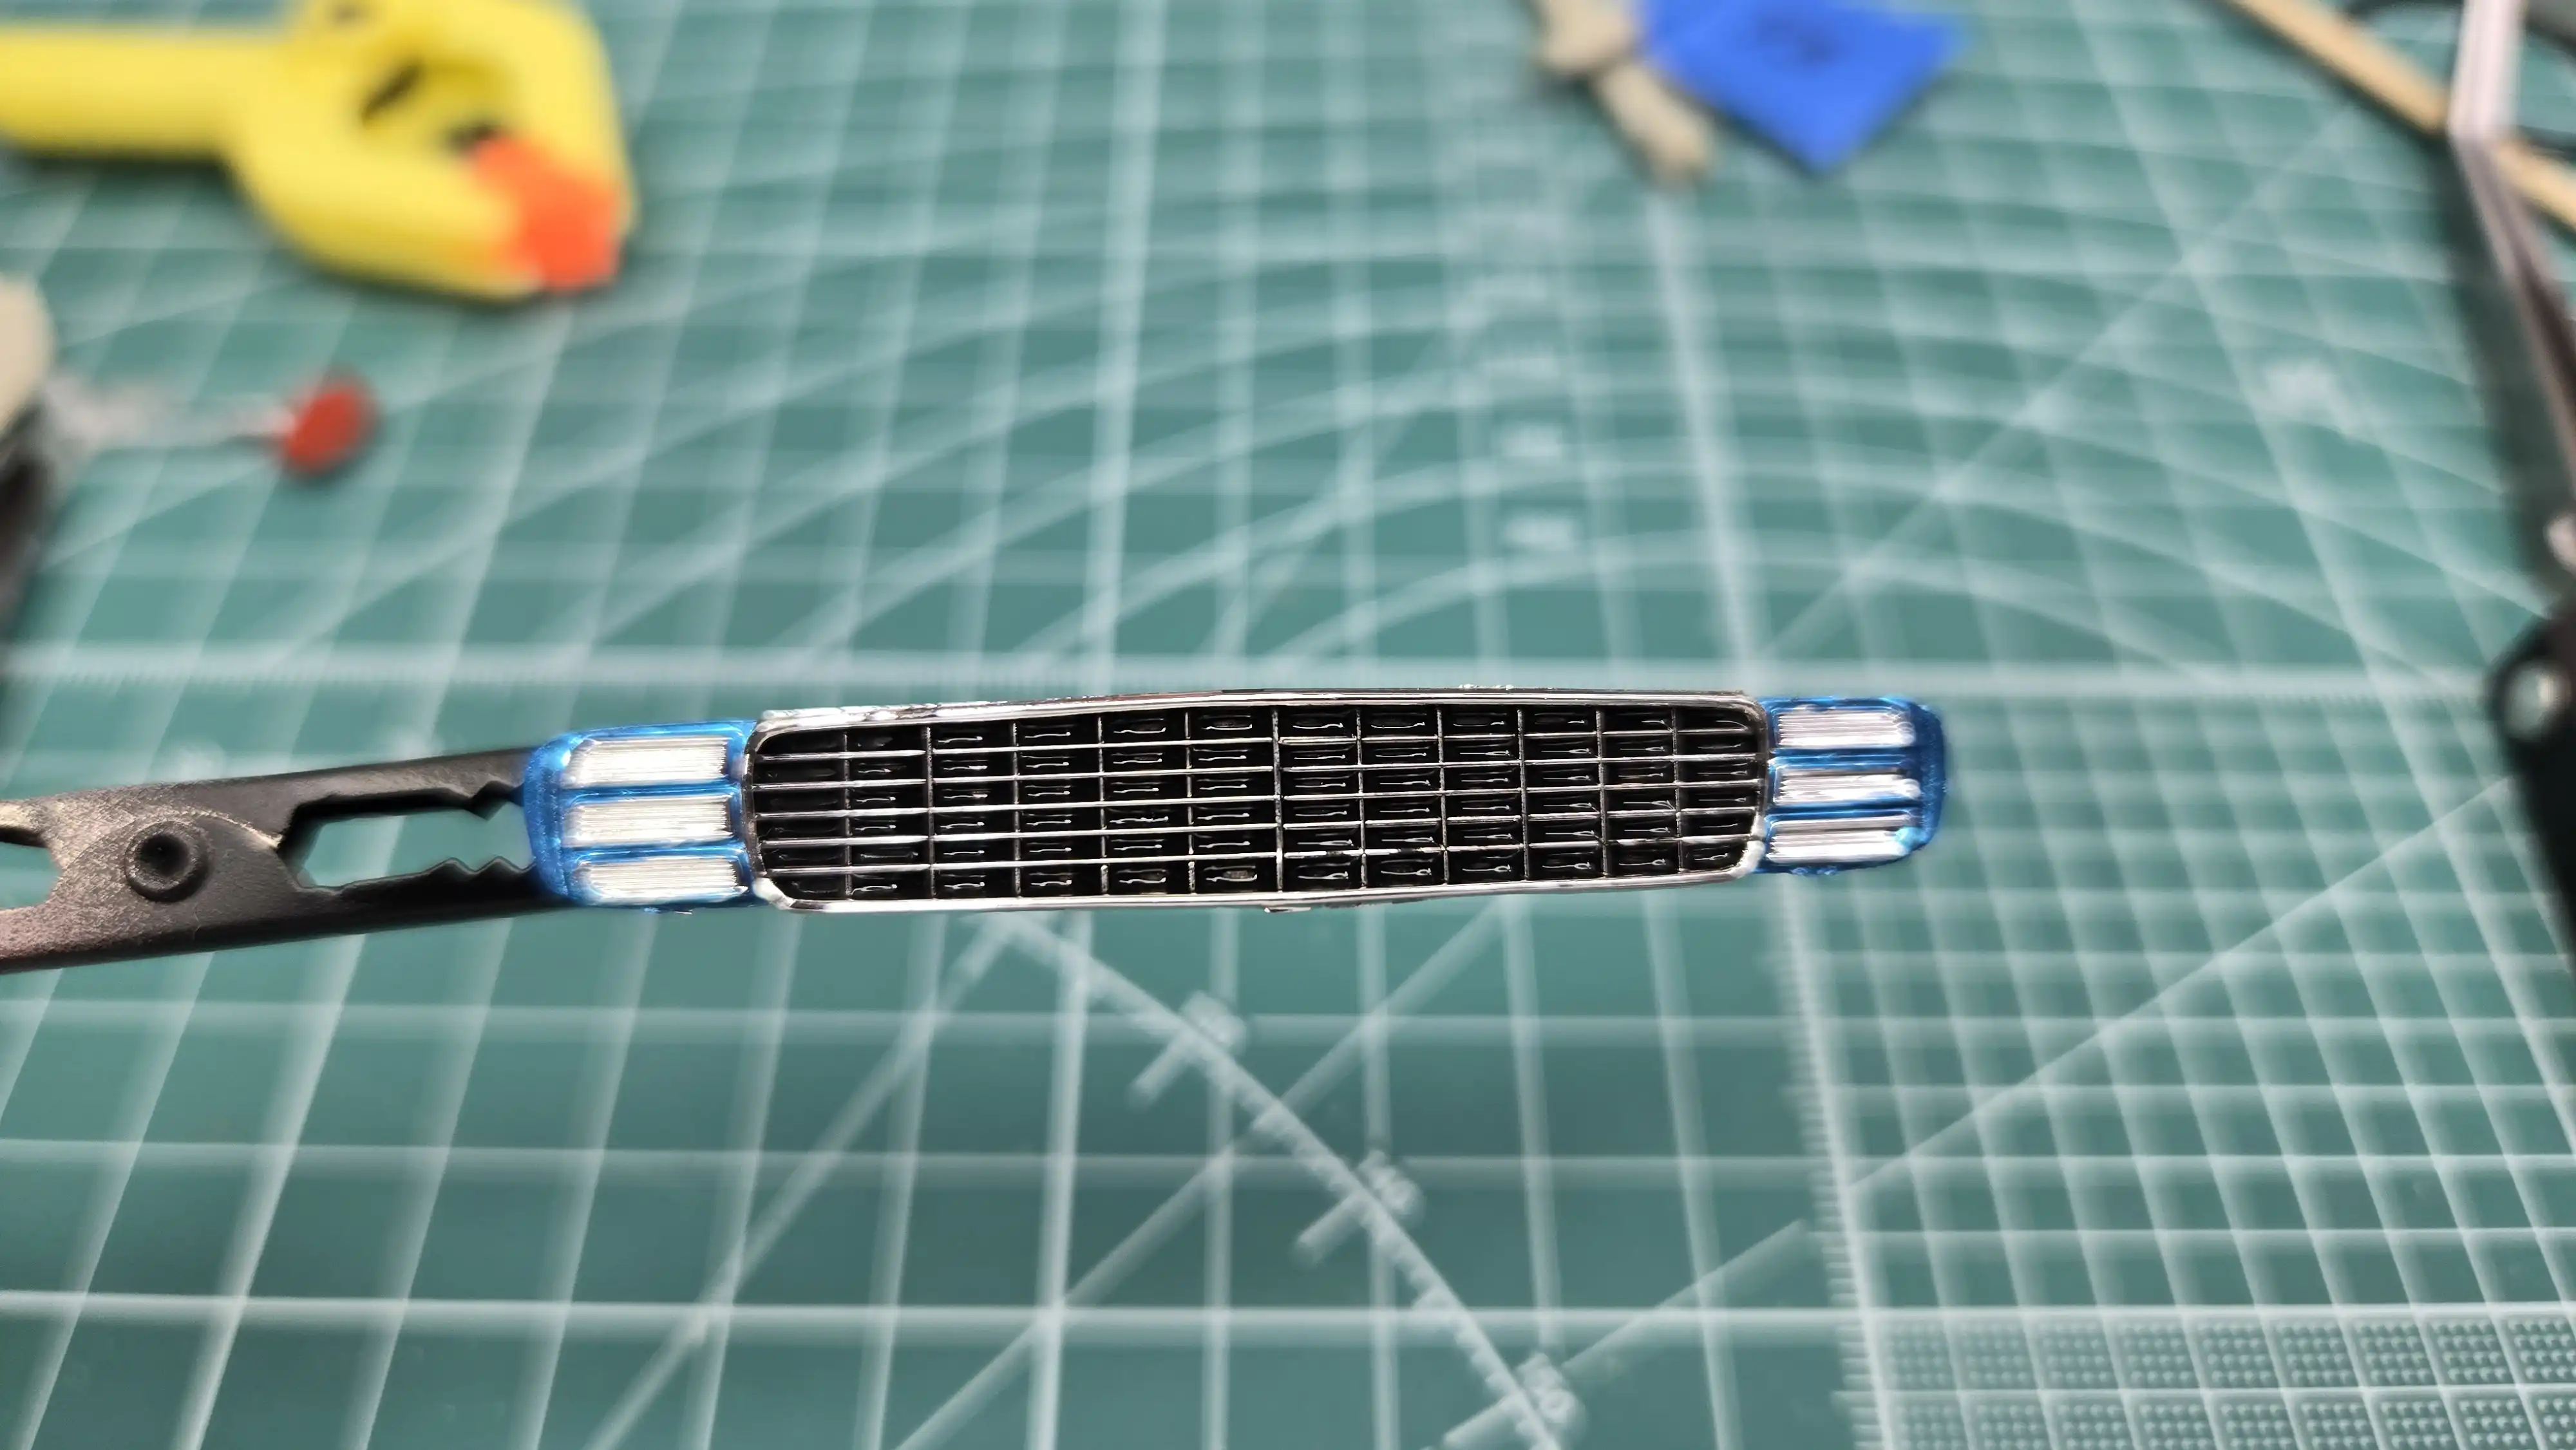
I decided to use what I believe the Chevy folks
call the Rally Sport Grill. I put two coats of
black wash in the grill and two coats of the
body color around the head lights. The grill is
not finished yet. There needs to be a-bit more
black wash and the body color needs another
coat and some touchup.
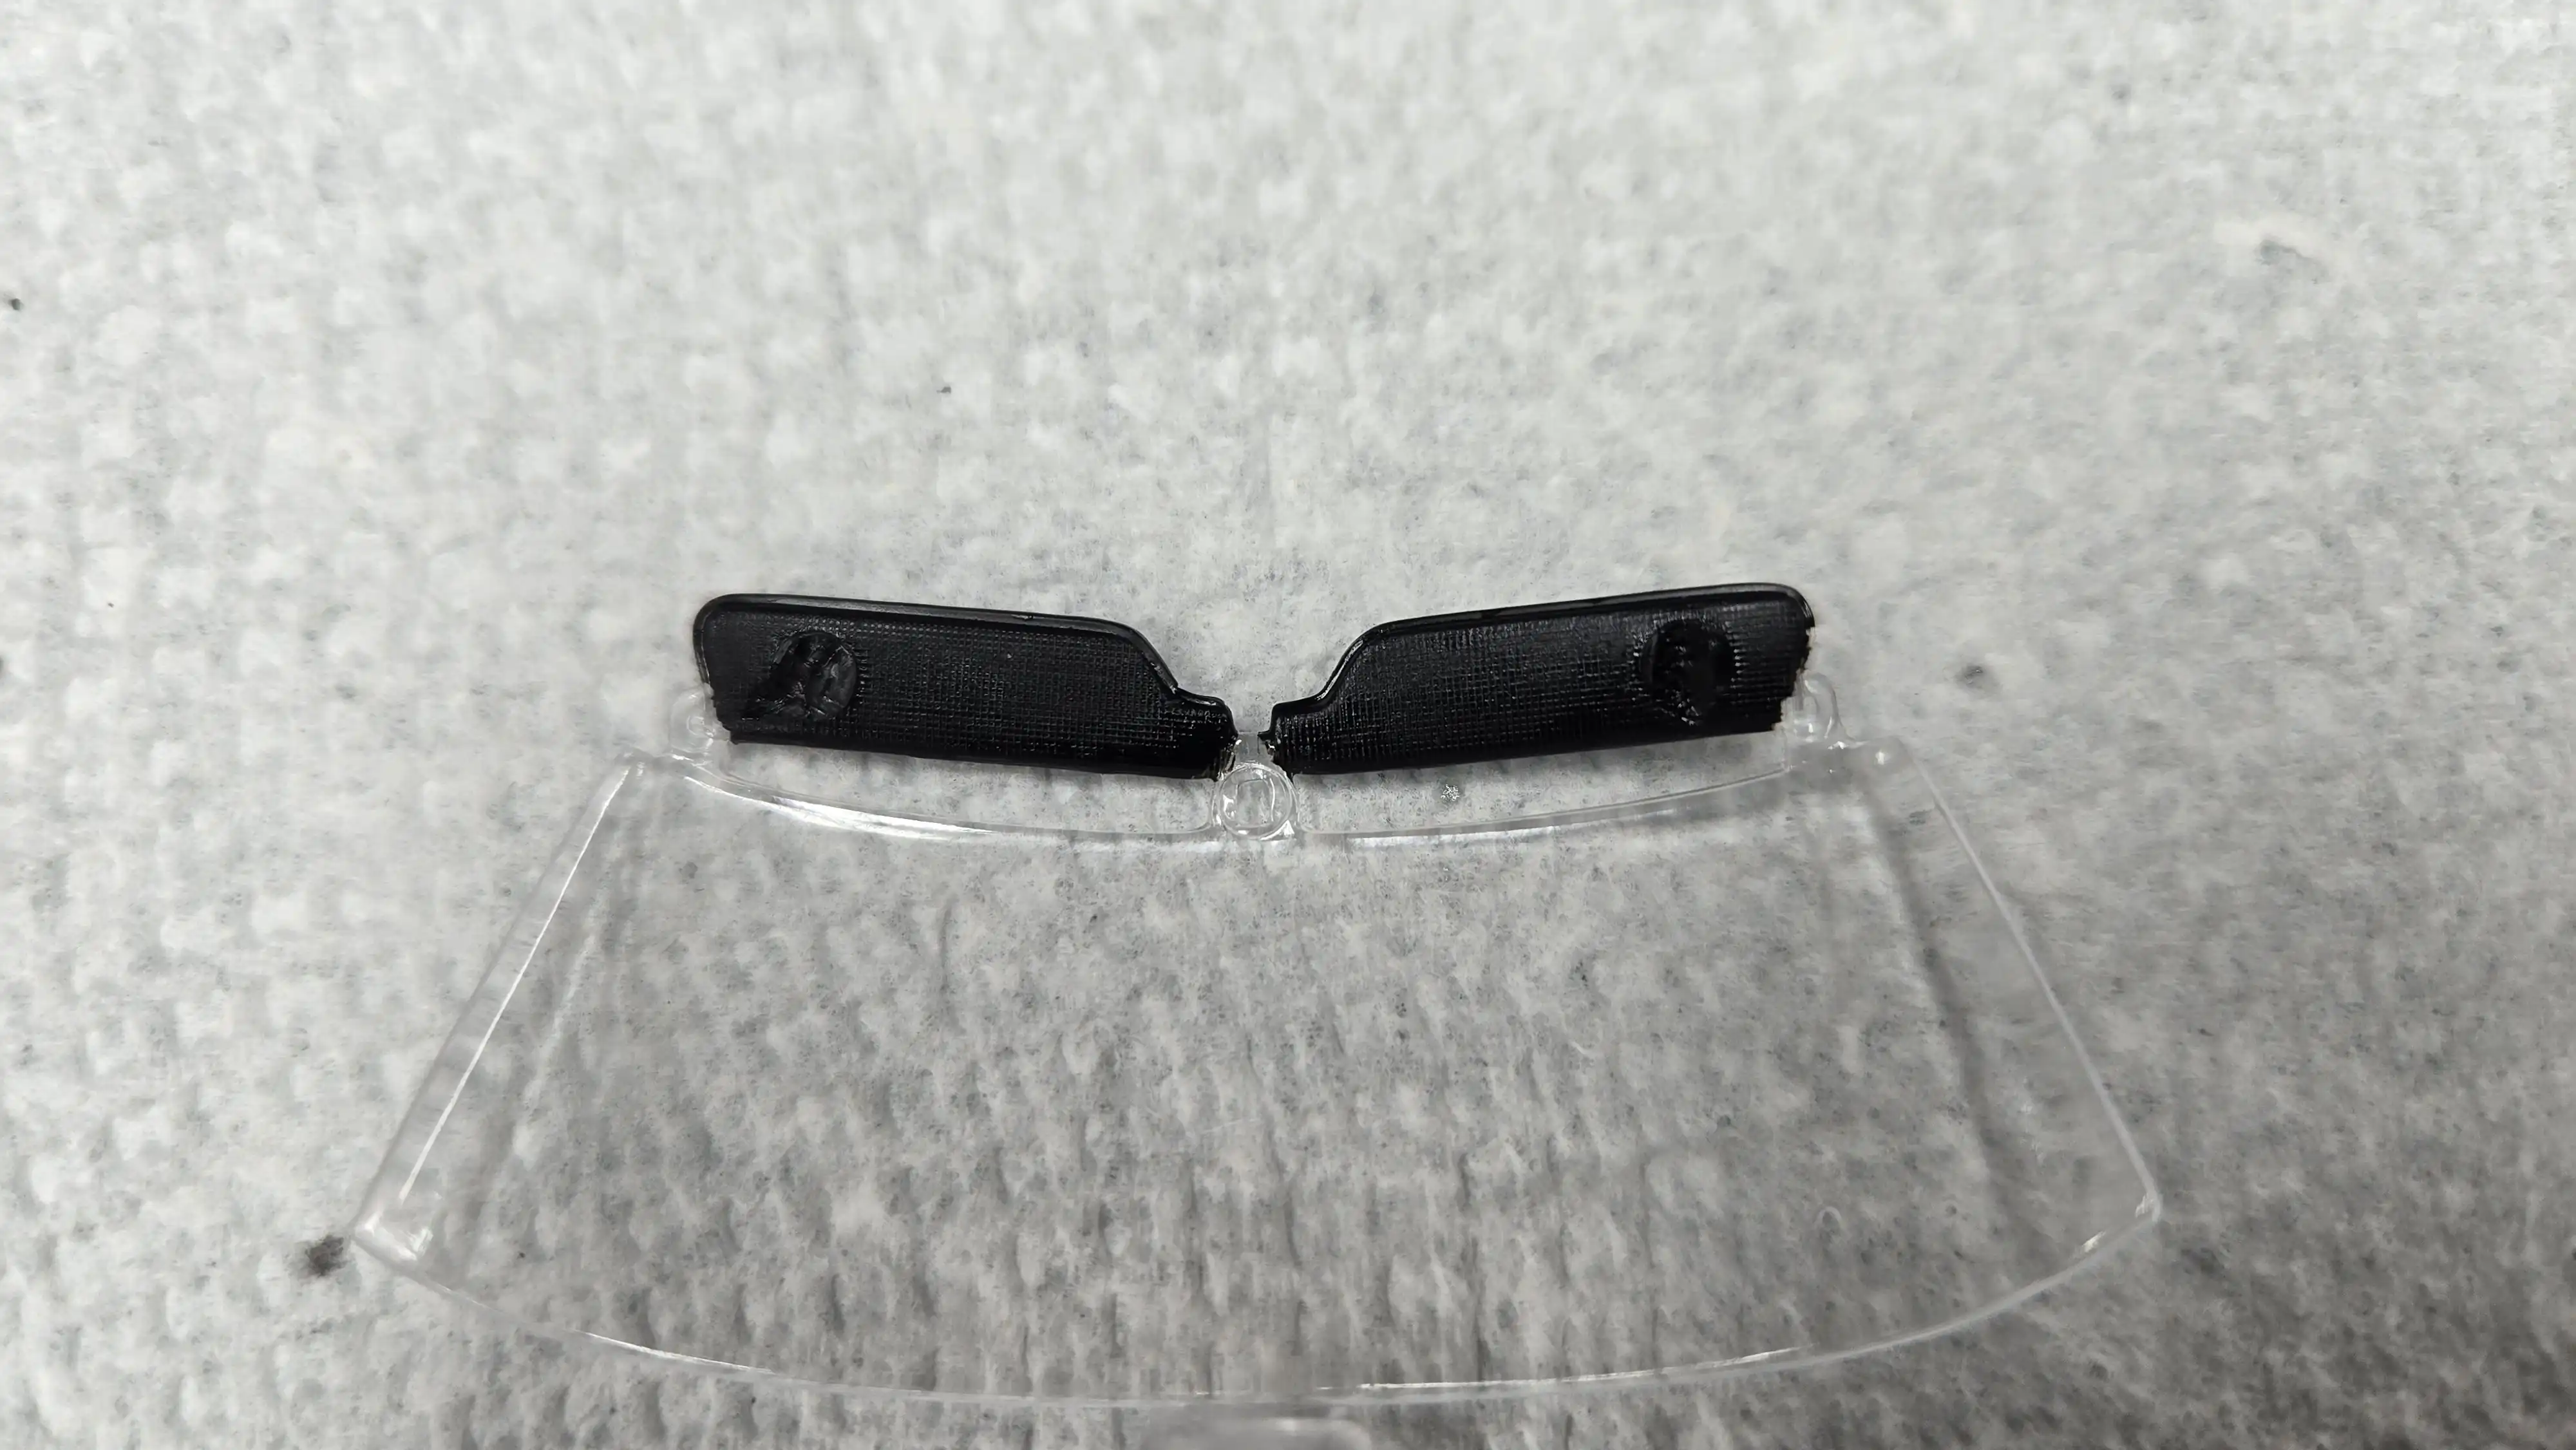
The sun visors are painted the interior color.
There are huge injection points on the visors that
I cut off, but it left a bad mark. If I sand them,
it will take away the detail on the visors.
Since it will be very difficult to see them
once the the glass is installed, I'm leaving them
as is.
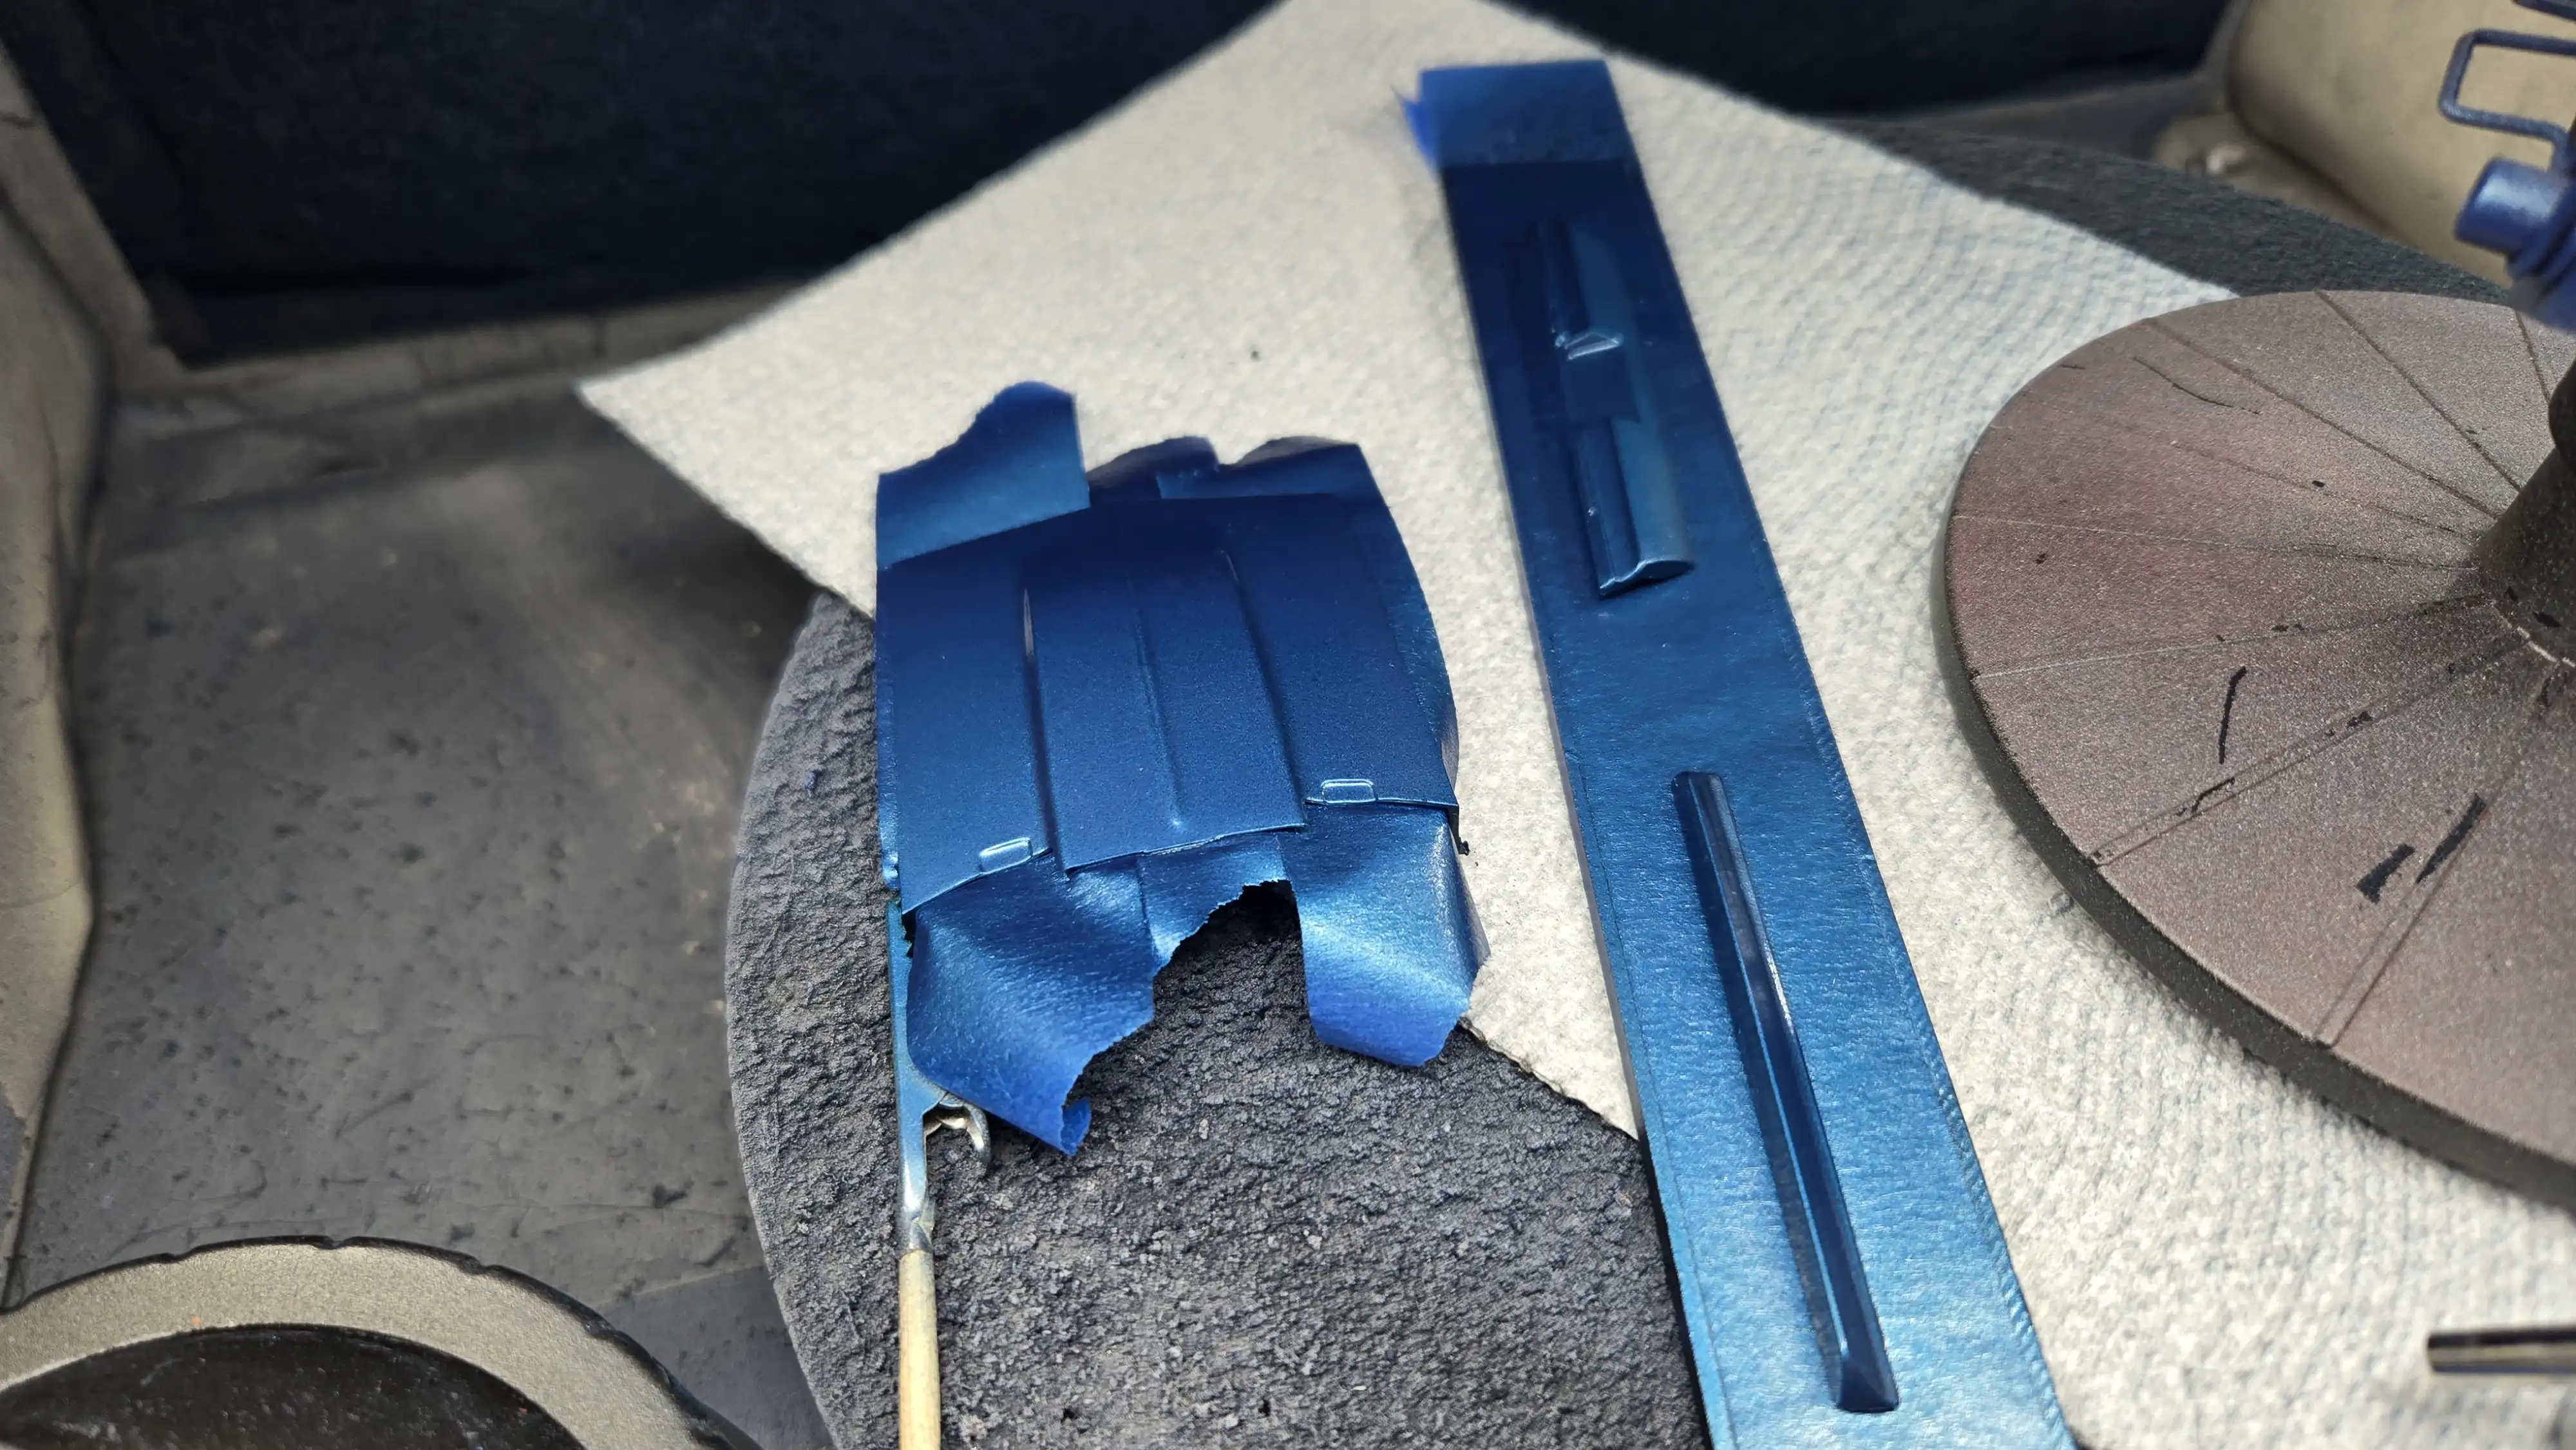
Bare Metal Foil (BMF) has been installed on all the body chrome
trim. I was a-bit leary about using BMF on acrylic paint. I was
concerned that it might mar or peal the paint. After doing some
research, one website said to wax the body with a non-silicon wax
before applying the BMF. The BMF instructions and other websites
said not to use any kind of wax on the painted surface. I asked
the question in some Facebook groups and also got mixed opinions.
To see how I handled it, go to my
info page for this build.
The wheels and tires are installed on the chassis. The instructions tell
you not to glue them on; however, they will not stay on the axle if I
didn't glue them in place.
The clamps are holding the tail lights in position until the glue
drys. I was bad...I hadn't read the instructions and didn't realize
that the tail light buckets had to be installed from inside the
body. So...I had to rip the chassis off the body and in so doing,
I damaged just a small bit of the fender well BMF chrome trim. I
can fix it, but shame on me for not doing what I always used to tell my
students when I was teaching..."READ THE INSTRUCTIONS!!!"
A view of the engine with the hood off. The engine is the one that
came with the kit. I didn't aad anything to it, nor did I strip
any of the chrome from the chrome parts.
Finished car back view. I made my own 1969 Pennsylvania license plate.
I found one online, saved the image file, then opened it in
Gimp.
Once in Gimp, I increase the resolution to 1000 px/inch and then
scaled it to 12mm x 5mm, the size of a 1:24 scale license plate.
I then printed it on my color laser, cut it out and used Elmer's
school glue to glue it on the plate holder.
After final assembly, the chassis must not be in the same position
as when I dry fit the assembly because as can be seen, the hood
does not close all they way because it is touching the air cleaner.
I could fix it by cutting the hood open and put a raised section
on the hood, but for now, this is just a shelf car and I will most
likely not do that.

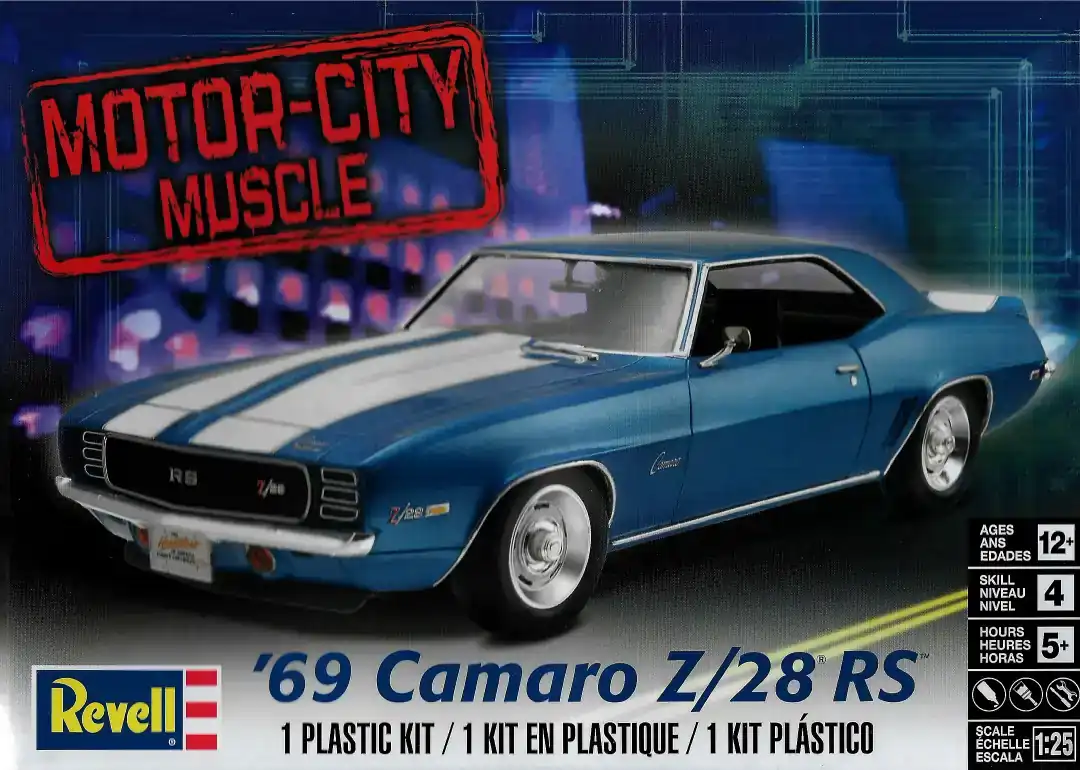 1969 Camaro Z/28 RS Box Art
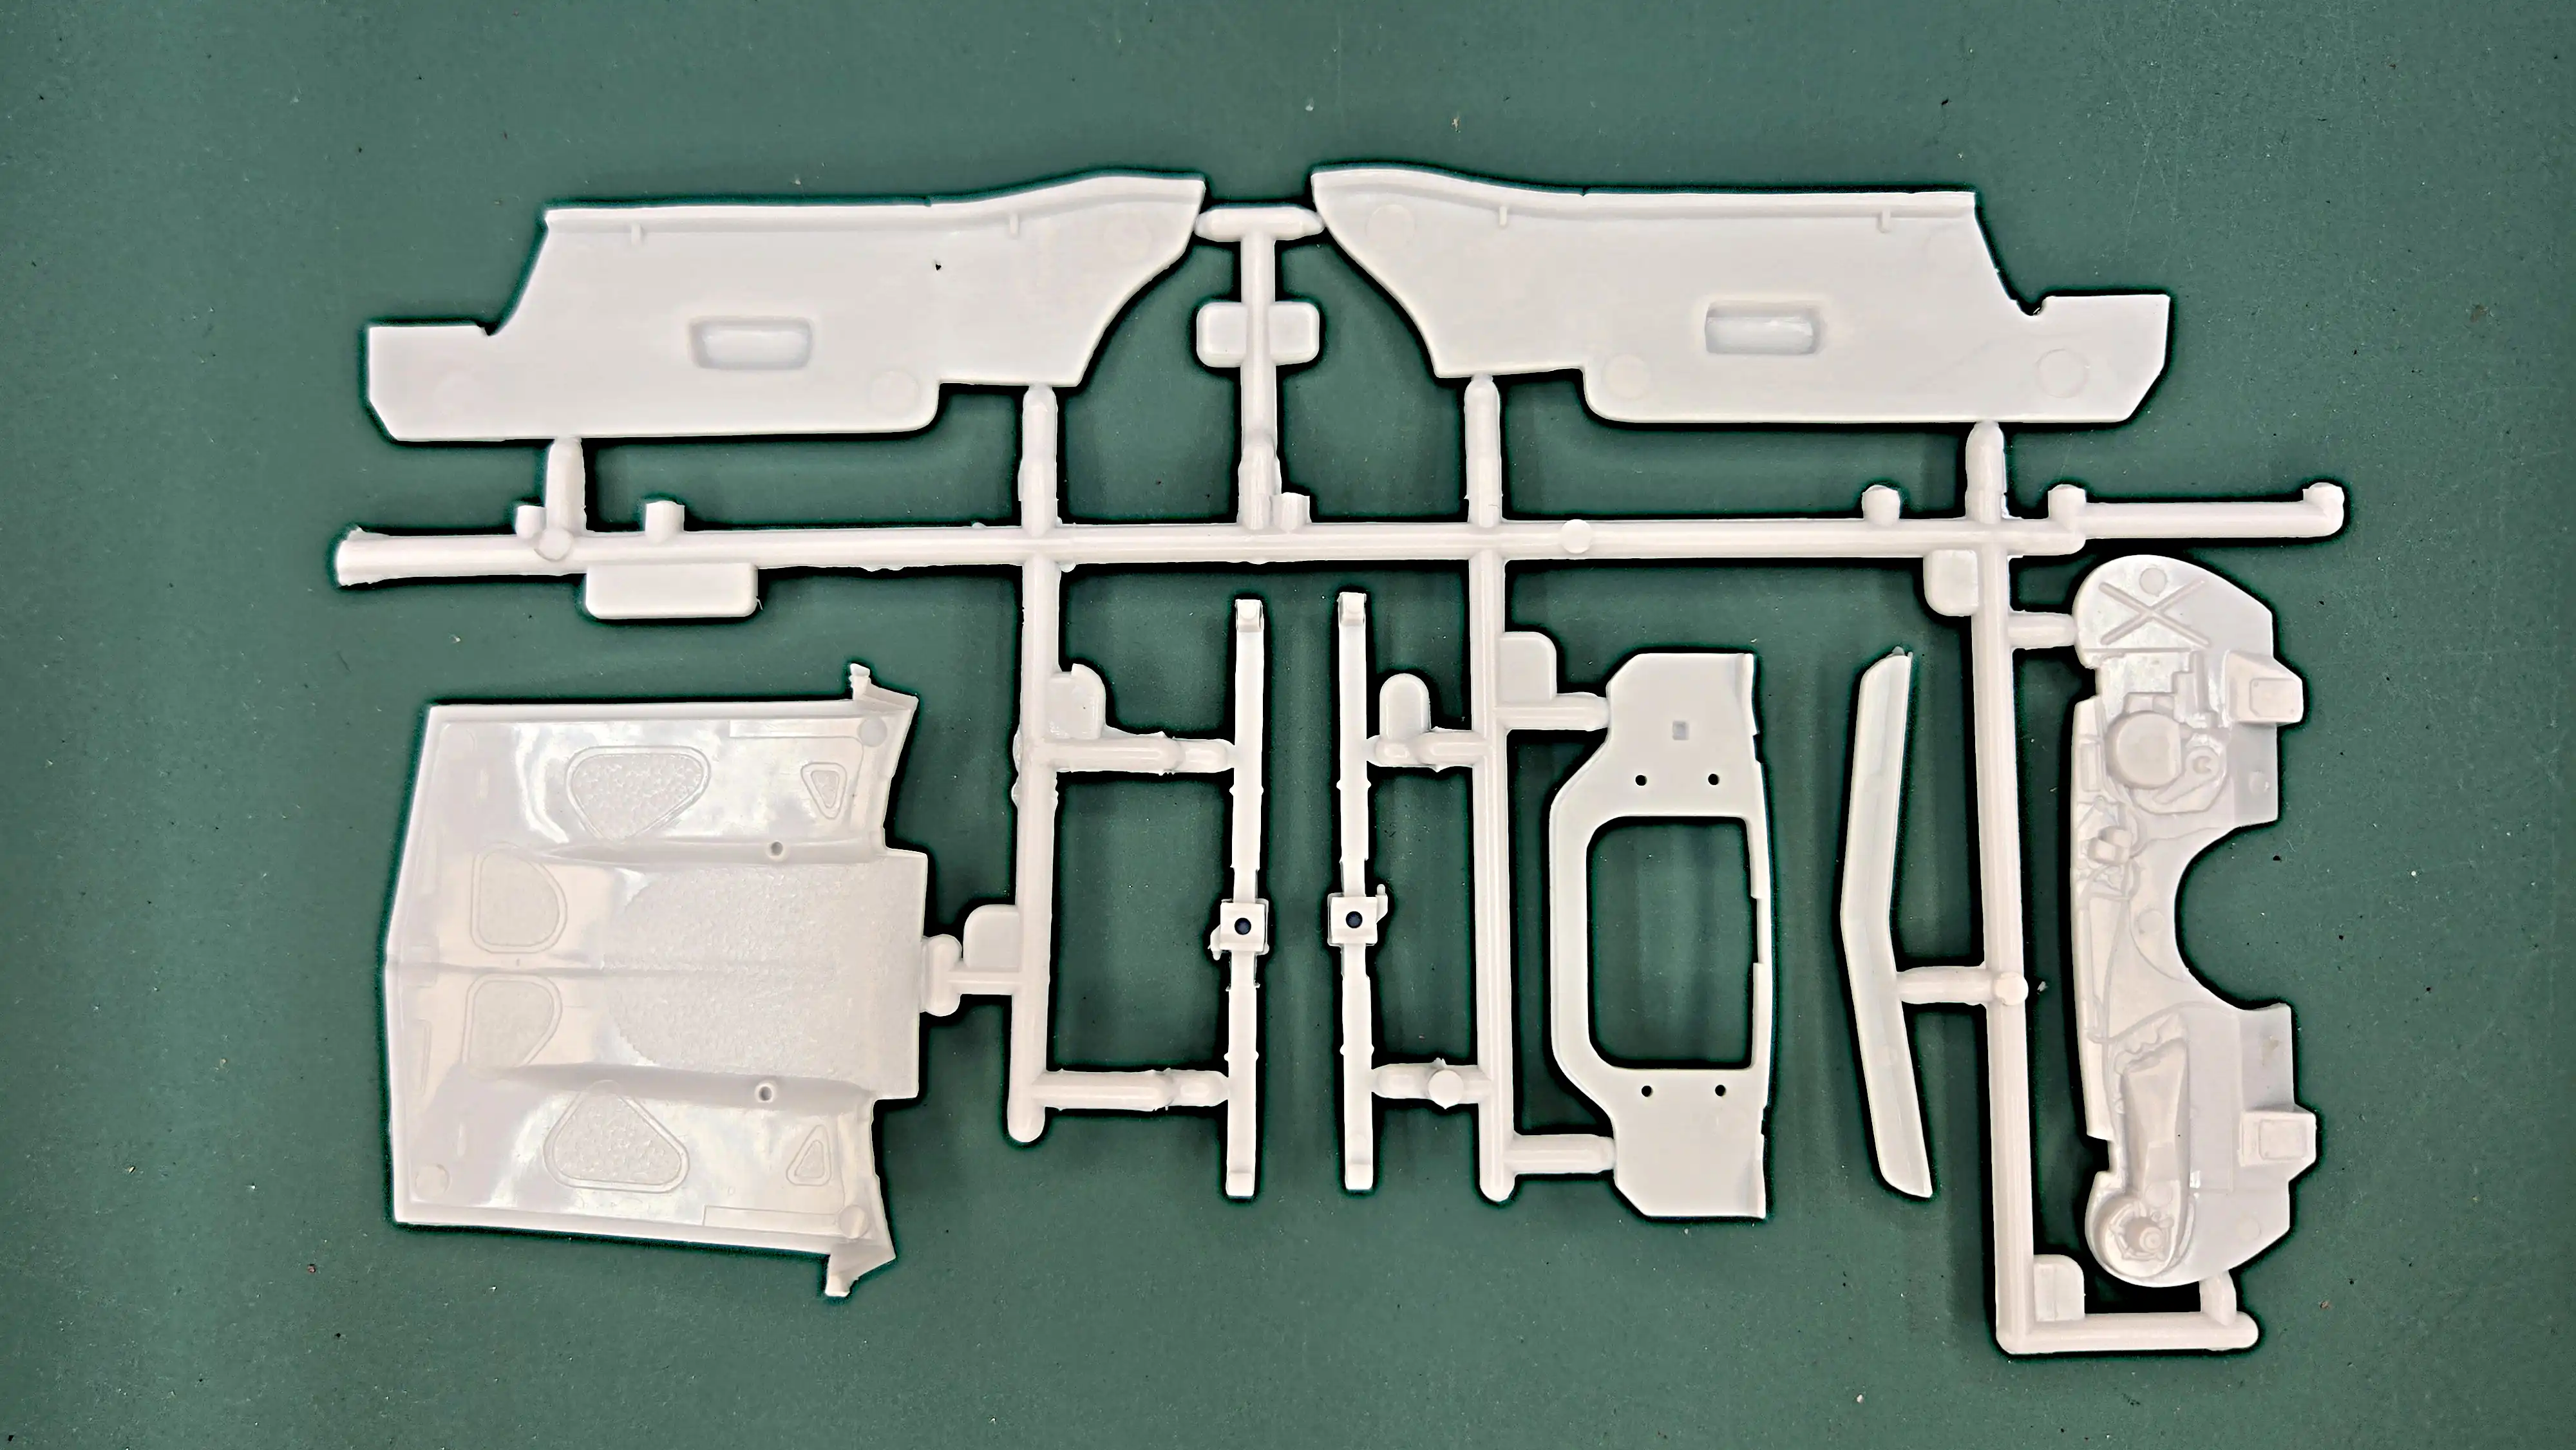
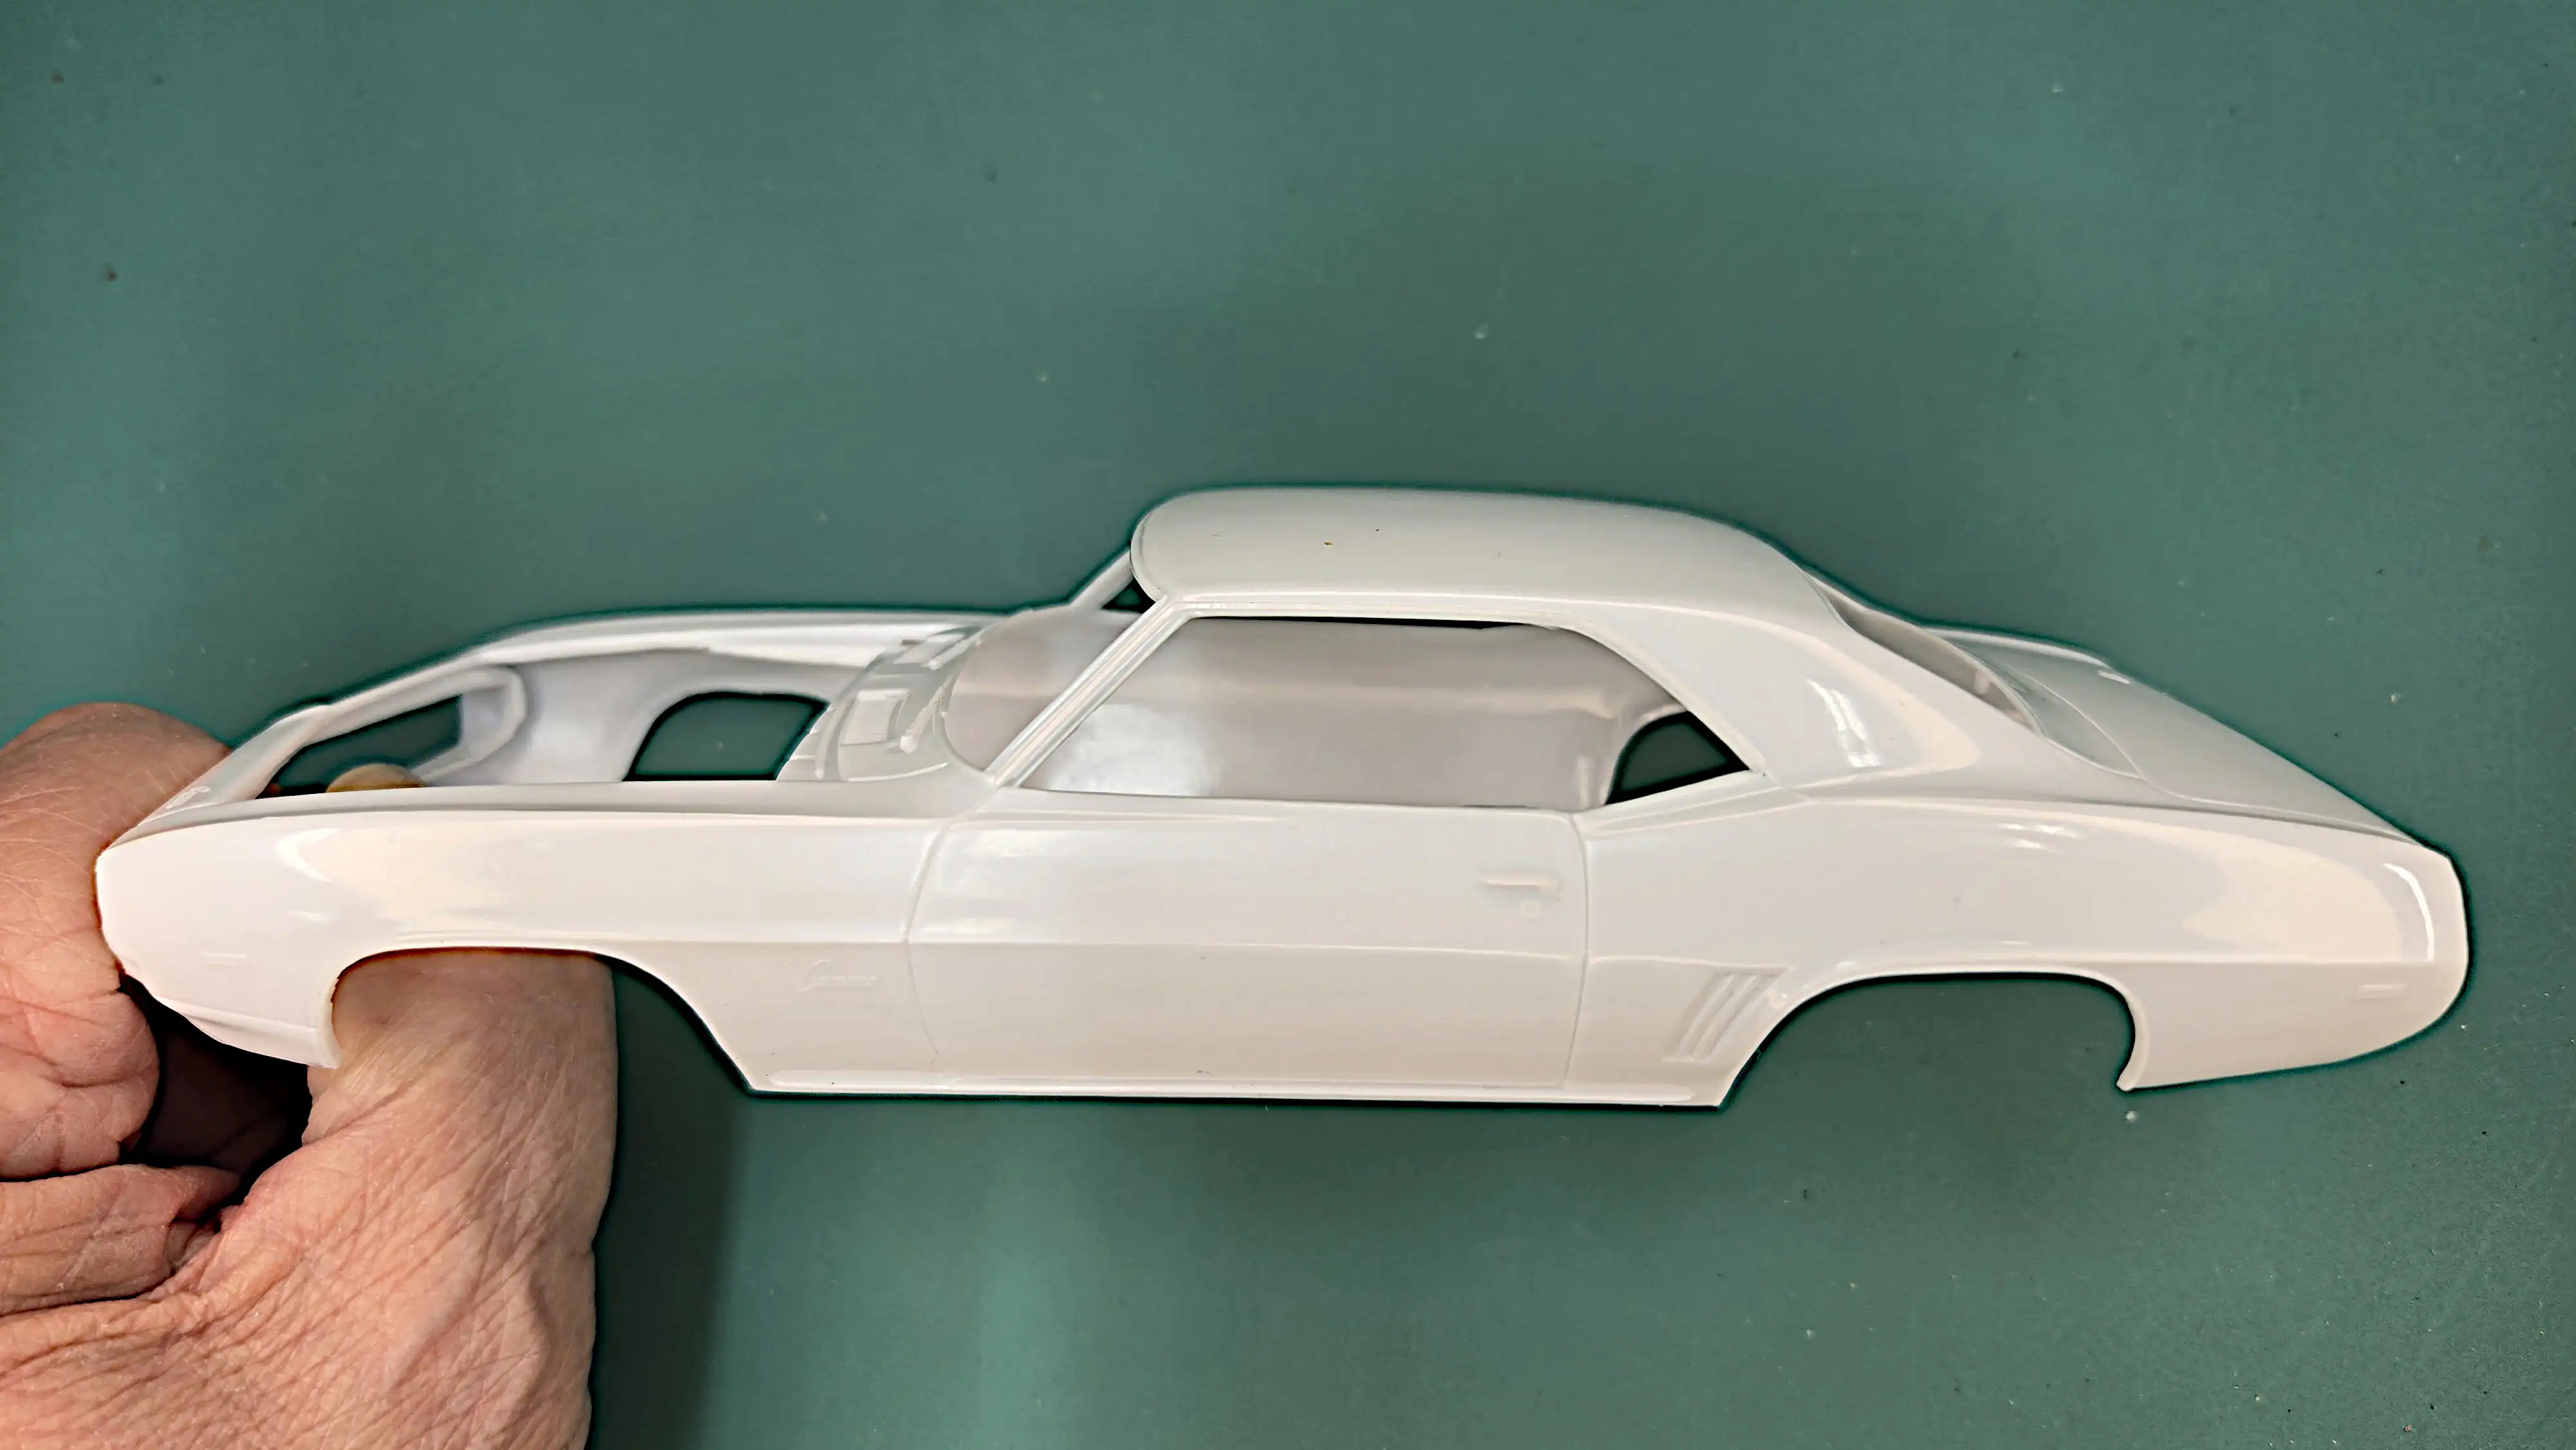 69 Camaro Body
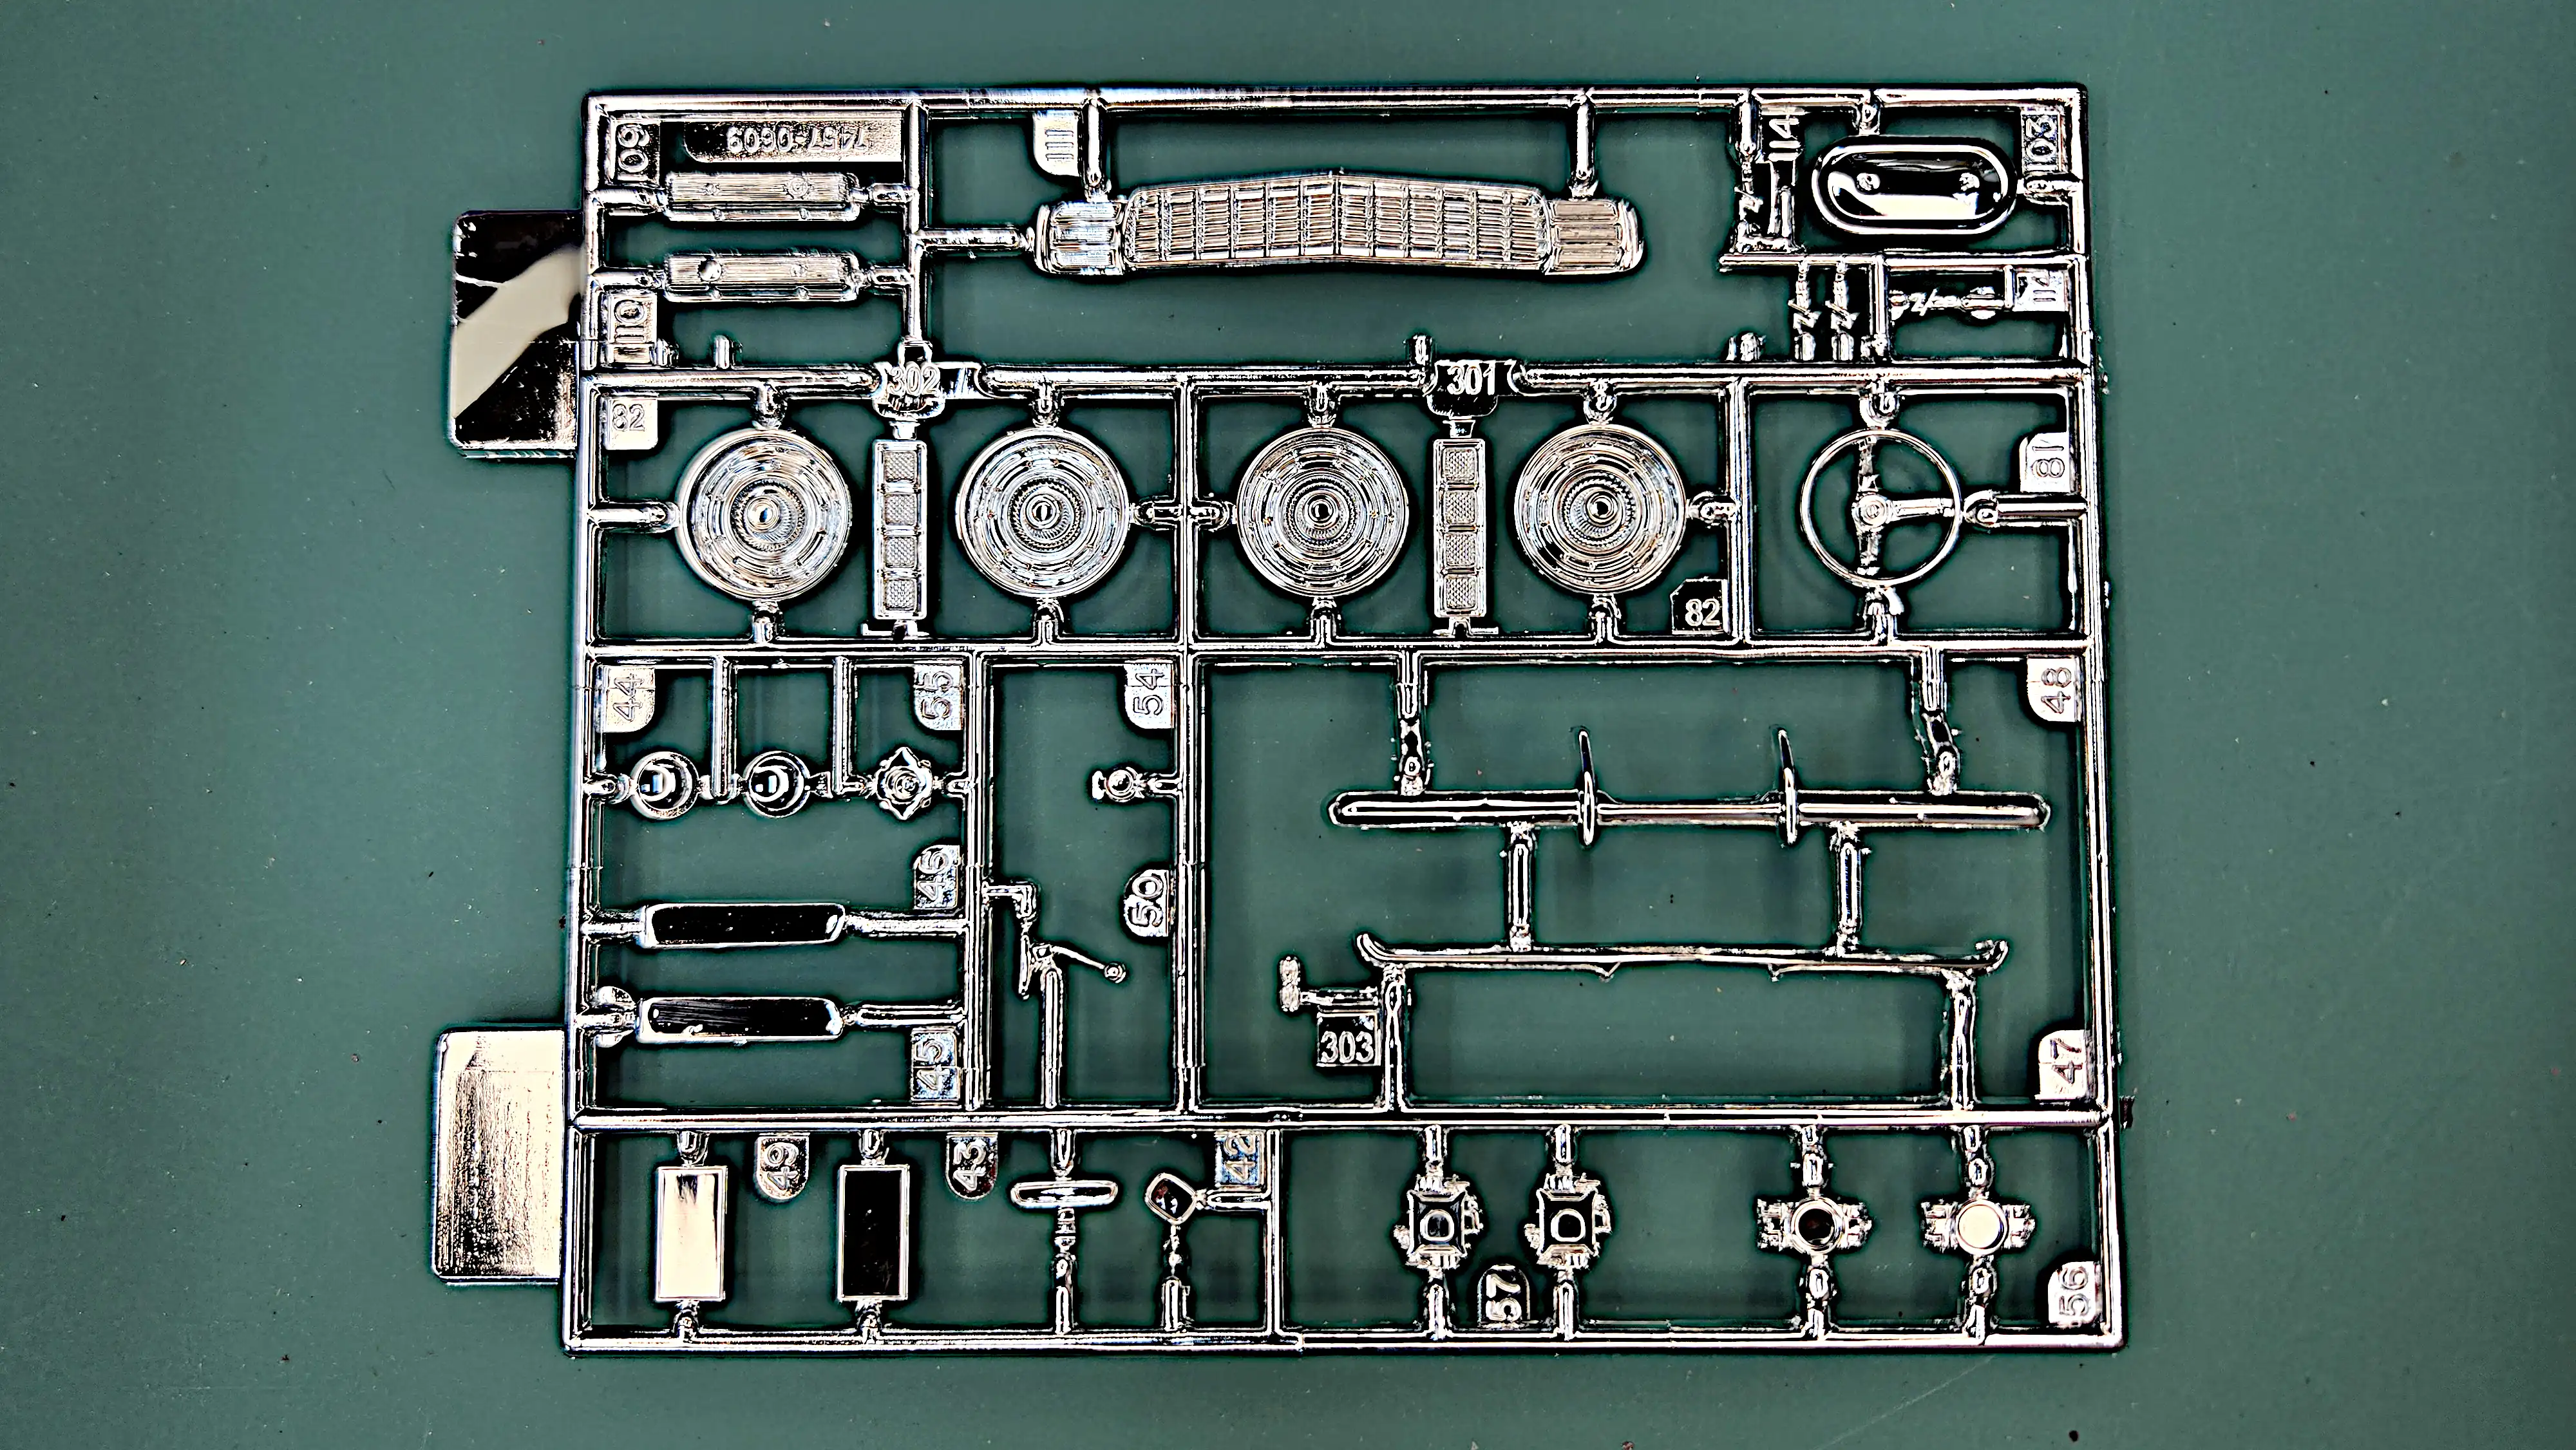
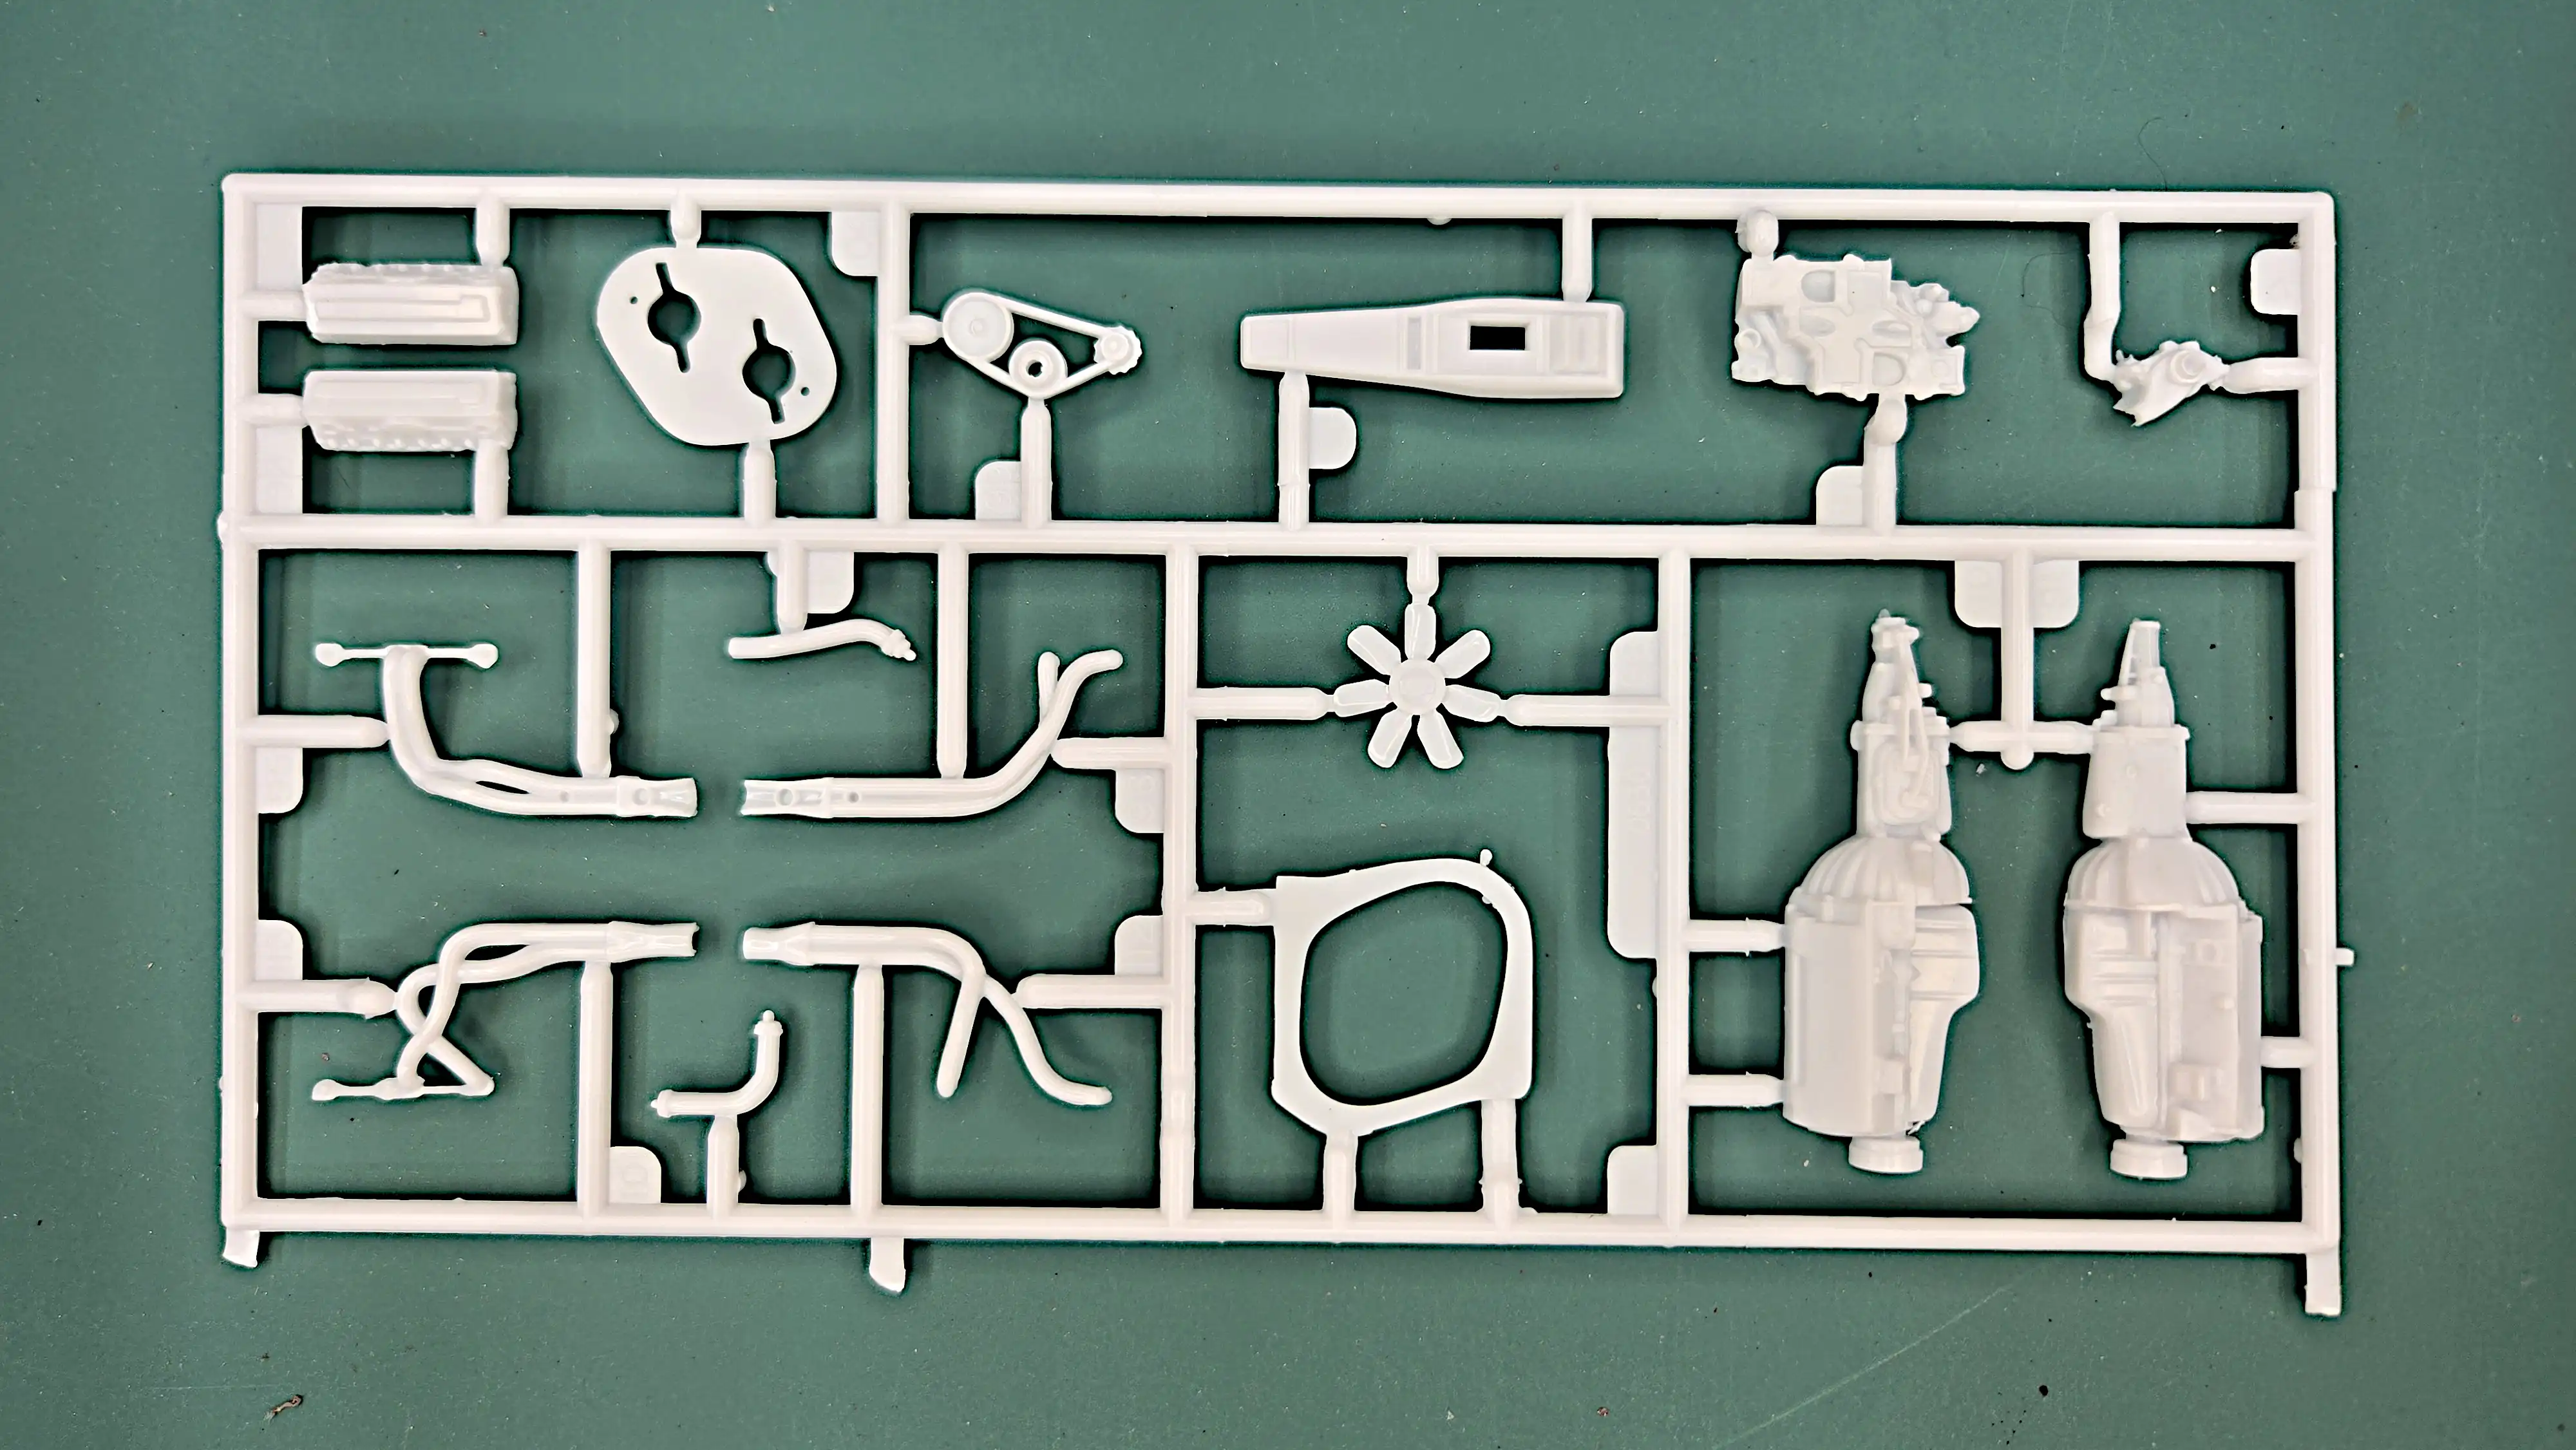 Parts Tree
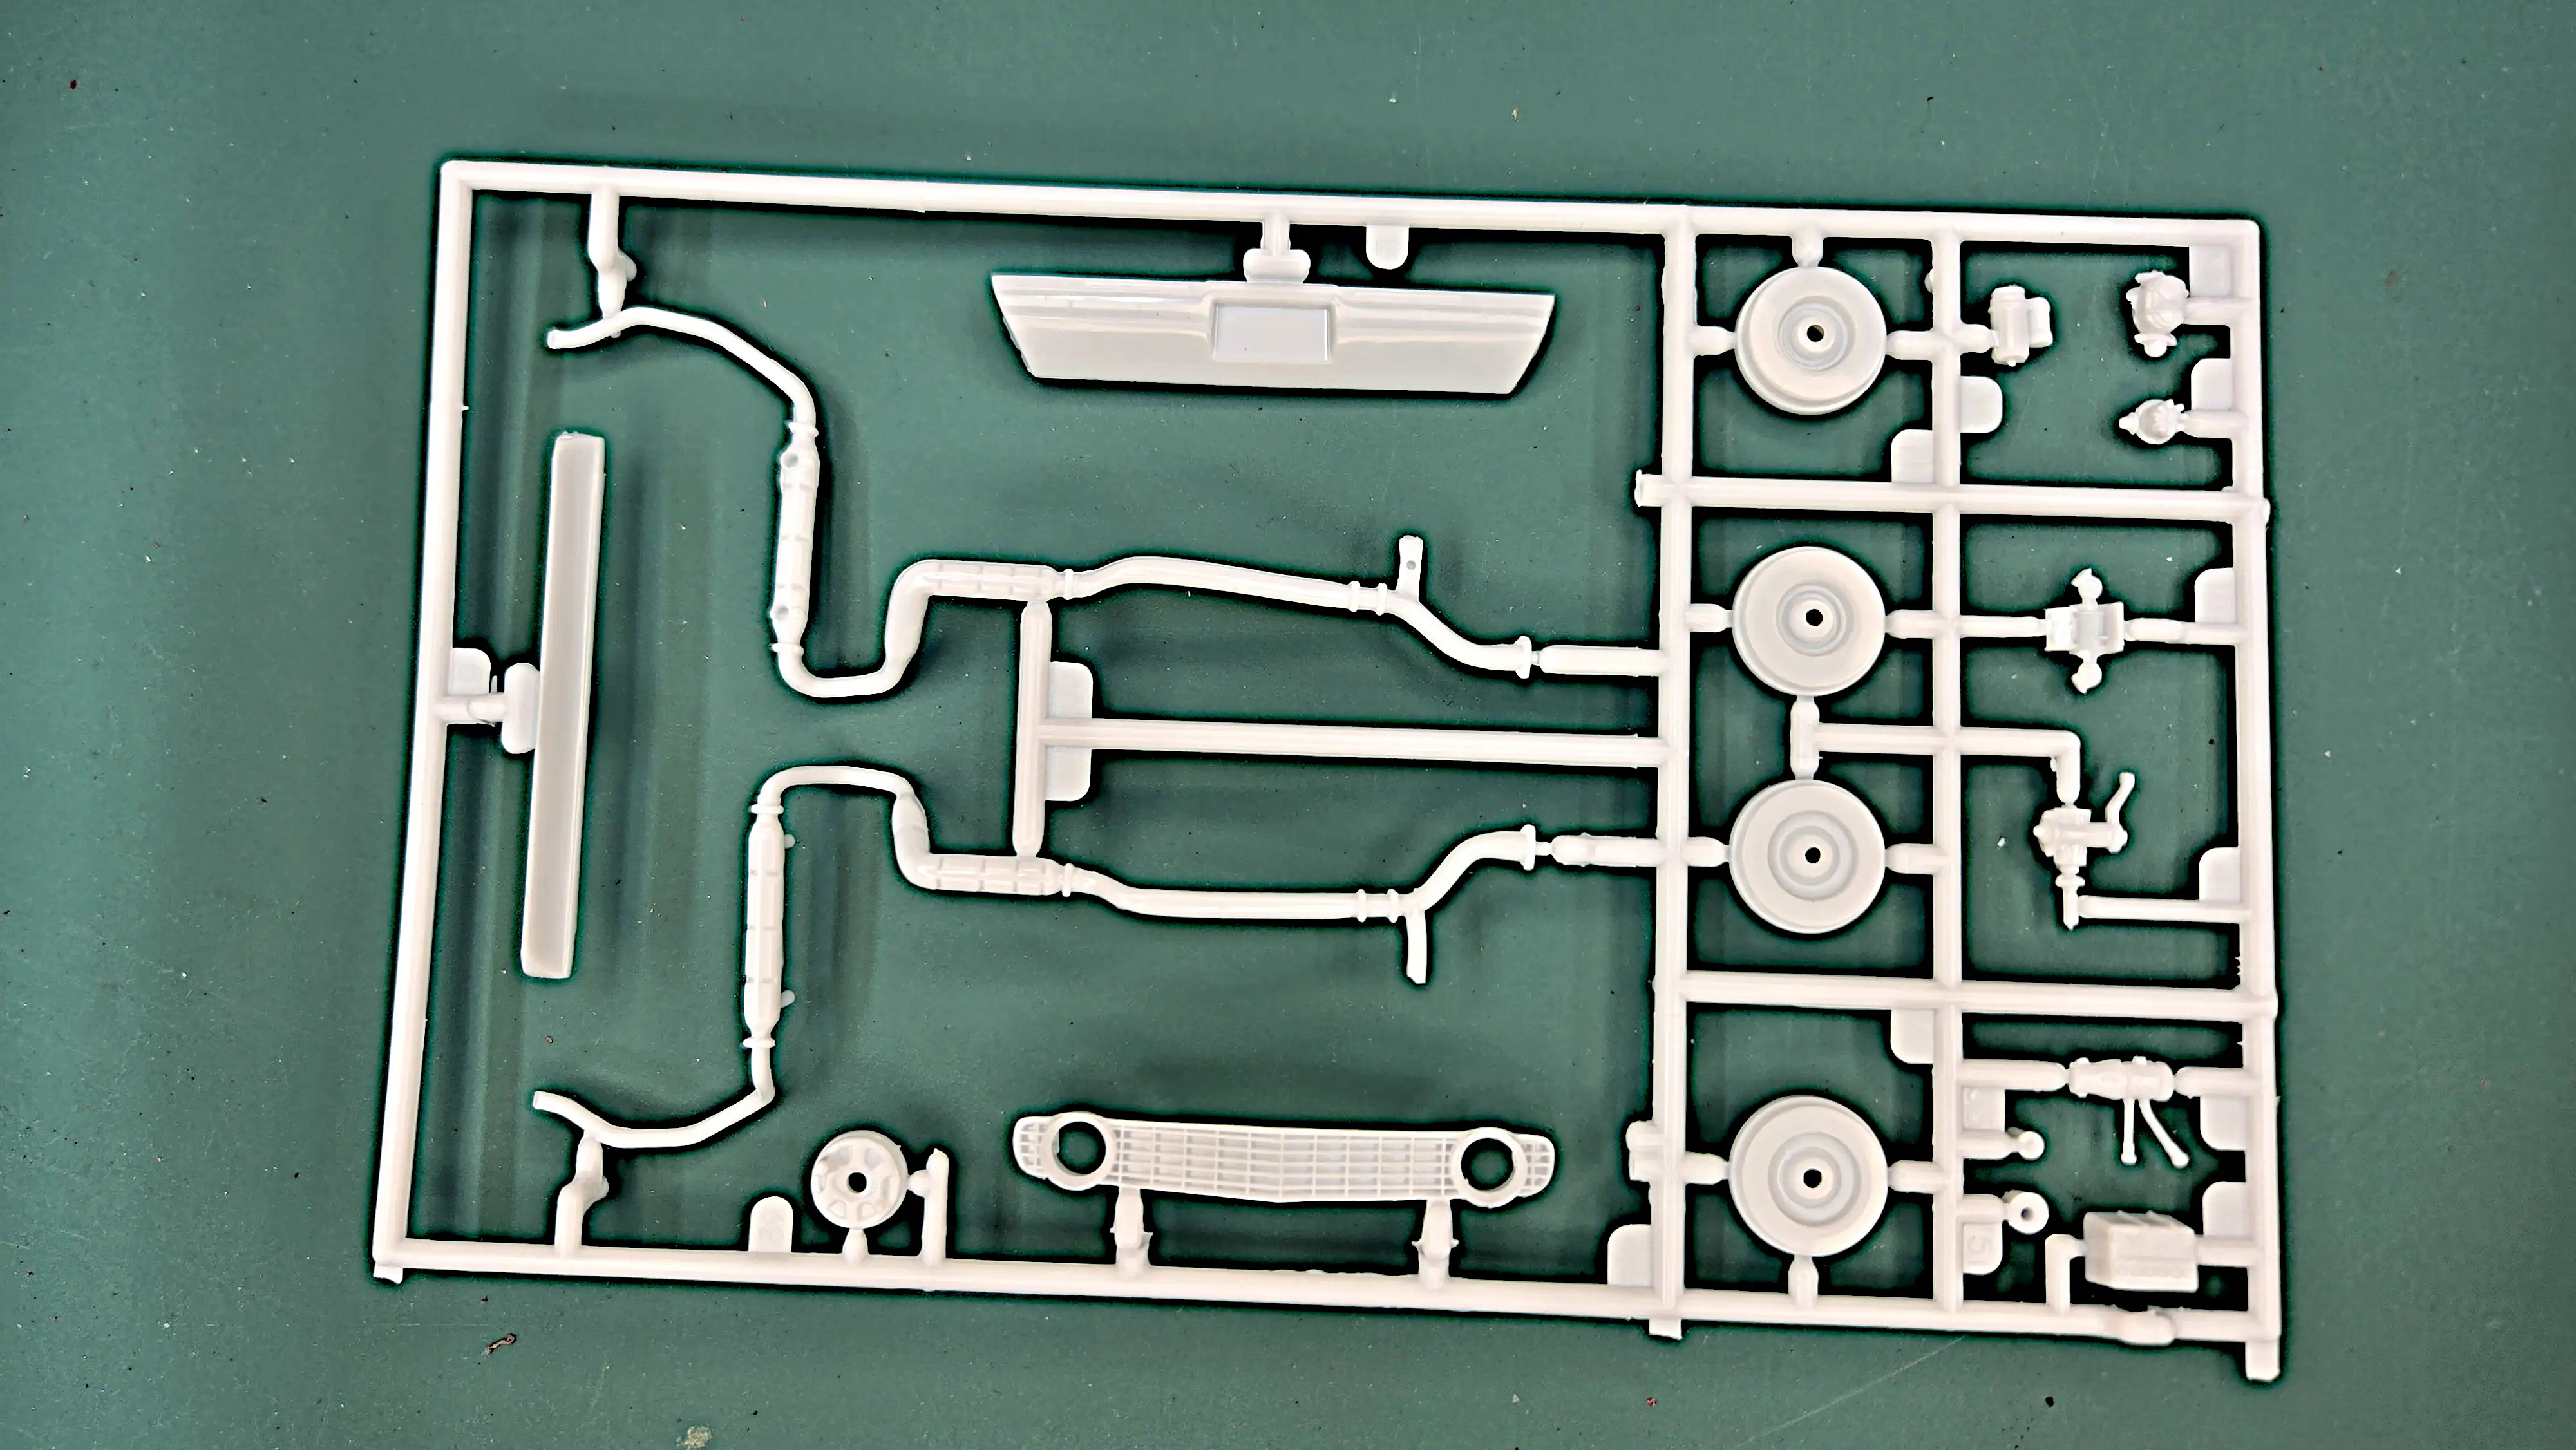 Parts Tree
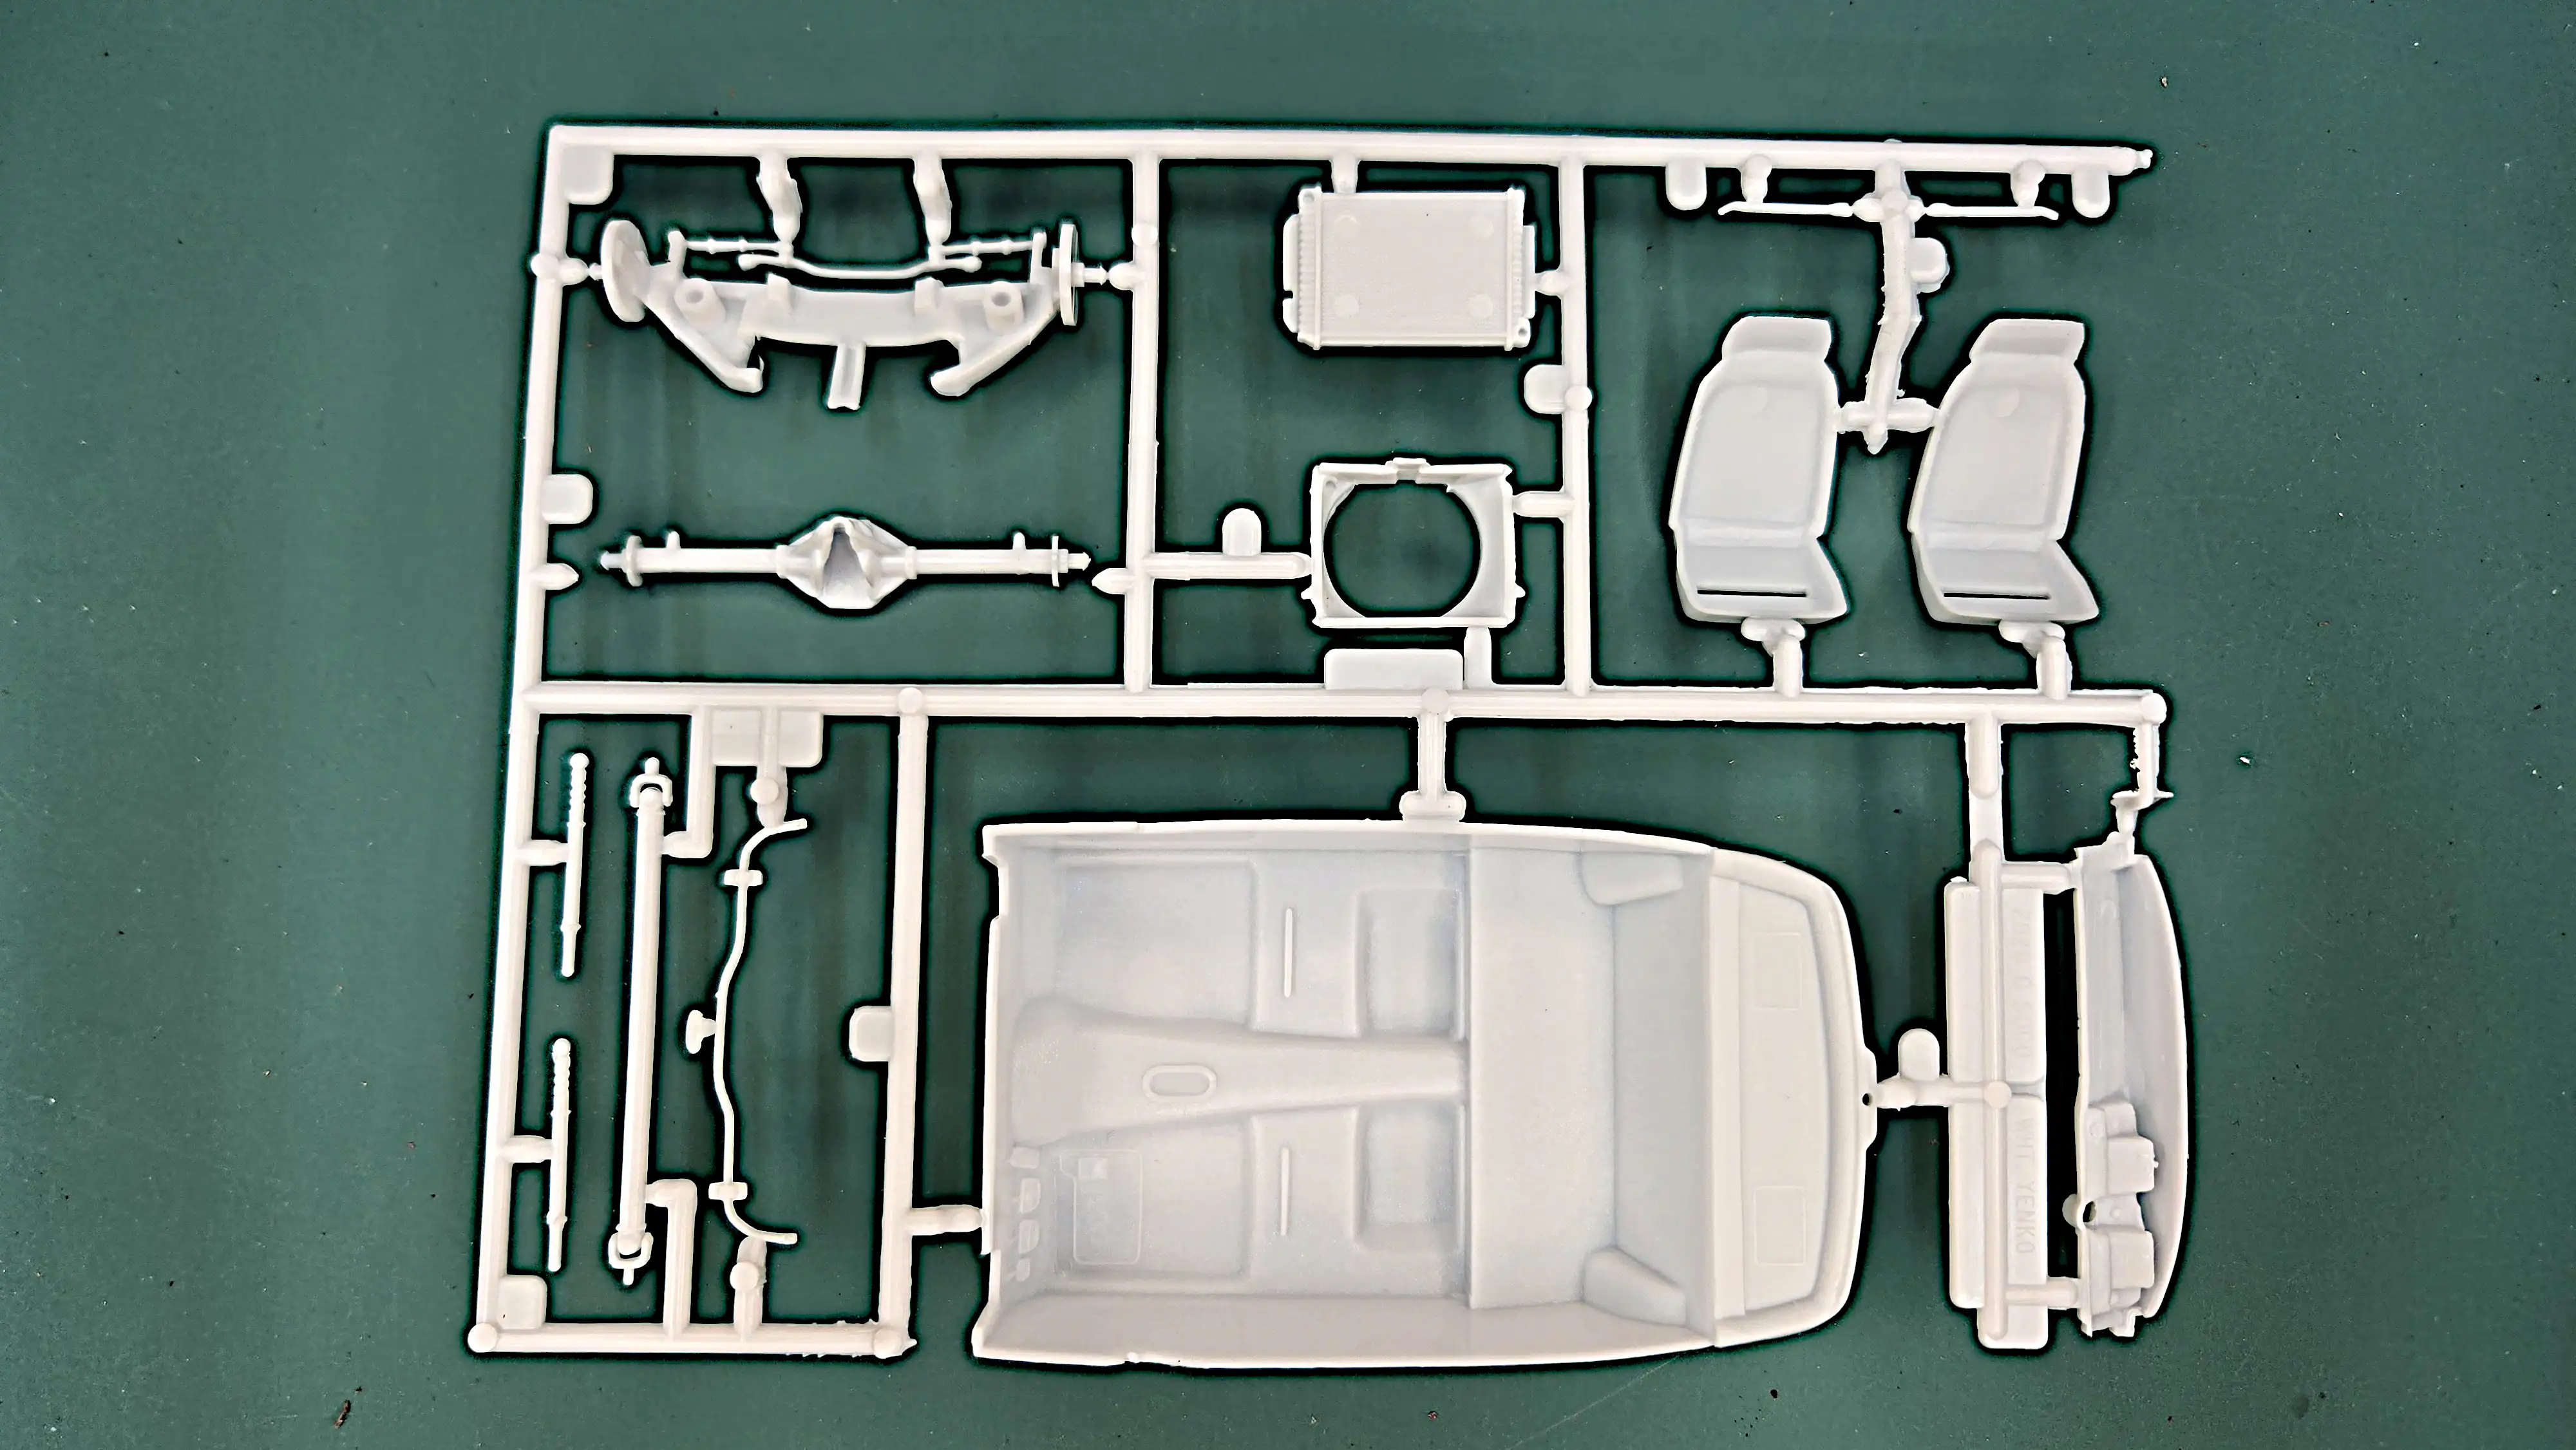 Parts Tree
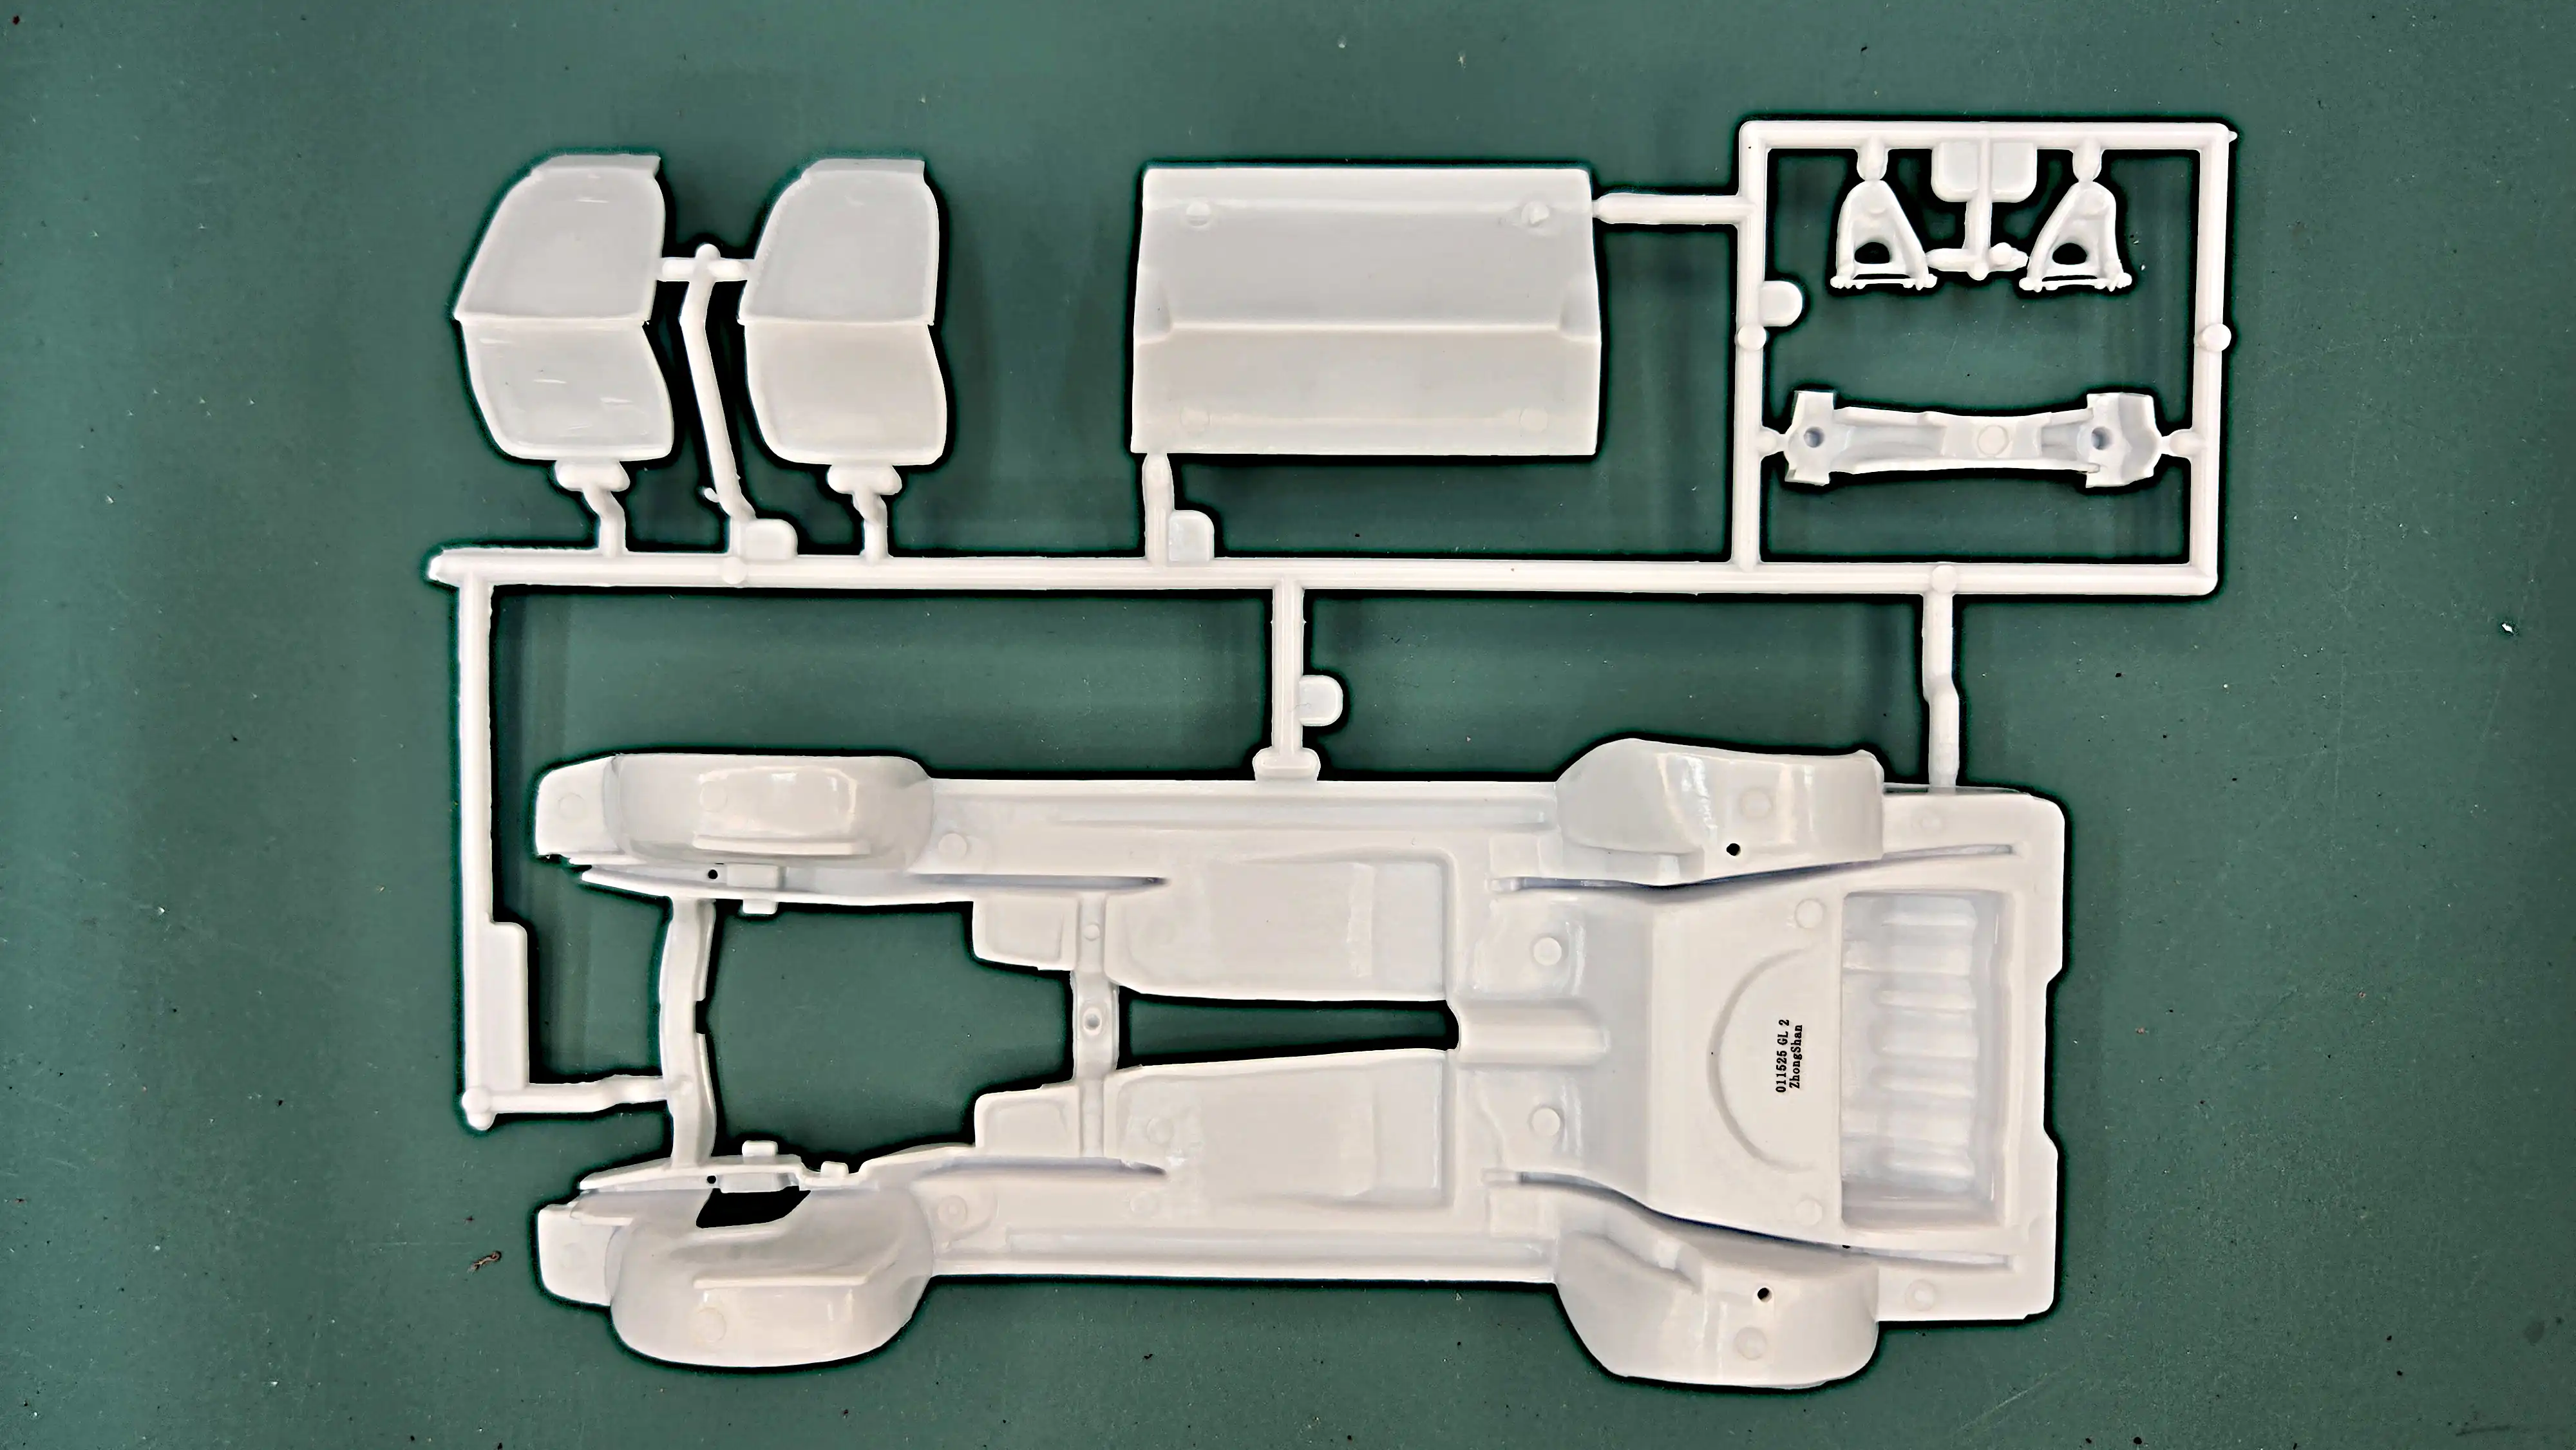 Parts Tree
 Parts Tree
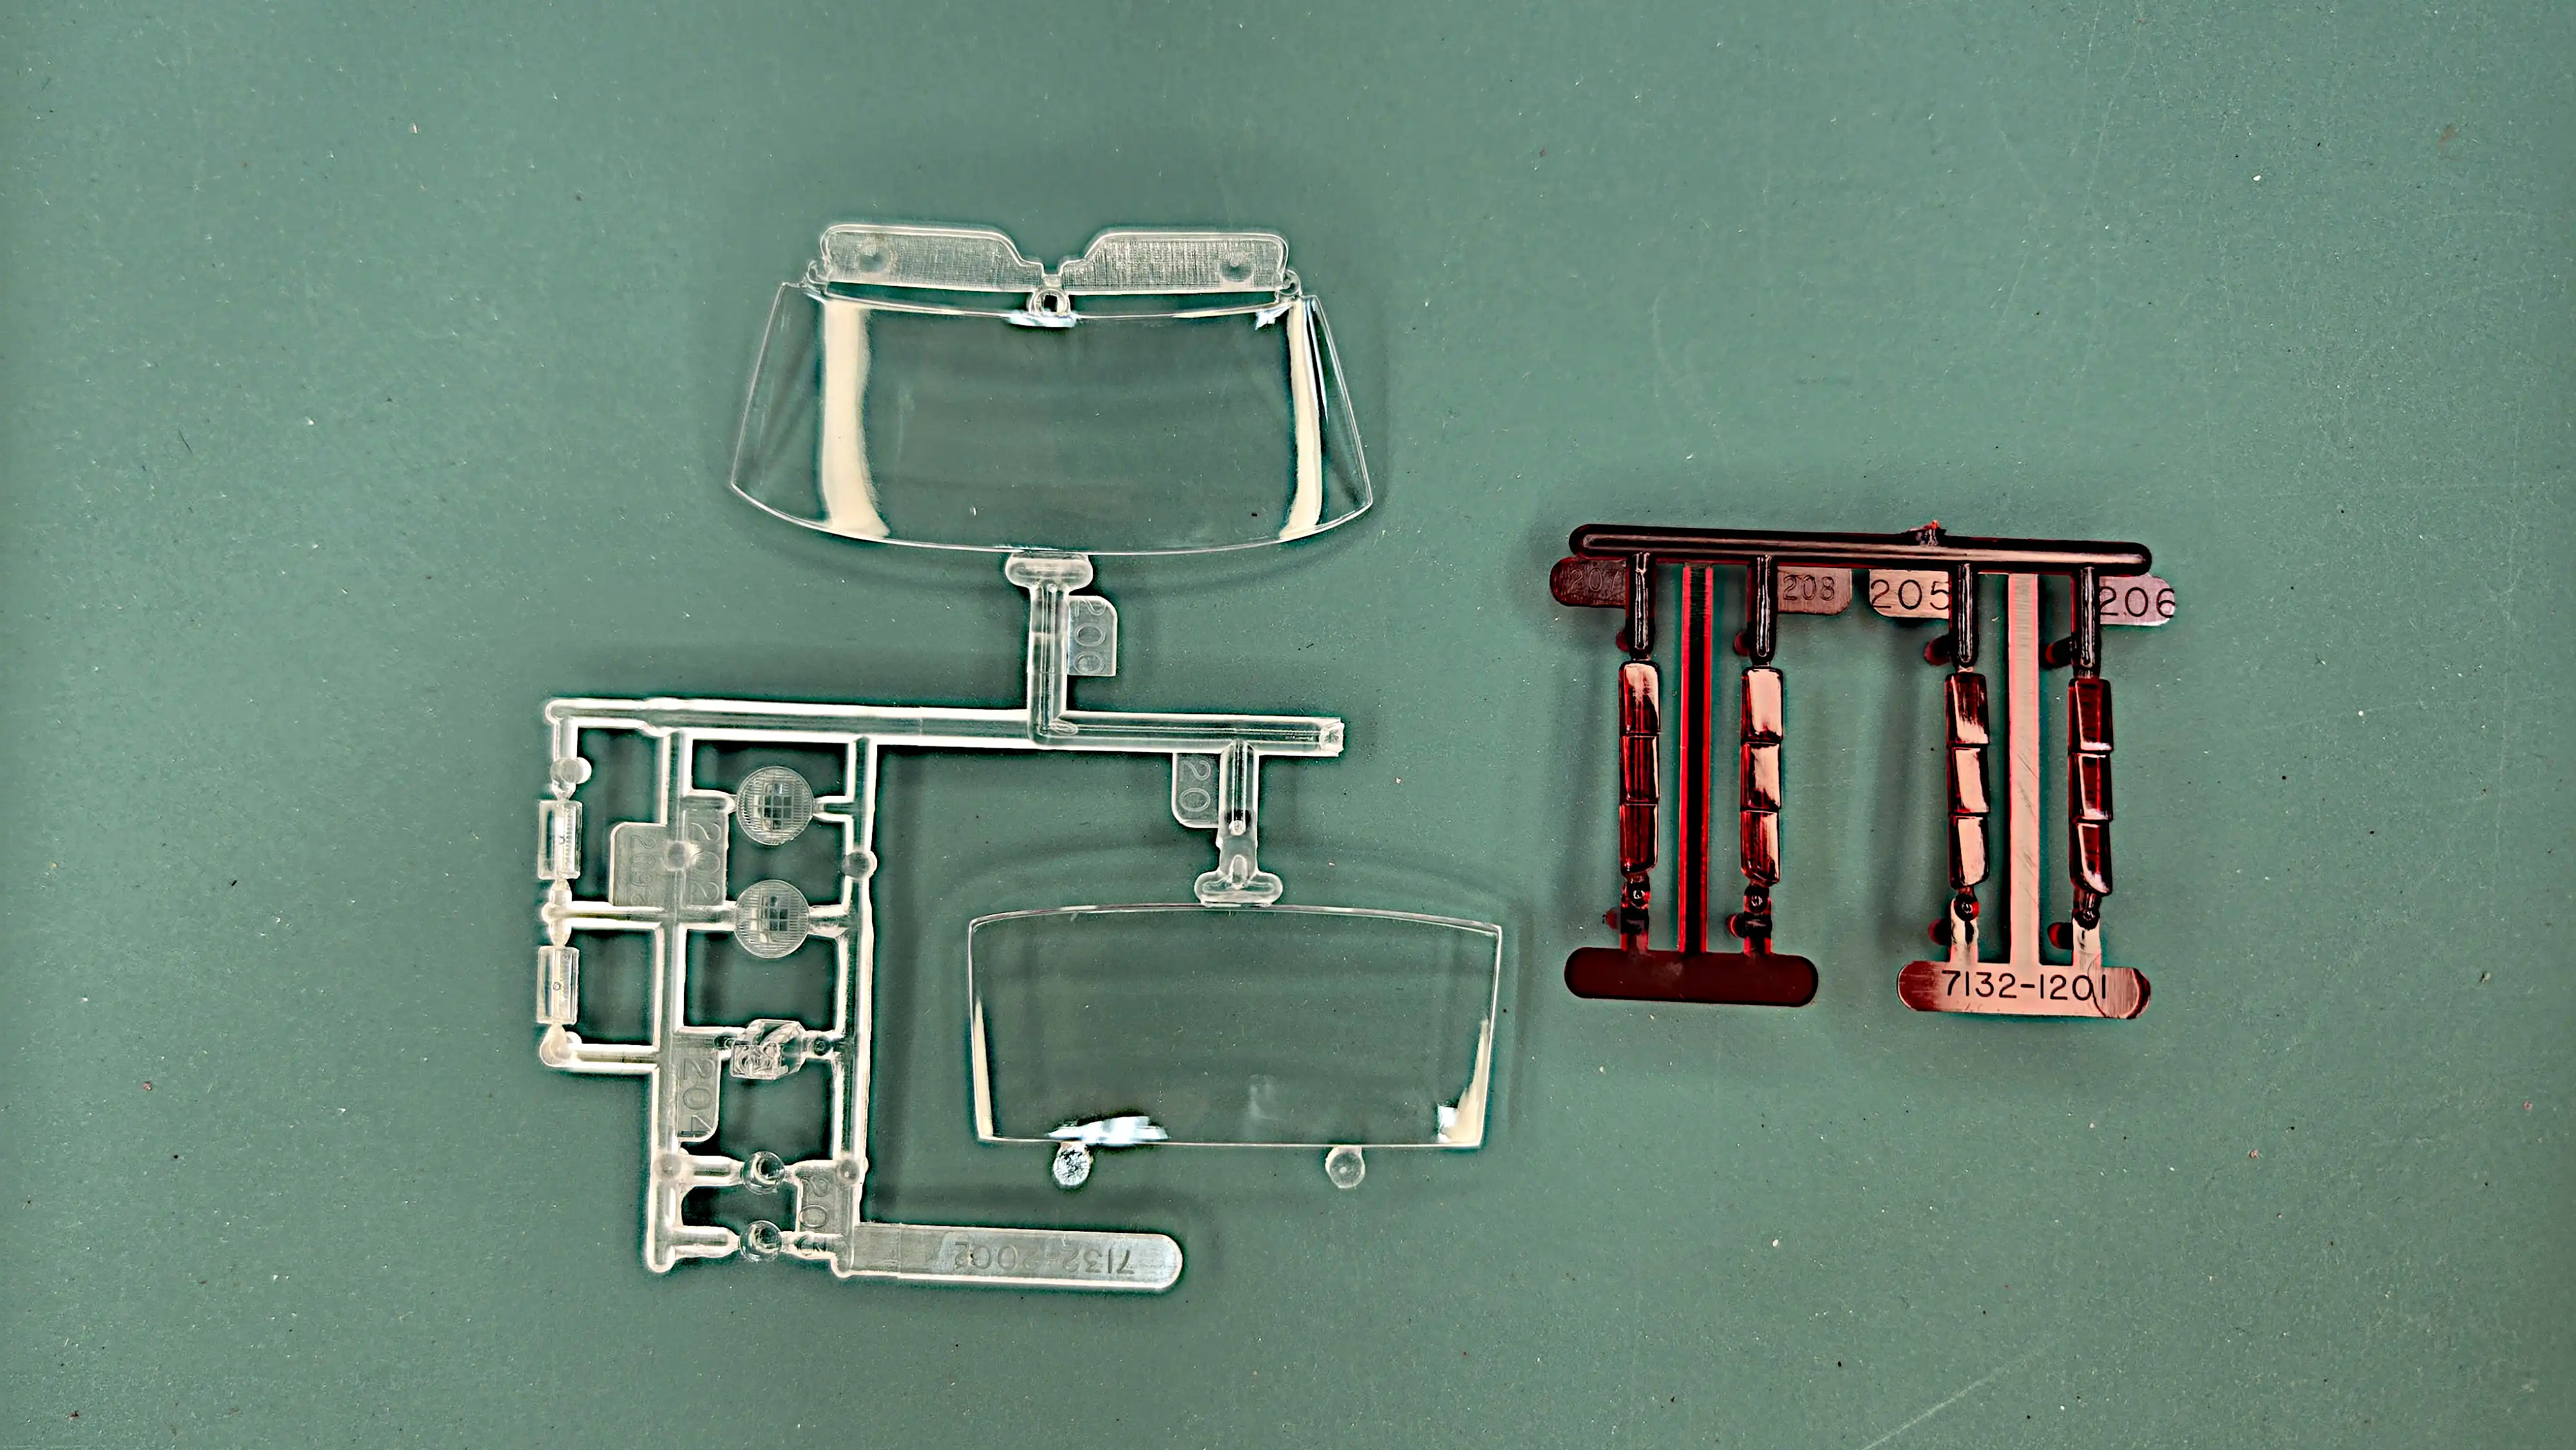 Clear and Red parts trees
 Chrome Tree
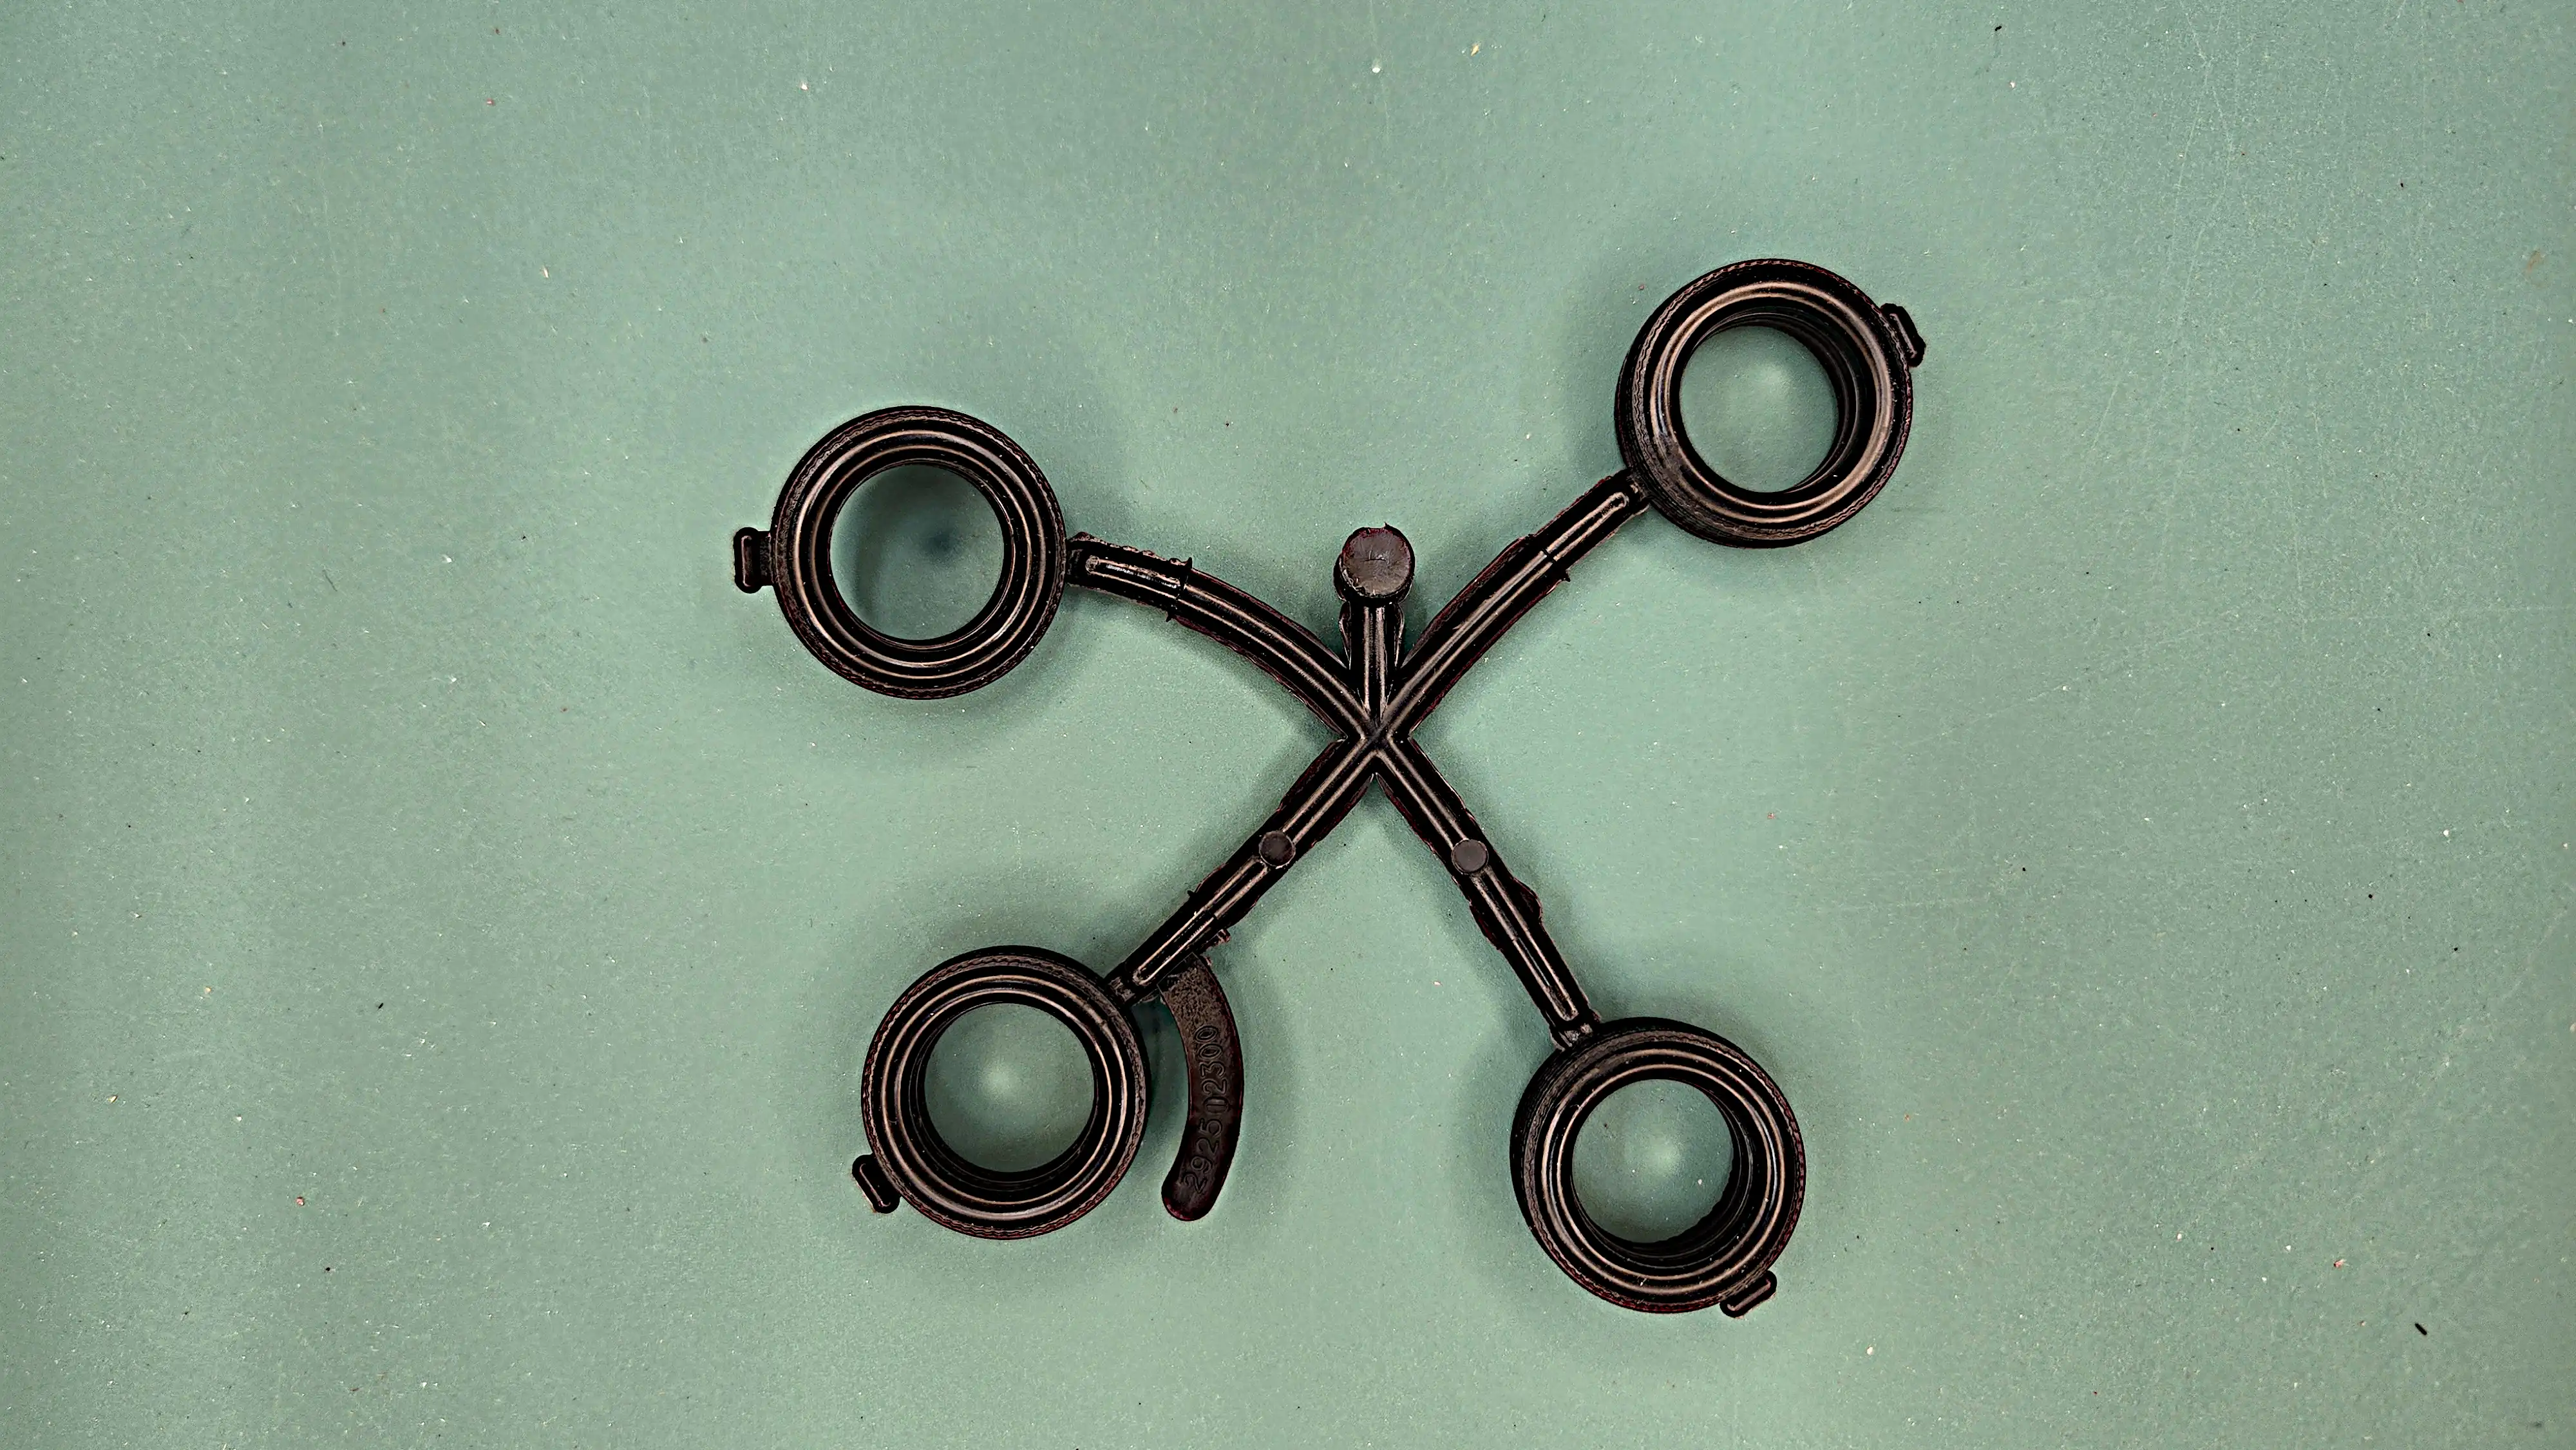 Tire tree
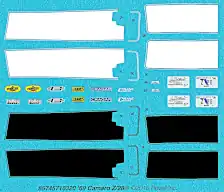 Kit Decal Sheet
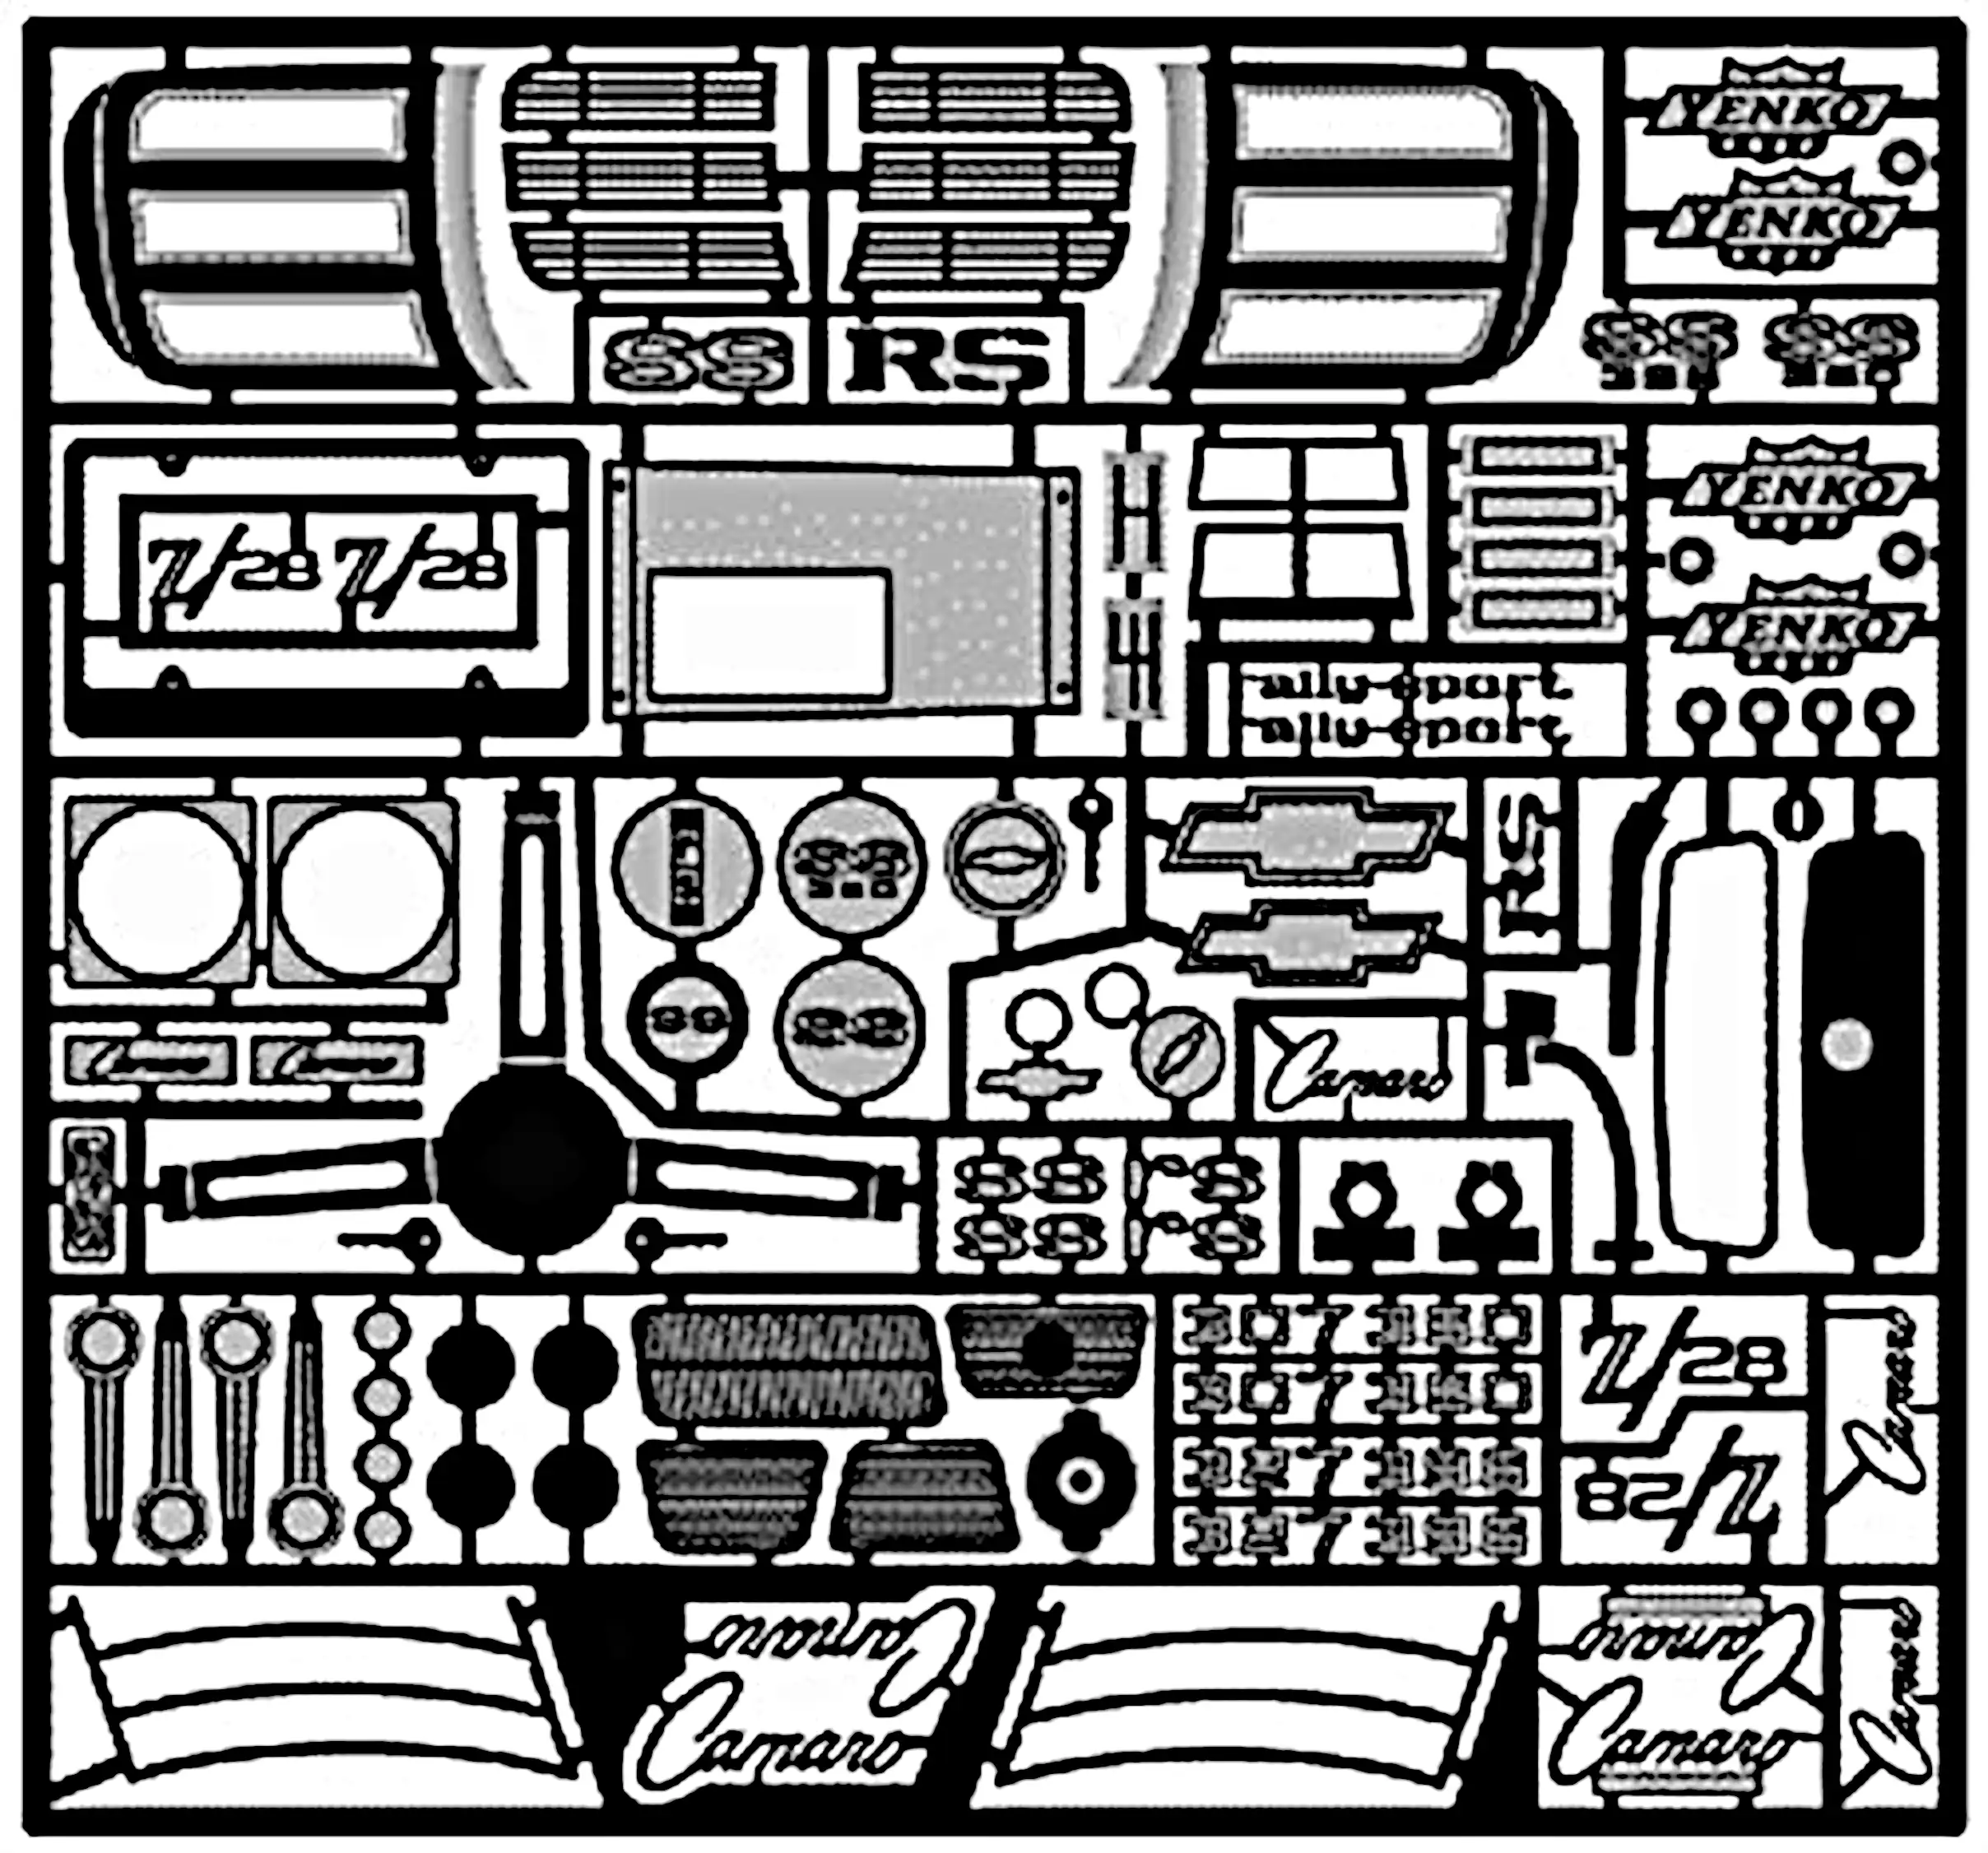
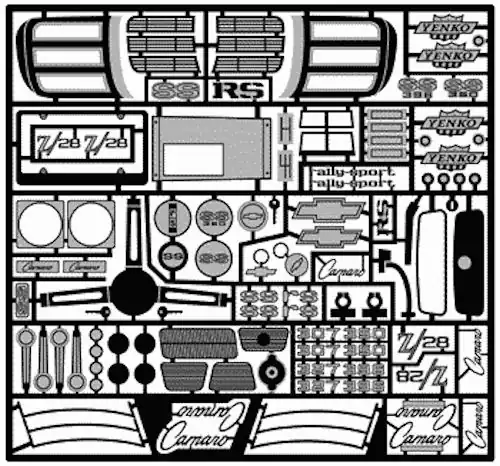 Photo Etch for the '69 Camaro'
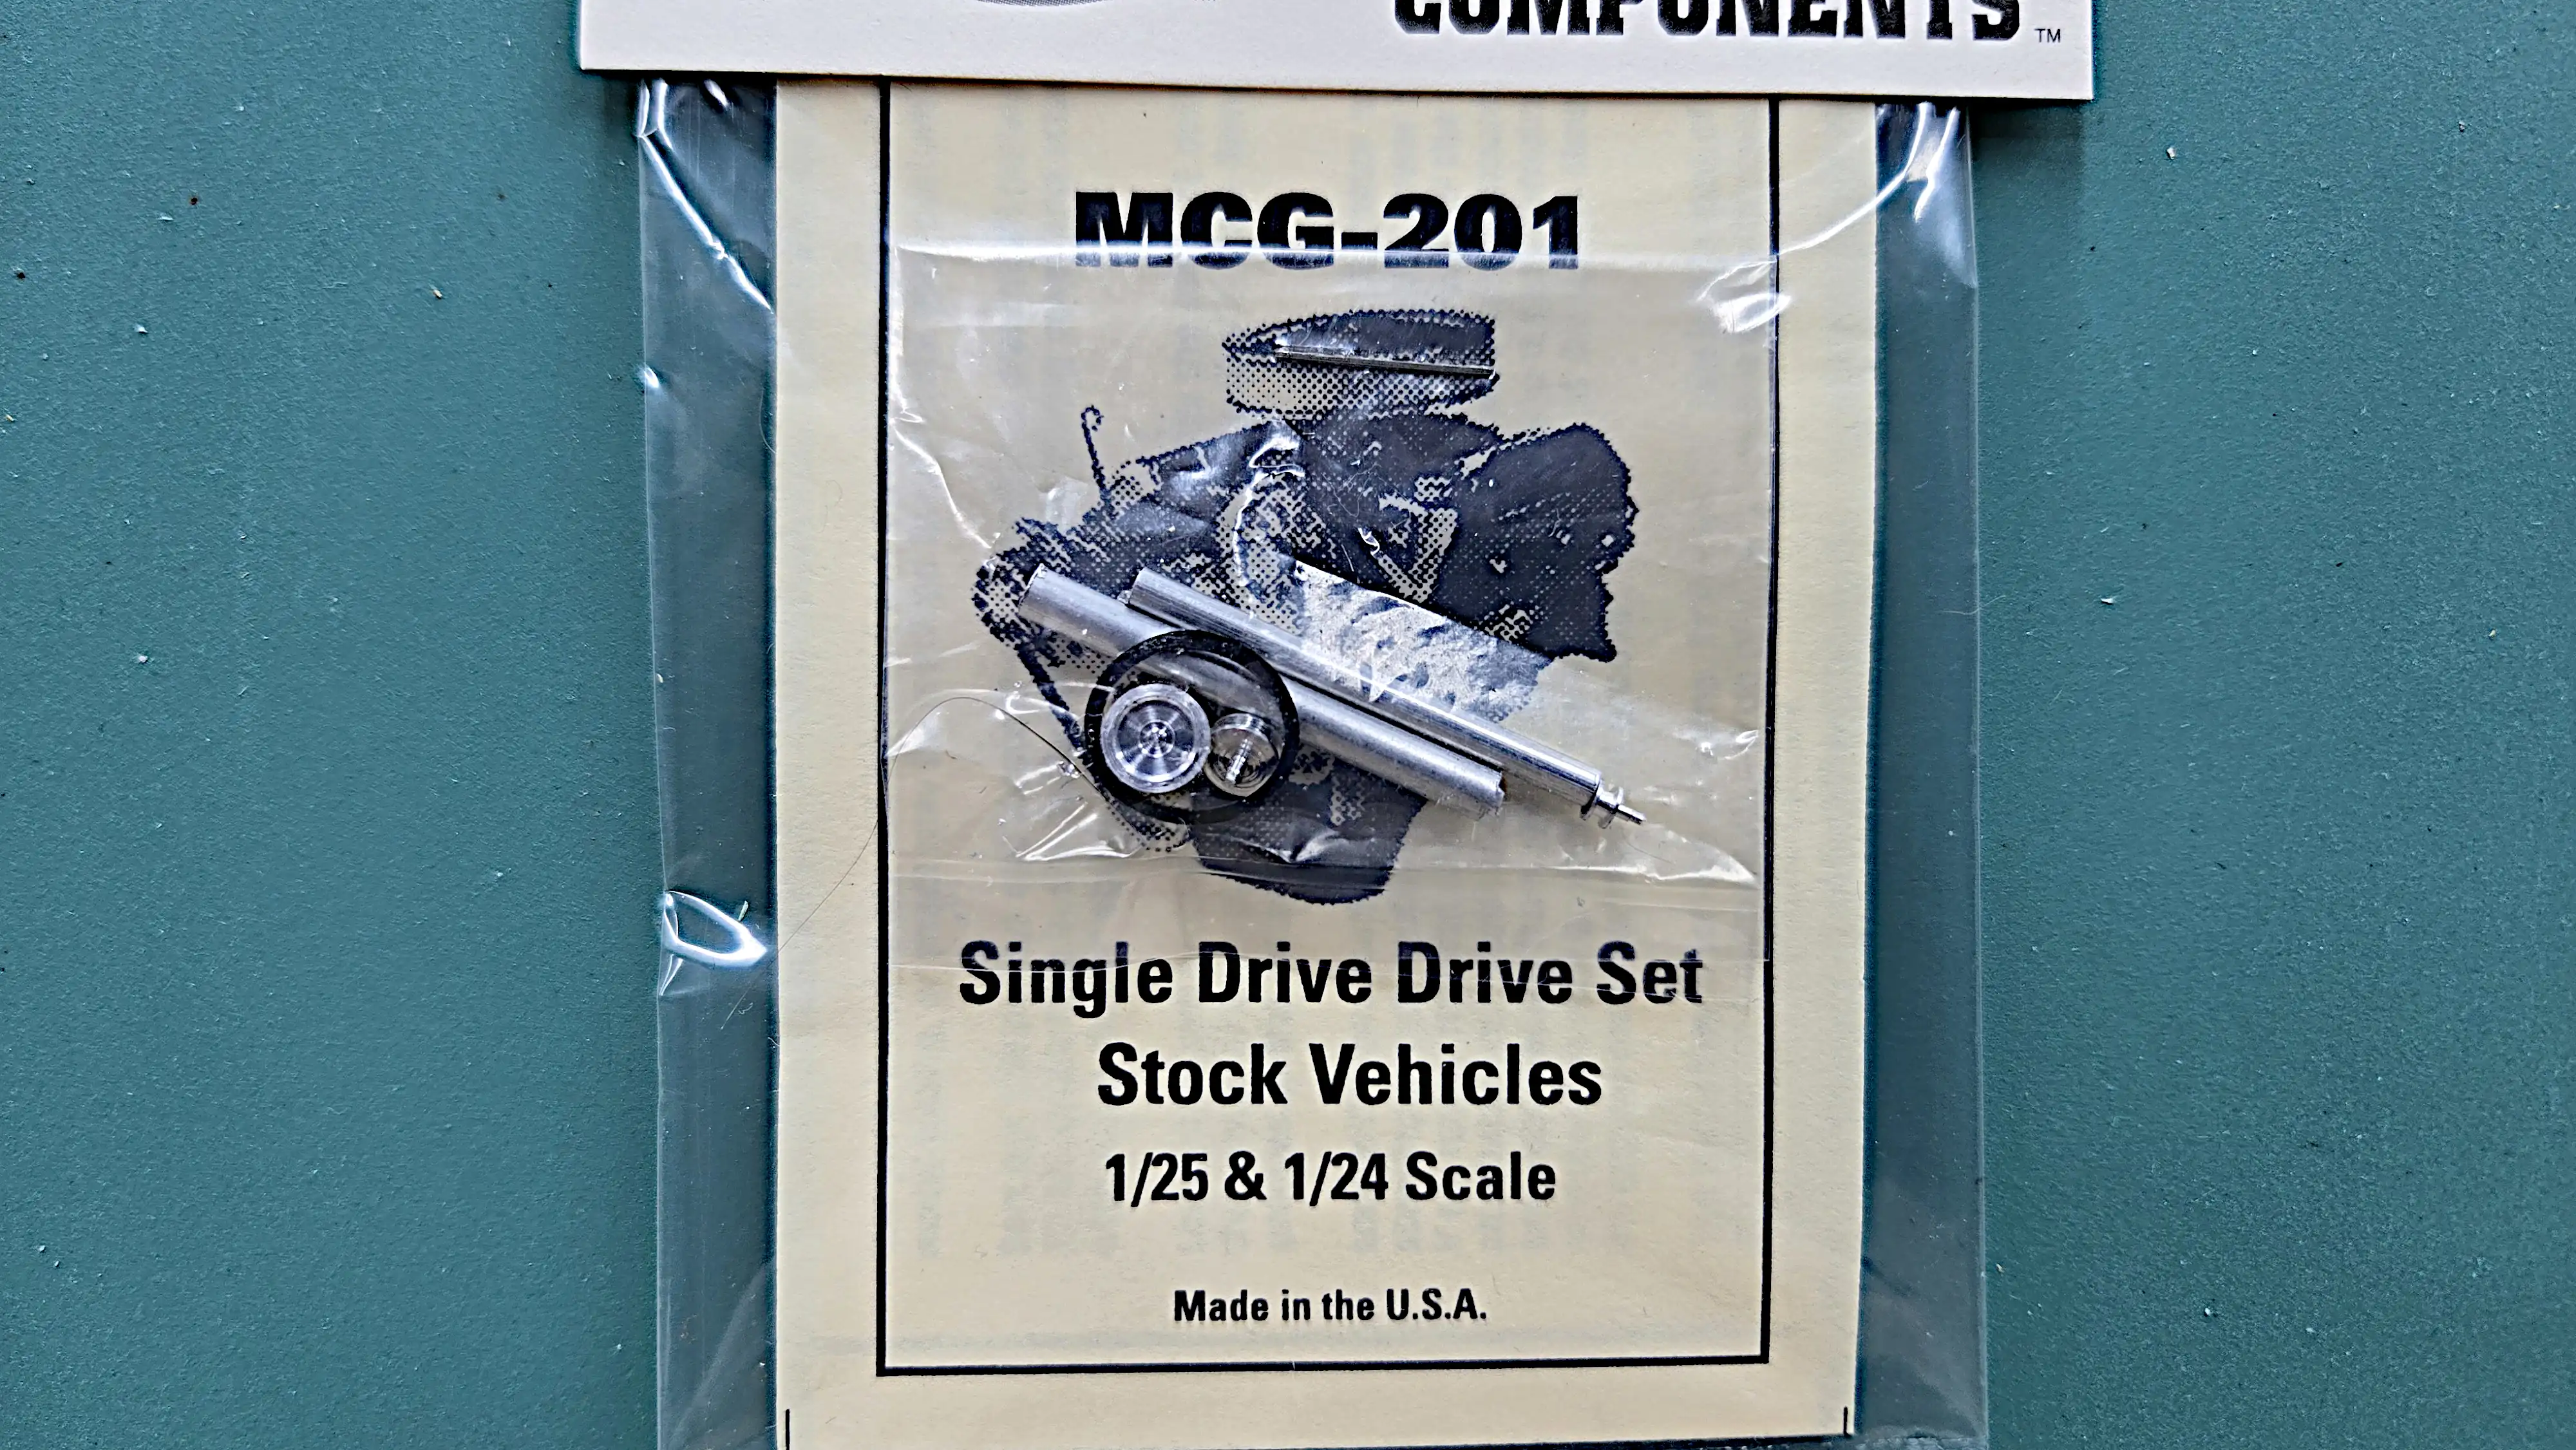 Single Drive Drive Set
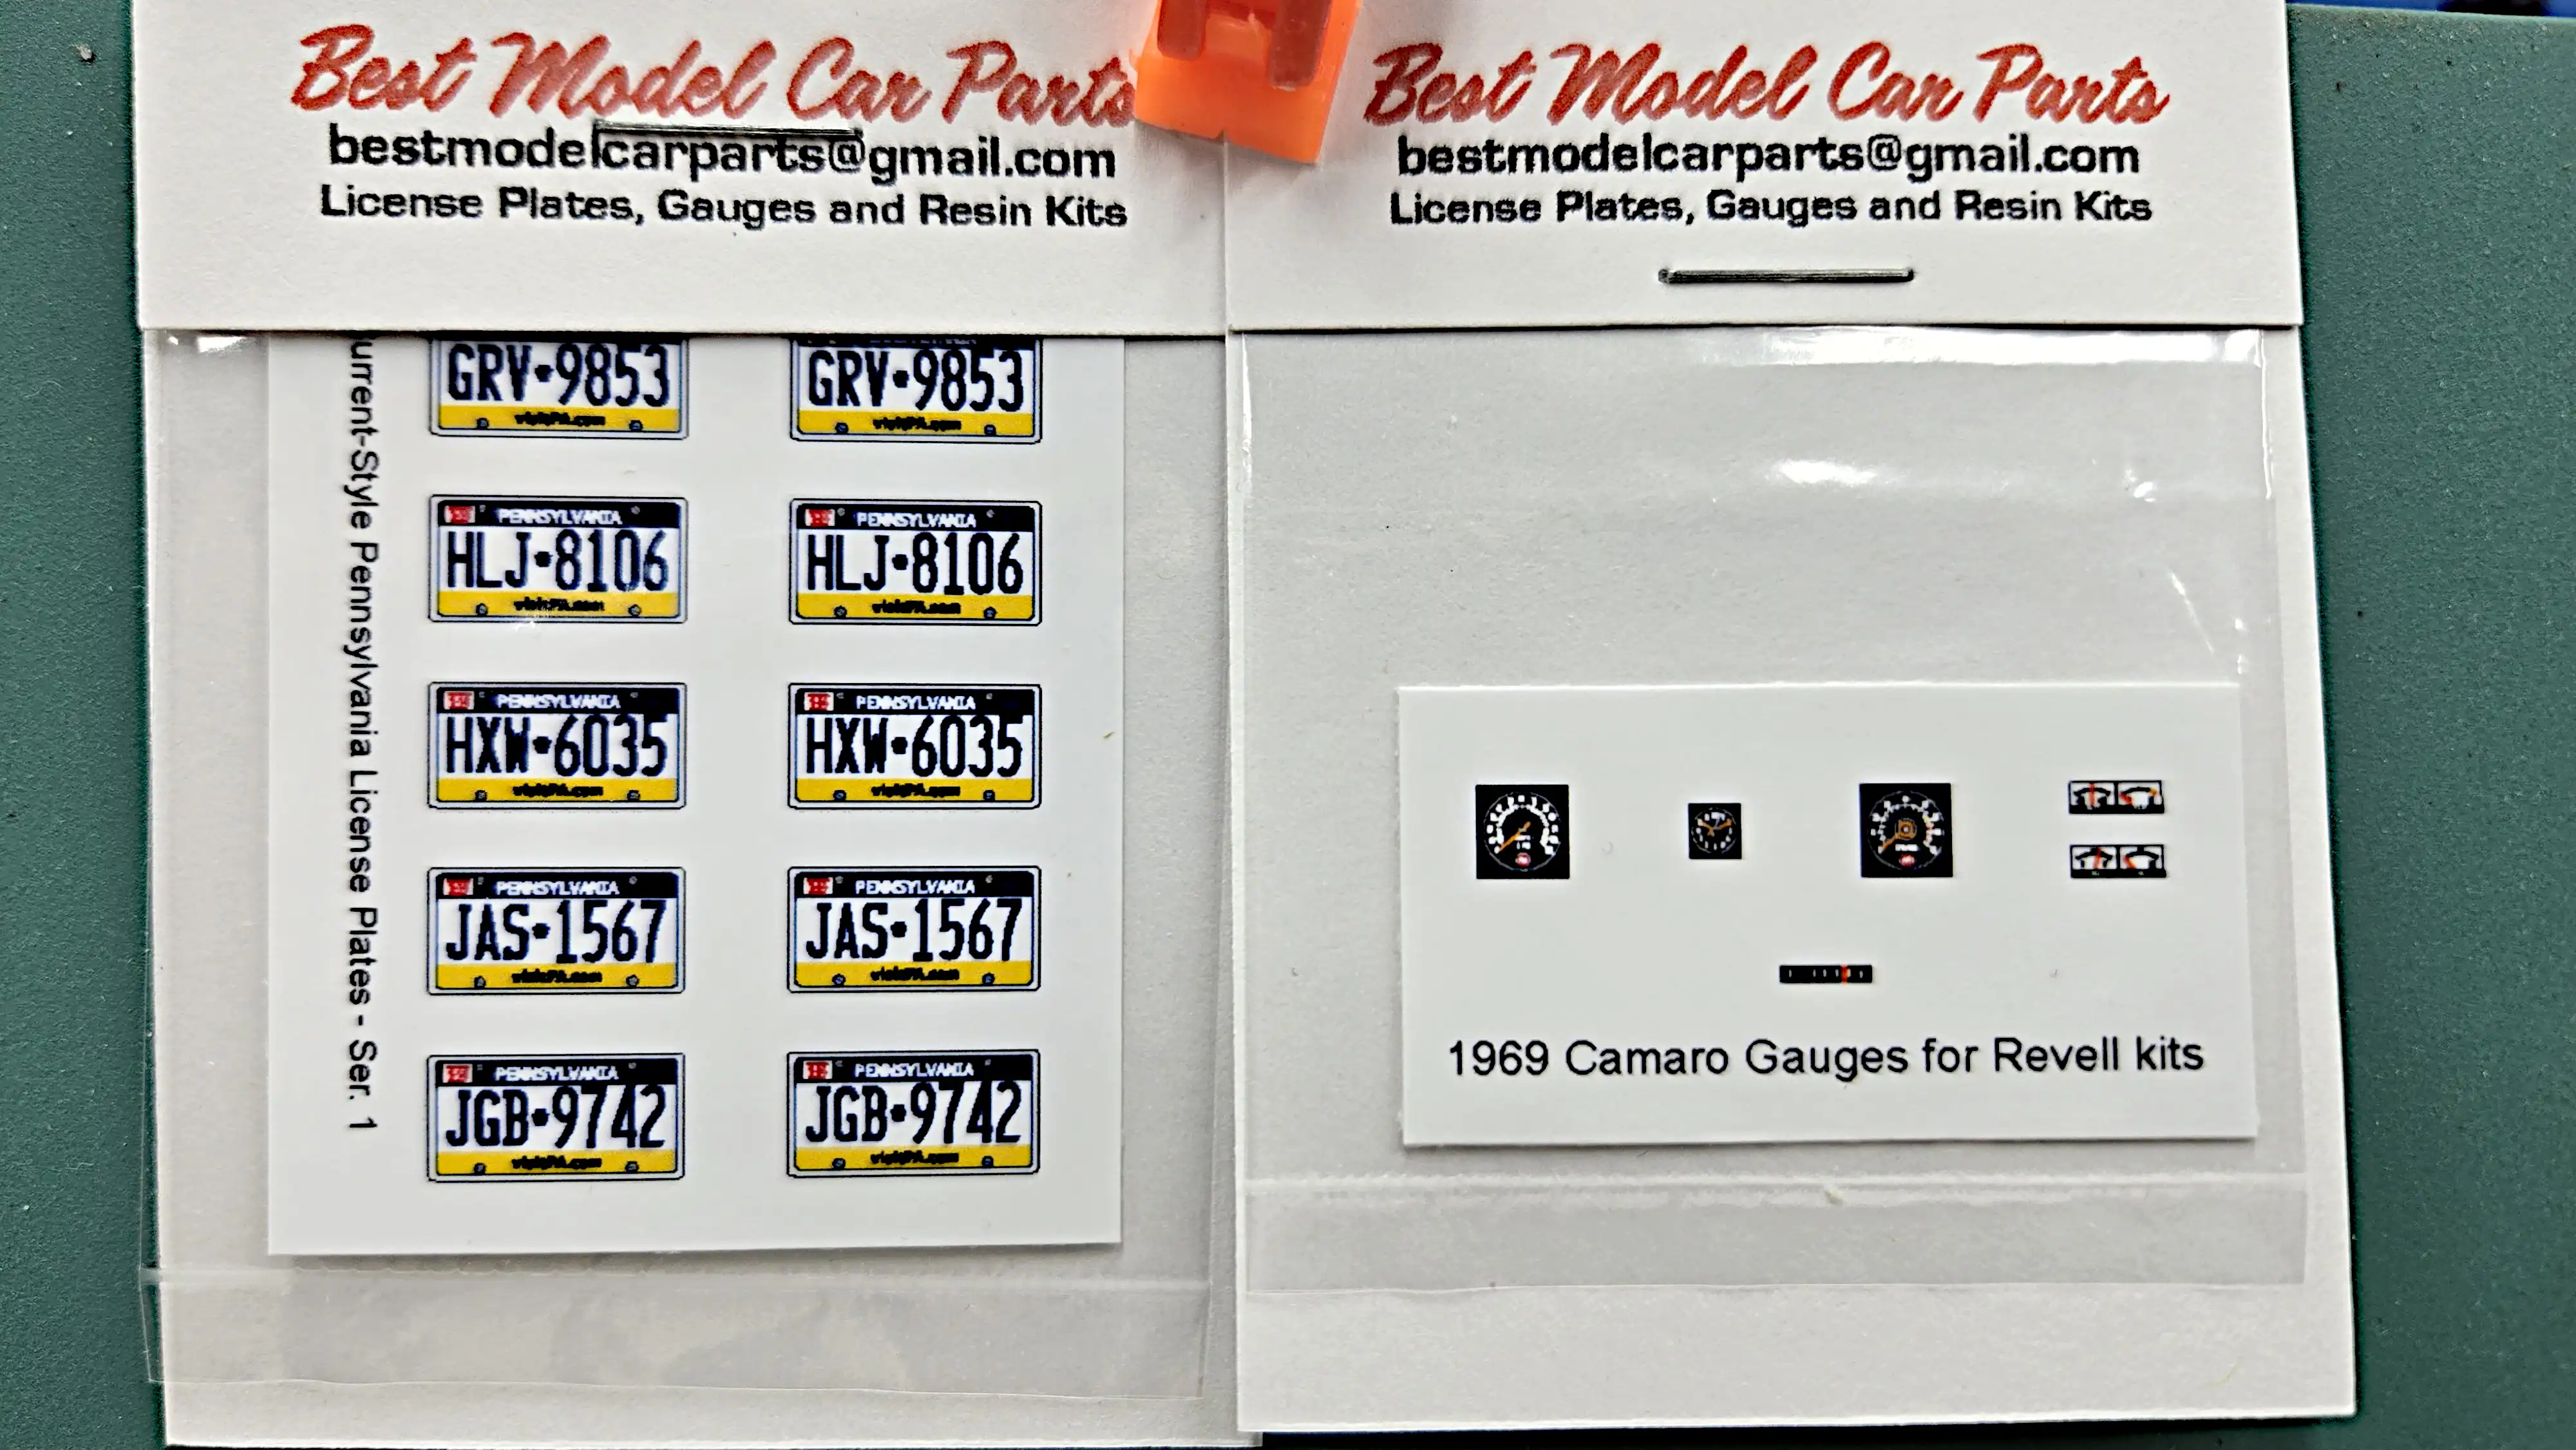 Gauge and License Plate Decals
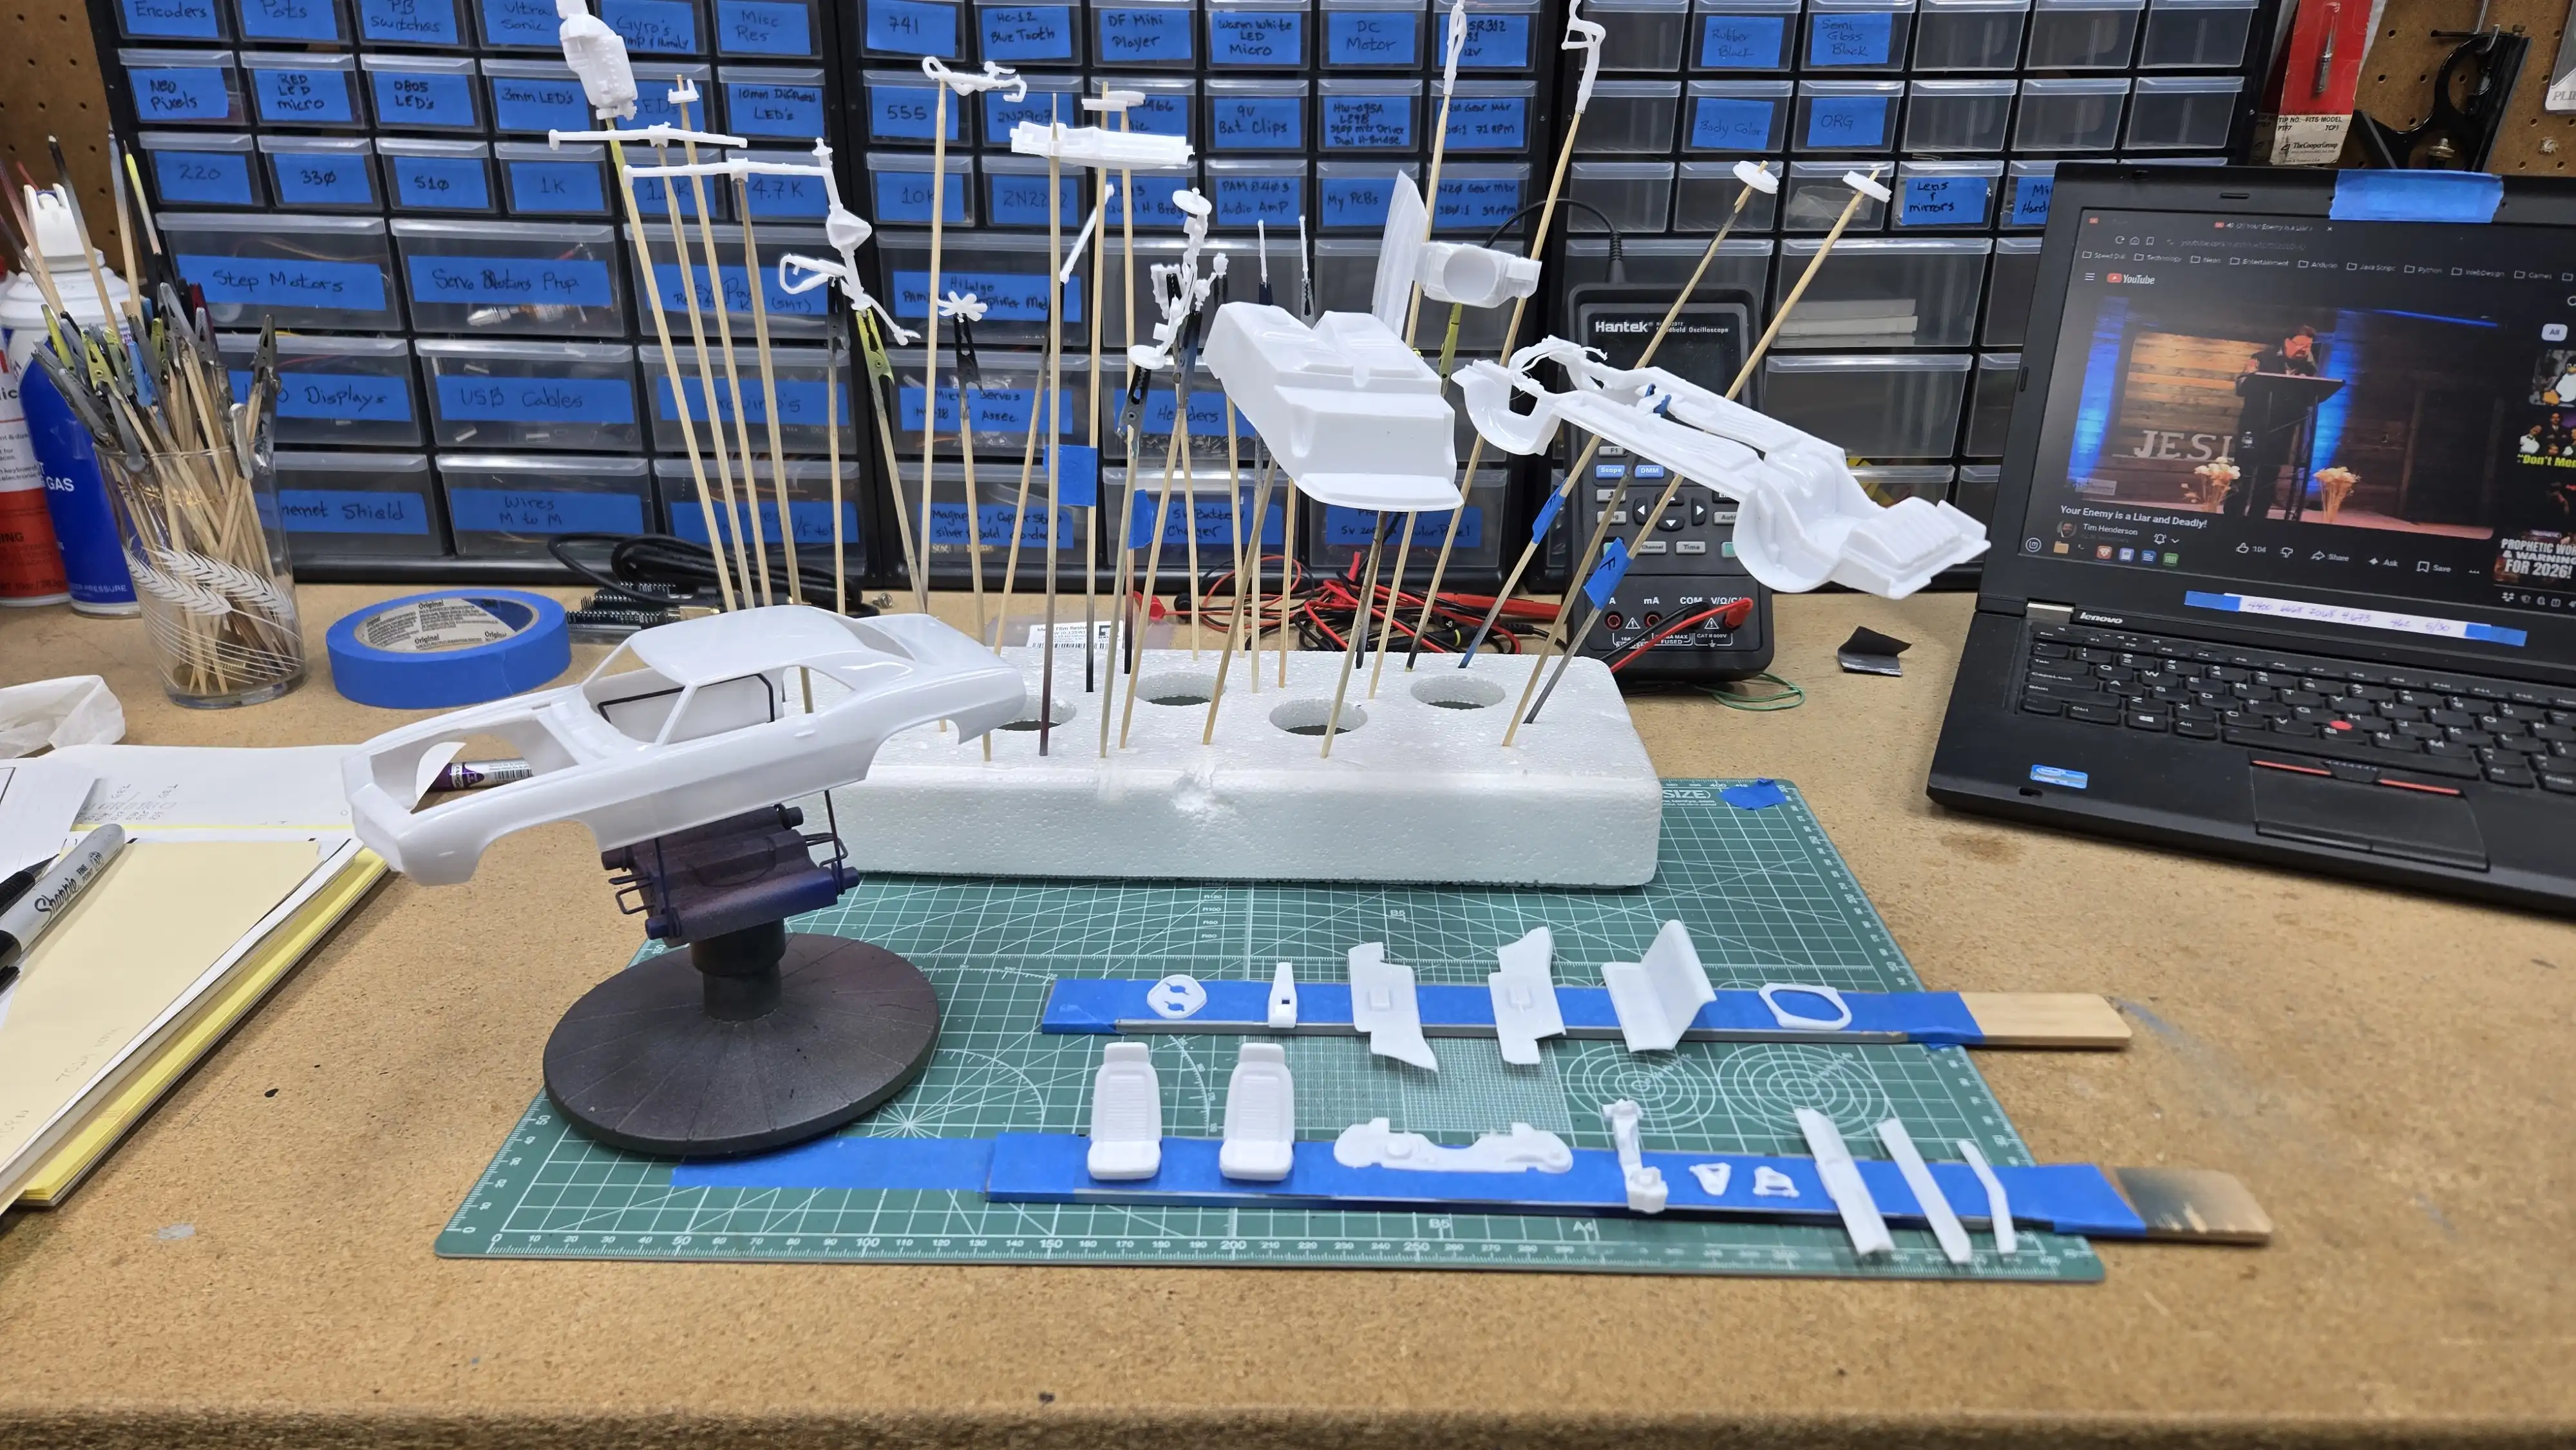 Parts ready for Paint
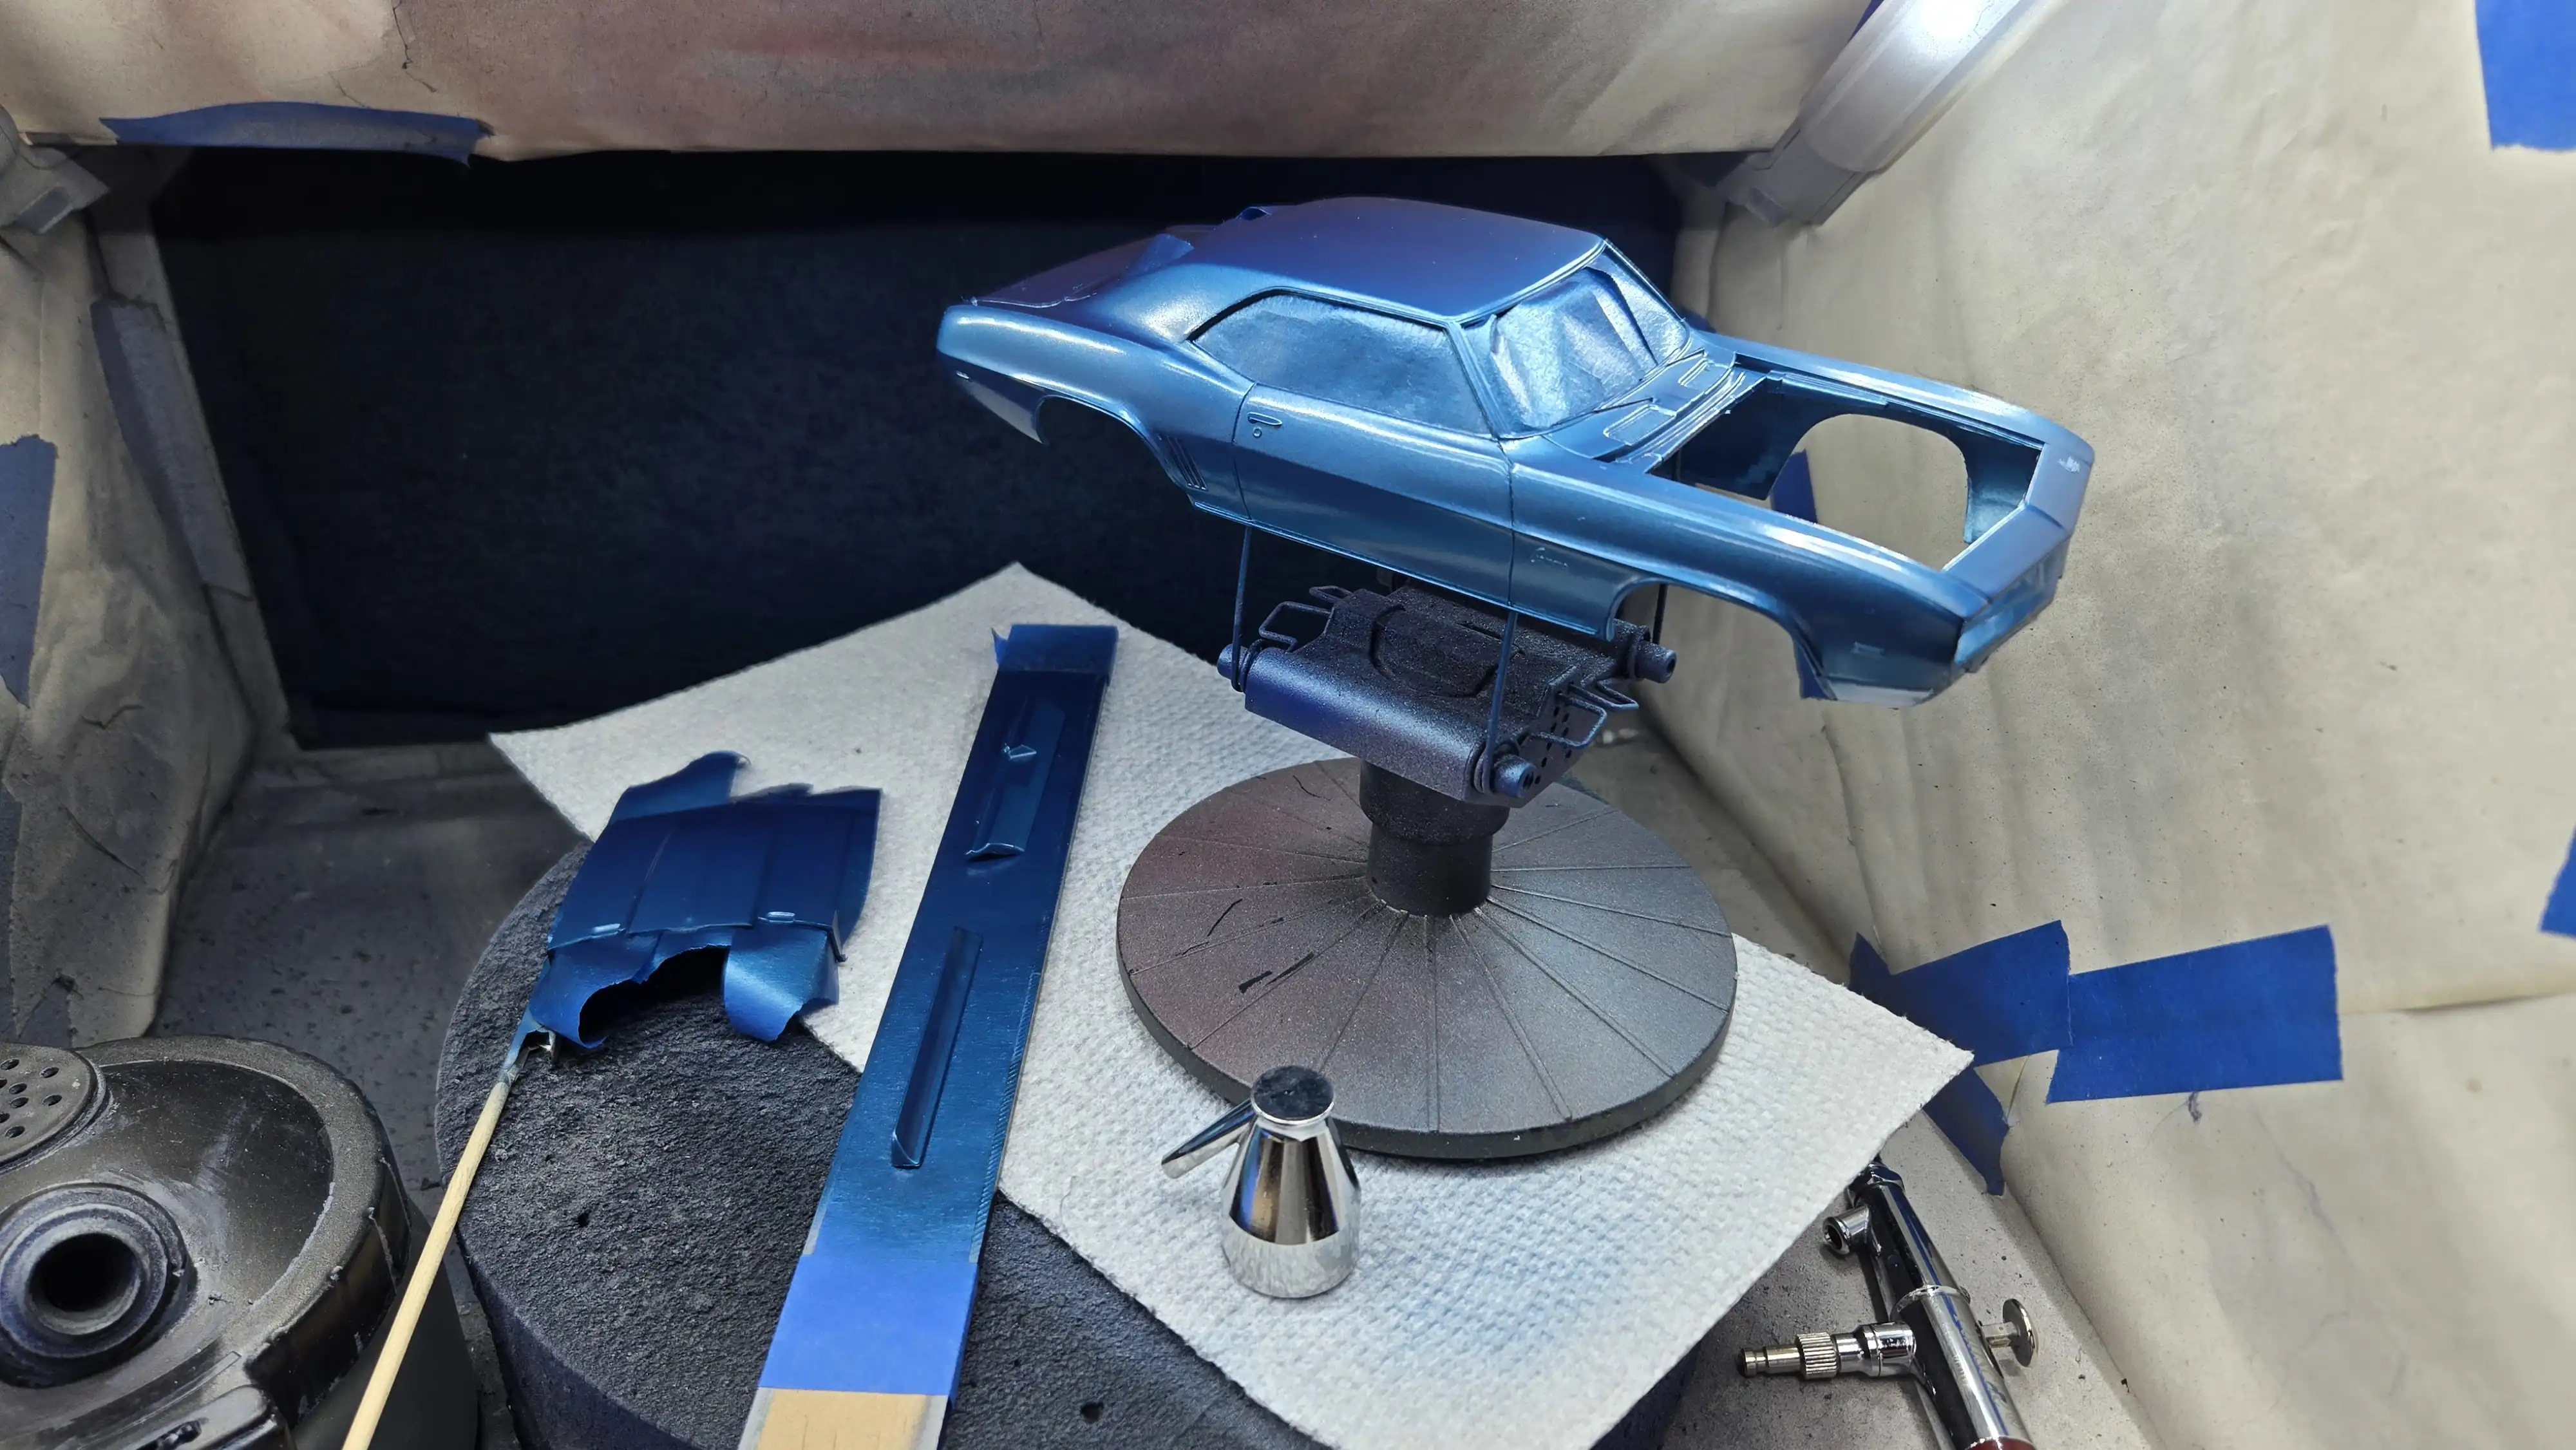 Body parts being painted
 Body parts being painted - 2nd coat
 Body parts painted
 Assembling the engine
 Radiator and battery assembly
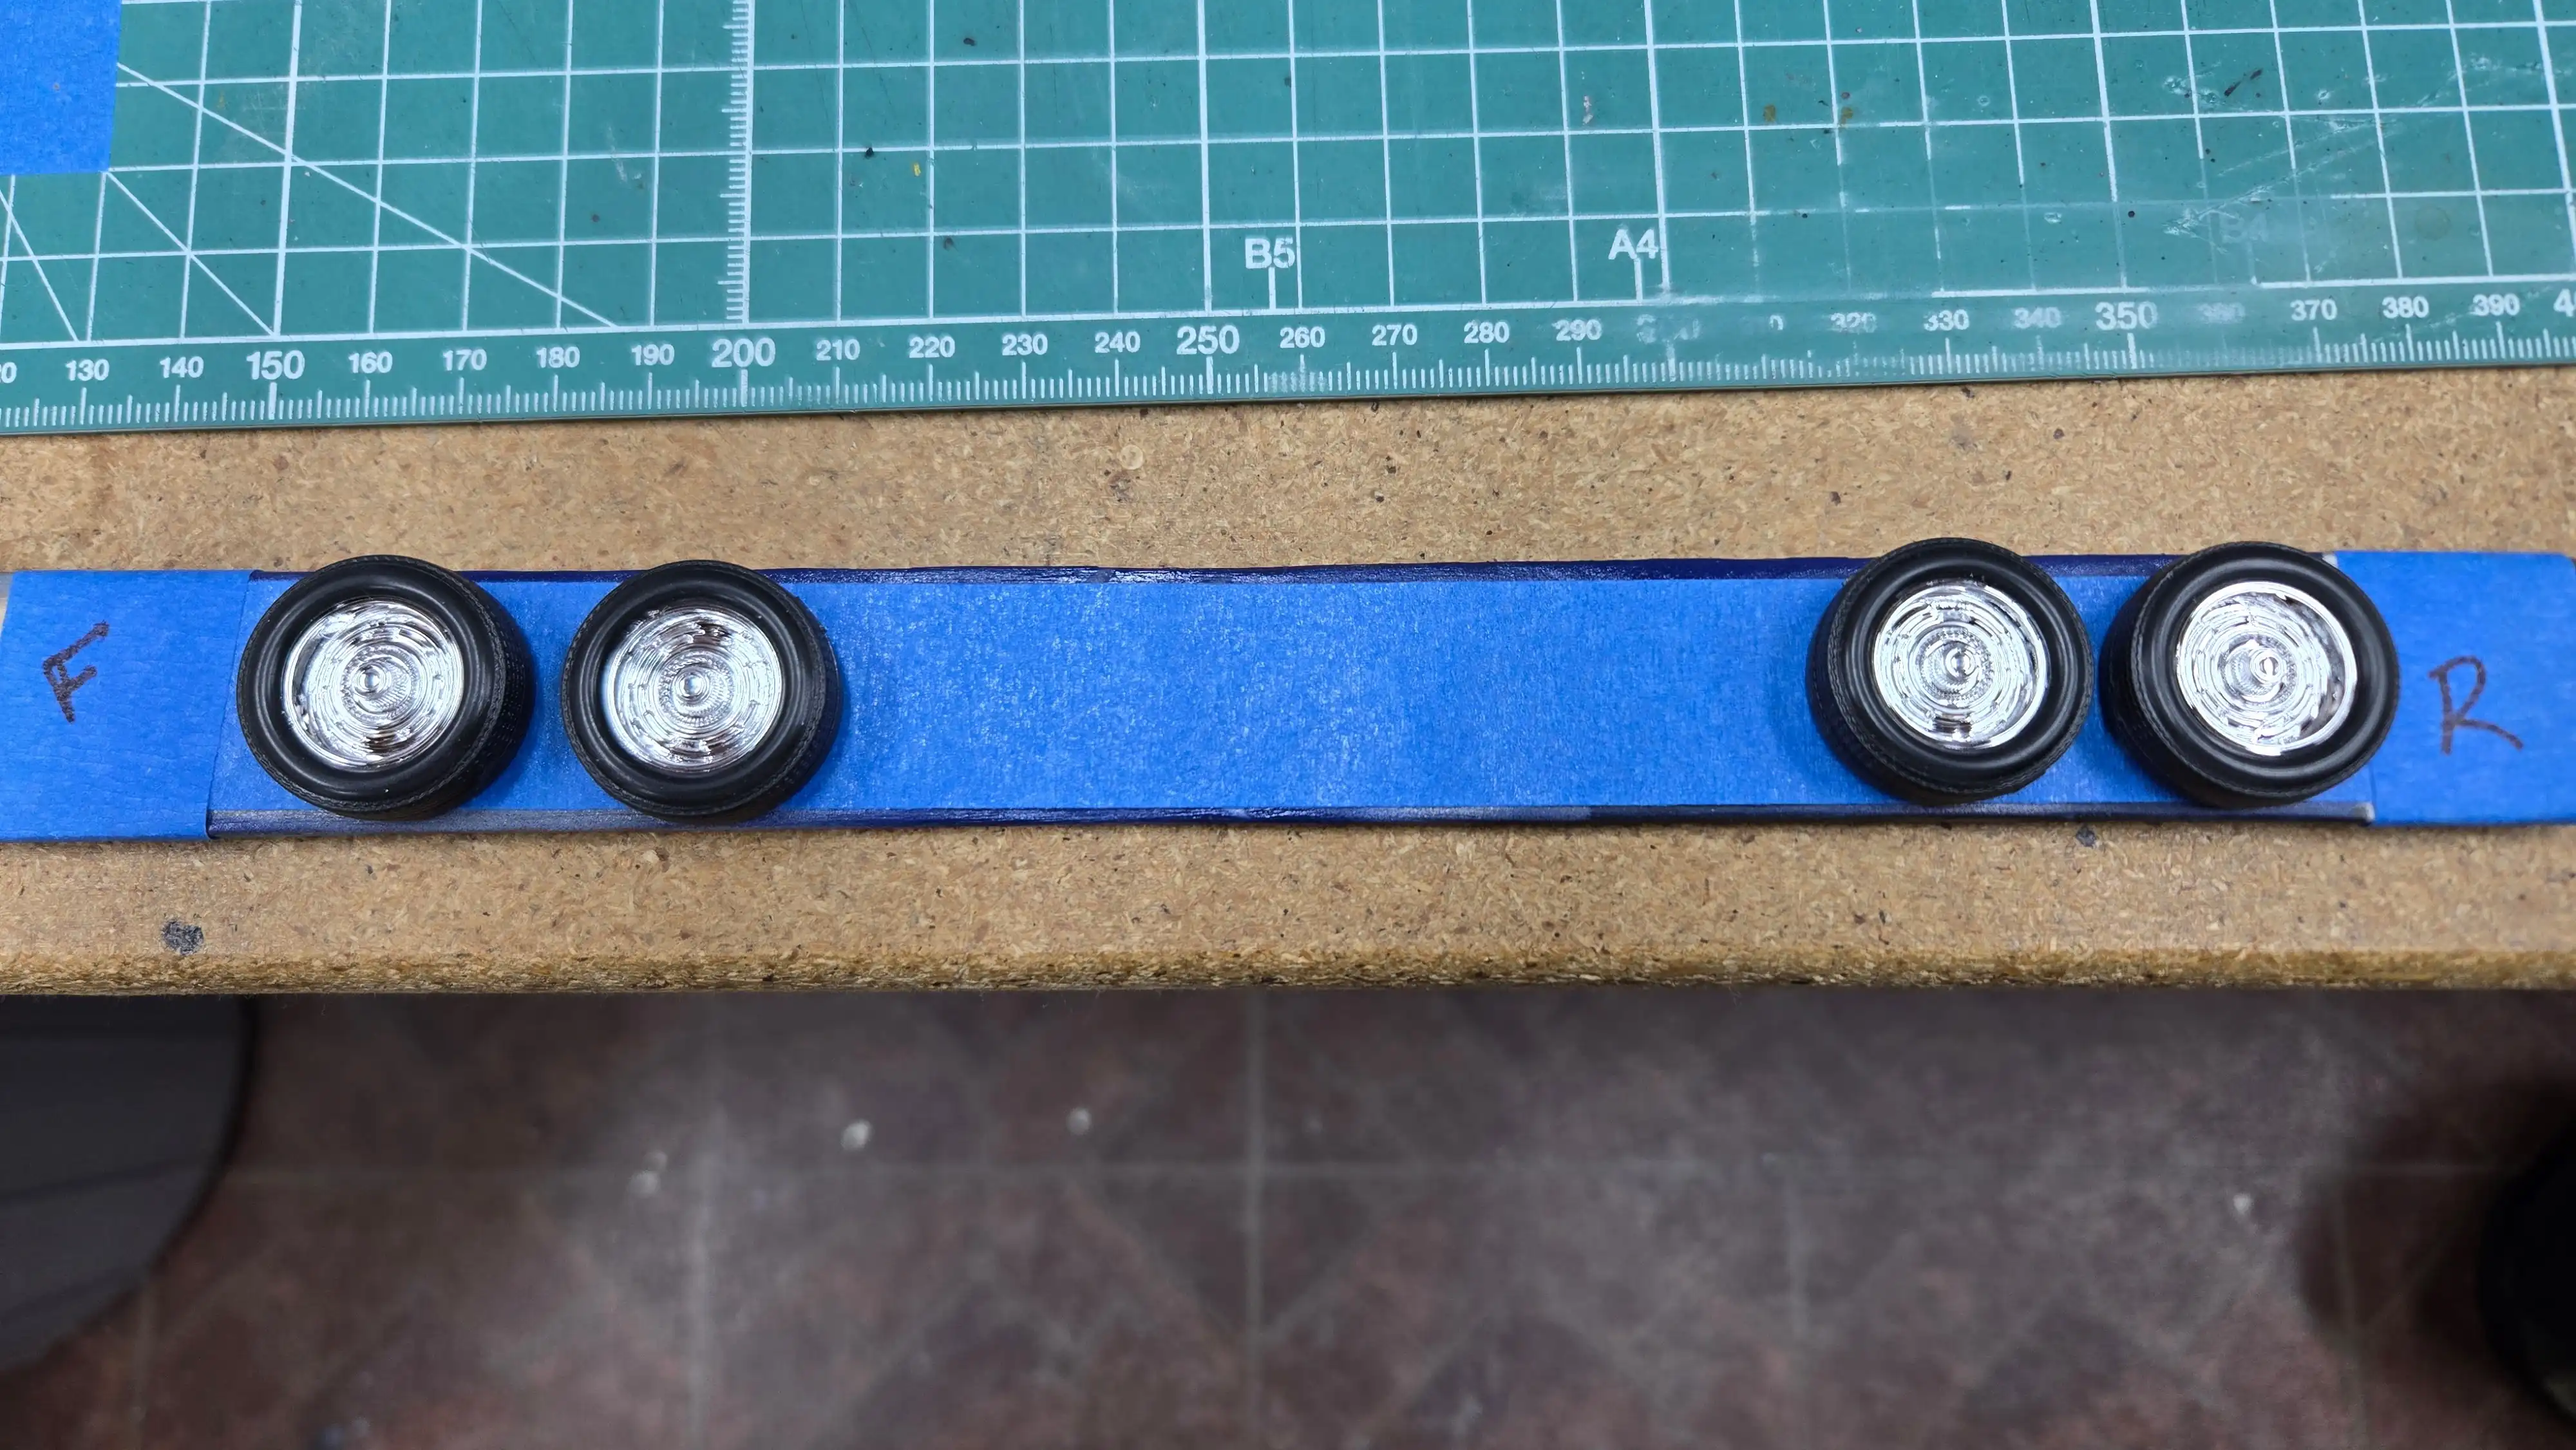 Wheels and tires assembled
 Interior parts being painted
 Chassis being assembled
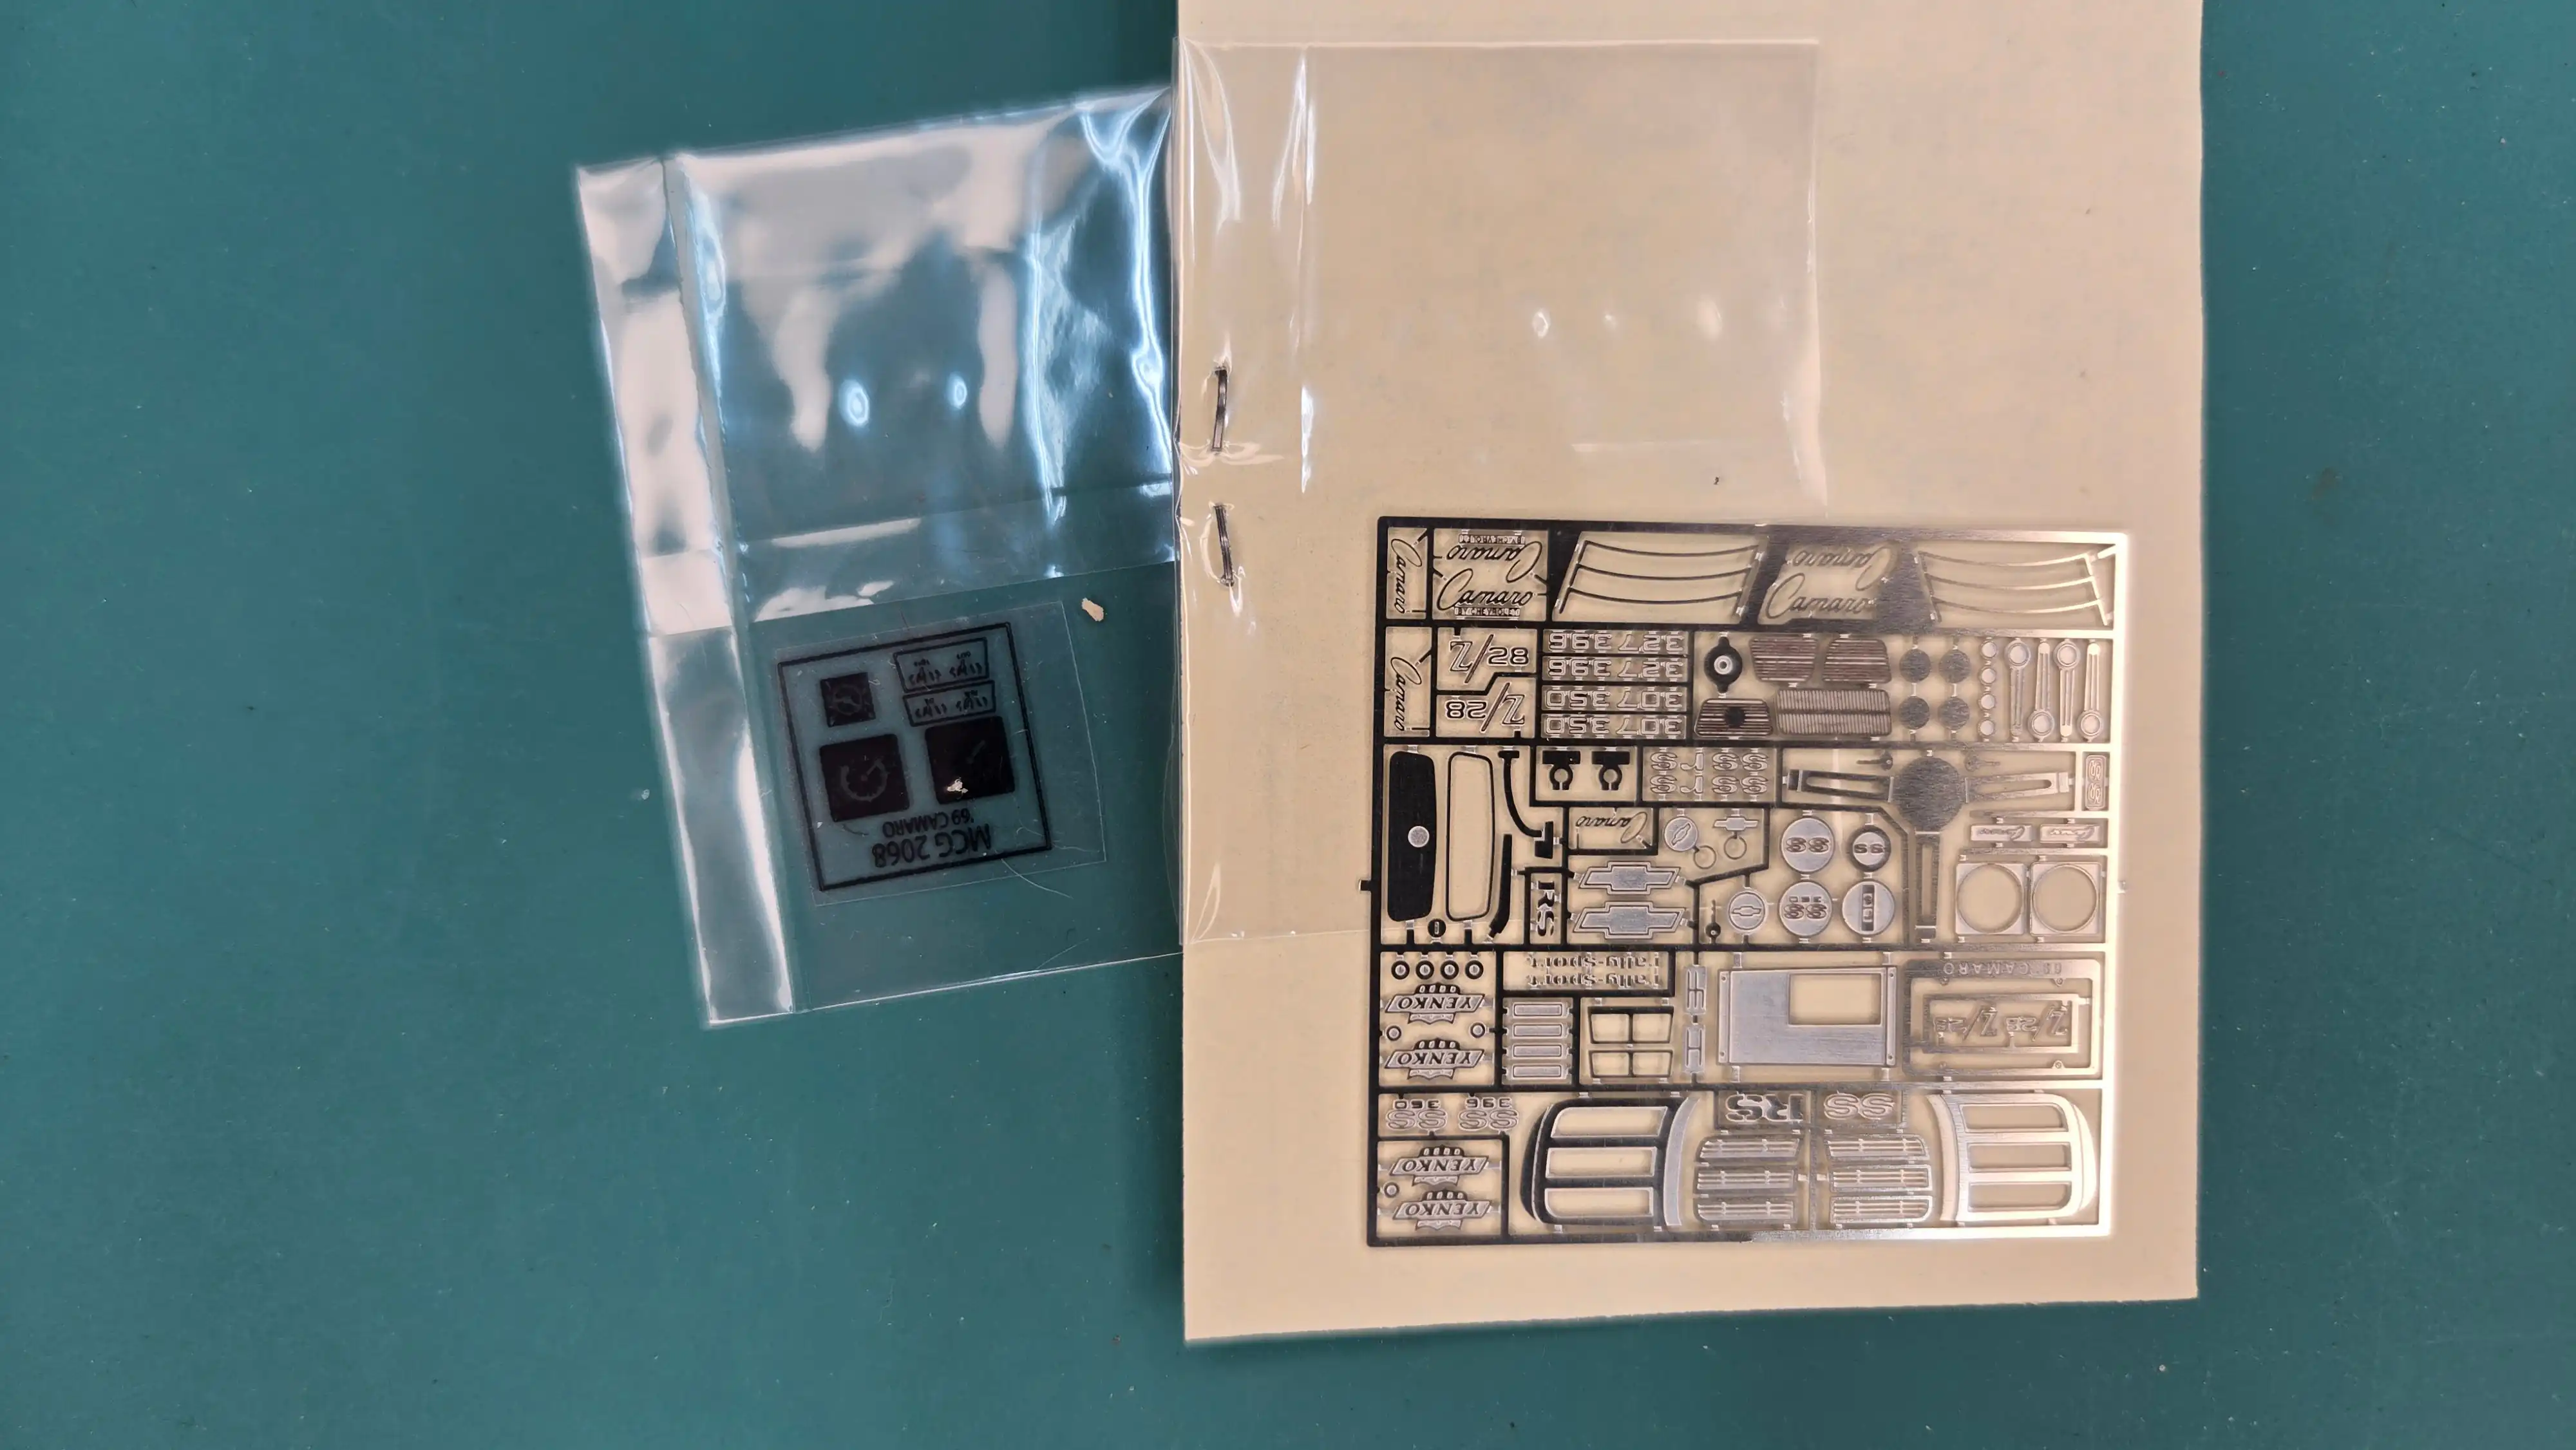 Photo etch and gauge decals
 69 Camaro photo etch detail
 69 Camaro interior
 69 Camaro dashboard in progress
 69 Camaro fire wall
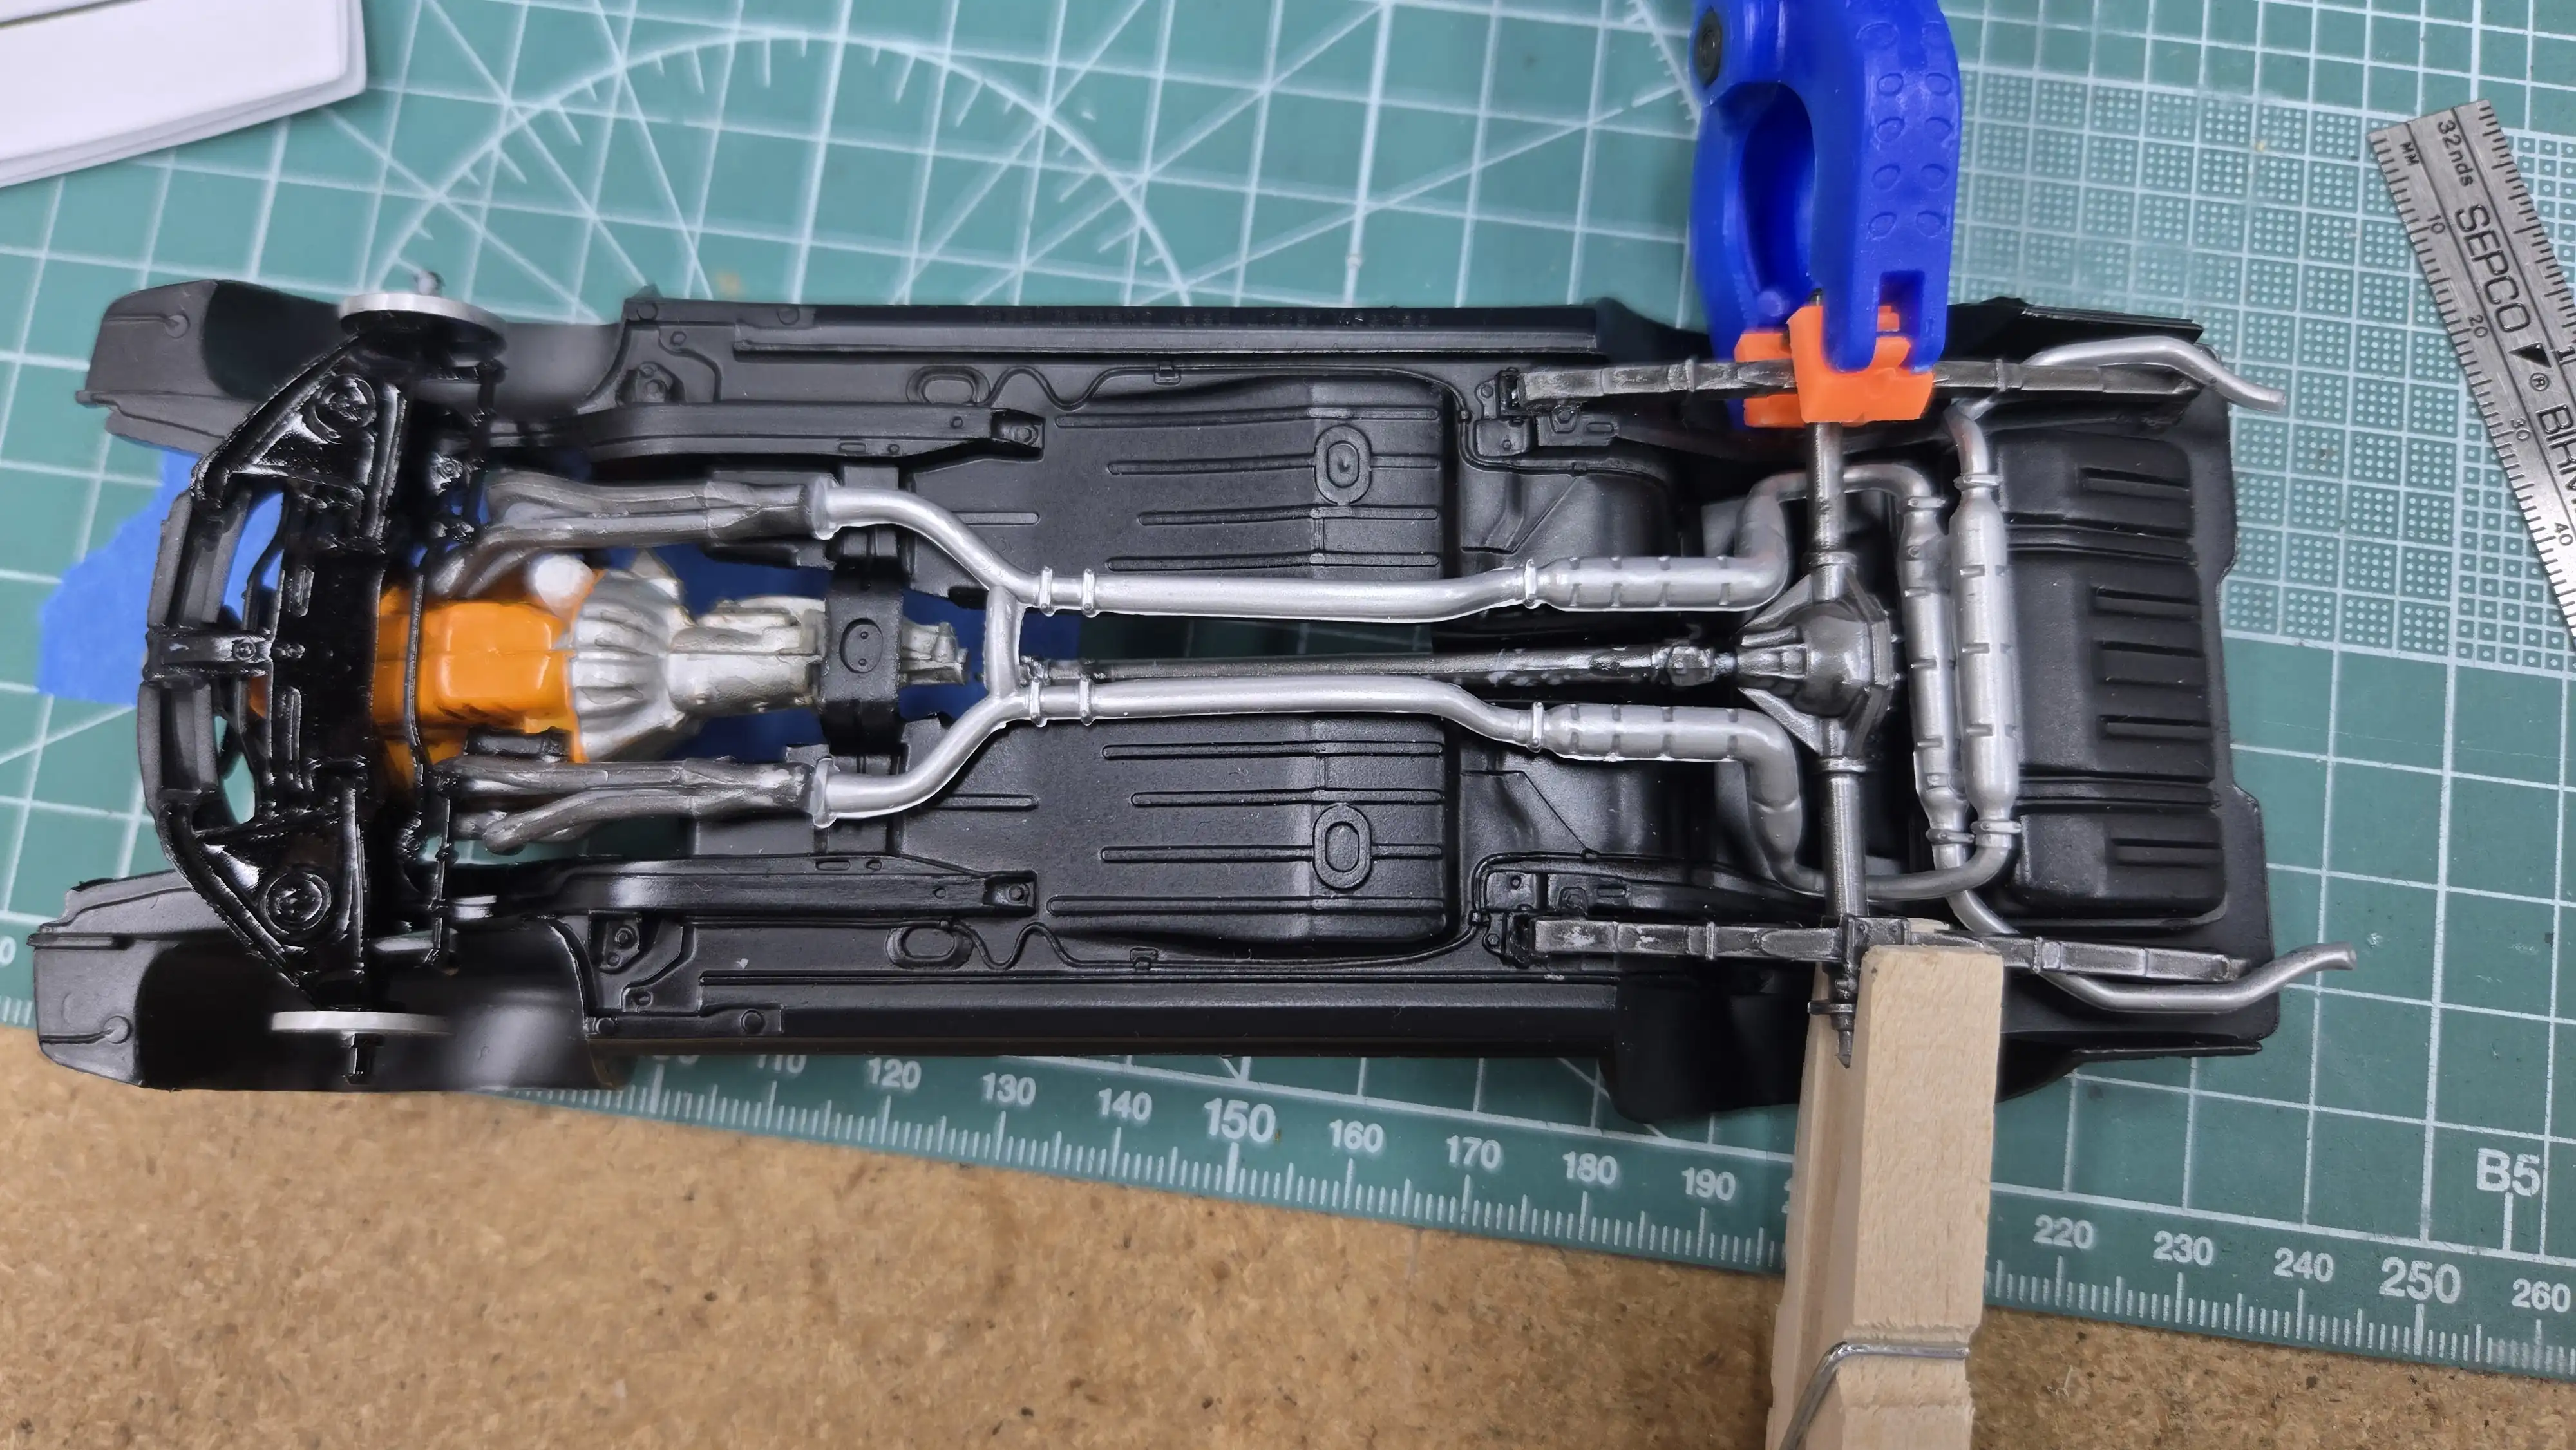 Rear springs and differential being installed
 Engine installed in the chassis
 Radiator and radiator hoses installed
 Drive shaft and rear shocks installed
 Dashboard and interior finished
 The grill is being detailed
 Sun visors are painted
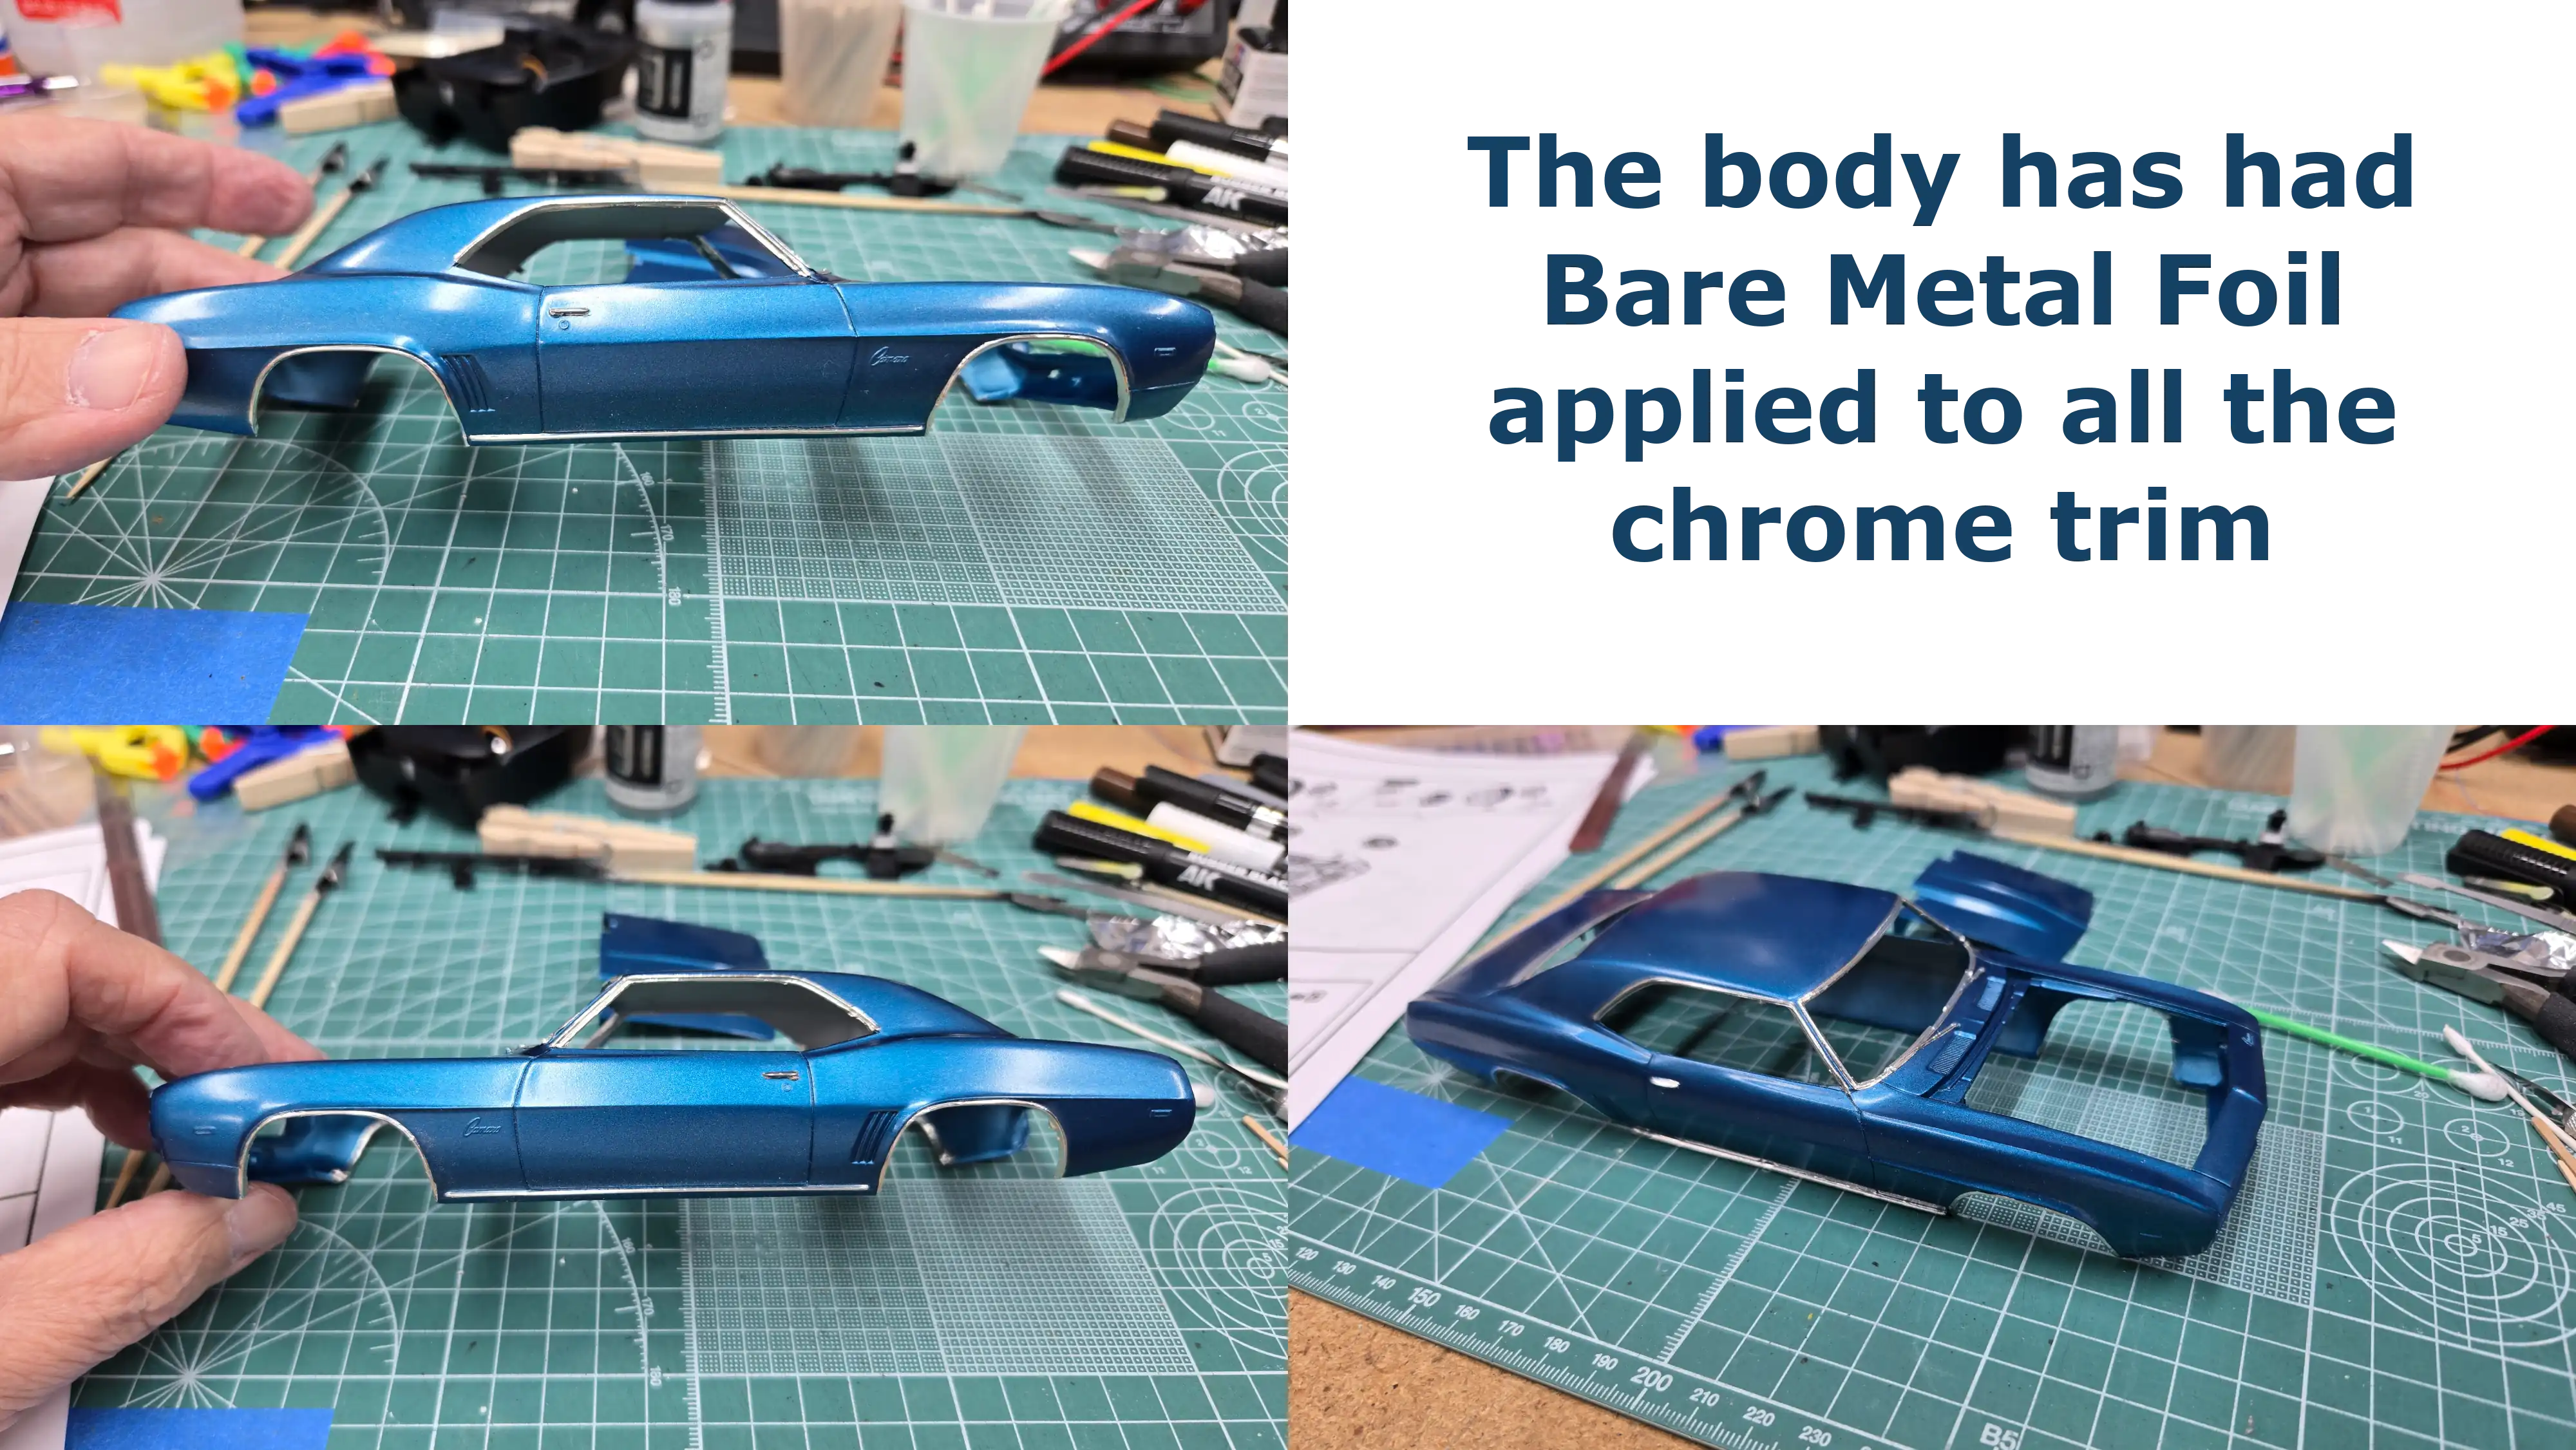 Body has Bare Metal Foil installed
 Wheels and tires installed on the chassis
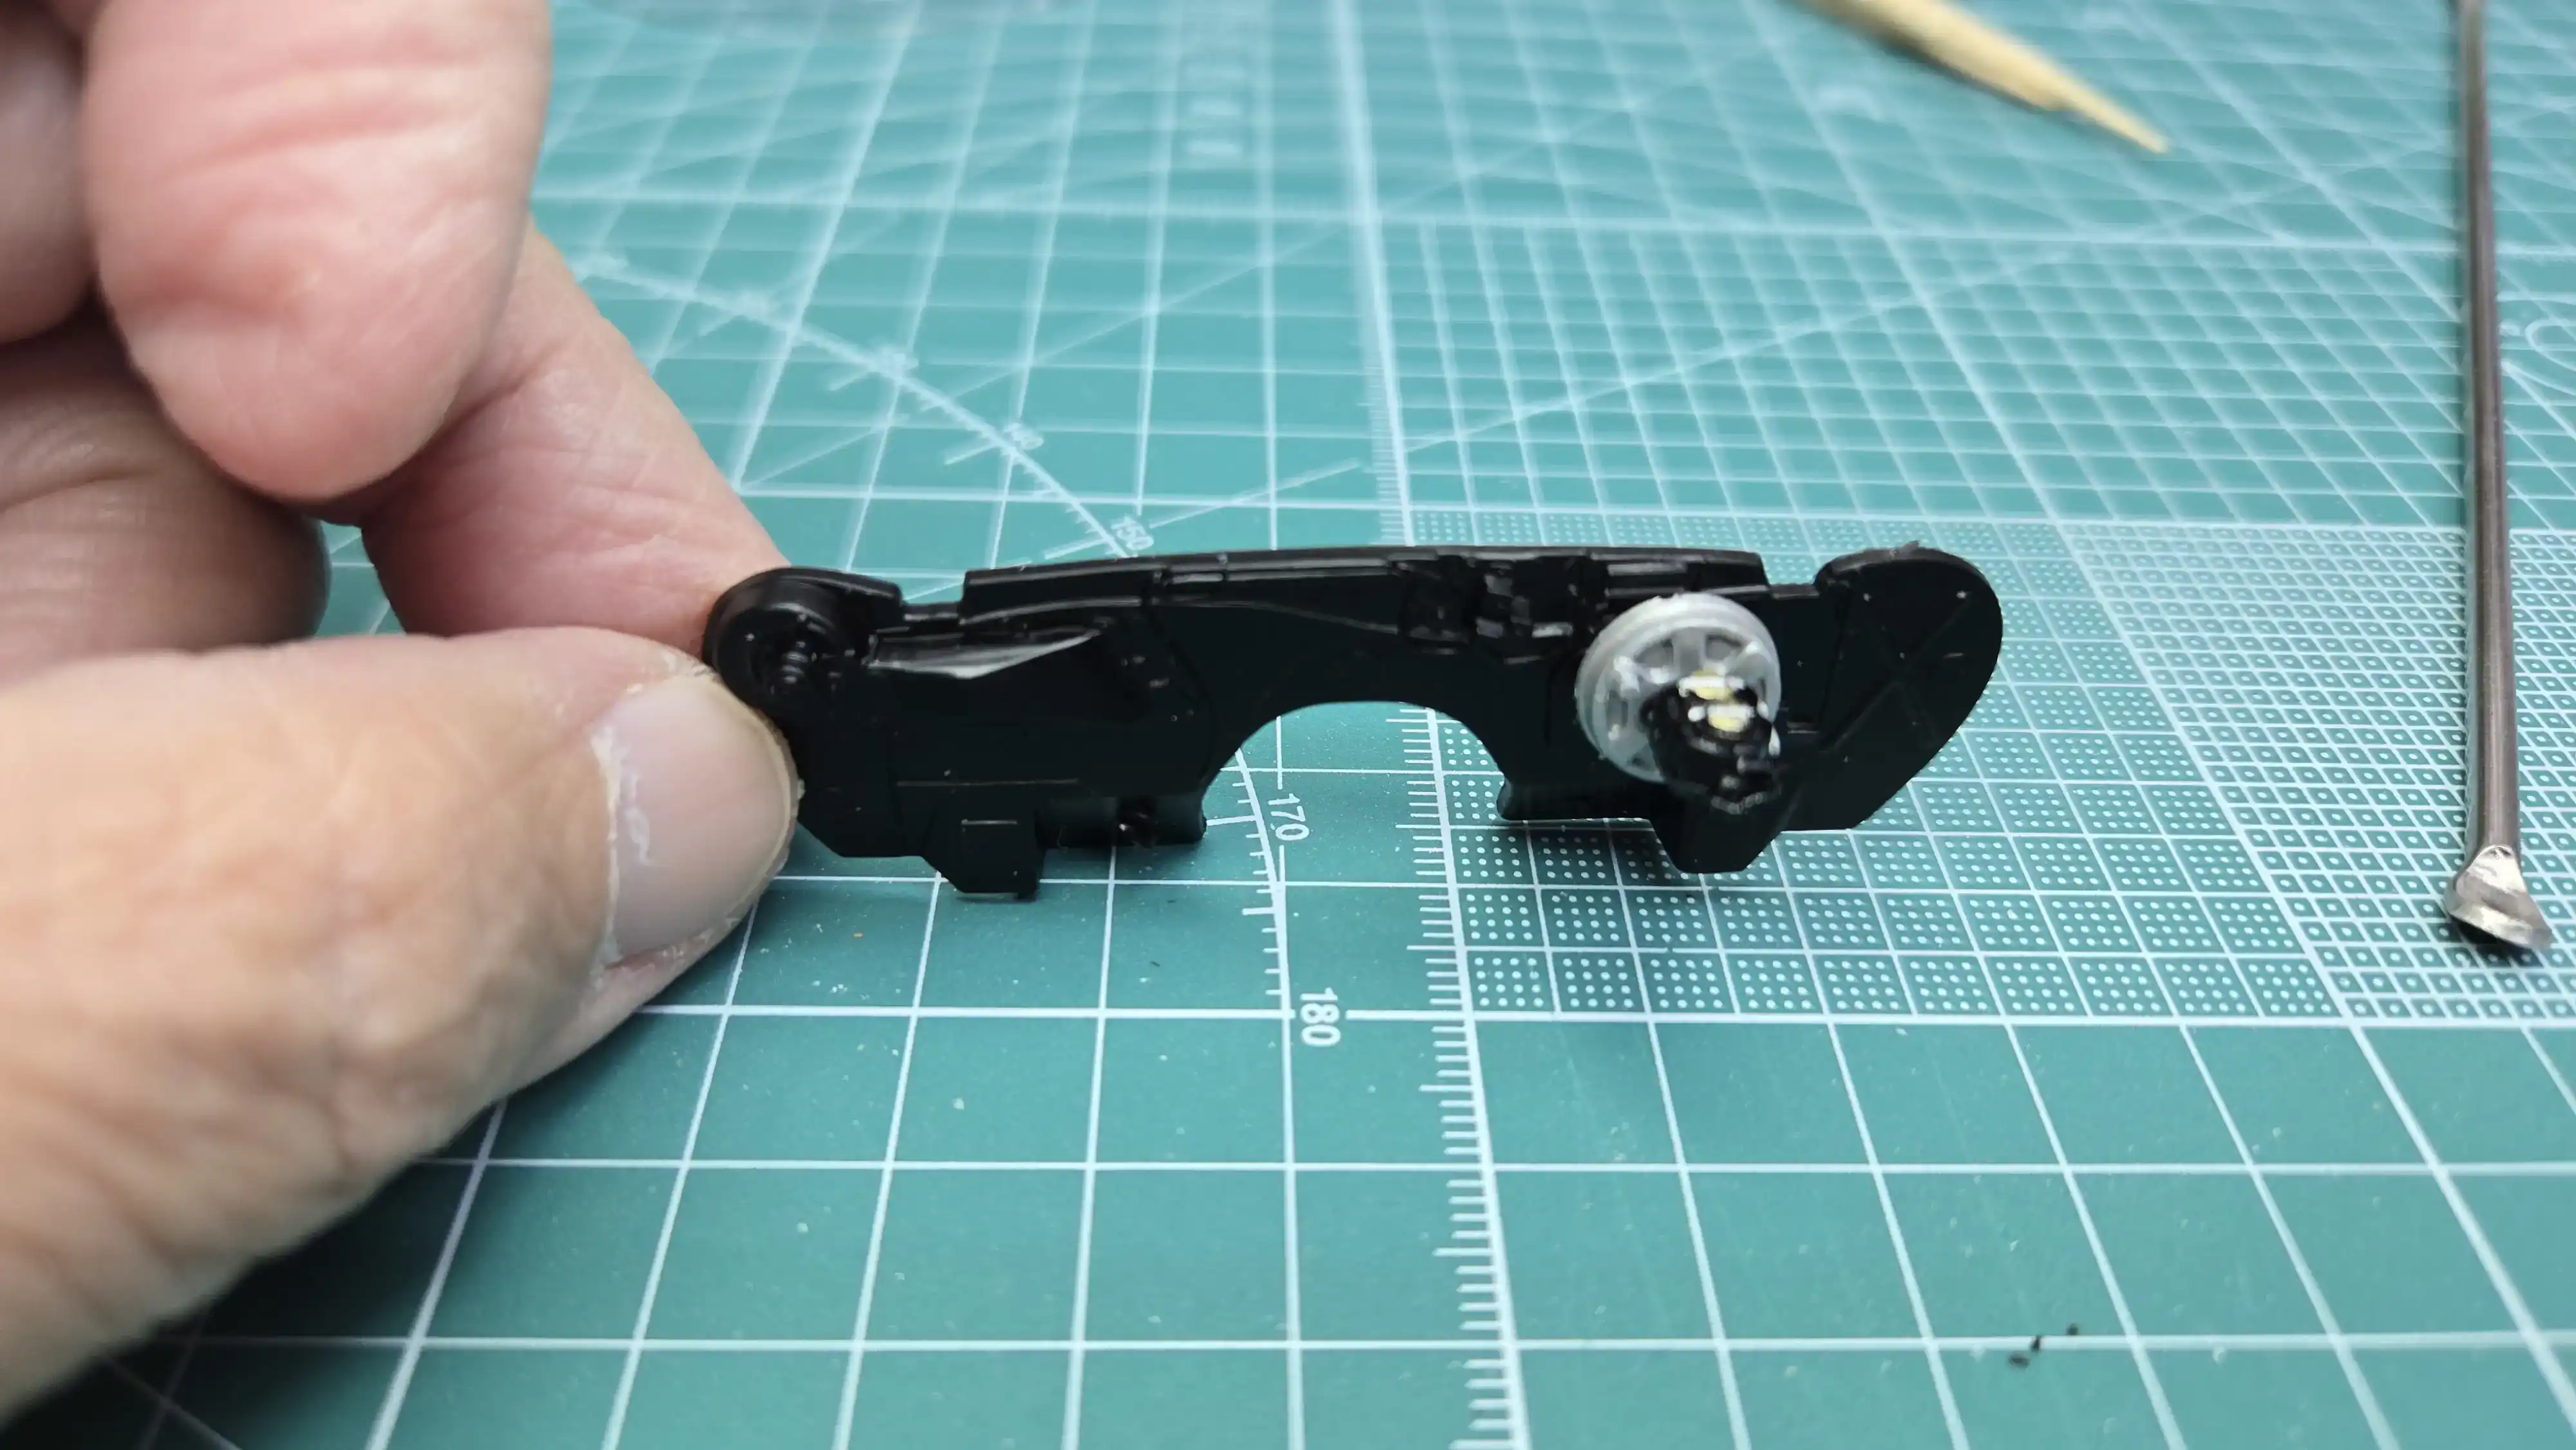
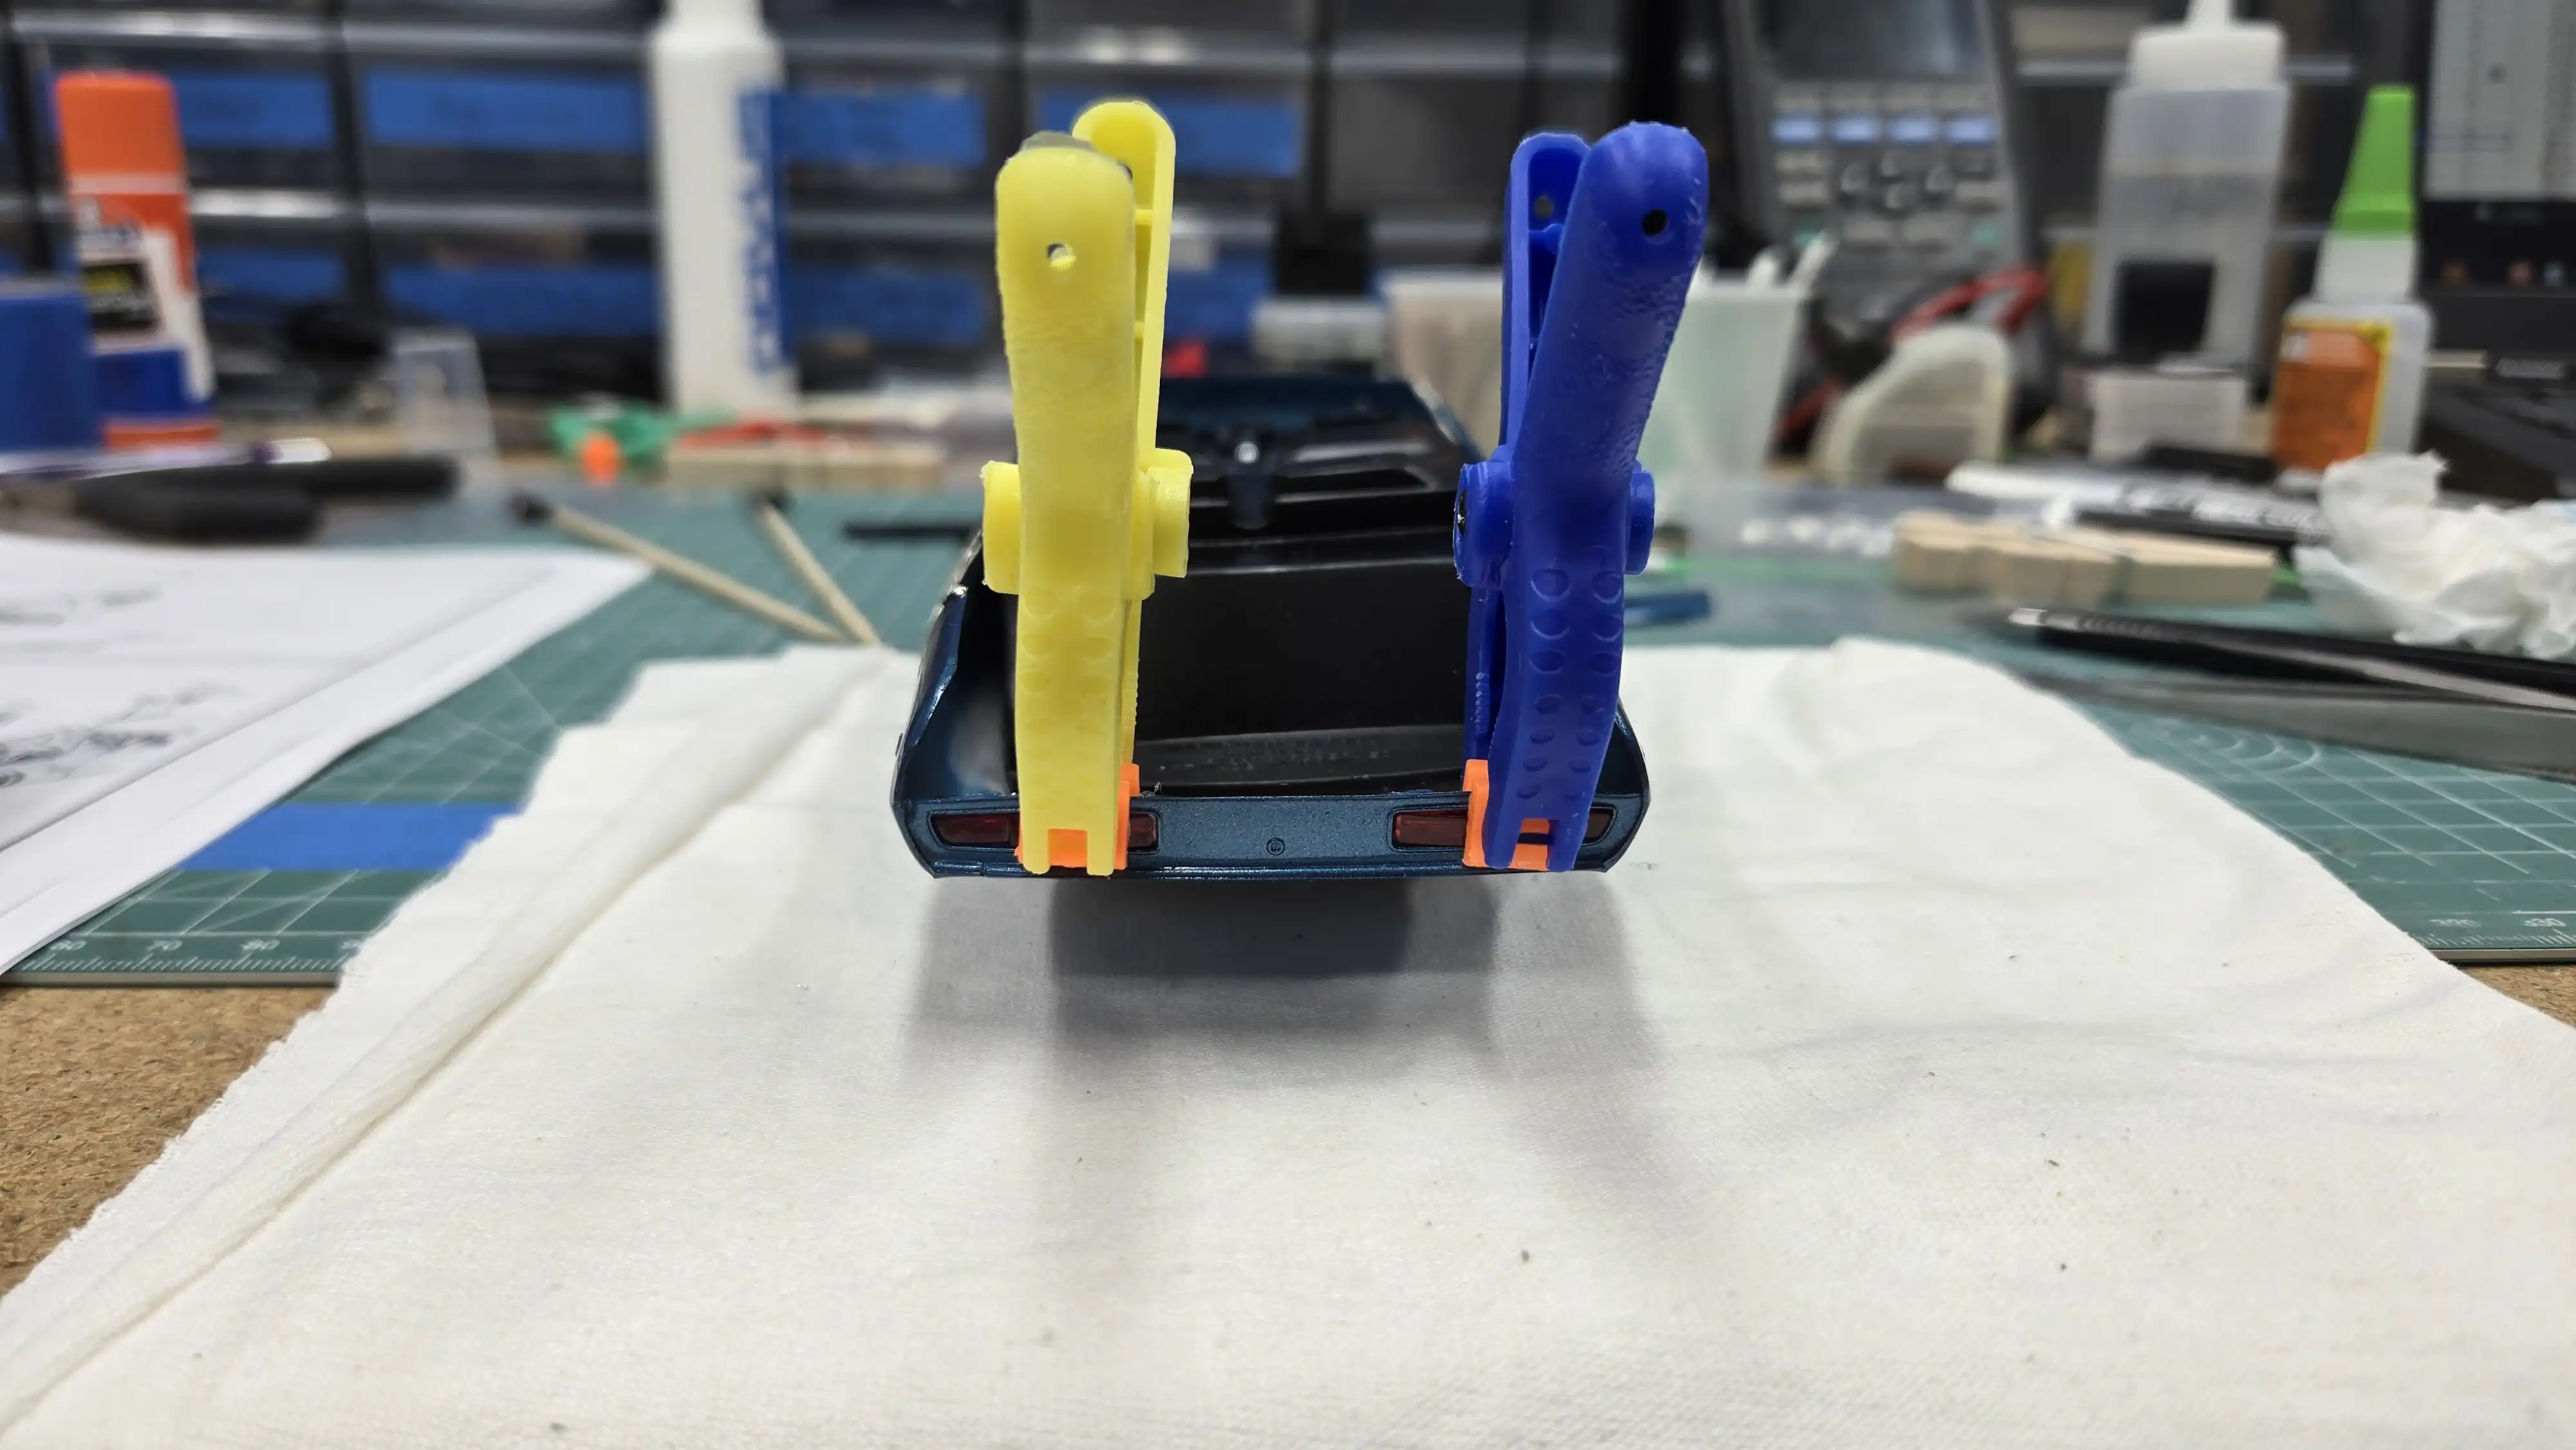 Tail light being installed
 Grill installed - car [is] upside down
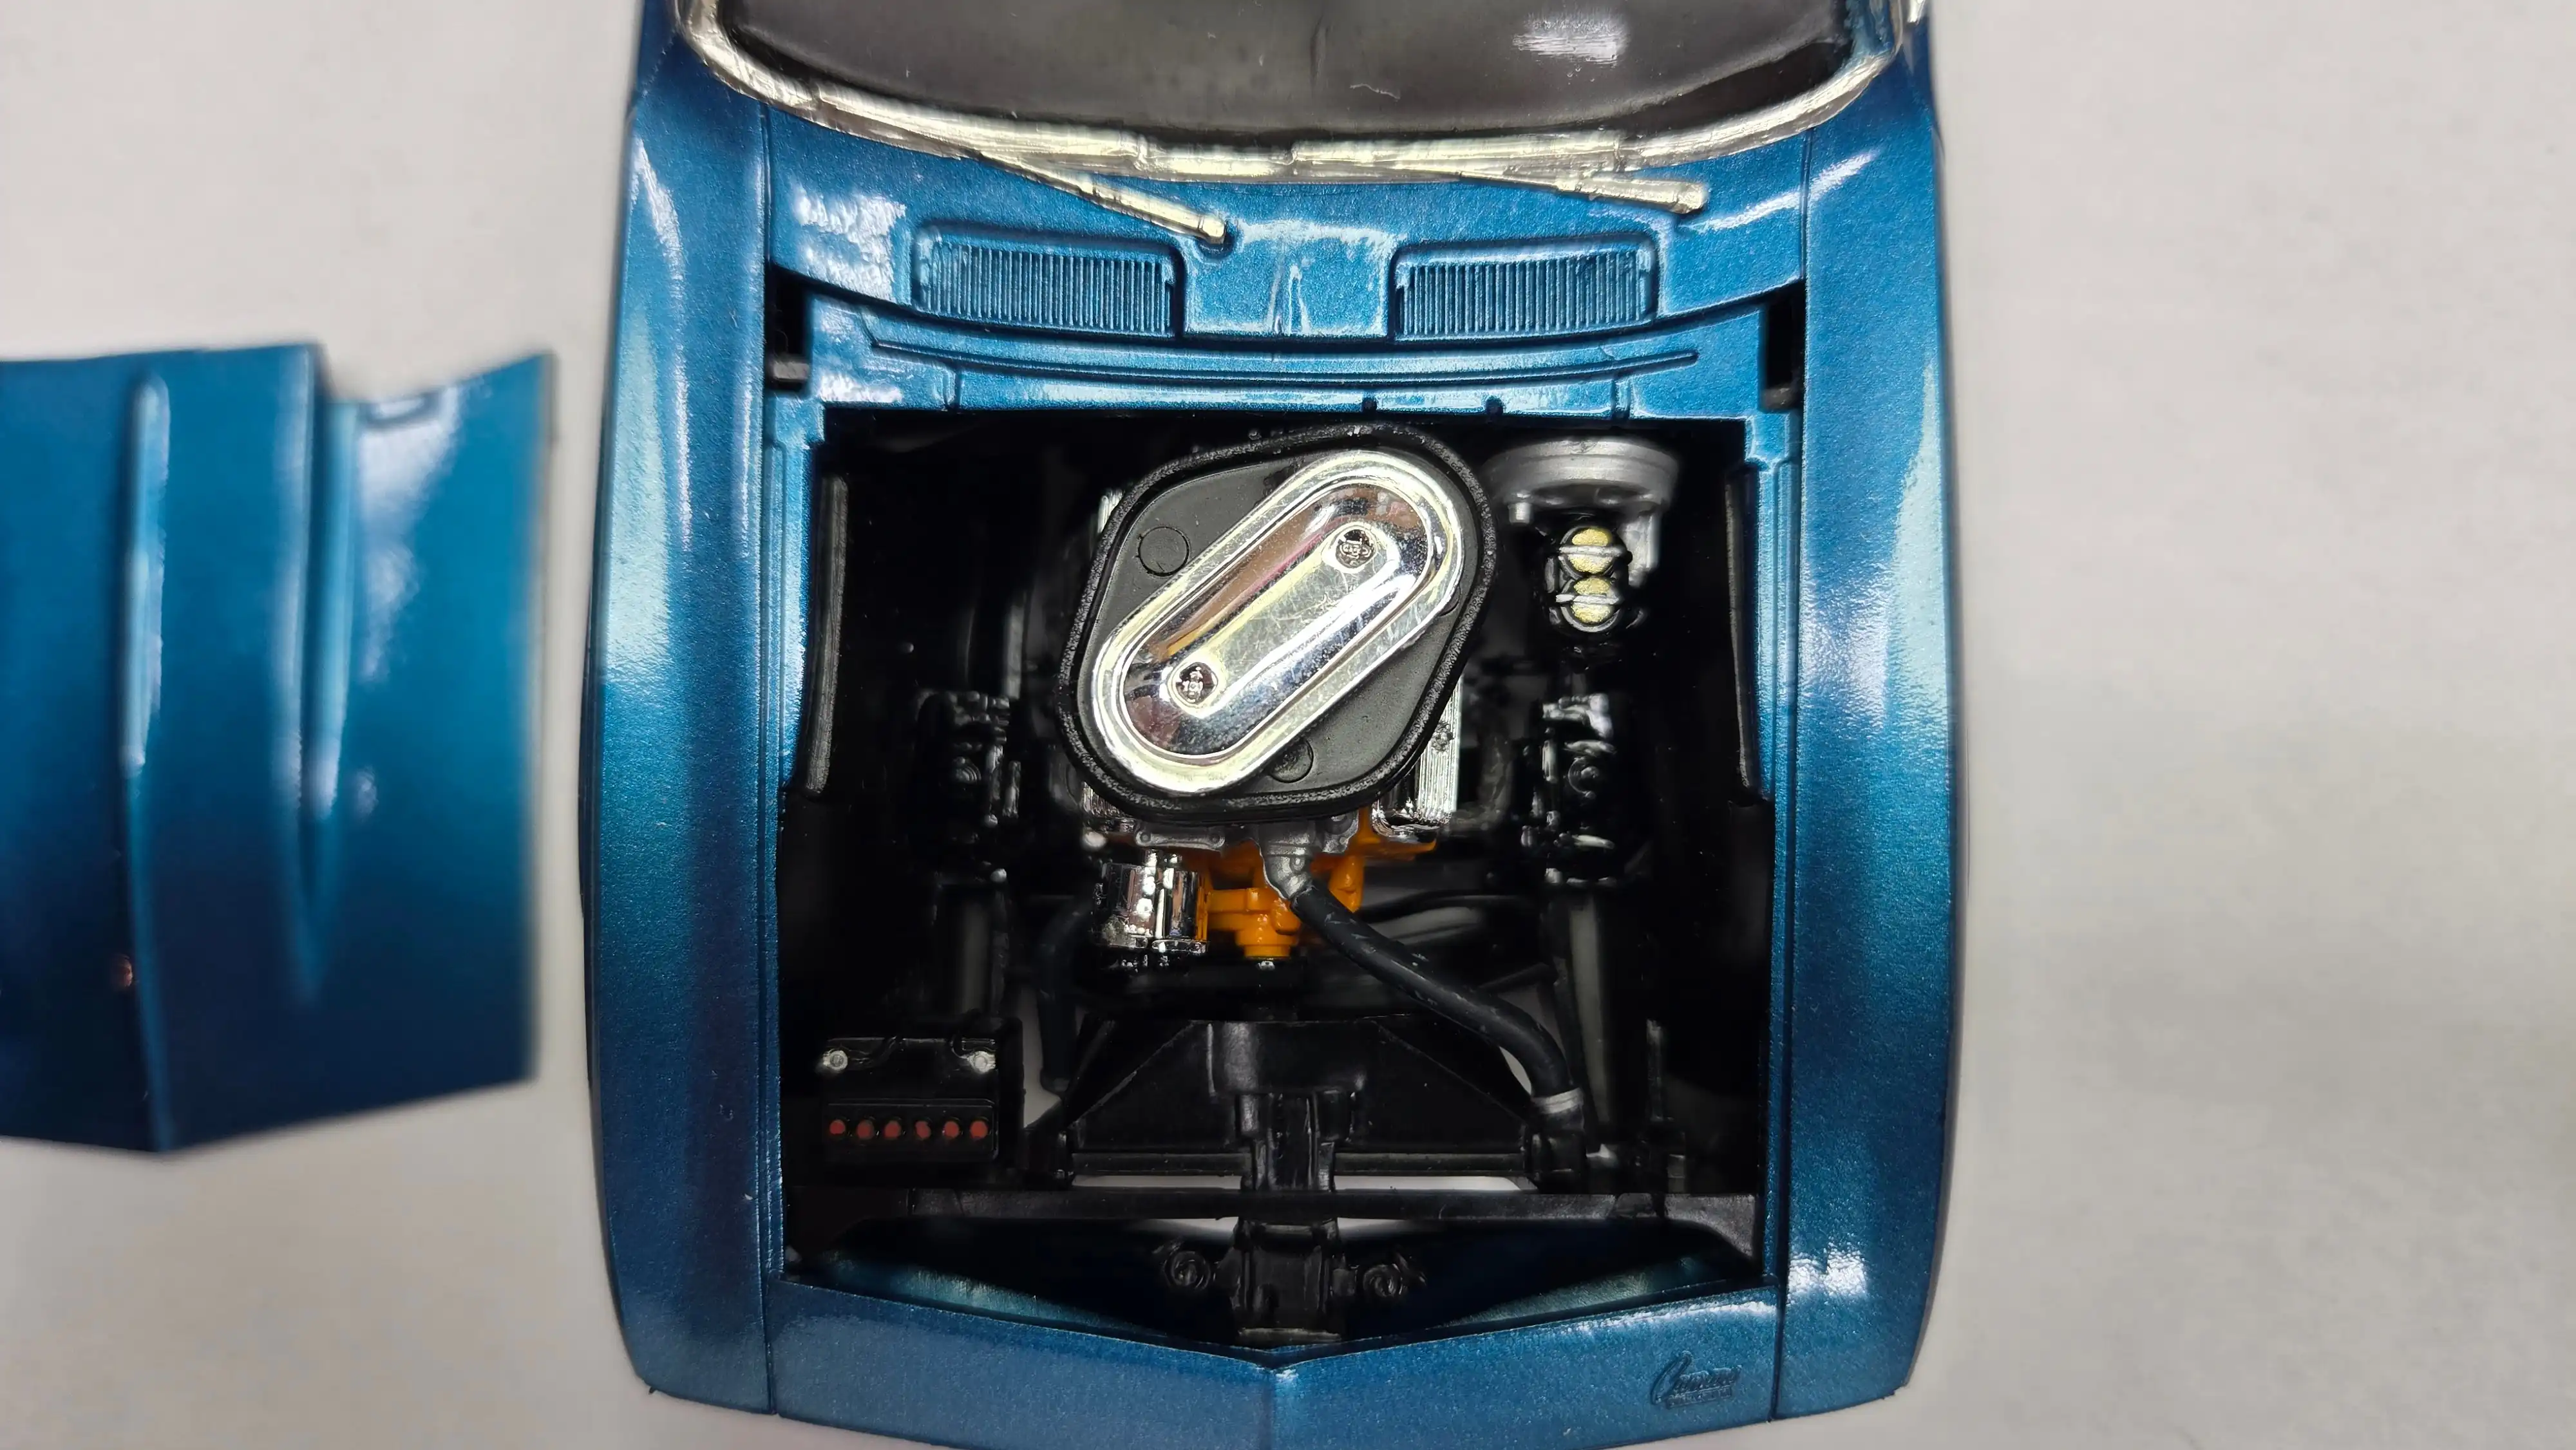 View of engine under the hood
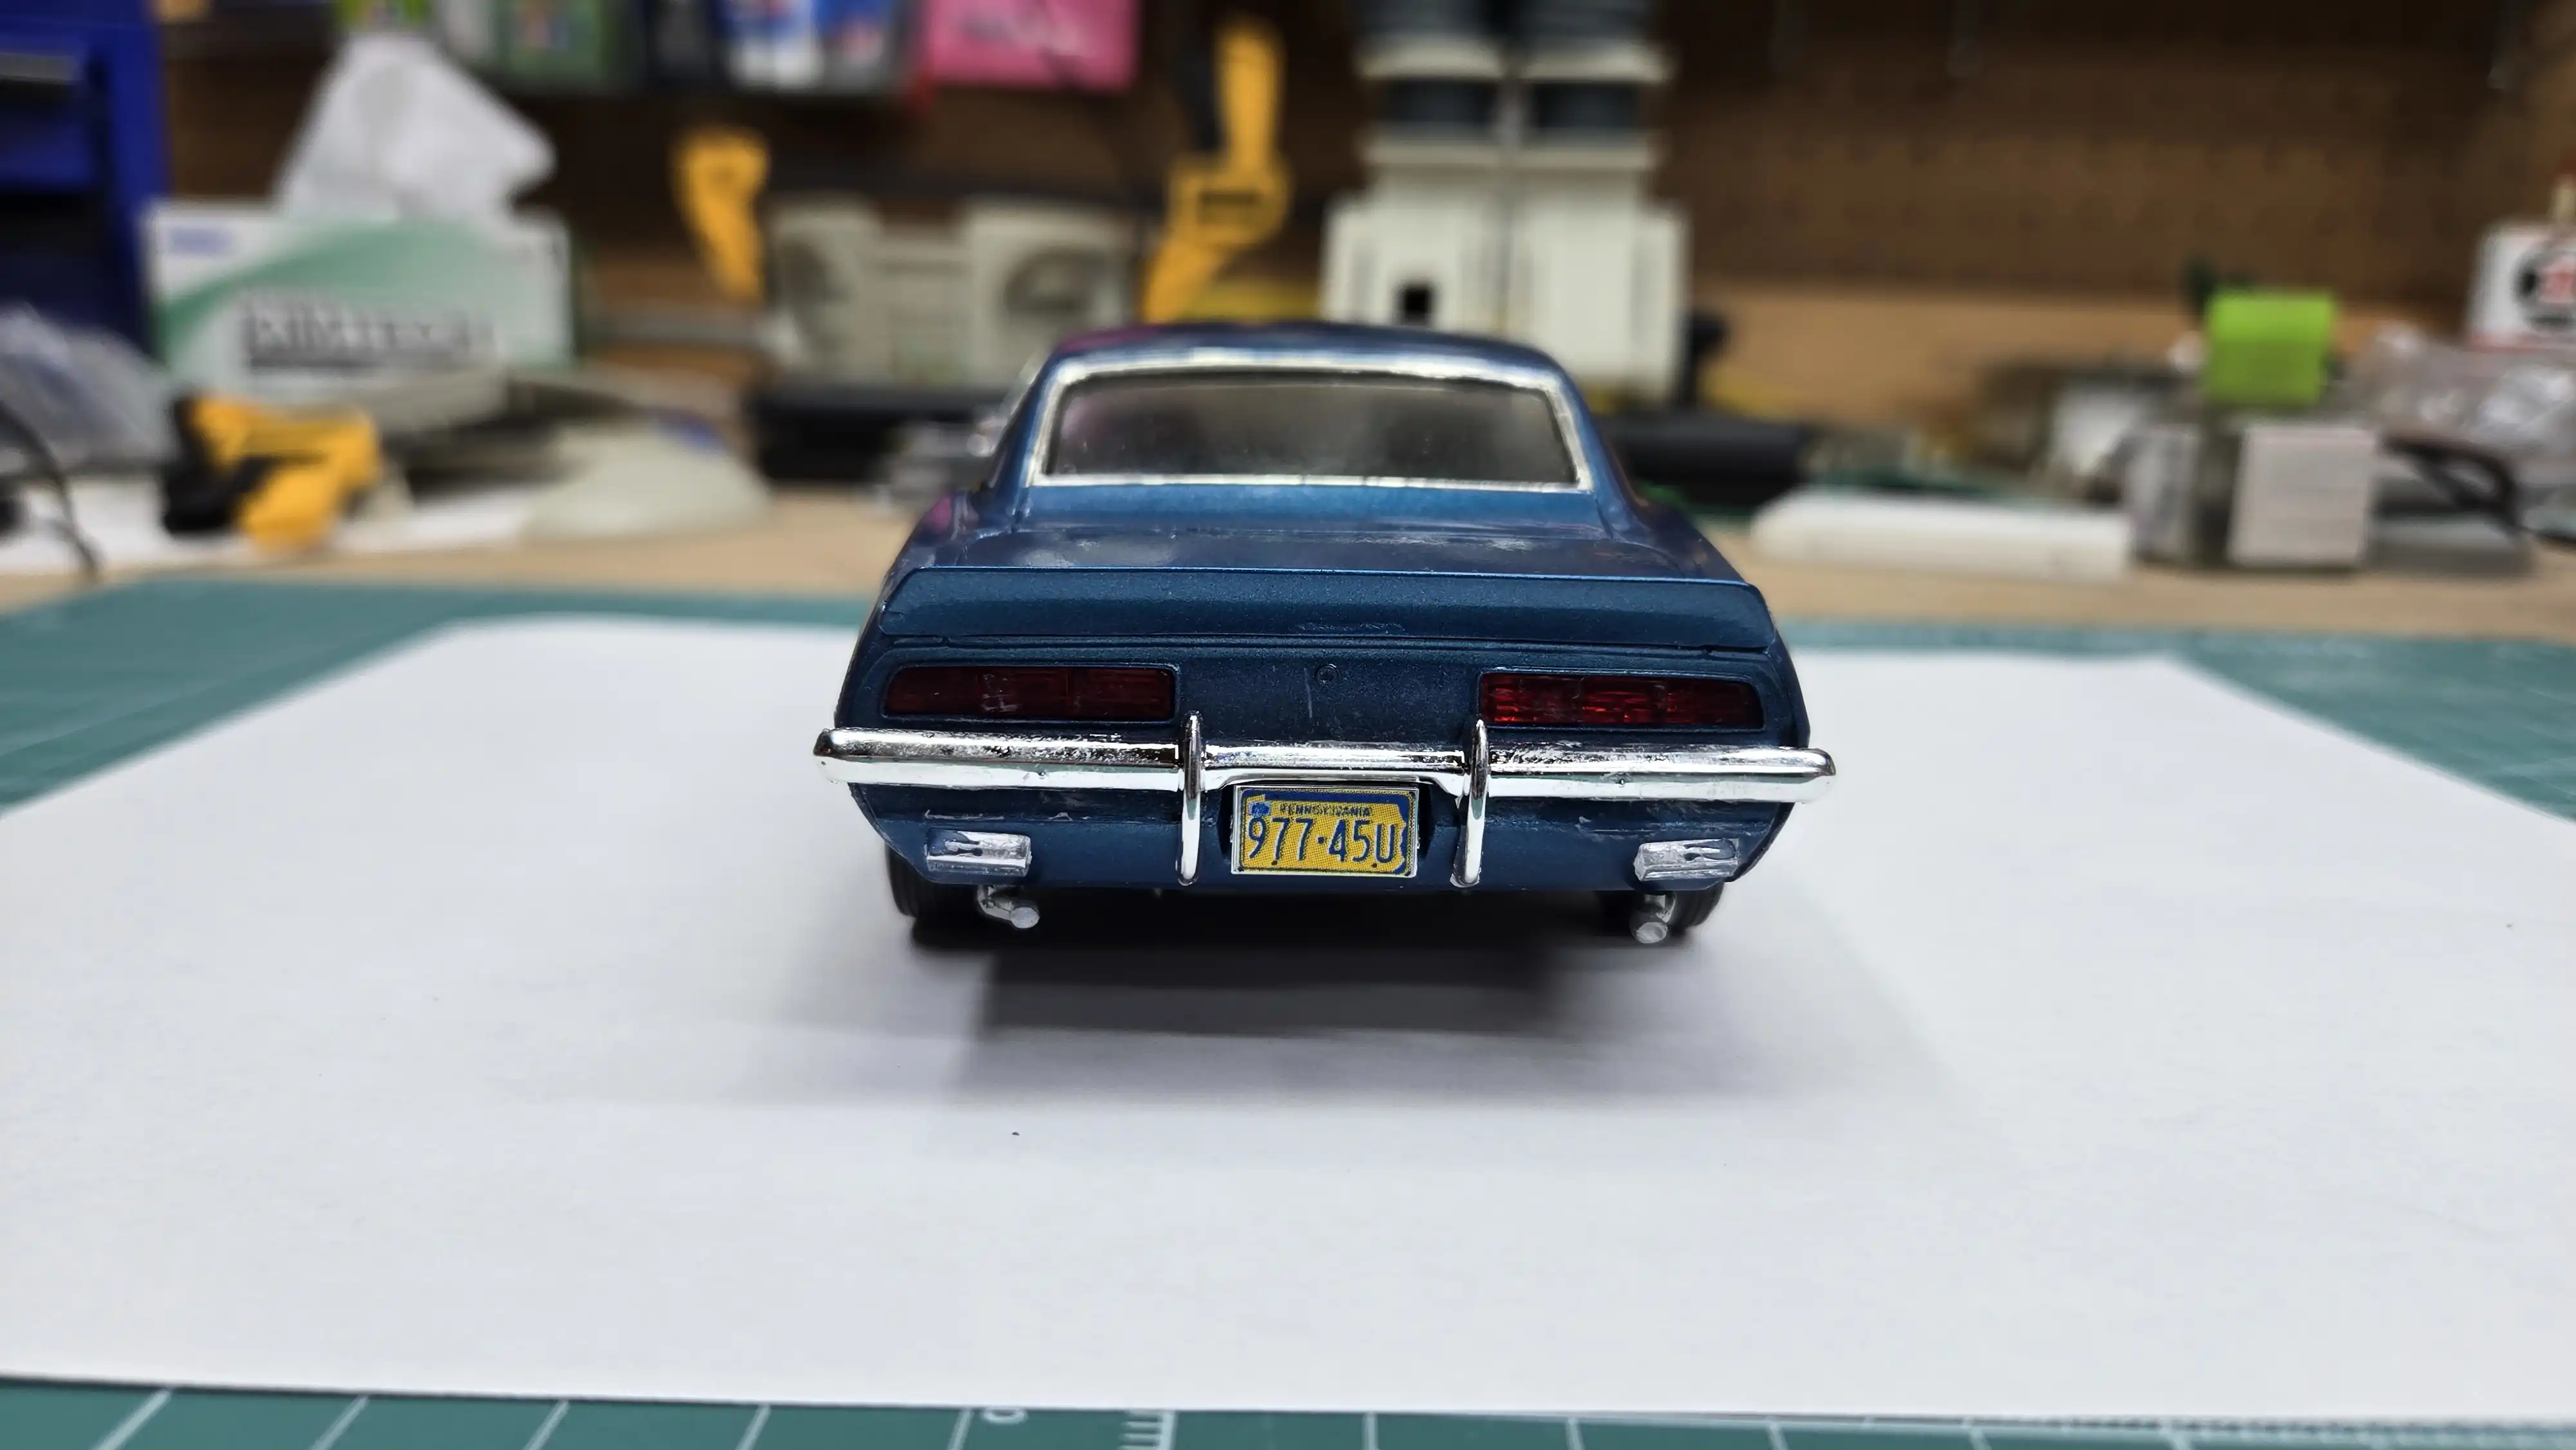 Finished car back view.
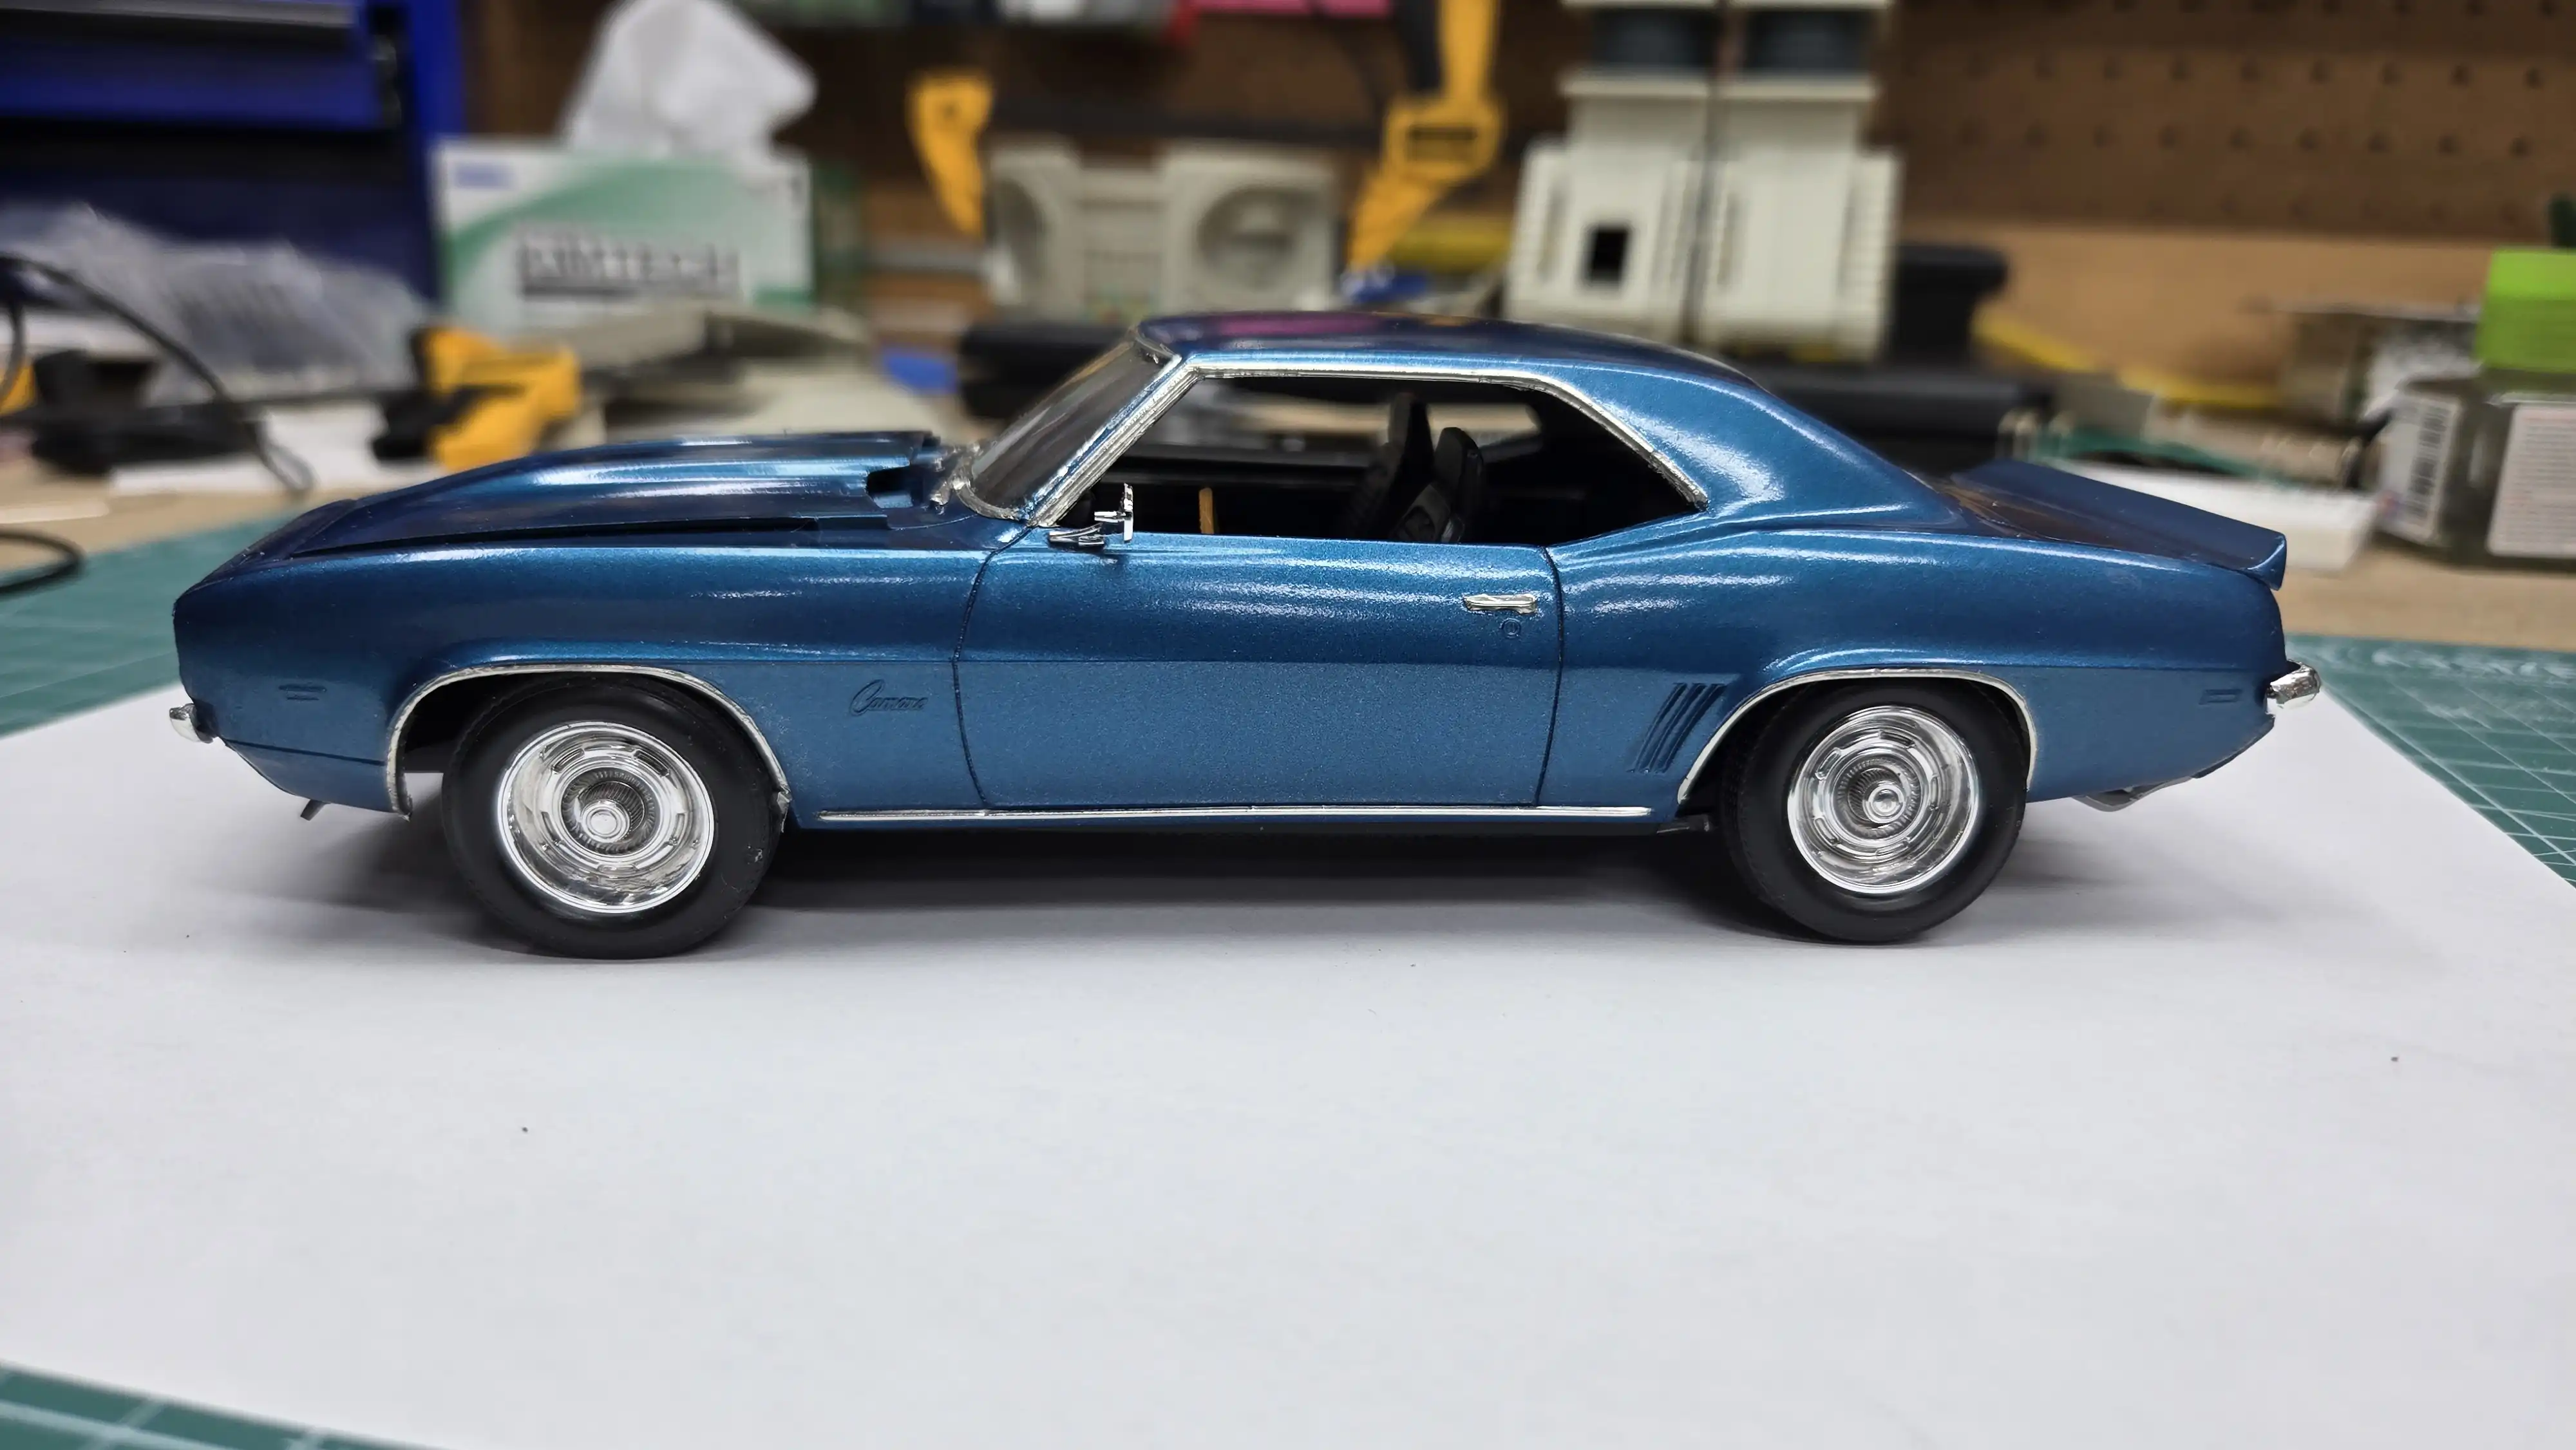
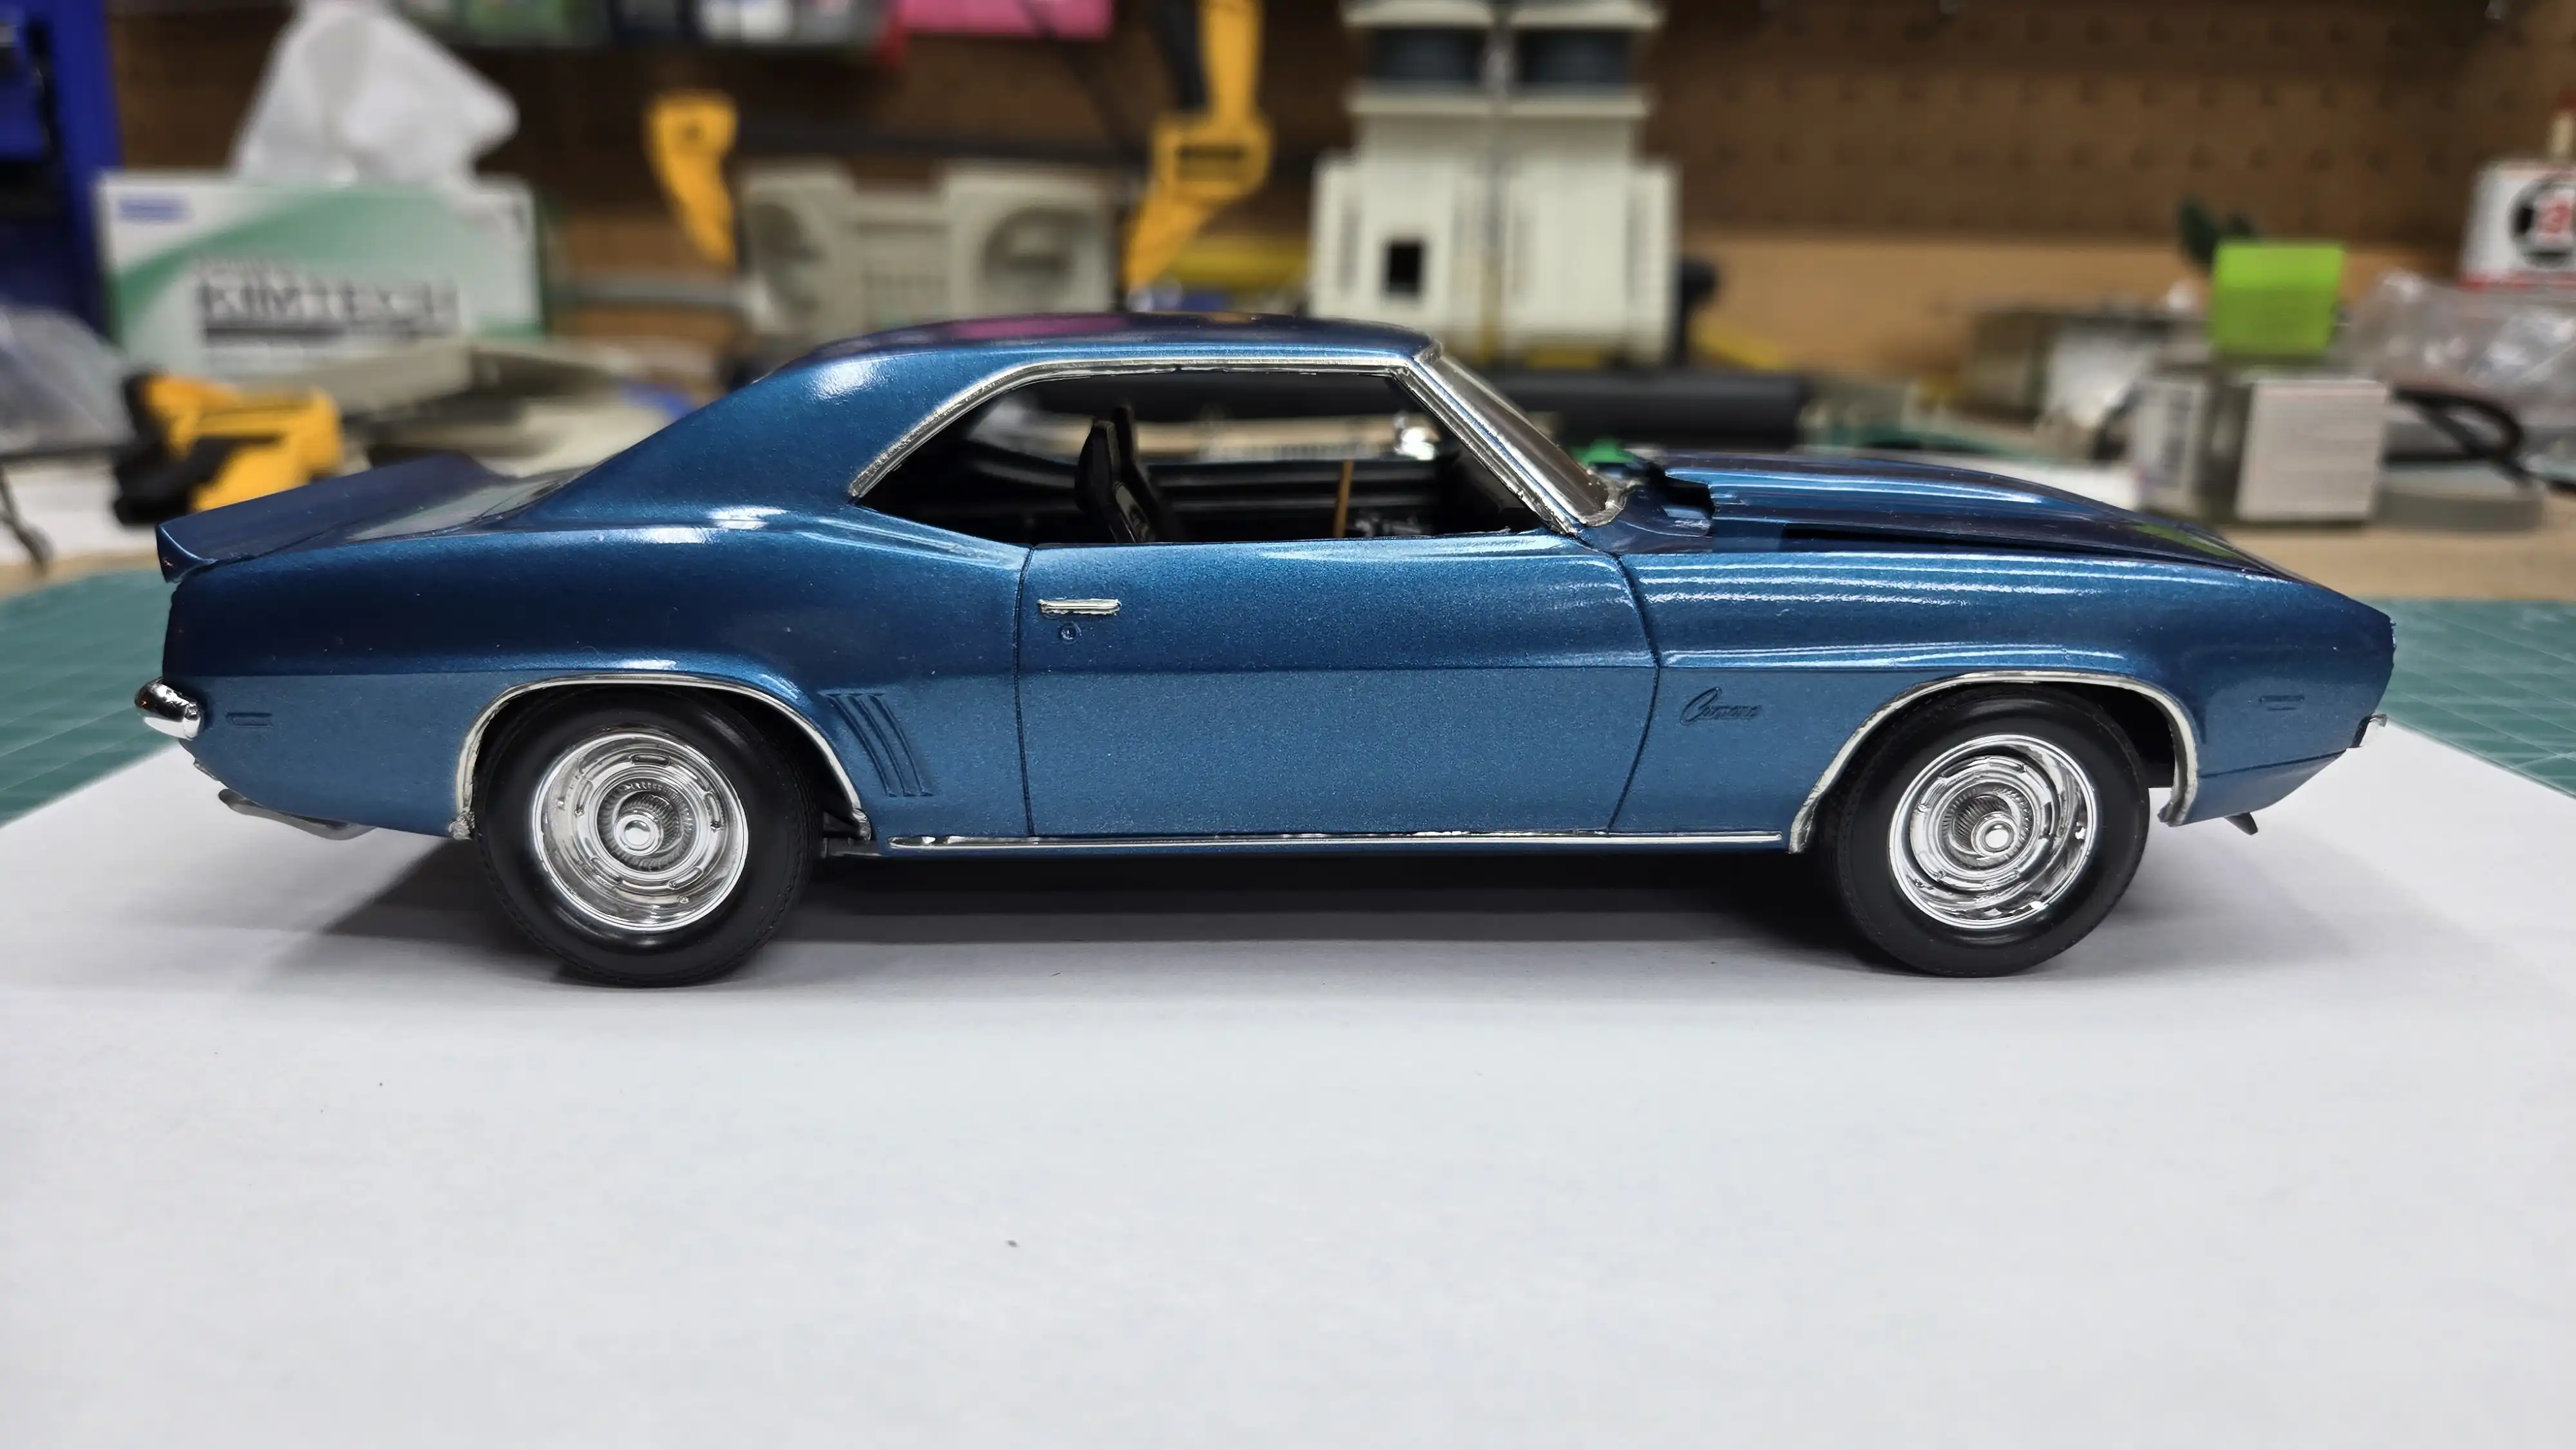 Finished car right side
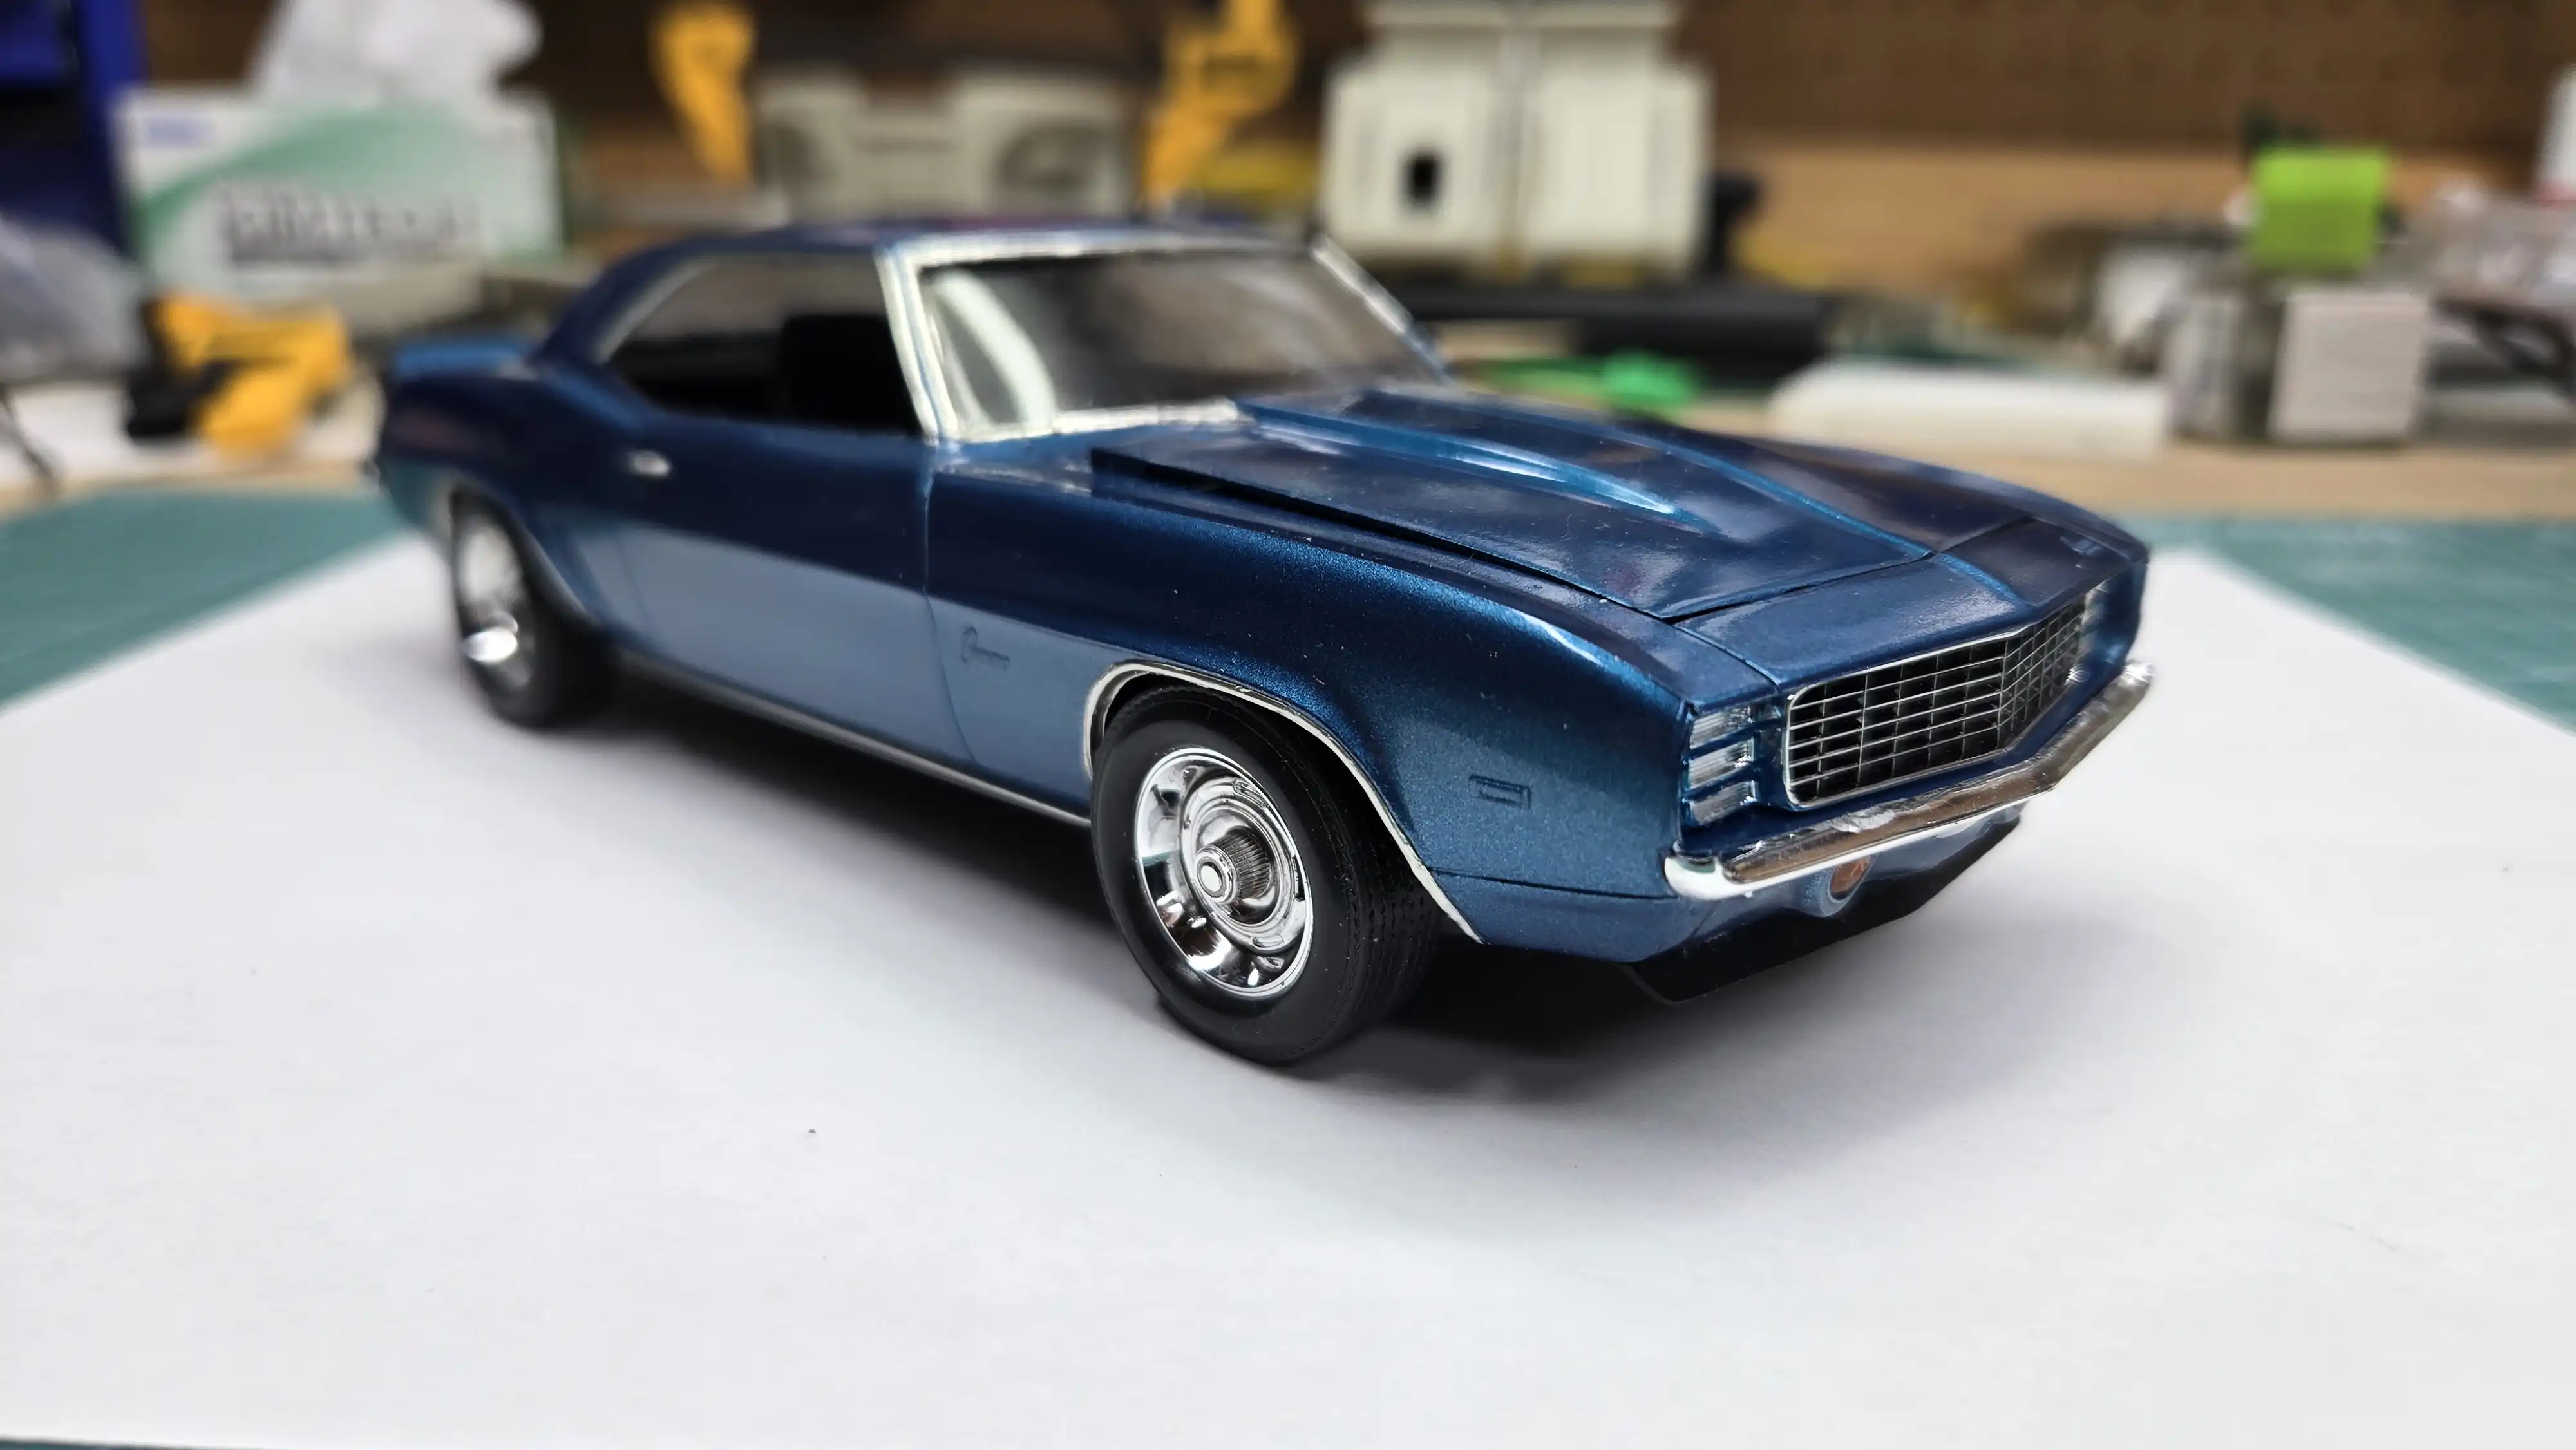 Finished car right front
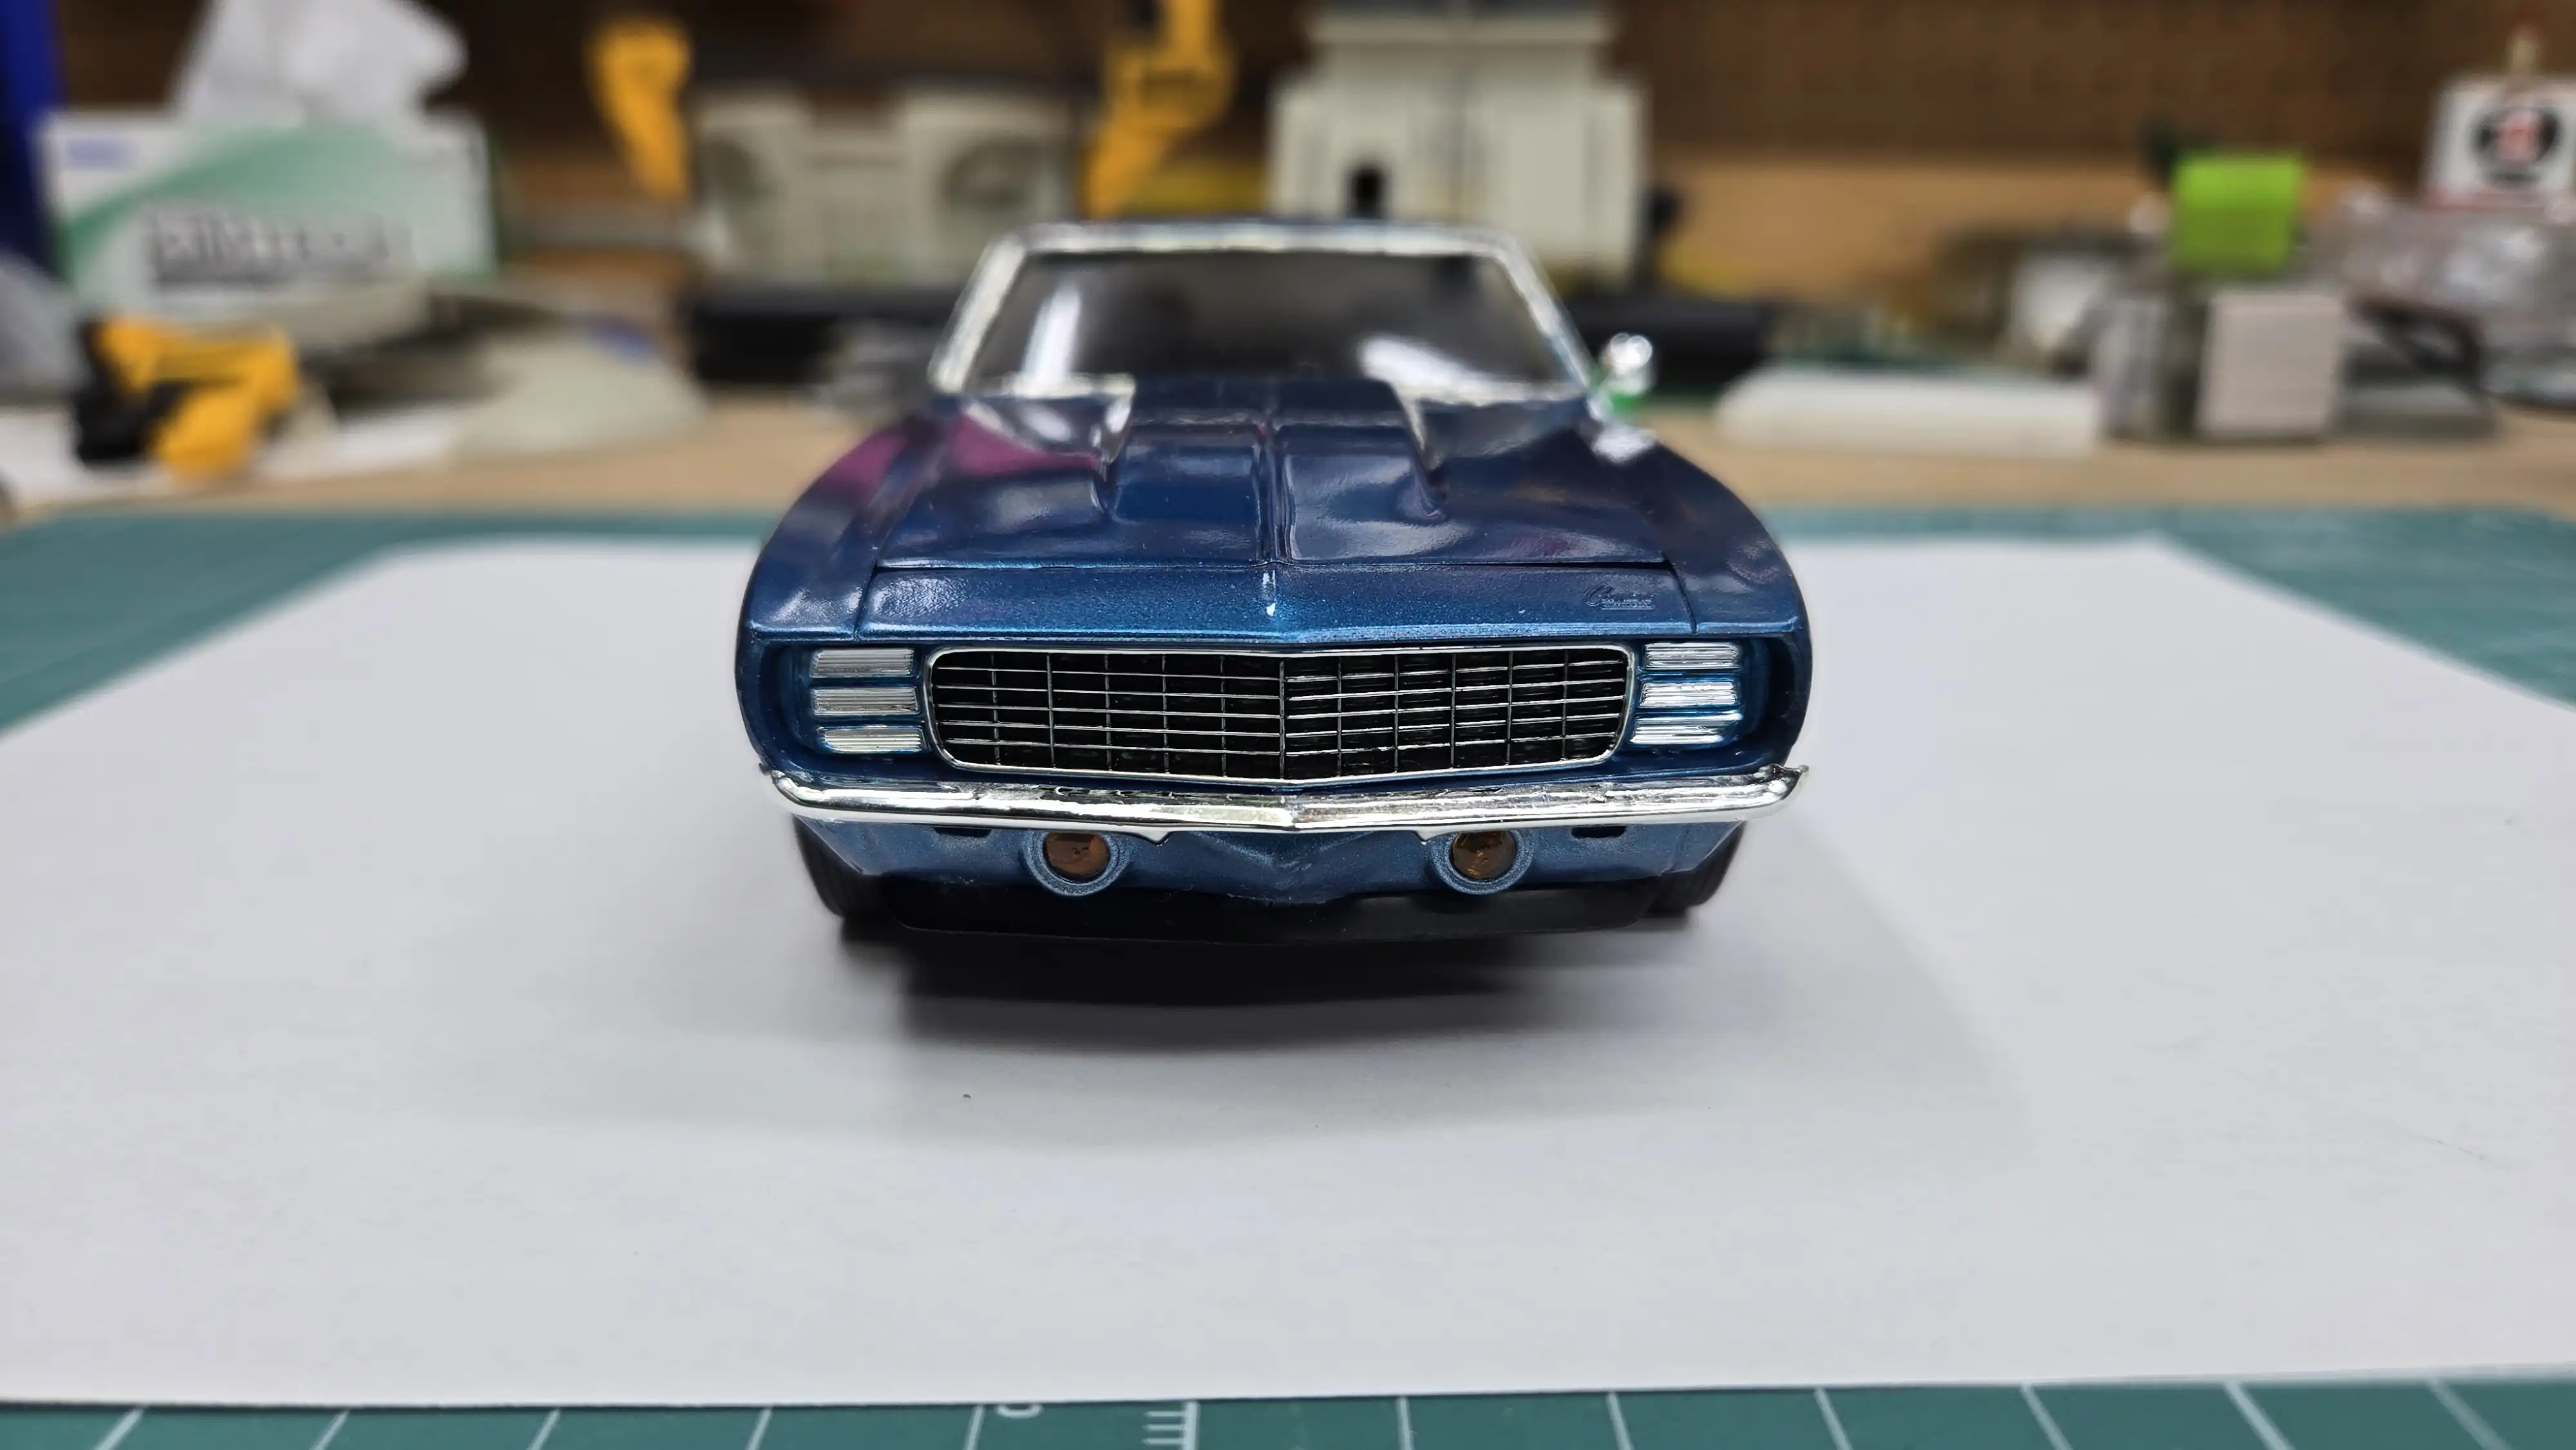 Finished car front view
 Finished car left front view
 Finished car left side
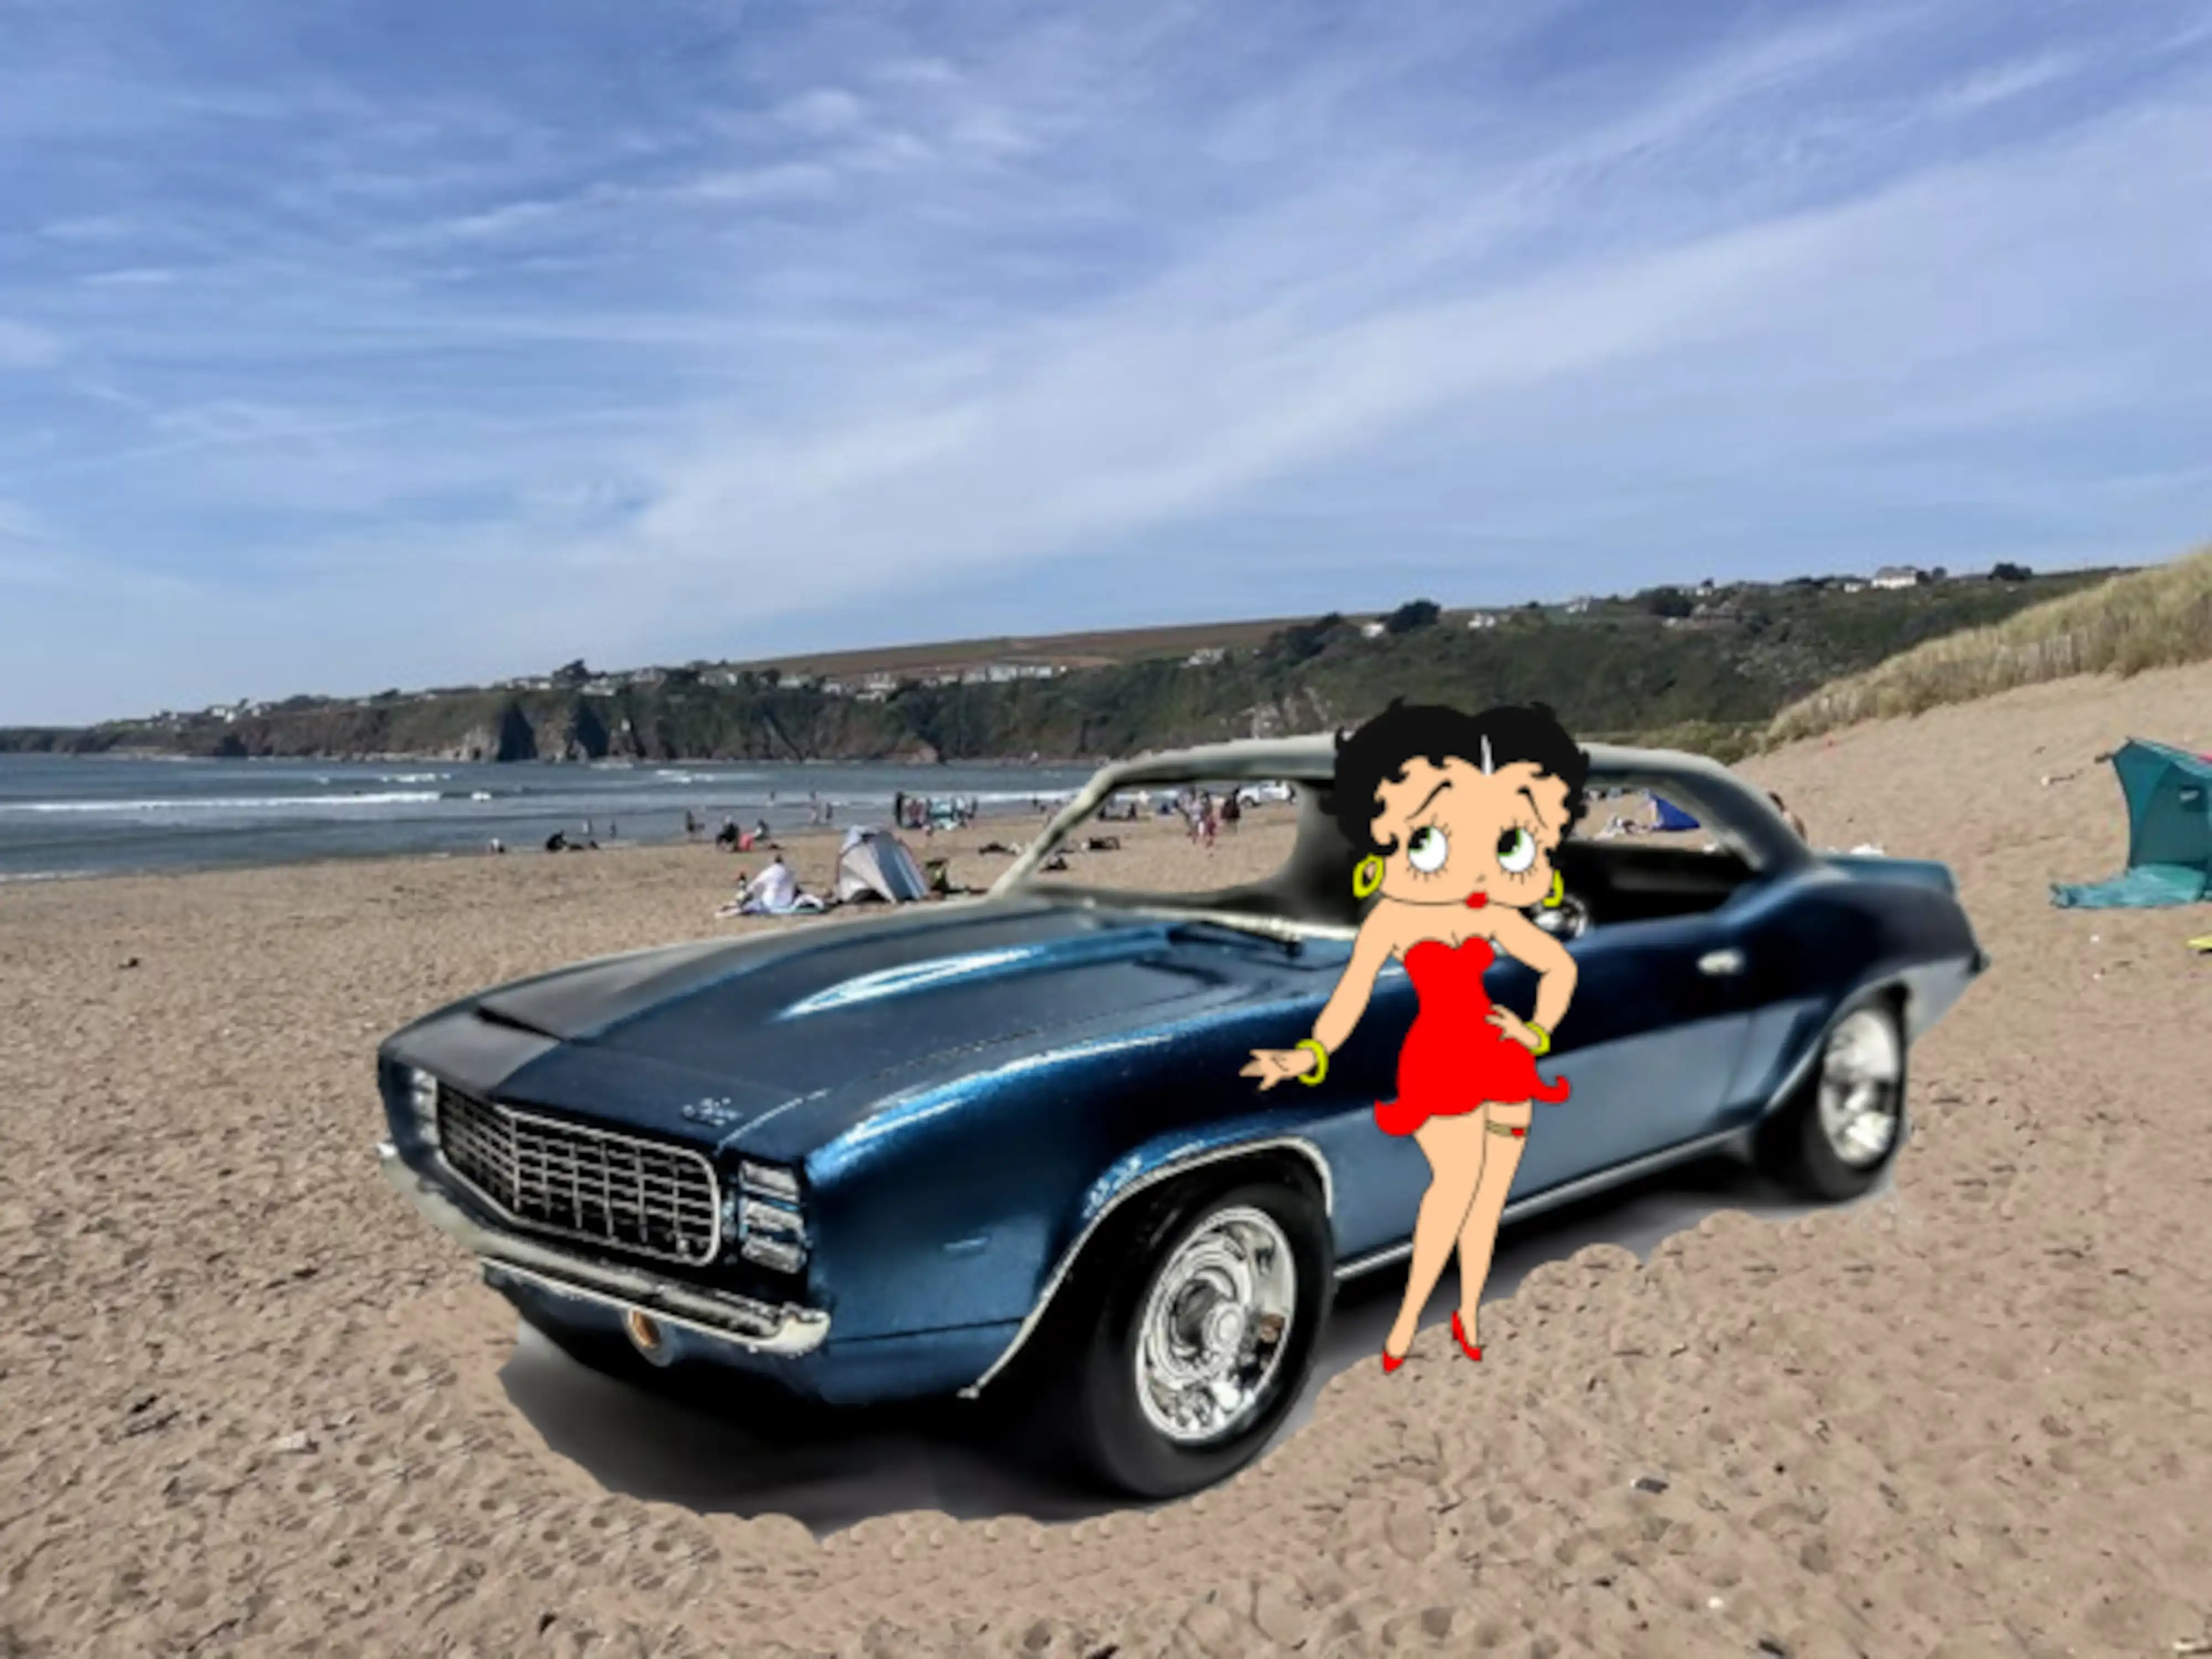 1969 Camaro with on the beach with Betty Boop
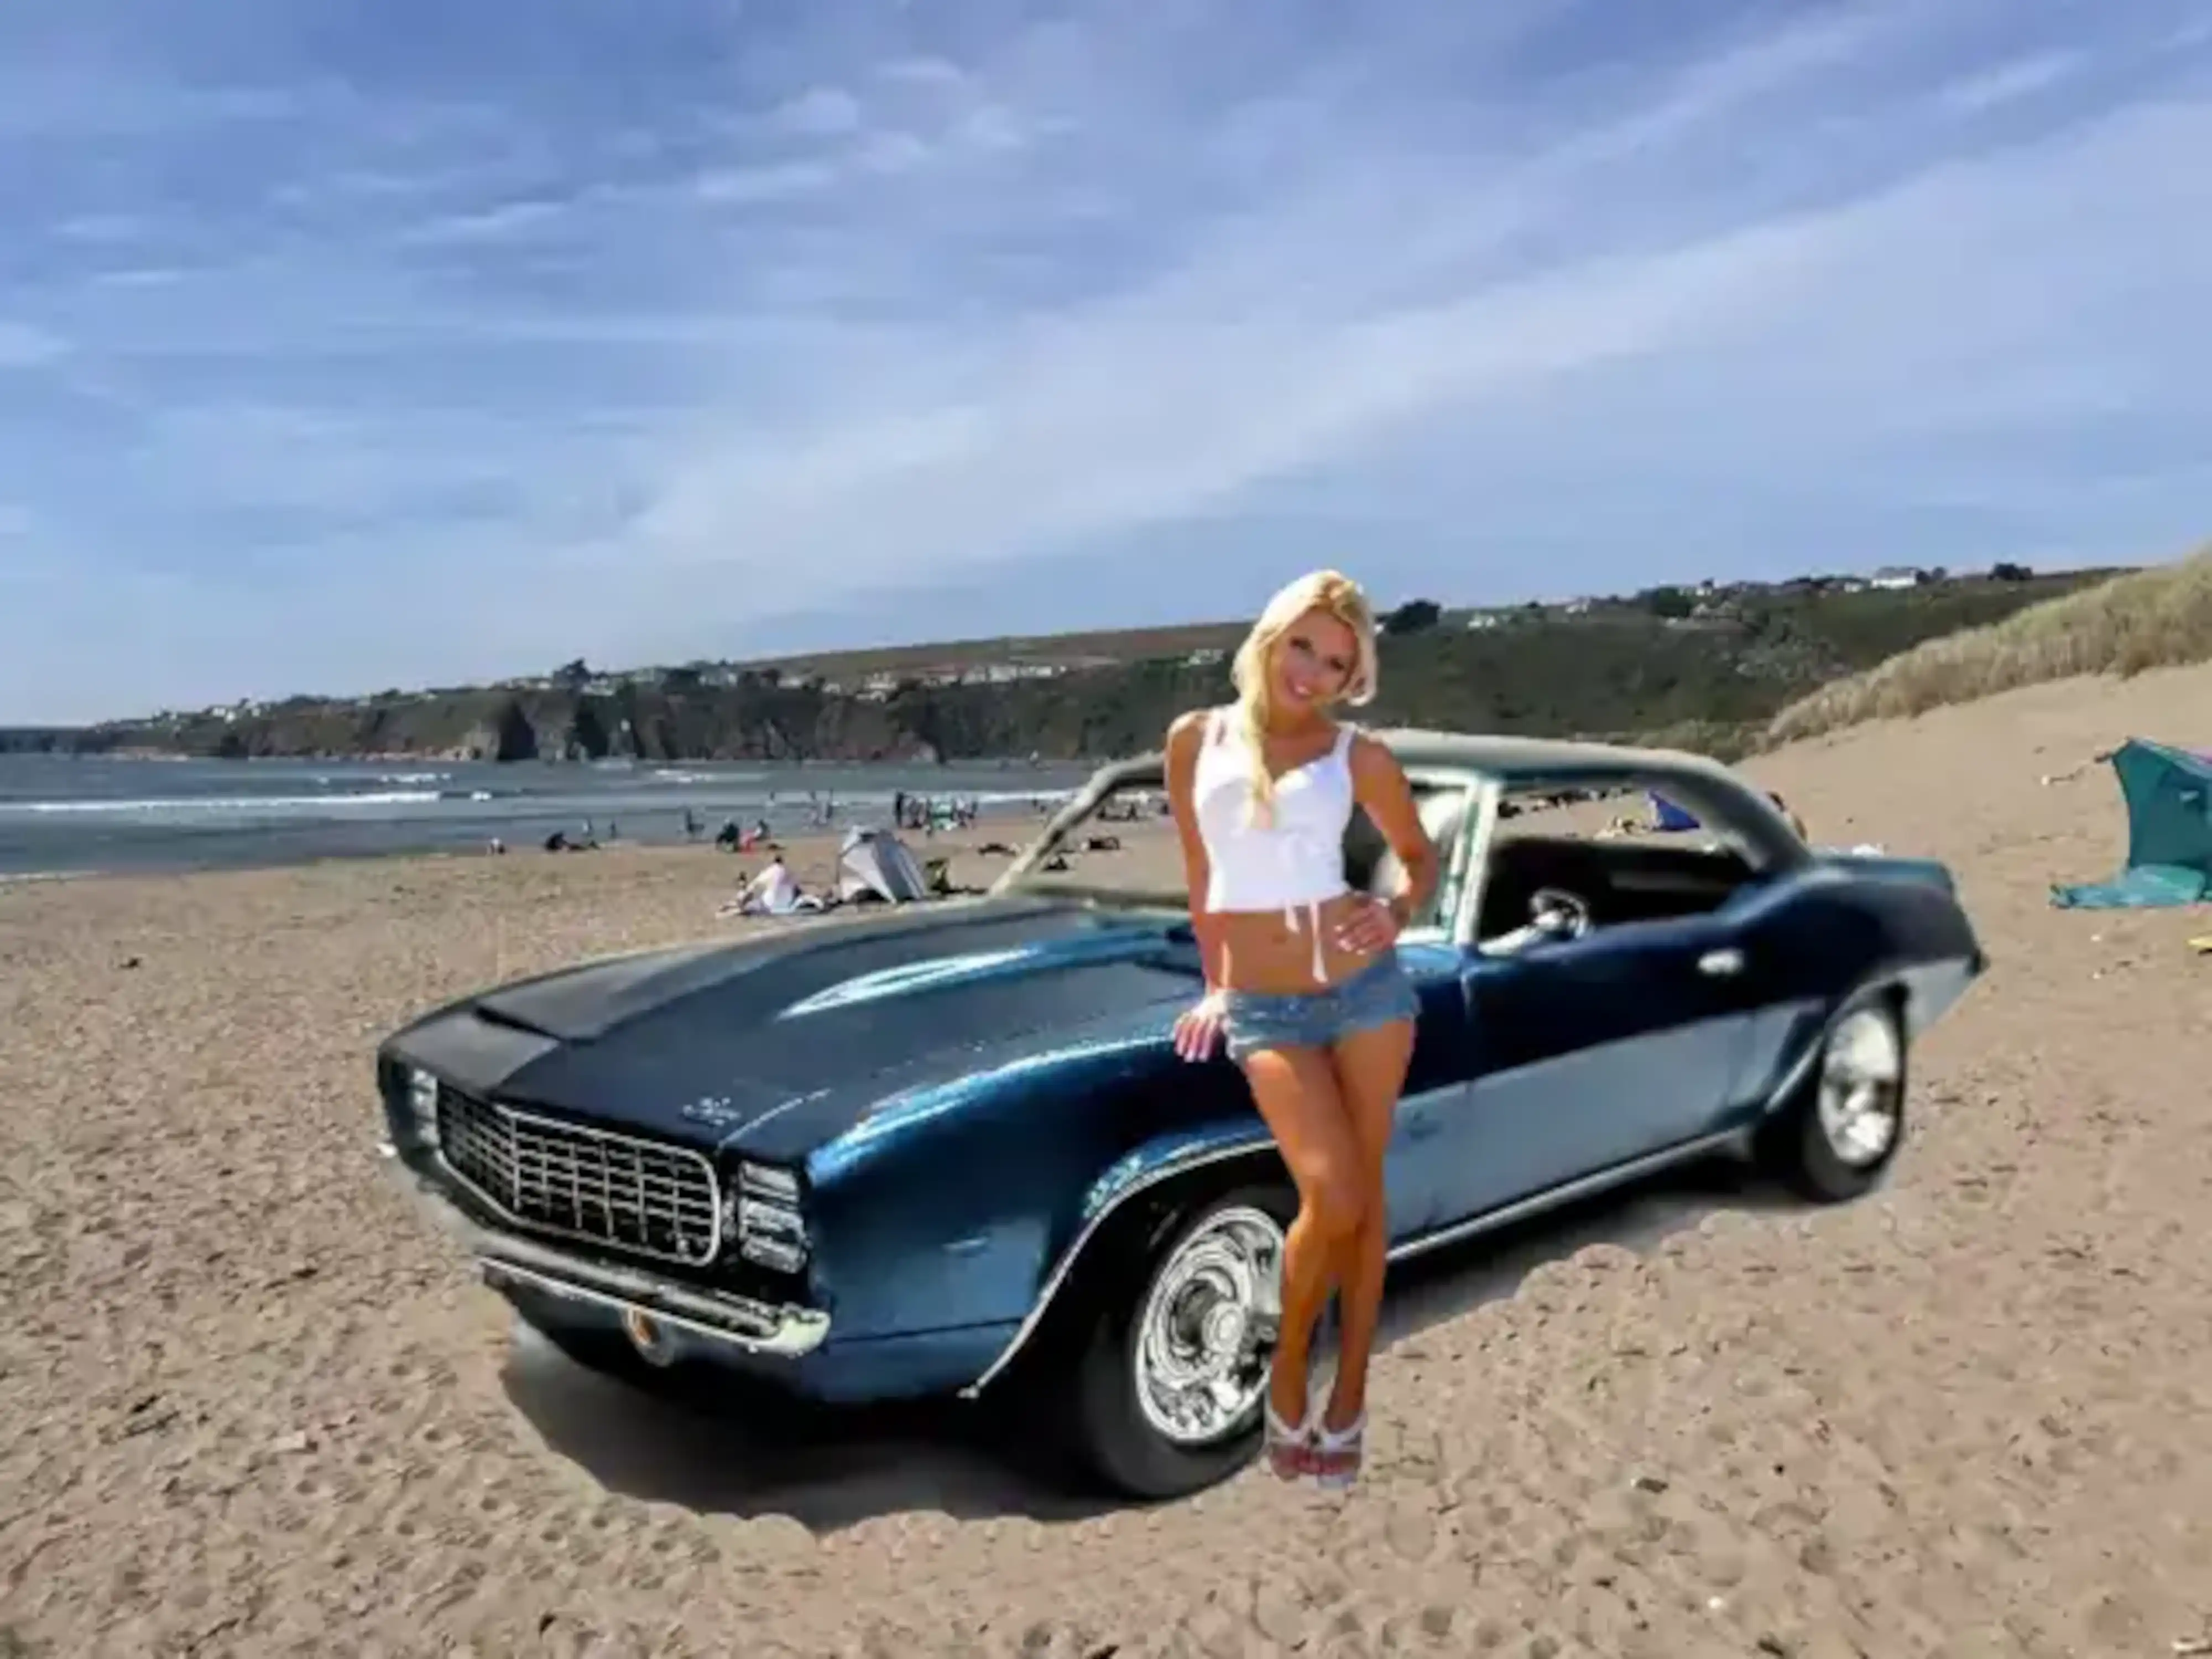 1969 Camaro on the beach with a pretty girl
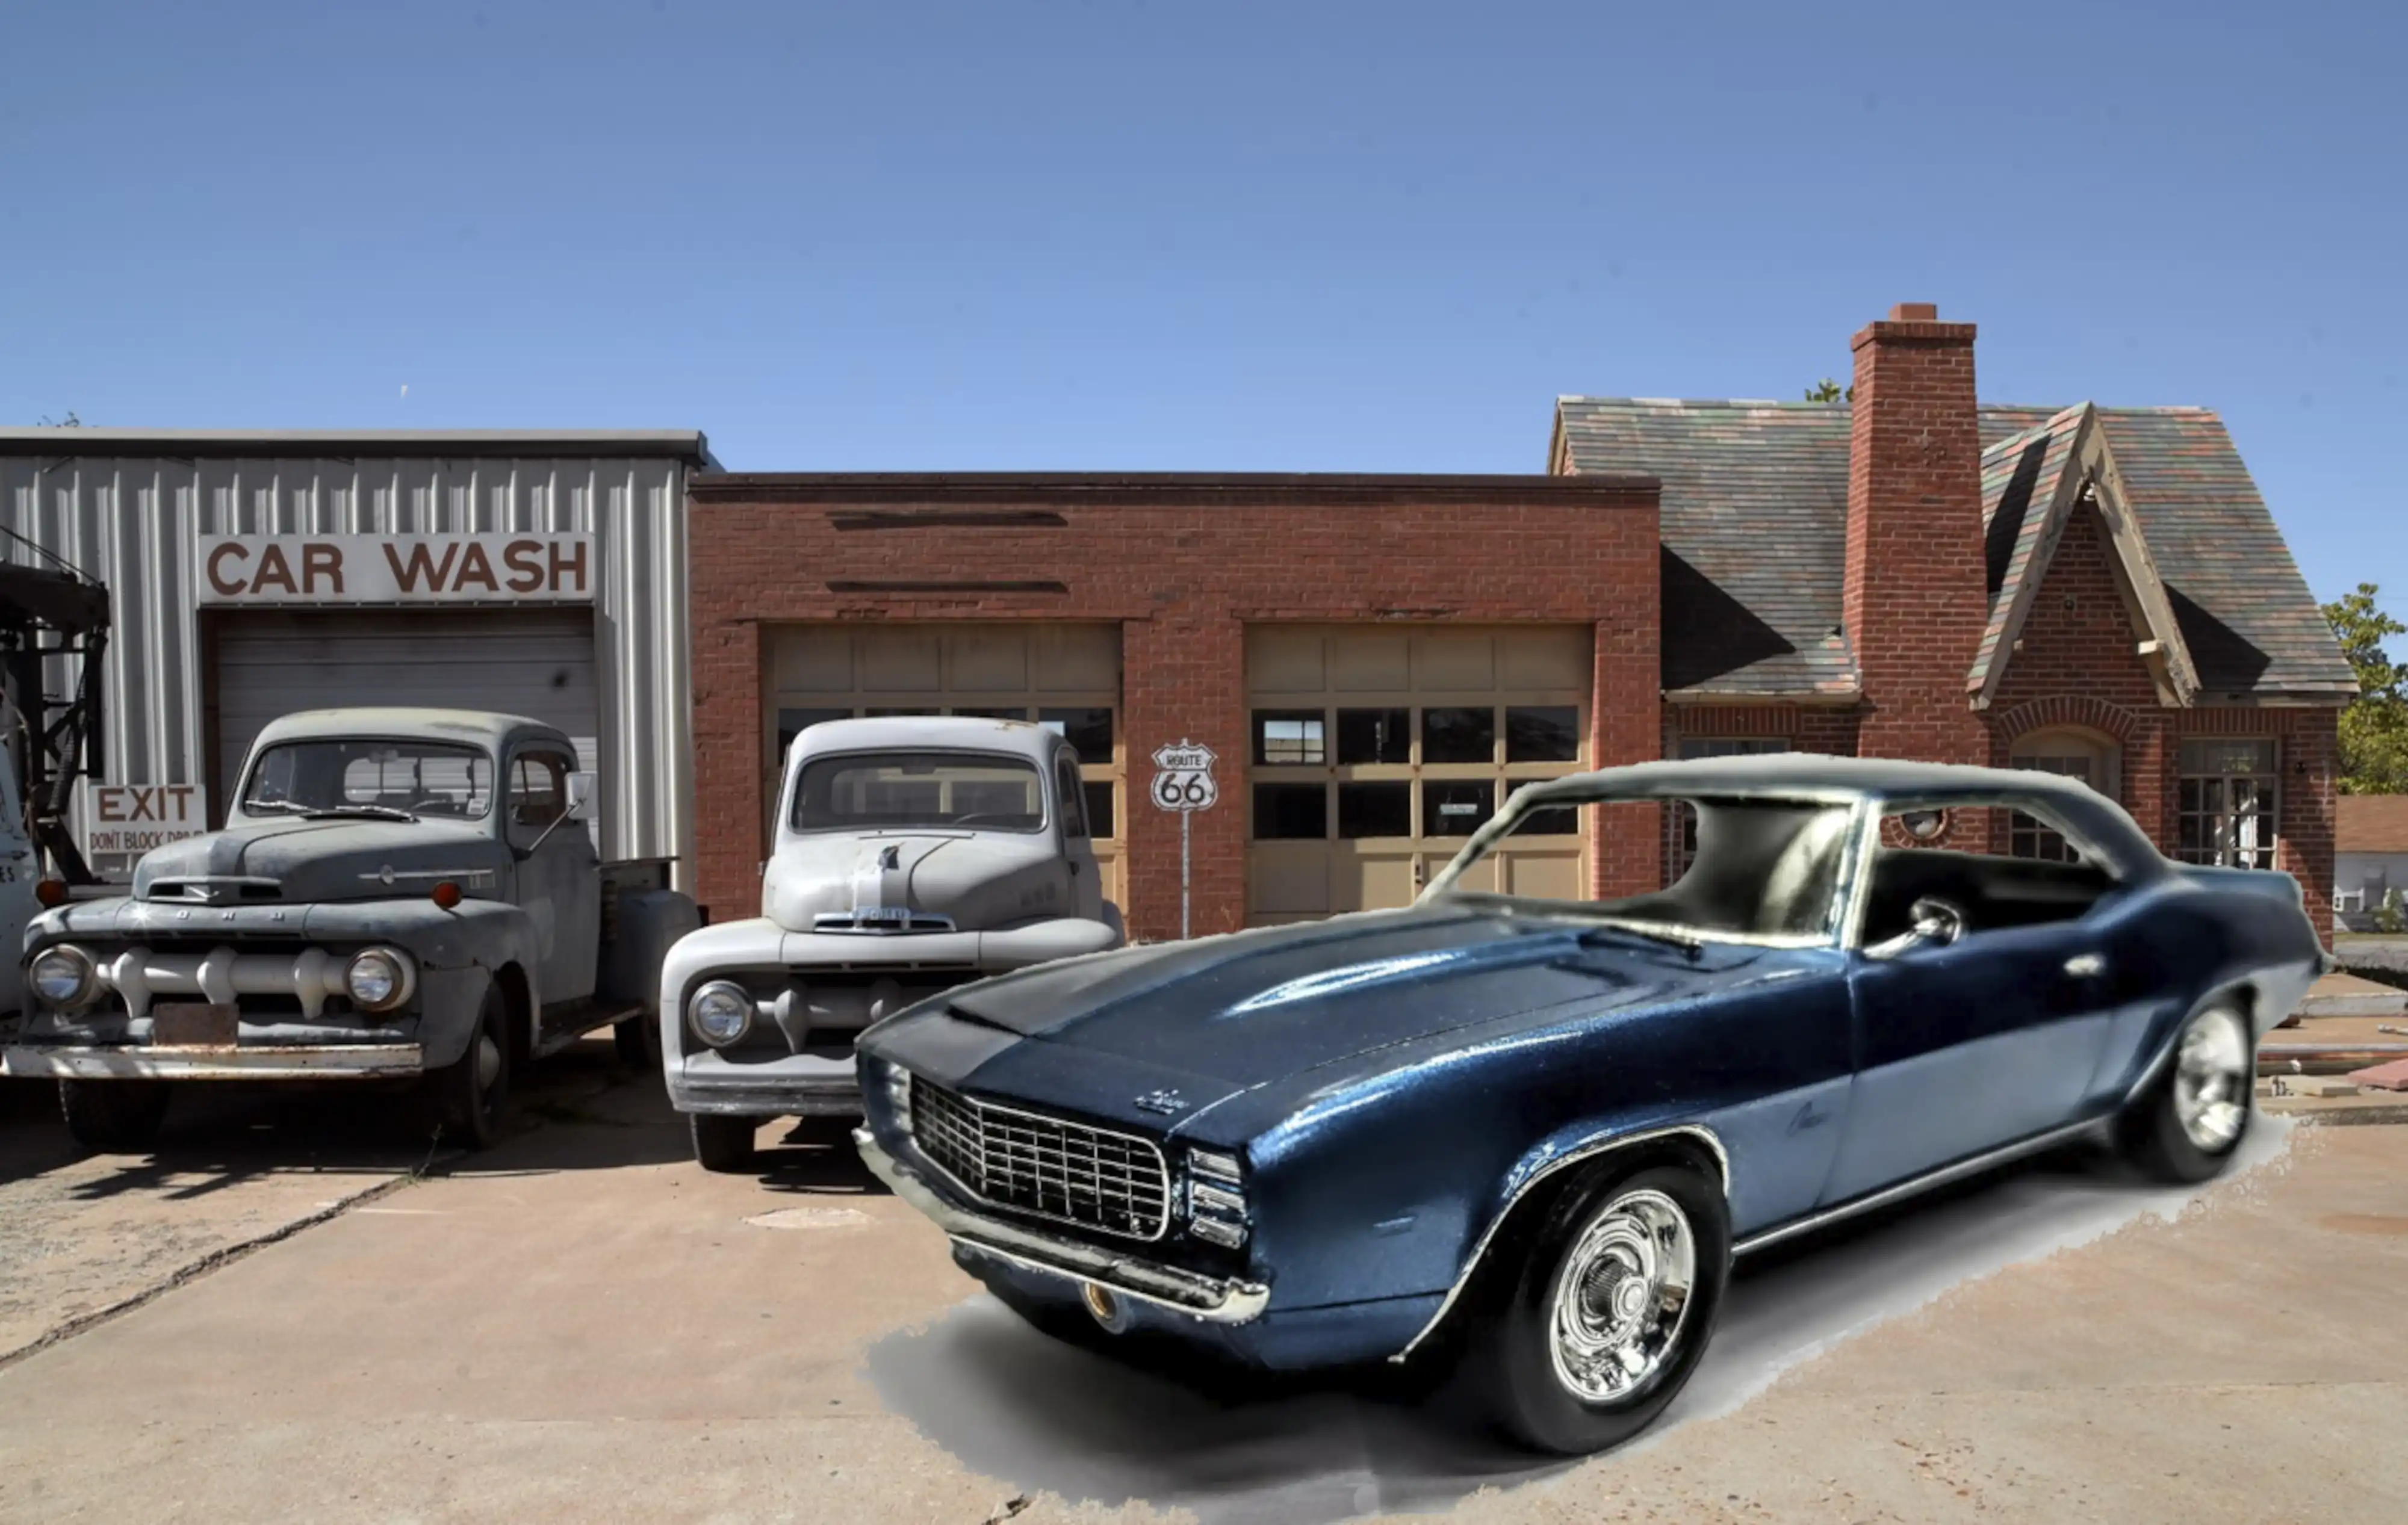 1969 Camaro by Route 66 Chandler Oklahoma

