Opening
Click/tap photo to enlarge
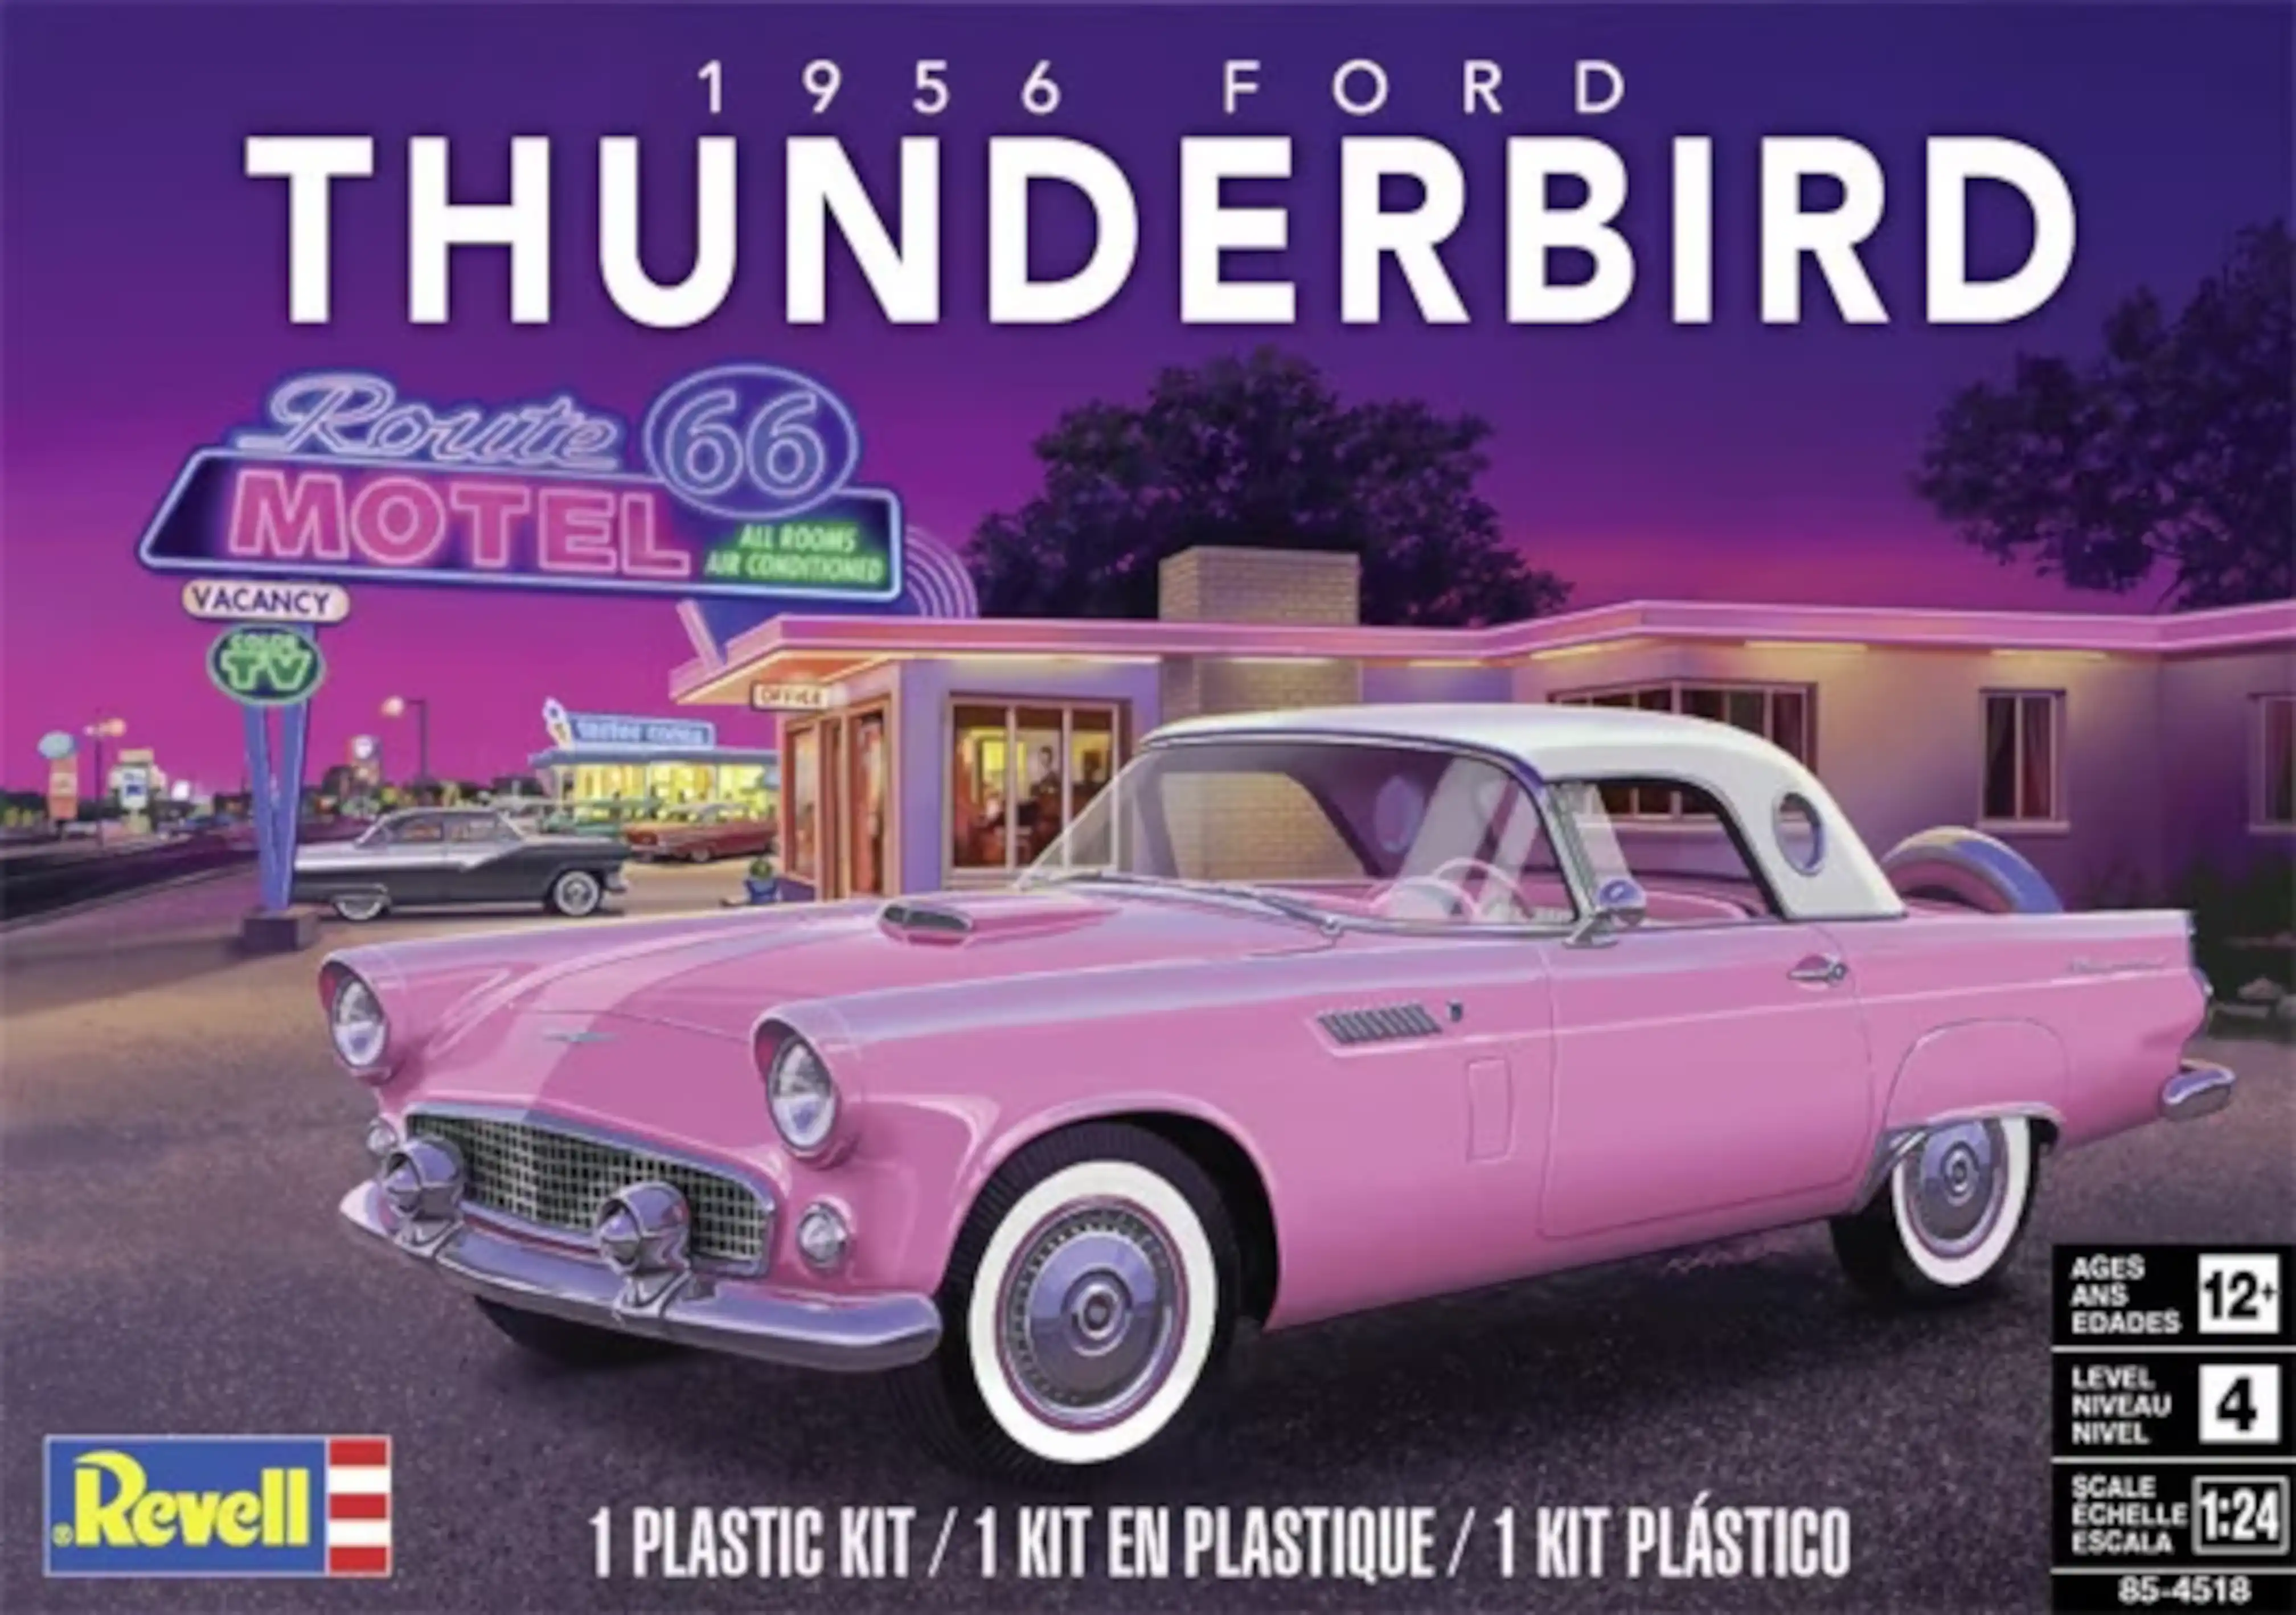 Box art for the Revell 1956 Ford Thunderbird
This is the box art for the 1956 Ford Thunderbird.

I've always loved the 2-seater Ford T-Birds. I used this kit to take a break. It is a fairly easy kit to build and I knew exactly what I wanted to do with it. I always wanted to own one of these T-Birds, therefore, I'll be building this car as if it just rolled off the factory floor and into my possession.
The 2-seater Ford T-Bird went into production in September 1954 and ran until November 1957. The model years were, 1955 - 1957. I really wanted to build a '55; however, I couldn't find a '55 kit, if one even exists. Following are some of the specifications:
Opening
Click/tap photo to enlarge
Box art for the Revell 1956 Ford Thunderbird
This is the box art for the 1956 Ford Thunderbird.
Photo 001
Click/tap photo to enlarge
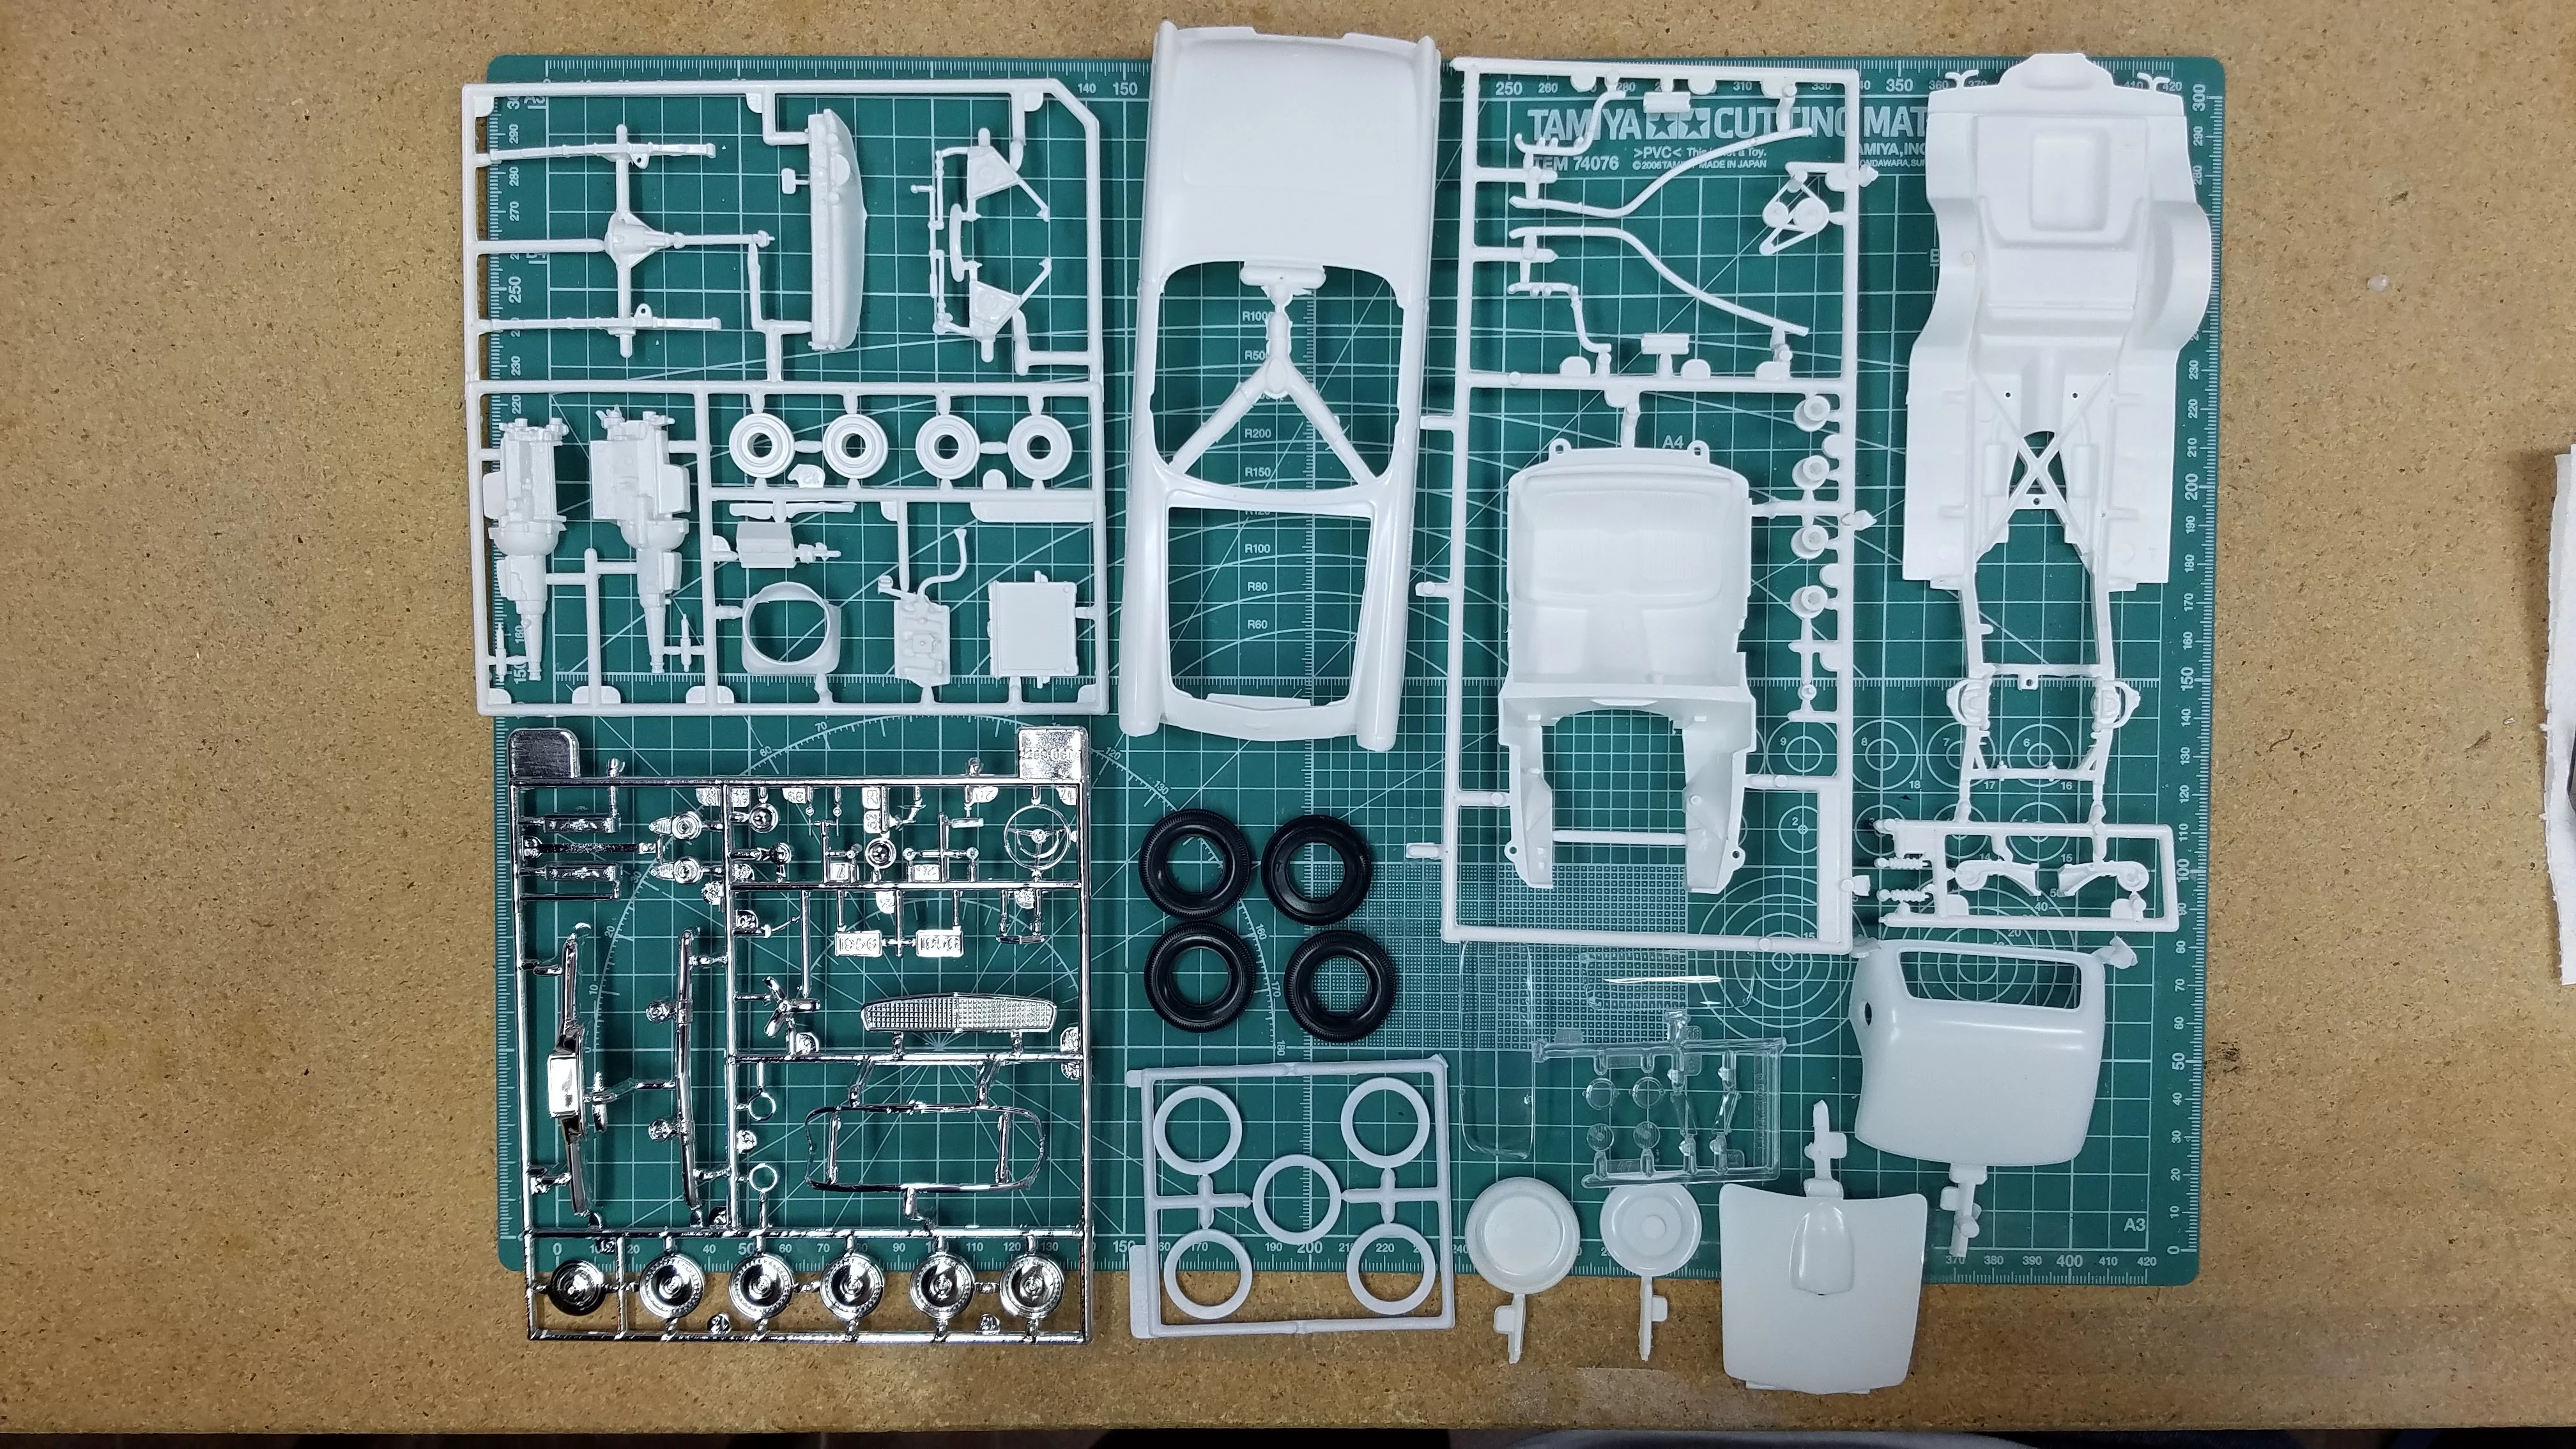 All the parts trees and parts
These are the parts trees and other parts for the 1956 Ford T-Bird. See my box opening video.
Photo 002
Click/tap photo to enlarge
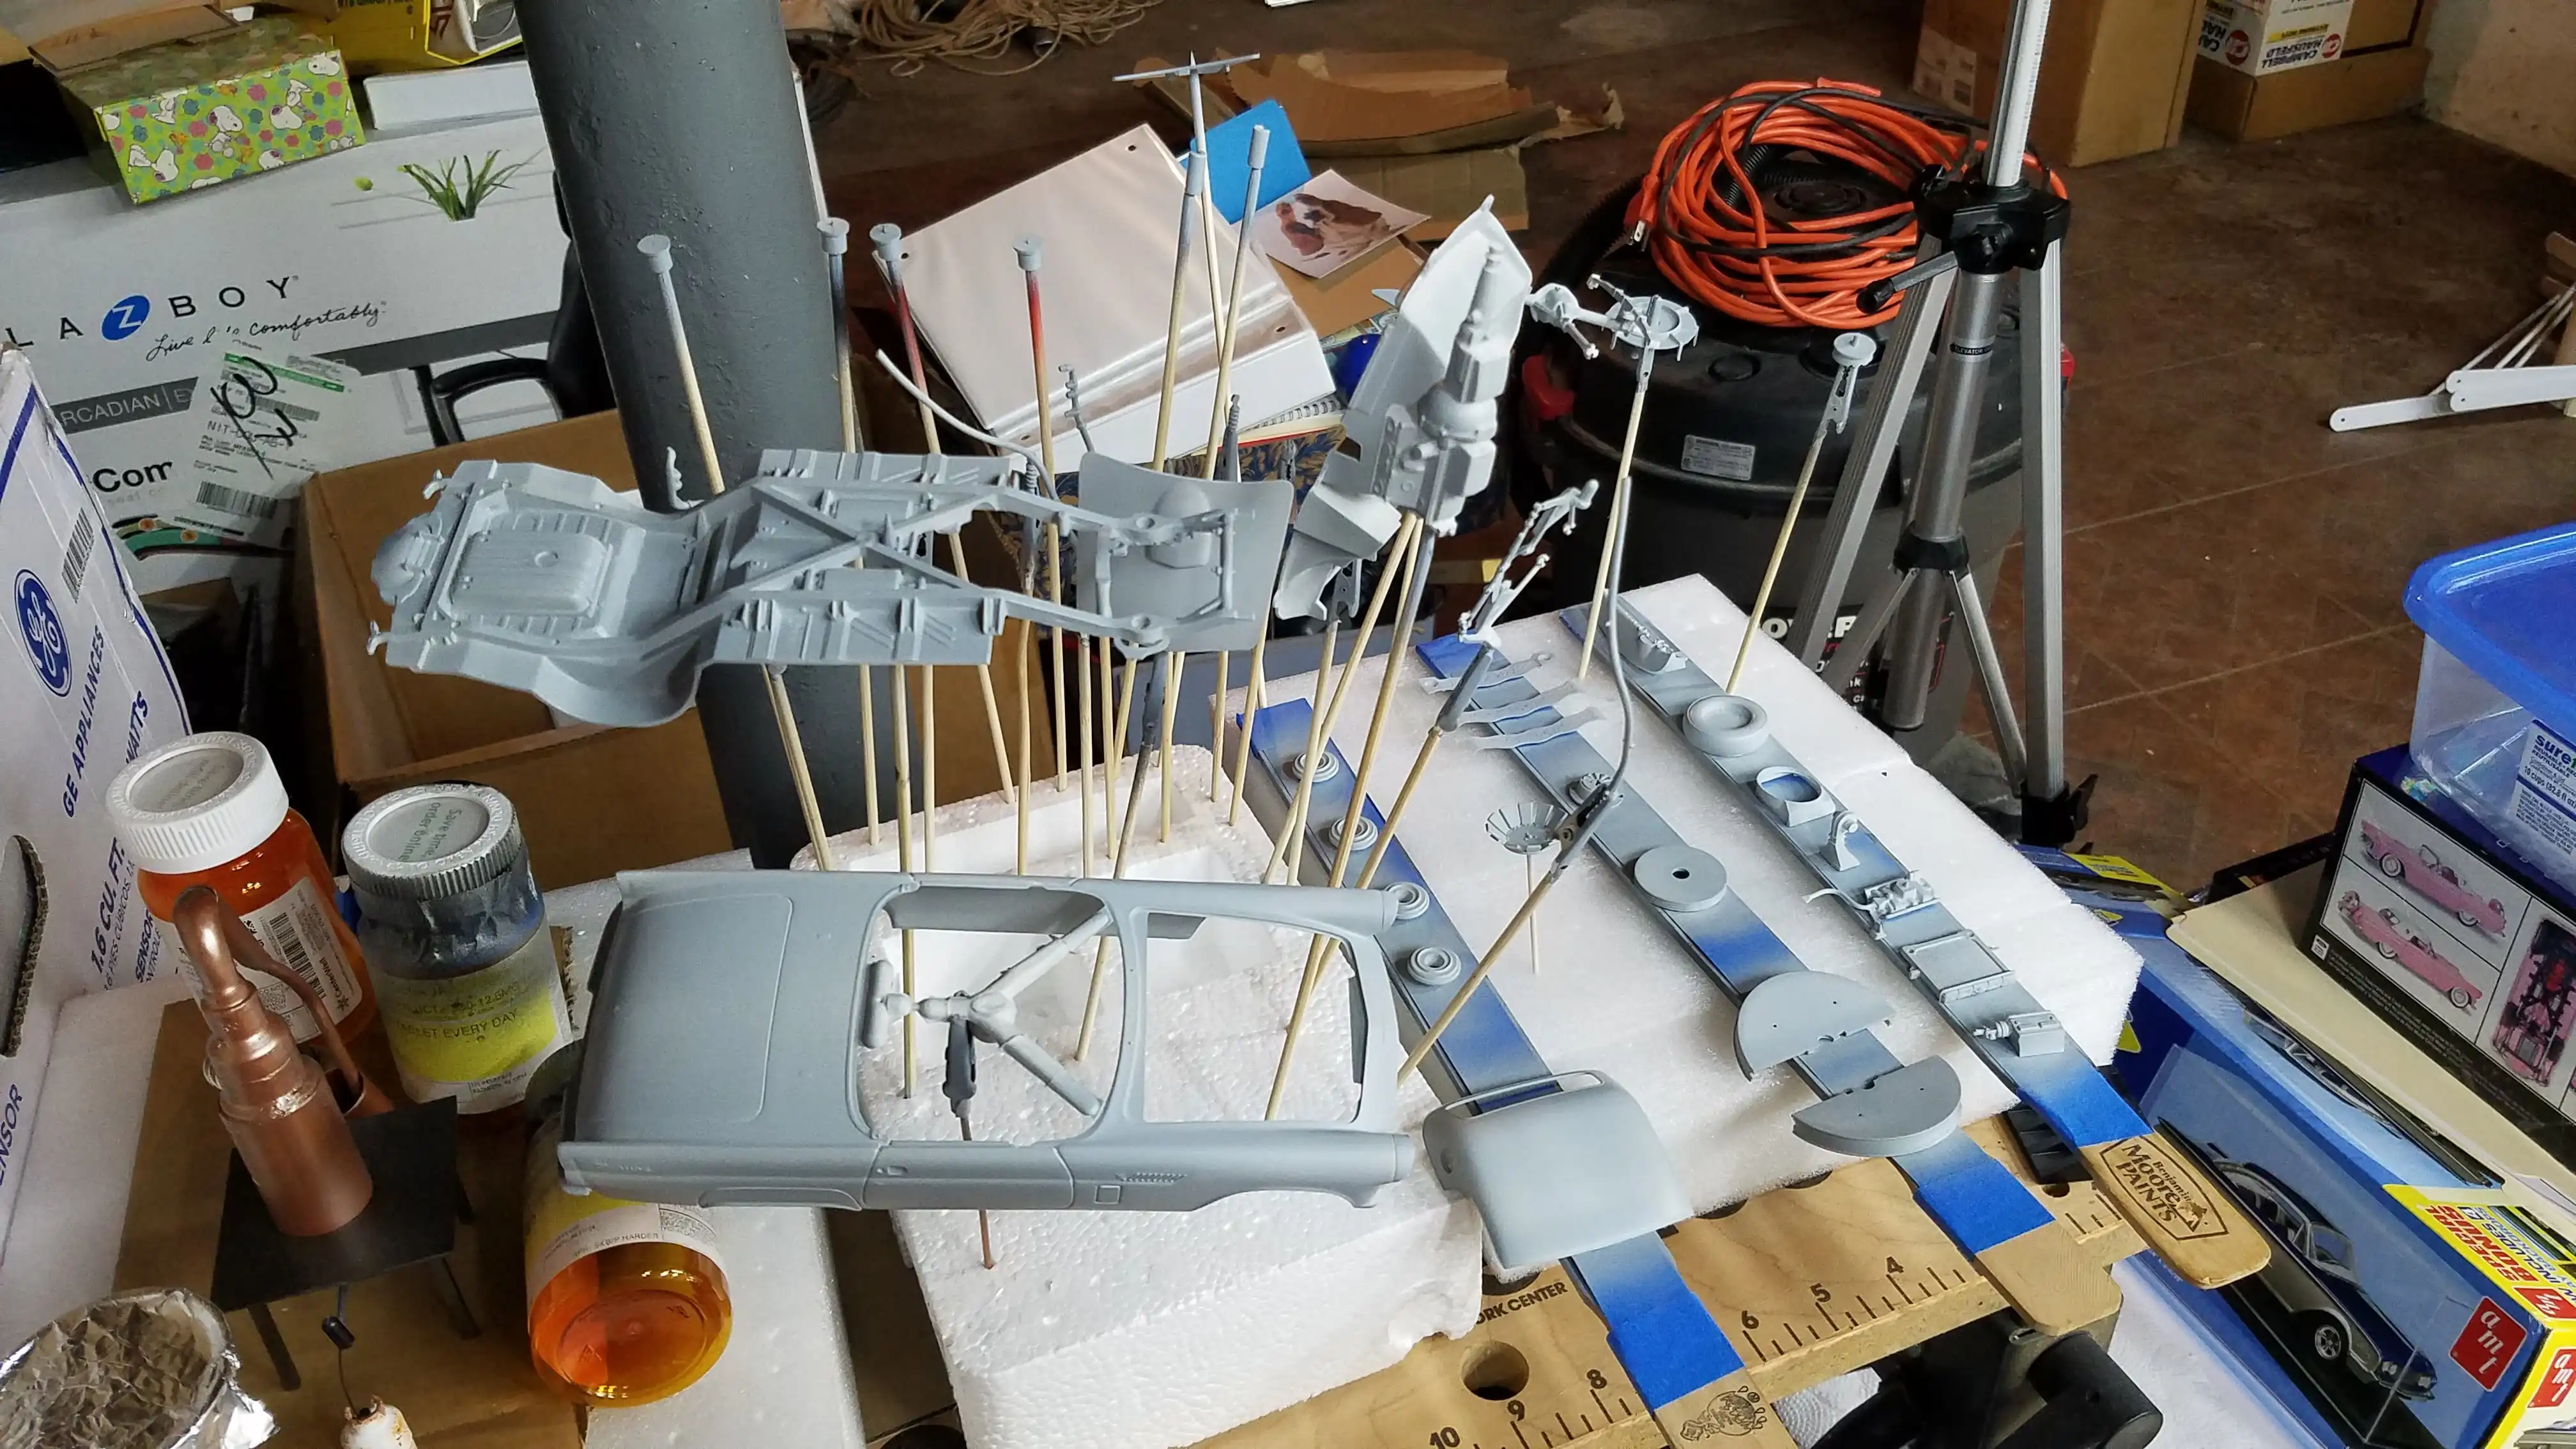
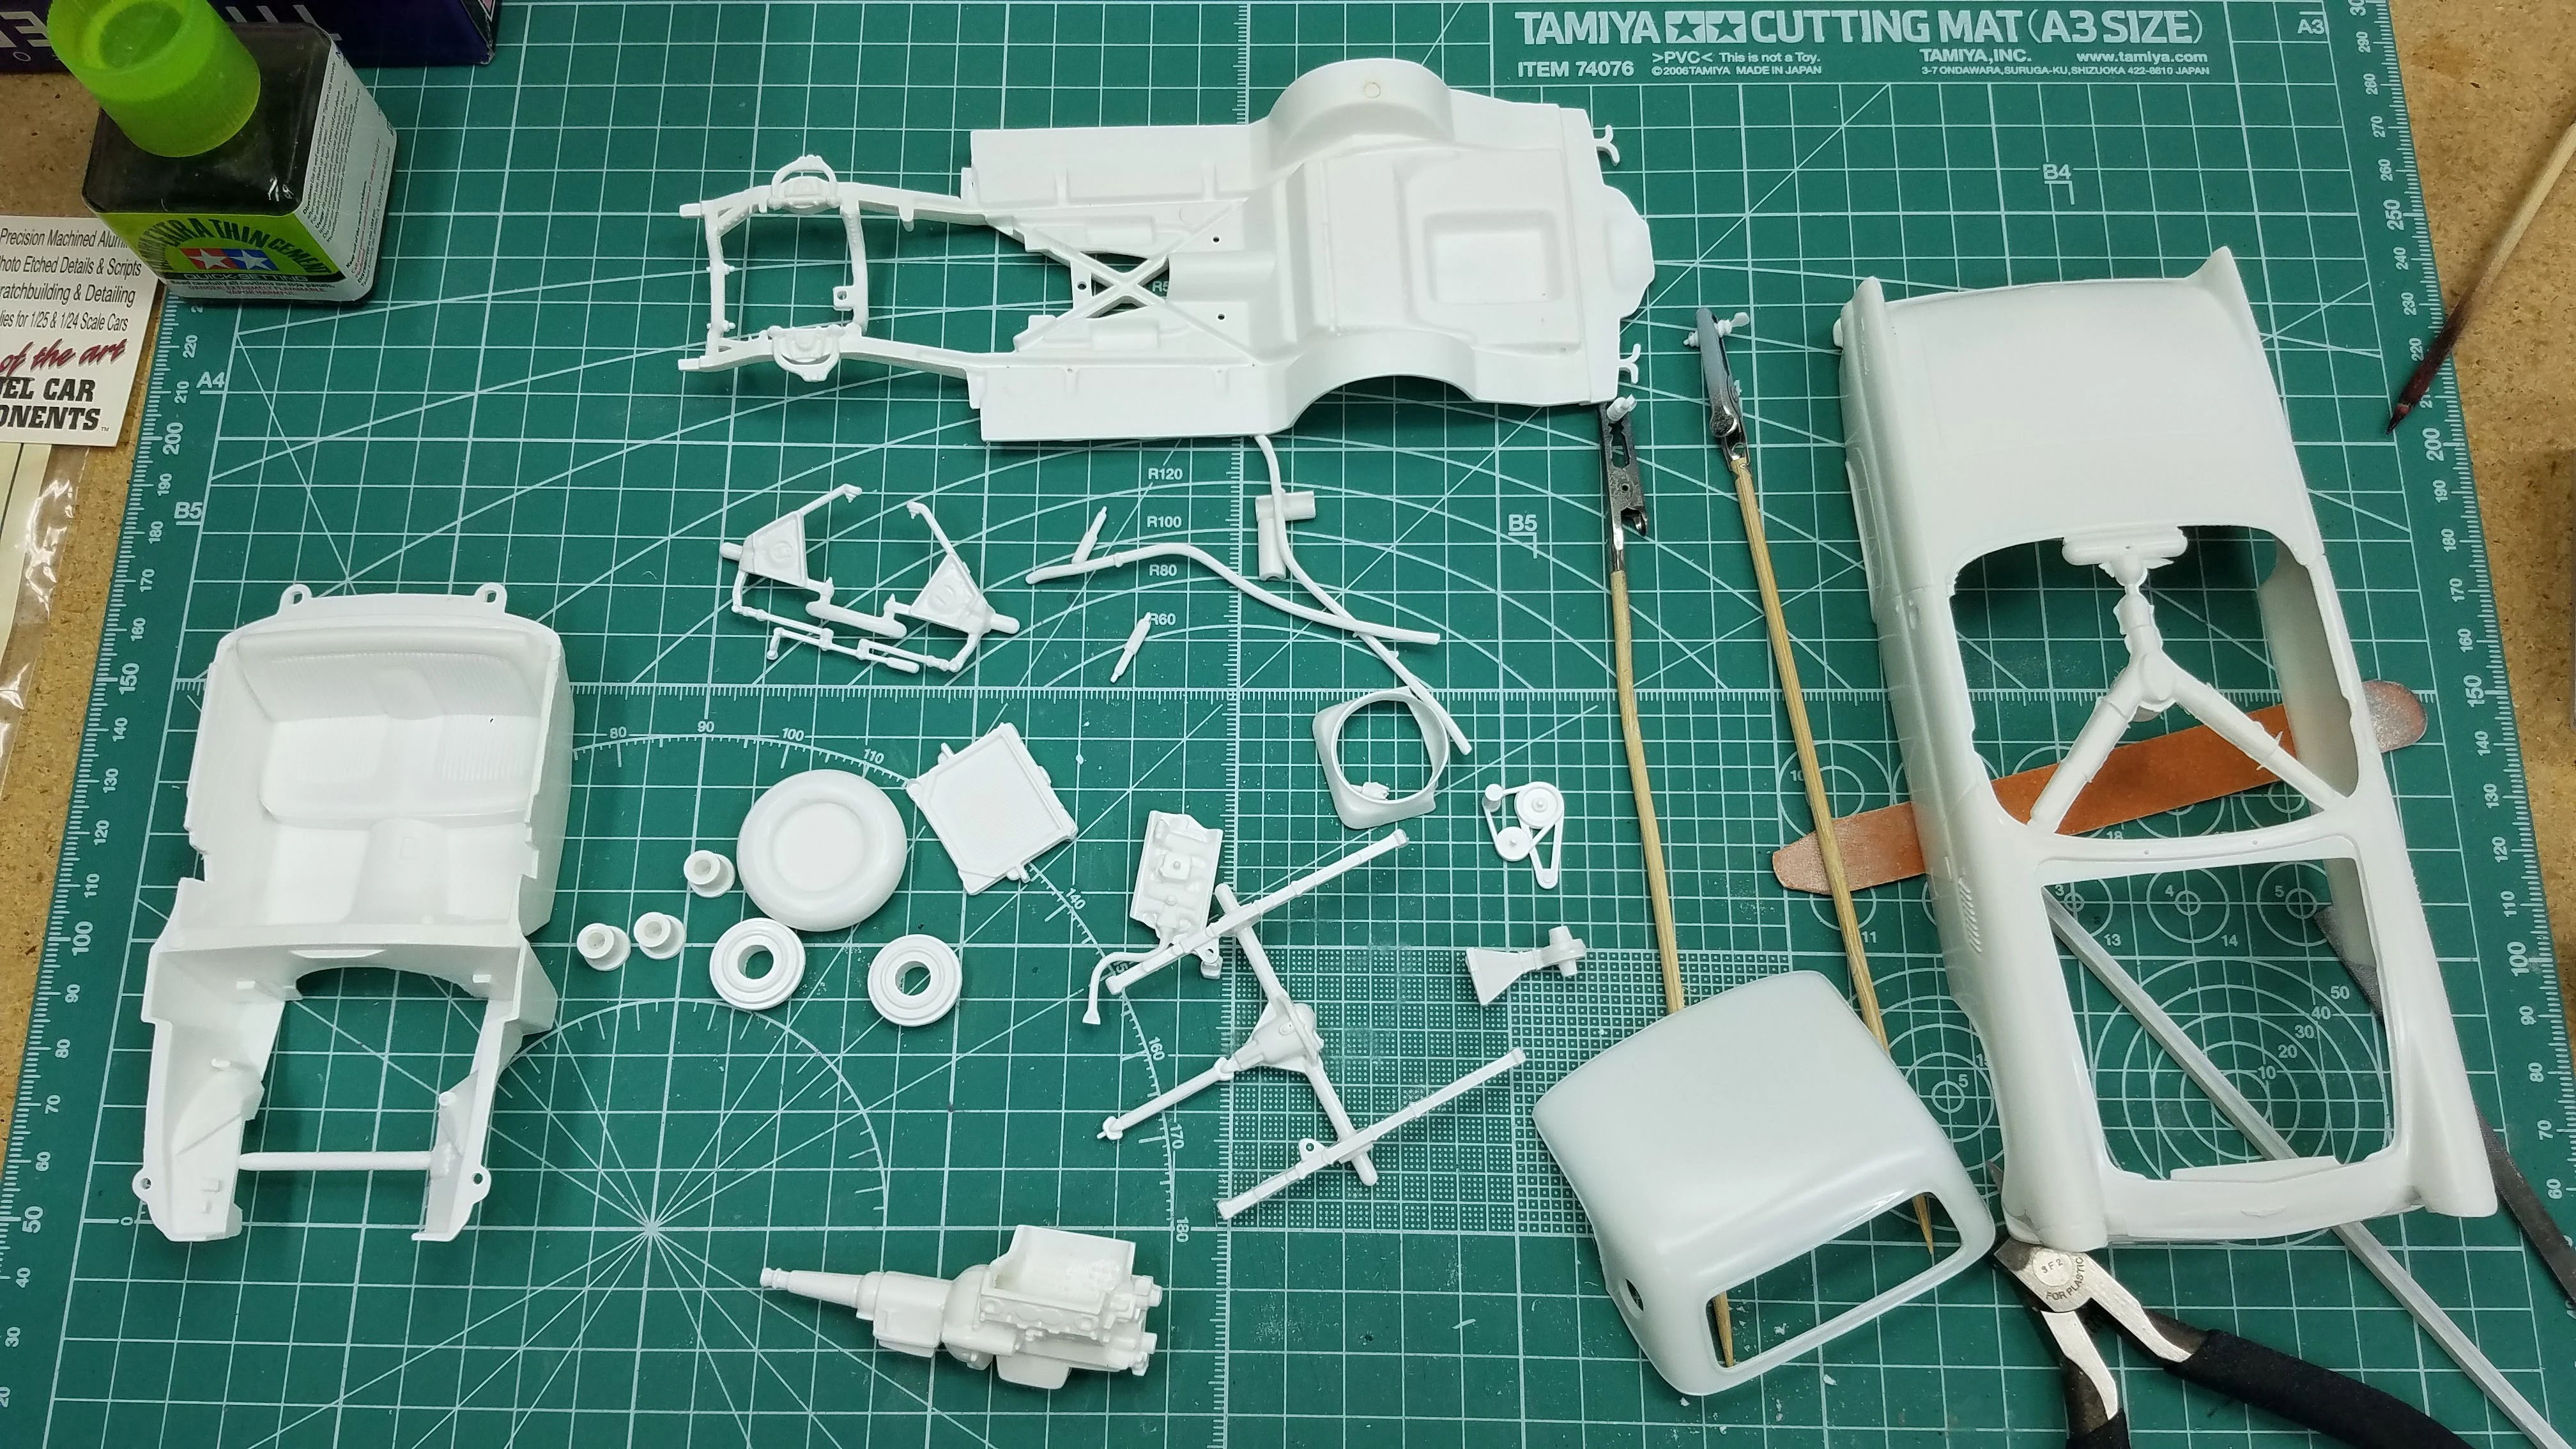 All parts have been removed from the sprues
All the parts have been removed from the sprues. There was actually more flash on them then I originally thought. There were also two fairly large mold lines along the top of the left and right fenders. They got sanded off and the seam line between the headlight frame and the fender was made deeper. Actually, all the panel lines will have to be made deeper, as they are fairly shallow.
The only parts not shown here are the dashboard and some of the chrome parts. I'll be stripping the chrome from the steering wheel, the valve covers and the air cleaner cover. I think they are too chrome looking and don't look real. Yes...sometimes I think chrome is too shinny. I guess it's because I prefer the brushed aluminum look over the shinny mirror finished chrome.
Photo 003
Click/tap photo to enlarge
 Decal sheet
Decal sheet. This image is larger than the actual decal sheet. If you would like a copy of the decal sheet in its actual size that can be printed, click this link. The image will open in a new tab or window, then right click the image and select Save Image As... . I'm not sure how to do this on a Mac or Linux...sorry.
The actual size of the sheet should be: 1188 x 652 pixels, 3.96" x 2.173", 300 x 300 ppi. After downloading the image, open it in your image editor and check the size to insure it is as stated. This size keeps everything to scale.
Photo 004
Click/tap photo to enlarge
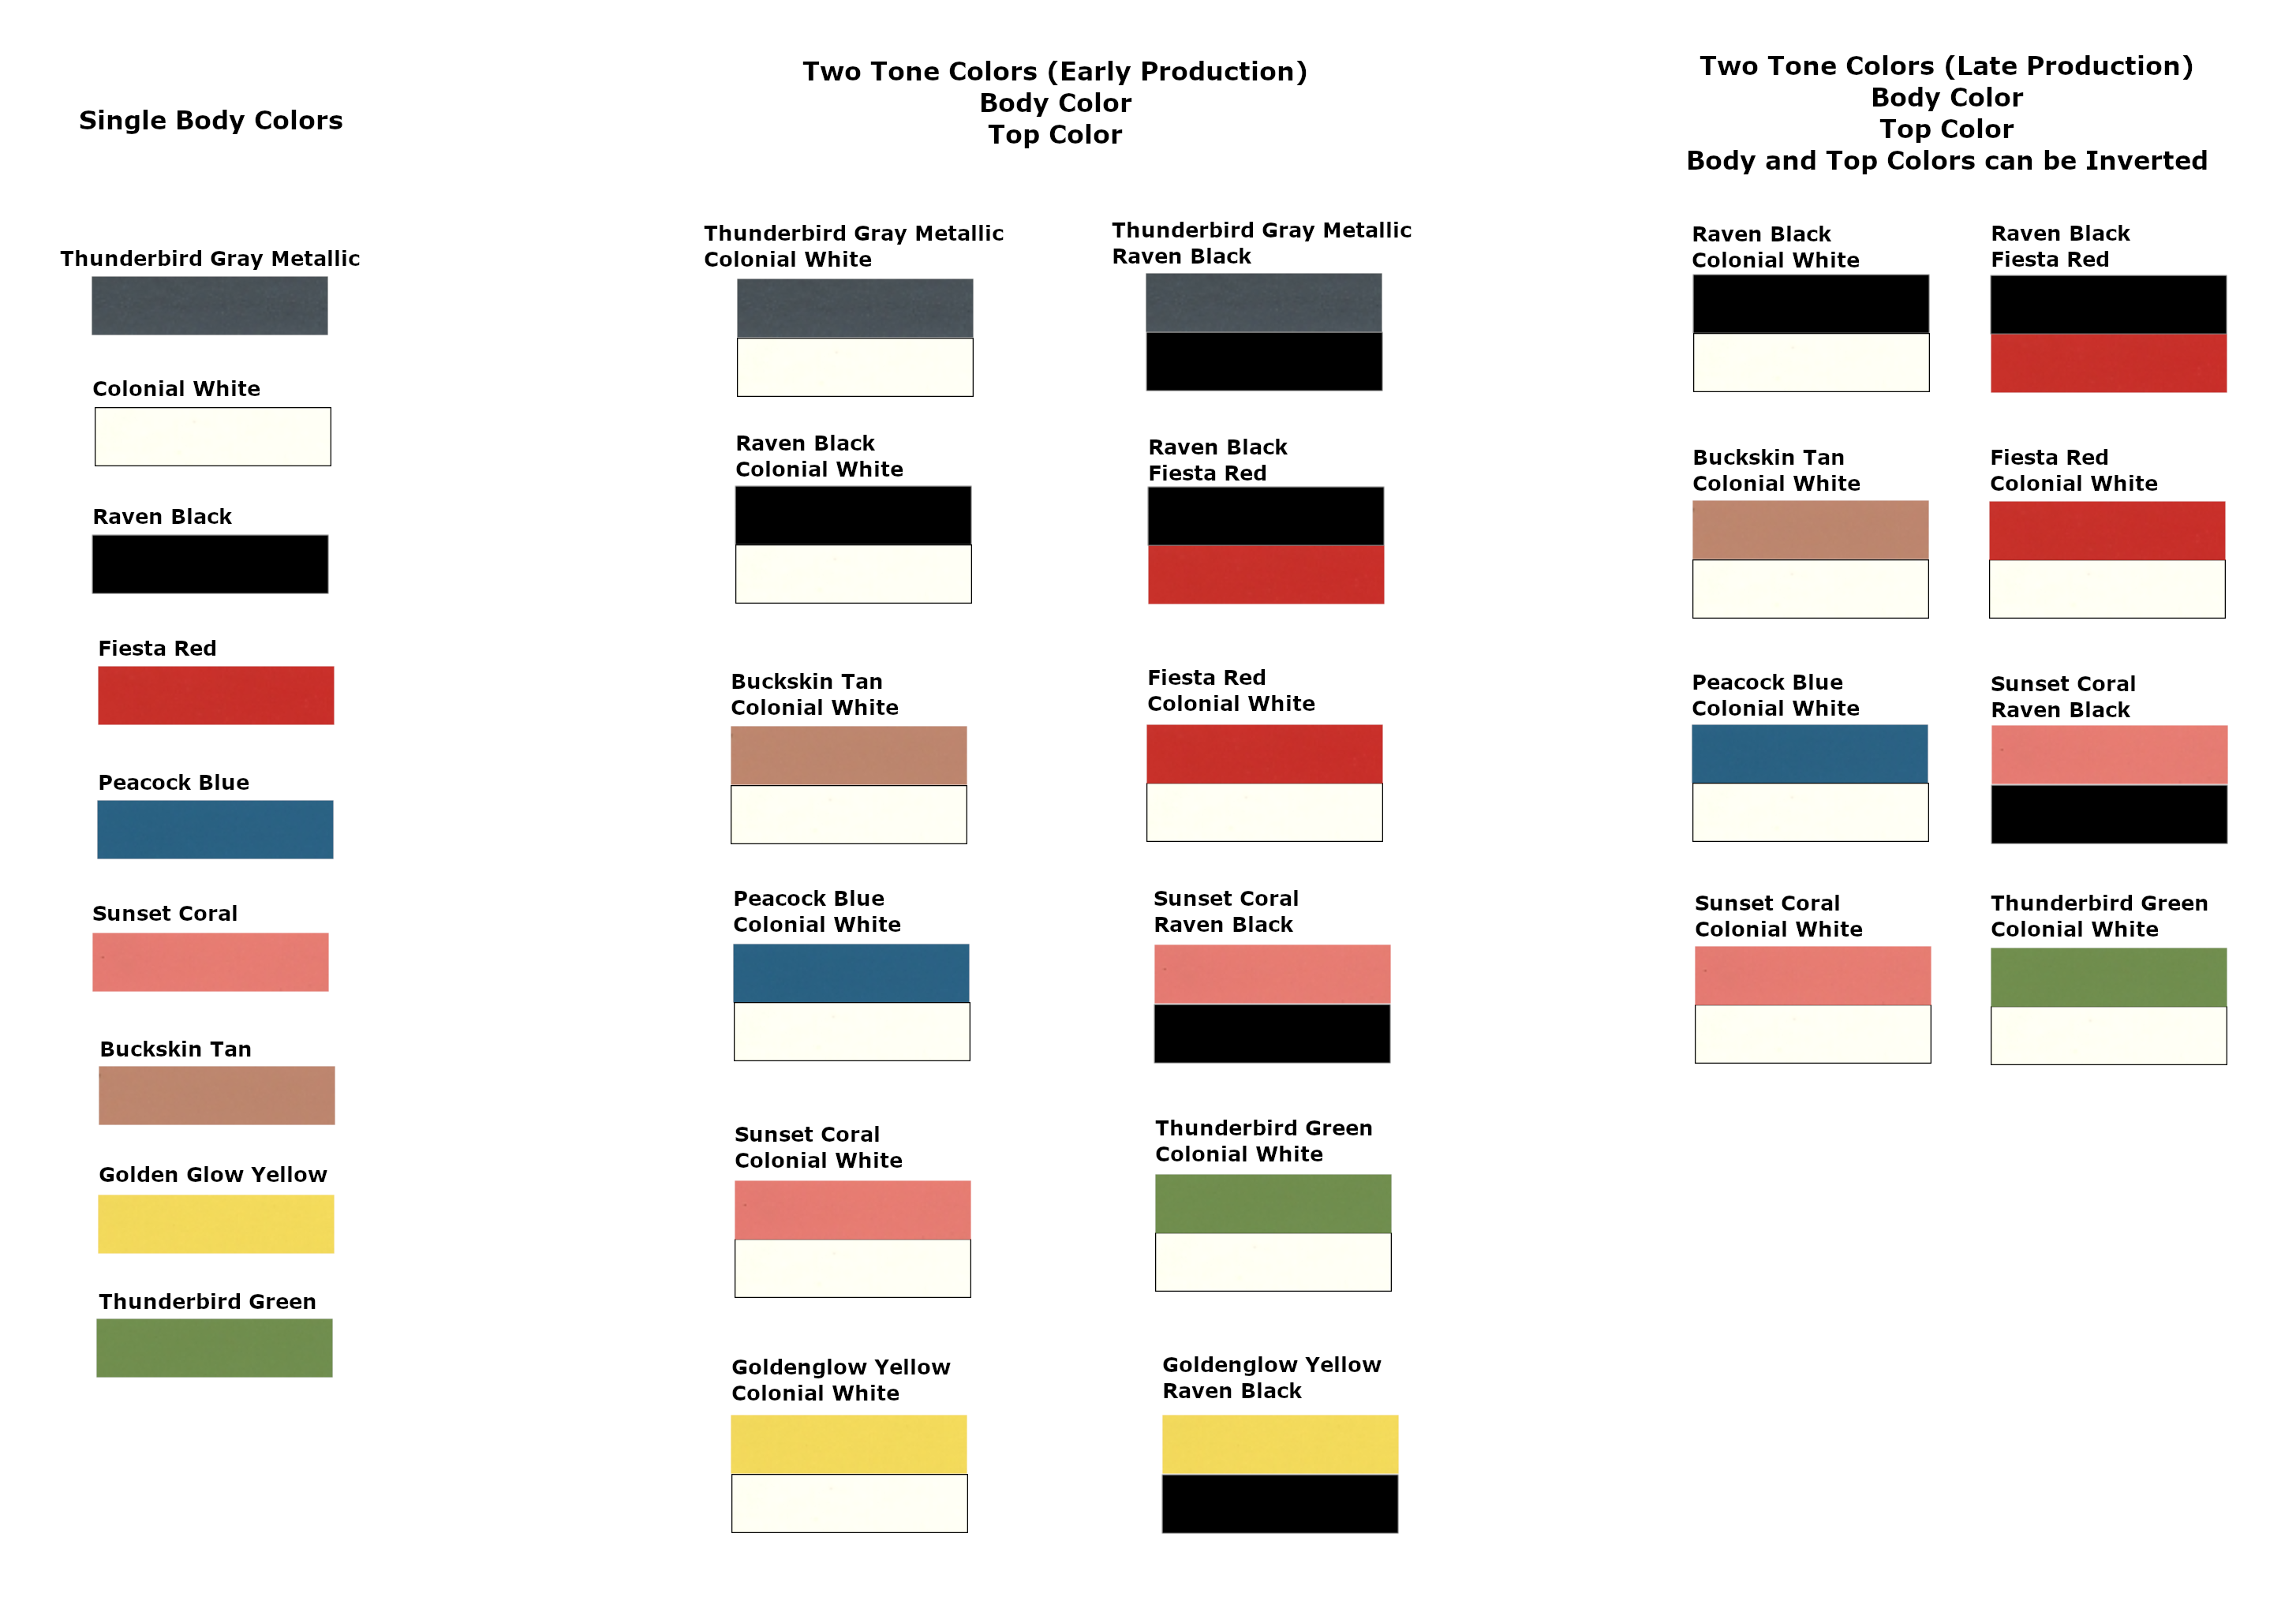
 Factory color chart
This is a color chart of factory colors available for the 1956 Ford T-Bird. At this time I'm trying to decide what color or colors I want to use?
The instructions state that this kit is of a car from the Early Production. I'm really not sure what color scheme I want to use. I'm leaning toward:
See my Part 02 Video that provides a quick update on the build progress.
Photo 005
Click/tap photo to enlarge
 Parts are in primer
All the parts have been primed using Vallejo 74.615 USN Light Grey Primer.
I think I've decided what color scheme I'll be using. It will most likely be a Fiesta Red body with a Raven Black Roof. Now I have to determine the interior colors available from the factory for 1956.
Photo 006
Click/tap photo to enlarge
 Flip side of some parts prime
Some parts that were primed on one side are now flipped over and primed on the other side.
Photo 007
Click/tap photo to enlarge
 Some parts painted semi-gloss or flat black. Engine in red
It's difficult to see in this photo, but some parts were painted either Tamiya X-18 semi-gloss black or Tamiya XF-1 flat black. The engine and transmission are painted with Vallejo 71.084 Fire Red.
Photo 008
Click/tap photo to enlarge
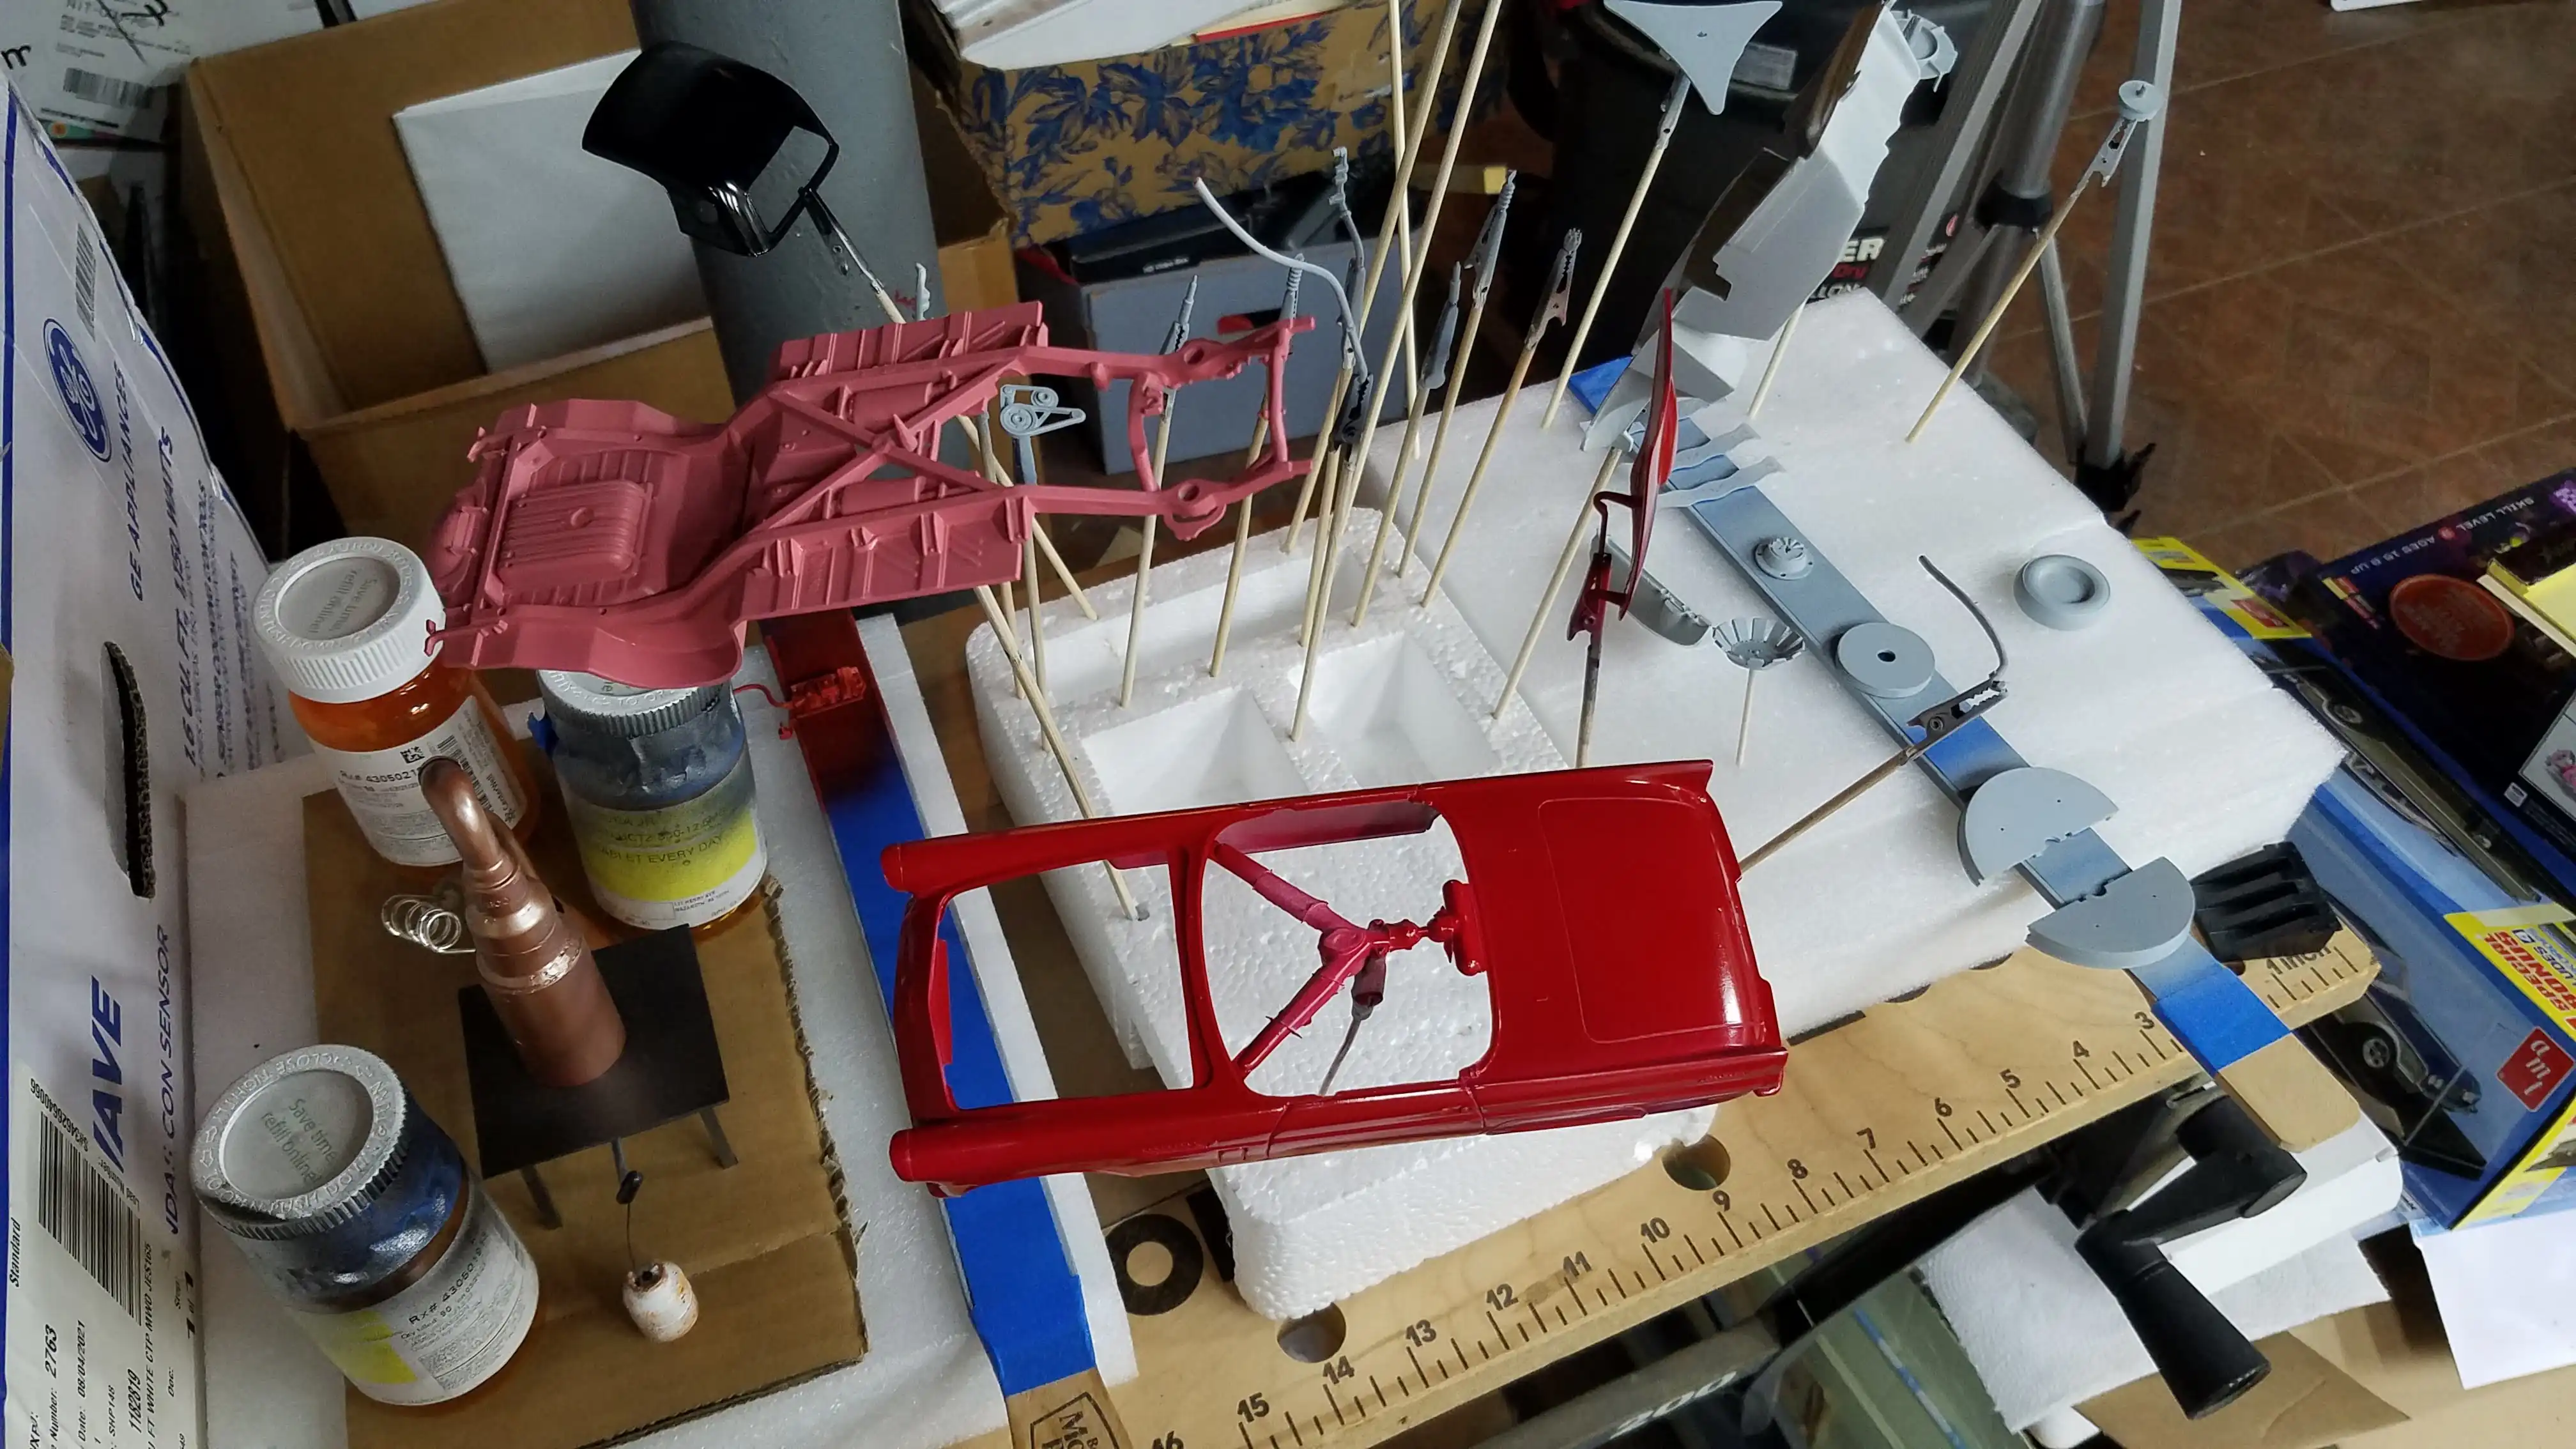
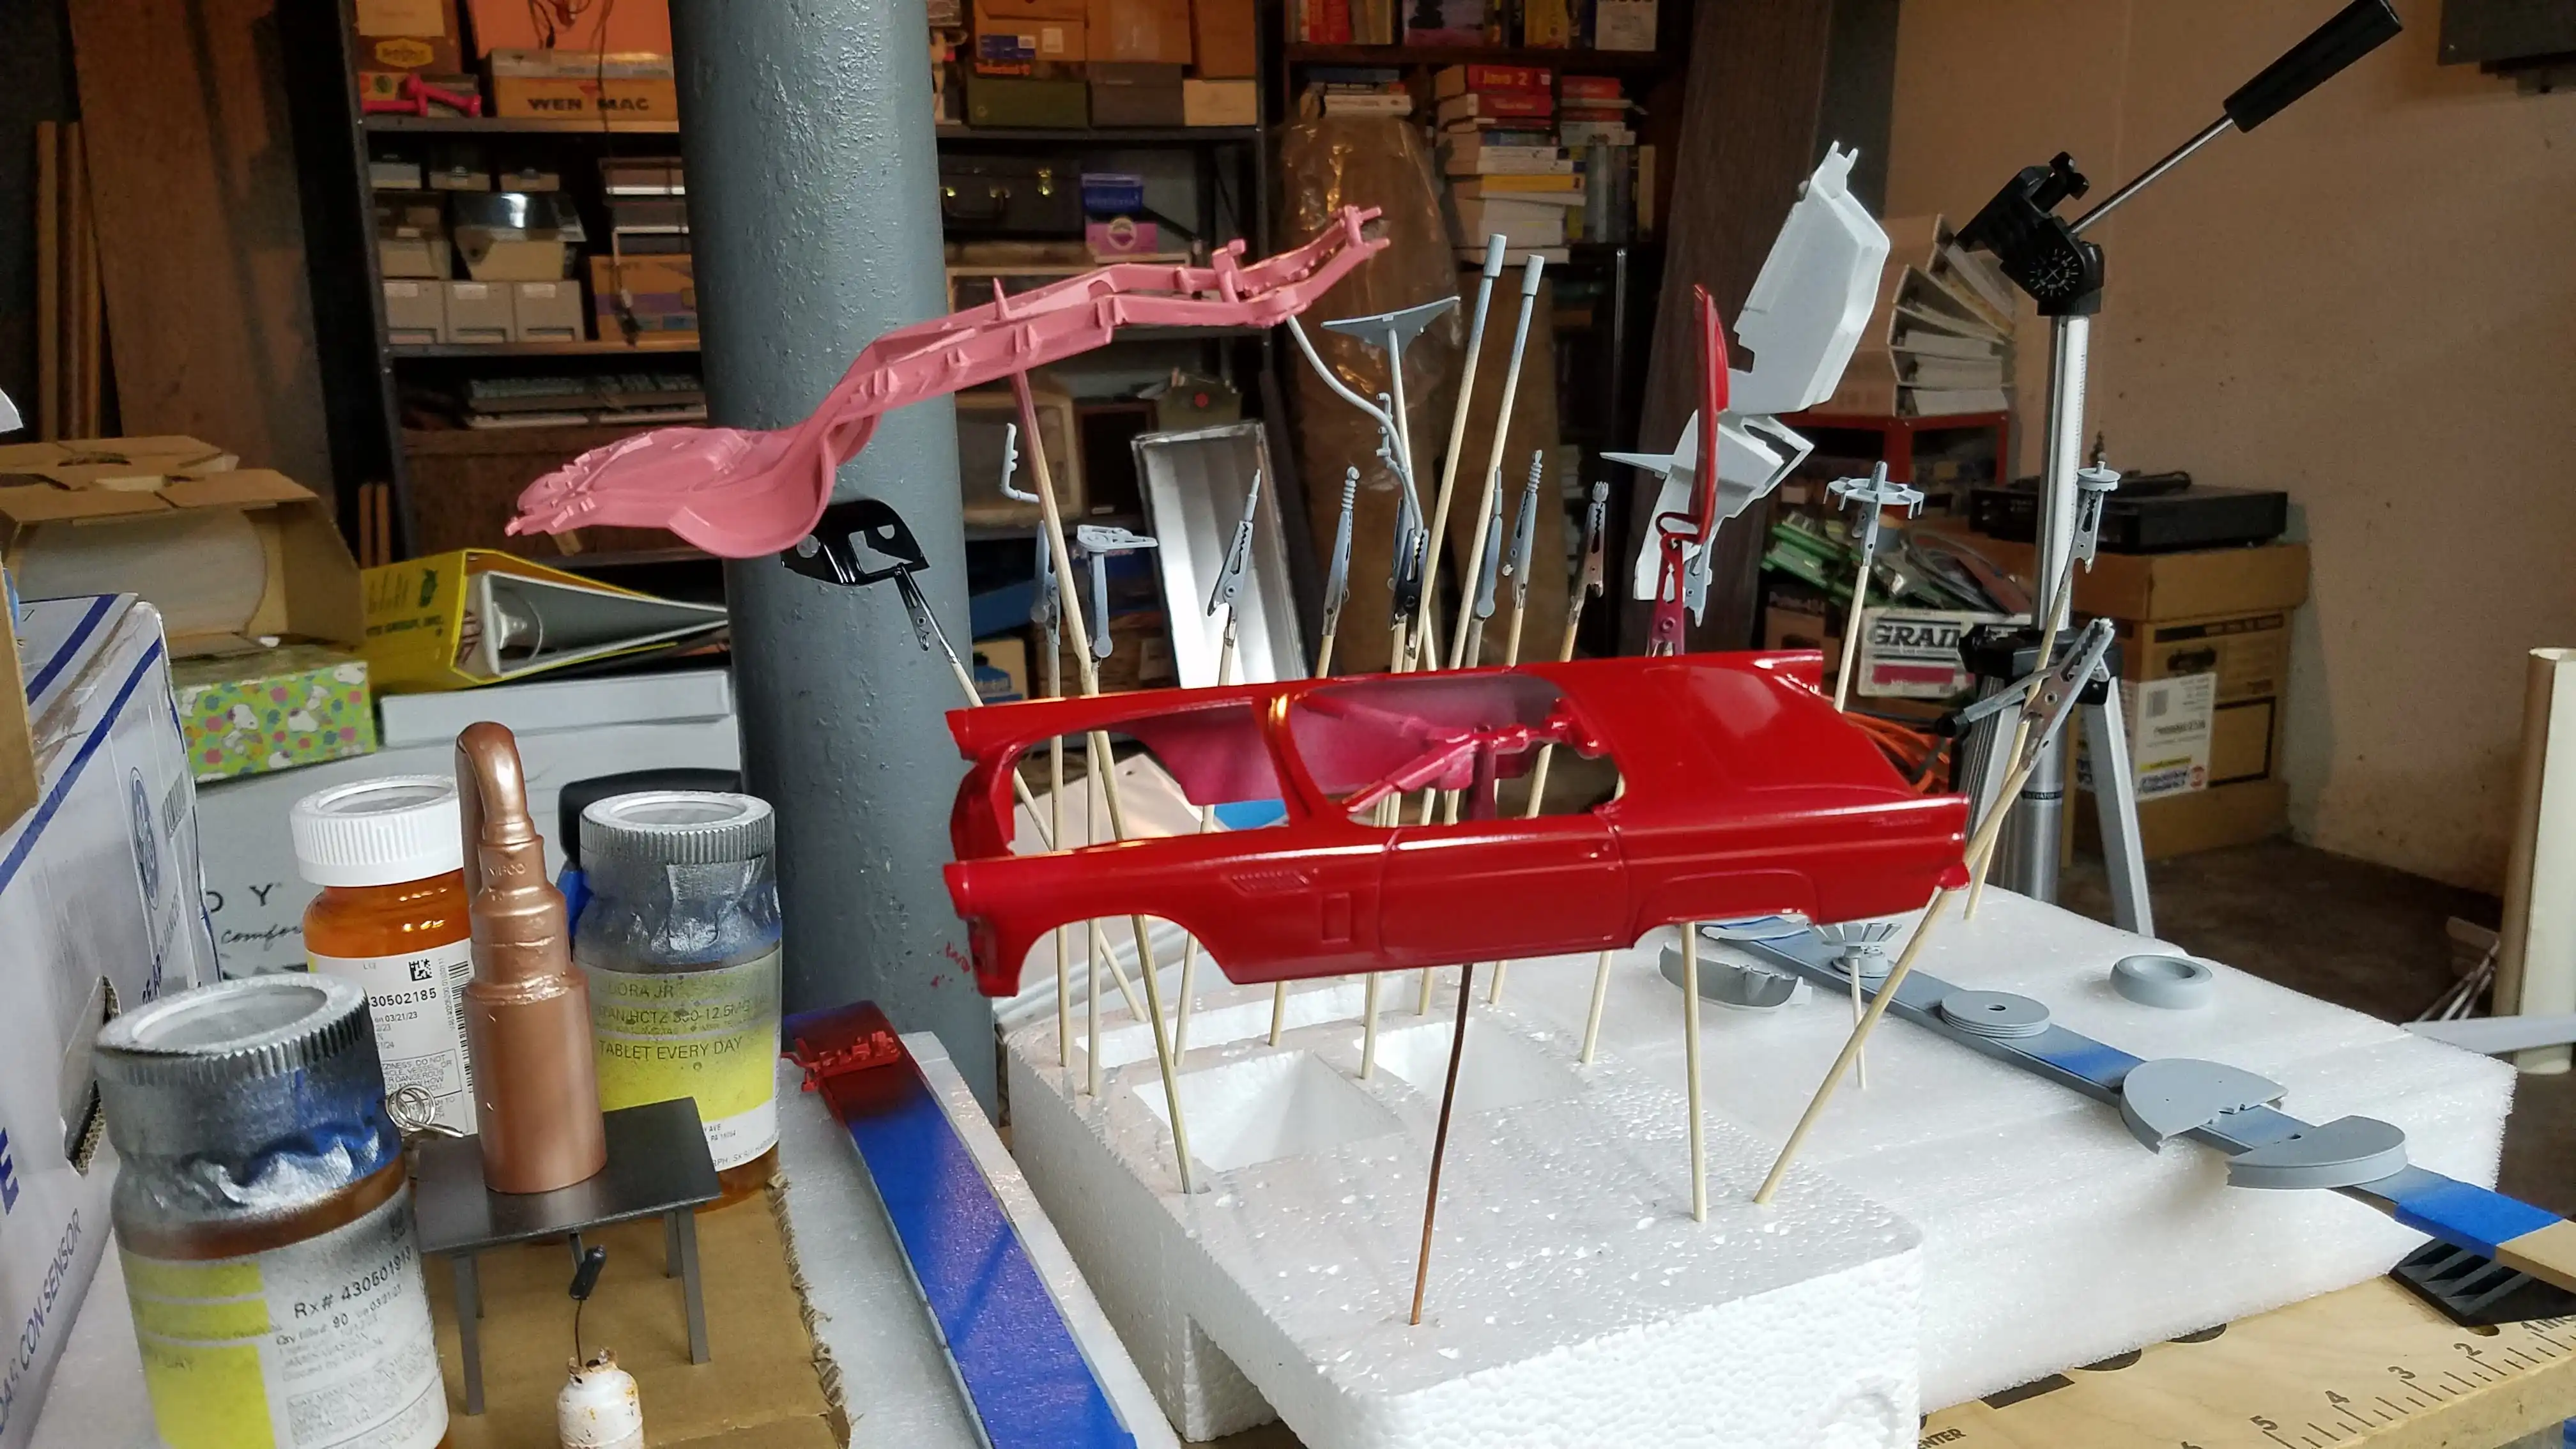 Body and undercarriage are painted
The body is painted with Tamiya X-7 Red. The roof is painted with Tamiya X-1 Gloss Black. The frame and floor pan is painted with Tamiya X-7 Red mixed with Tamiya X-2 White in a 25:75 (Red/White) mixture. This color is what the kit suggests when painting the body red. After checking...the factory color of the underside is approximately this 'pink' color when the body is Fiesta Red. The frame rails will be detailed in Tamiya X-18 Semi-Gloss Black. The exhaust pipes will be done with Vallejo Metal Color 77.723 Exhaust Manifold. The mufflers will be done with Vallejo Metal Color 77.704 Burnt Metallic and the gas tank will be done with Vallejo Metal Color 77.716 Semi Matt Aluminum.
Photo 009
Click/tap photo to enlarge
 Another view of the body and undercarriage after painting
Another view of the body and undercarriage painted and on the drying rack.
Photo 010
Click/tap photo to enlarge
 Body and roof painted
As shown in previous photos, the body is painted with Tamiya X-7 Red and the roof is painted with Tamiya X-1 Black. This red is close to the factory color of Fiesta Red and the black is the same as Raven Black.
The body is a first coat. As can be seen in this photo, the left rear fin is not covered properly and the front fenders are a-bit dull.
UPDATE!!!
I'm posting this part of the description on June 19, 2024,
about one month after painting the body and roof because I
discovered that I made a huge faux pas. I said I wanted
to do this build as if the car came from the factory, and I
still do; however, when I looked at the factory color chart
...in my head...I had the body and roof colors reversed. What I
thought should be a red body with black roof should be a
black body with red roof...OOPS!
Click this link to see the color chart with my faux pas.
Thankfully, one of the factory color combo's is a red body
with a colonial white roof. This makes the fix easy, I'll
simply redo the roof in white. I'm not sure what colonial
white looks like, but I'm assuming it is not a bright white.
I might use Vallejo 71.279 Insignia White? I'll have to take
a closer look at the white(s) I have in my stash of paint.
Photo 011
Click/tap photo to enlarge
 Testing how the black roof will look with the red body
In this photo I'm showing how the T-bird will look in red with a black roof. The clear coat has not been put on the body or roof at this time.
UPDATE!!!
As stated in the previous photo, the roof will be white so
that the color combo for 1956 factory release is accurate.
Photo 012
Click/tap photo to enlarge
 Interior is painted red to match the body
I decided to also do the interior in Tamiya X-7 Red to match the body color. This was also a factory option in 1956. The seat and side door panels will have white insets. I have not decided what shade of white yet. I'll be trying, and using one of the following:
Photo 013
Click/tap photo to enlarge
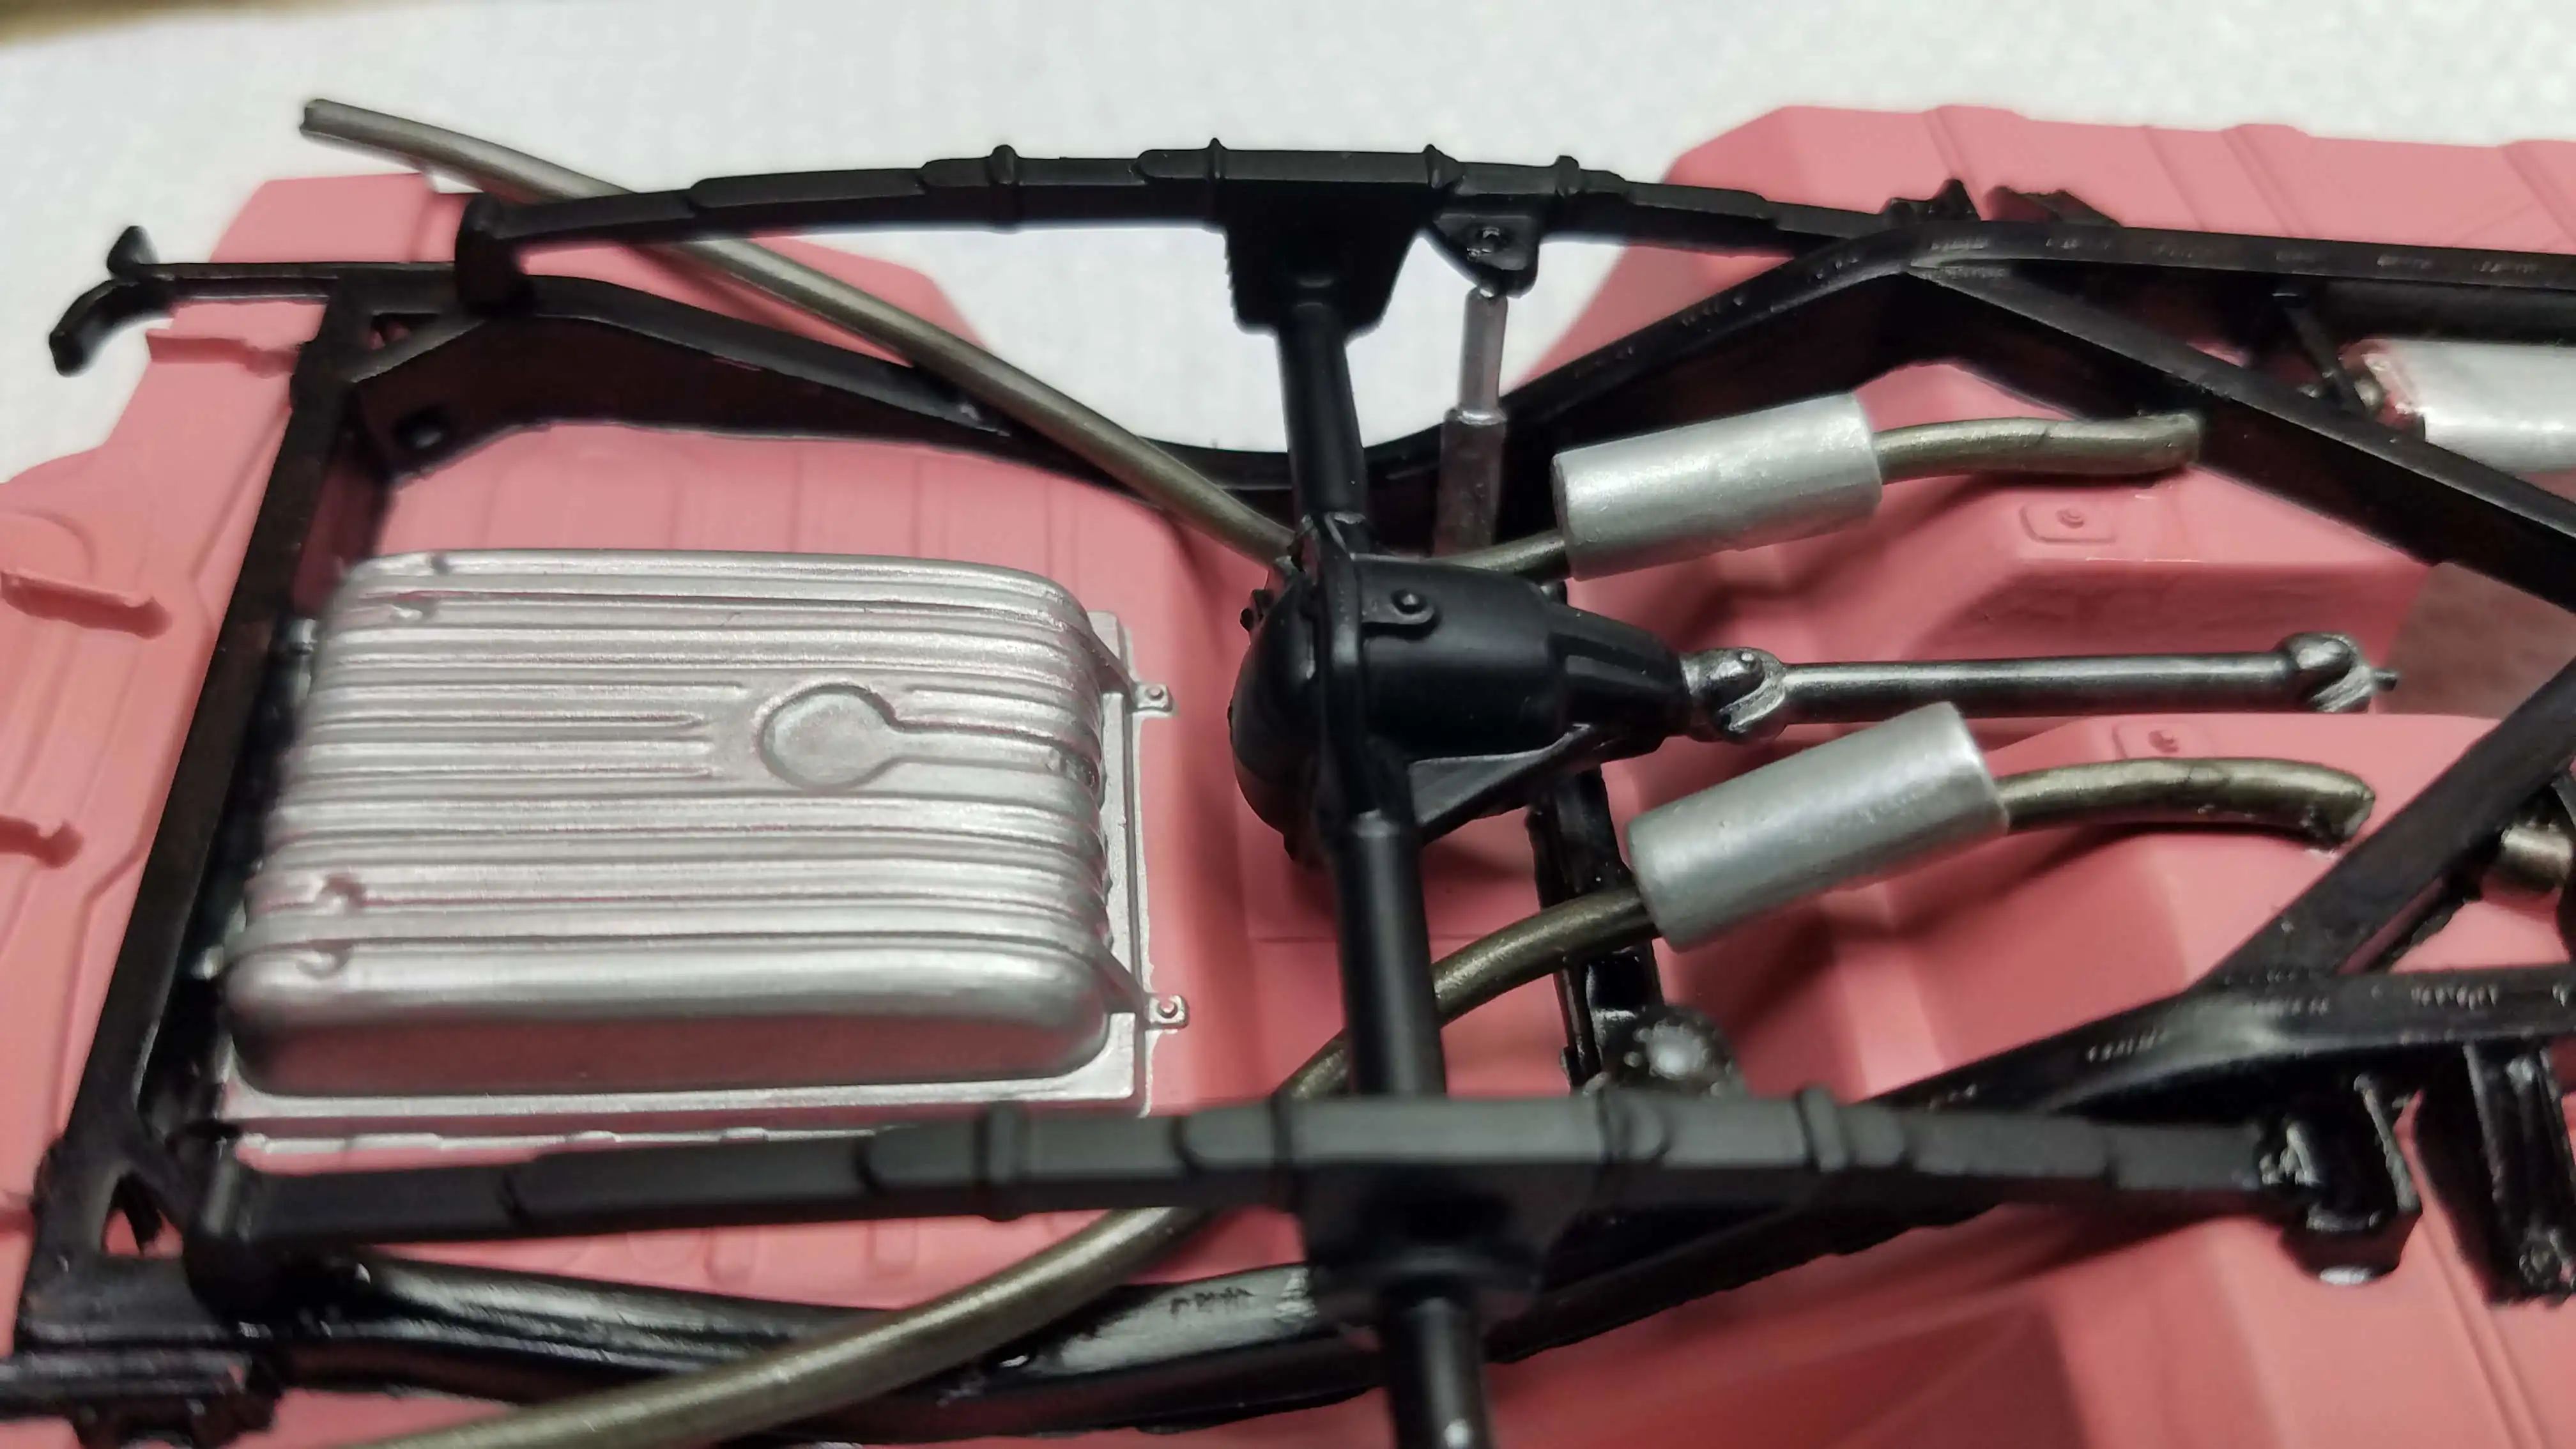
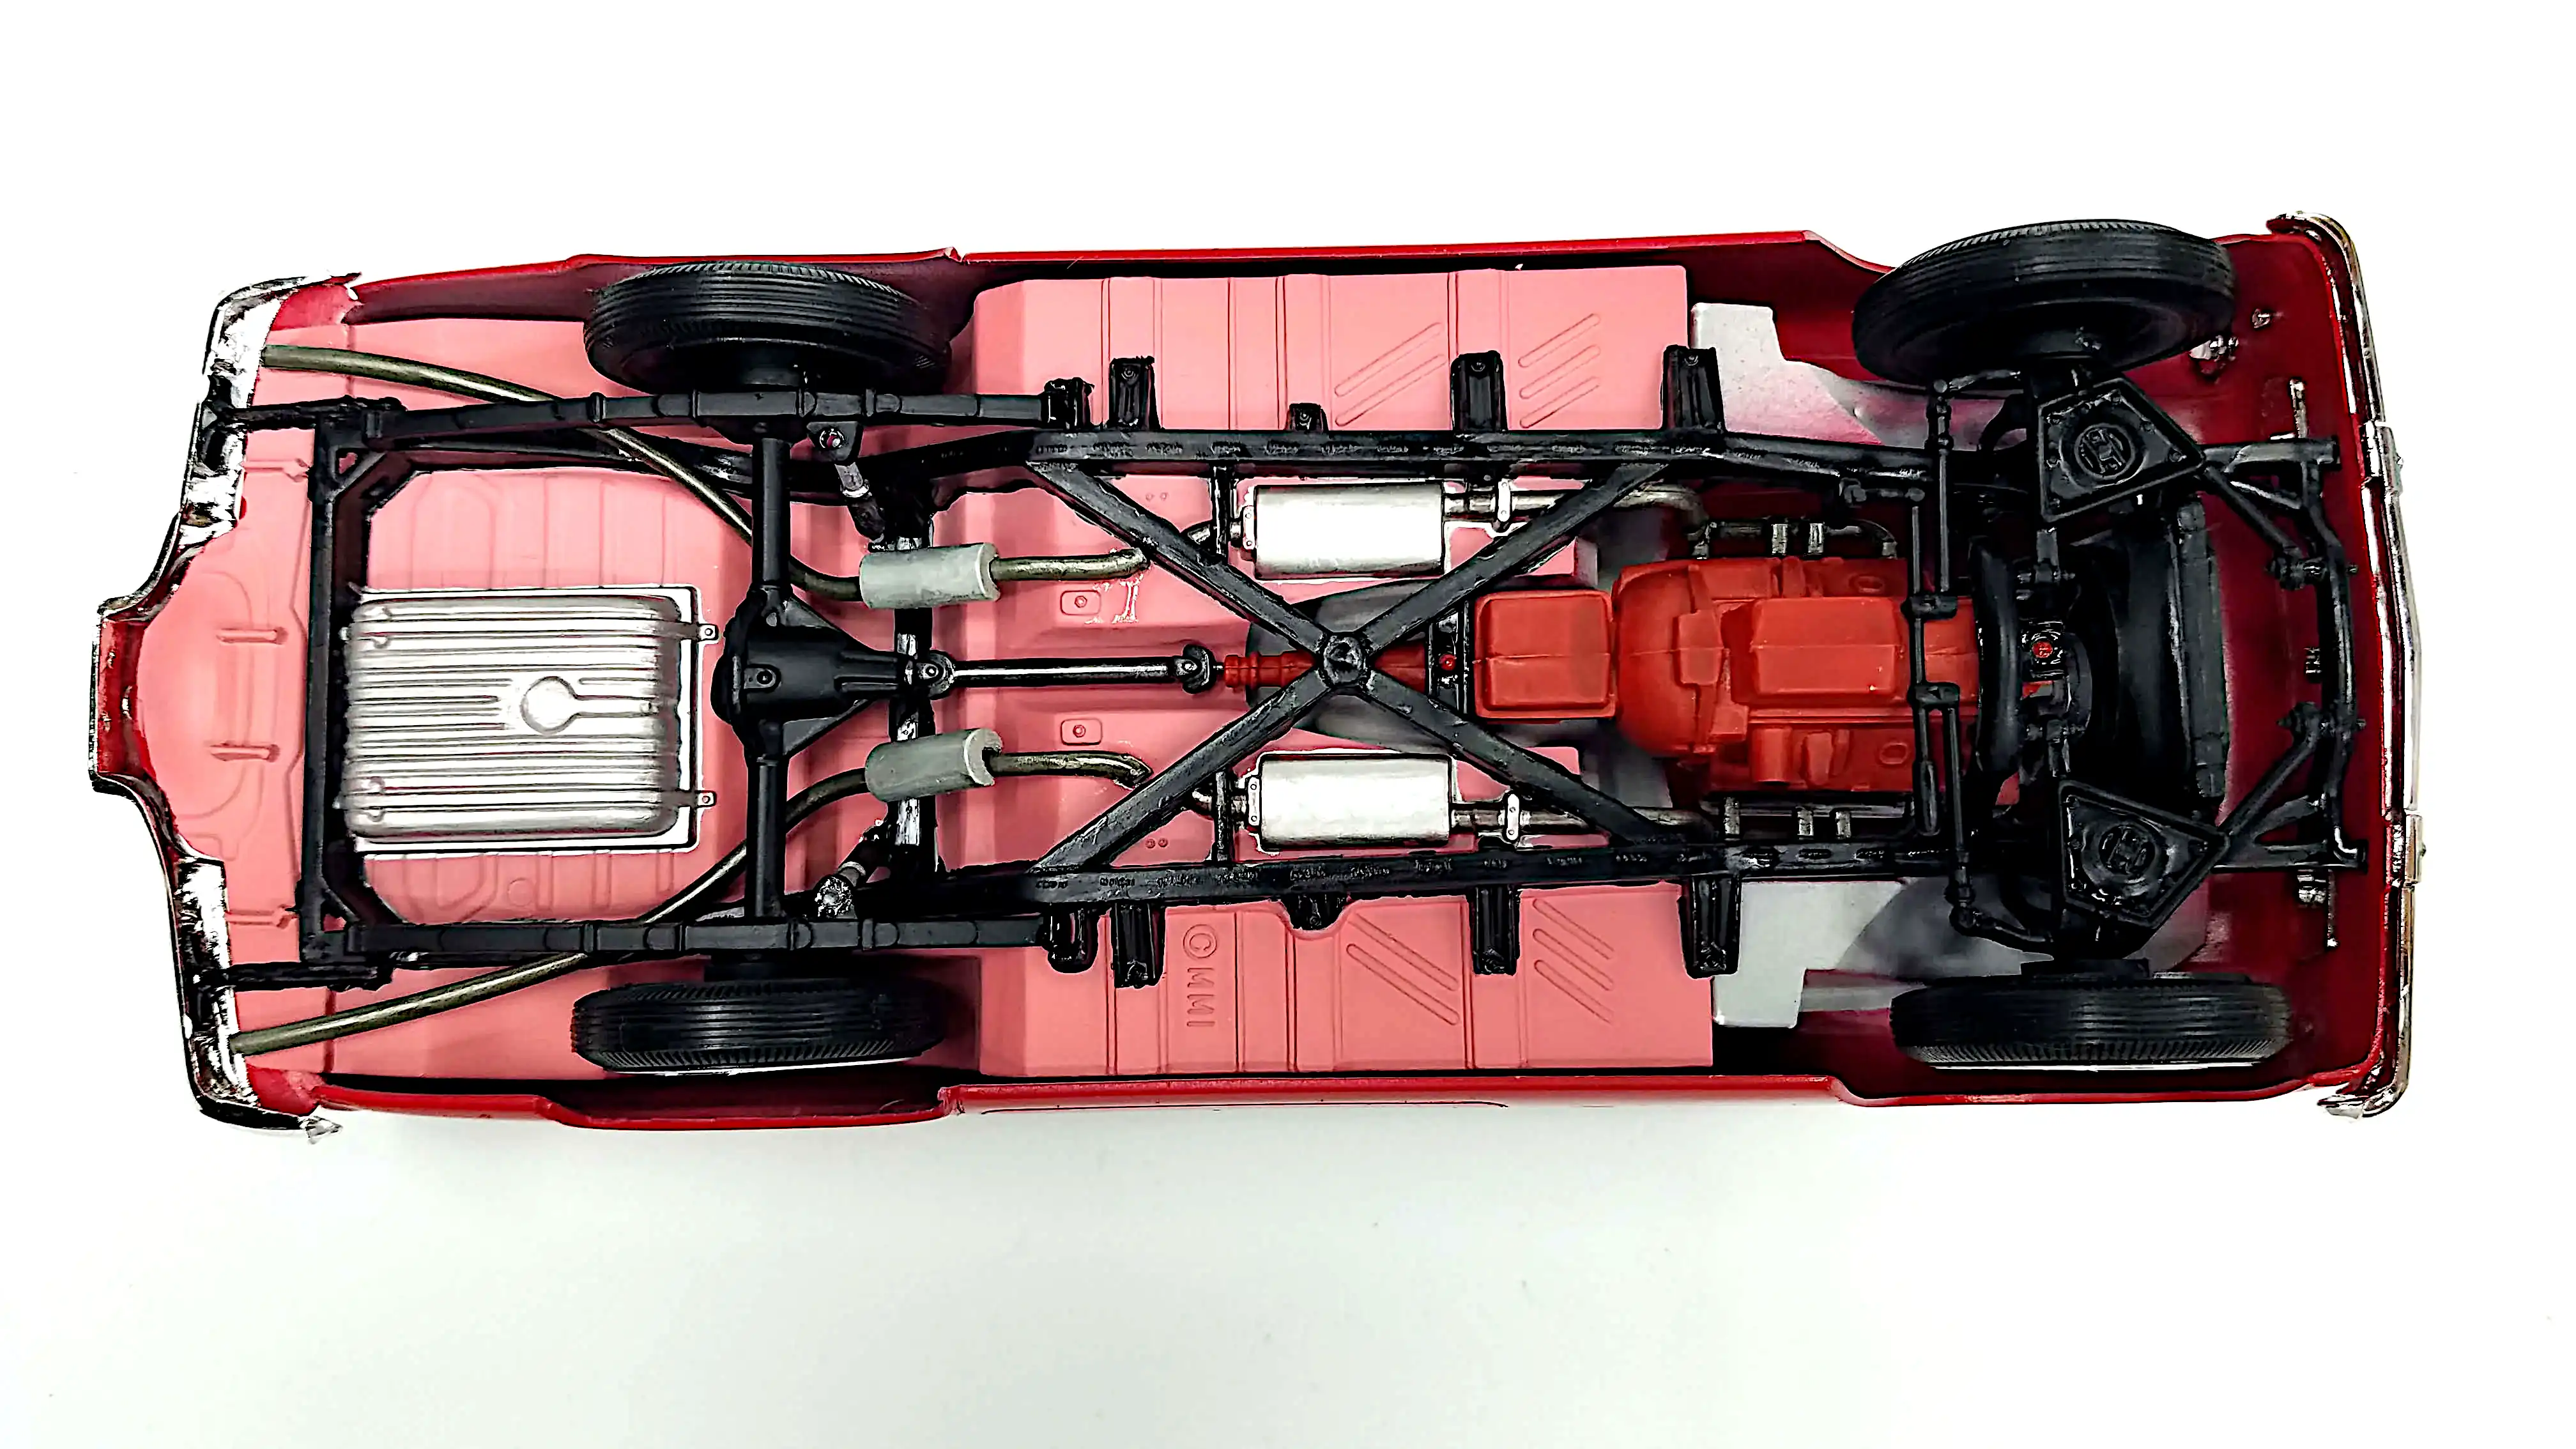
 Undercarriage is detail painted
The undercarriage, frame, exhaust pipes and gas tank have been detailed and is still in need of some touchup. As stated in an earlier photo here are the colors that I used:
Photo 014
Click/tap photo to enlarge
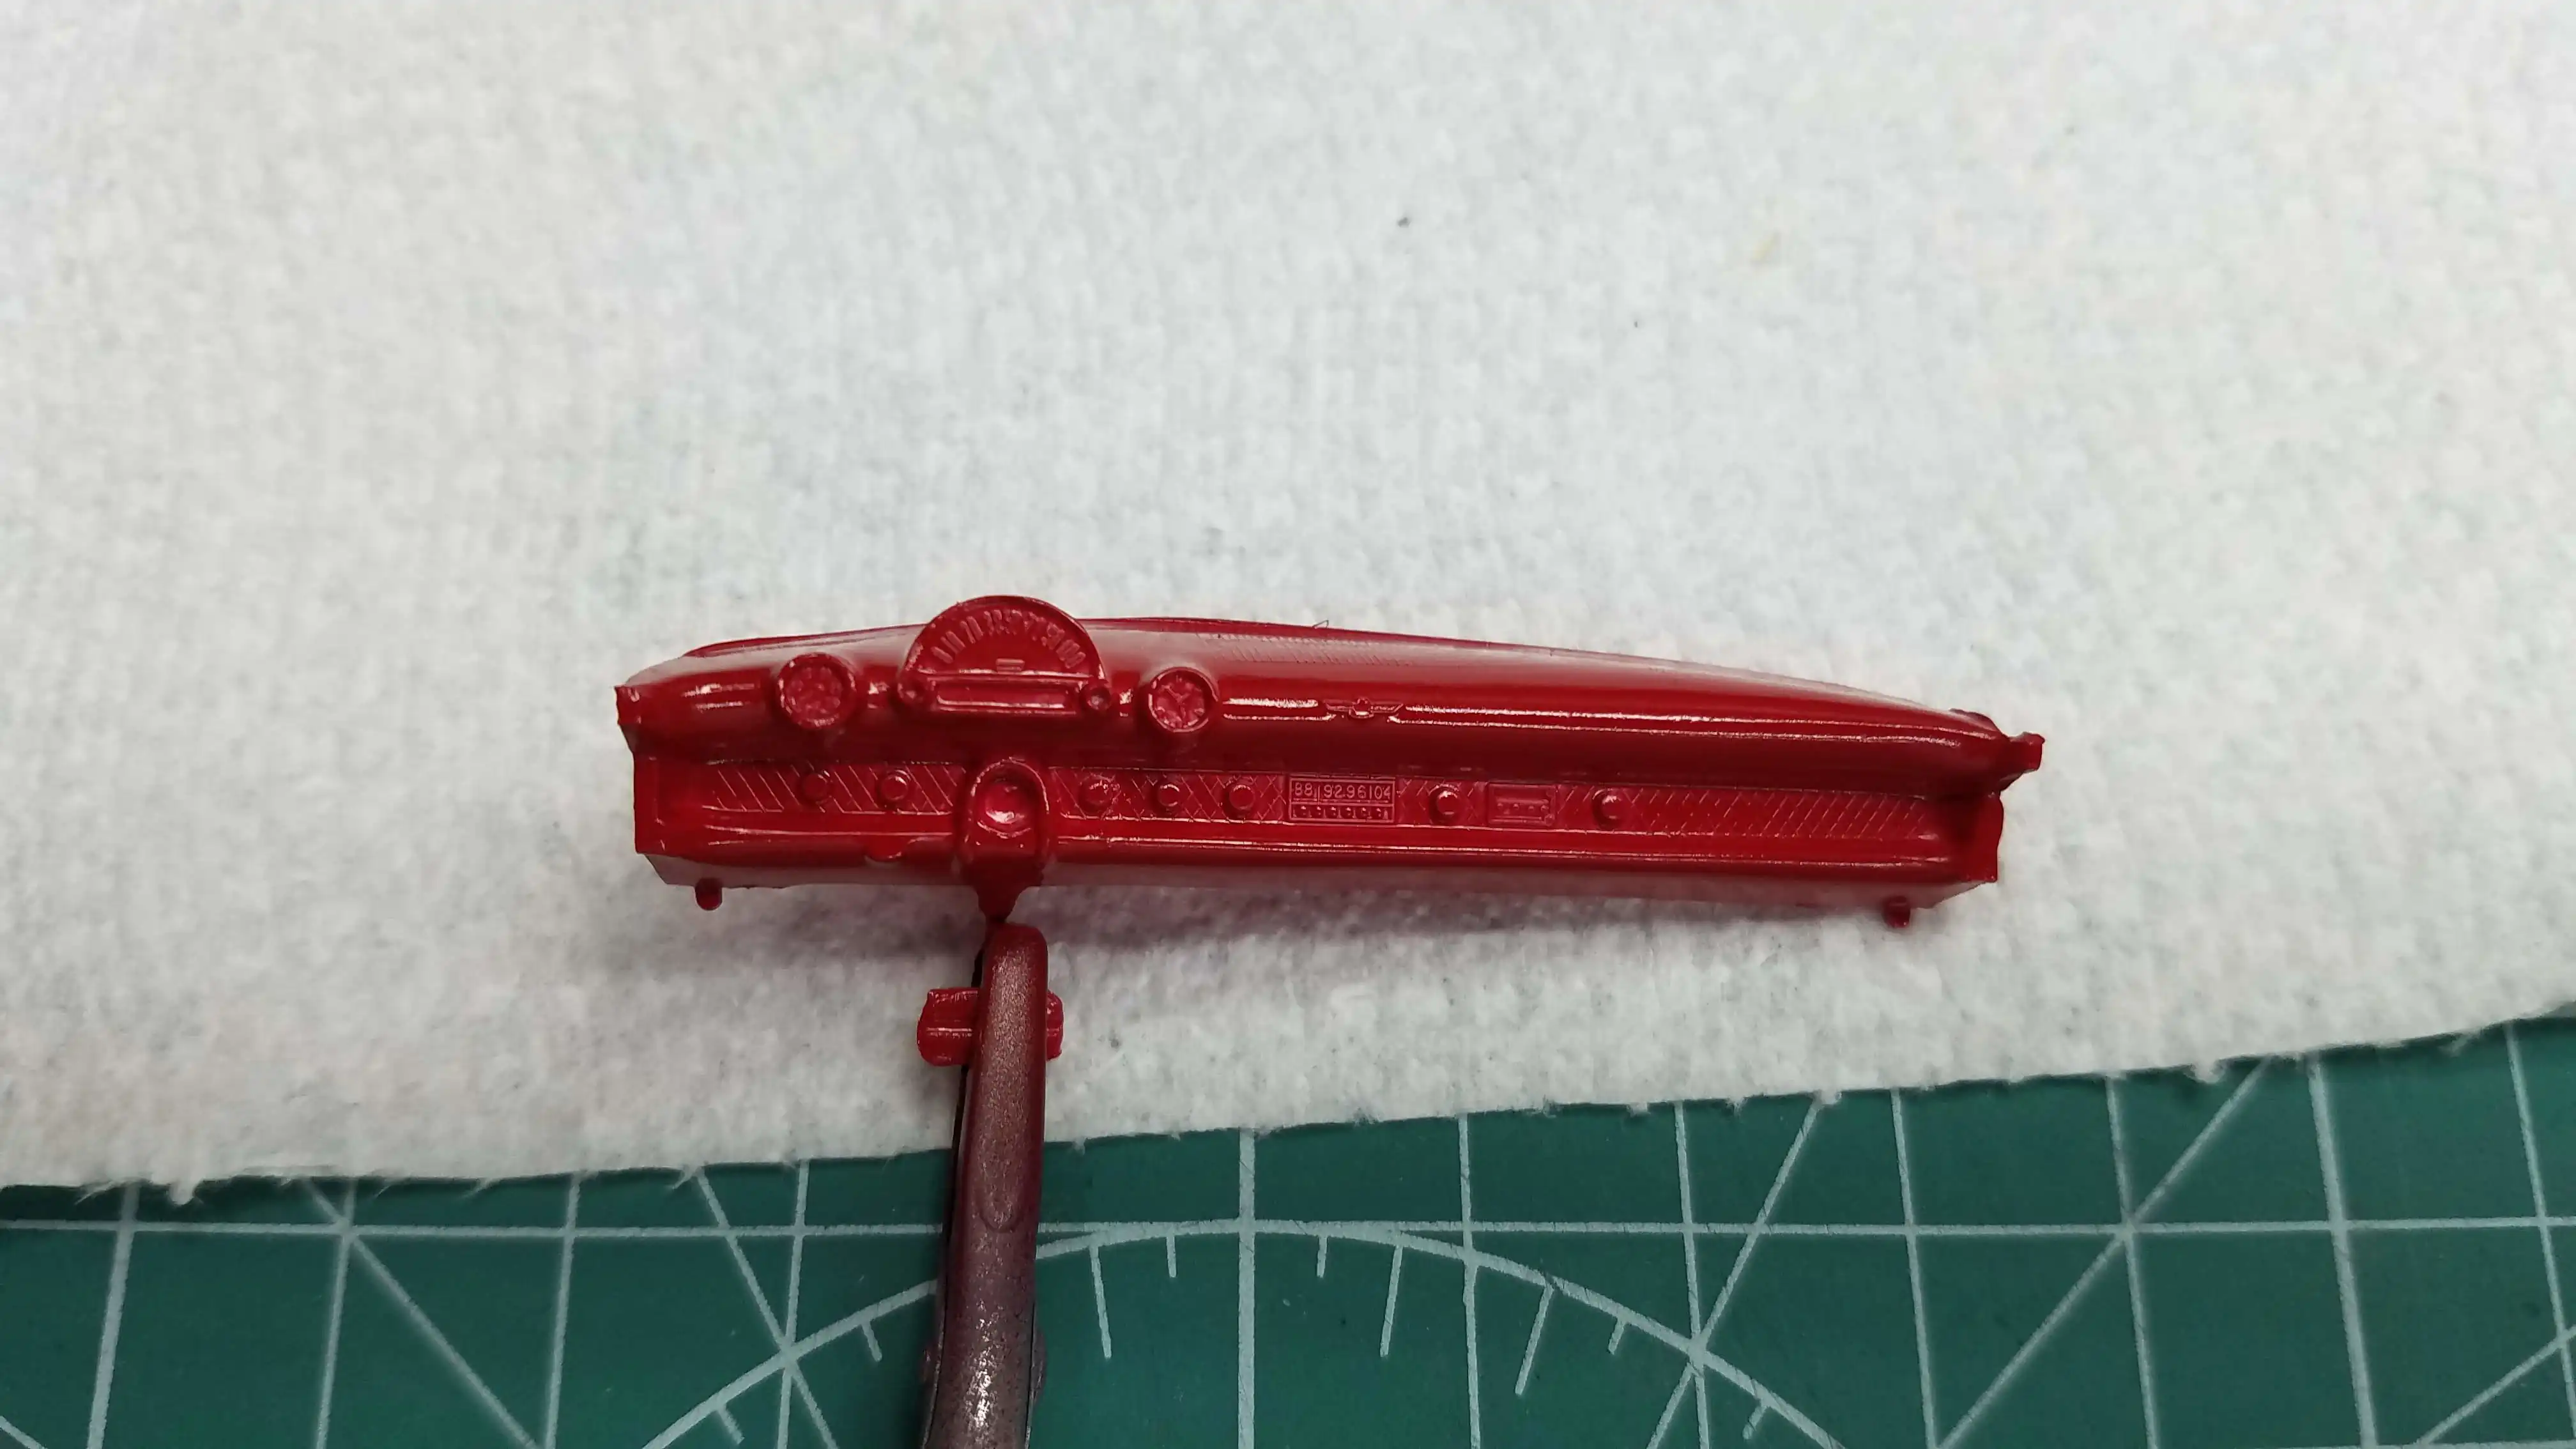
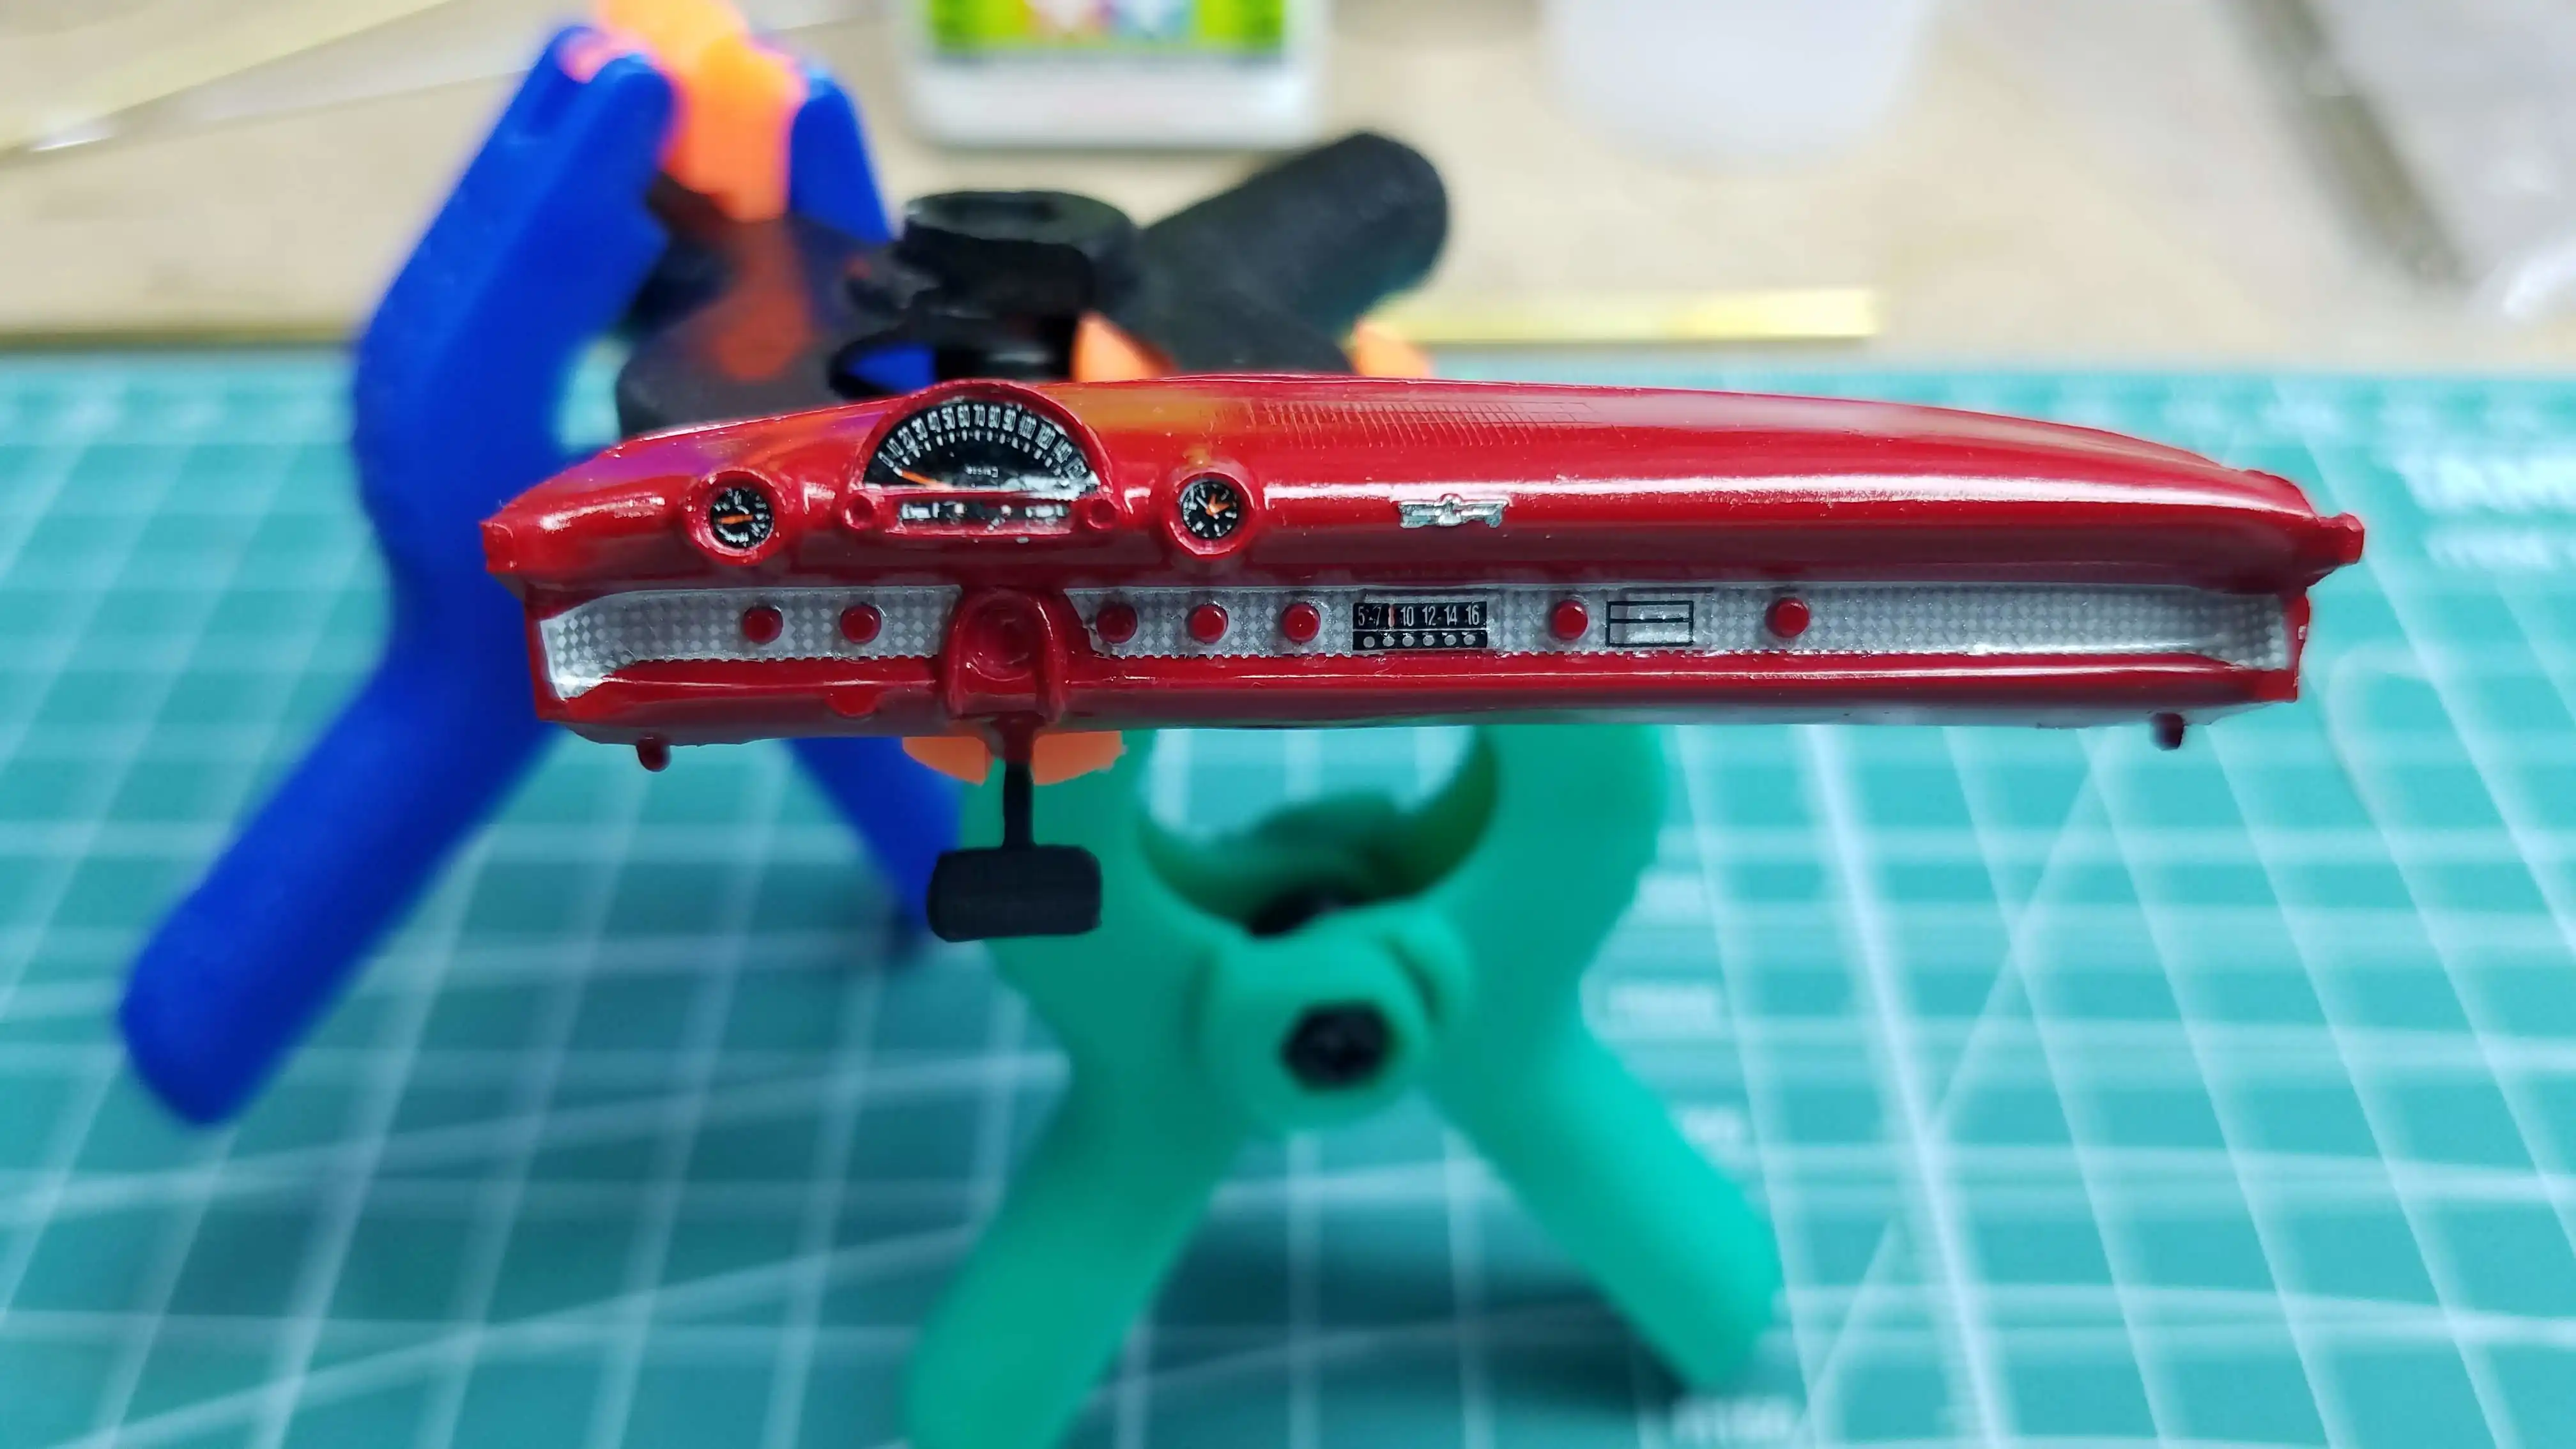
 Dashboard is painted red and still needs to be detailed
The dashboard is painted with Tamiya X-7 Red and still needs to be detailed. There are several decals to use. One for the silver trim and others for the instruments. The brake pedal will be painted with Tamiya XF-85 Rubber Black and the pedal bracket will be painted with Tamiya X-18 Semi-Gloss Black.
Photo 015
Click/tap photo to enlarge
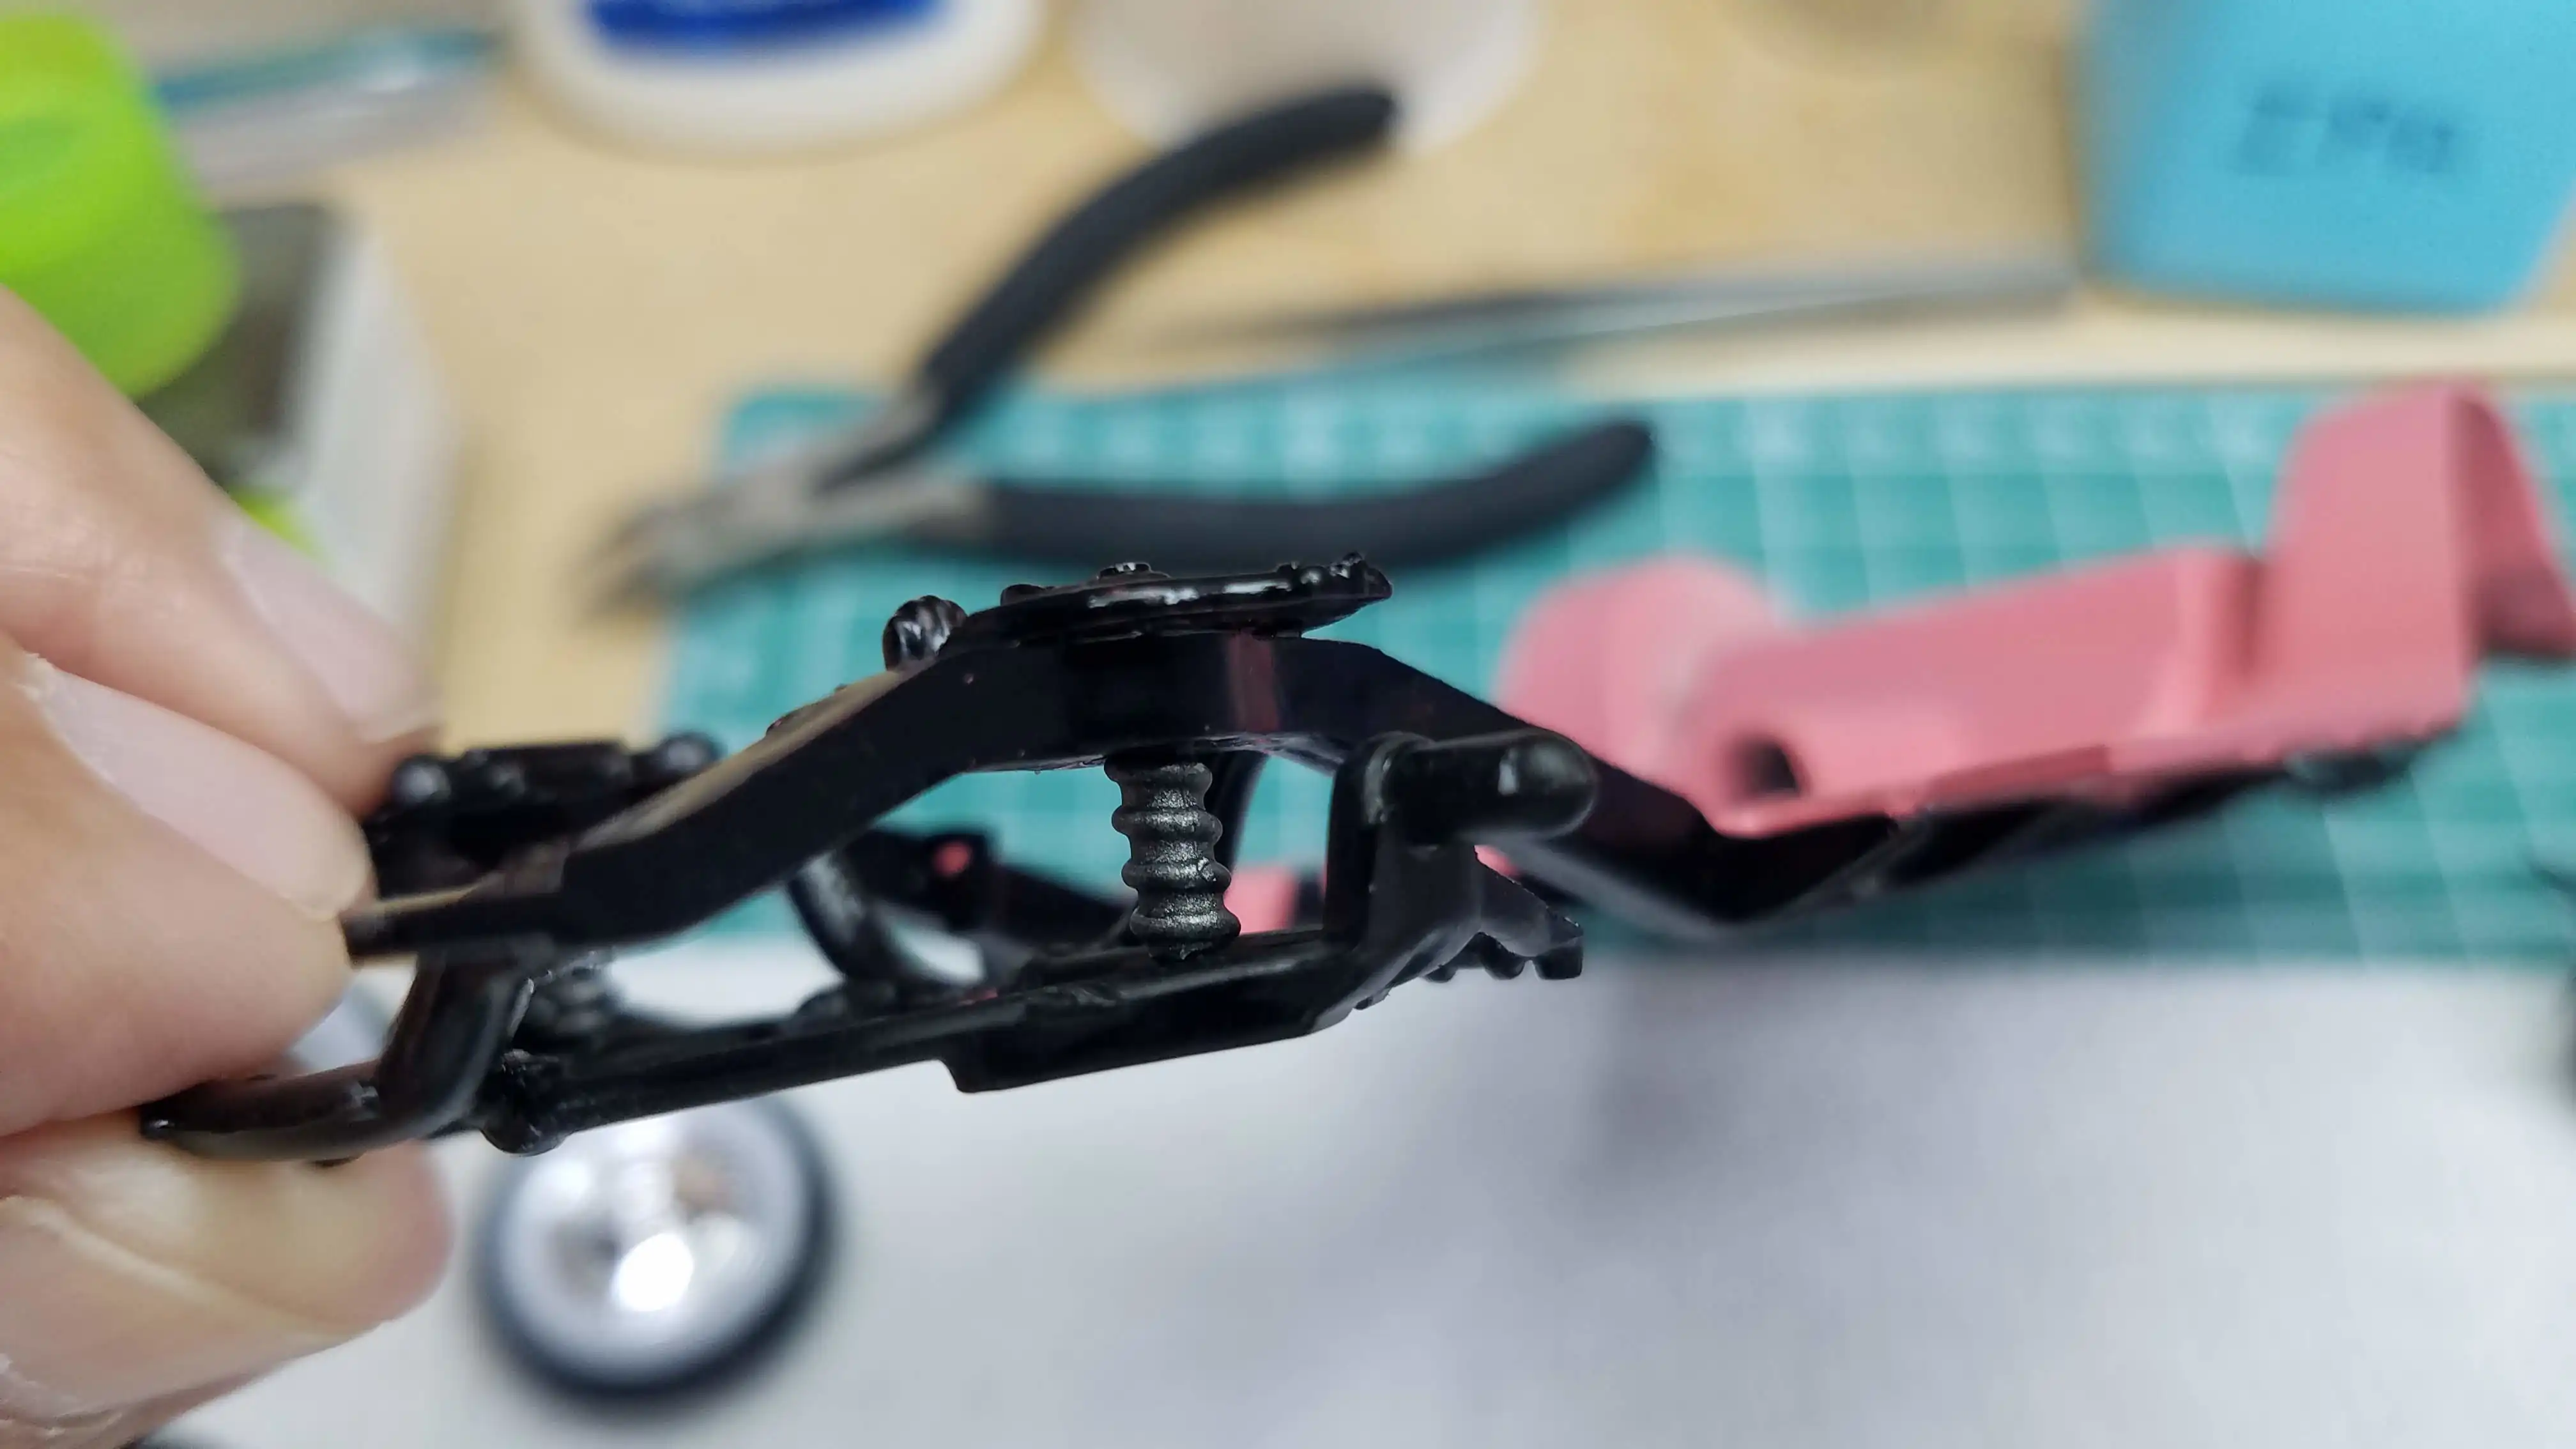
 Modifying and installing front suspension coil springs
This photo shows one of the front suspension struts installed; however, the strut needed a small modification to fit it into the space provided in the front end. See the next photo
Photo 016
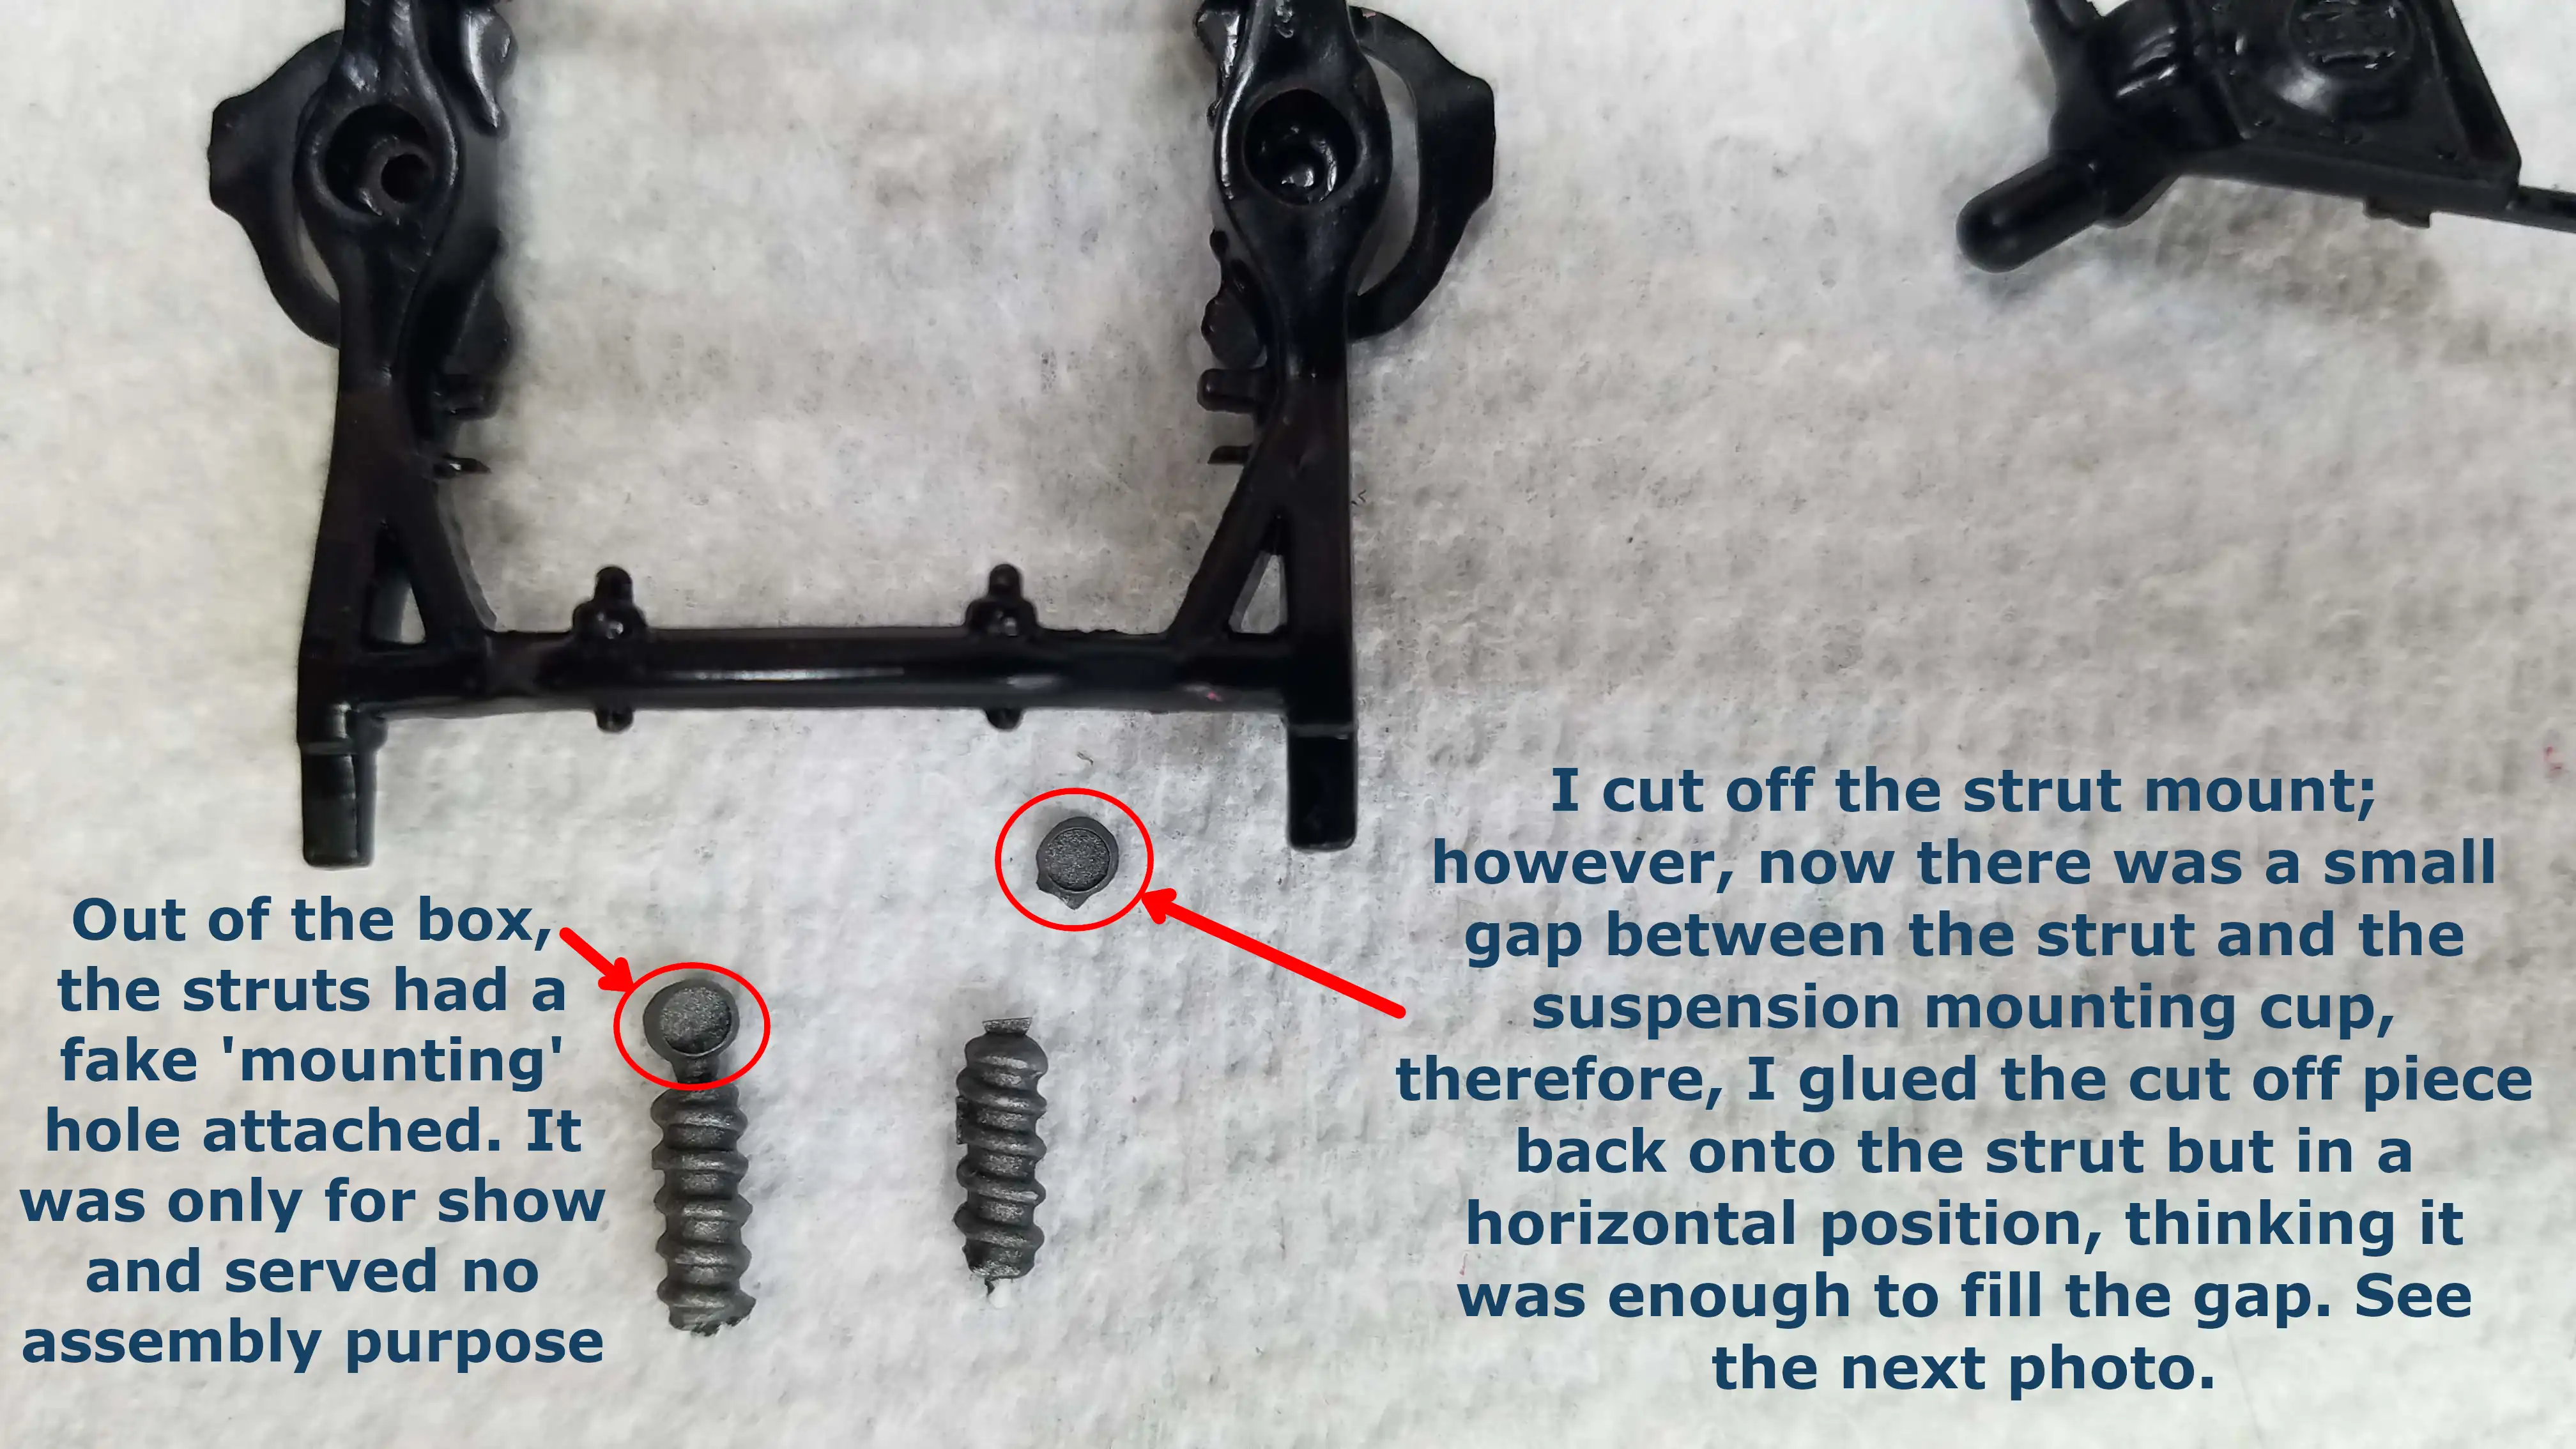
Click/tap photo to enlarge
 Shock/Spring modification
The photo below shows the front struts. The one on the left was out of the box and had a shaft with a fake eyelet for where it would mount. With the fake eyelet on the strut, it was too long to fit into the front suspension strut mounting cups. Since the top of the strut can not be seen after assembly I cut the small shaft and fake eyelet off the strut. The strut on the right is when I cut the top.
The graphic below is Step 4 from the instruction sheets showing how the front suspension and struts should be assembled. Click the instruction step 4 image to enlarge it. The star in the step means shown in place.

With the small shaft and fake eyelet cut off, after inserting the strut into the front suspension, there was a gap between the upper mounting cup and the strut. This gap looked to be about the thickness of the fake eyelet if it was laid horizontally on top of the strut, so...I glued the cut off fake eyelet on top of the strut simply to act as a spacer and reinstalled them in the front assembly.
See the next photo, because this was not the solution.
Photo 017
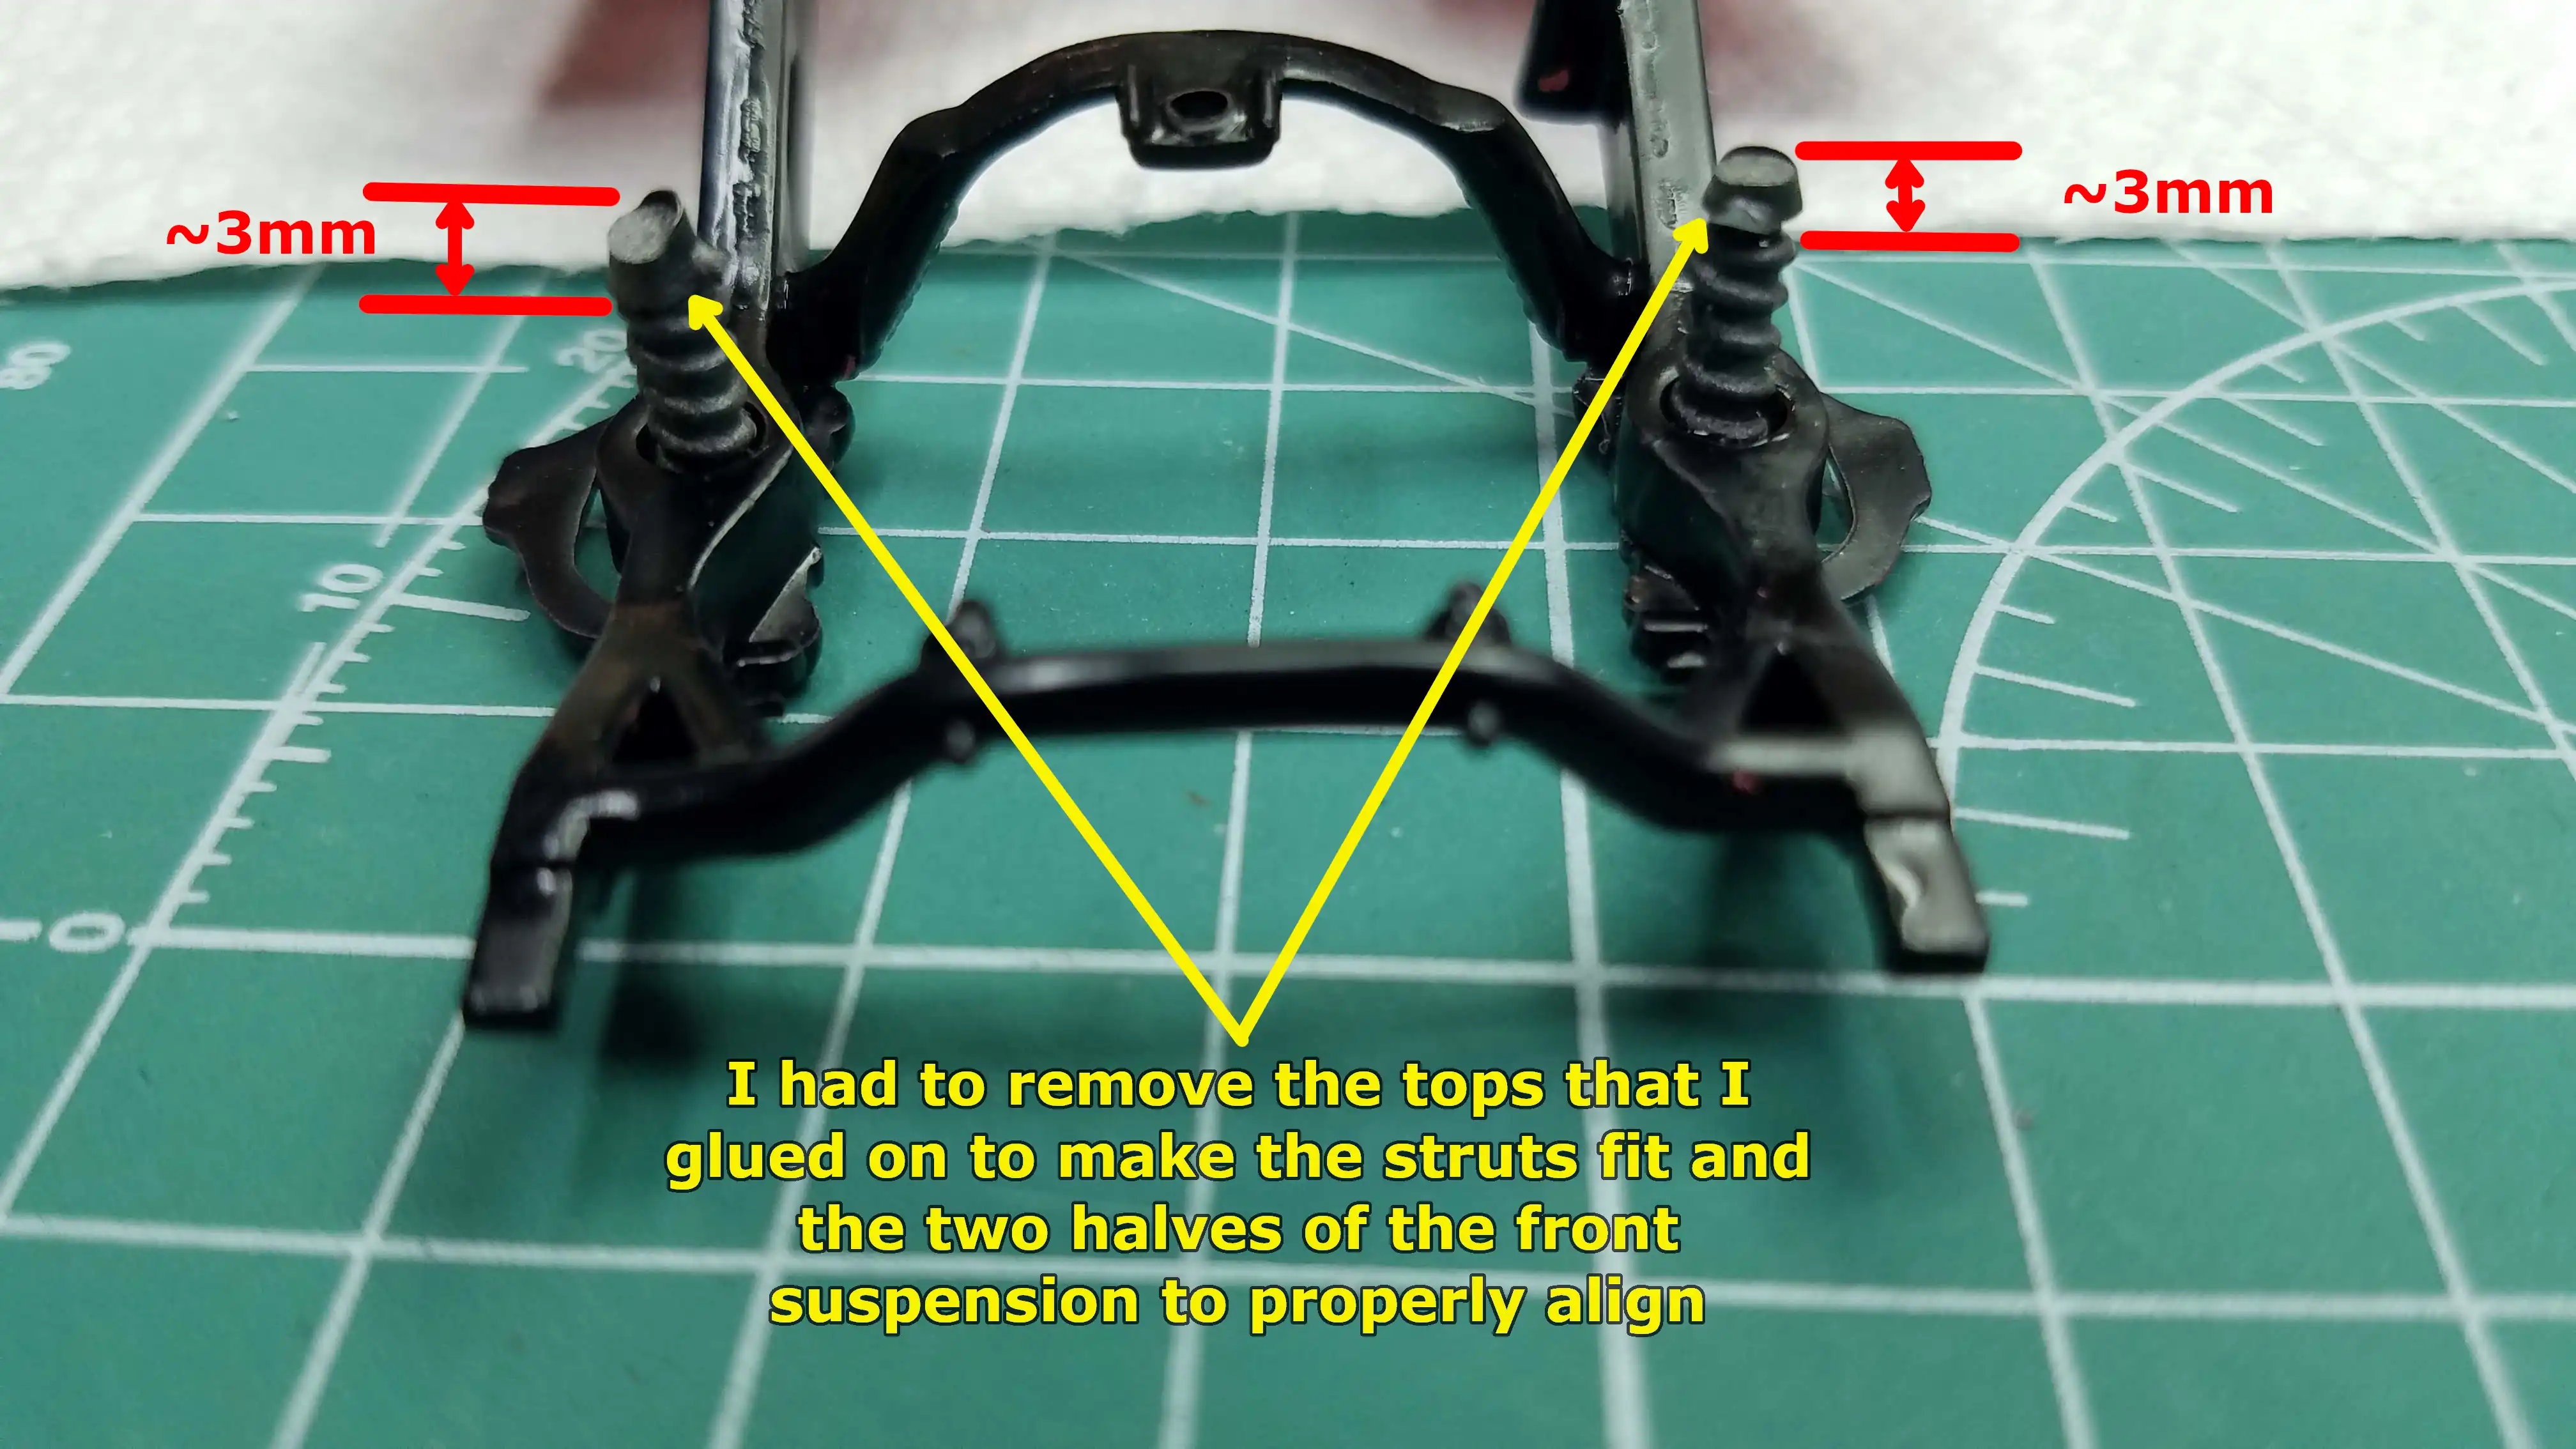
Click/tap photo to enlarge
 Modified shock/springs that did not work as planned
This photo shows the struts installed in the lower mounting cup and the fake eyelets installed in a horizontal position on top of the struts. Unfortunately, it was still too long and the other half of the front suspension still did not fit properly.
I ended up having to remove the fake eyelets I had glued on and not use any gap filler. I glued the struts into the frame mounting cups and then installed the other piece of the front suspension. The front suspension pieces now fit well. With the struts glued into the frame mounting cup as shown here and the pieces I had glued on removed, the gap between the other suspension piece and its mounting cup was still present; however, it can not be seen.
Photo 018
Click/tap photo to enlarge
 Shock/Springs installed in the front suspension
This photo shows the front suspension with the struts installed and also showing that the small gap that is present cannot be seen.
Photo 019
Click/tap photo to enlarge
 Rear suspension installed
The rear suspension, shocks and drive shaft are installed.
Photo 020
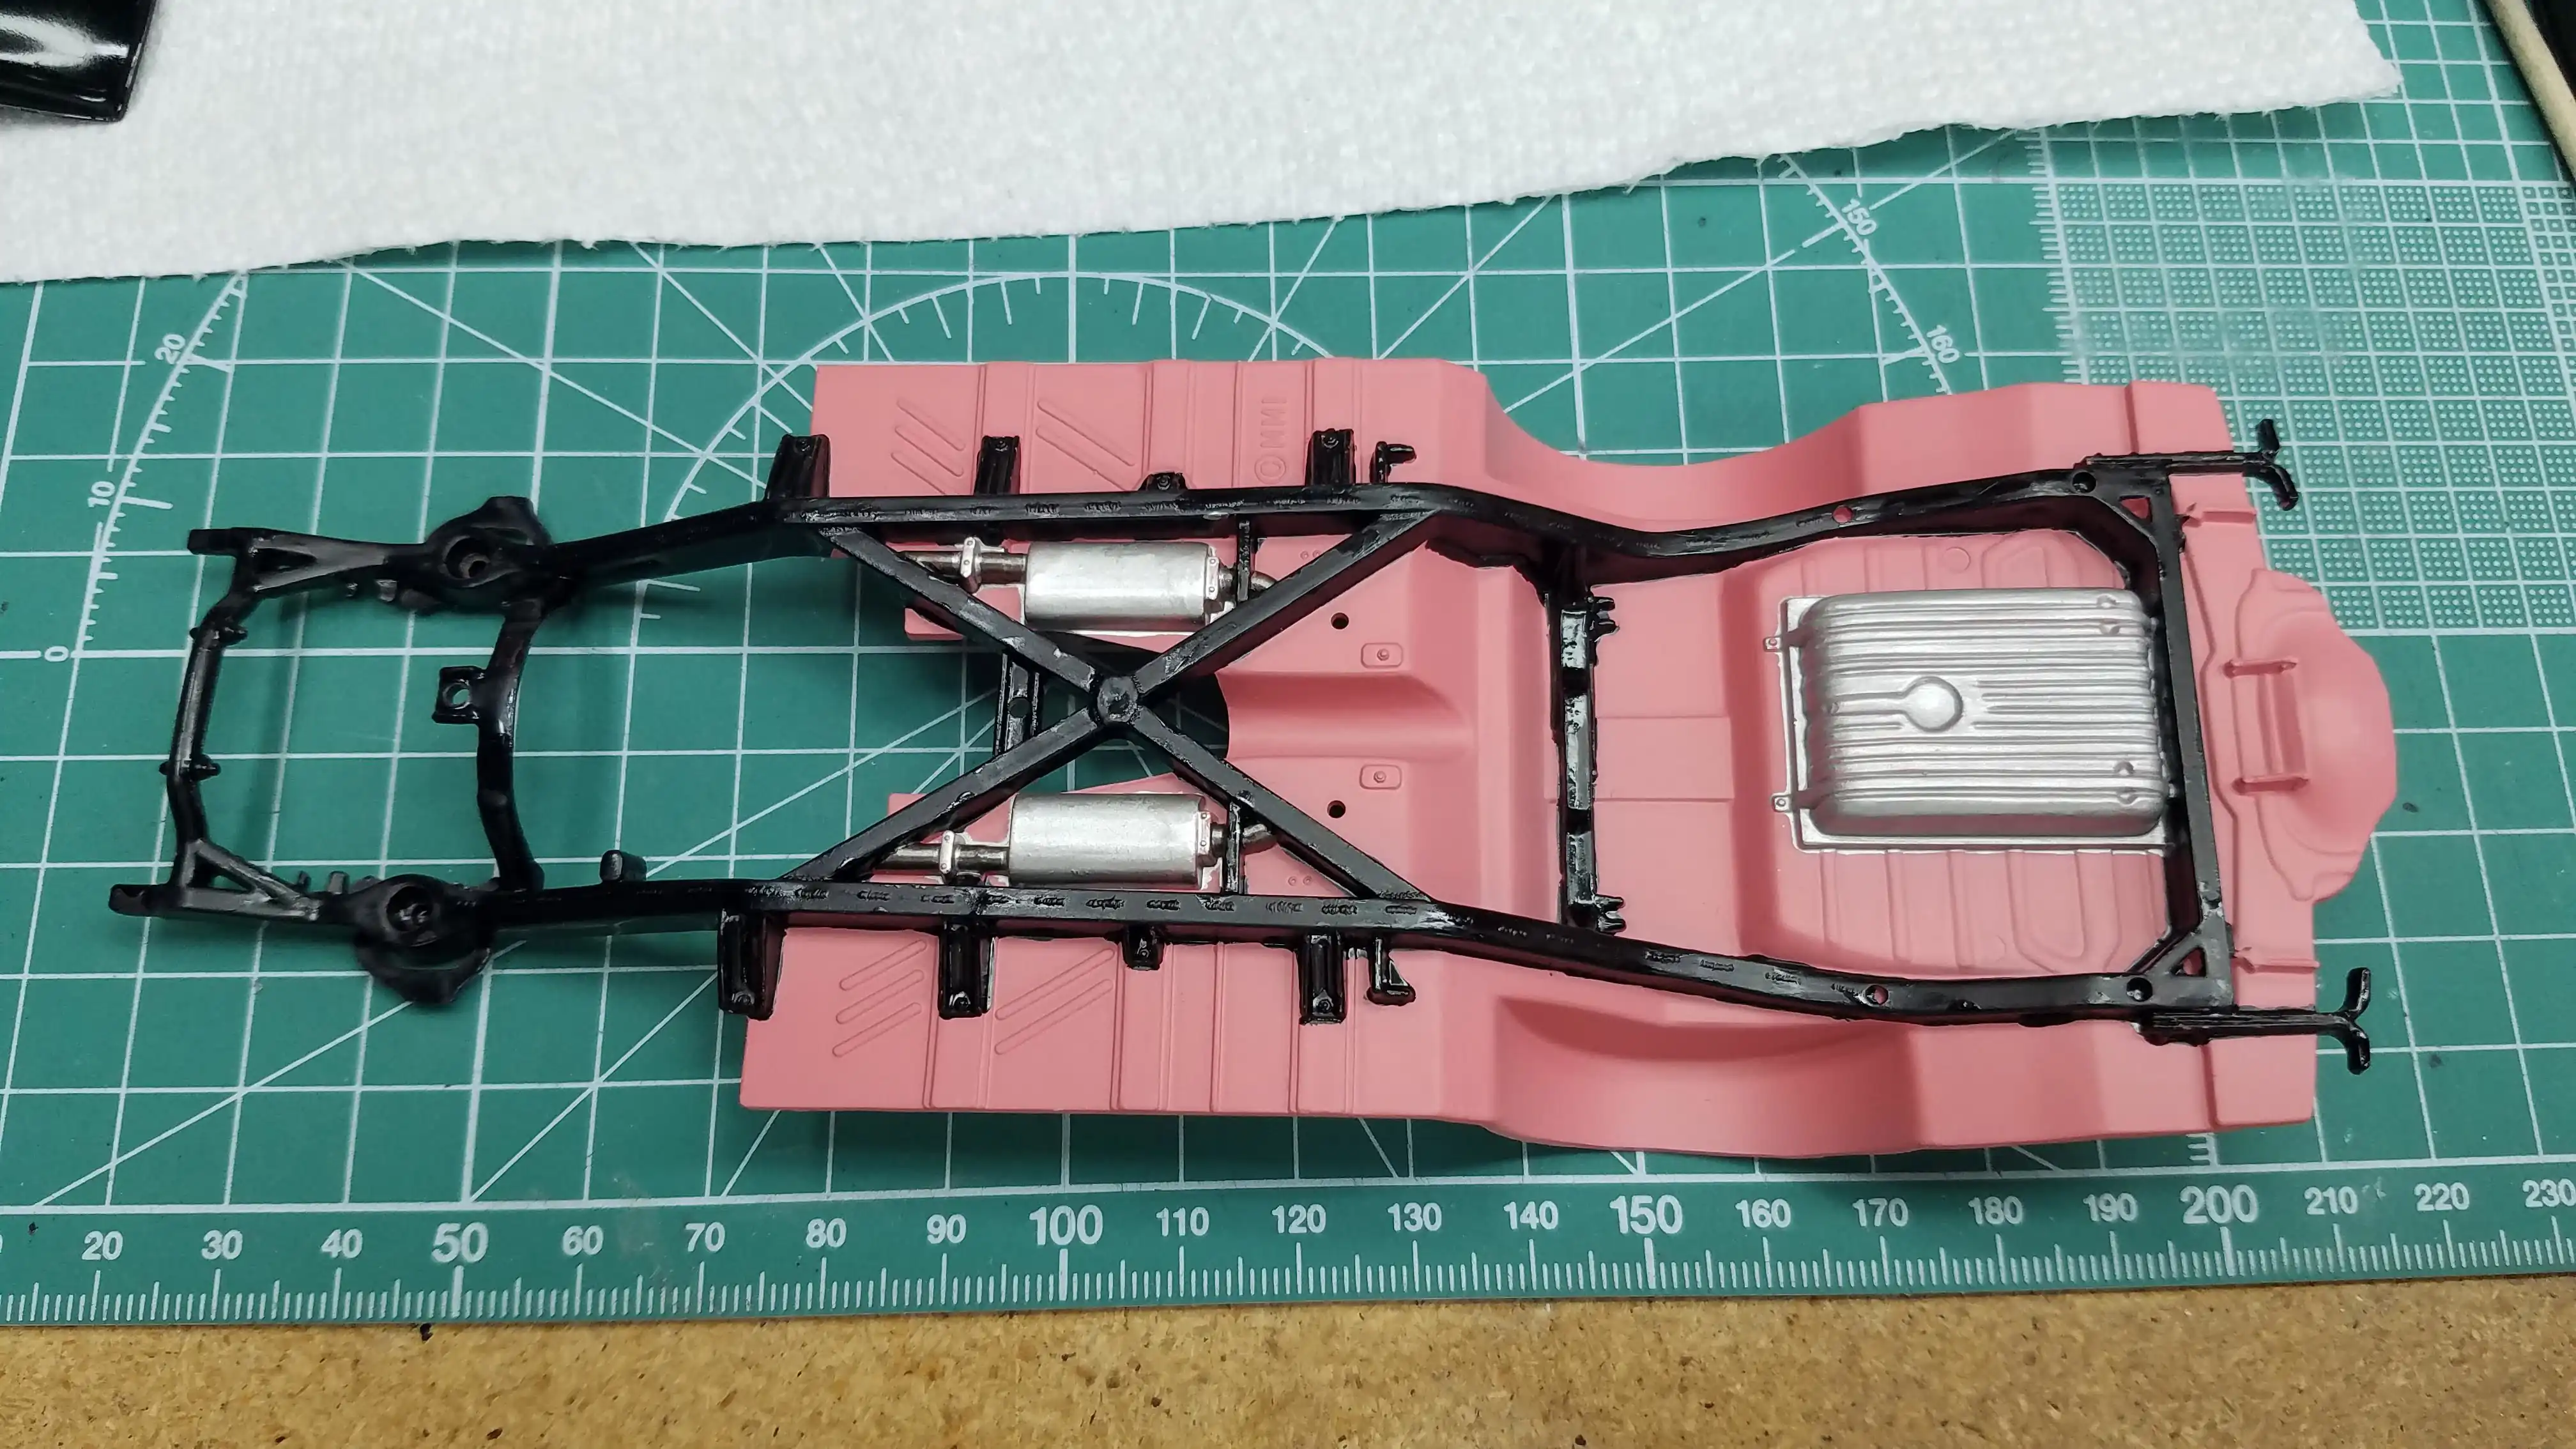
Click/tap photo to enlarge
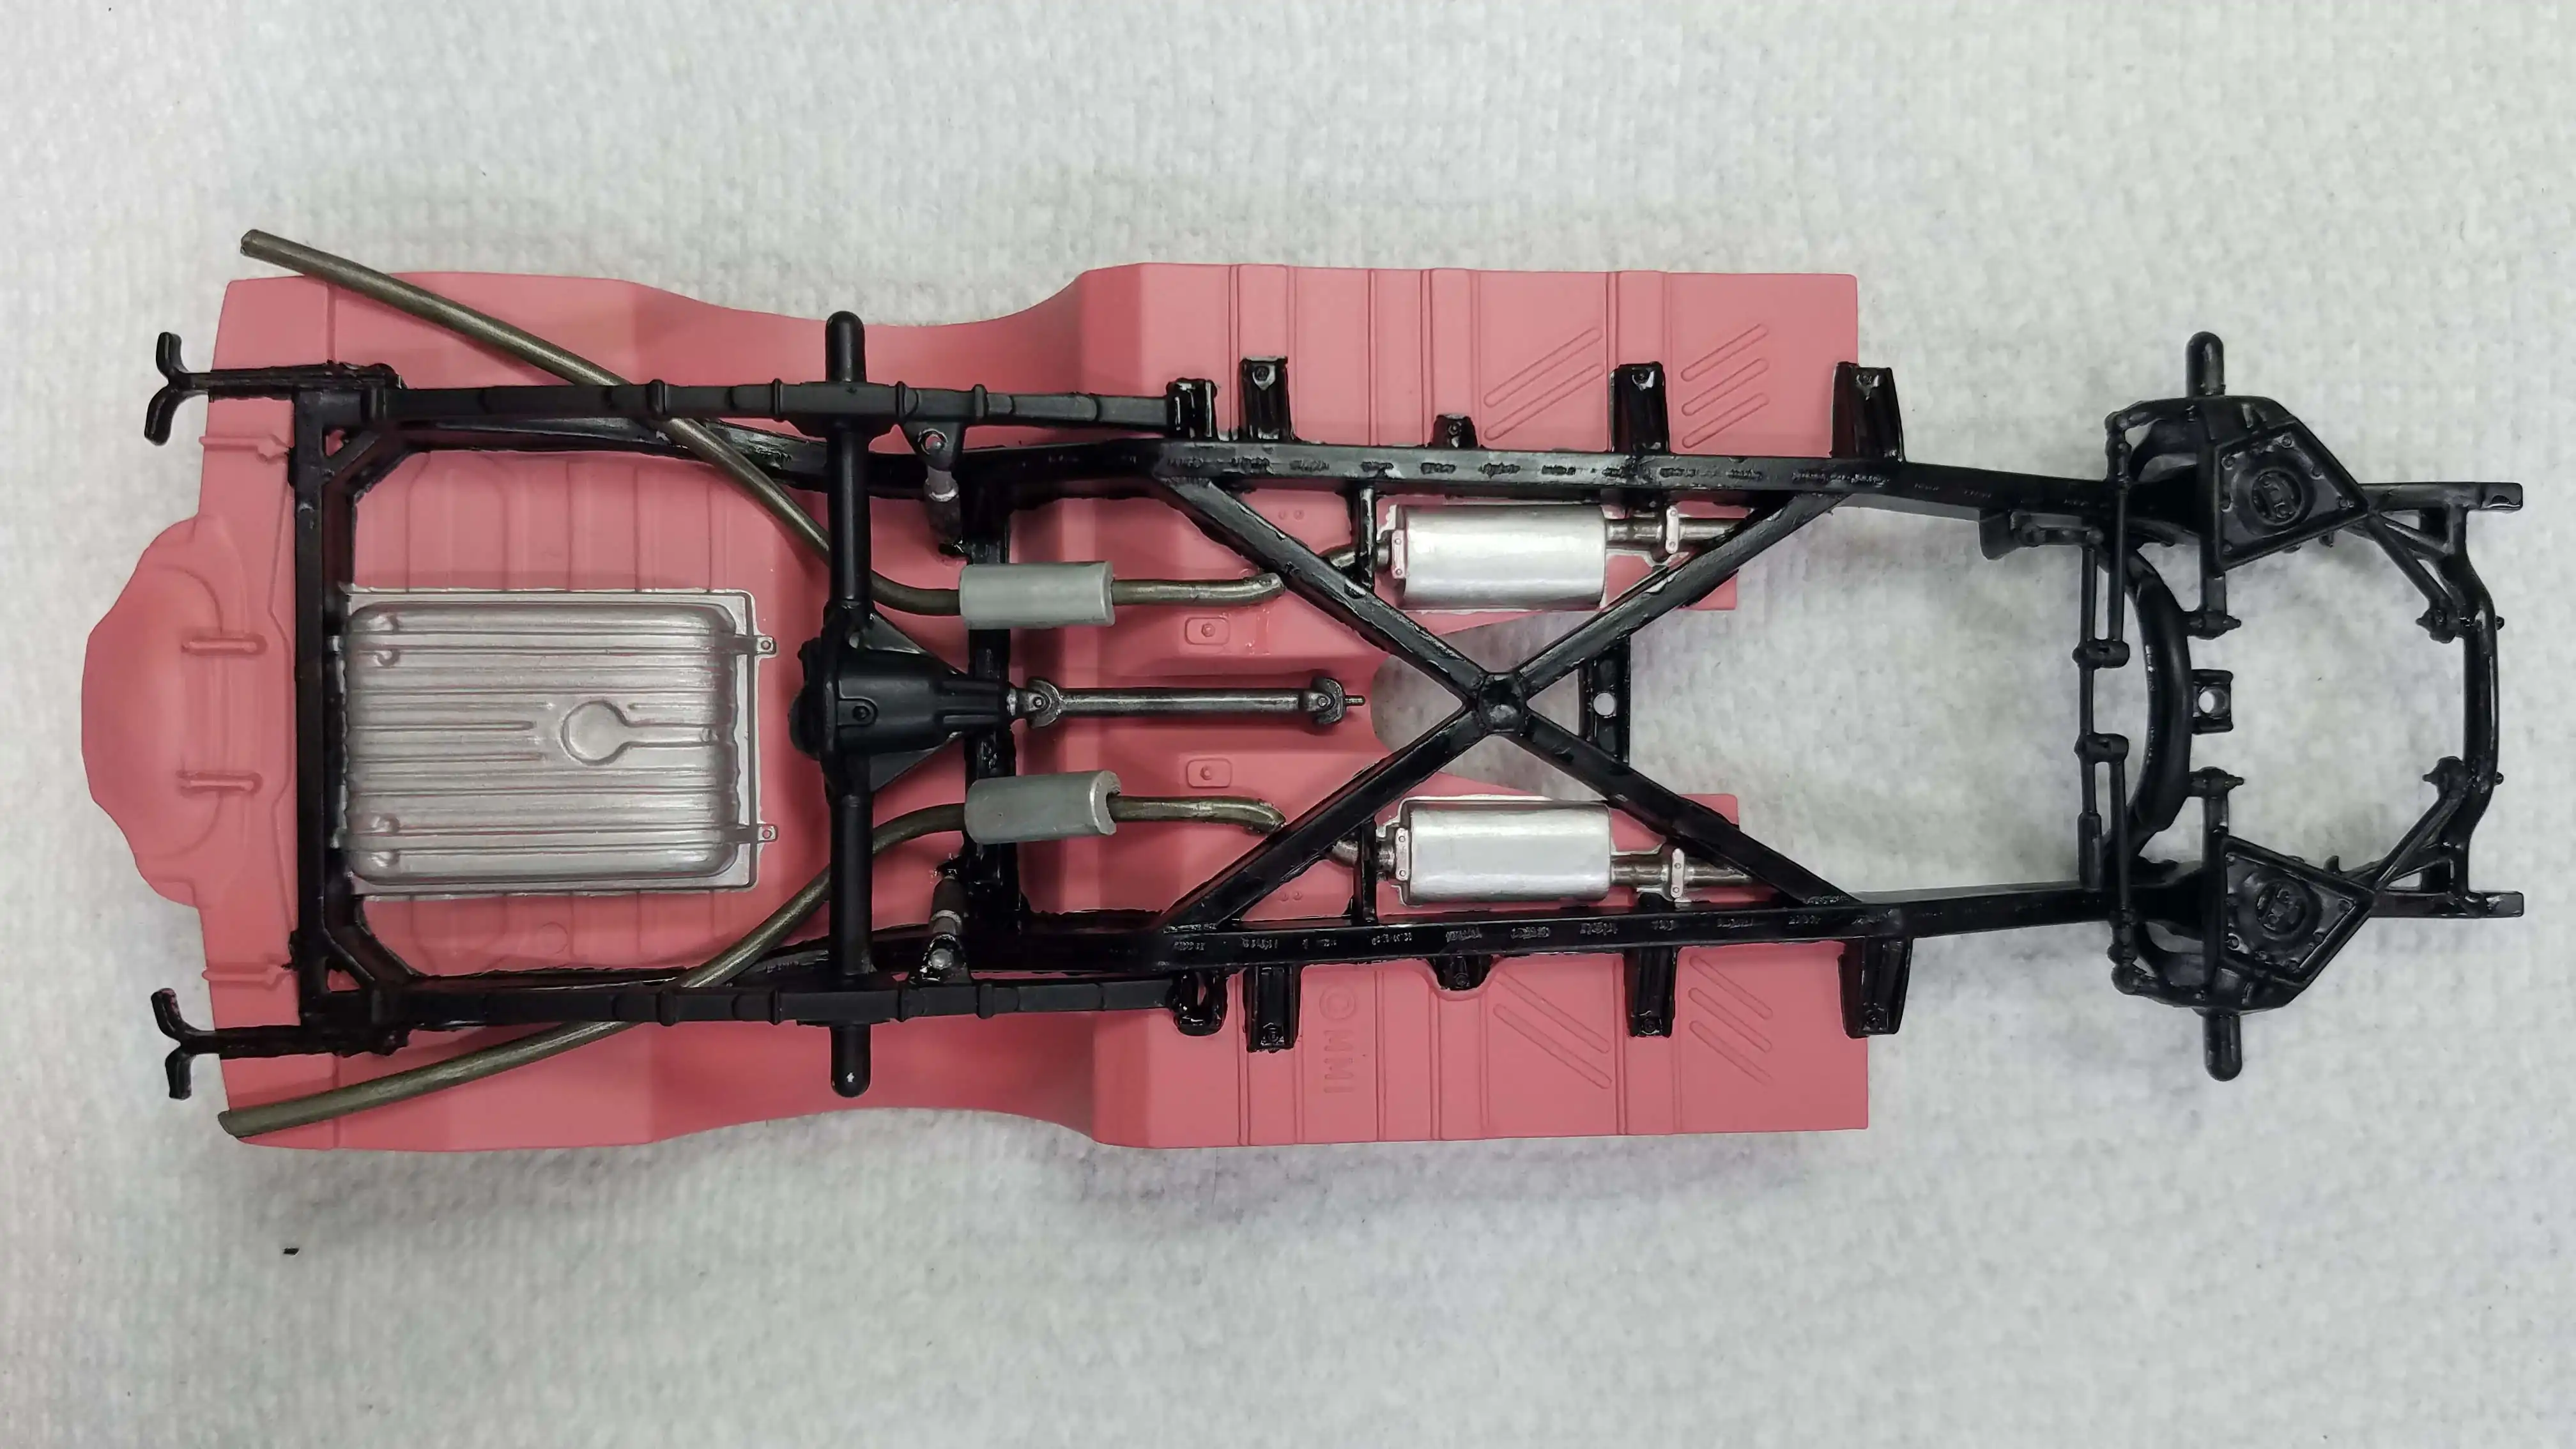
 Chassis, frame and floor pan are finished
The frame, front and rear suspension are installed, exhaust pipes, mufflers and resonators are installed. In other words, the frame, chassis and floor pan are finished.
Photo 021
Click/tap photo to enlarge
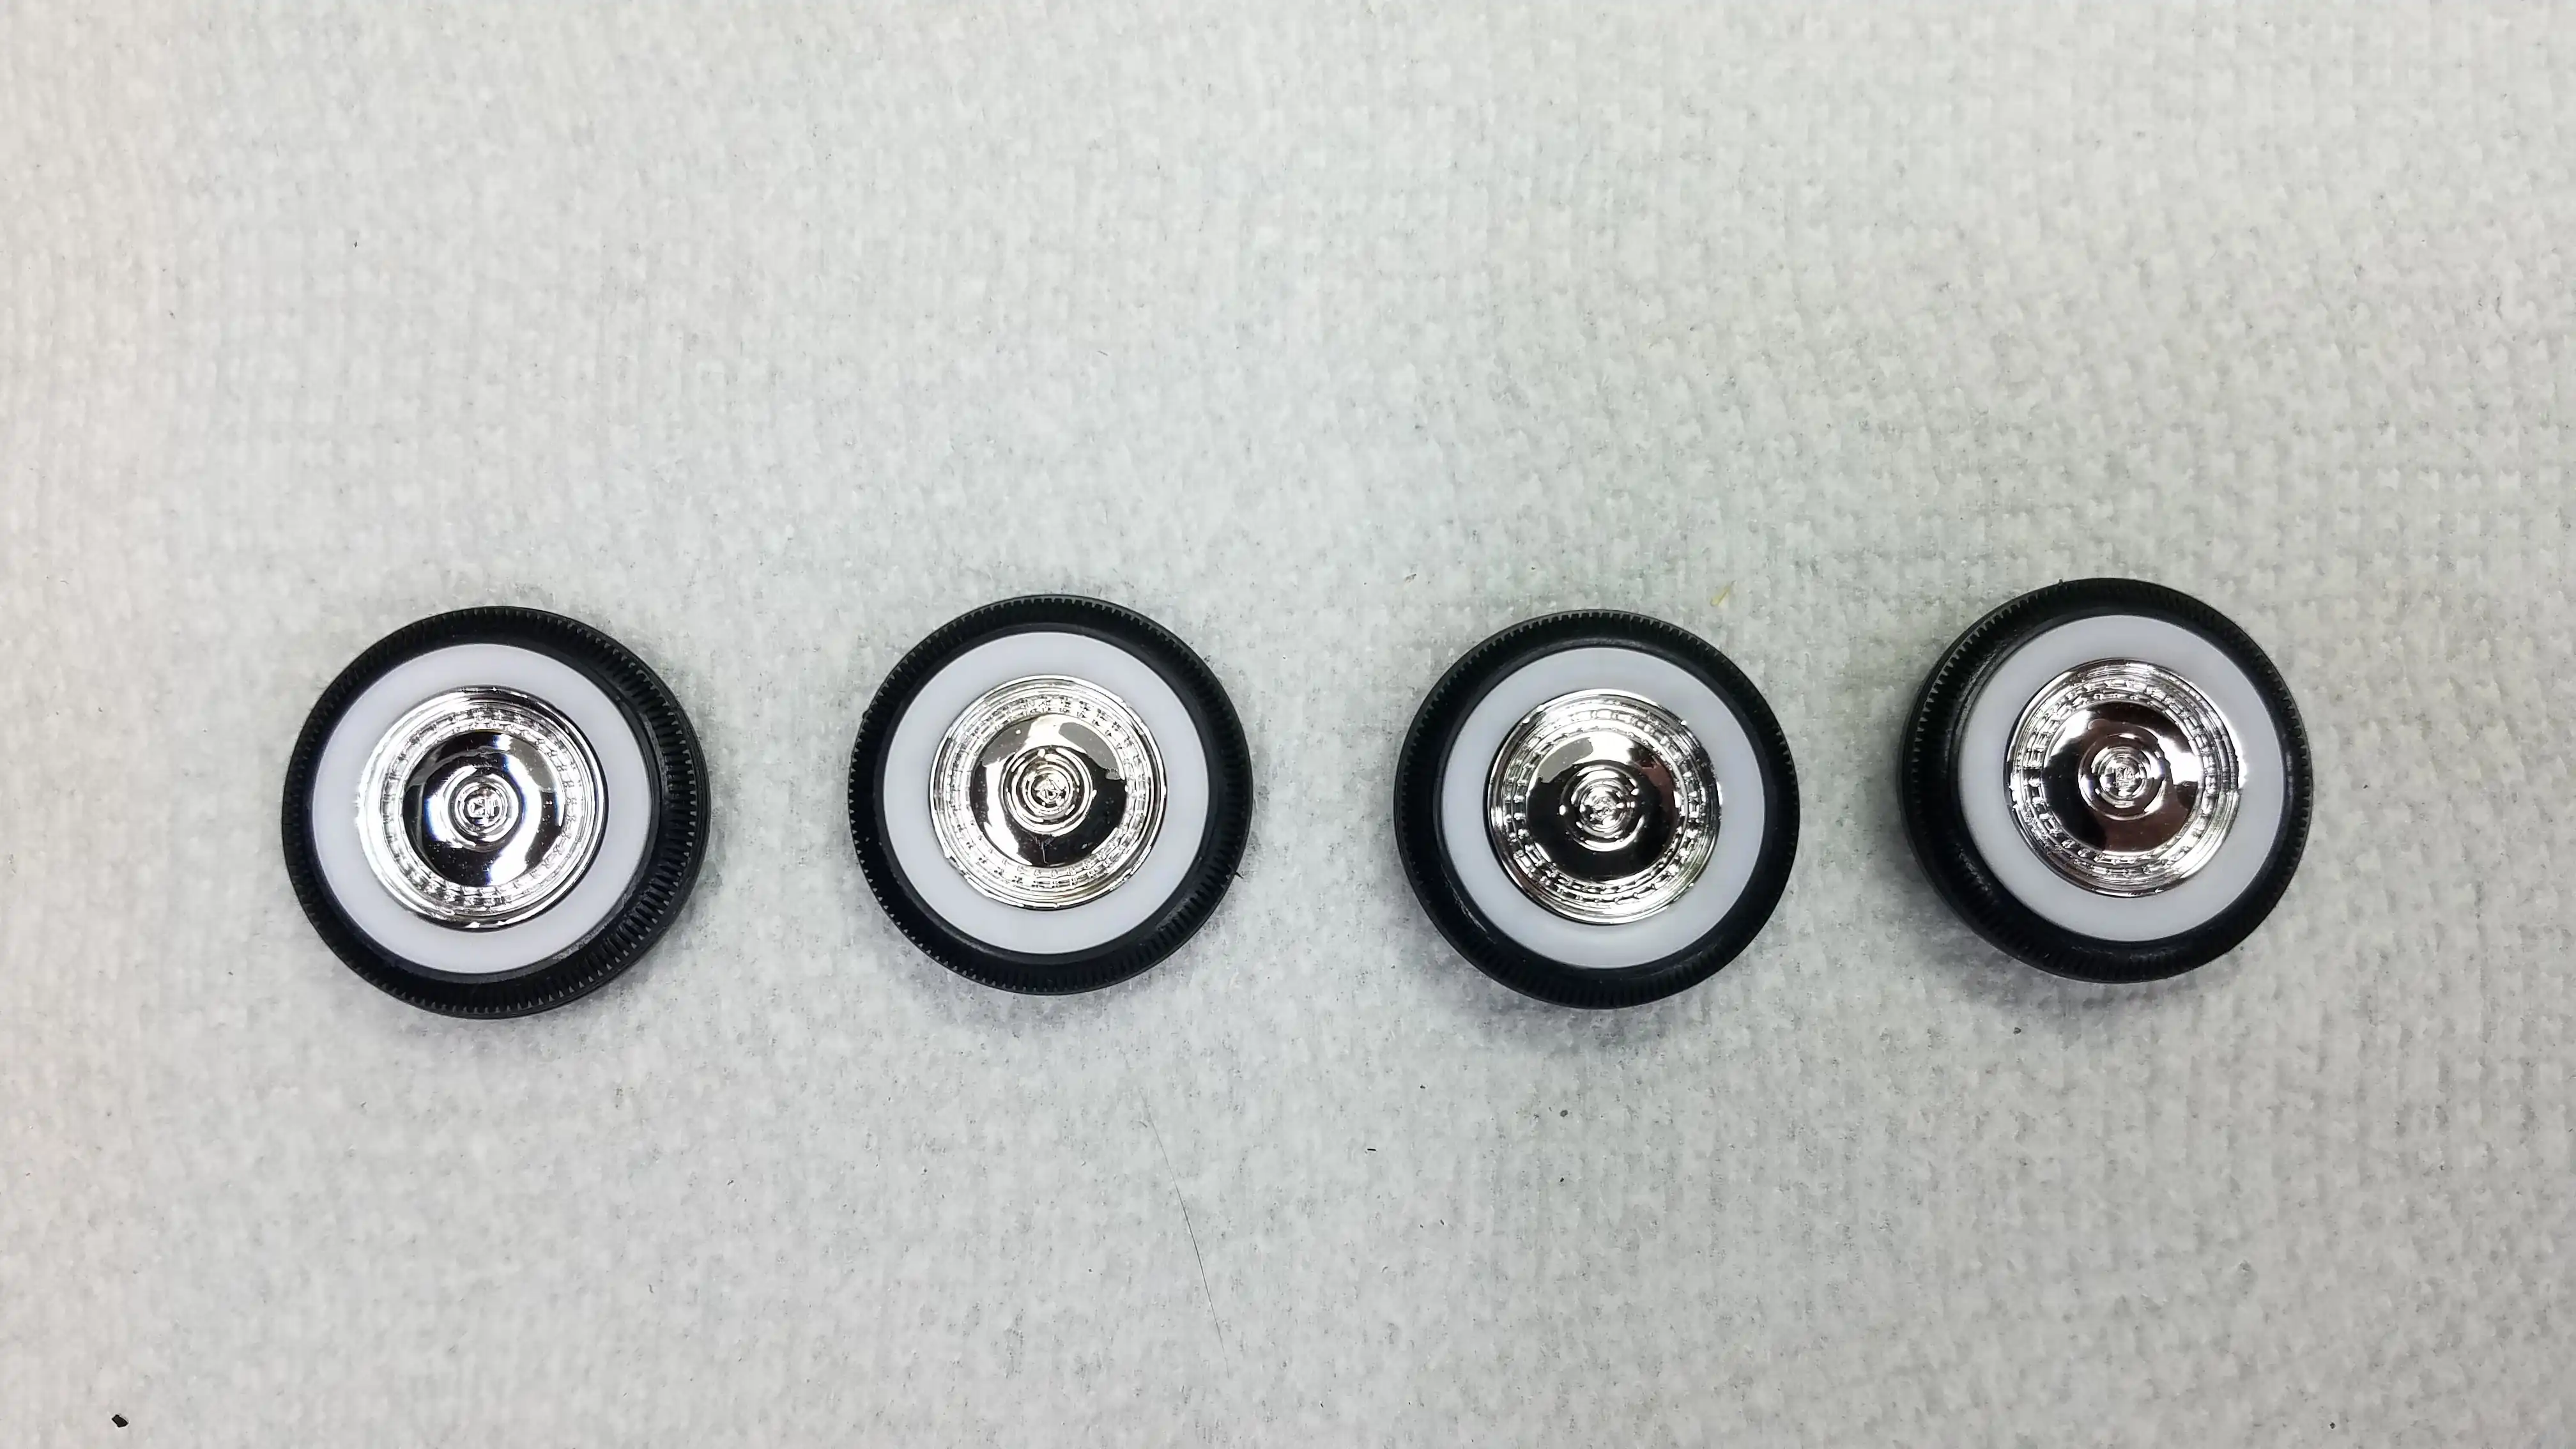
 Wheels and tires are assembled
The wheels, rims, tires and hub caps are assembled
Photo 022
Click/tap photo to enlarge
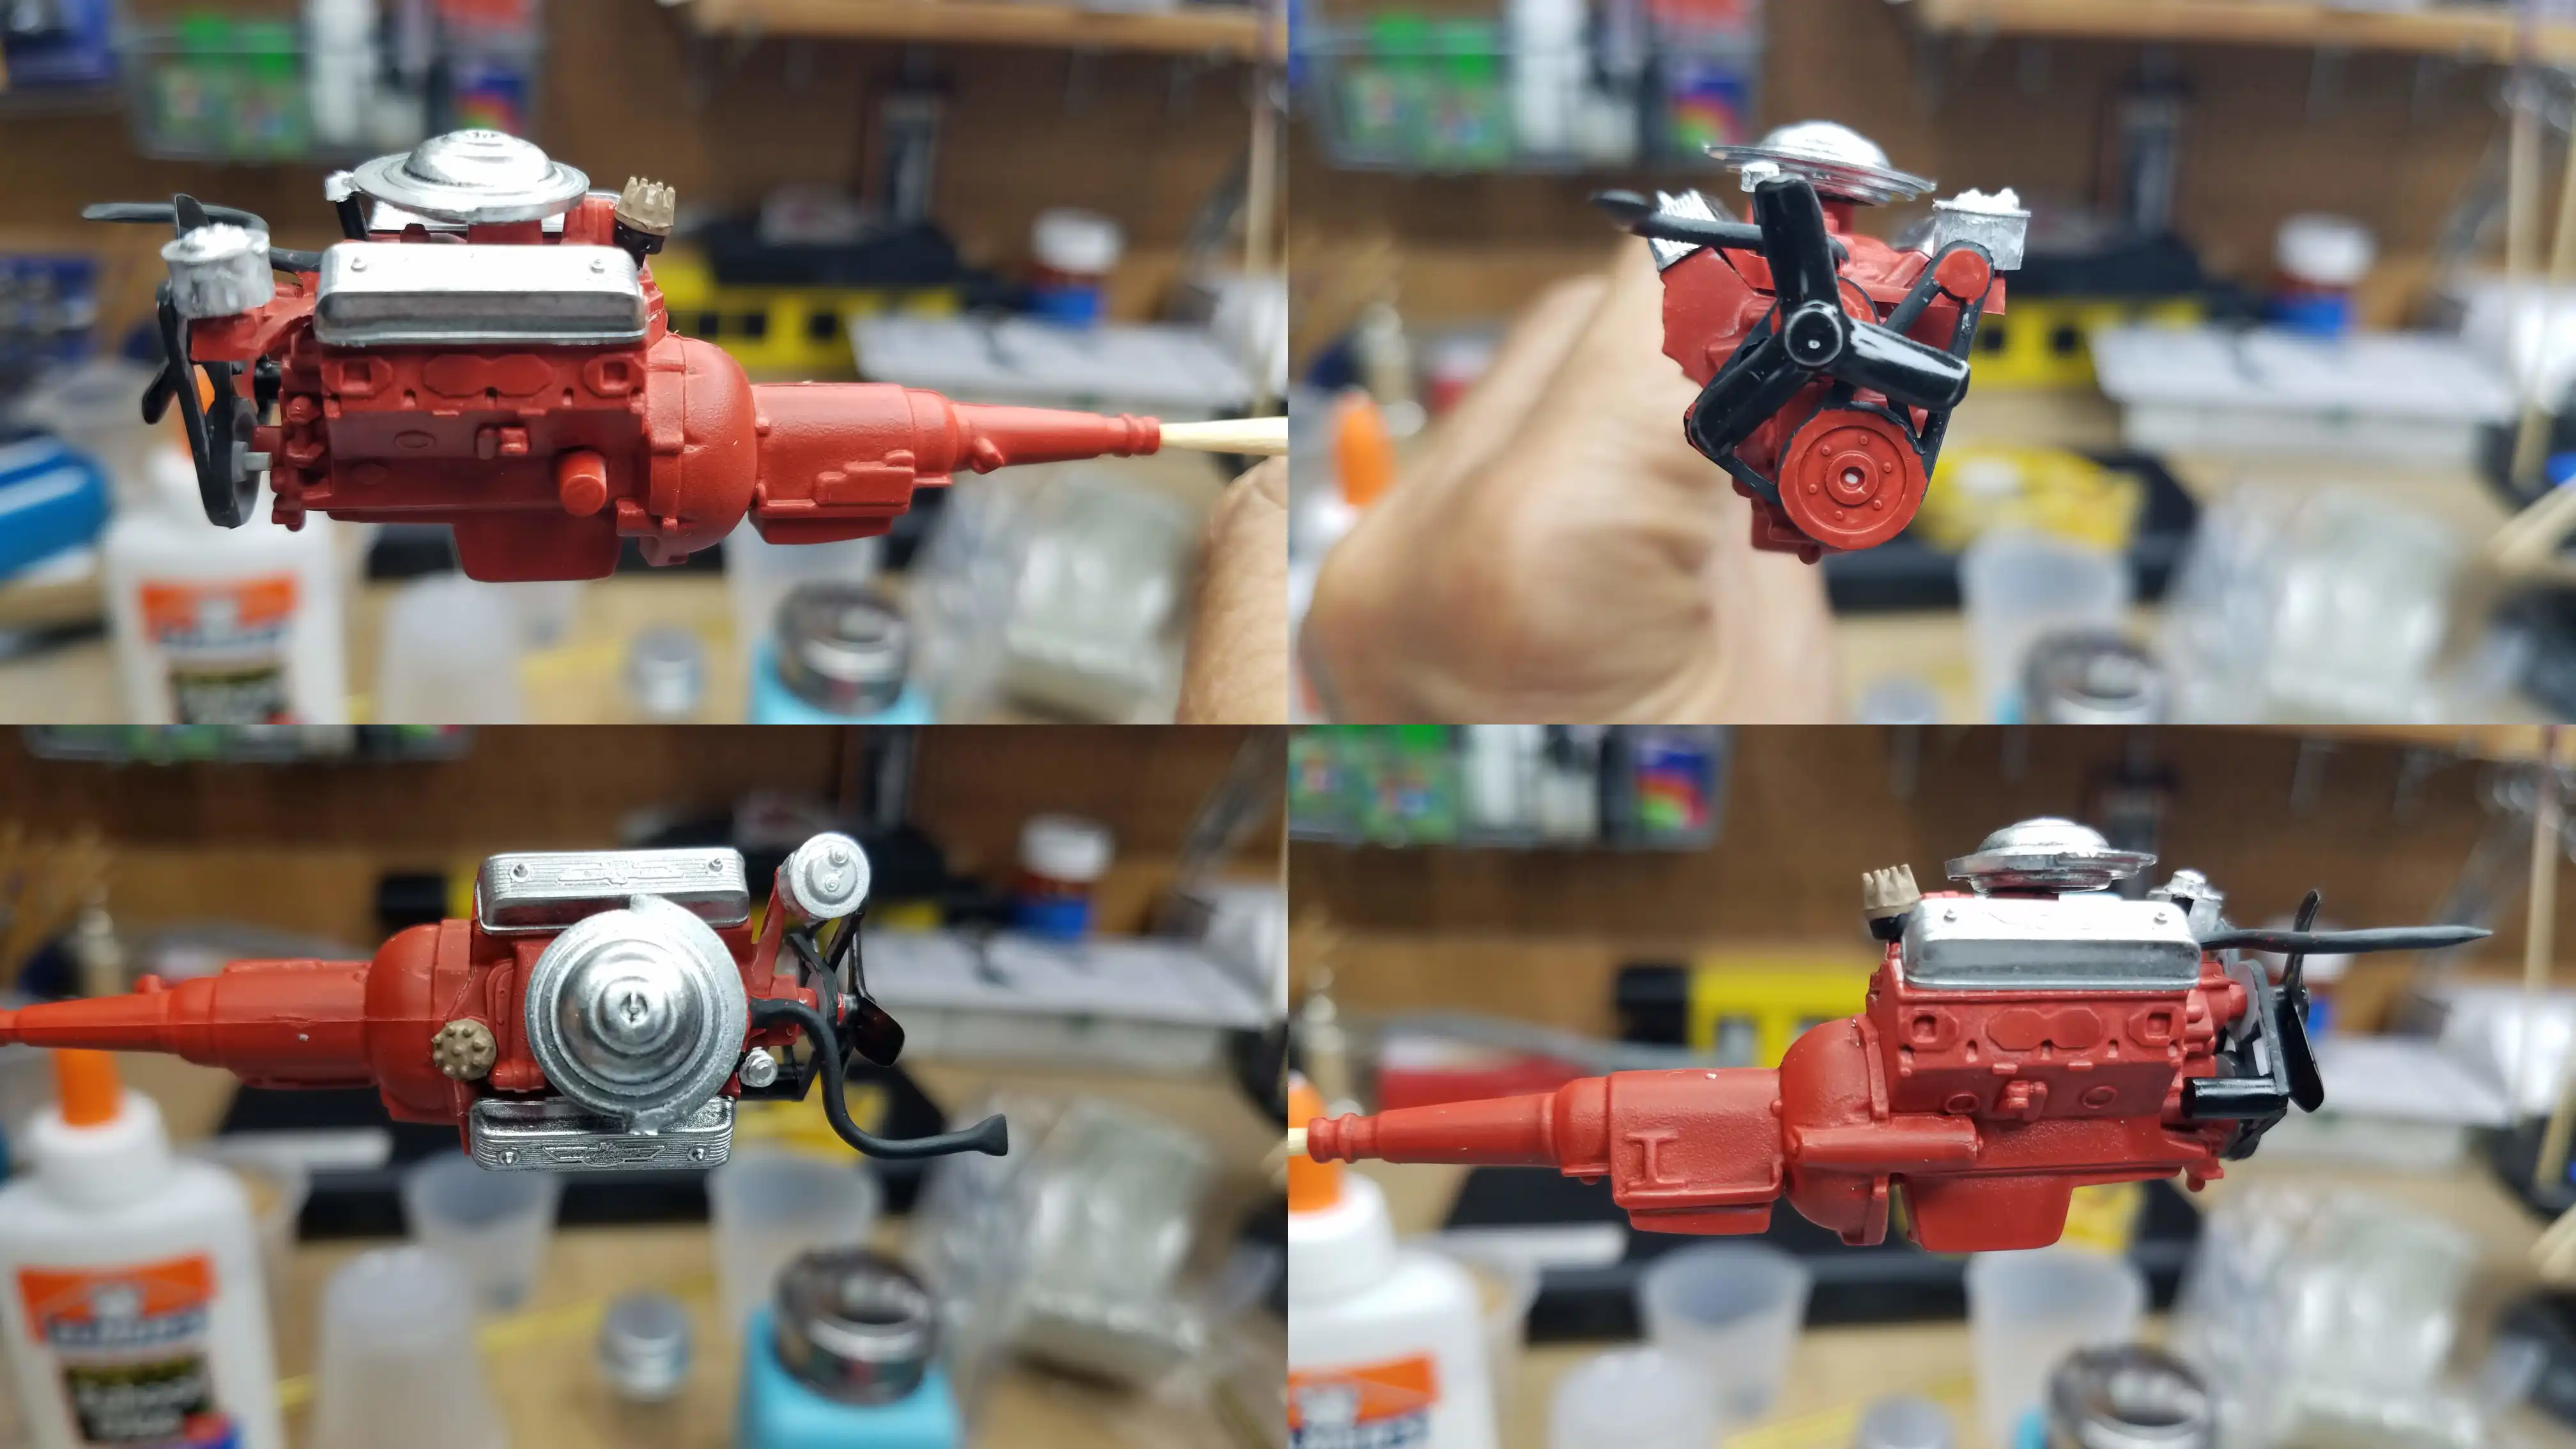
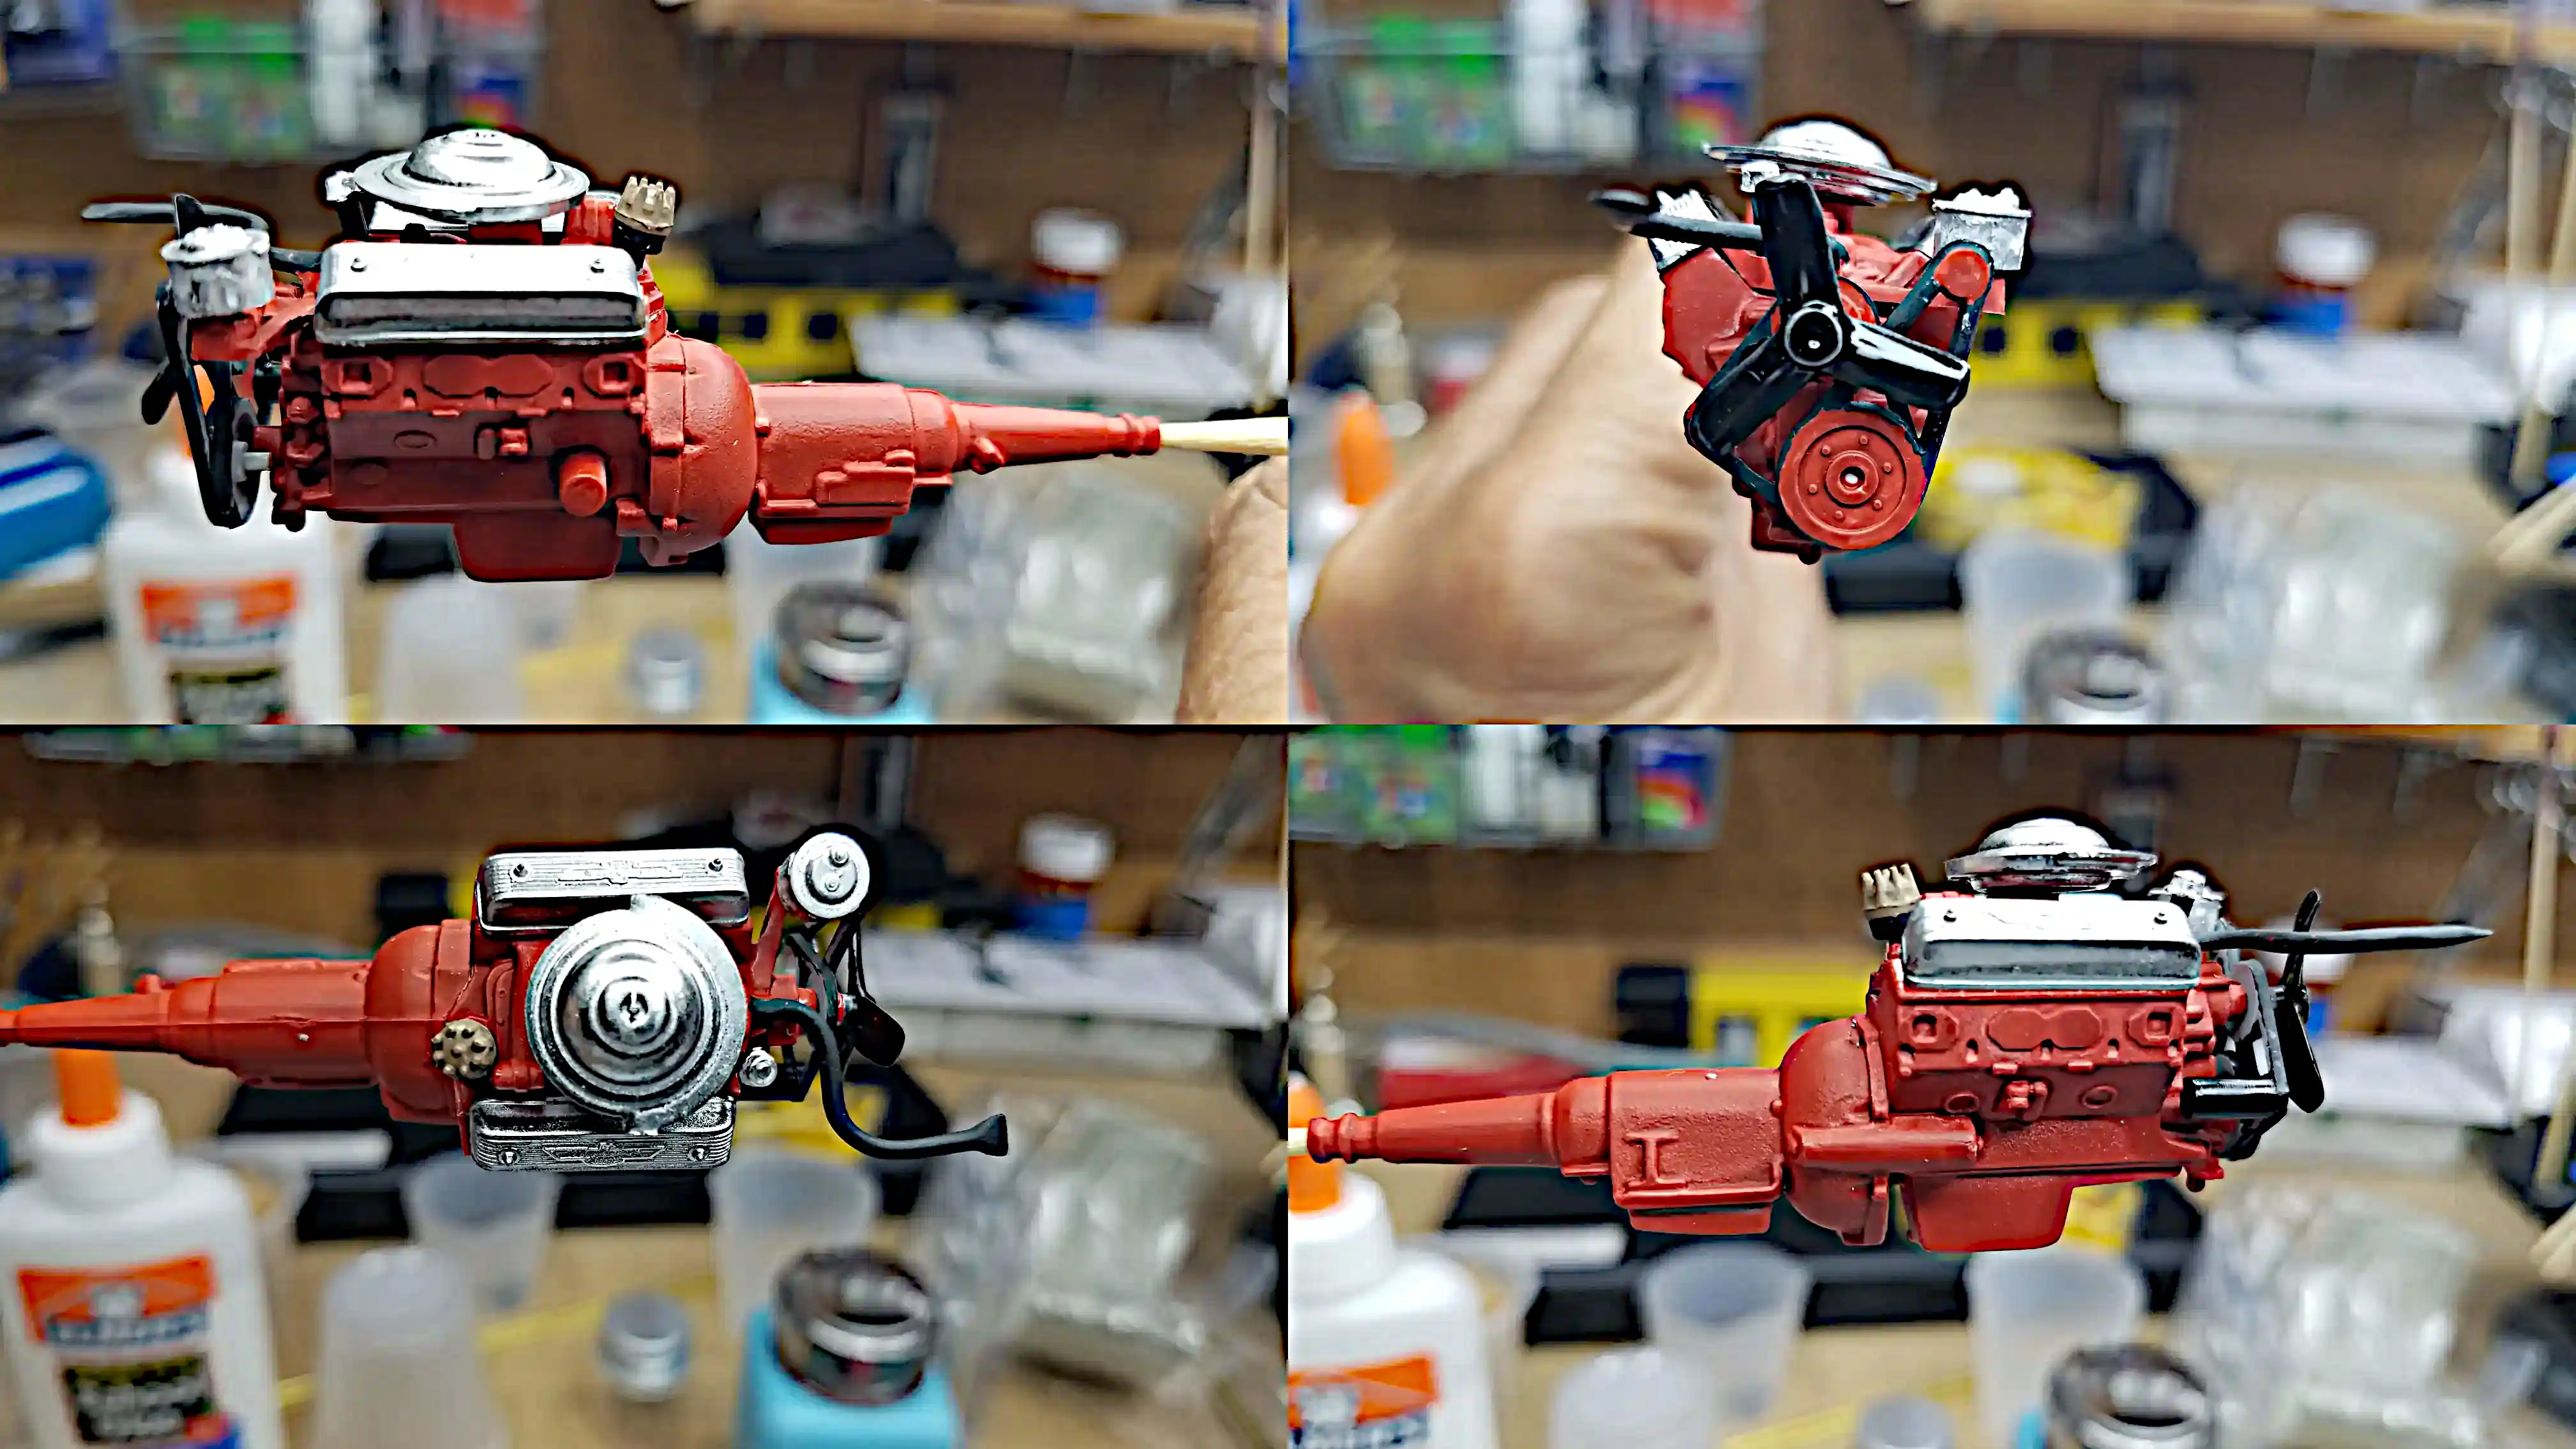 Four views of the almost completed engine
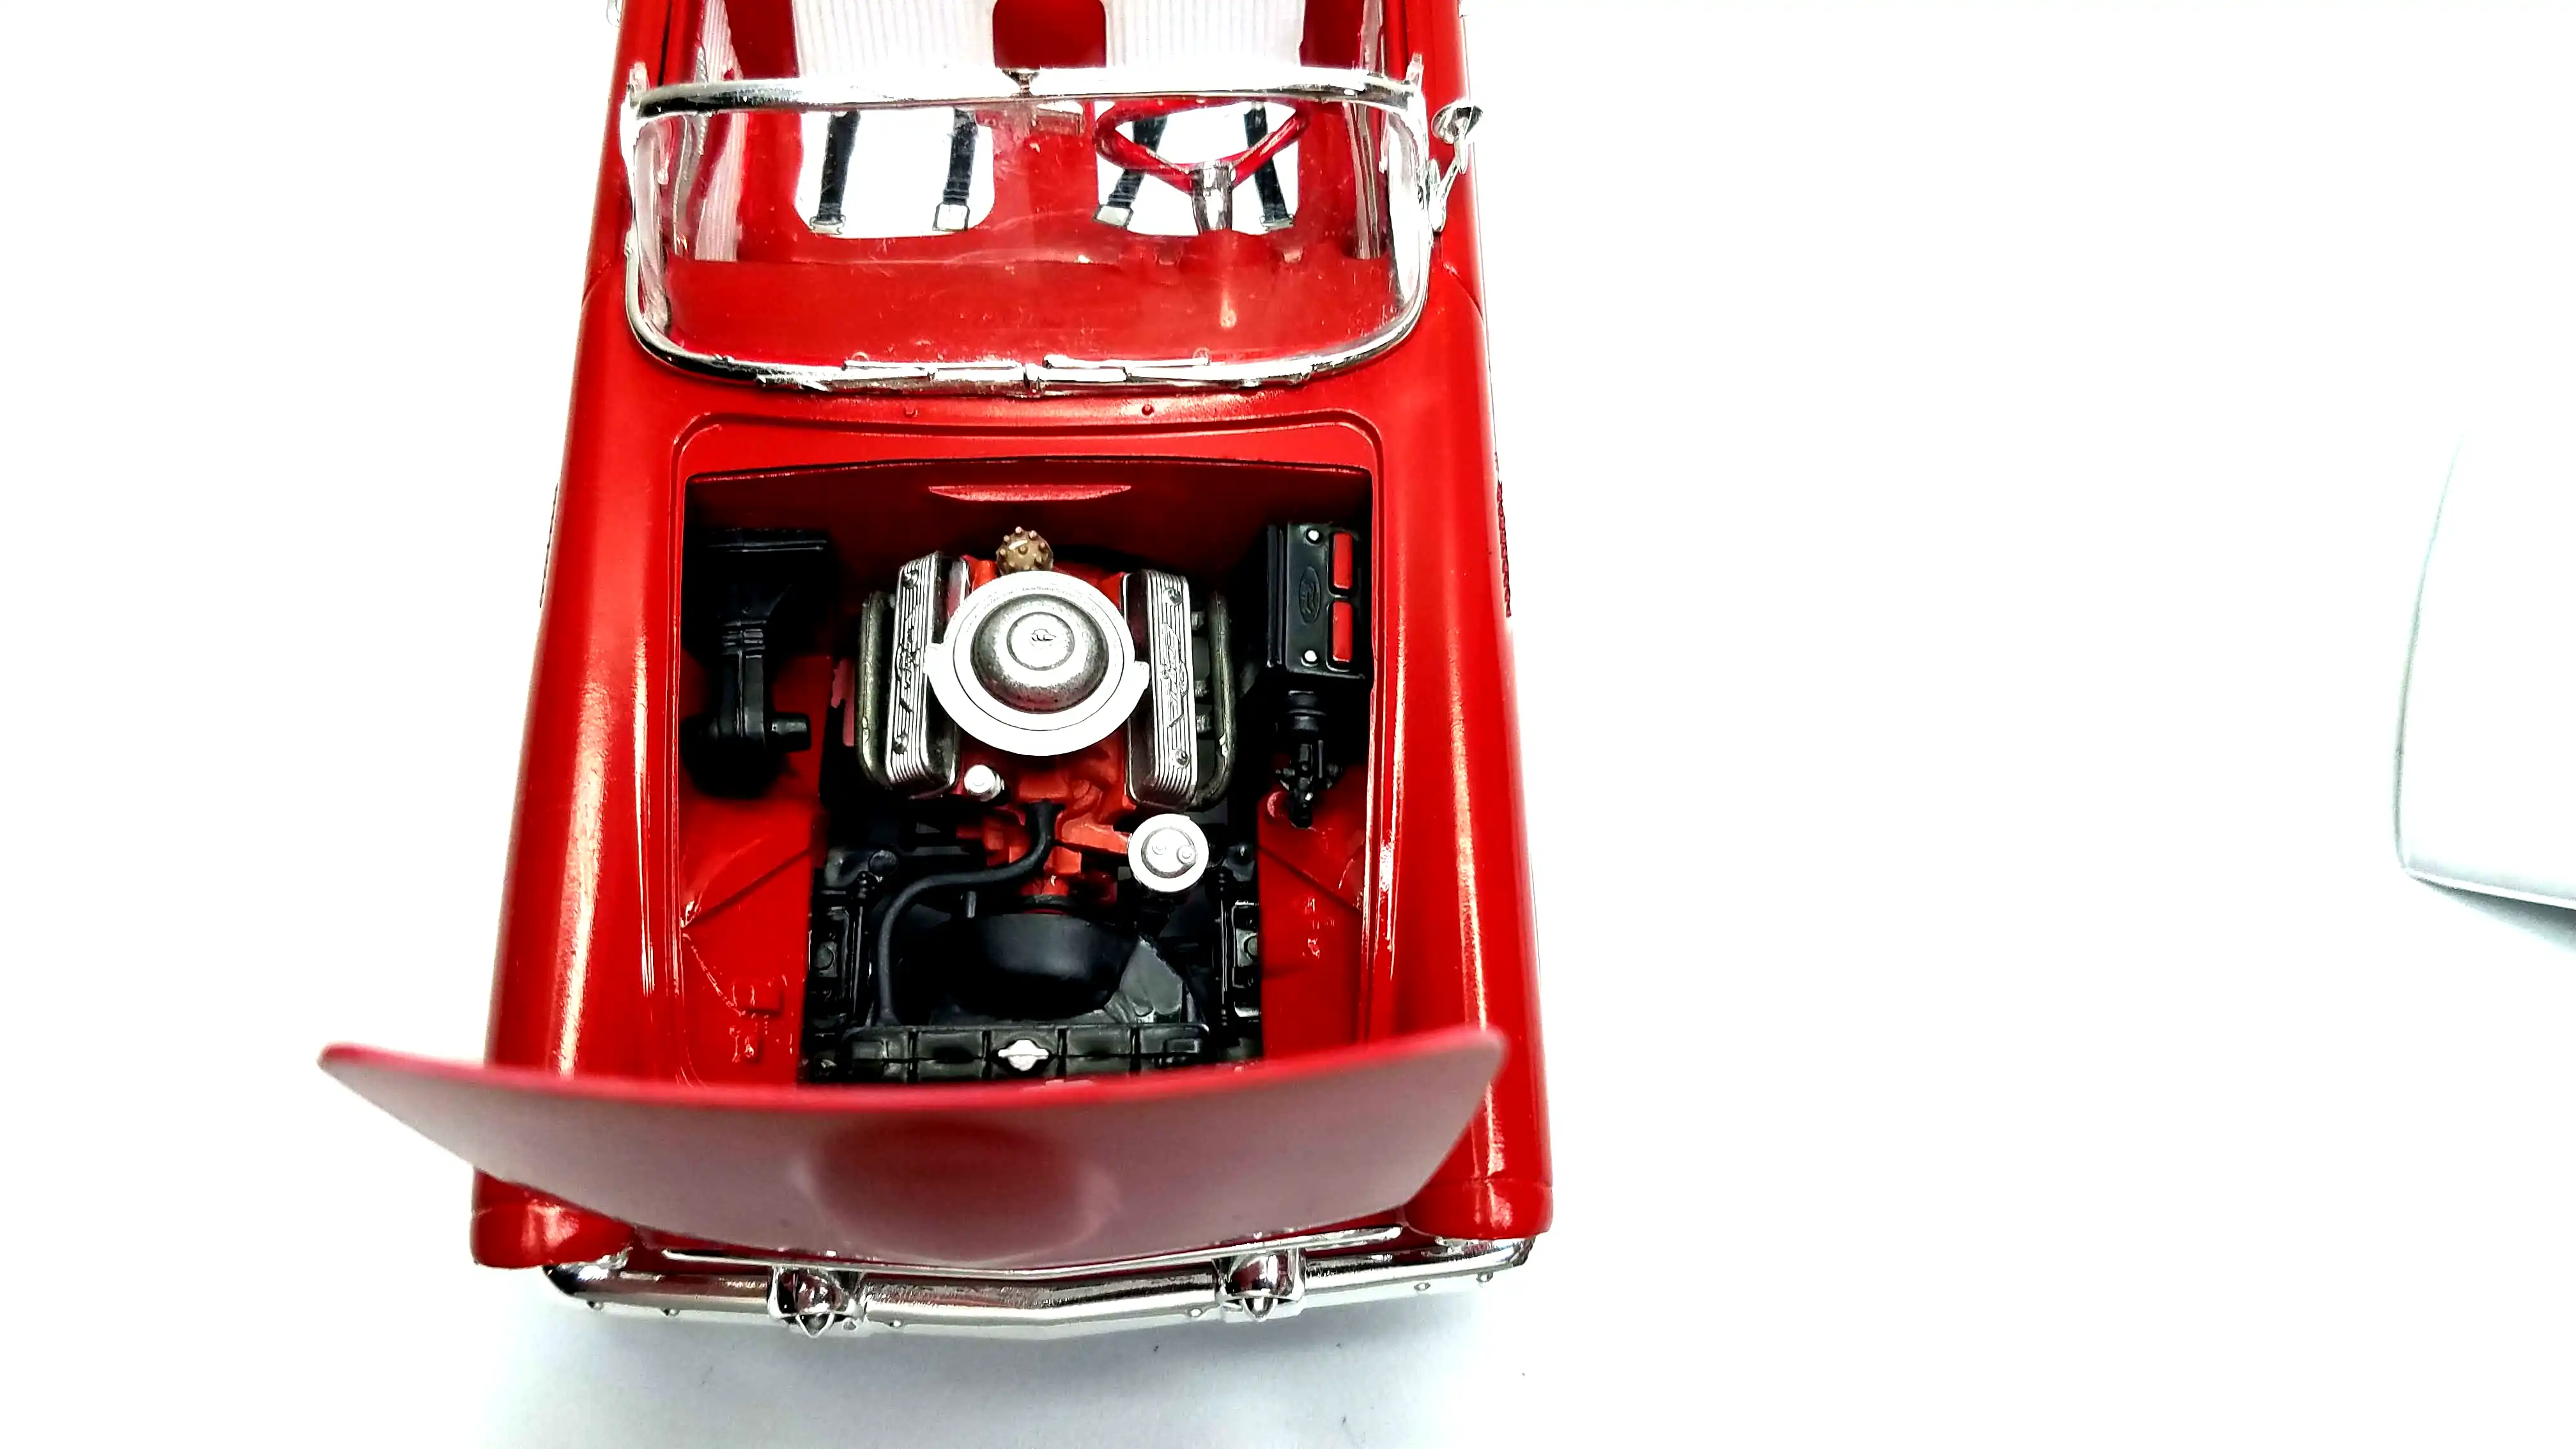
The Engine is built and ready to install. The exhaust manifolds will be added after the motor is in place in the chassis.
The instructions say to install the valve covers before installing the intake manifold; however, if that is done, the intake manifolds will be setting on top of the inner part of the valve covers, therefore, install the intake manifold first then install the valve covers. That makes for a much better fit.
Click the instruction sheet images for Steps 2 and 3 to enlarge them.


Photo 023
Click/tap photo to enlarge
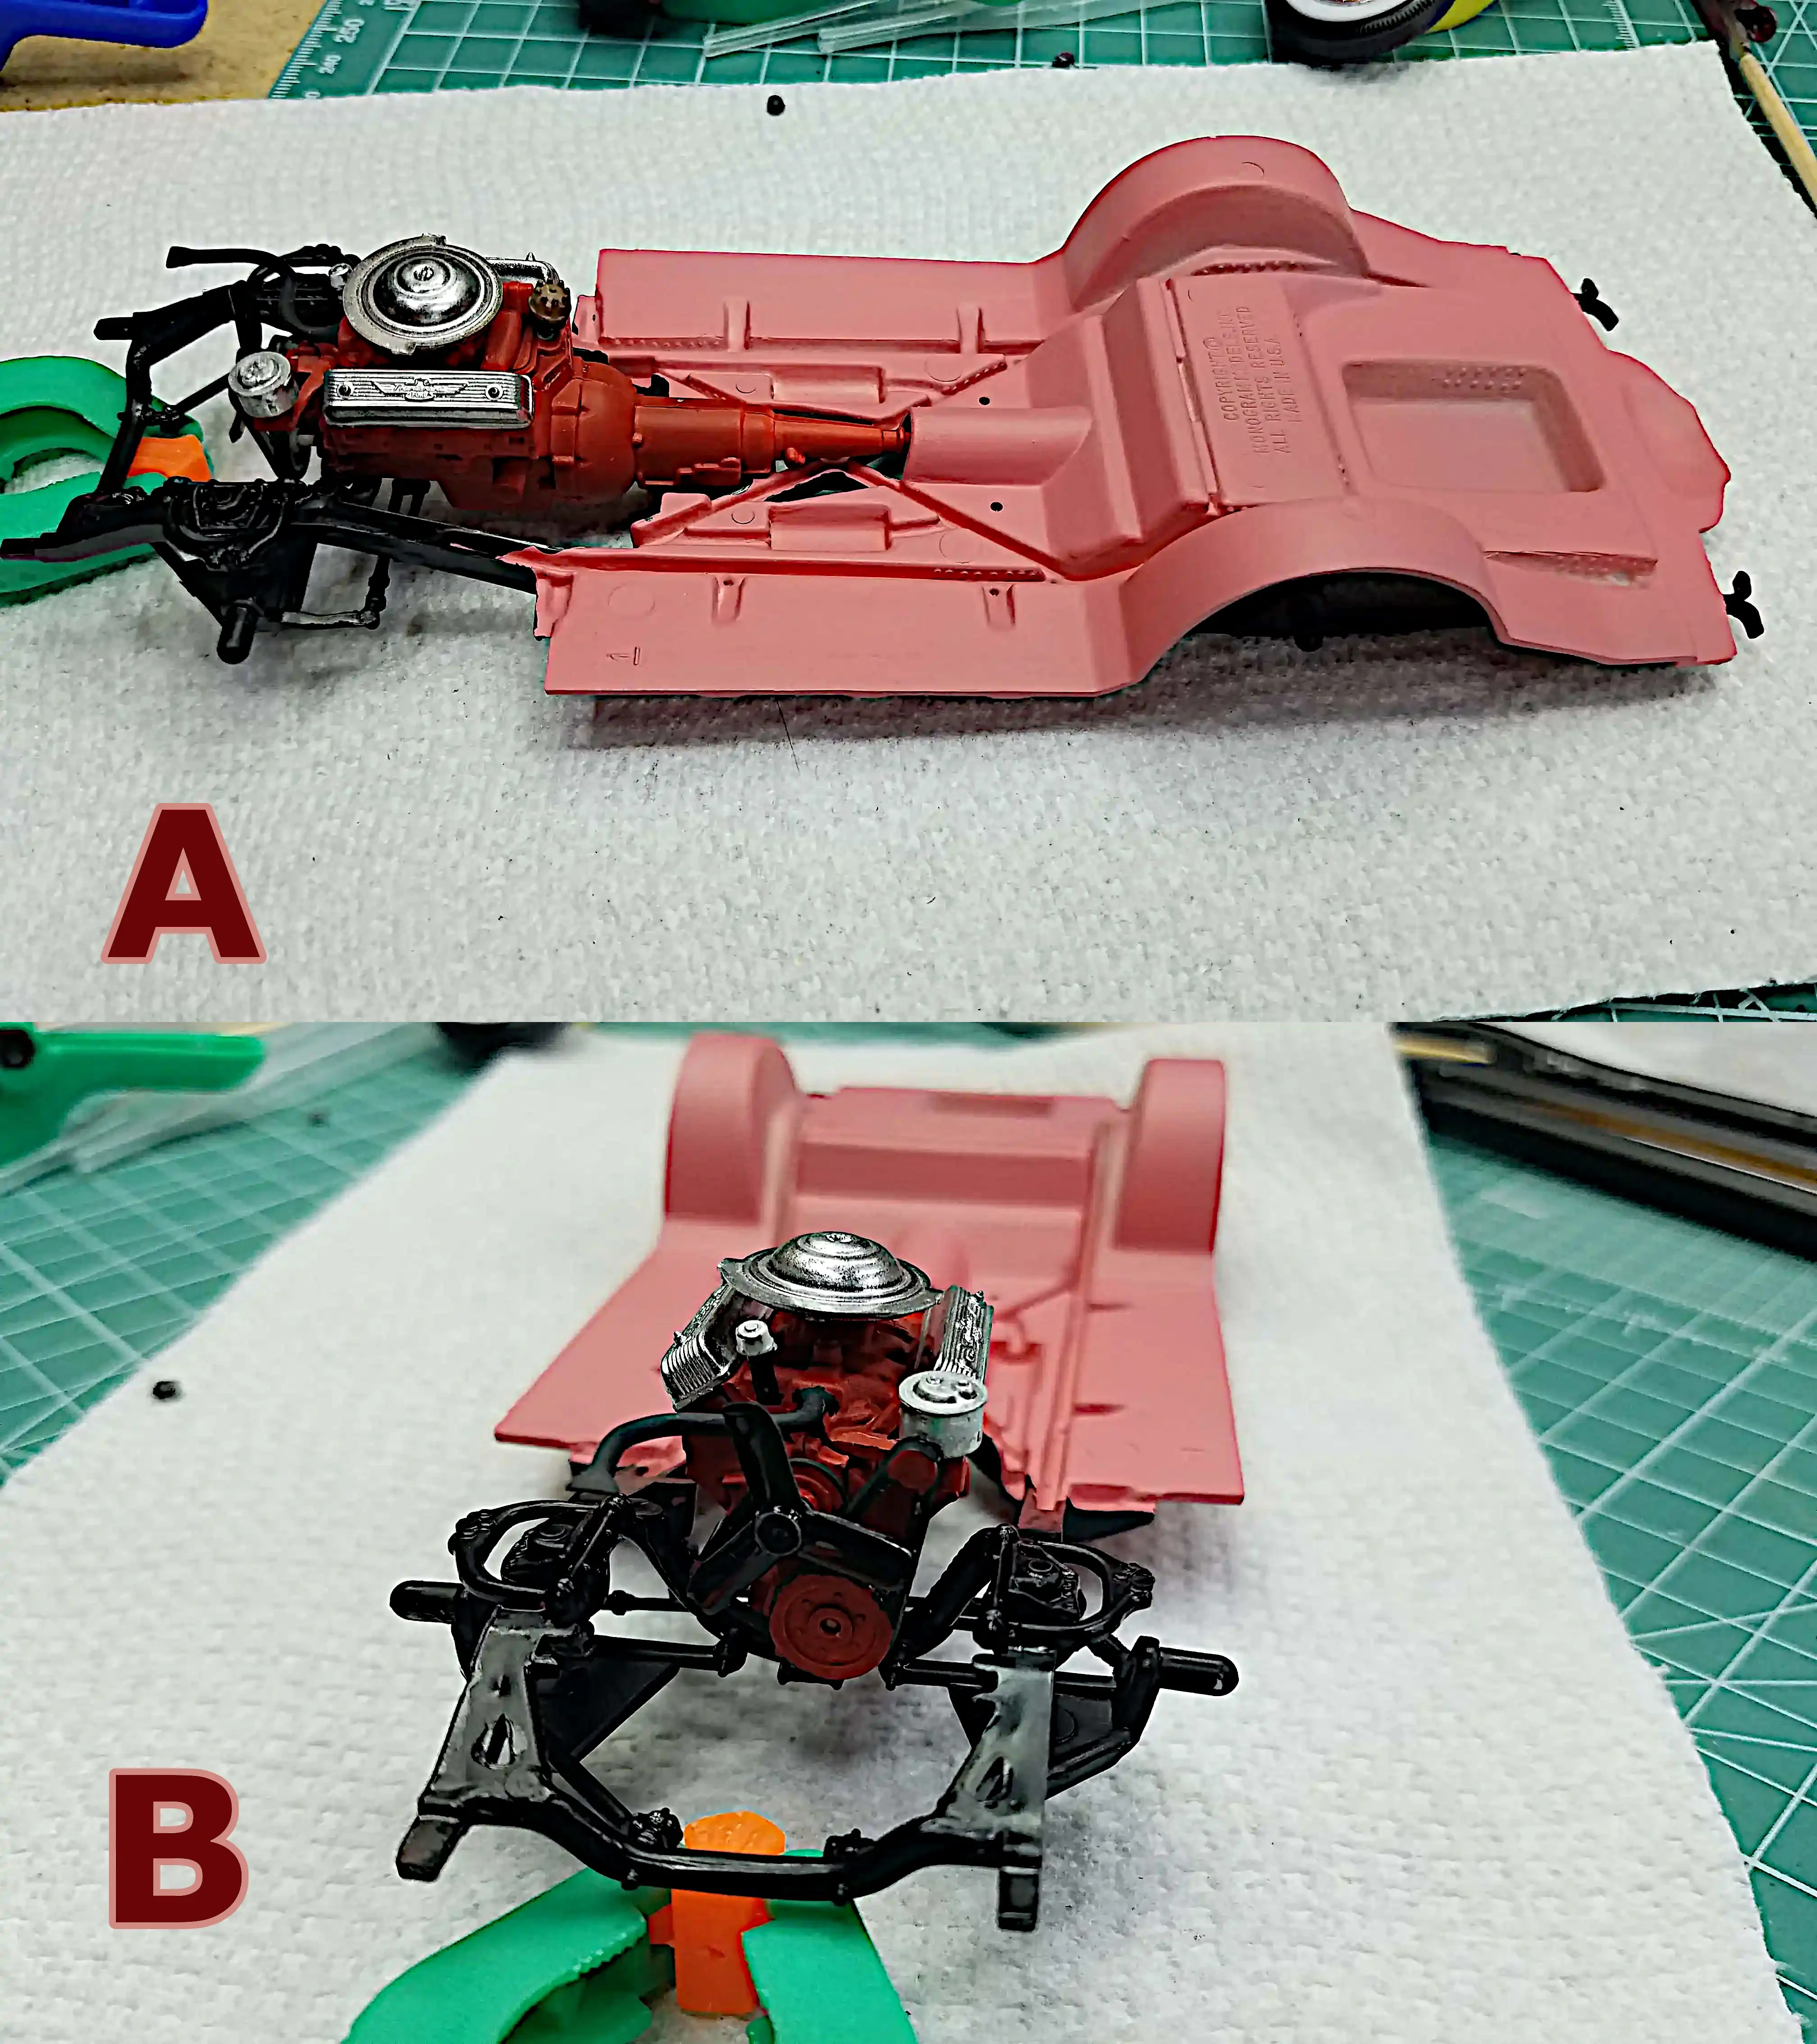 Dry fitting the engine to the frame
Dry fitting engine to the frame brought out something the instructions are not clear about.
Steps 10 and 11 must be done at the same time because if the engine is in place the radiator cannot be put in place because the fan will not be able to be place with in the shroud. Both pieces need to be placed in location and than glued in place. Even after doing this, the fit is not very good as can be seen in the next photos.

Photo 024
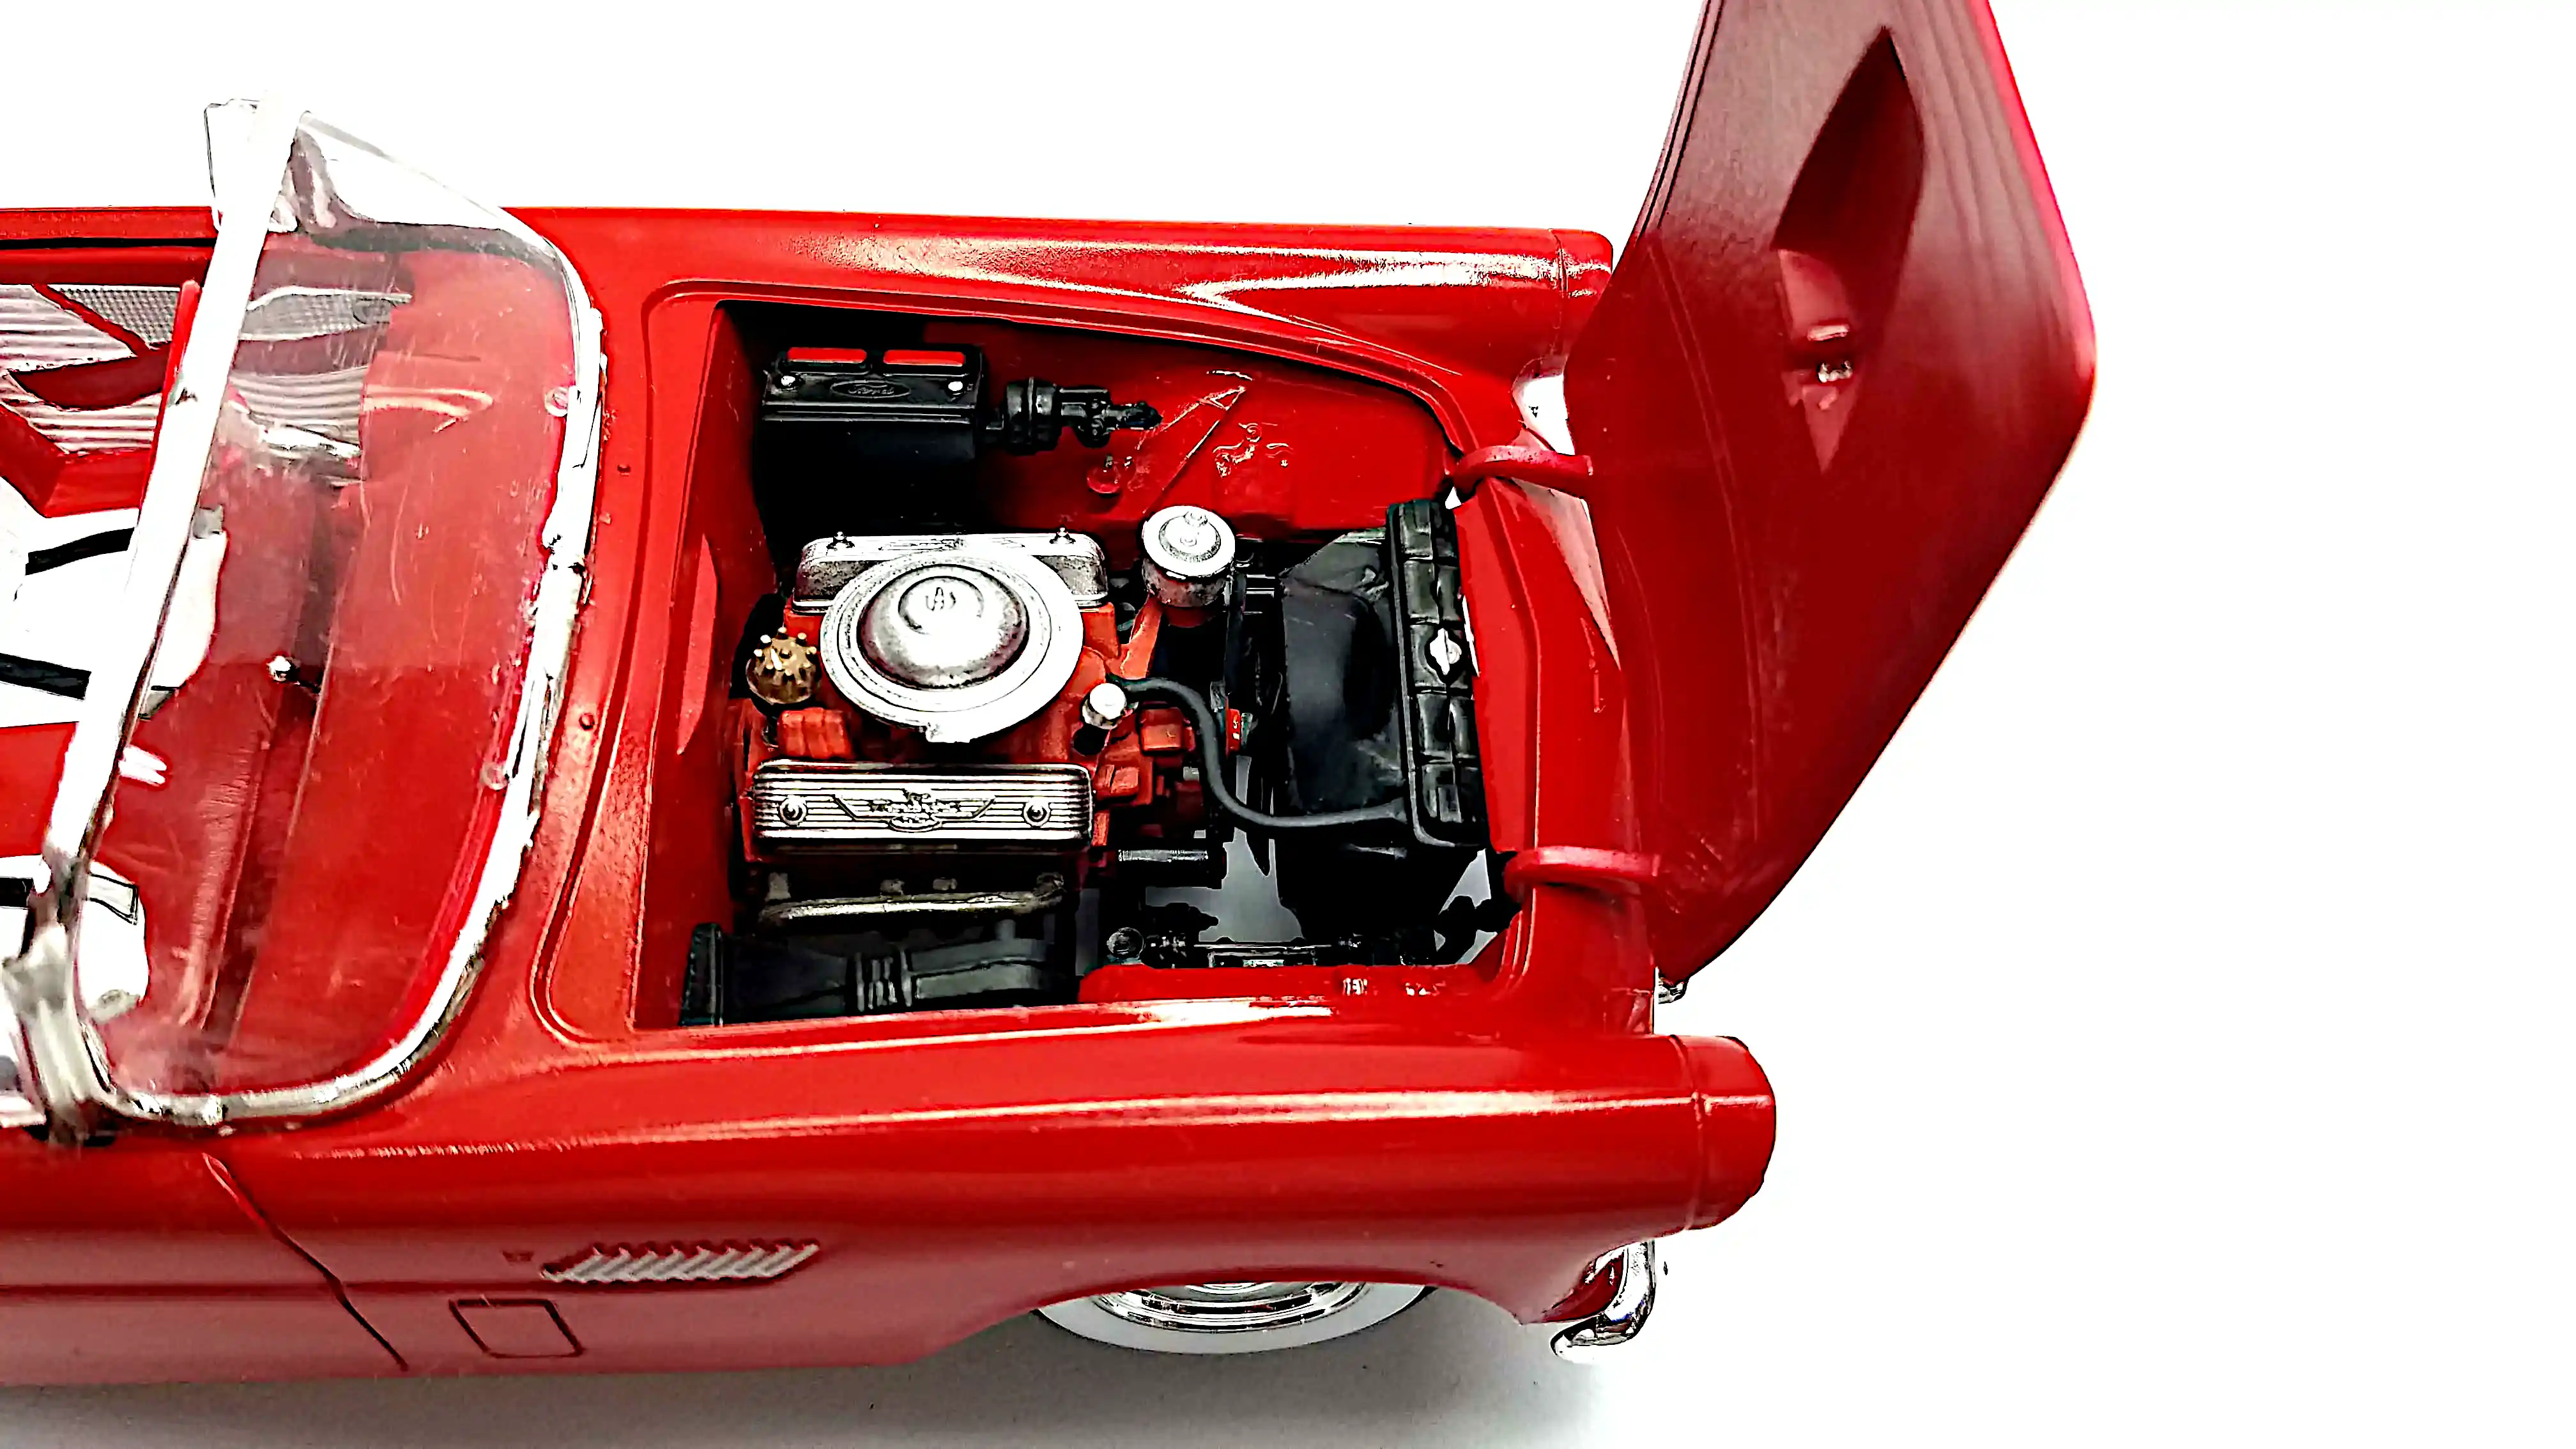
Click/tap photo to enlarge
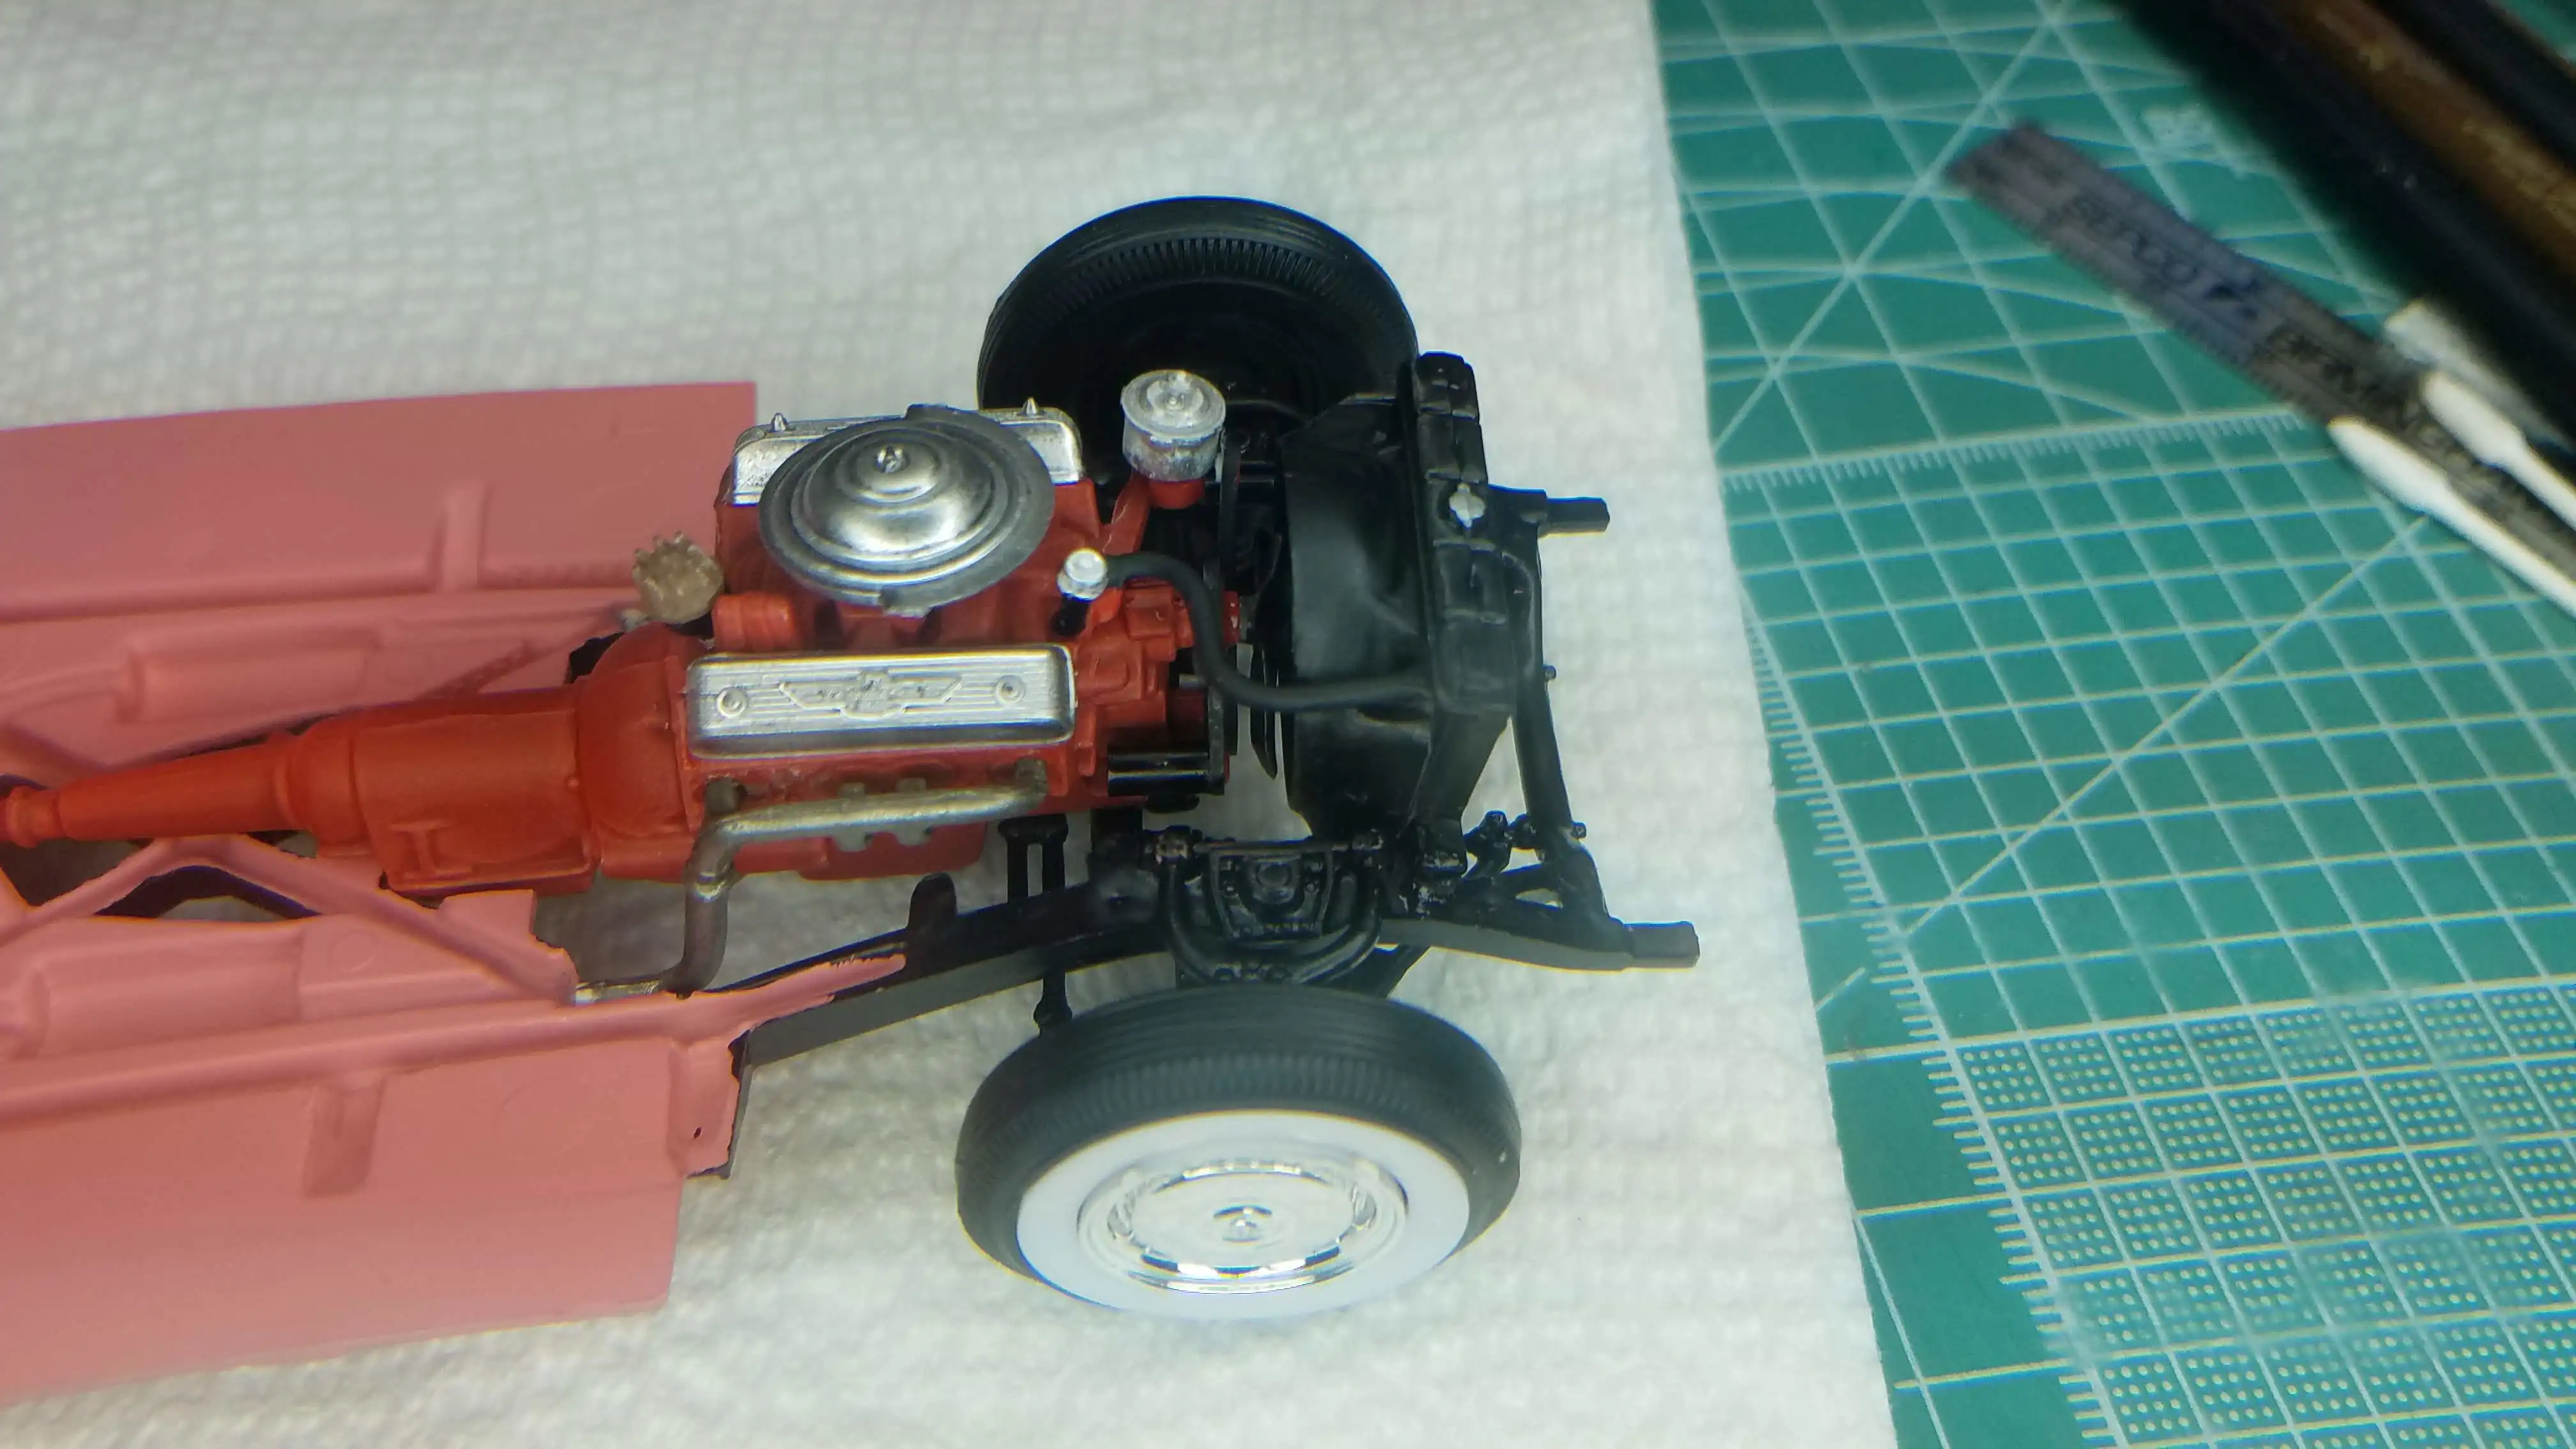 Radiator and engine installed
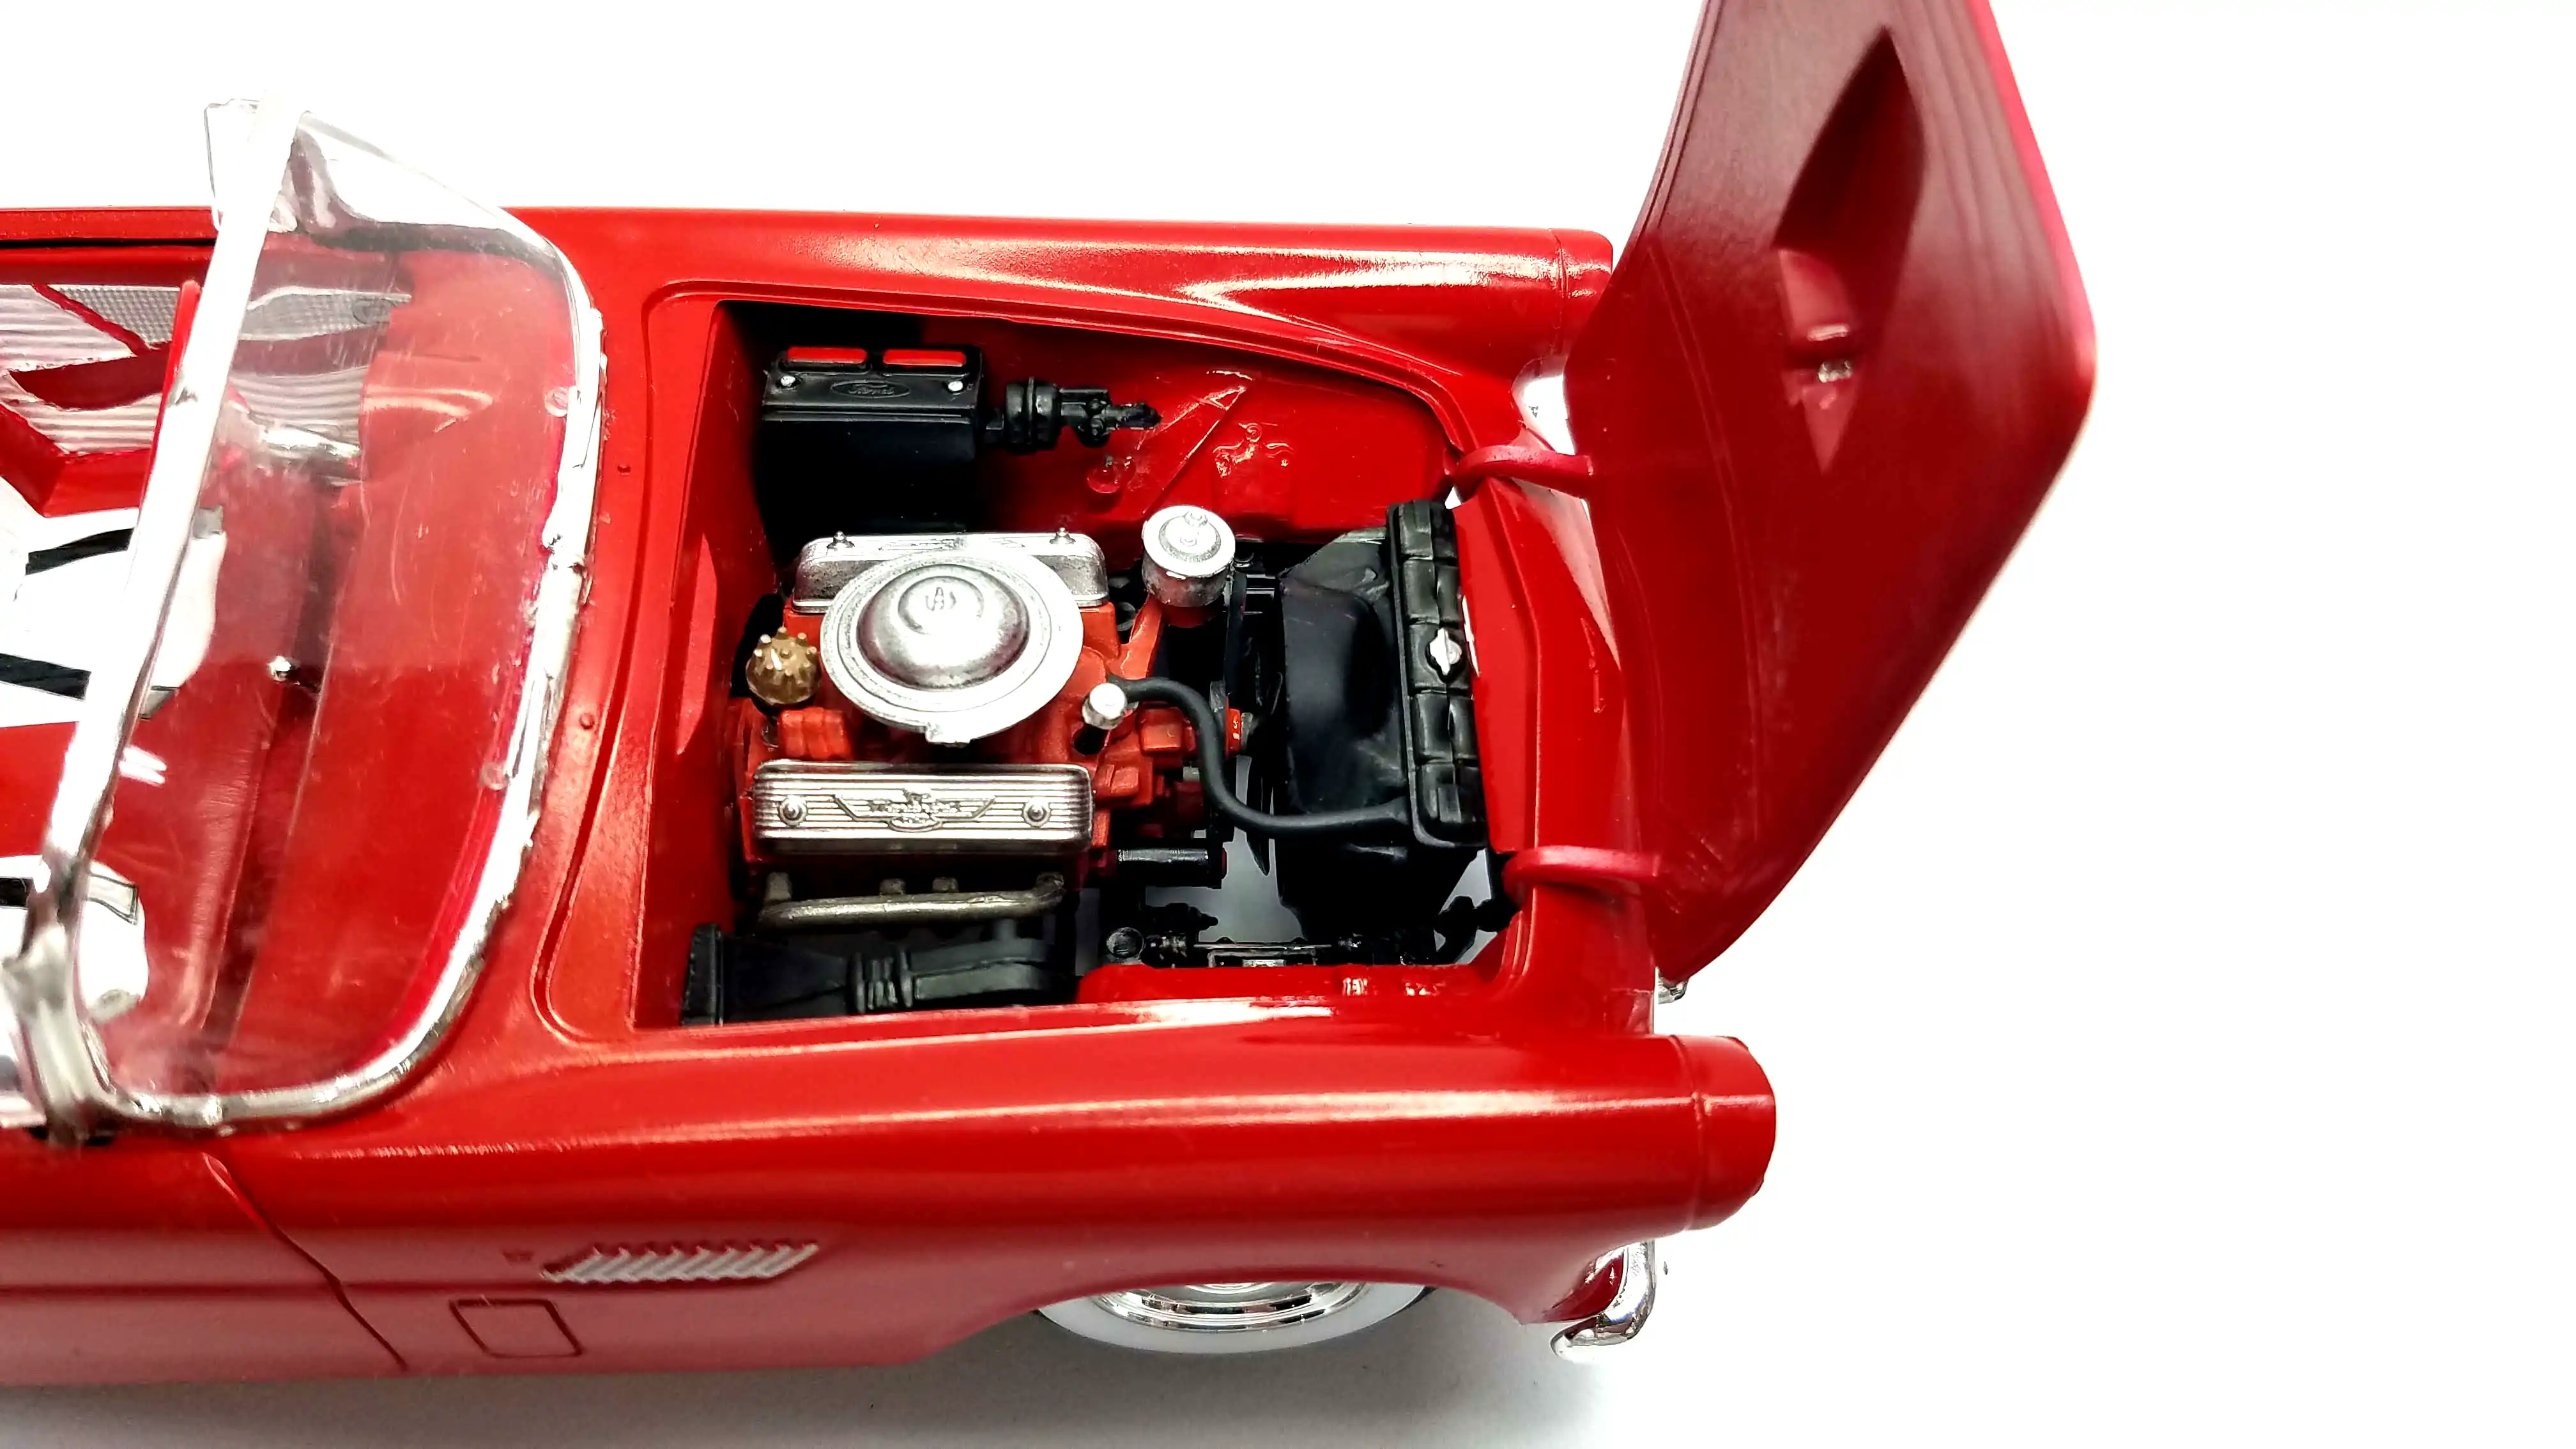
The engine and the radiator were installed together. There is a problem, that's not going to affect the final build, but as you can see in these photos, the radiator leans forward. I could not make it stand straight because the fan would be jammed against the radiator. I thought about shortening the top radiator hose, but again, the fan touches the radiator before the radiator gets straight, and, the engine [is] in the correct location on the frame.
Photo 025
Click/tap photo to enlarge
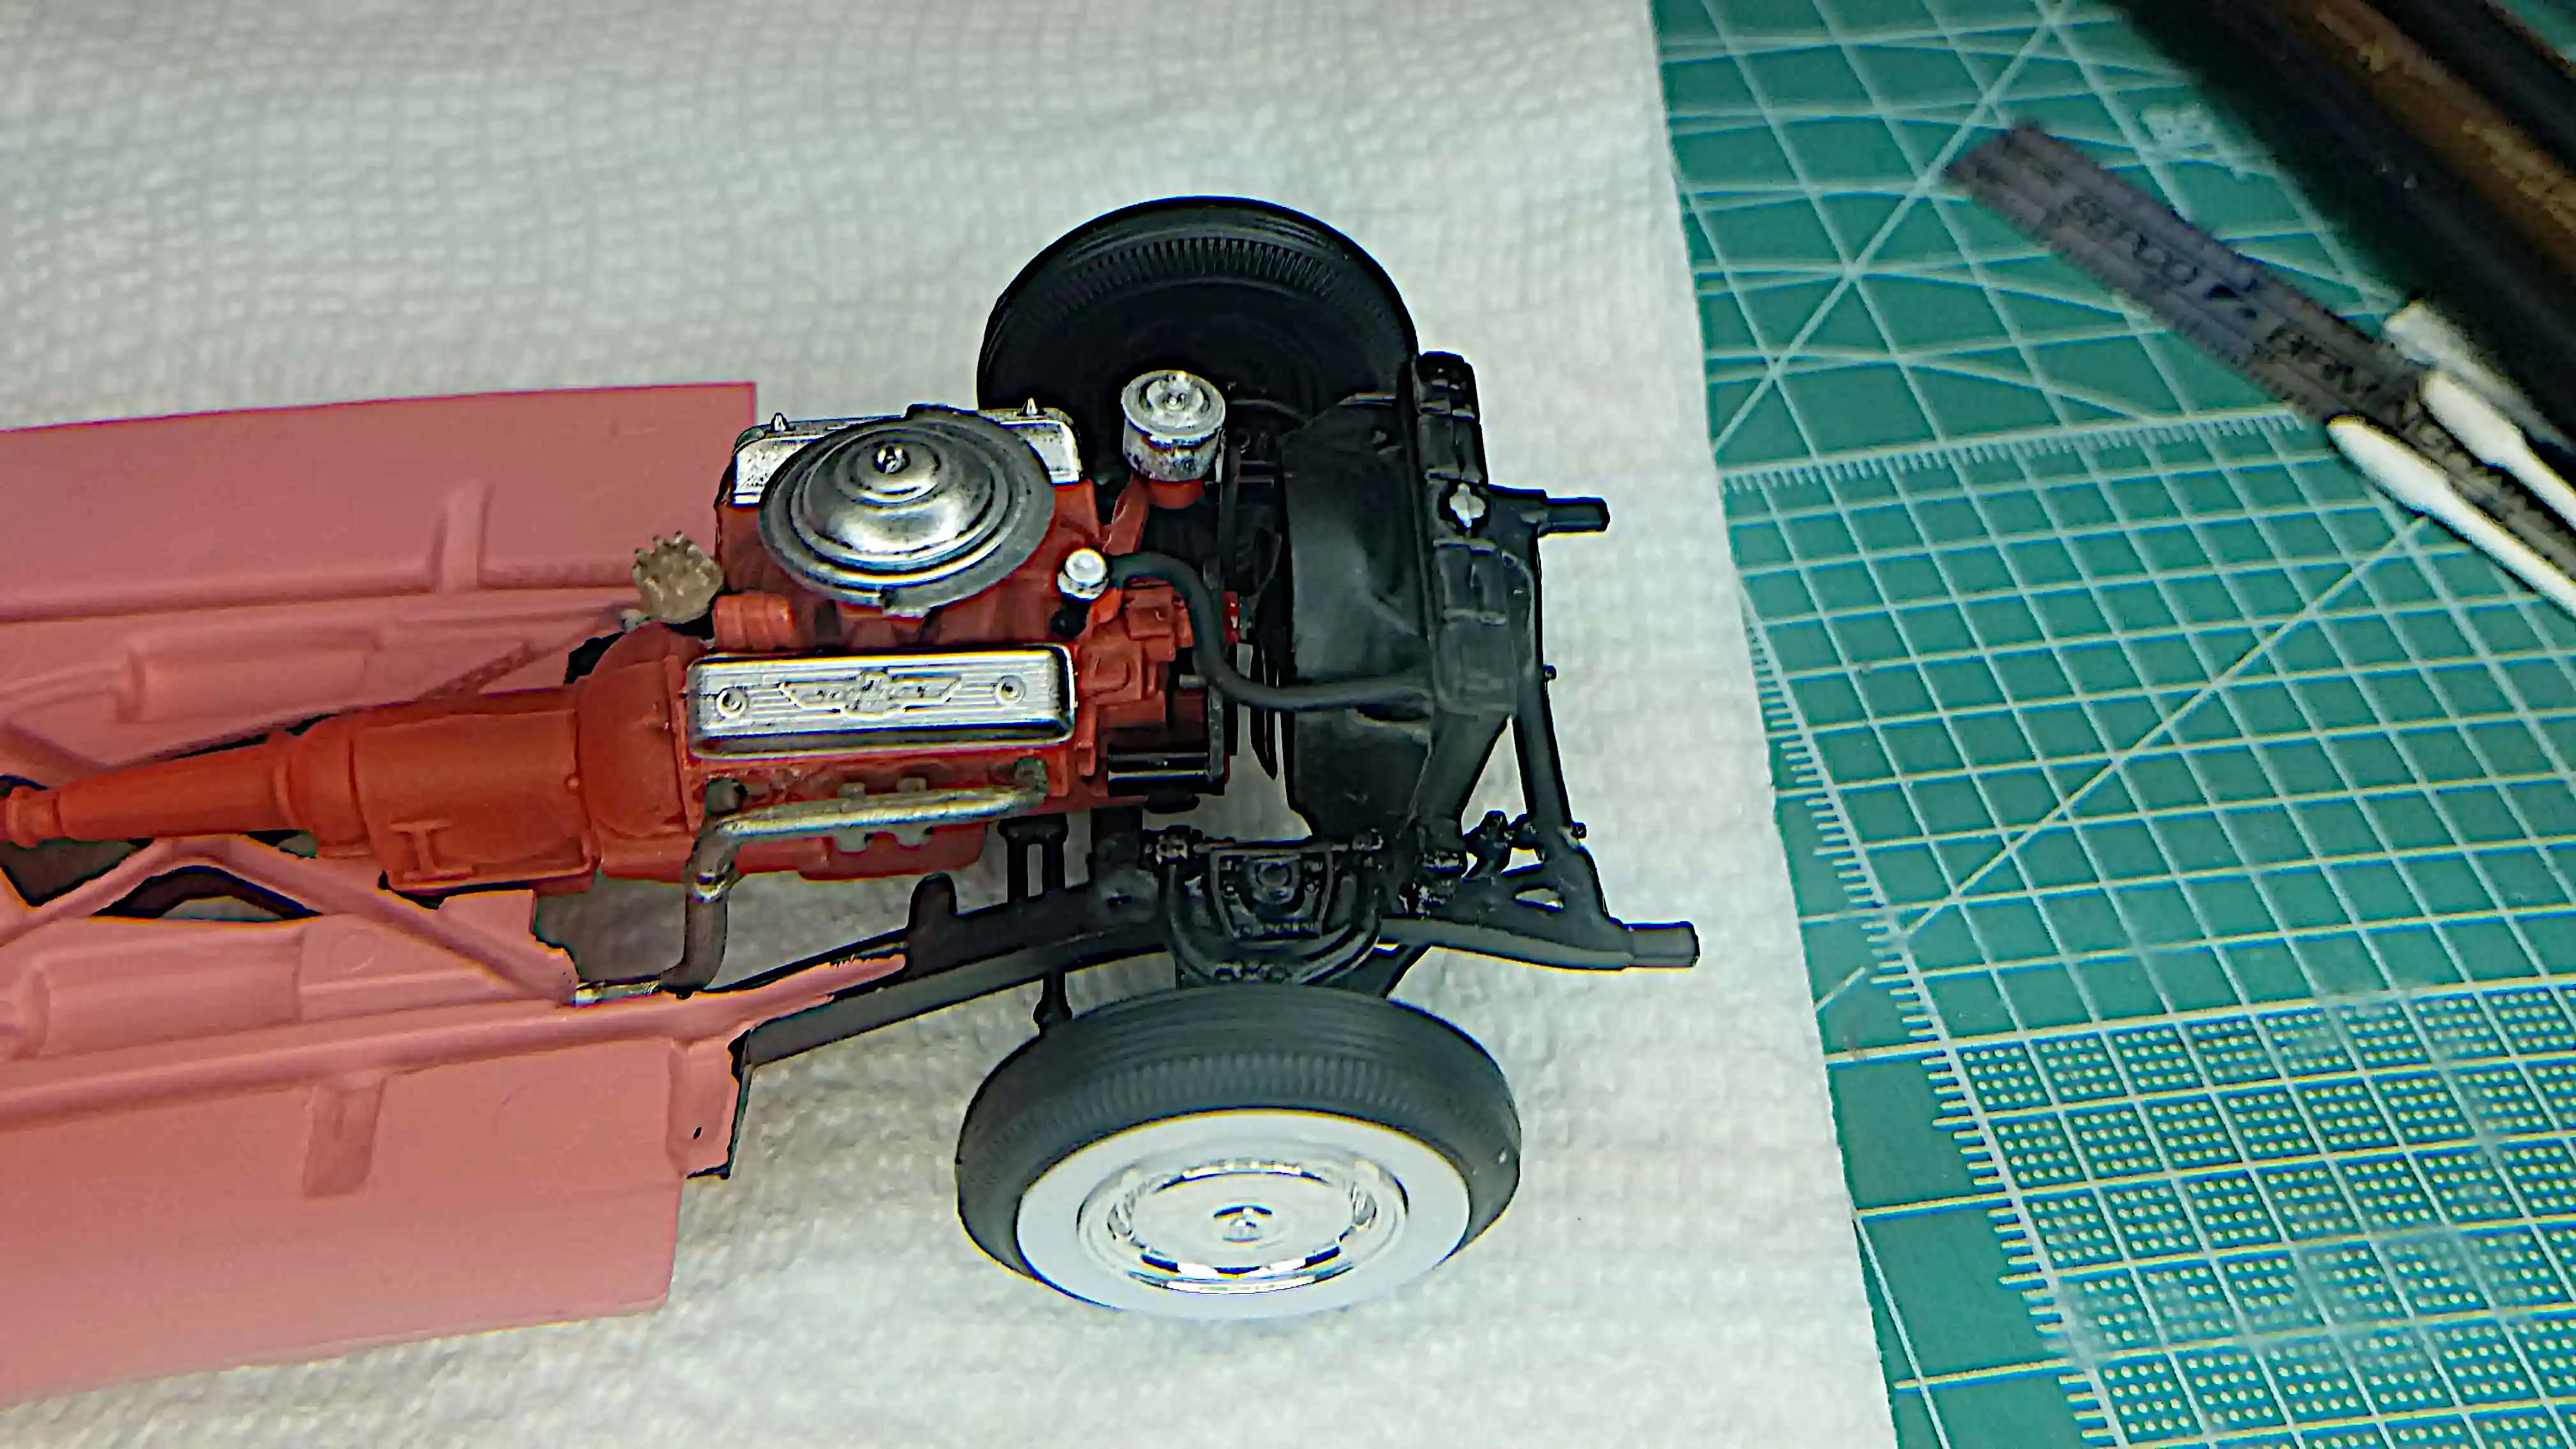 Radiator and engine installed
Here is another view of the installed engine and radiator. As mentioned in the previous photo I thought about making the radiator hose shorter, but than the fan hits the radiator before the radiator is straight. Yes...I could have possibly modified the frame mounting, but I just didn't want to spend the time on a model that is for my shelf only. I tested to make sure the body will sit well and it does, so...I'm leaving it as is.
Photo 026
Click/tap photo to enlarge
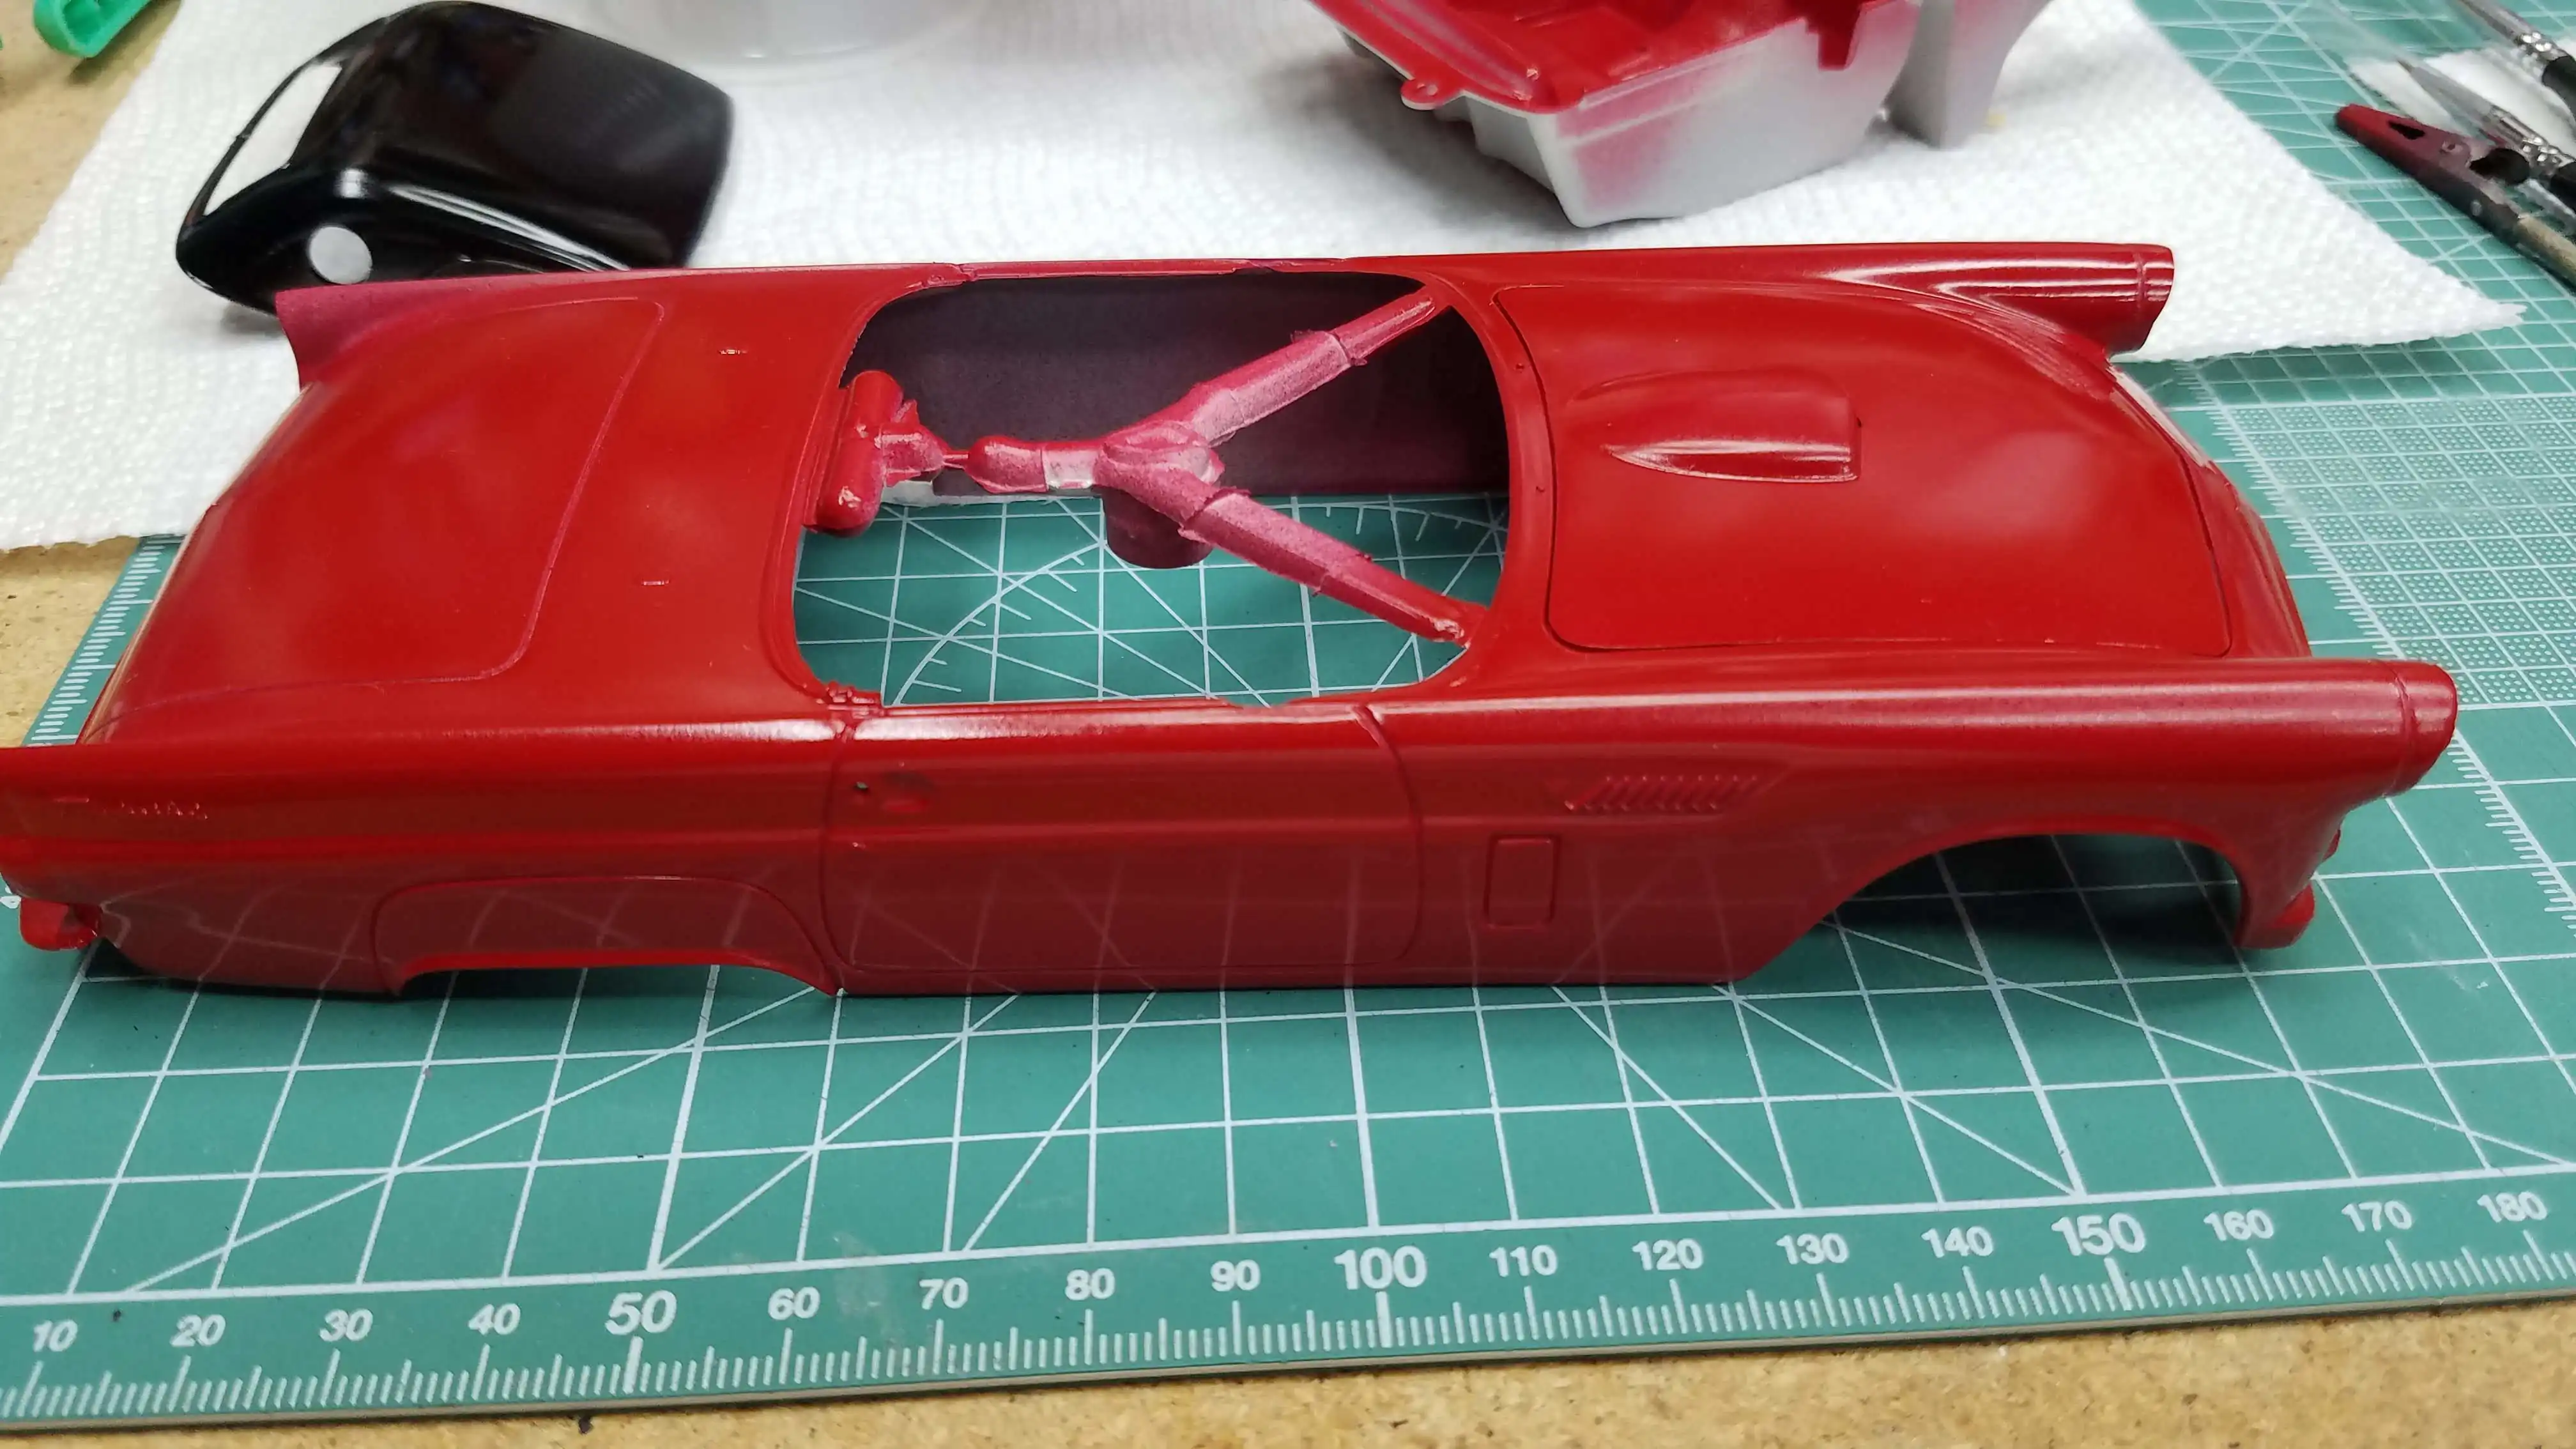
 The body is painted red
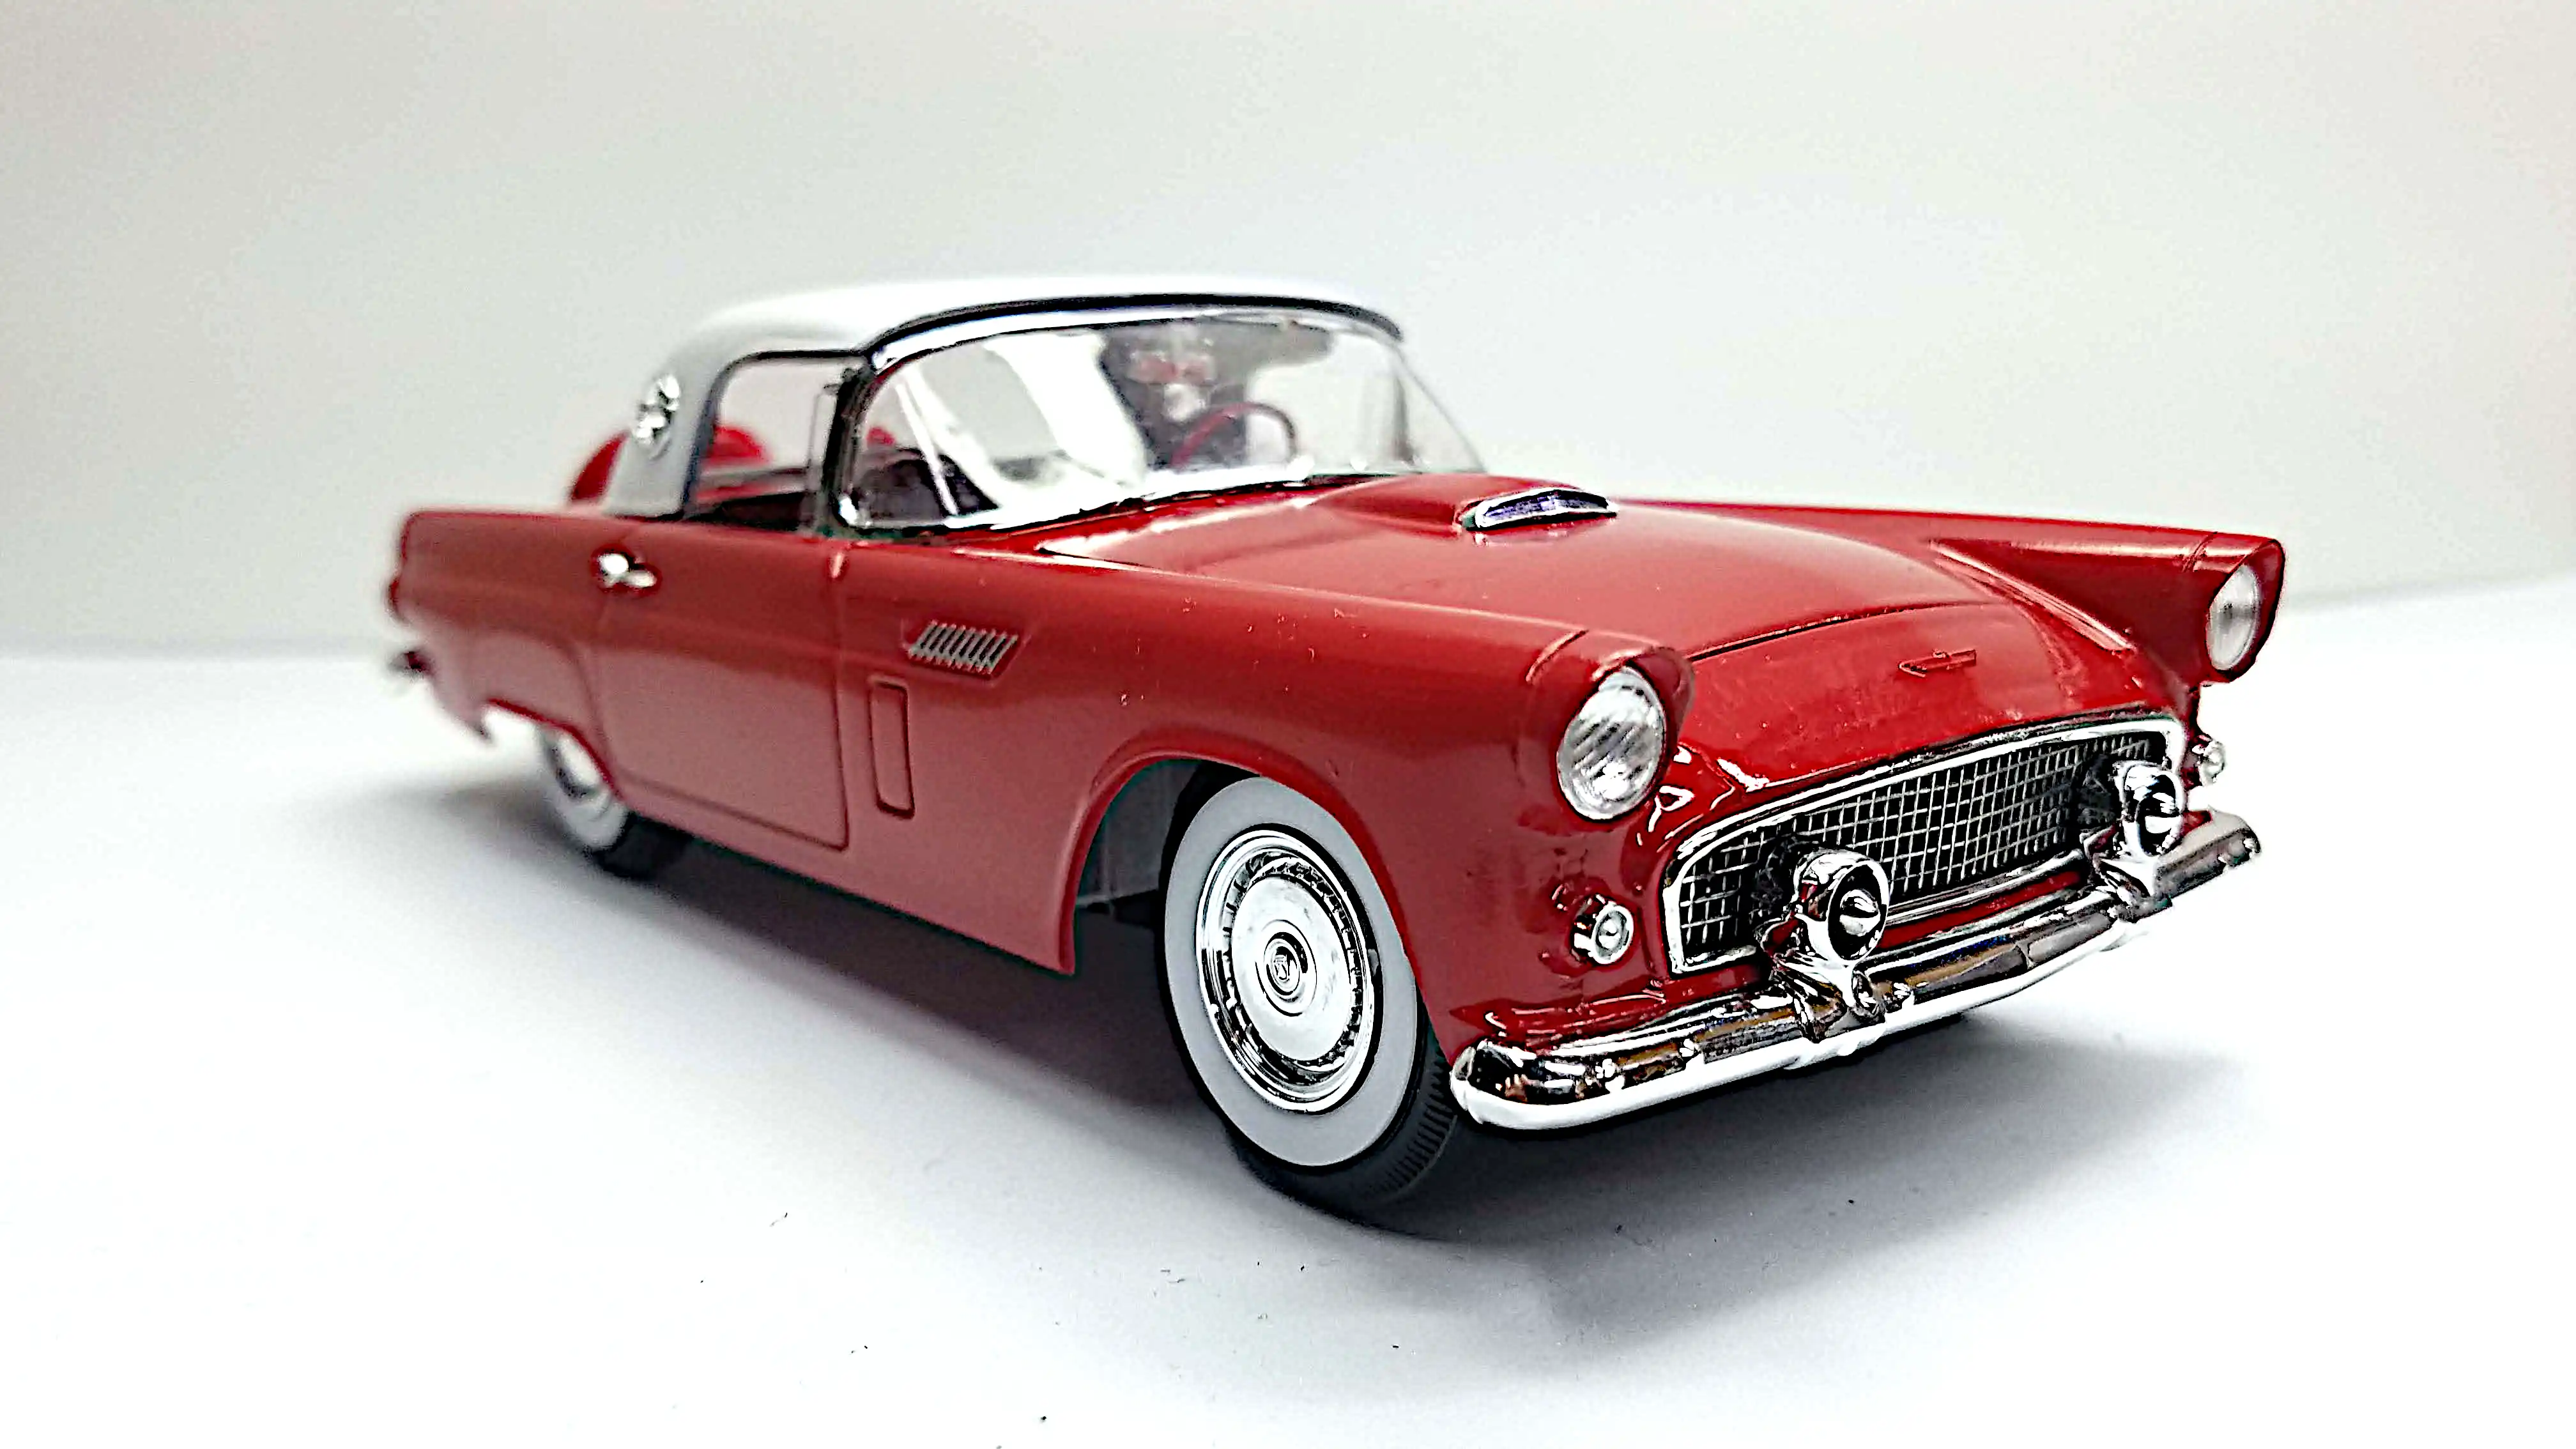
The body is painted red using Tamiya X-7. As described in the text of photo 9. I made a major faux pas with the color combo by reading the factory color chart wrong. I thought the body was red and the roof was black; however, that combo was not available as a factory color combo. The combo should have been a black body with a red roof. I easily recovered from this by painting the roof white because a factory color combo that [was] available was a red body with a white roof.
Photo 027
Click/tap photo to enlarge
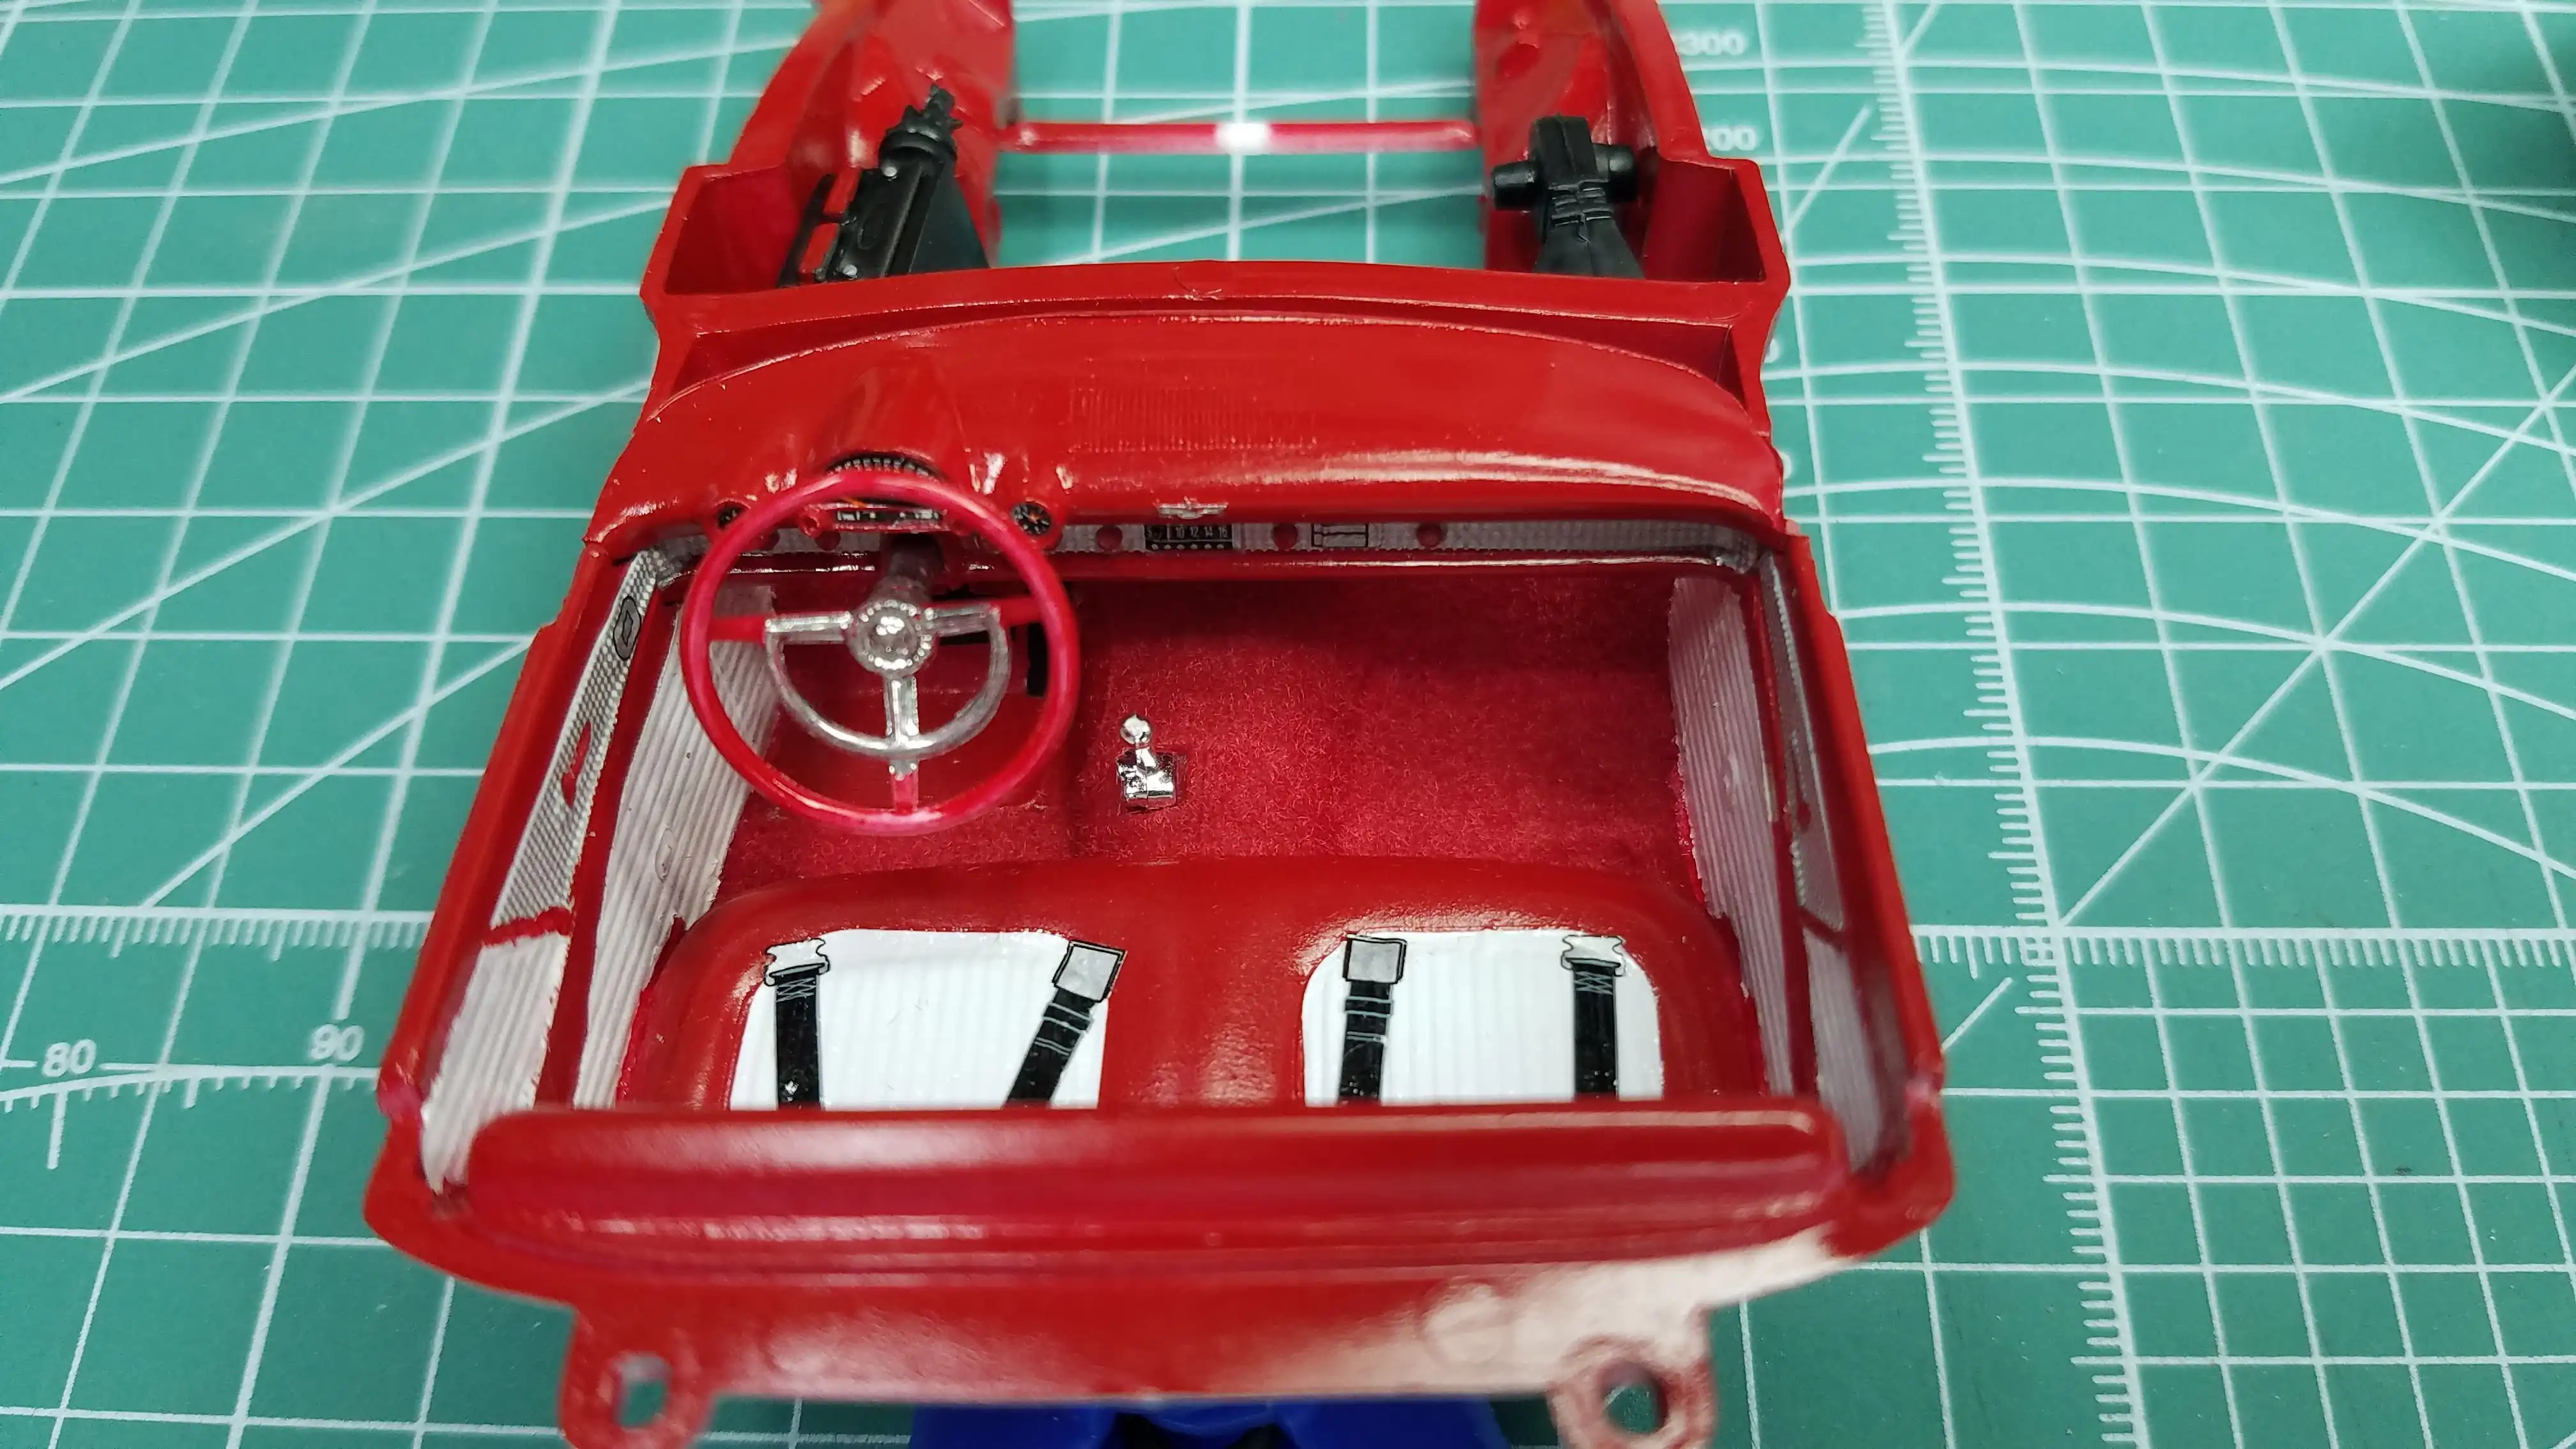
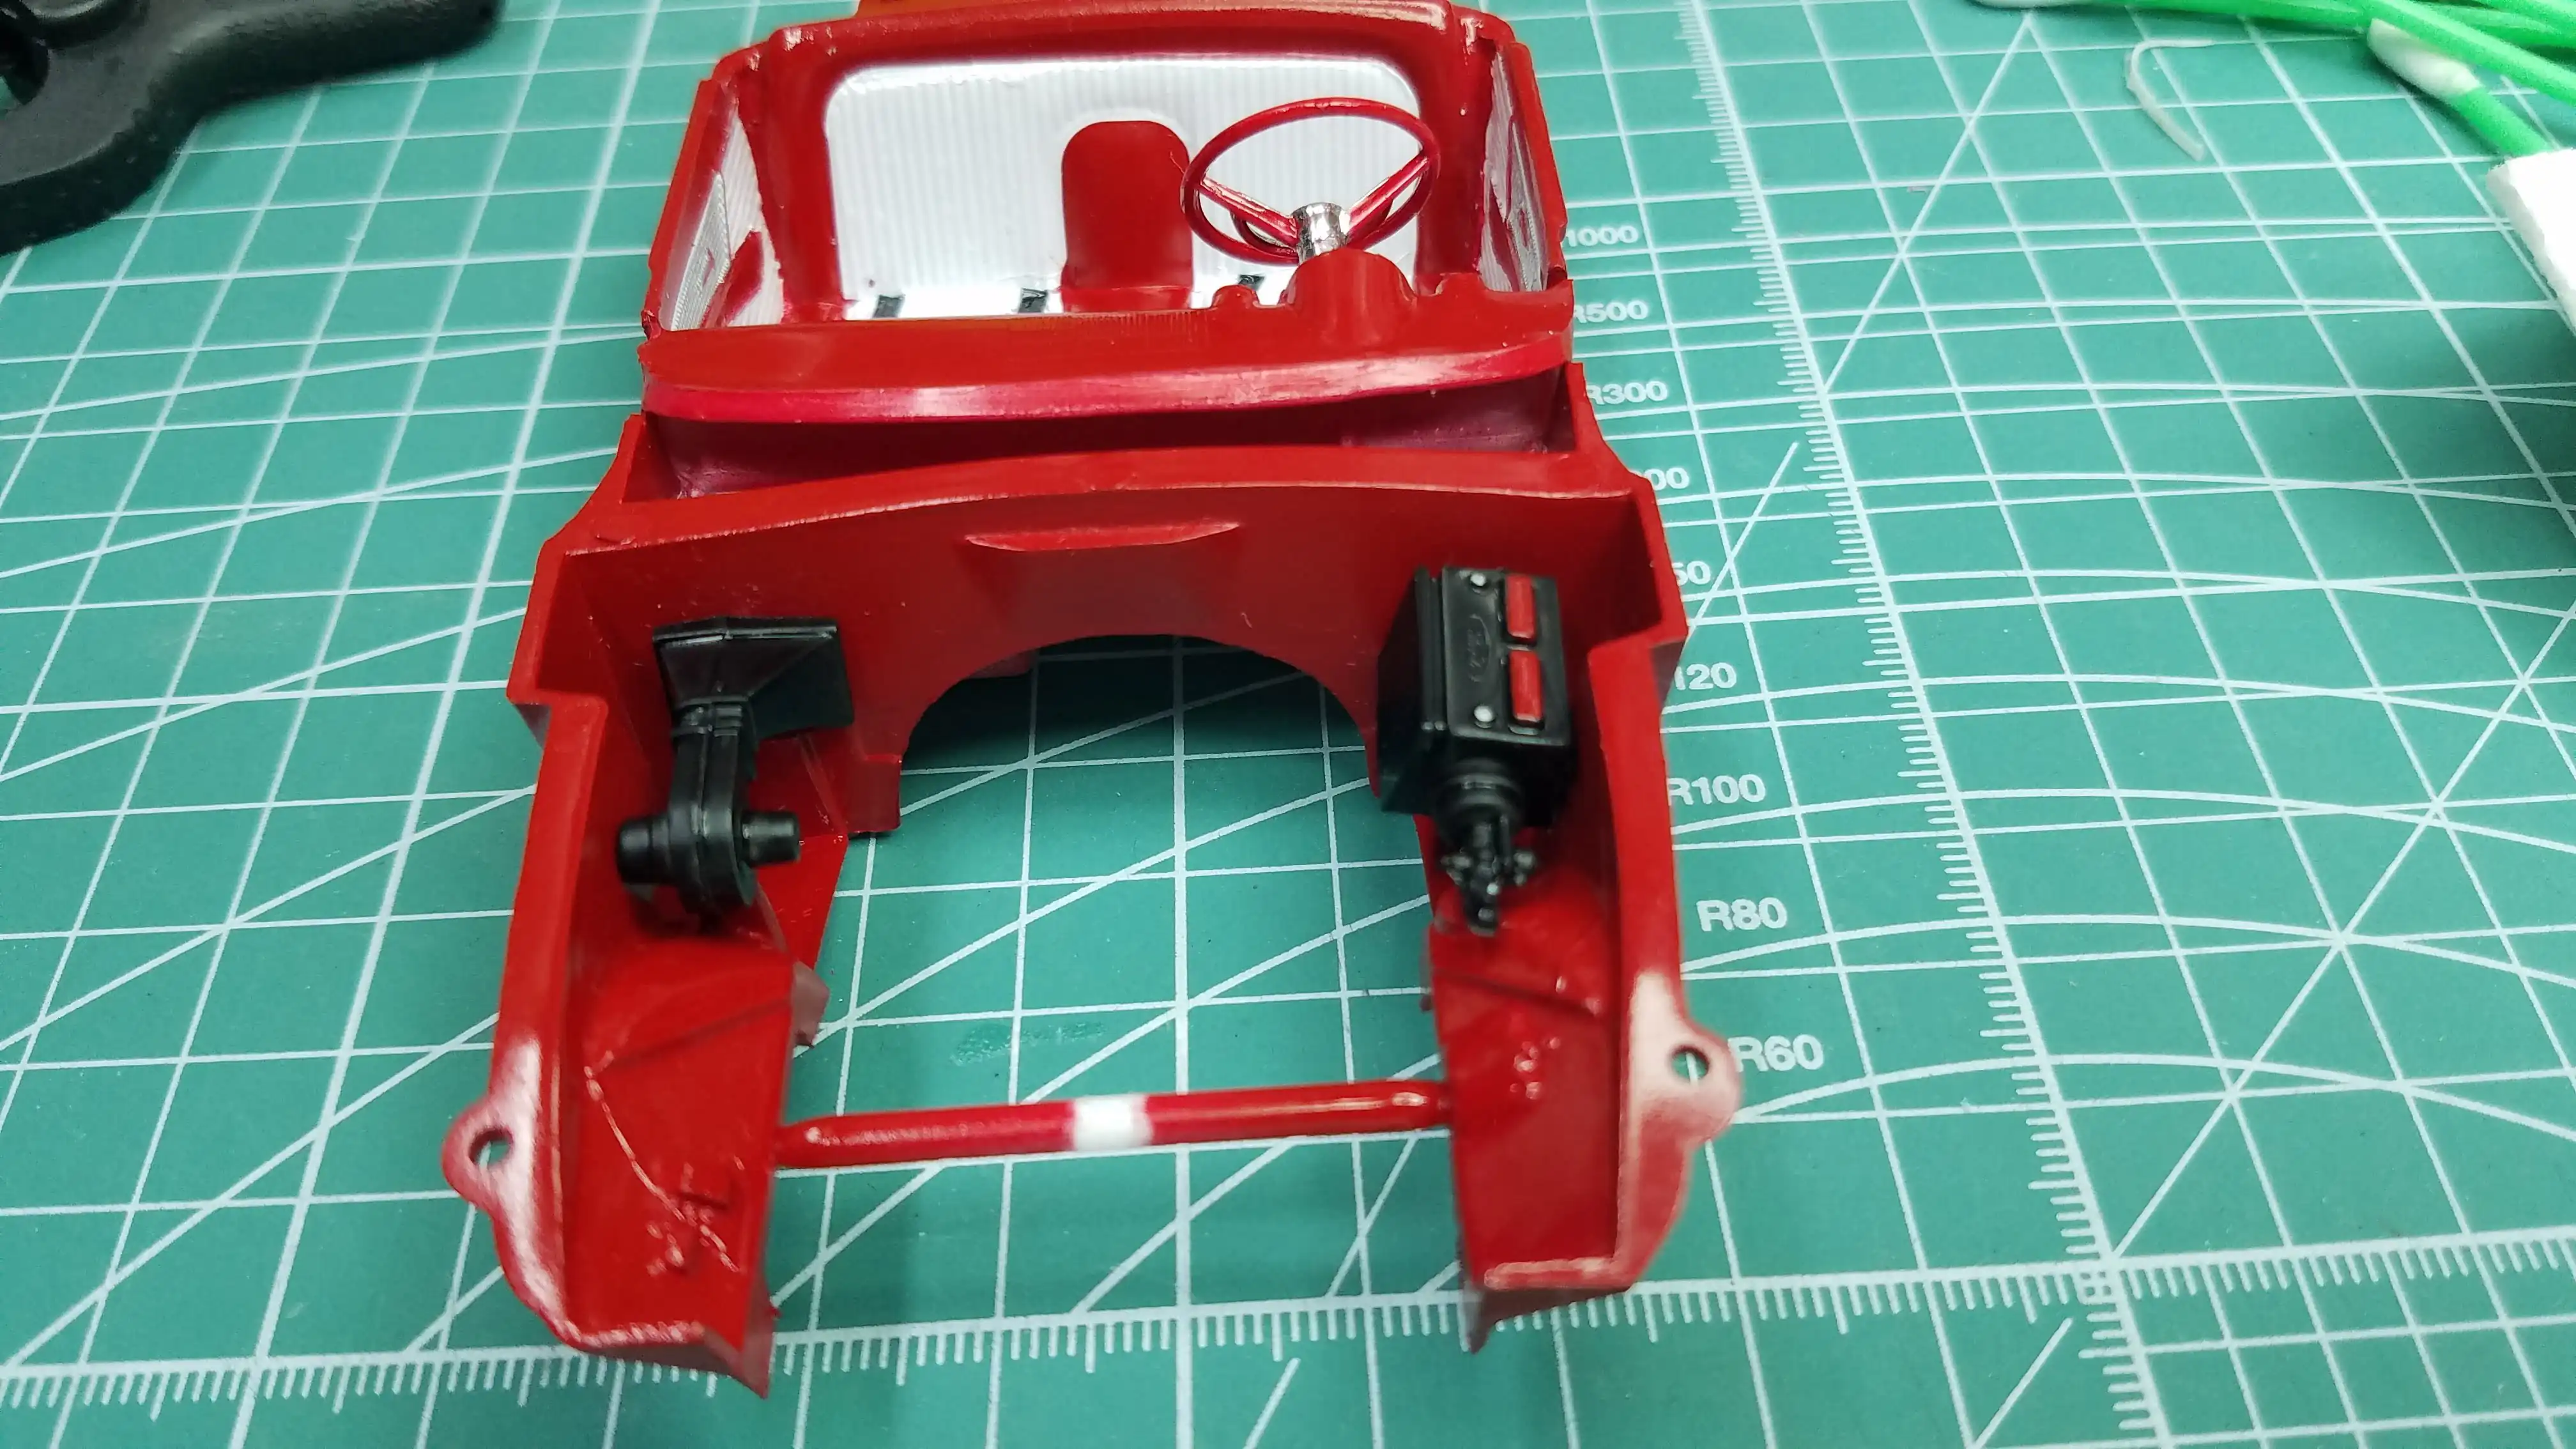
 Dashboard is detailed and ready to be installed
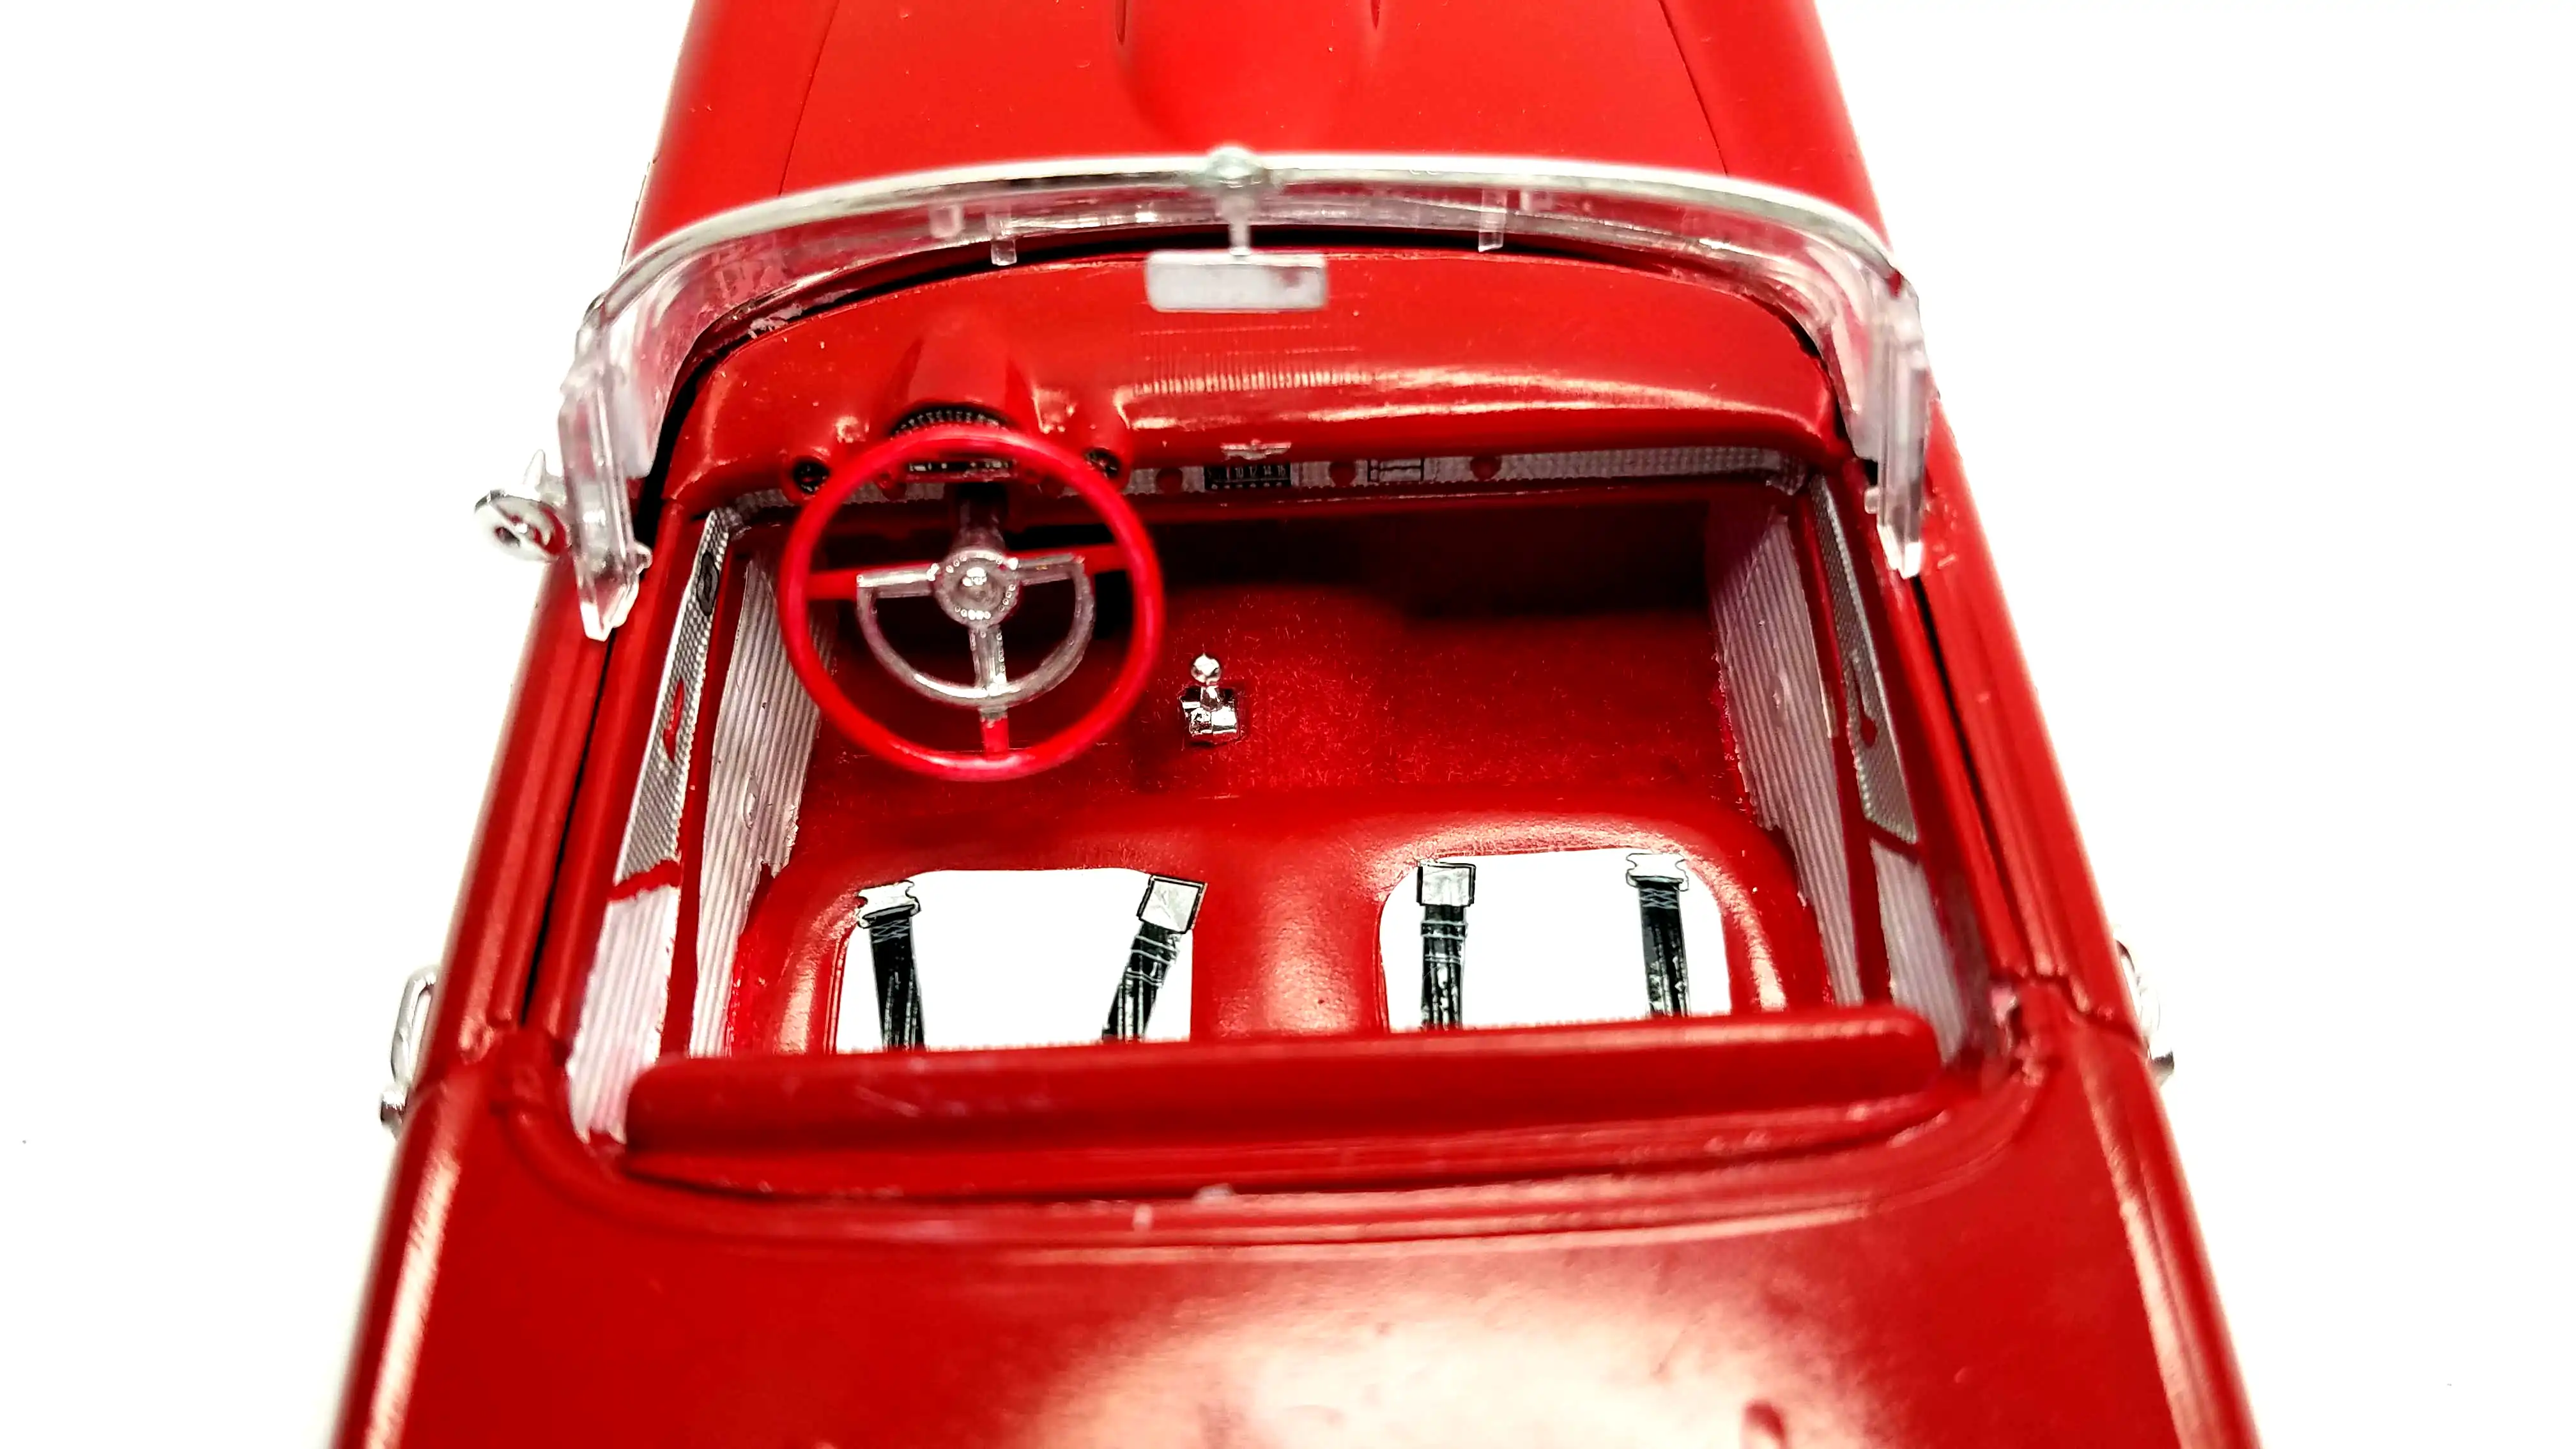
The dashboard is detailed and ready to install. The steering wheel is also ready (not shown in this photo). It will be installed after the dashboard is installed.
Photo 028
Click/tap photo to enlarge
 Flocking the interior tub
The tube is in the process of having the floor flocked. I should have done all the painting and detailing and than flocked the floor, but it is what it is.
Photo 029
Click/tap photo to enlarge
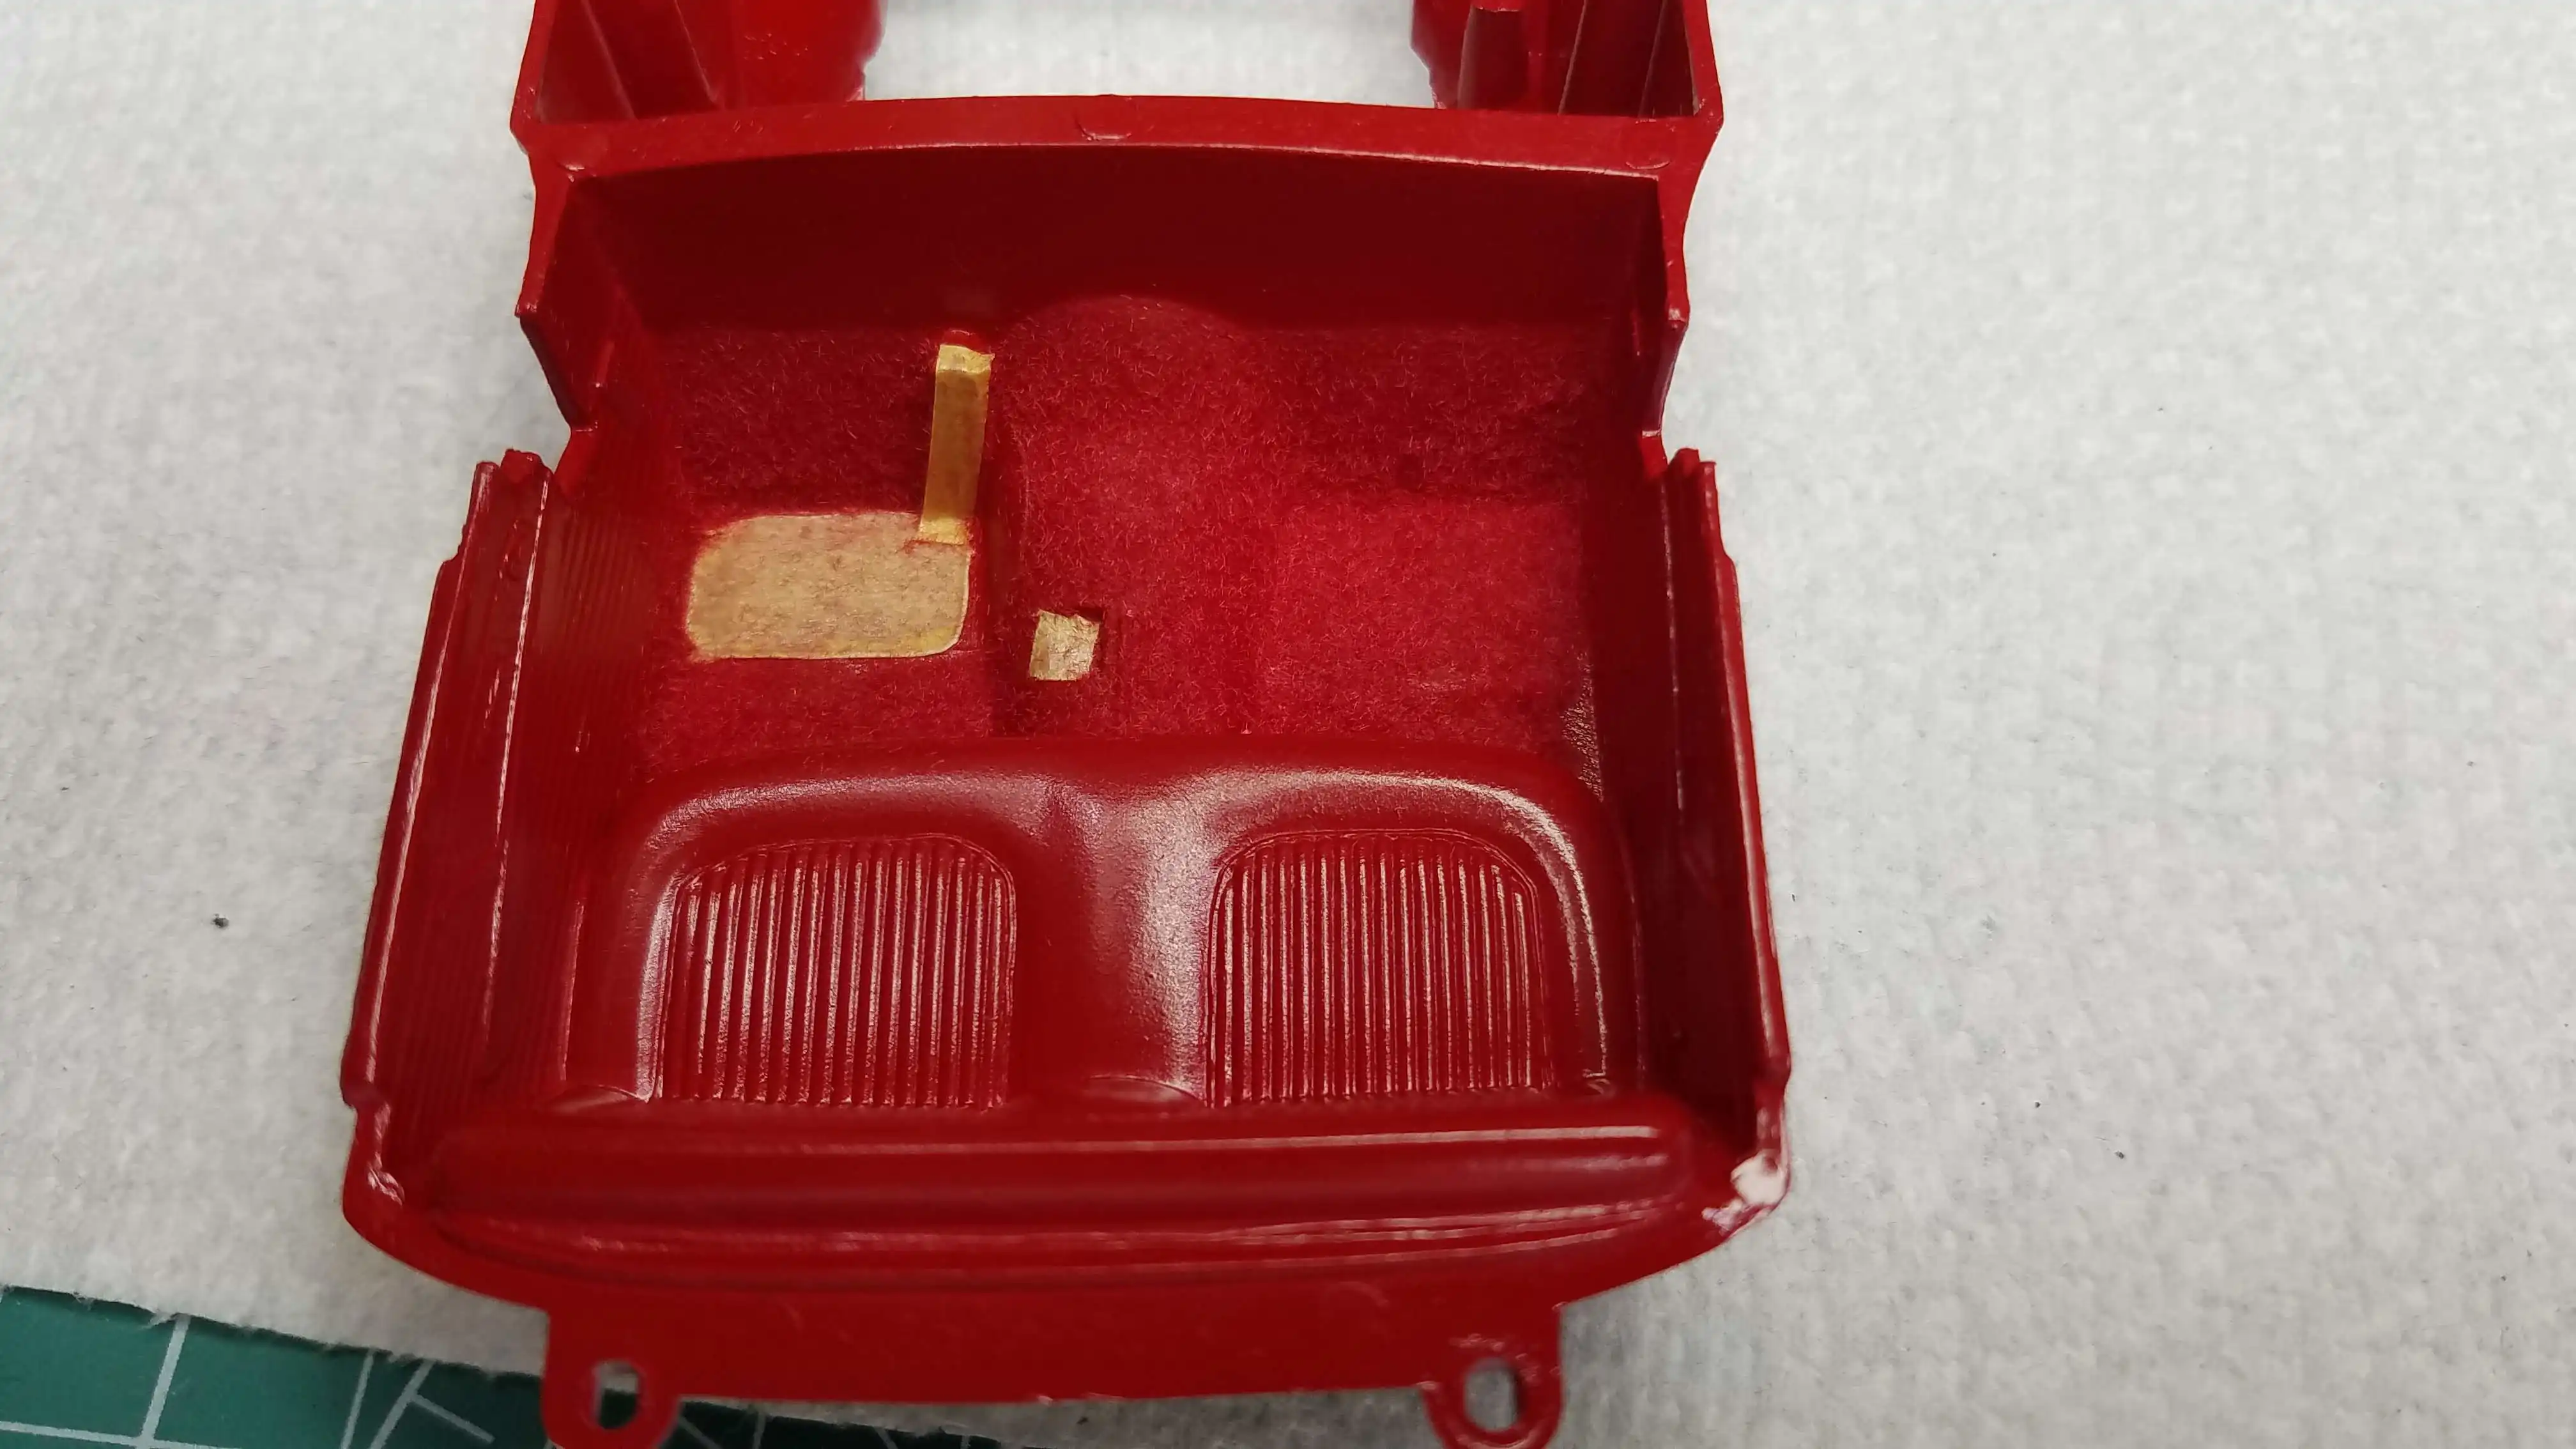
 Interior tub is finished
The interior is finished. I made another procedural mistake when doing the painting (I HATE PAINTING!!!). I sprayed the entire tub red and then attempted to paint the white side panels. I should have painted the white first and then masked it and painted the red. Oh well! The white on the seat is a decal.
Photo 030
Click/tap photo to enlarge
 Blower motor and duct and the battery are mounted
The blower fan and duct and the battery is installed.
Photo 031
Click/tap photo to enlarge
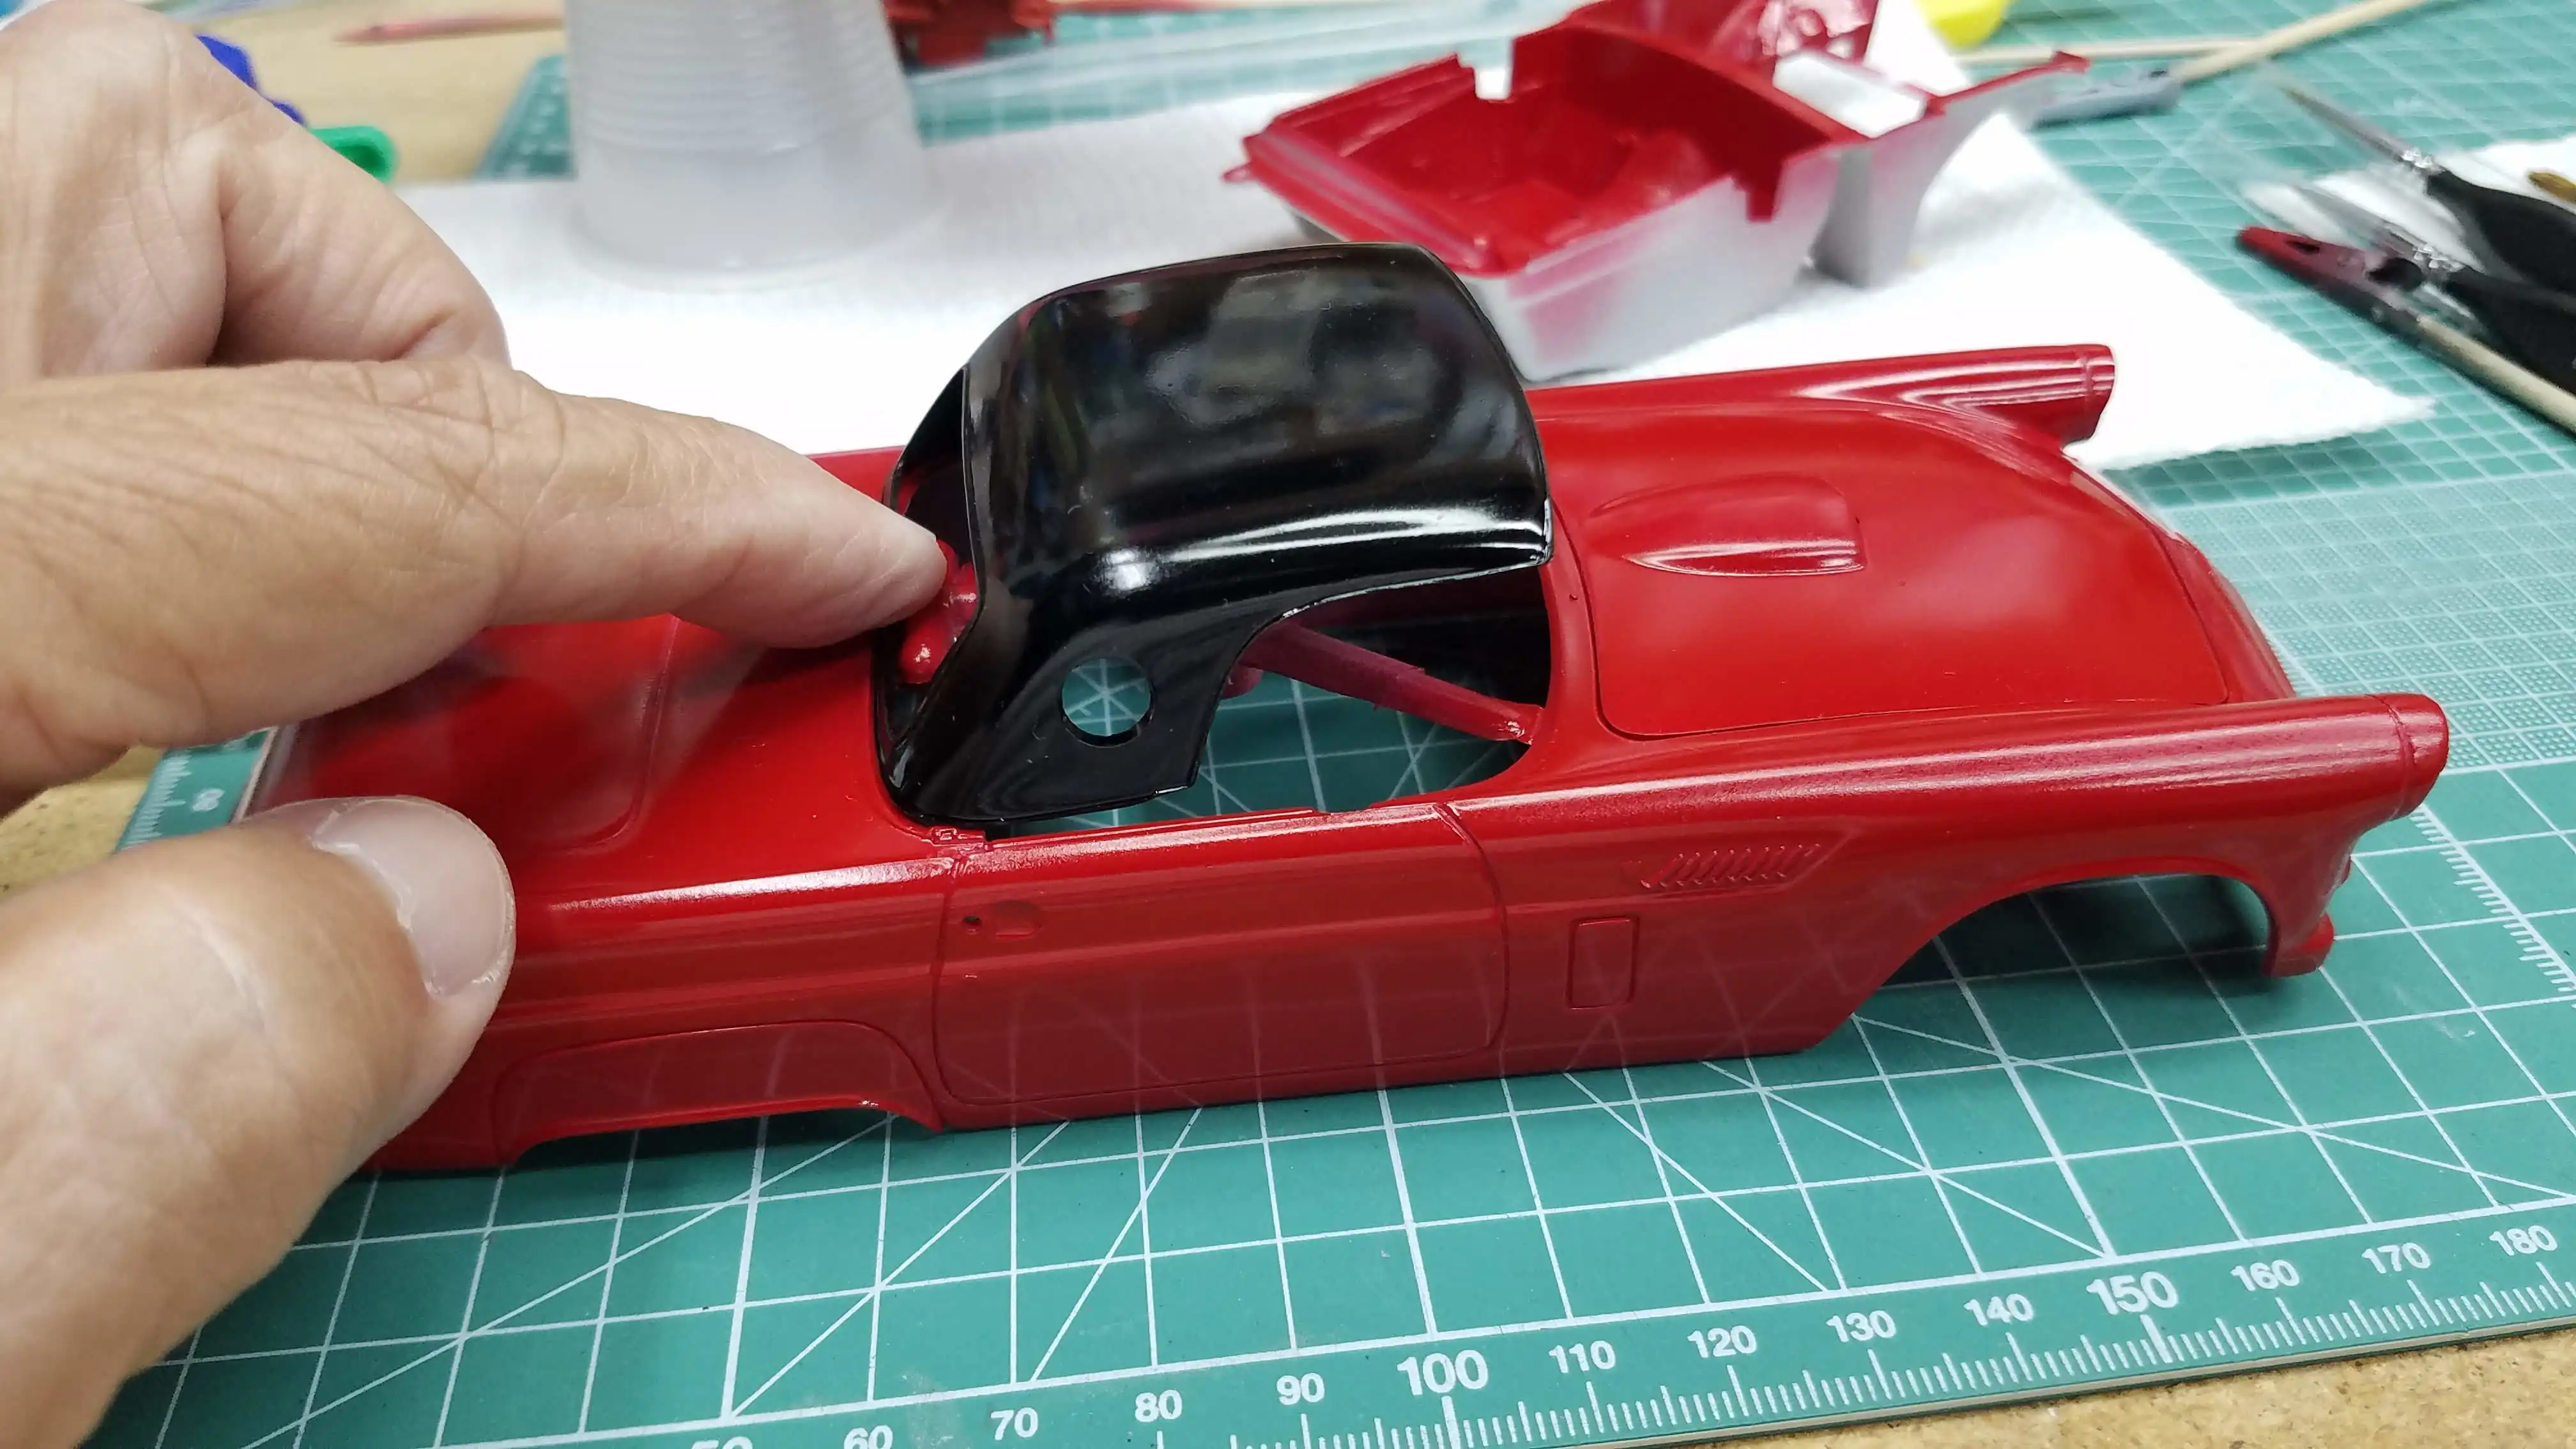
 Roof repainted white
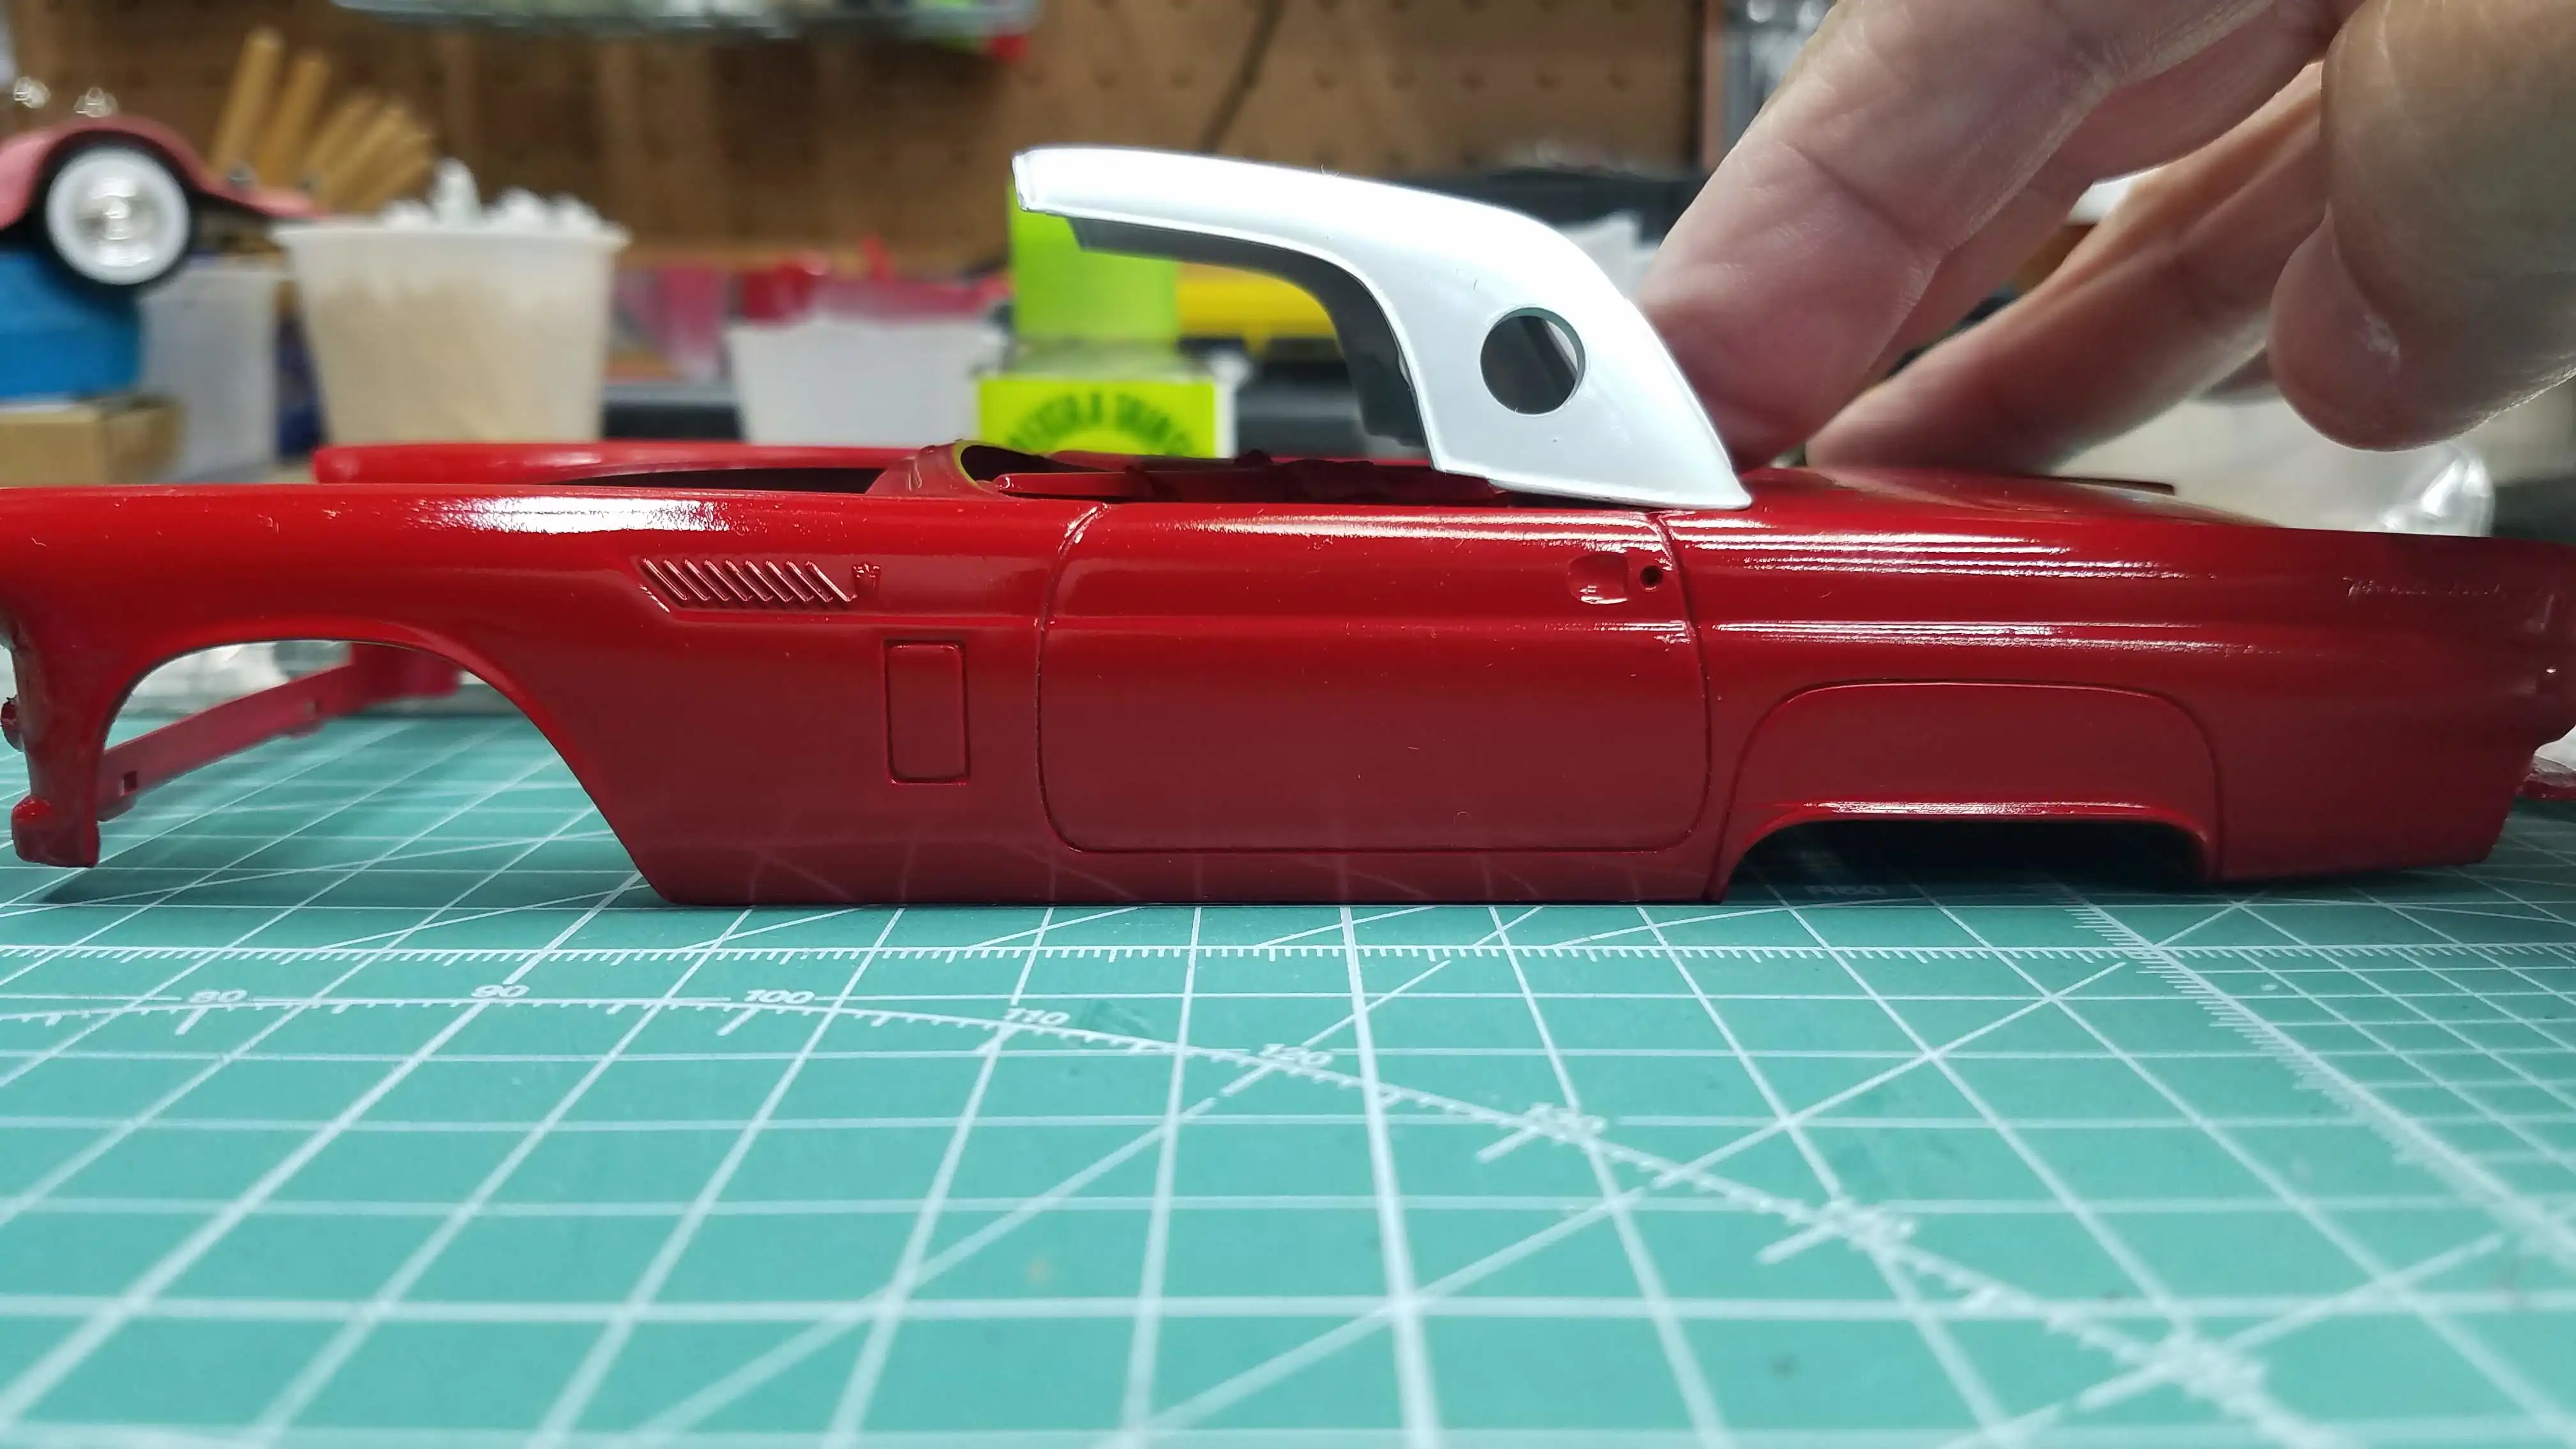
I repainted the roof white to fix my faux pas with reading the factory color chart. As shown, and talked about in a previous photo, I had painted the roof black; however, a red body with a black roof was not available on the T-Bird.
Photo 032
Click/tap photo to enlarge
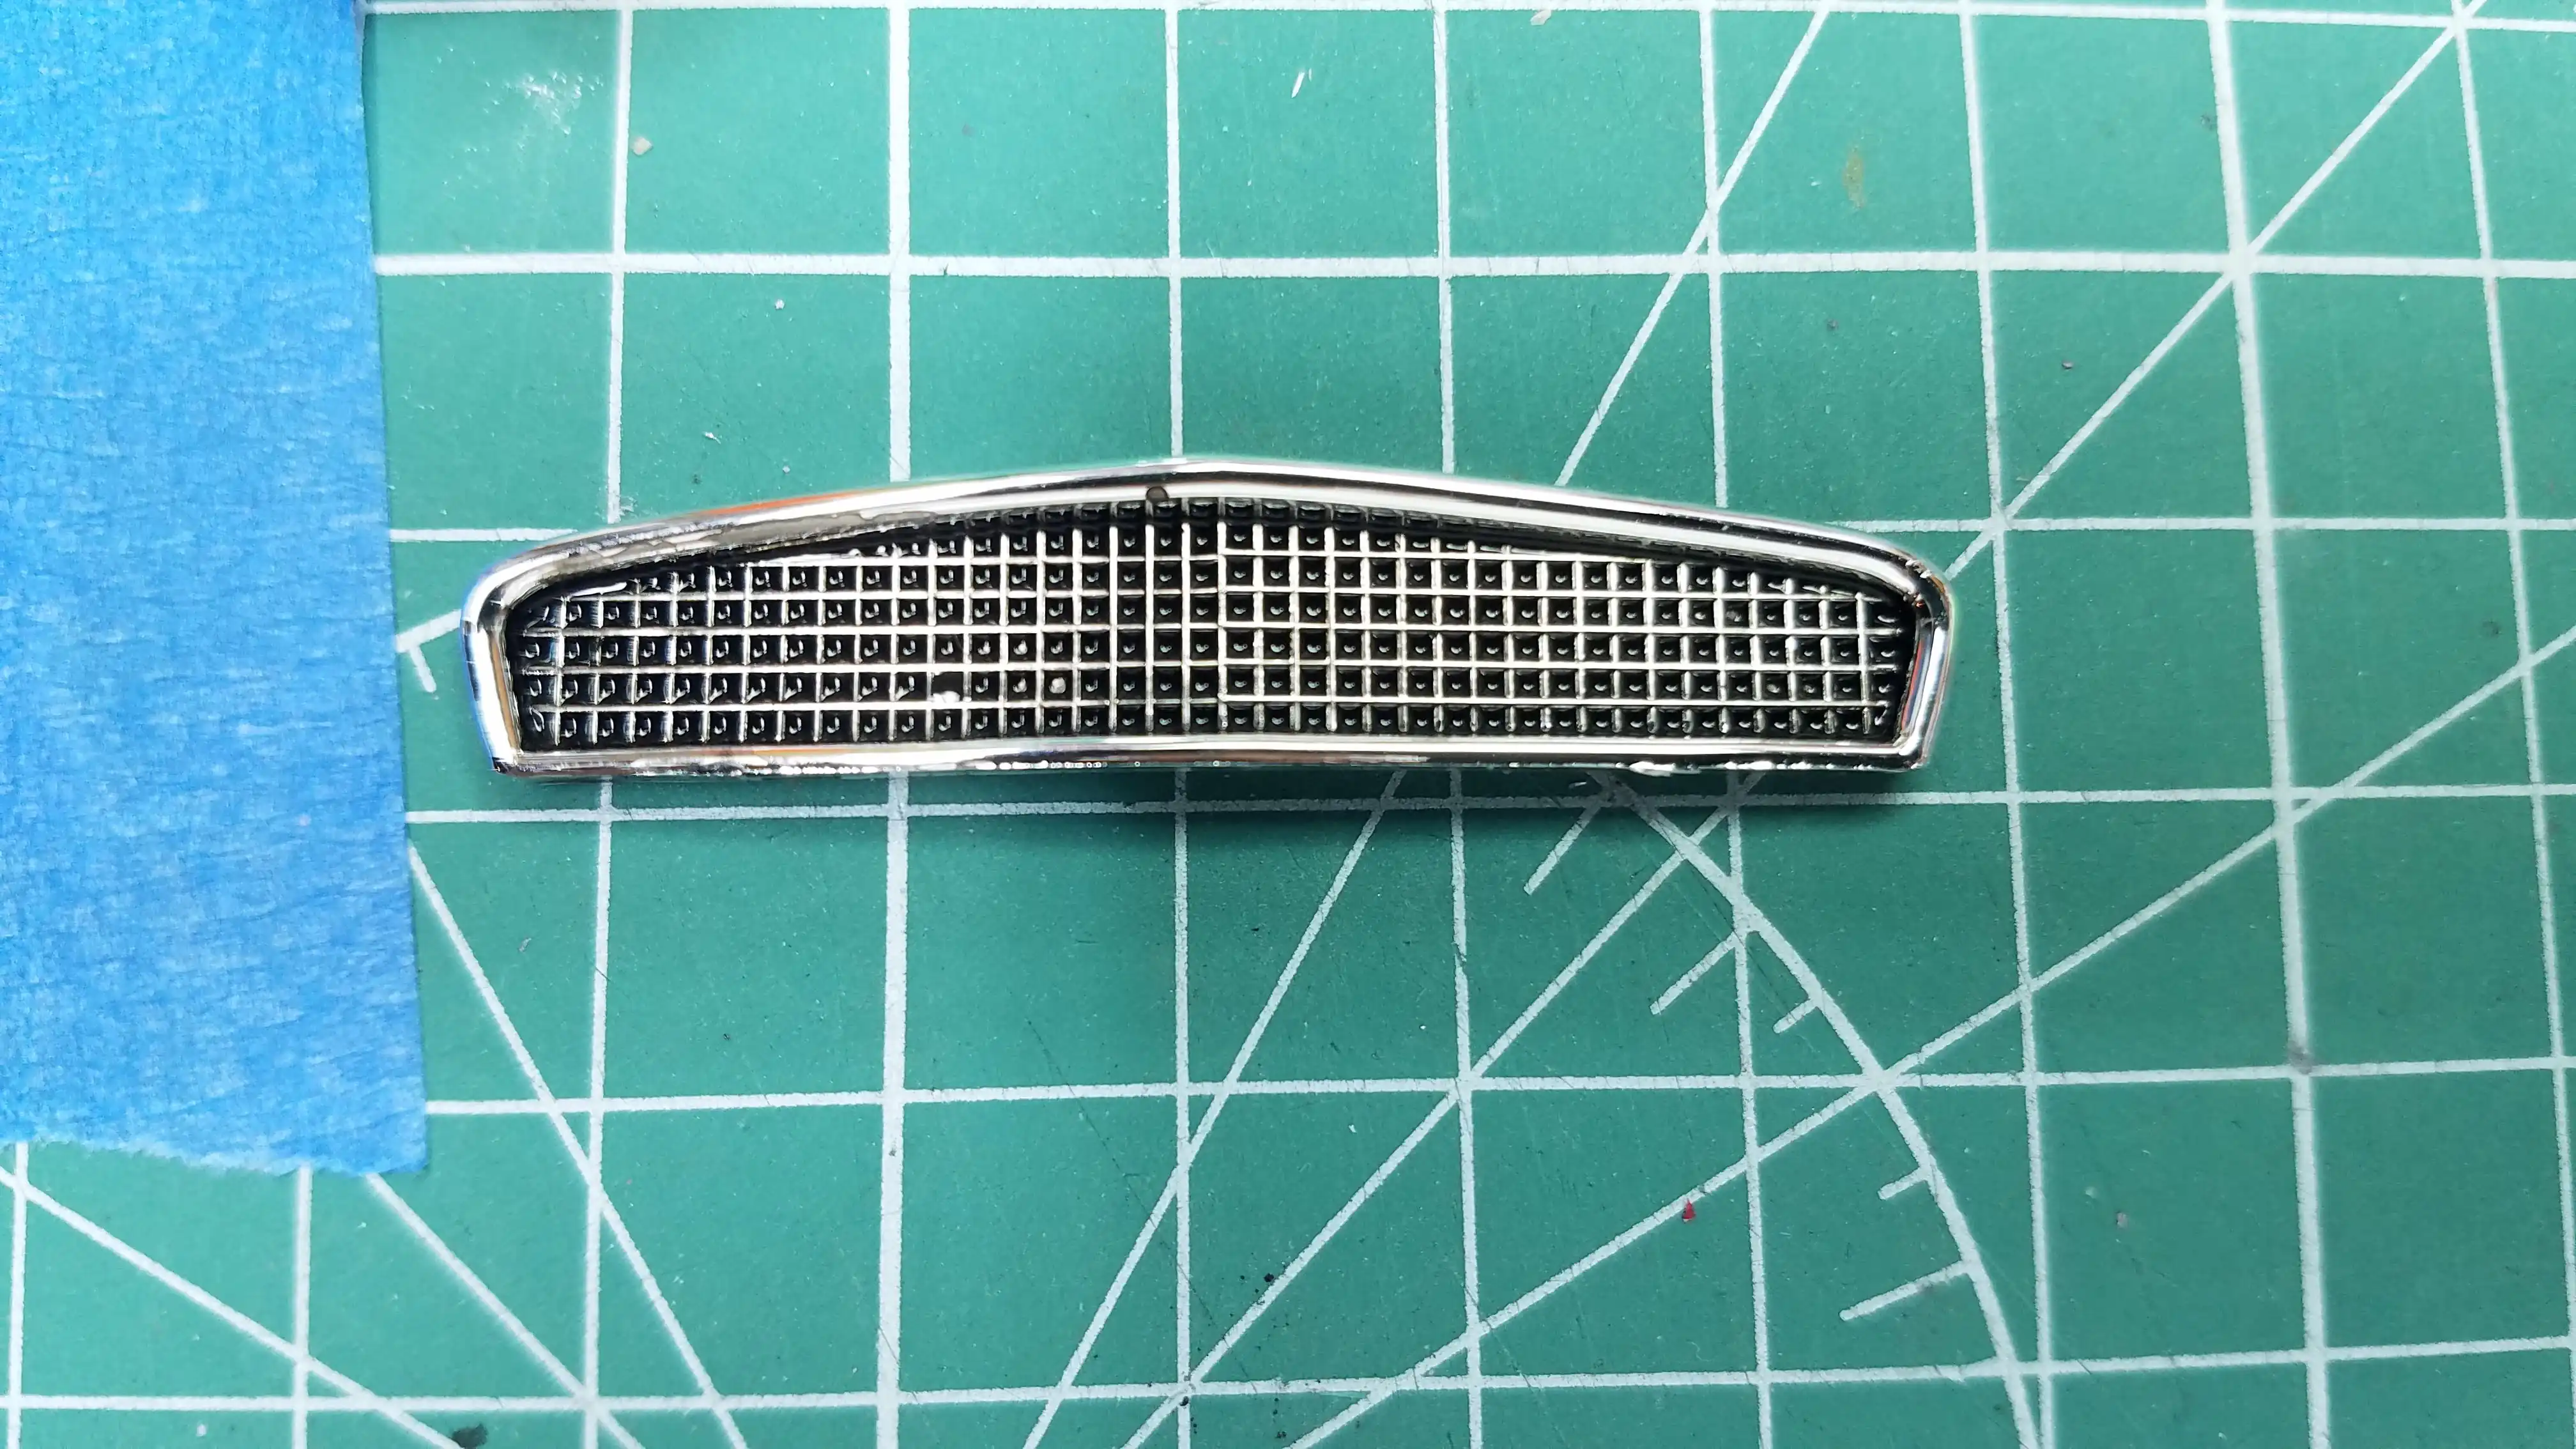
 Grill accented with Tamiya Black Wash
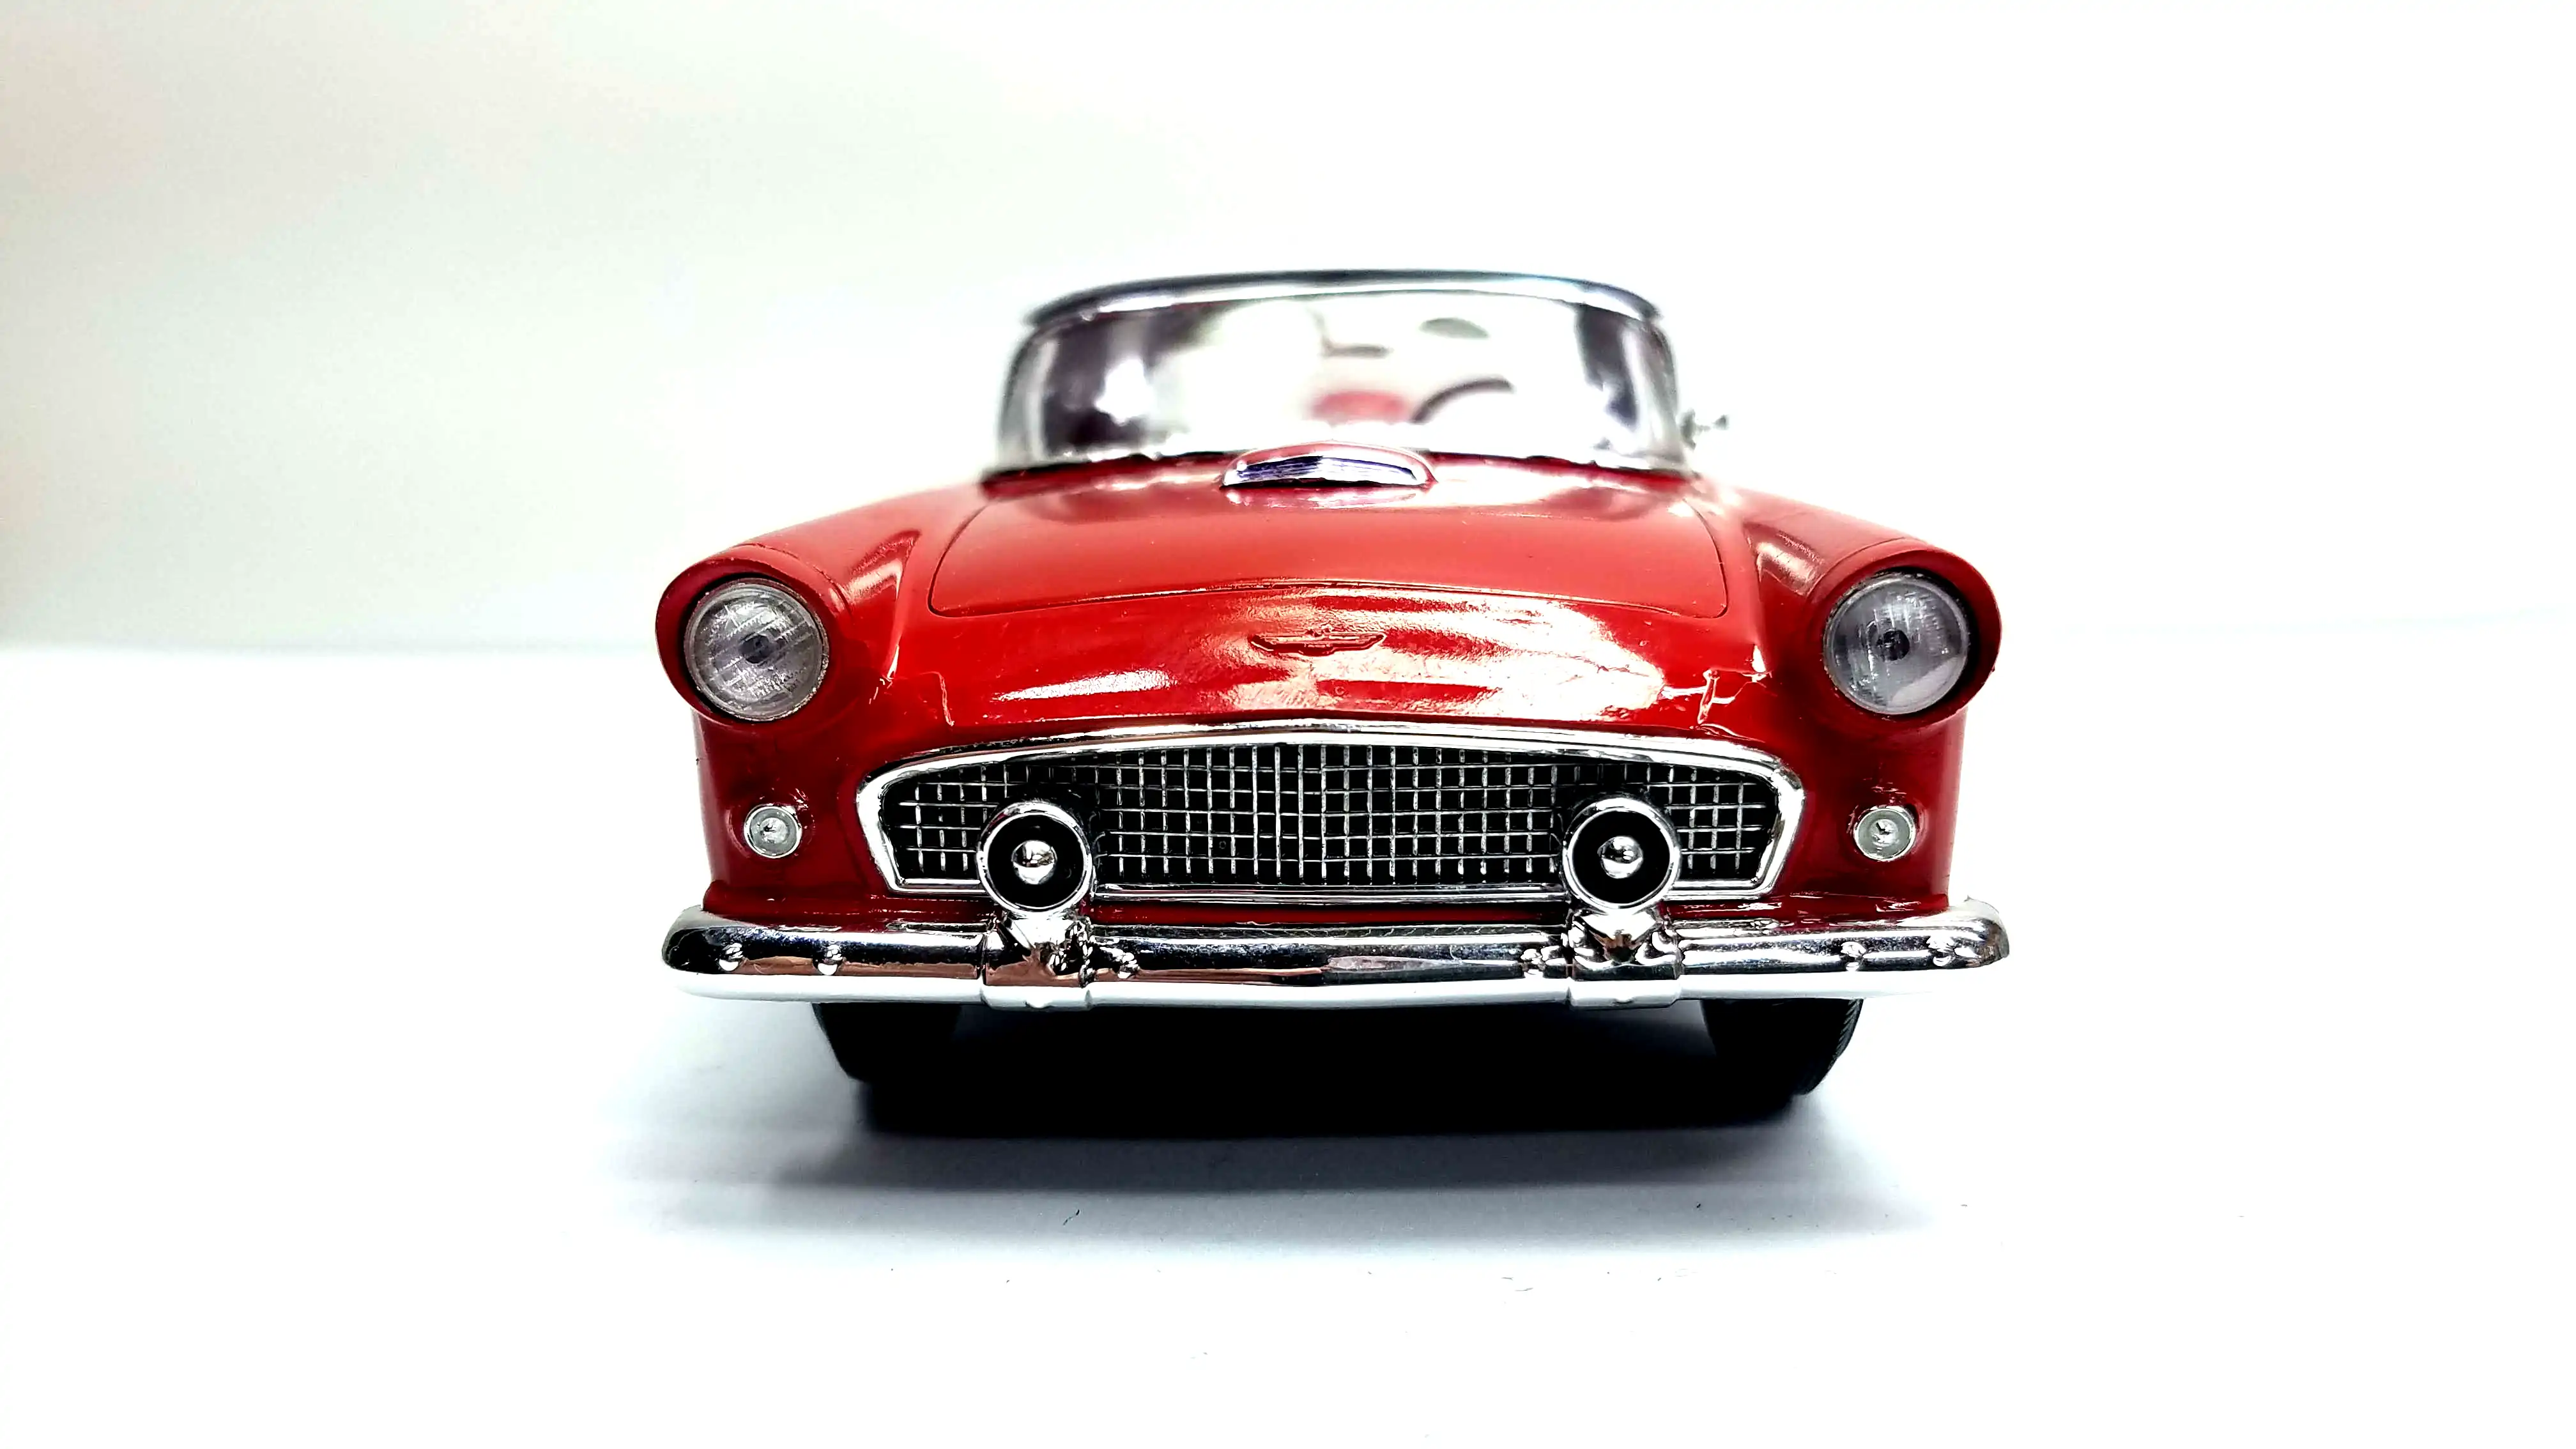
The grill has been detailed with Tamiya Black Wash and is ready to be installed.
Photo 033
Click/tap photo to enlarge
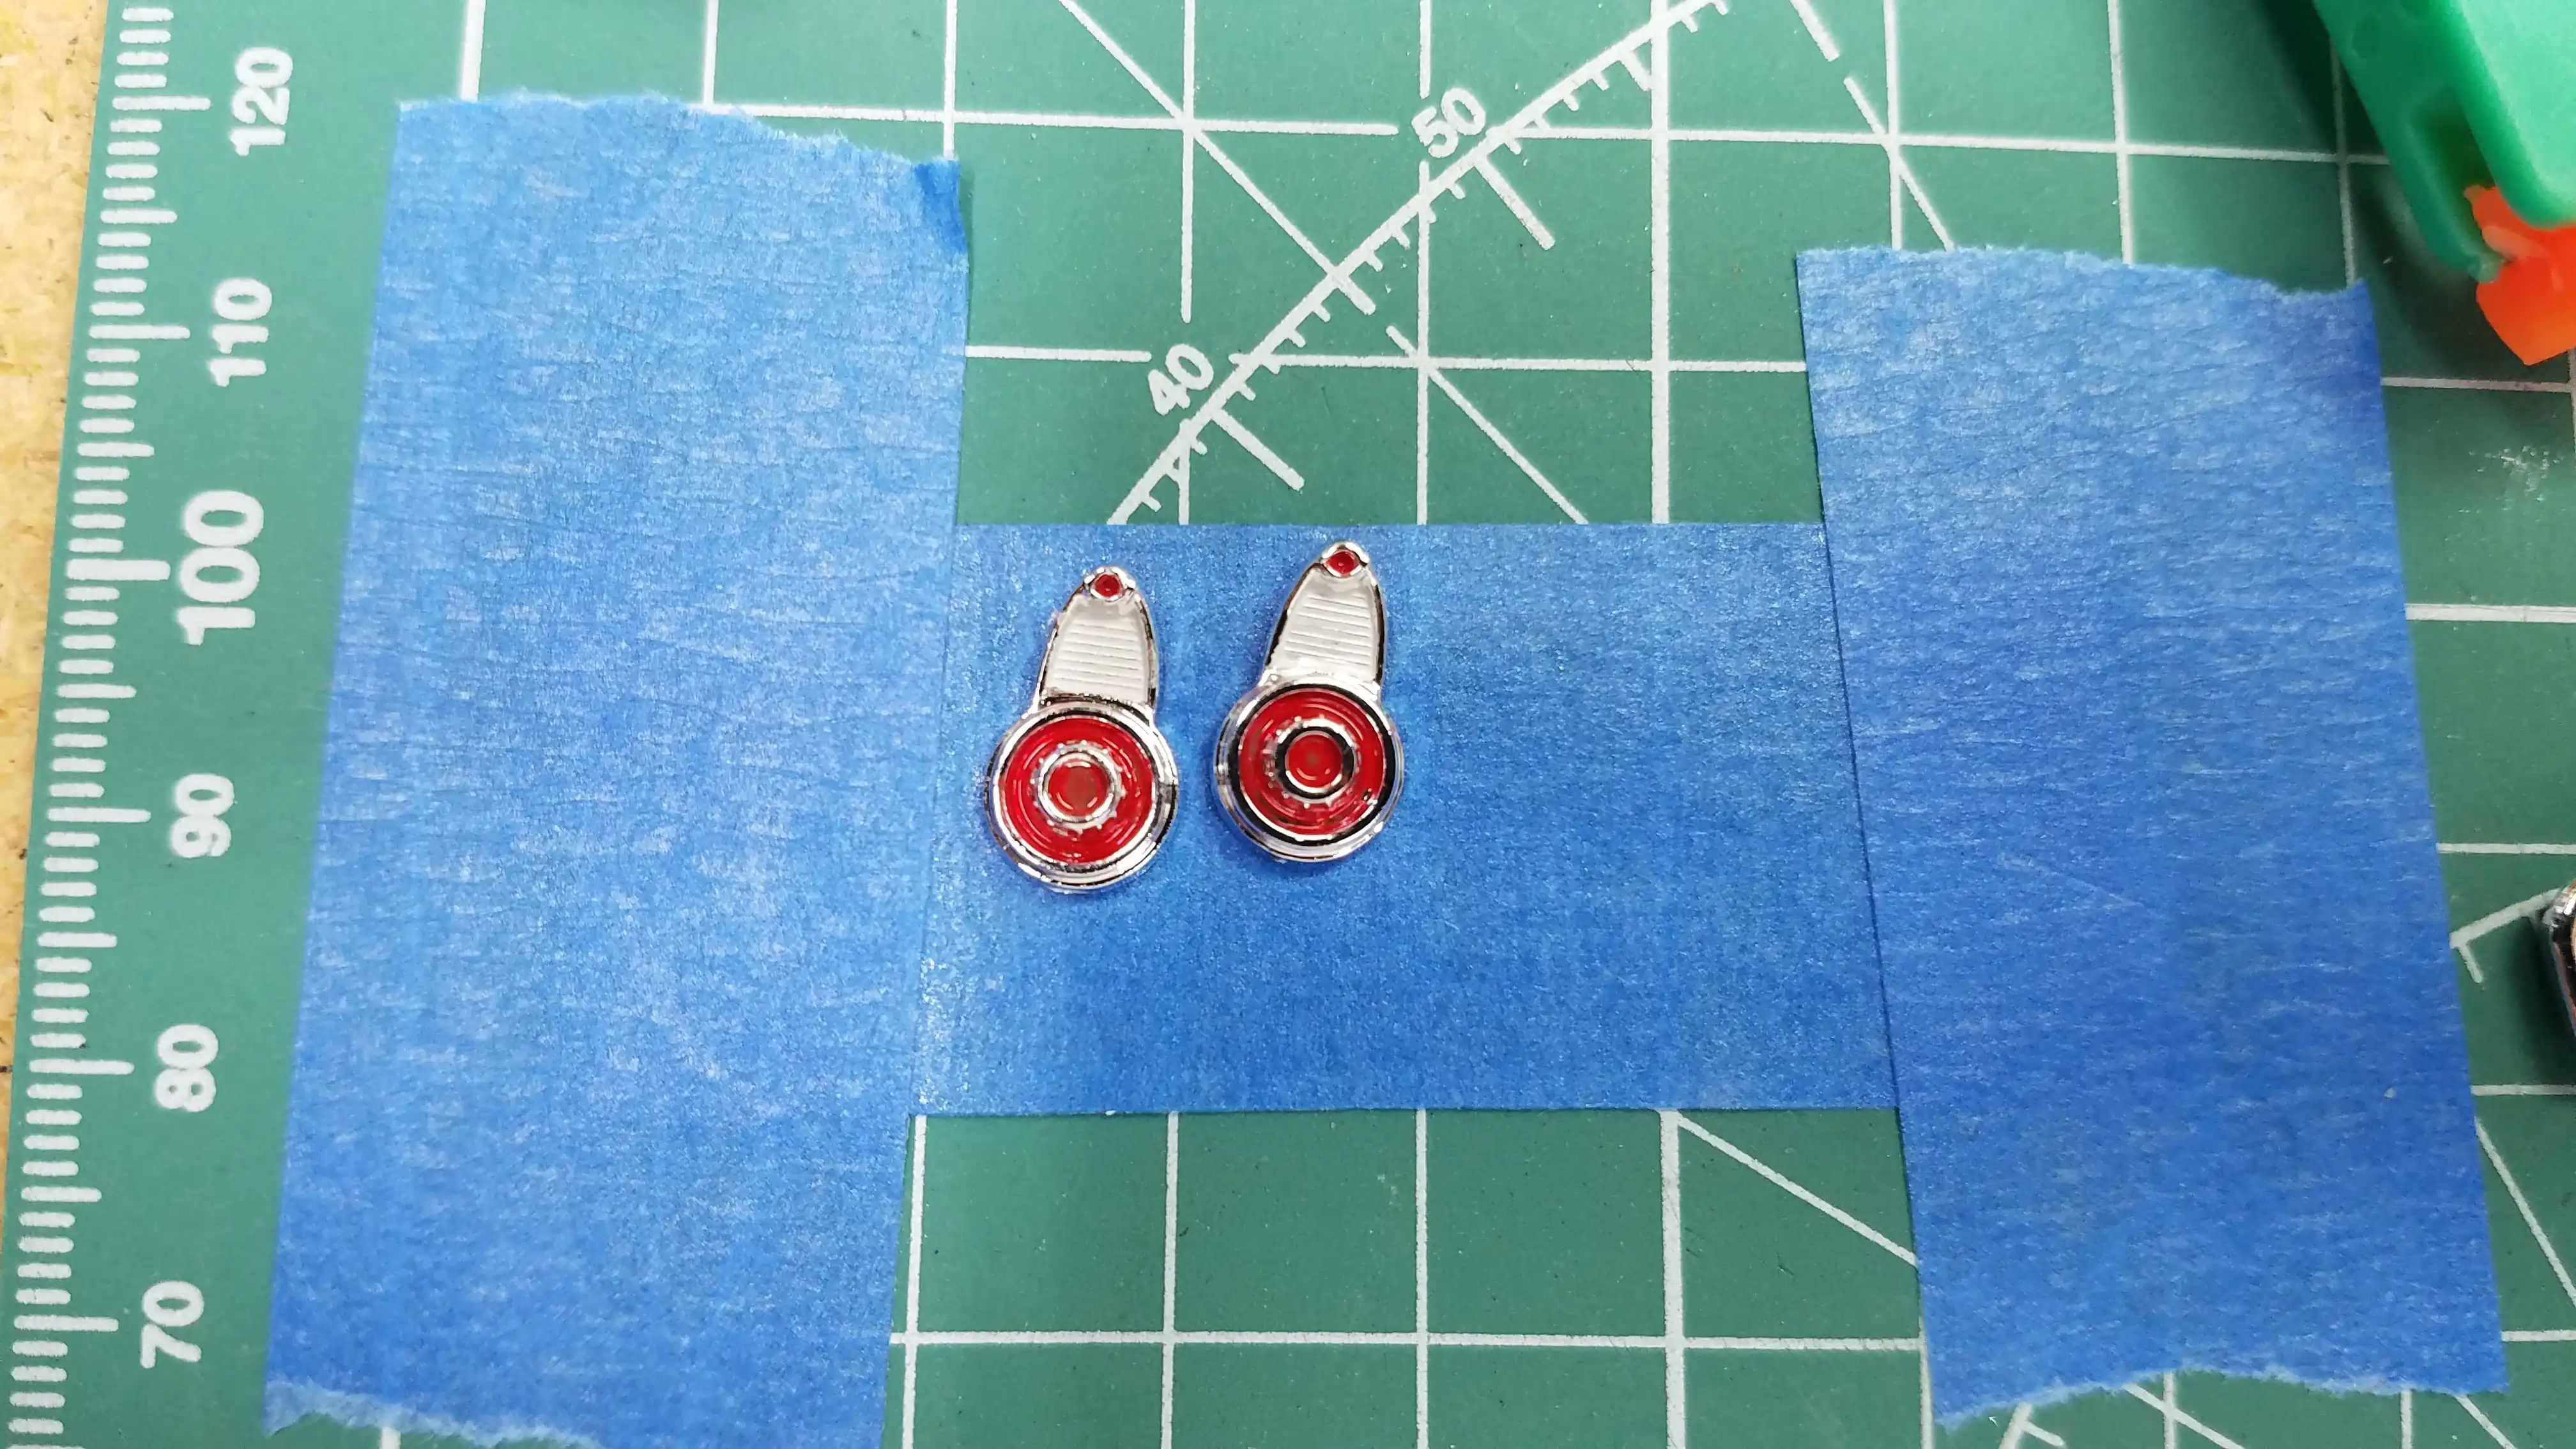
 Tail lights colored with clear red and white
The tail lights are painted and ready to go. The red is Model Master Clear Red. The white lights were filled with a wash made with a 2:3 ratio of Vallejo 71.279 Insignia White and Vallejo 71:261 Airbrush Thinner.
Photo 034
Click/tap photo to enlarge
 1956 Pennsylvania license plate
I live in Pennsylvania, therefore I always use a PA license plate. I find an image of the year plate that I want and then download the image and save it to my hard drive. I open the image in Gimp , a totally free image manipulation program to enhance and size the plate. This plate is 10mm x 5mm and the print size is 11mm x 5.5mm. I increased the number of pixels from 75 x 75 pixels to 1000 x 1000 pixels. I then enhanced the dark blue areas so that they didn't look black. I found this plate at The Brandywine General Store website
Photo 035
Click/tap photo to enlarge
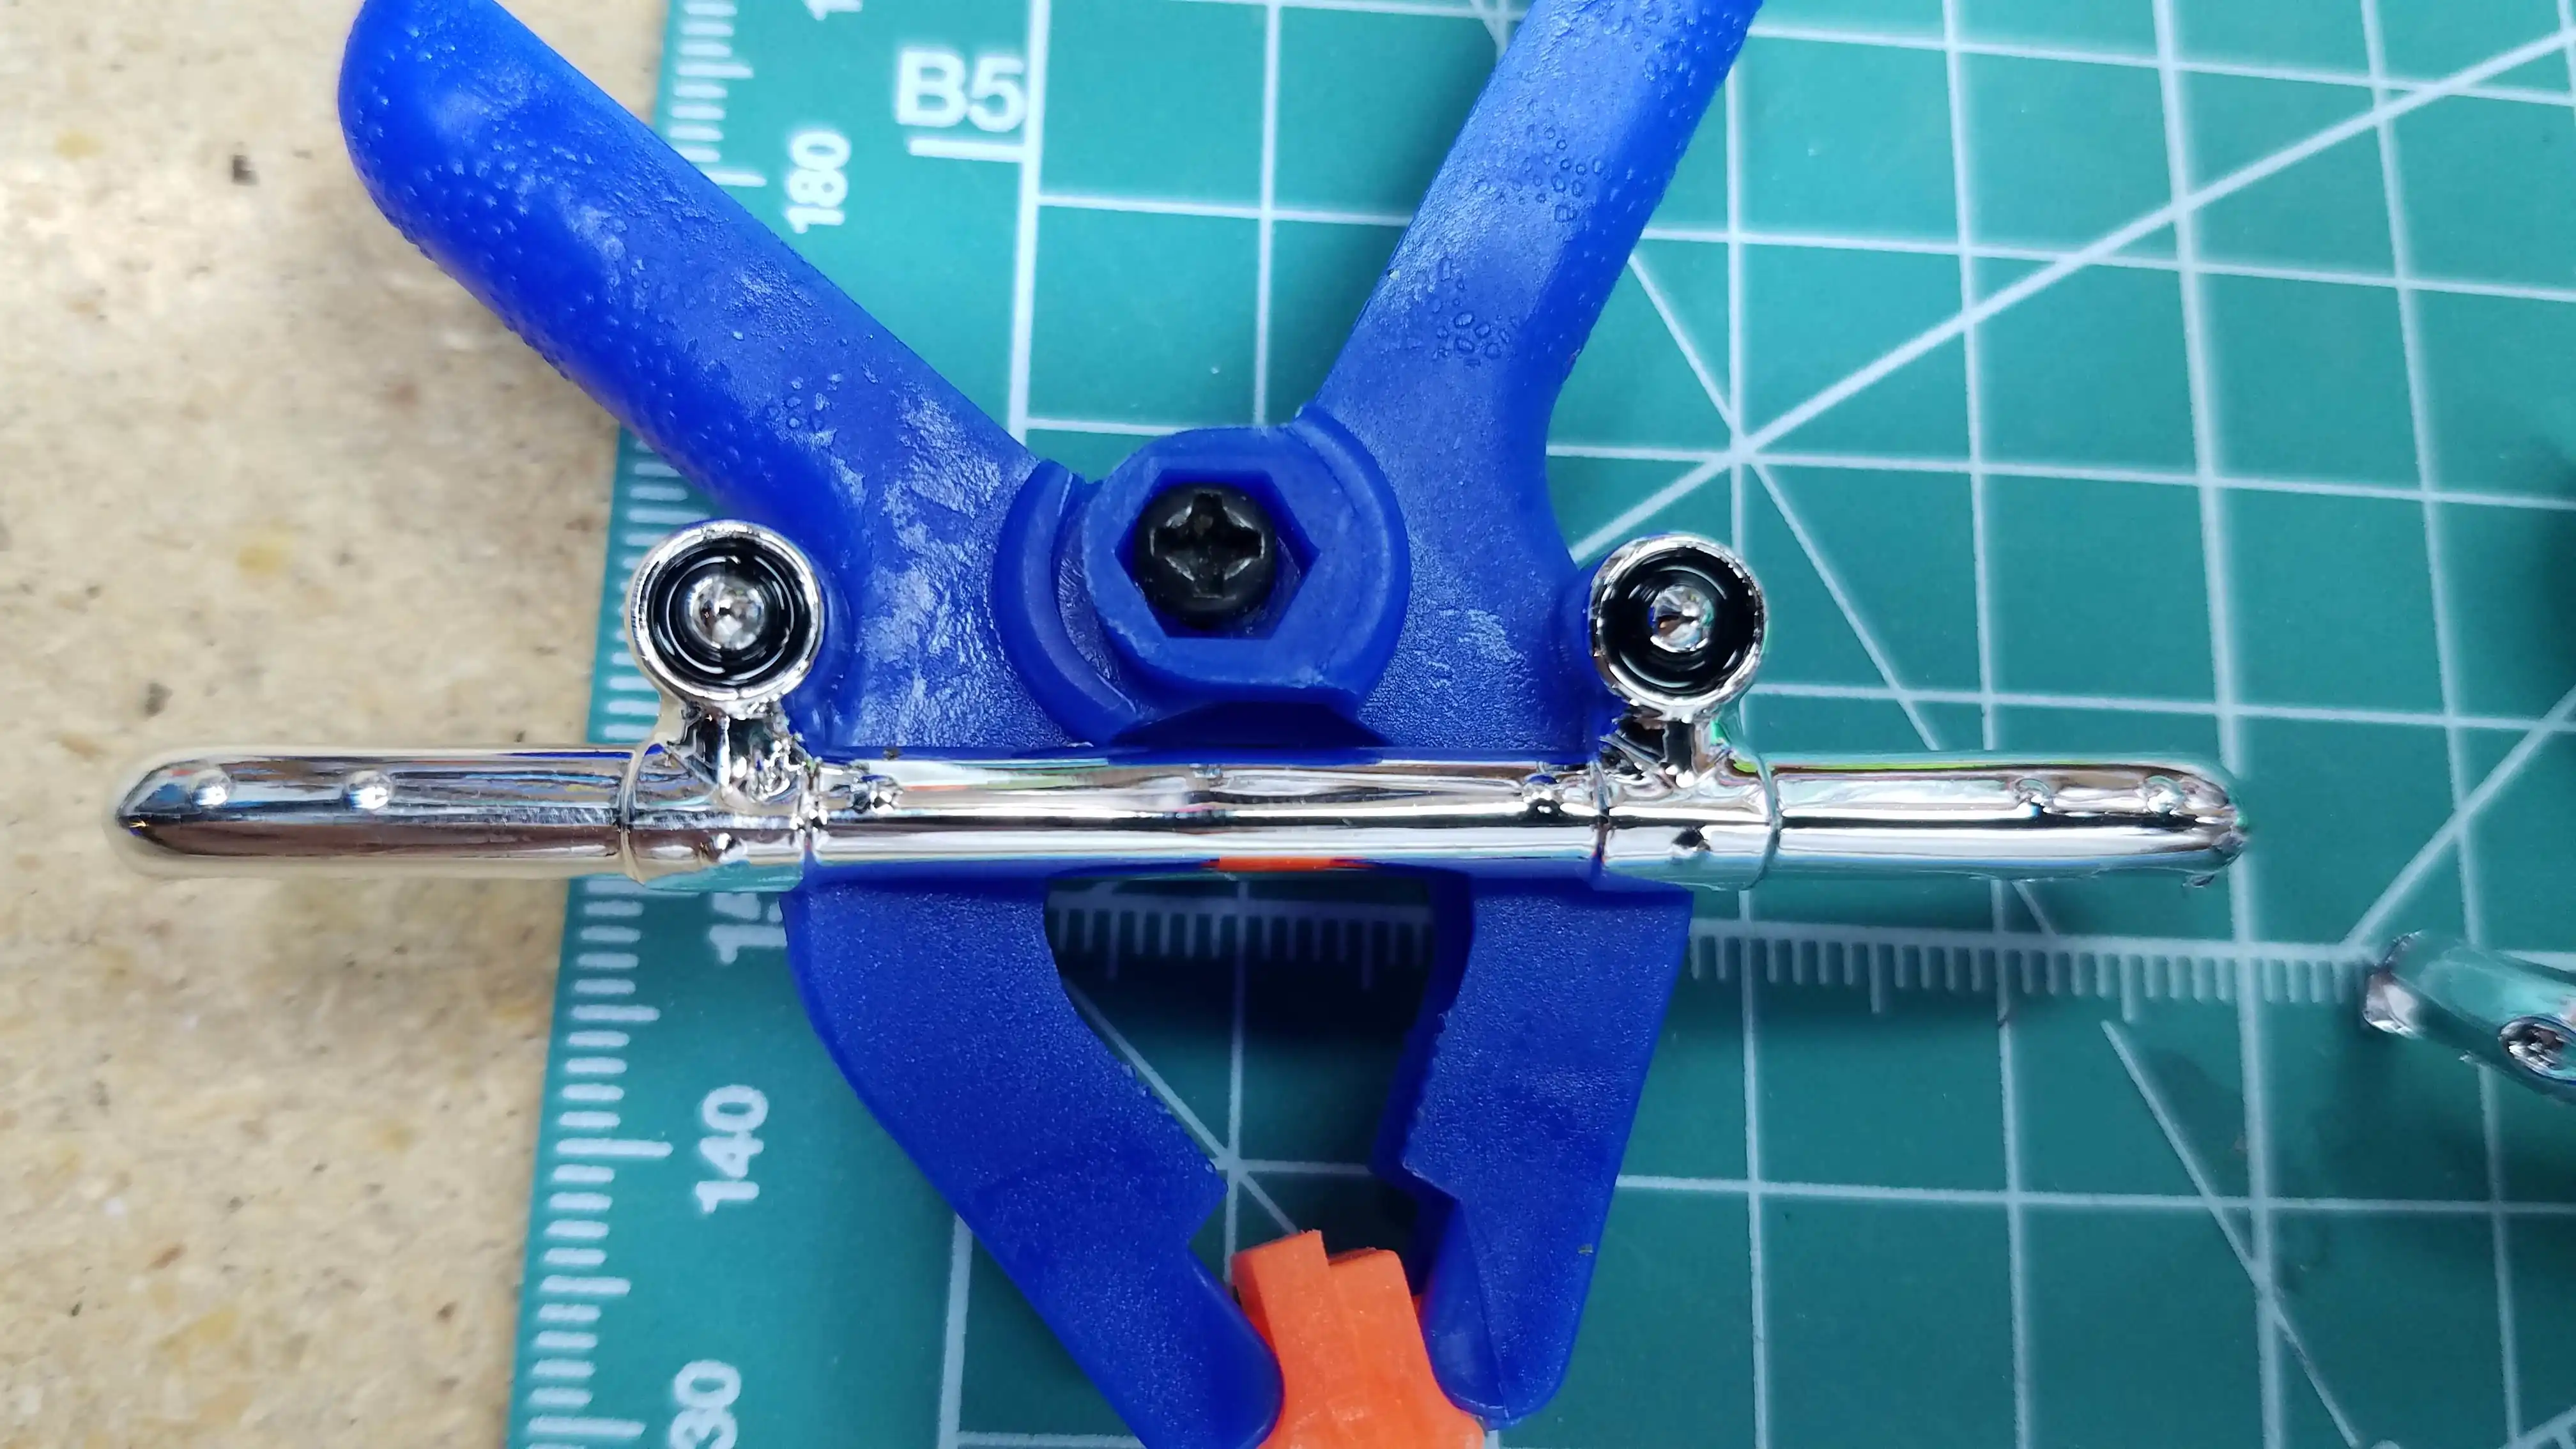
 Front bumper is detailed
The front bumper is detailed with some Tamiya Black Wash and is ready to be installed.
Photo 049
Click/tap photo to enlarge
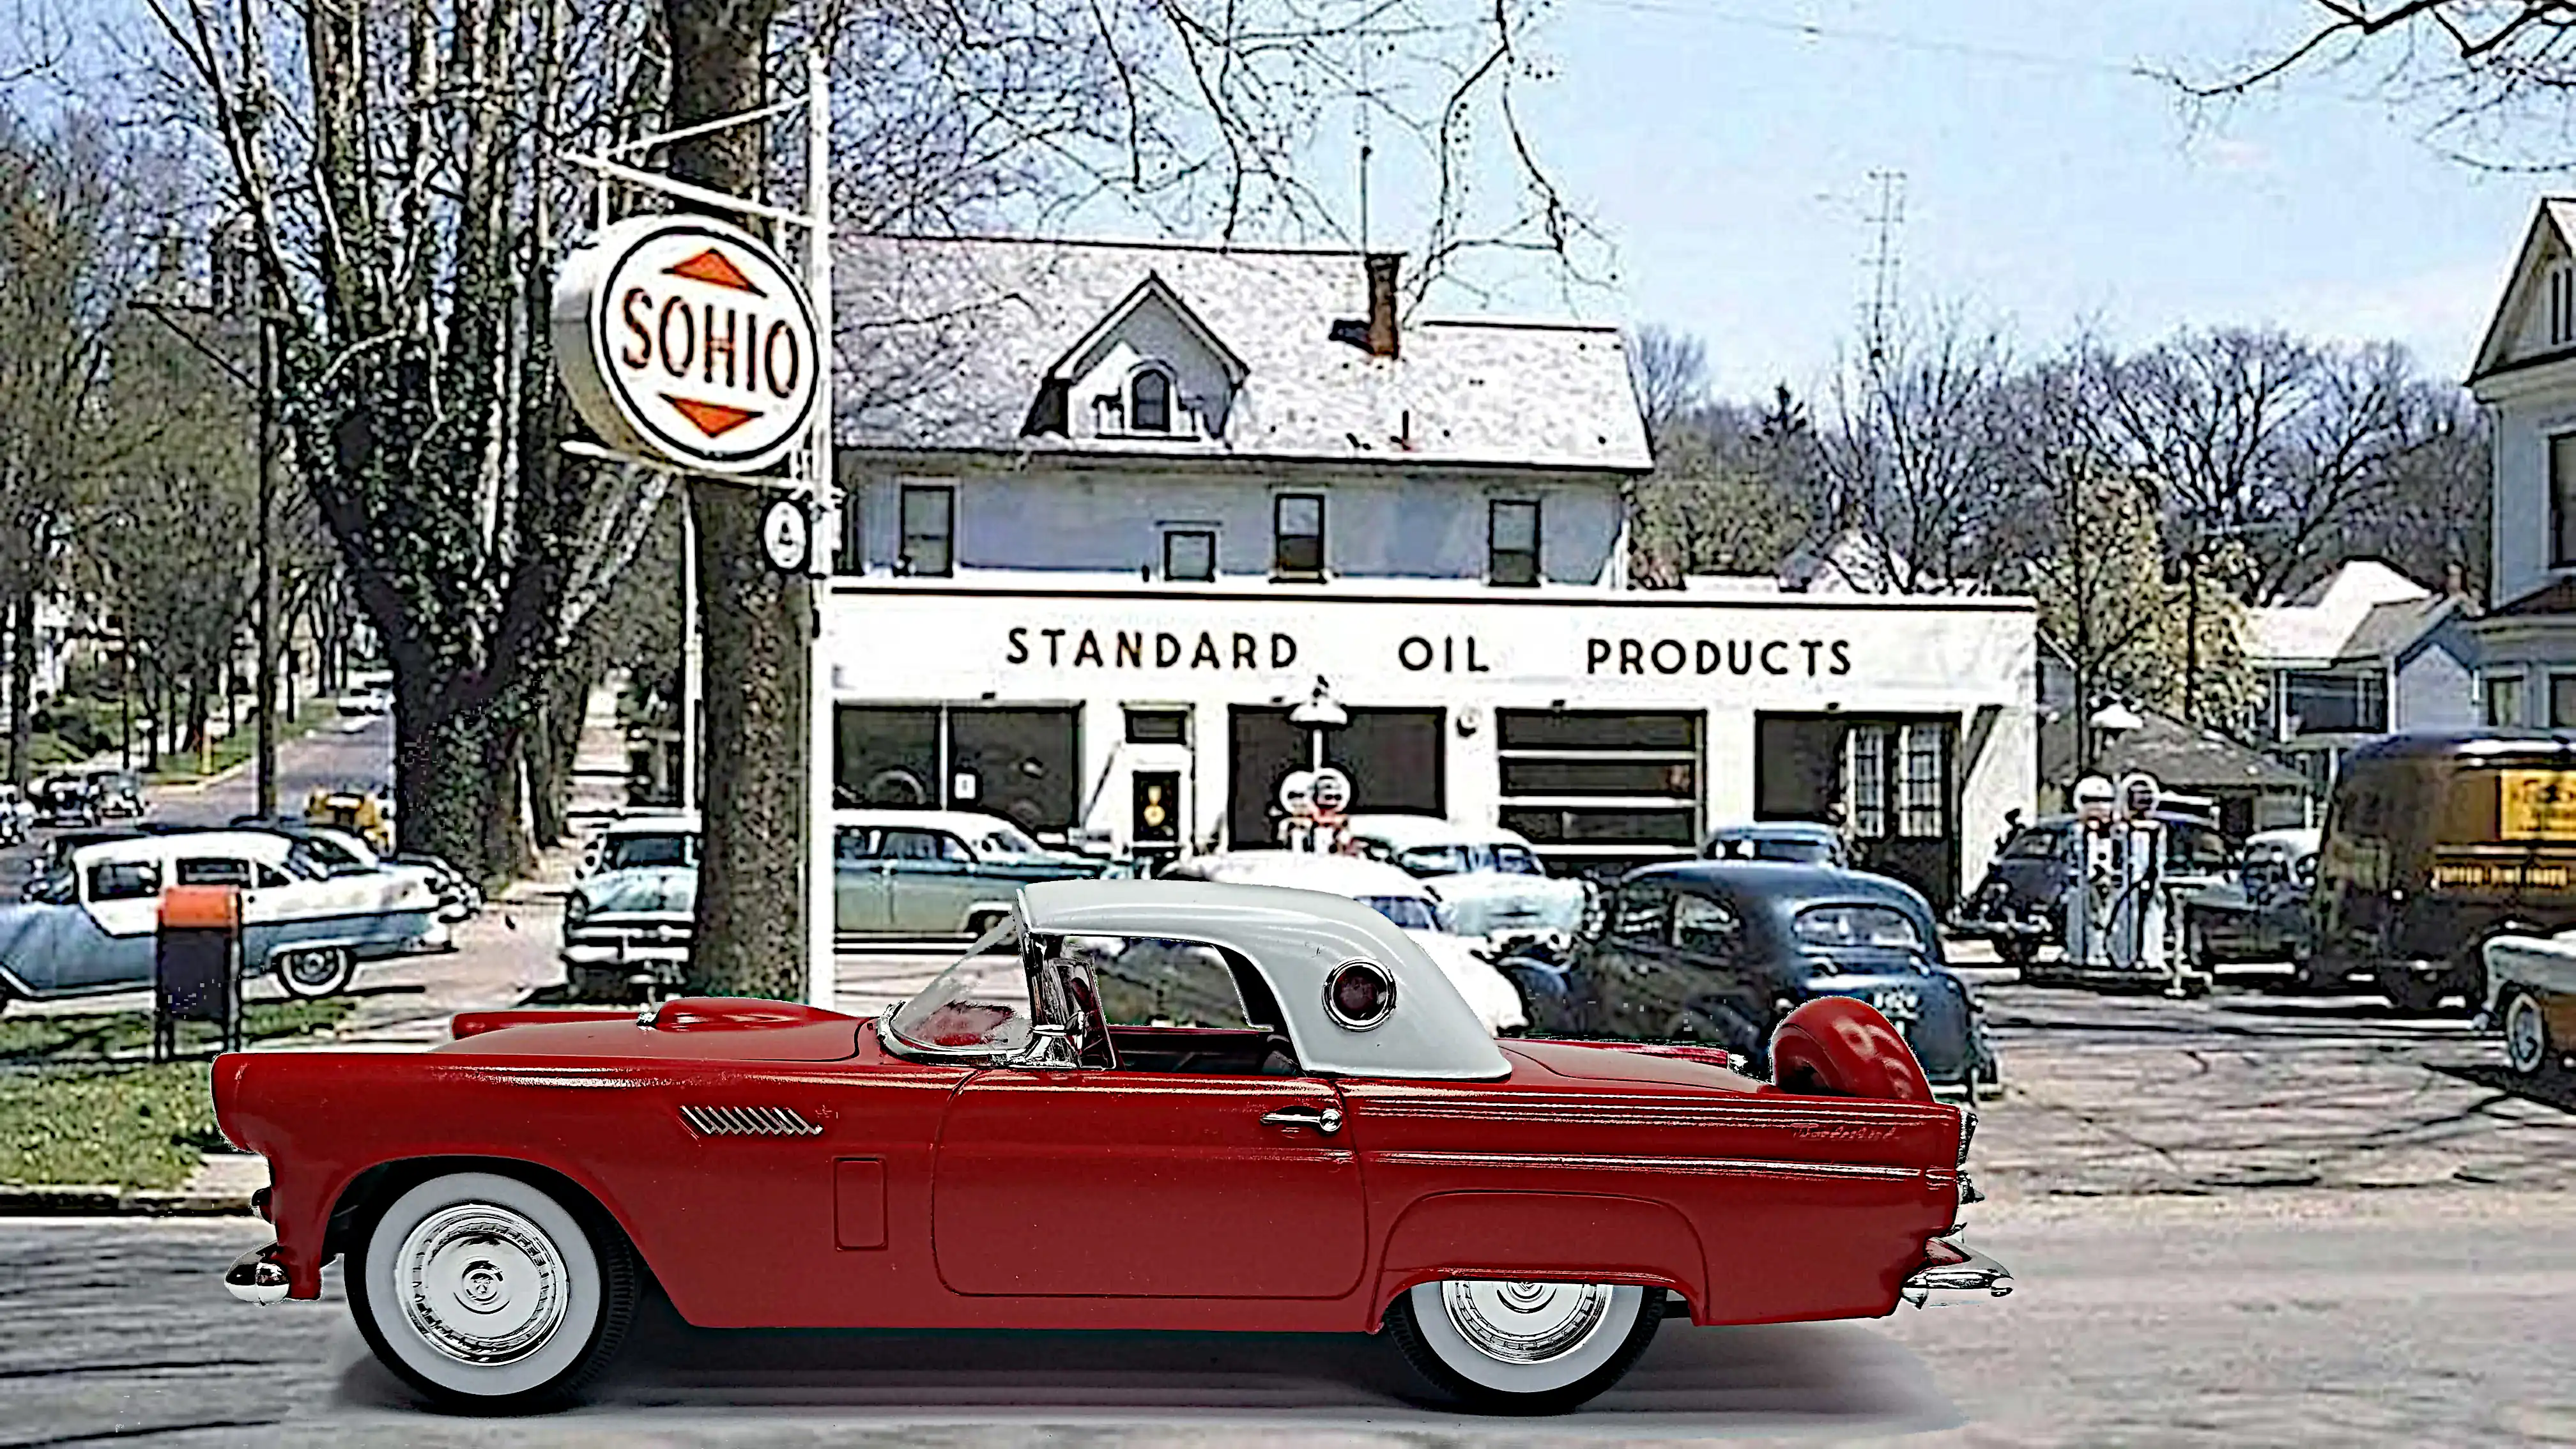 Finished embedded into a photo passing a SOHIO gas station
Finished embedded into a photo passing a SOHIO gas station.
Photo 050
Click/tap photo to enlarge
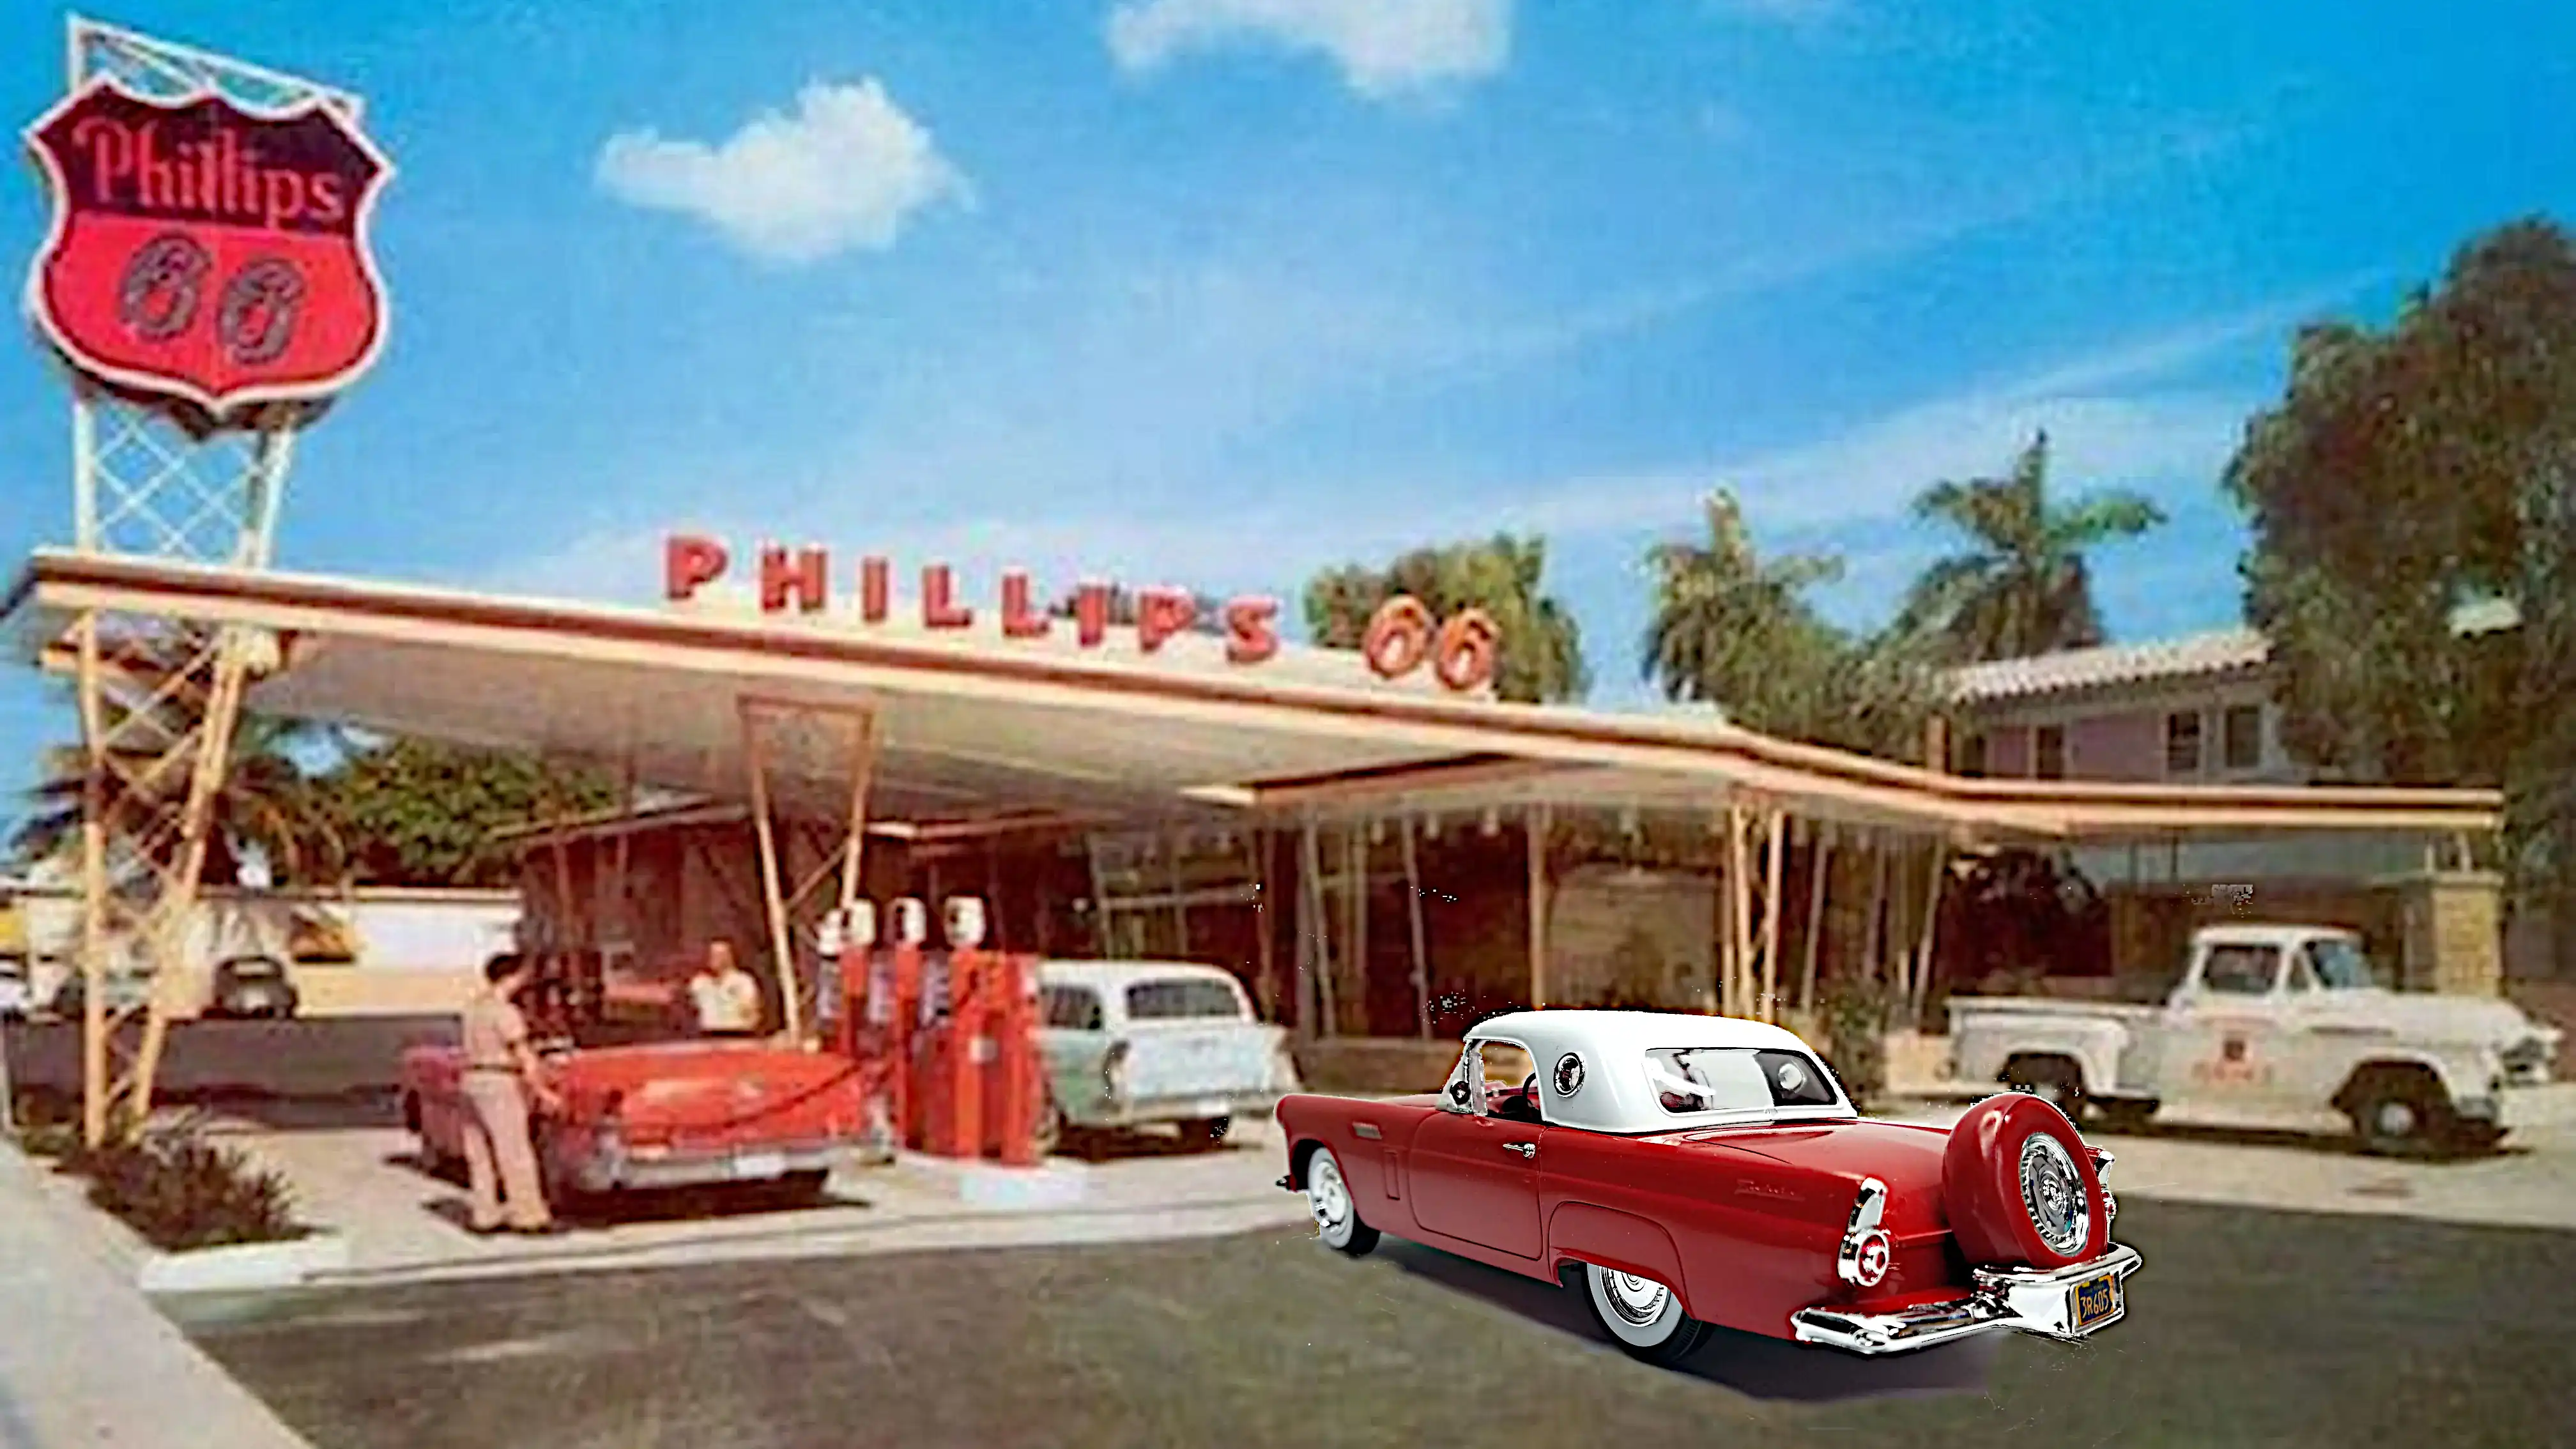 Finish embedded waiting in line for gas at a Phillips 66 gas station
Finished car embedded into a photo waiting in line at a Phillips 66 gas station from the 1950's.
Photo 051
Click/tap photo to enlarge
 Finished embedded in front of a Drive-In movie theater
Finished car embedded into a photo in front of a Drive-In movie theater.
Photo 052
Click/tap photo to enlarge
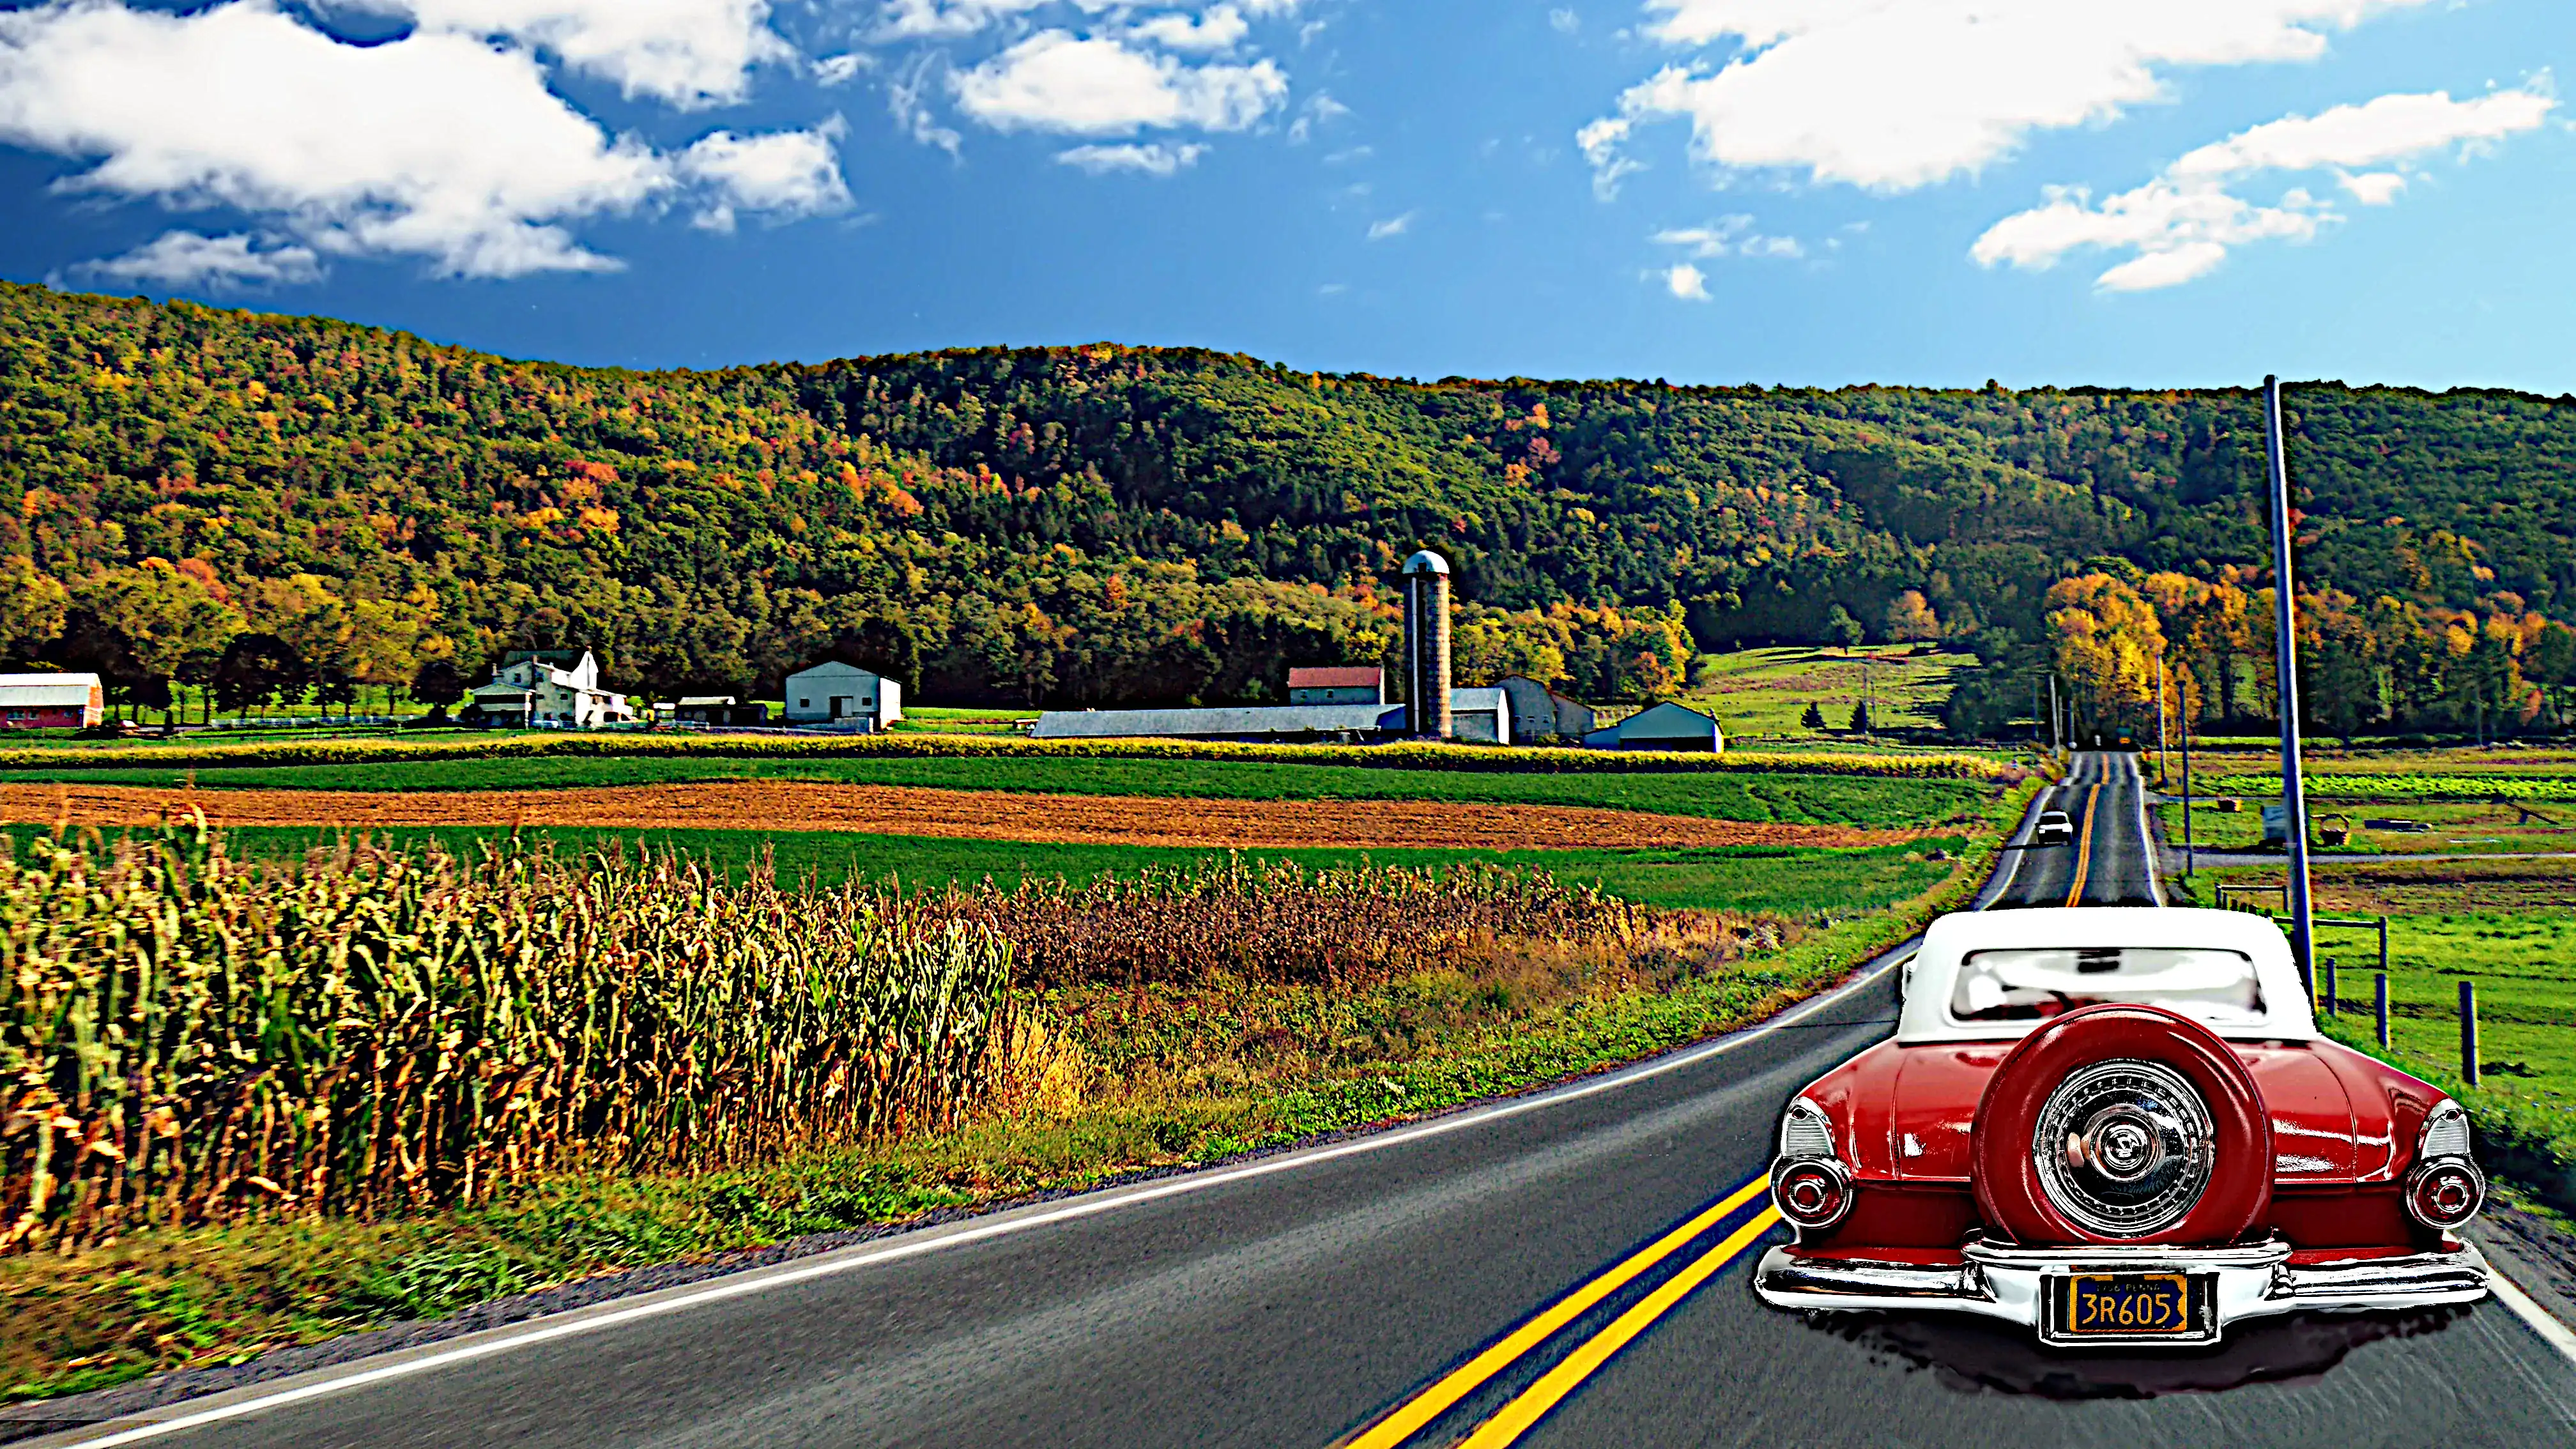 Finished embedded on country road driving away
Finished embedded on country road driving away.


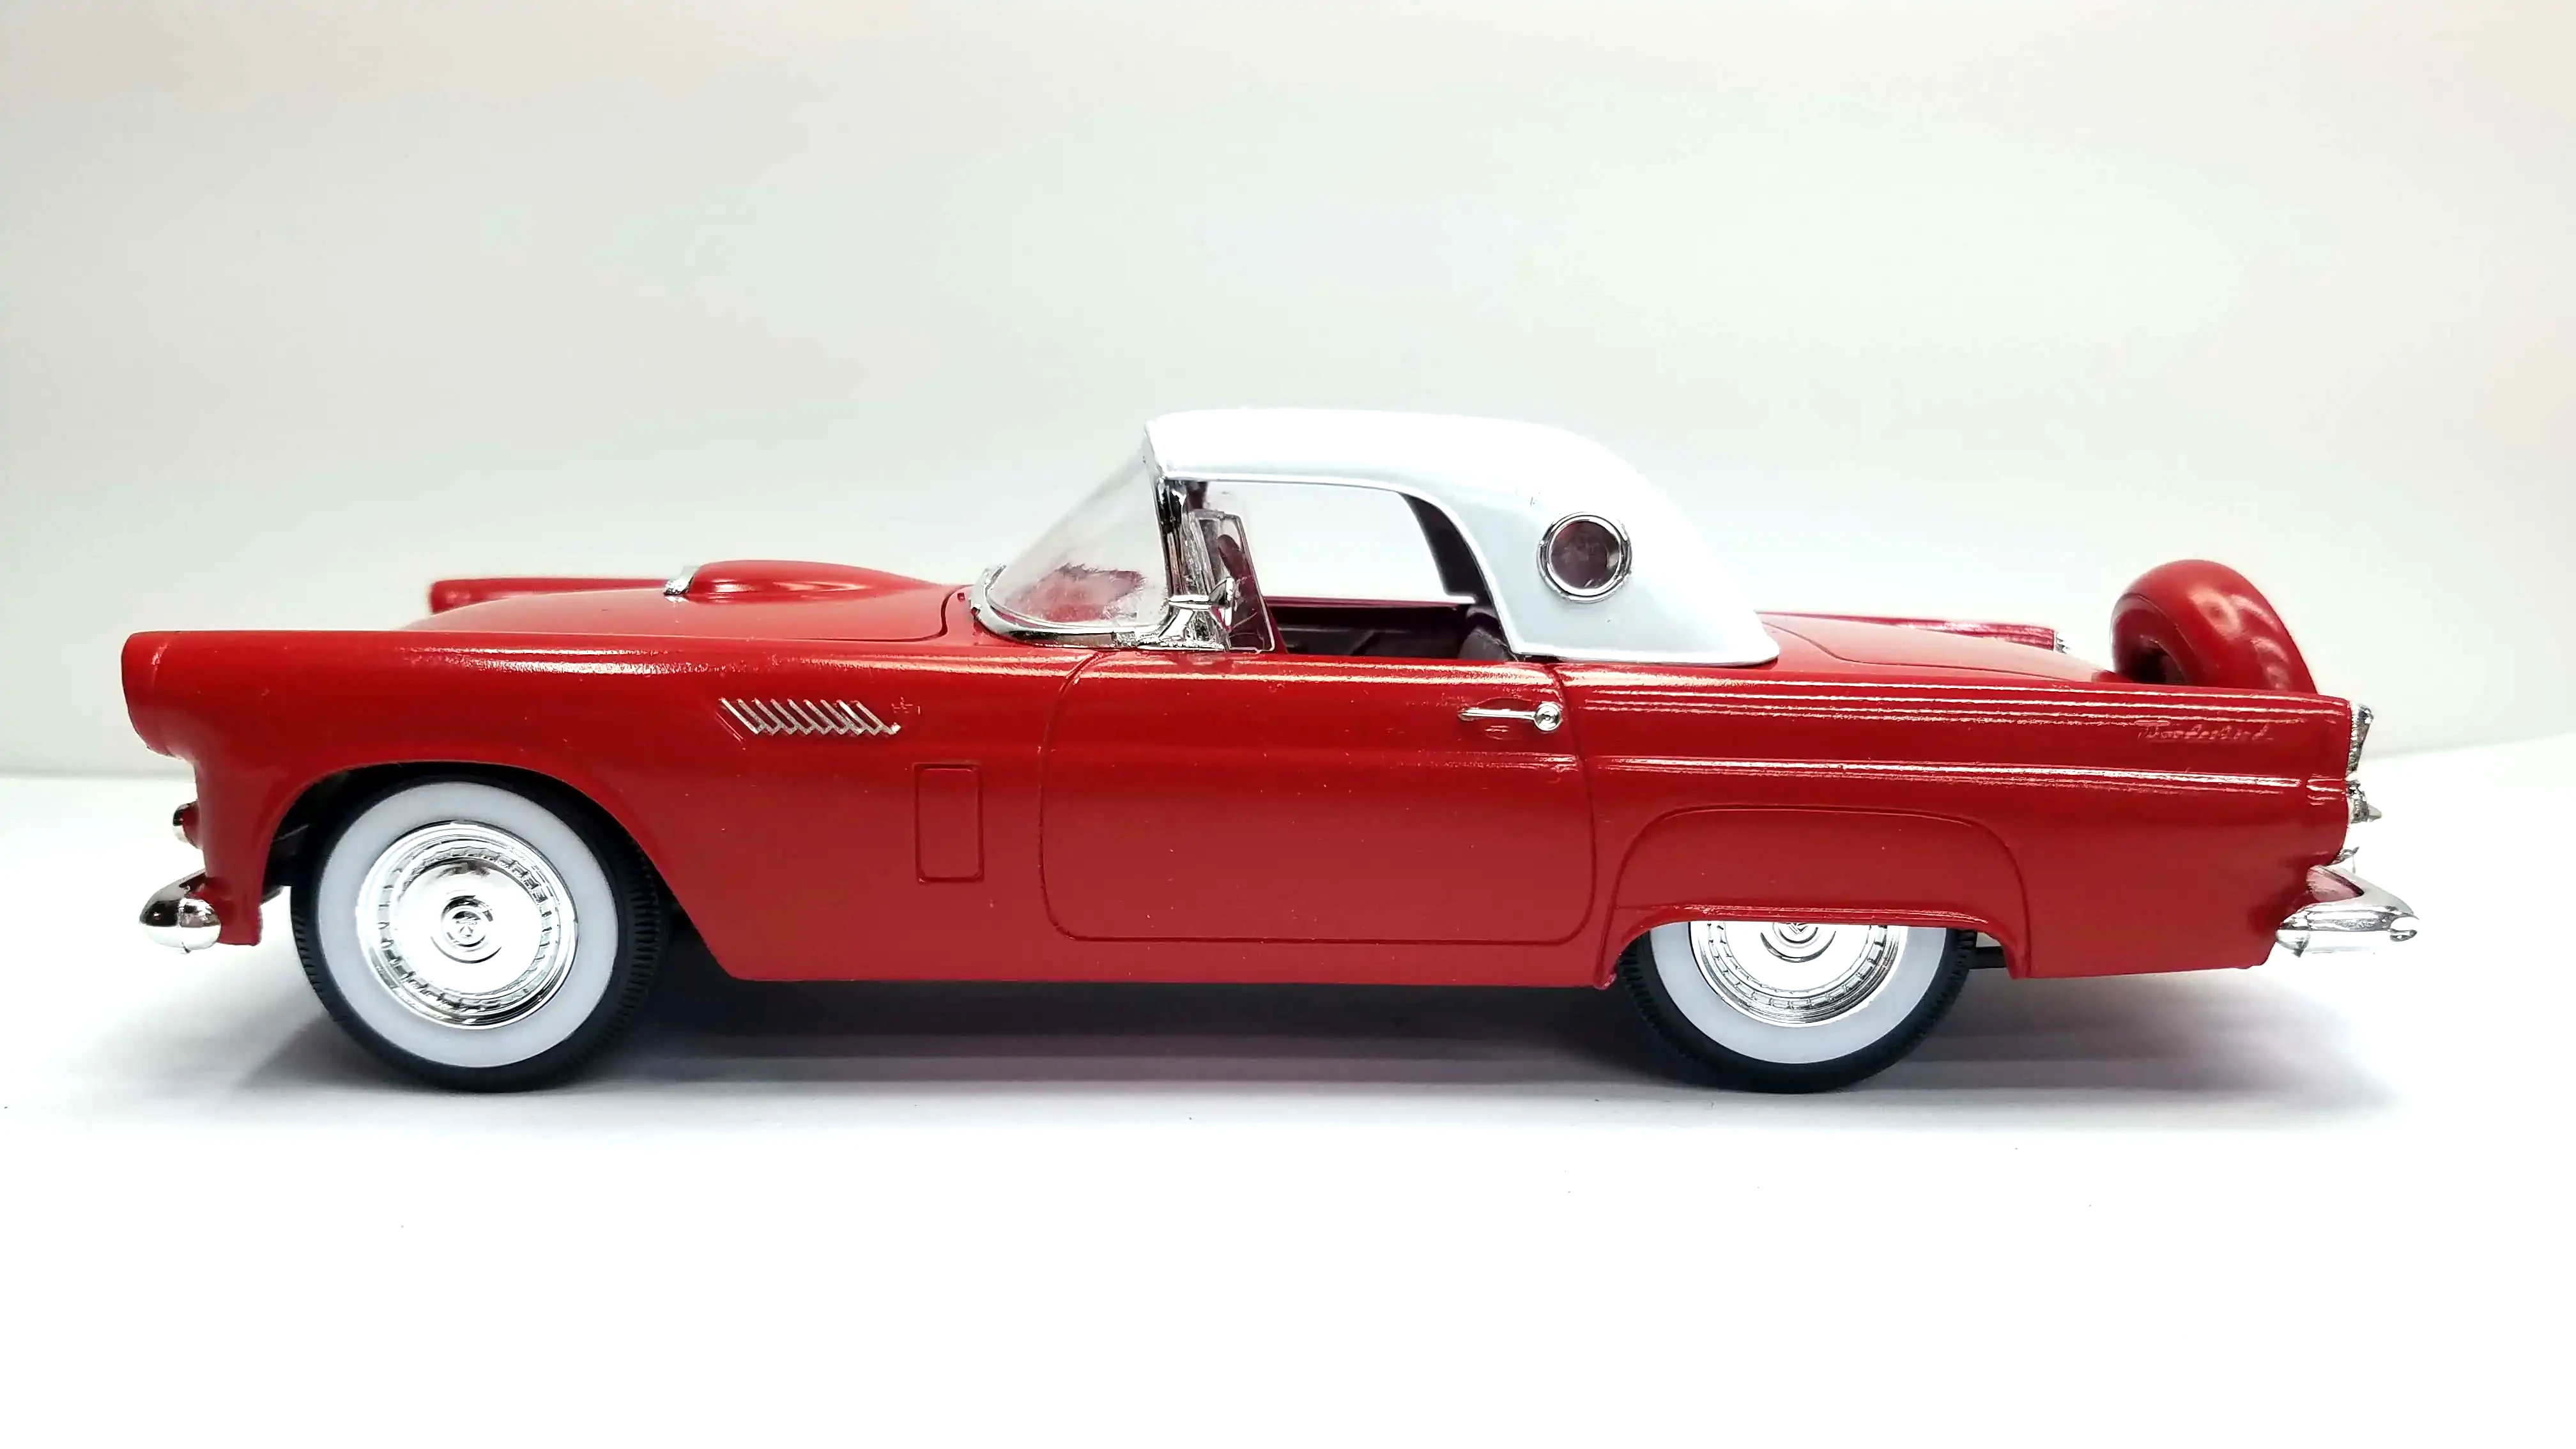 Finished photo
 Finished photo
 Finished photo
 Finished photo
 Finished photo
 Finished photo
 Finished photo
 Finished photo
 Finished photo
 Finished photo
 Finished photo
 Finished photo
 Finished photo