About this Build
This years USACC build is a 1955 Ford Truck. We could use a pickup
or a panel van. I had a 55 Ford pickup in my stash; however, I
always wanted to do a panel van, or as they called them in that
era, a panel truck. I started my search for the 55 Panel Truck.
I really wanted the Moogram Kit #2772, the "Bootlegger"; however,
it is no longer available, but I found one on Ebay at a reasonable
price, so I grabbed it. The Scalemates information is in the
description of the box art image that is the first image of this
photo journal.
My 2nd Cousin, who we called Smokey, had just passed away at the
time of this build. He owned a plumbing business and in honor of
my cousin I decided to make this truck a plumbing service truck.
I always use the USACC build to try a lot of things that I never
tried before and I plan to make a lot of modifications to this
kit. Here are some of the modification and additions I'm planning on:
-
Putting a Chrysler 426 HEMI Engine under the hood.
-
Scratch building a roof rack.
-
Scratch building a working extension ladder.
-
I'm contemplating opening the back doors?
-
Using 3D printed wheels.
-
Making my own decals.
-
...and a surprise addition that you'll have to wait till the
build is finished to find out.
So...as the great one says, "And away we go!"
Photo/Video/Assembly Journal
93 Photos
Skip's Messy Workbench ⇔ All rights reserved ⇔ Copyright © 2023-2025
Skip's Messy Workbench
⇔ Last updated: August 08, 2025

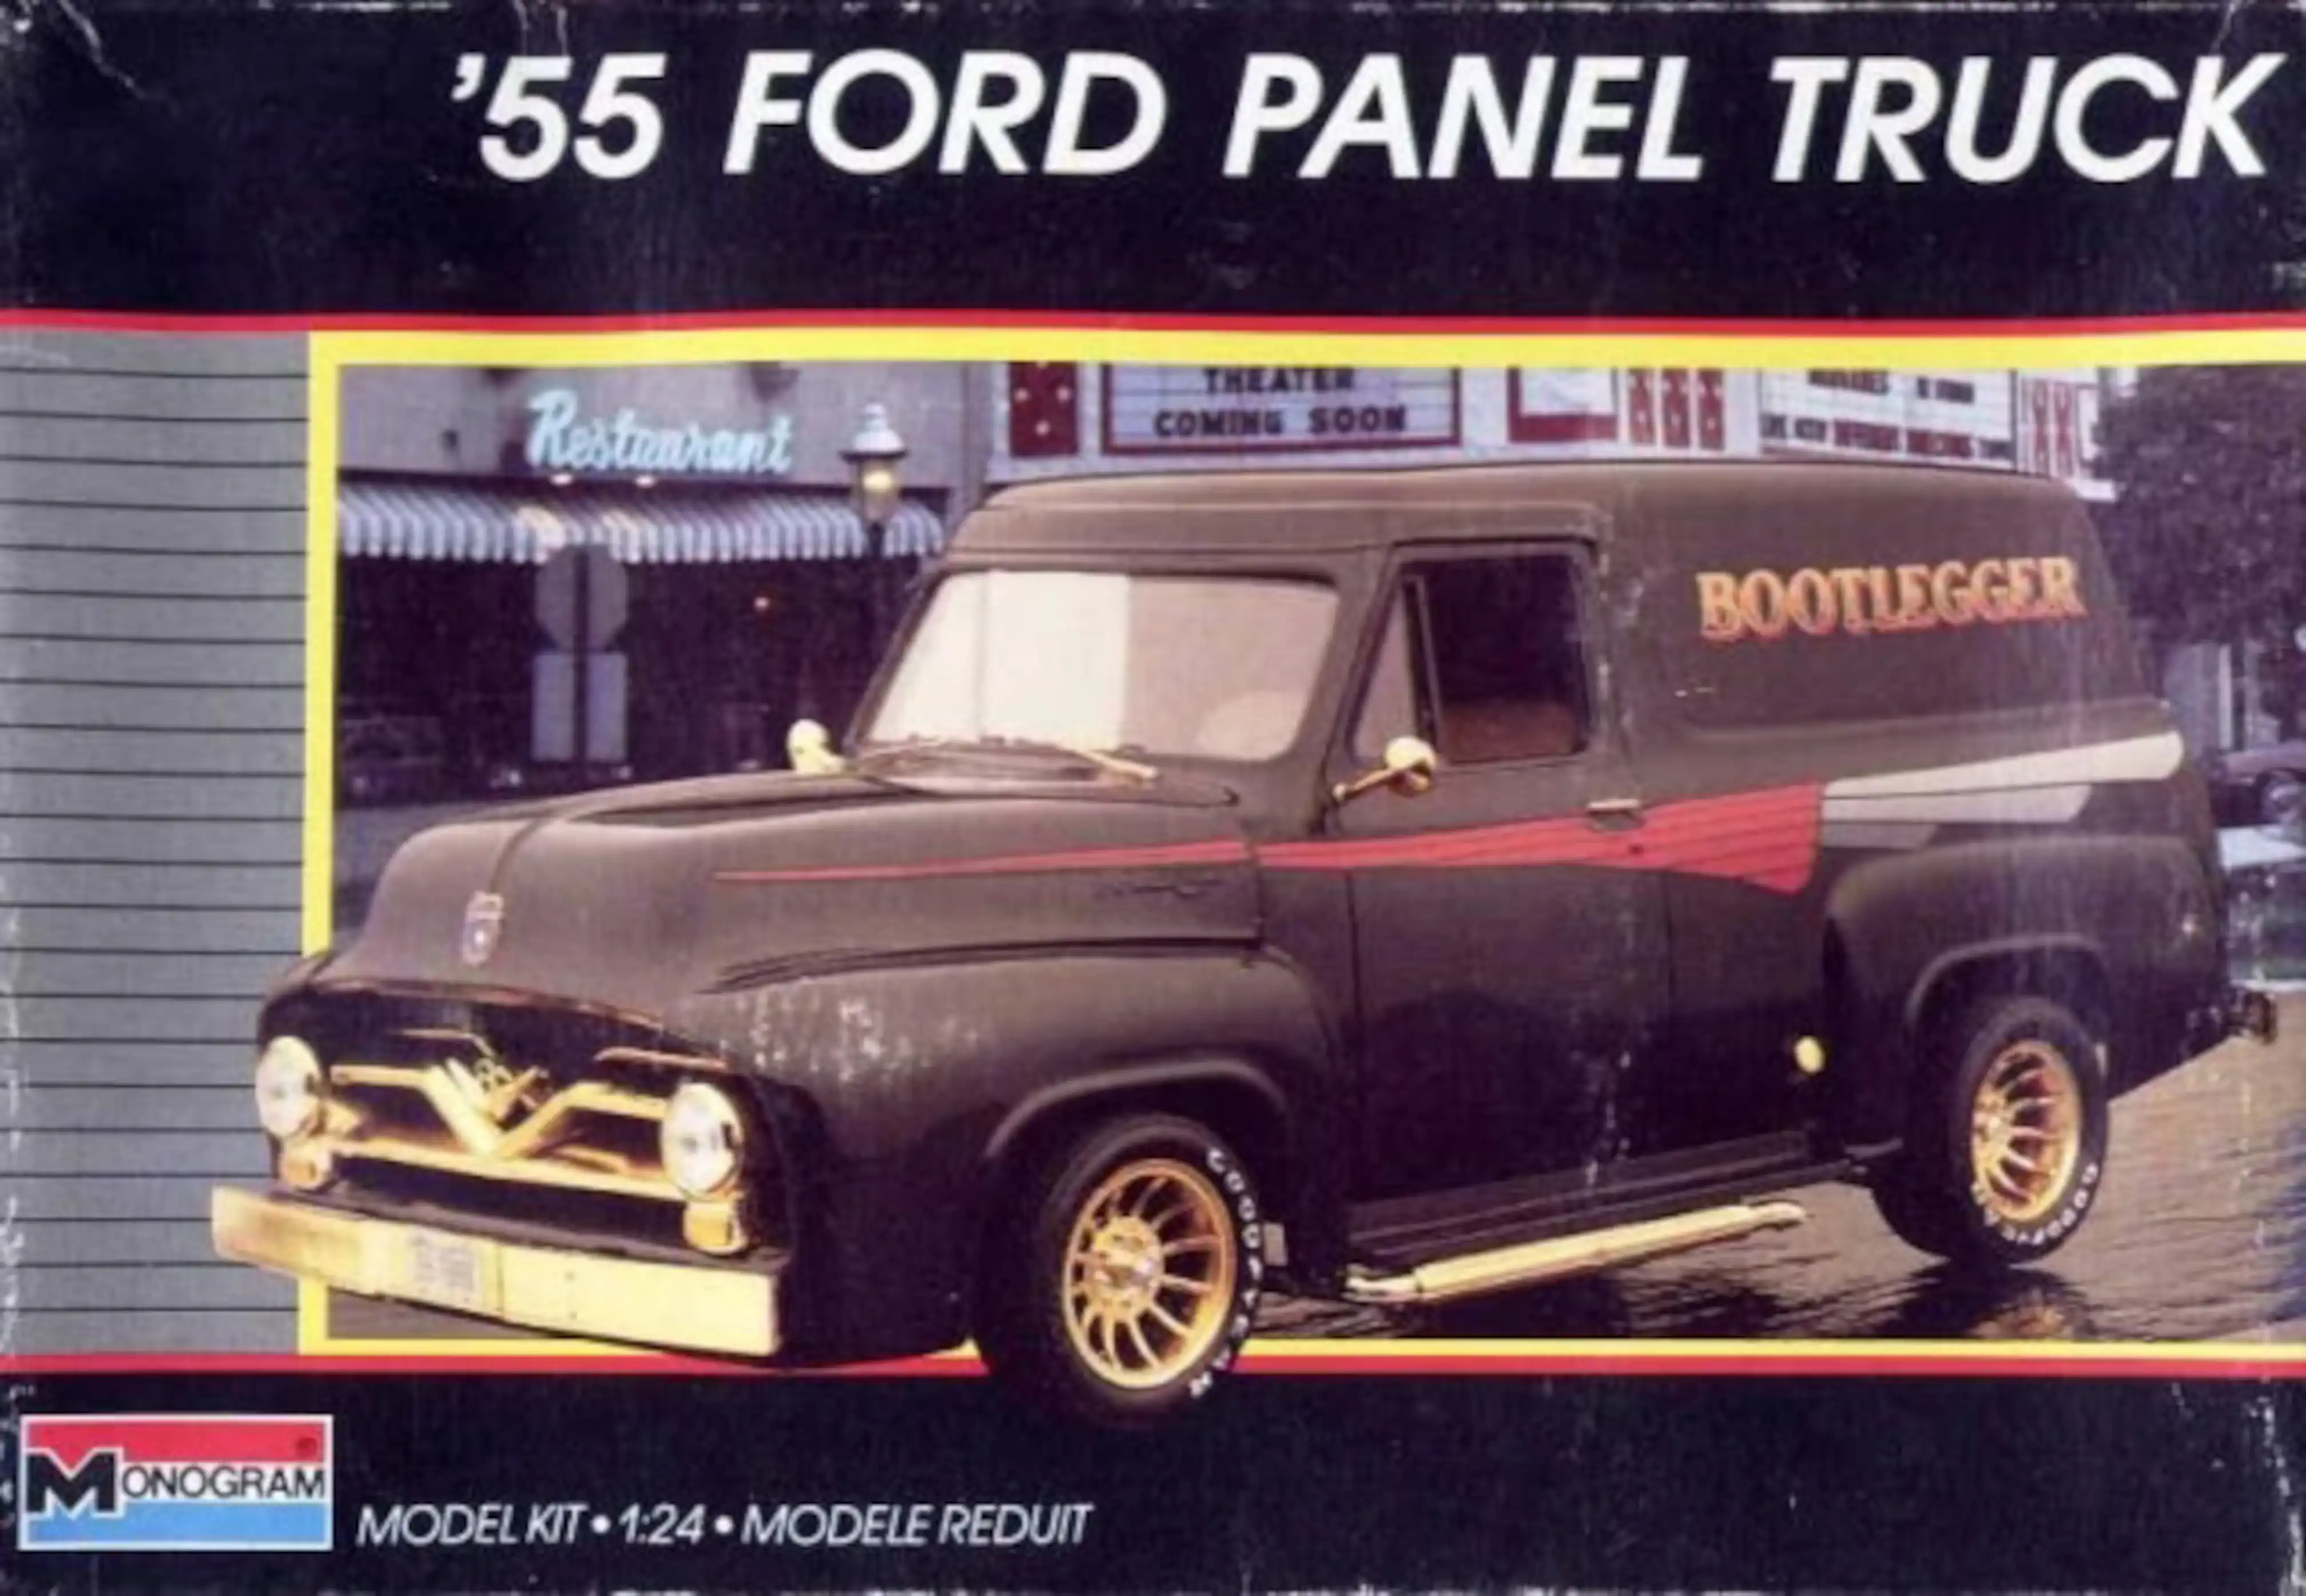 Box Art for the '55 Ford Panel Truck
 Created a ring to throw my hat in
 Threw my hat in the ring
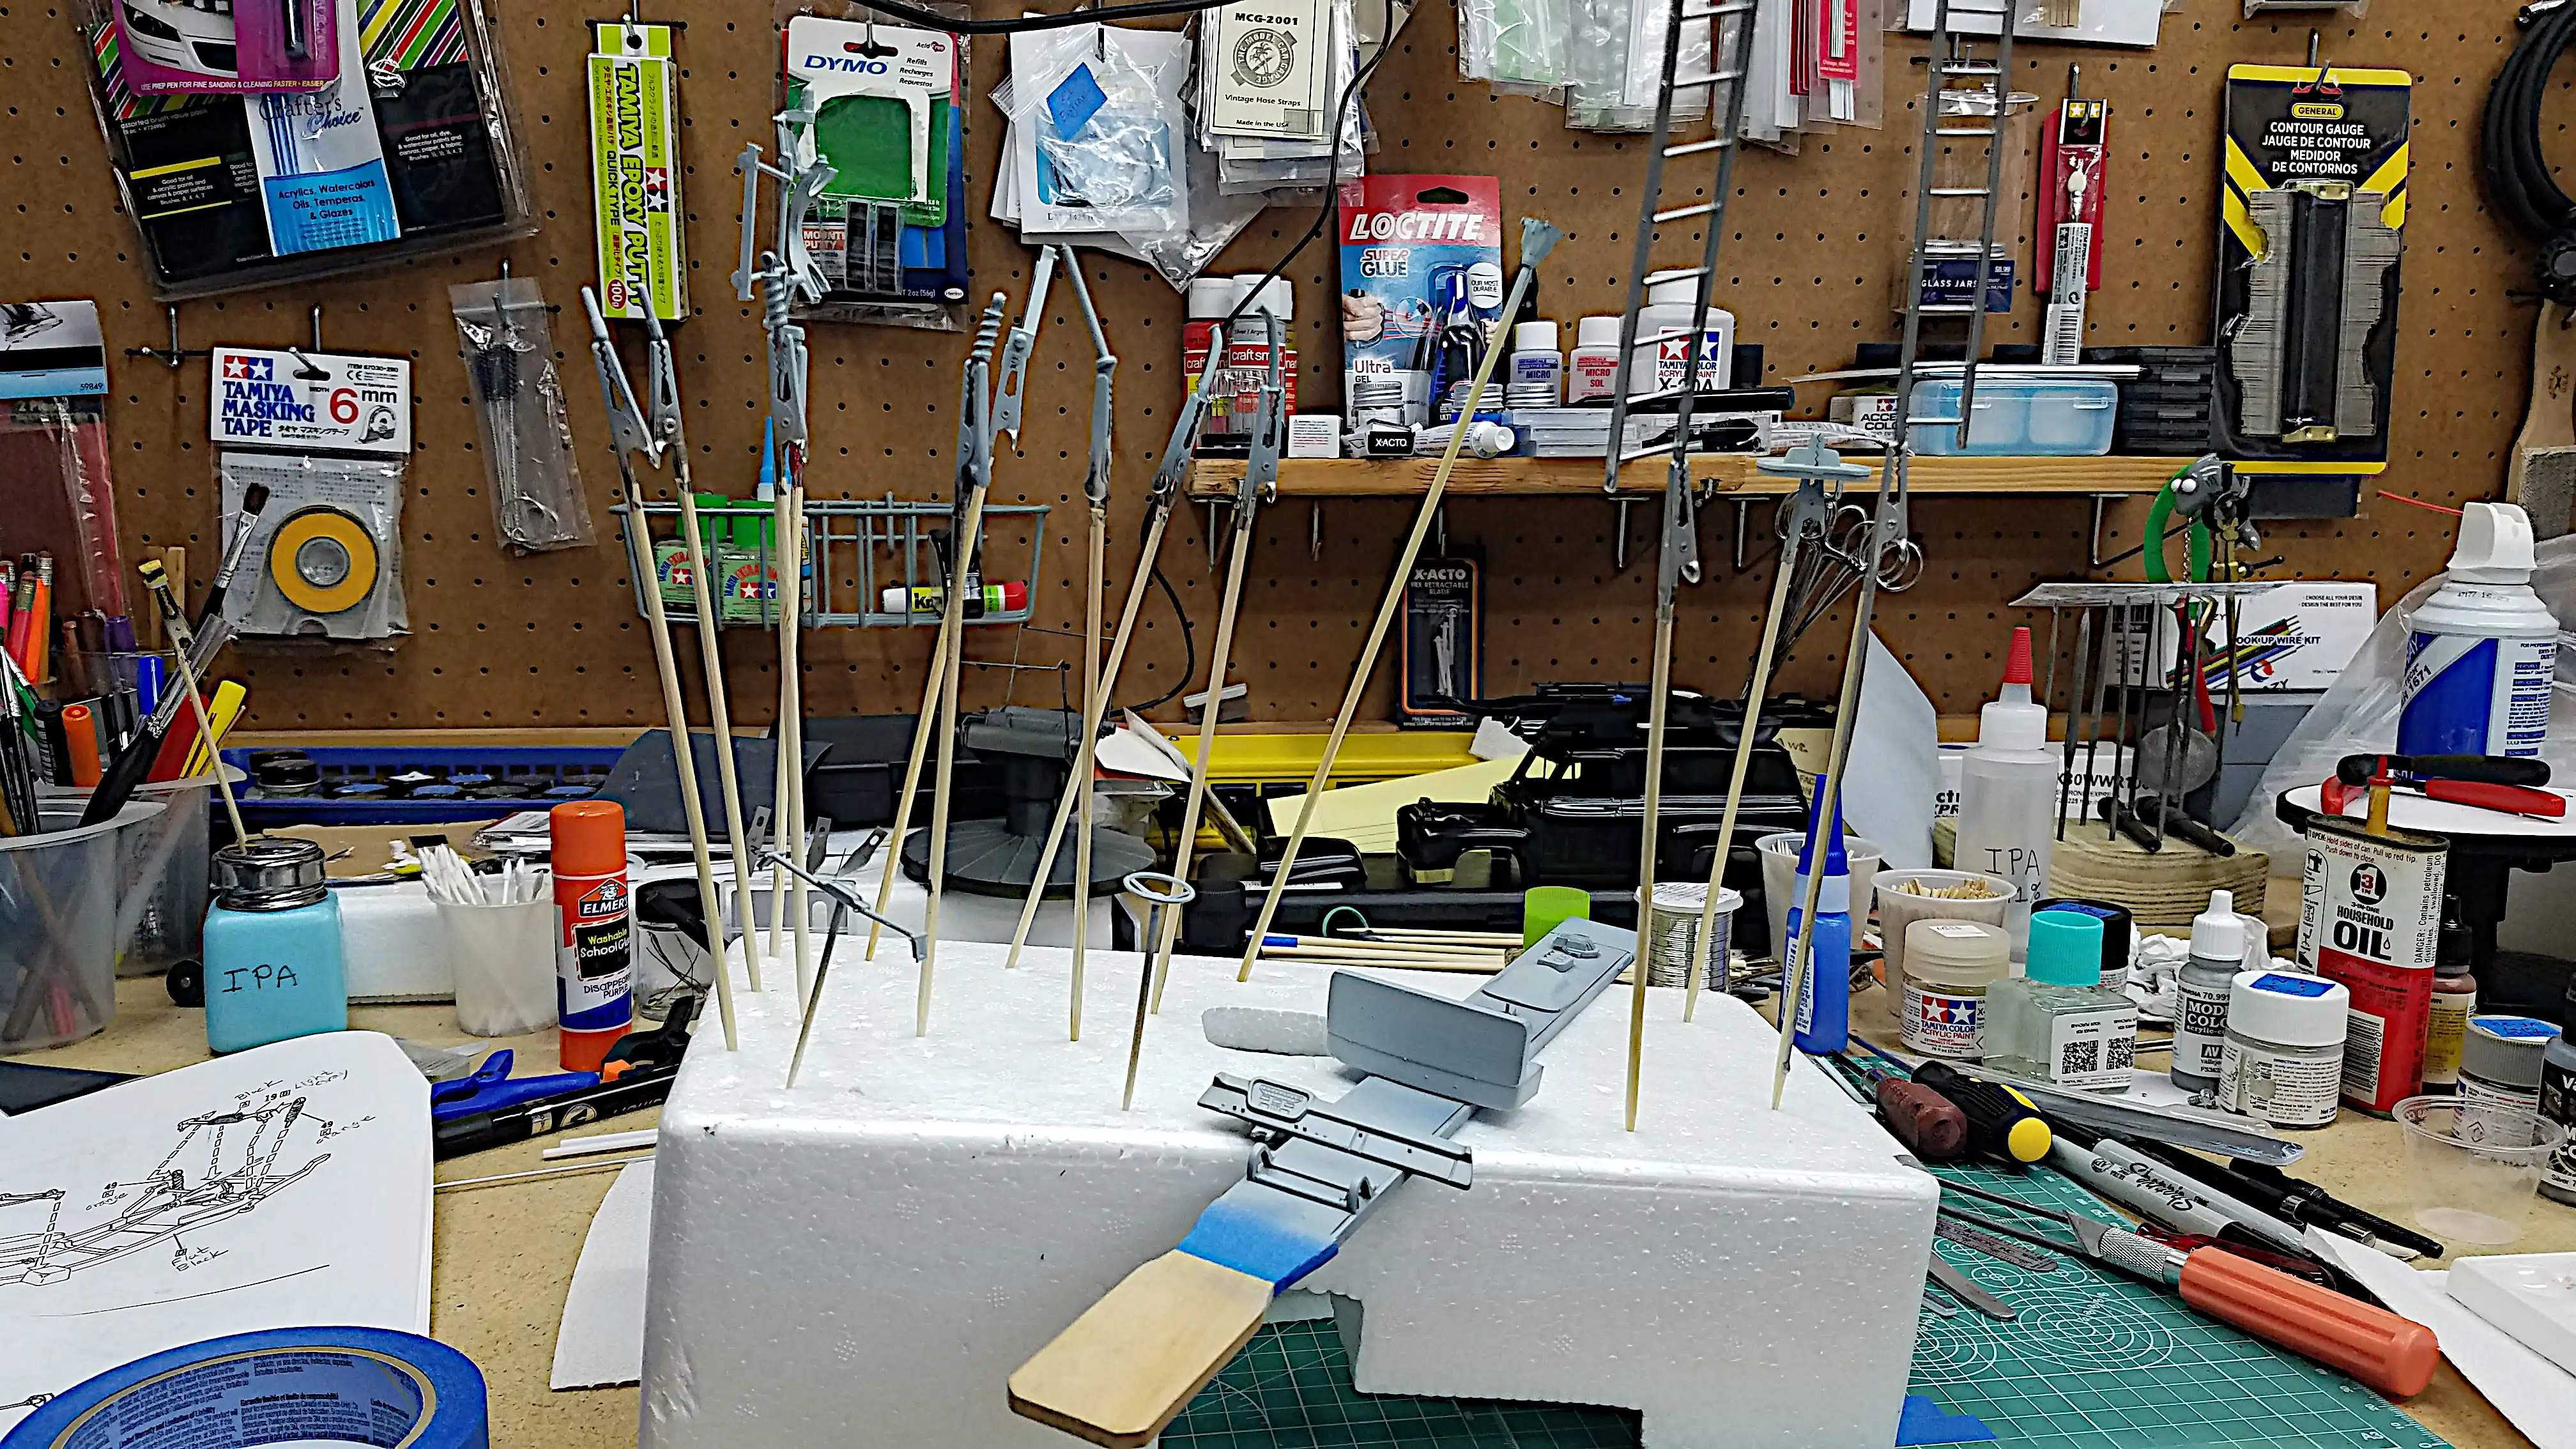
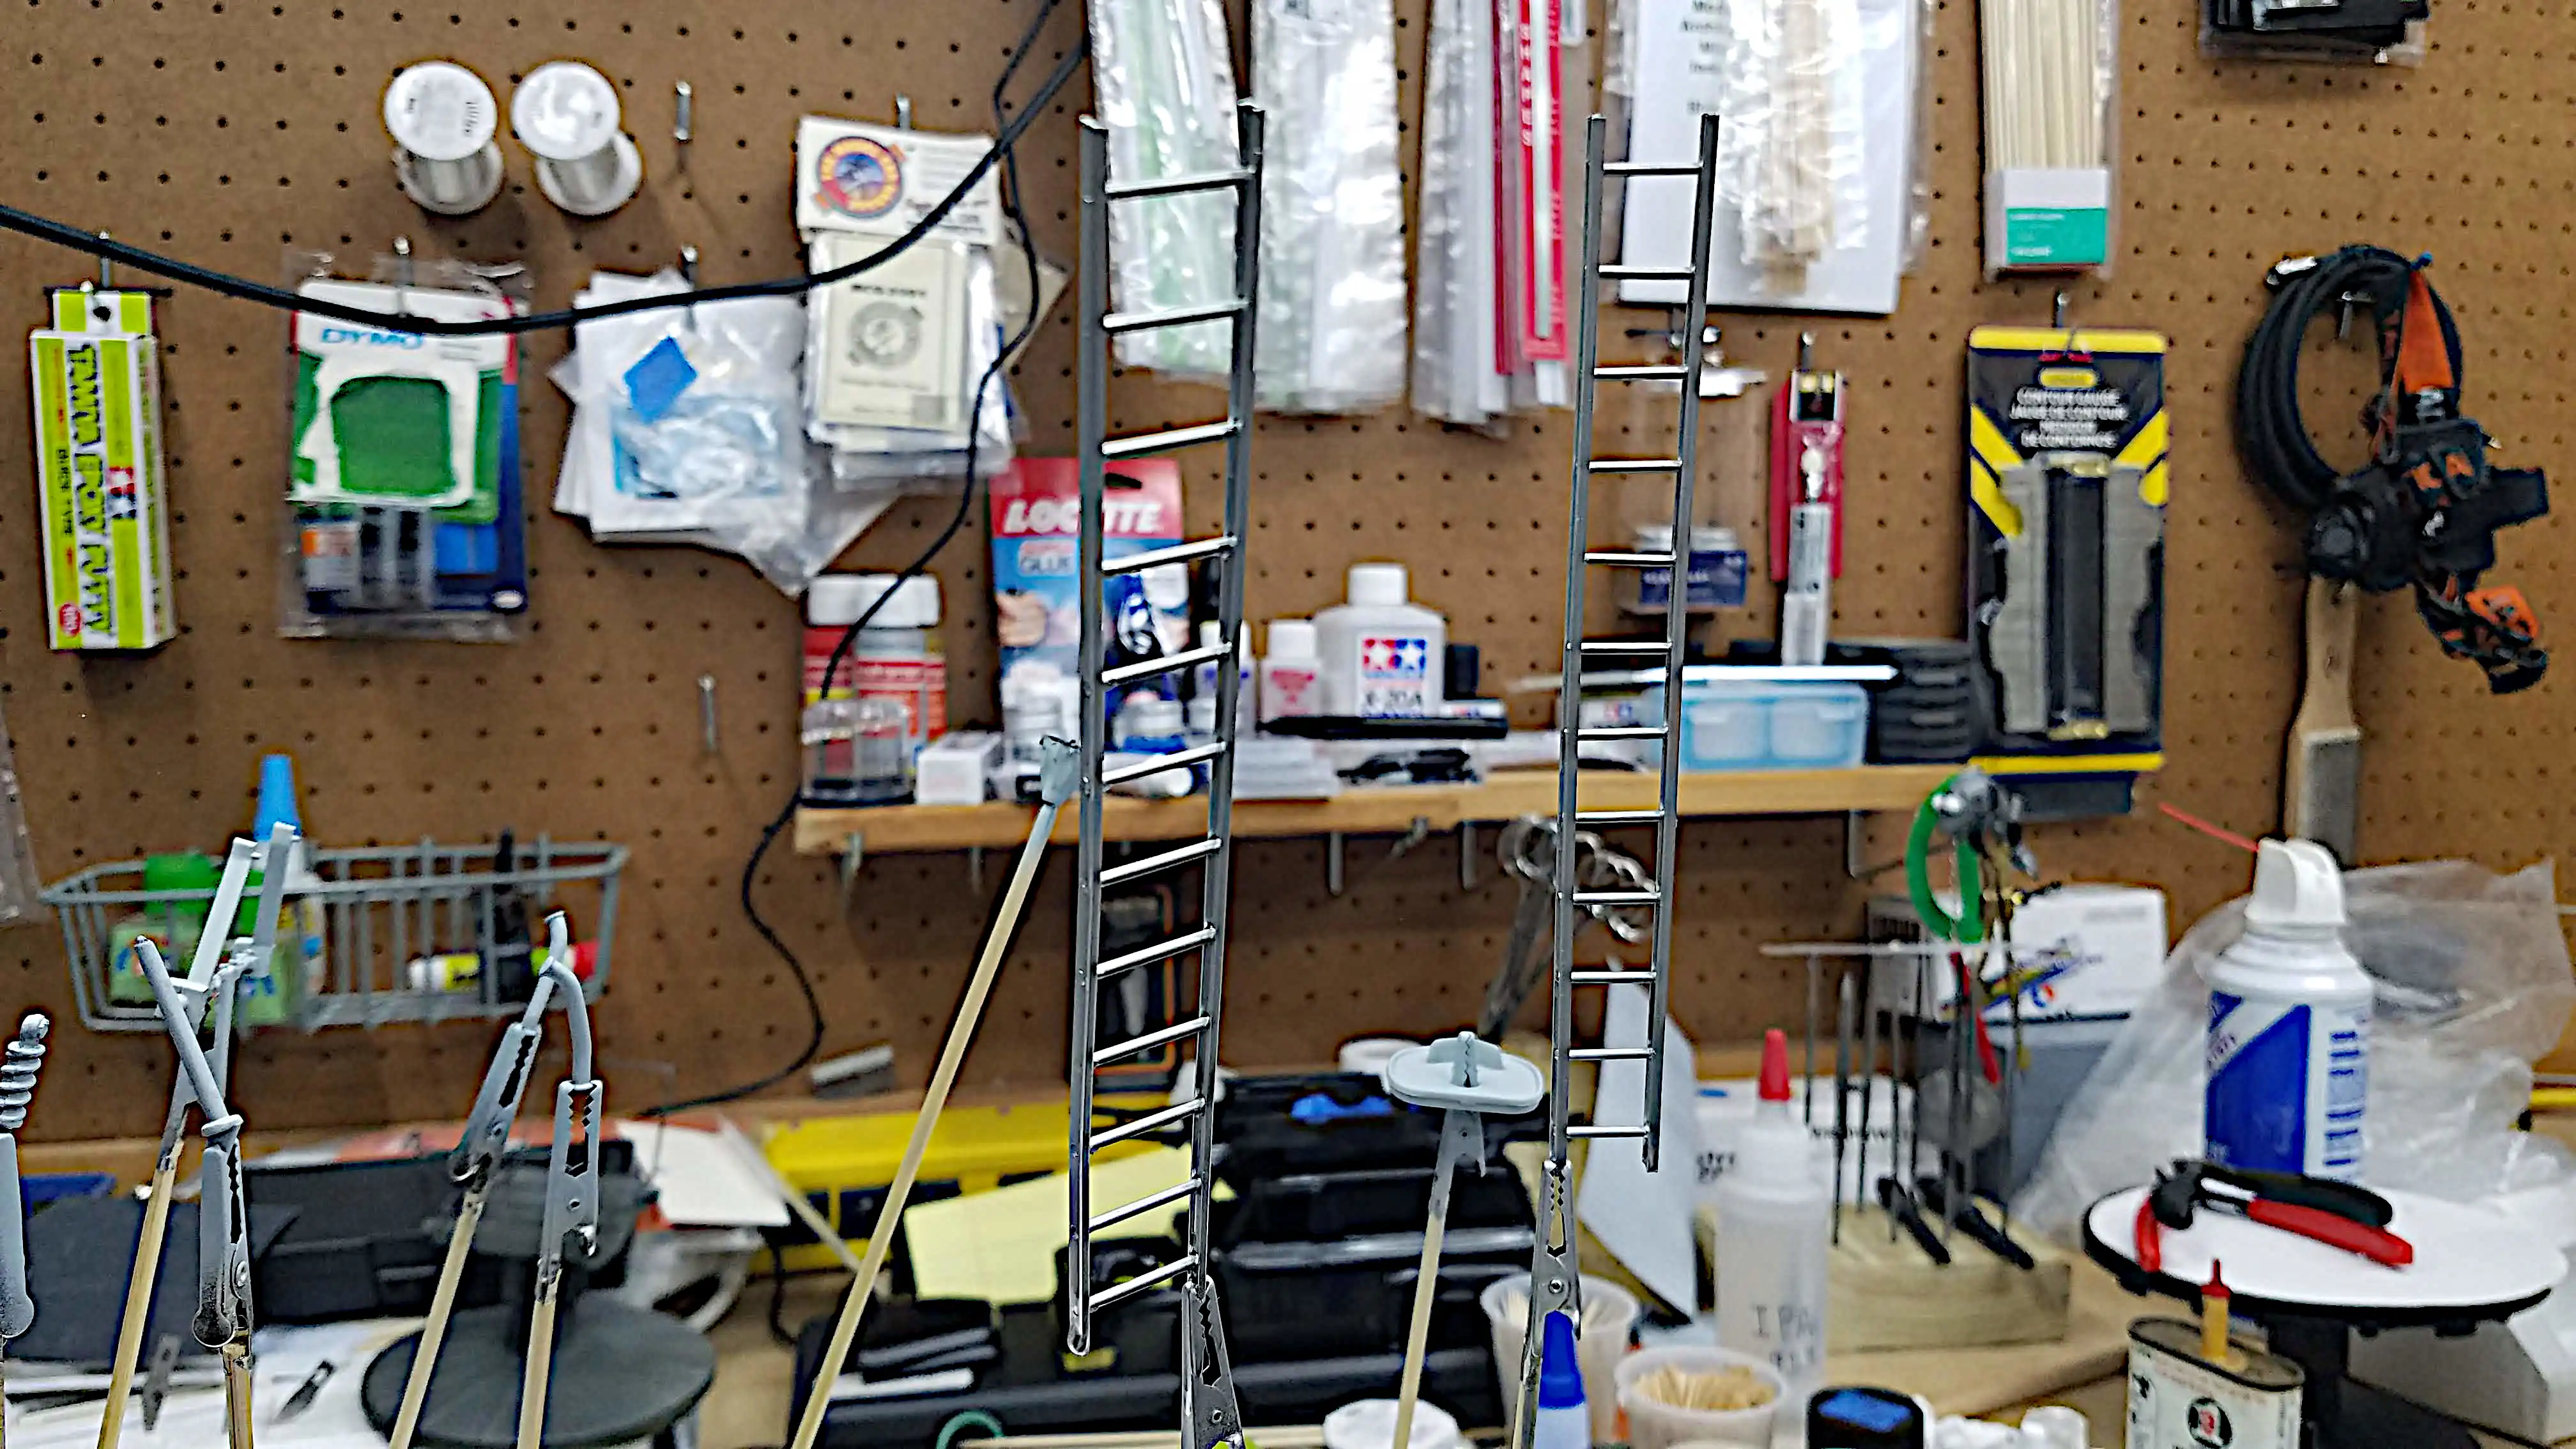
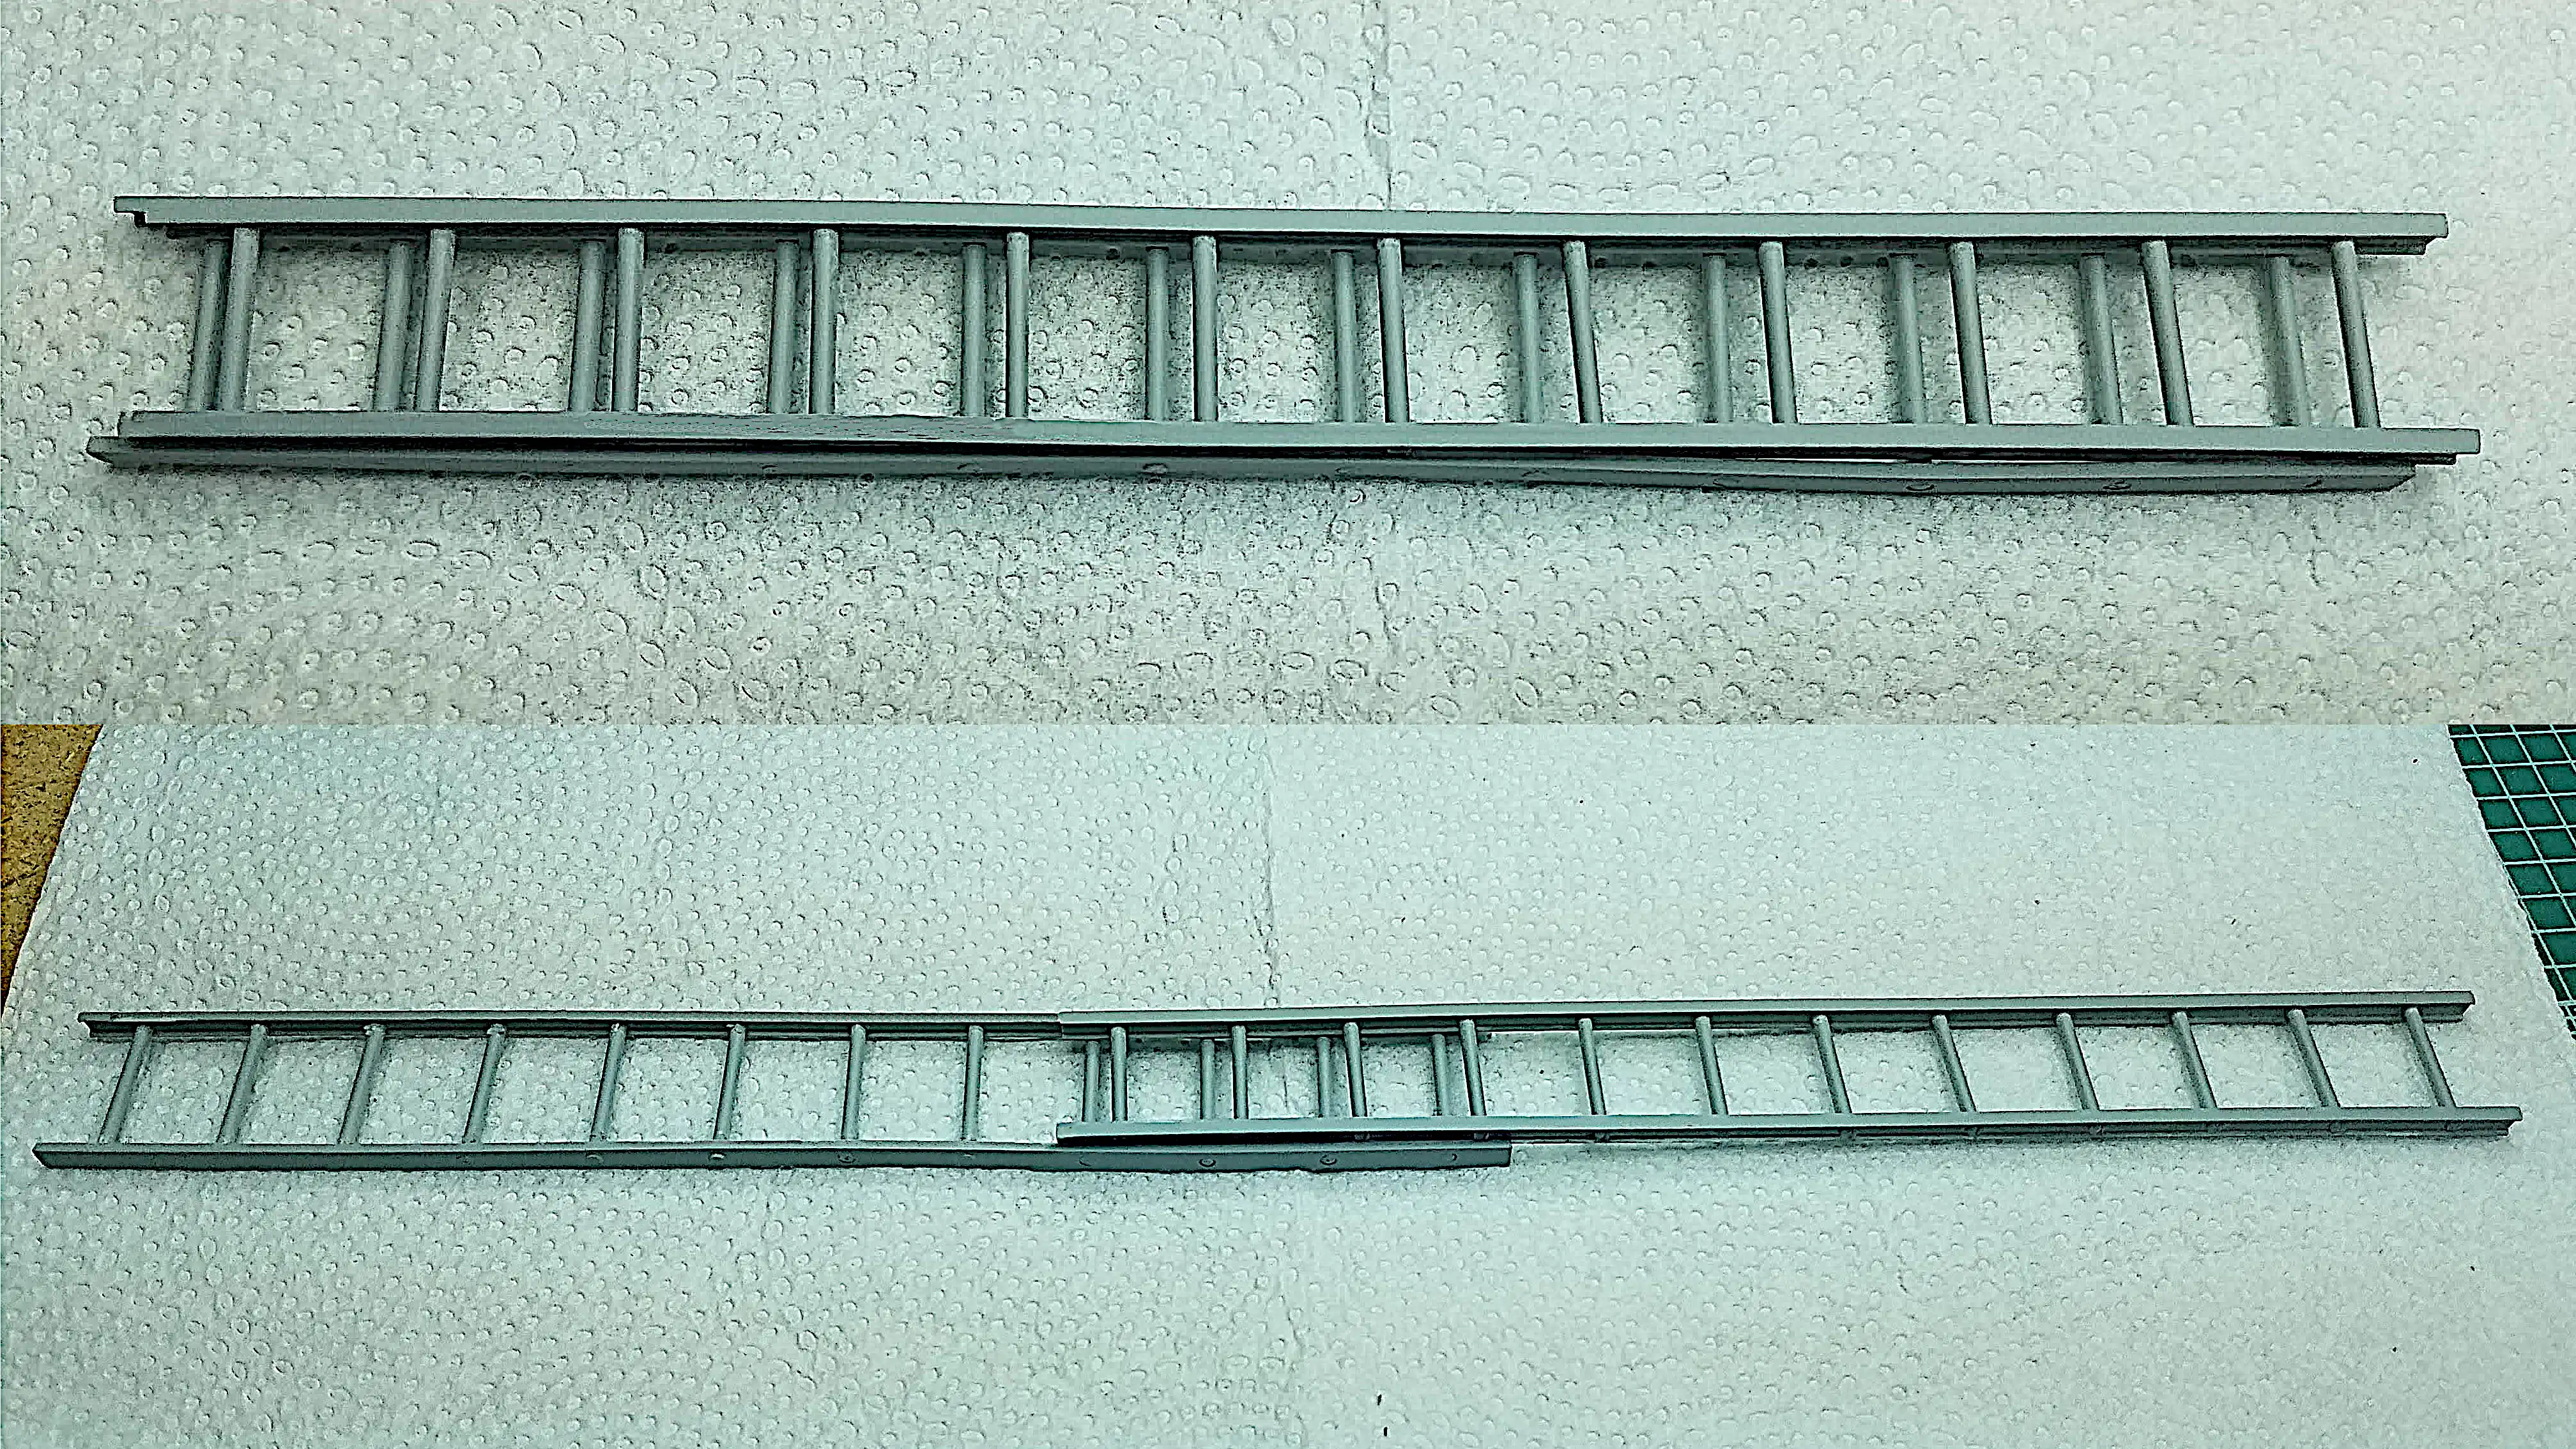 A scratch built 1:24 scale 24-foot extension ladder
 3D printed bench seat
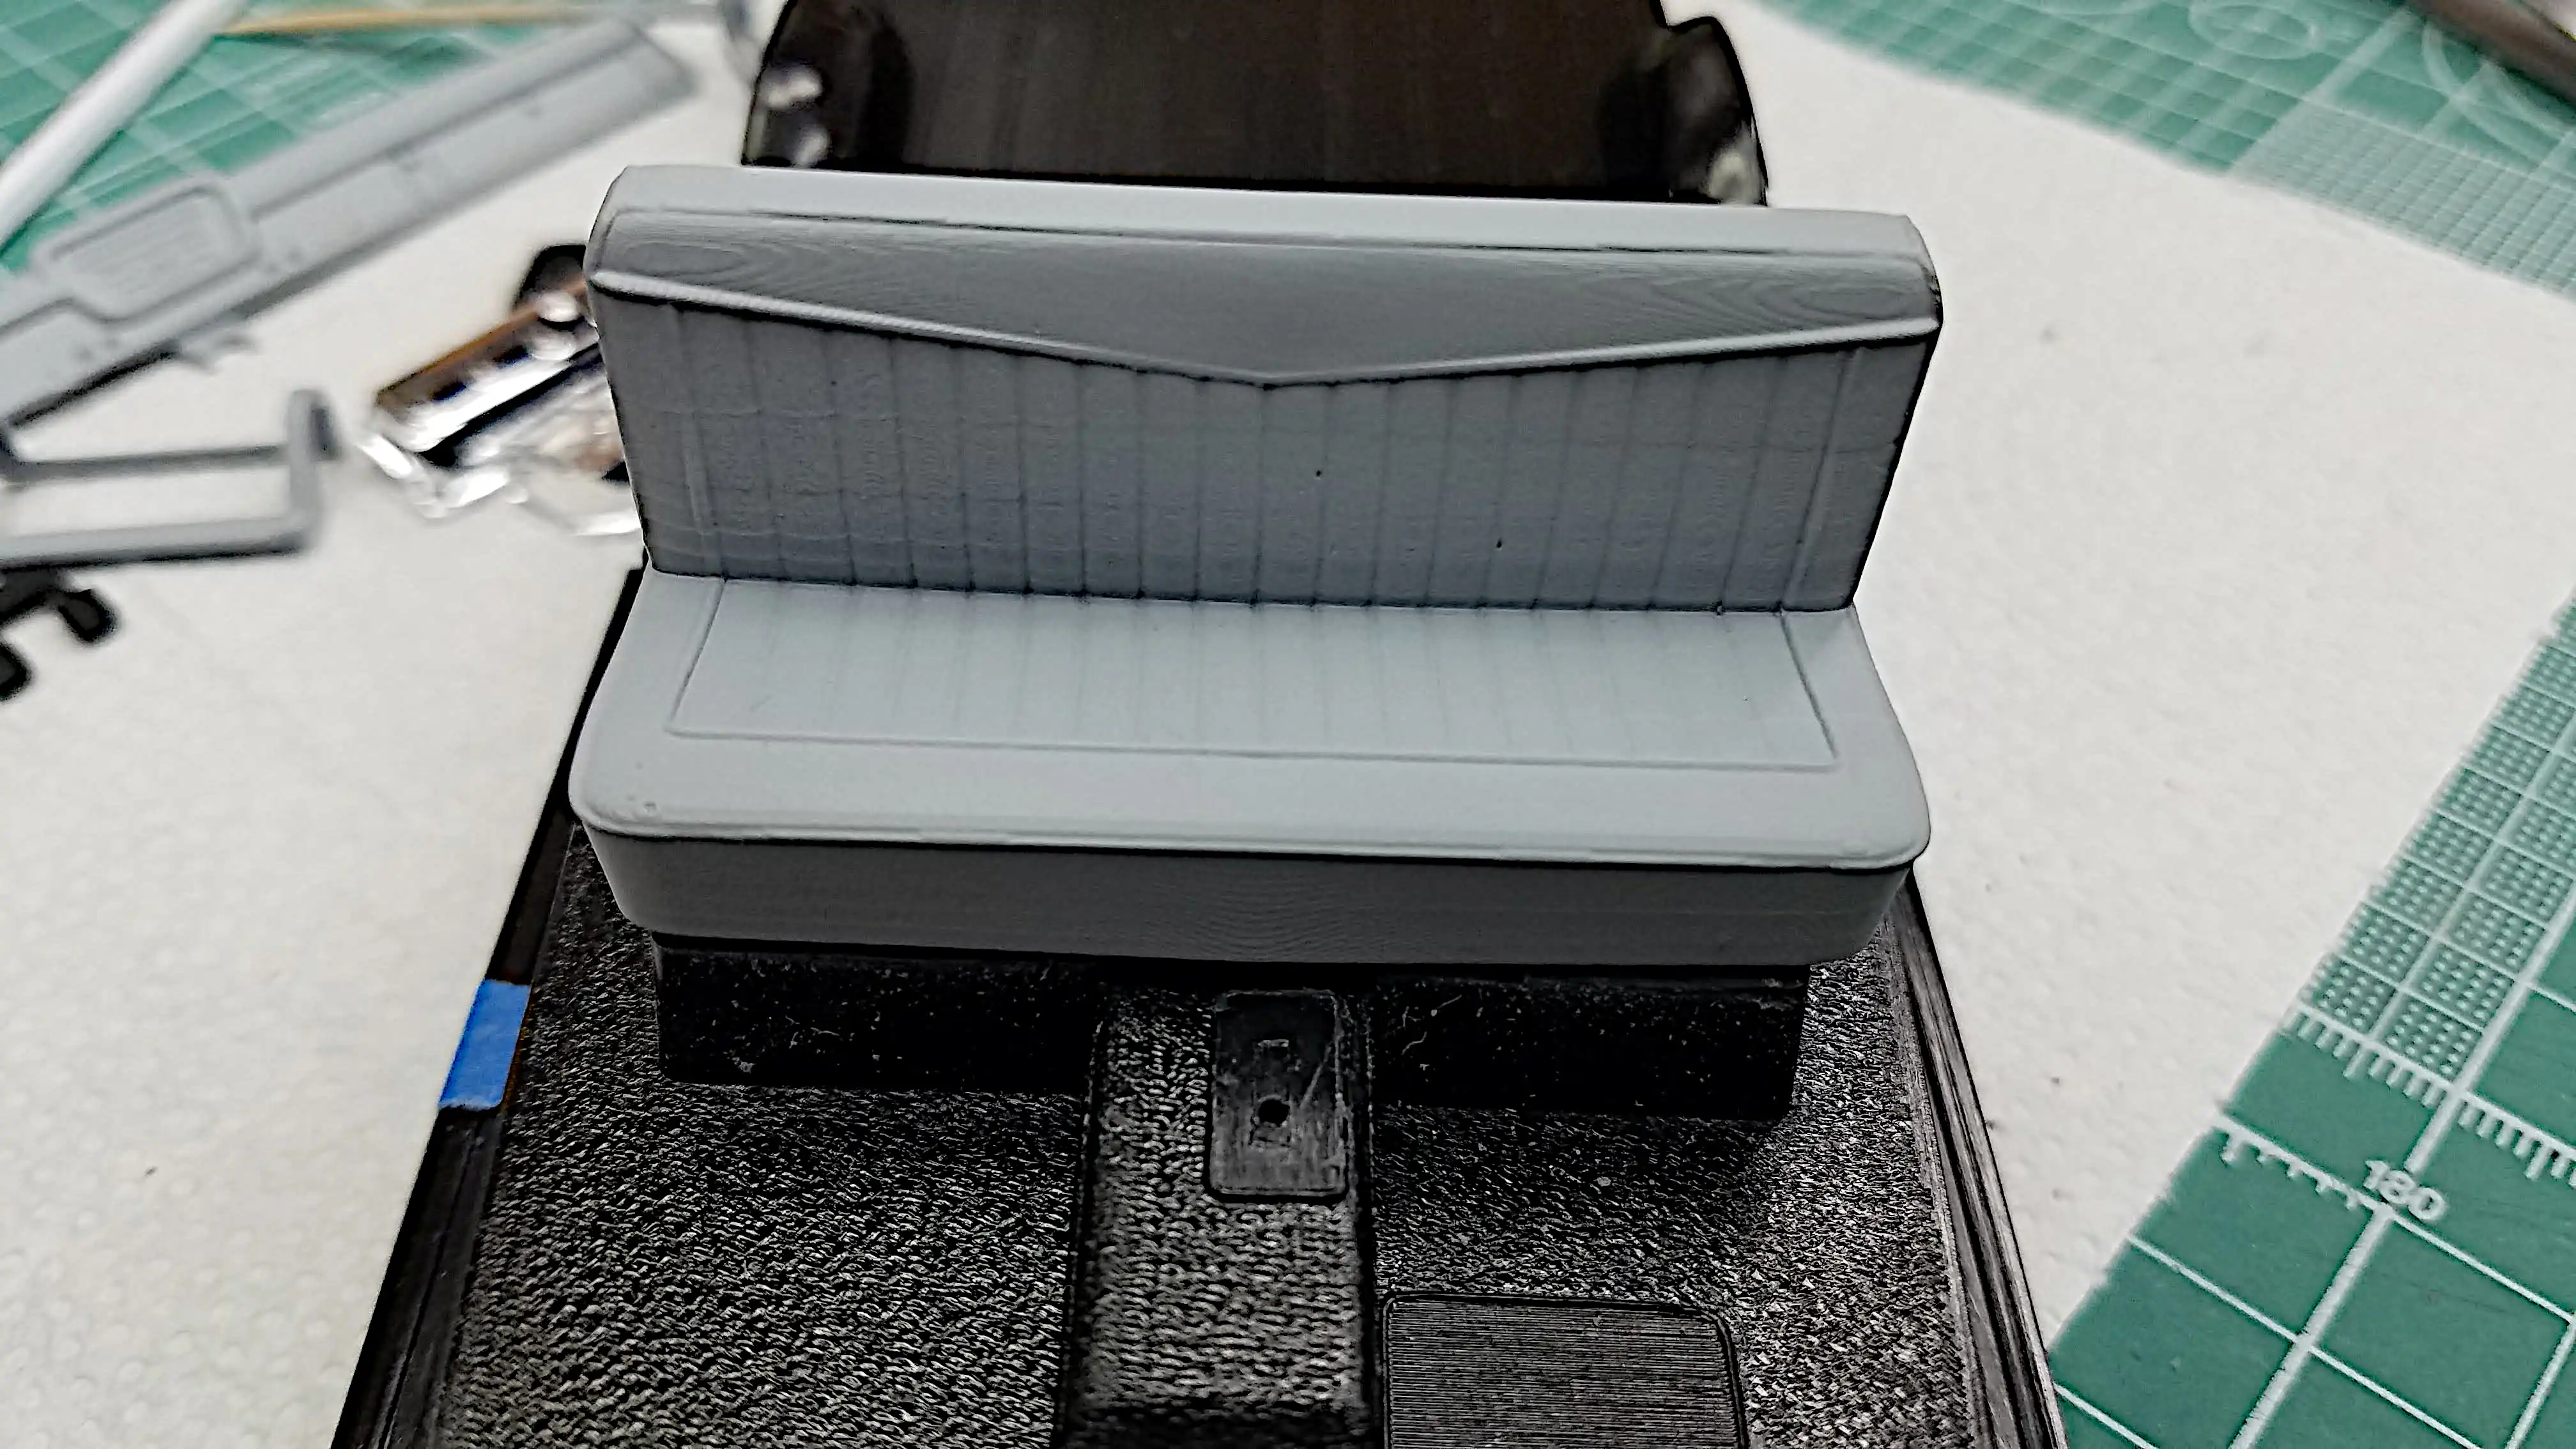 3D printed bench seat dry fitted to the interior tub
 Some small parts have been primed and waiting to dry
 Scratch built ladder painted with Vallejo 77.701 aluminum drying
 Back door hinge locations are marked
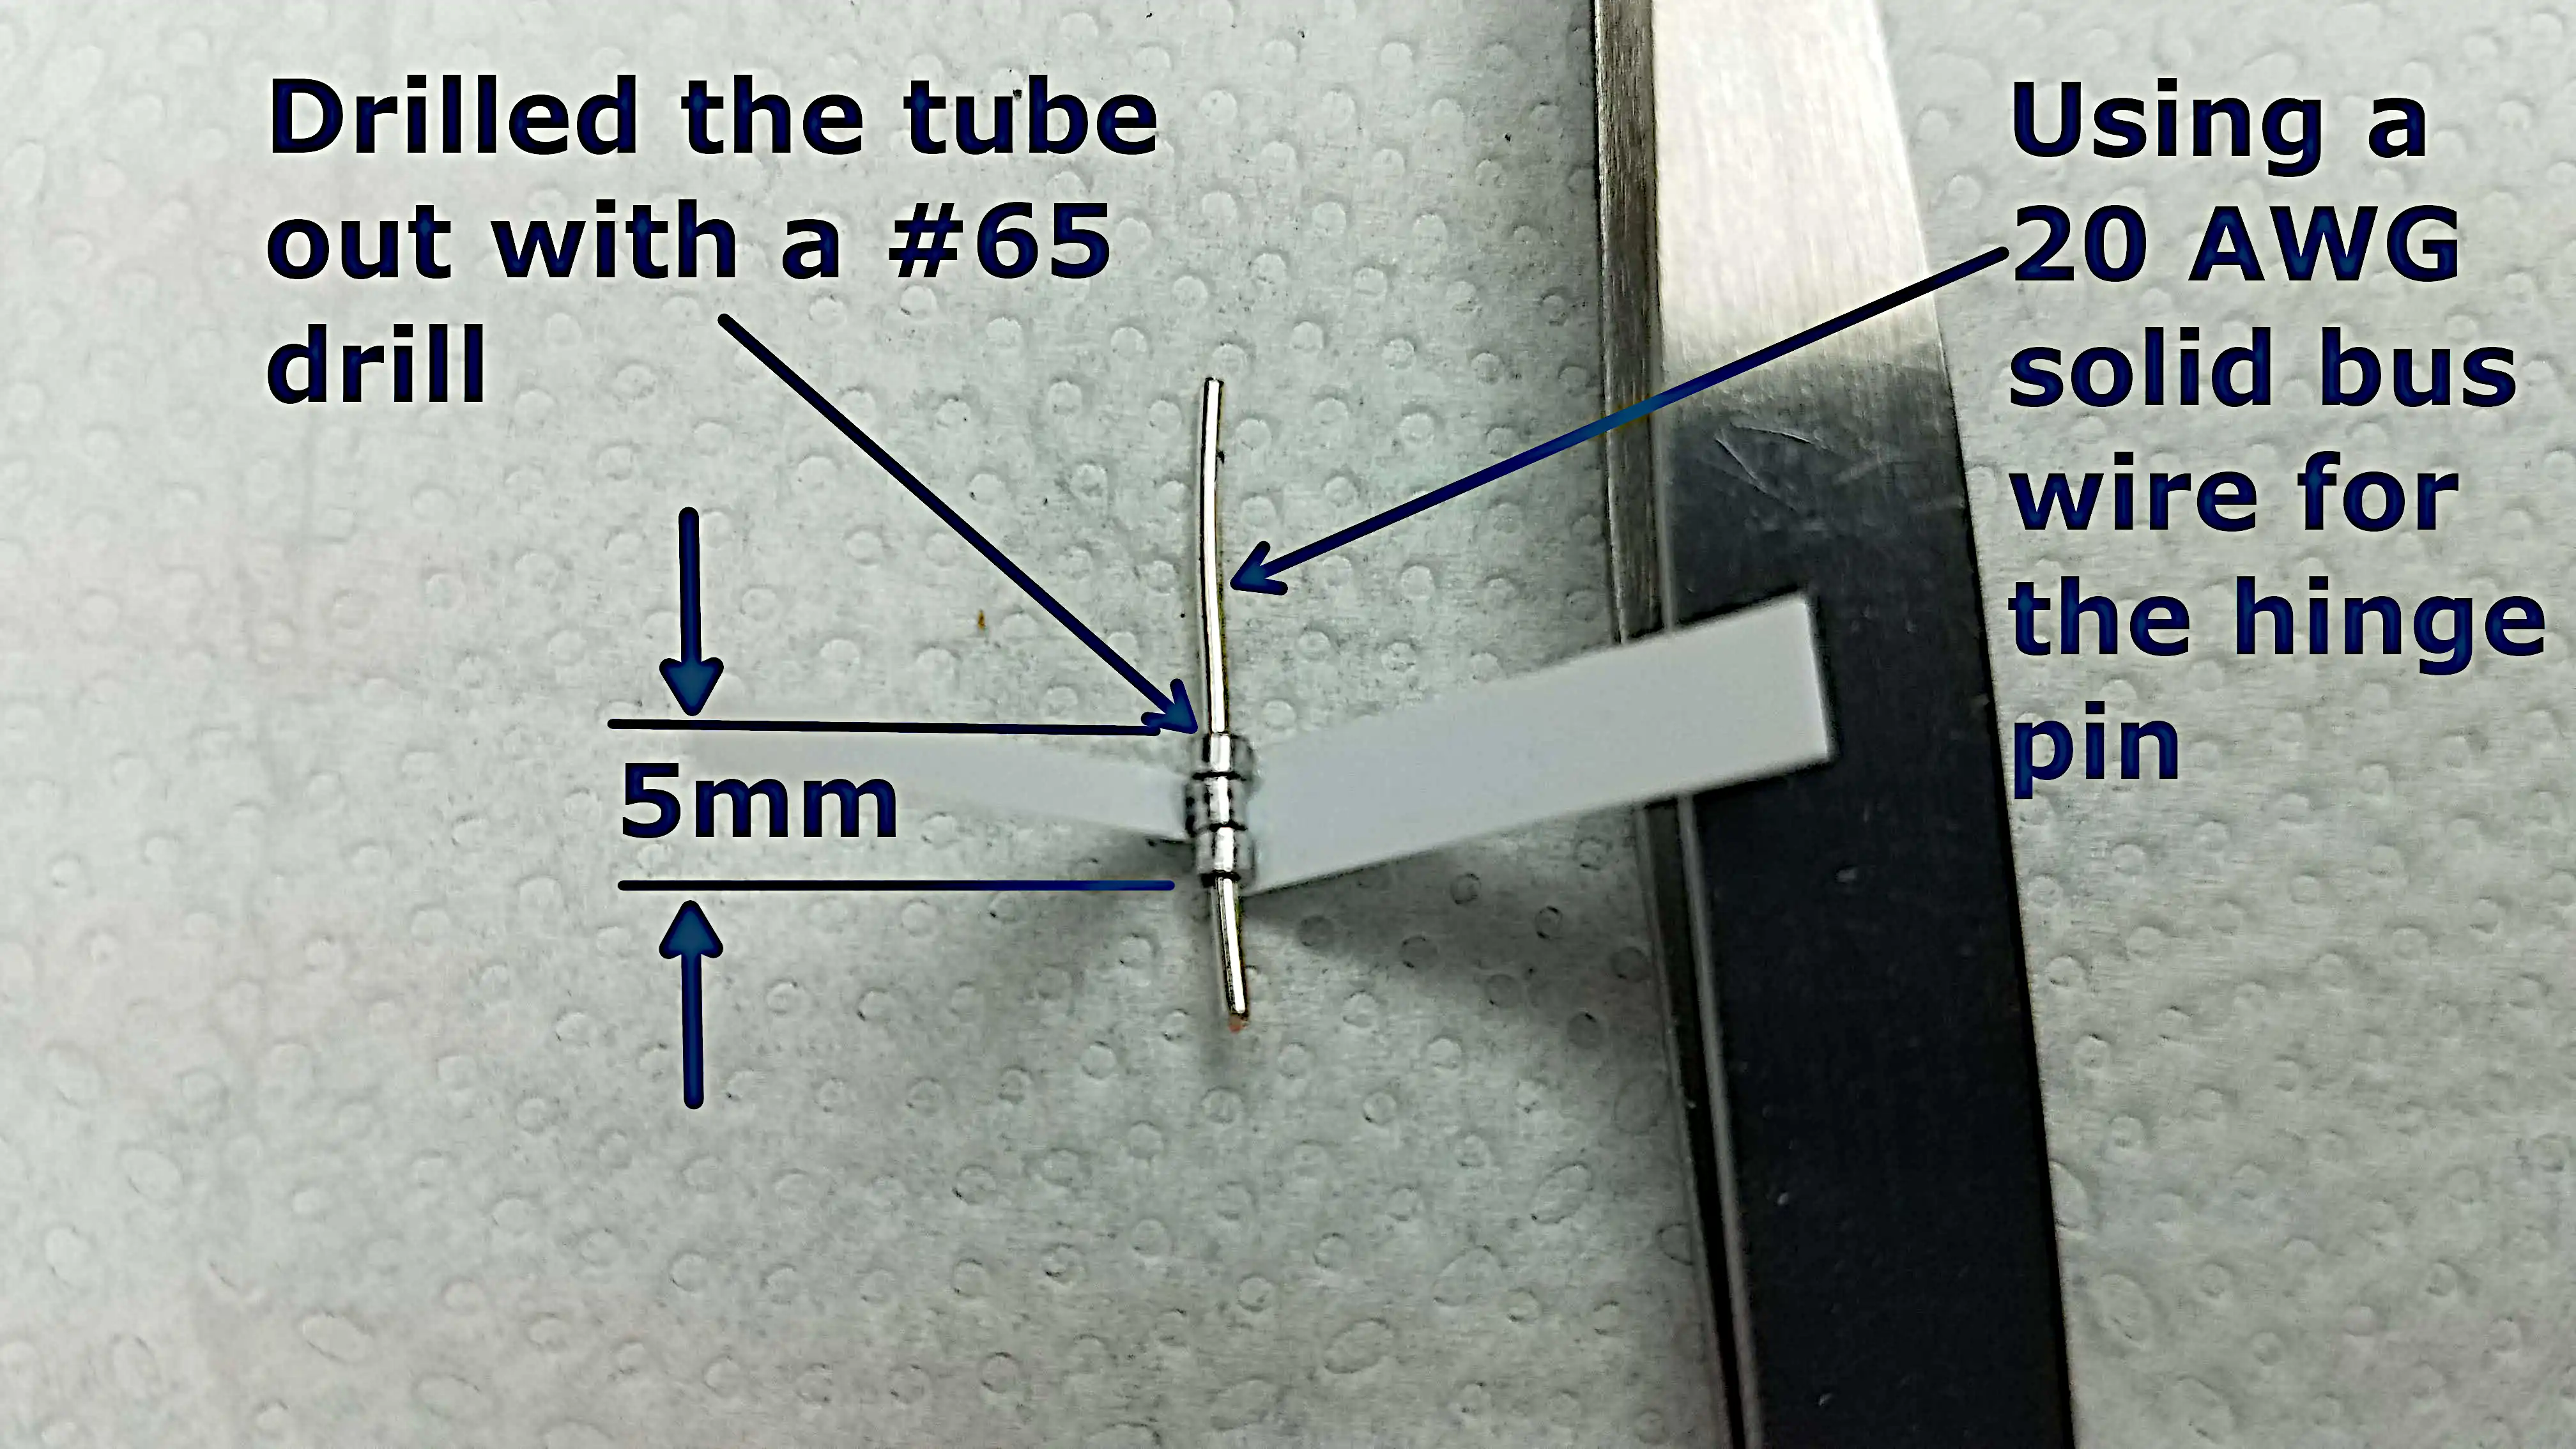 Rear door hinge concep
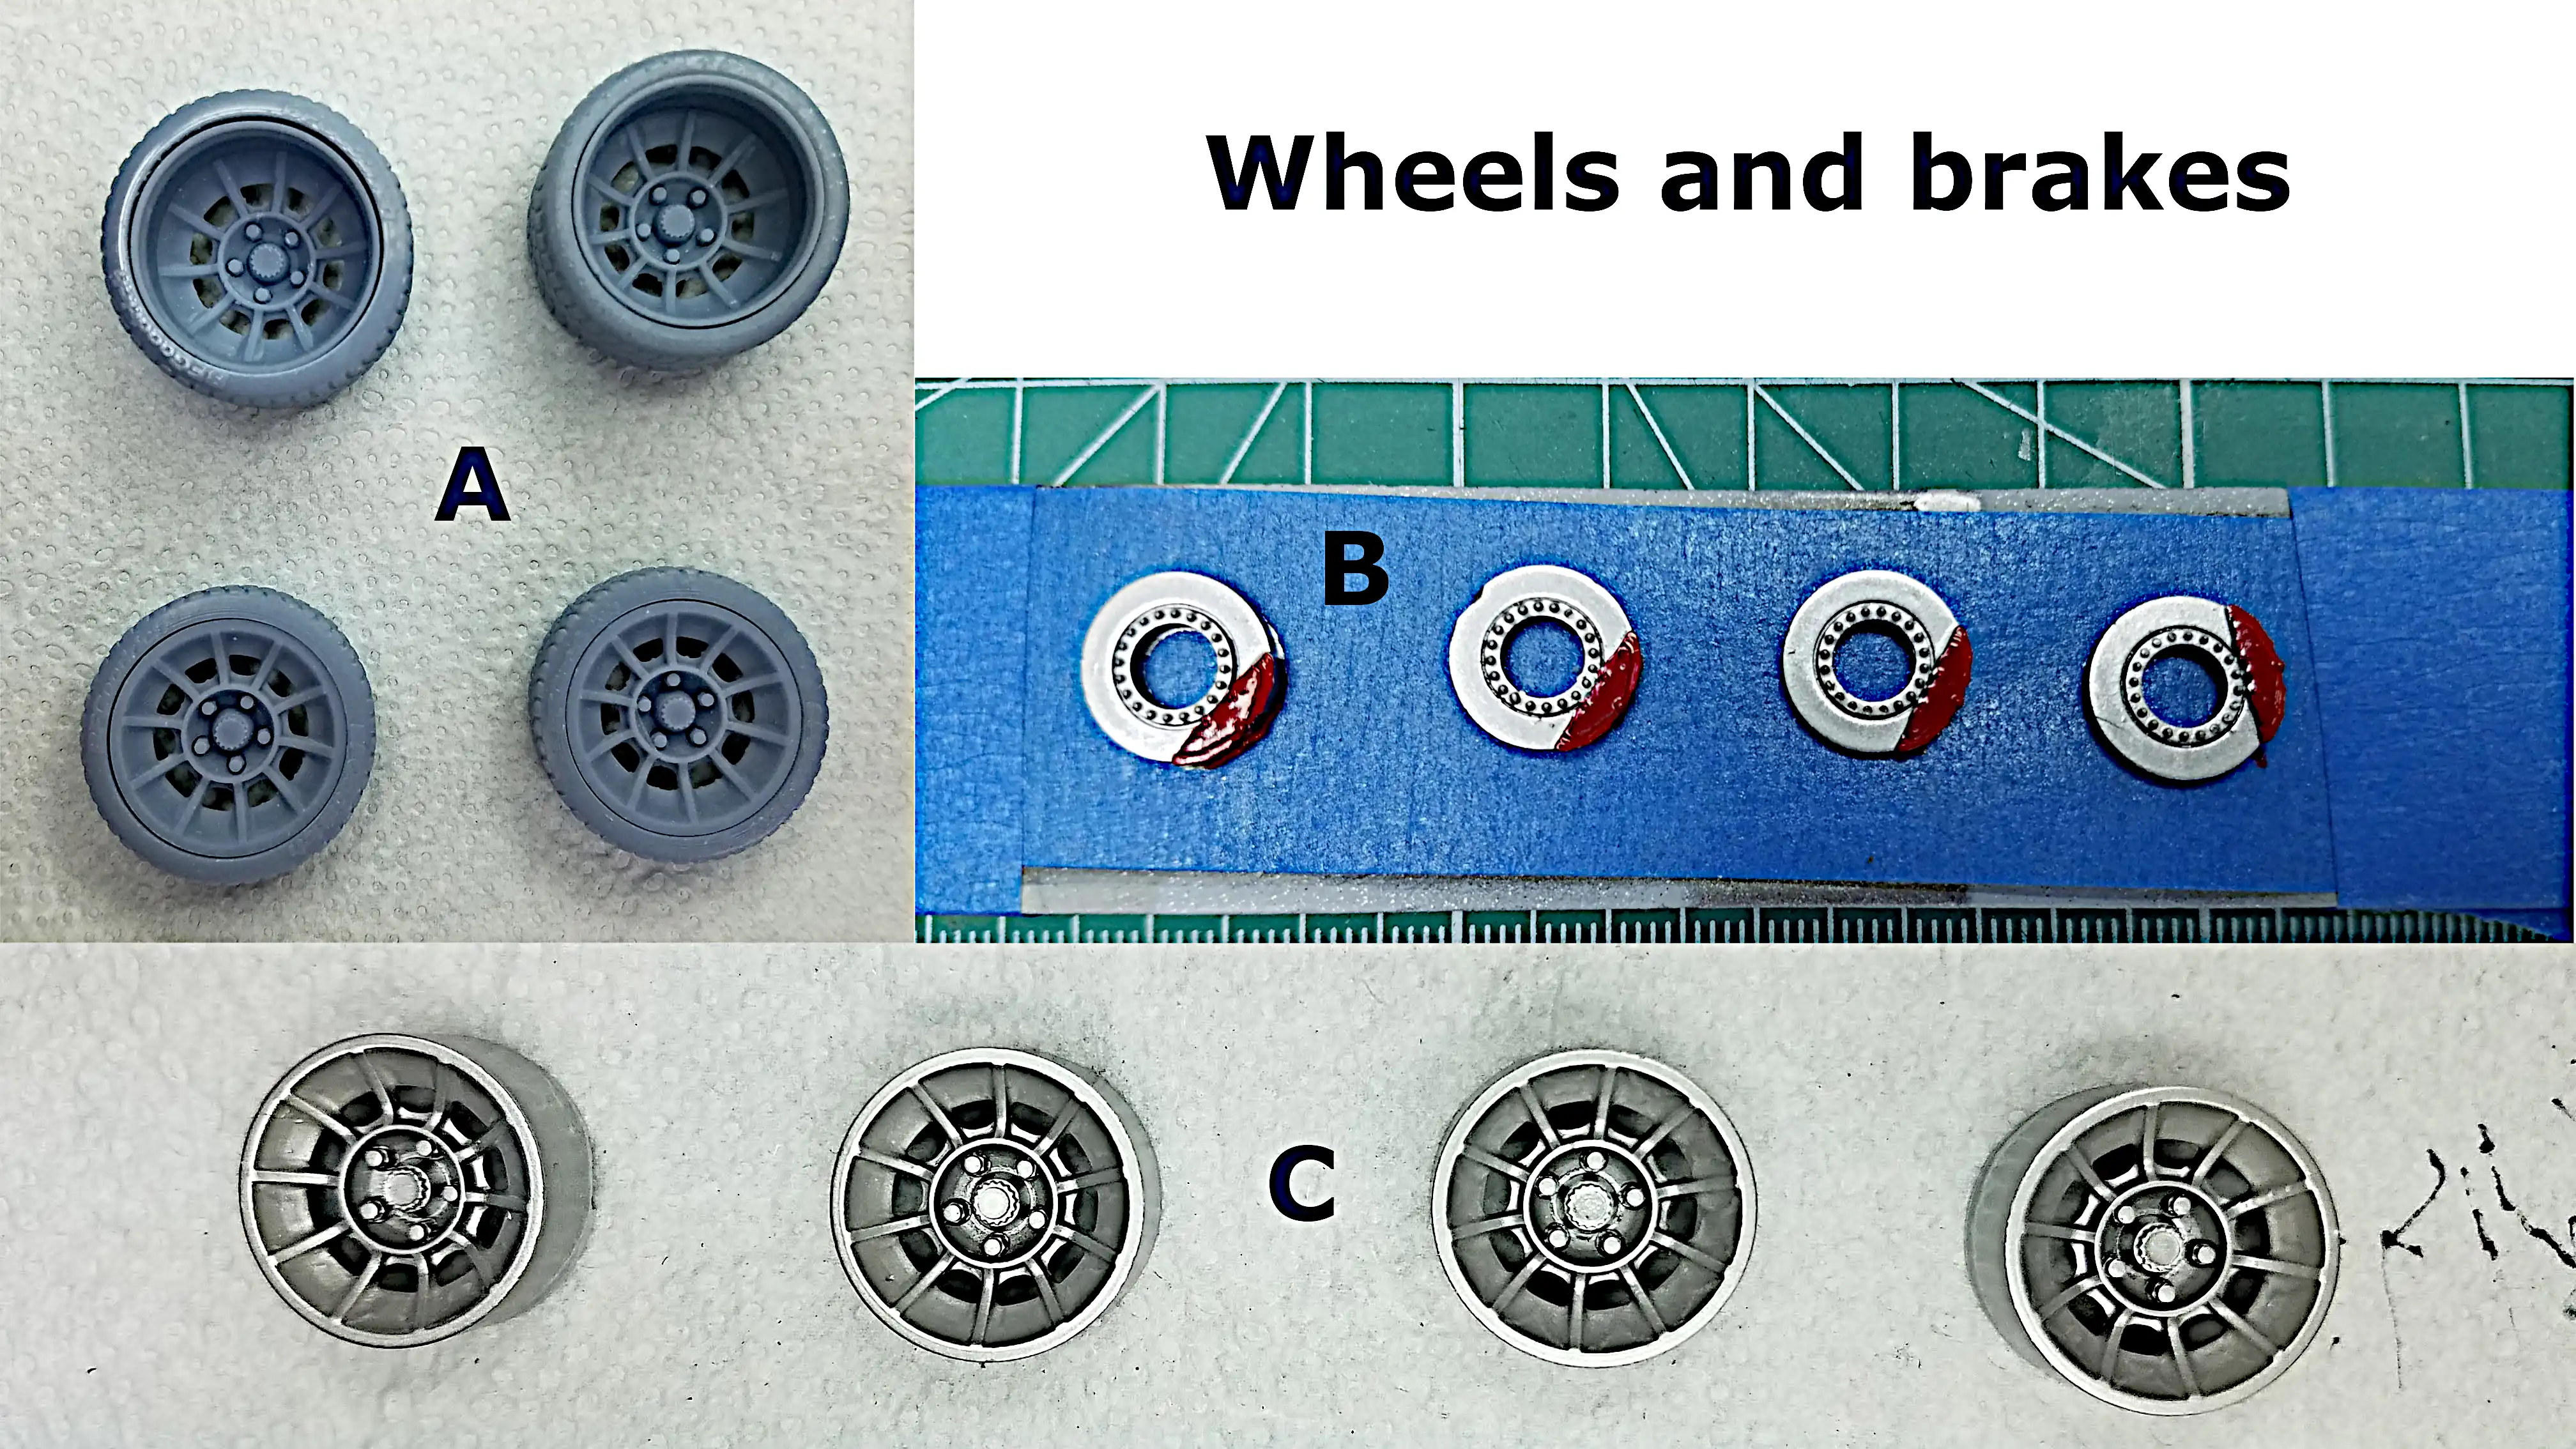 Wheels, brake rotors and calipers
 Tires primed and painted Tamiya Rubber Black
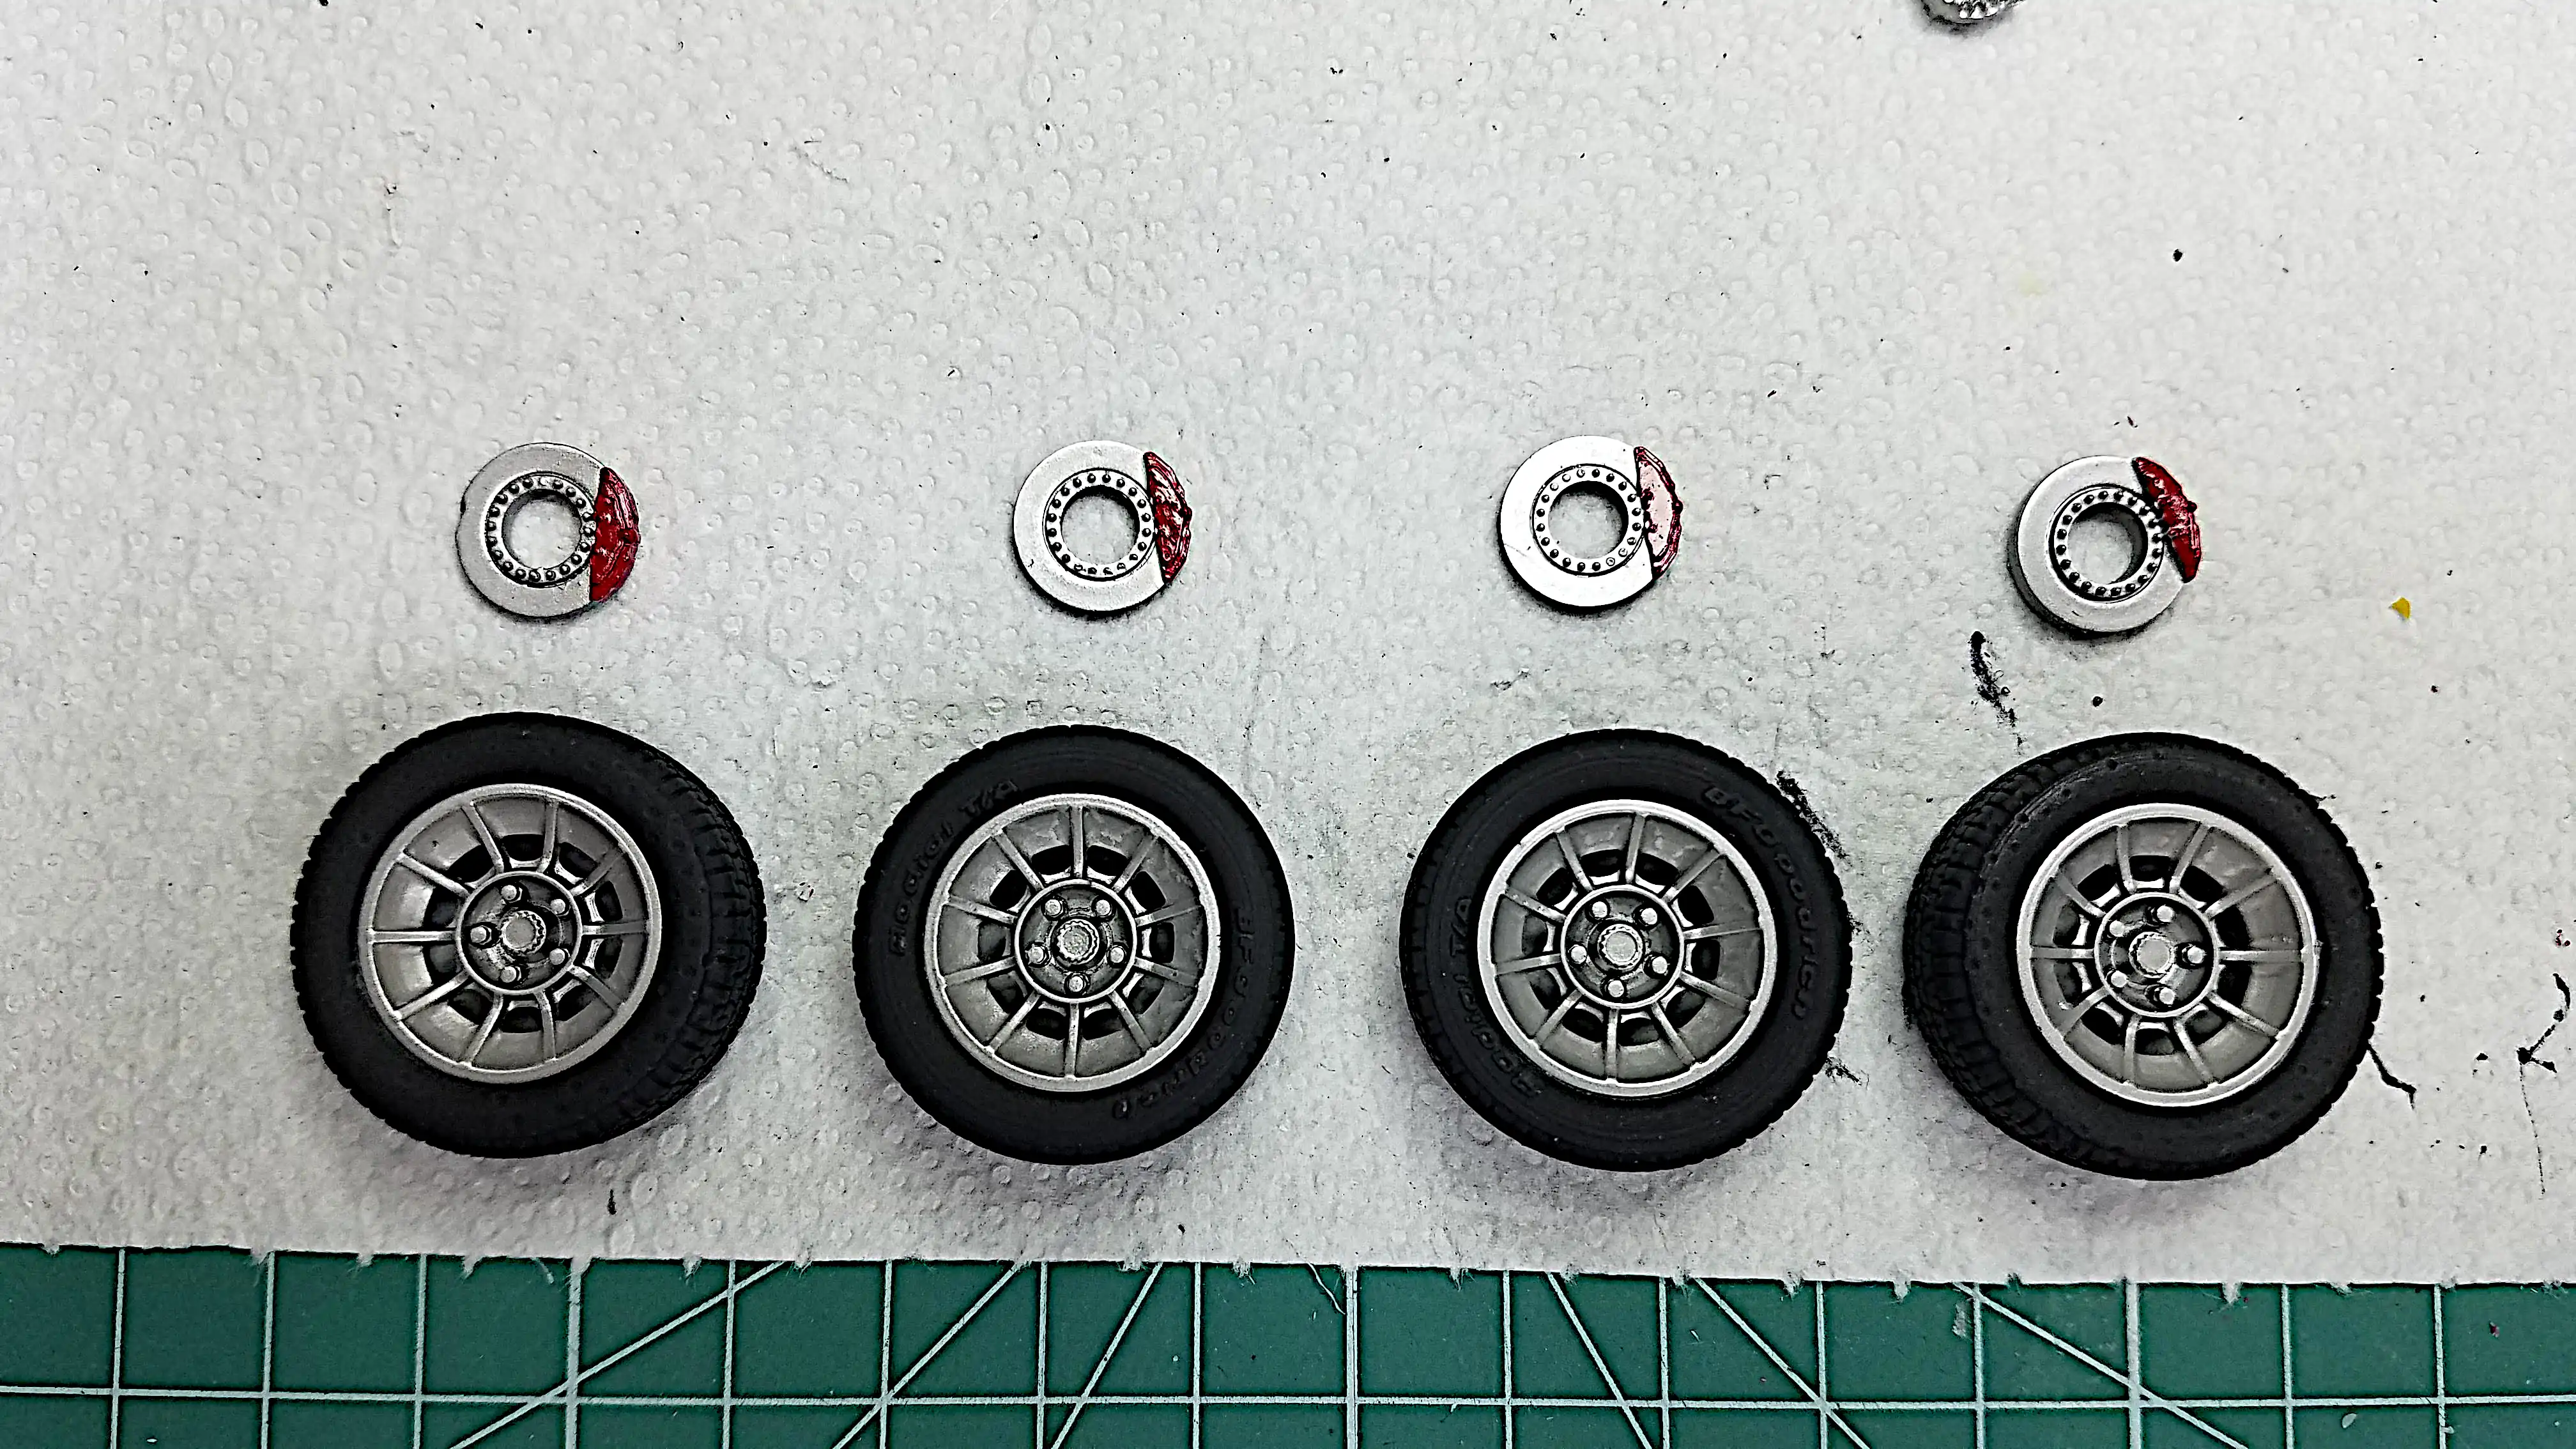 ires and wheels assembled
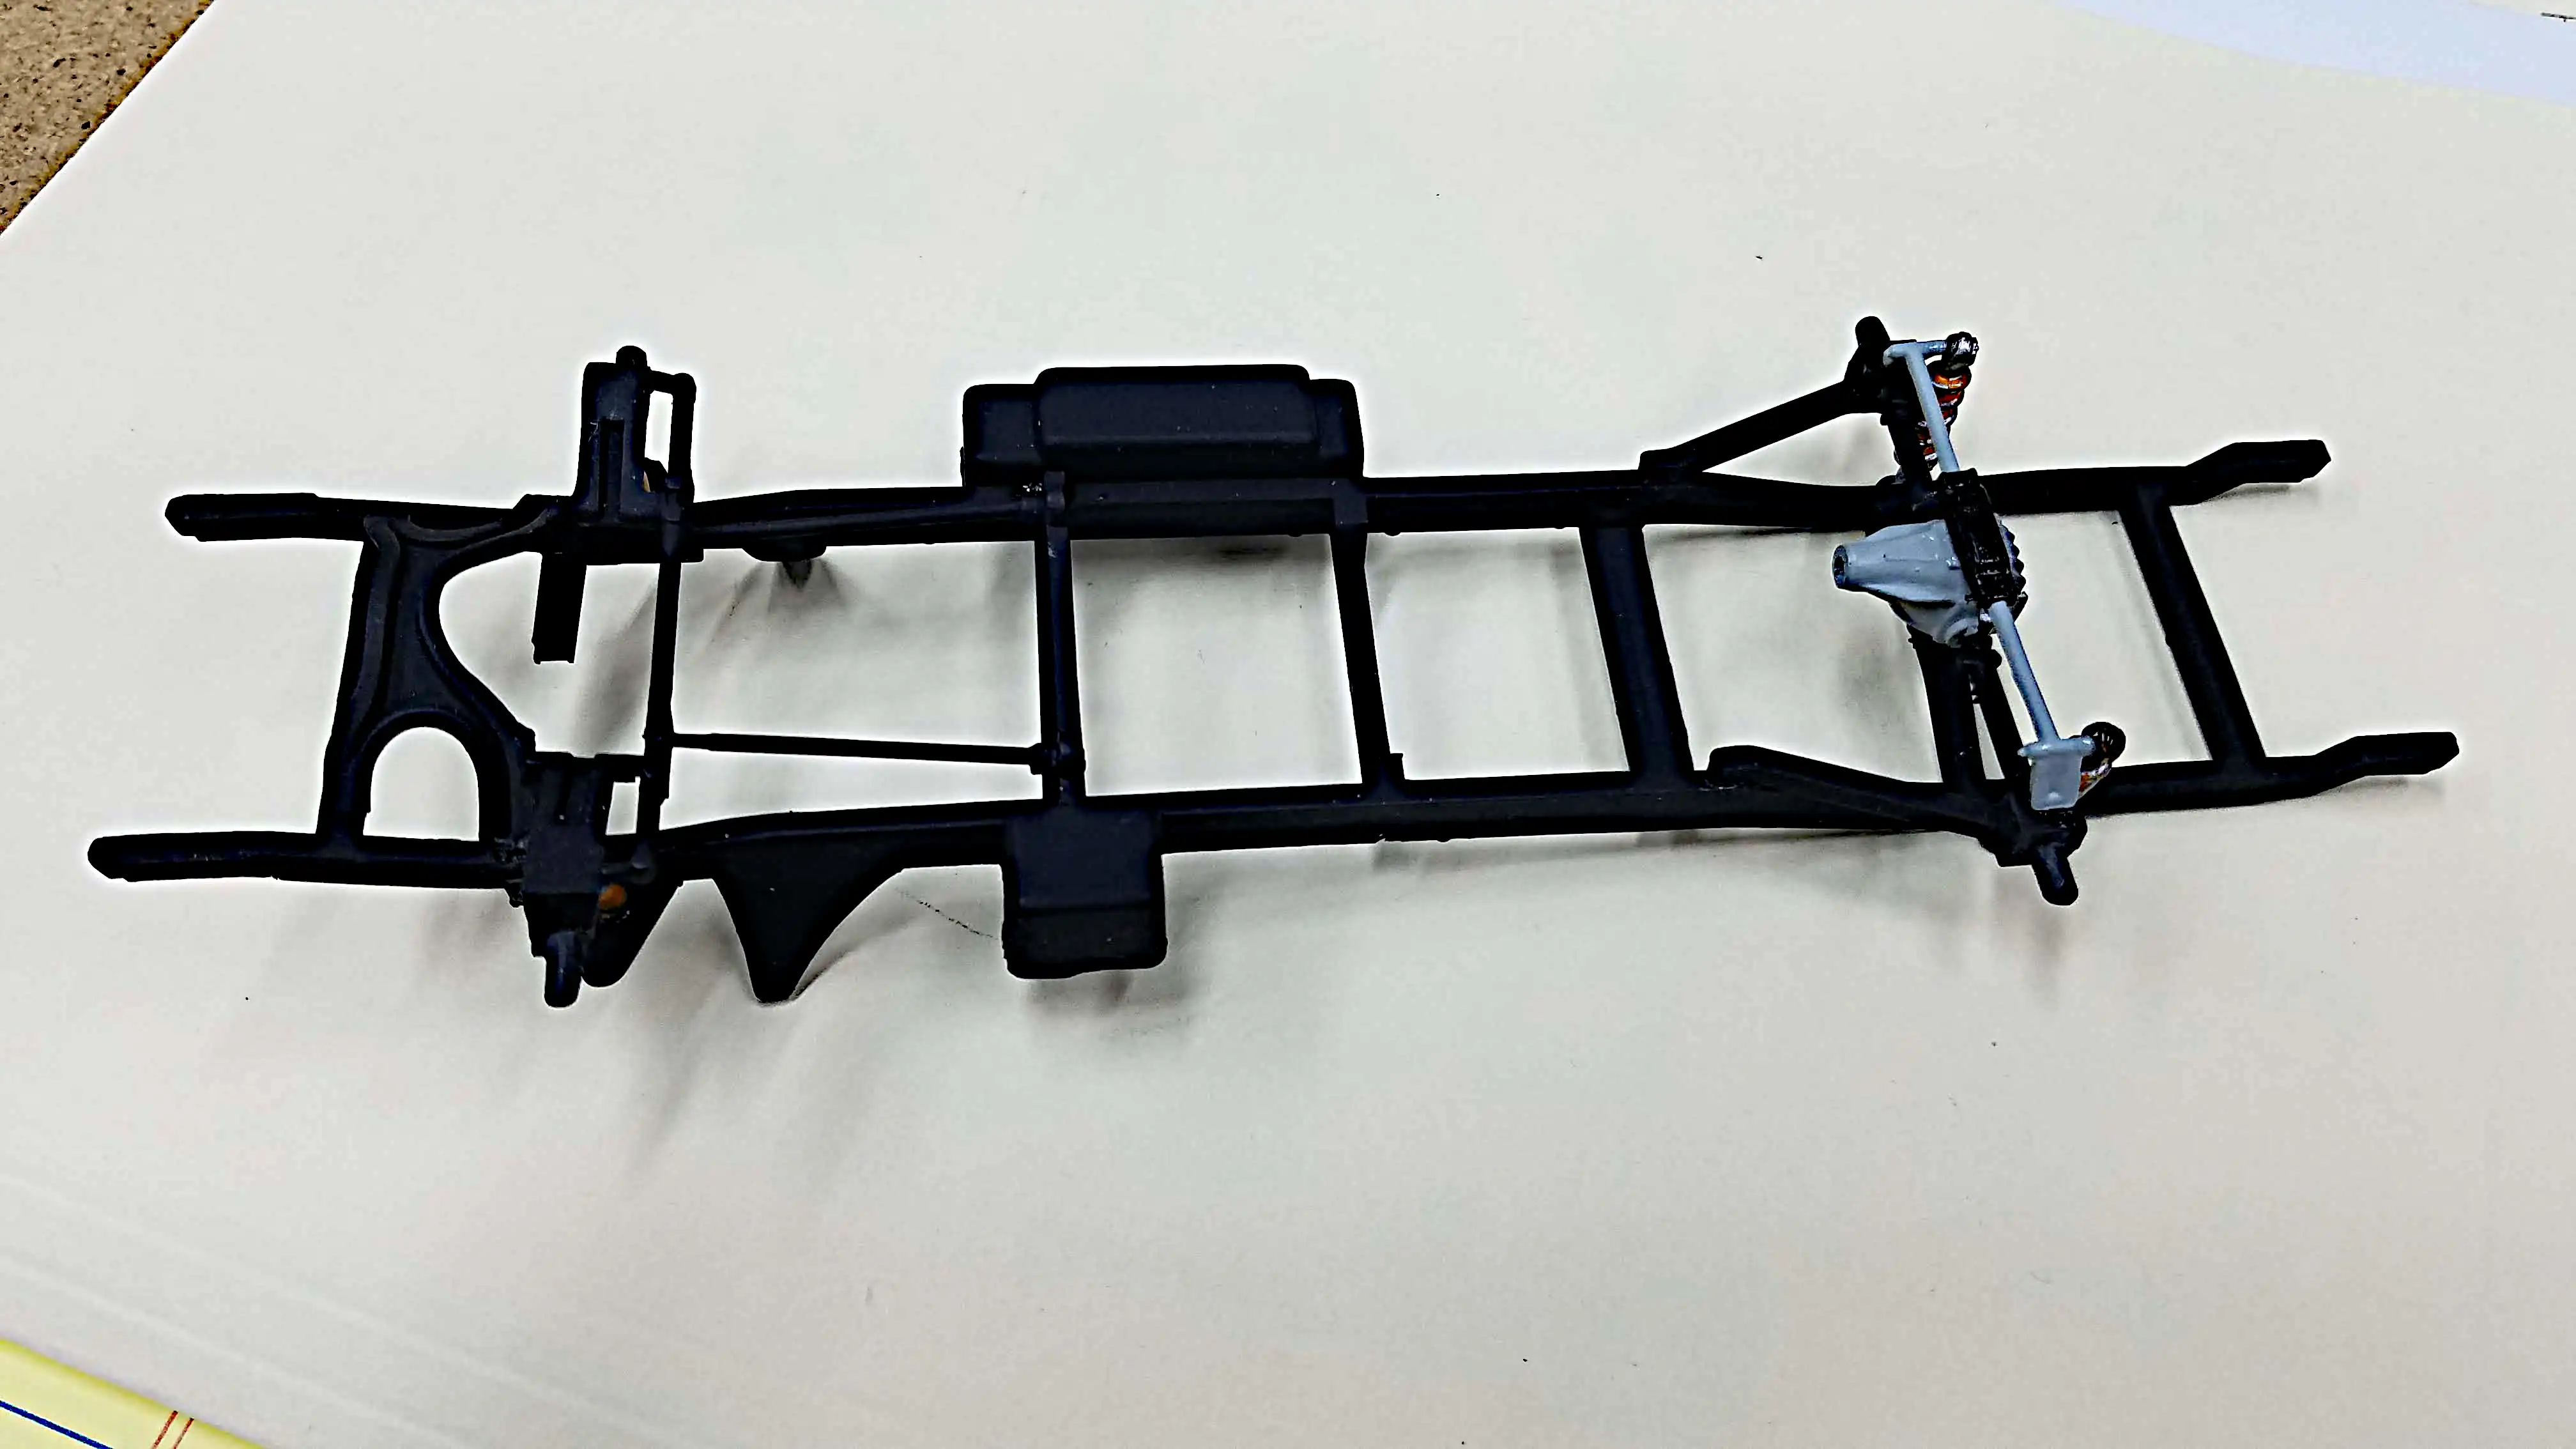
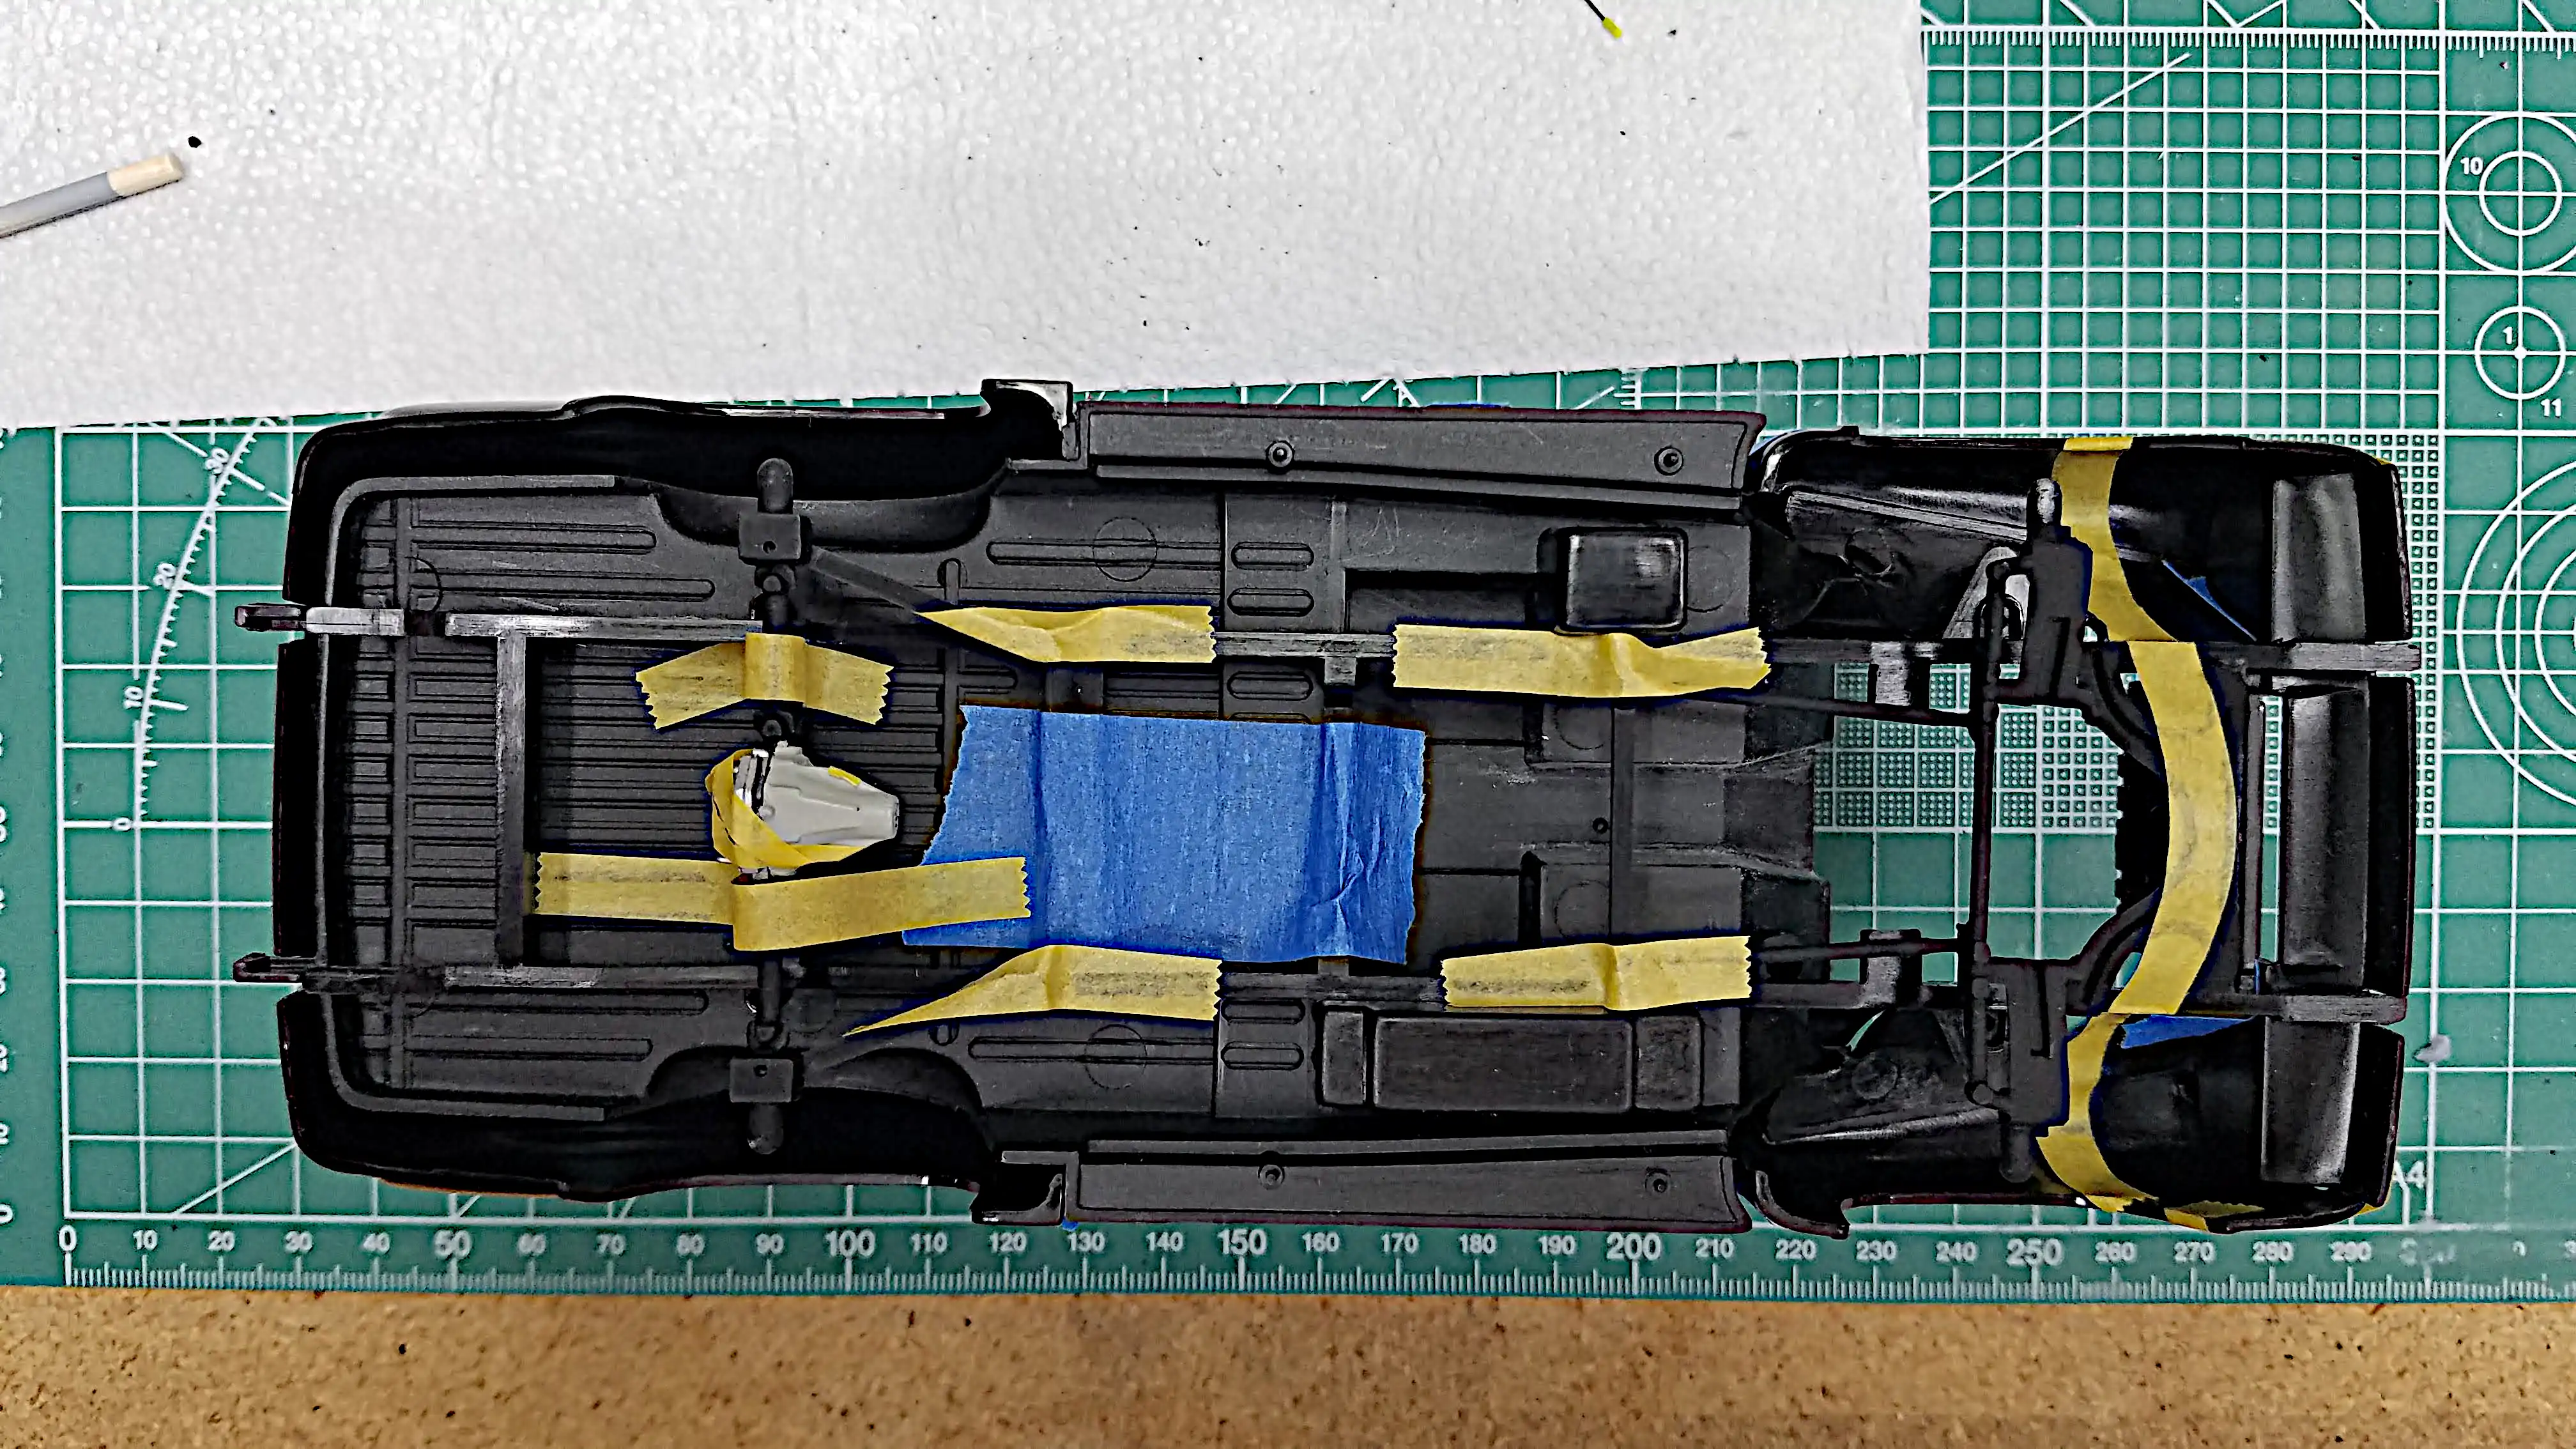 Frame, interior tub, rear differential and front suspension dry fitted
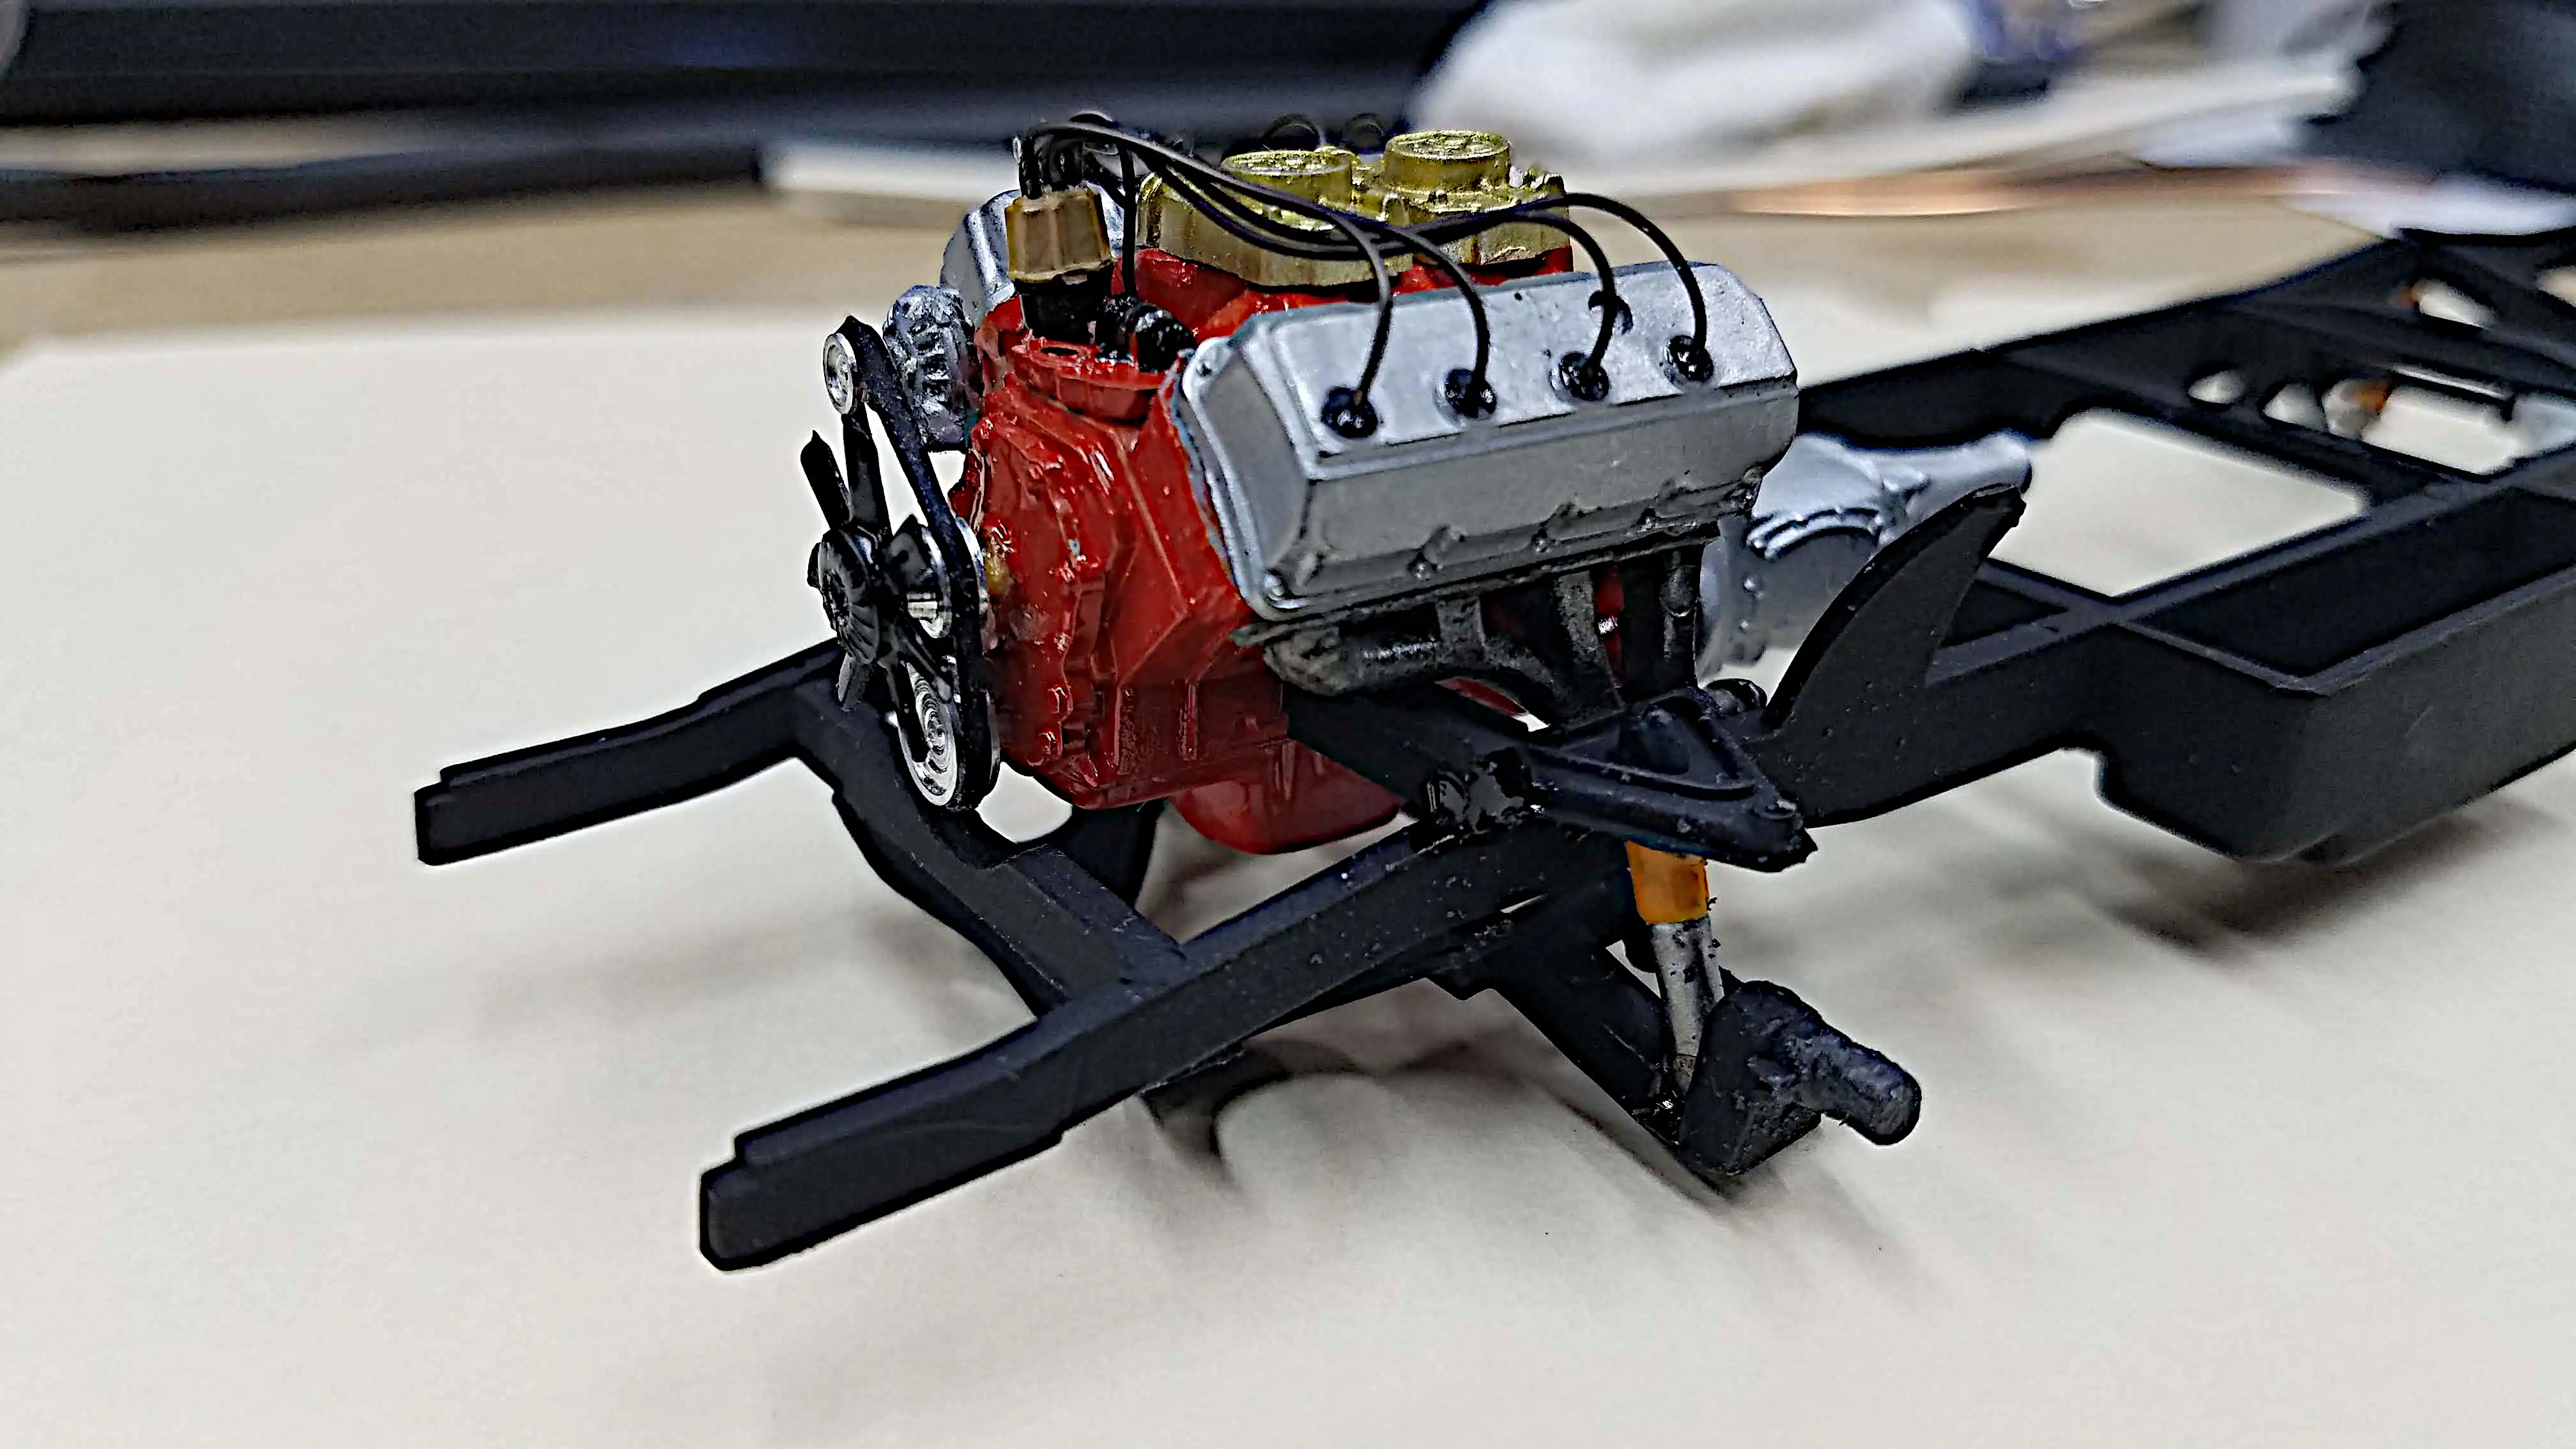
 Checking engine compartment clearance with radiator installed
 How did the 426 Hemi get it's name
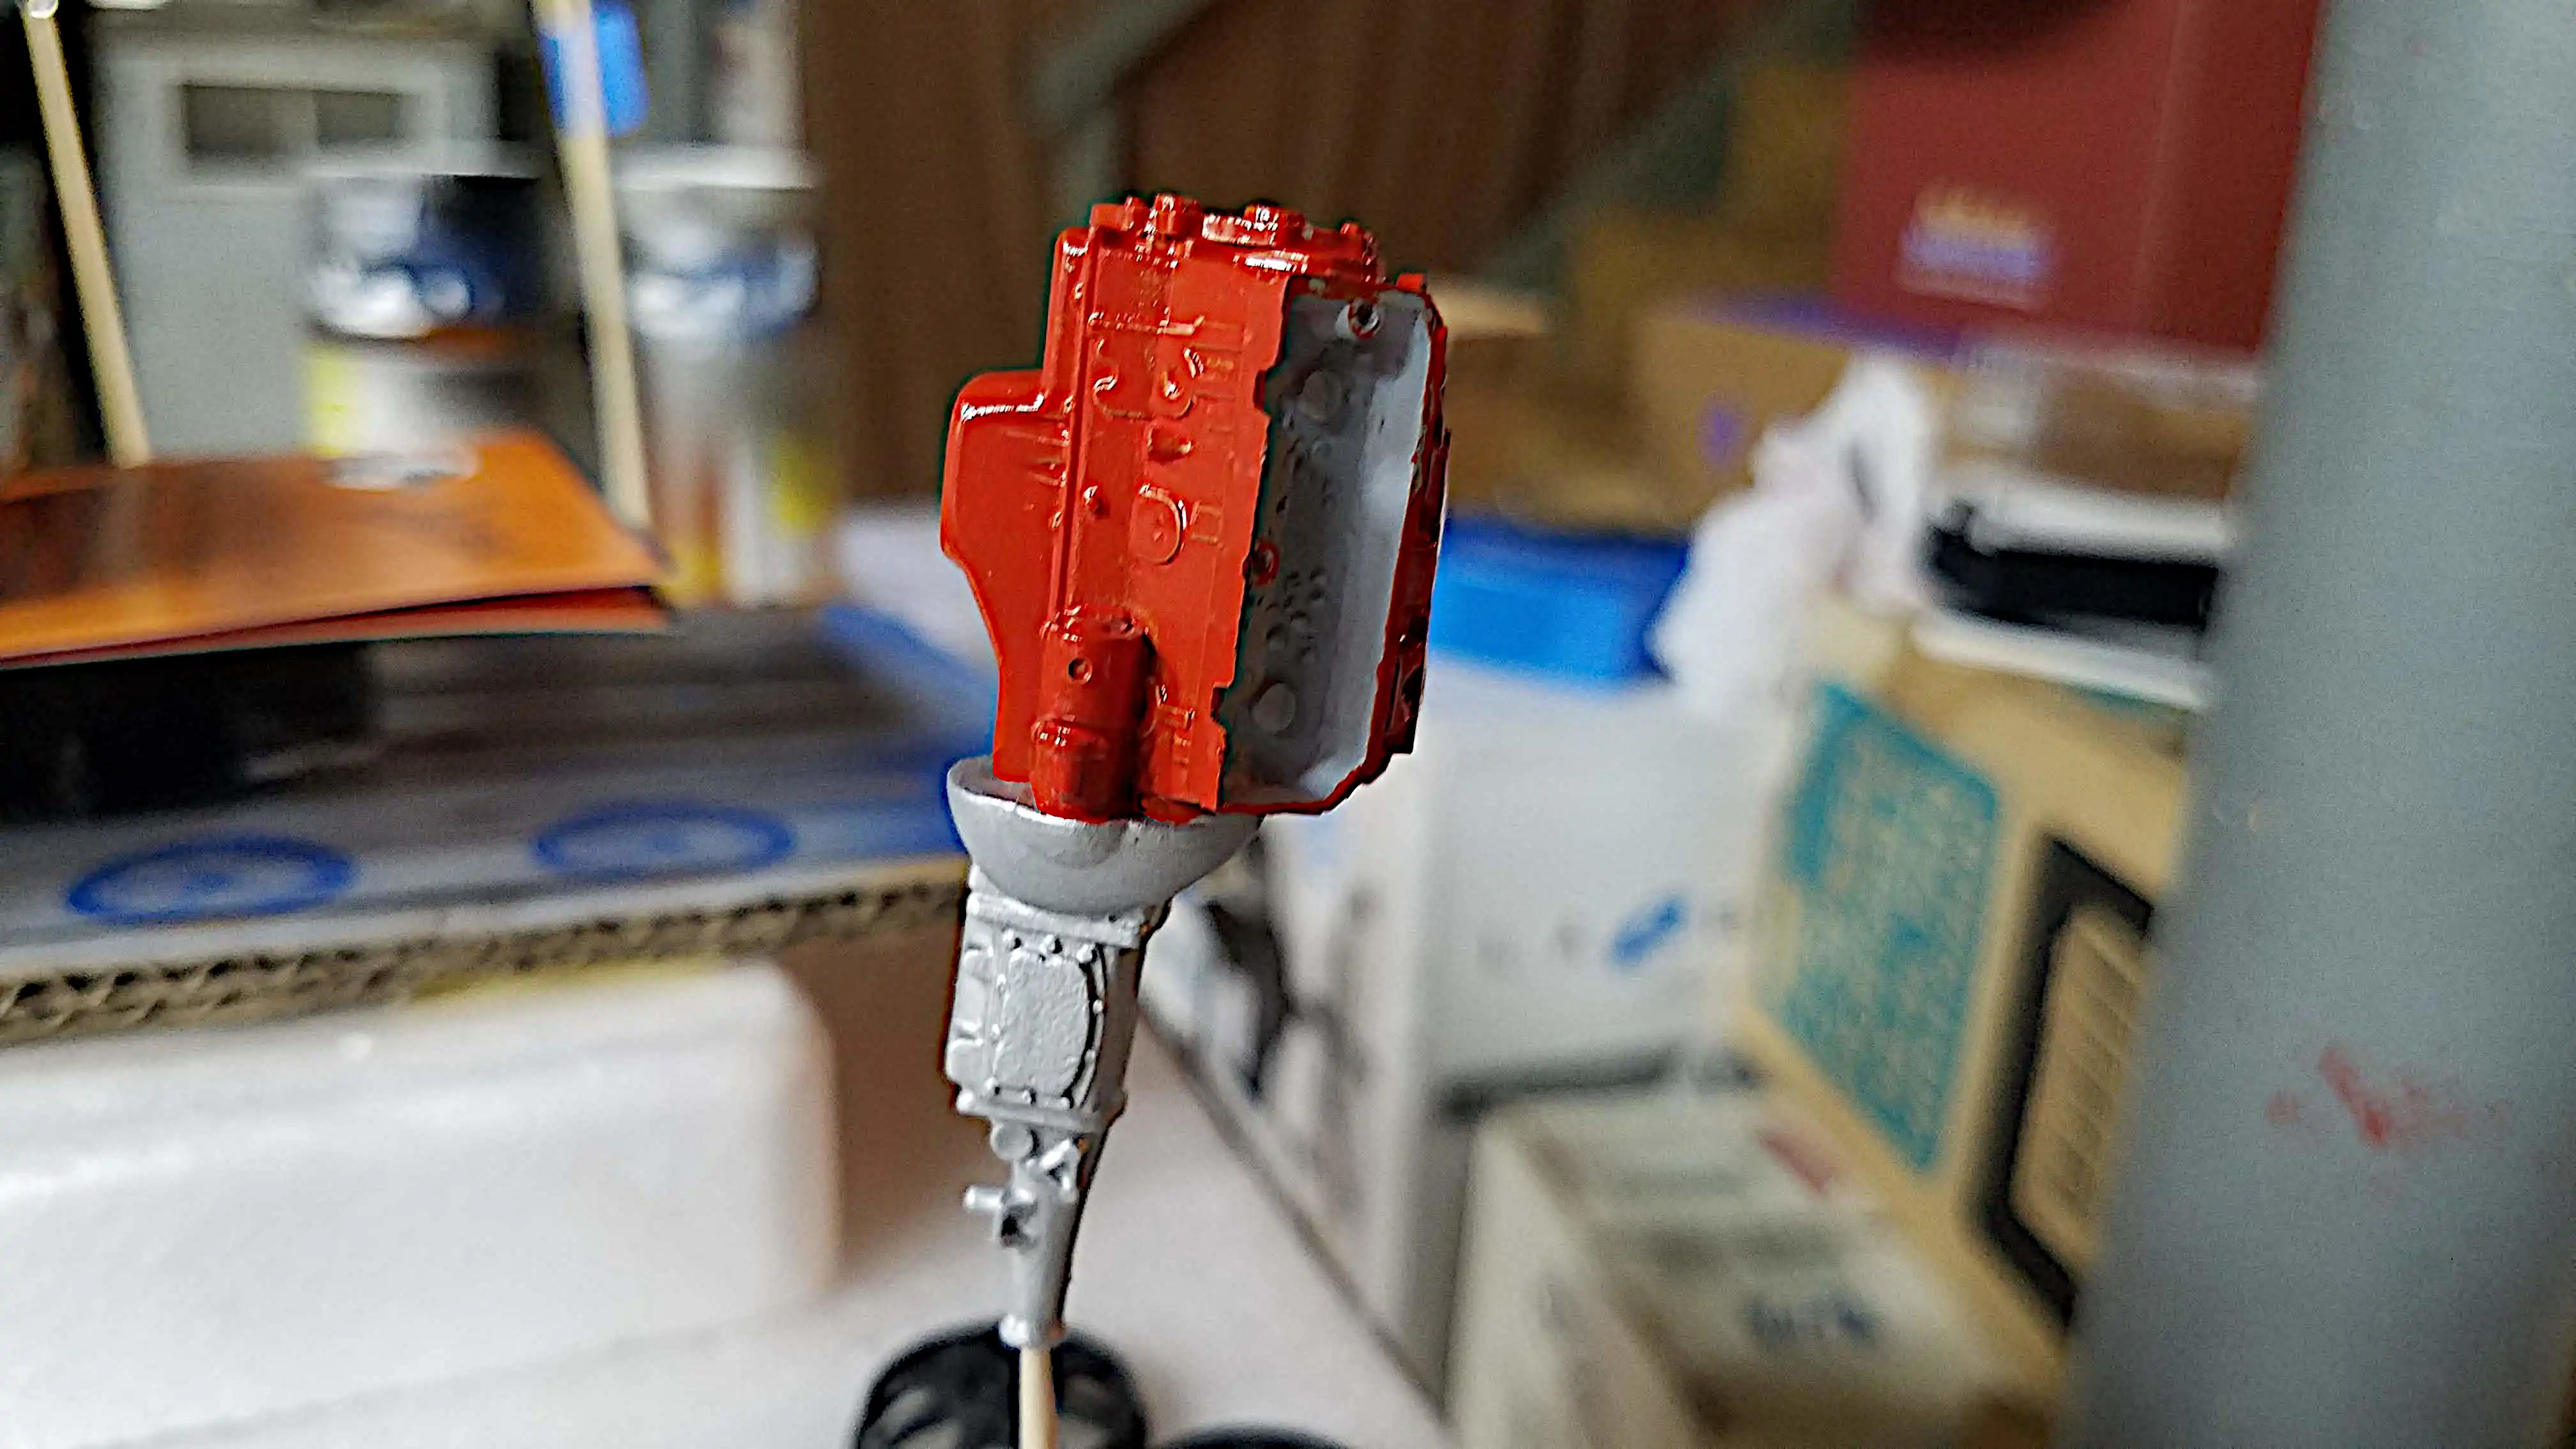
 Hemi engine dual carburetors and exhaust manifolds installed
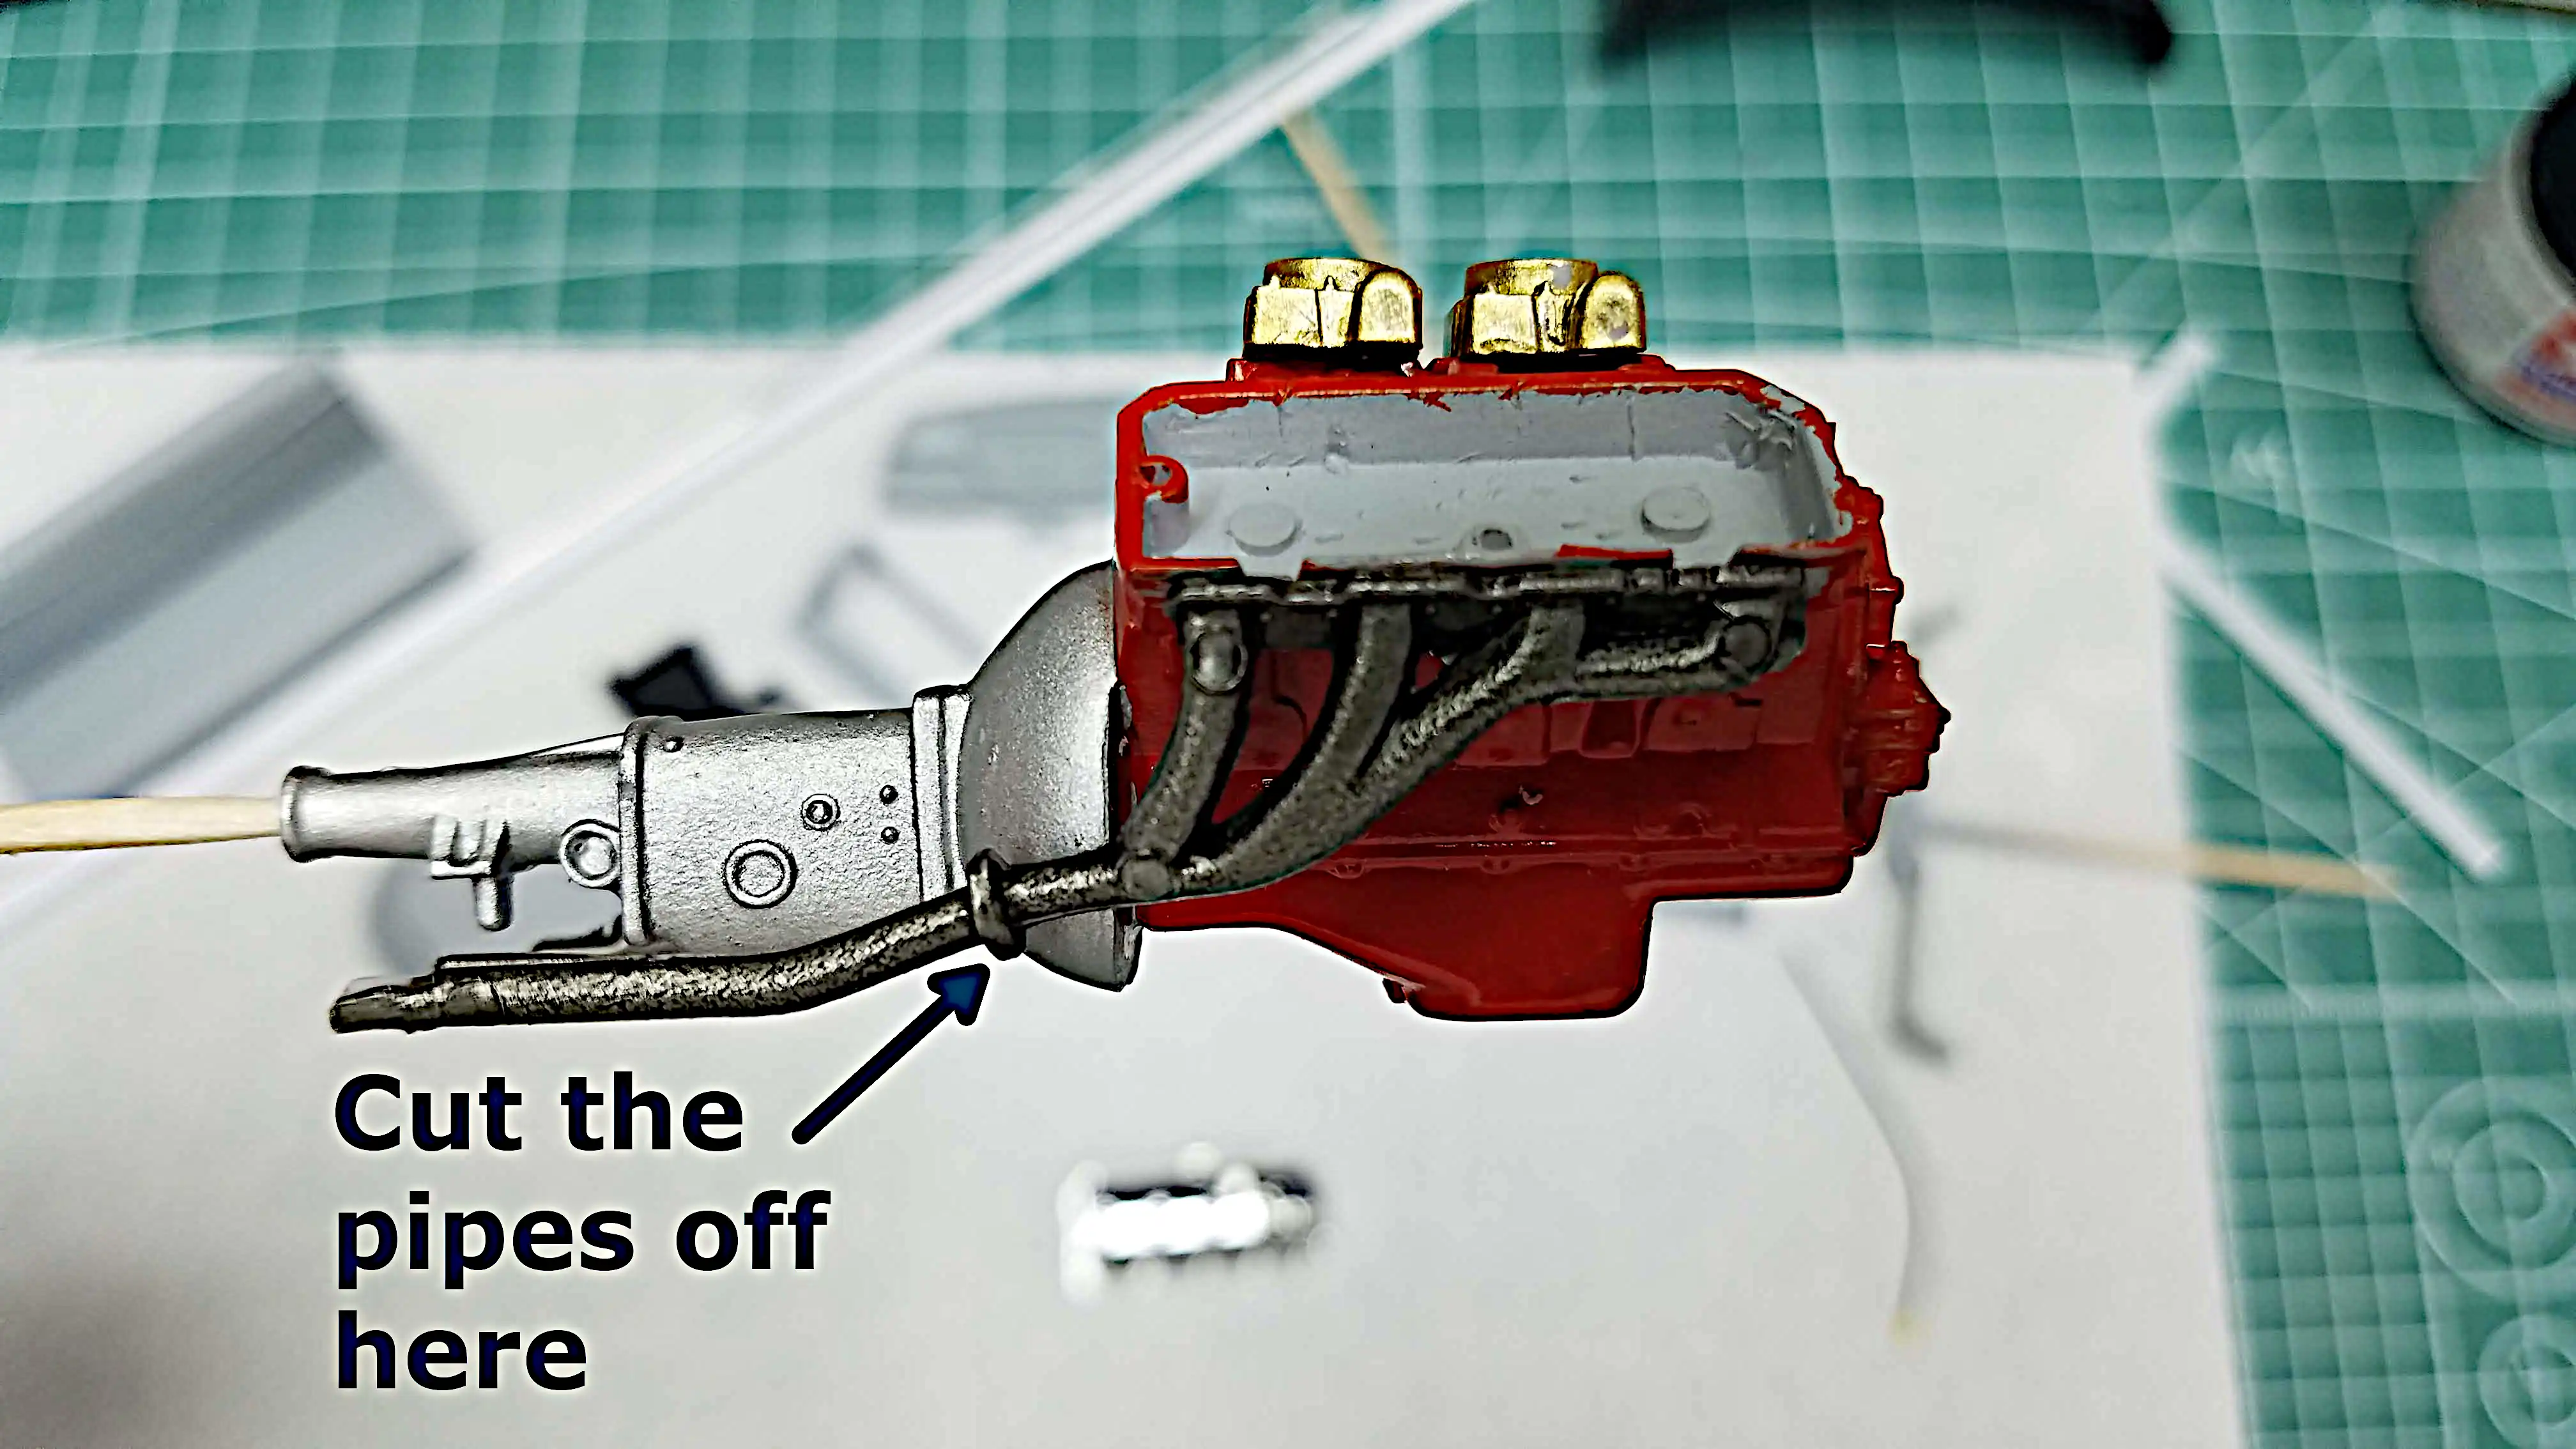 Exhaust manifold pipe had to be cut
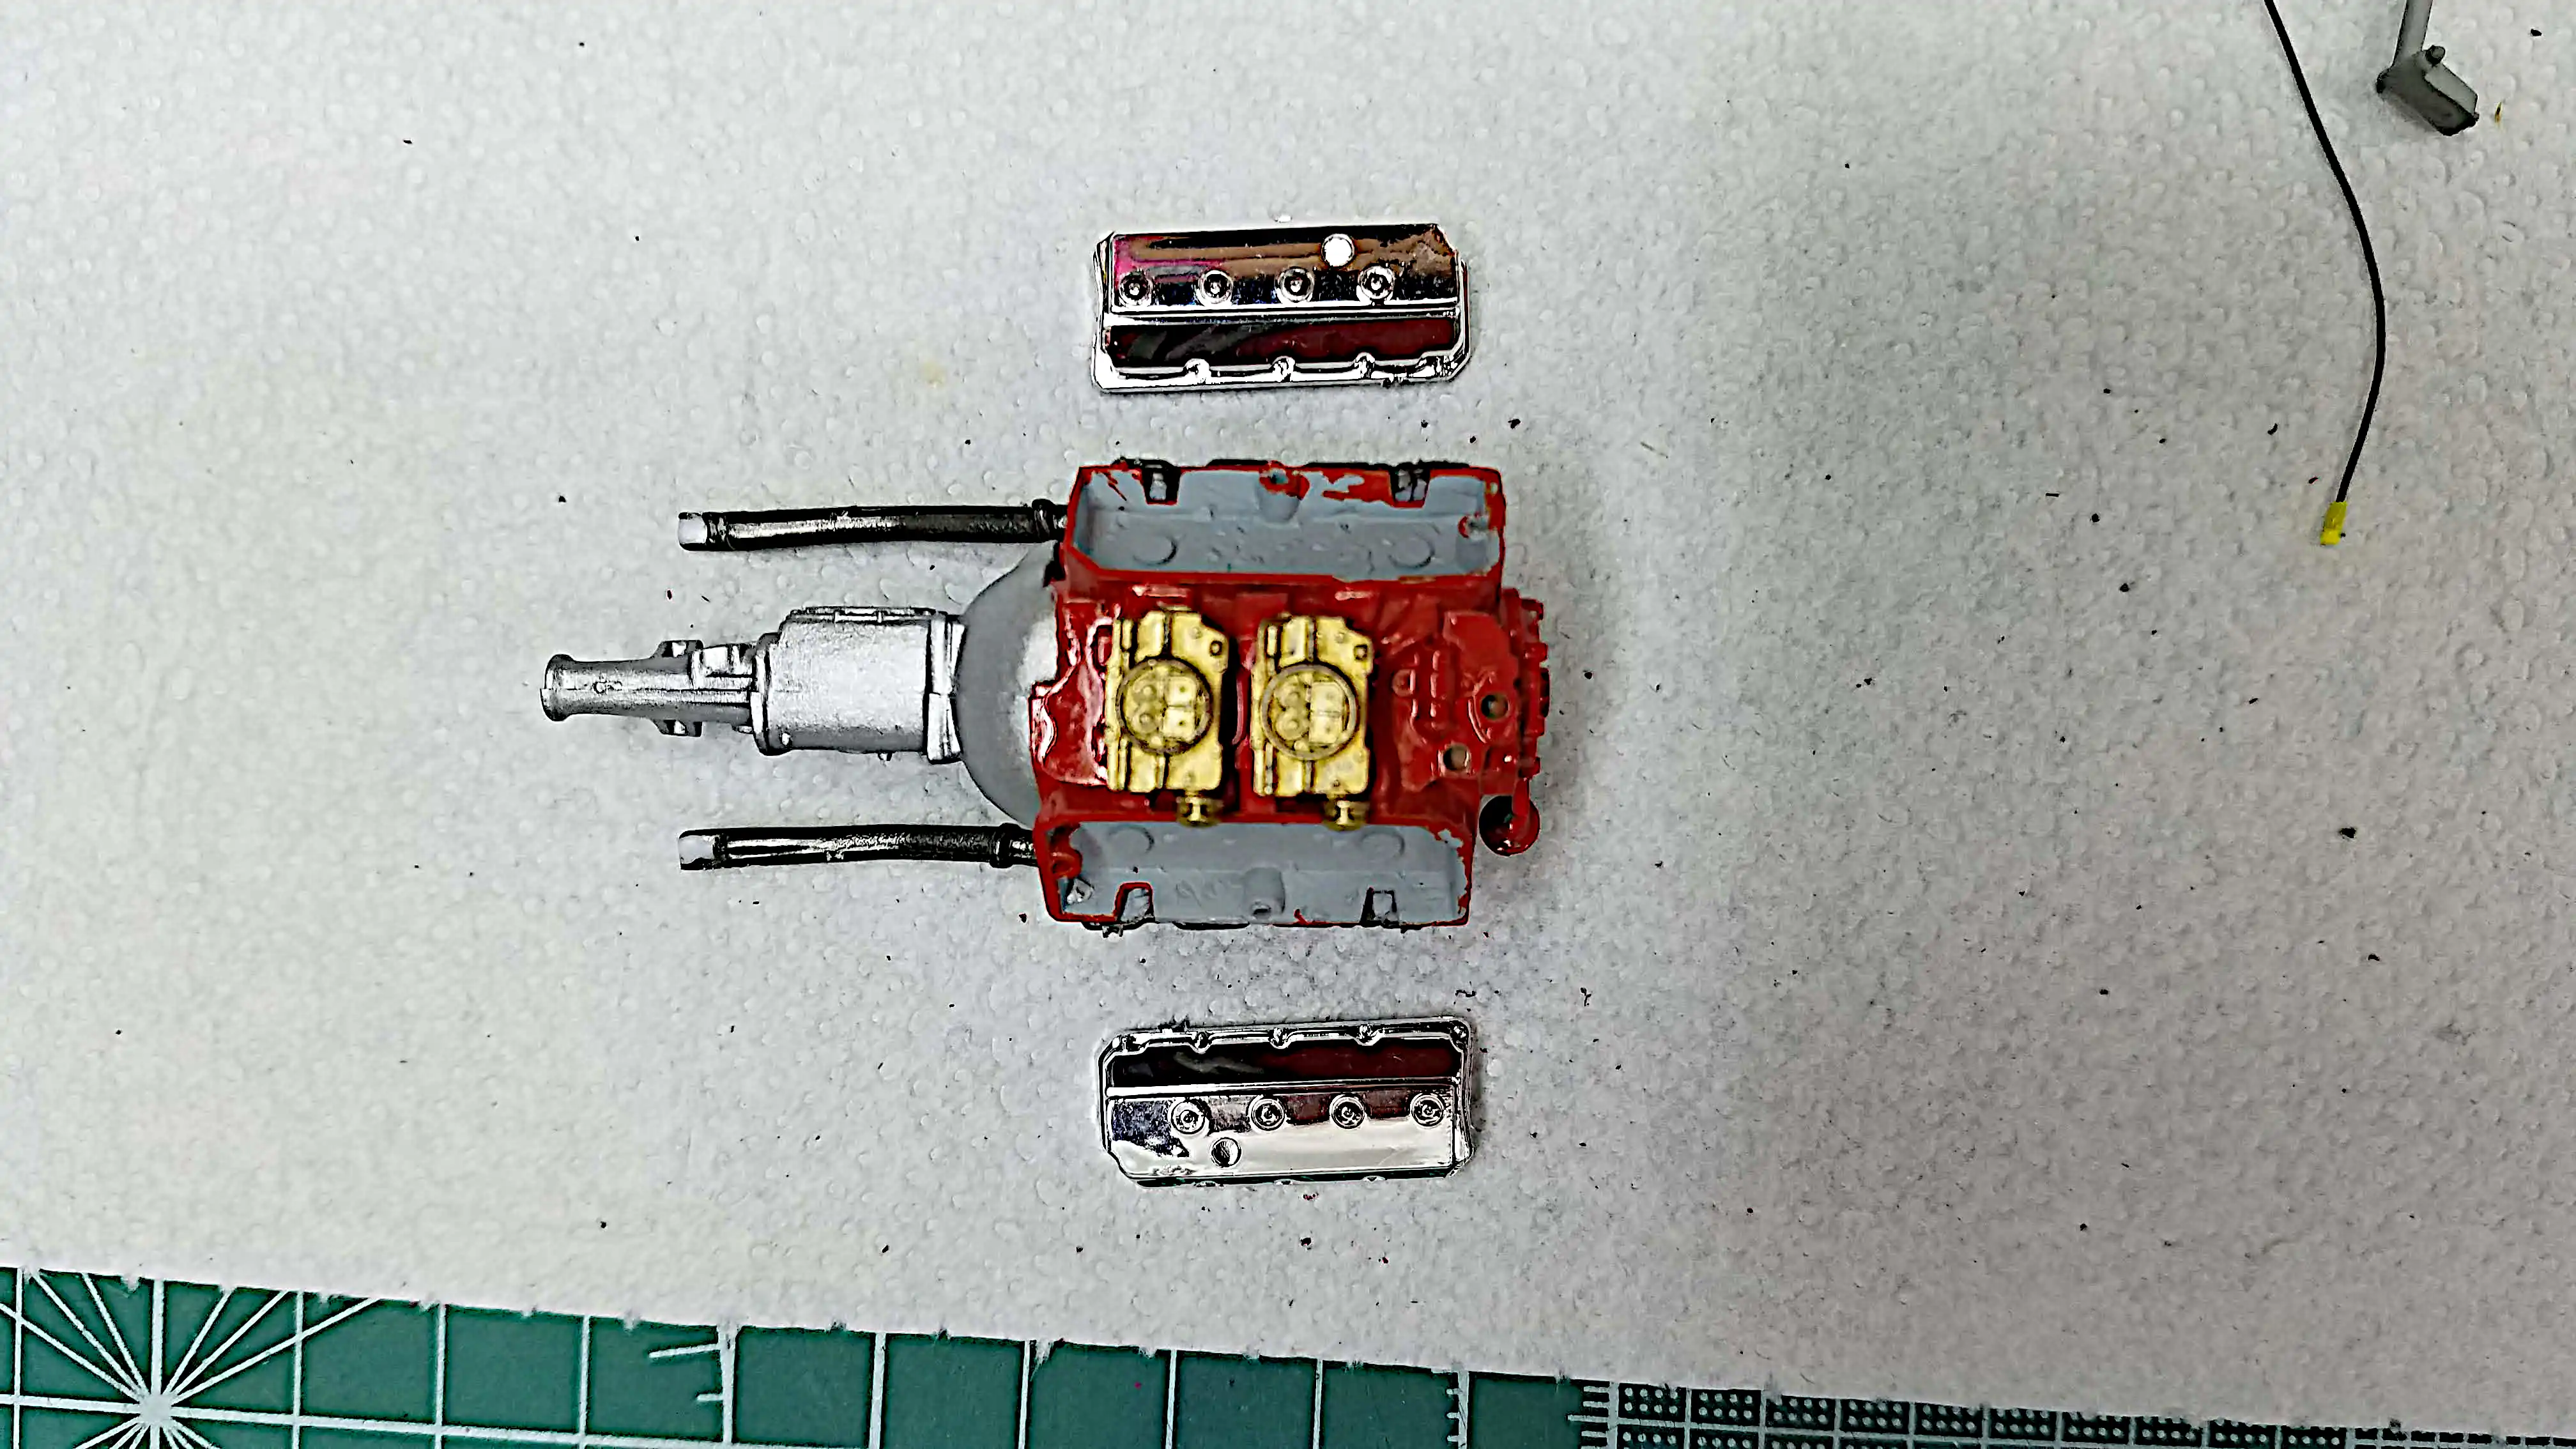
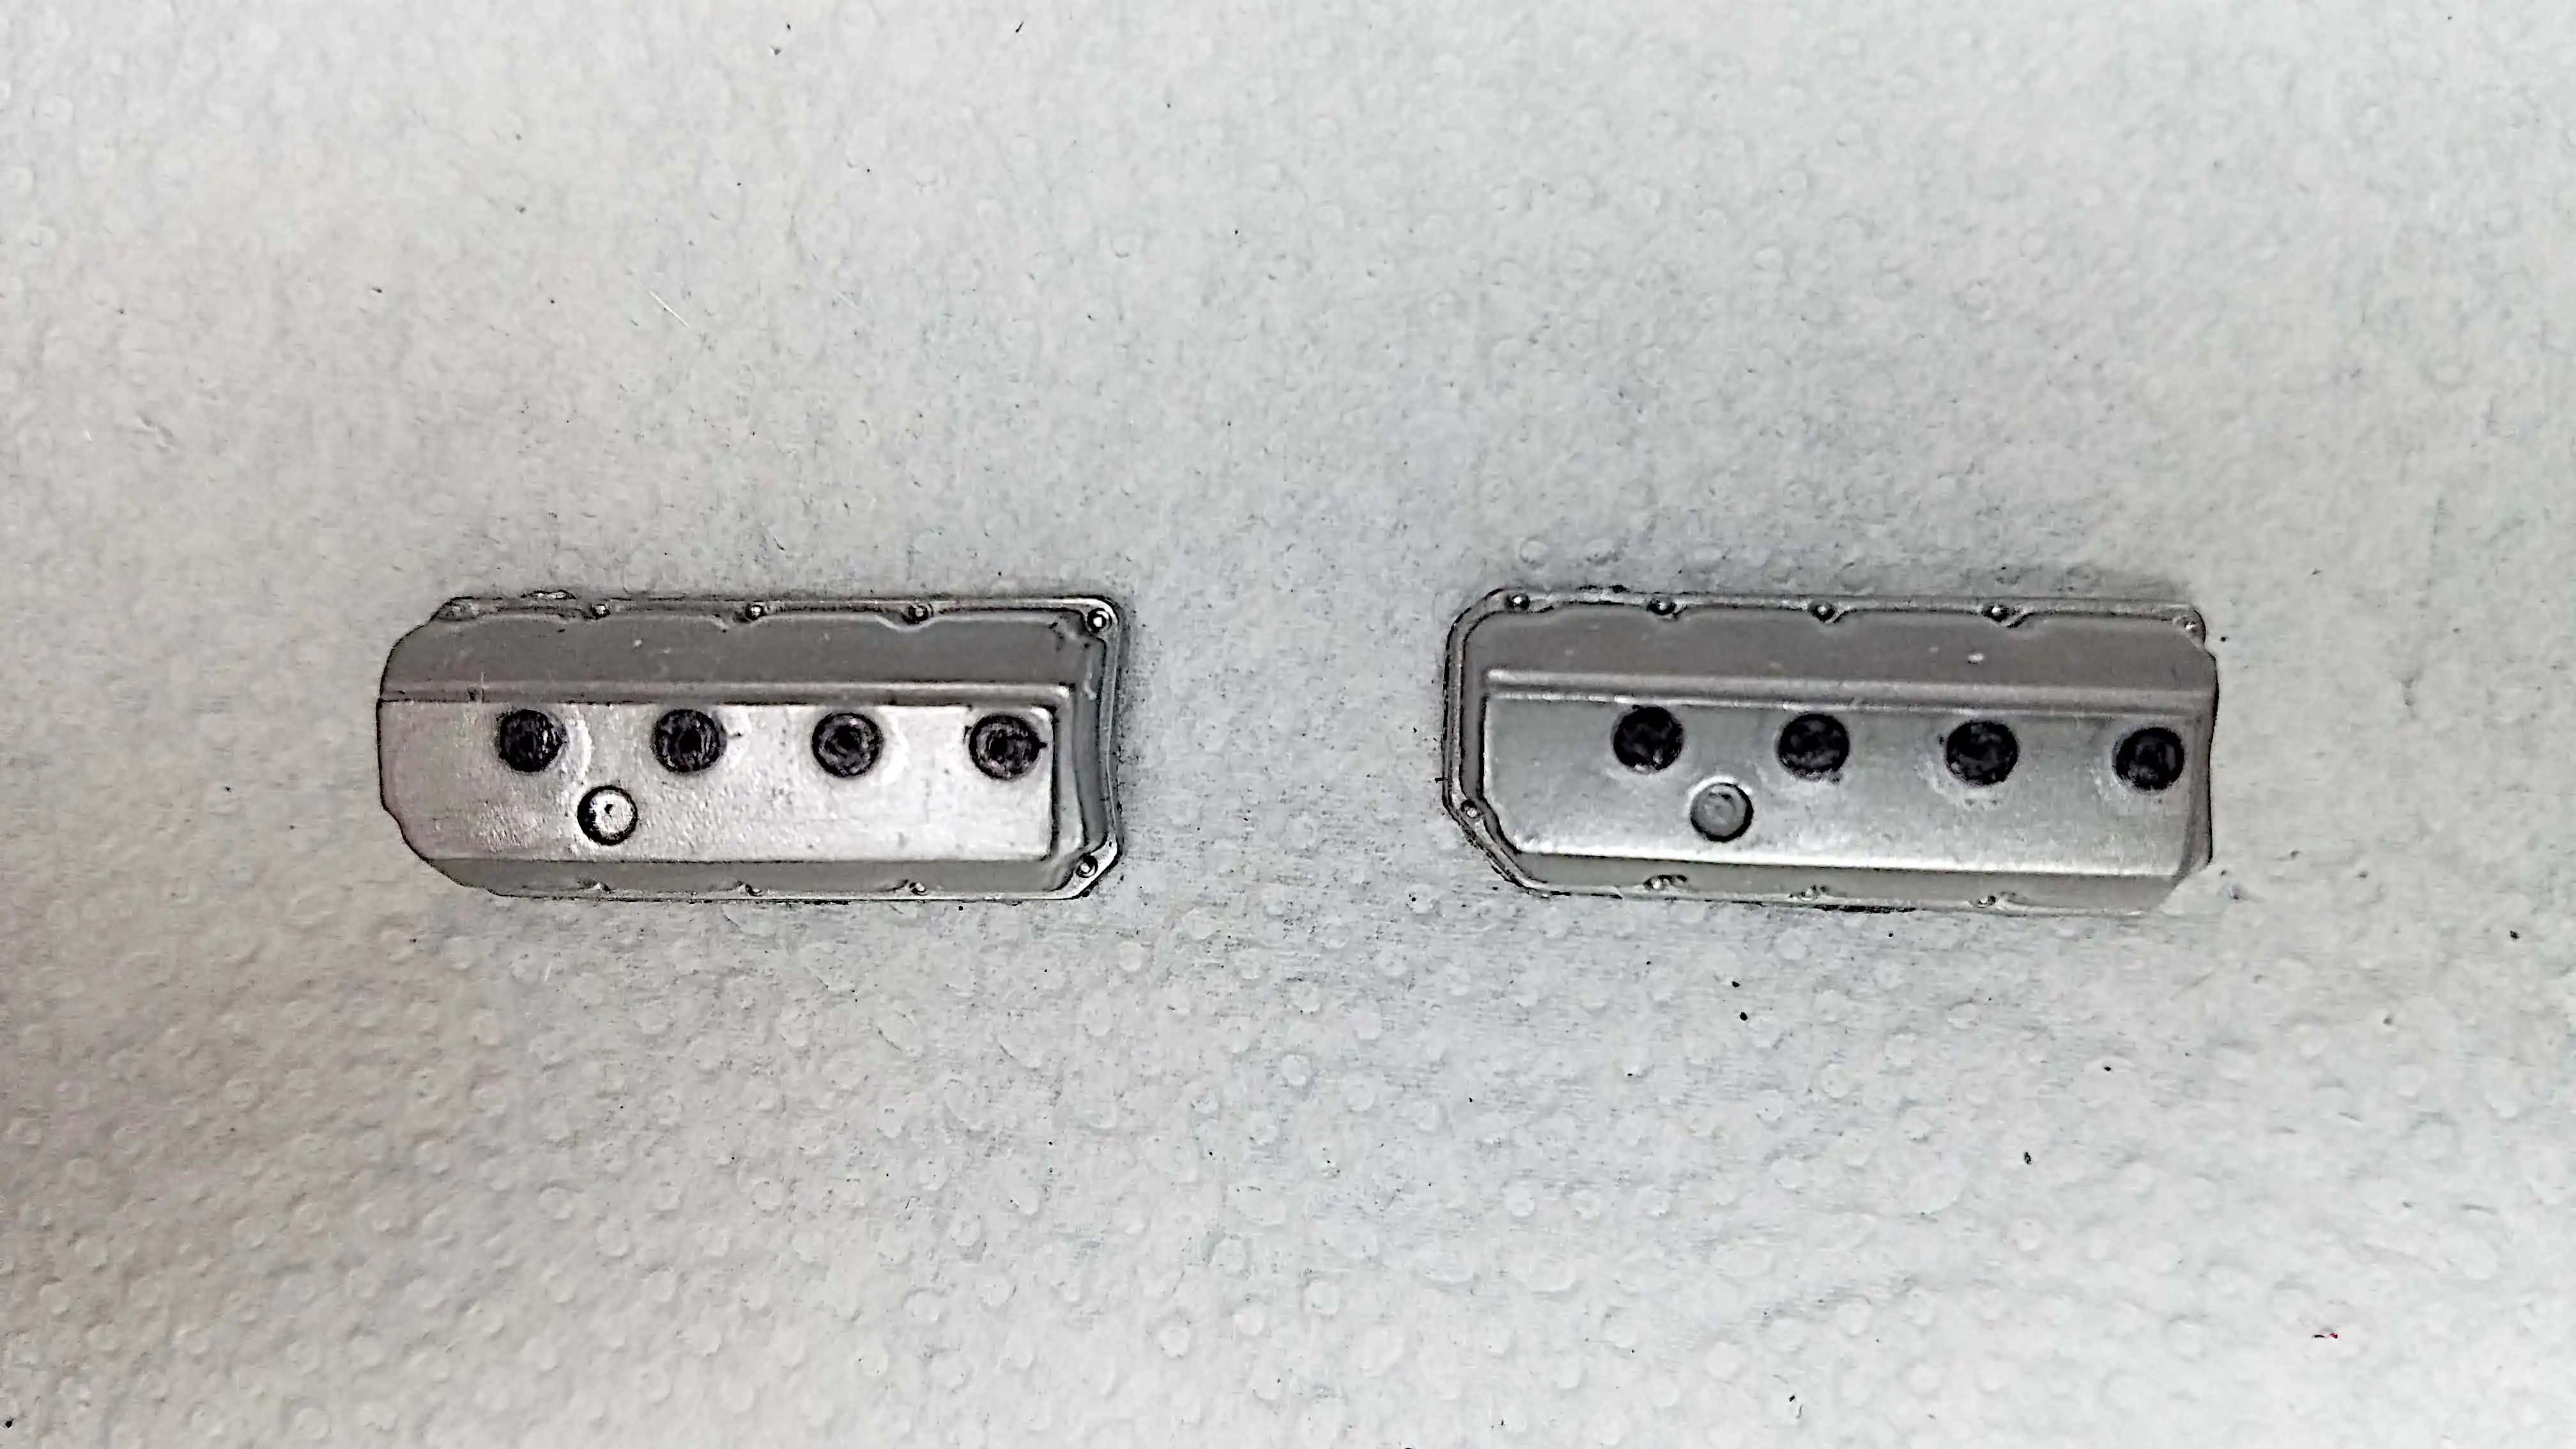 Valve covers painted with Vallejo 77.716 Semi Matt Aluminum
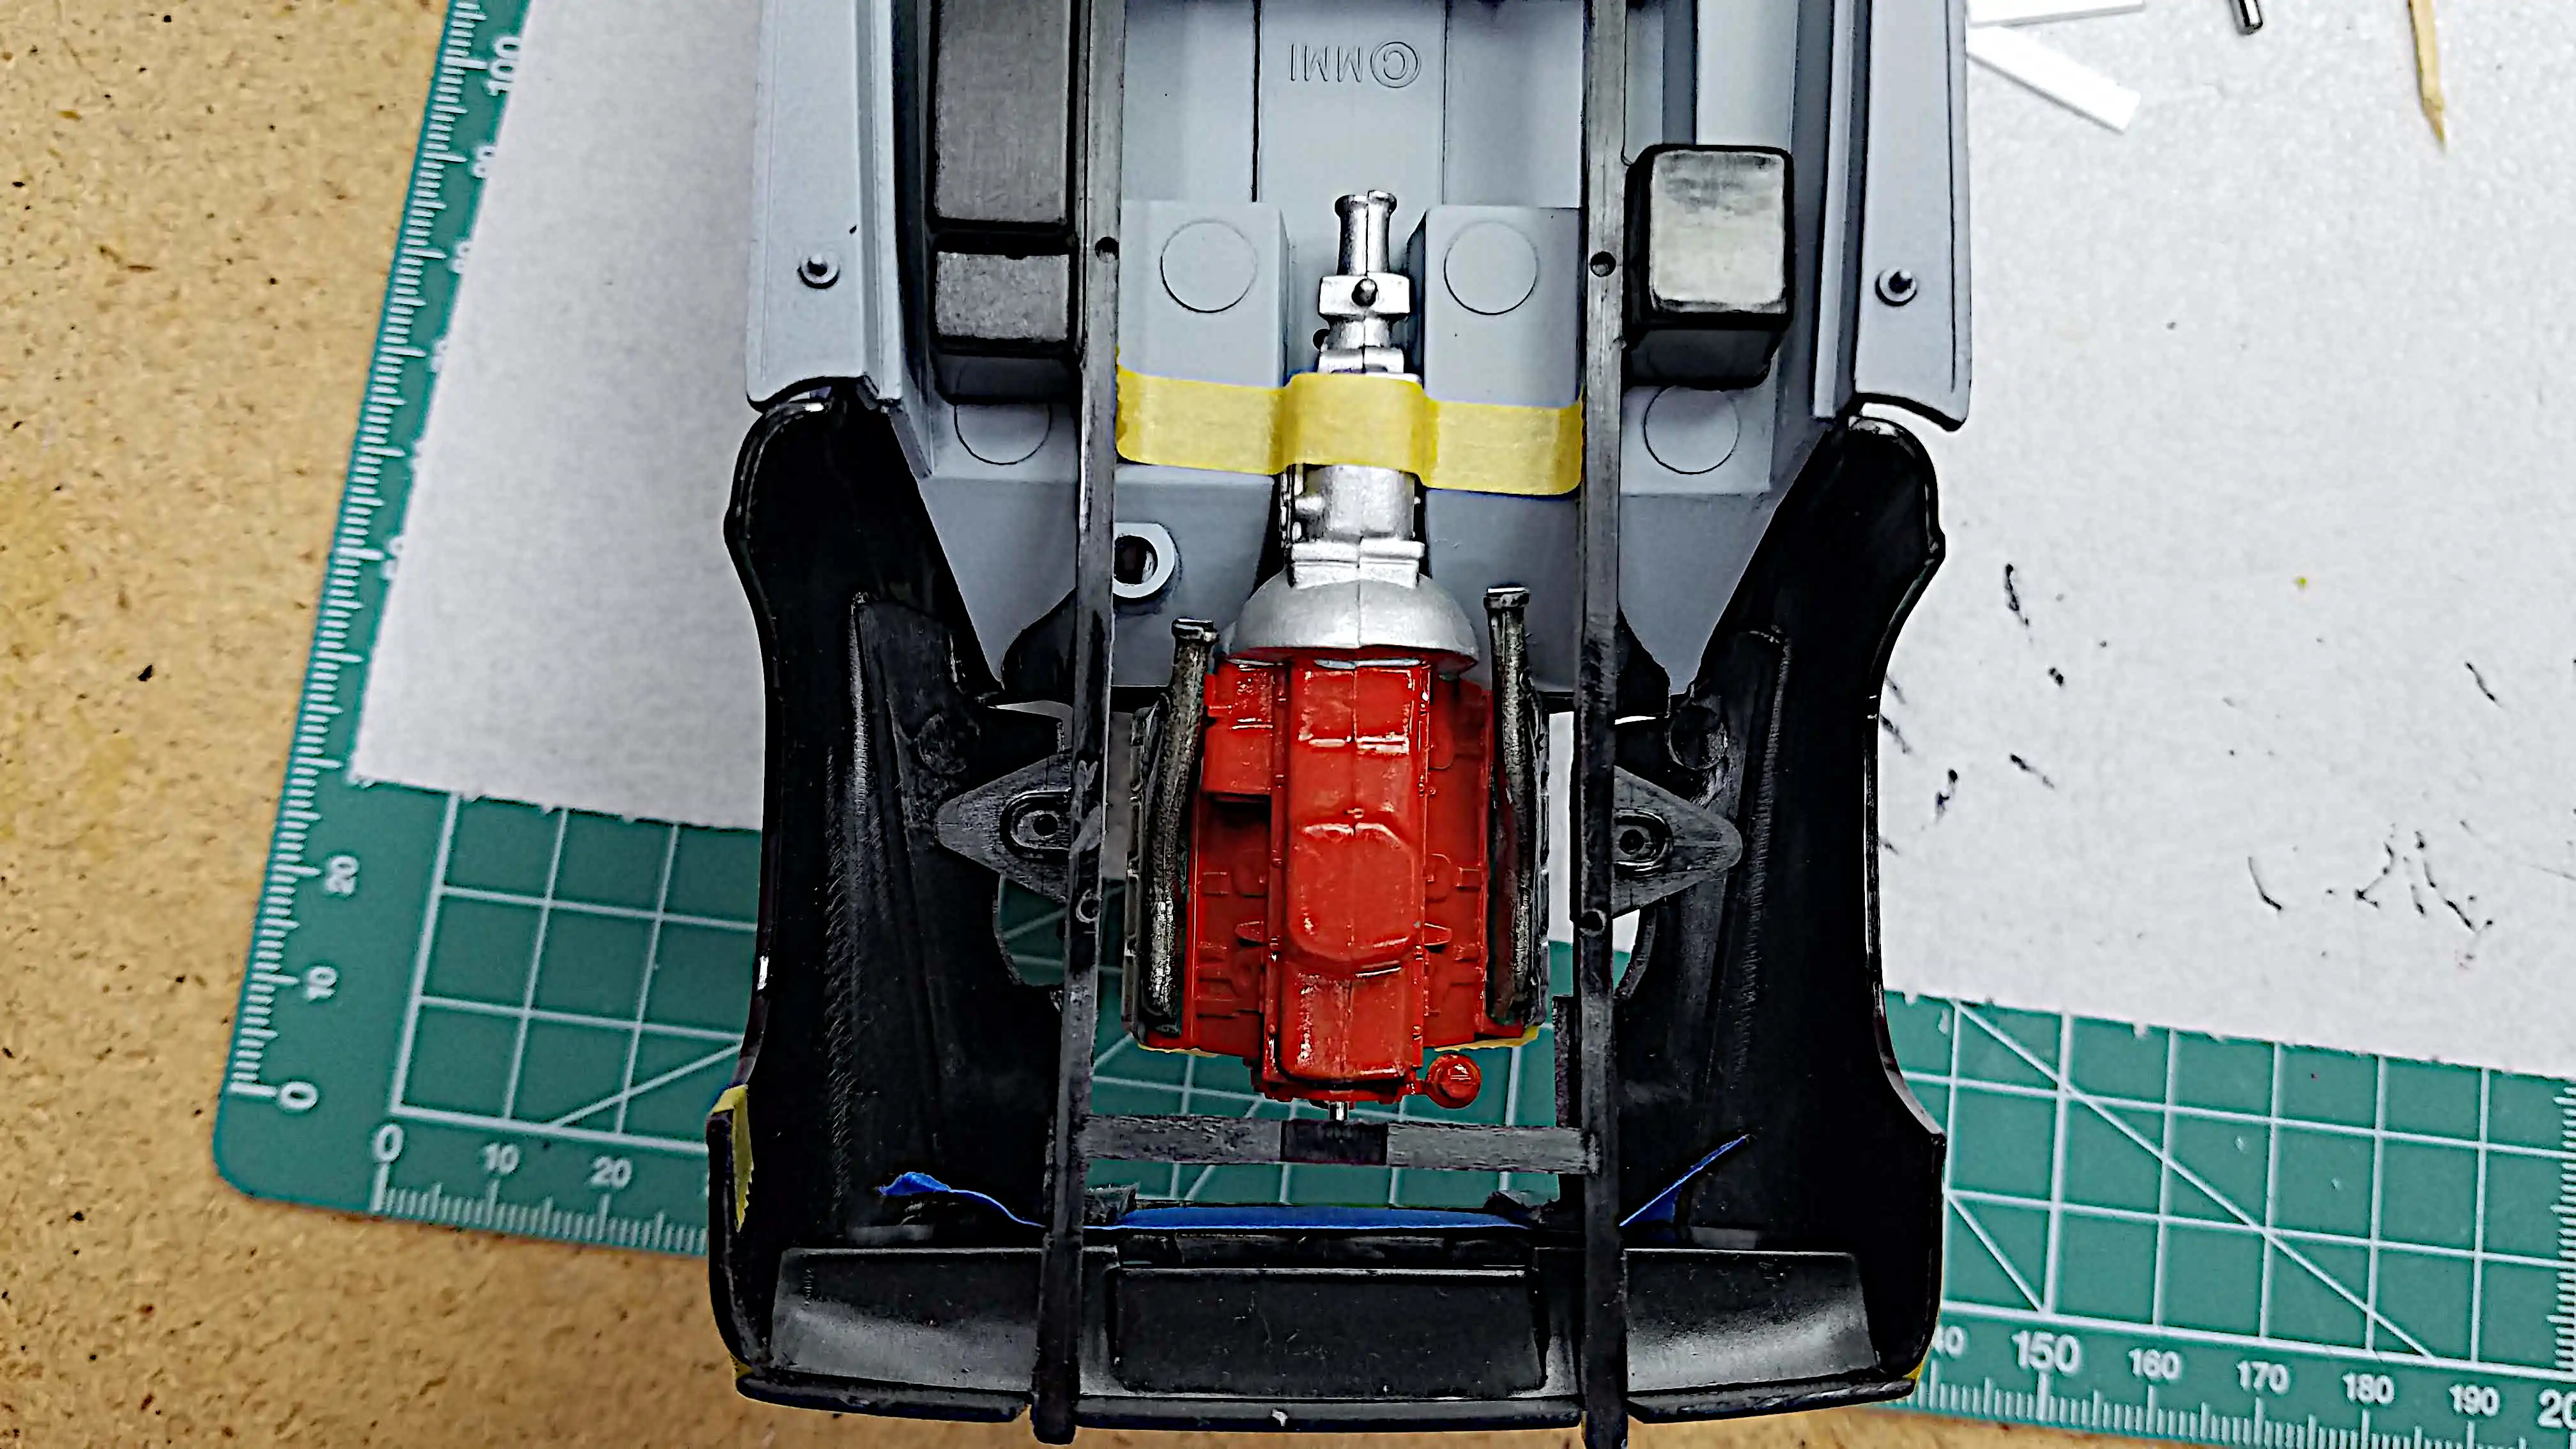 Hemi engine being dry fitted into the frame
 Valve covers, distributor cap and crank pulley installed
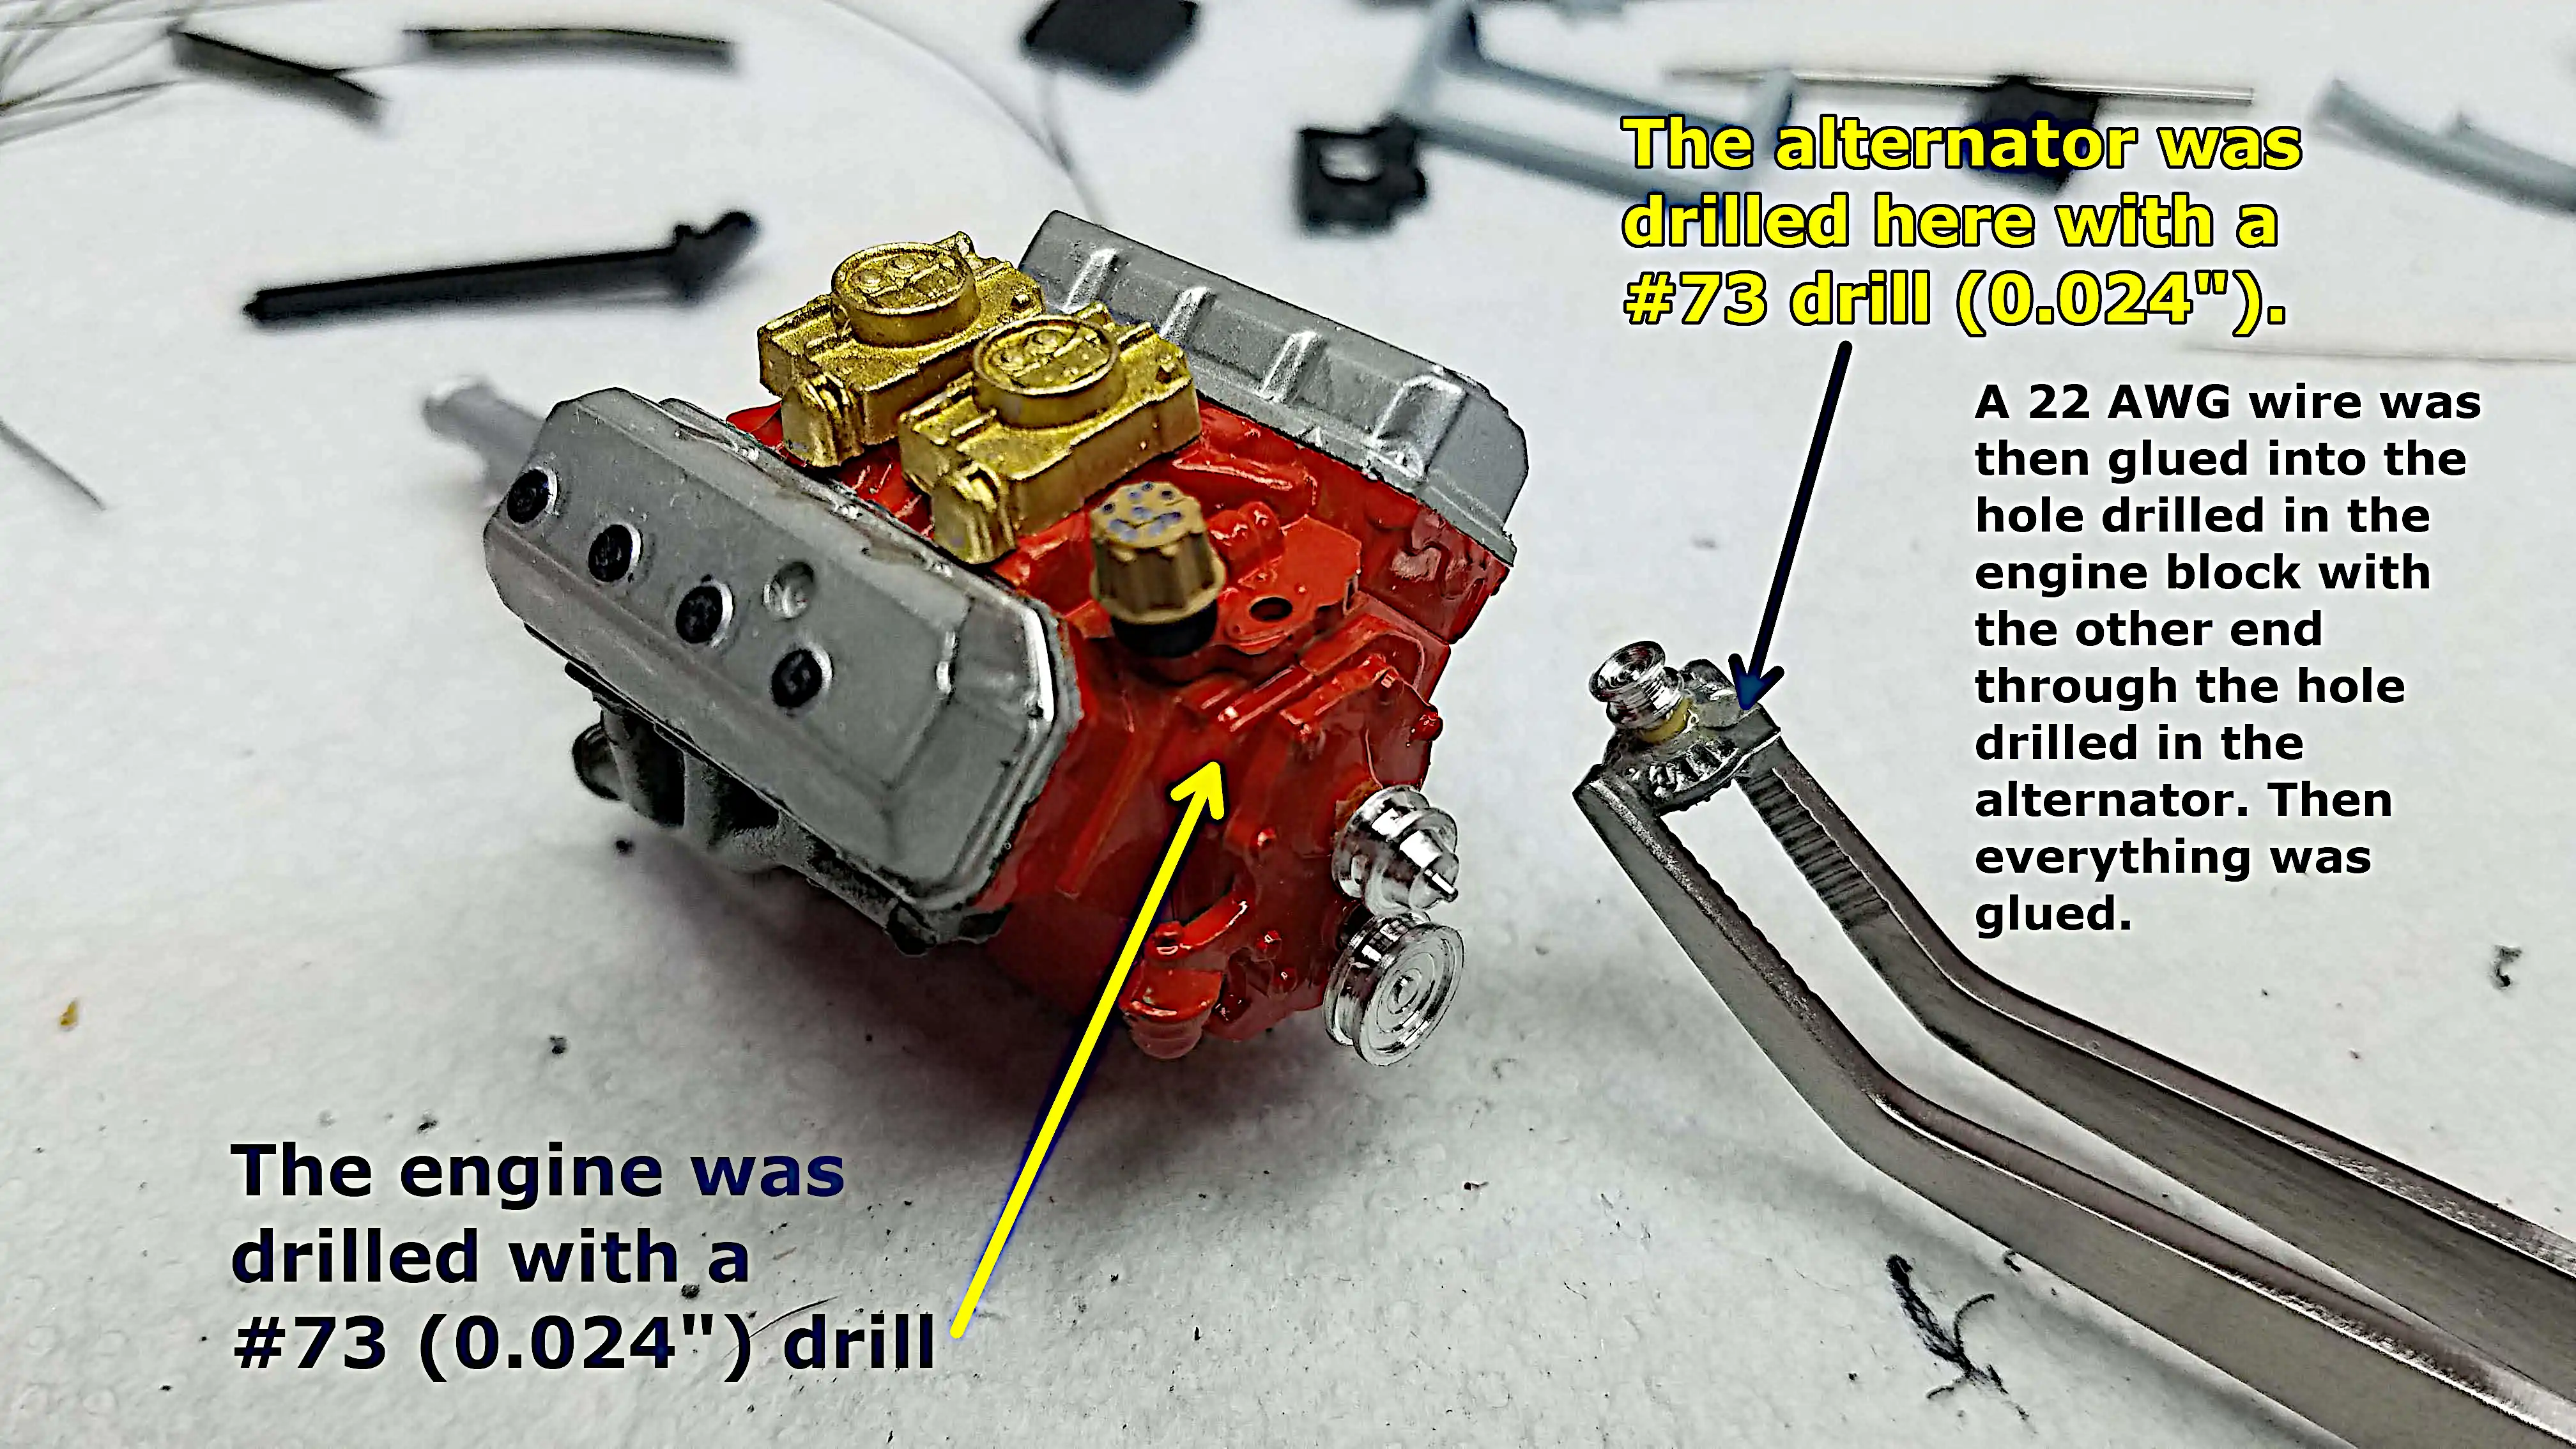 Water pump and alternator pulley mounted and engine drilled to mount alternator
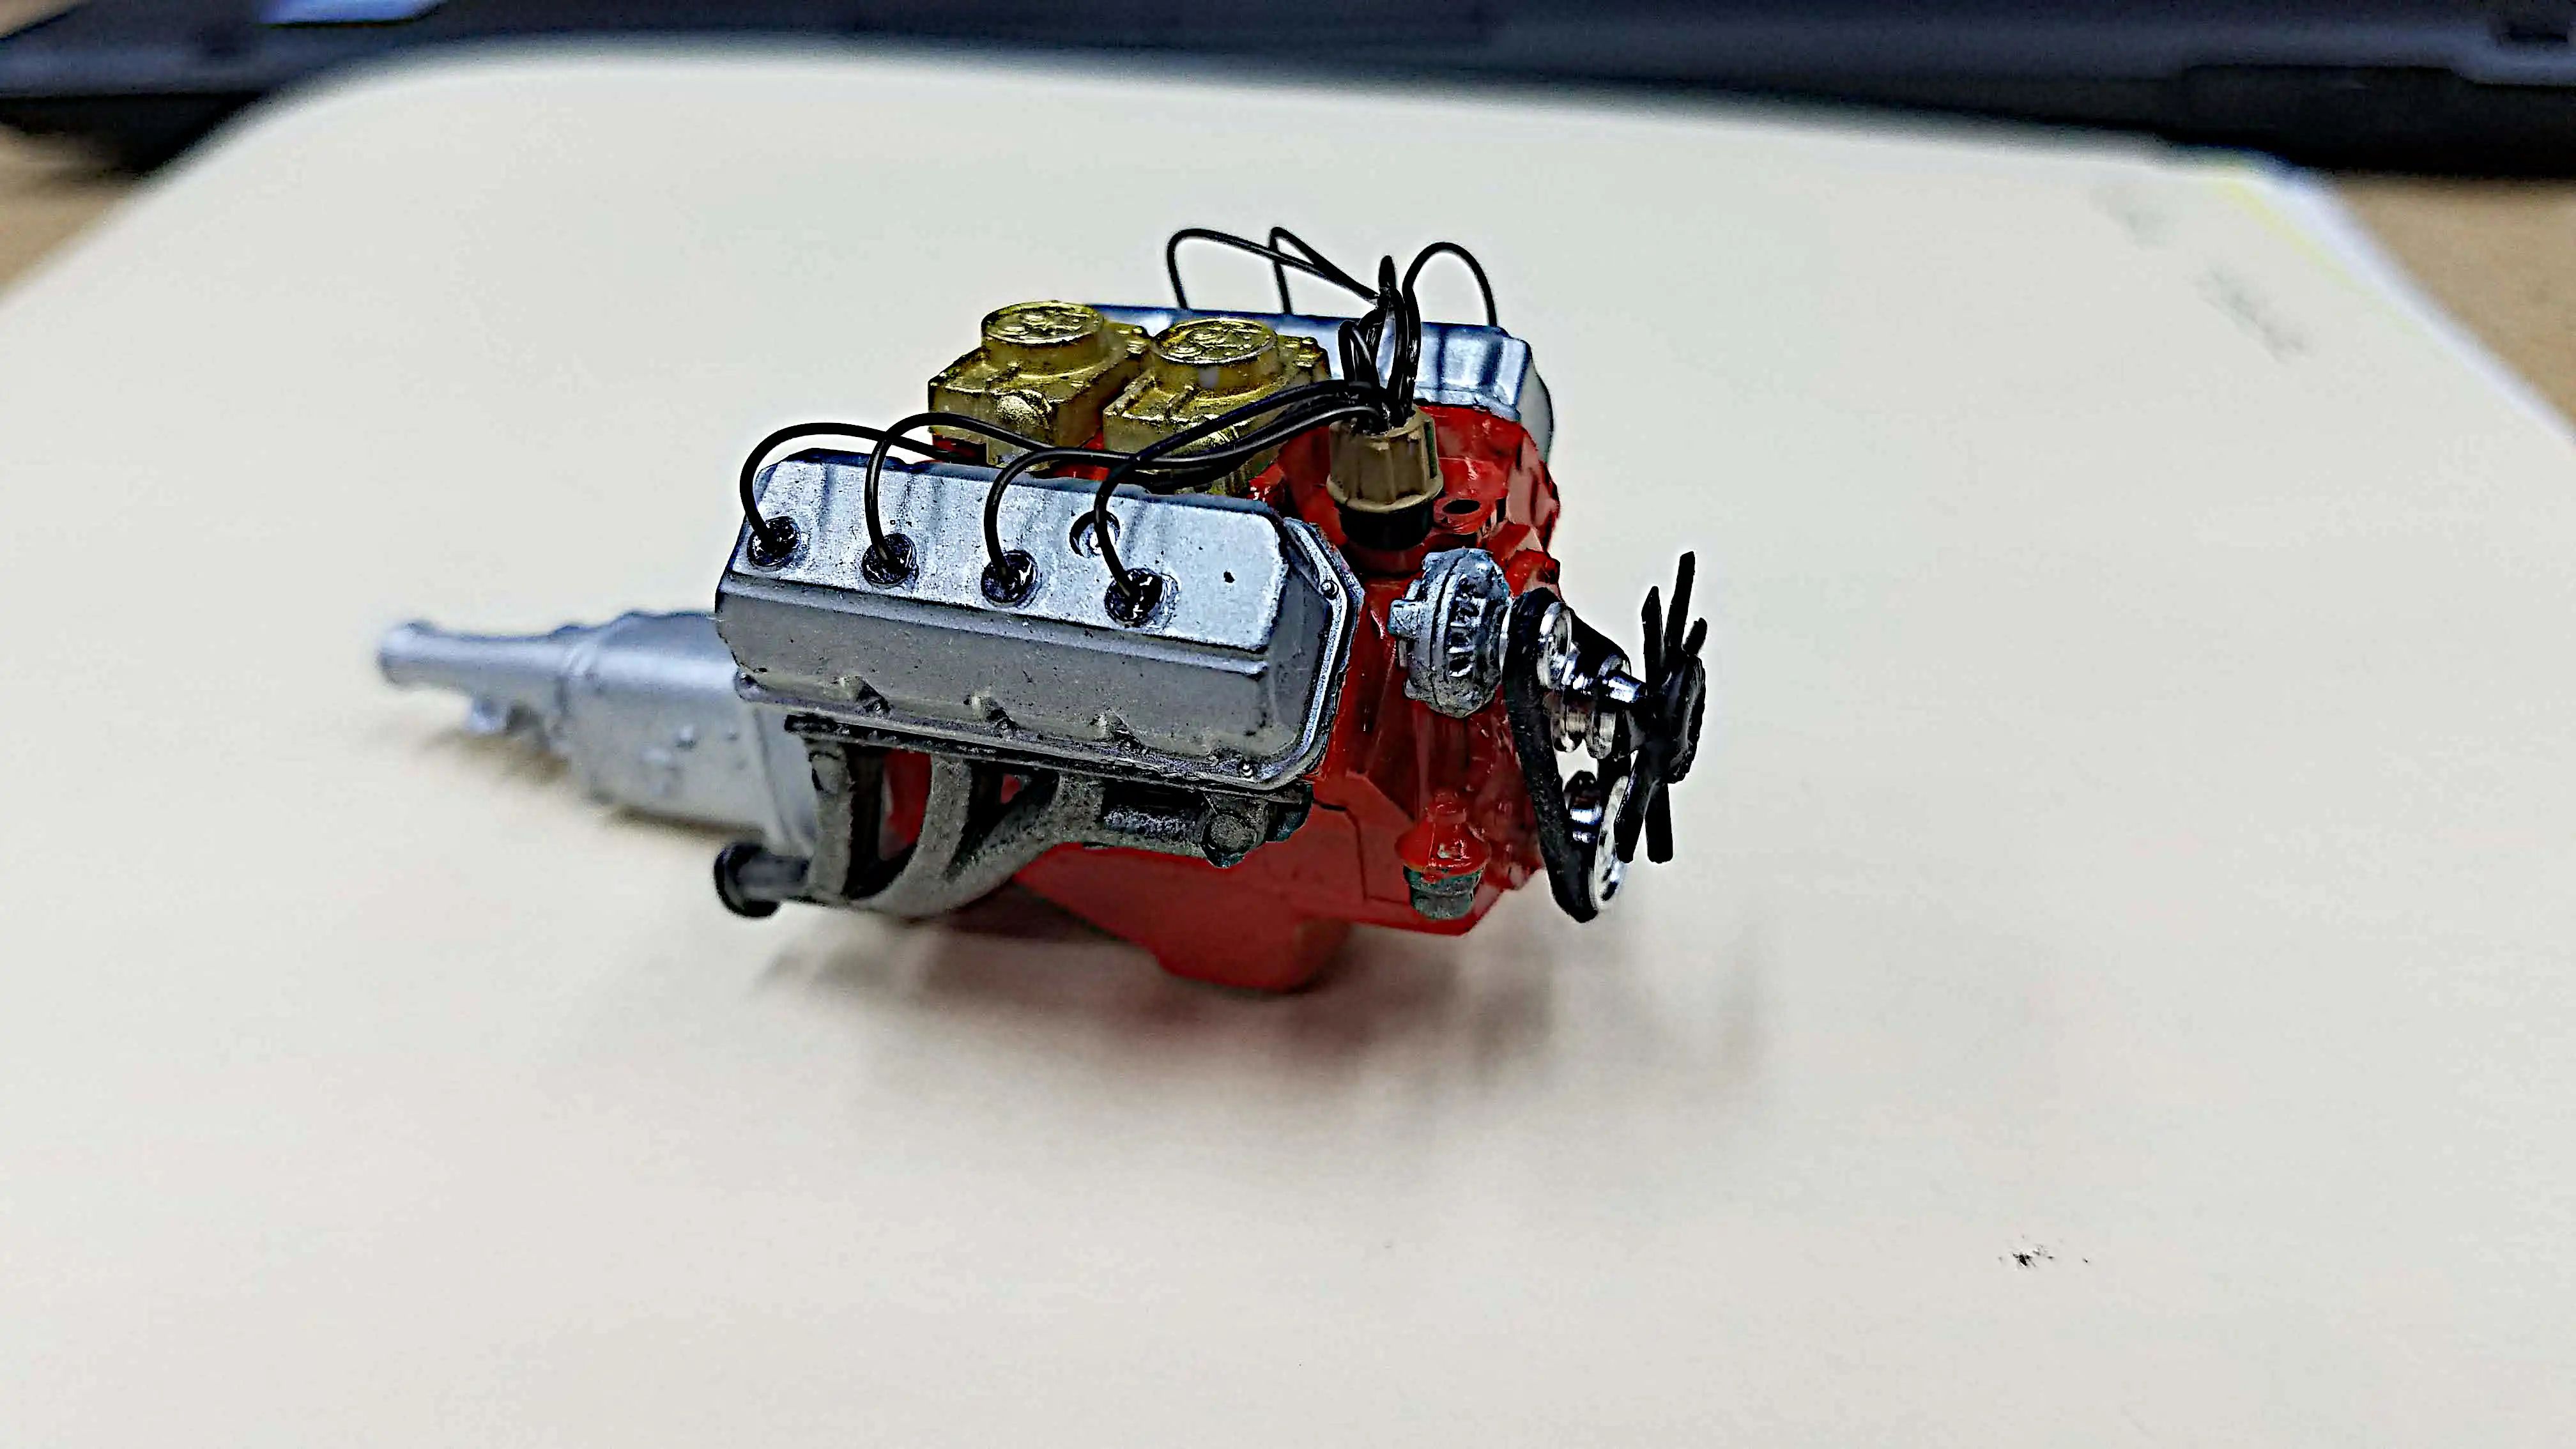
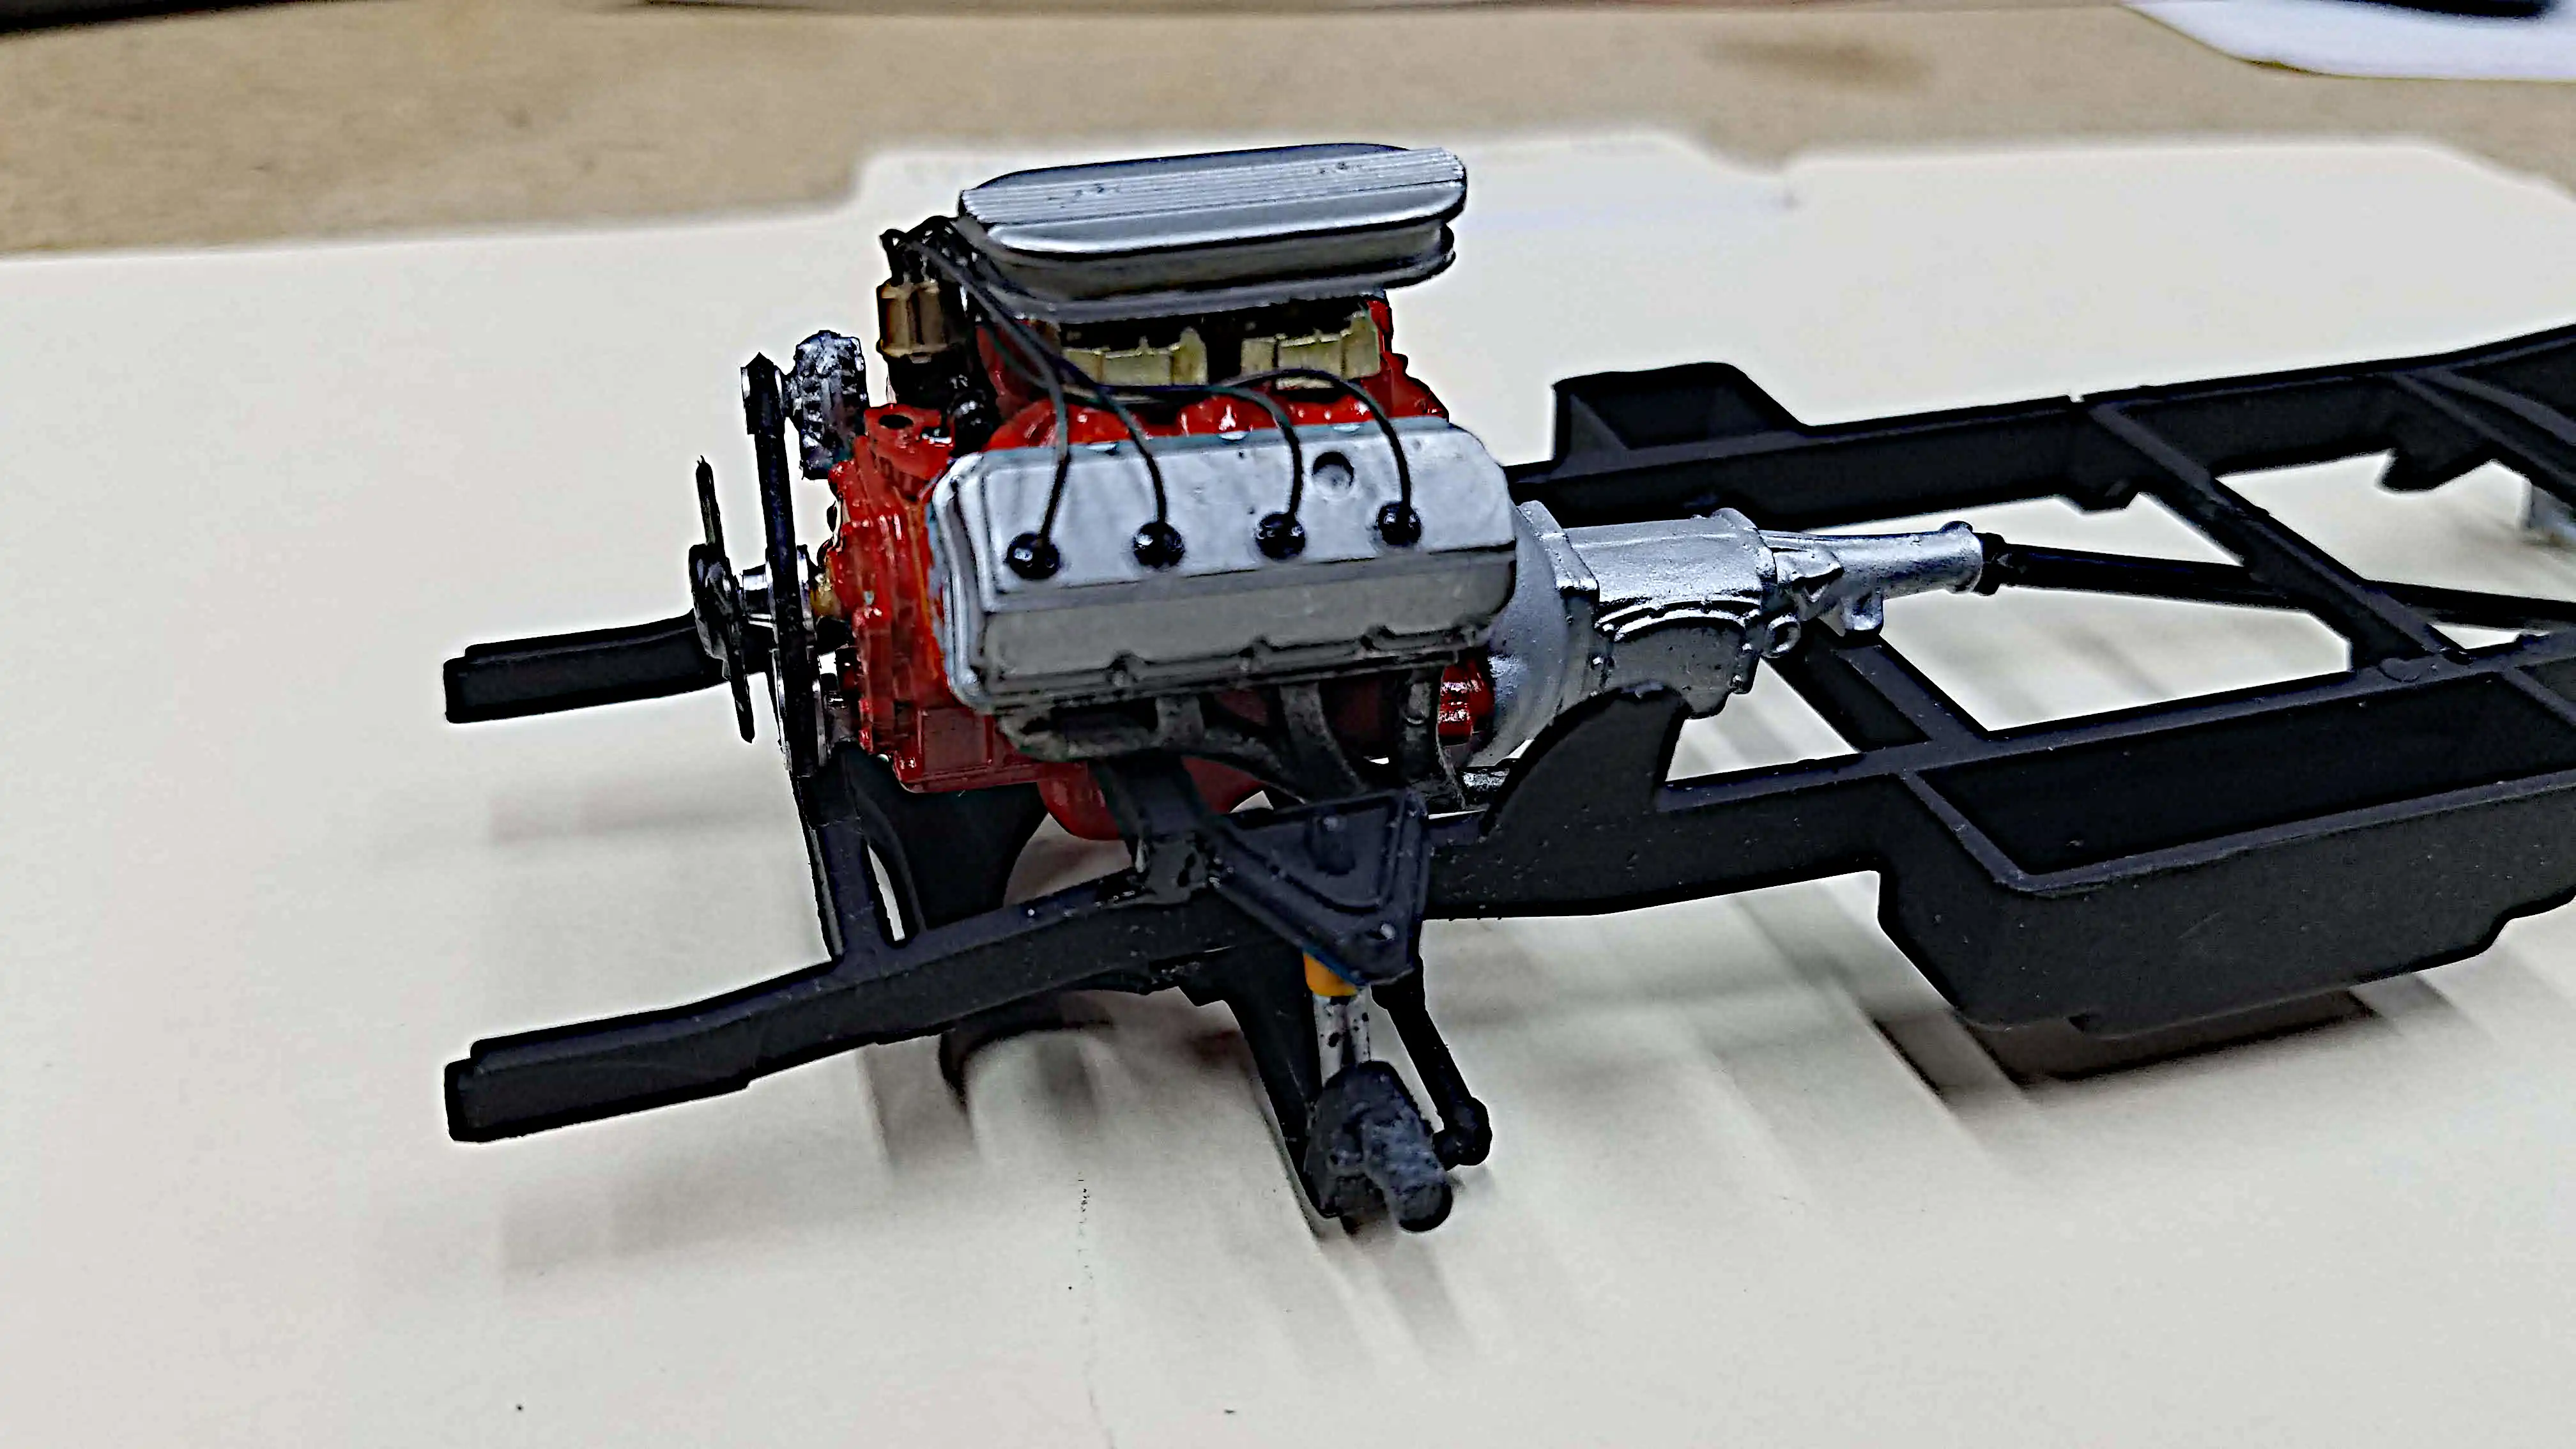
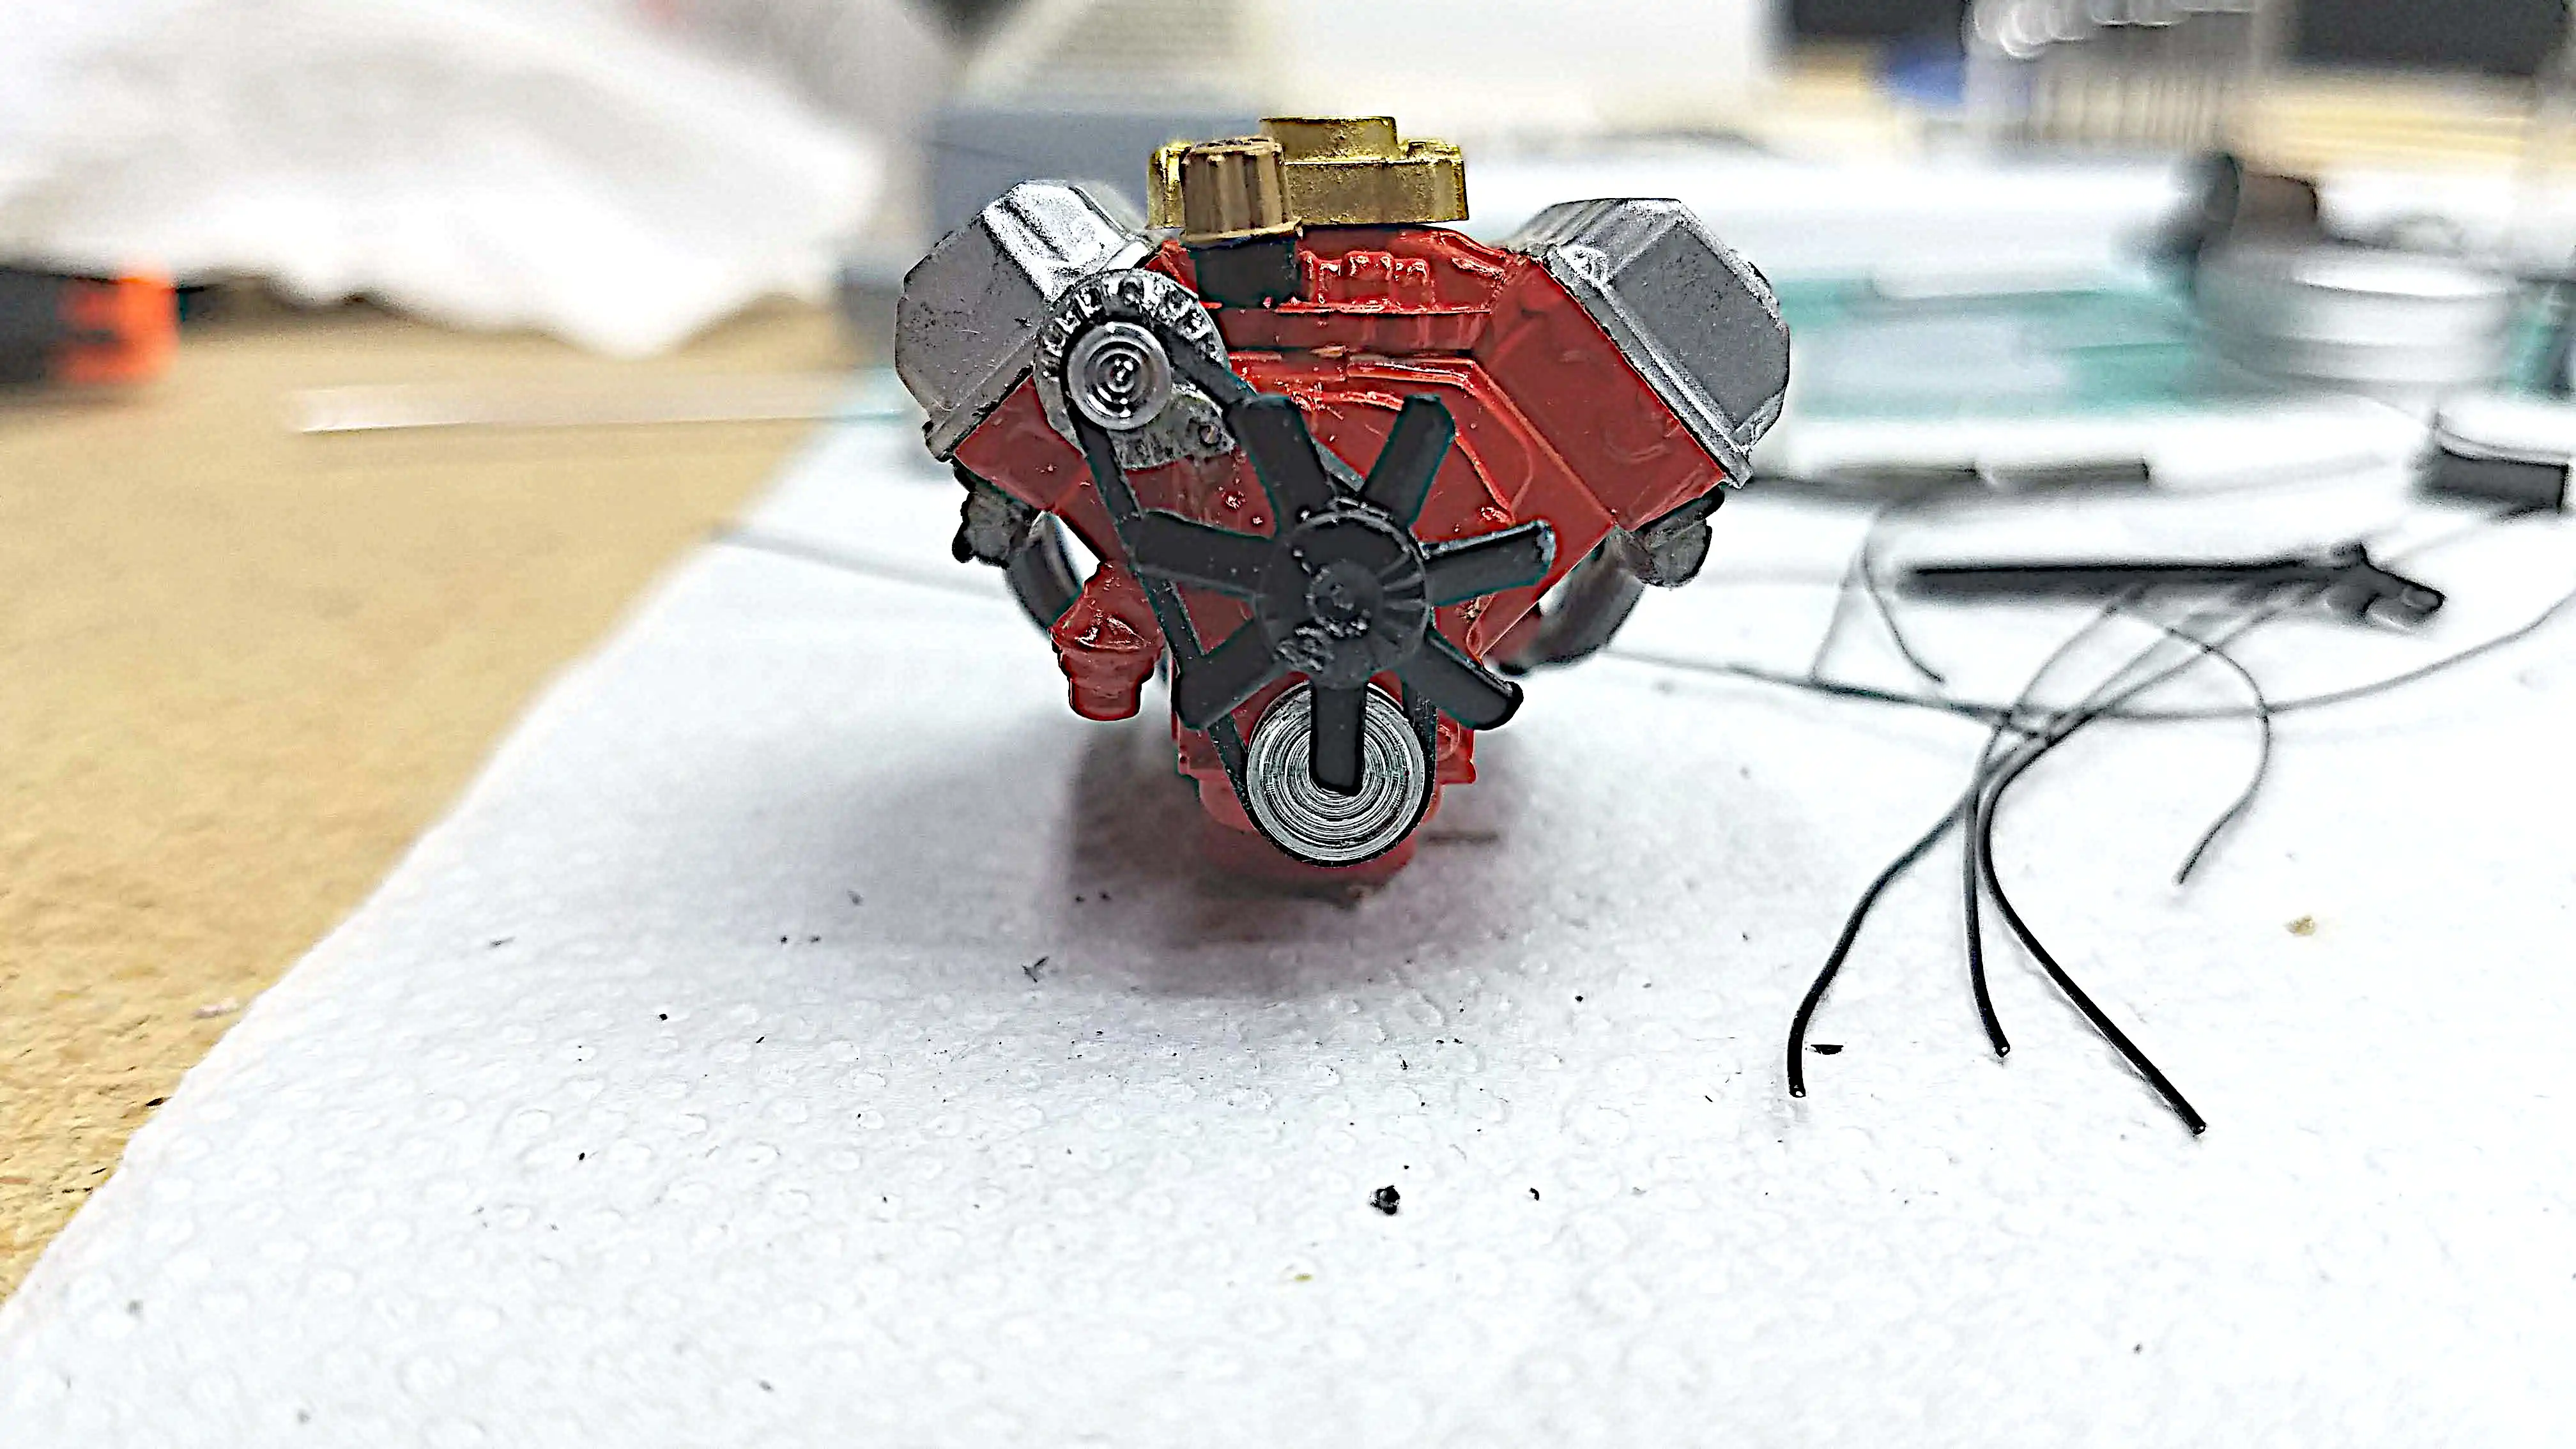 Font of completed engine with fan and belt installed
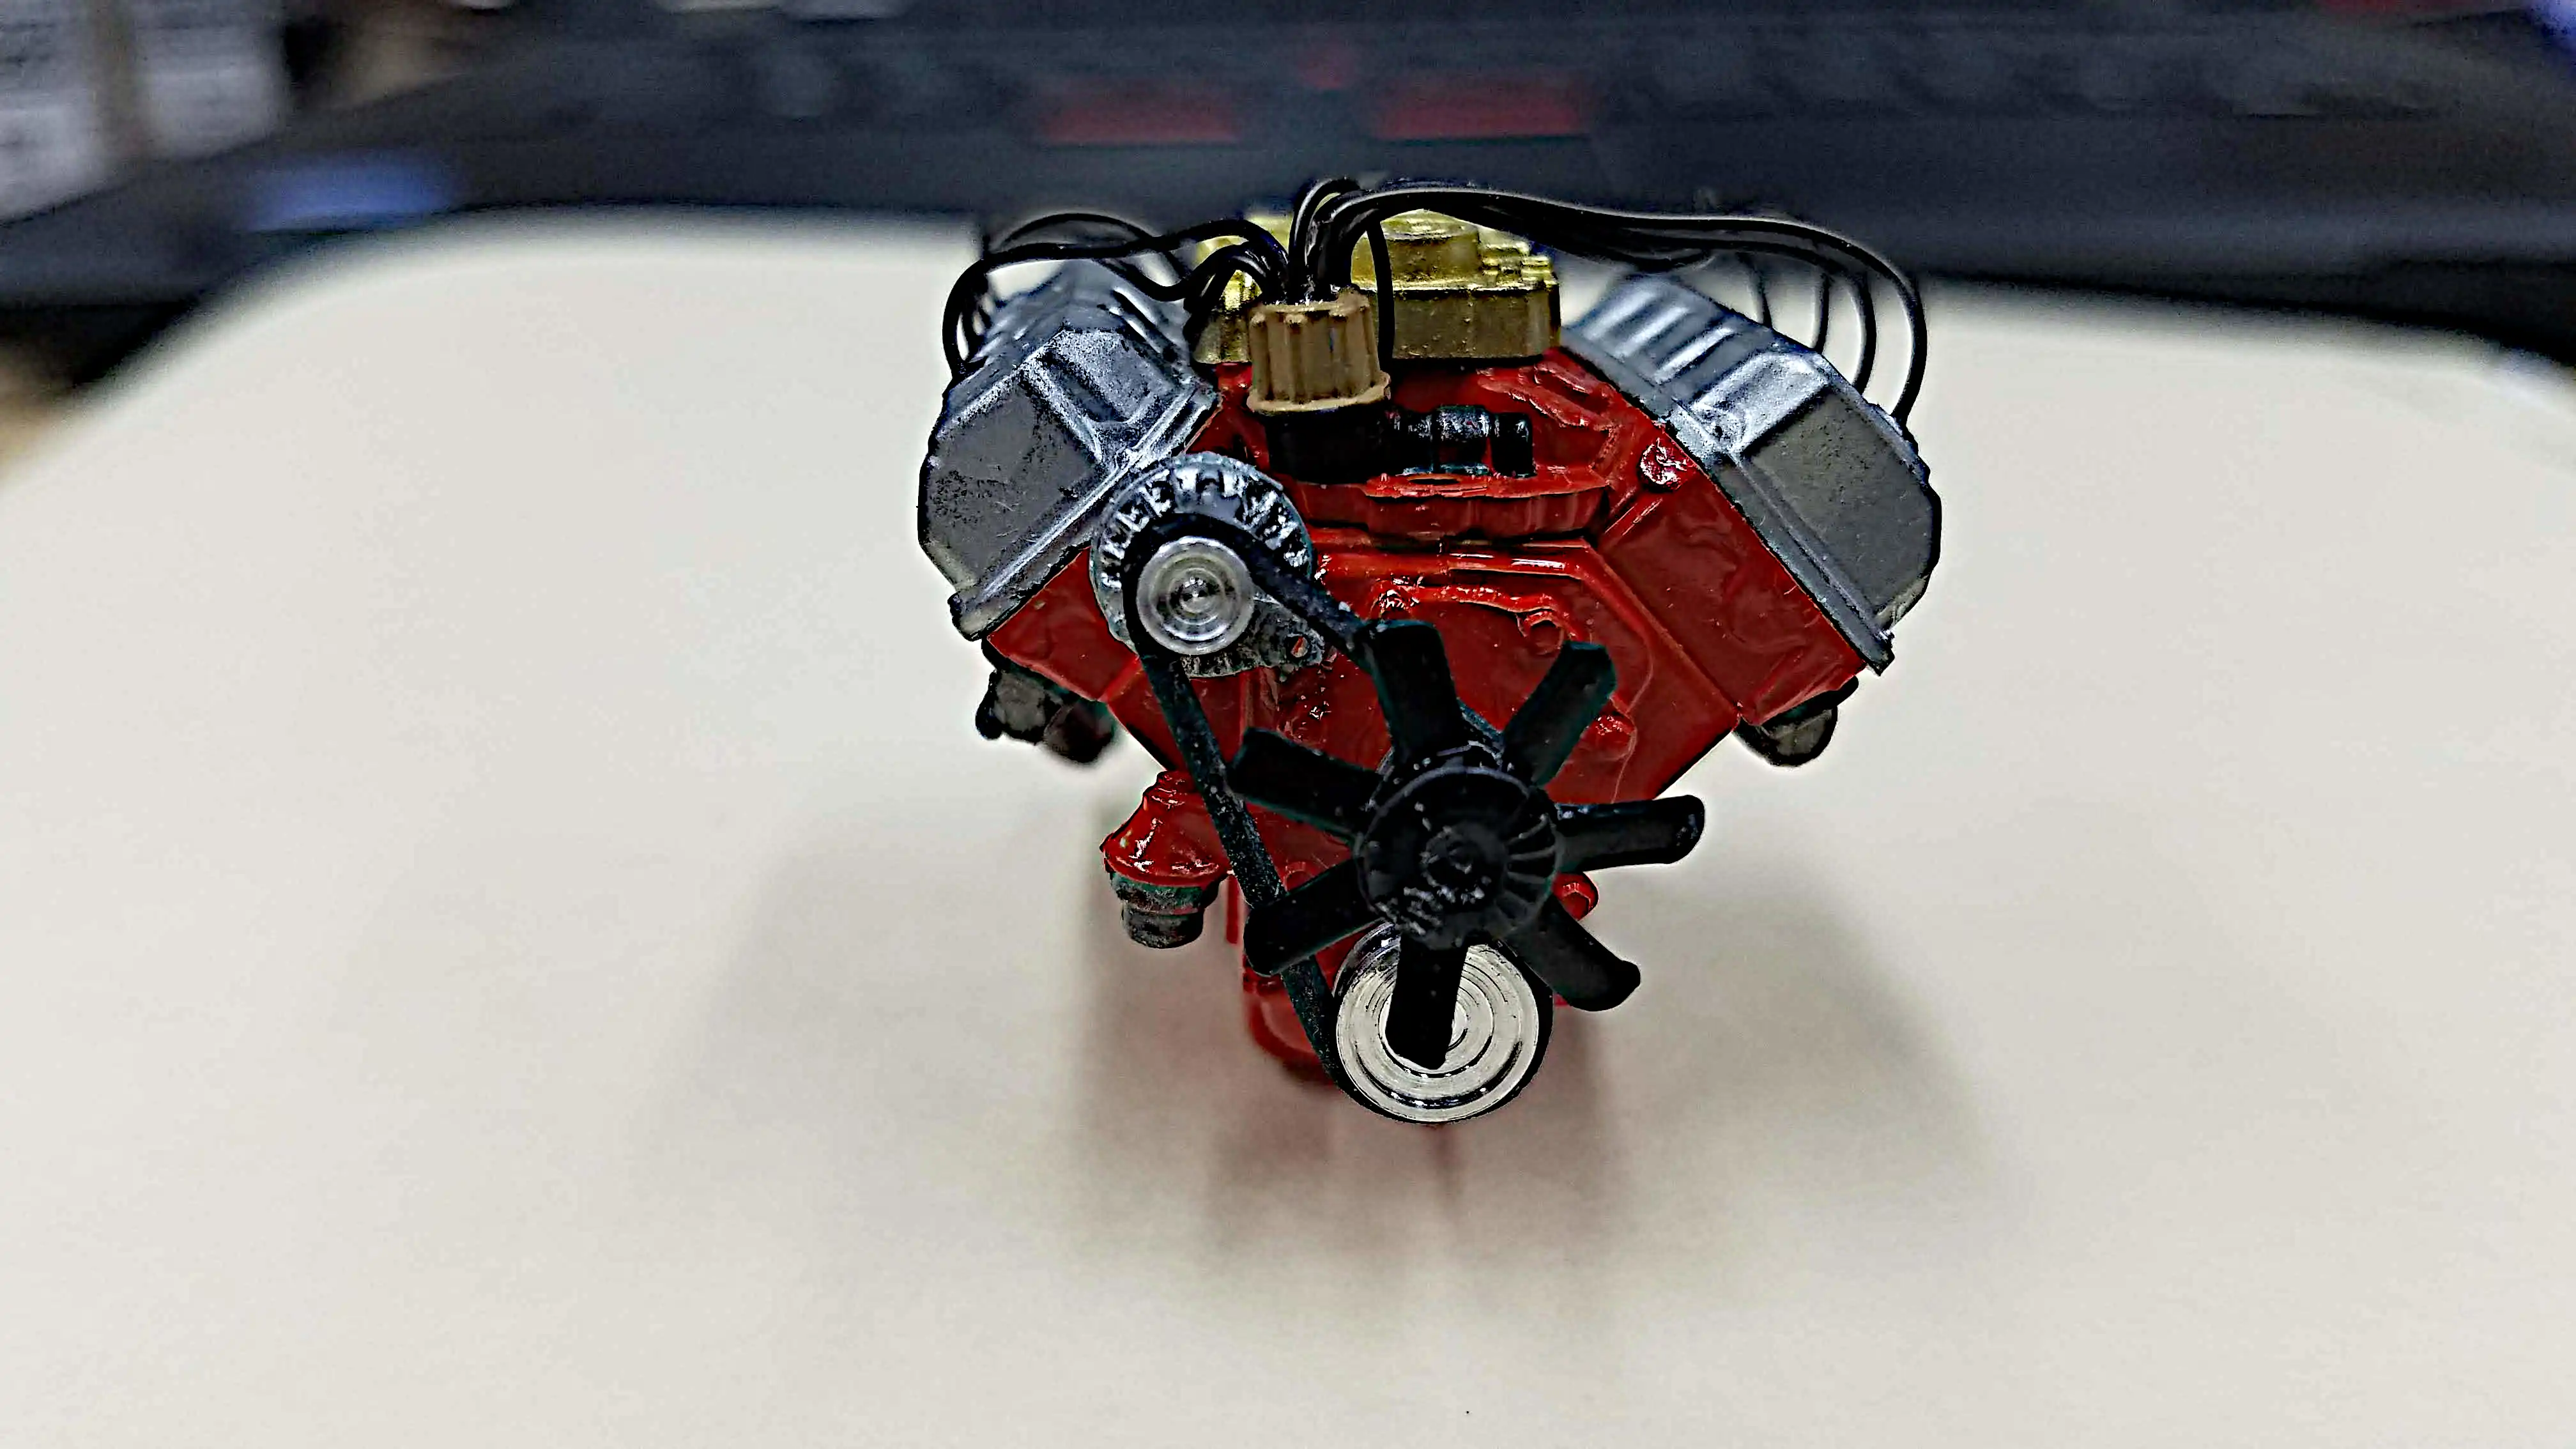
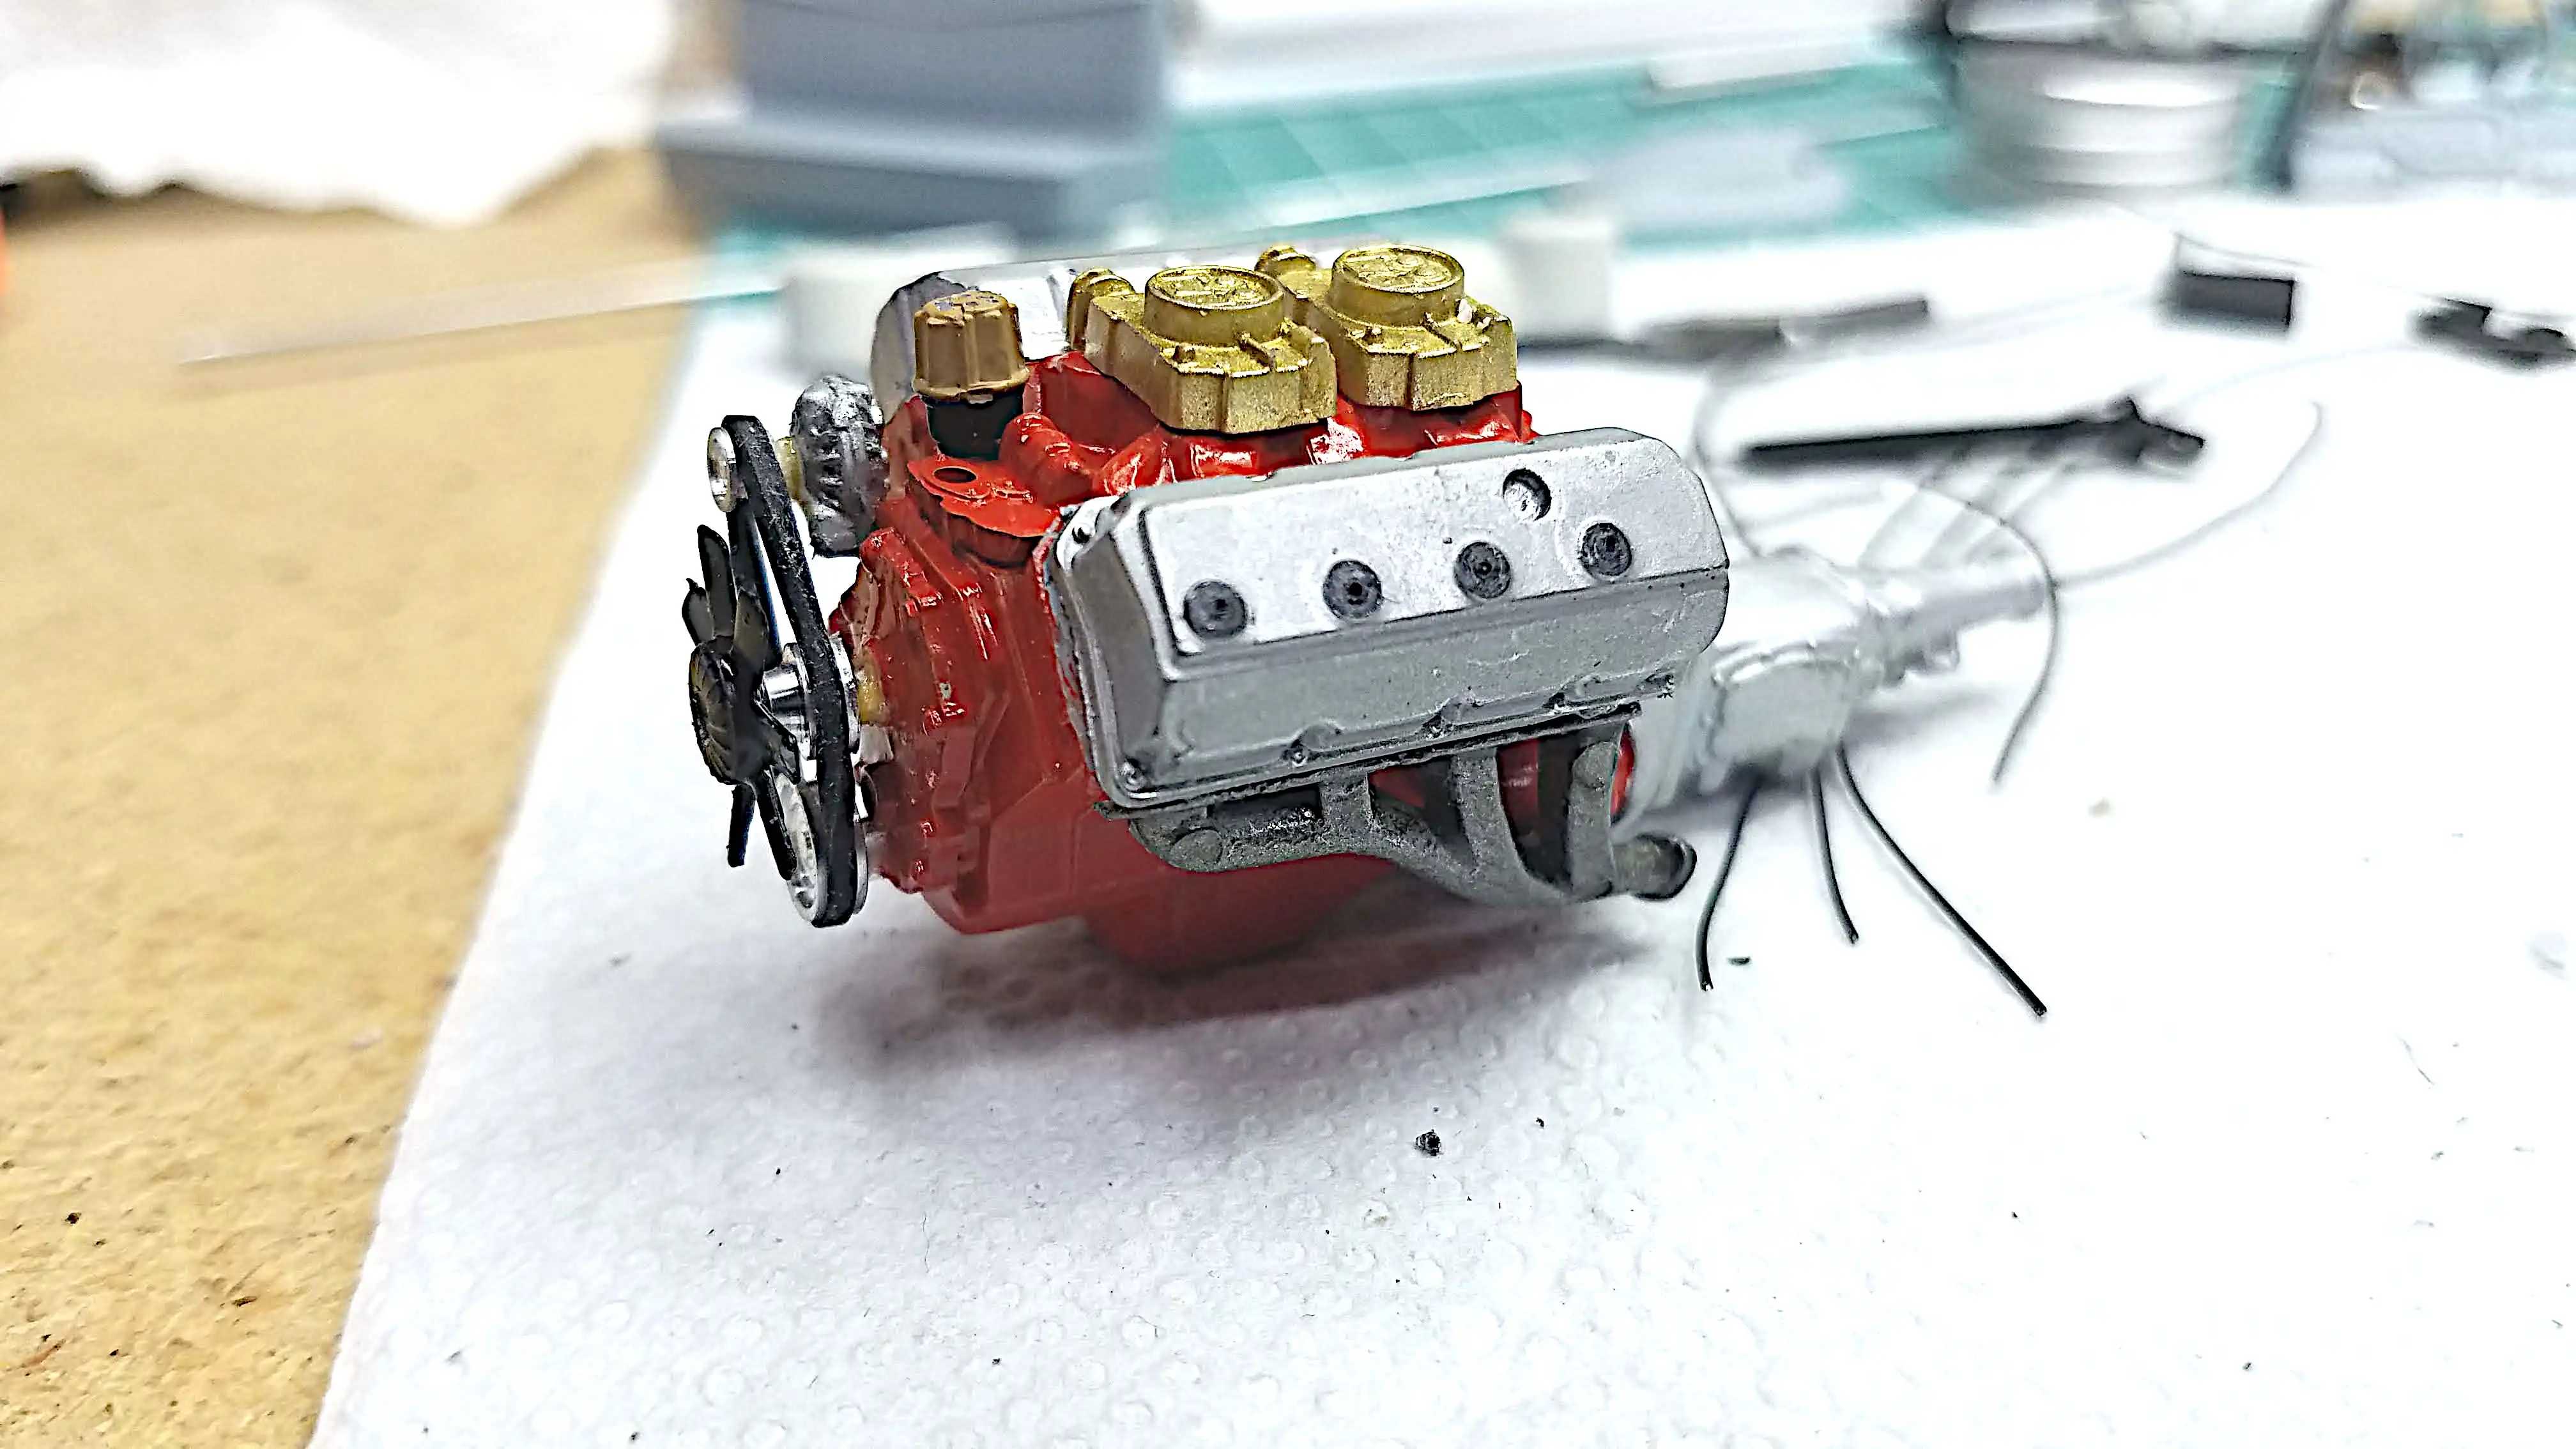 Photo of engine from the right front corner
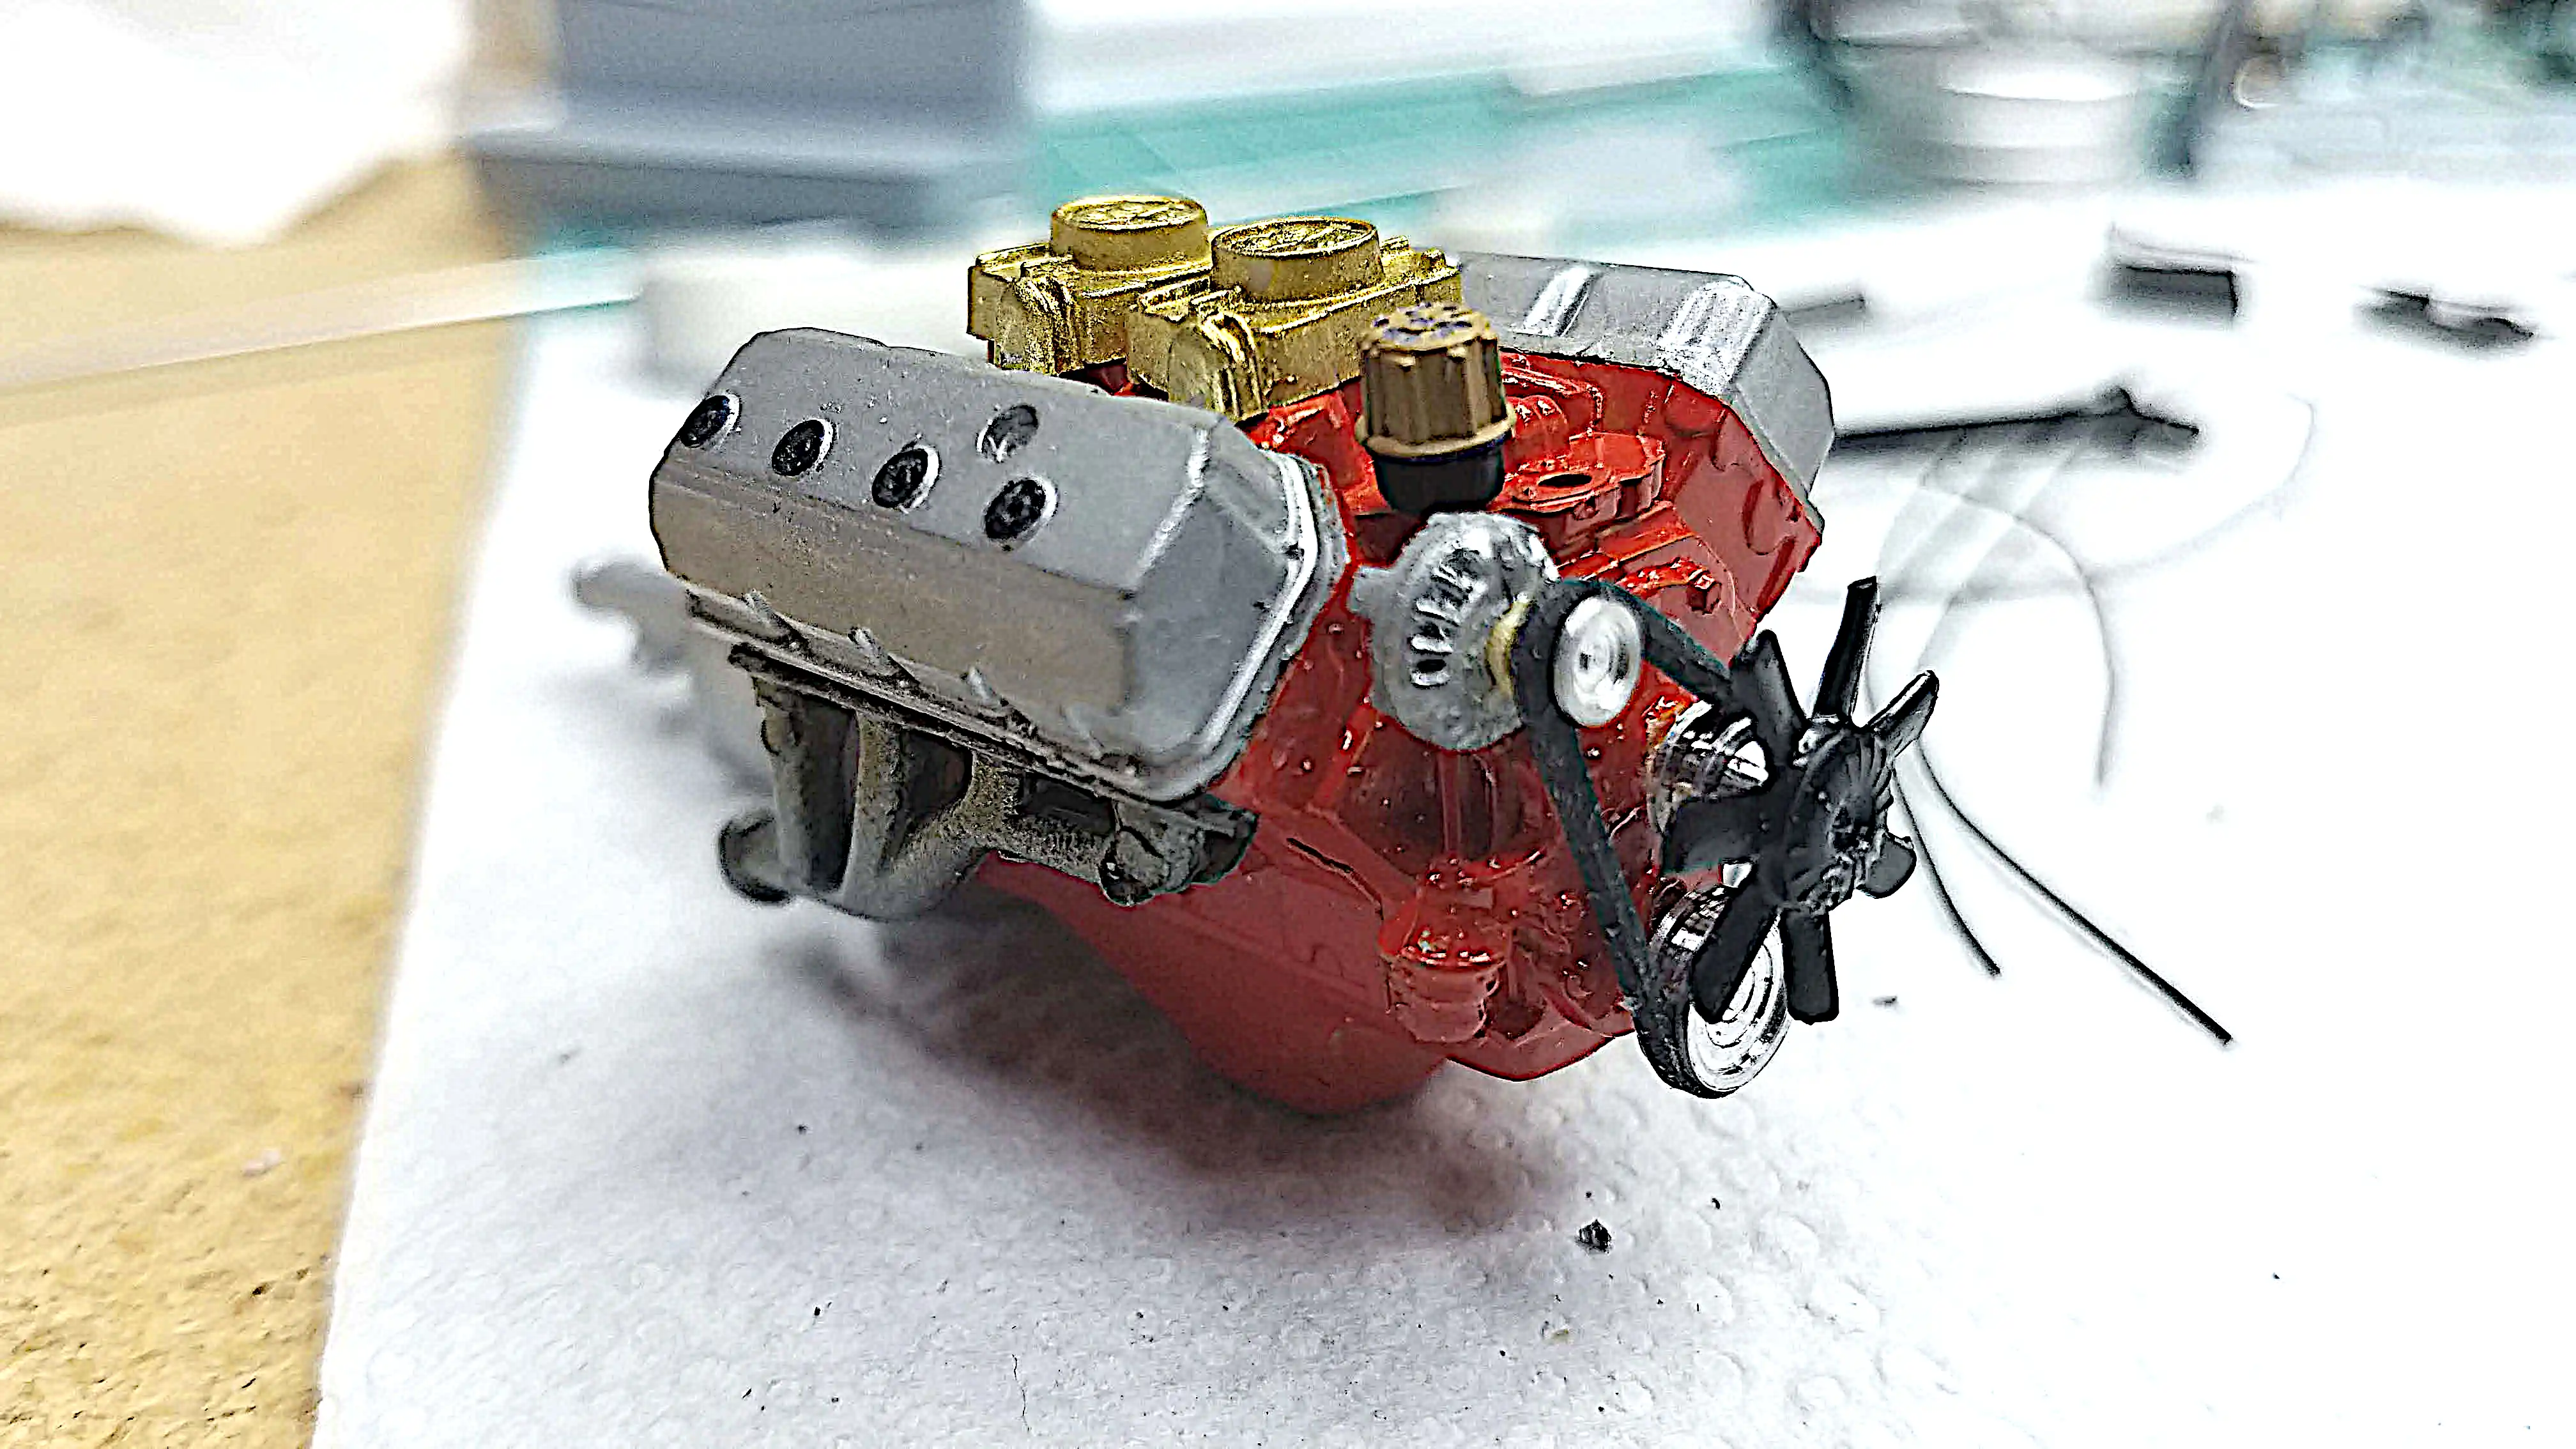 Photo of engine from the right front corner
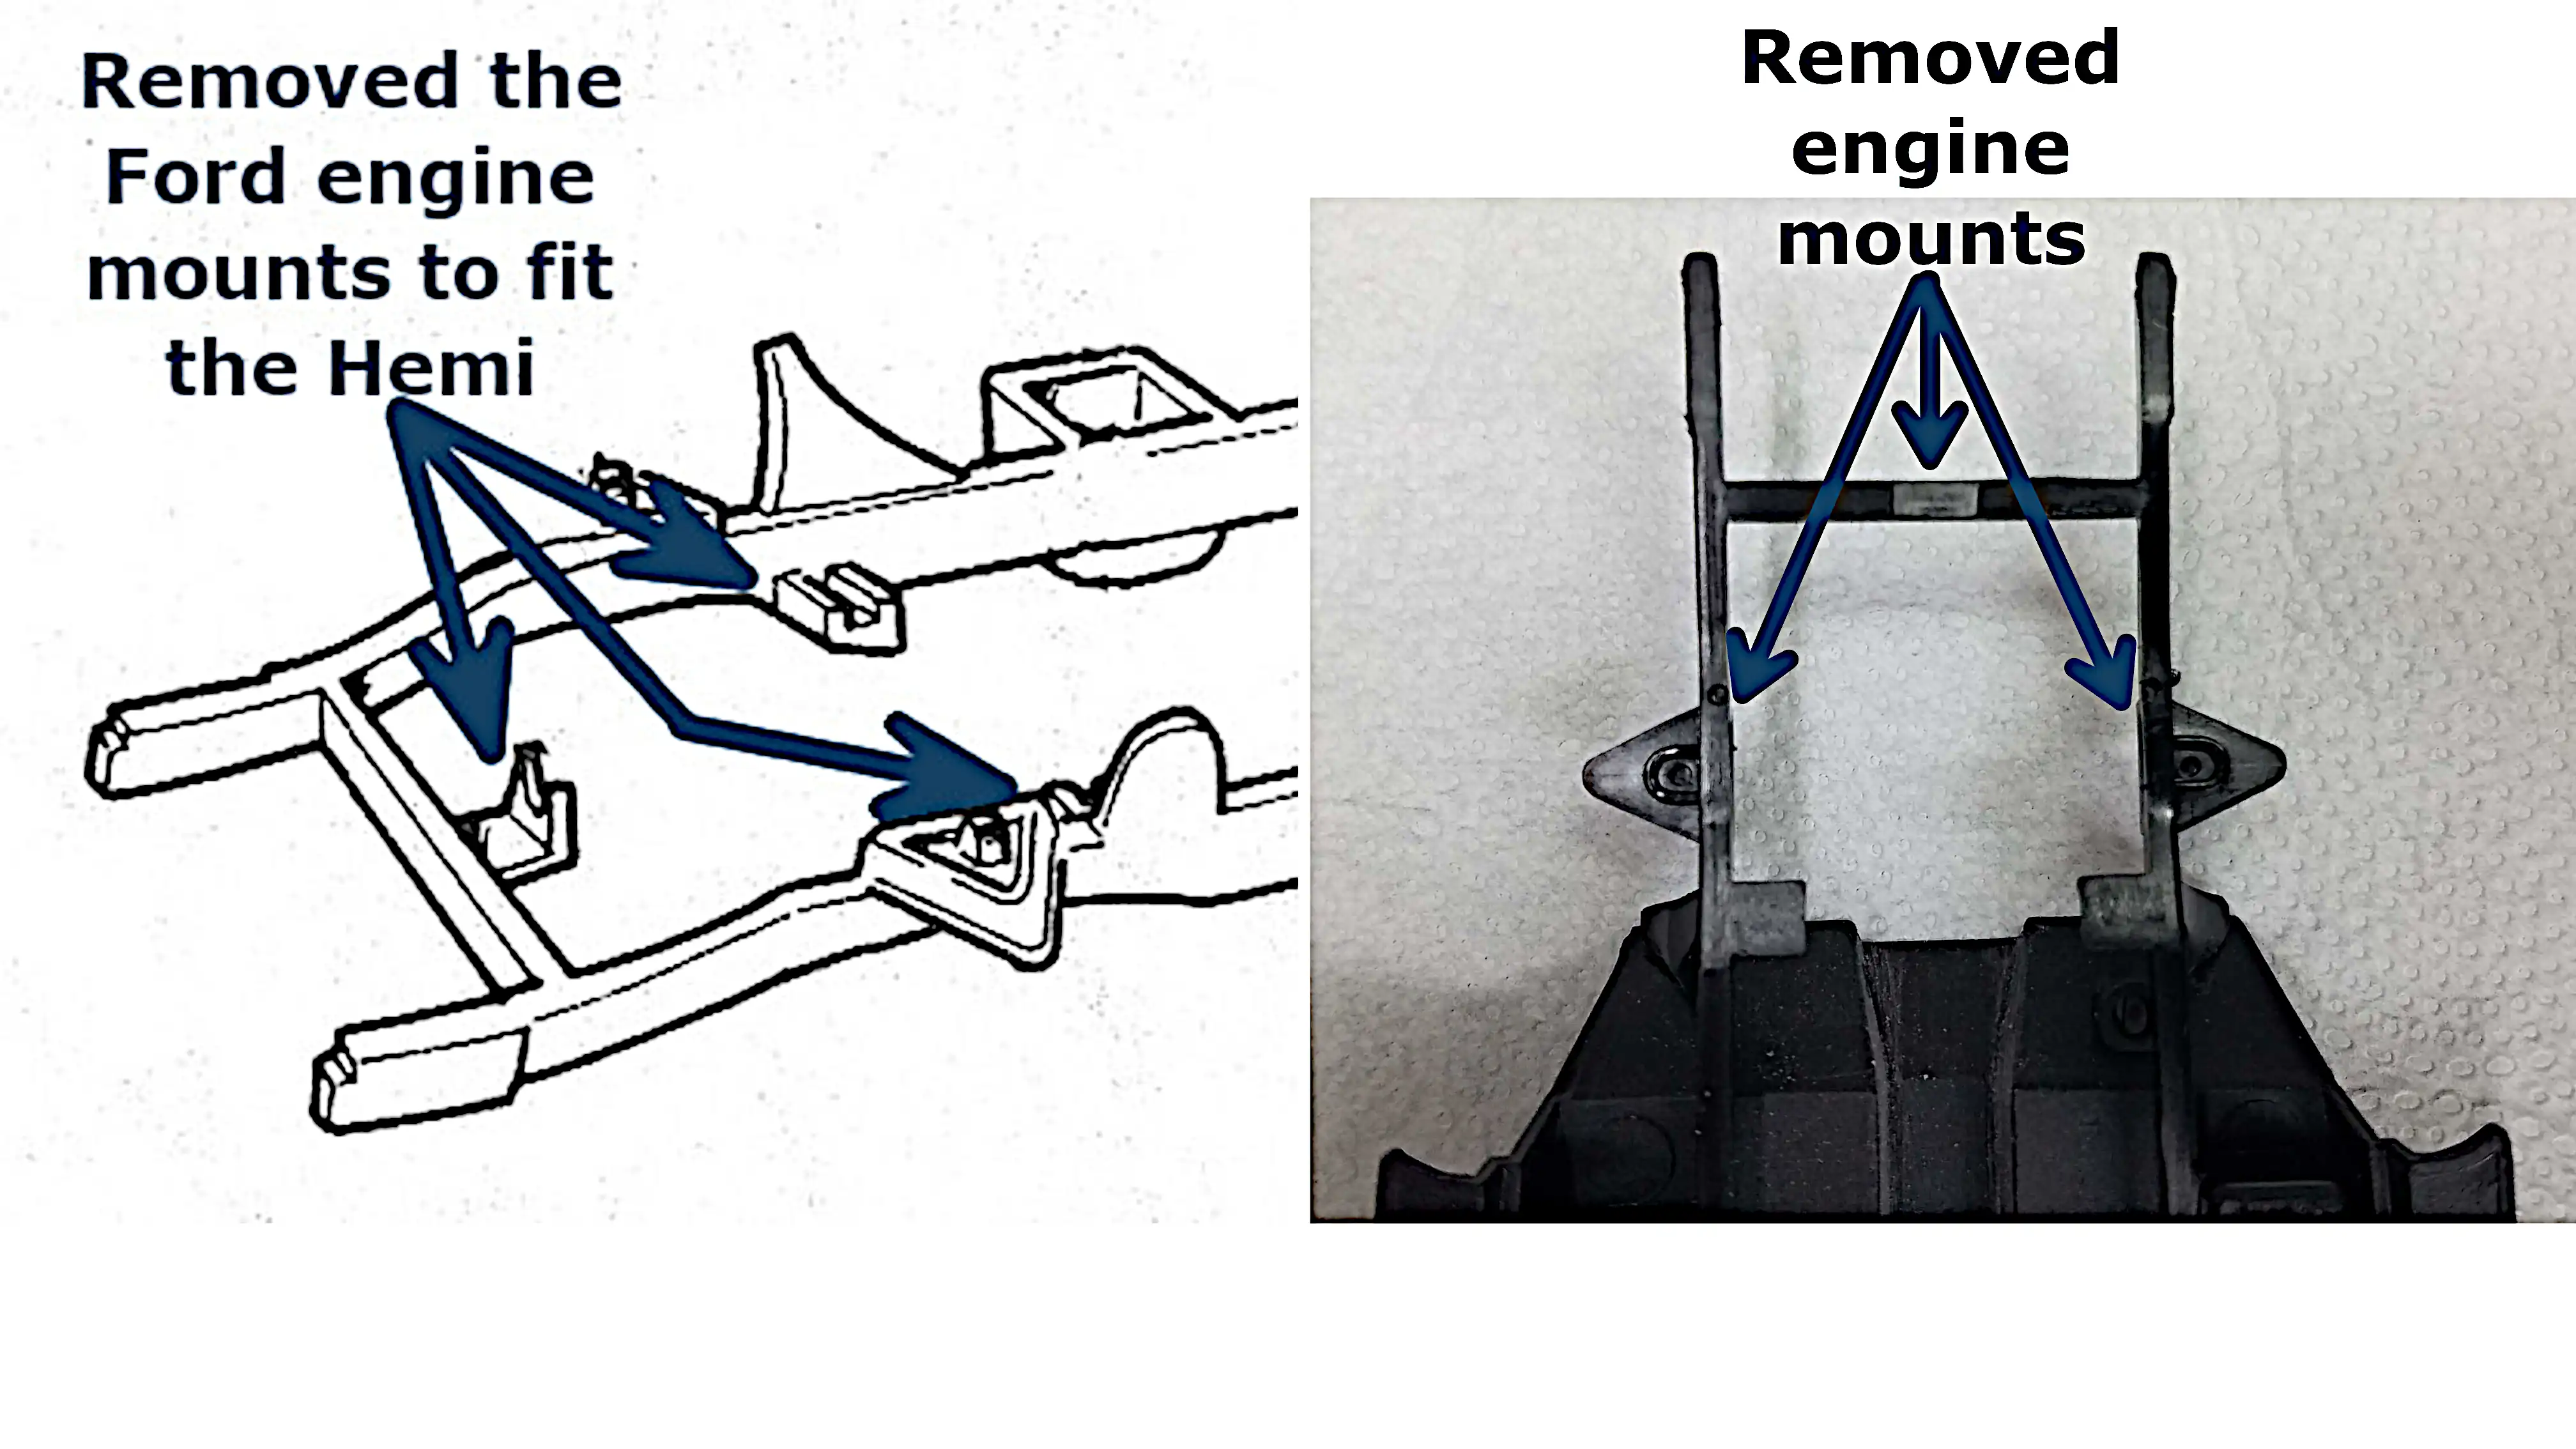 Ford engine motor mounts had to be removed from the frame
 First attempt at a hemi motor mount
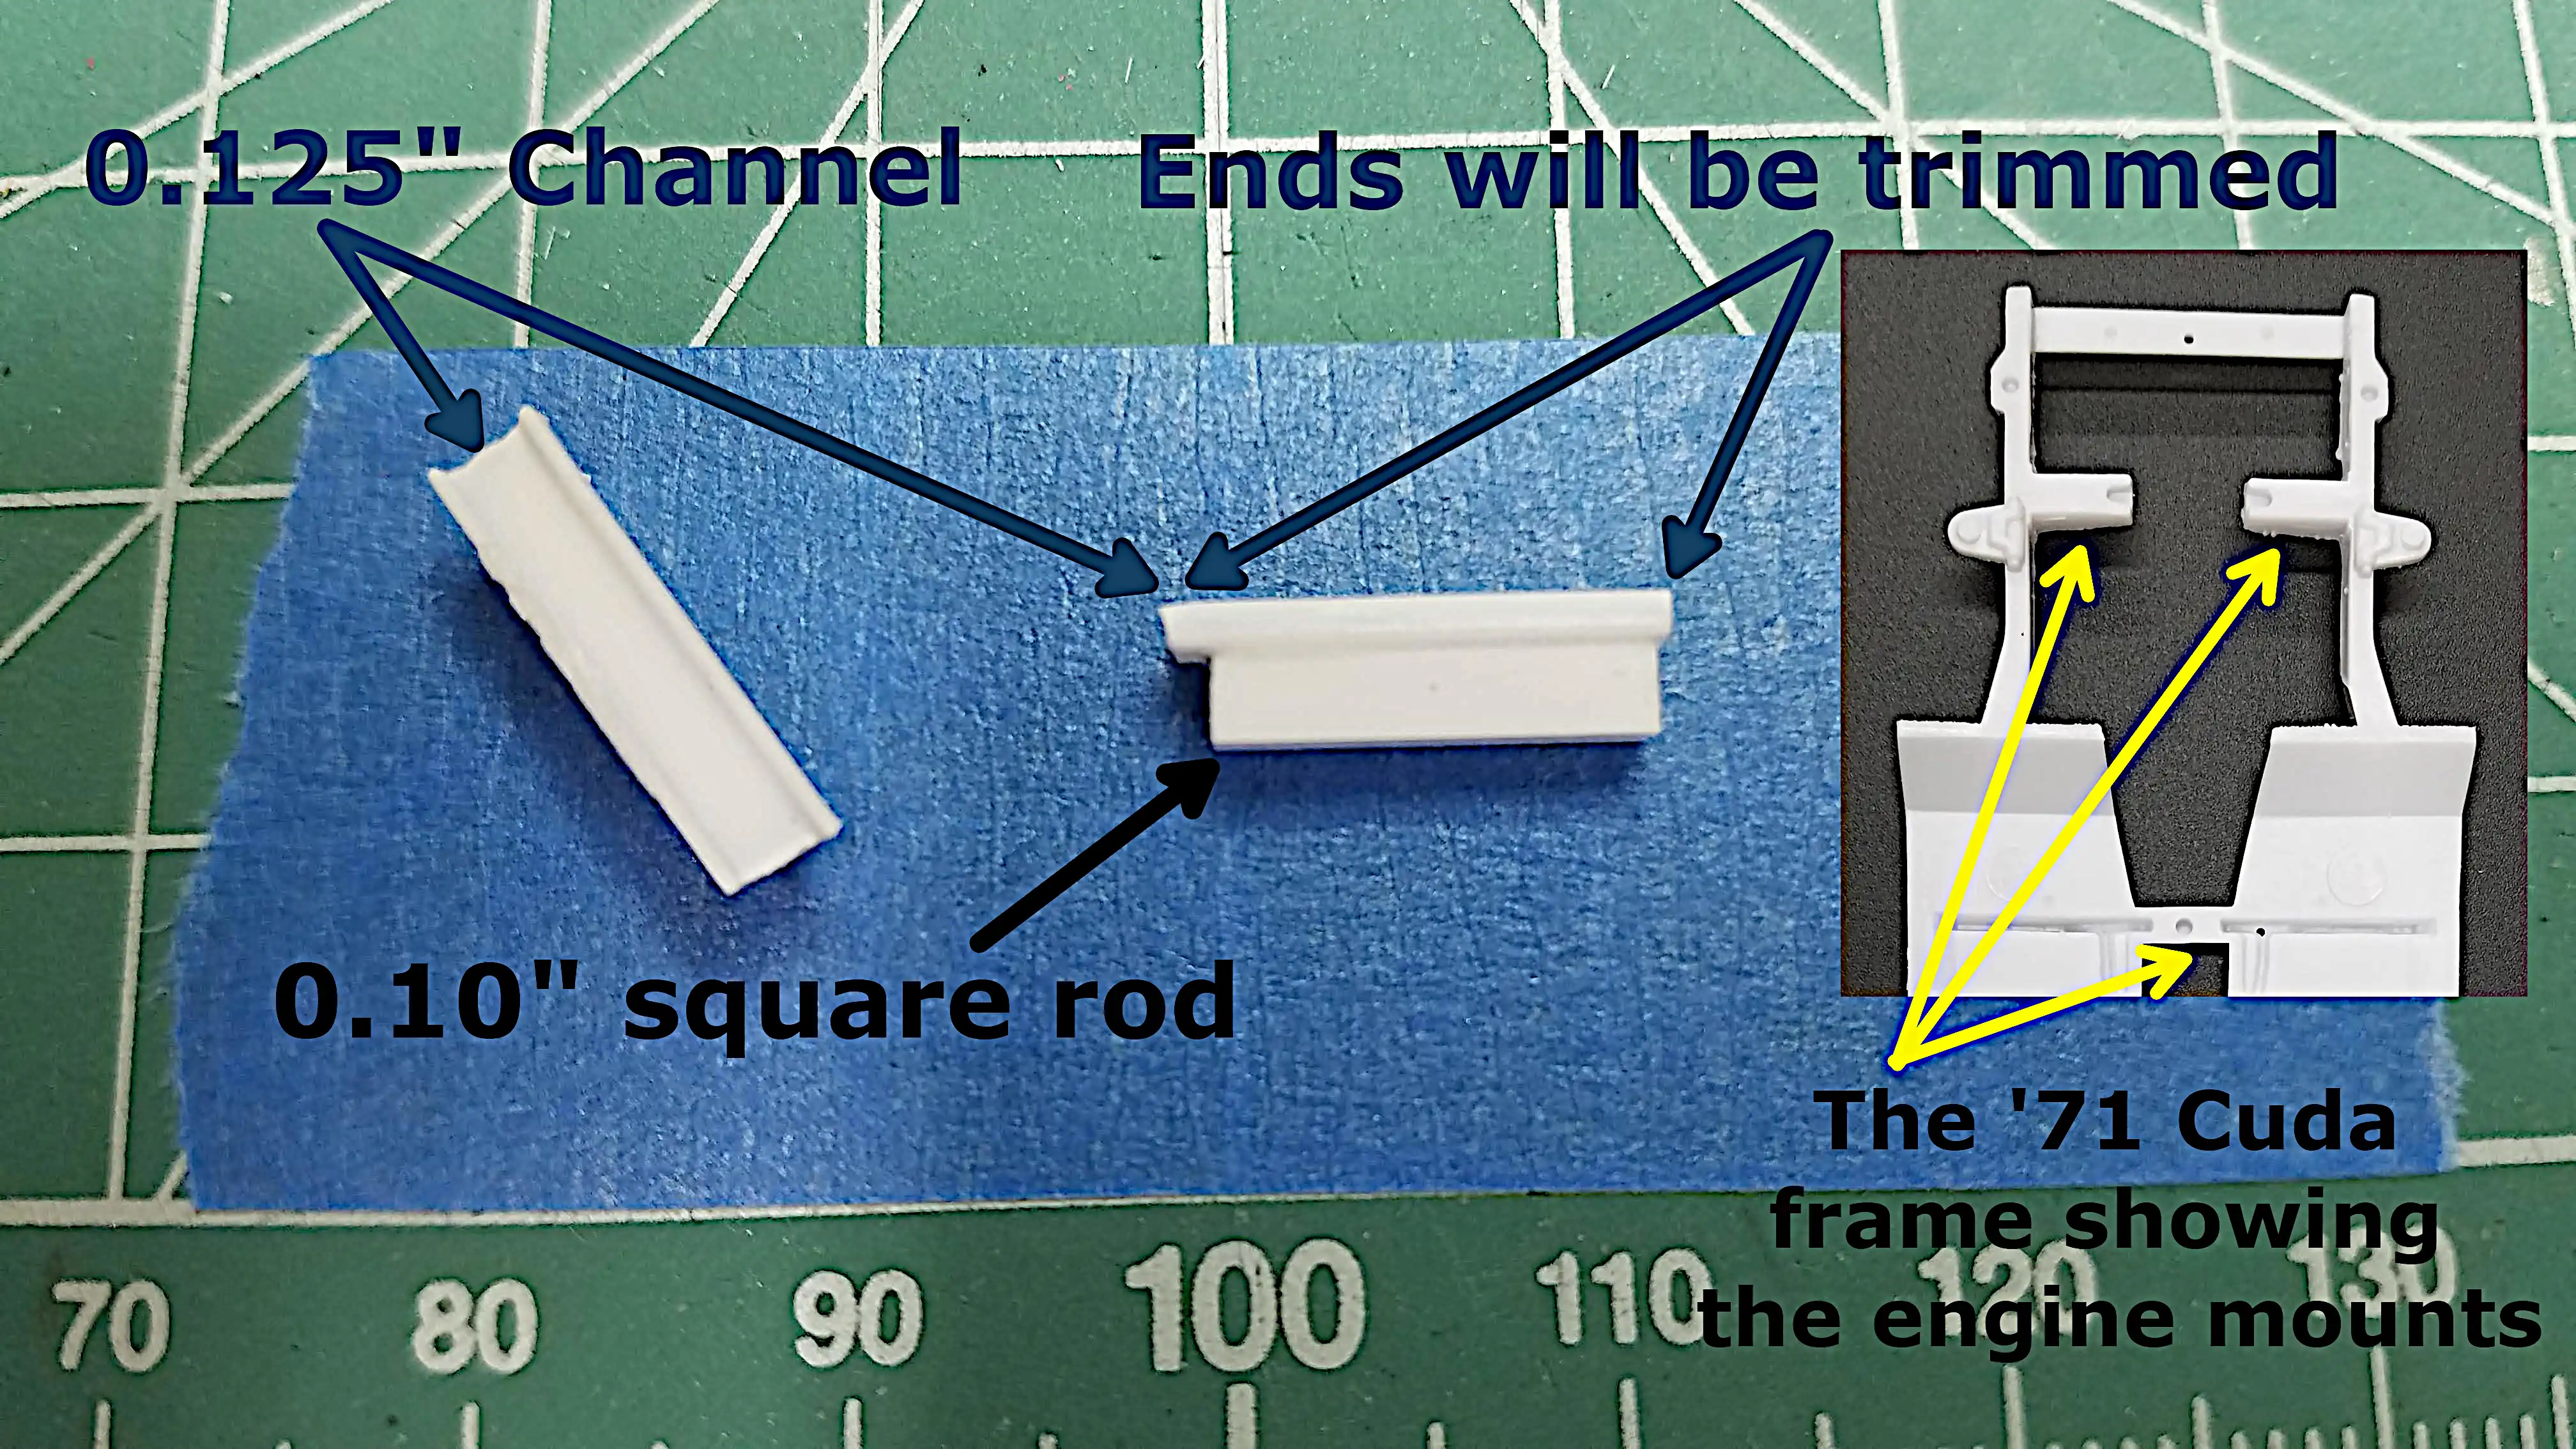 New scratch built motor mounts using channel and square stock
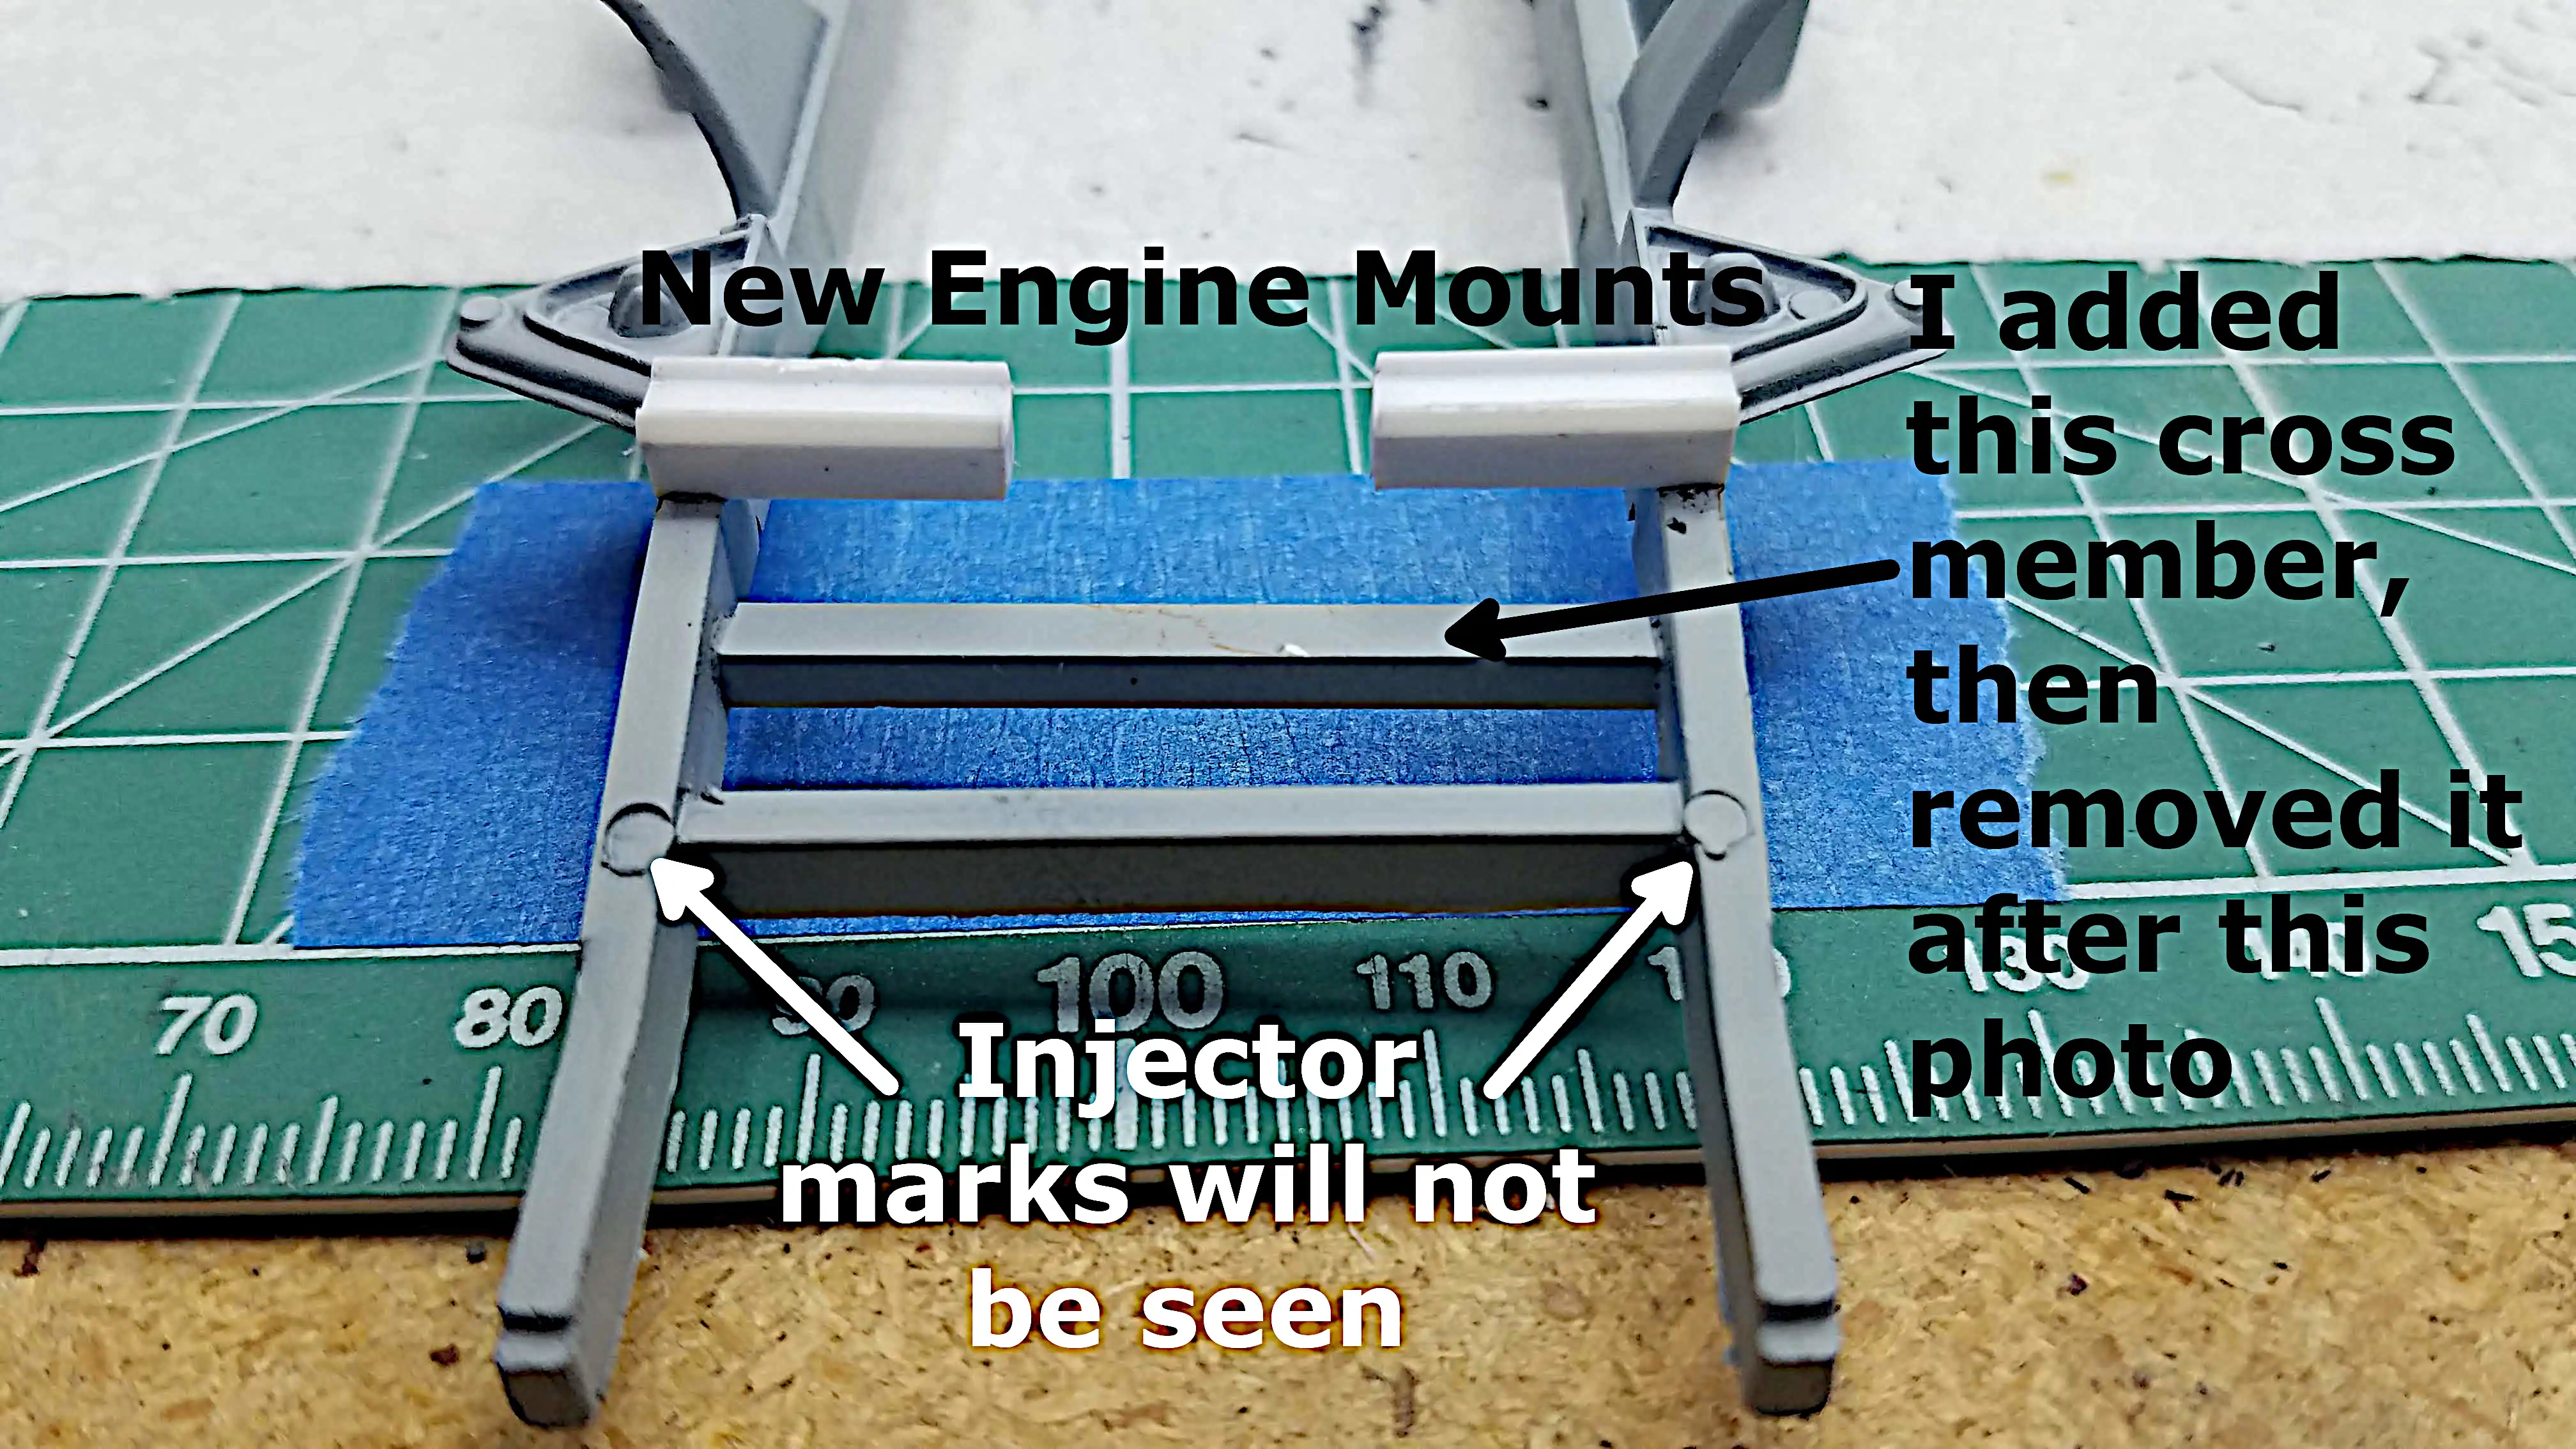 New scratch built motor mounts installed on the frame
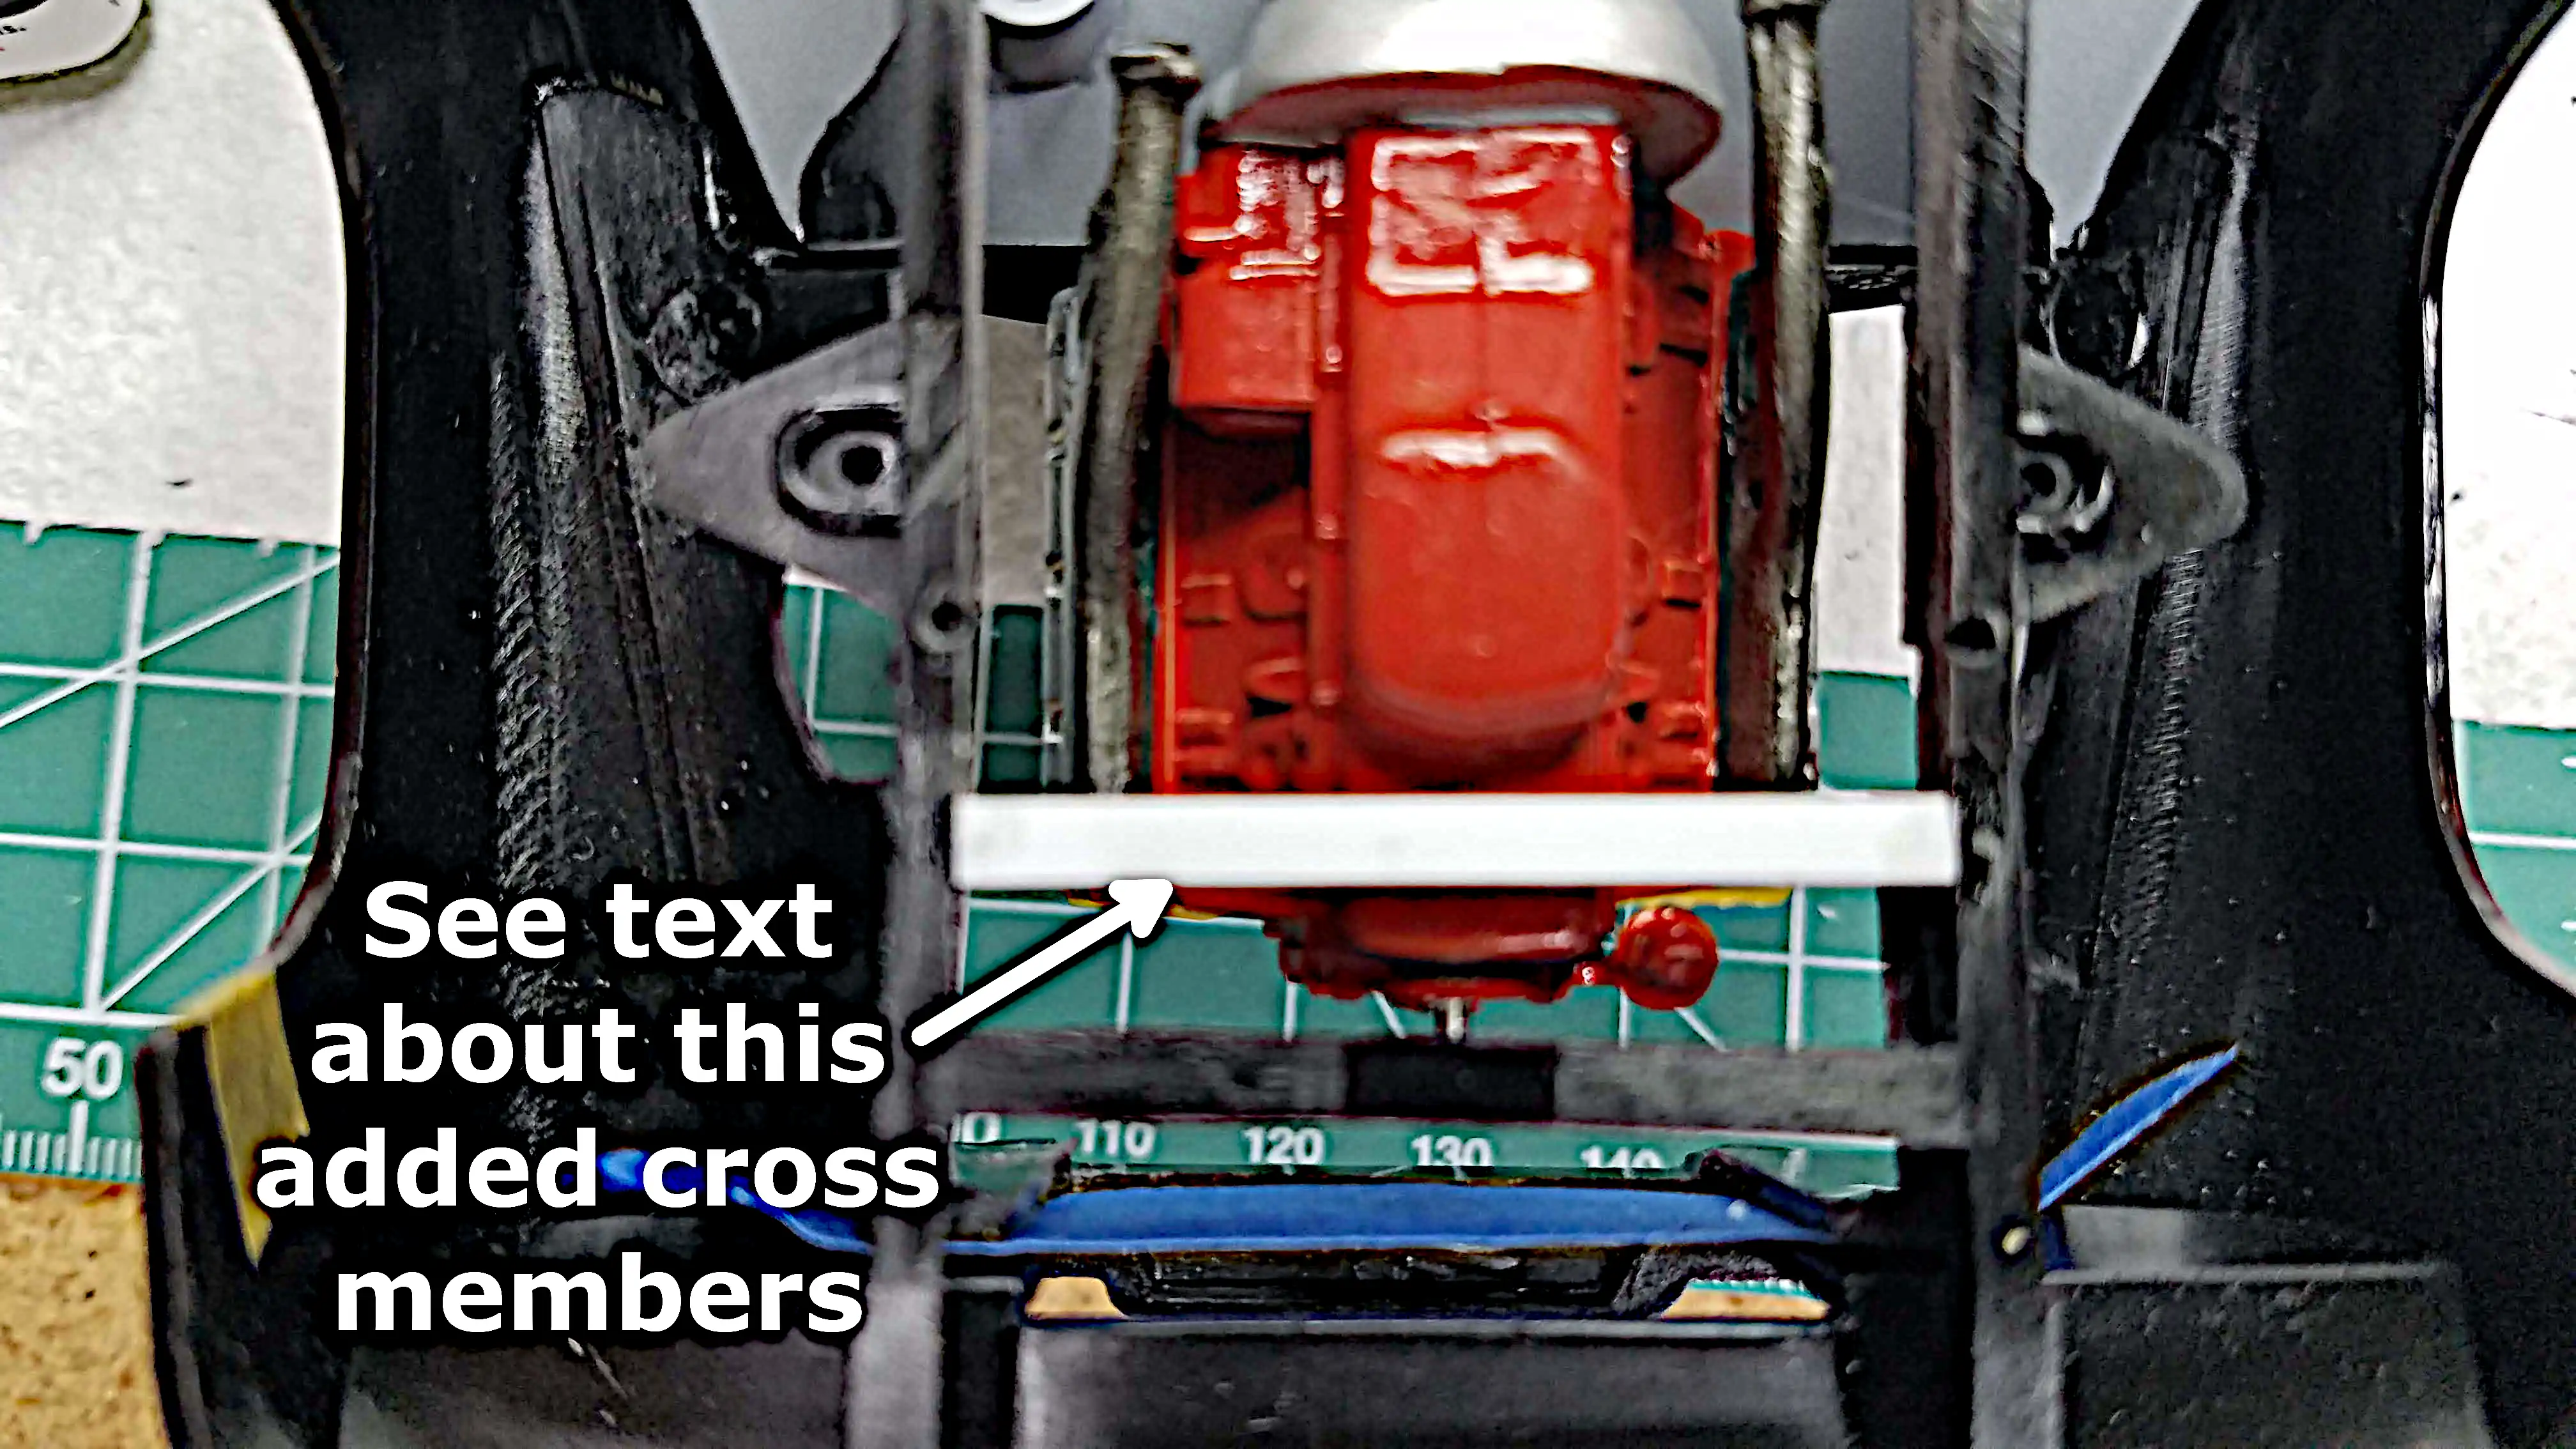
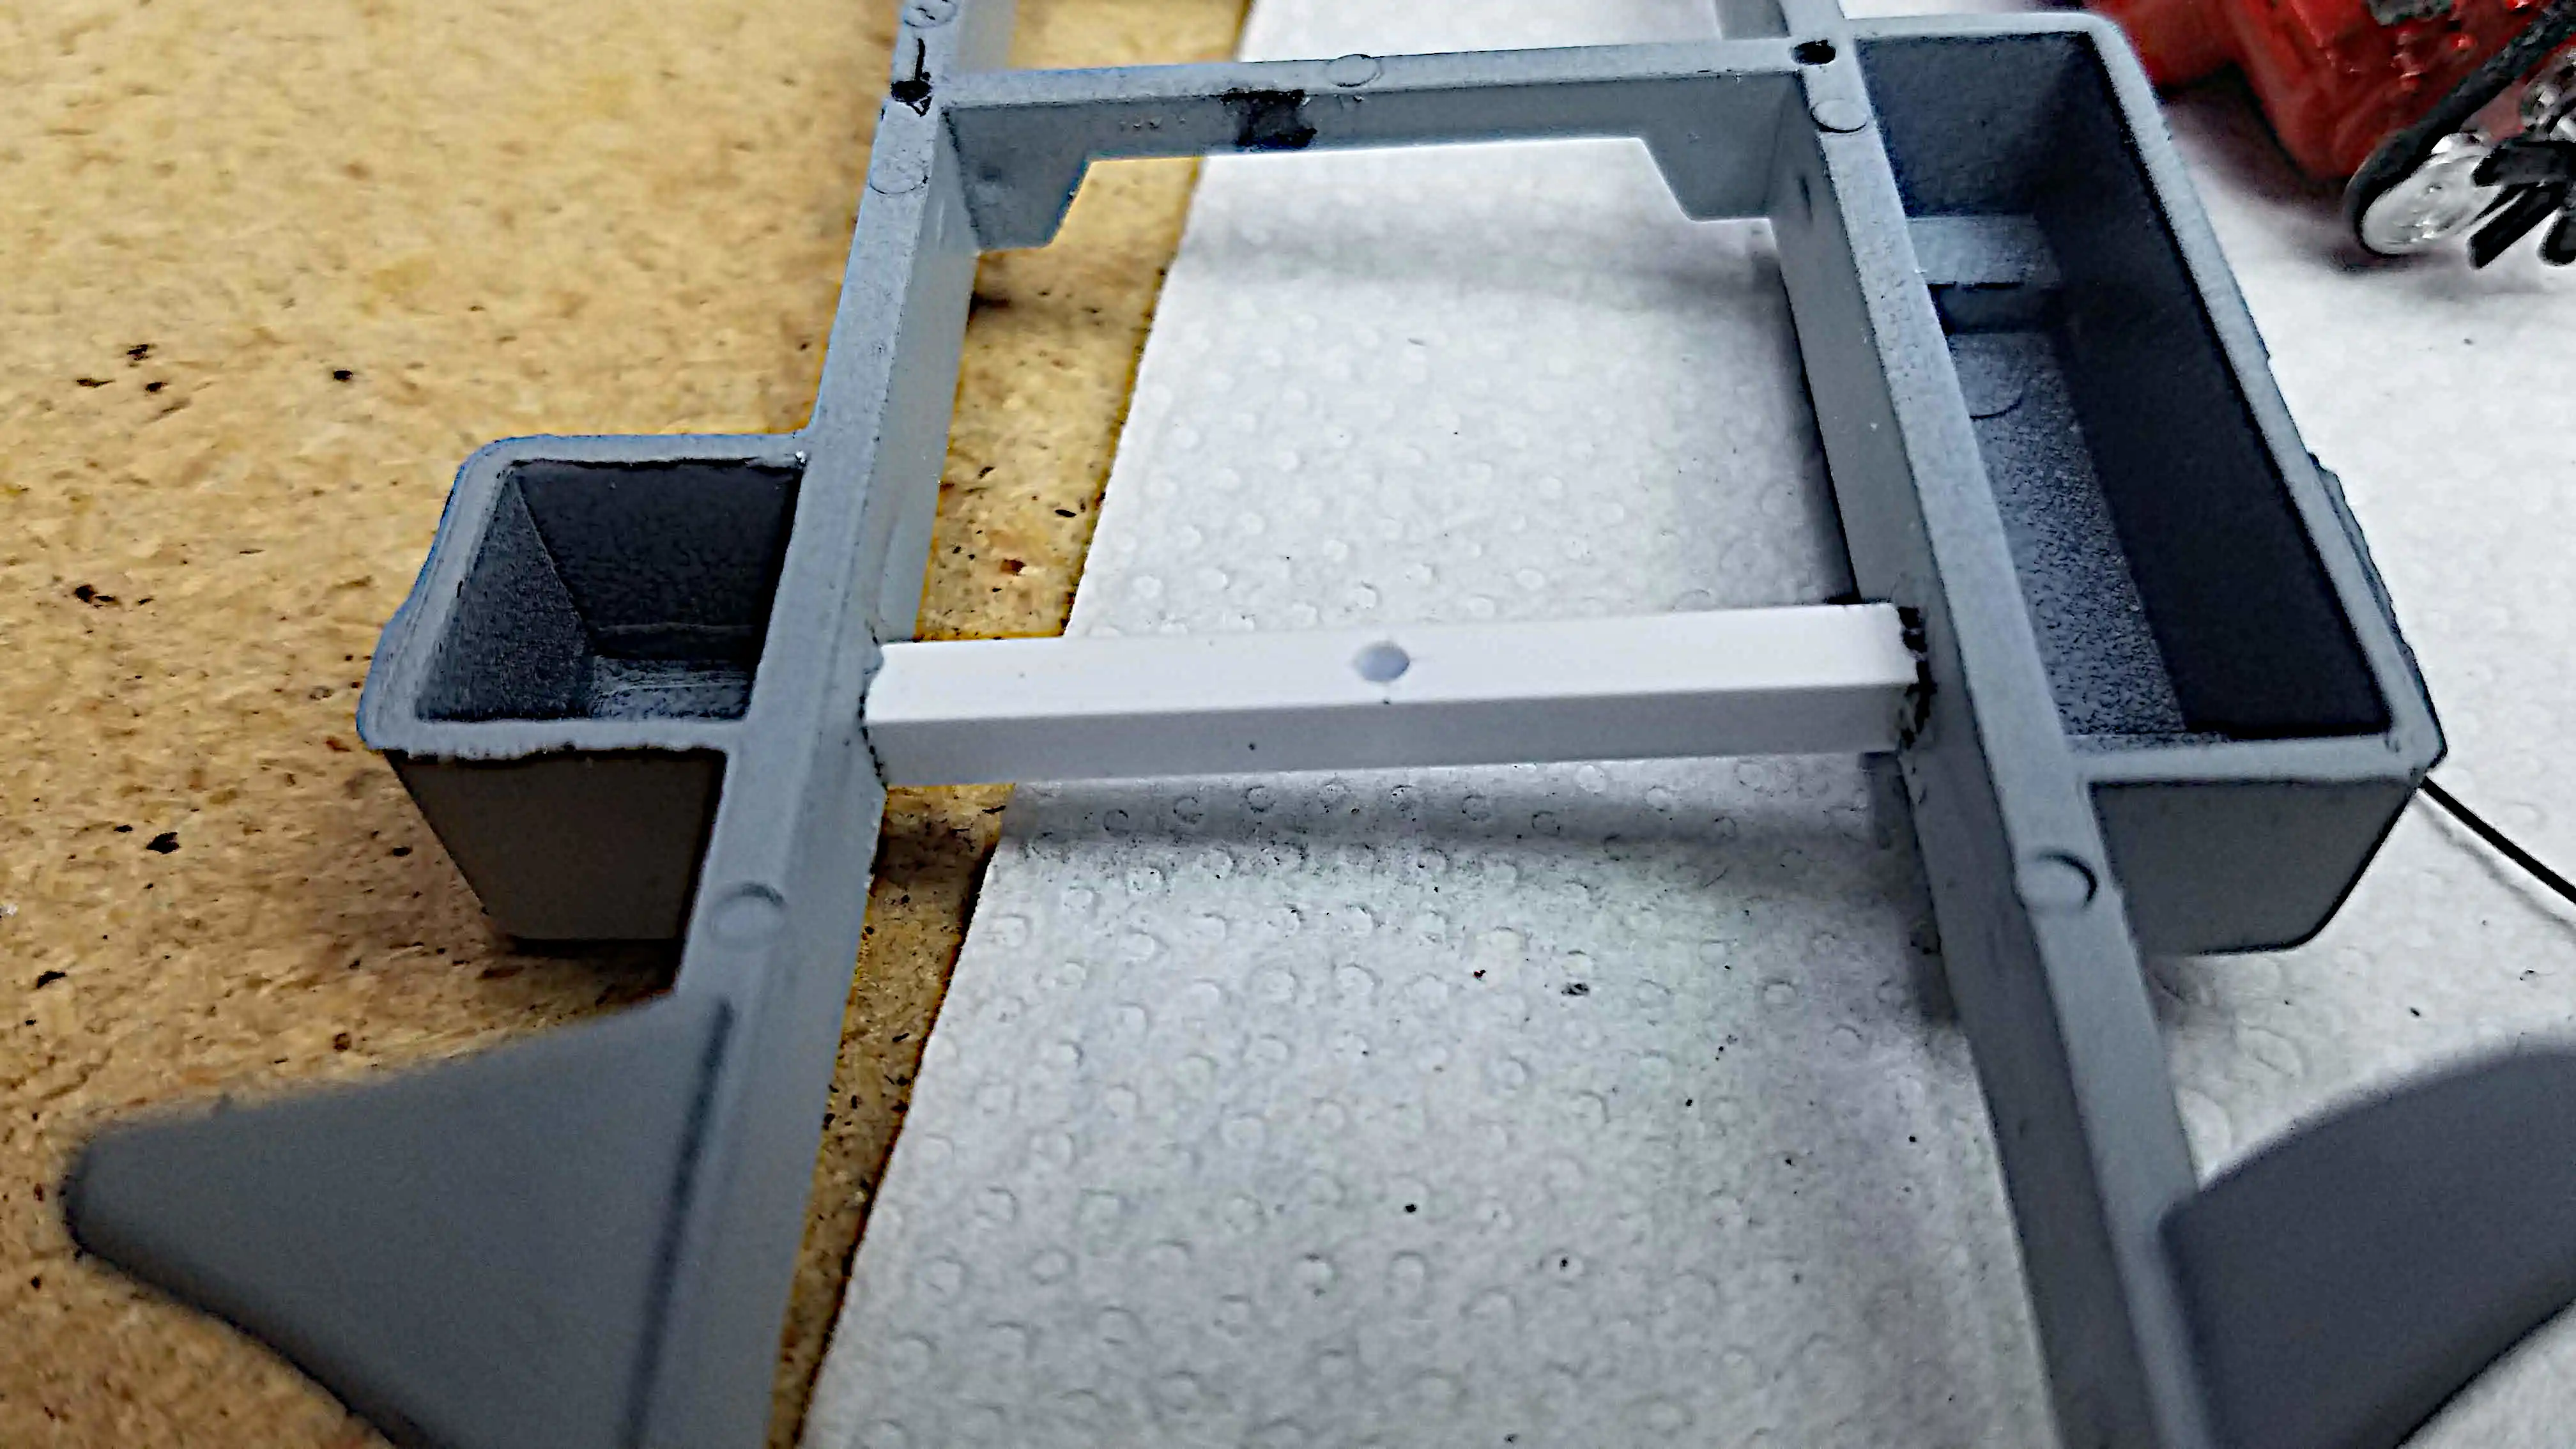 New cross member with a hole in the center for mounting the transmission to the frame
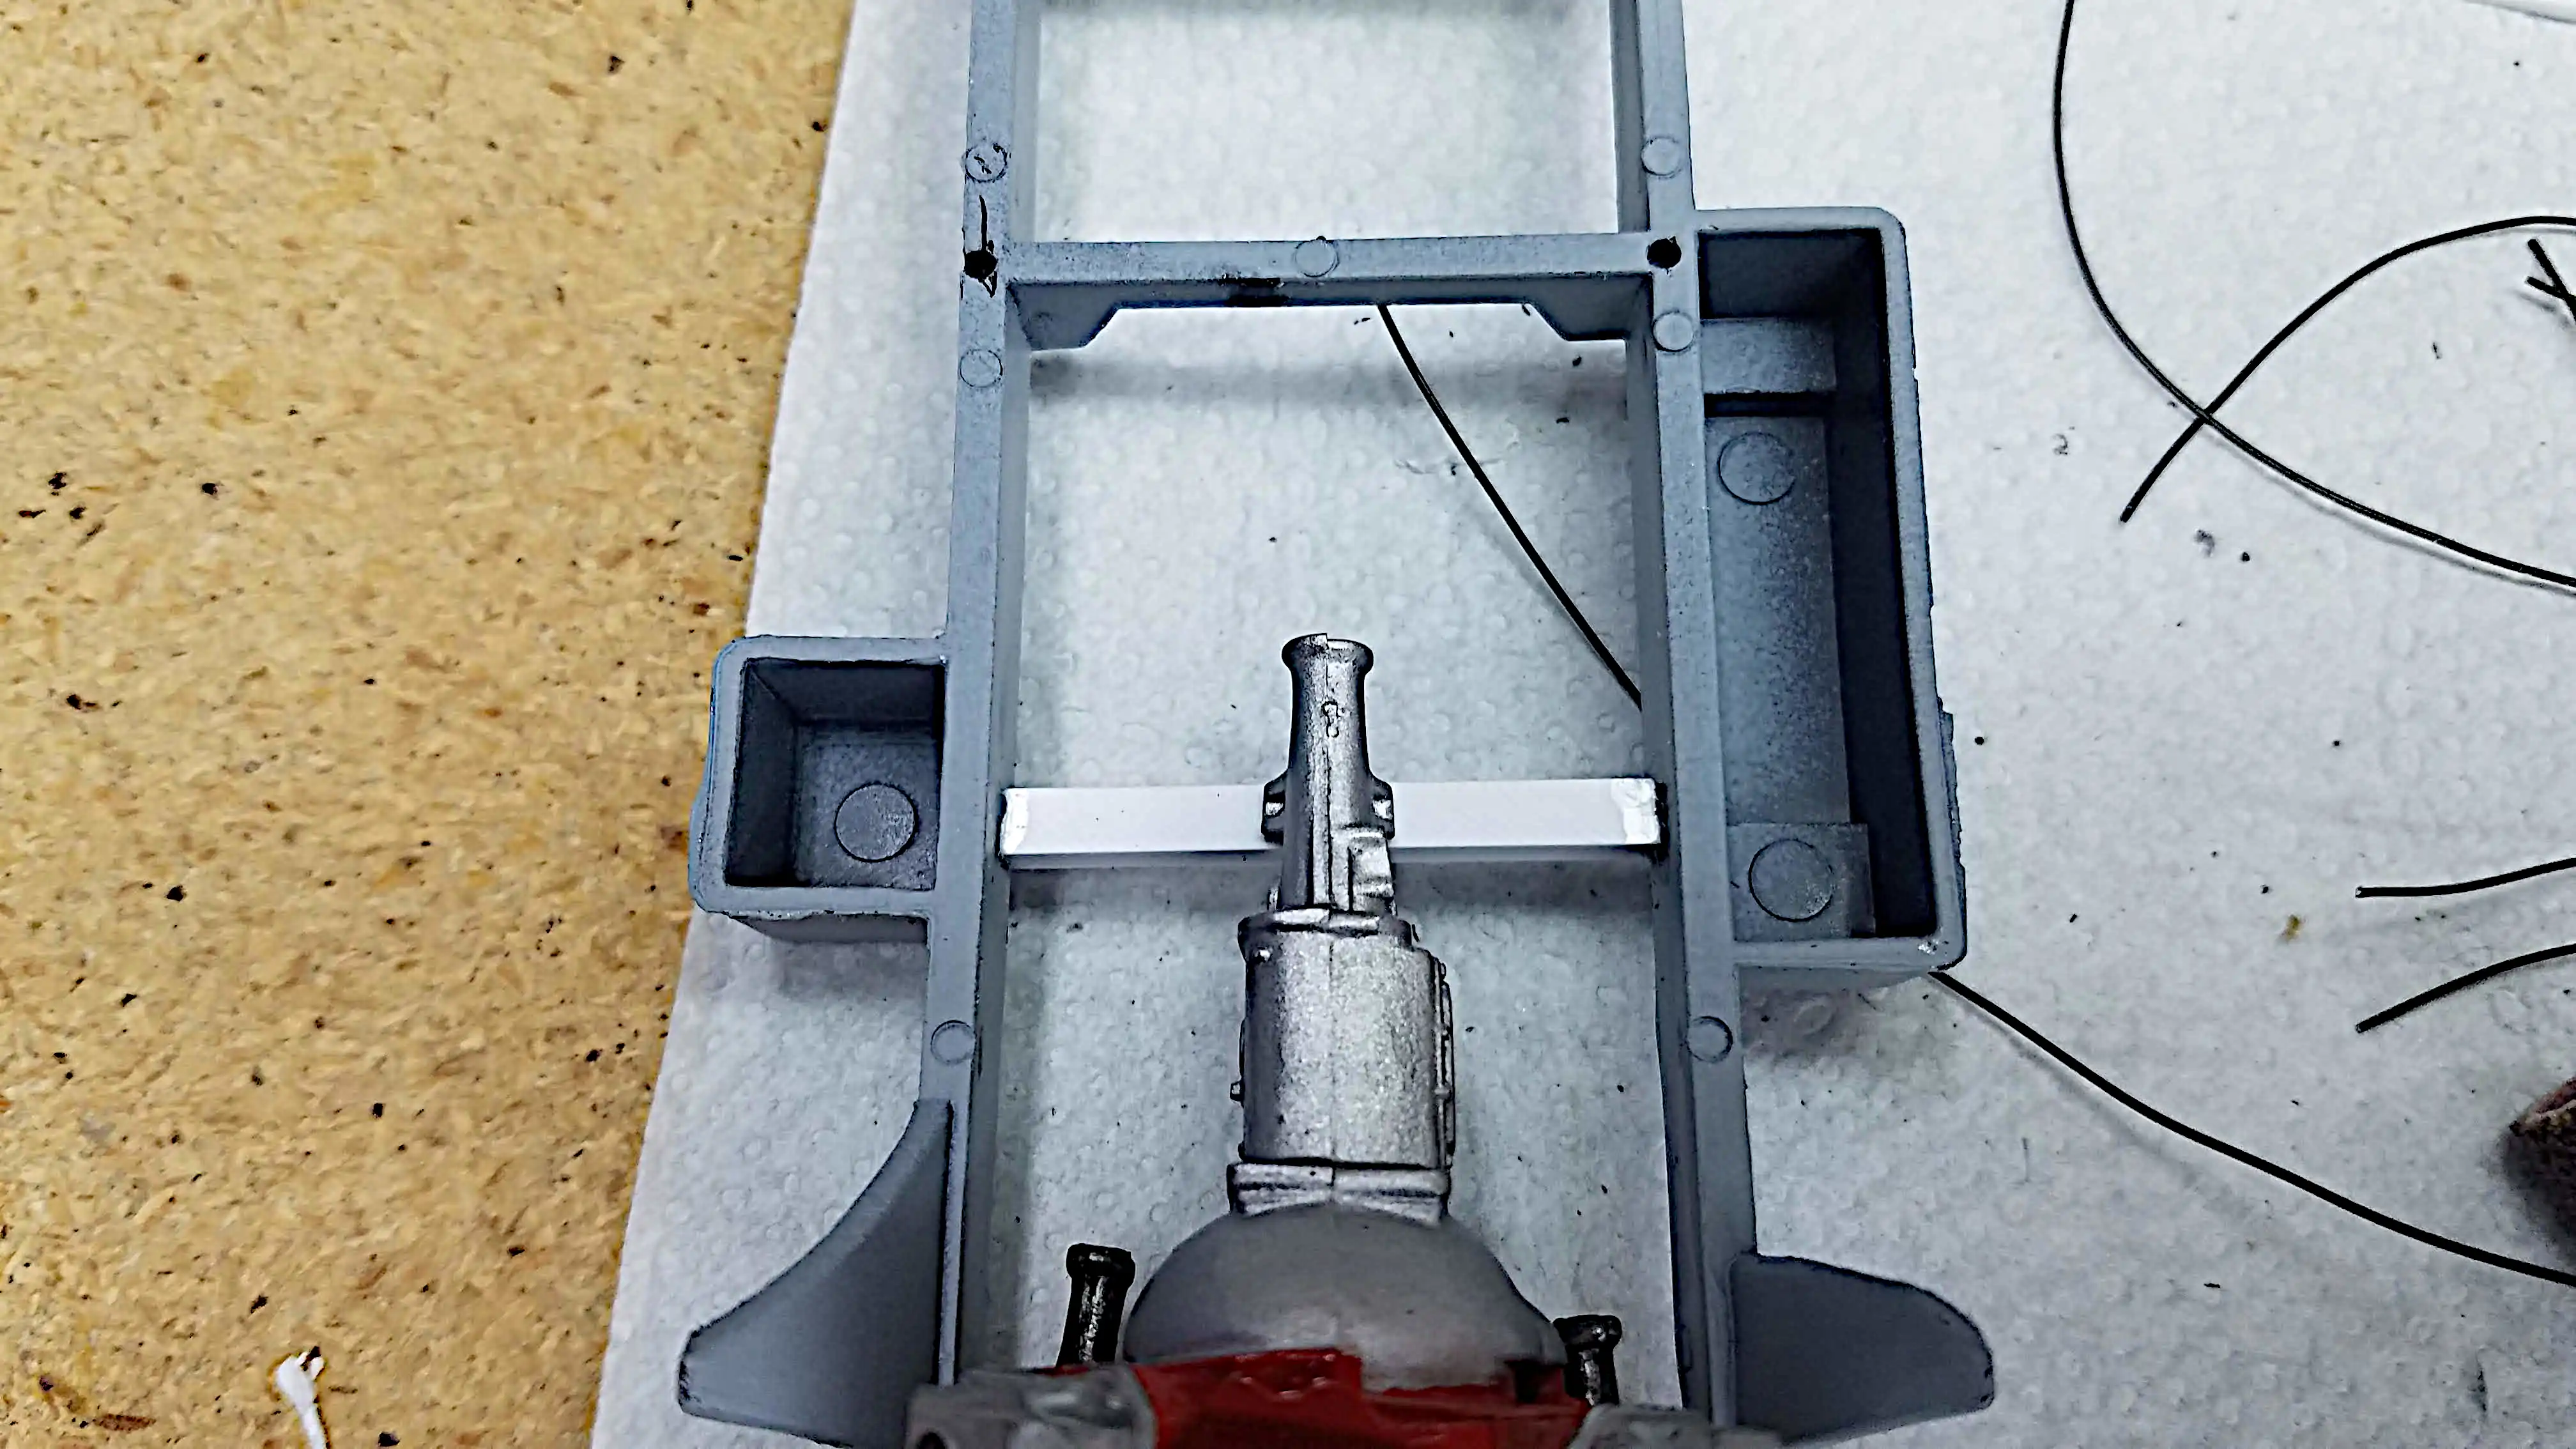 Transmission positioned on the new cross member
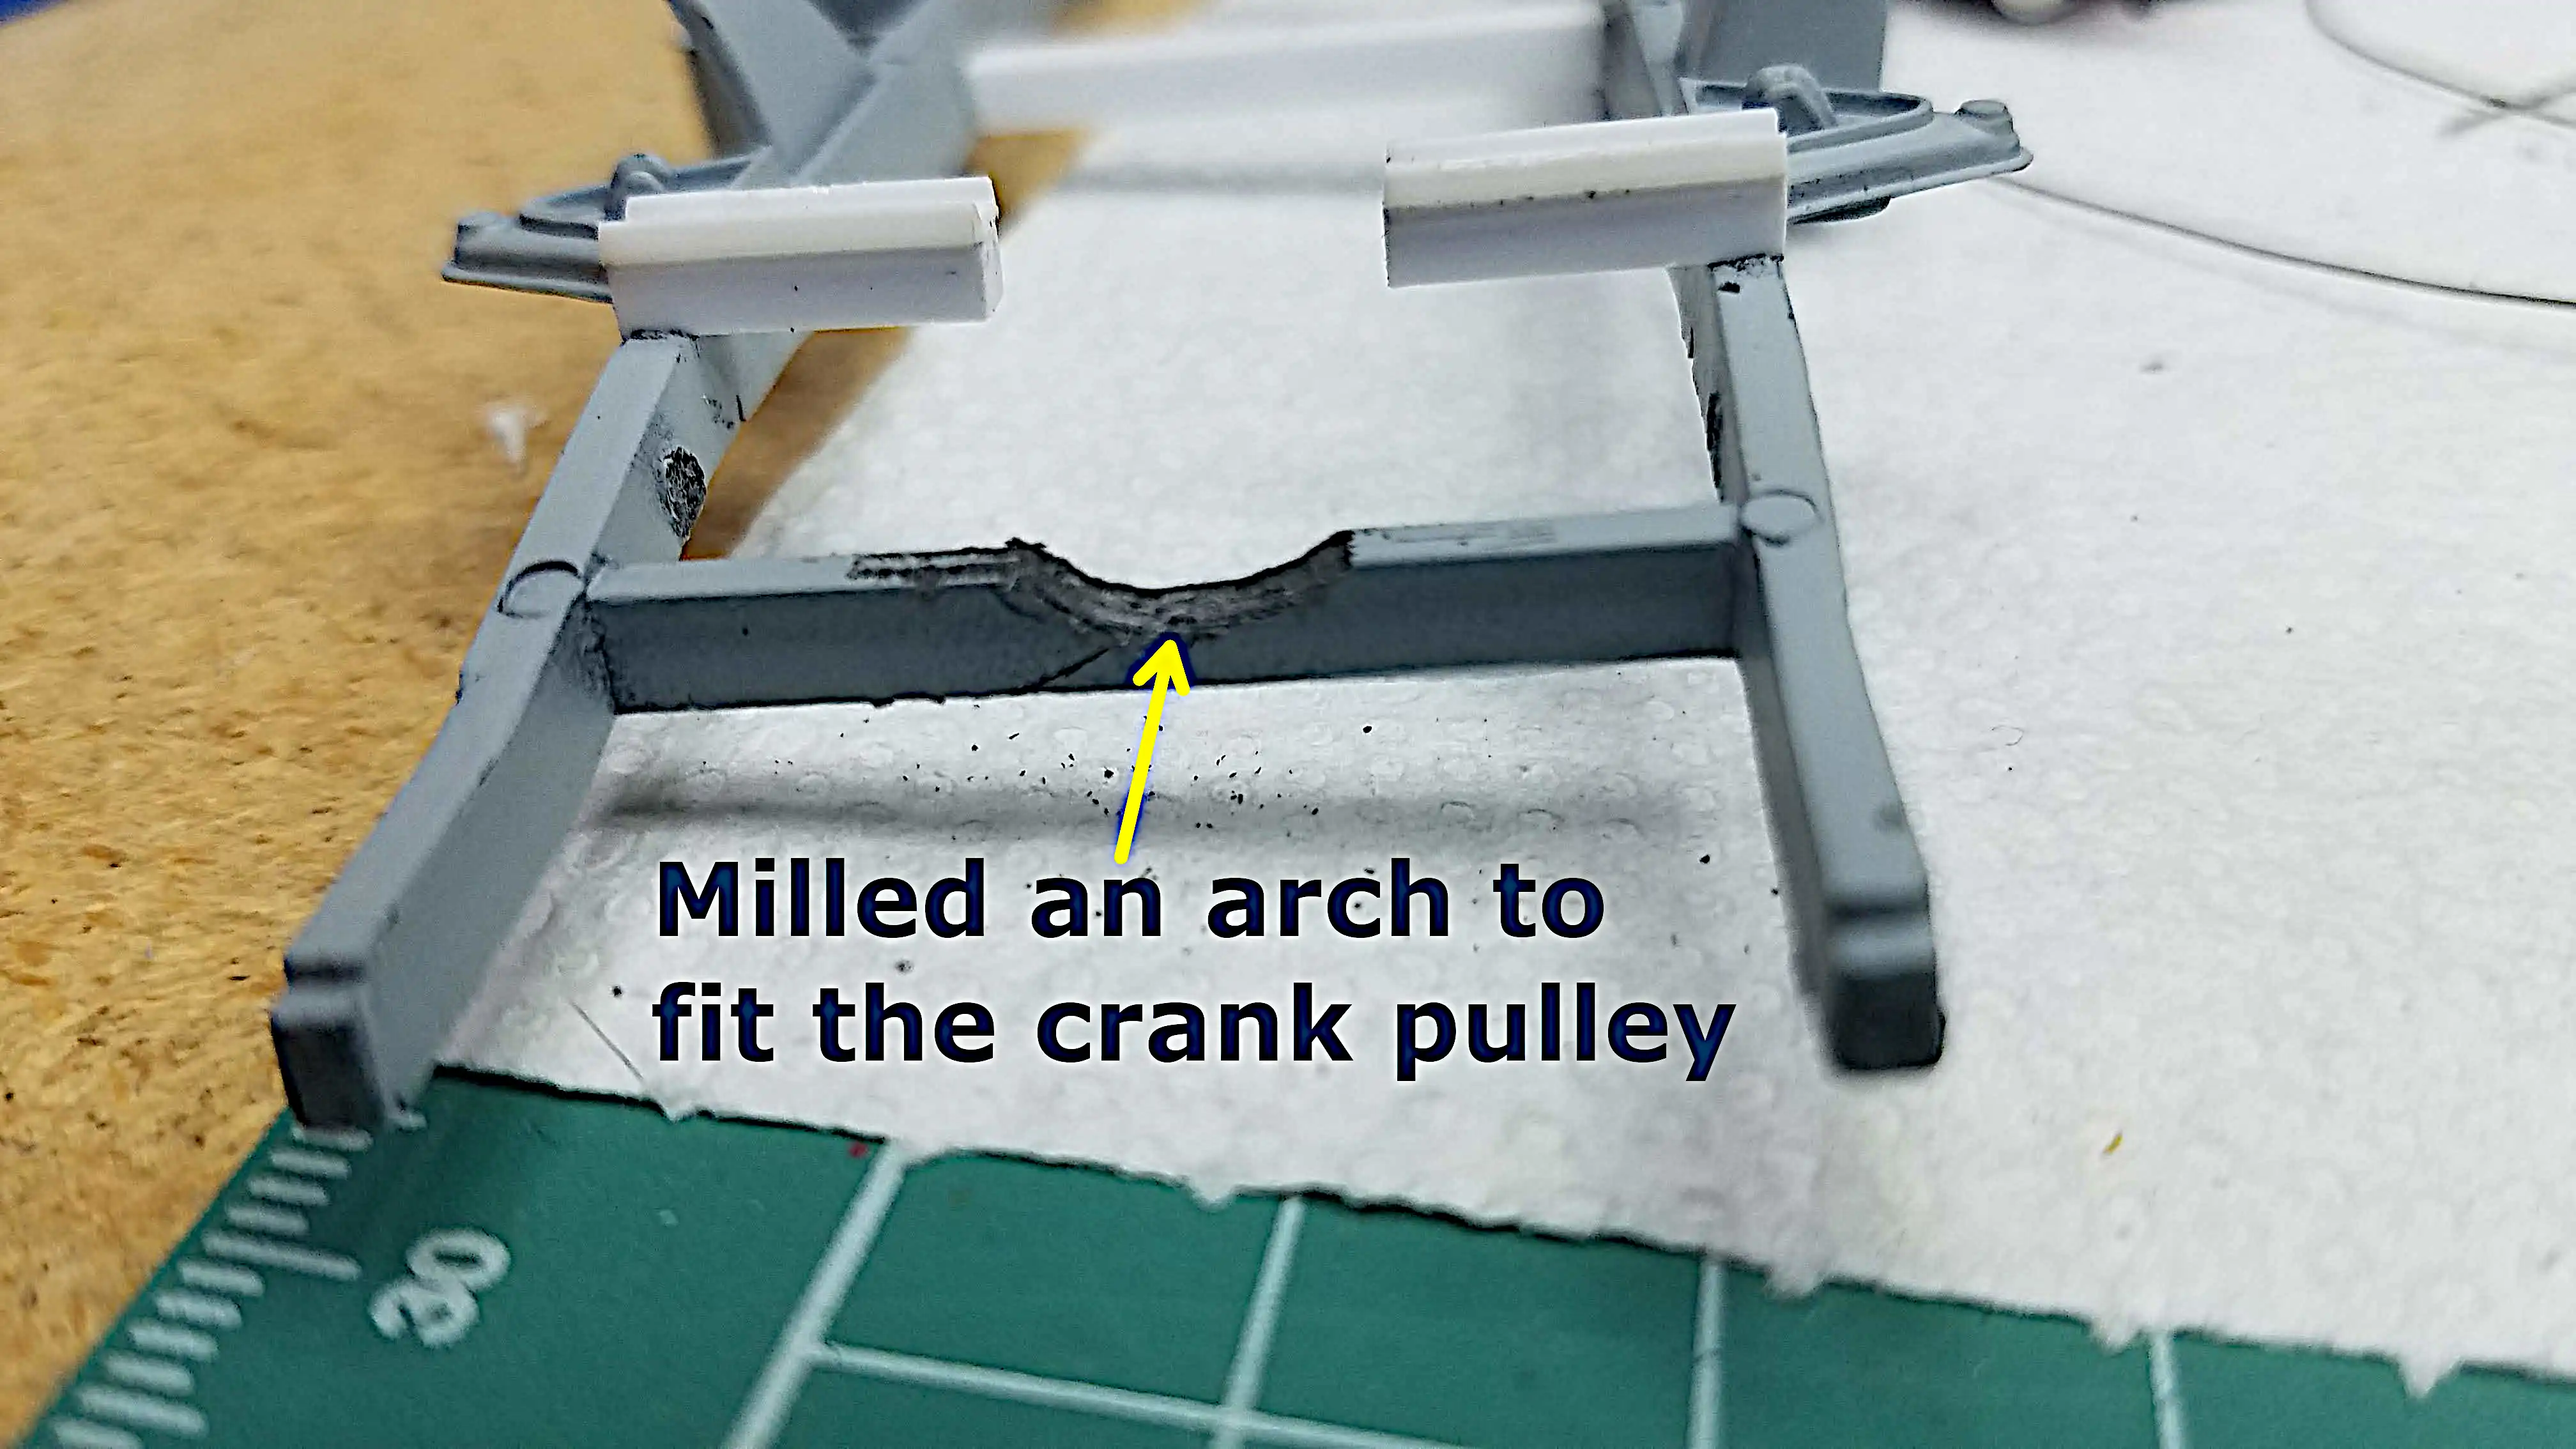 Front frame cross member cut out to allow the crank pulley to clear the frame
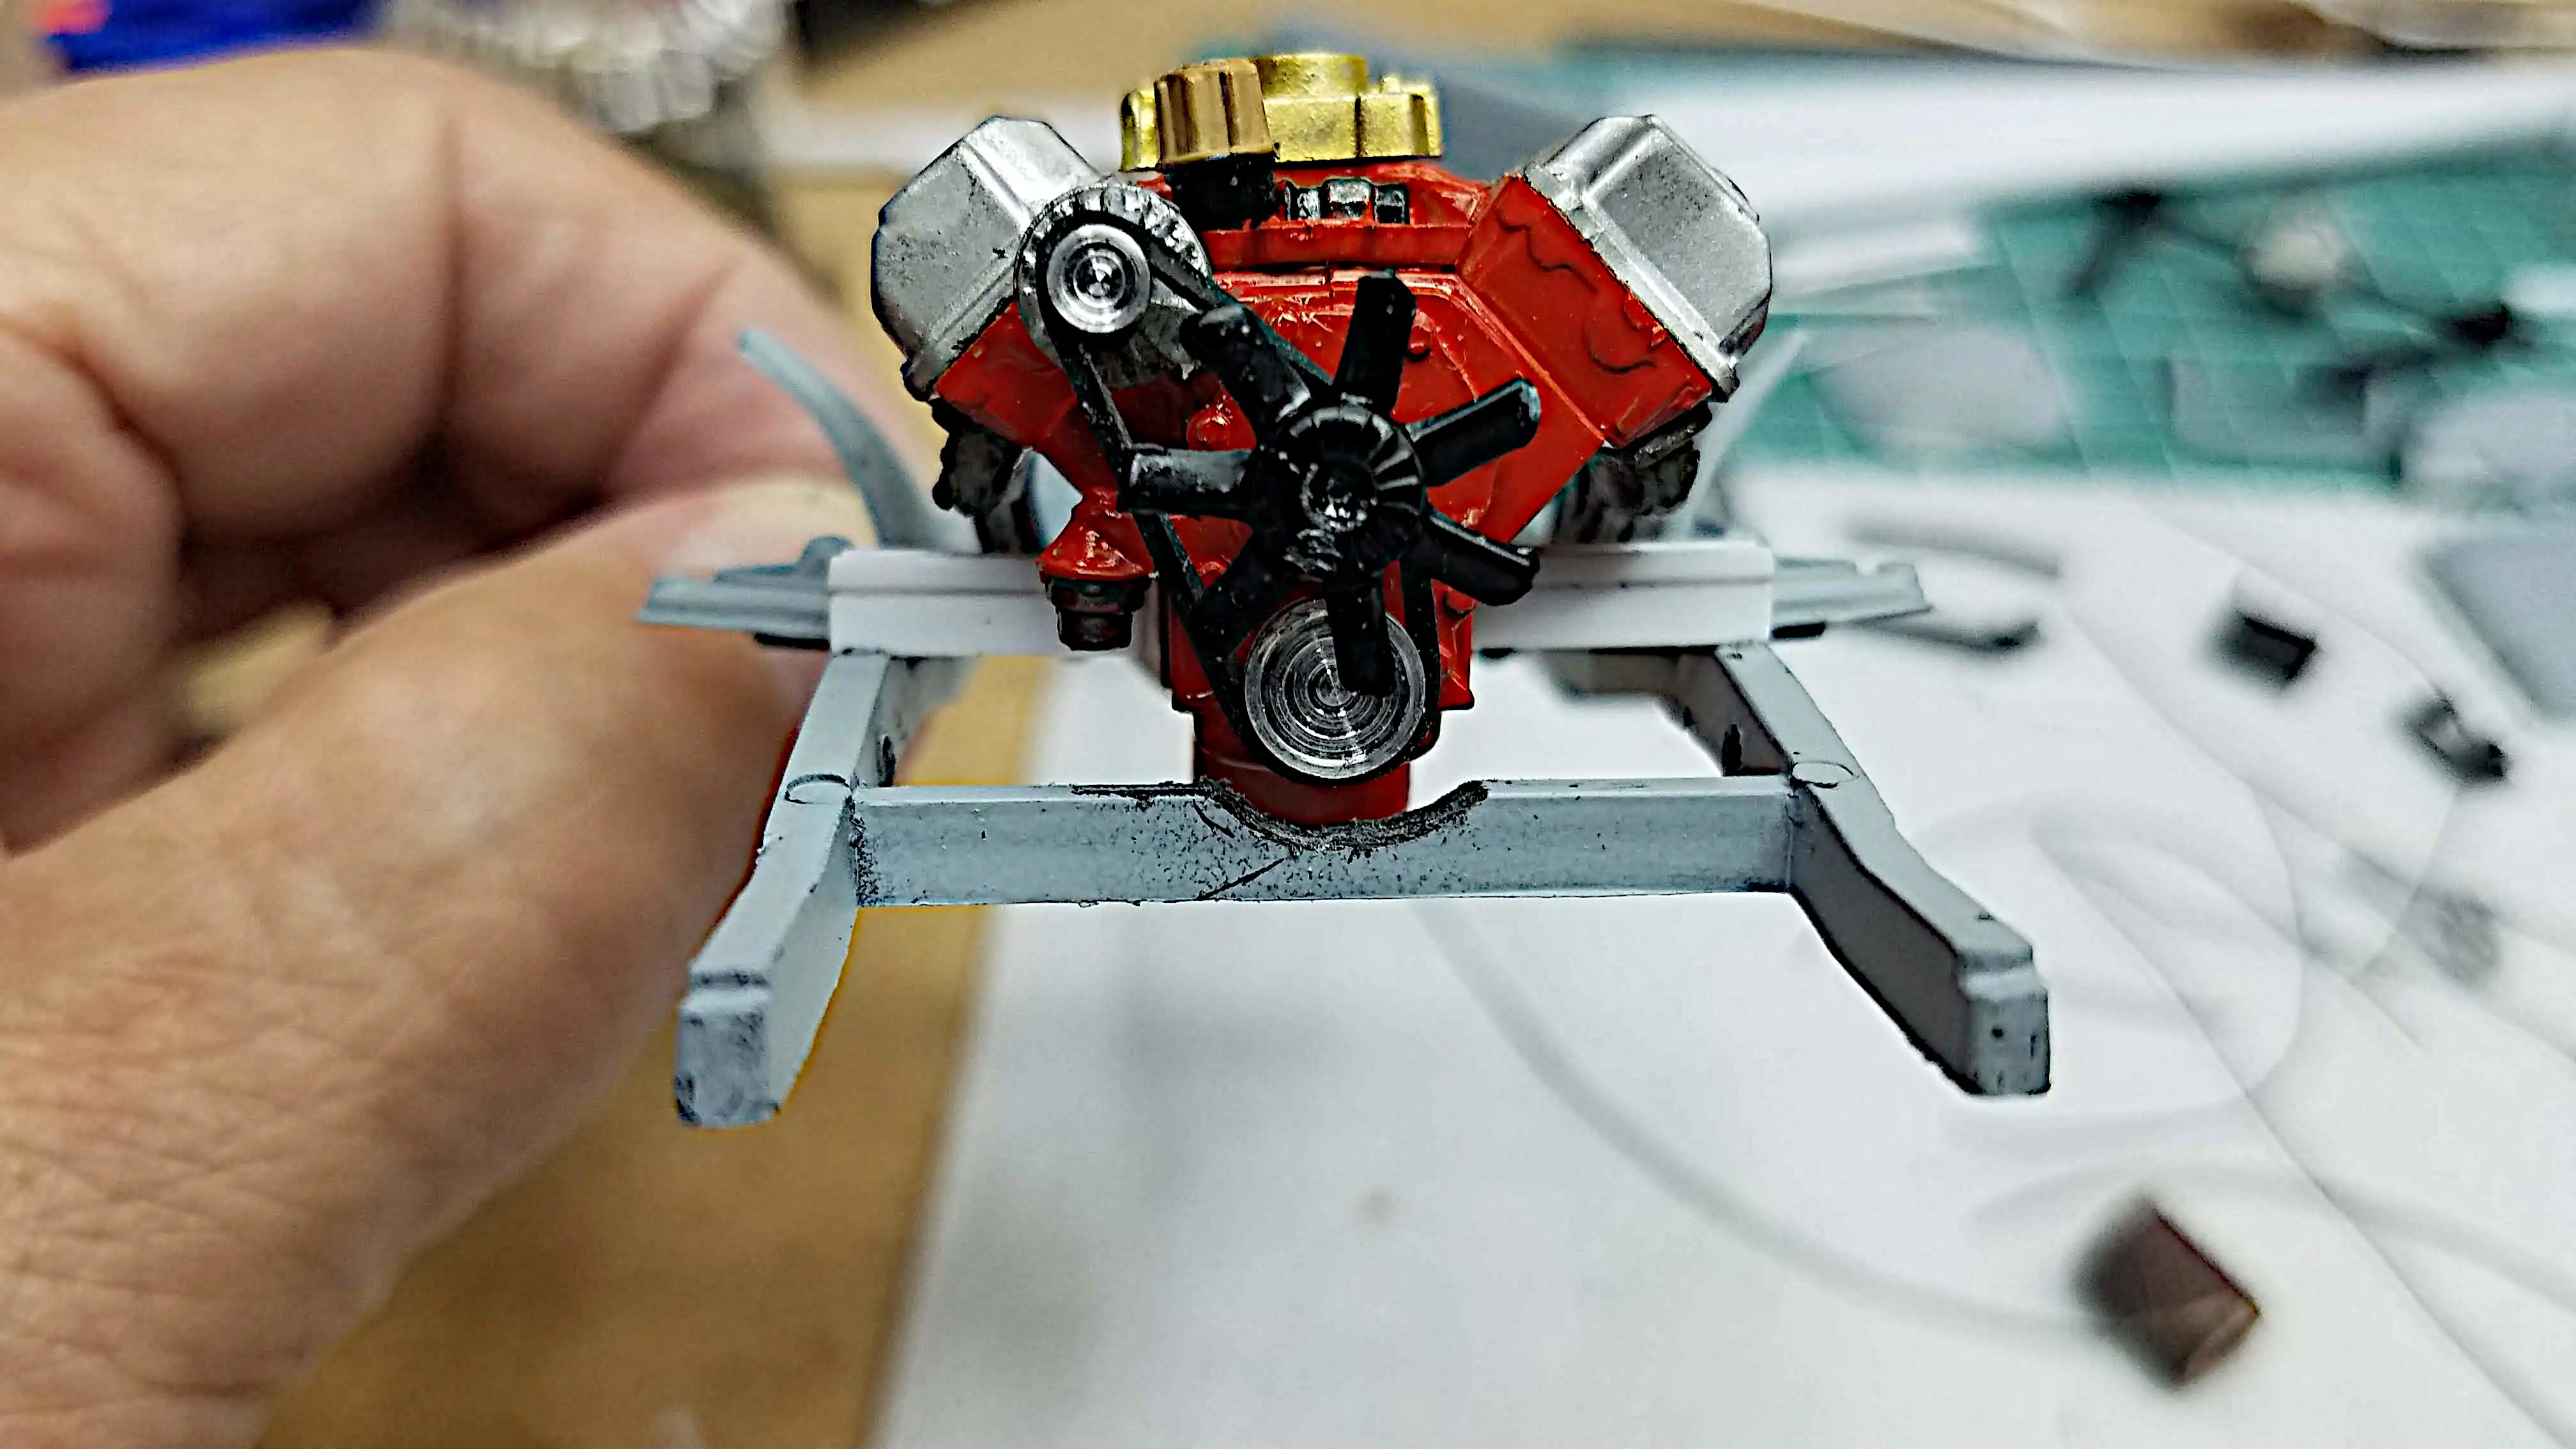 Hemi dry fitted on new mounts
 Spark plug and coil wire installed in the distributor cap
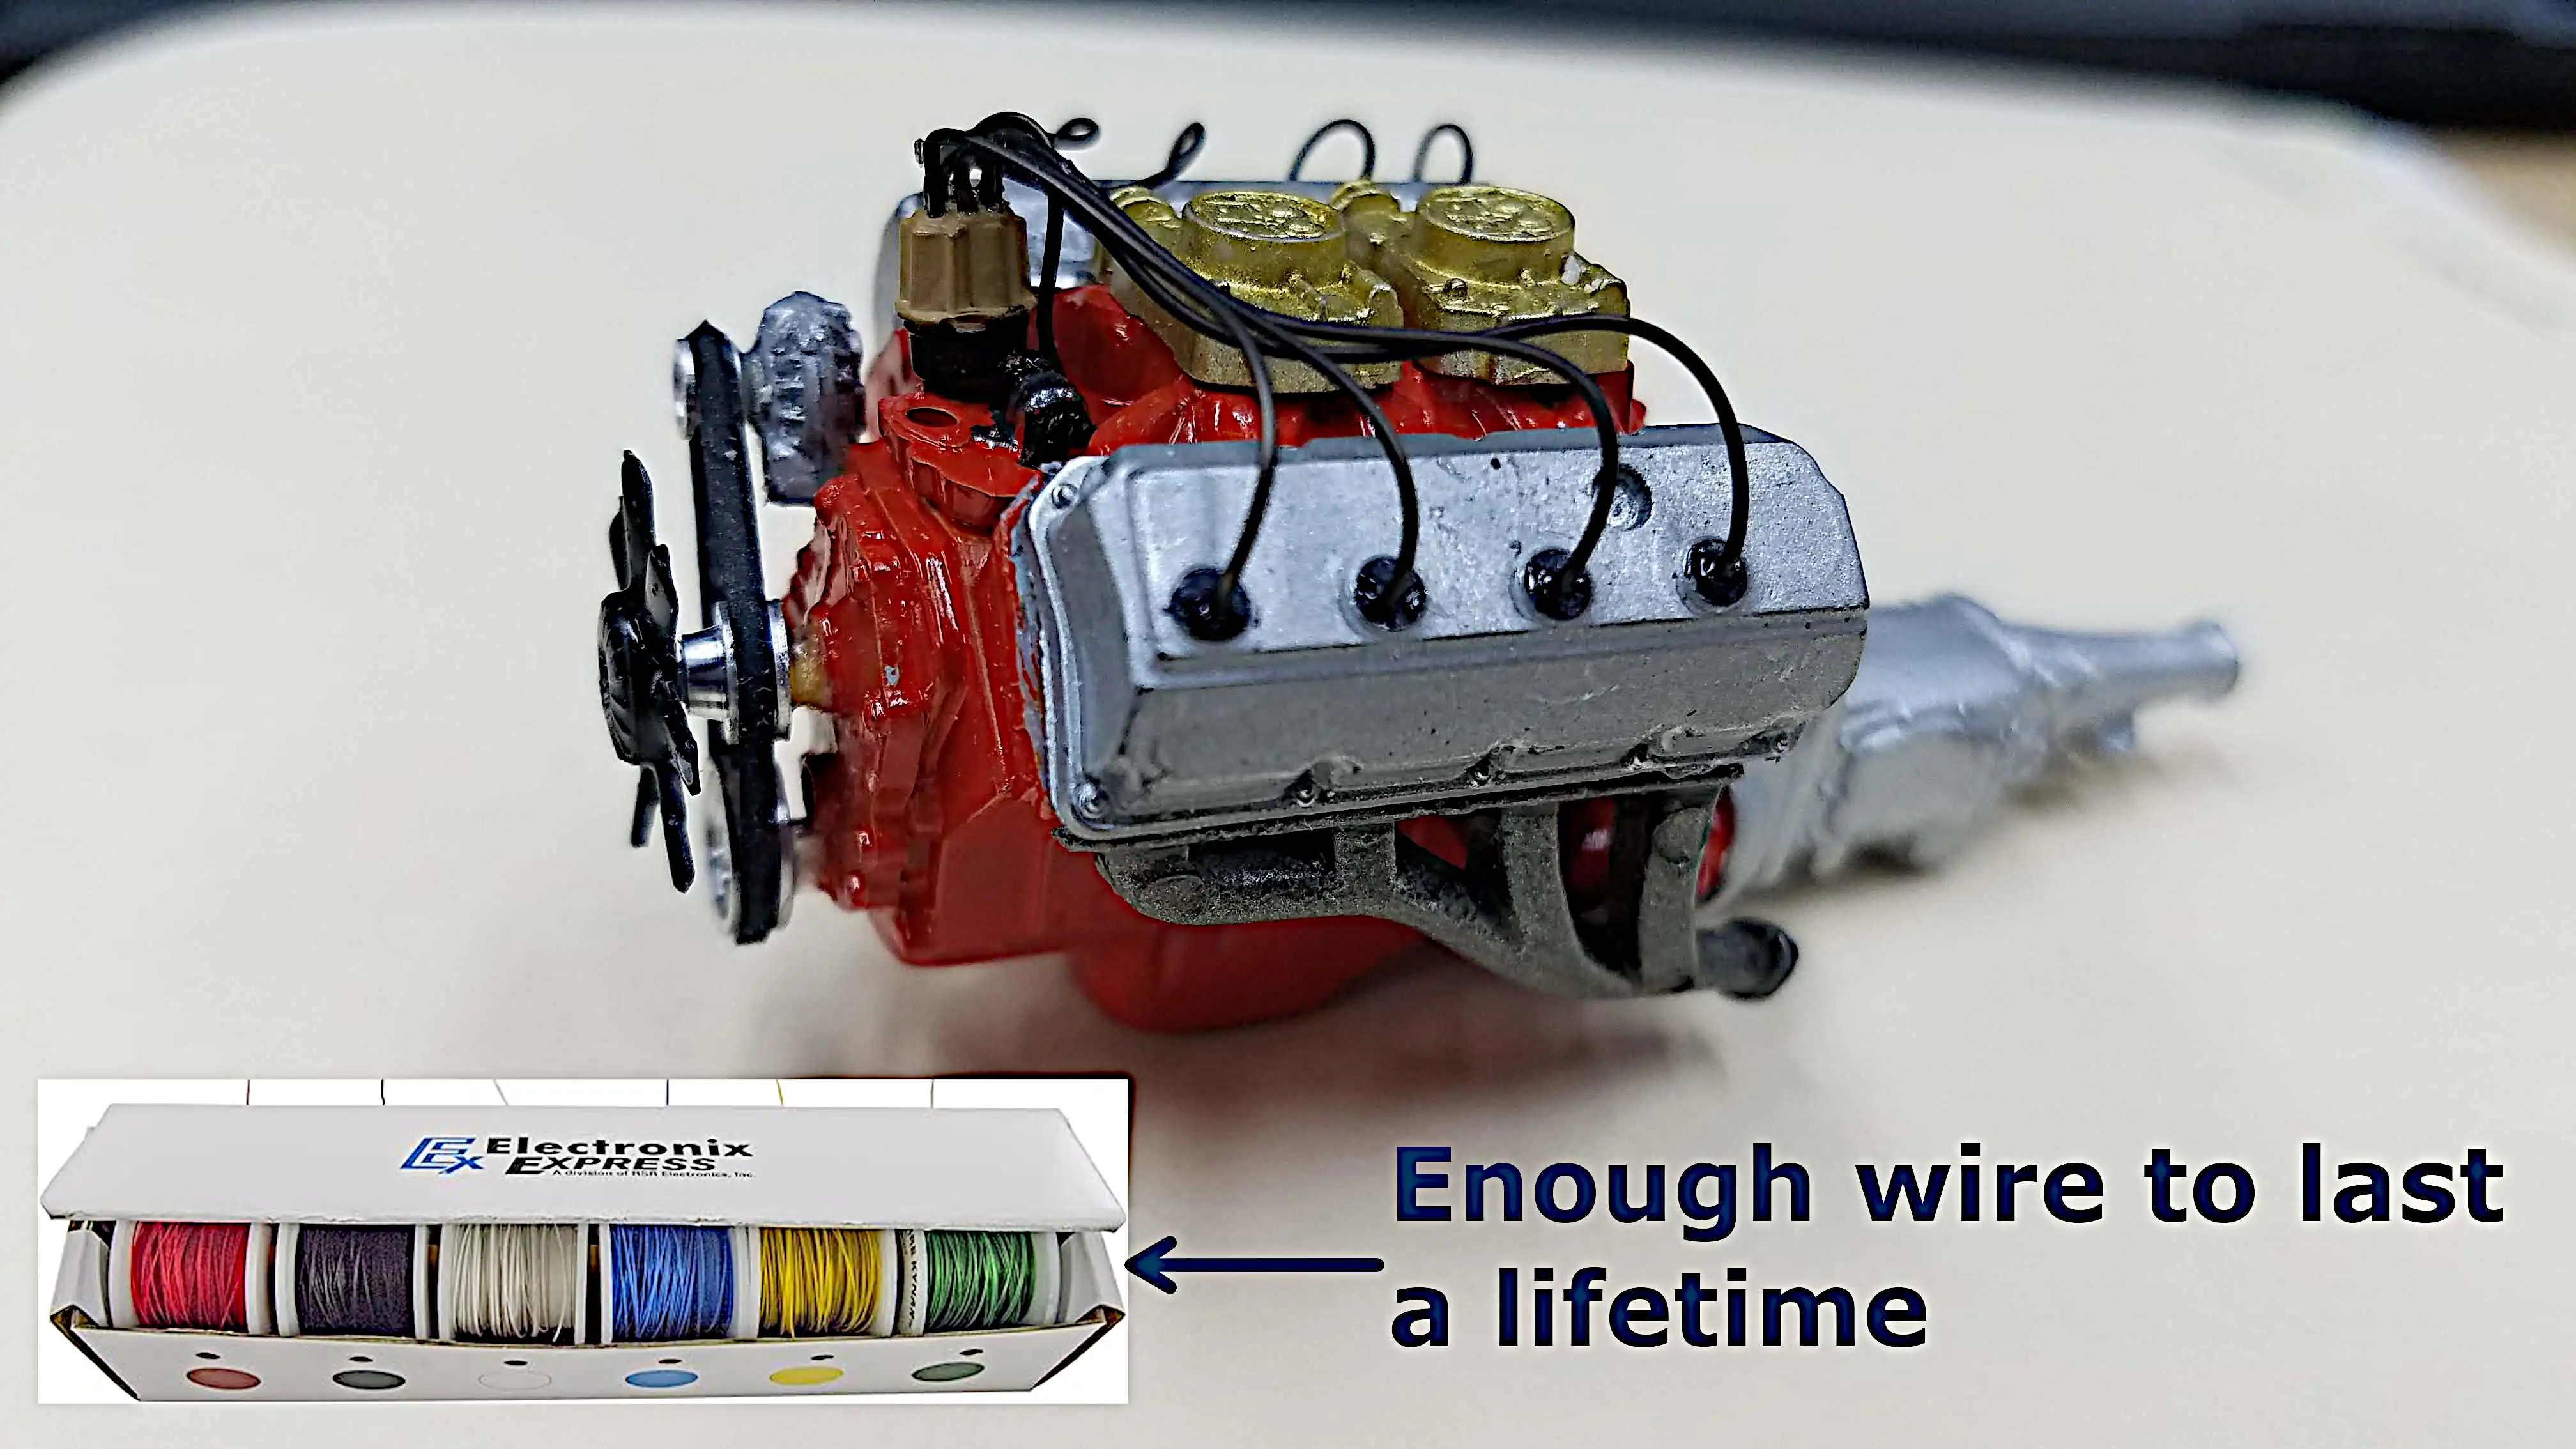 Wired engine left side
 Wired engine right side
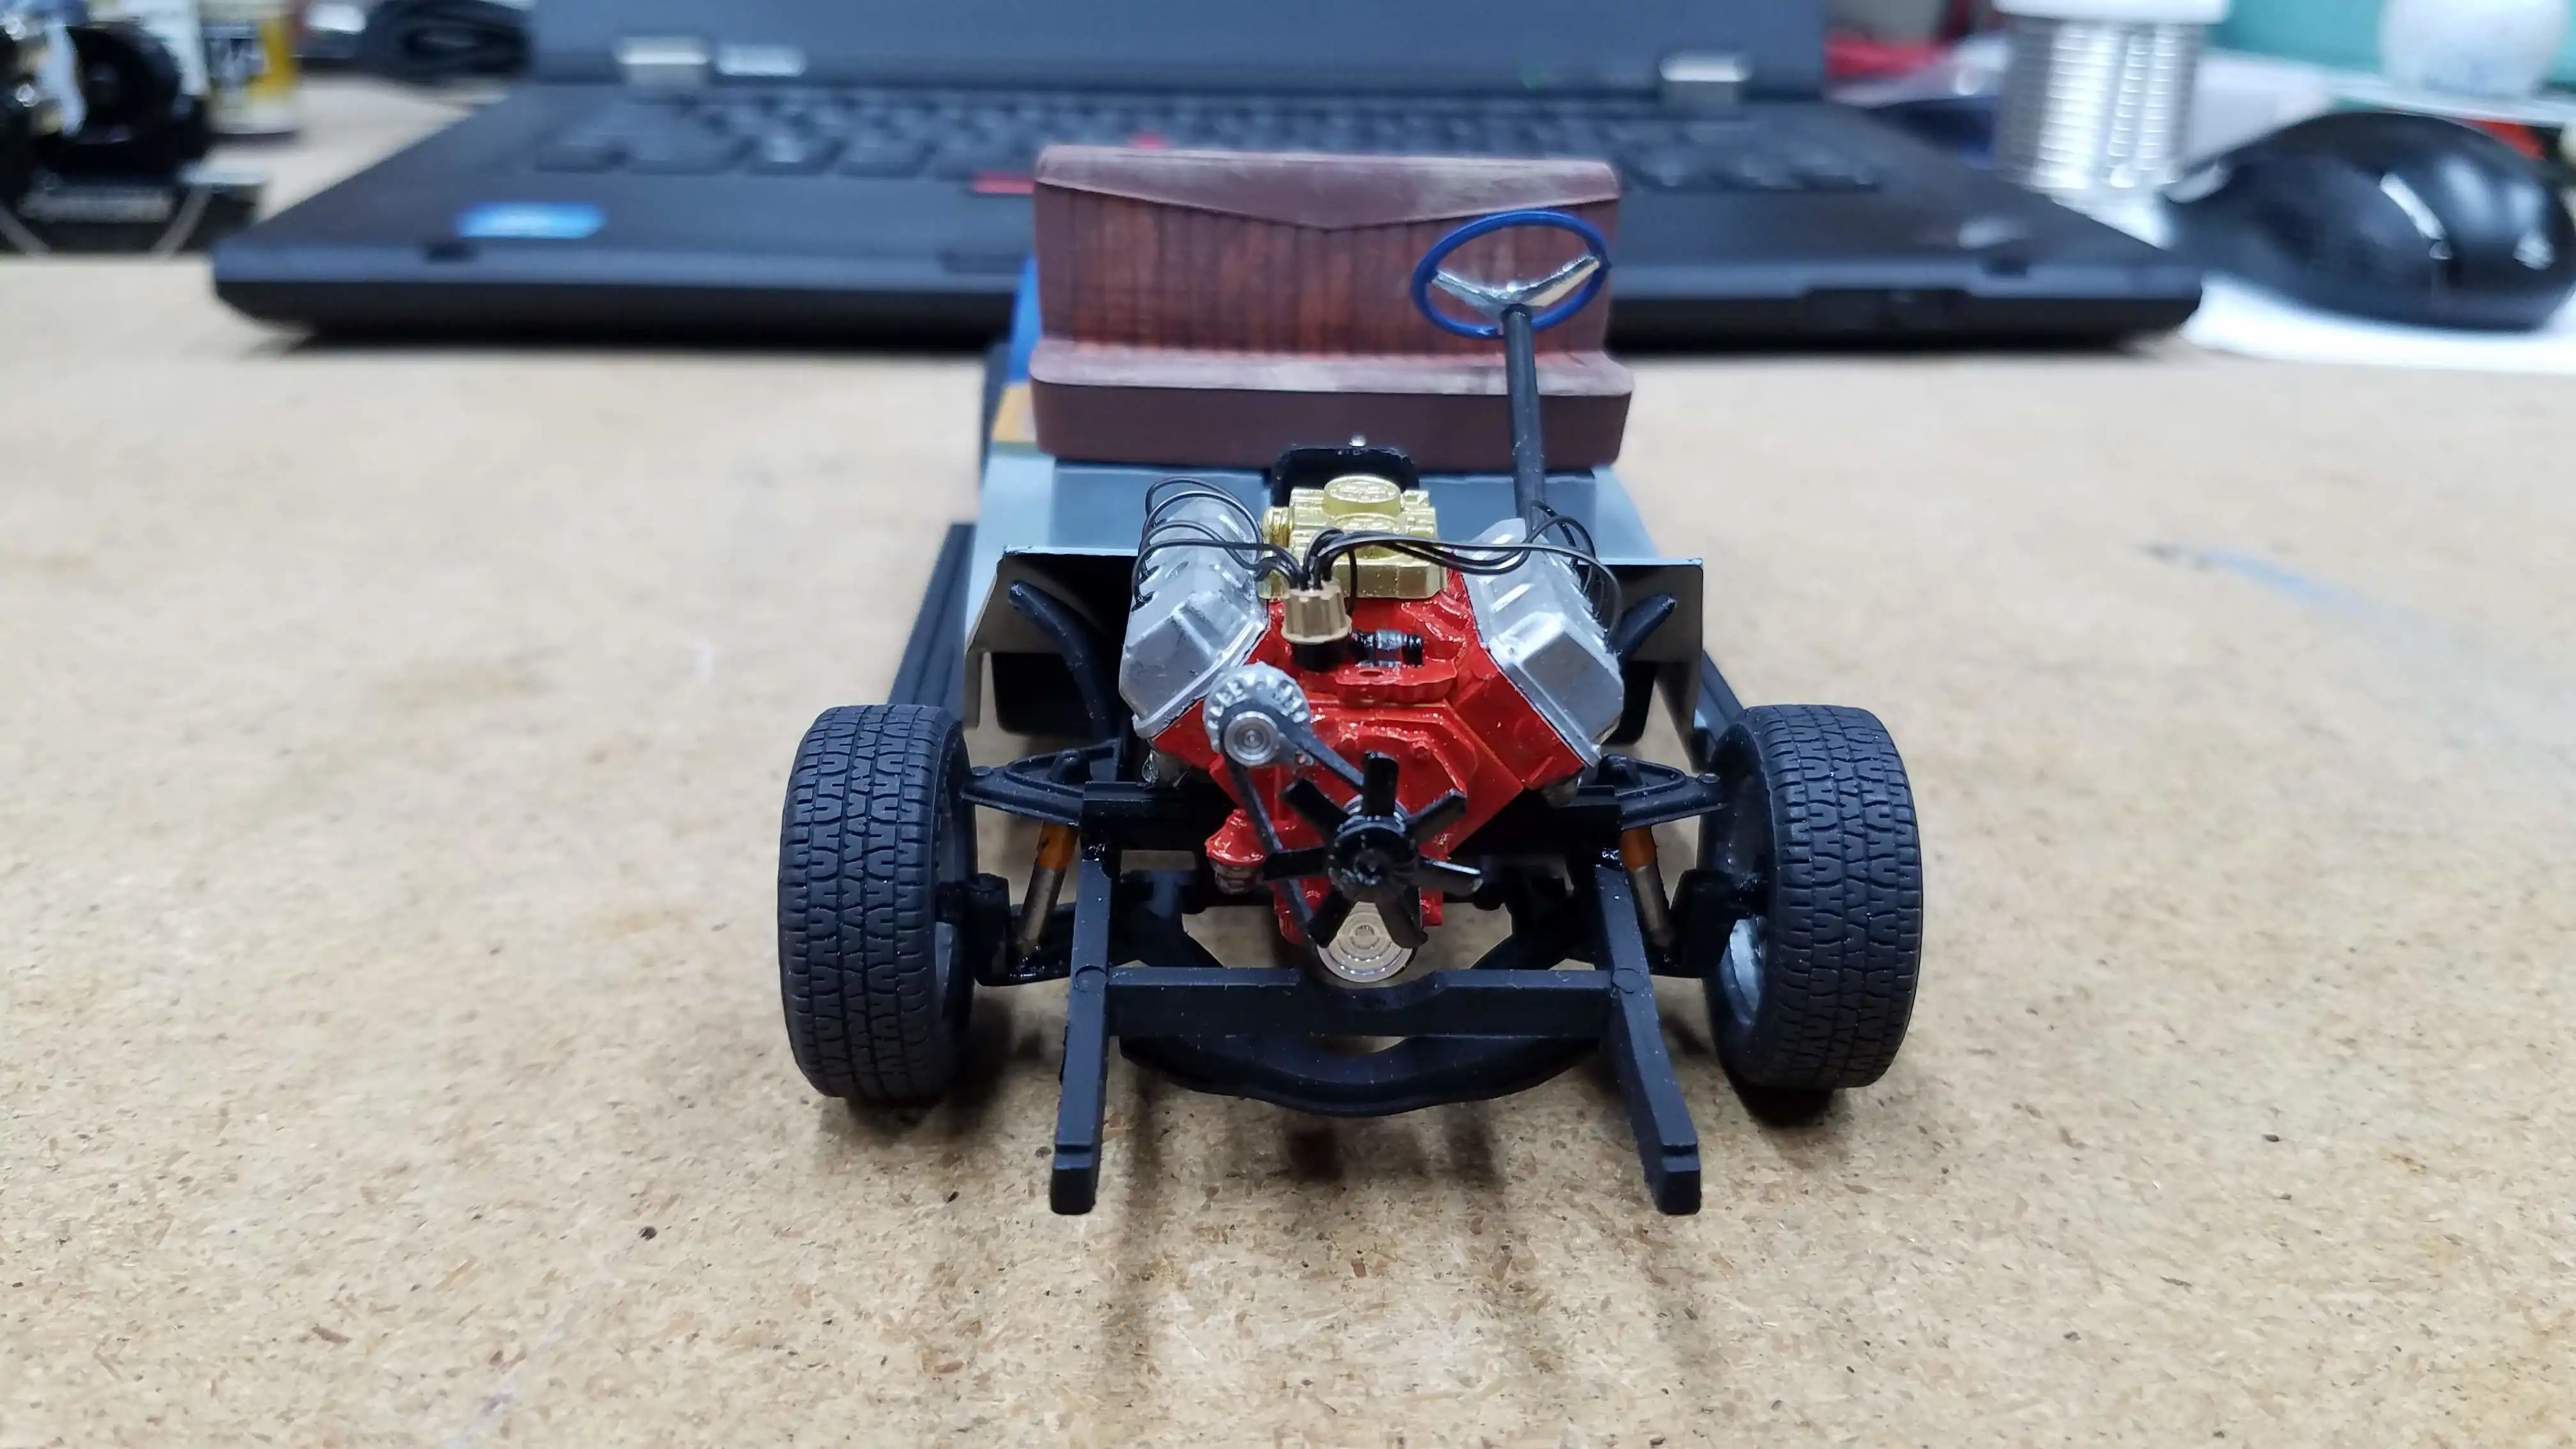
 Wired engine front view
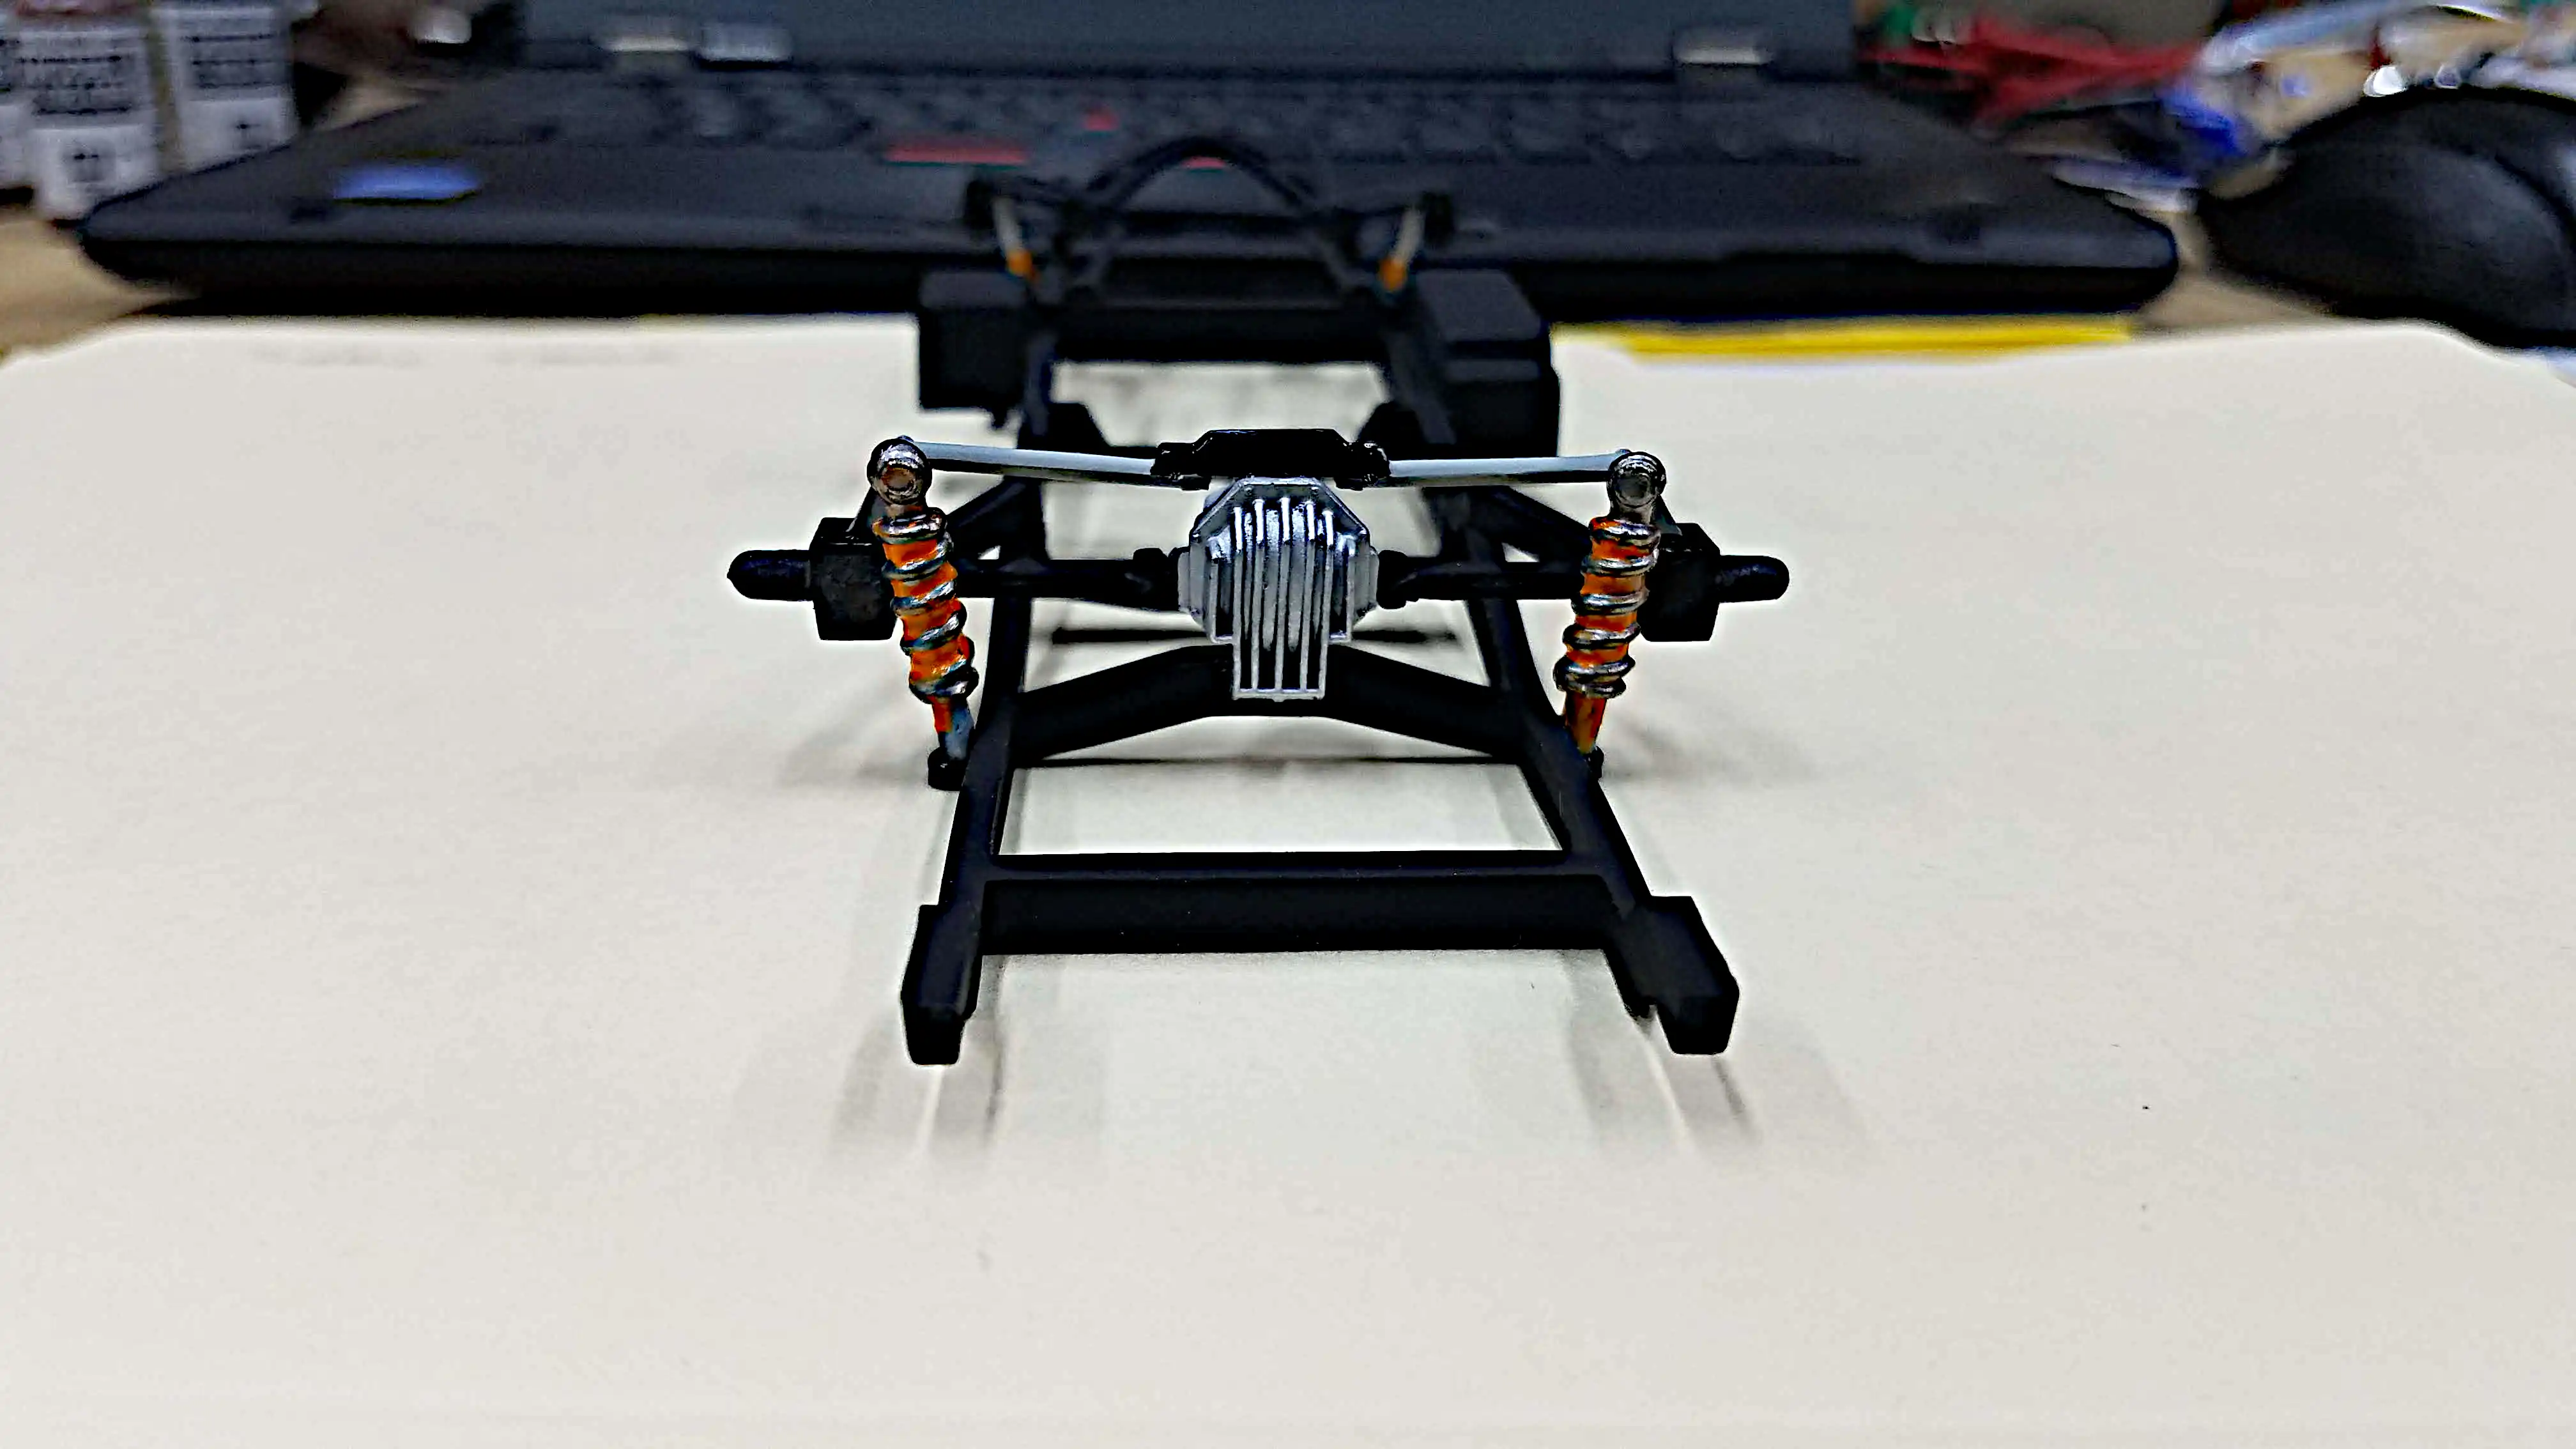 Rear axle, differential and coil over shocks installed
 Front shocks are installed
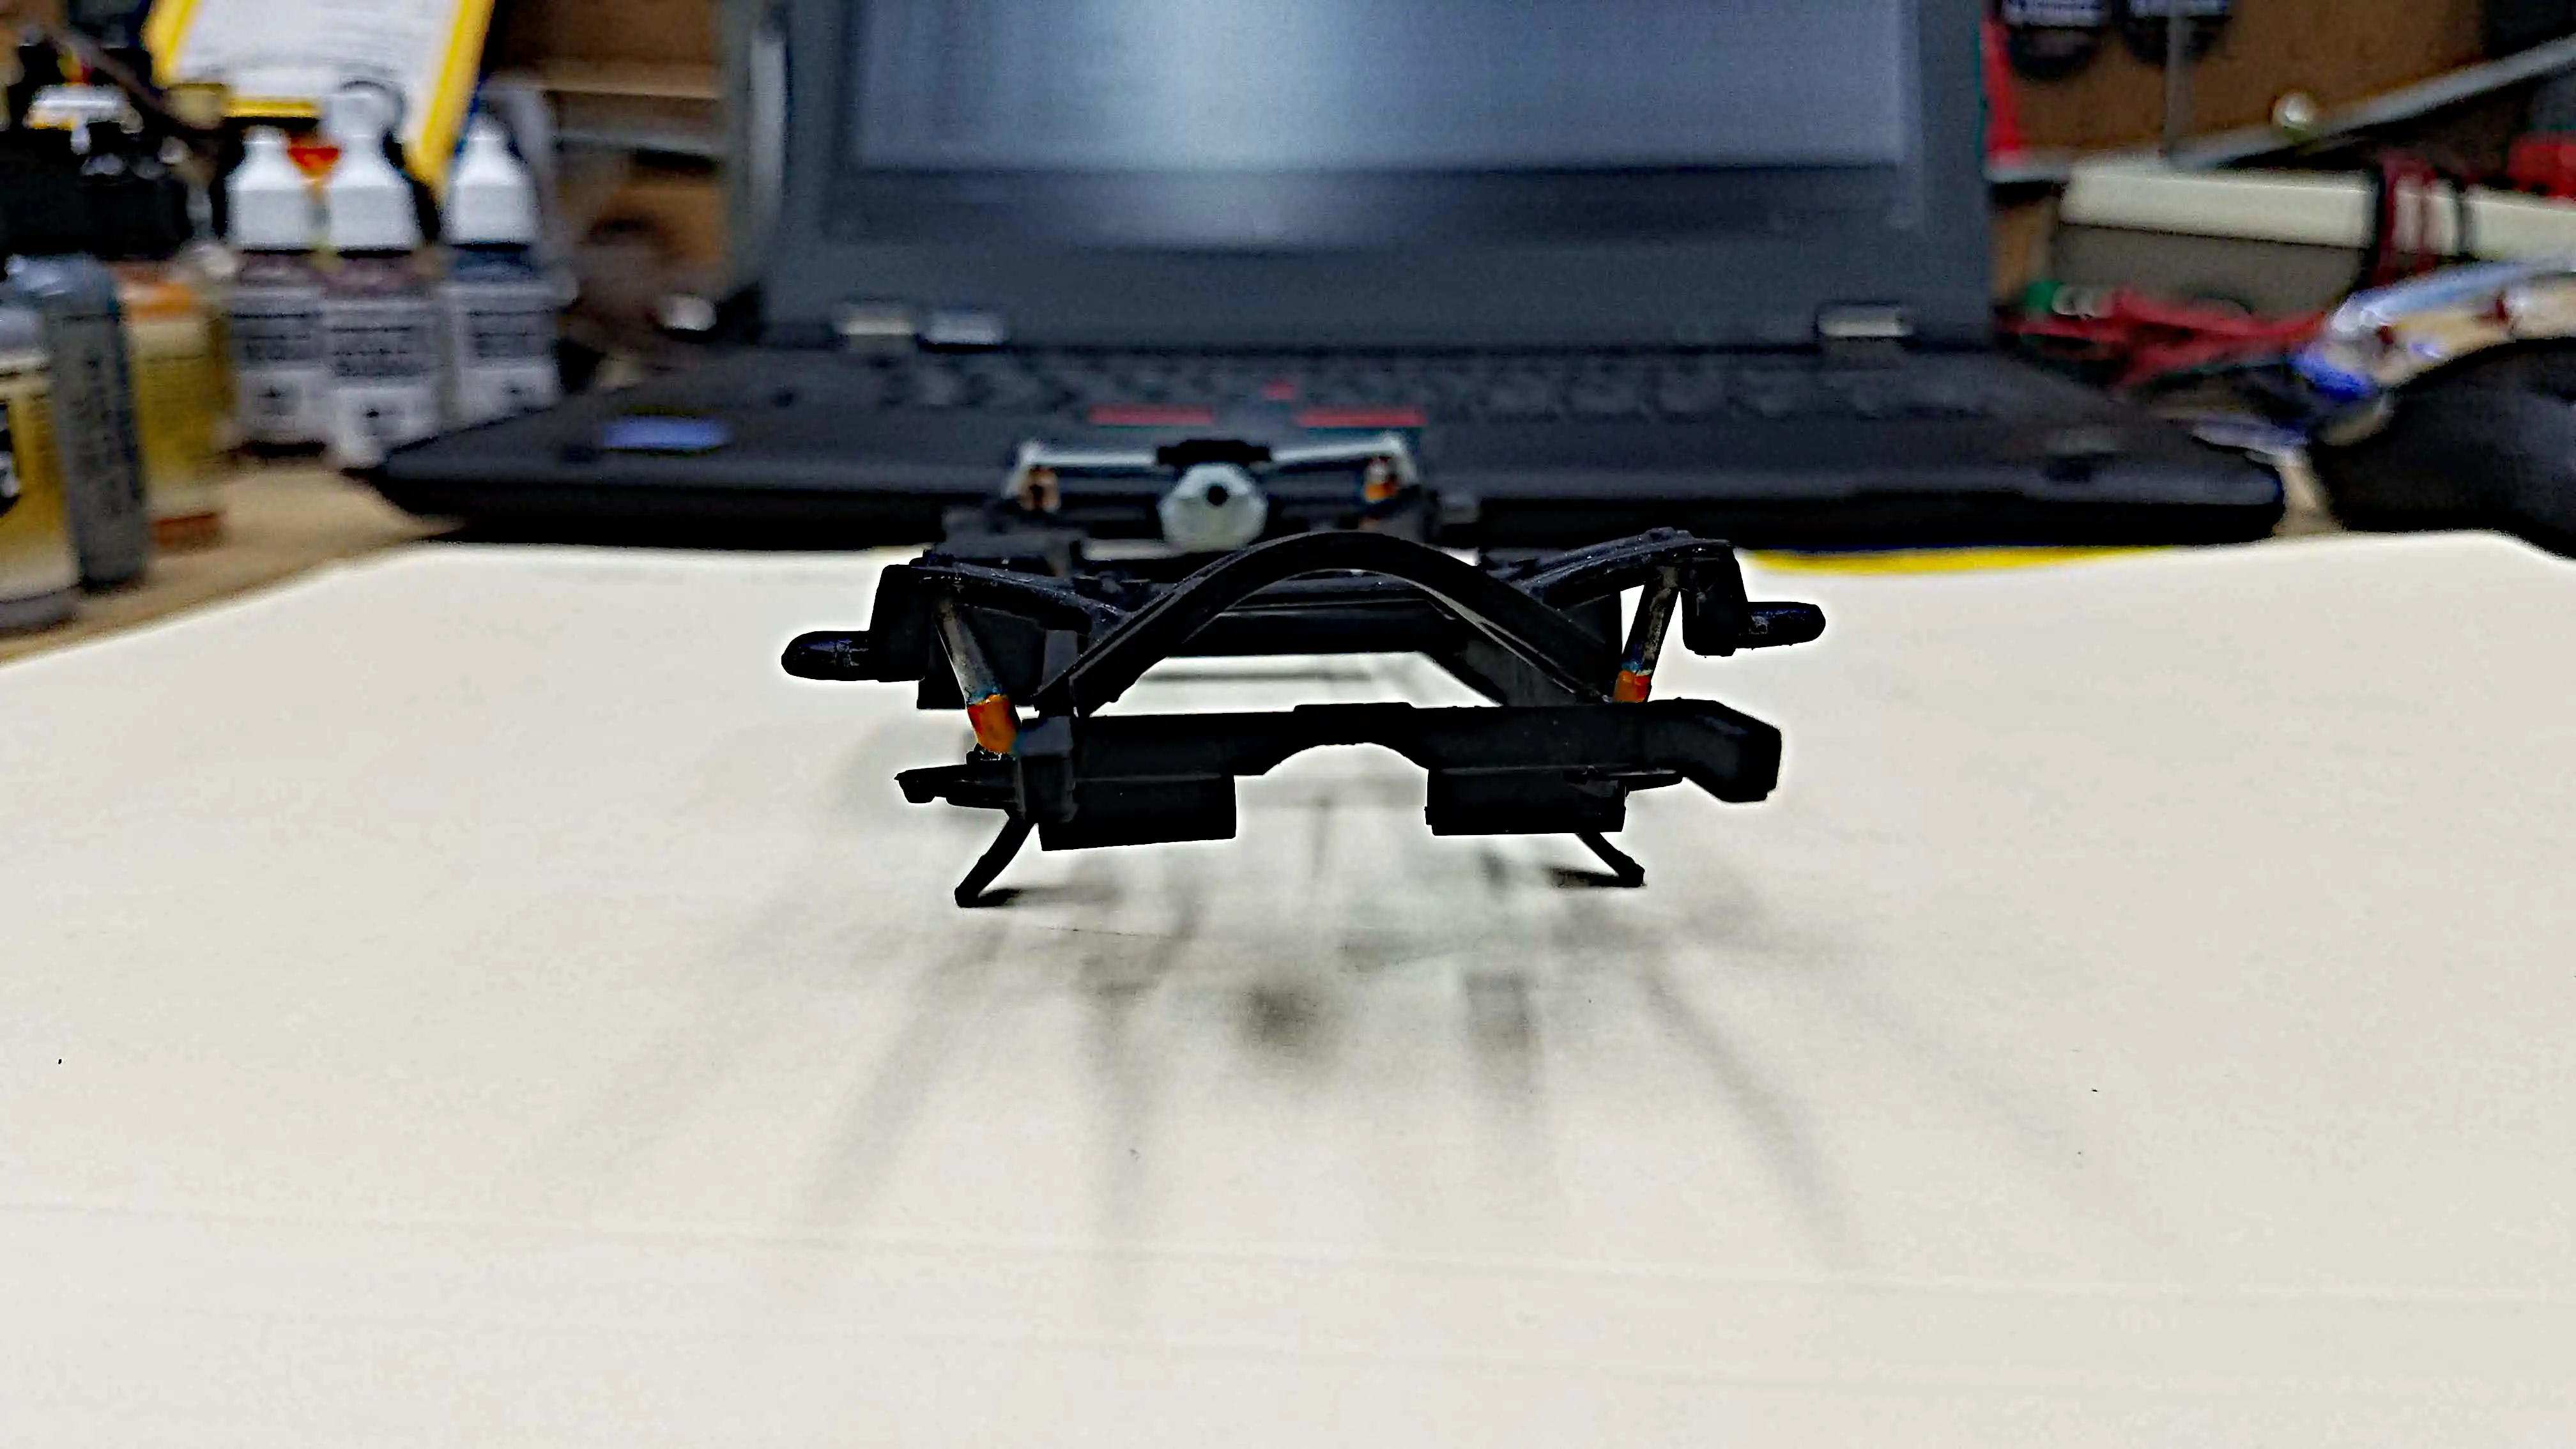
 Bottom view of the frame
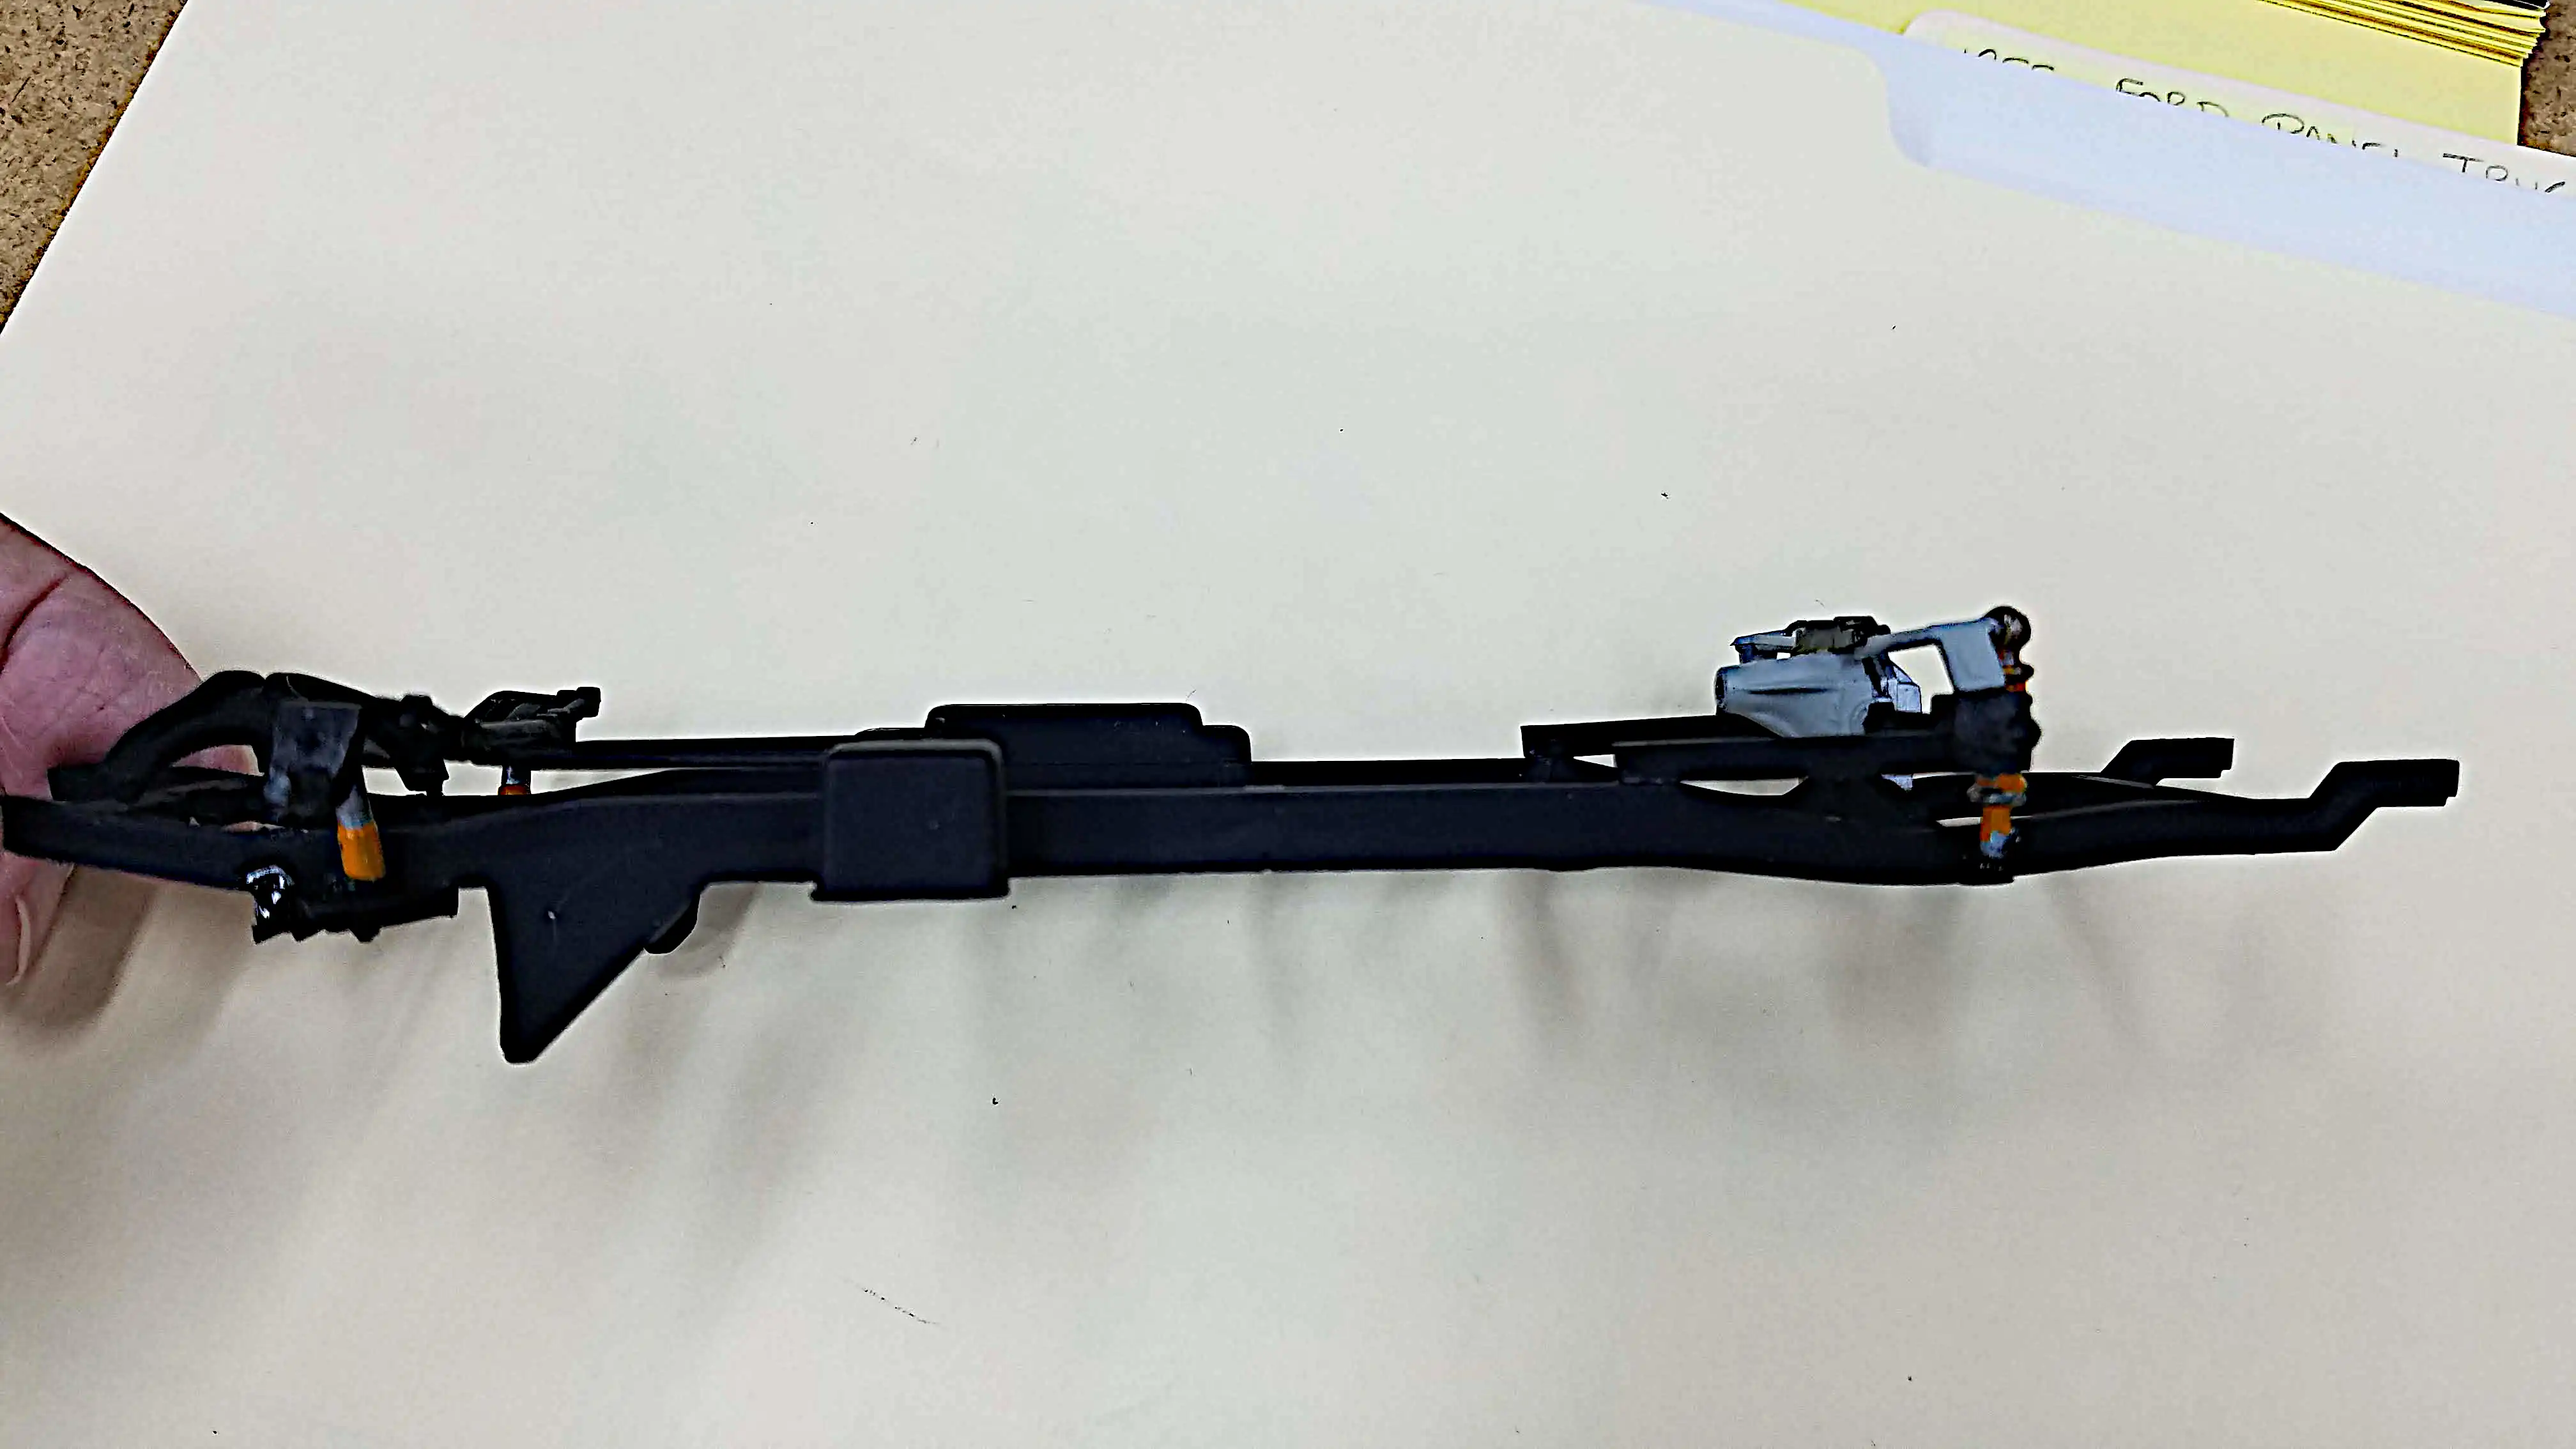 Side view of the frame
 Engine mounted on the frame
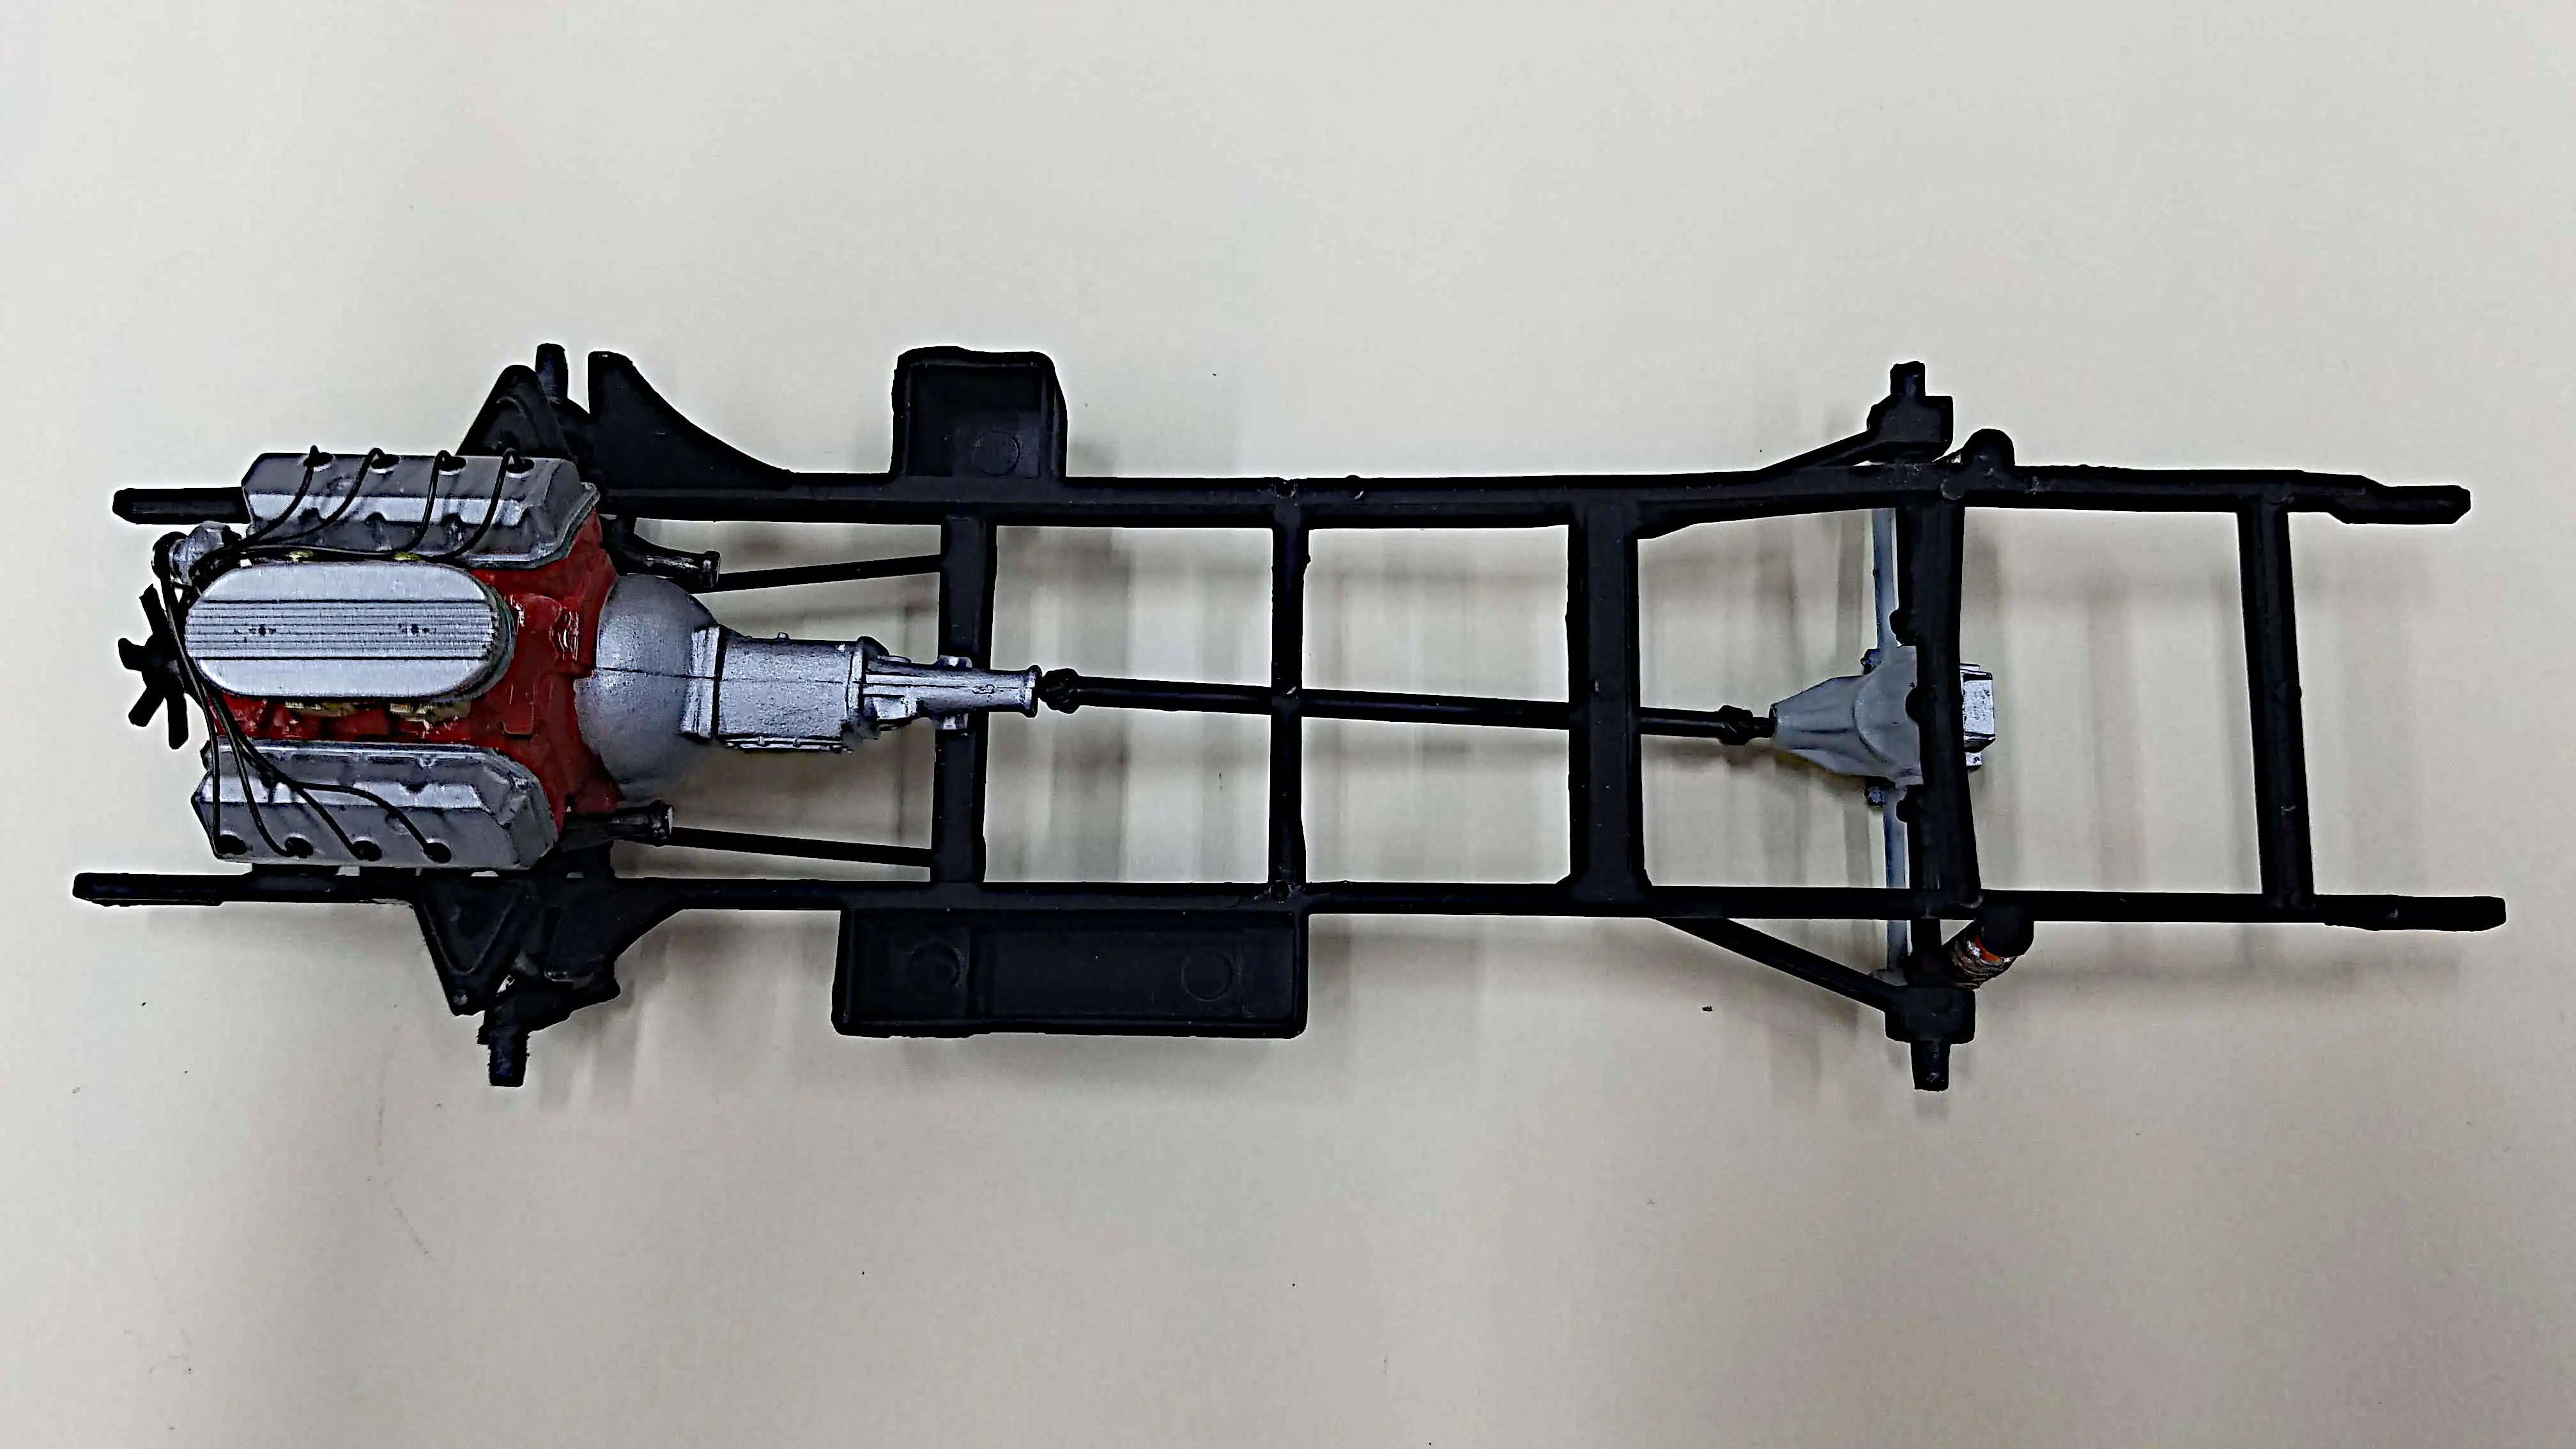
 Top view of the frame with the engine mounted
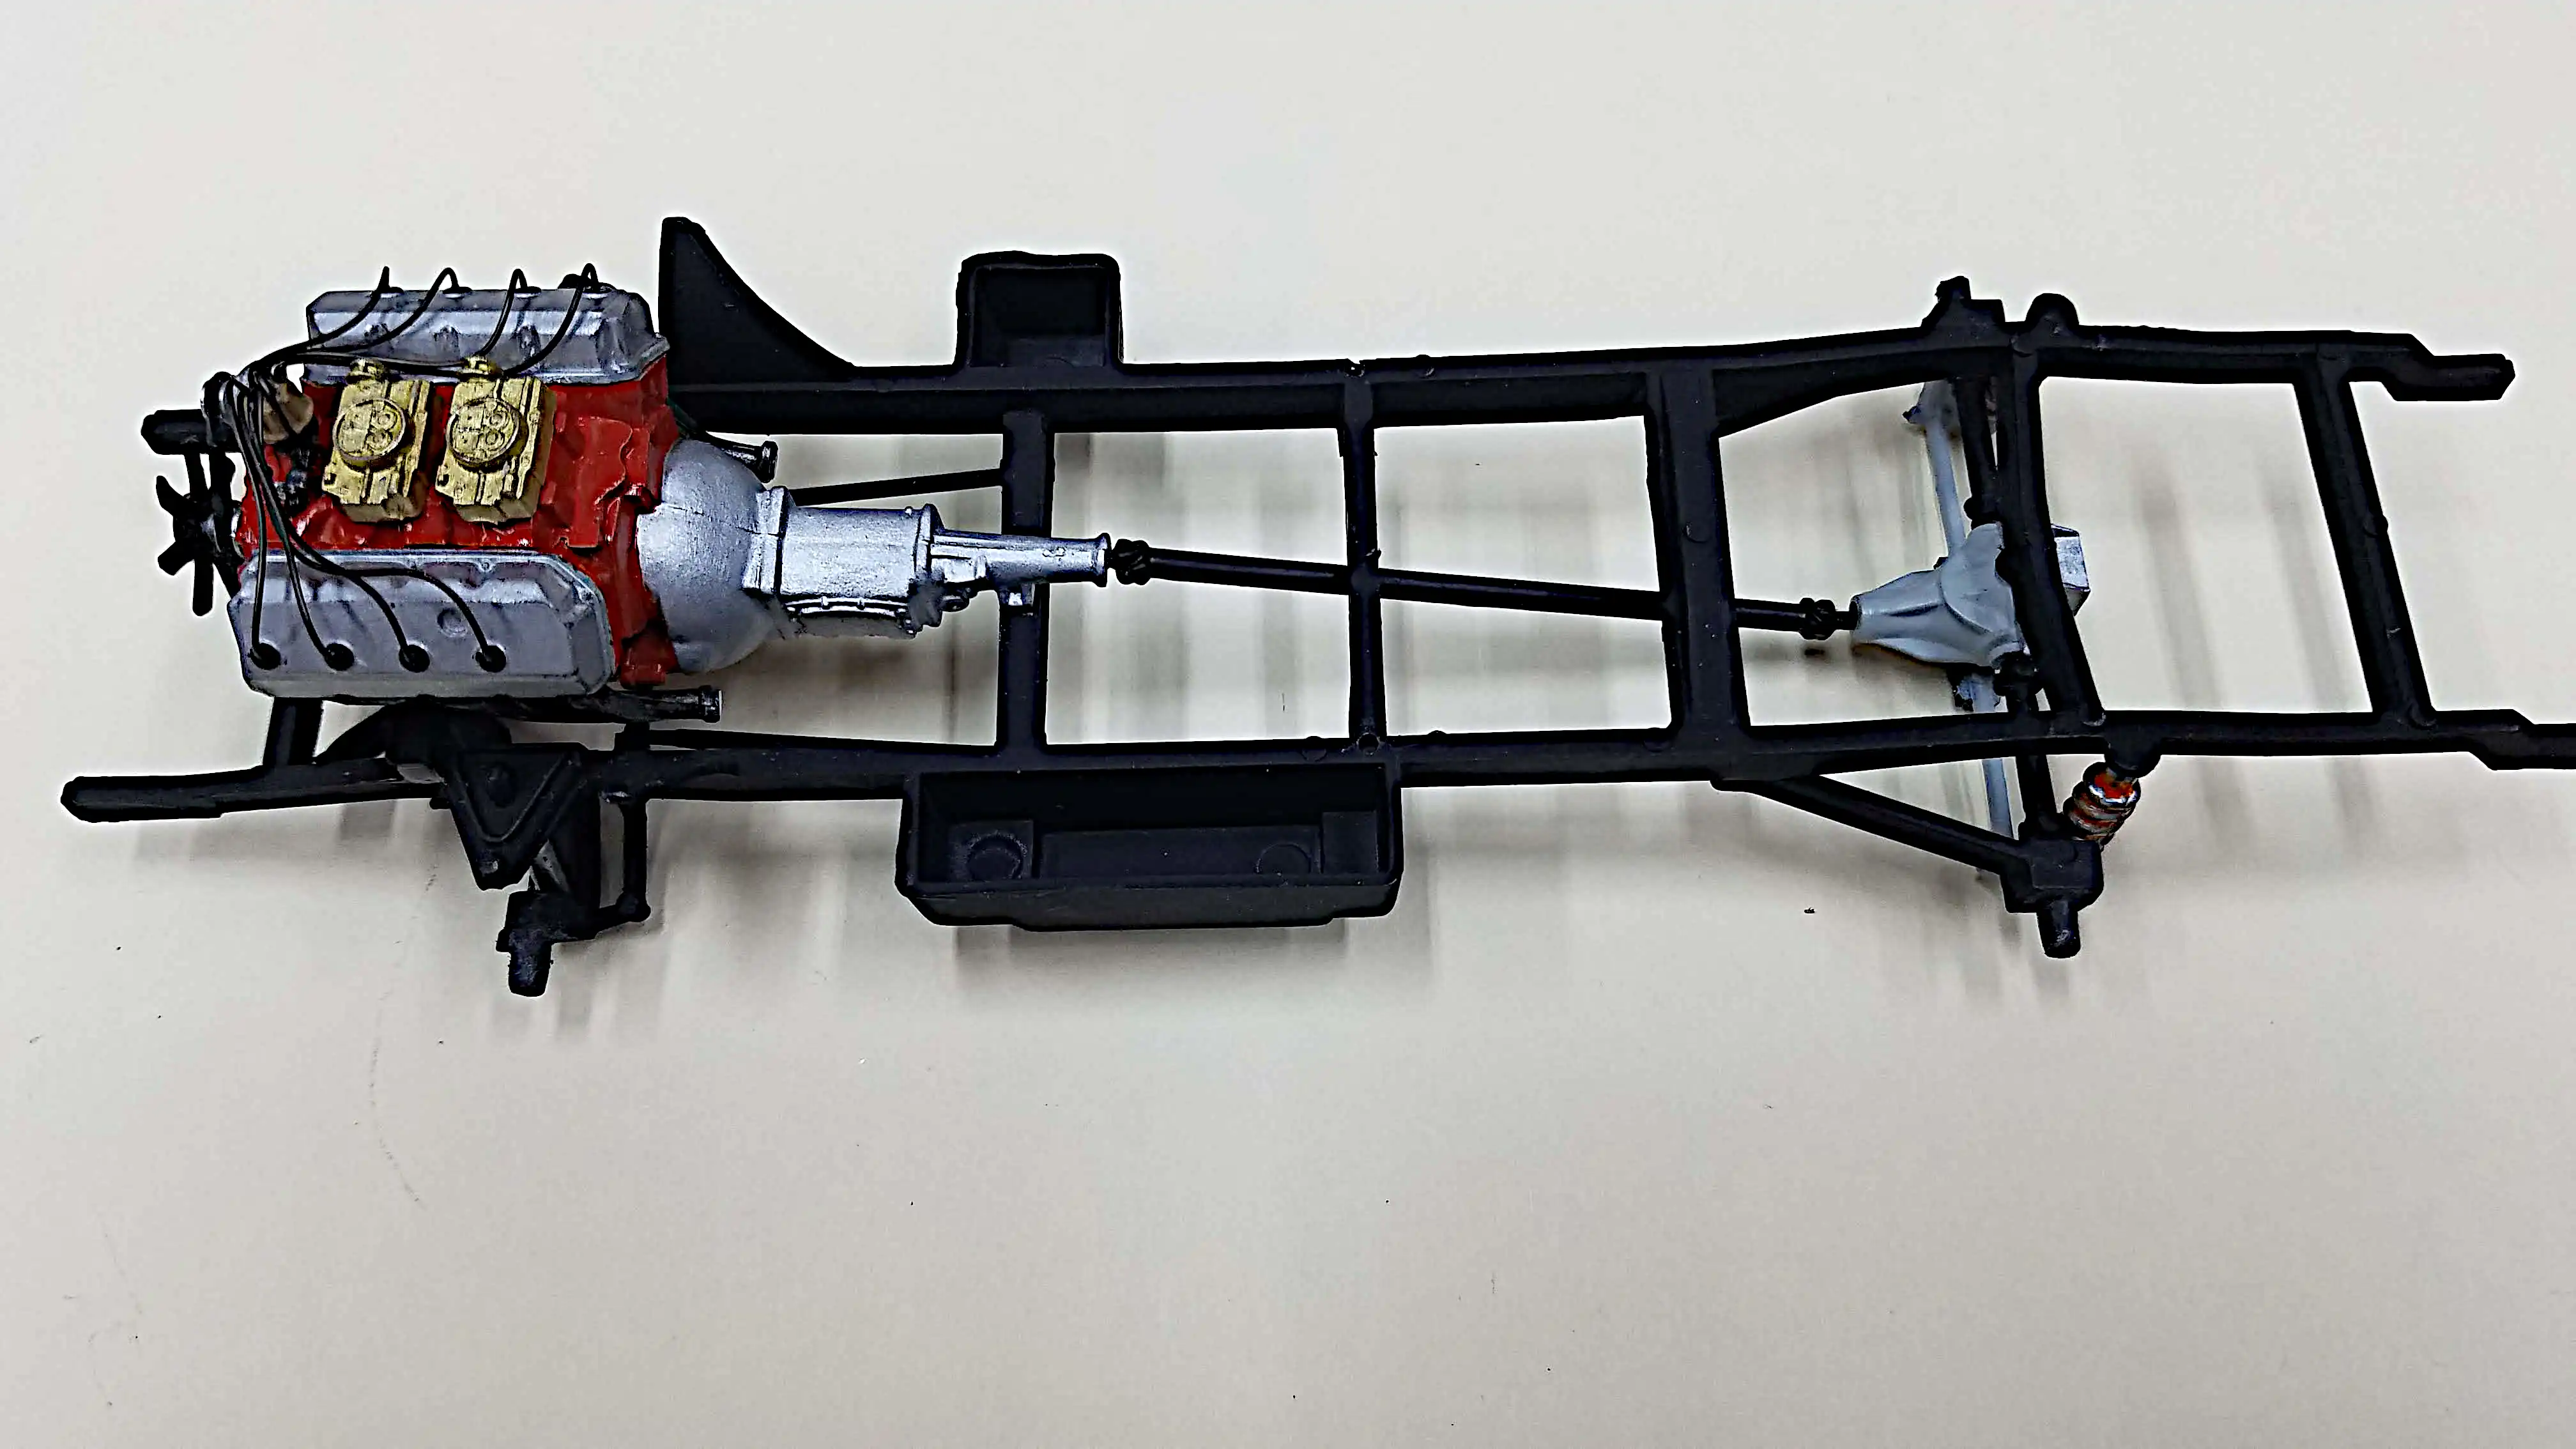 The drive shaft has been installed
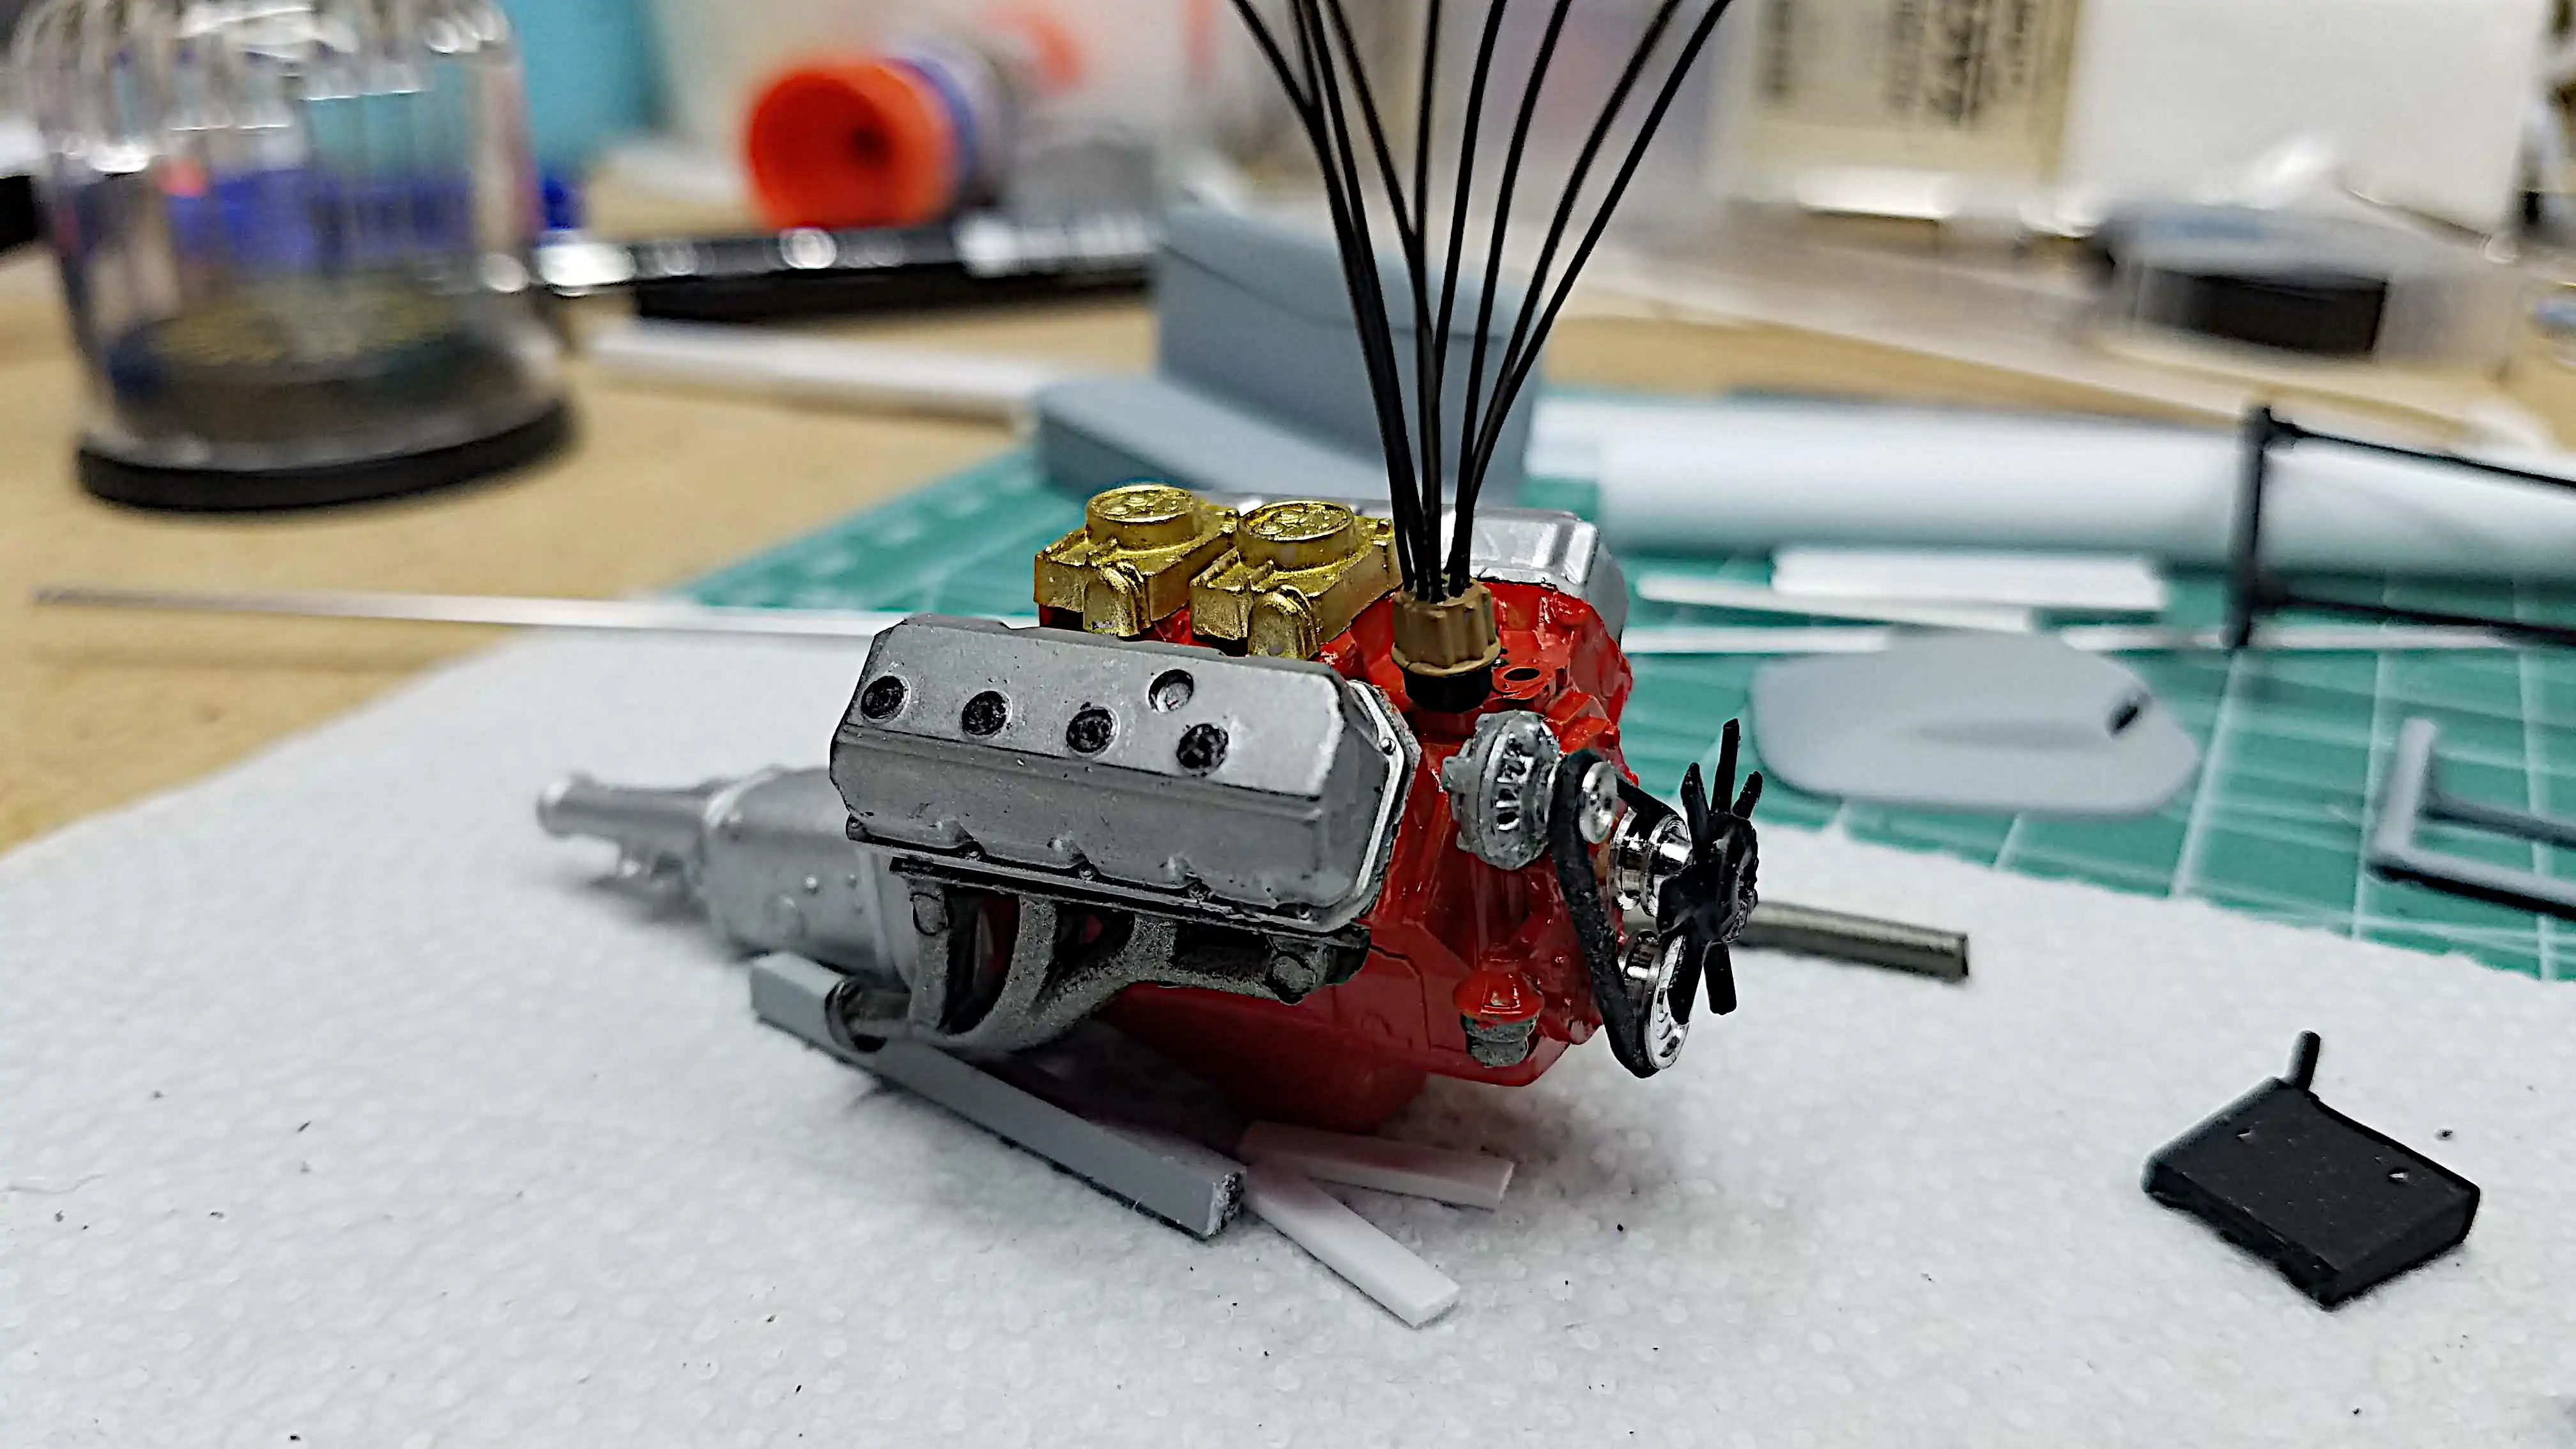
 The air cleaner is installed on the engine
 Top view of the frame
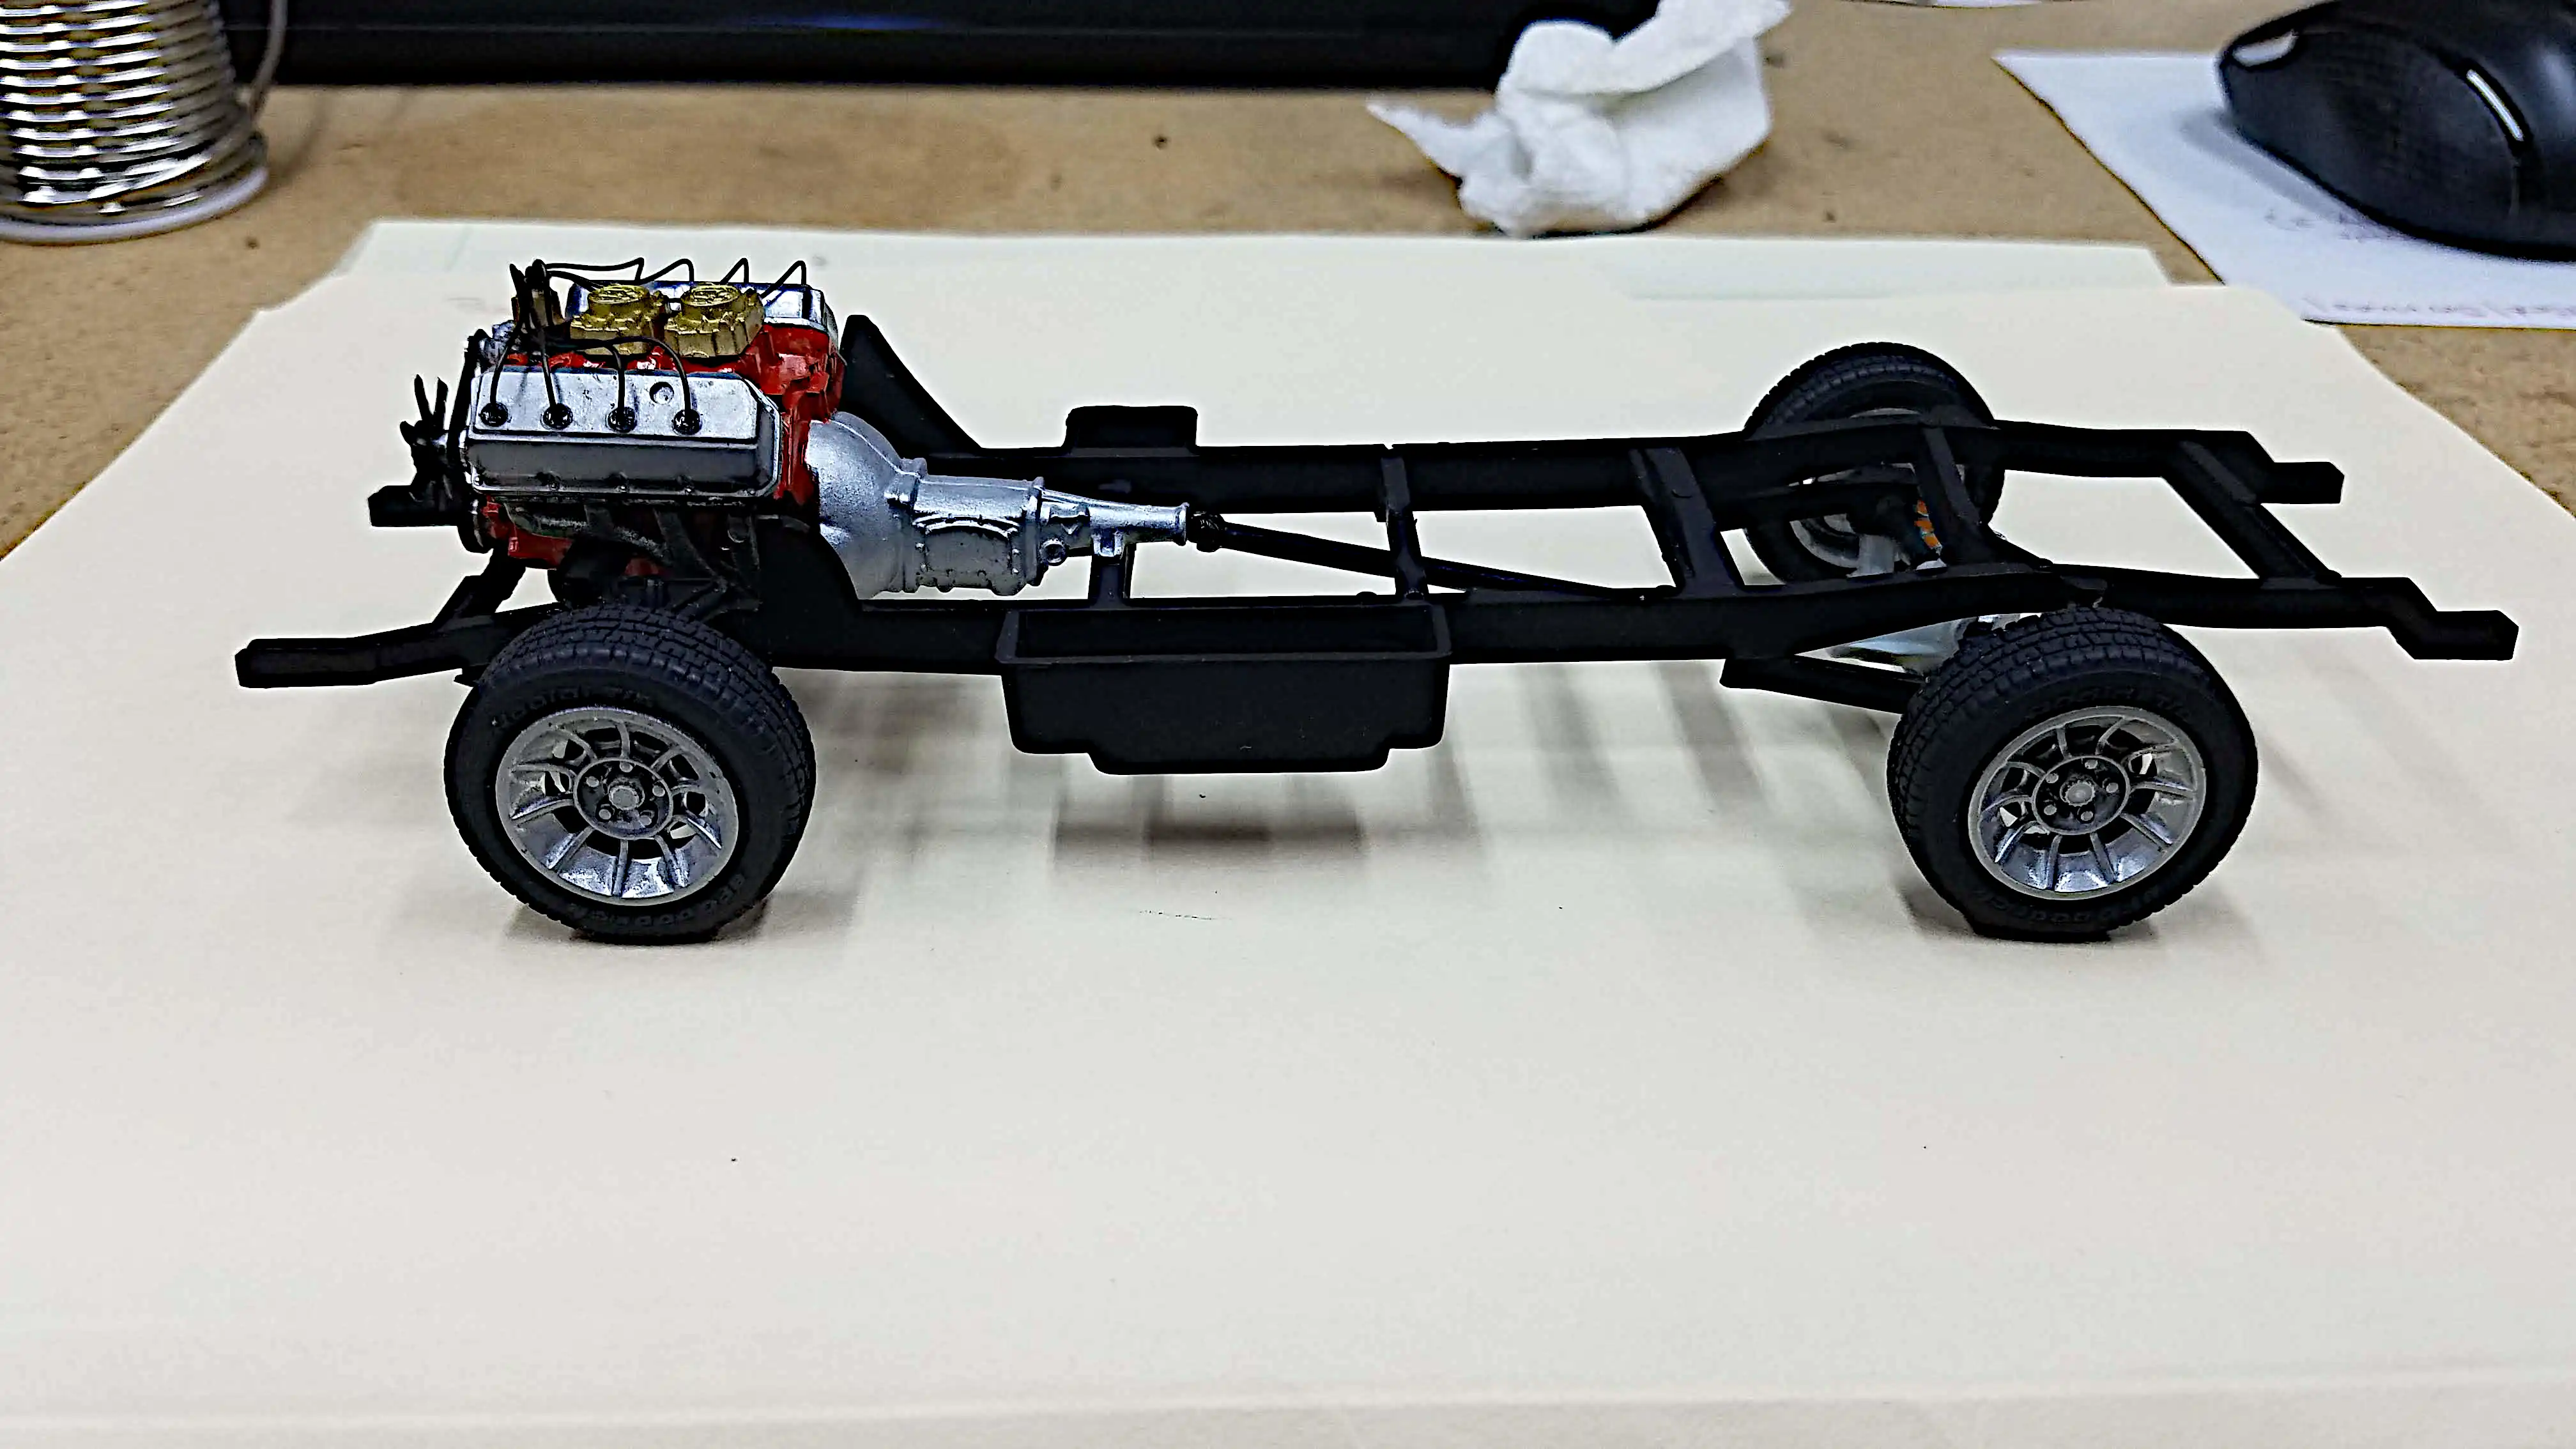 Side view of the wheels and tires are installed on the frame
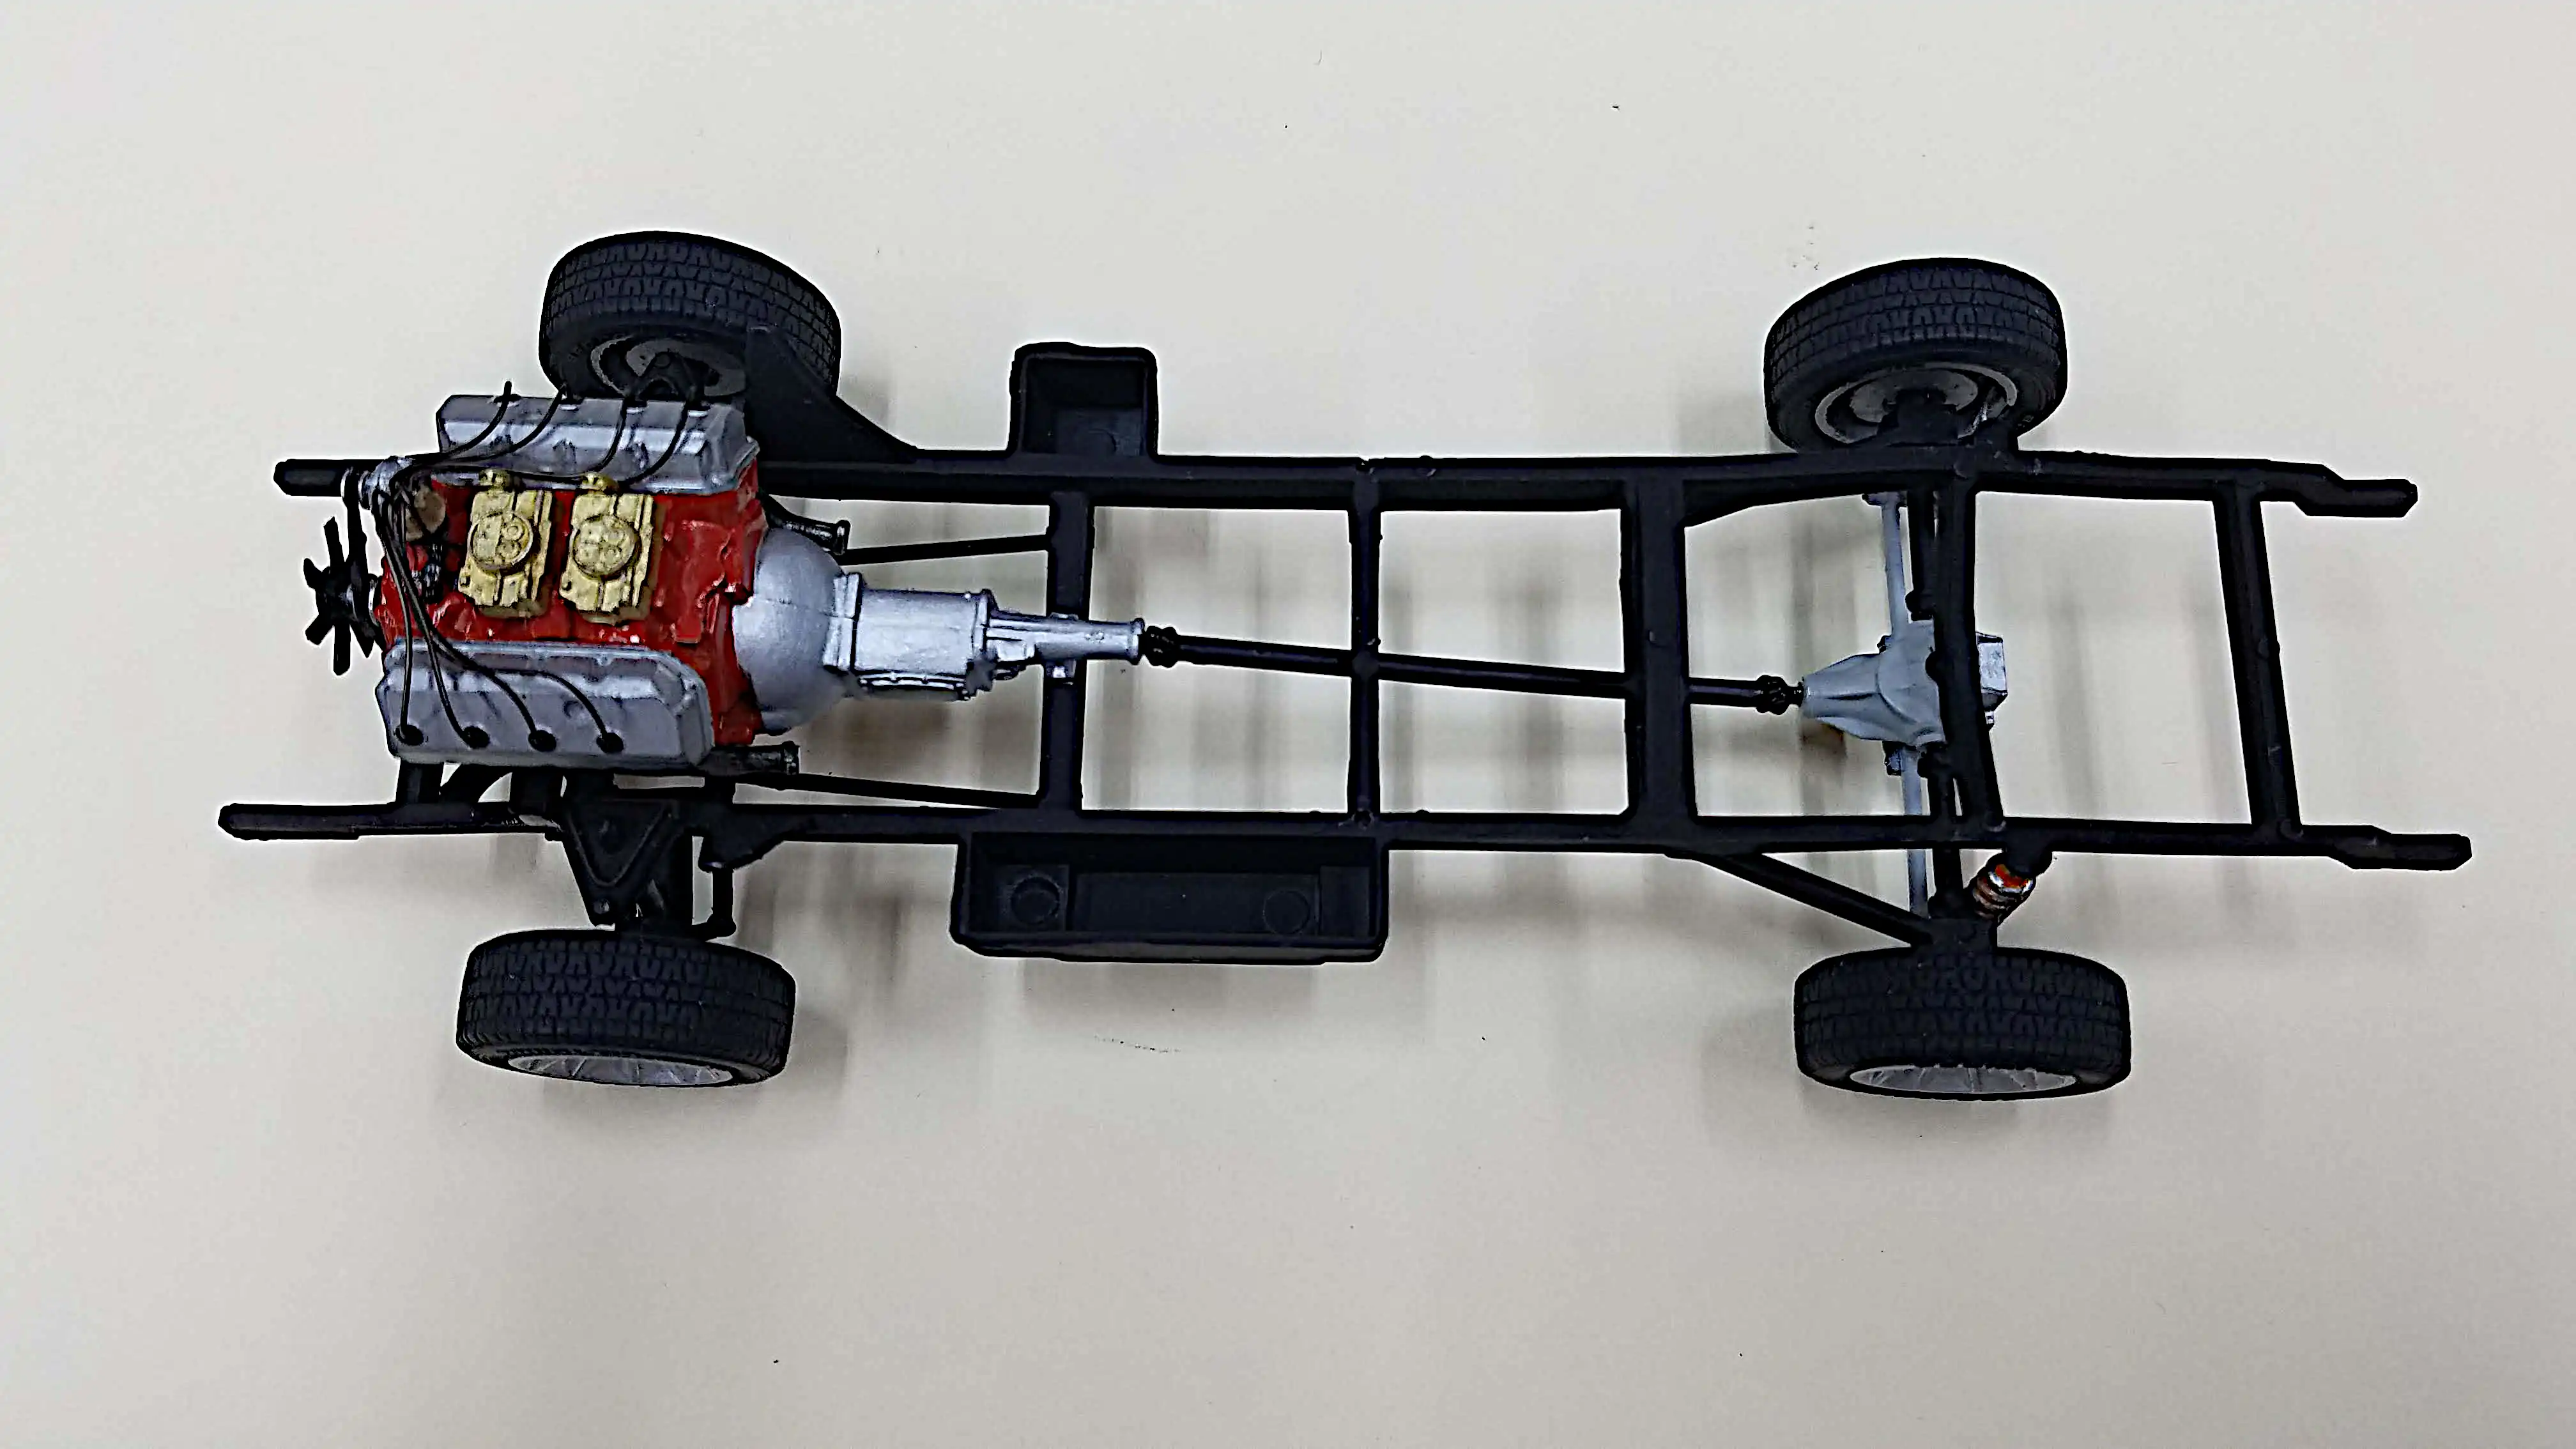 Top view of the chassis with the wheels and tires installed
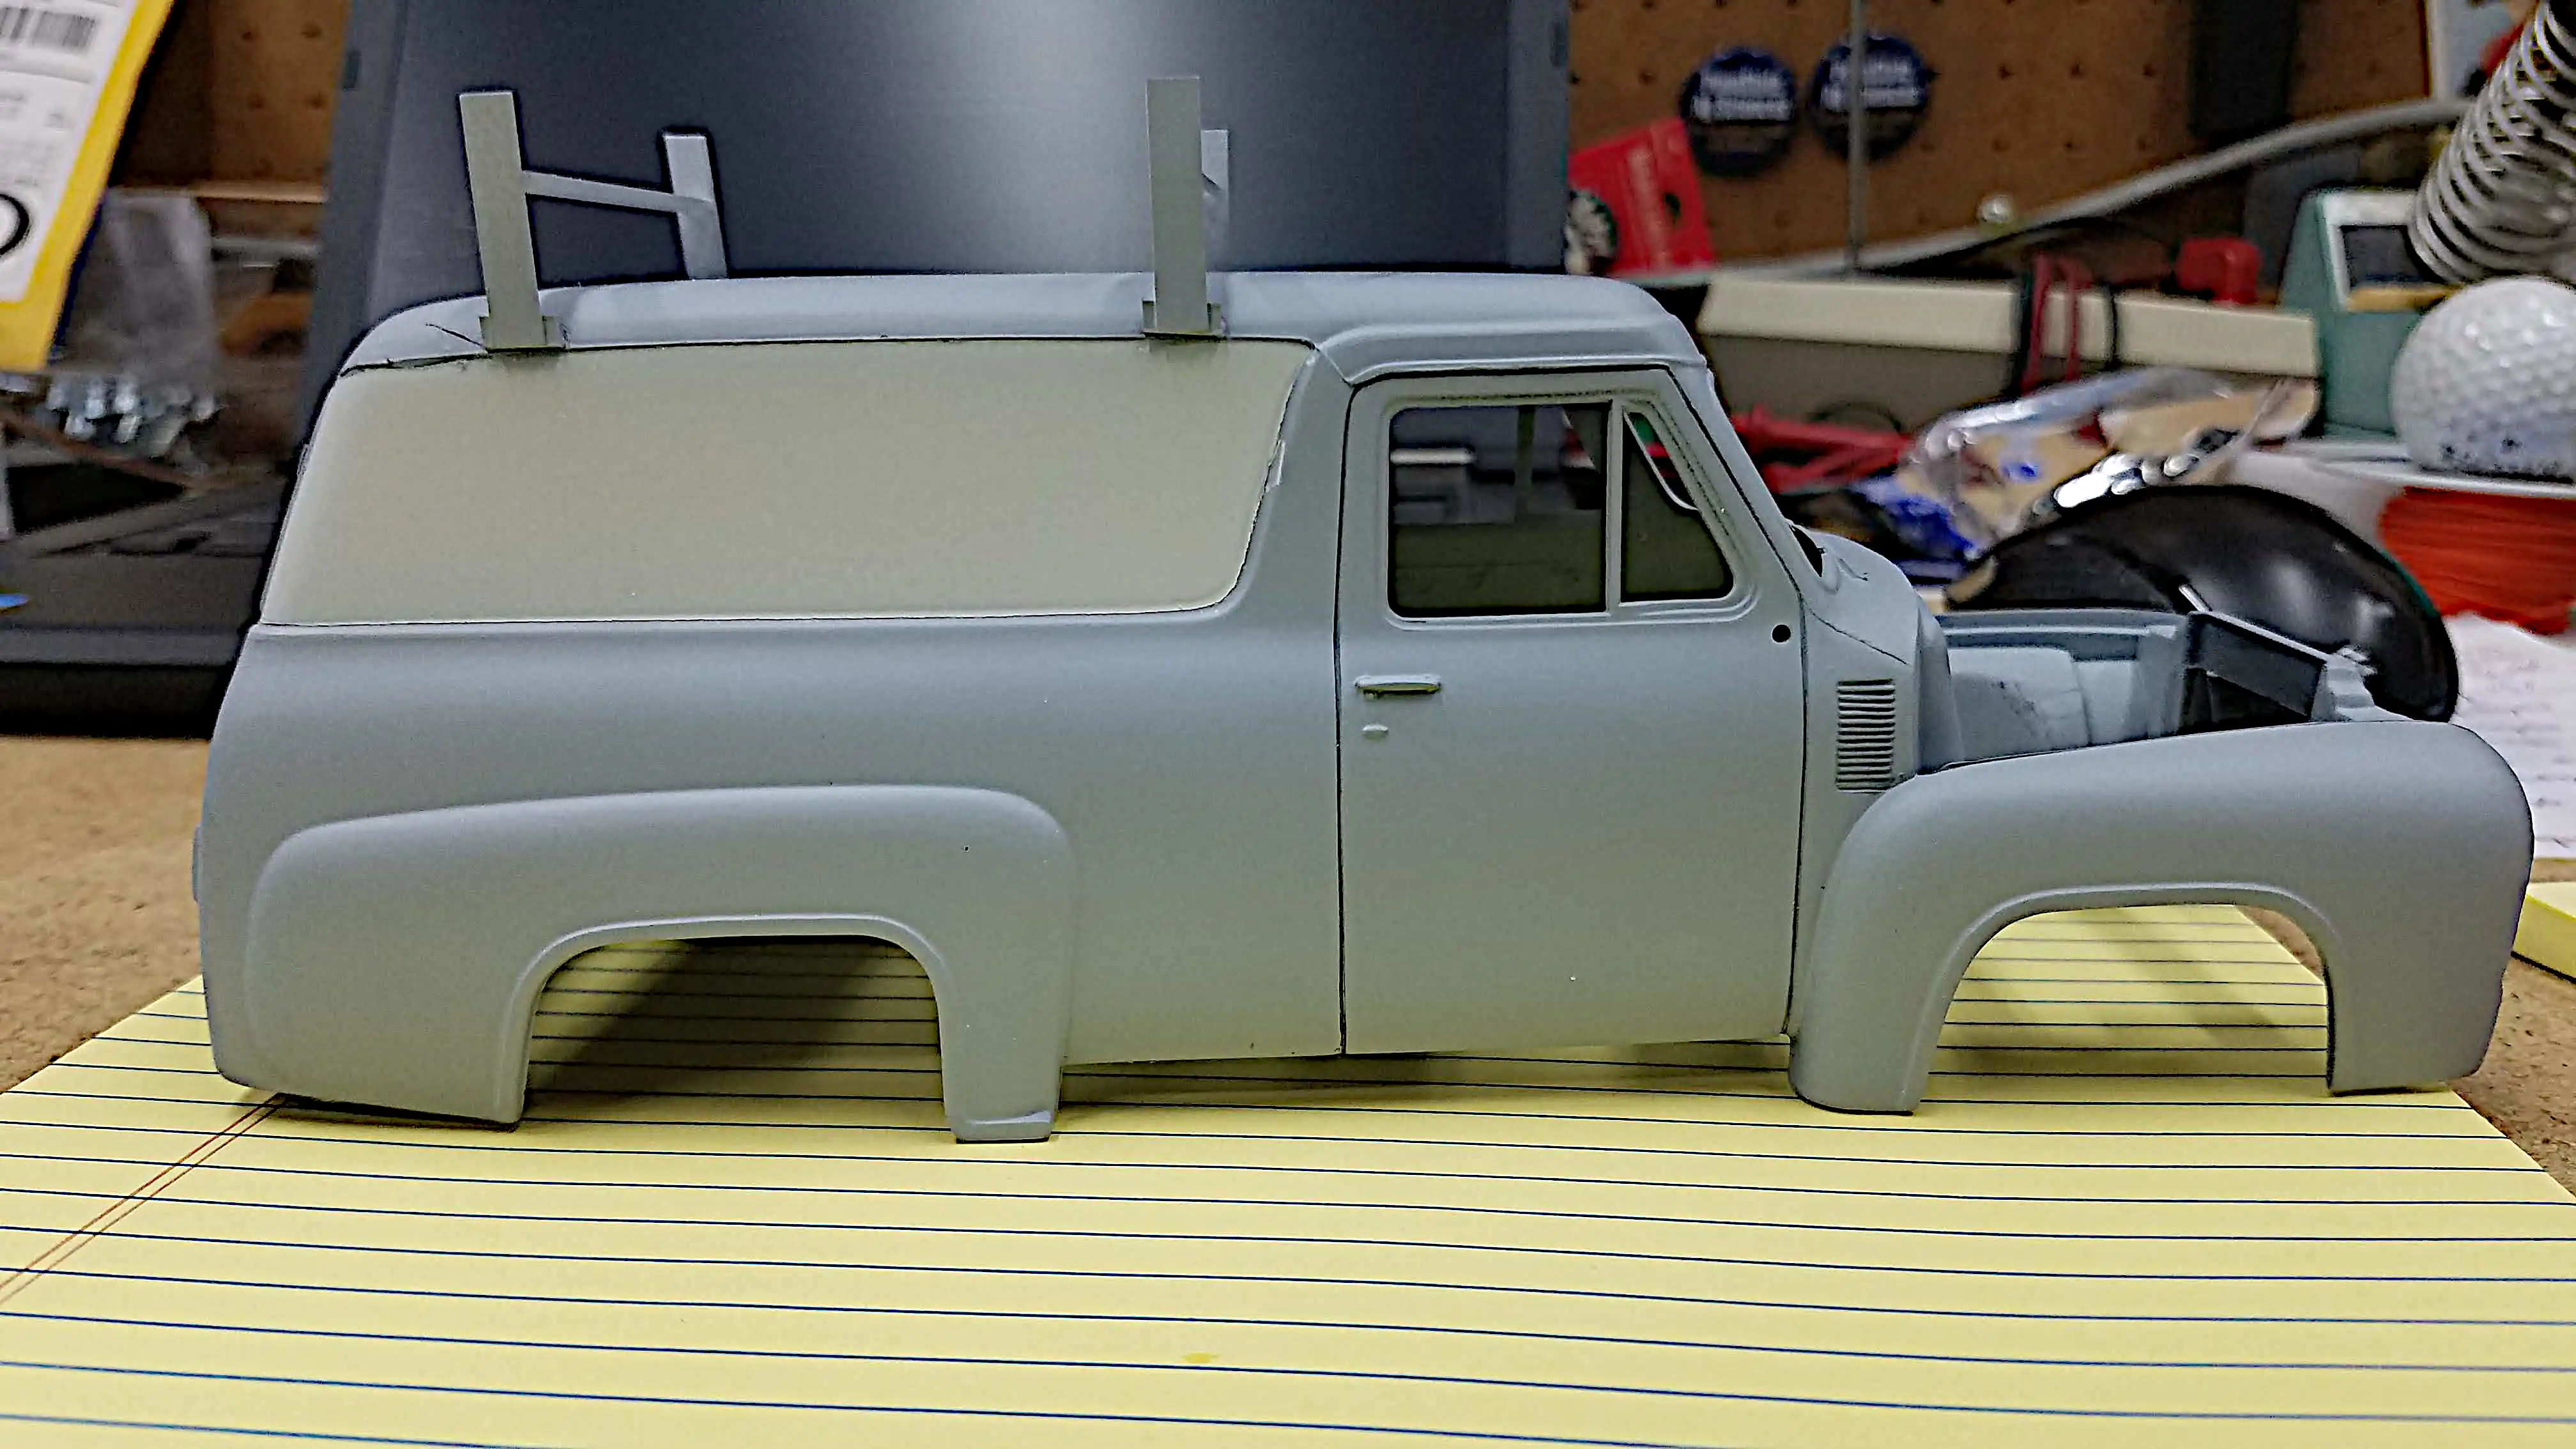
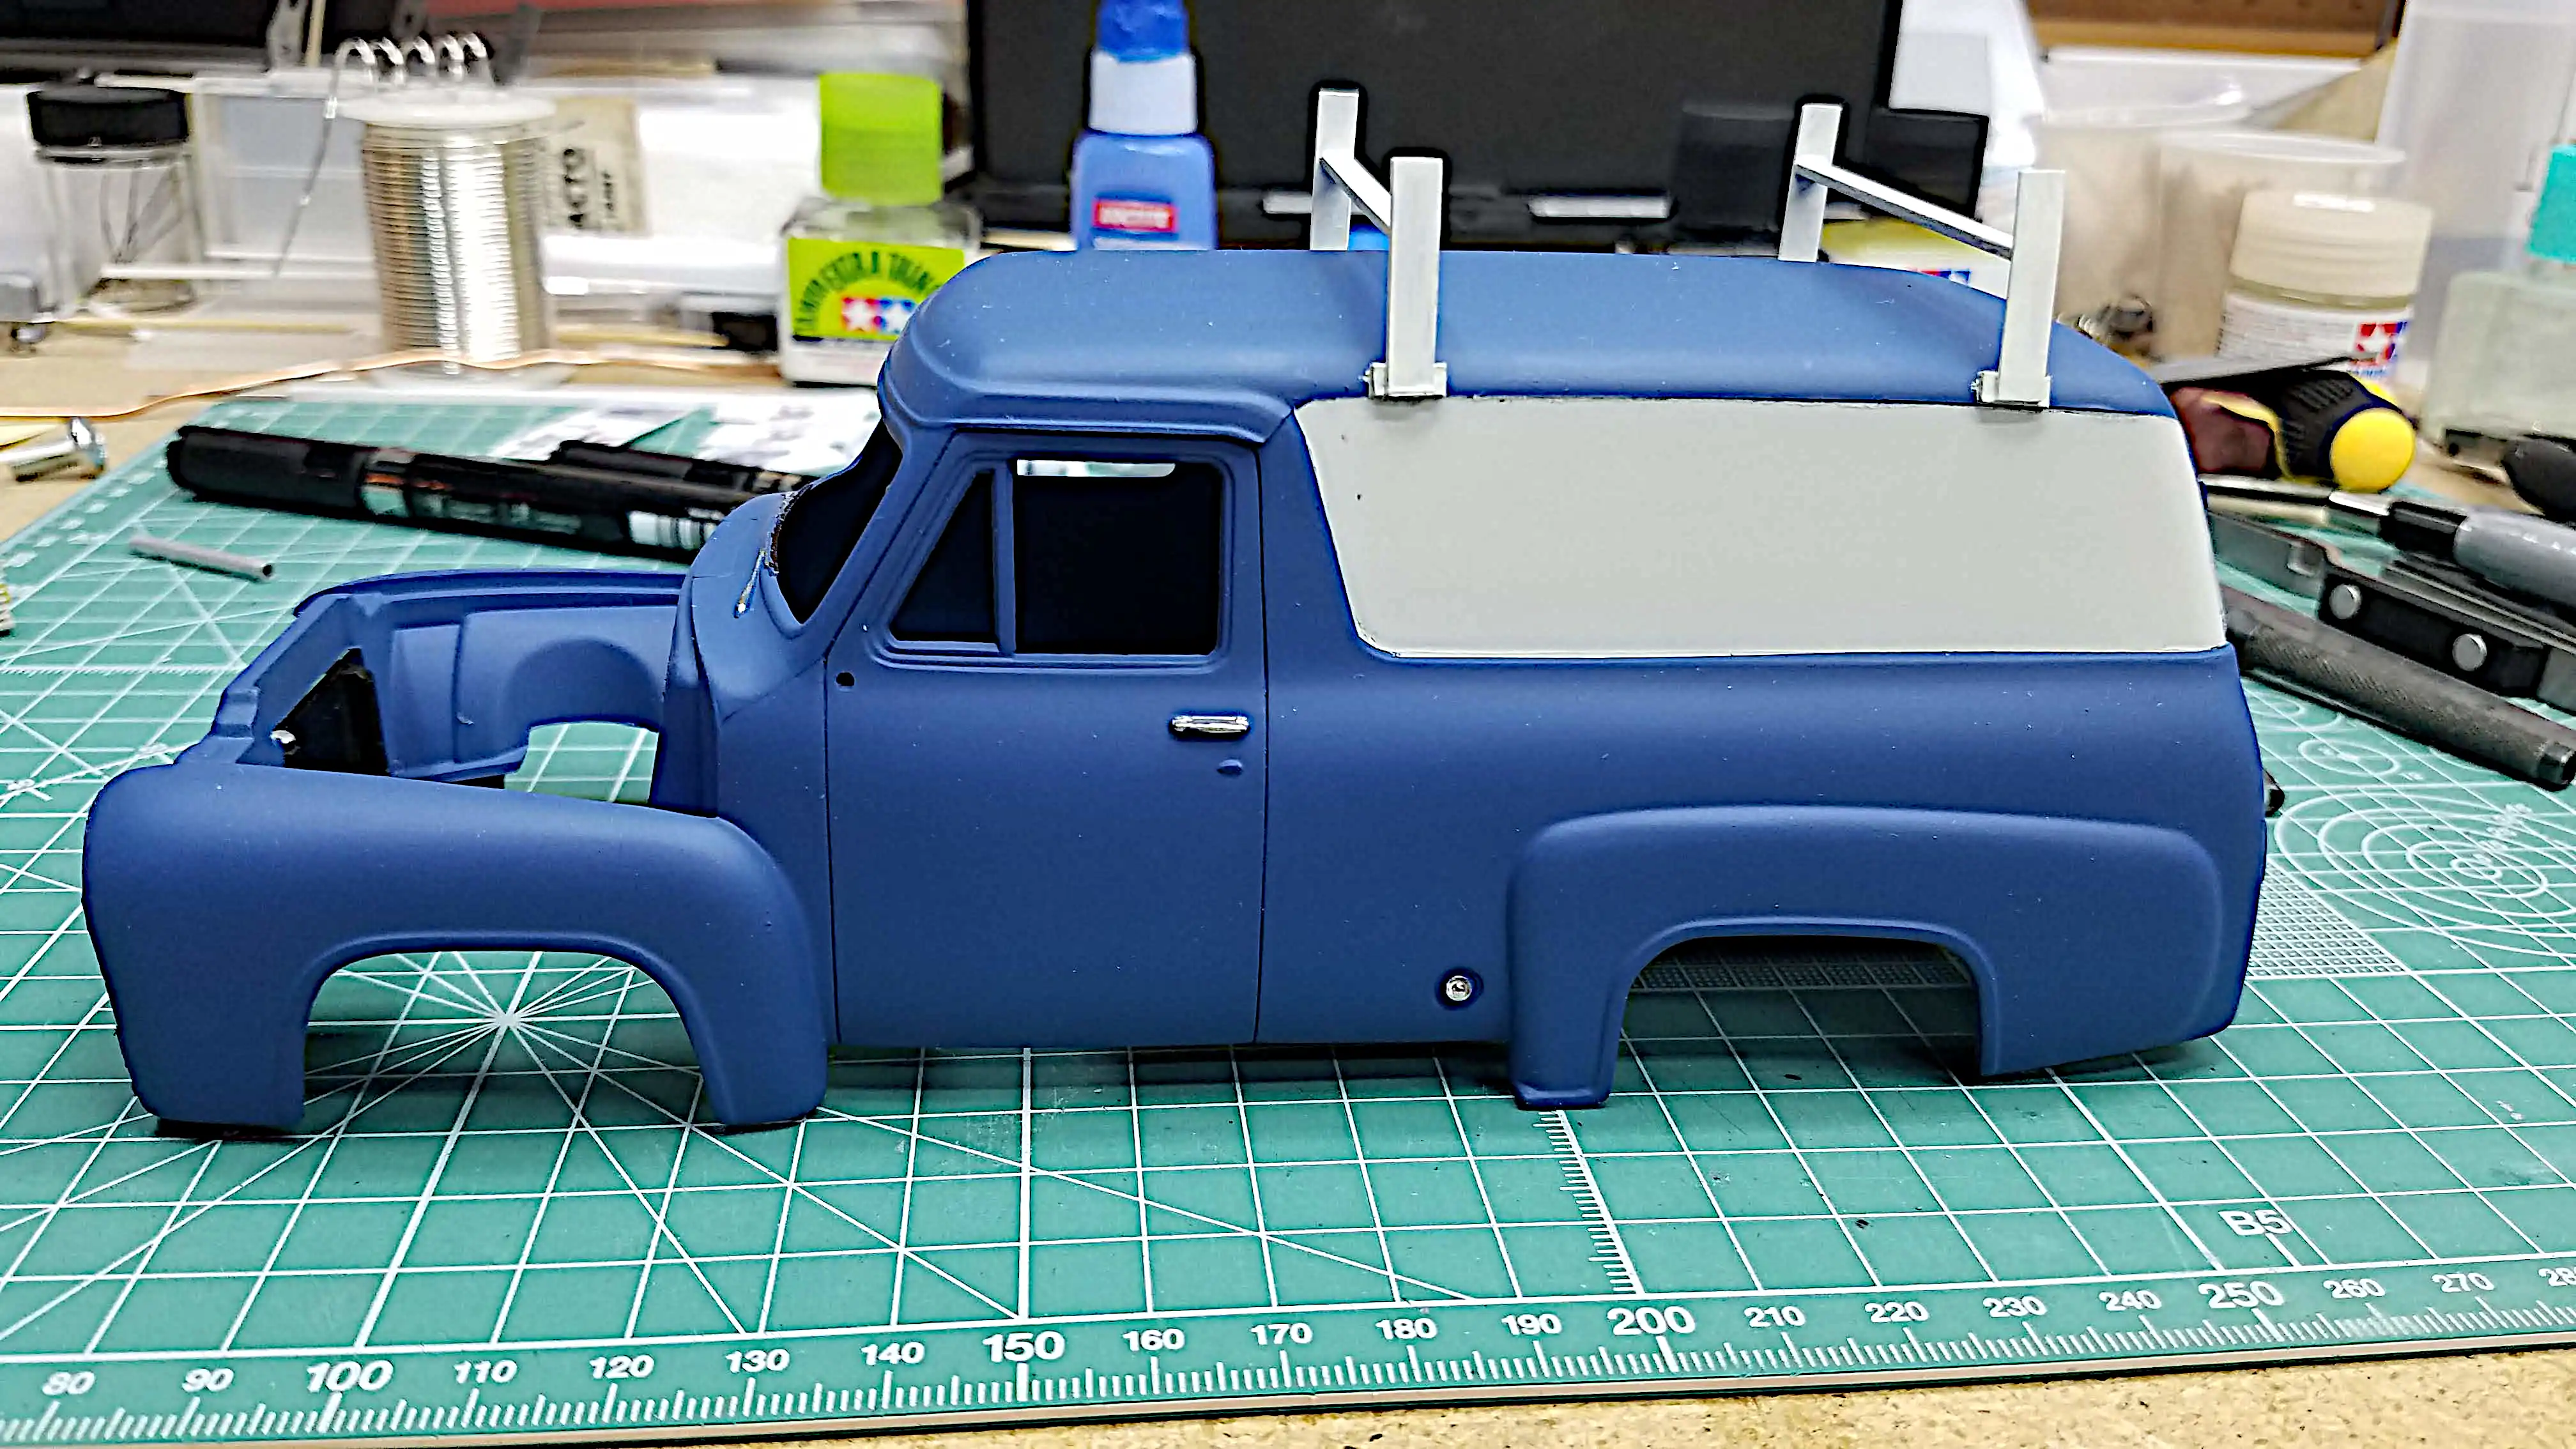
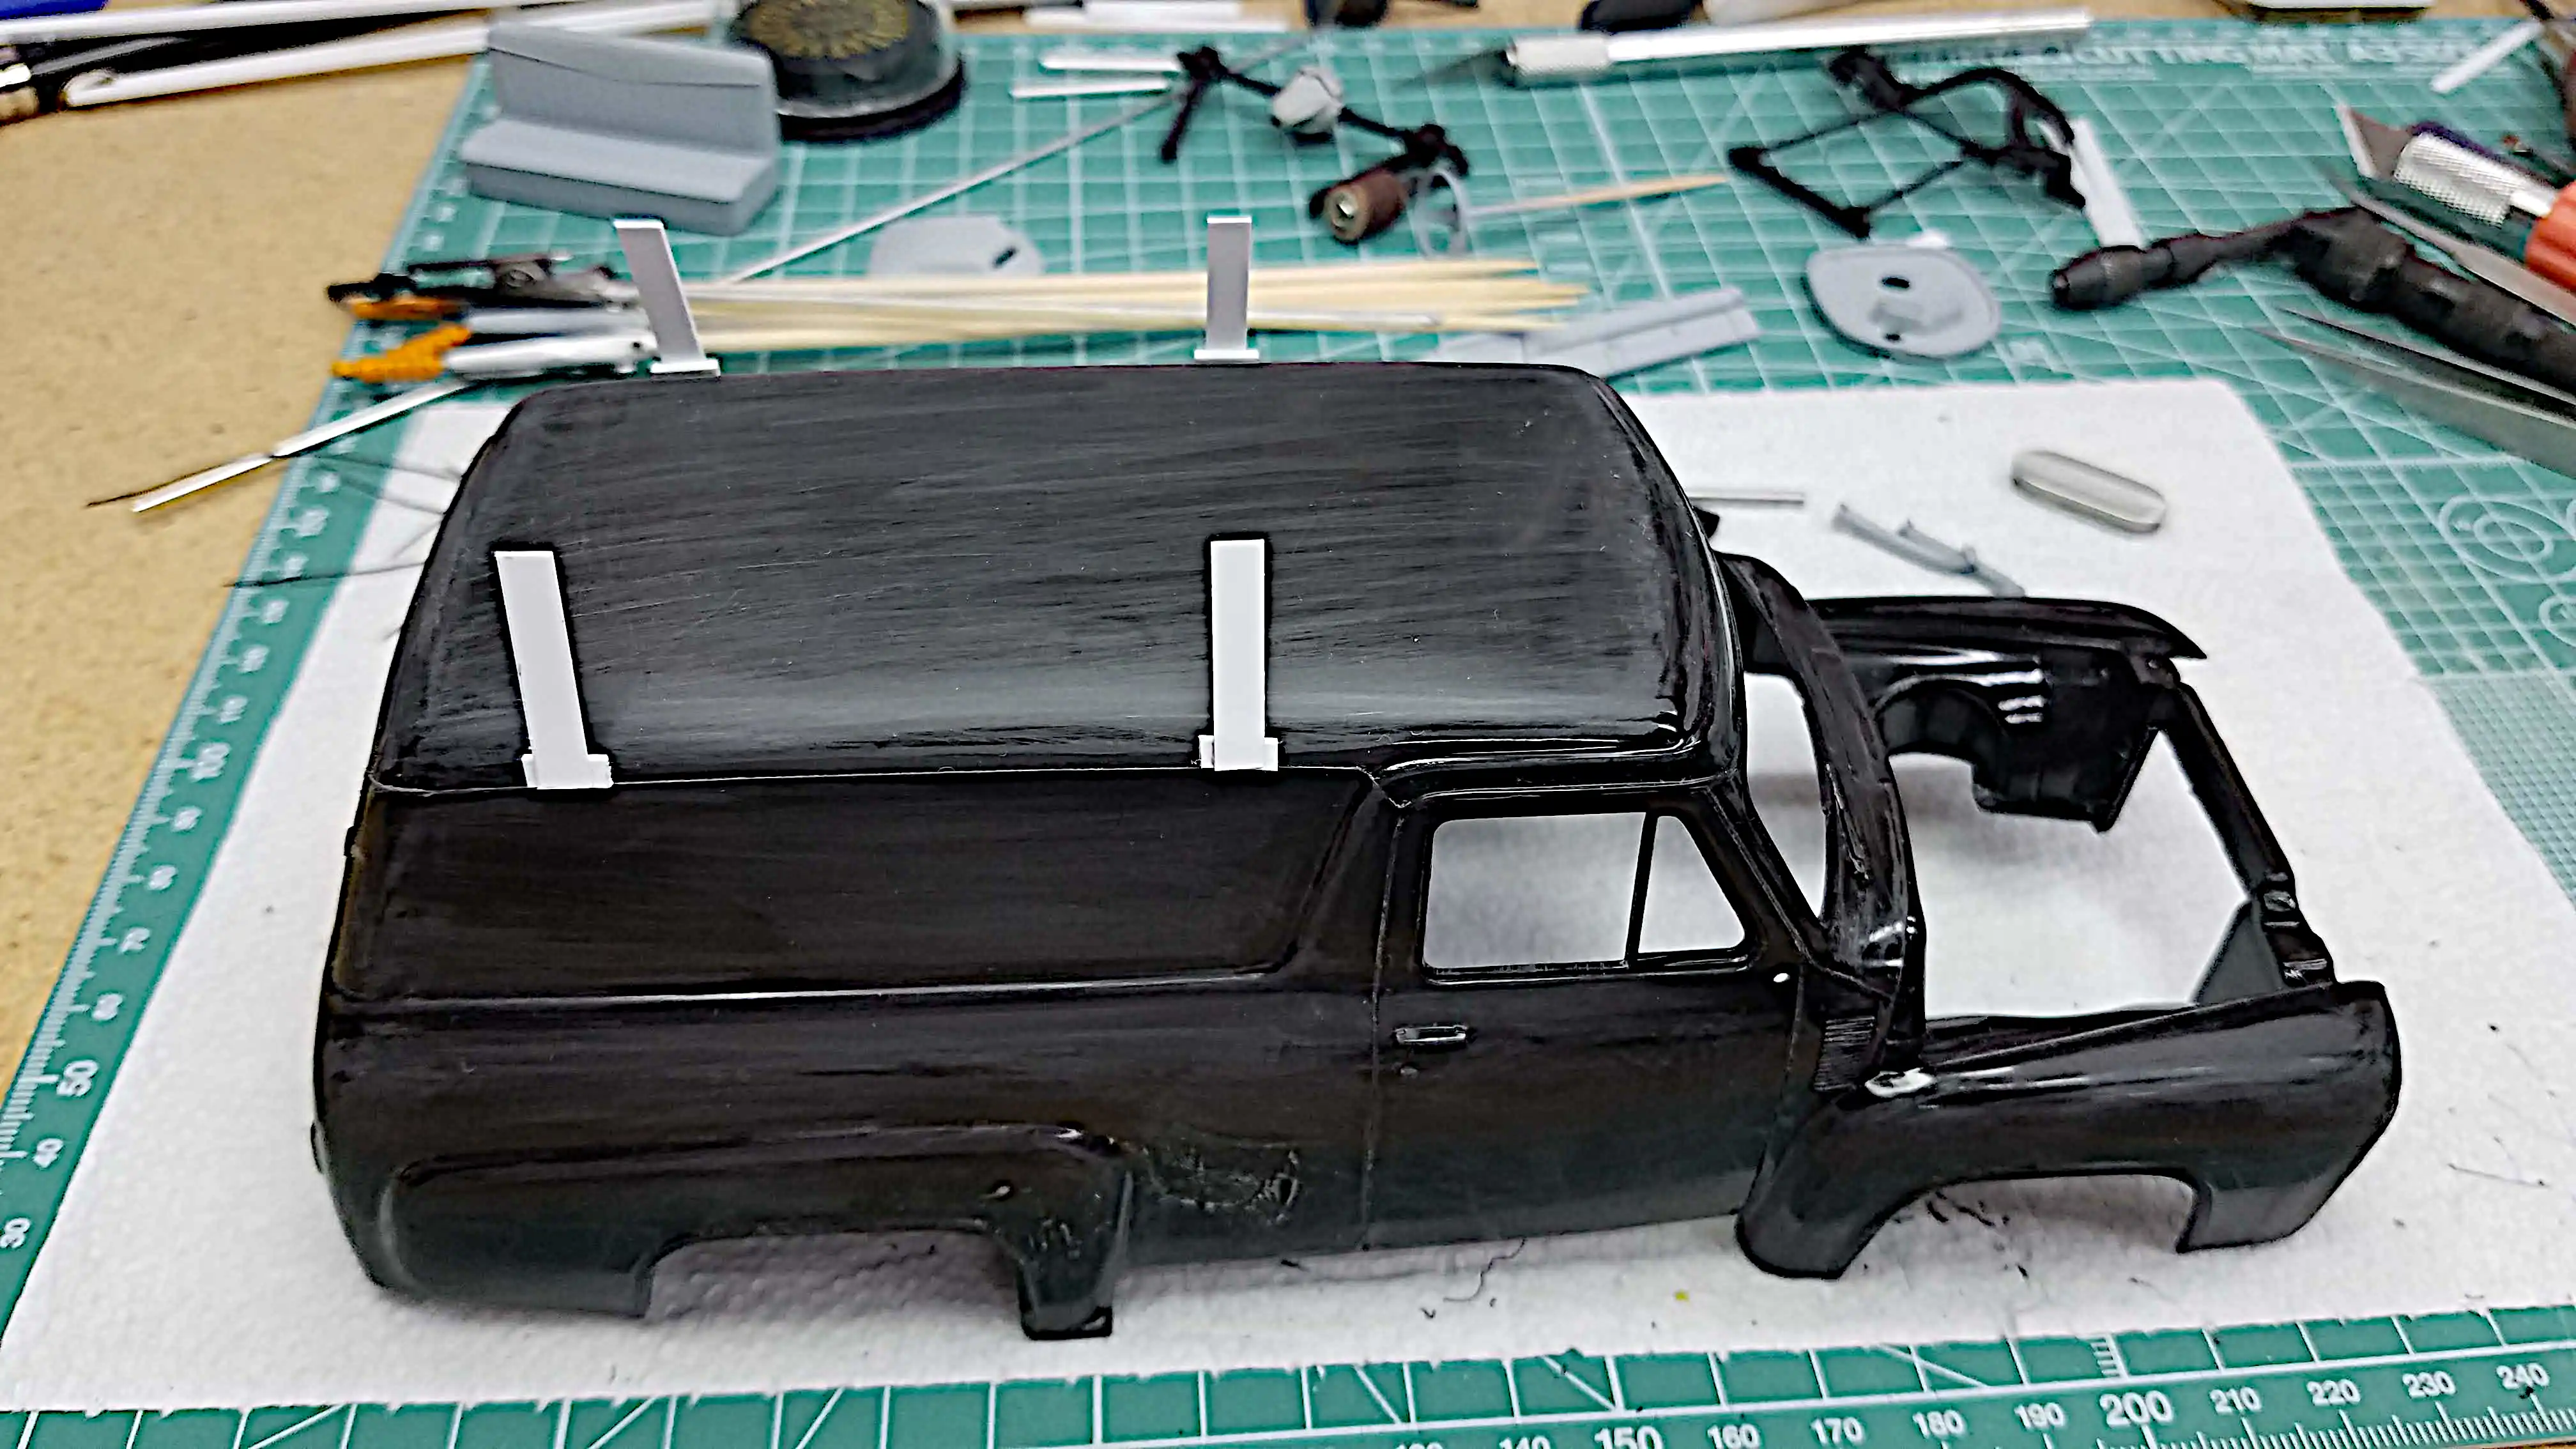 Body sanded and roof rack uprights are installed
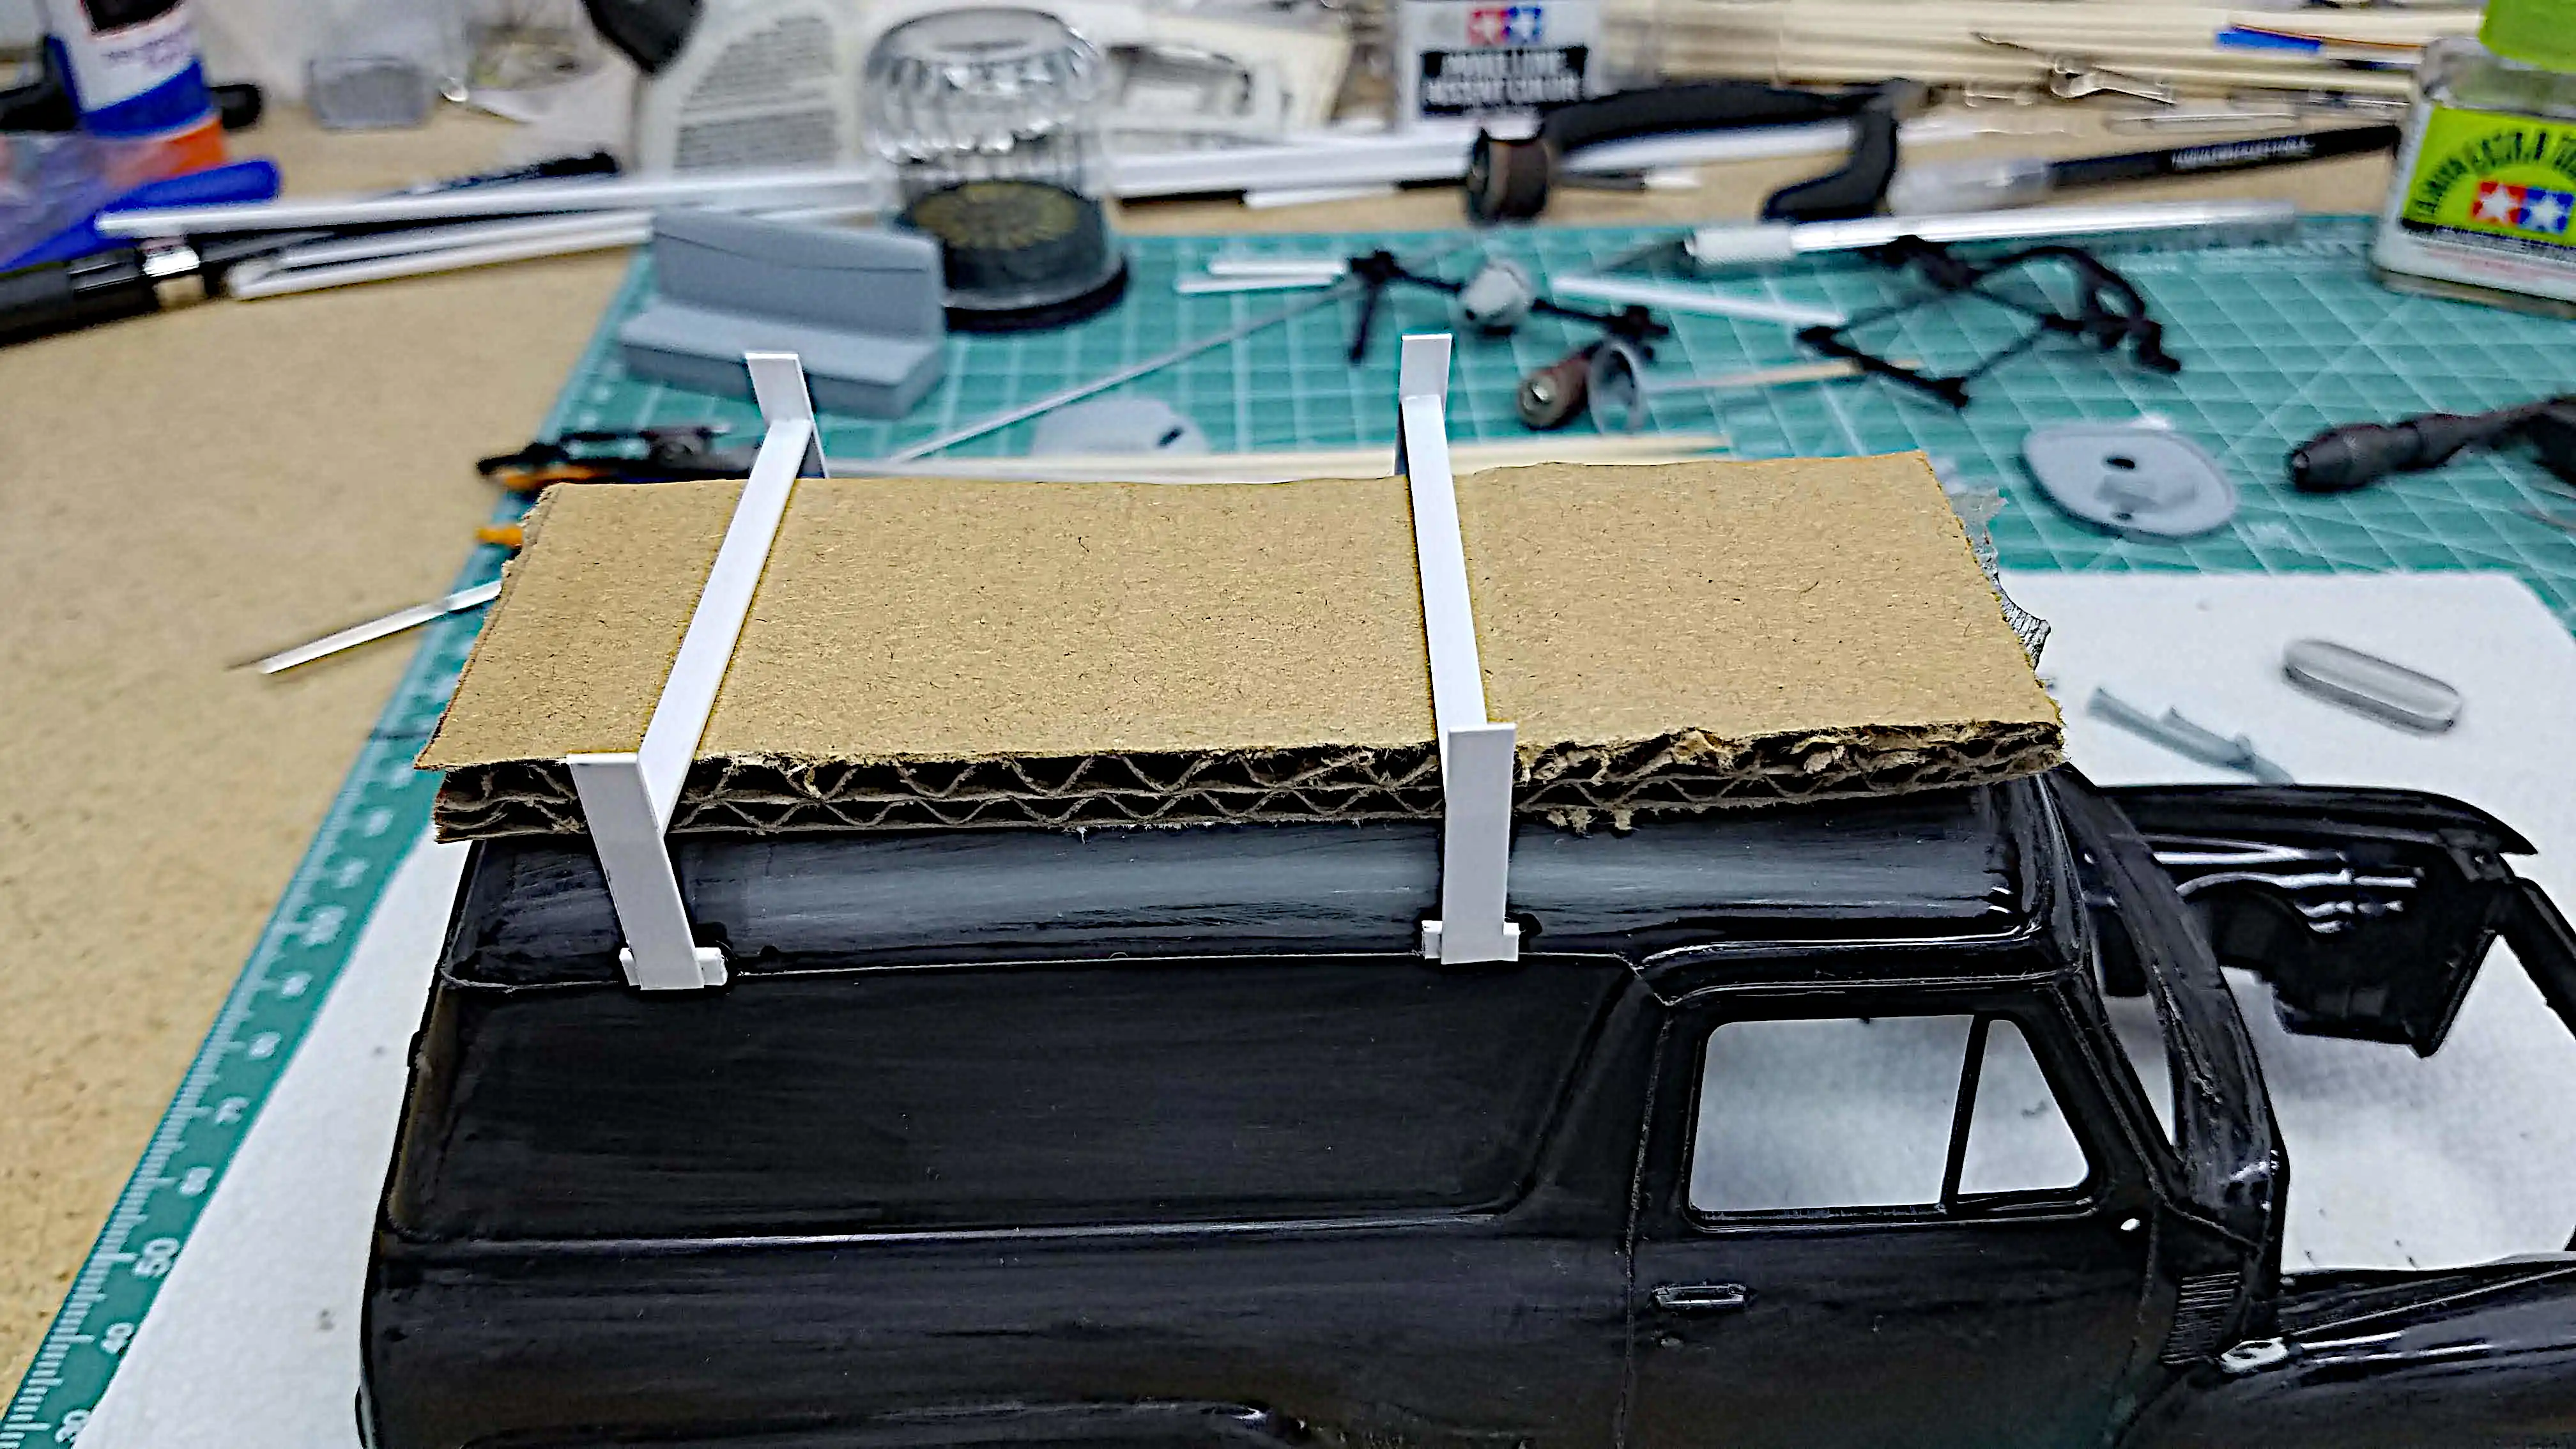 Card board used as a spacer to mount the roof rack cross members.
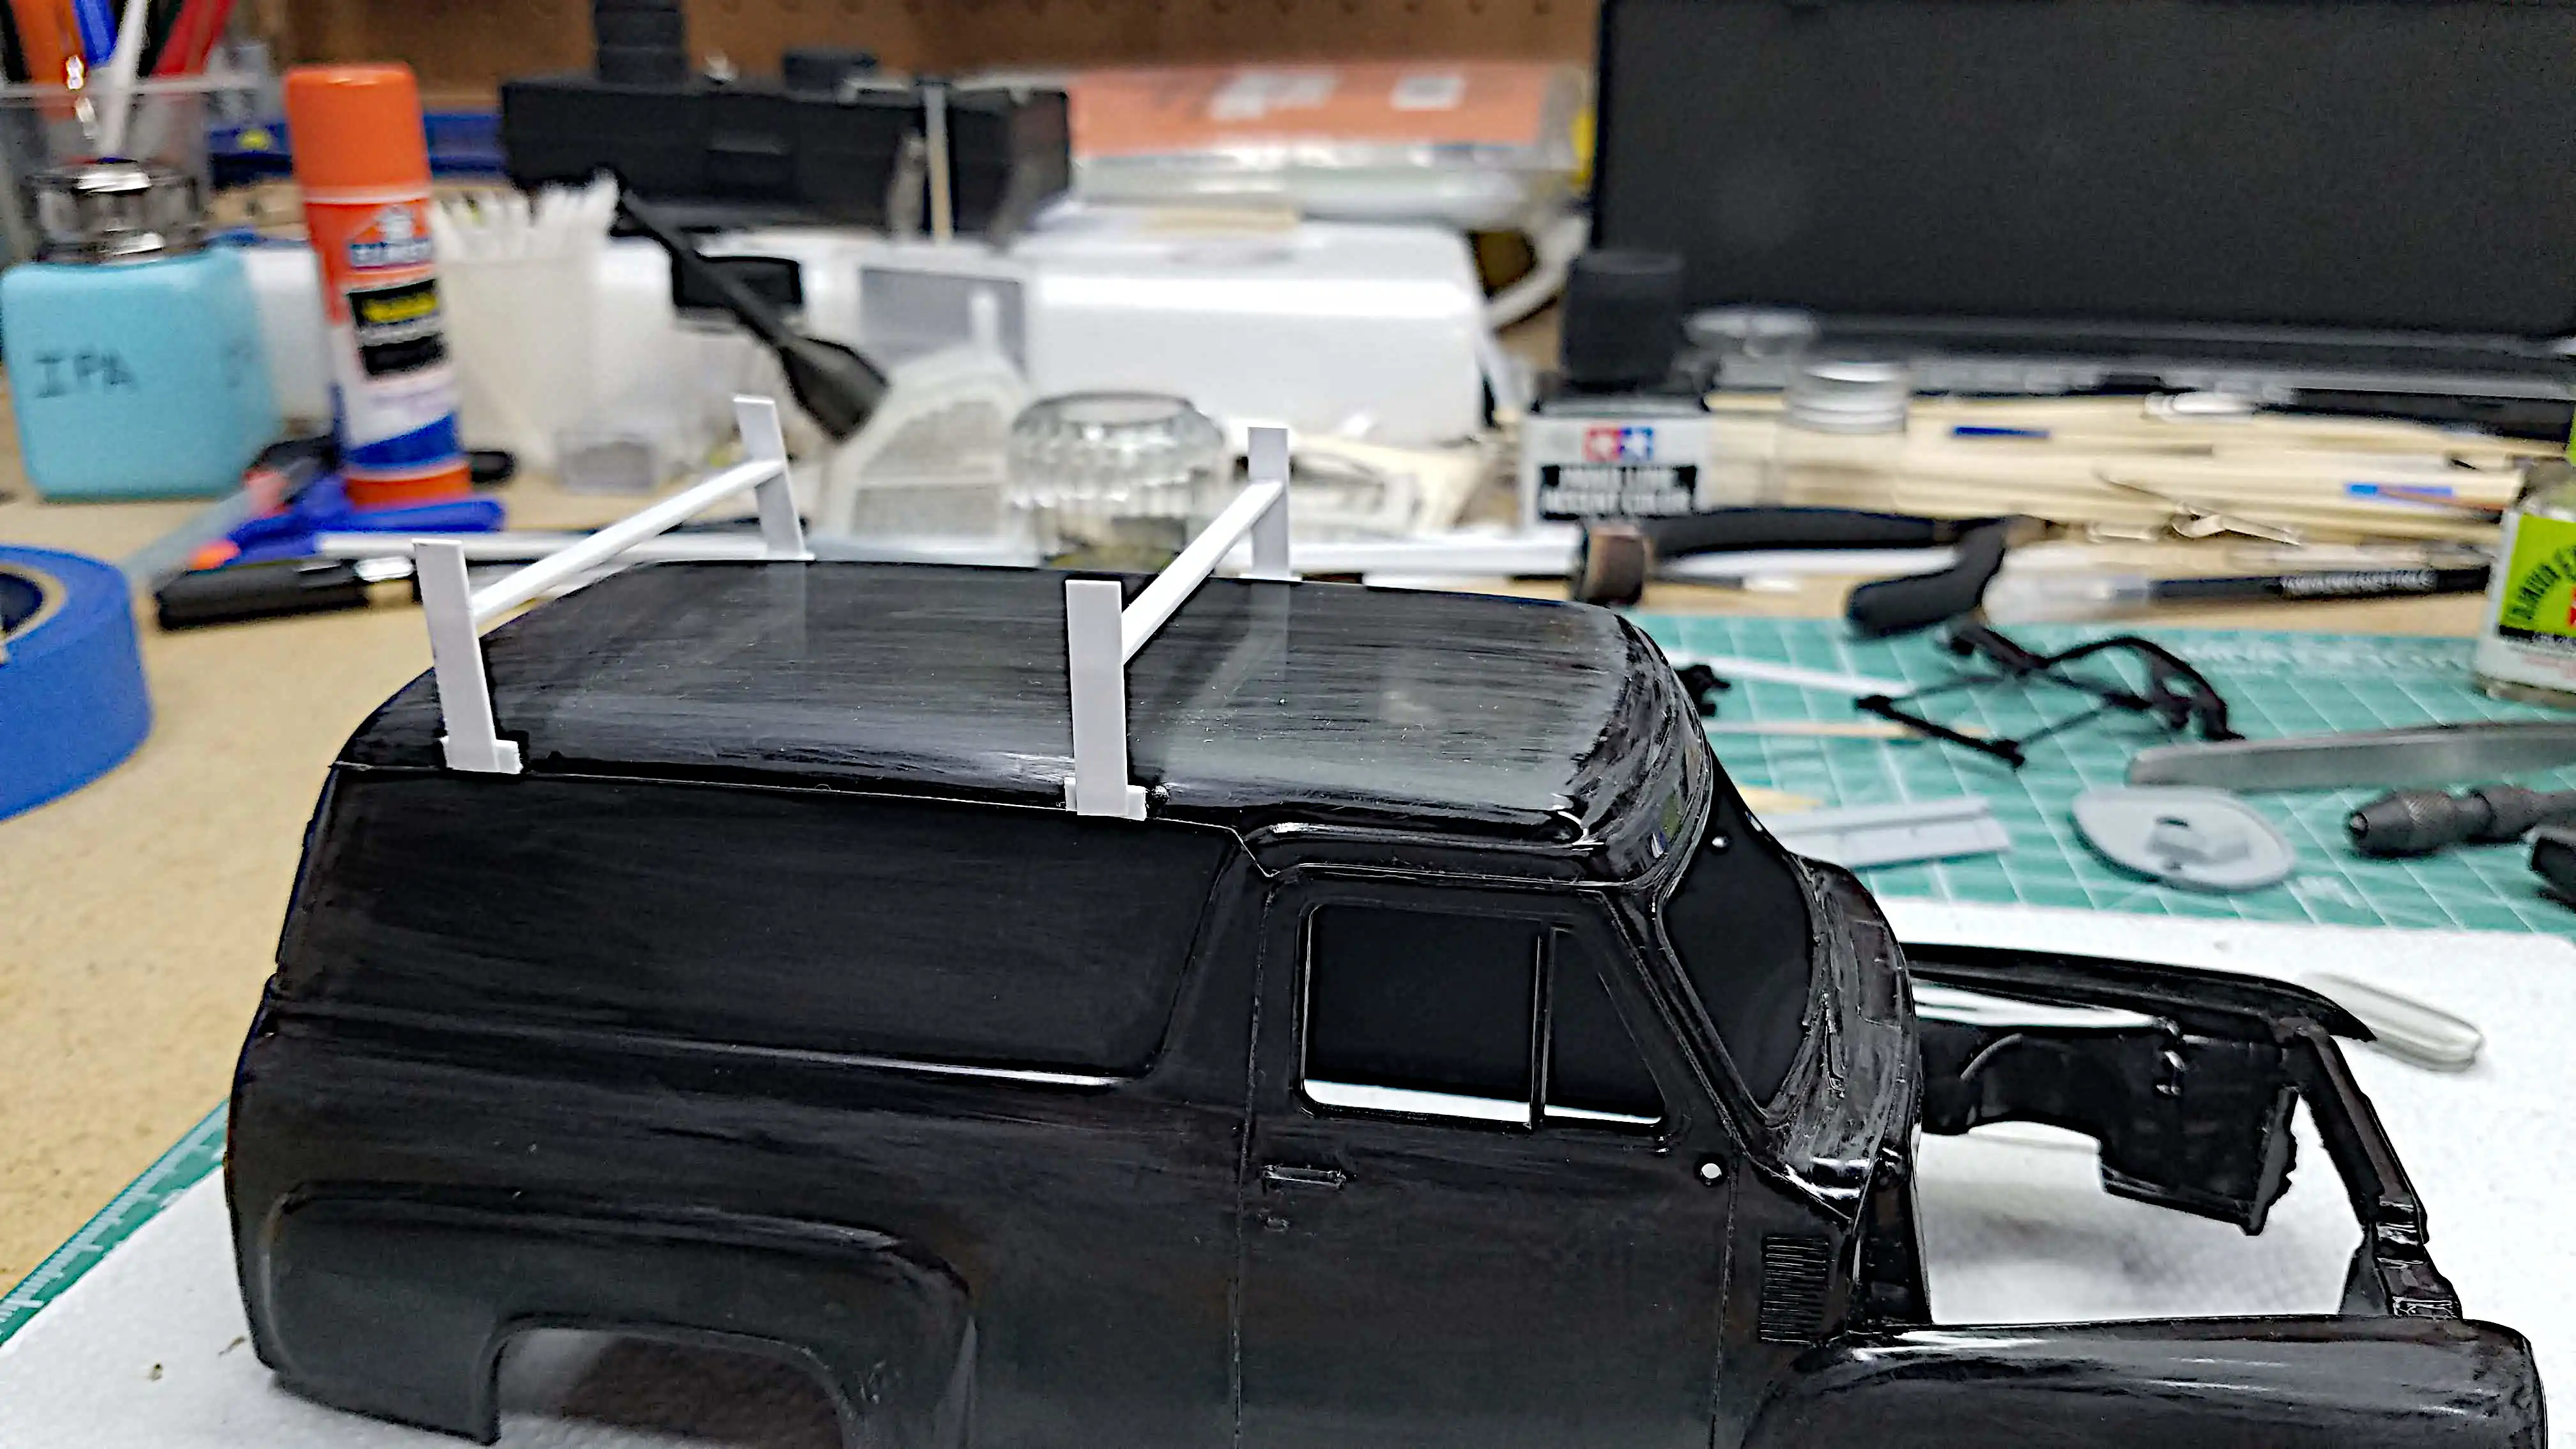 The Roof racks are installed
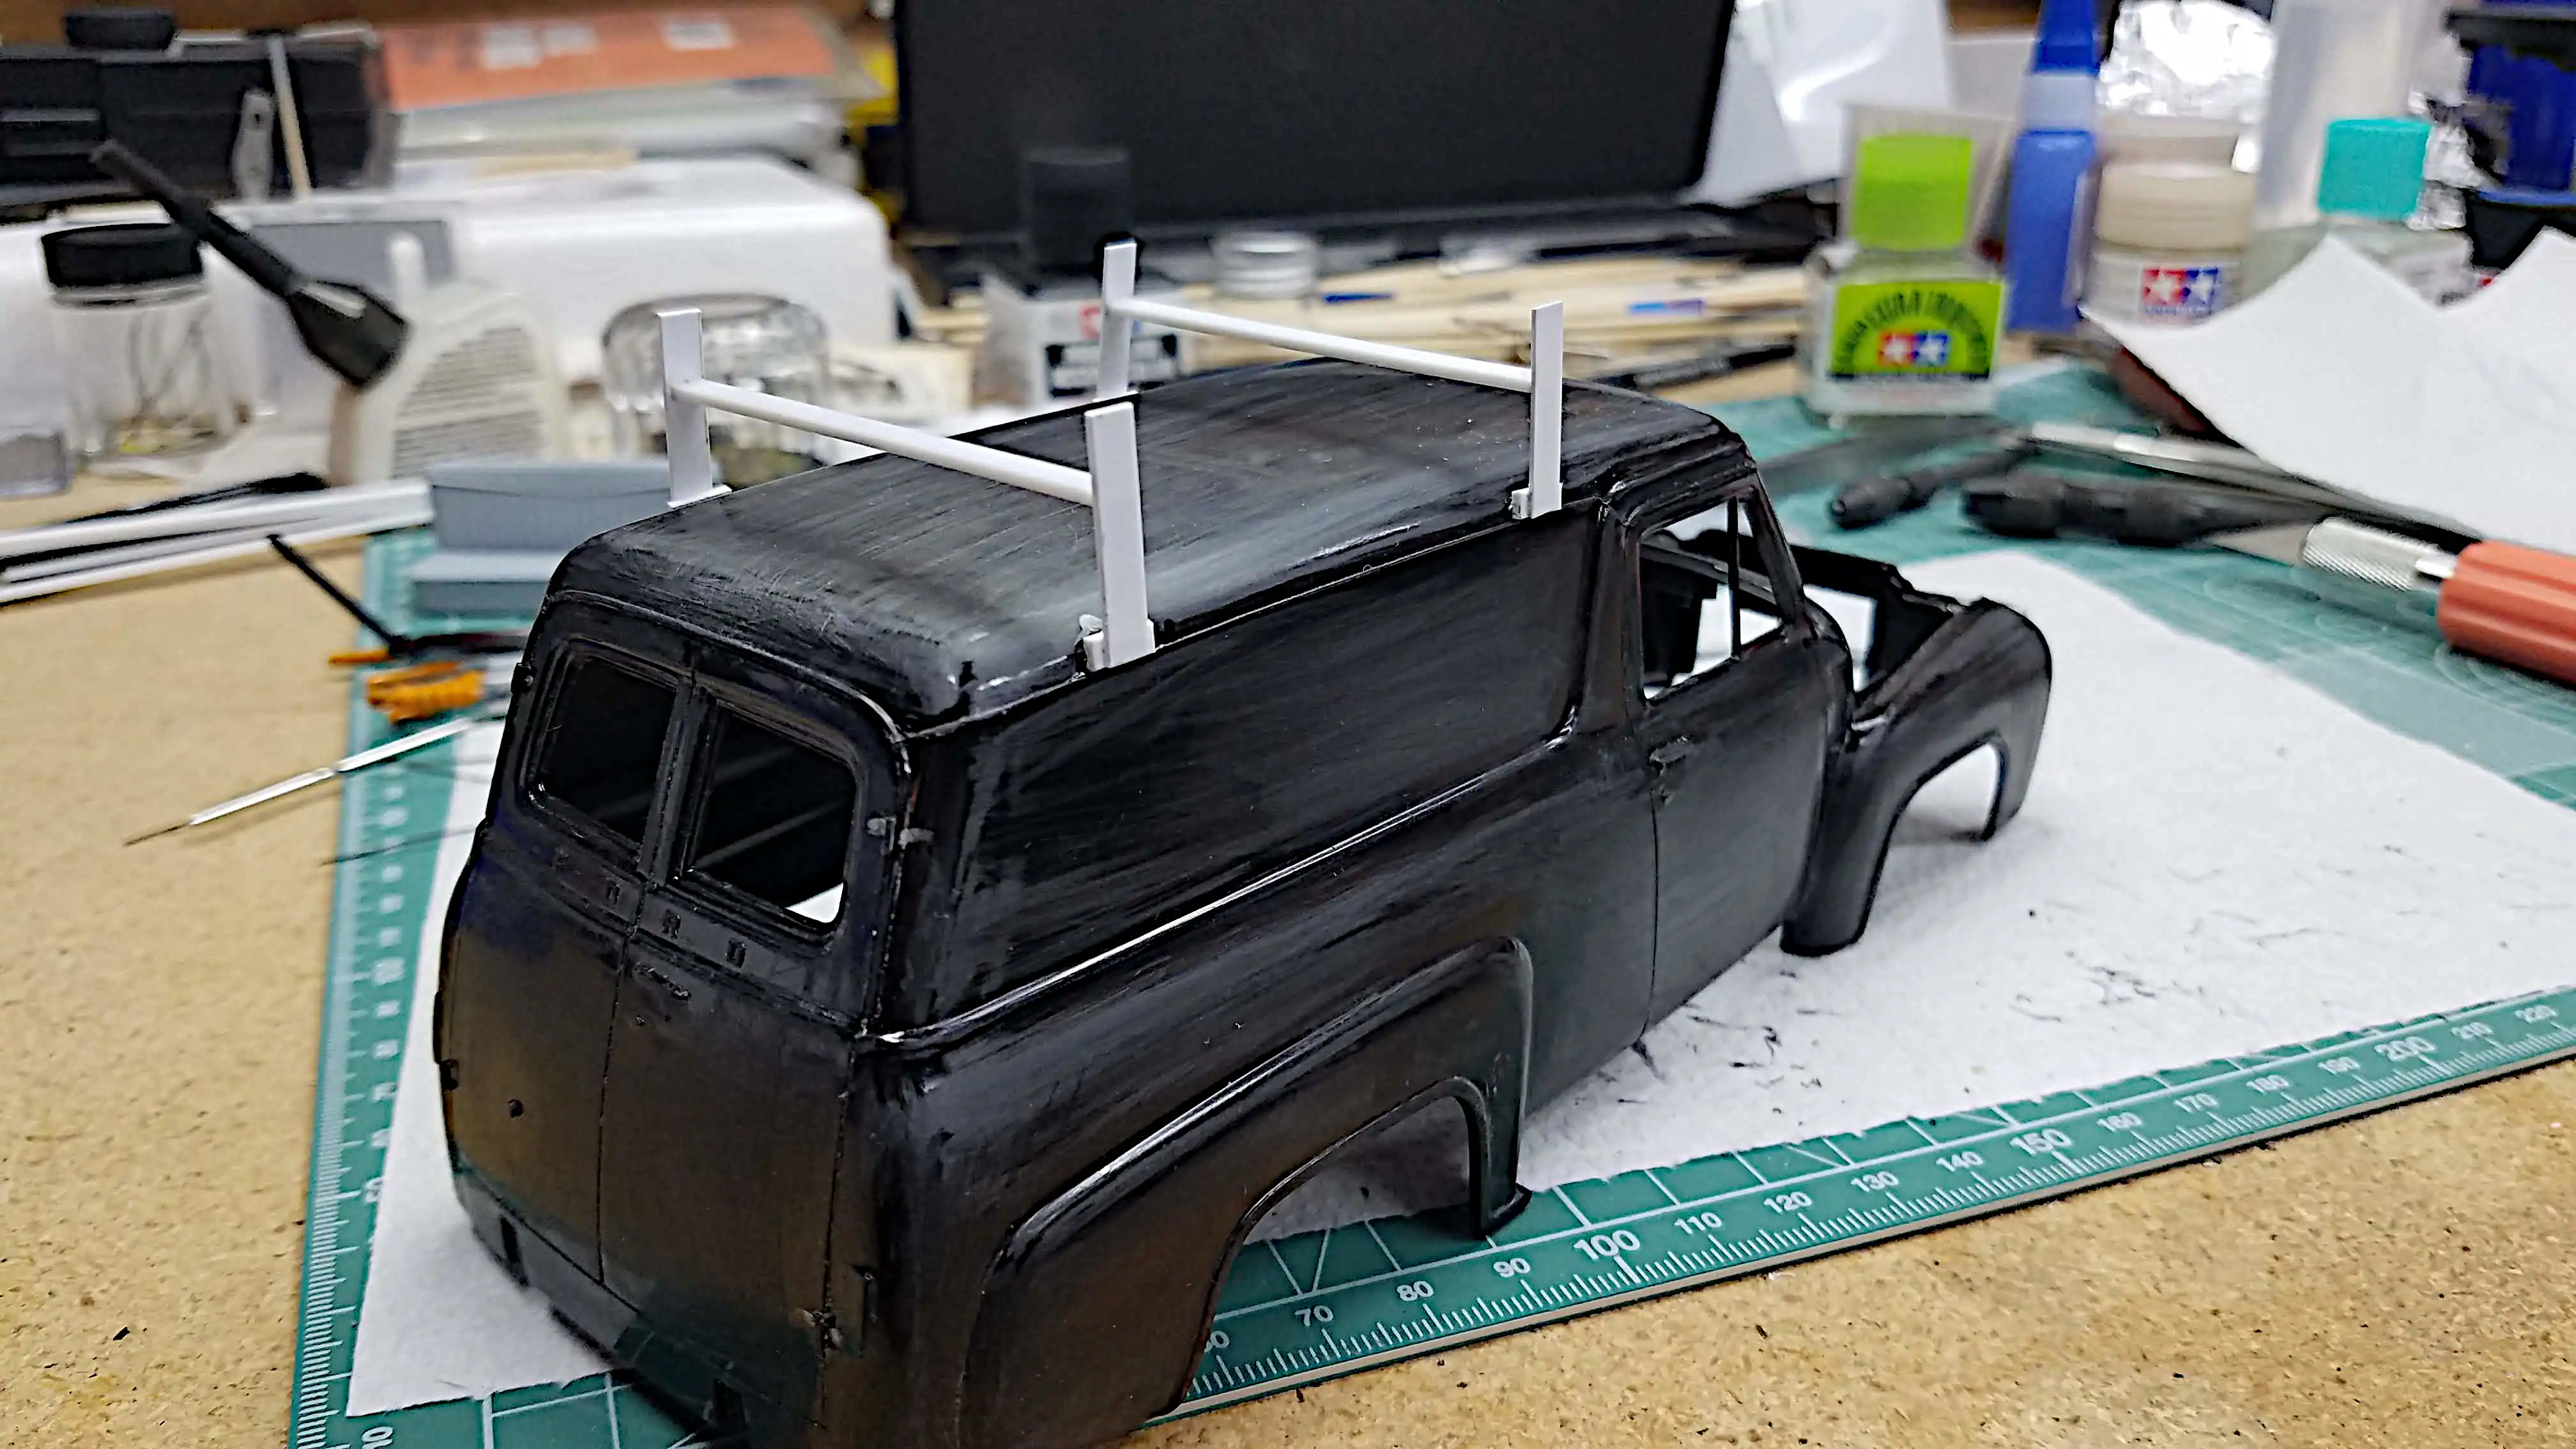 Back view of the installed roof racks.
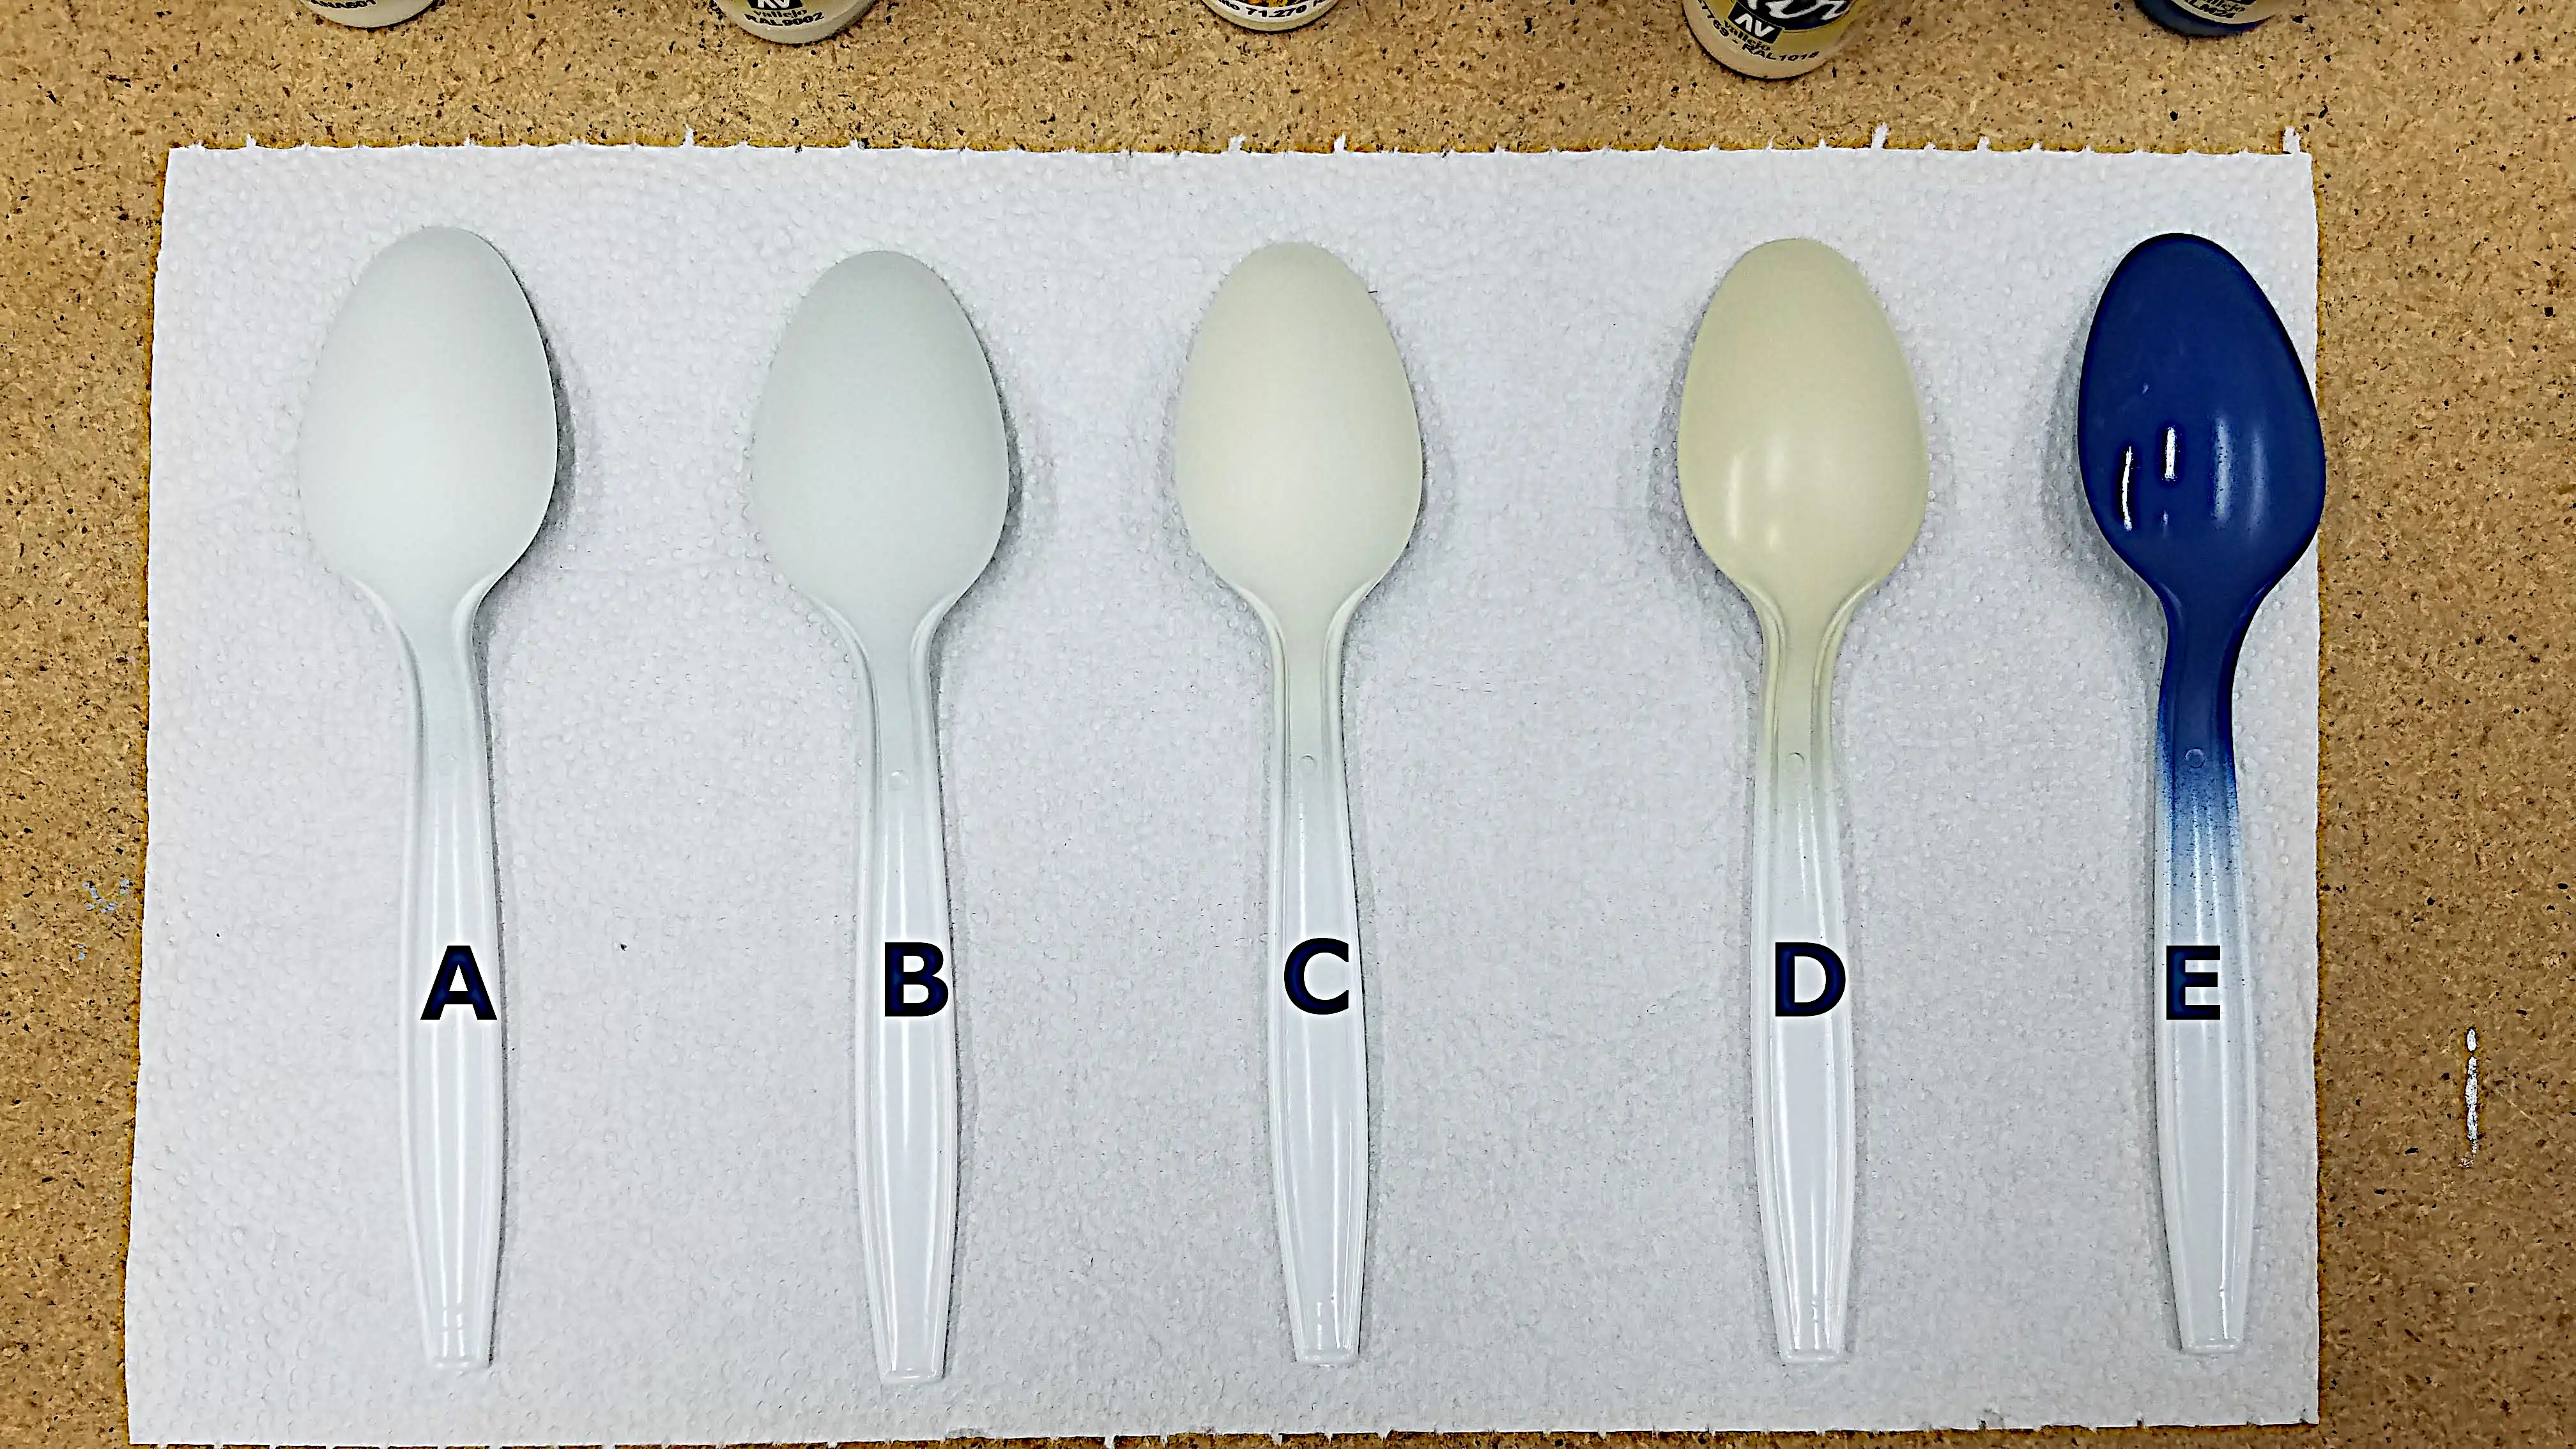 Test spoons for body colors
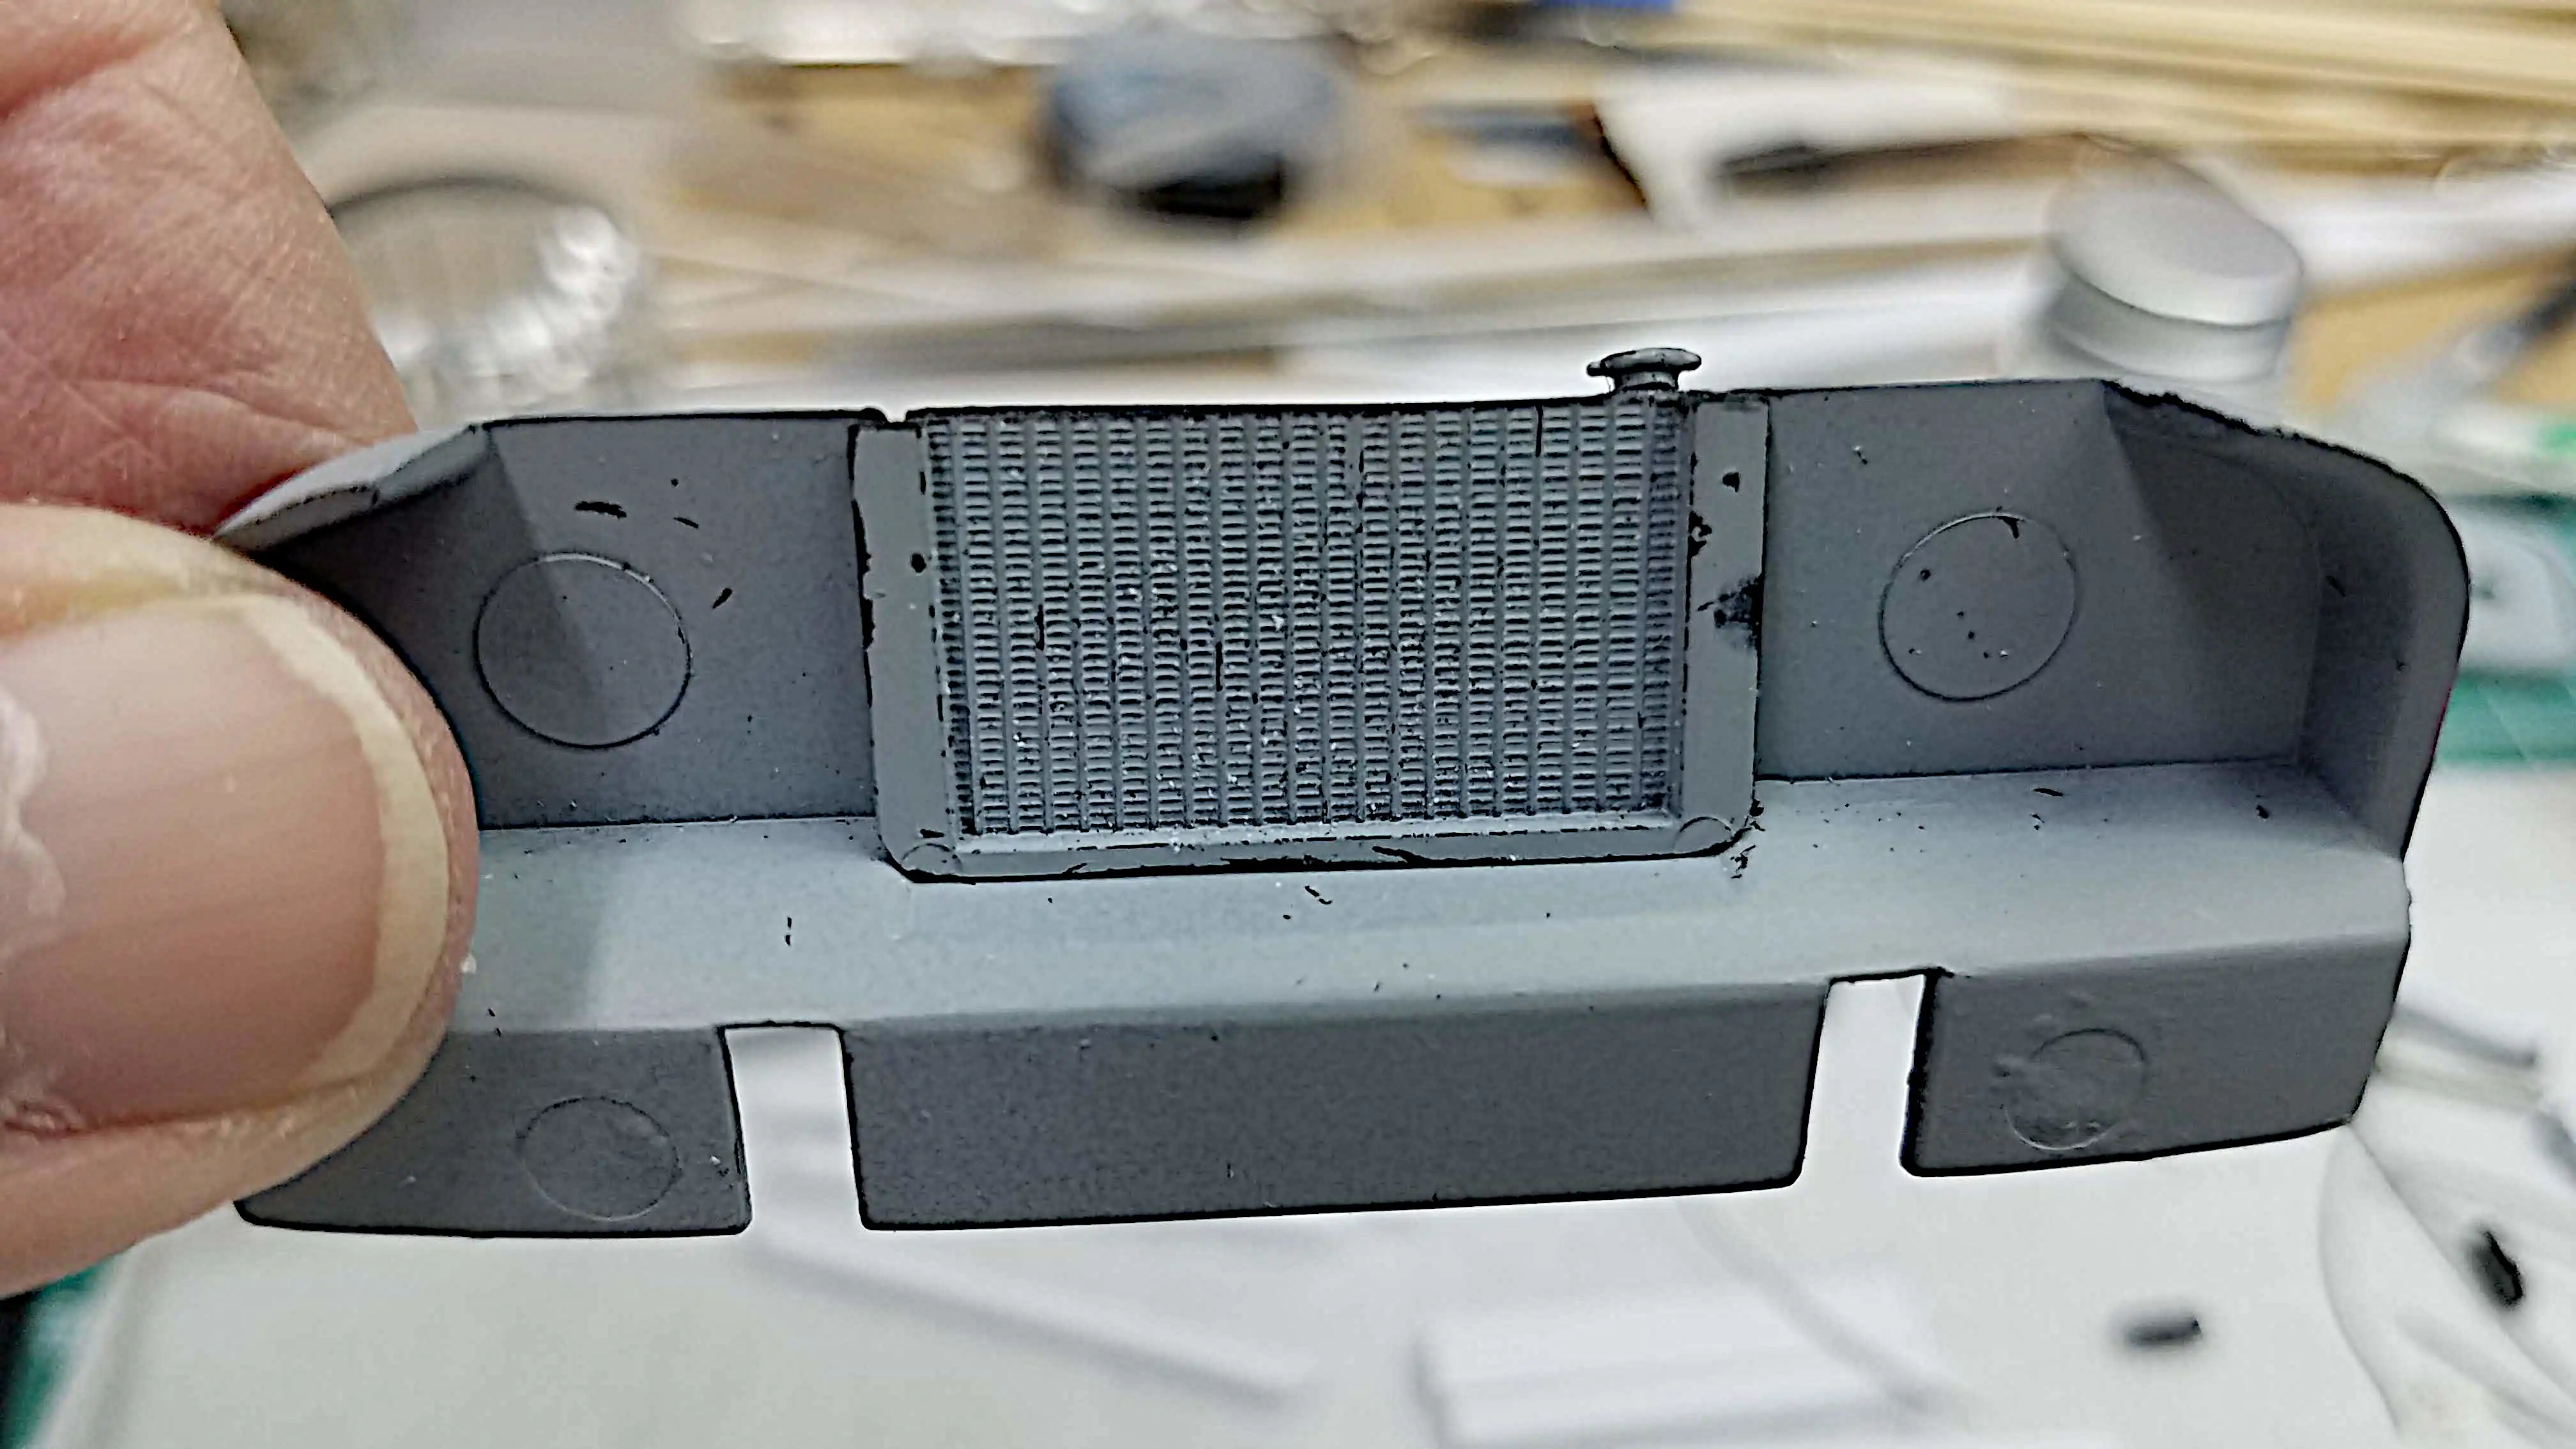
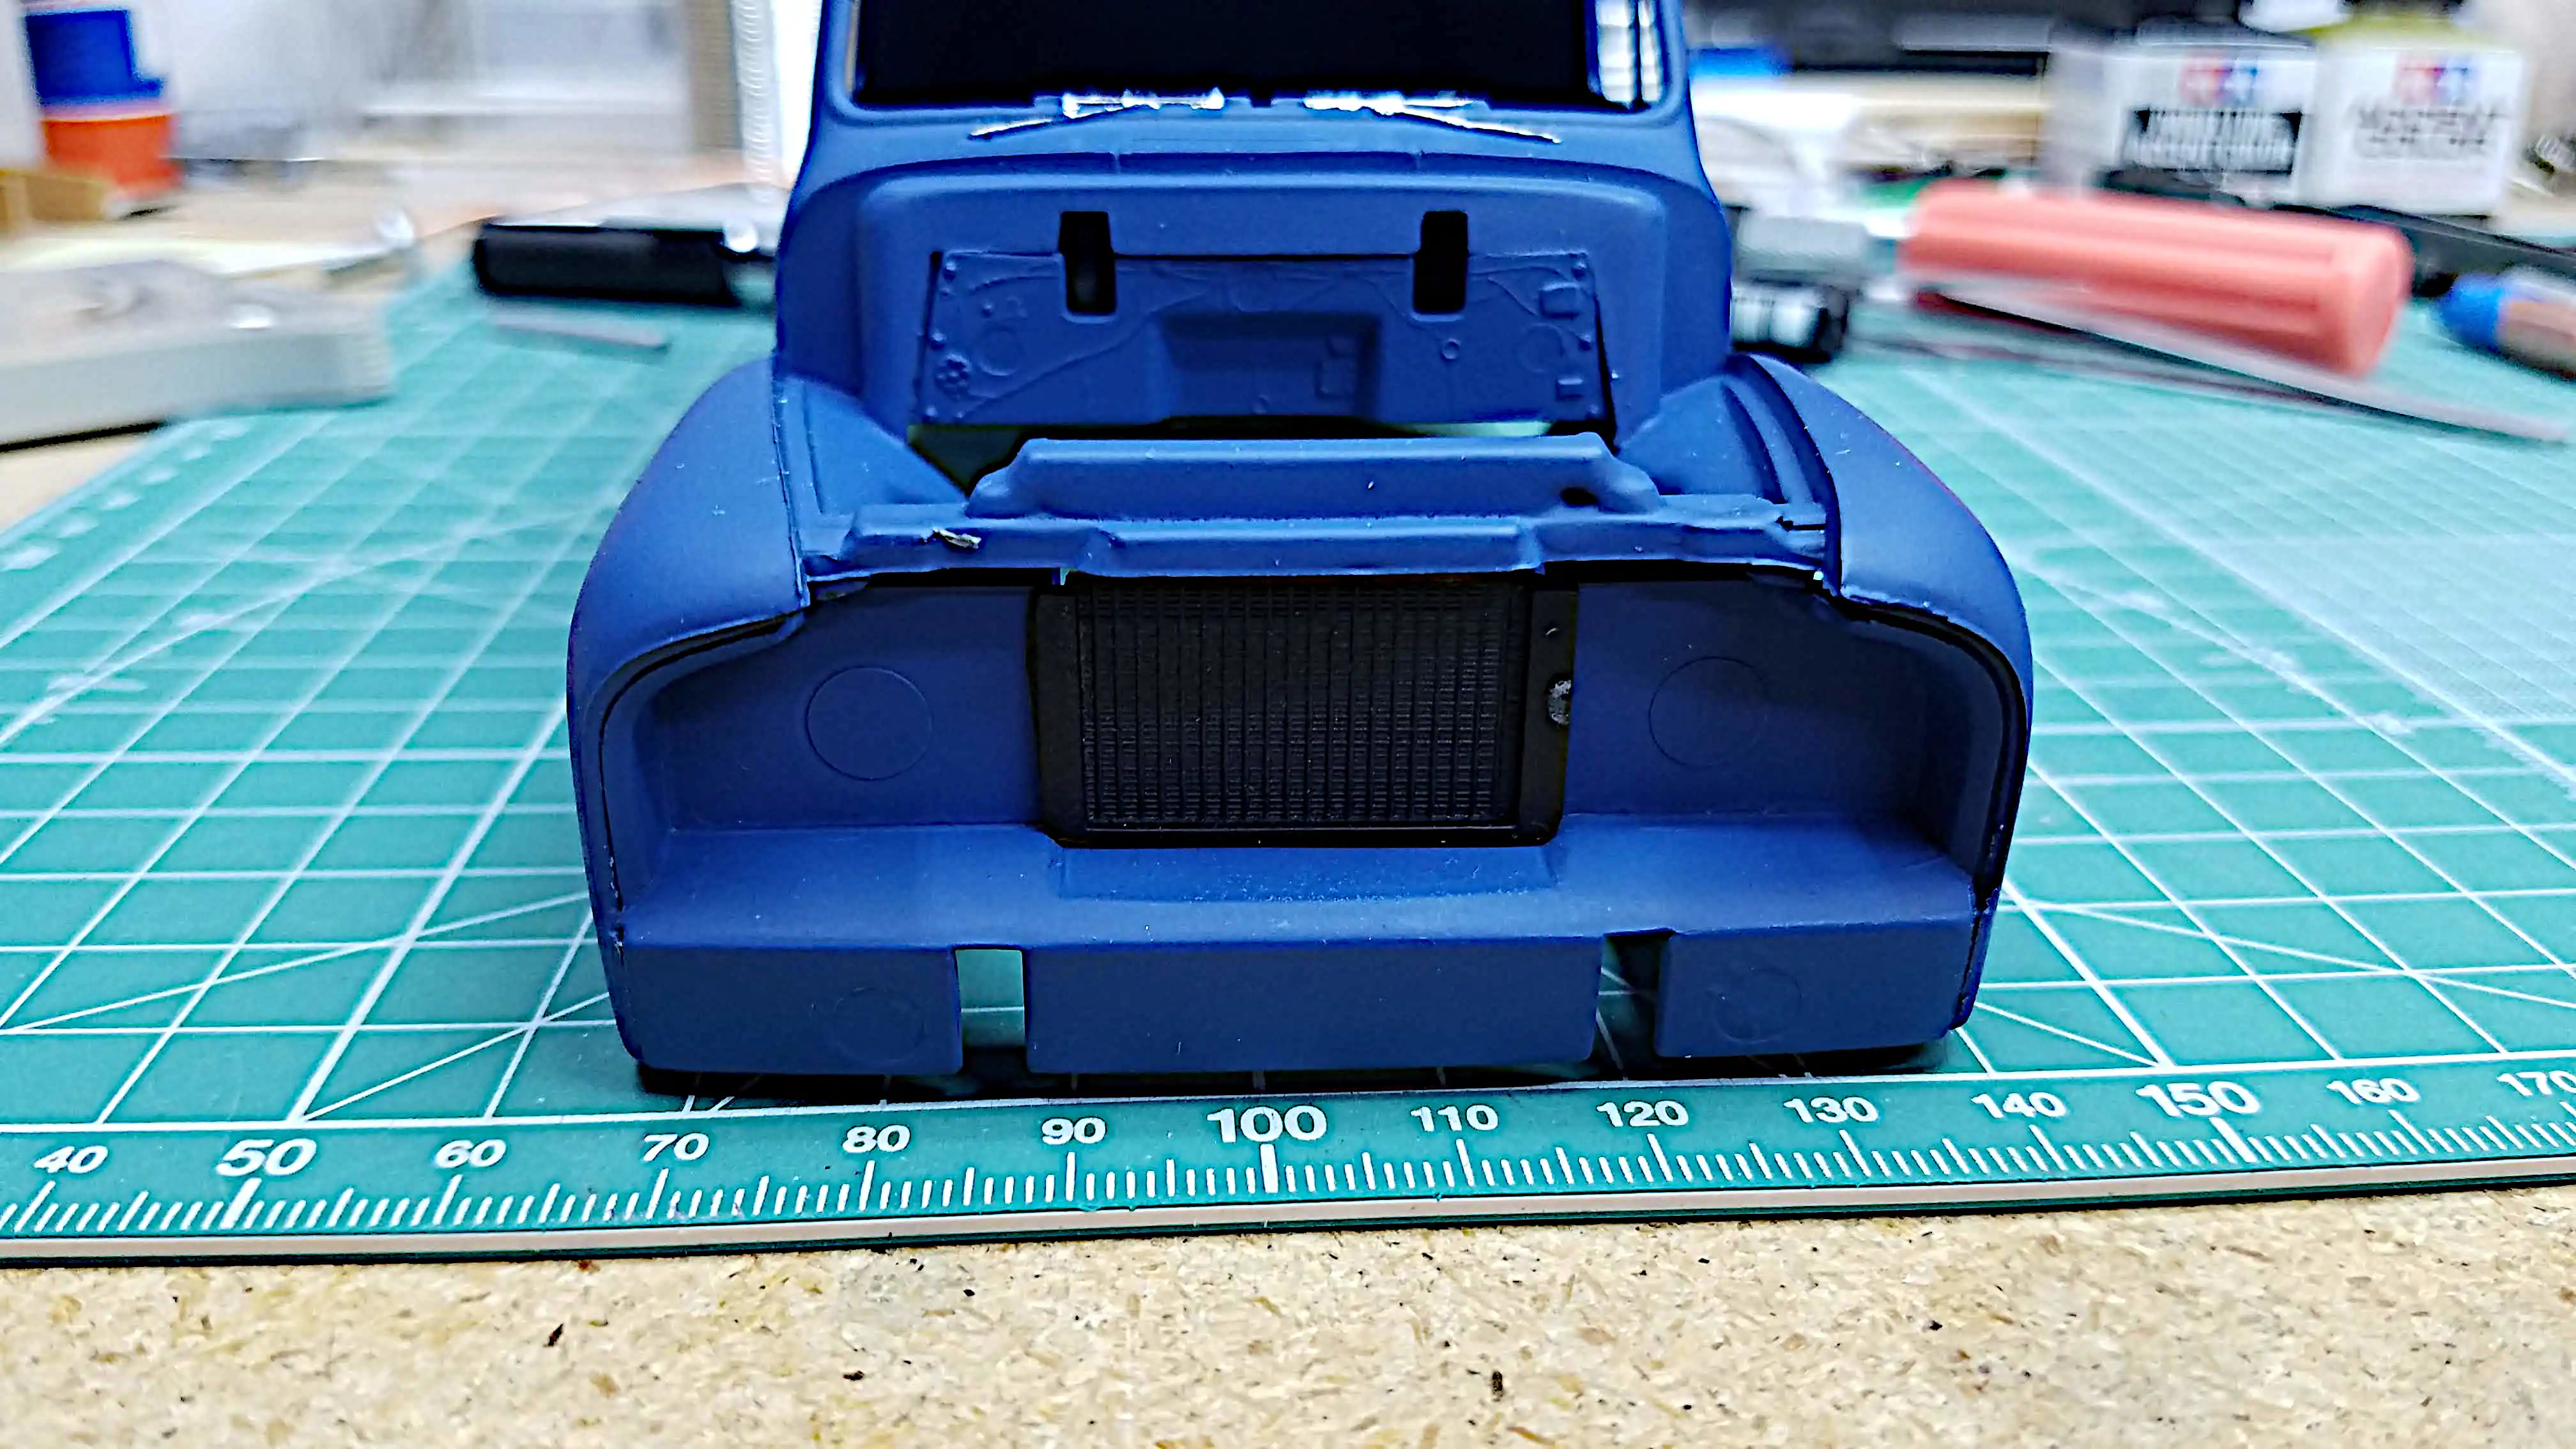
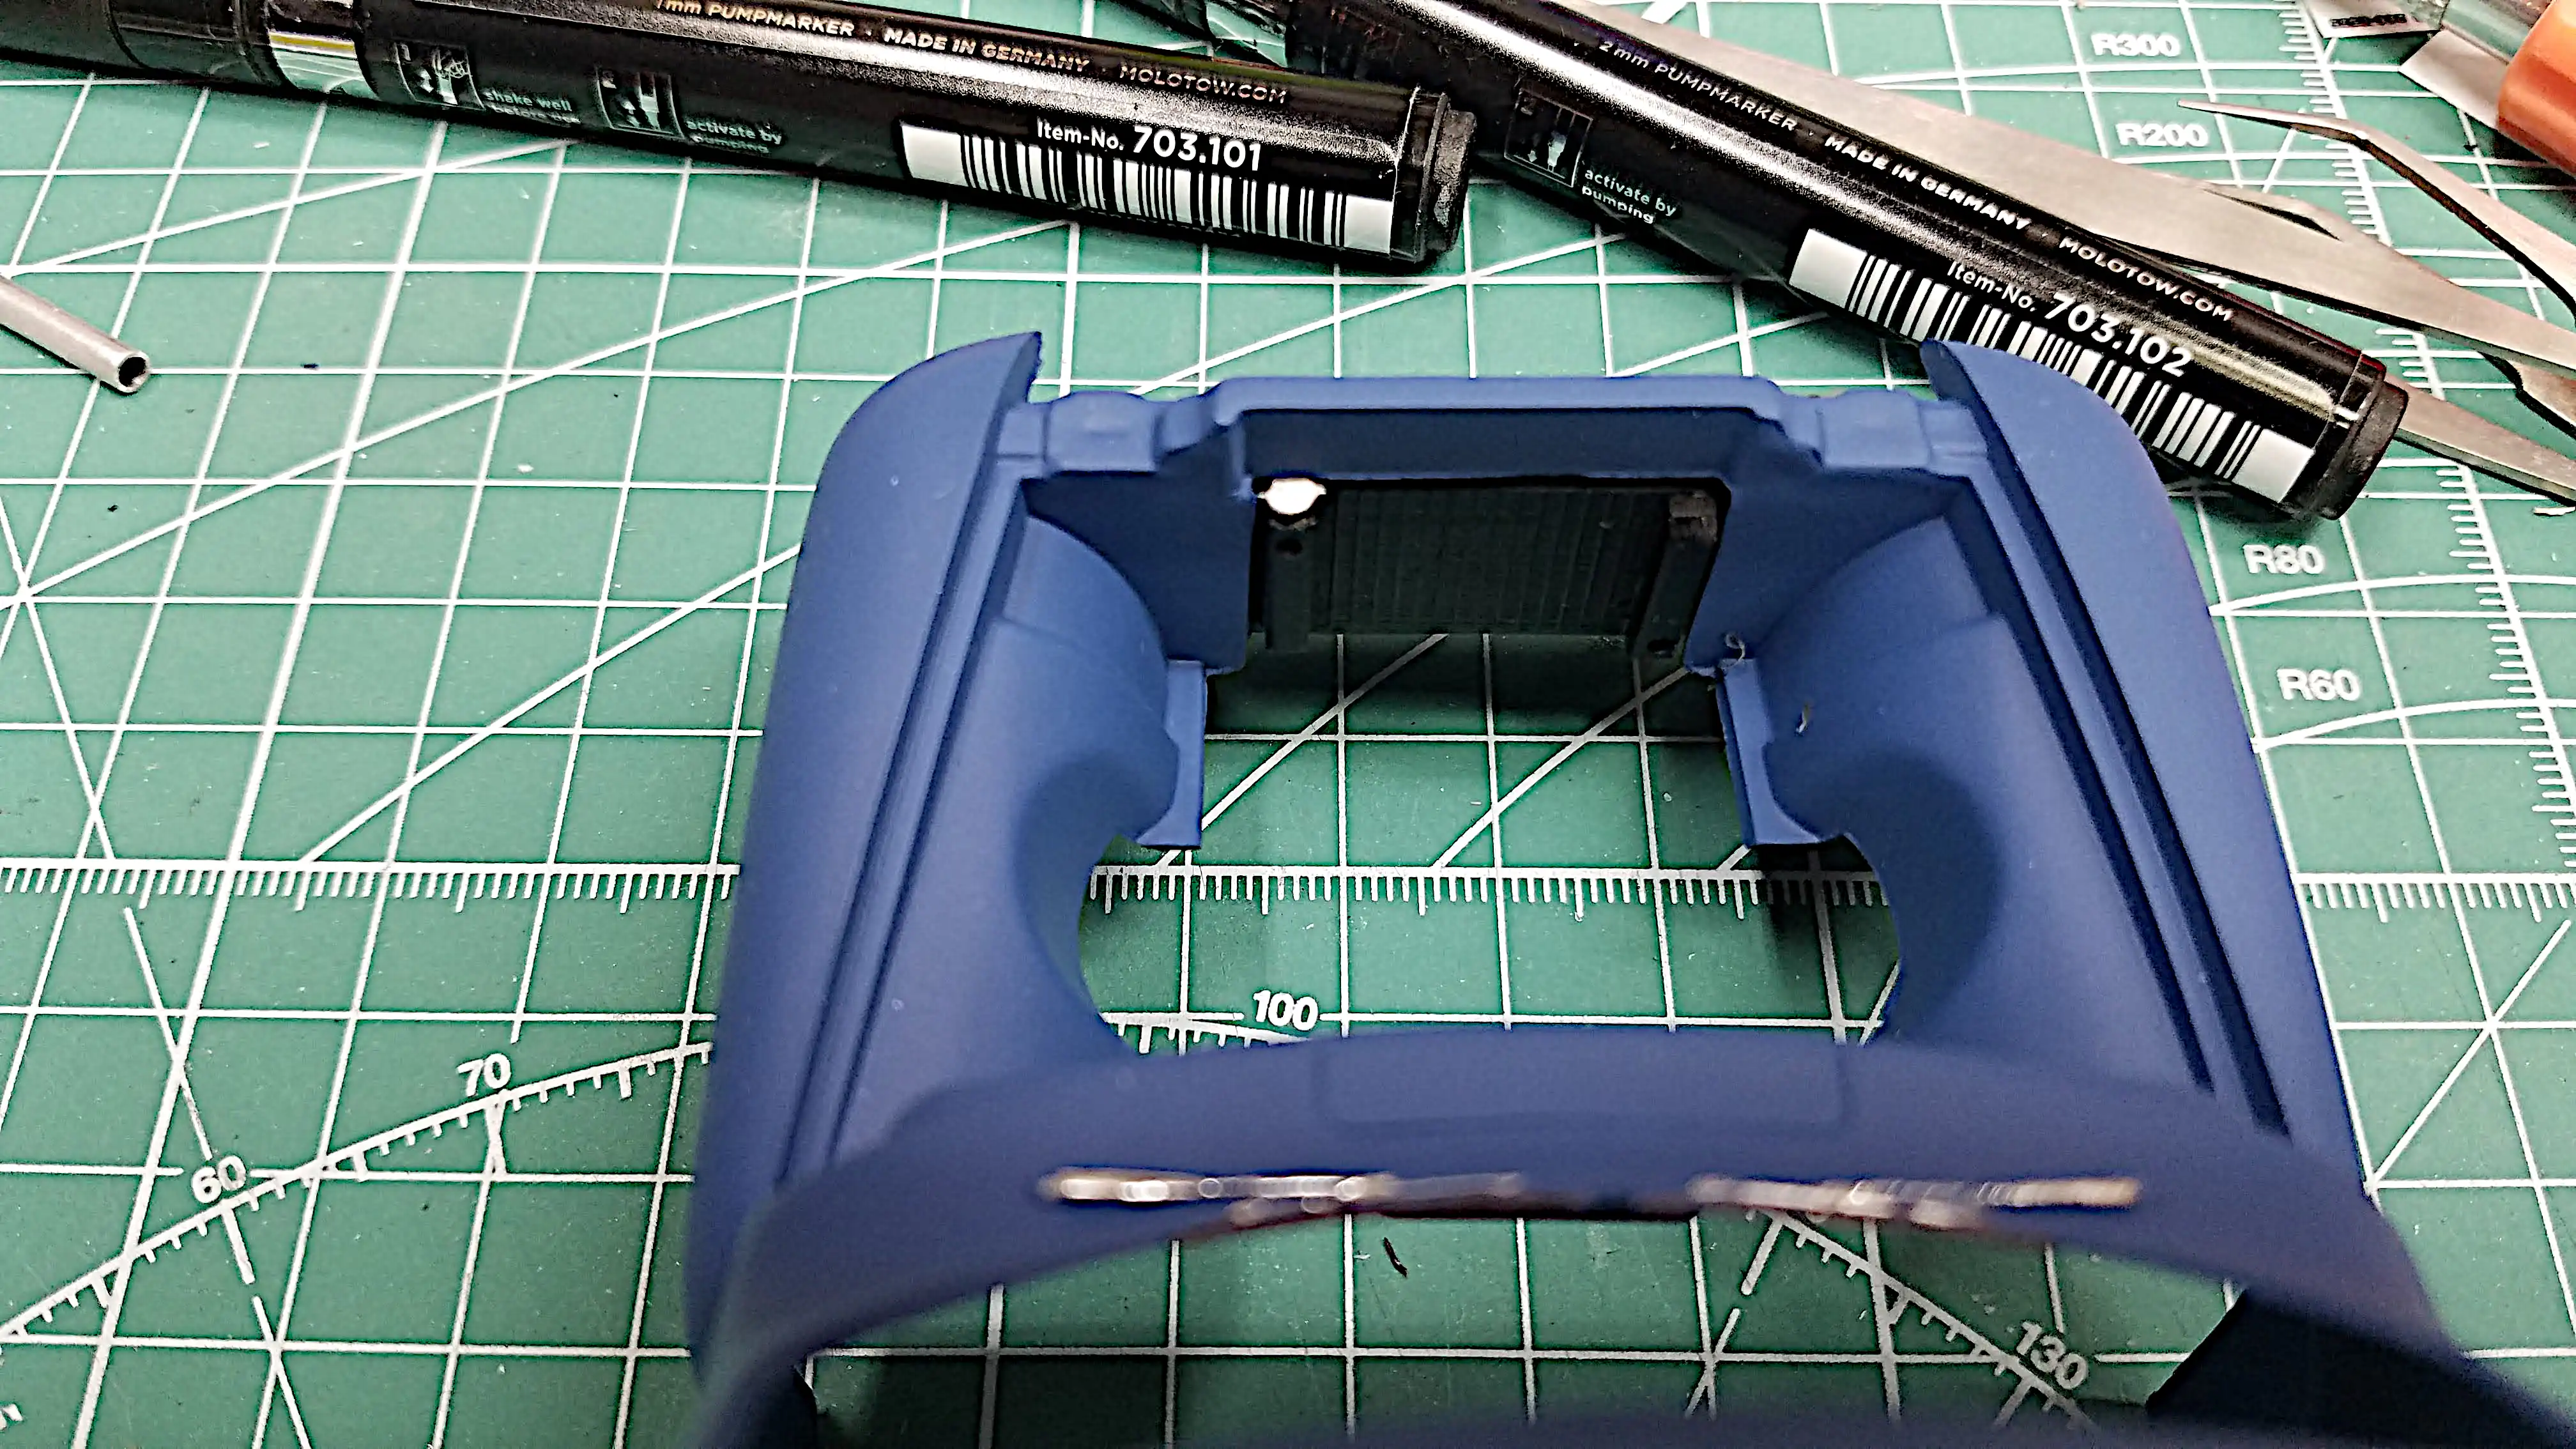
 Scratch built a cross-flow radiator
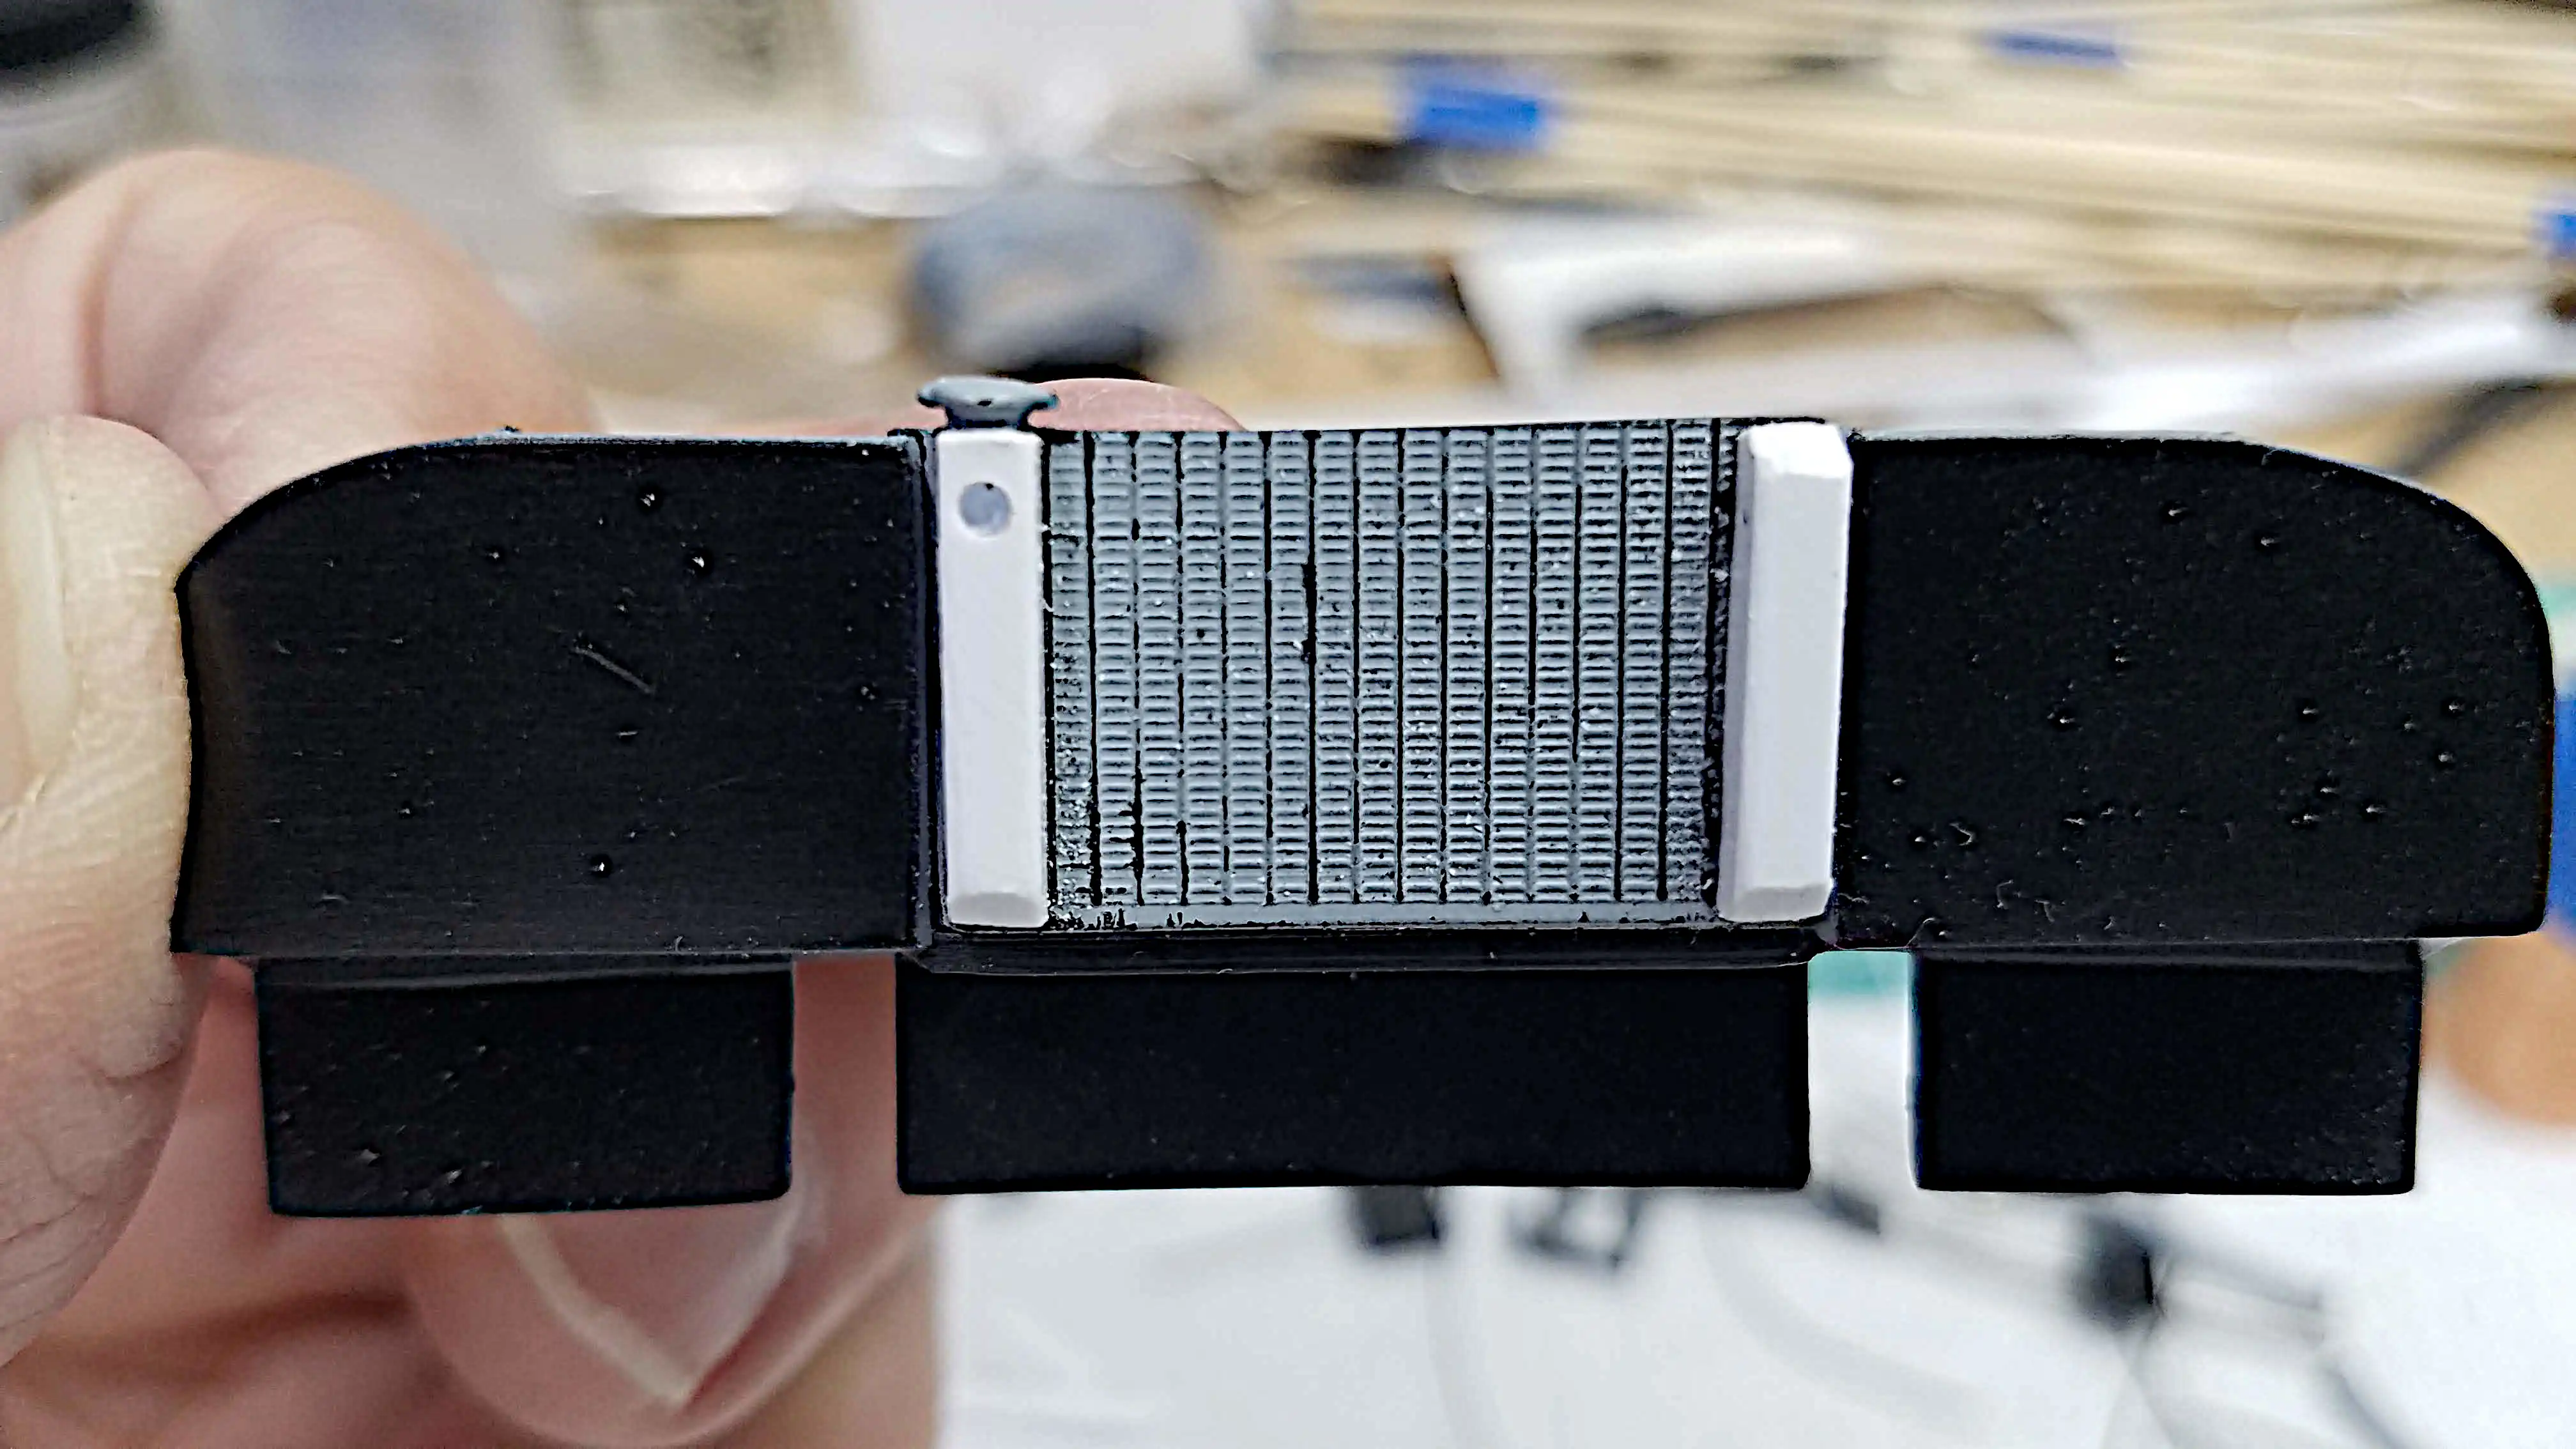
 Scratch built radiator fits perfectly in the opening, front view
 This is the radiator from the back side, the engine bay side
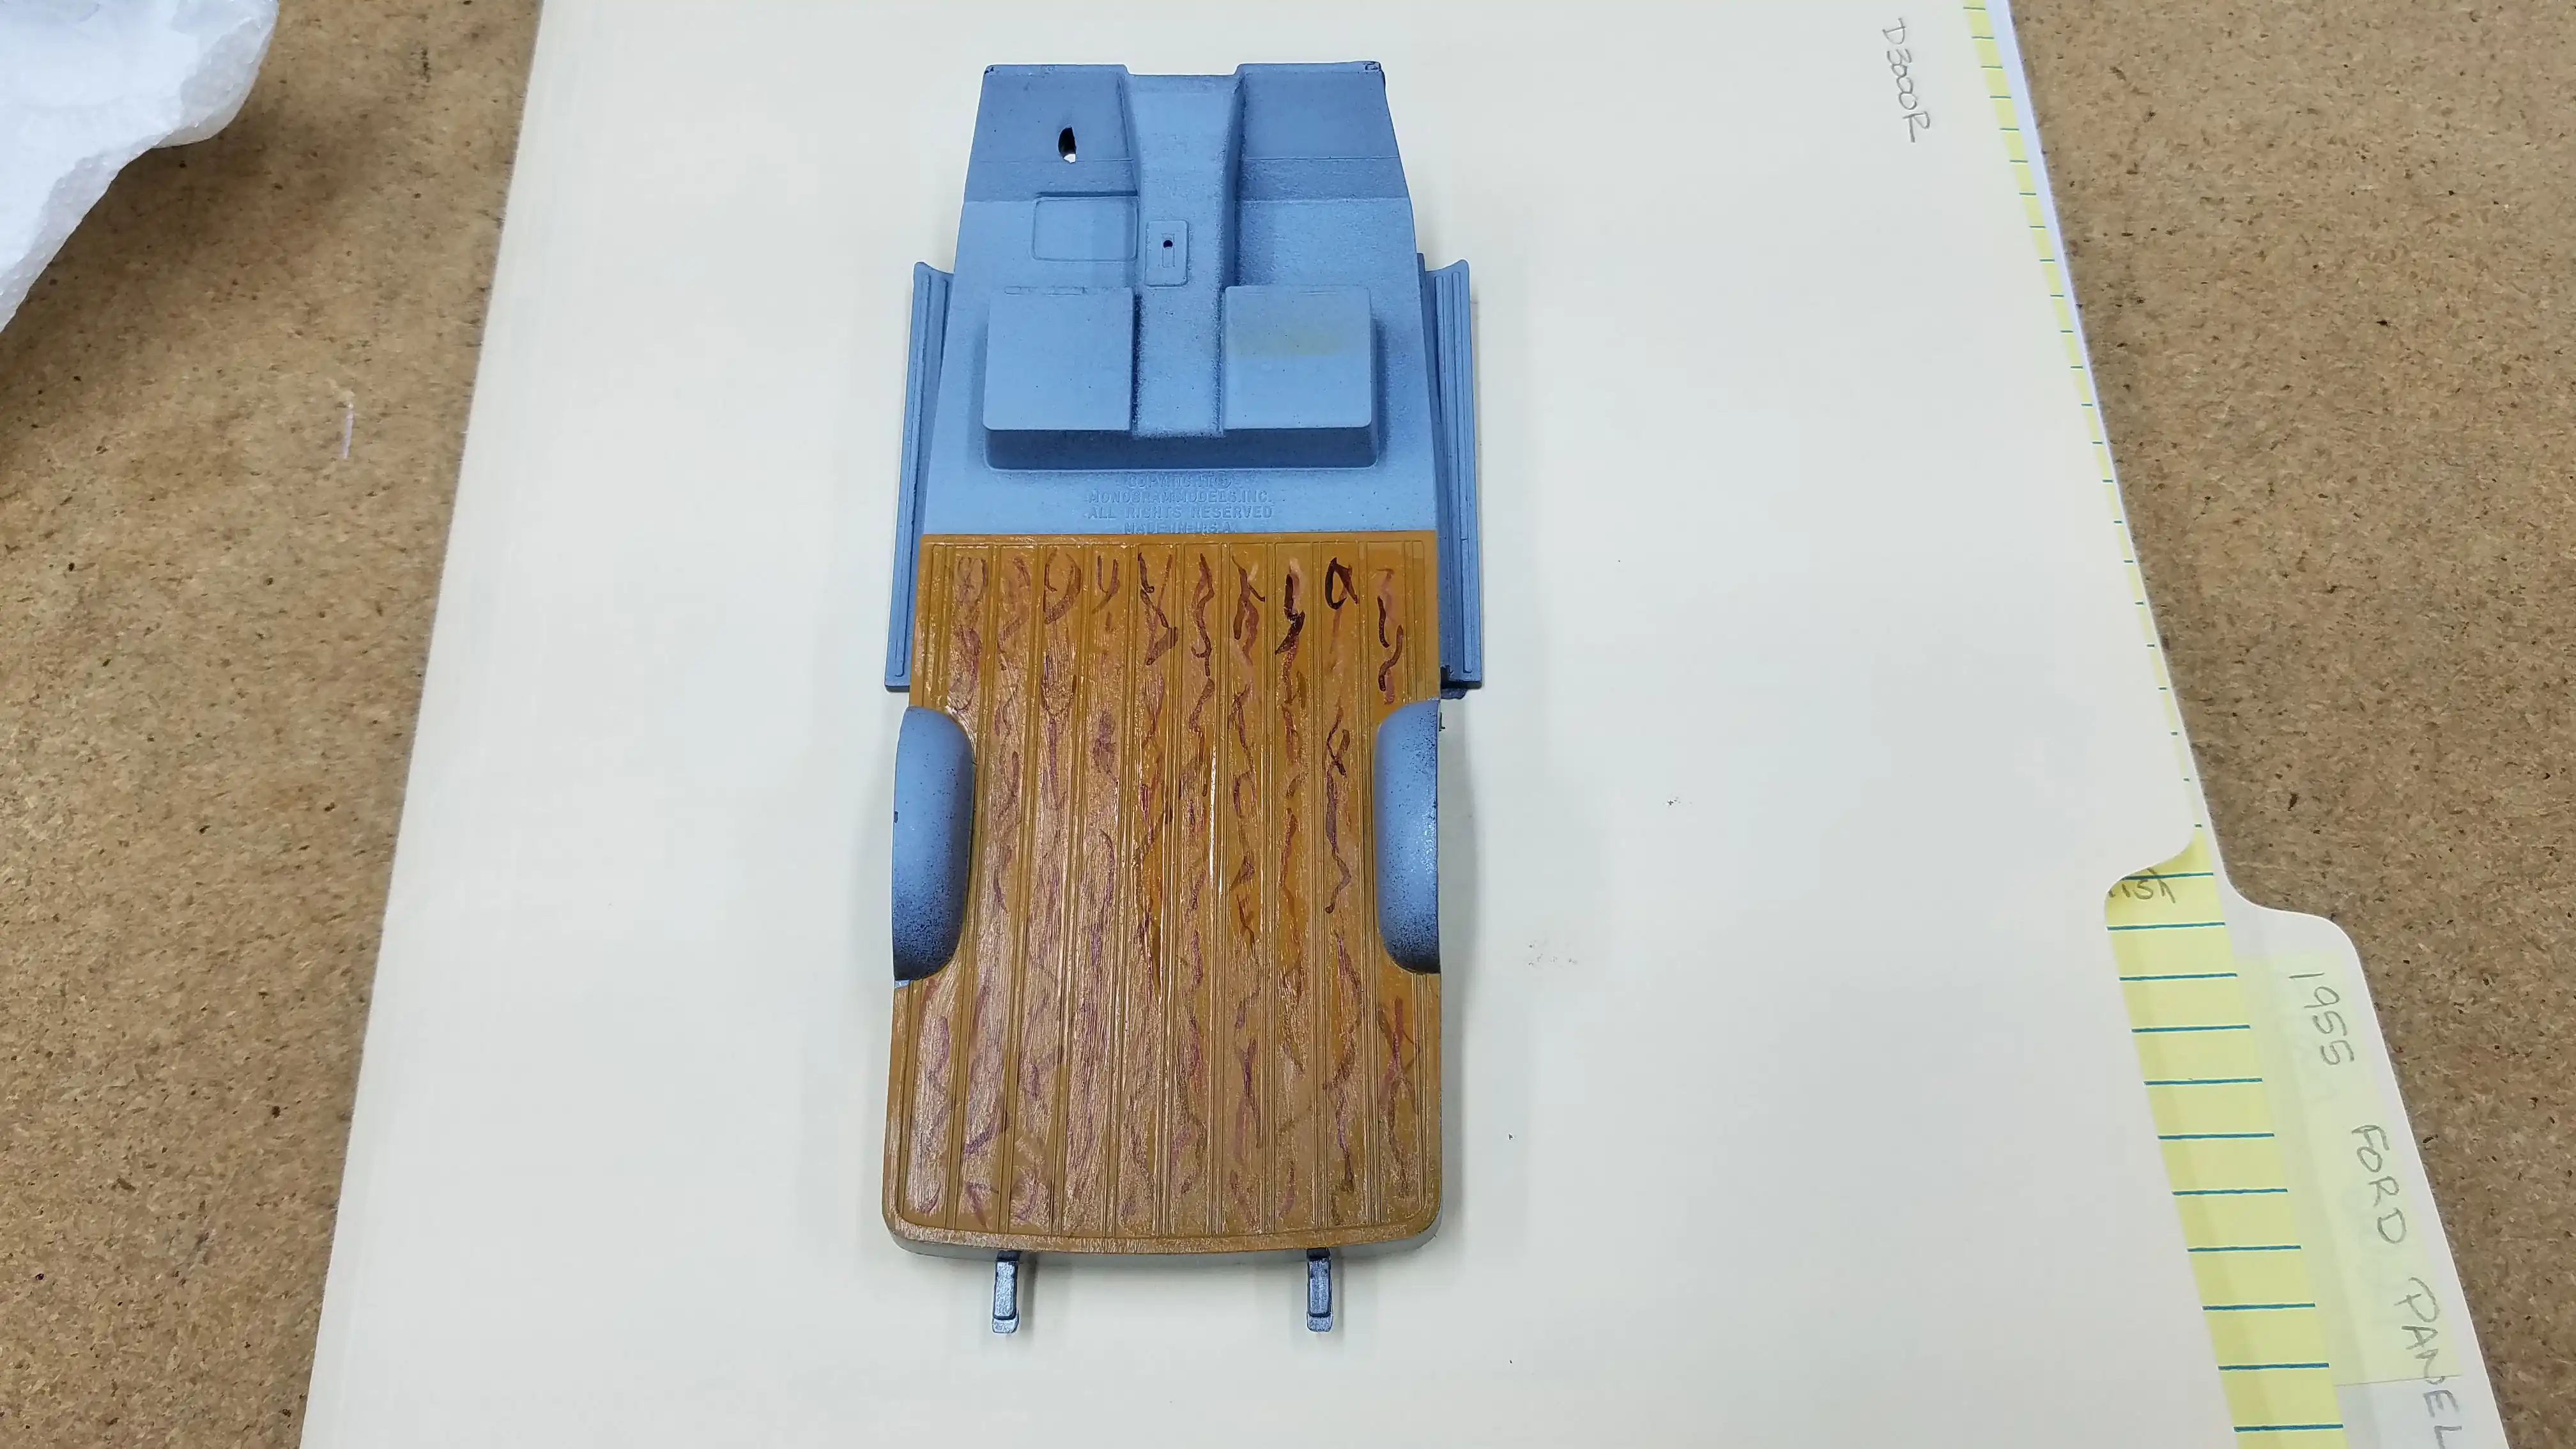
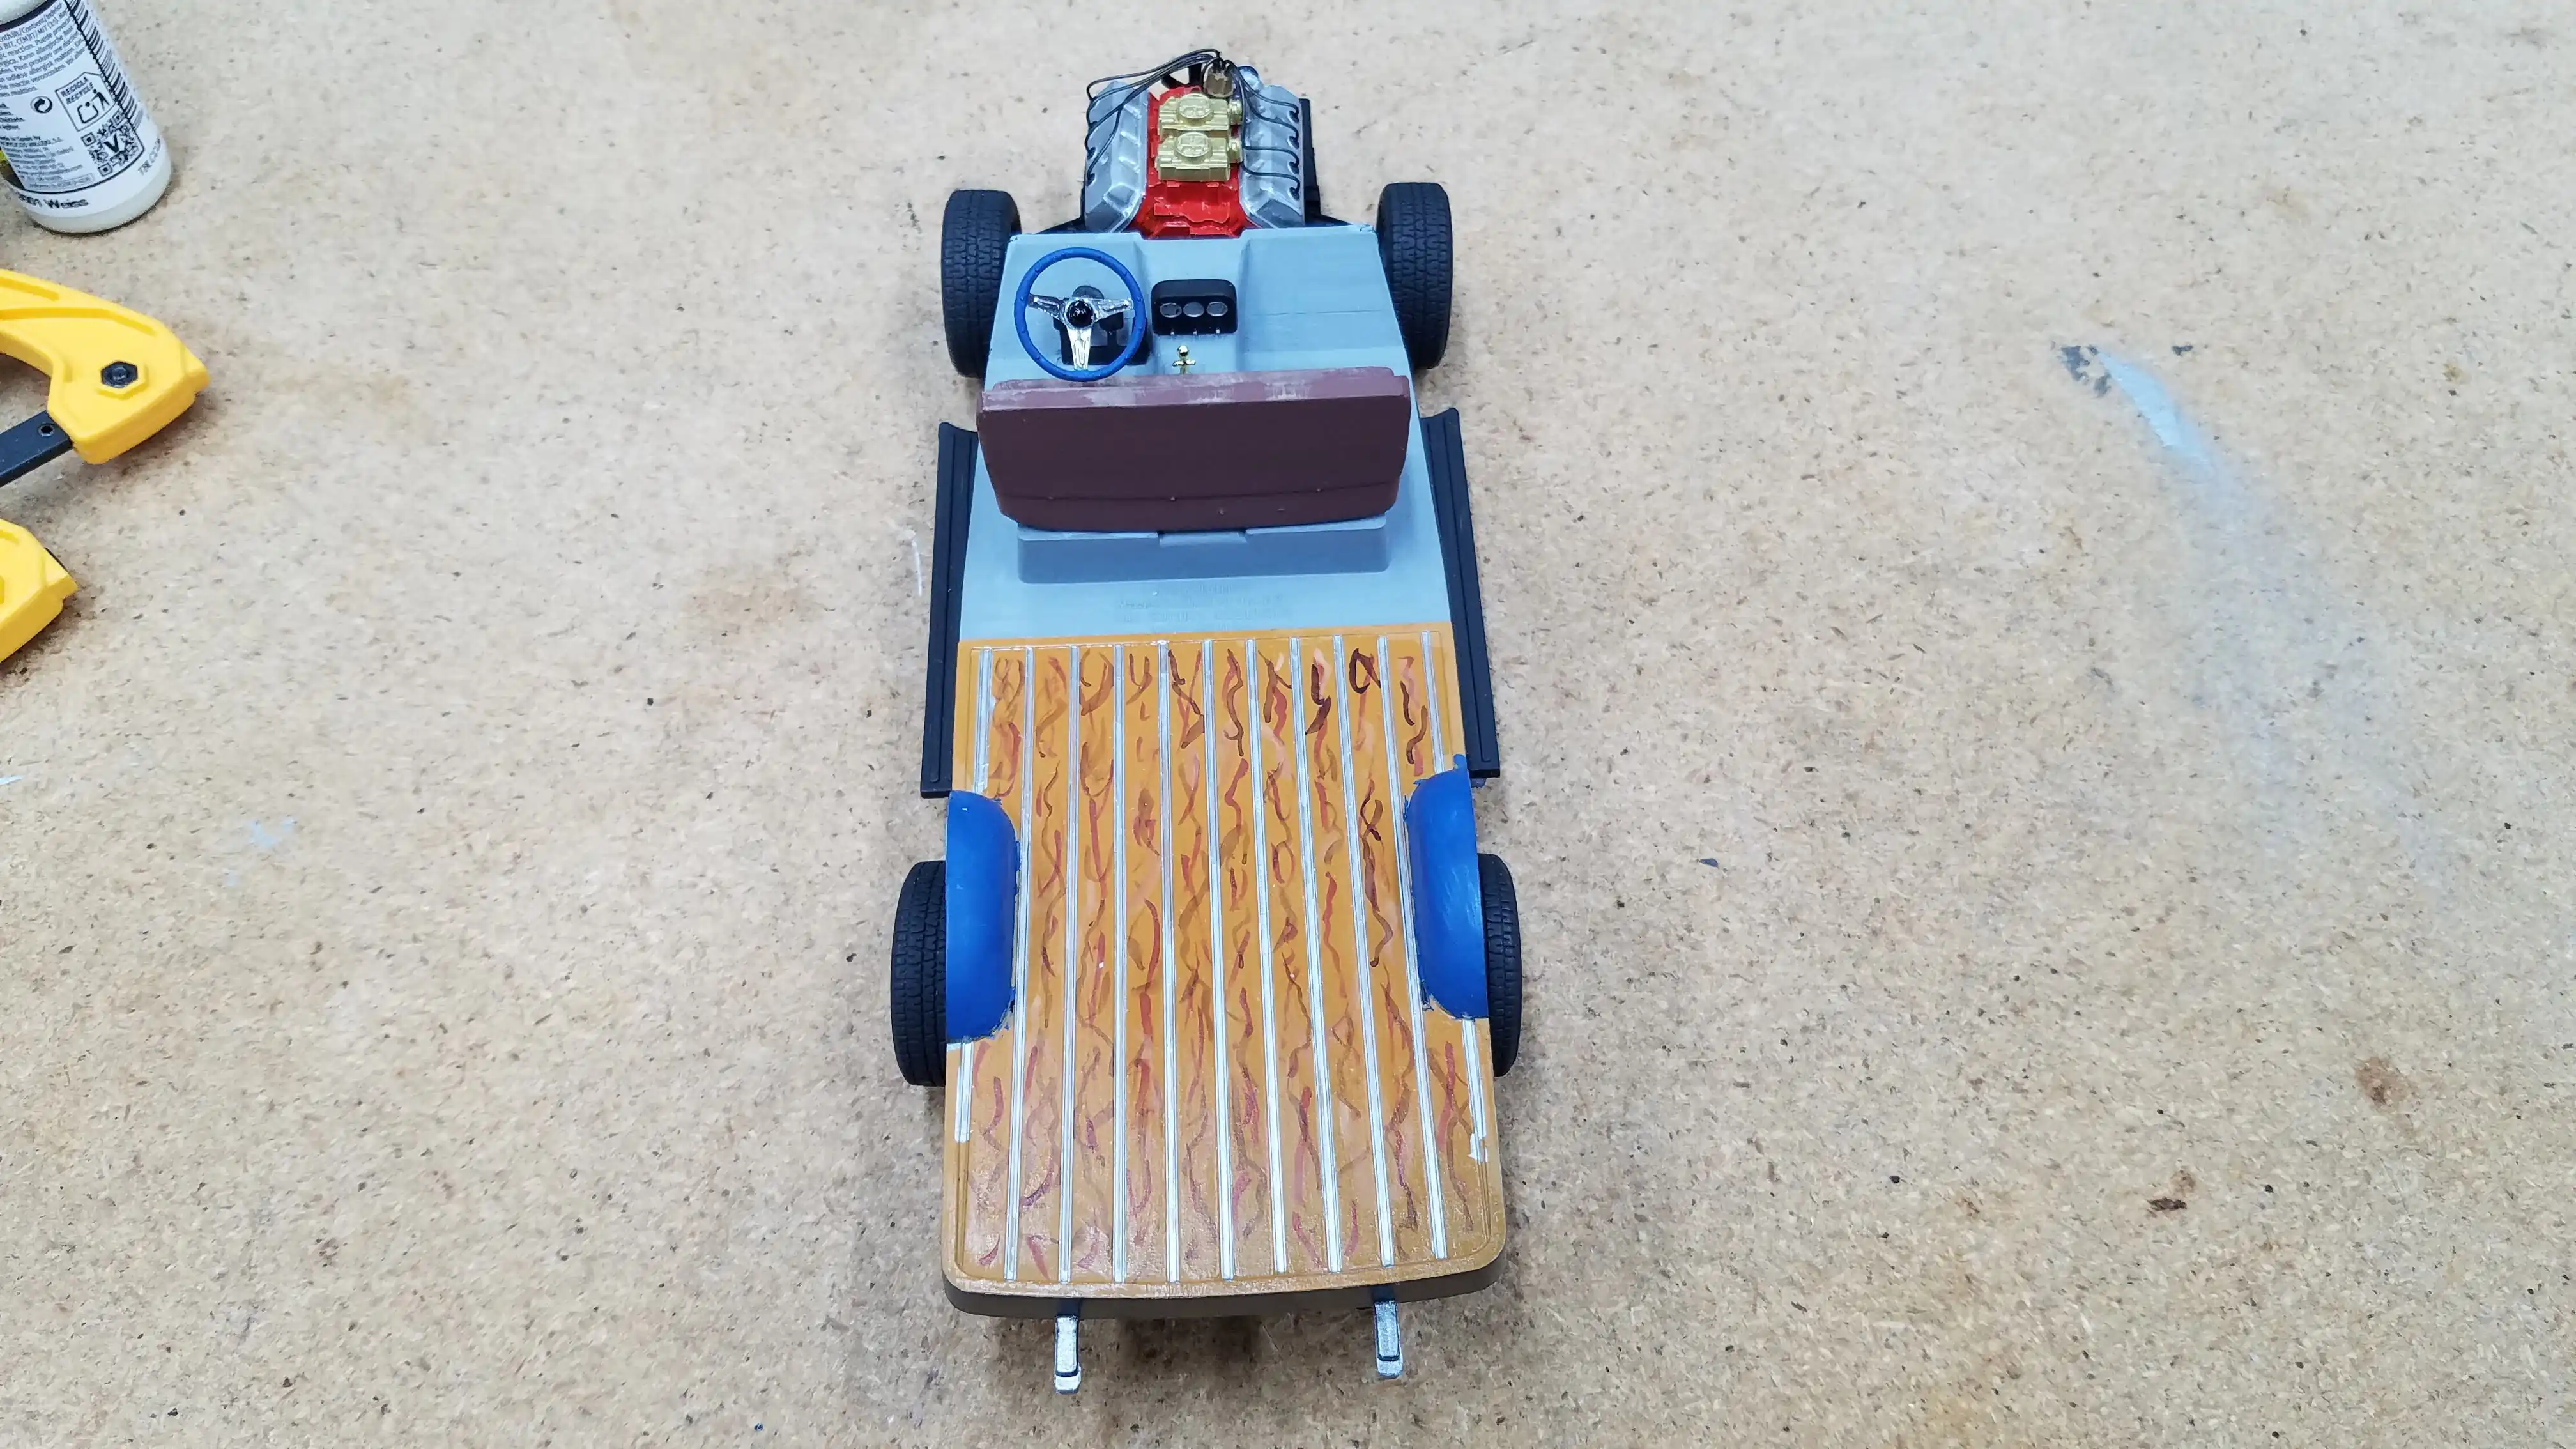
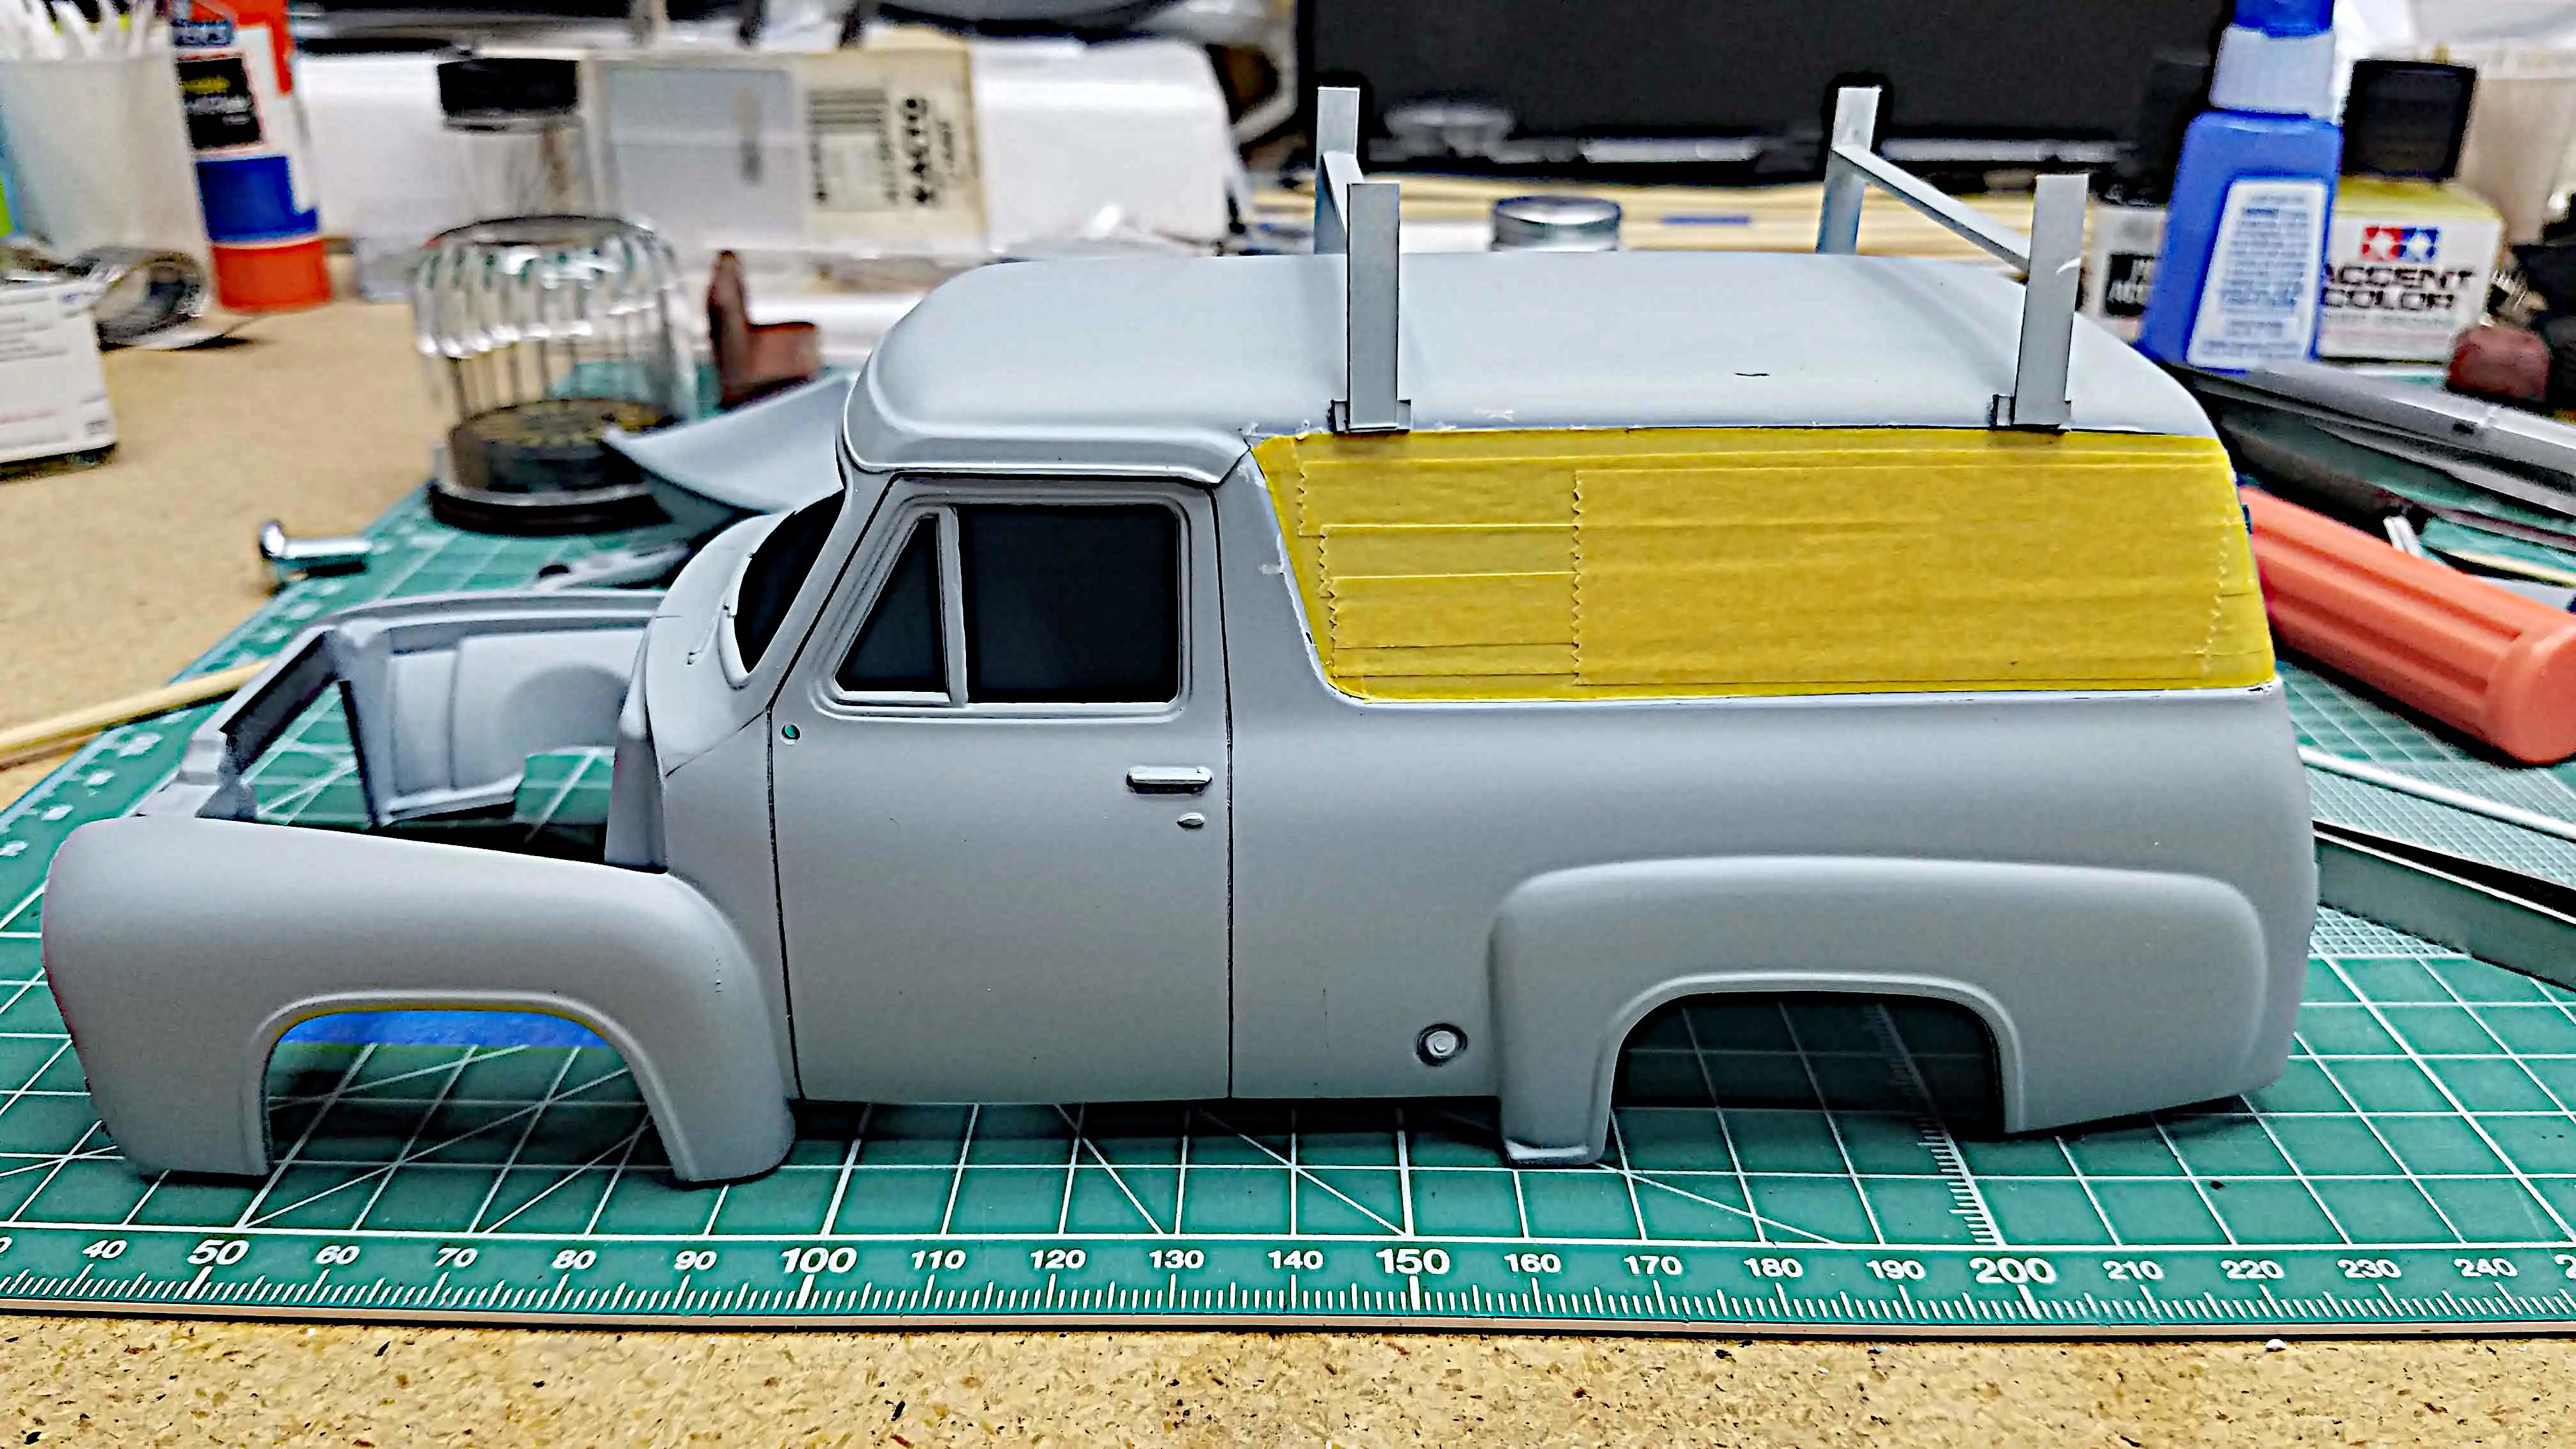
 Attempting to paint wood grain
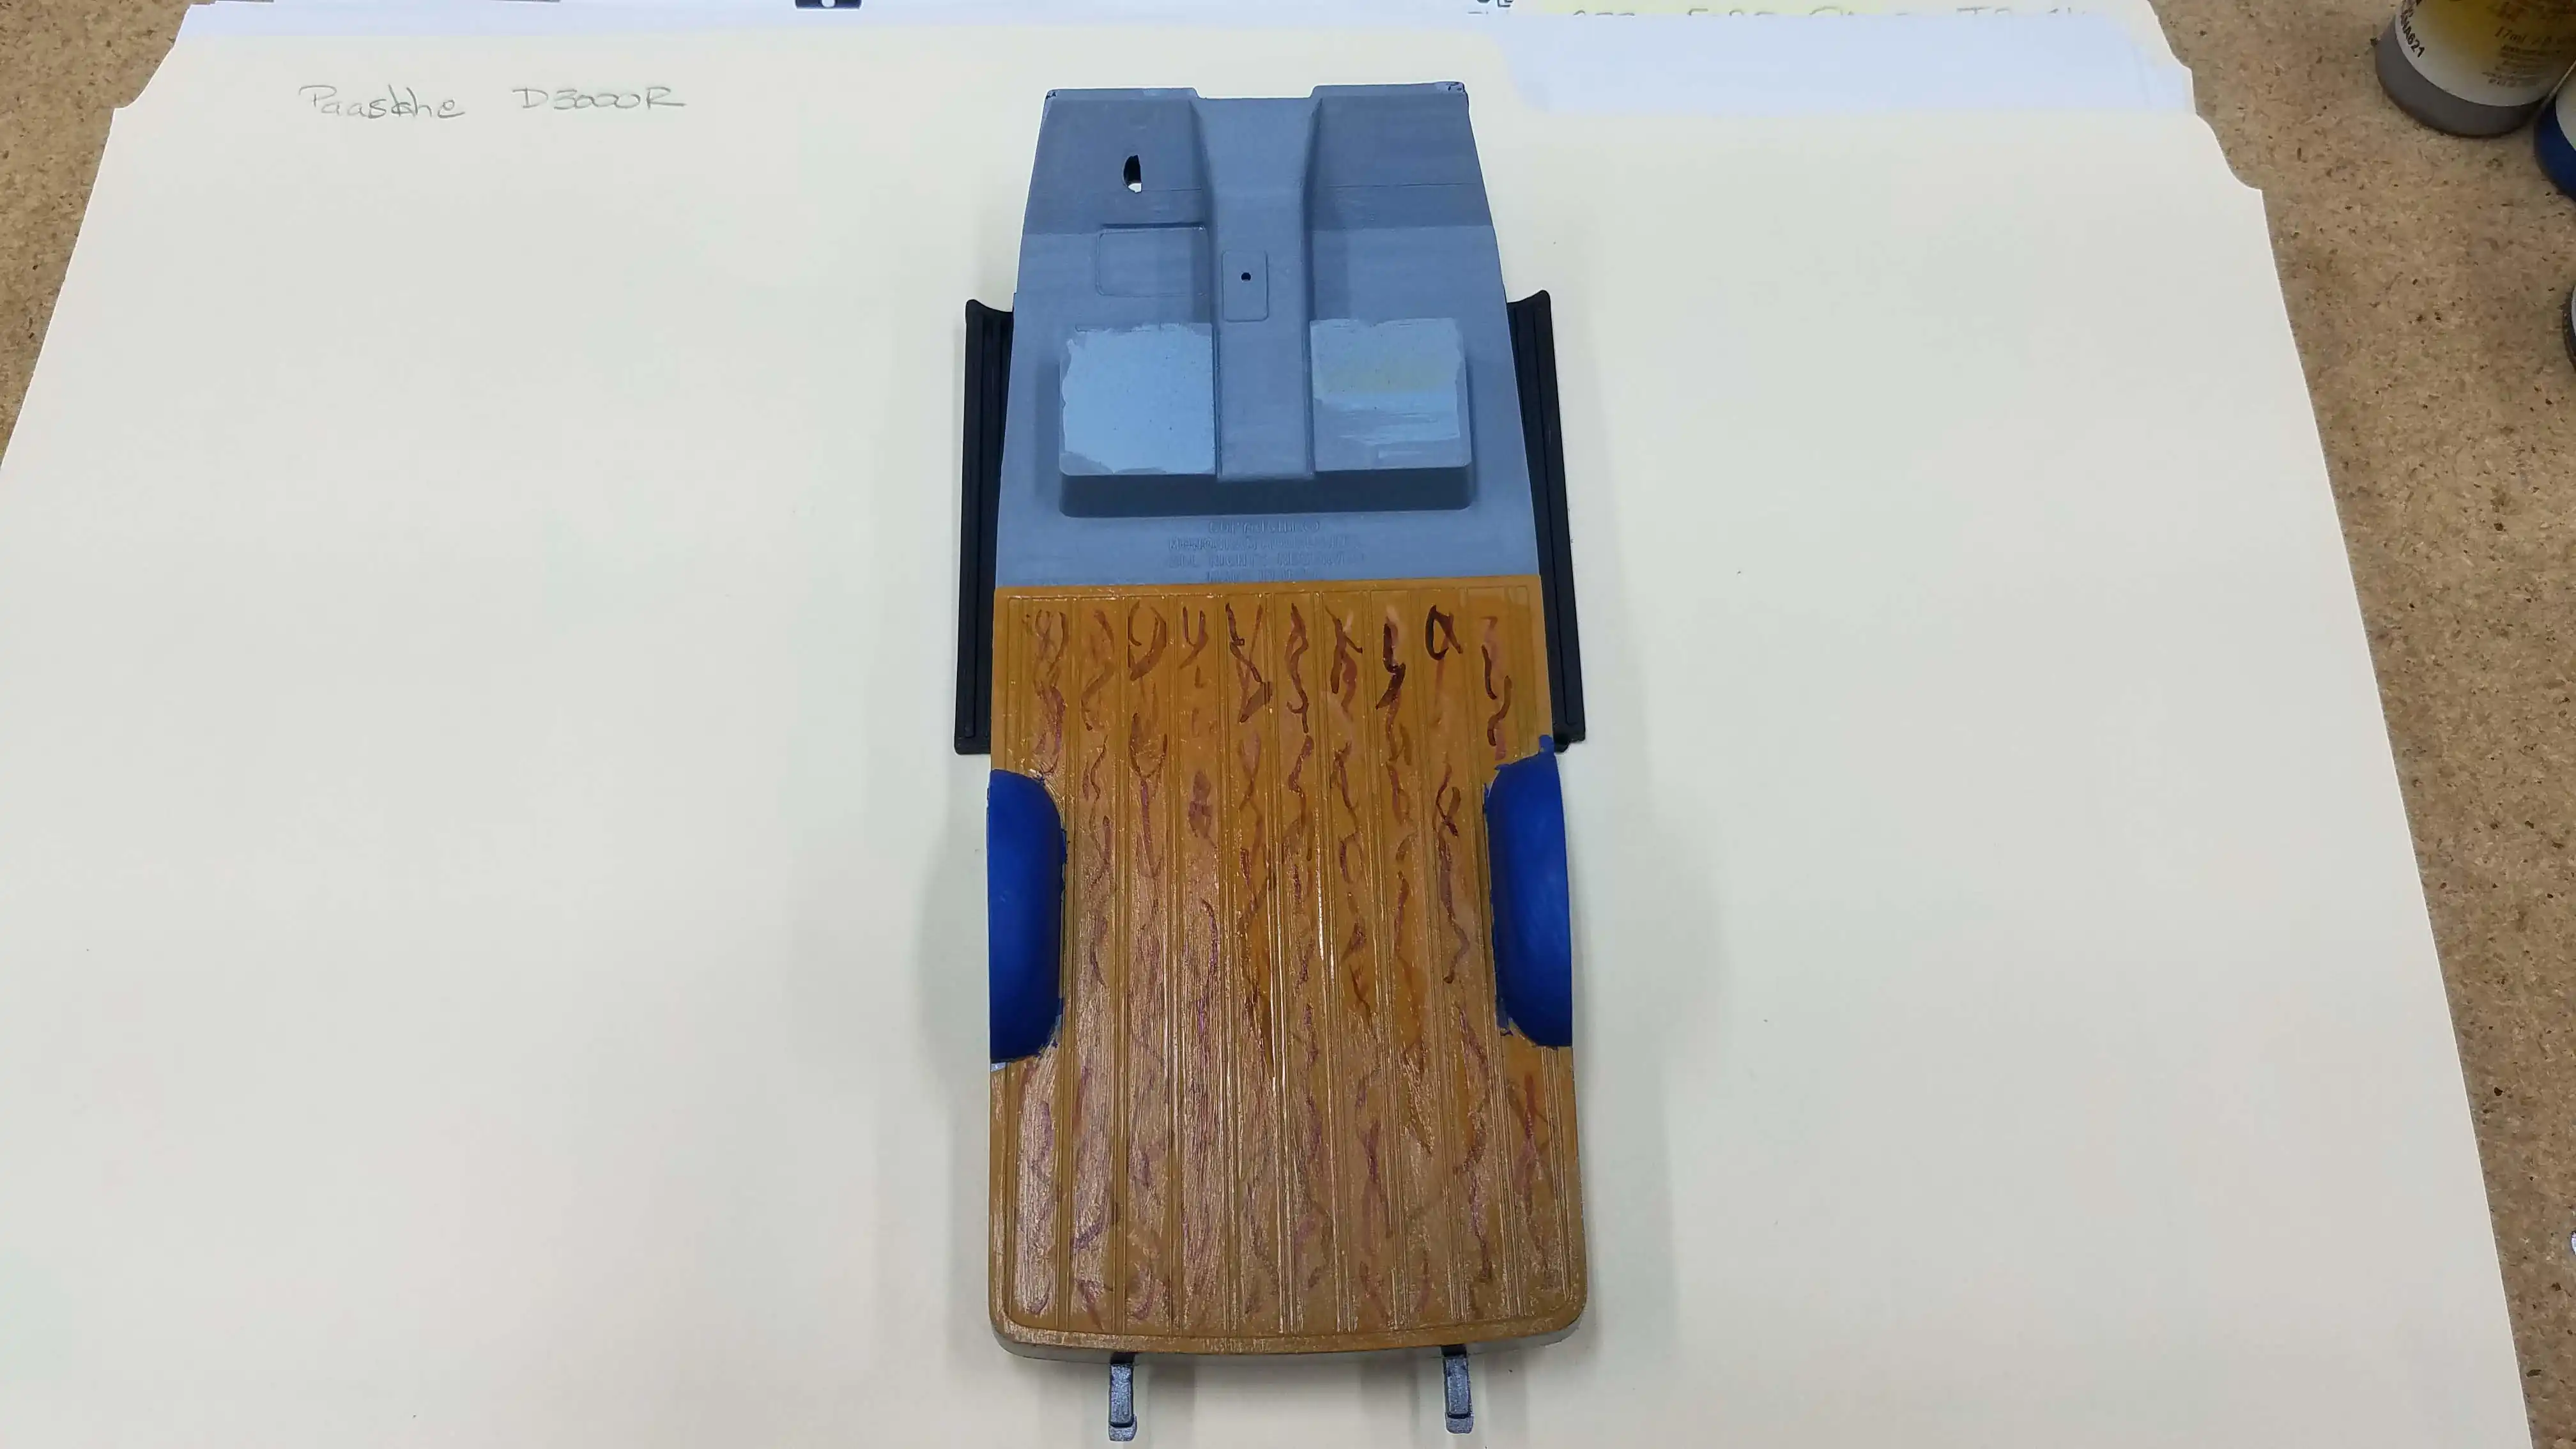
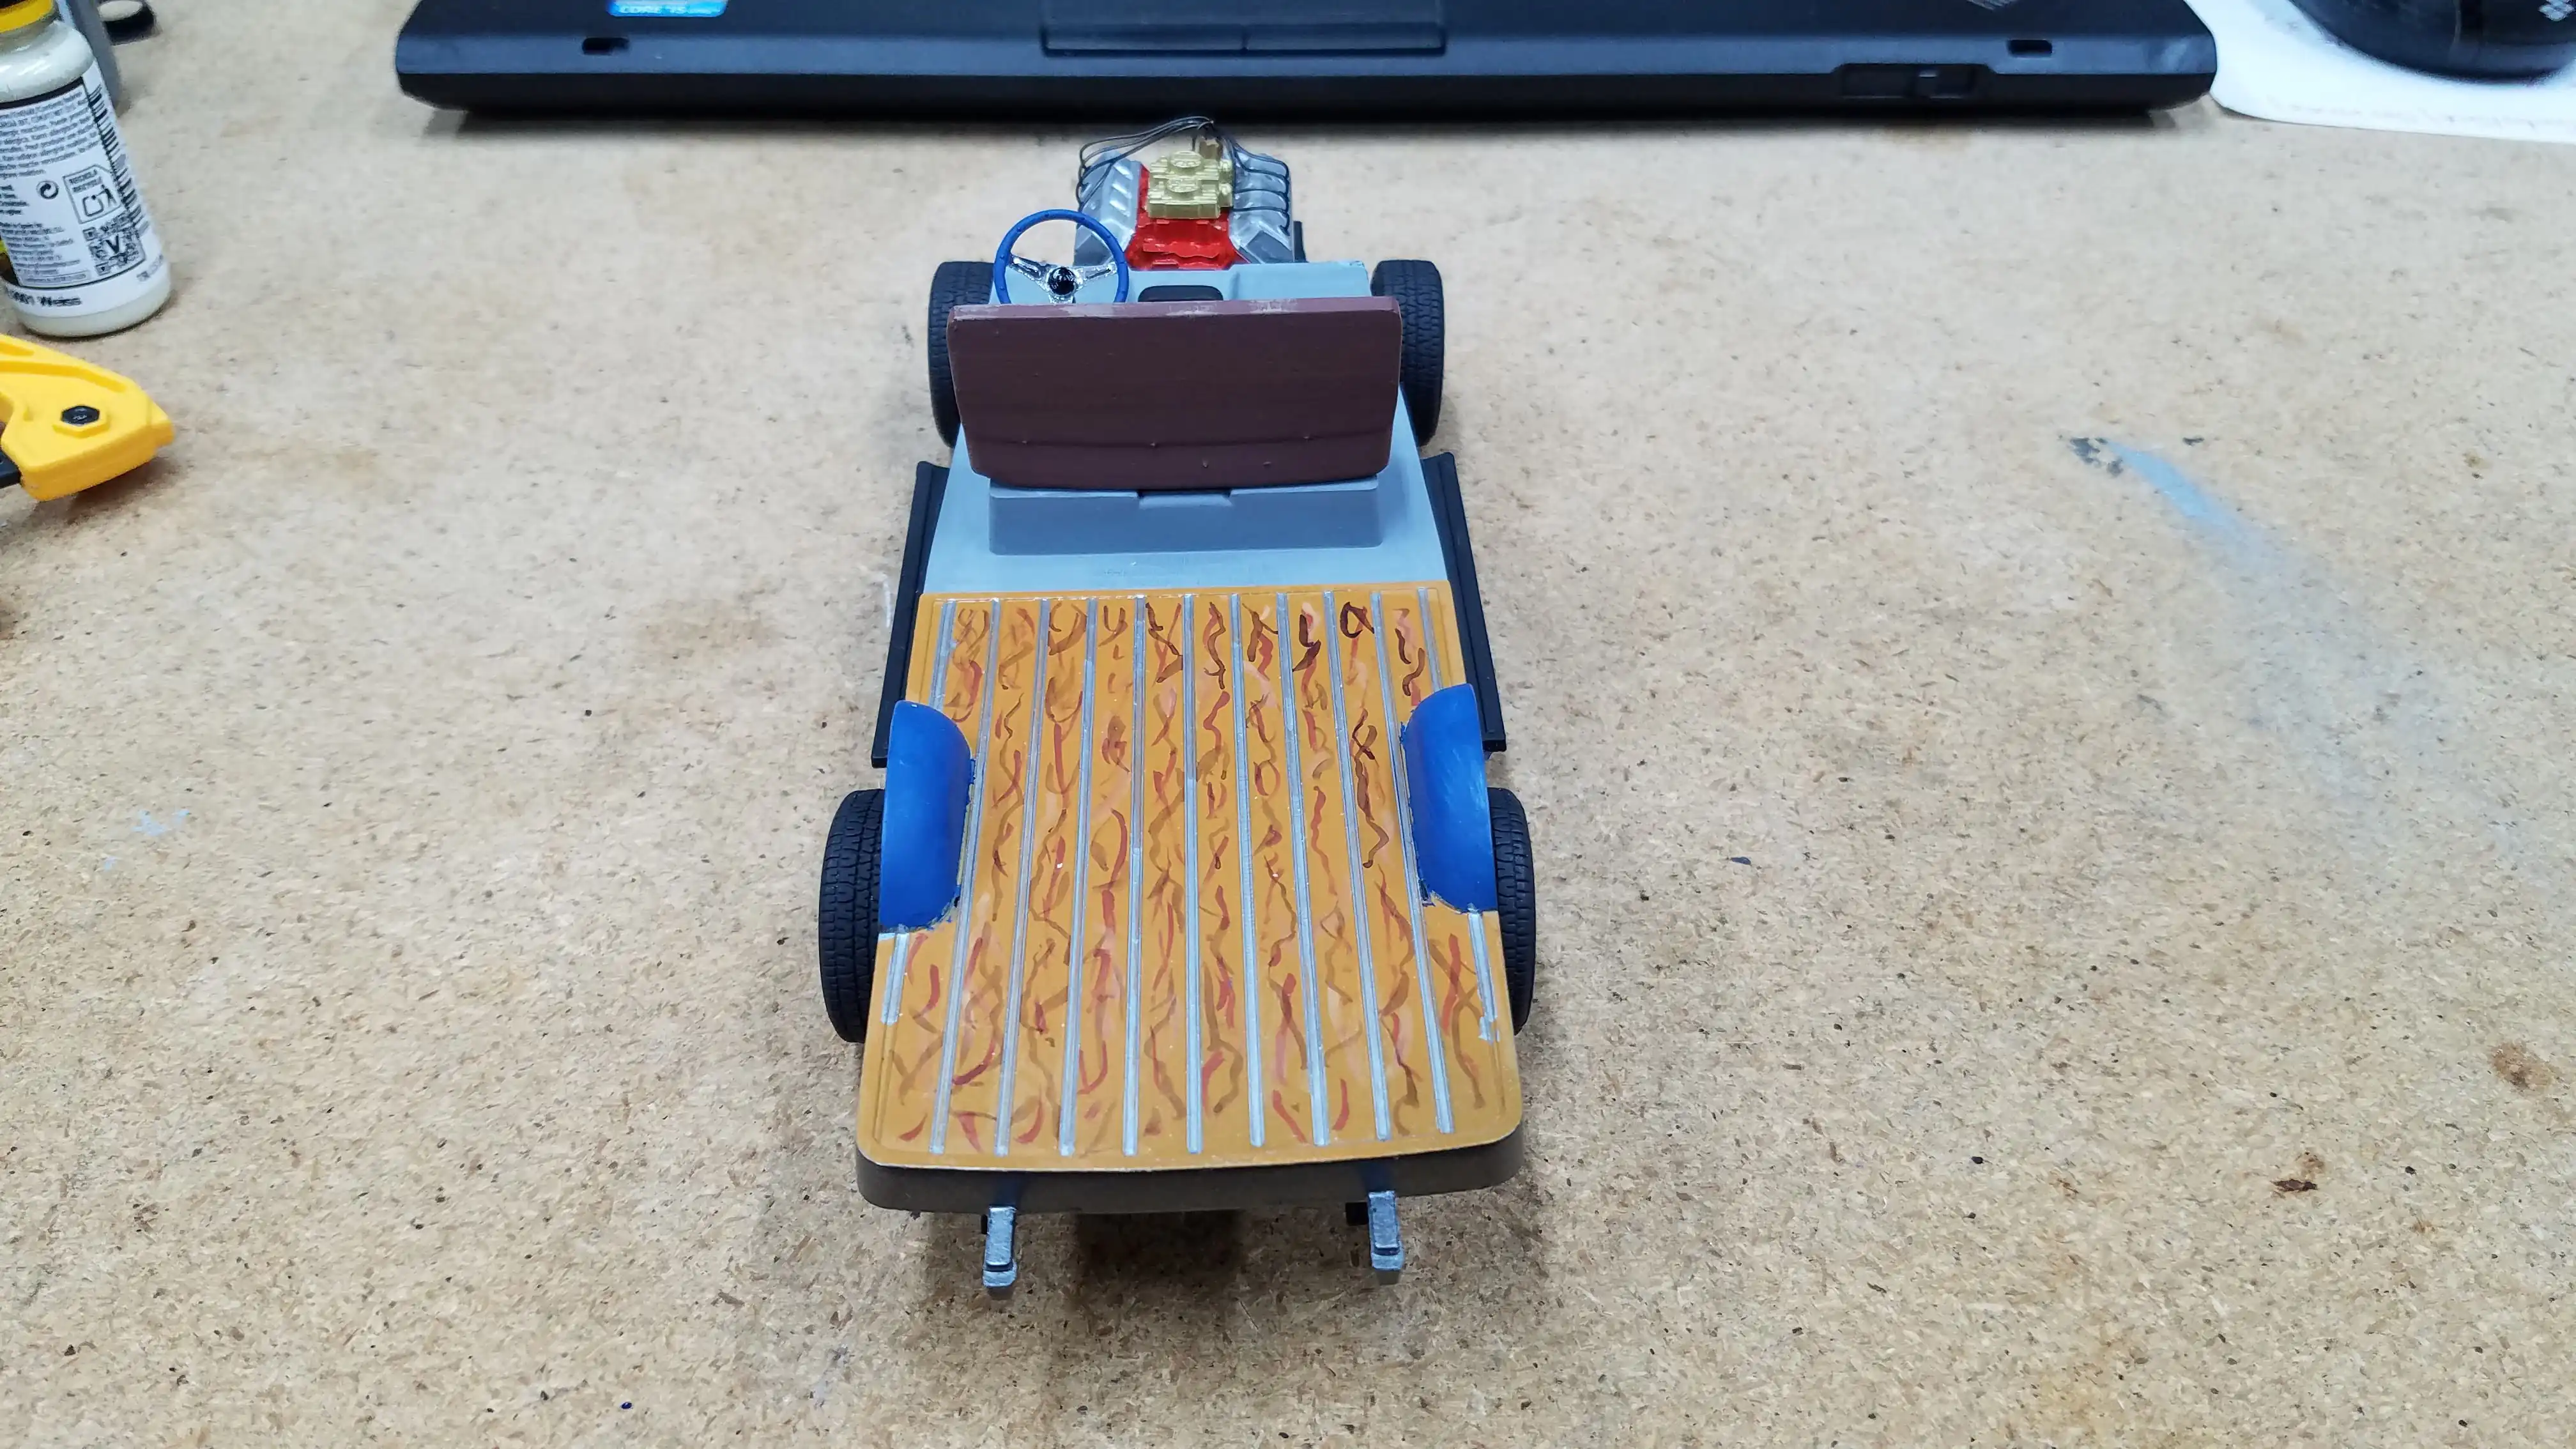
 Truck bed with the masking tape removed
 Interior tub and running boards painted
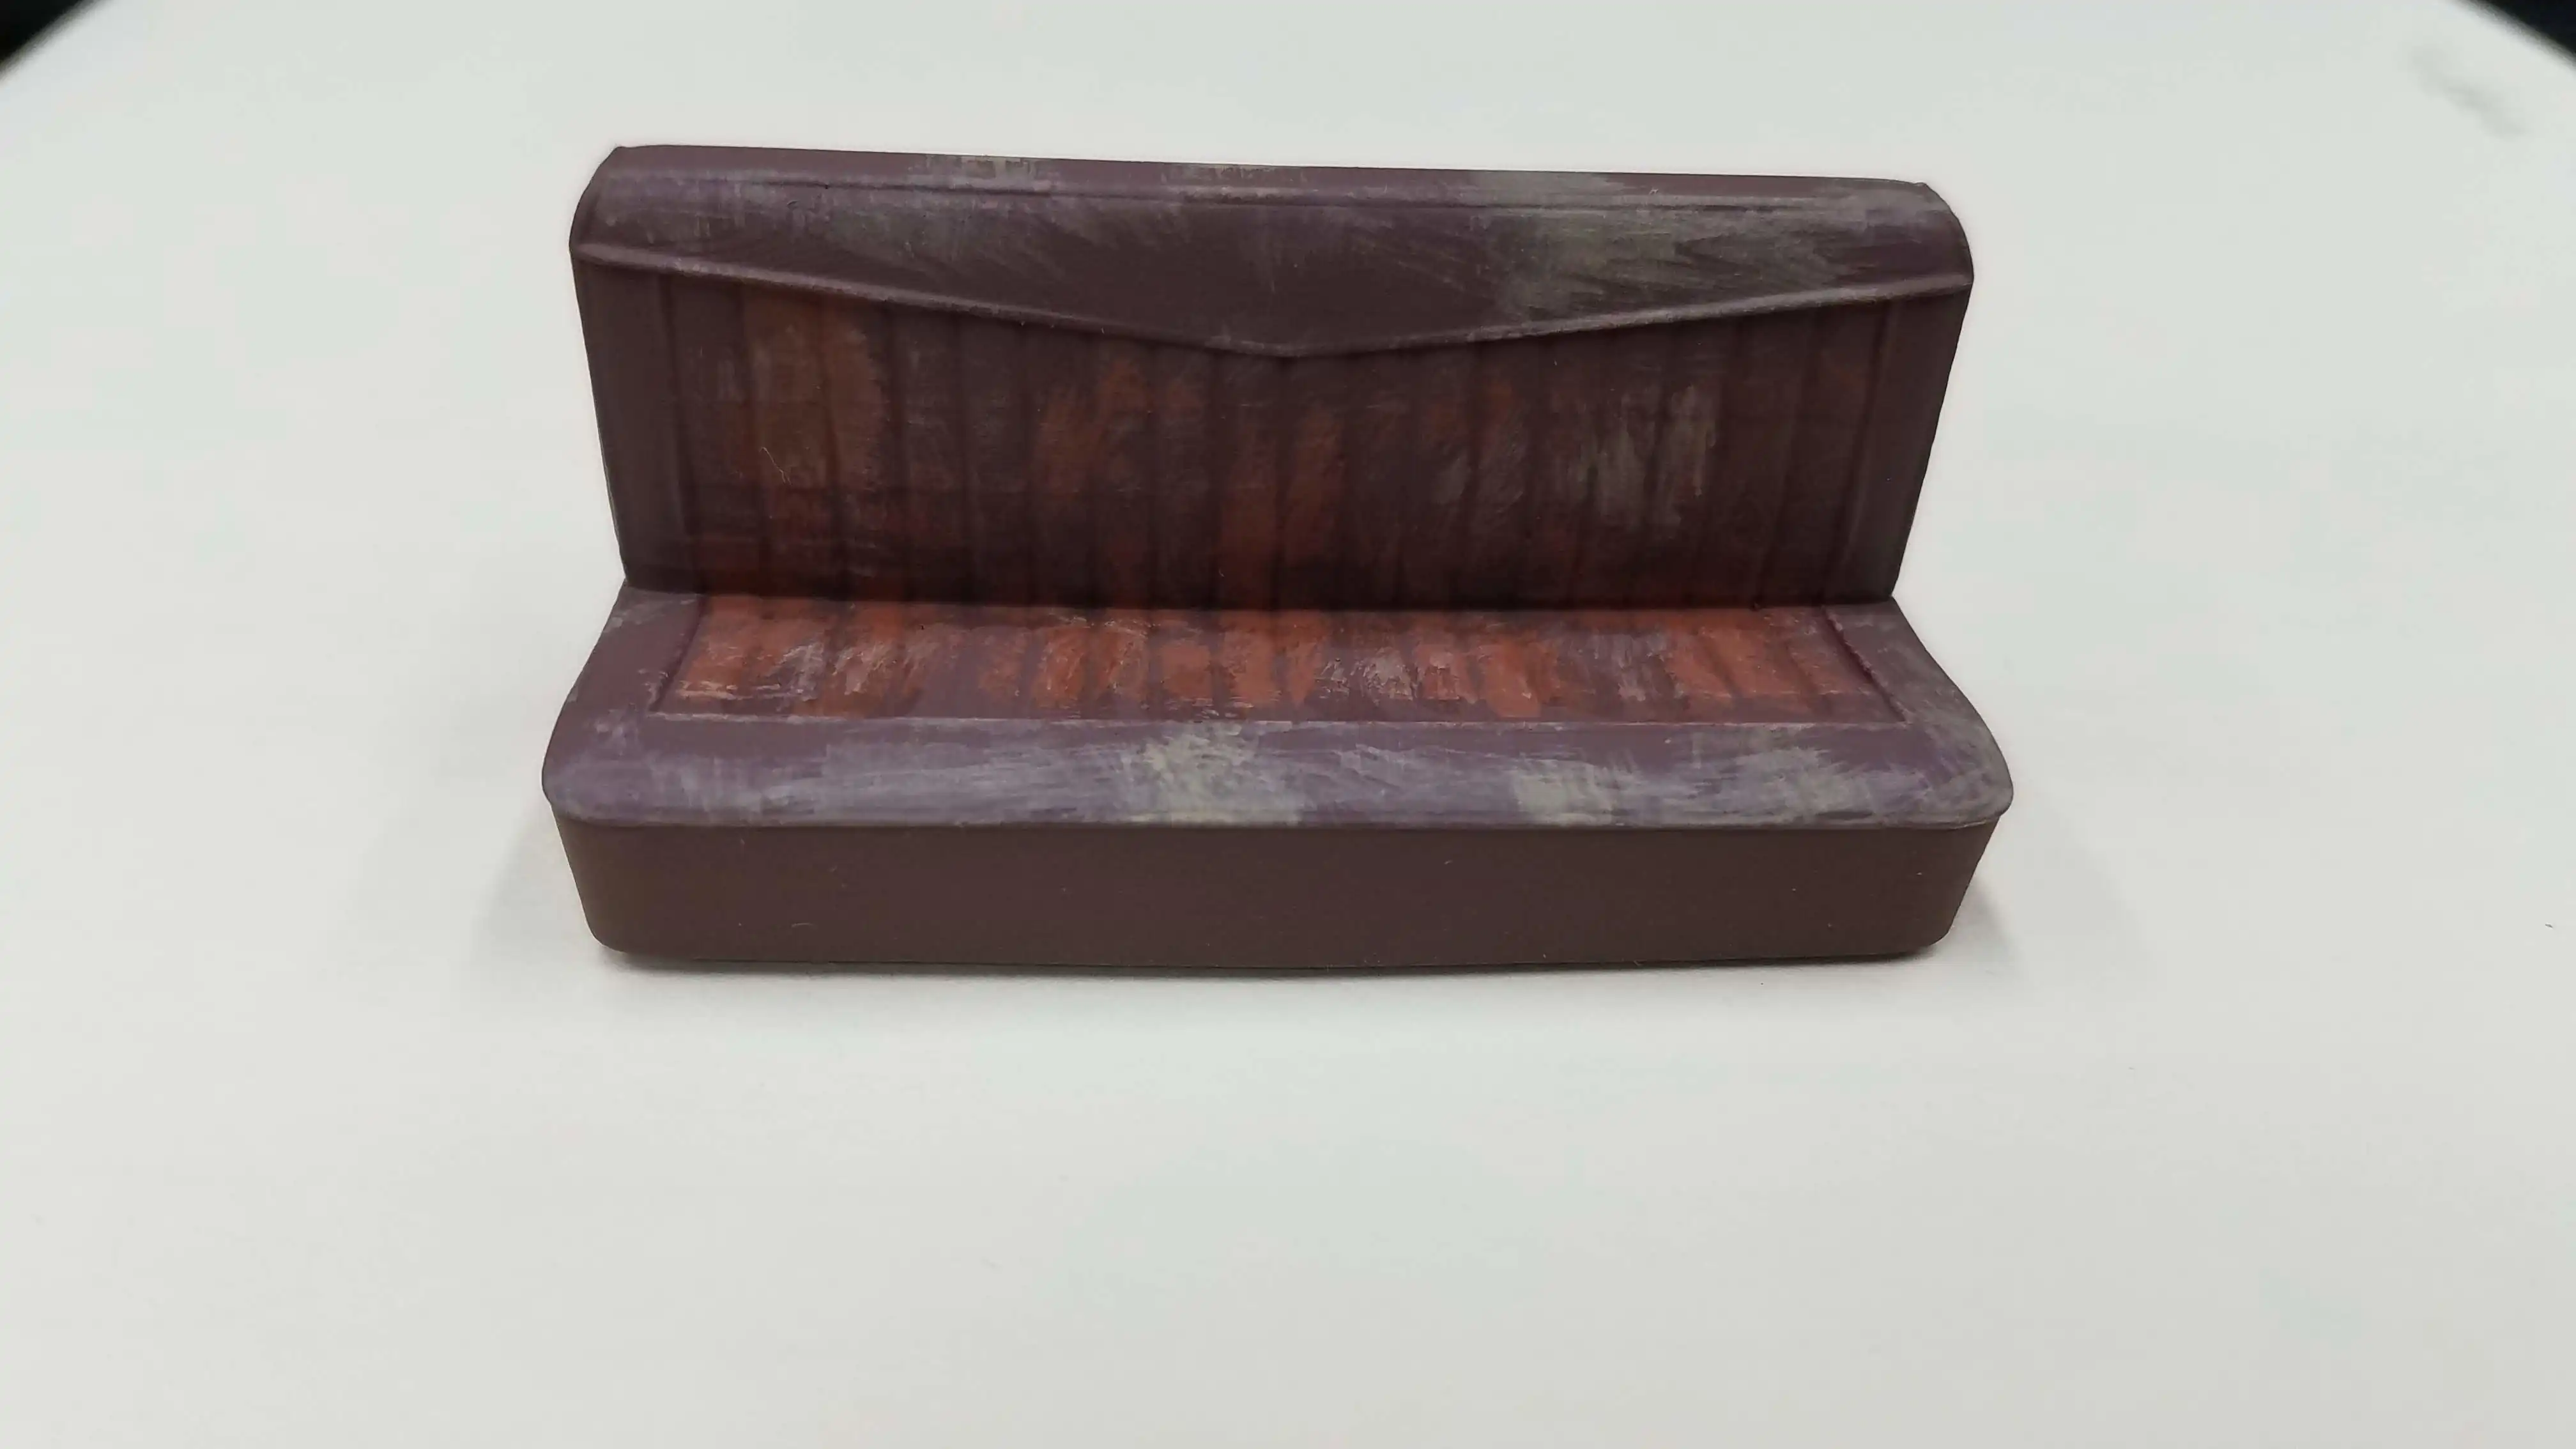 Leather seat painted
 Interior tub is finished
 The interior tub looking from the back of the van
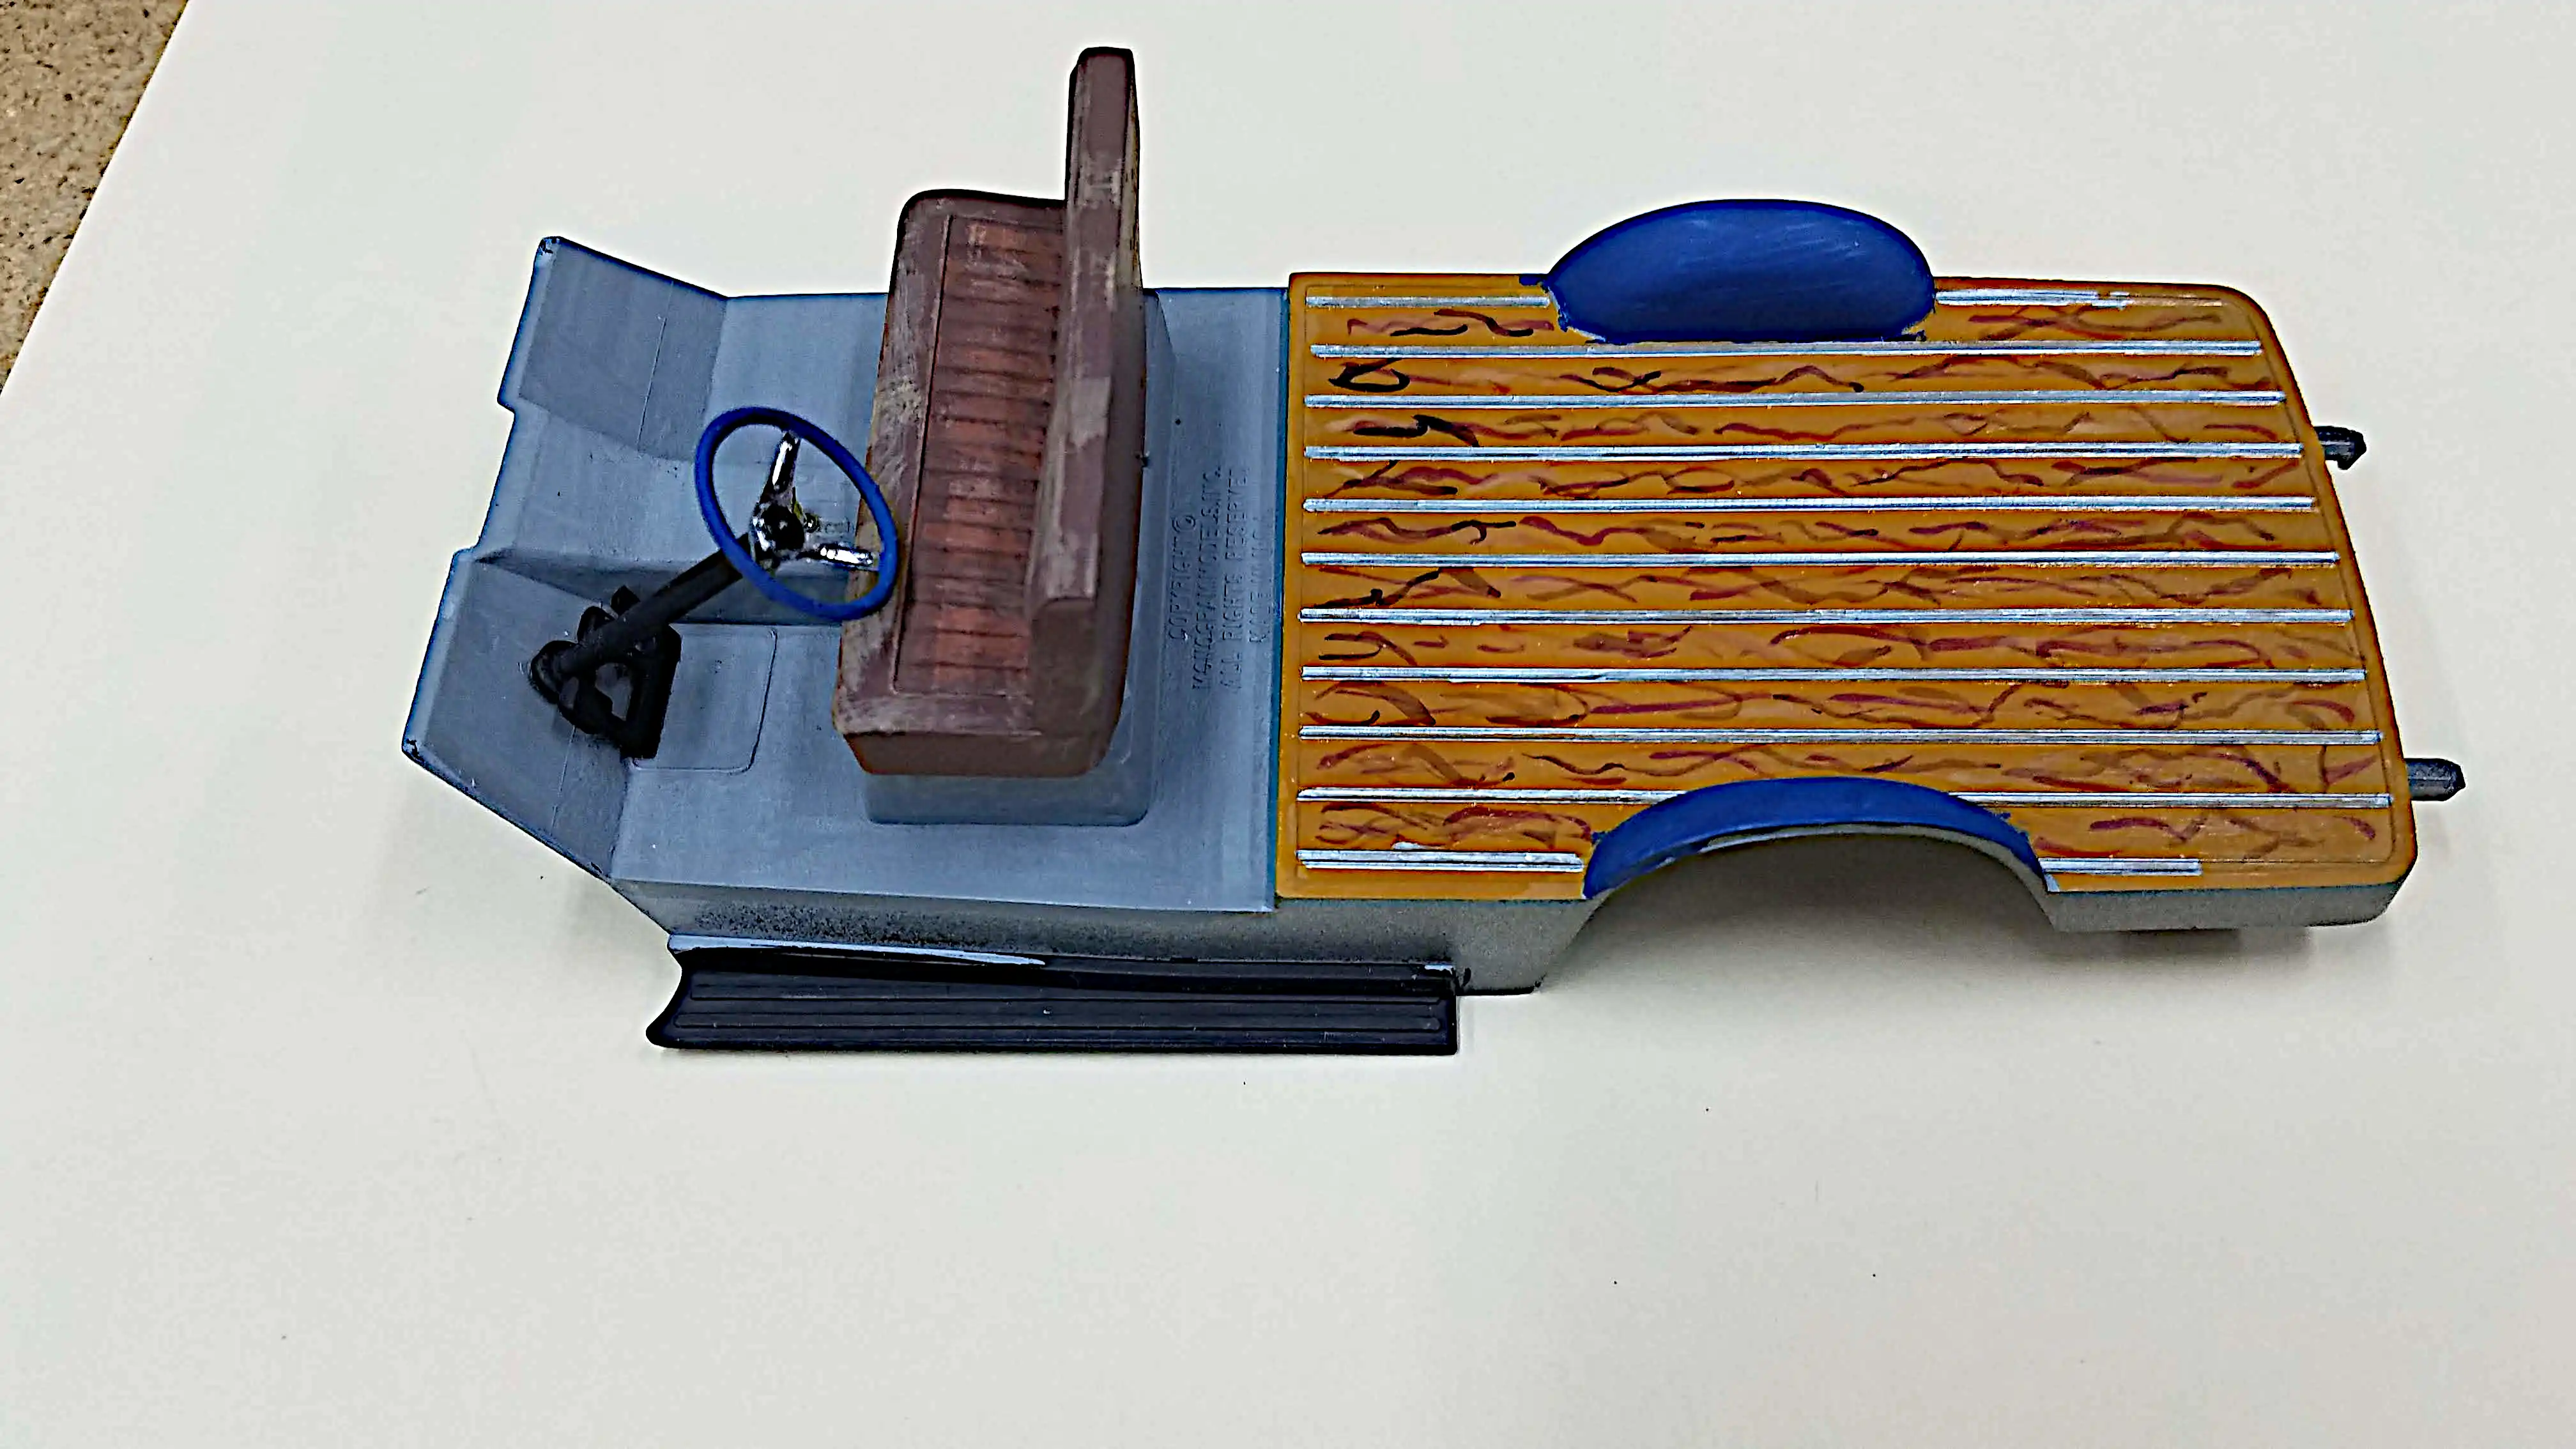
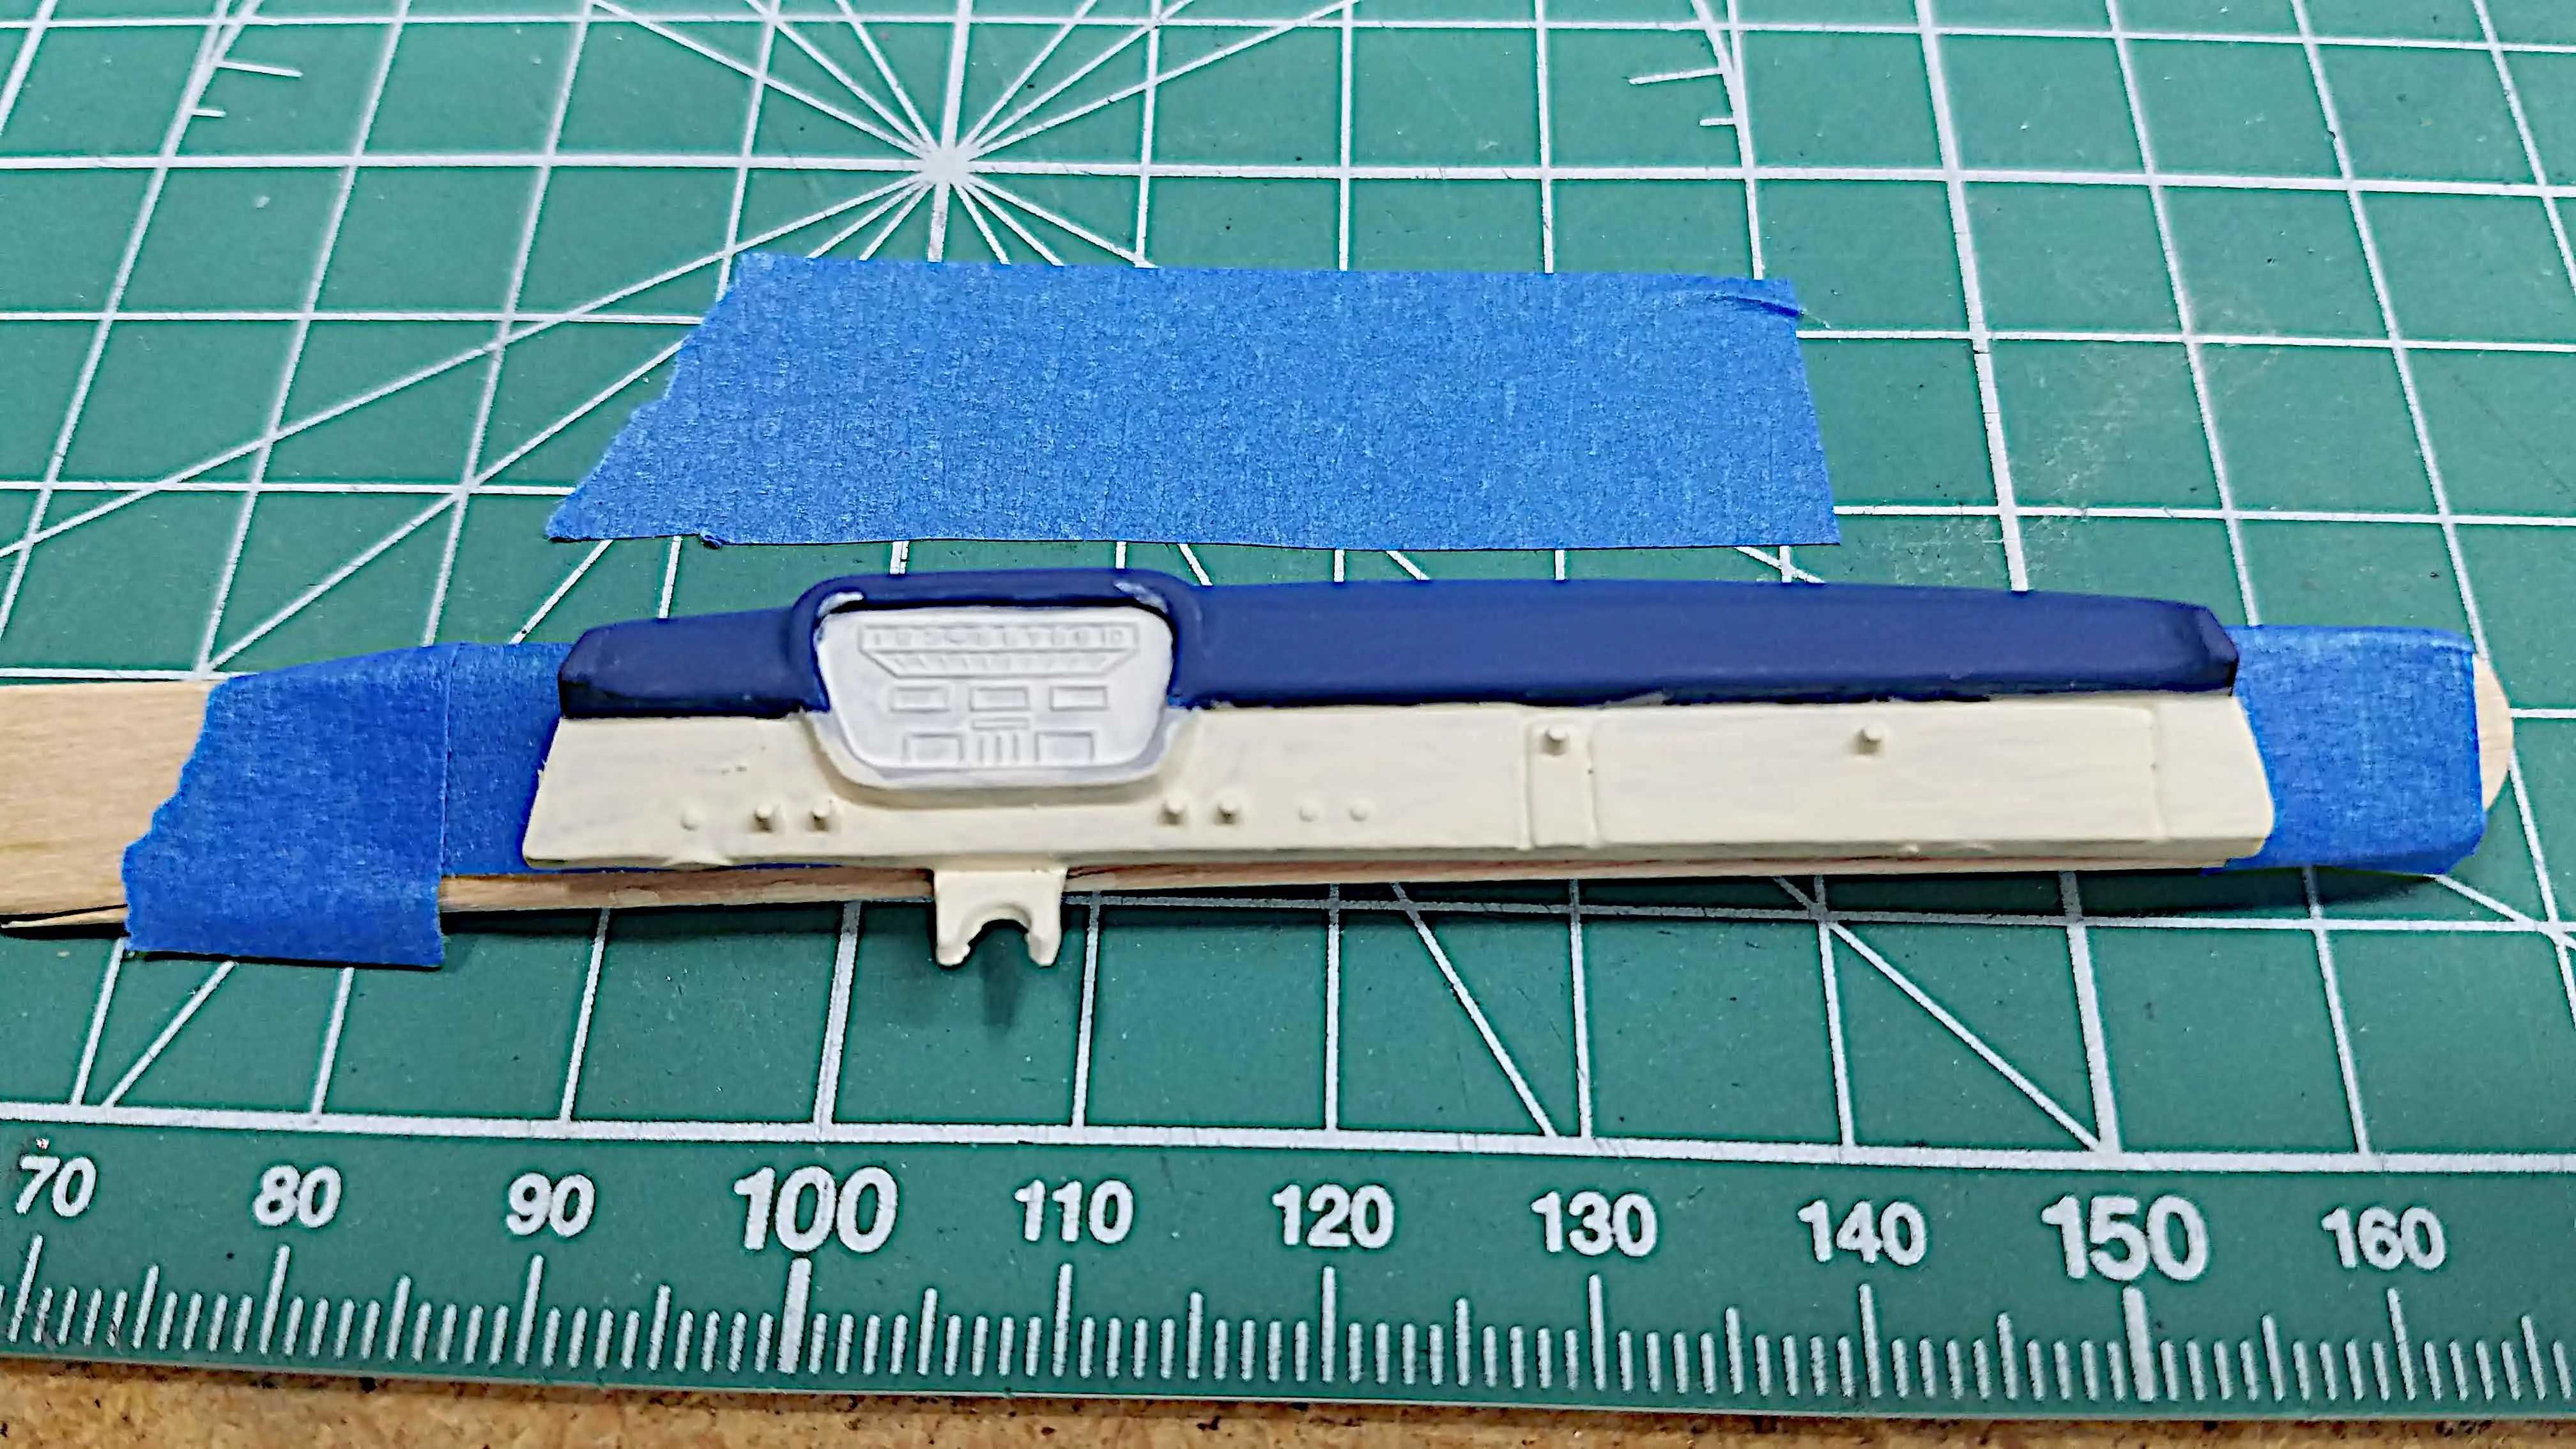 Dash board is painted
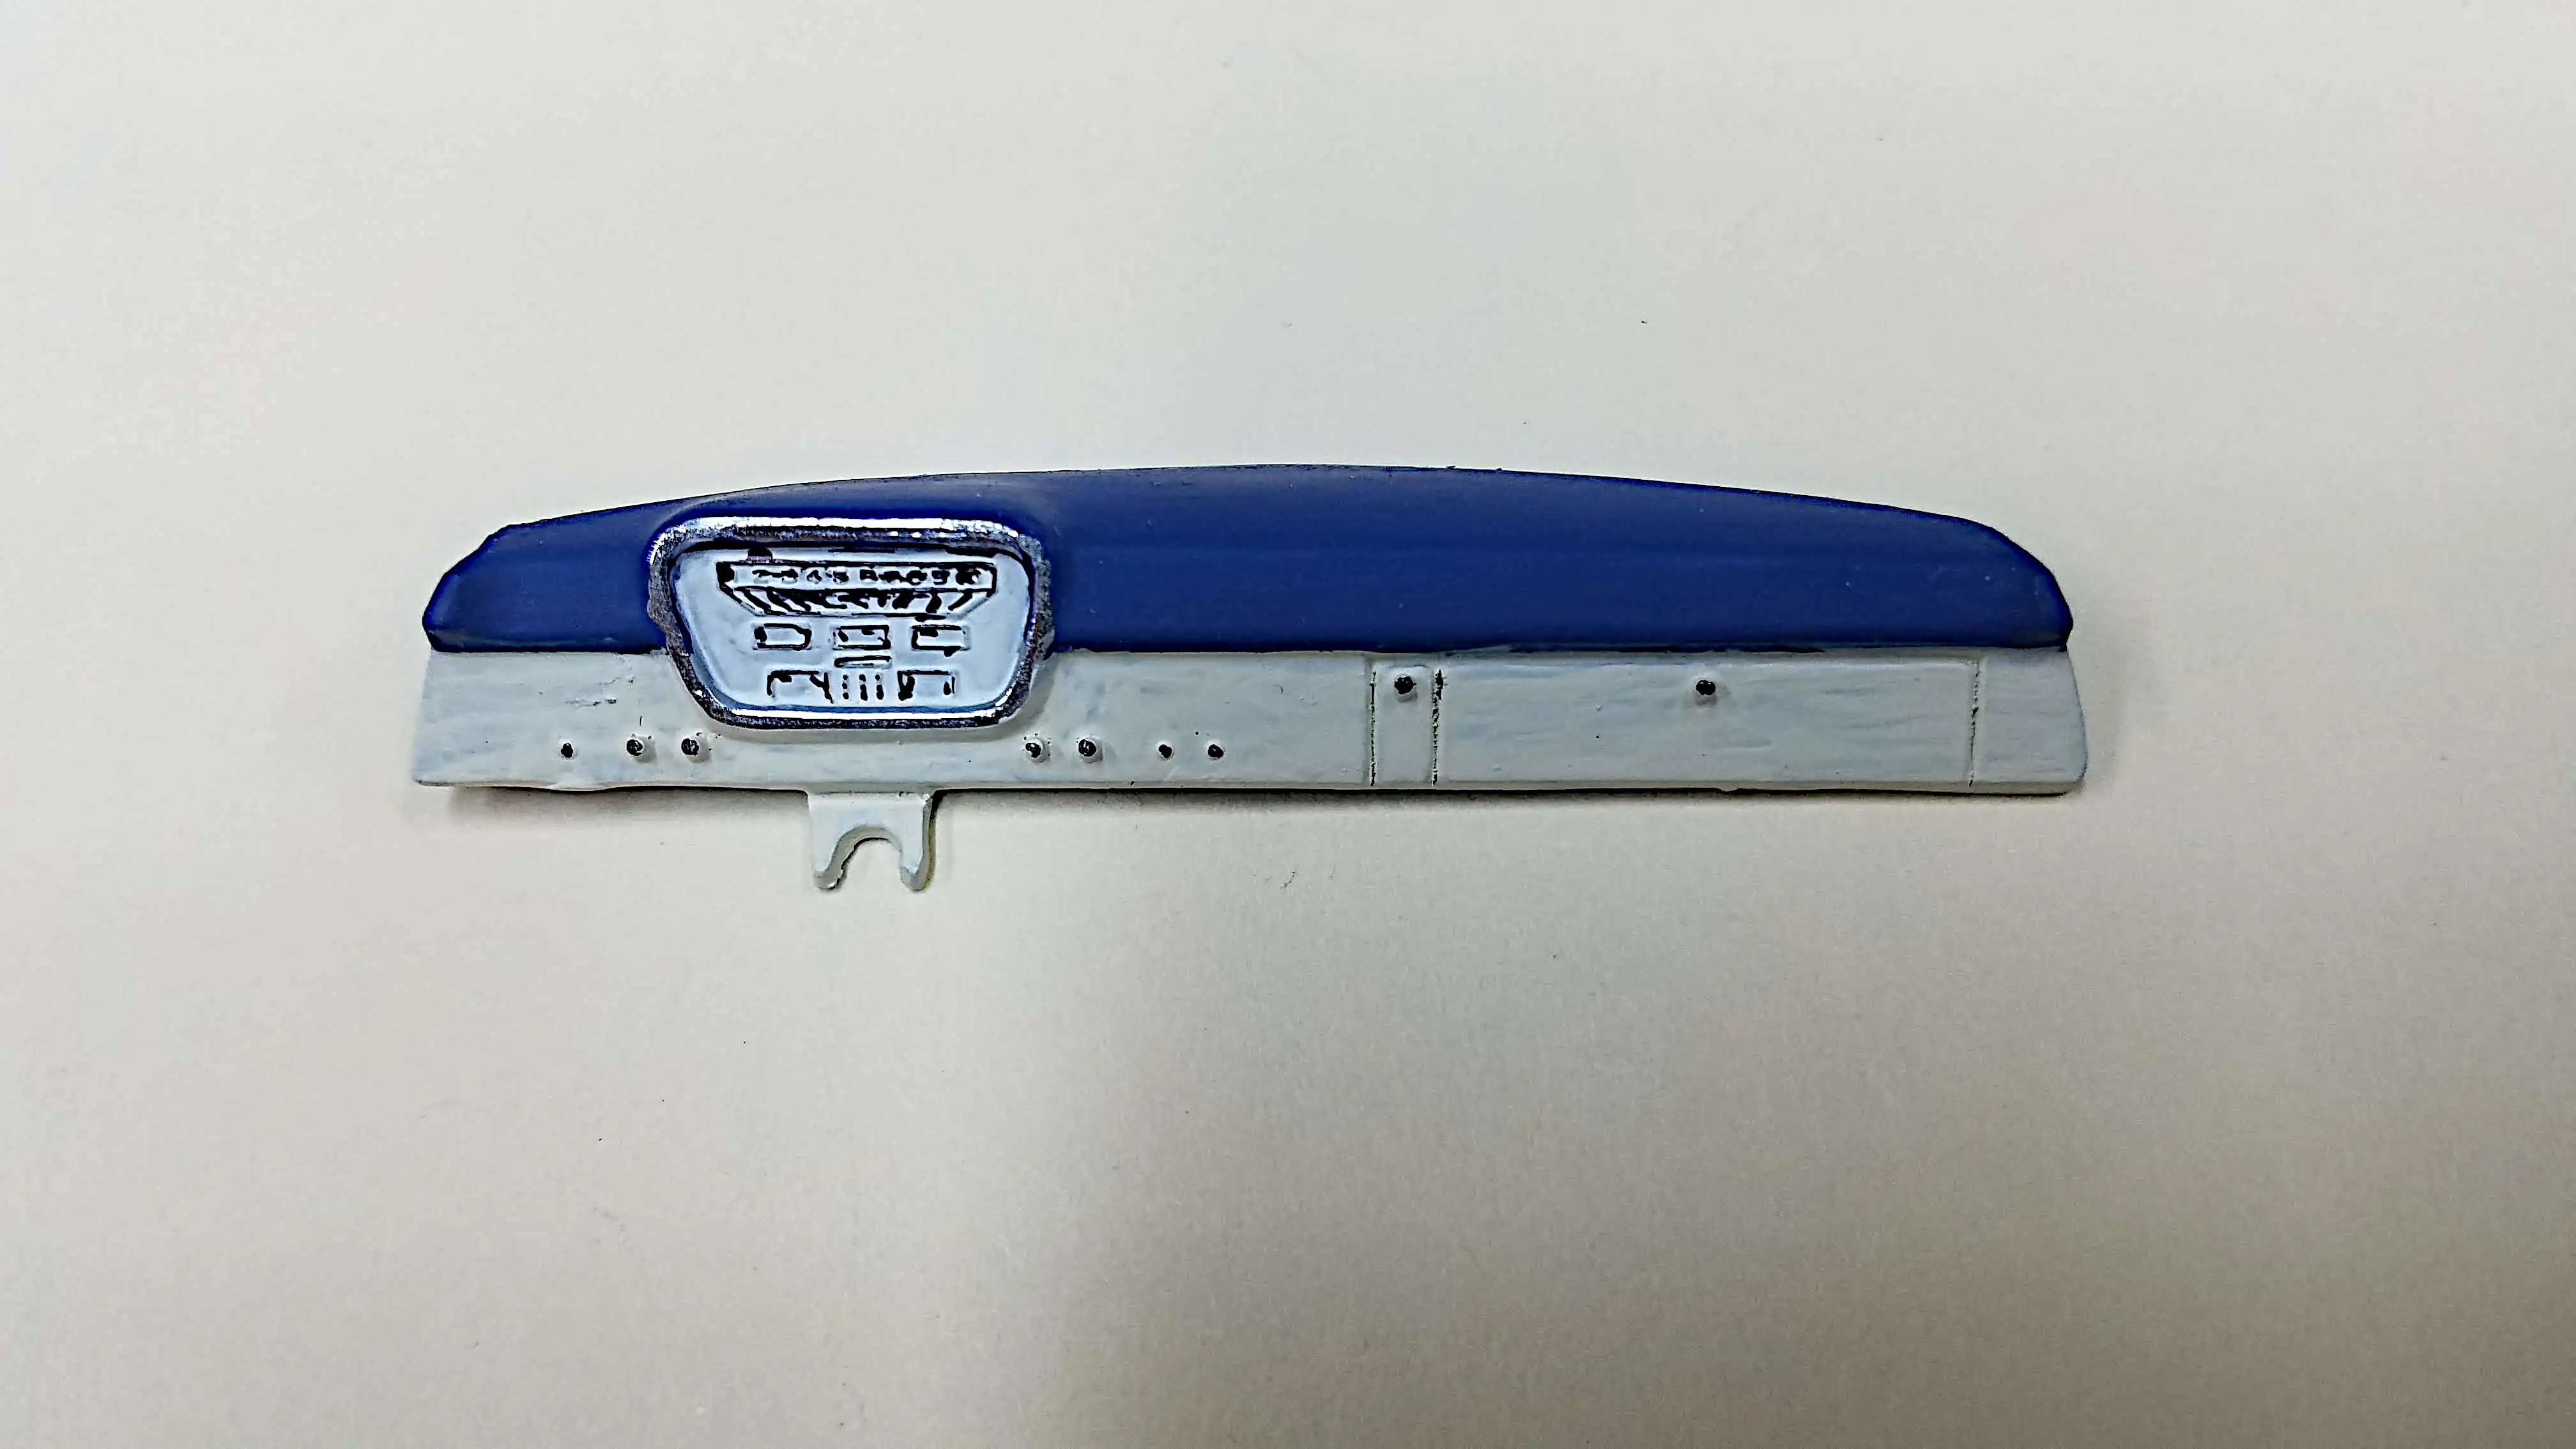 Detailed dash board
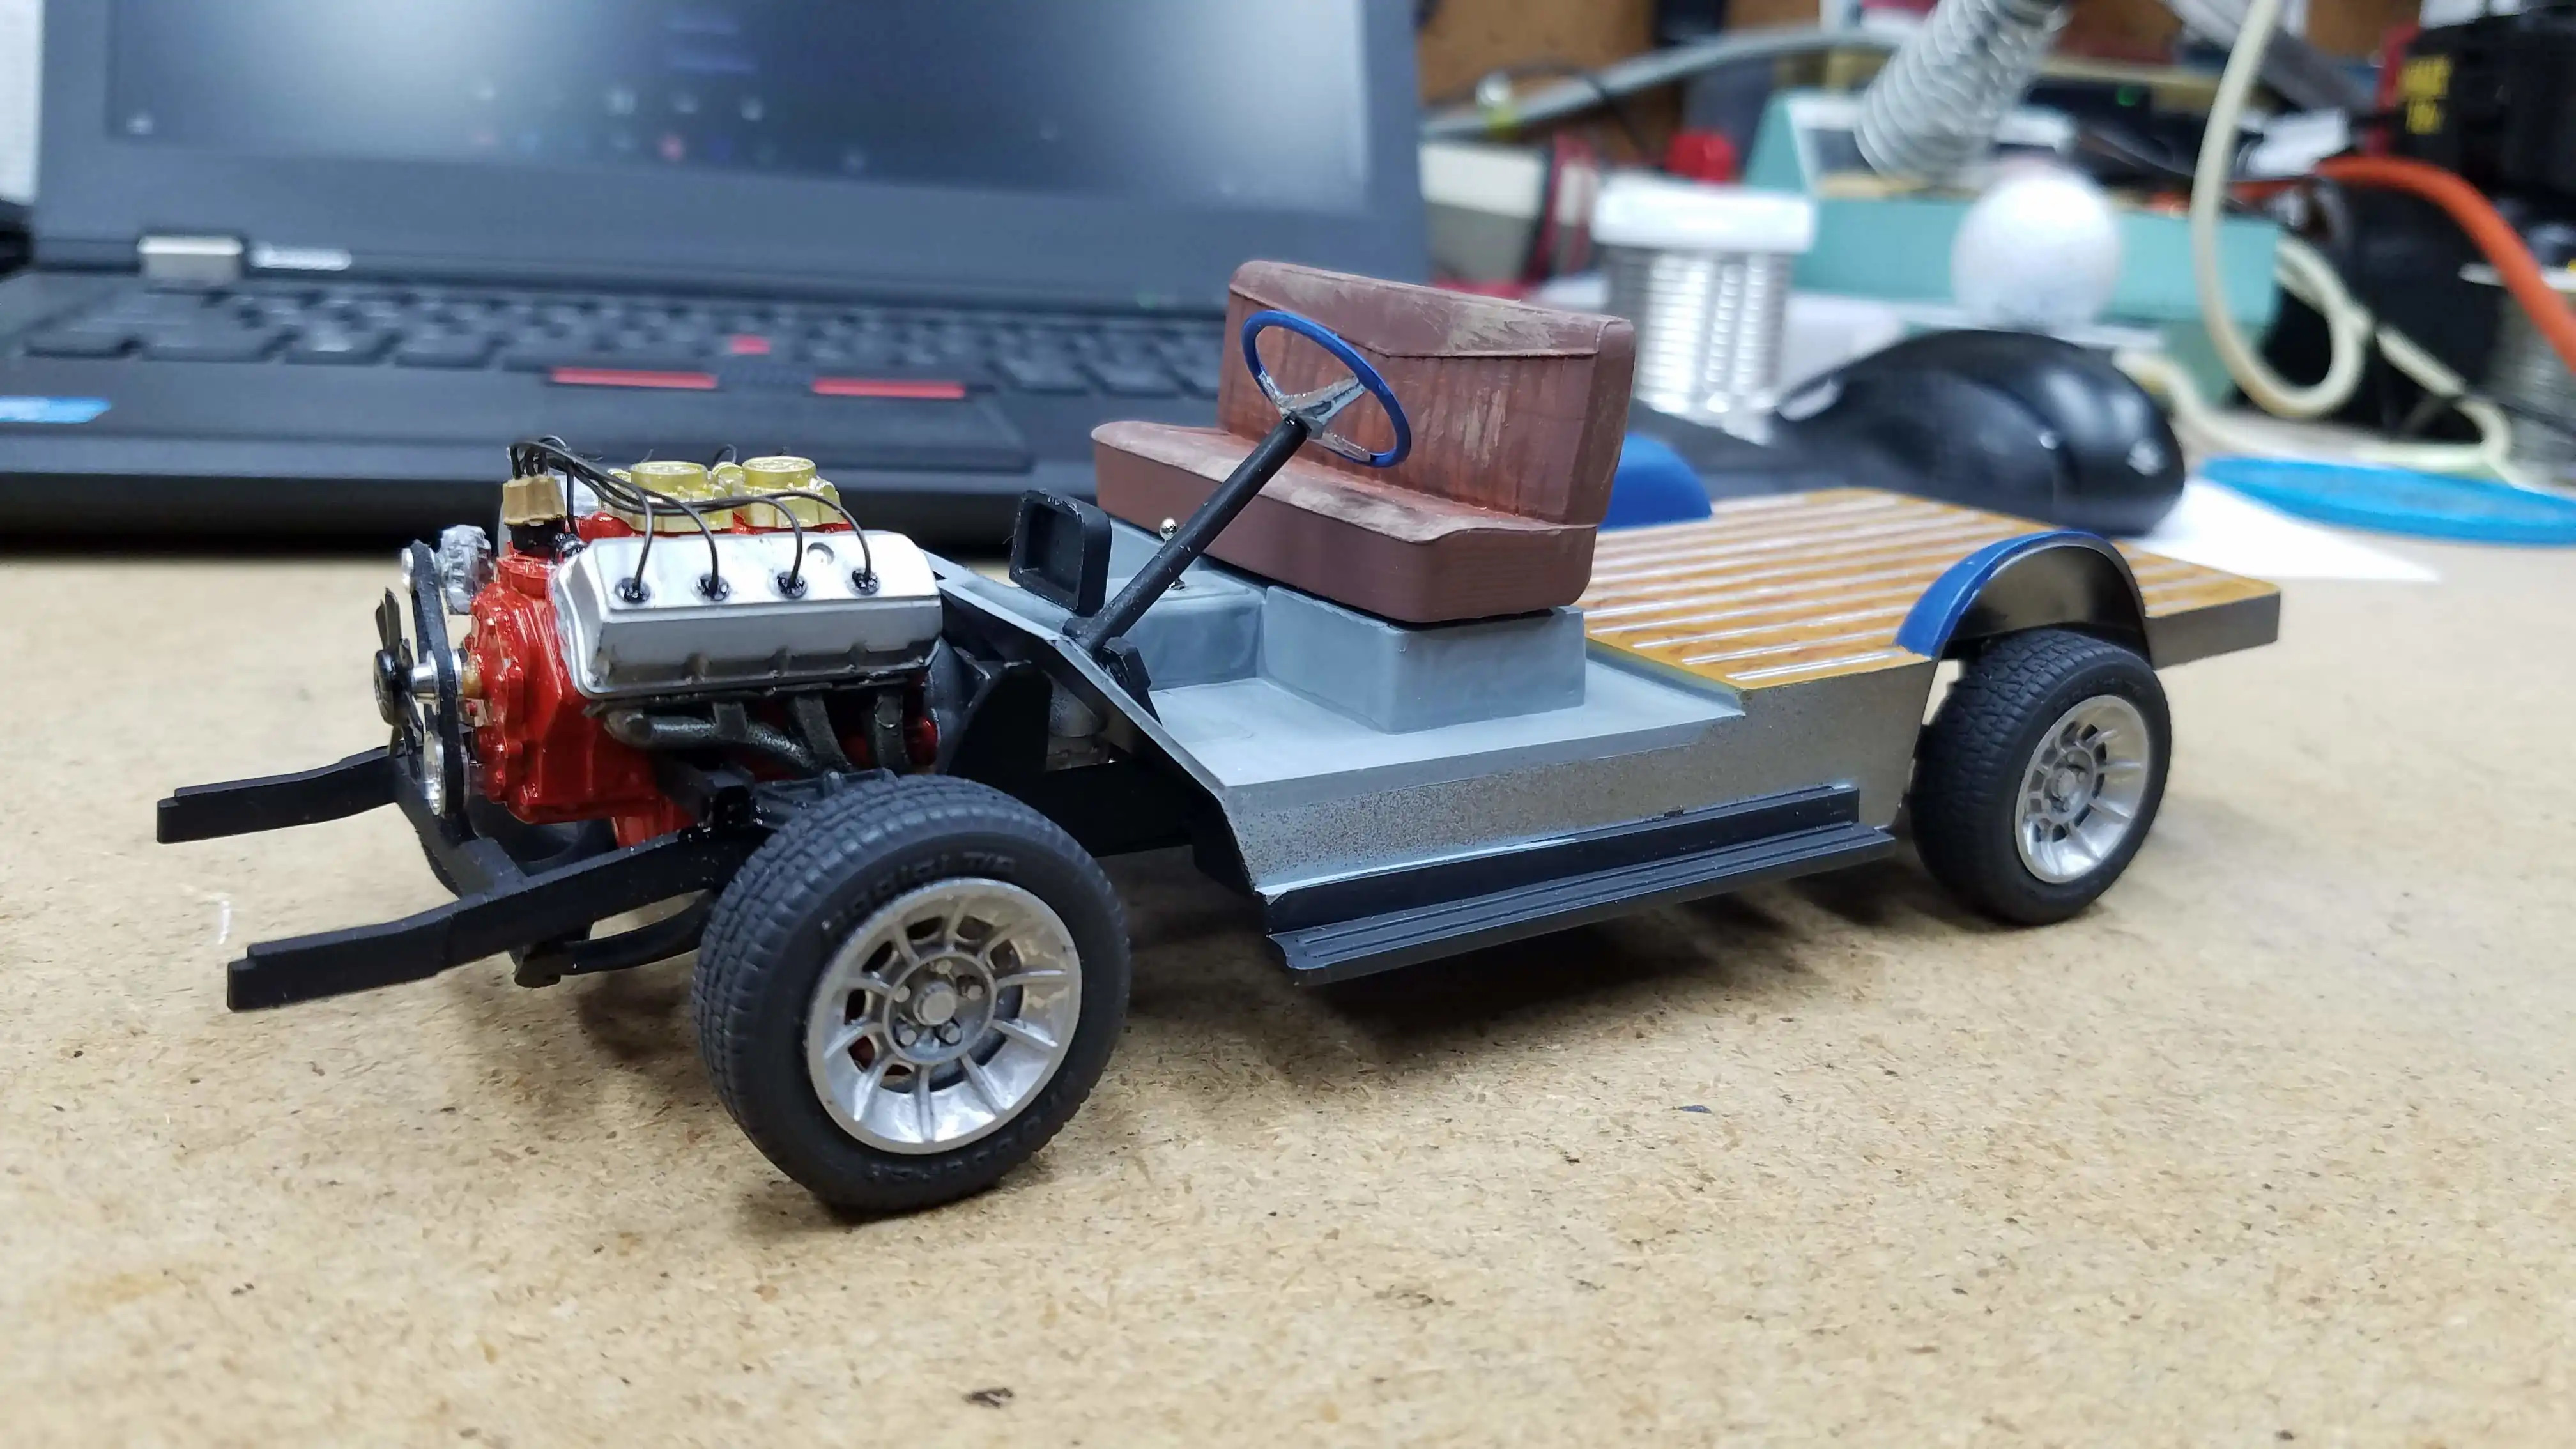 Interior tub setting on the frame, left side
 Interior tub setting on the frame, right side
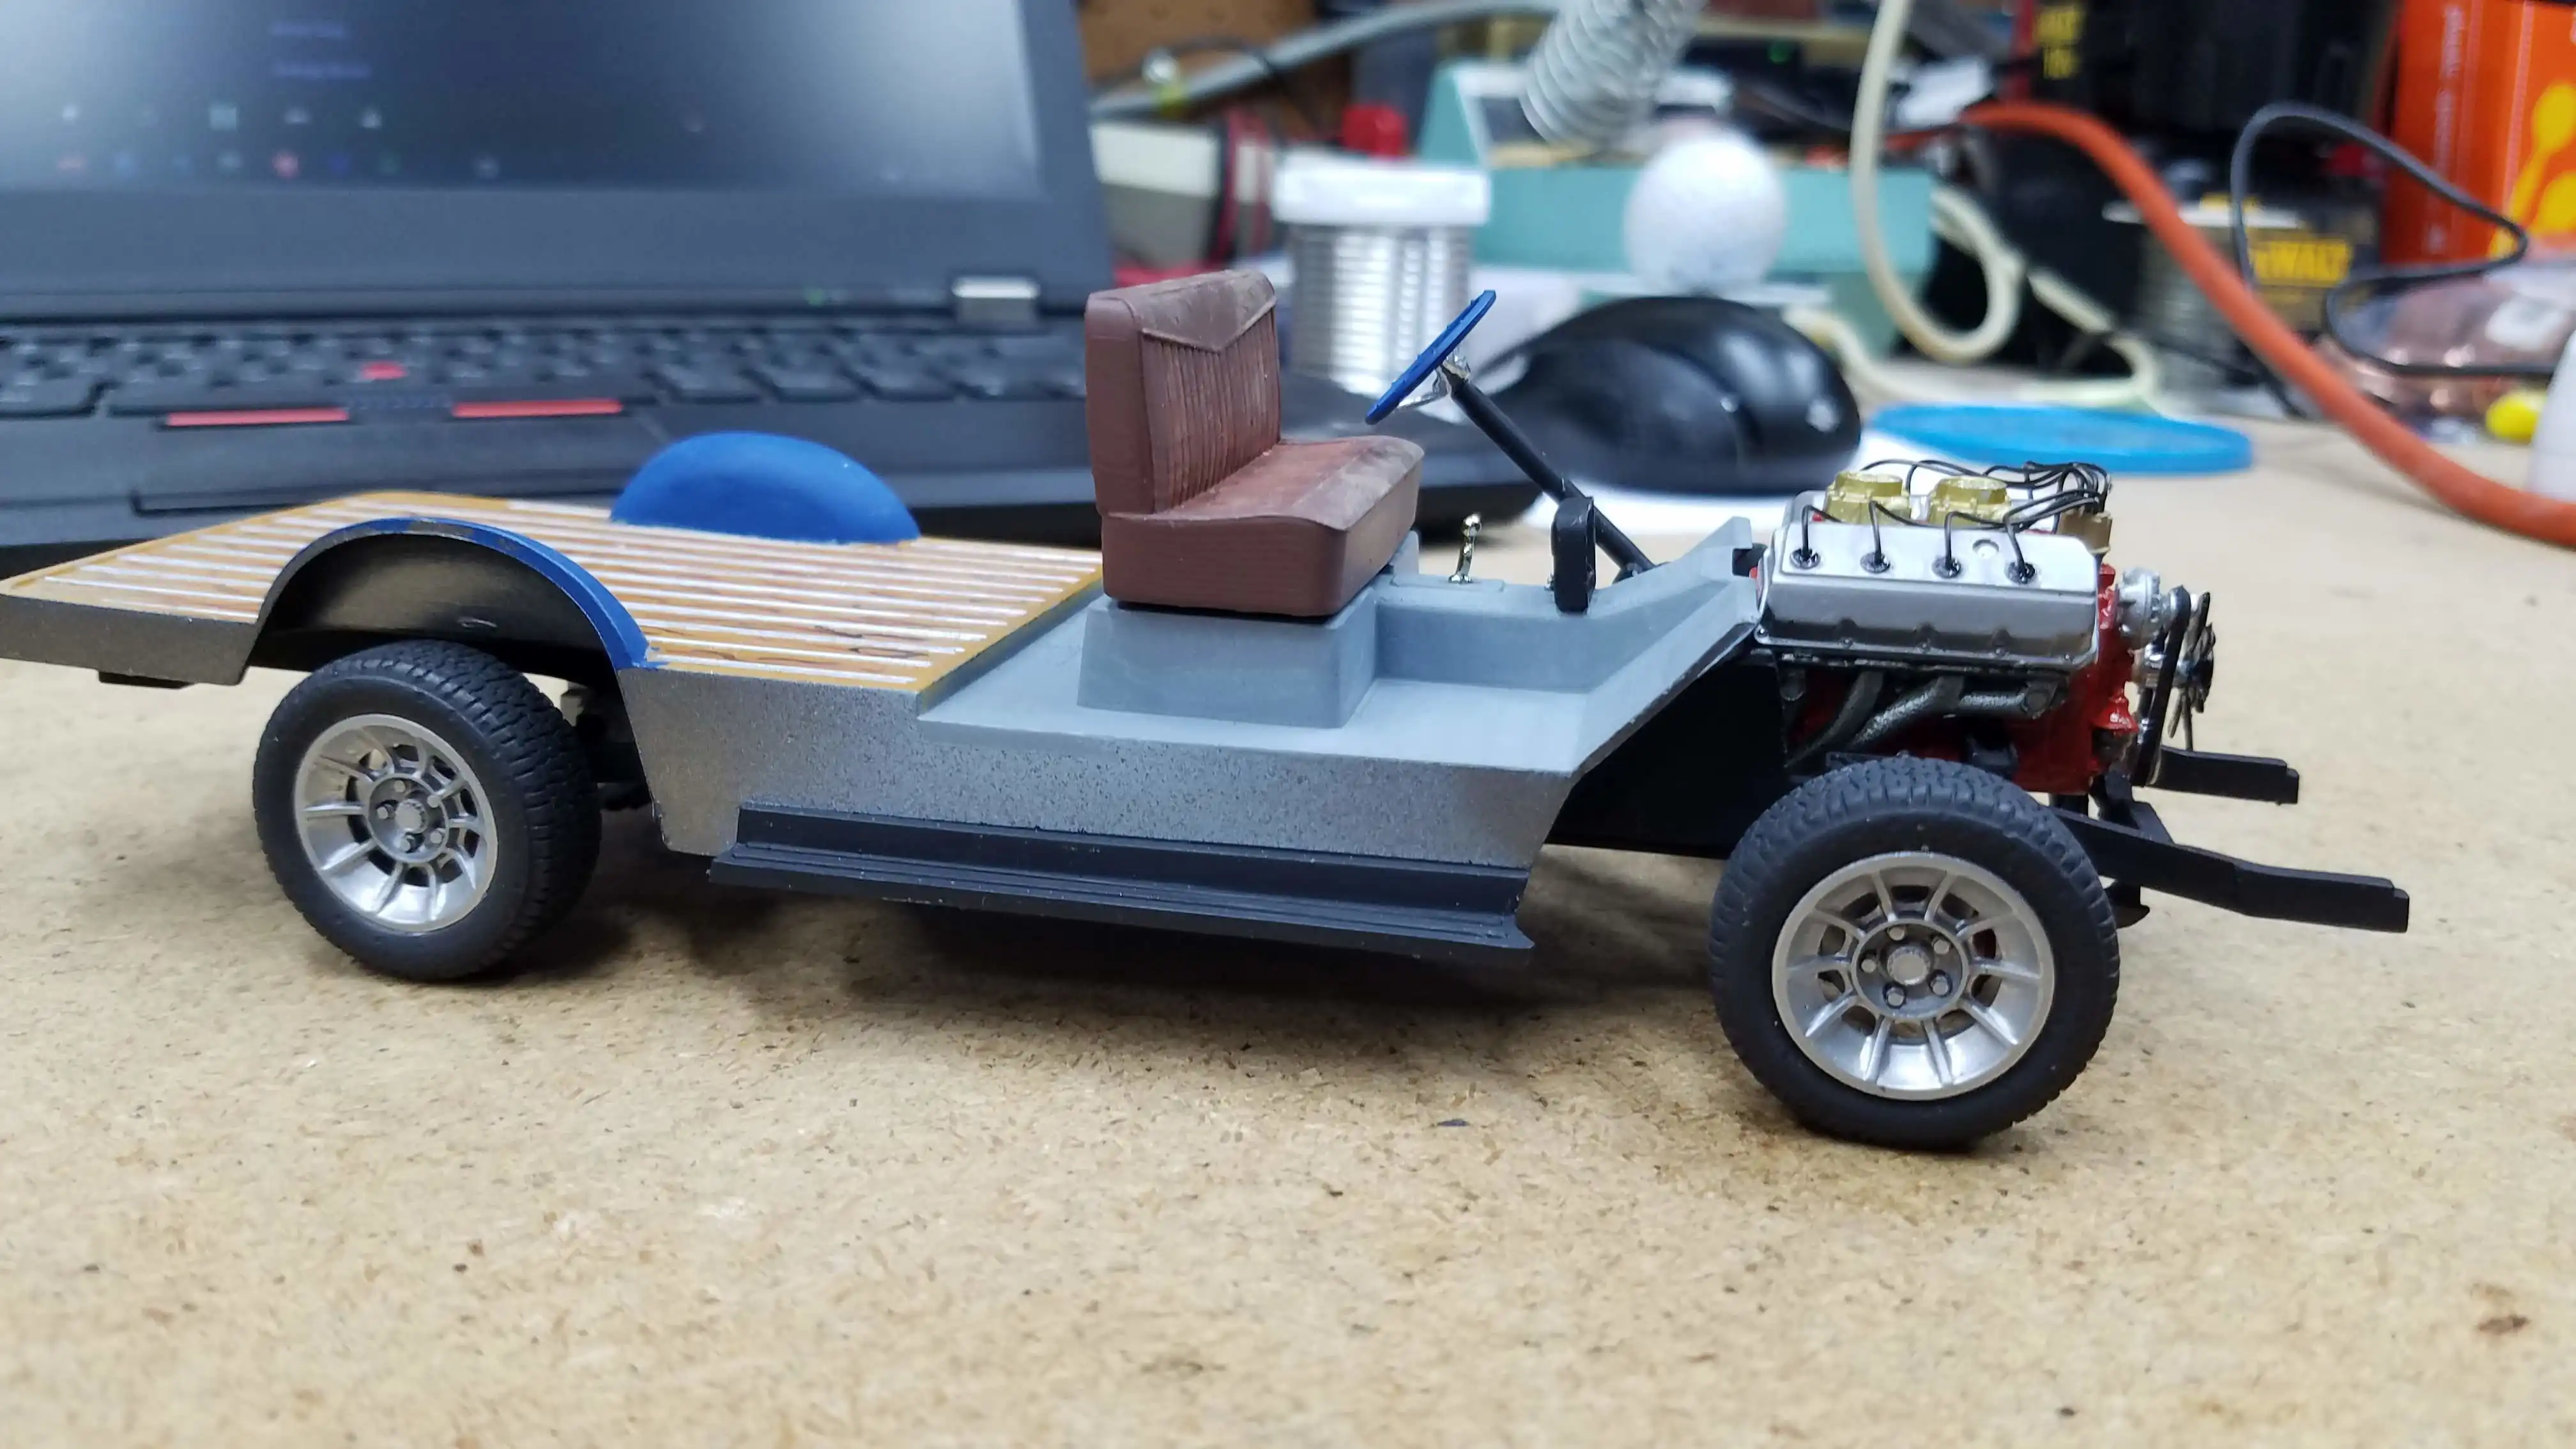
 Interior tub setting on the frame, from the front
 Interior tub setting on the frame, from the back
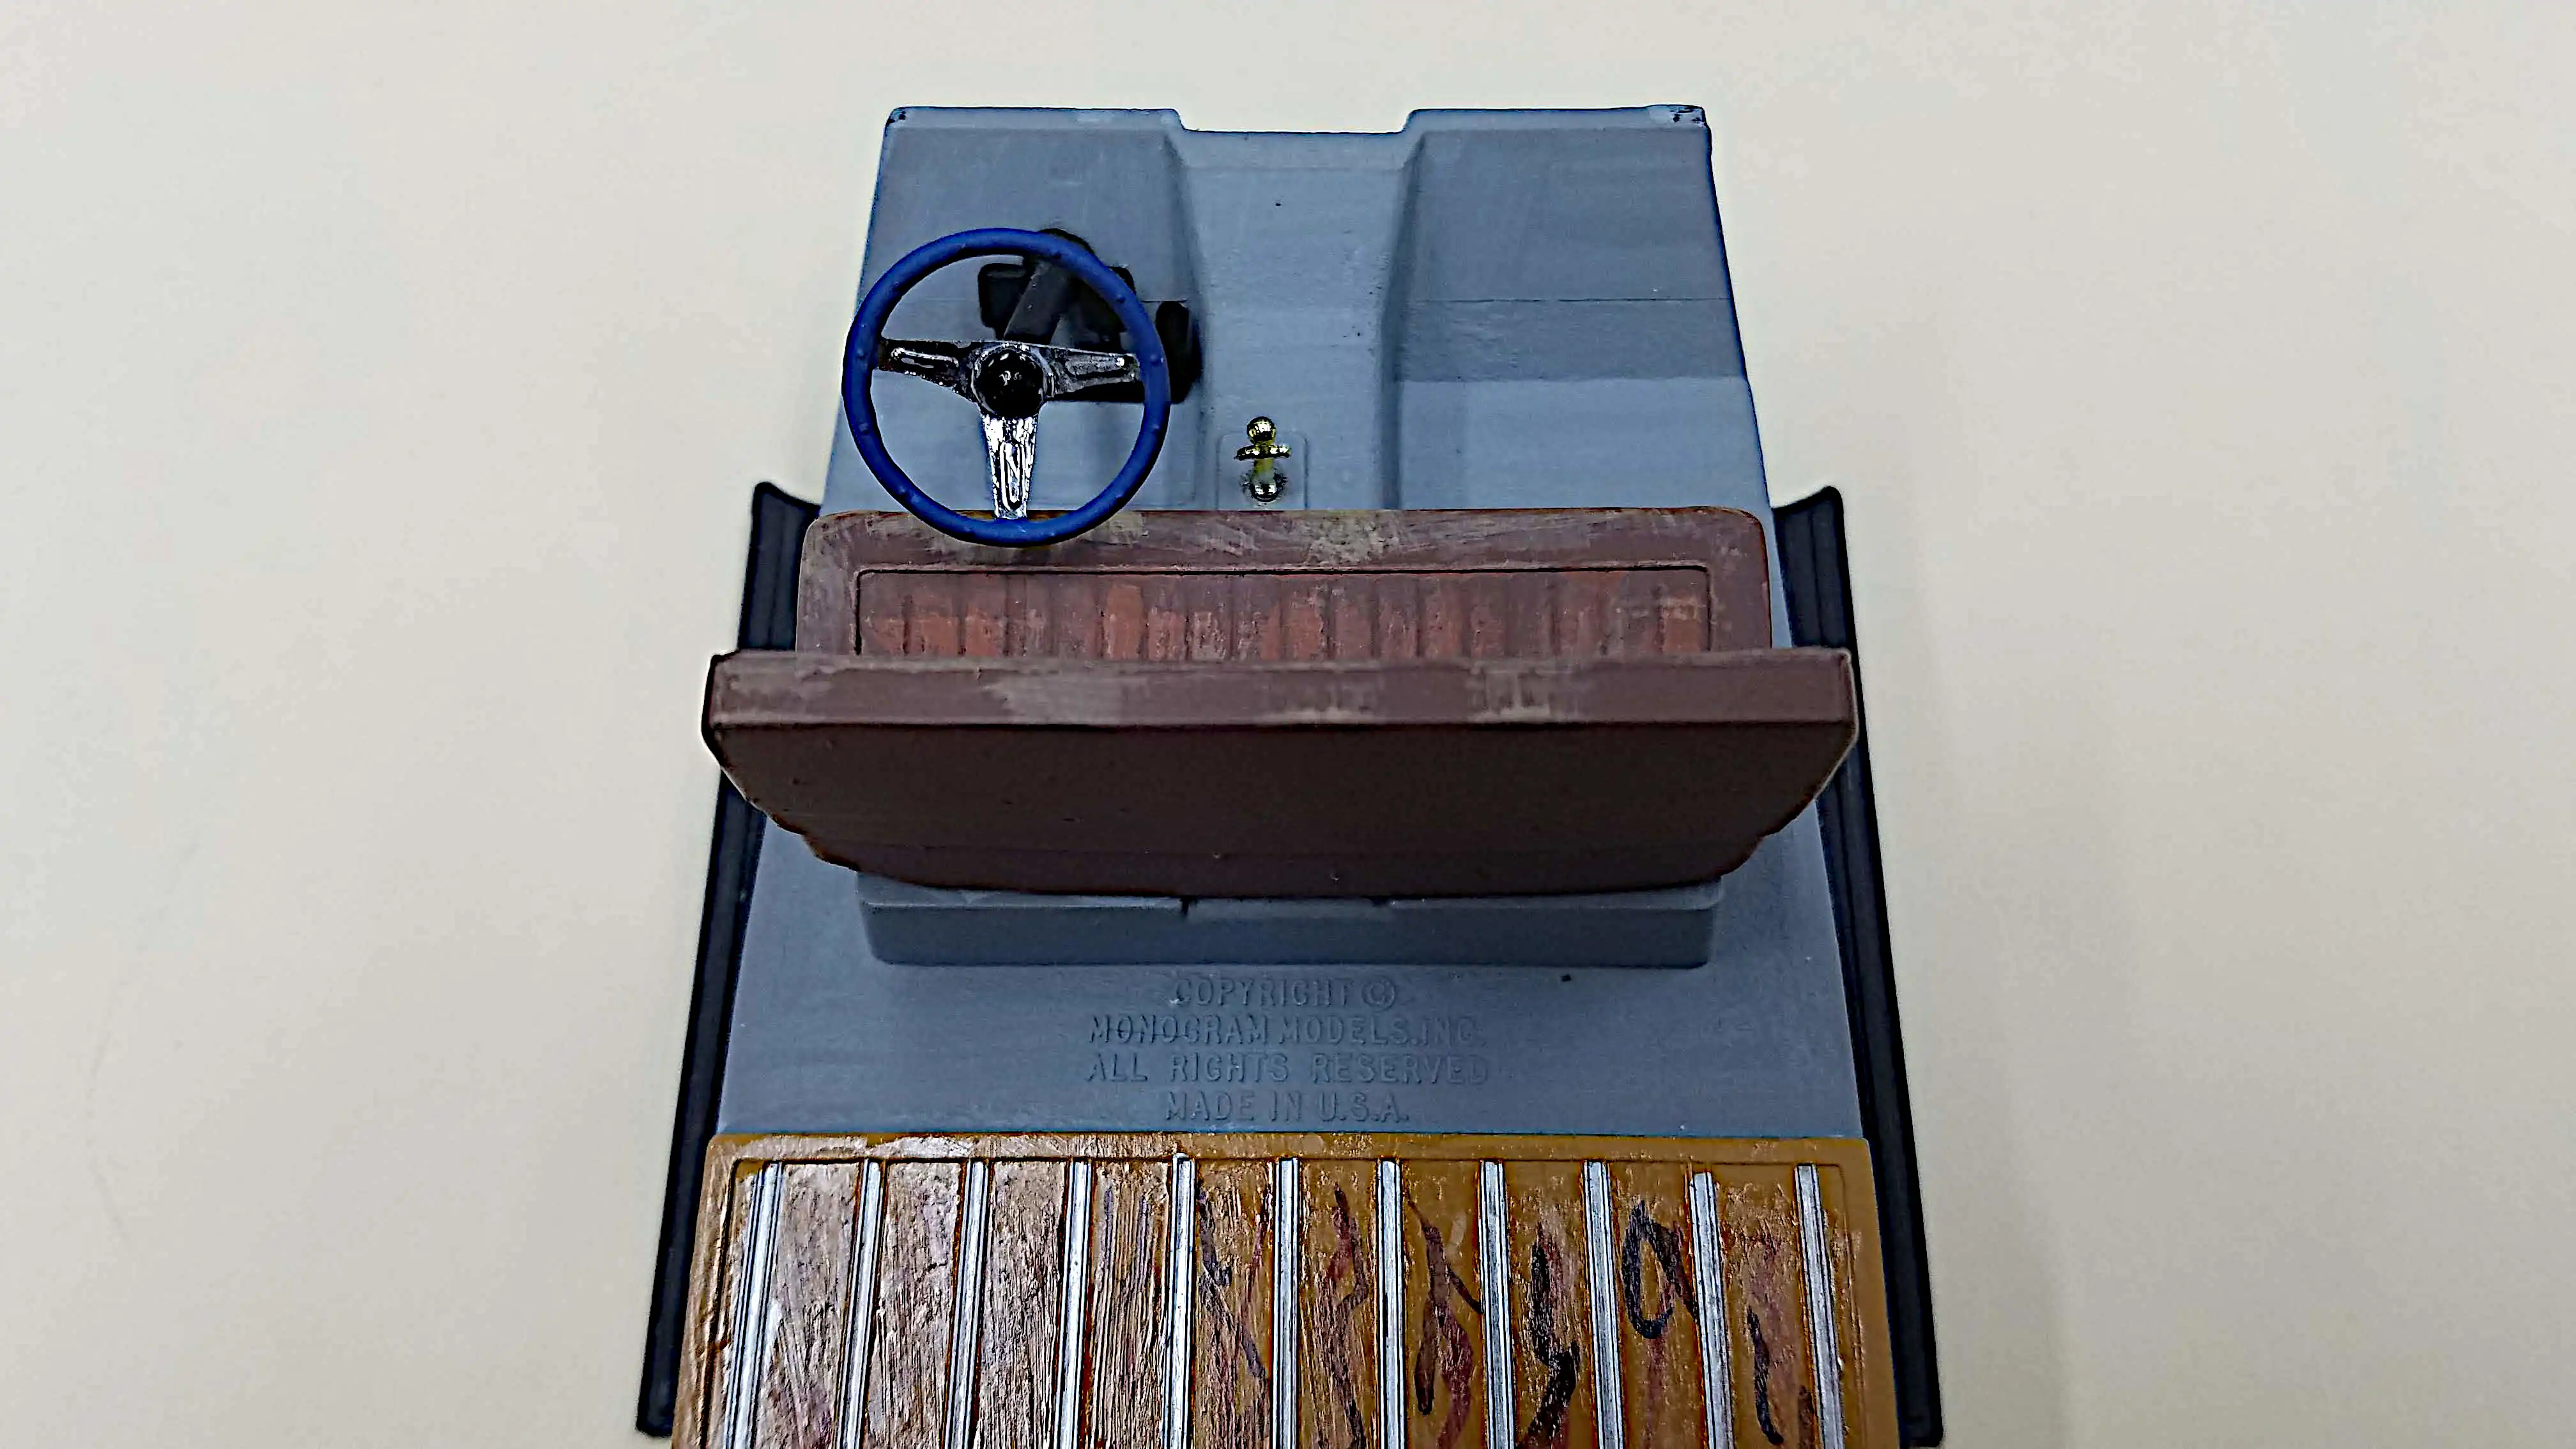
 Interior tub from back showing small instrument cluster
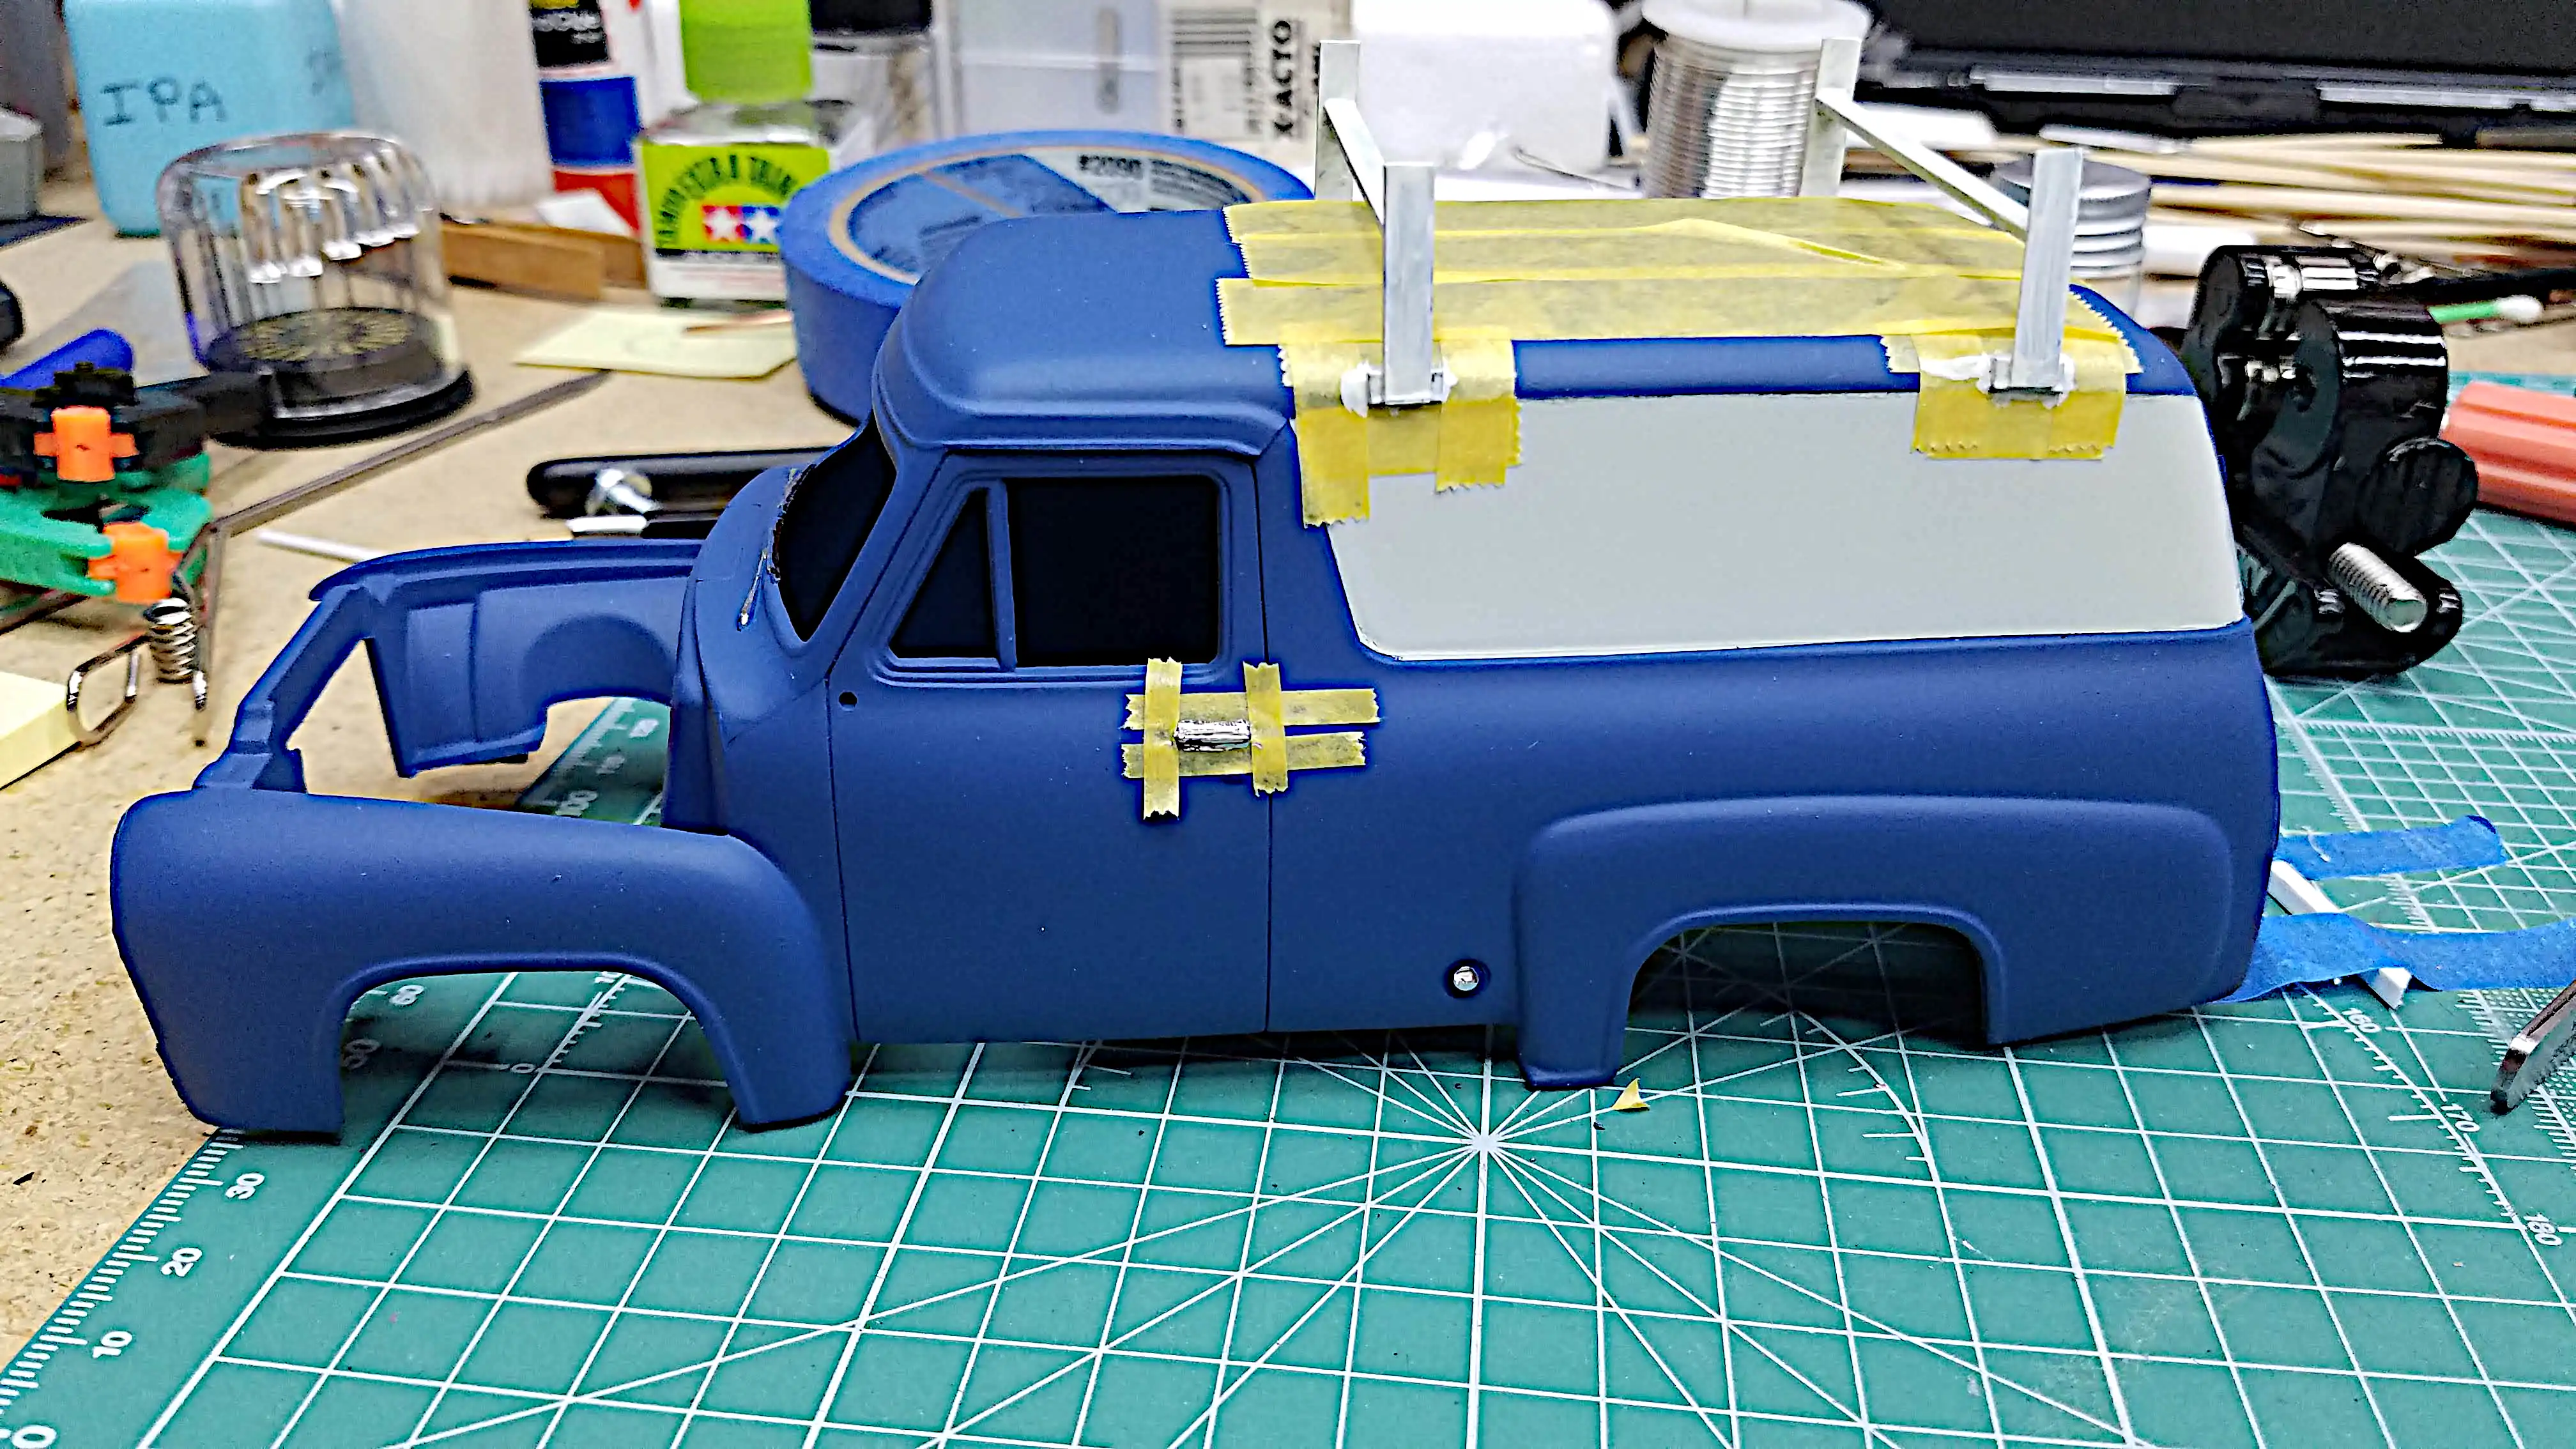
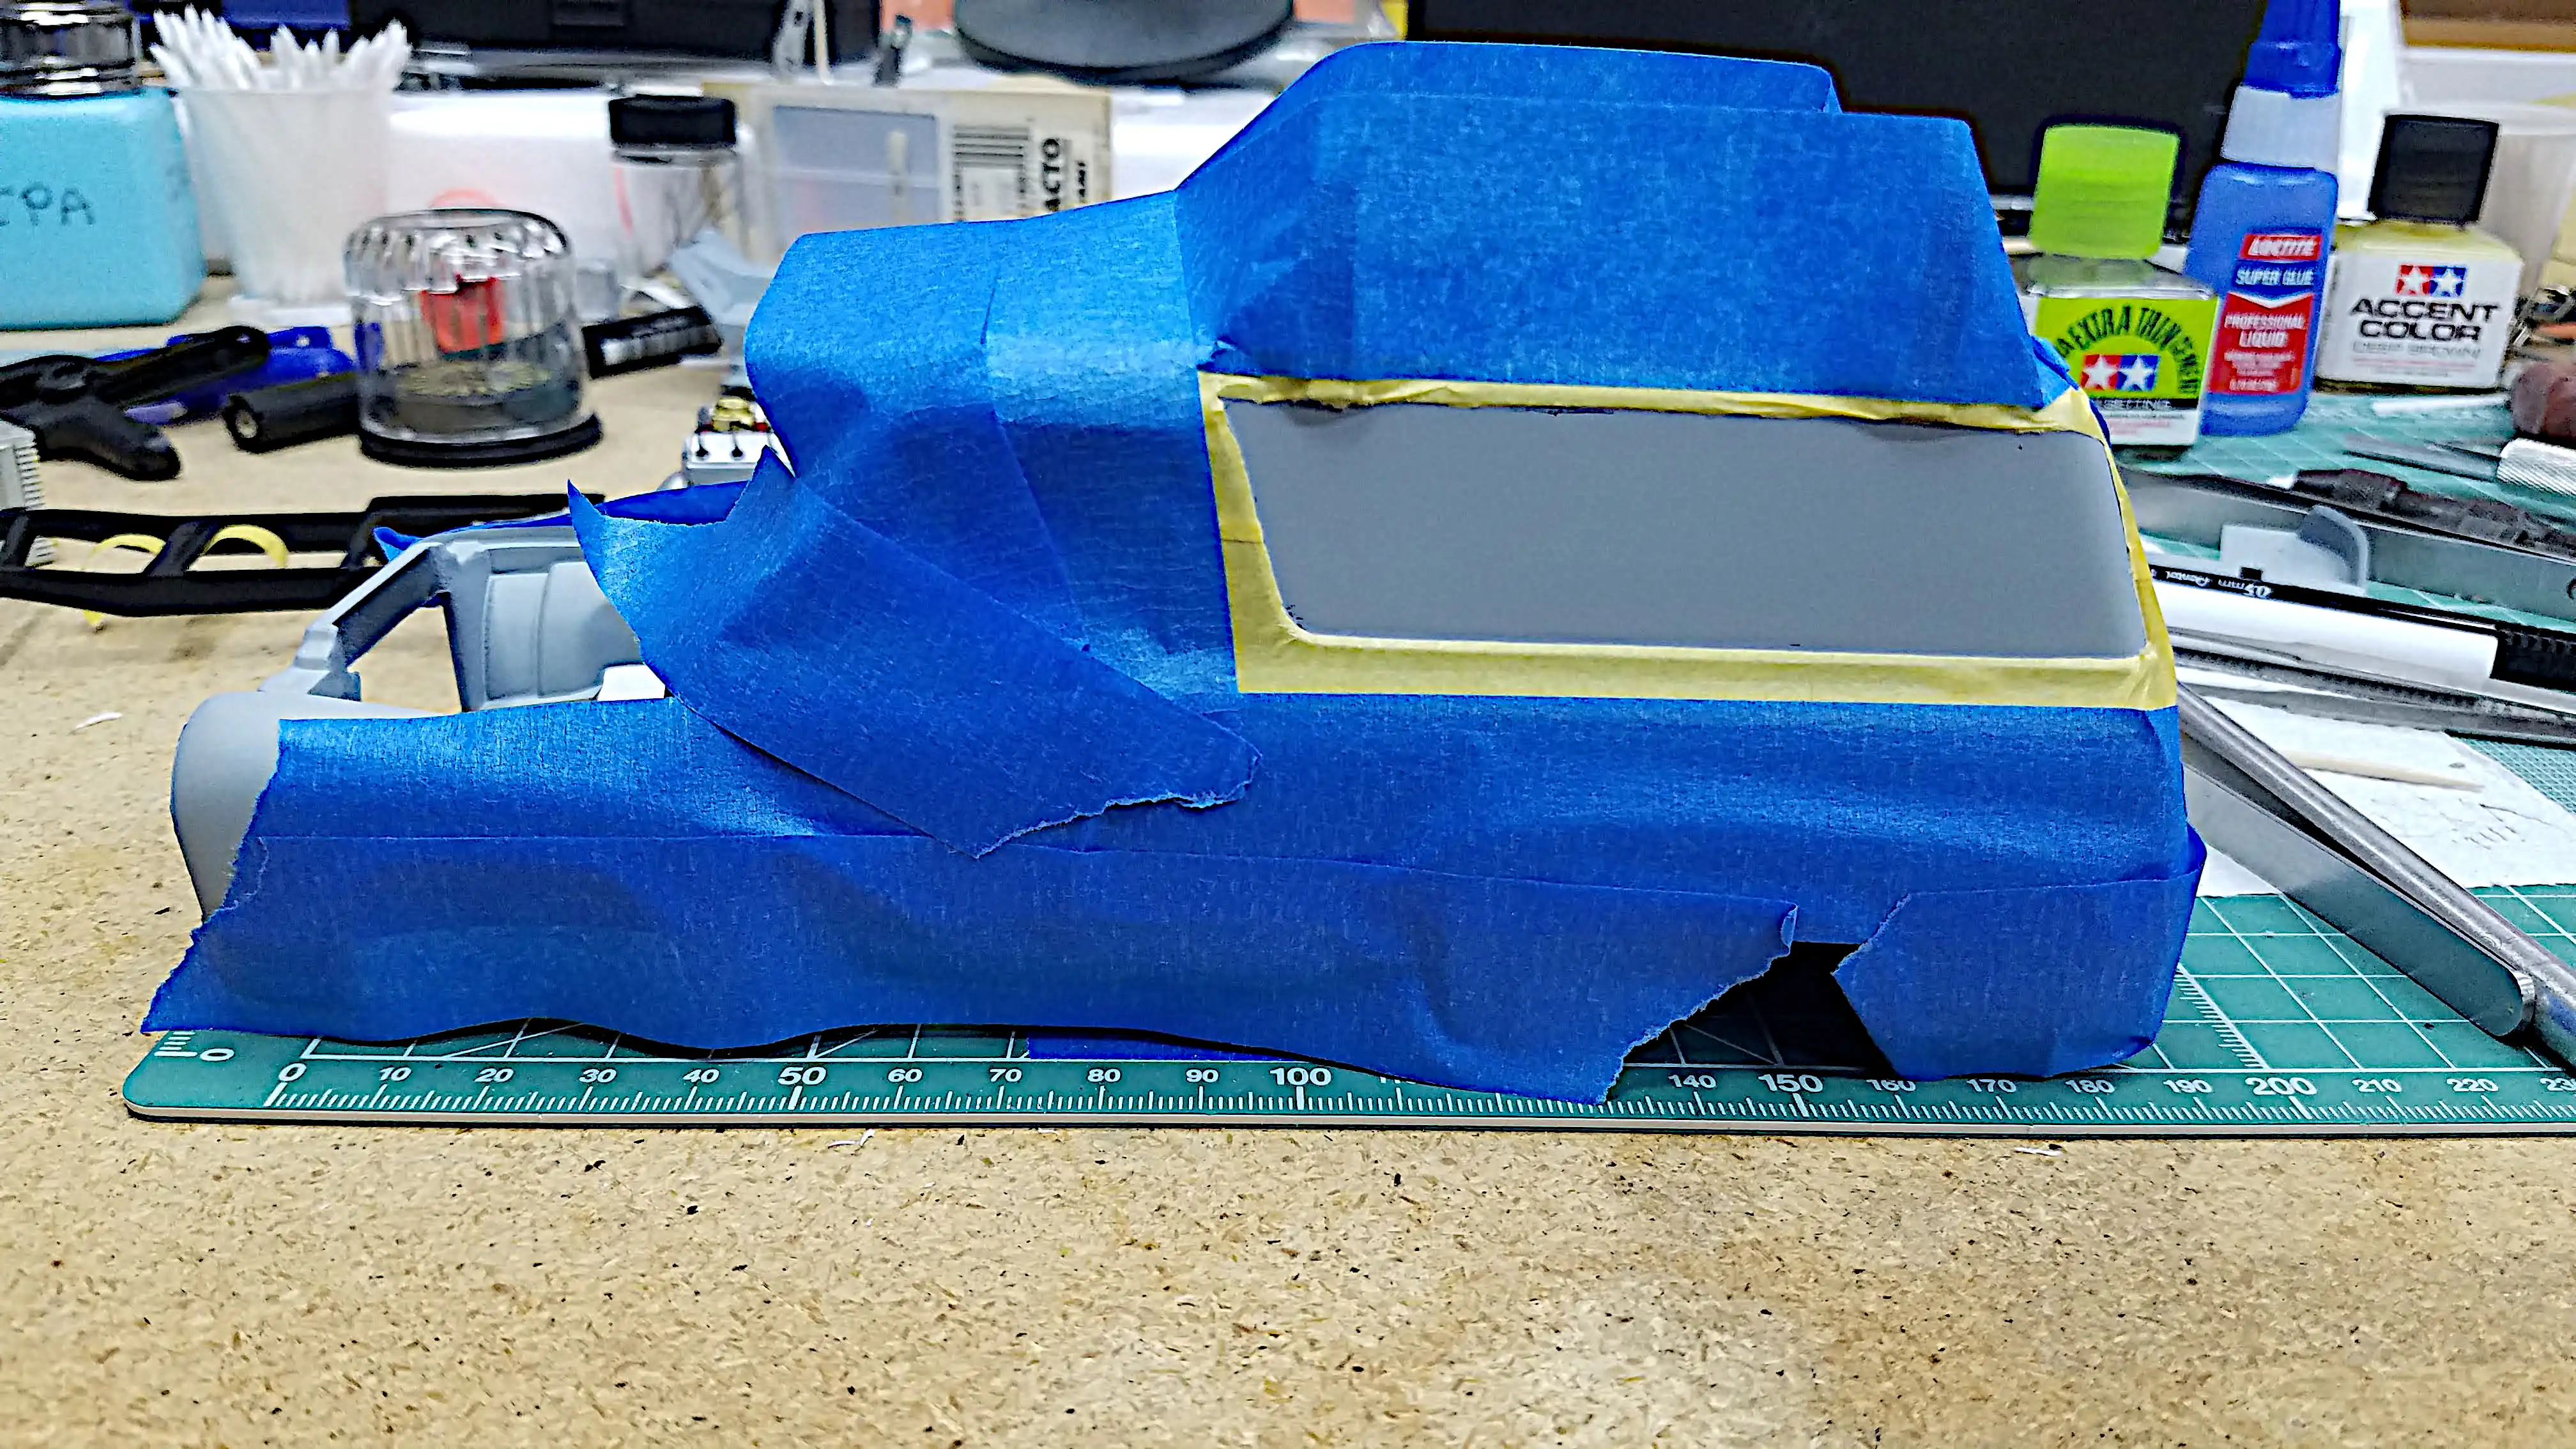 Body is masked for painting the side panels
 Mask removed showing the side panels
 Side panels masked so that body can be painted
 First coat of body color applied to body
 Second and third coat on the body
 Side panel masking removed
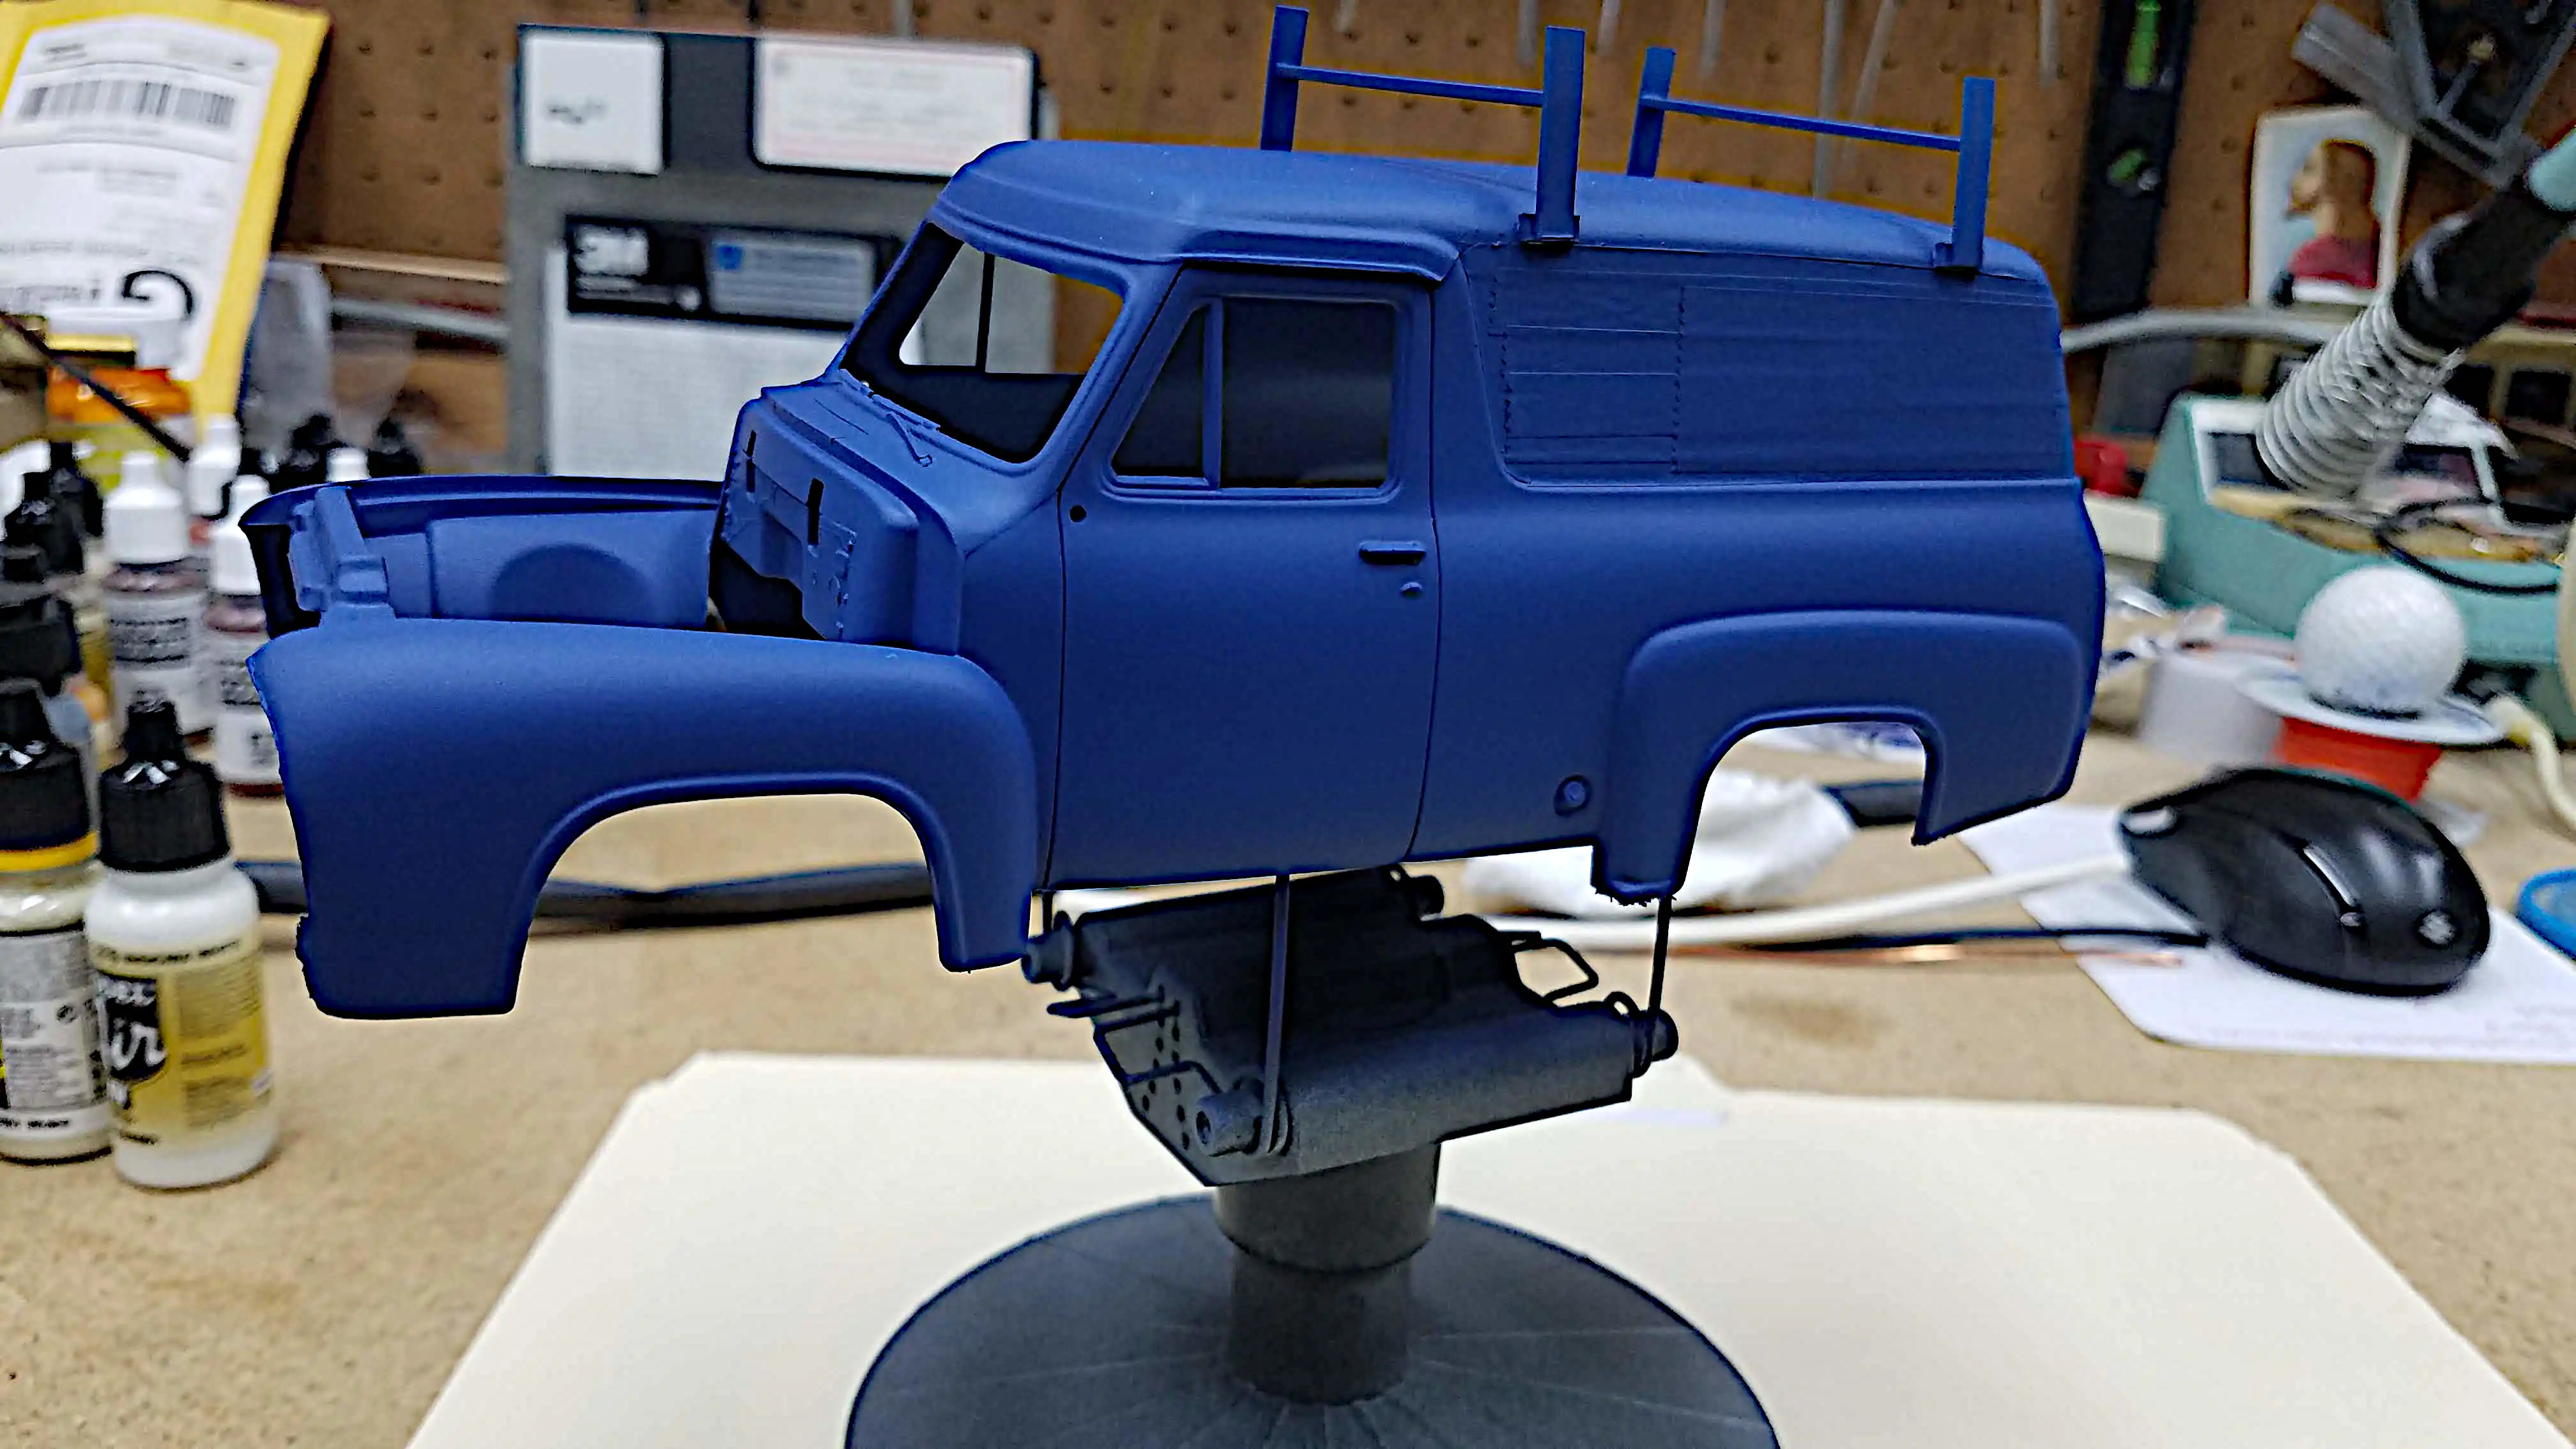
 Roof racks and chrome parts were painted
 All the masking tape was removed
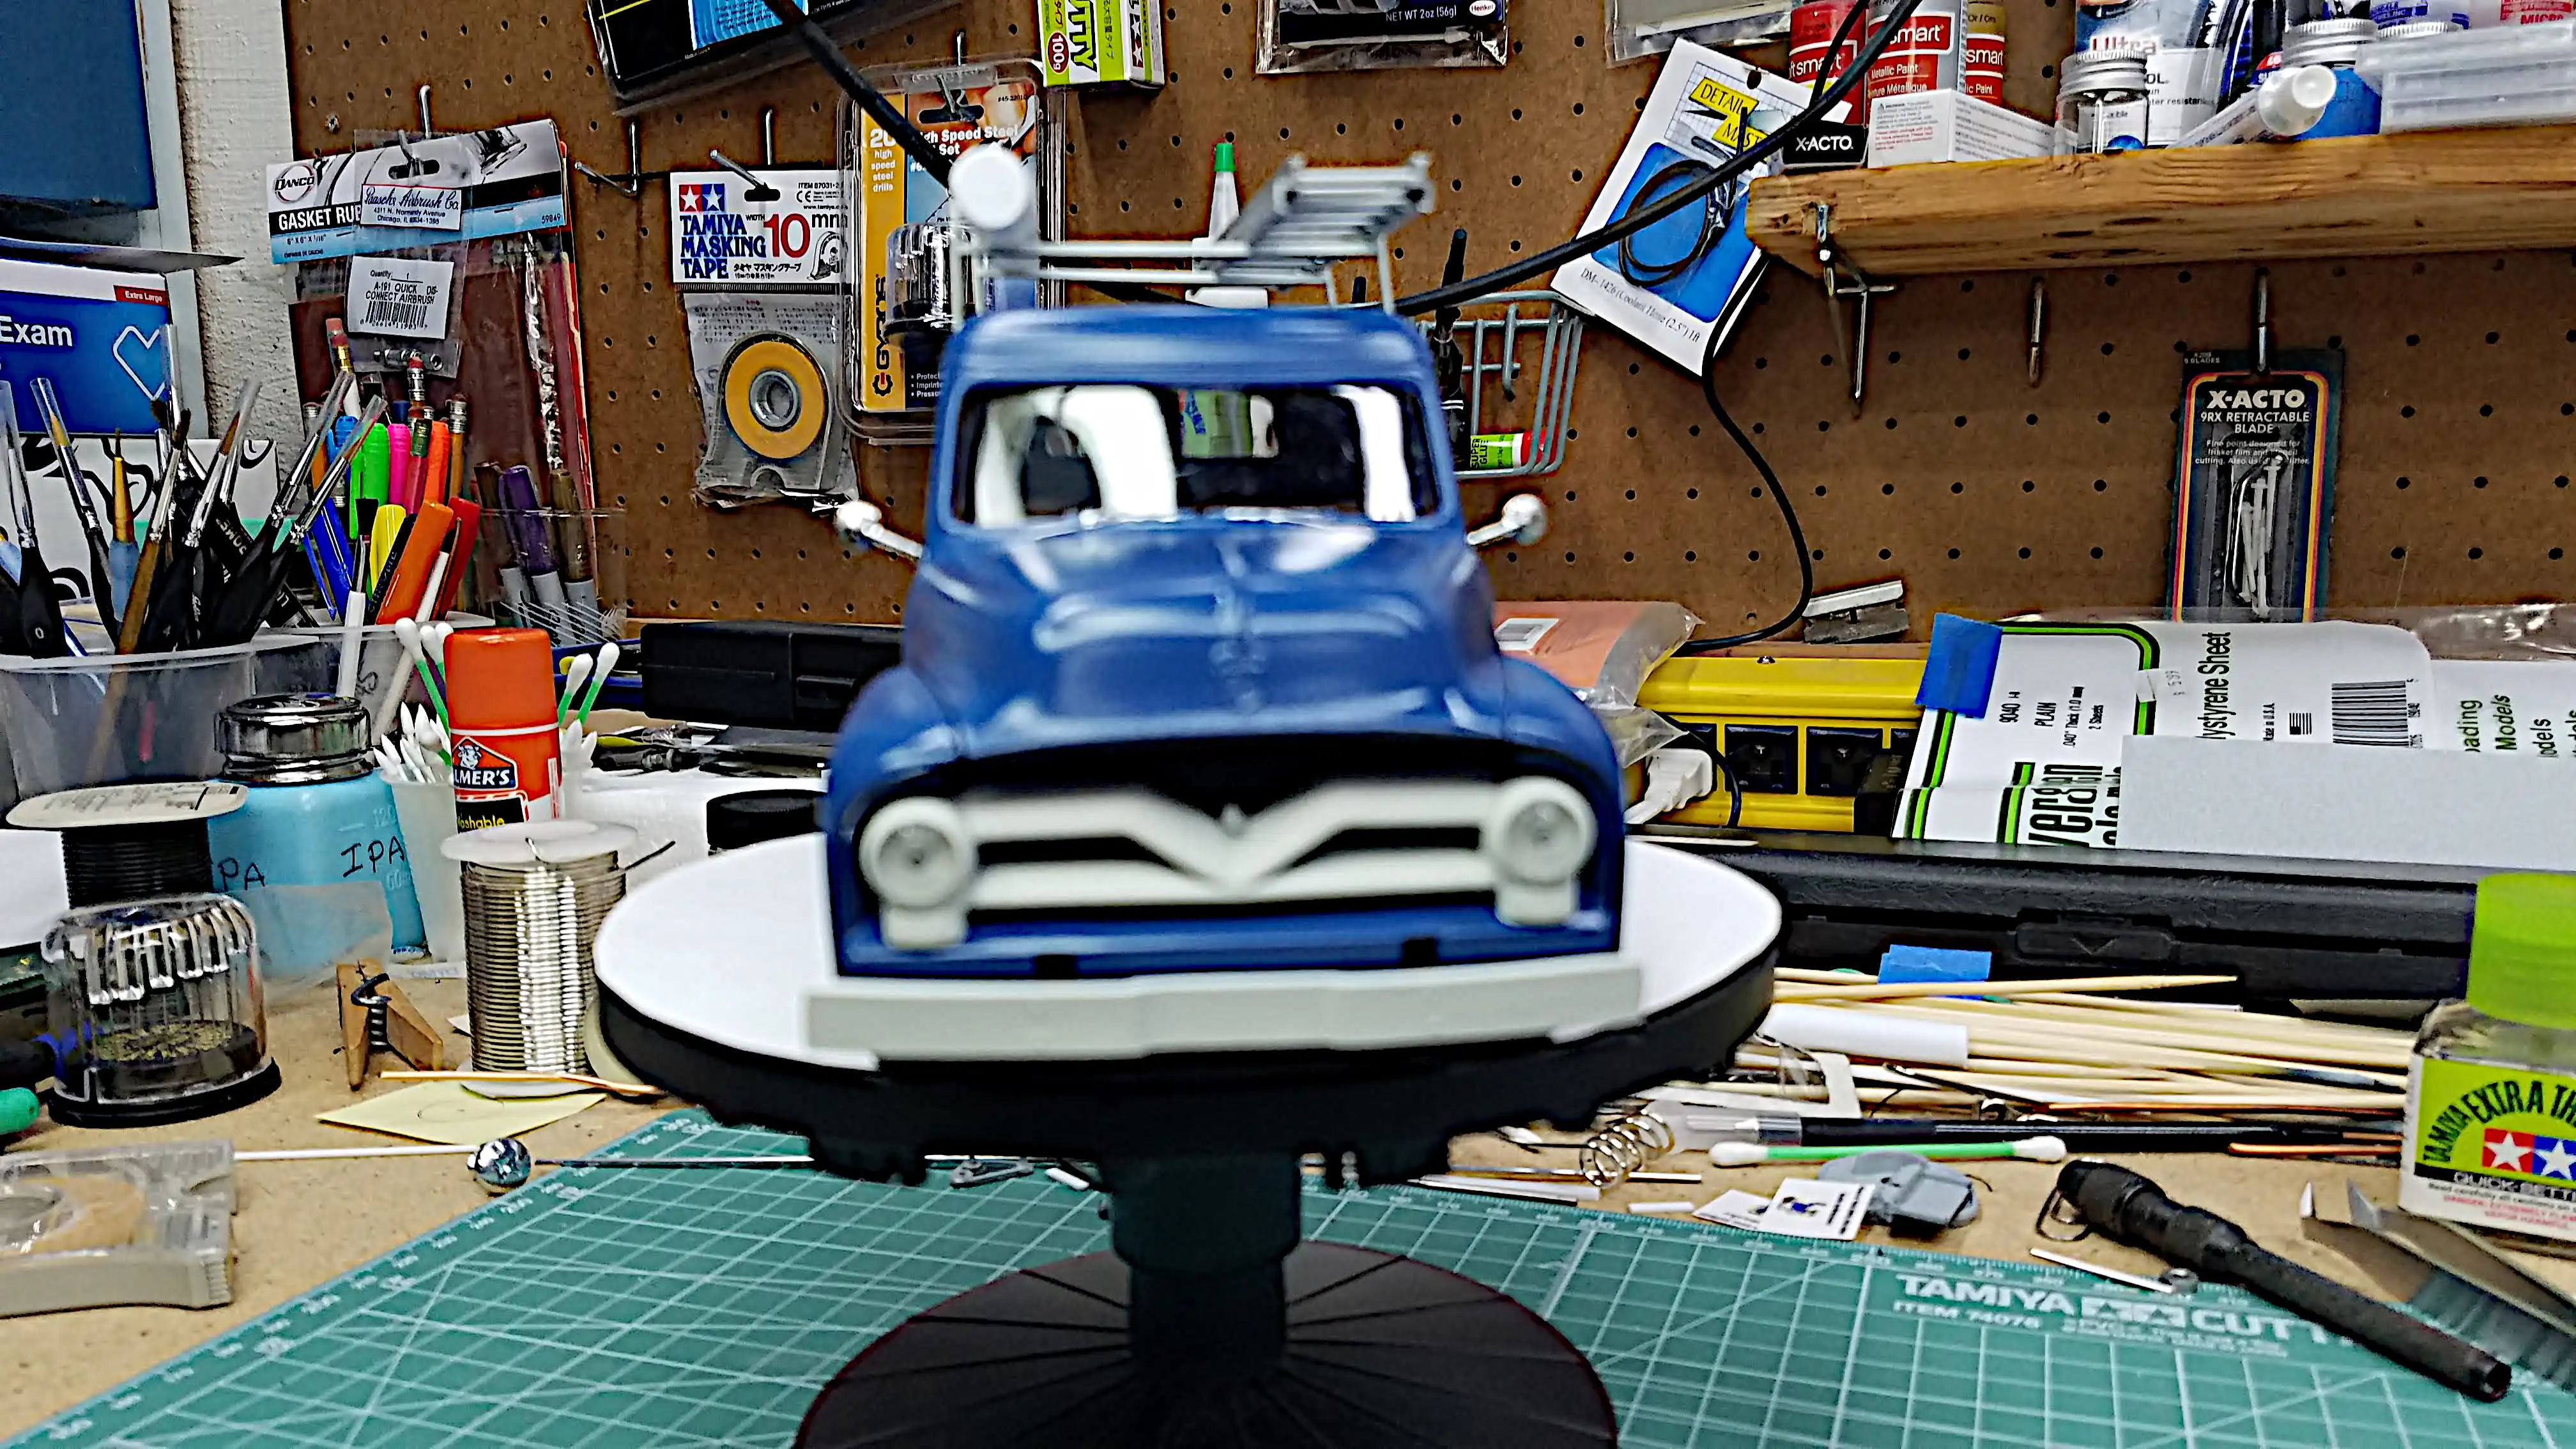
 The front of the body with the radiator were installed
 Engine compartment view from the roof
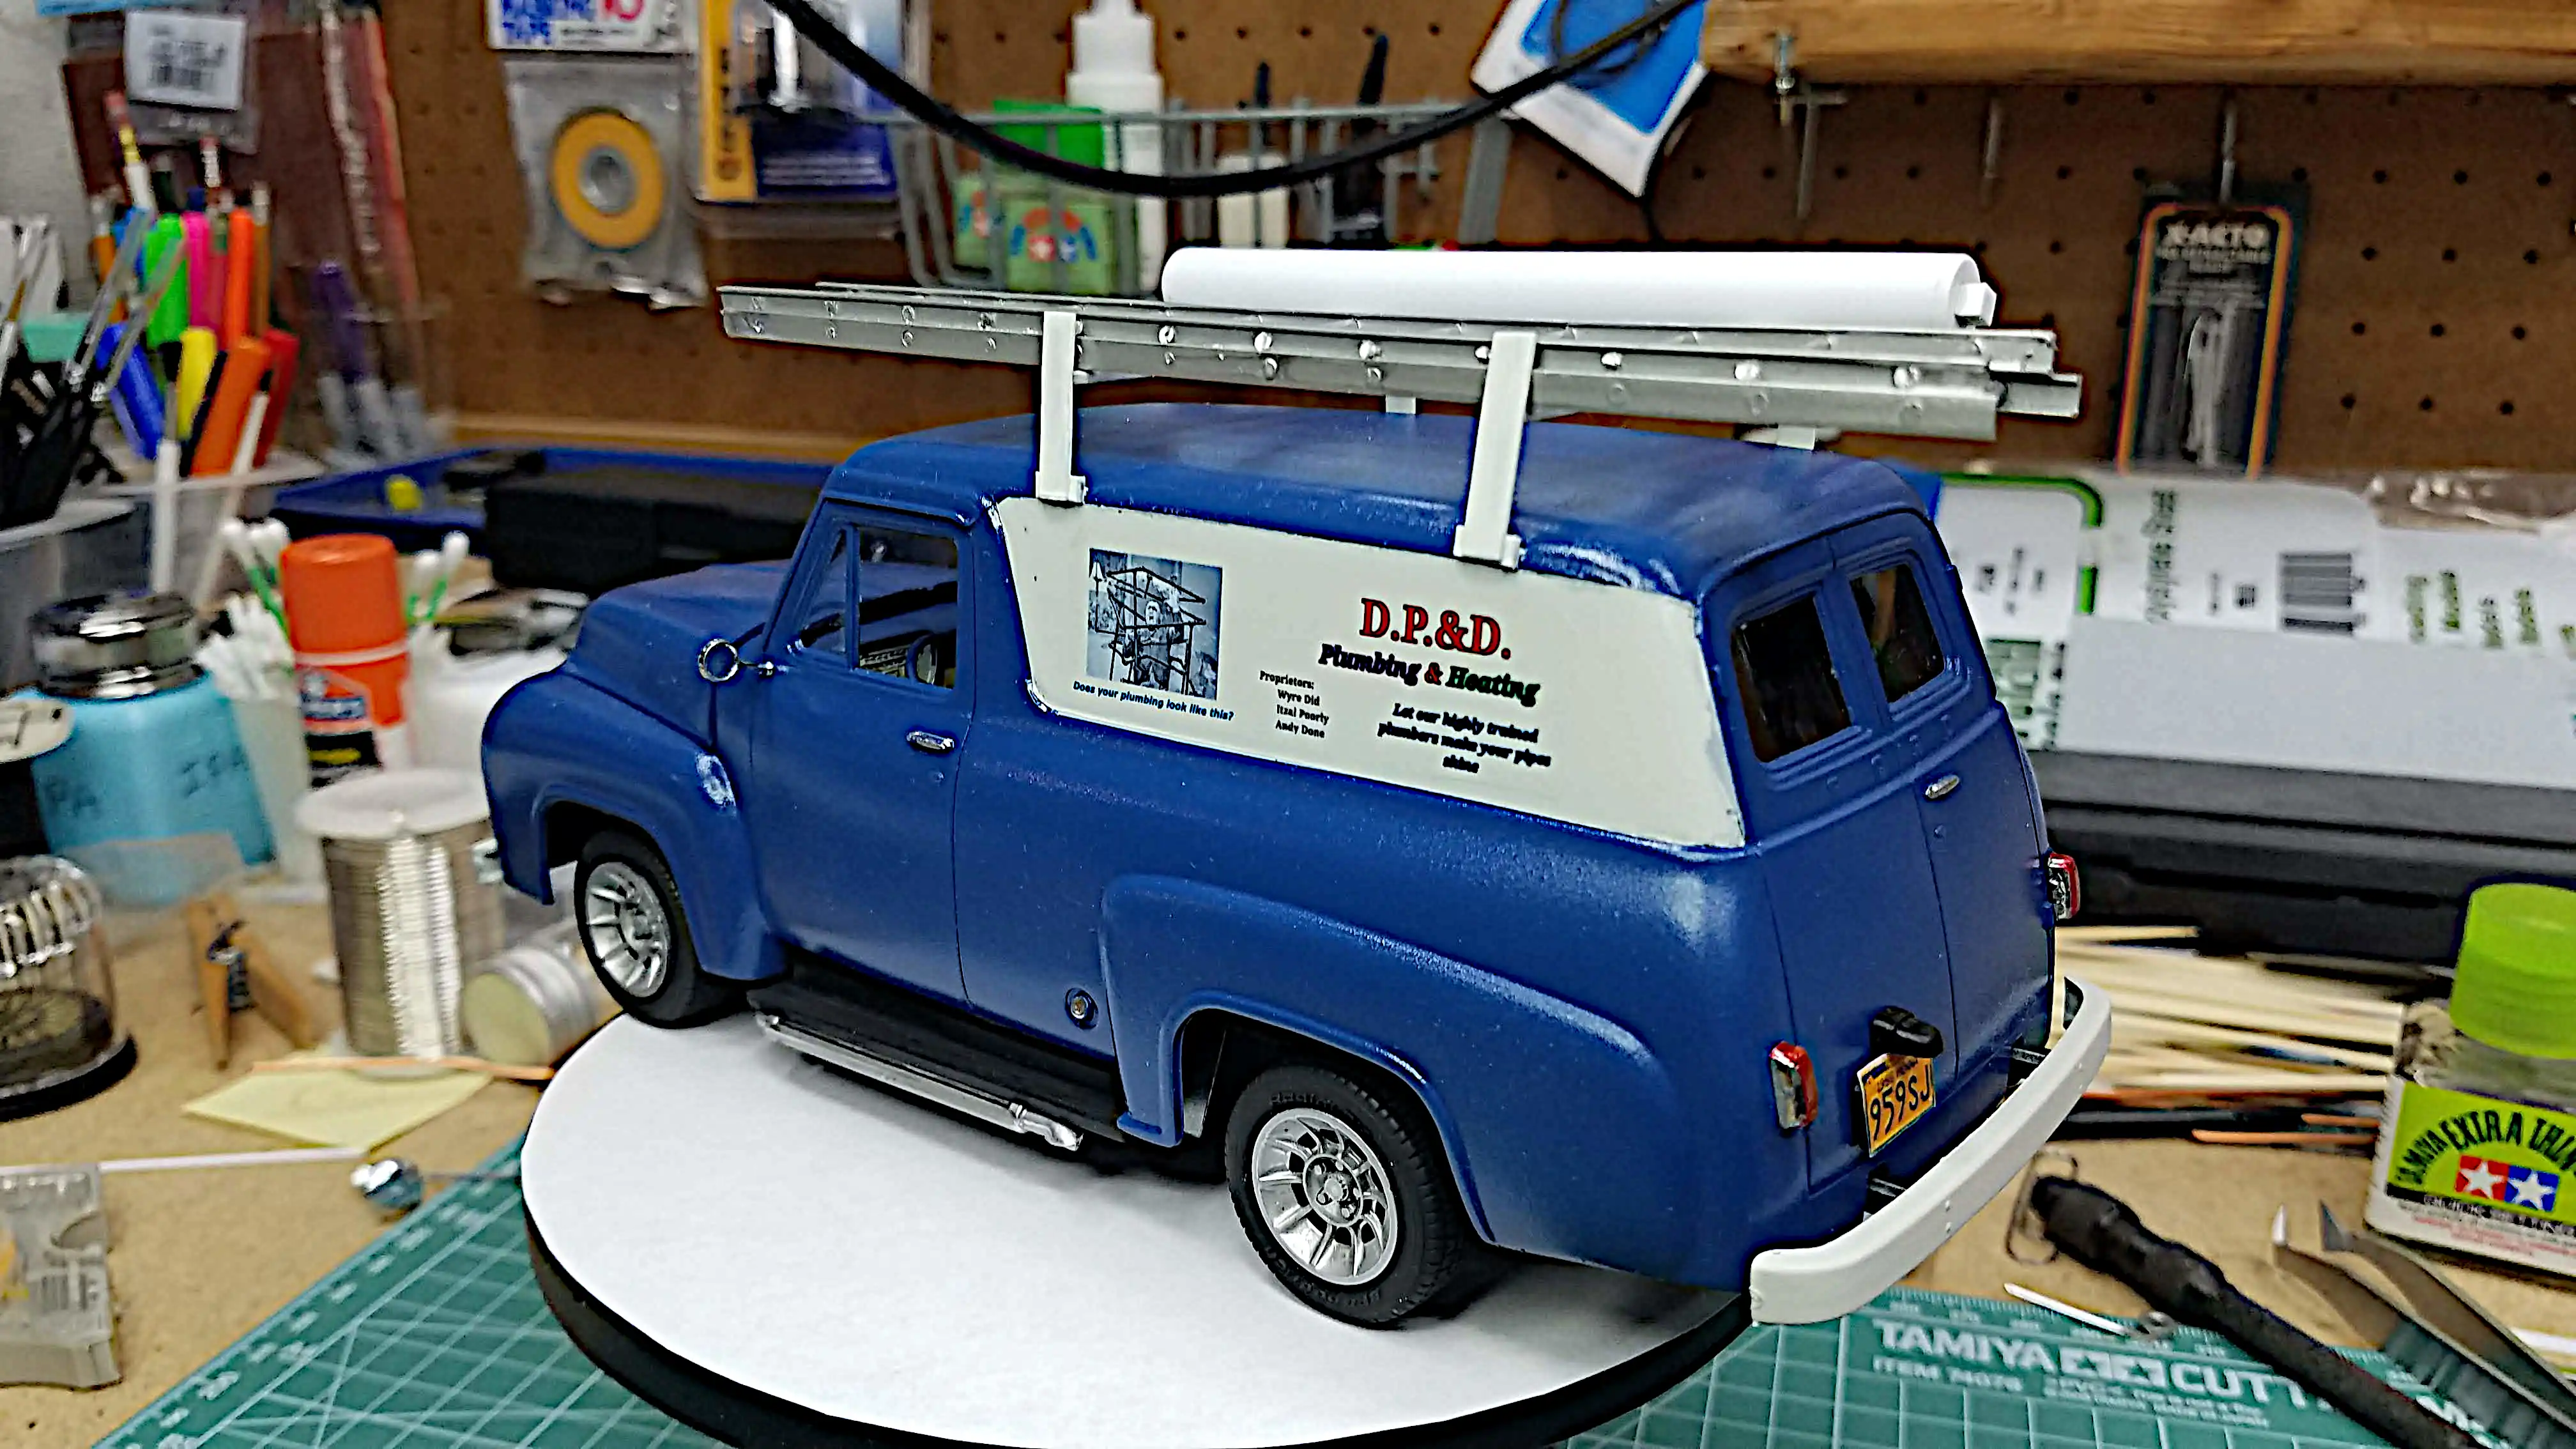
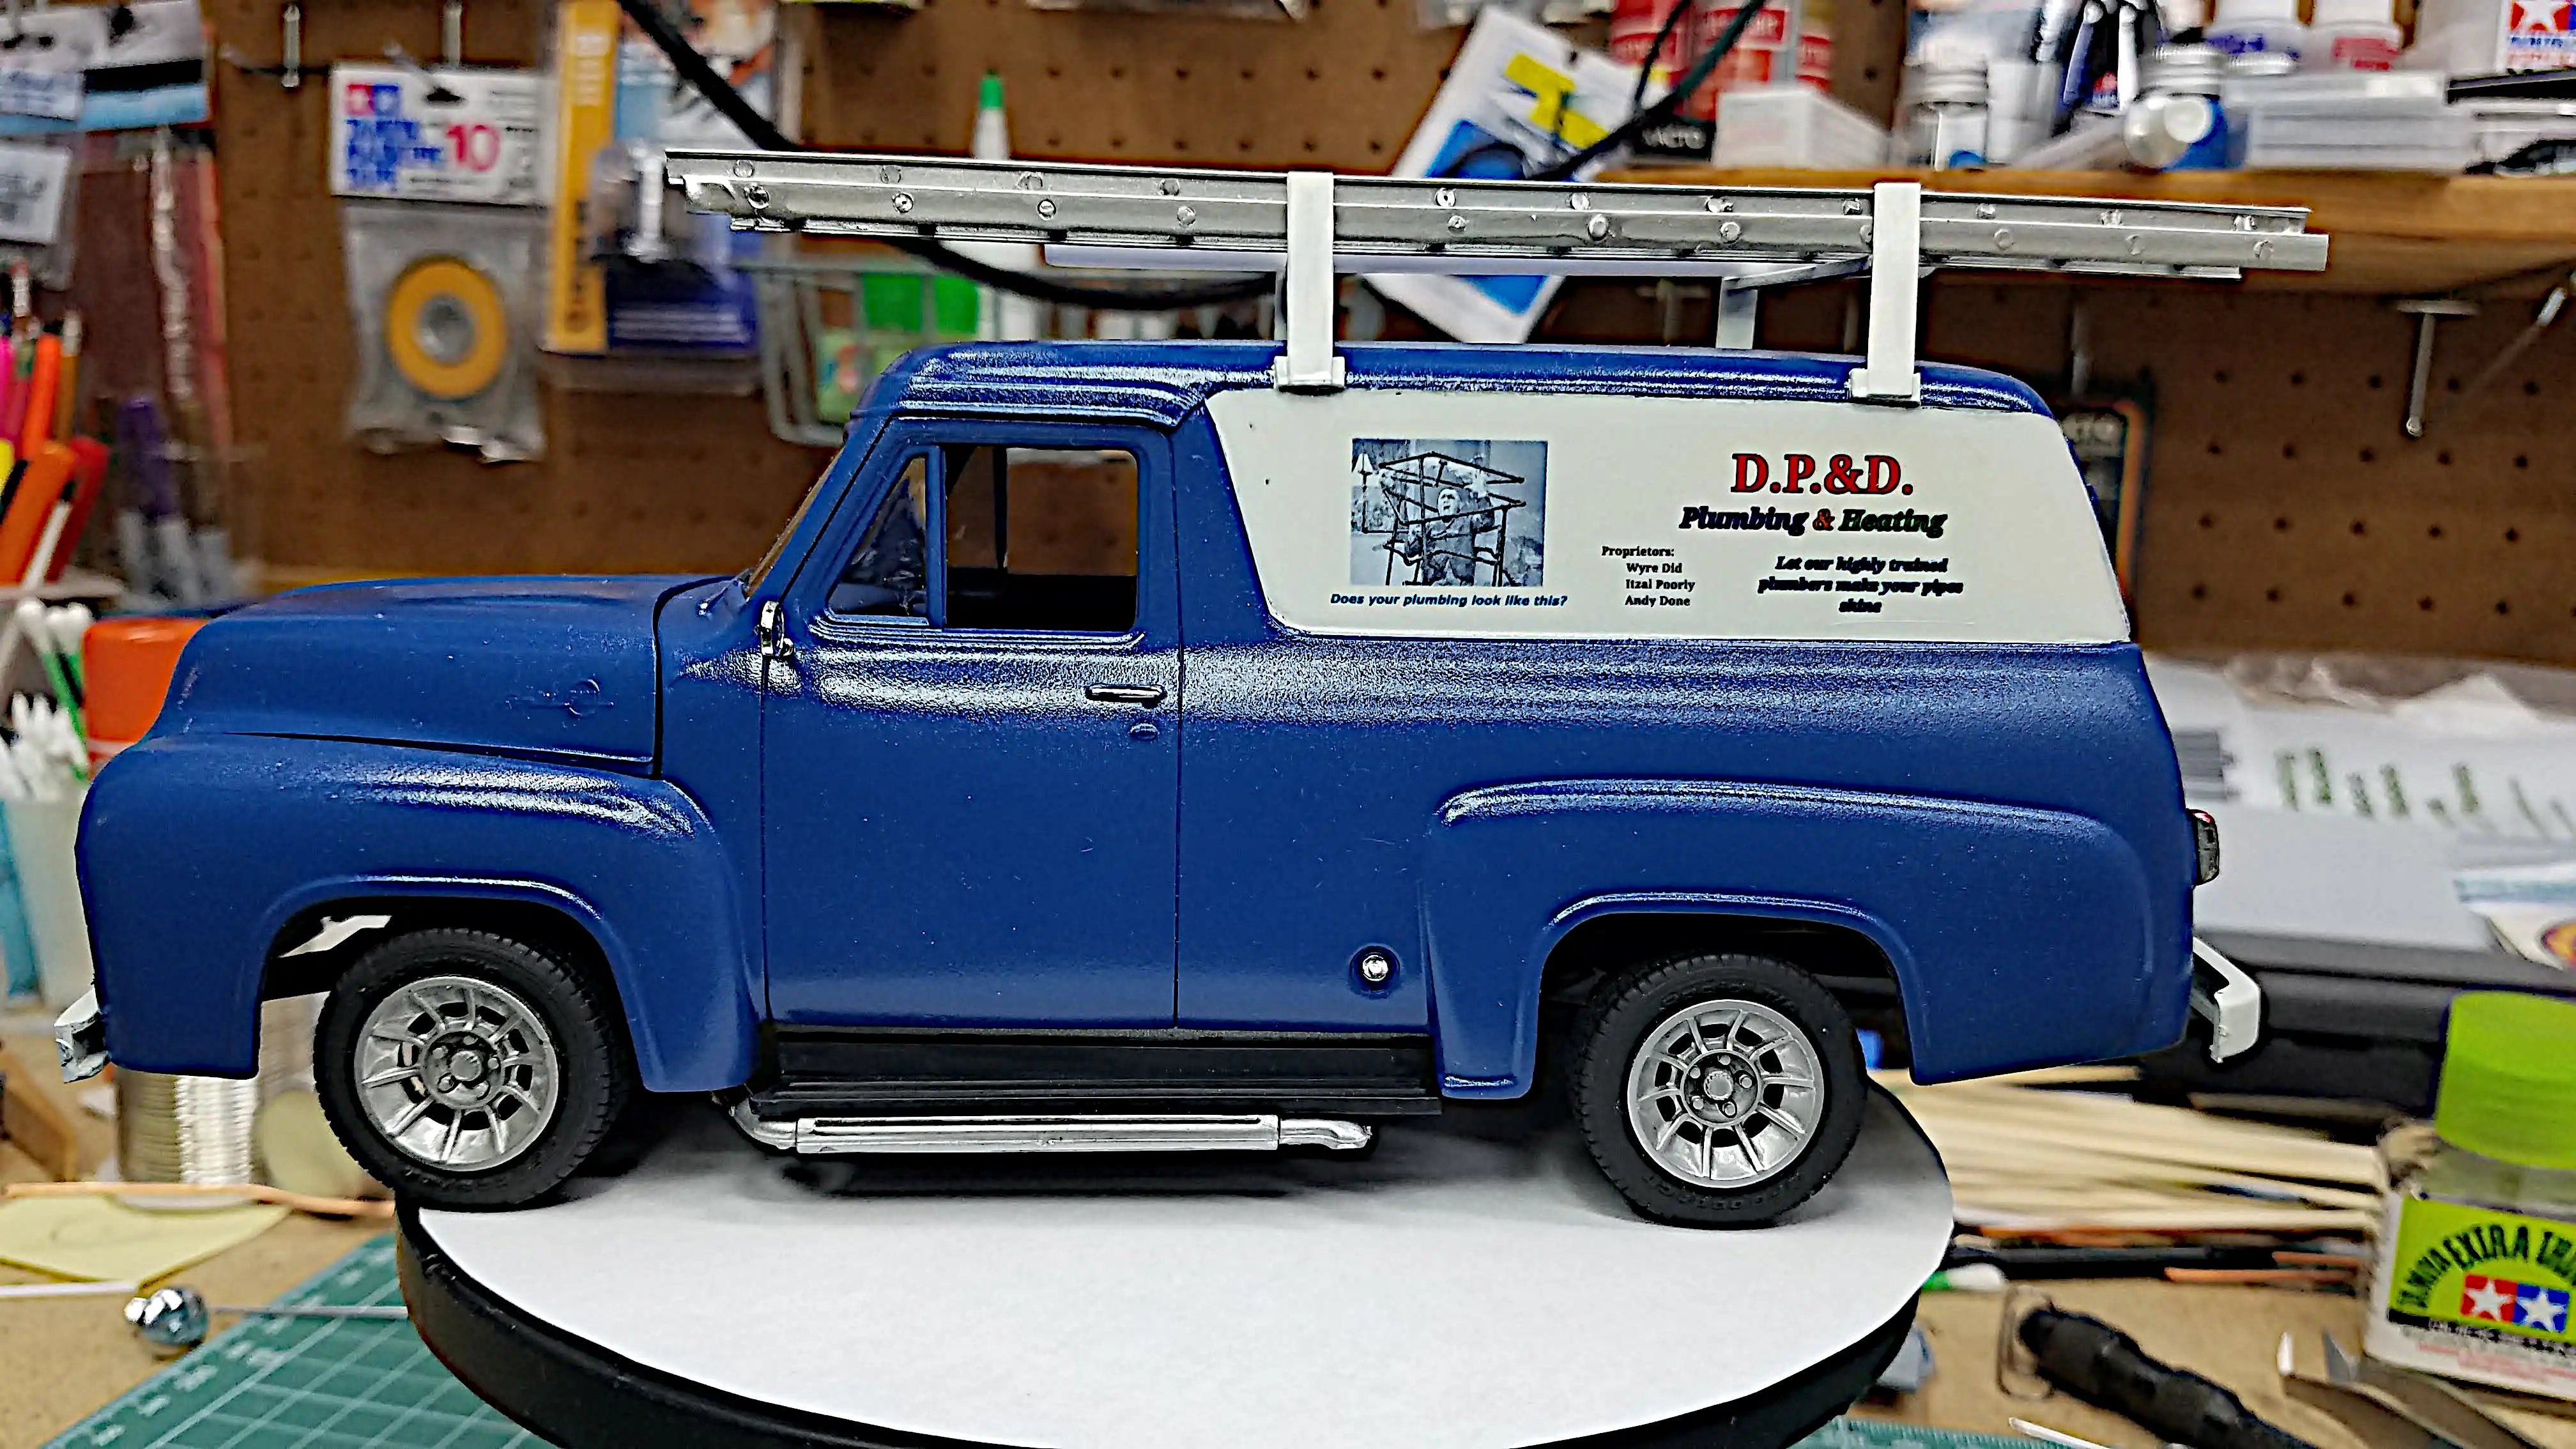
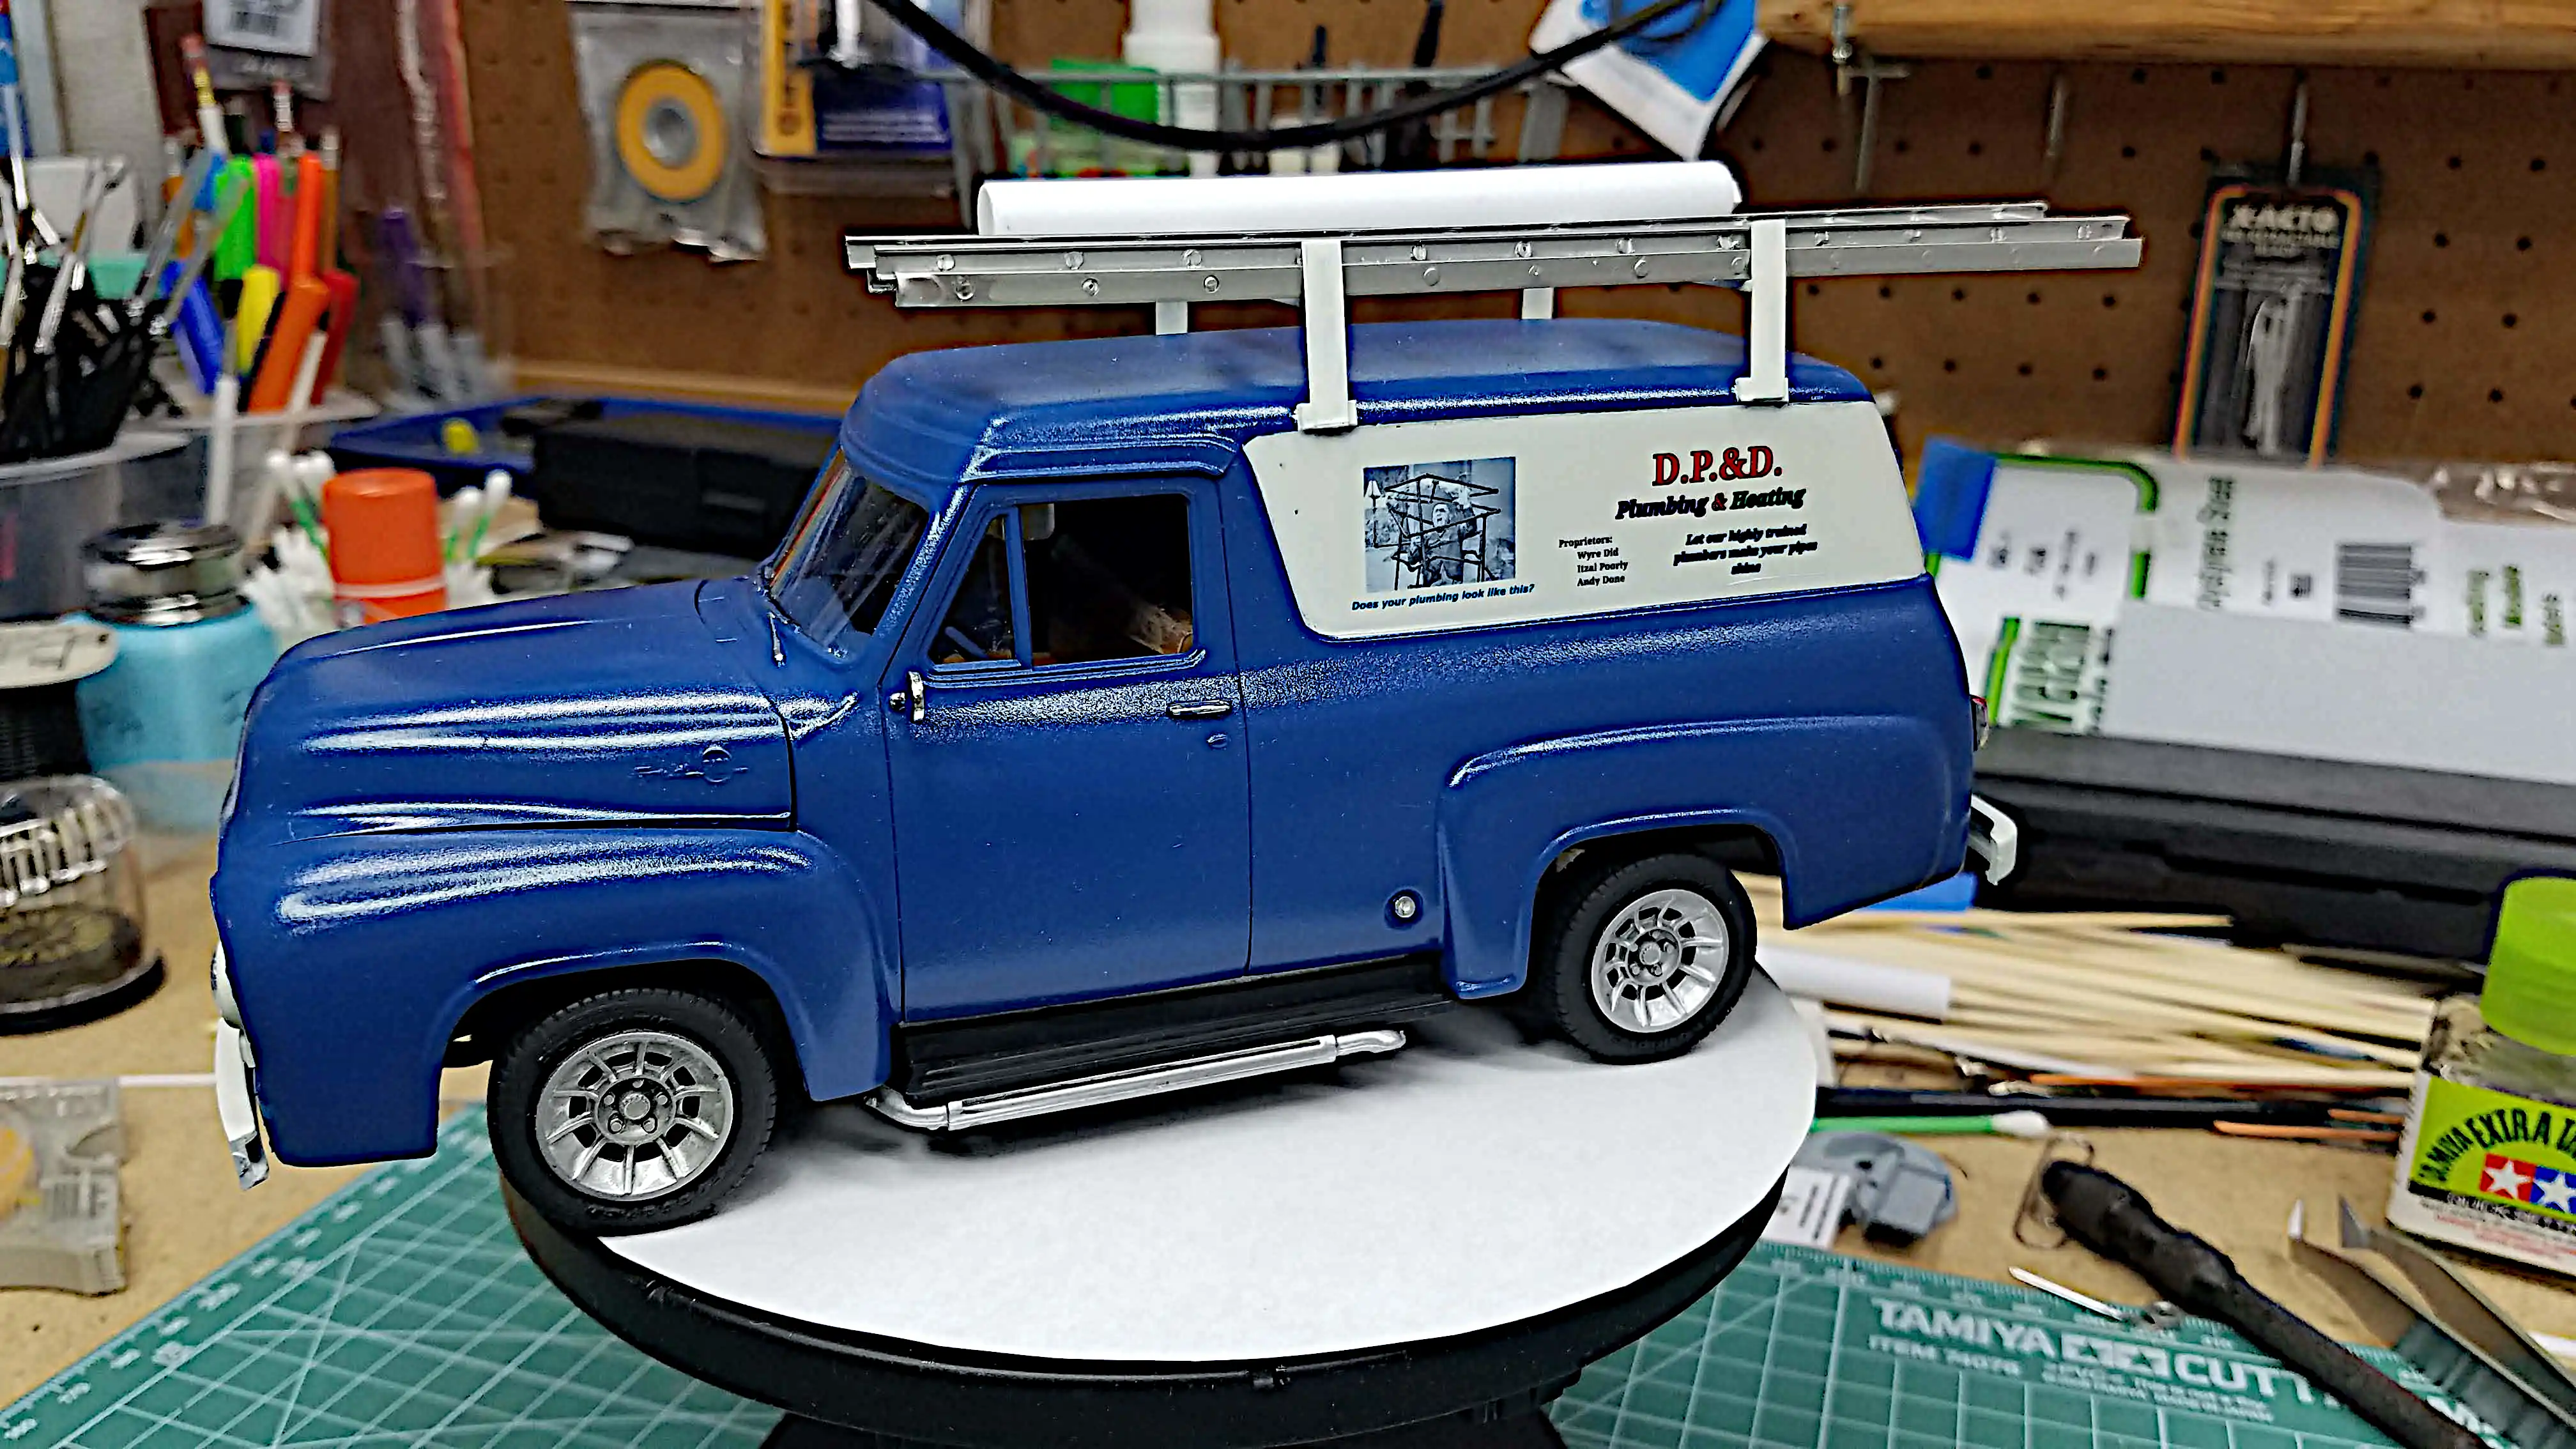 Completed Build
 Completed Build
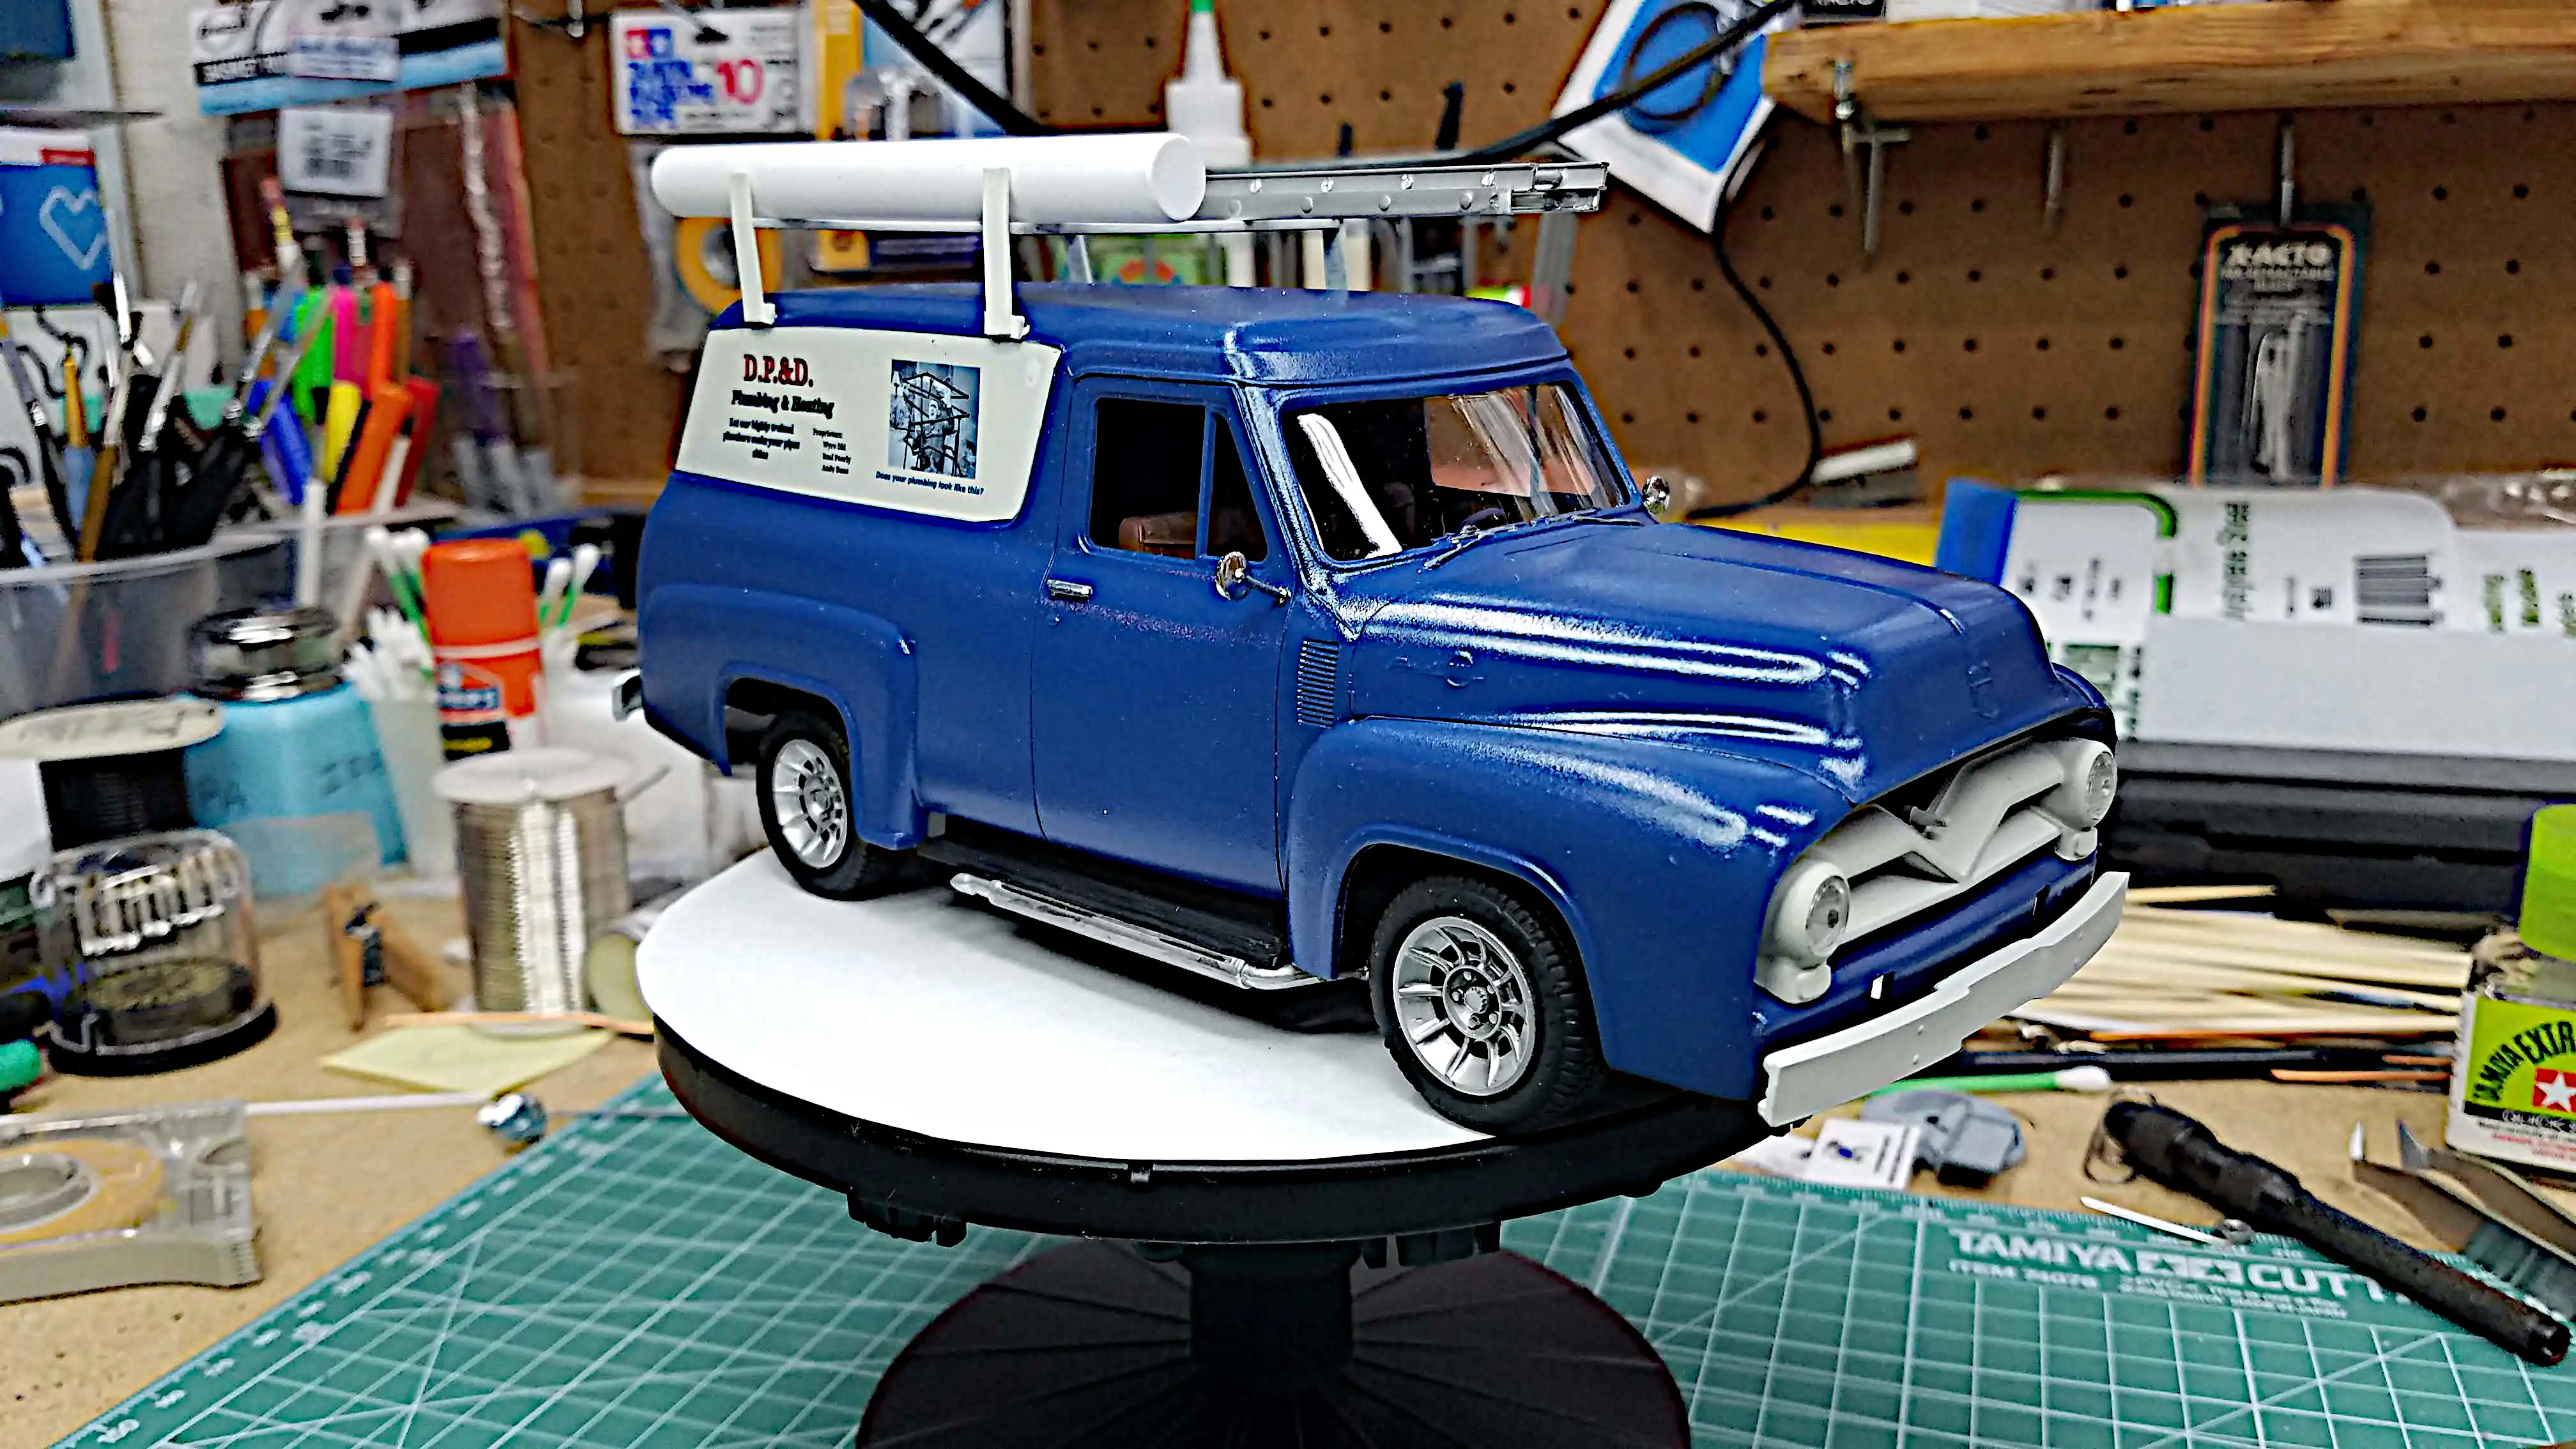 Completed Build
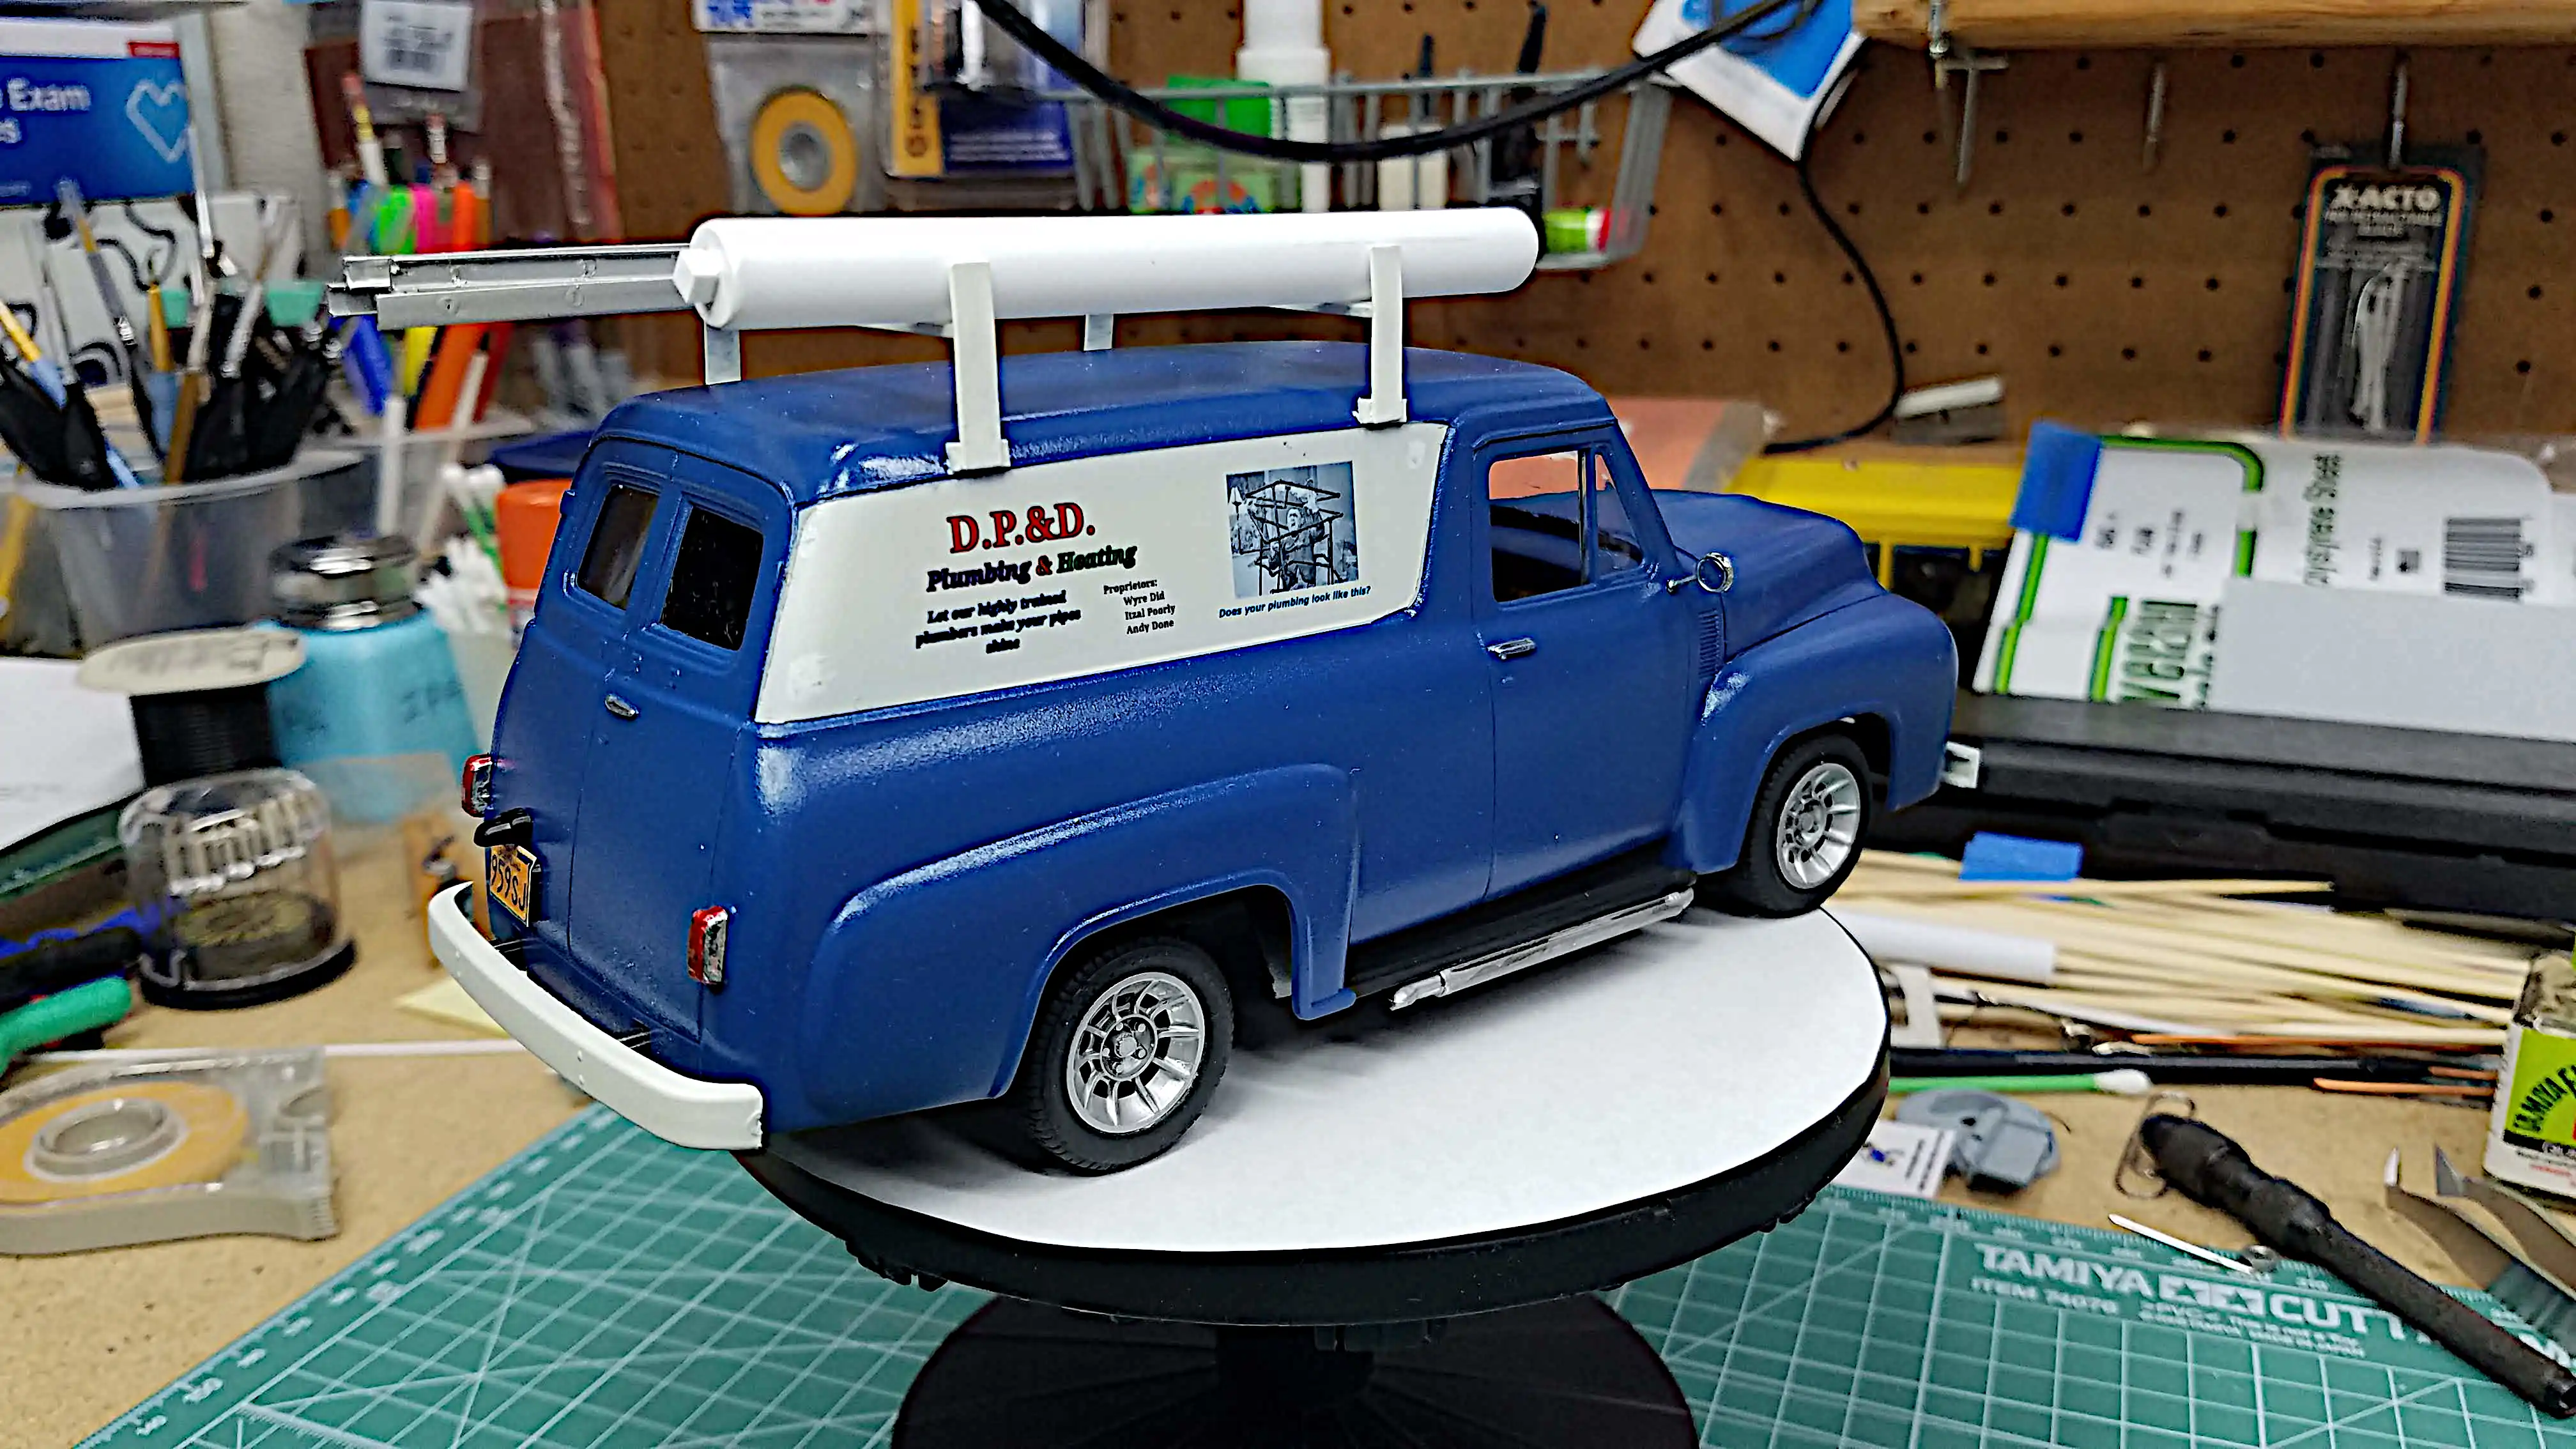 Completed Build
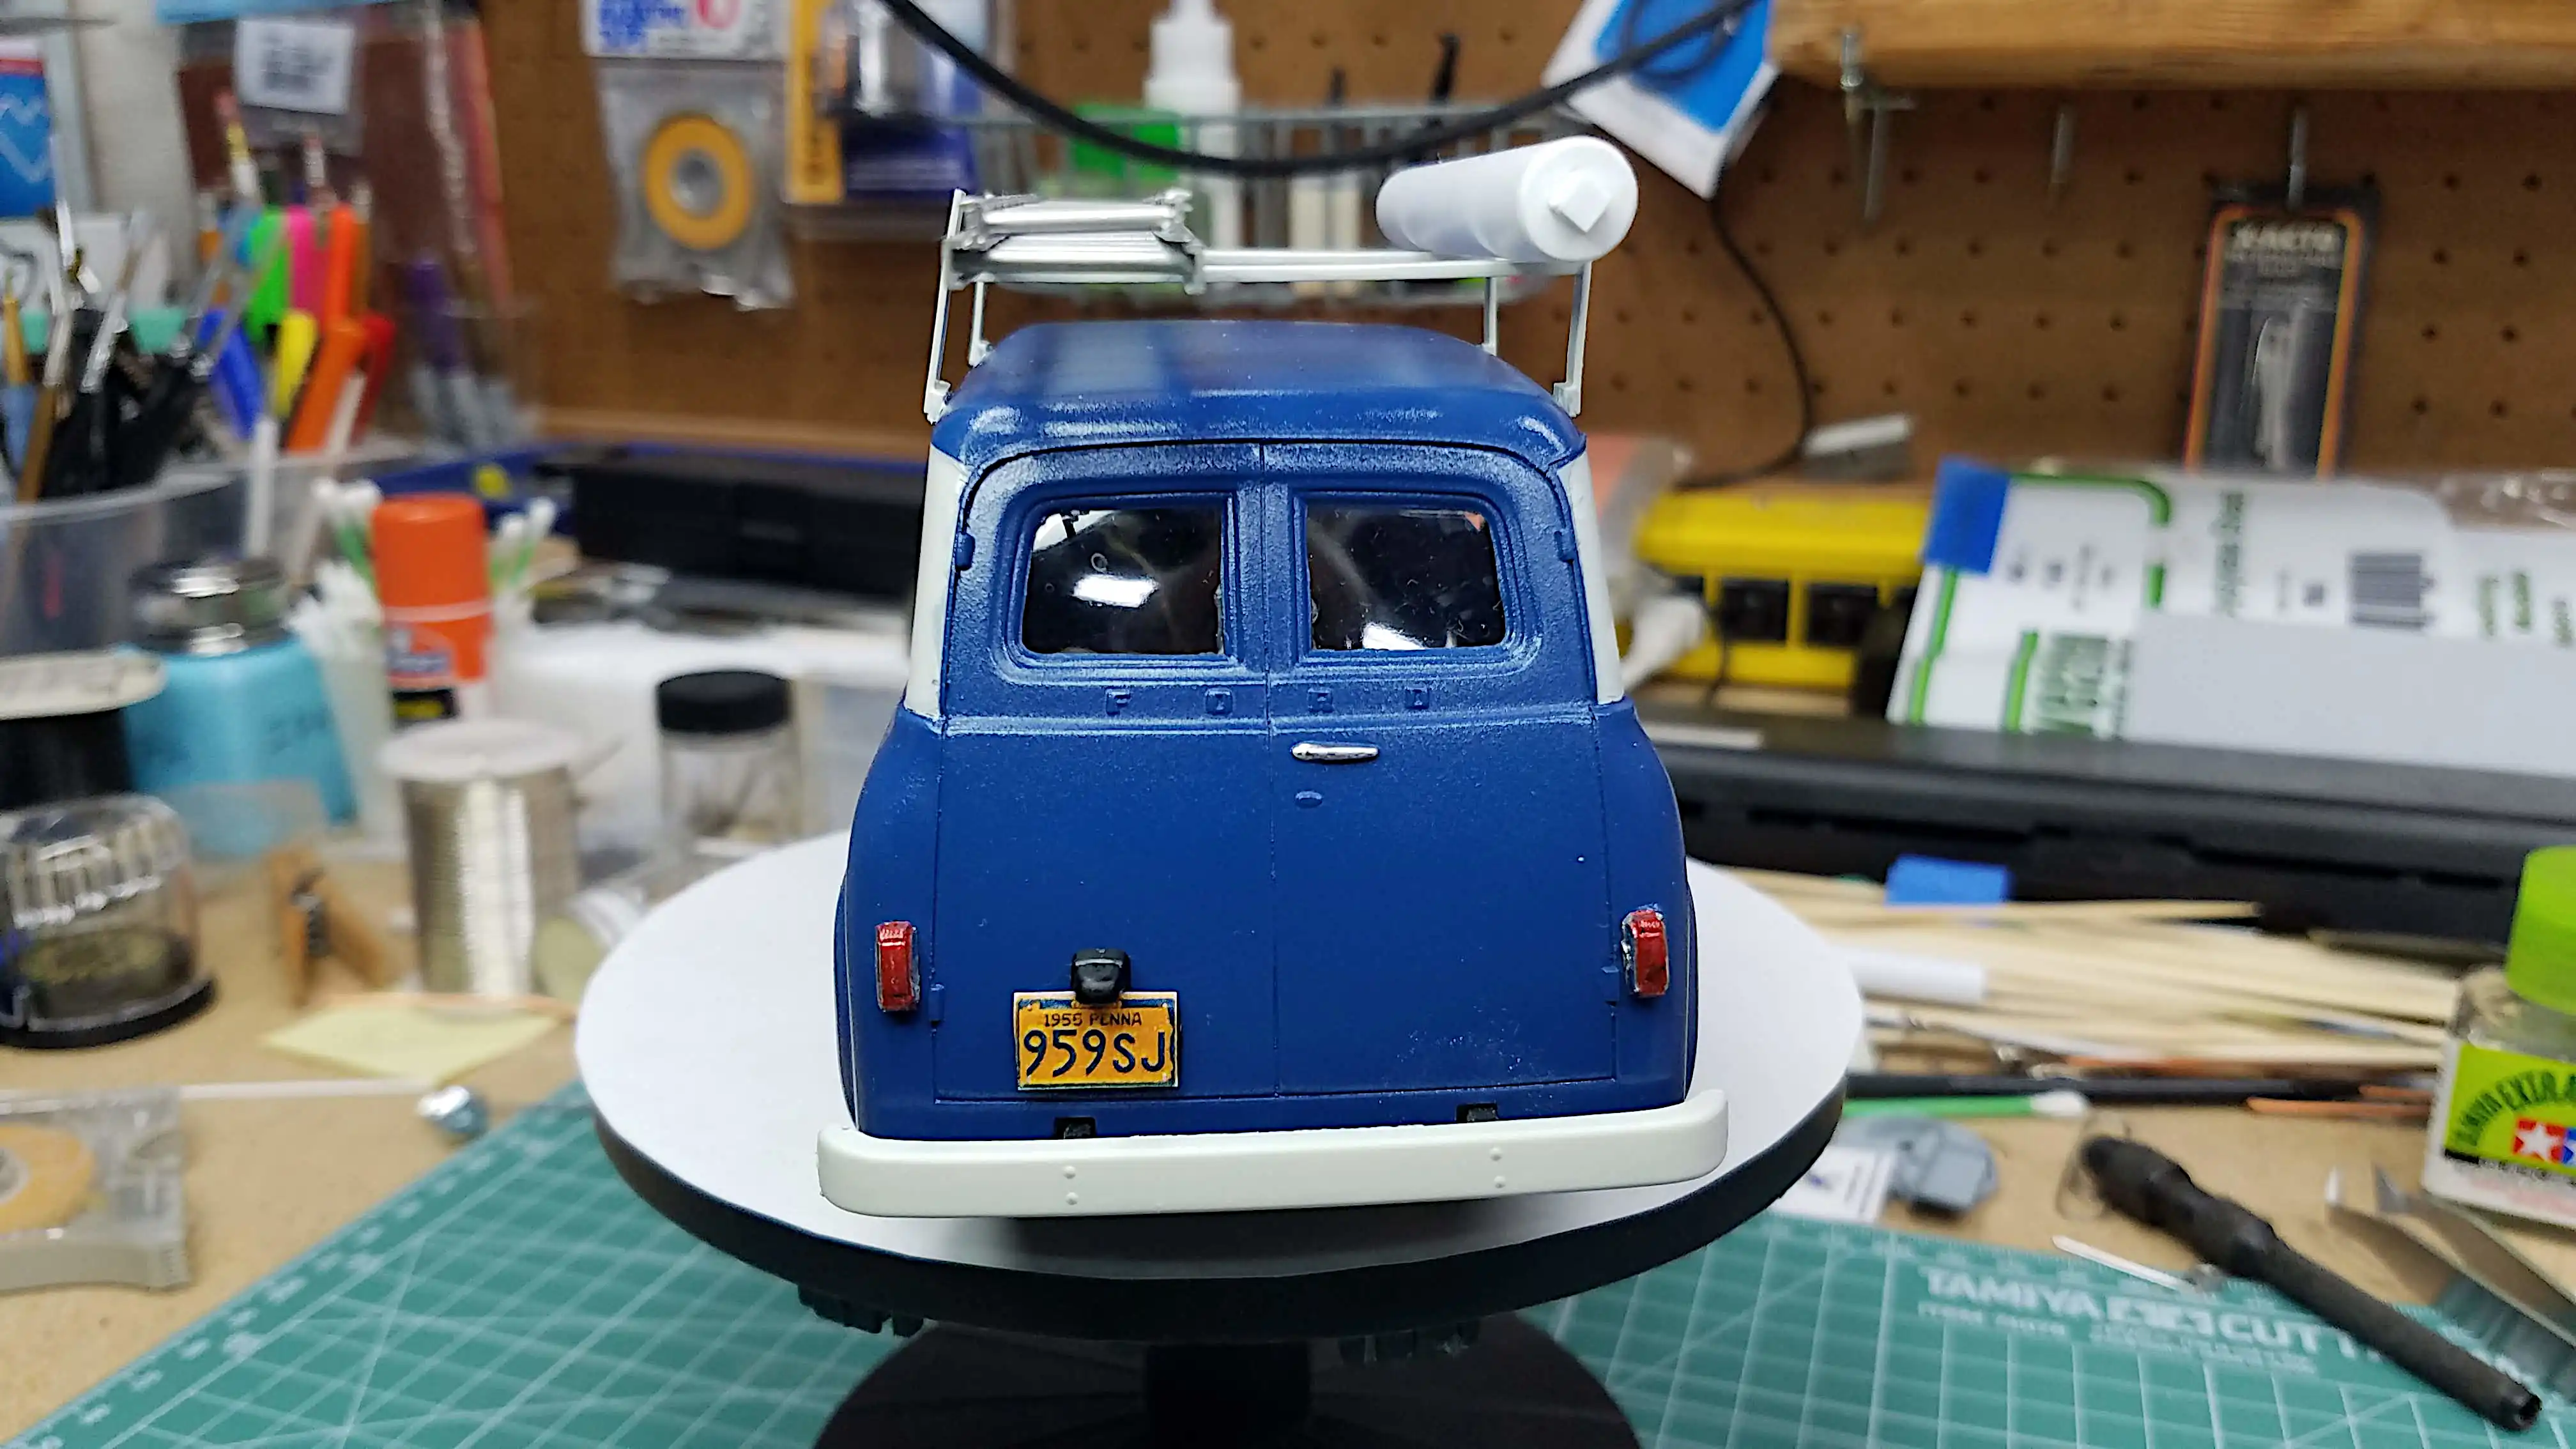 Completed Build
 Completed Build
 Completed Build
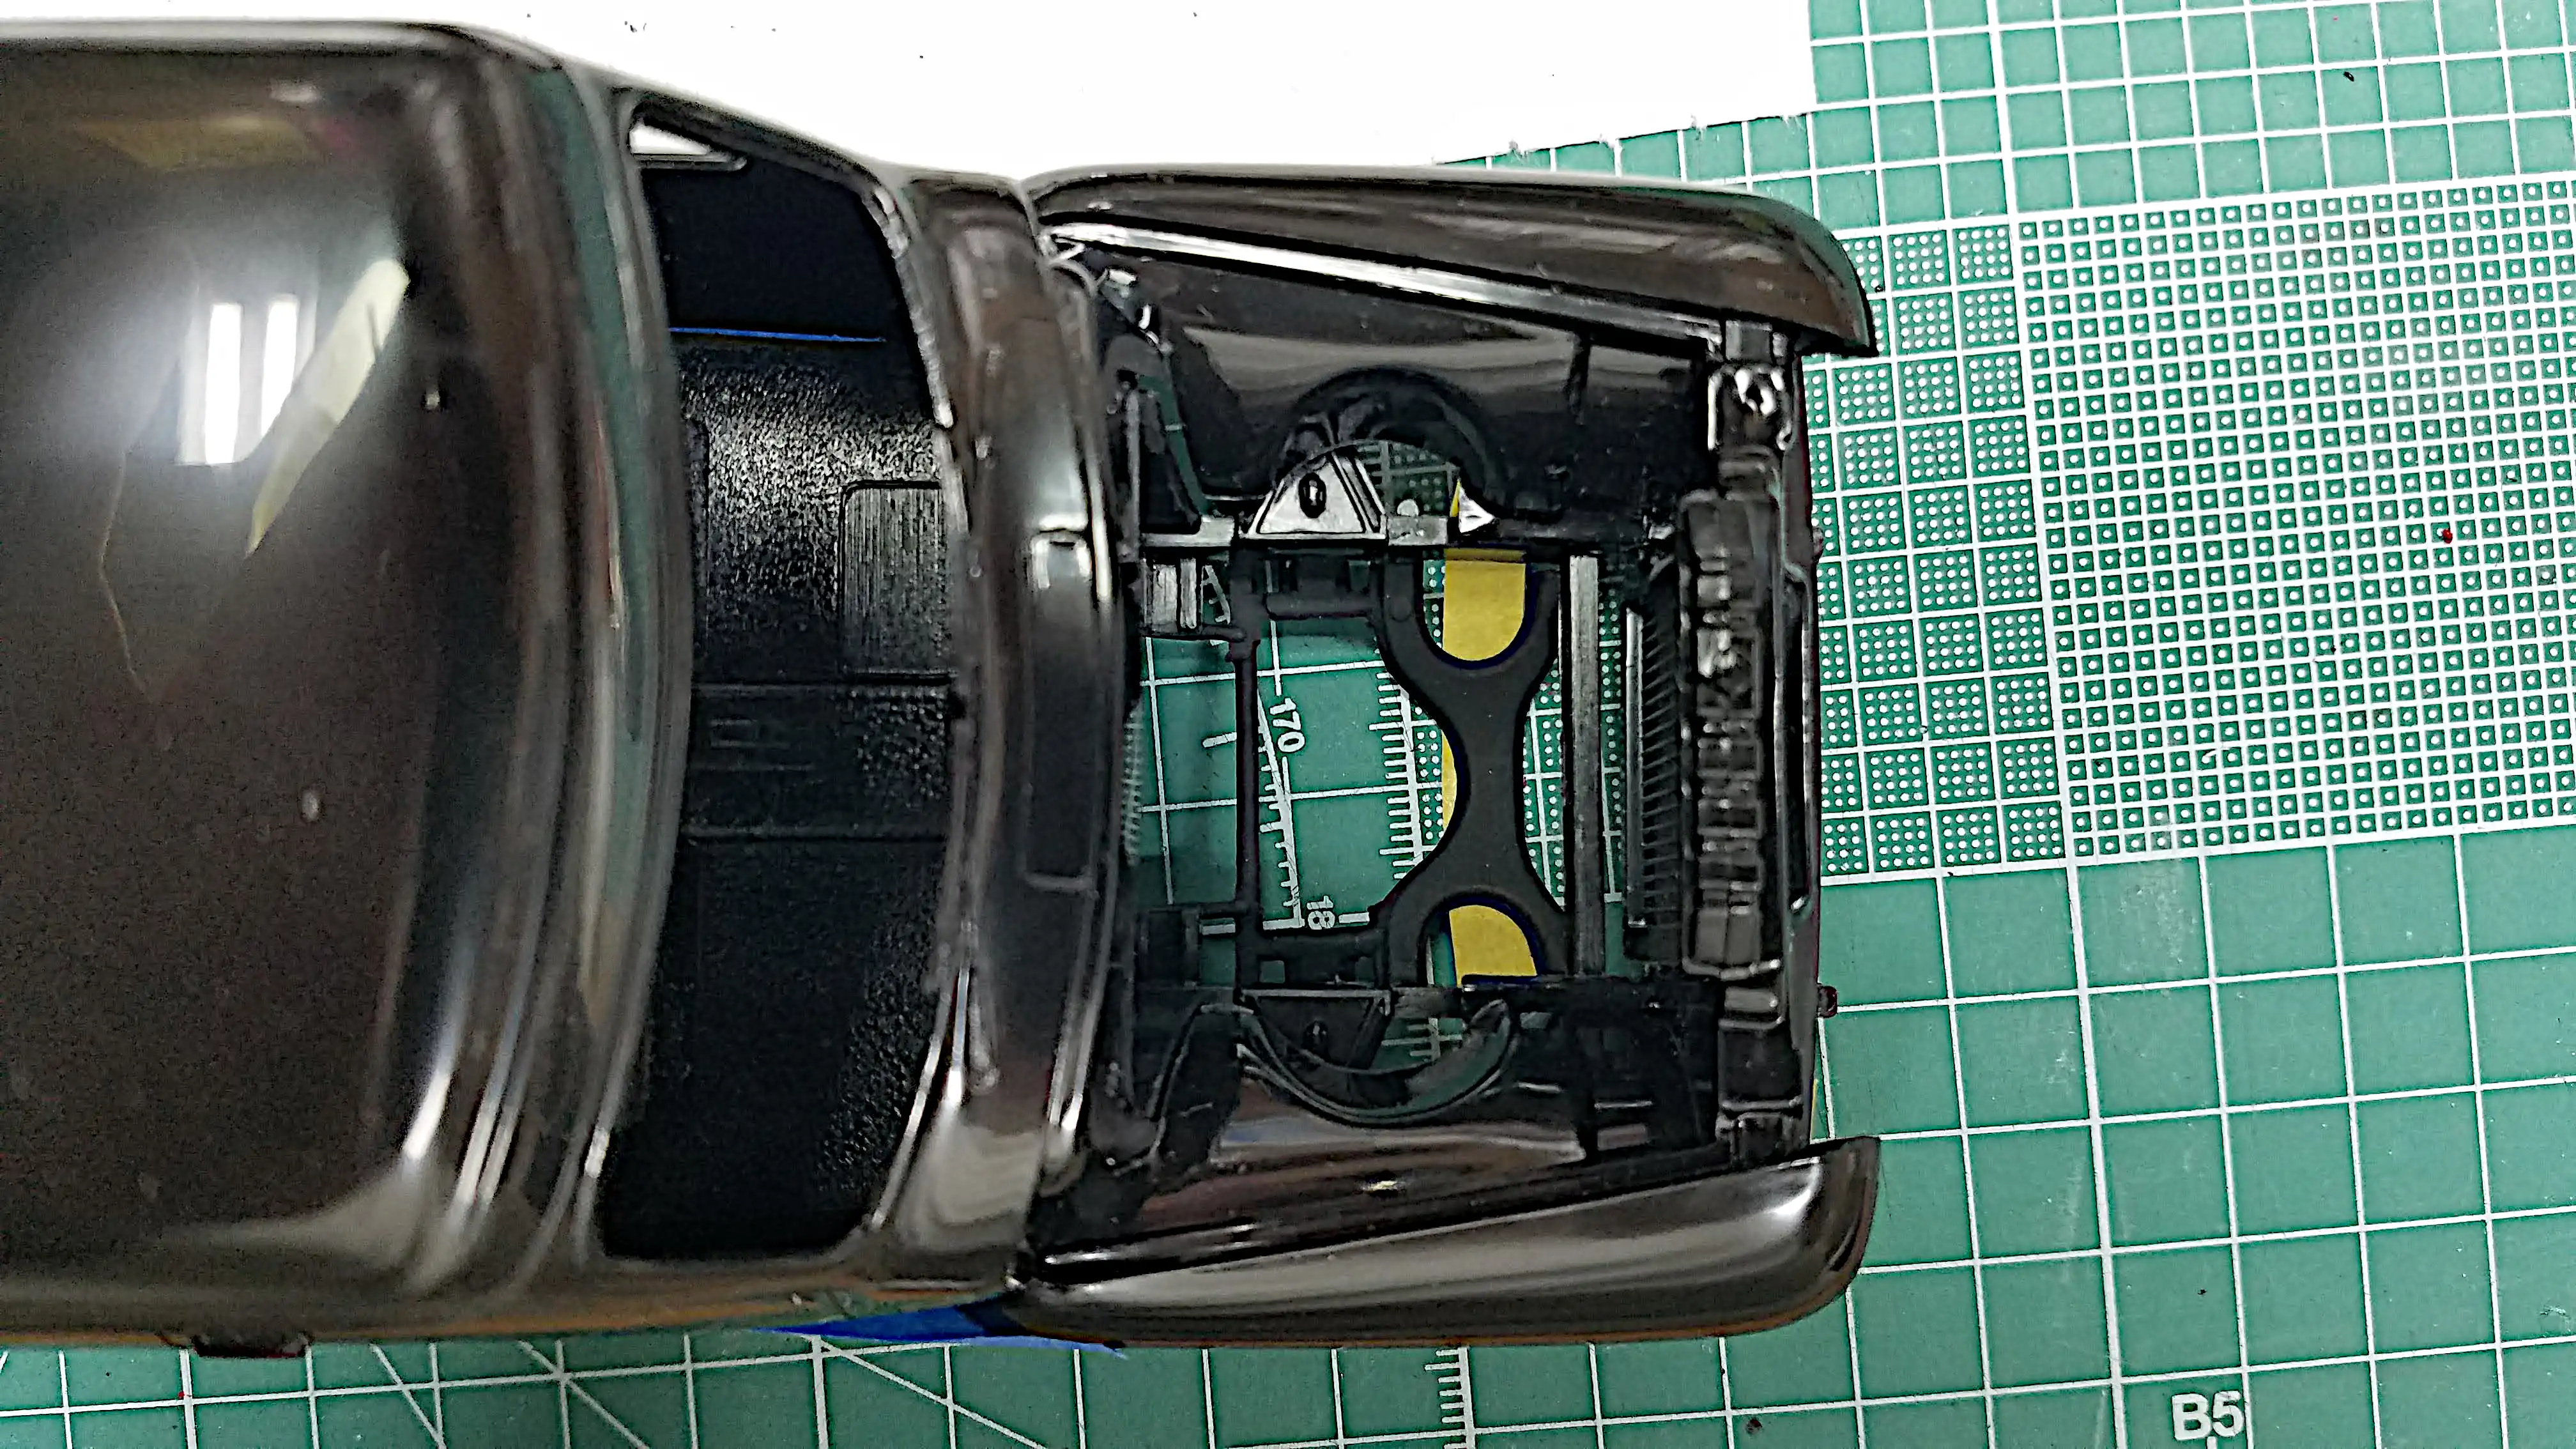
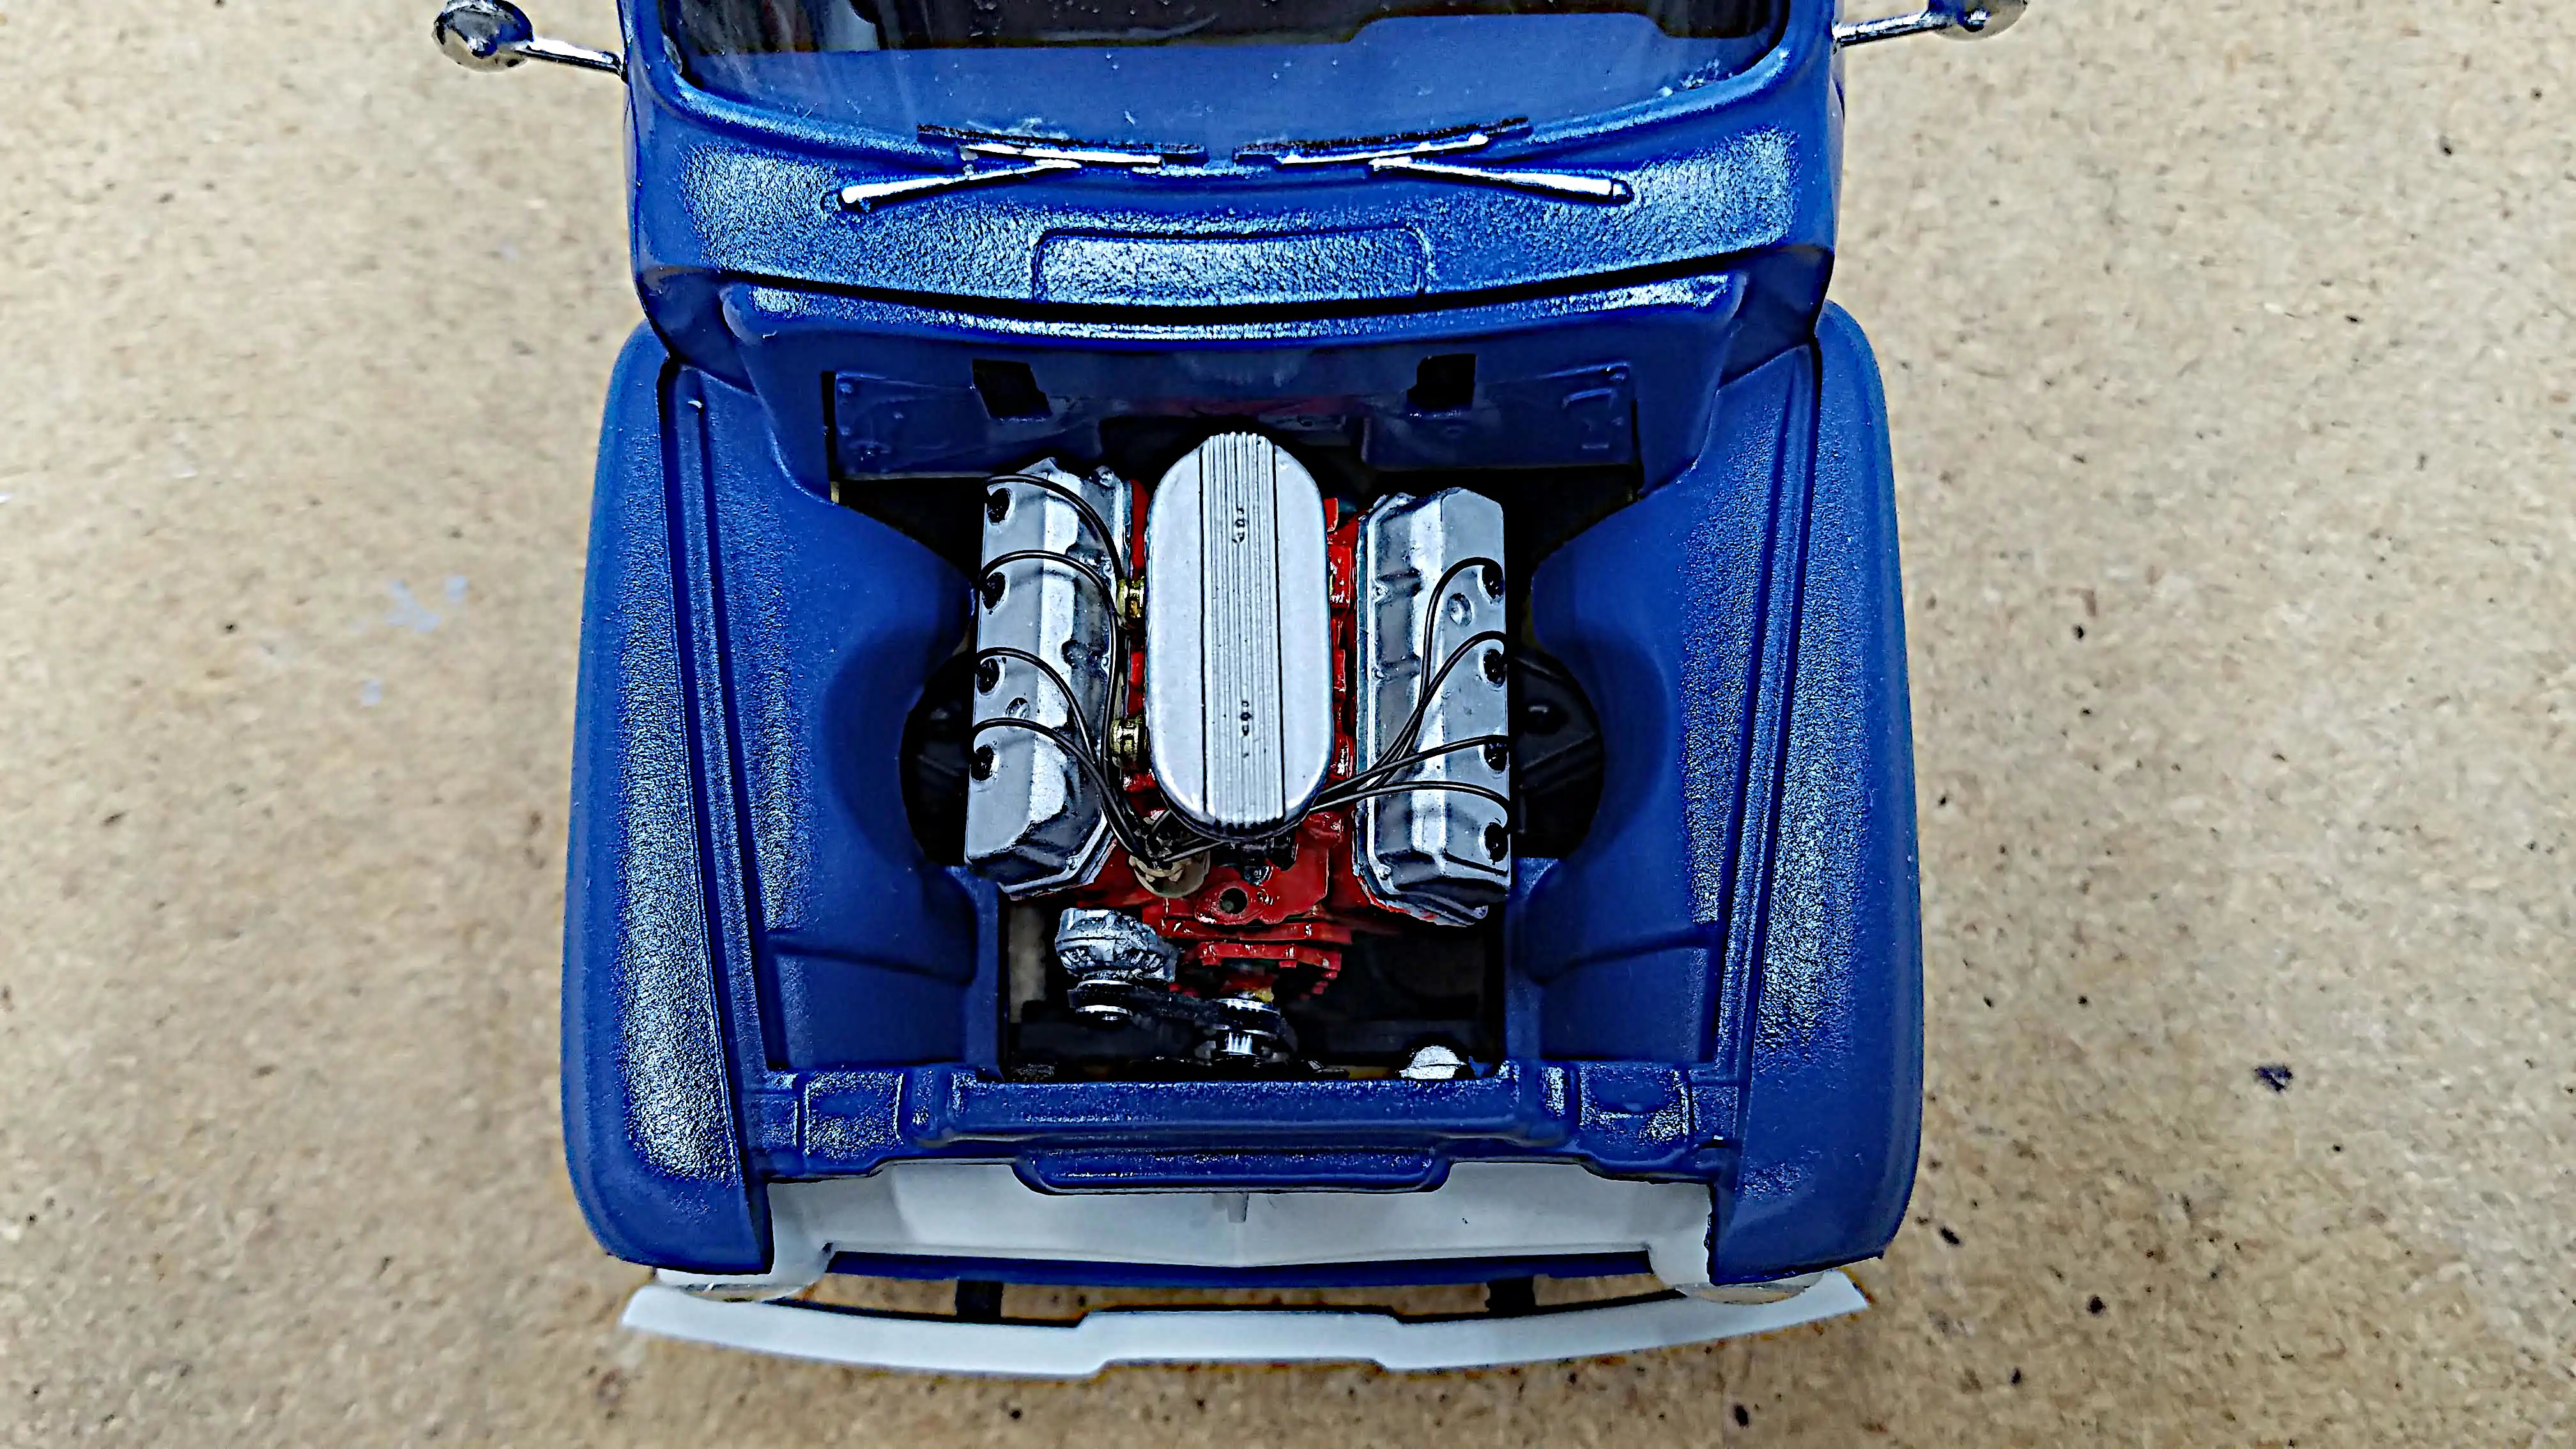 Hood open looking at the engine
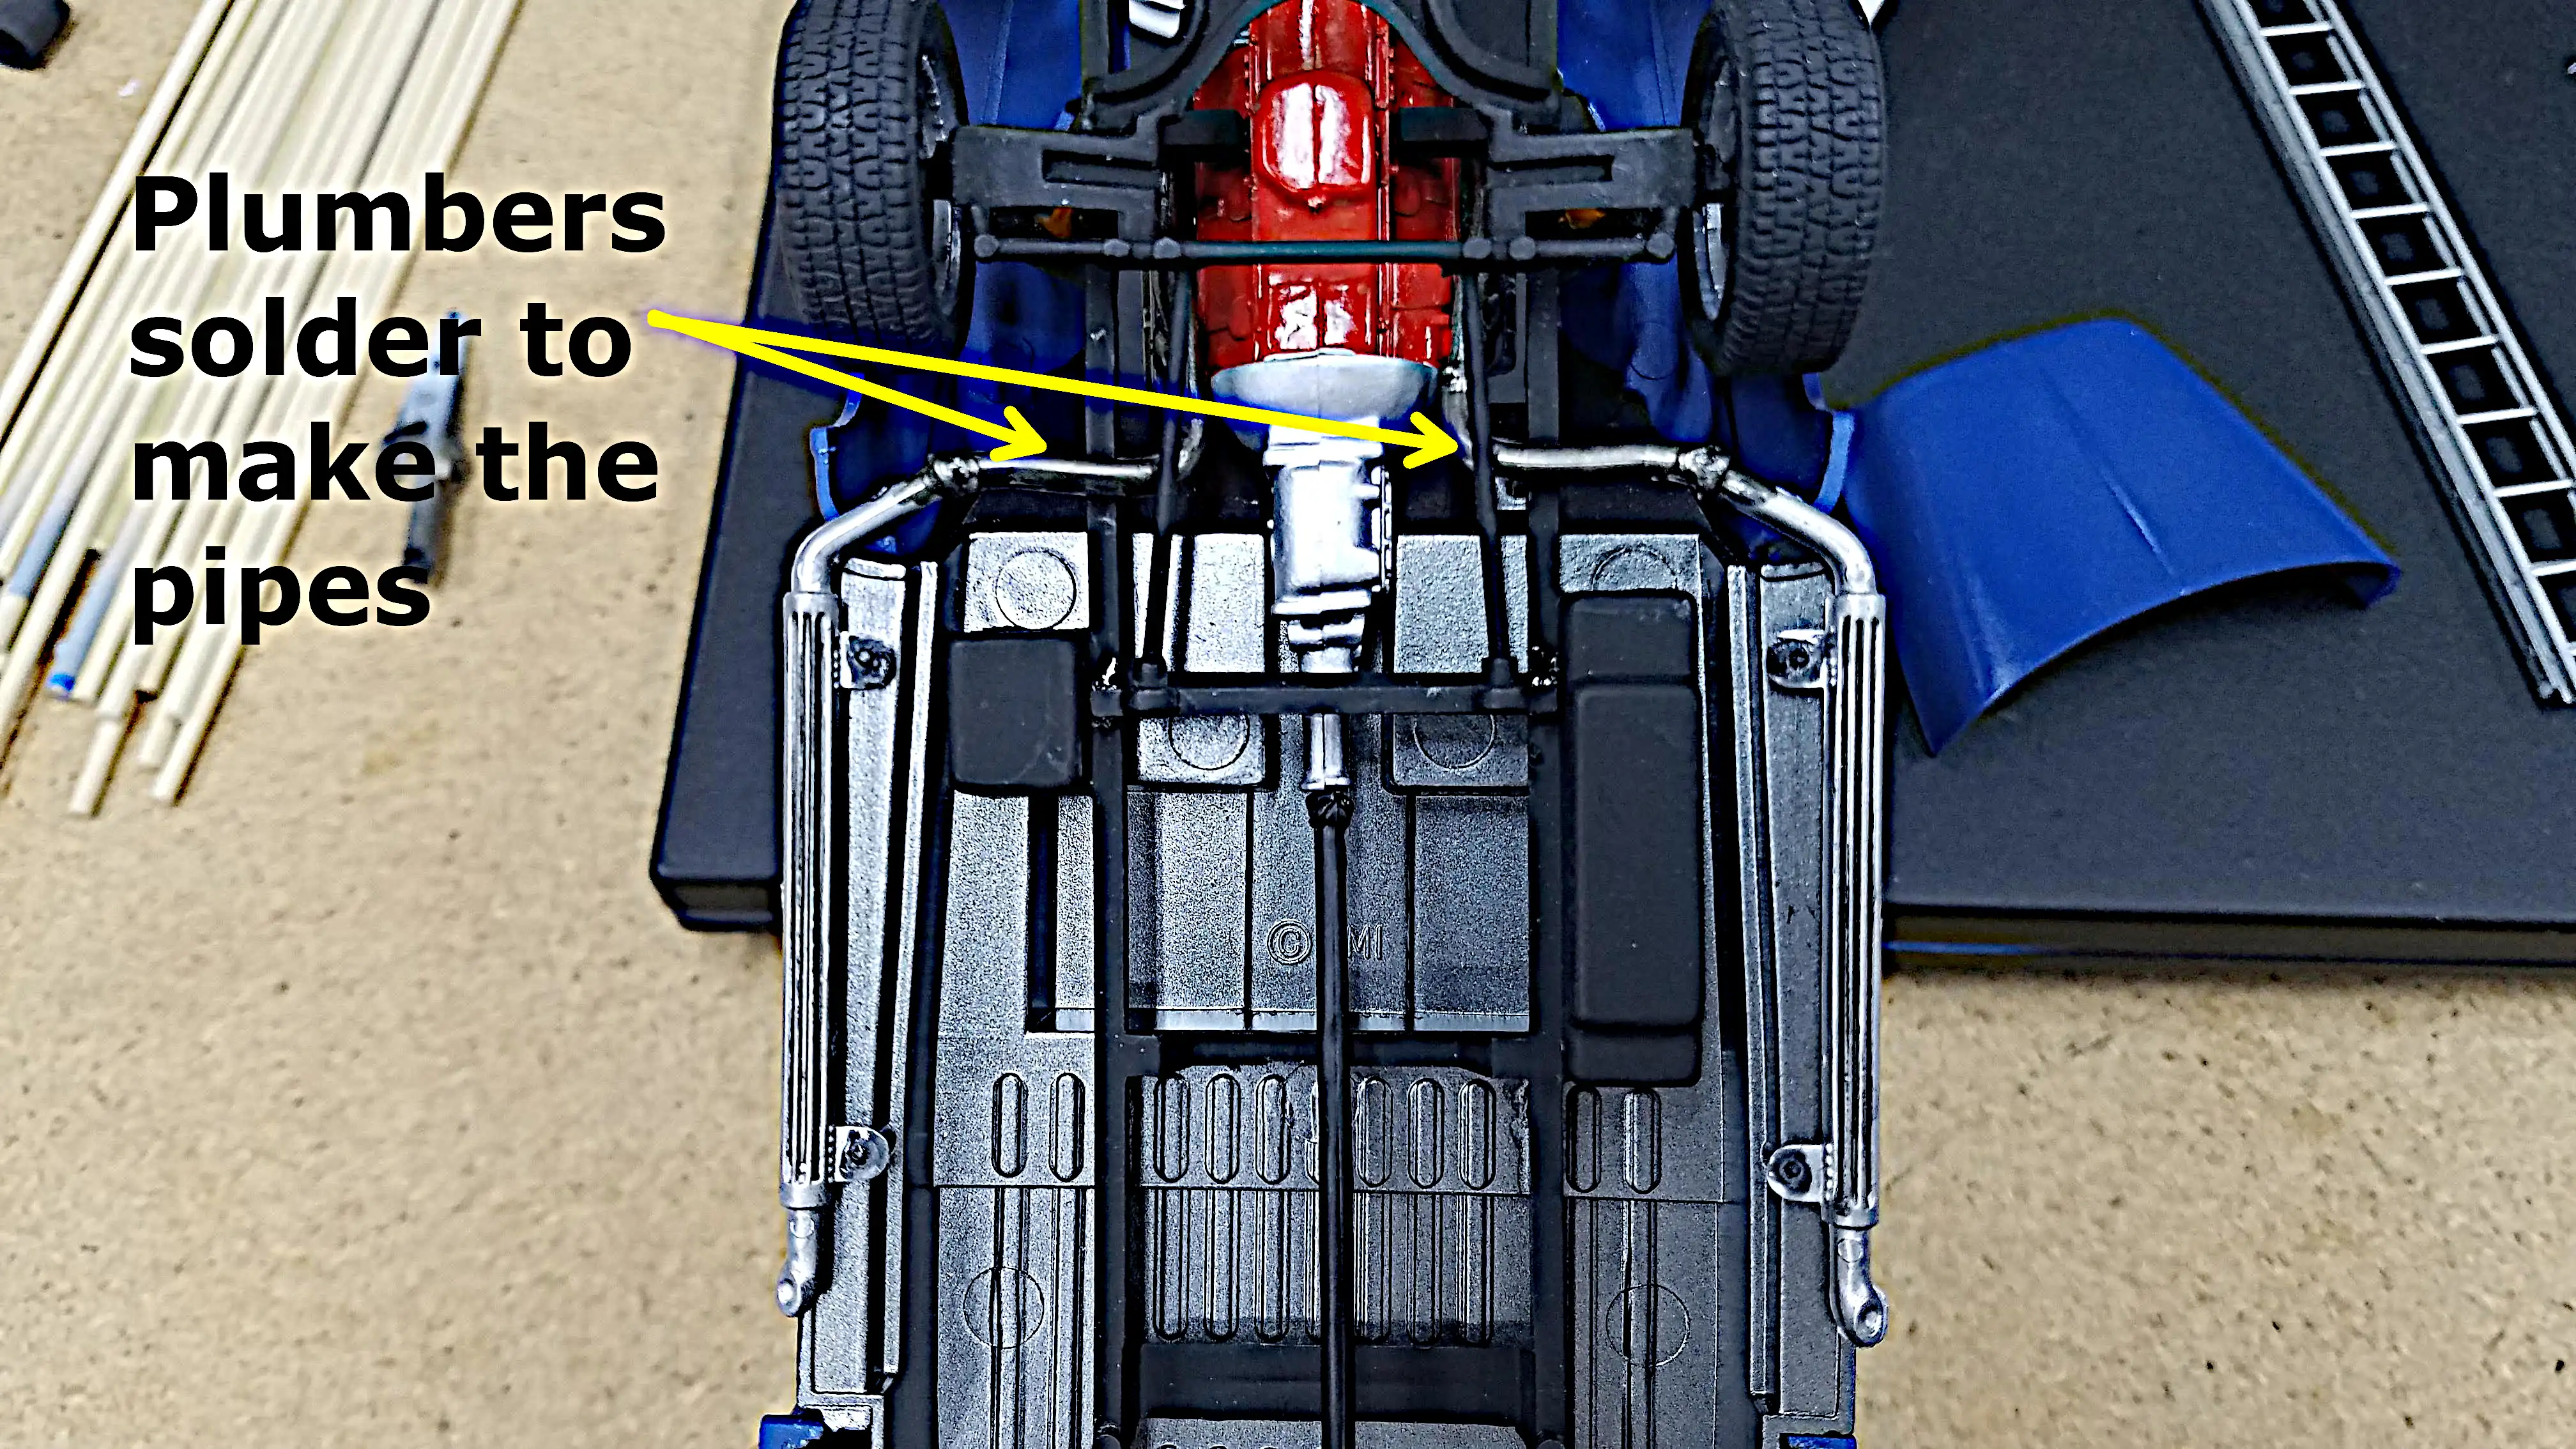 Exhaust pipes made from solder to join with the side pipes
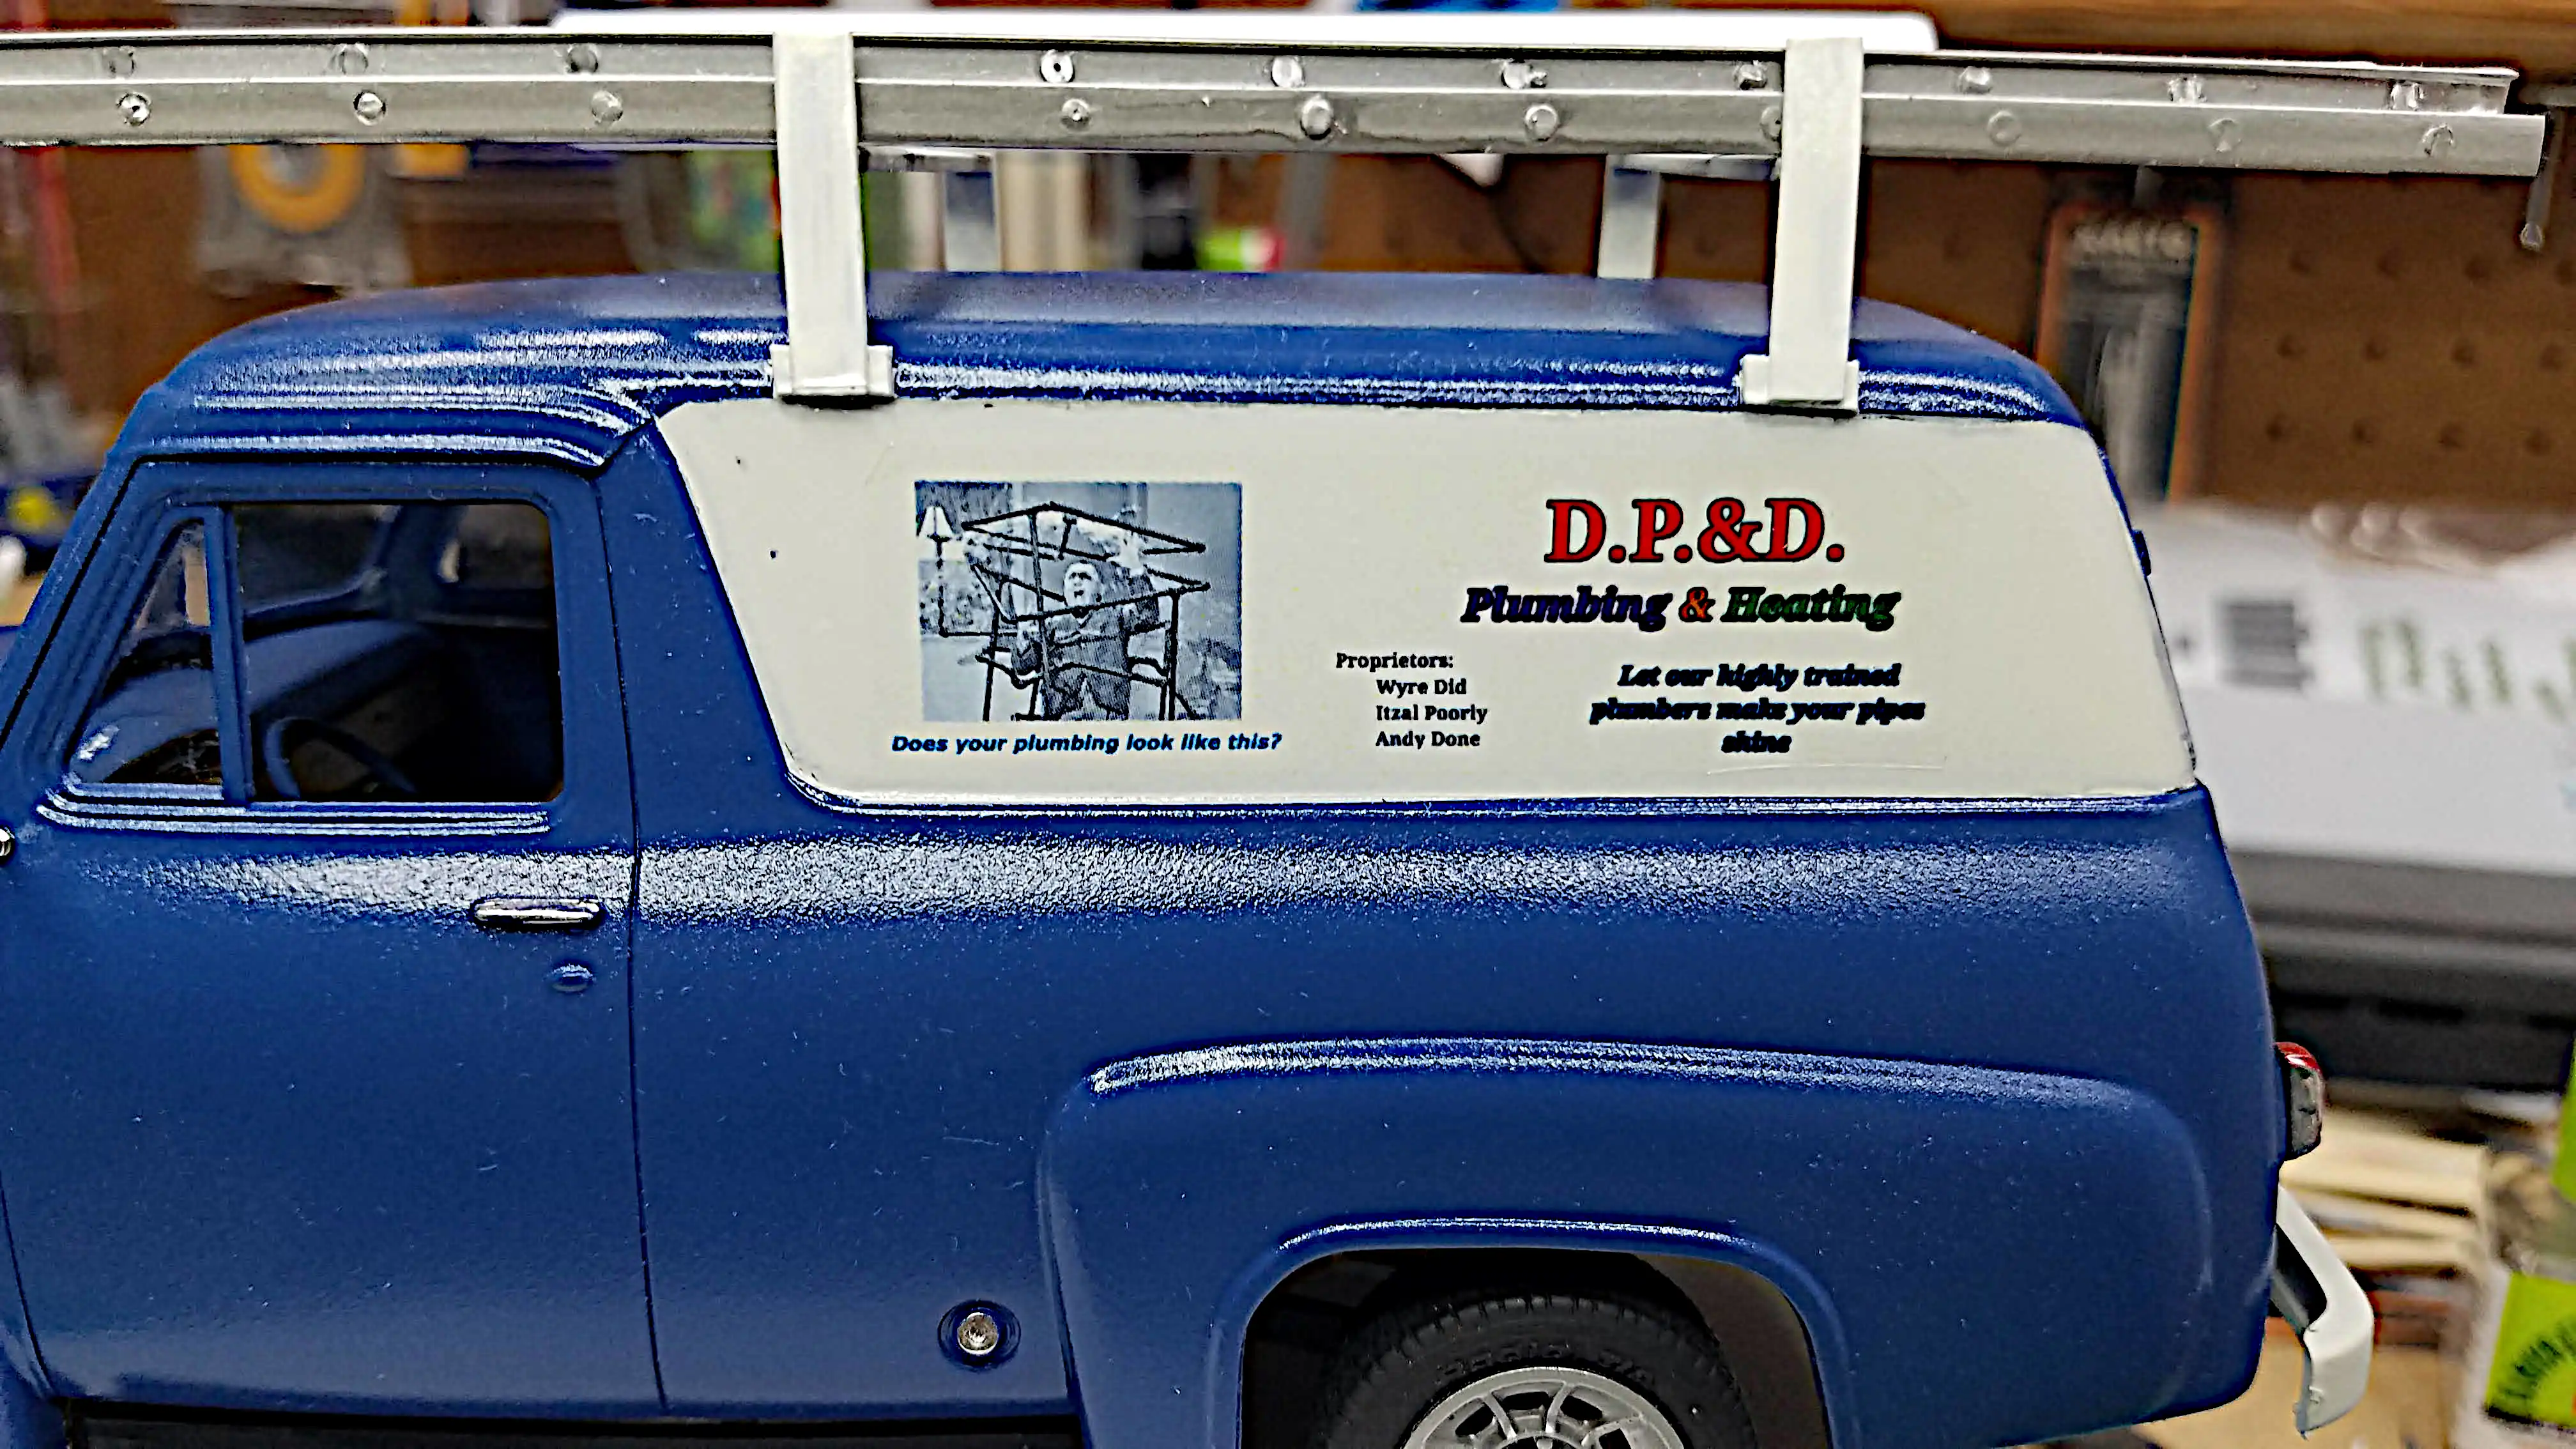 My custom decal
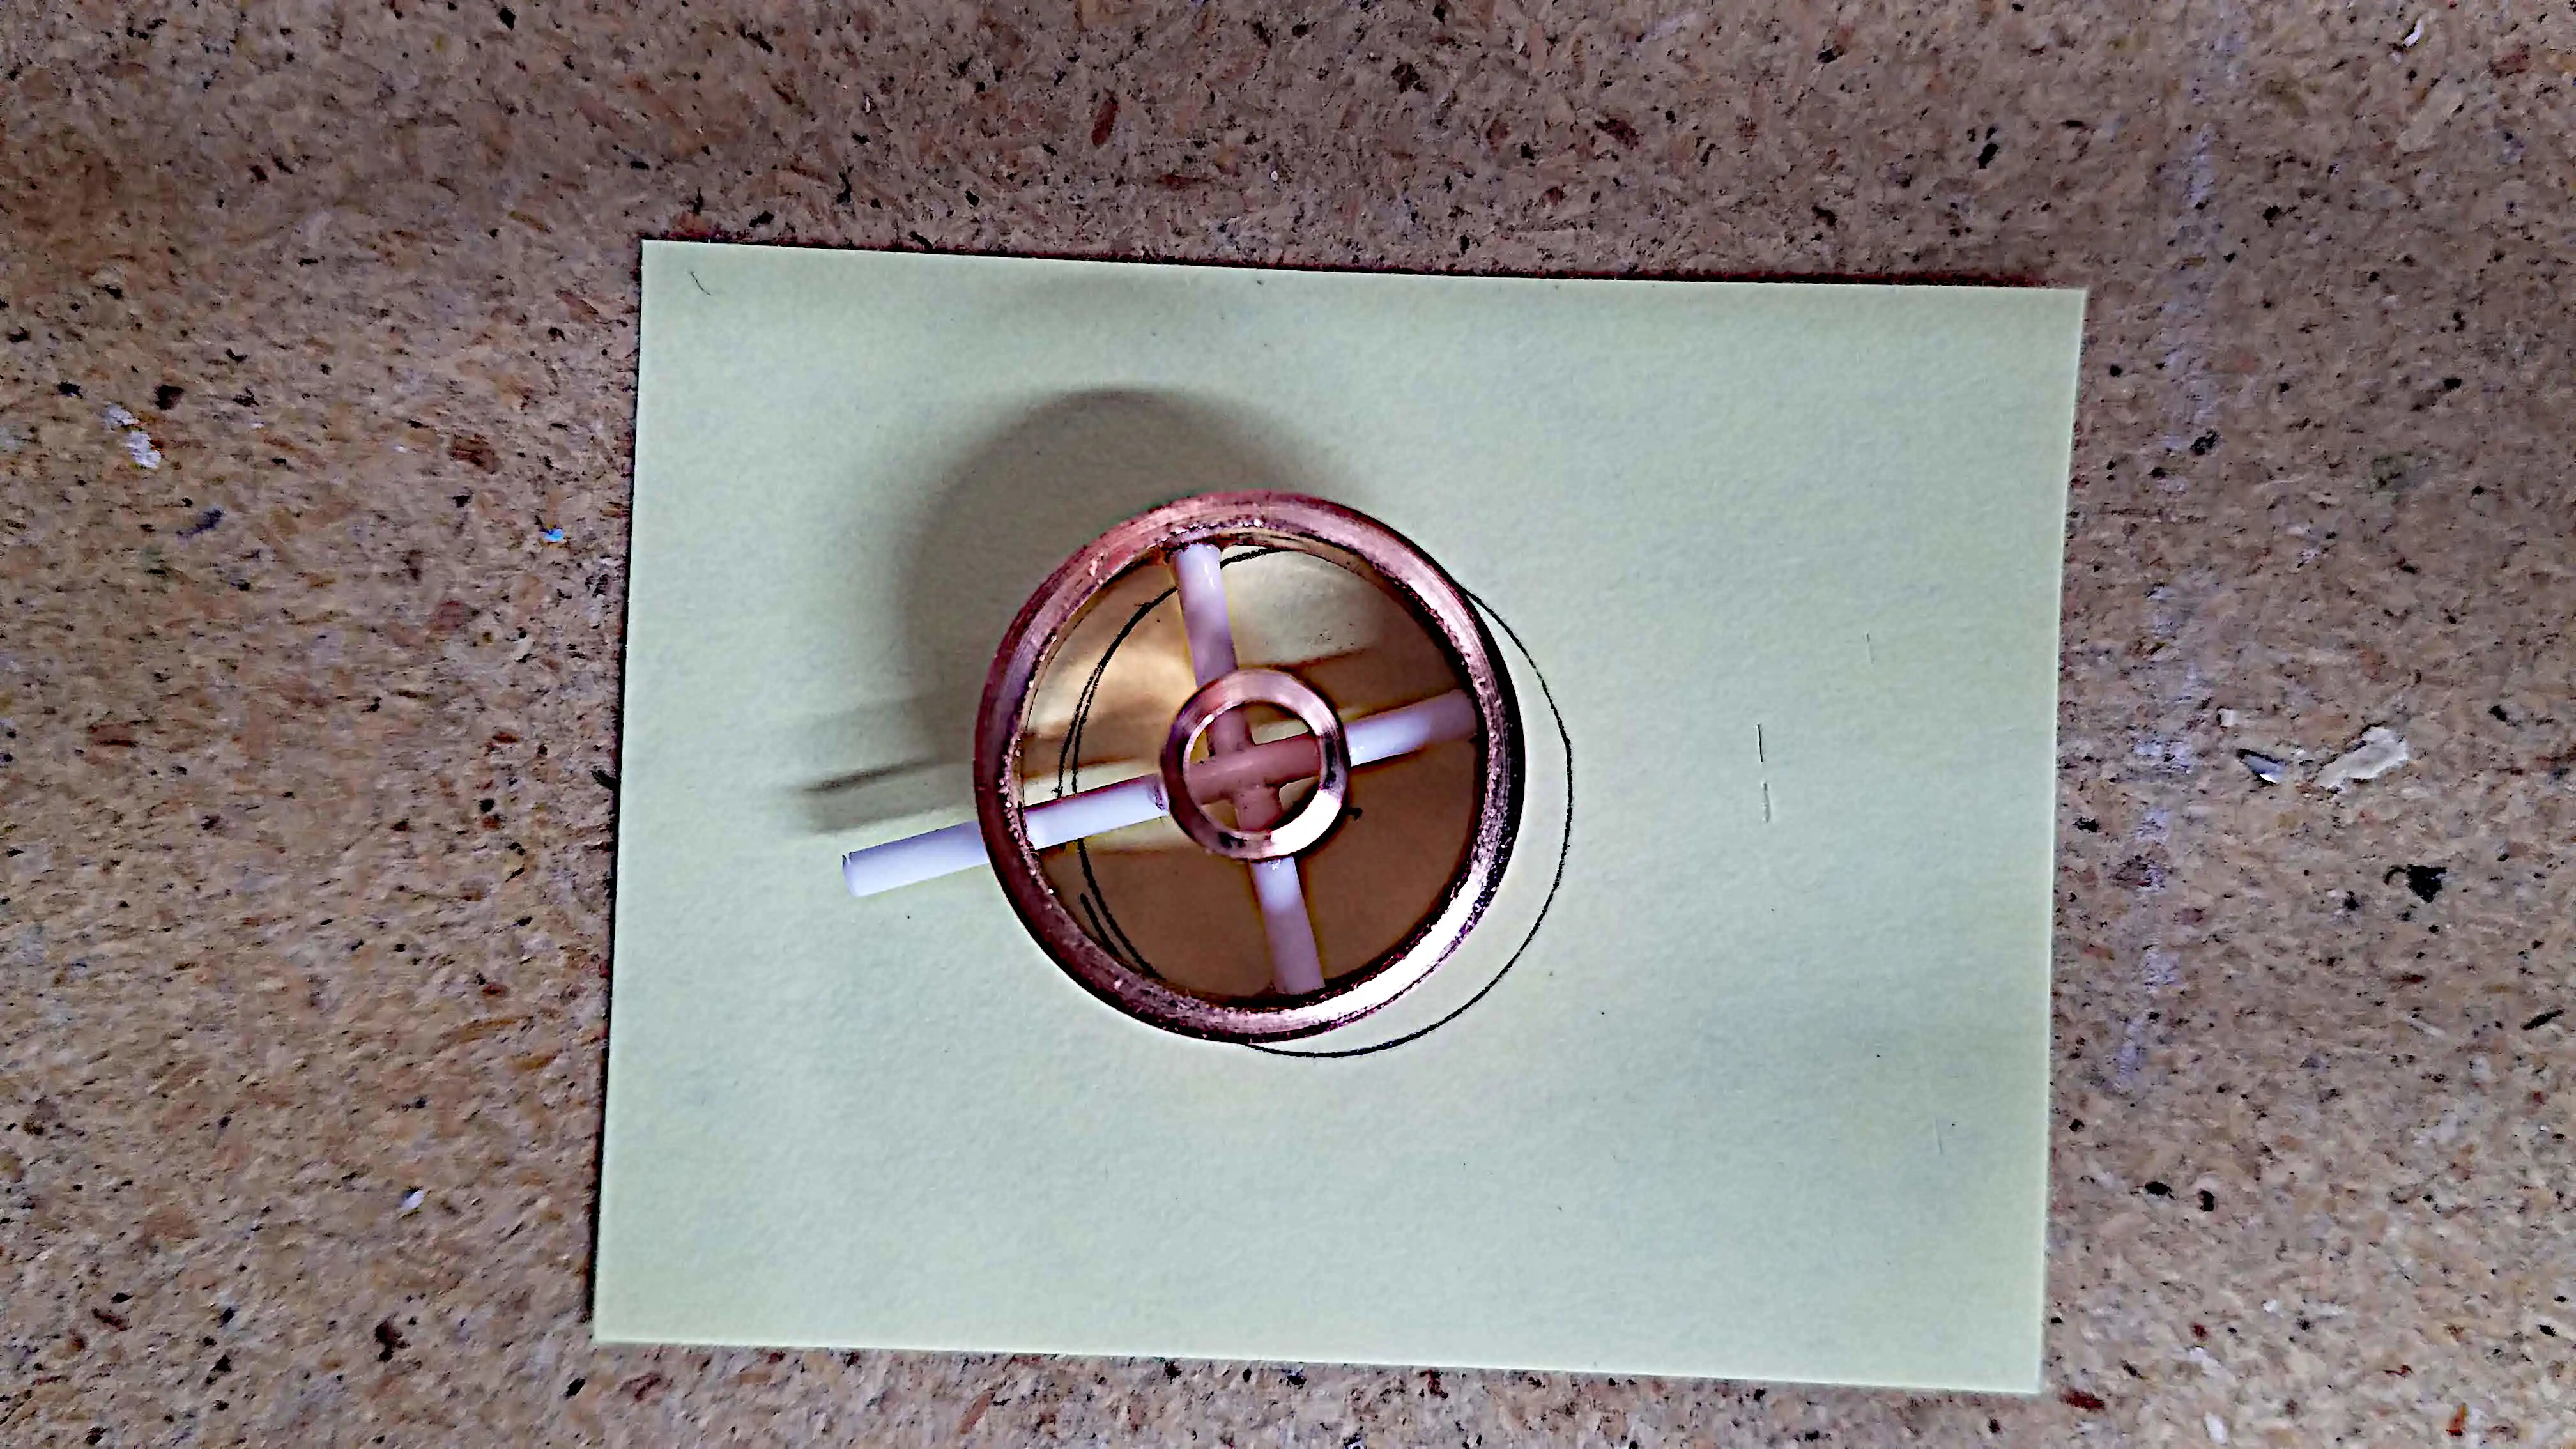
 A moonshine still
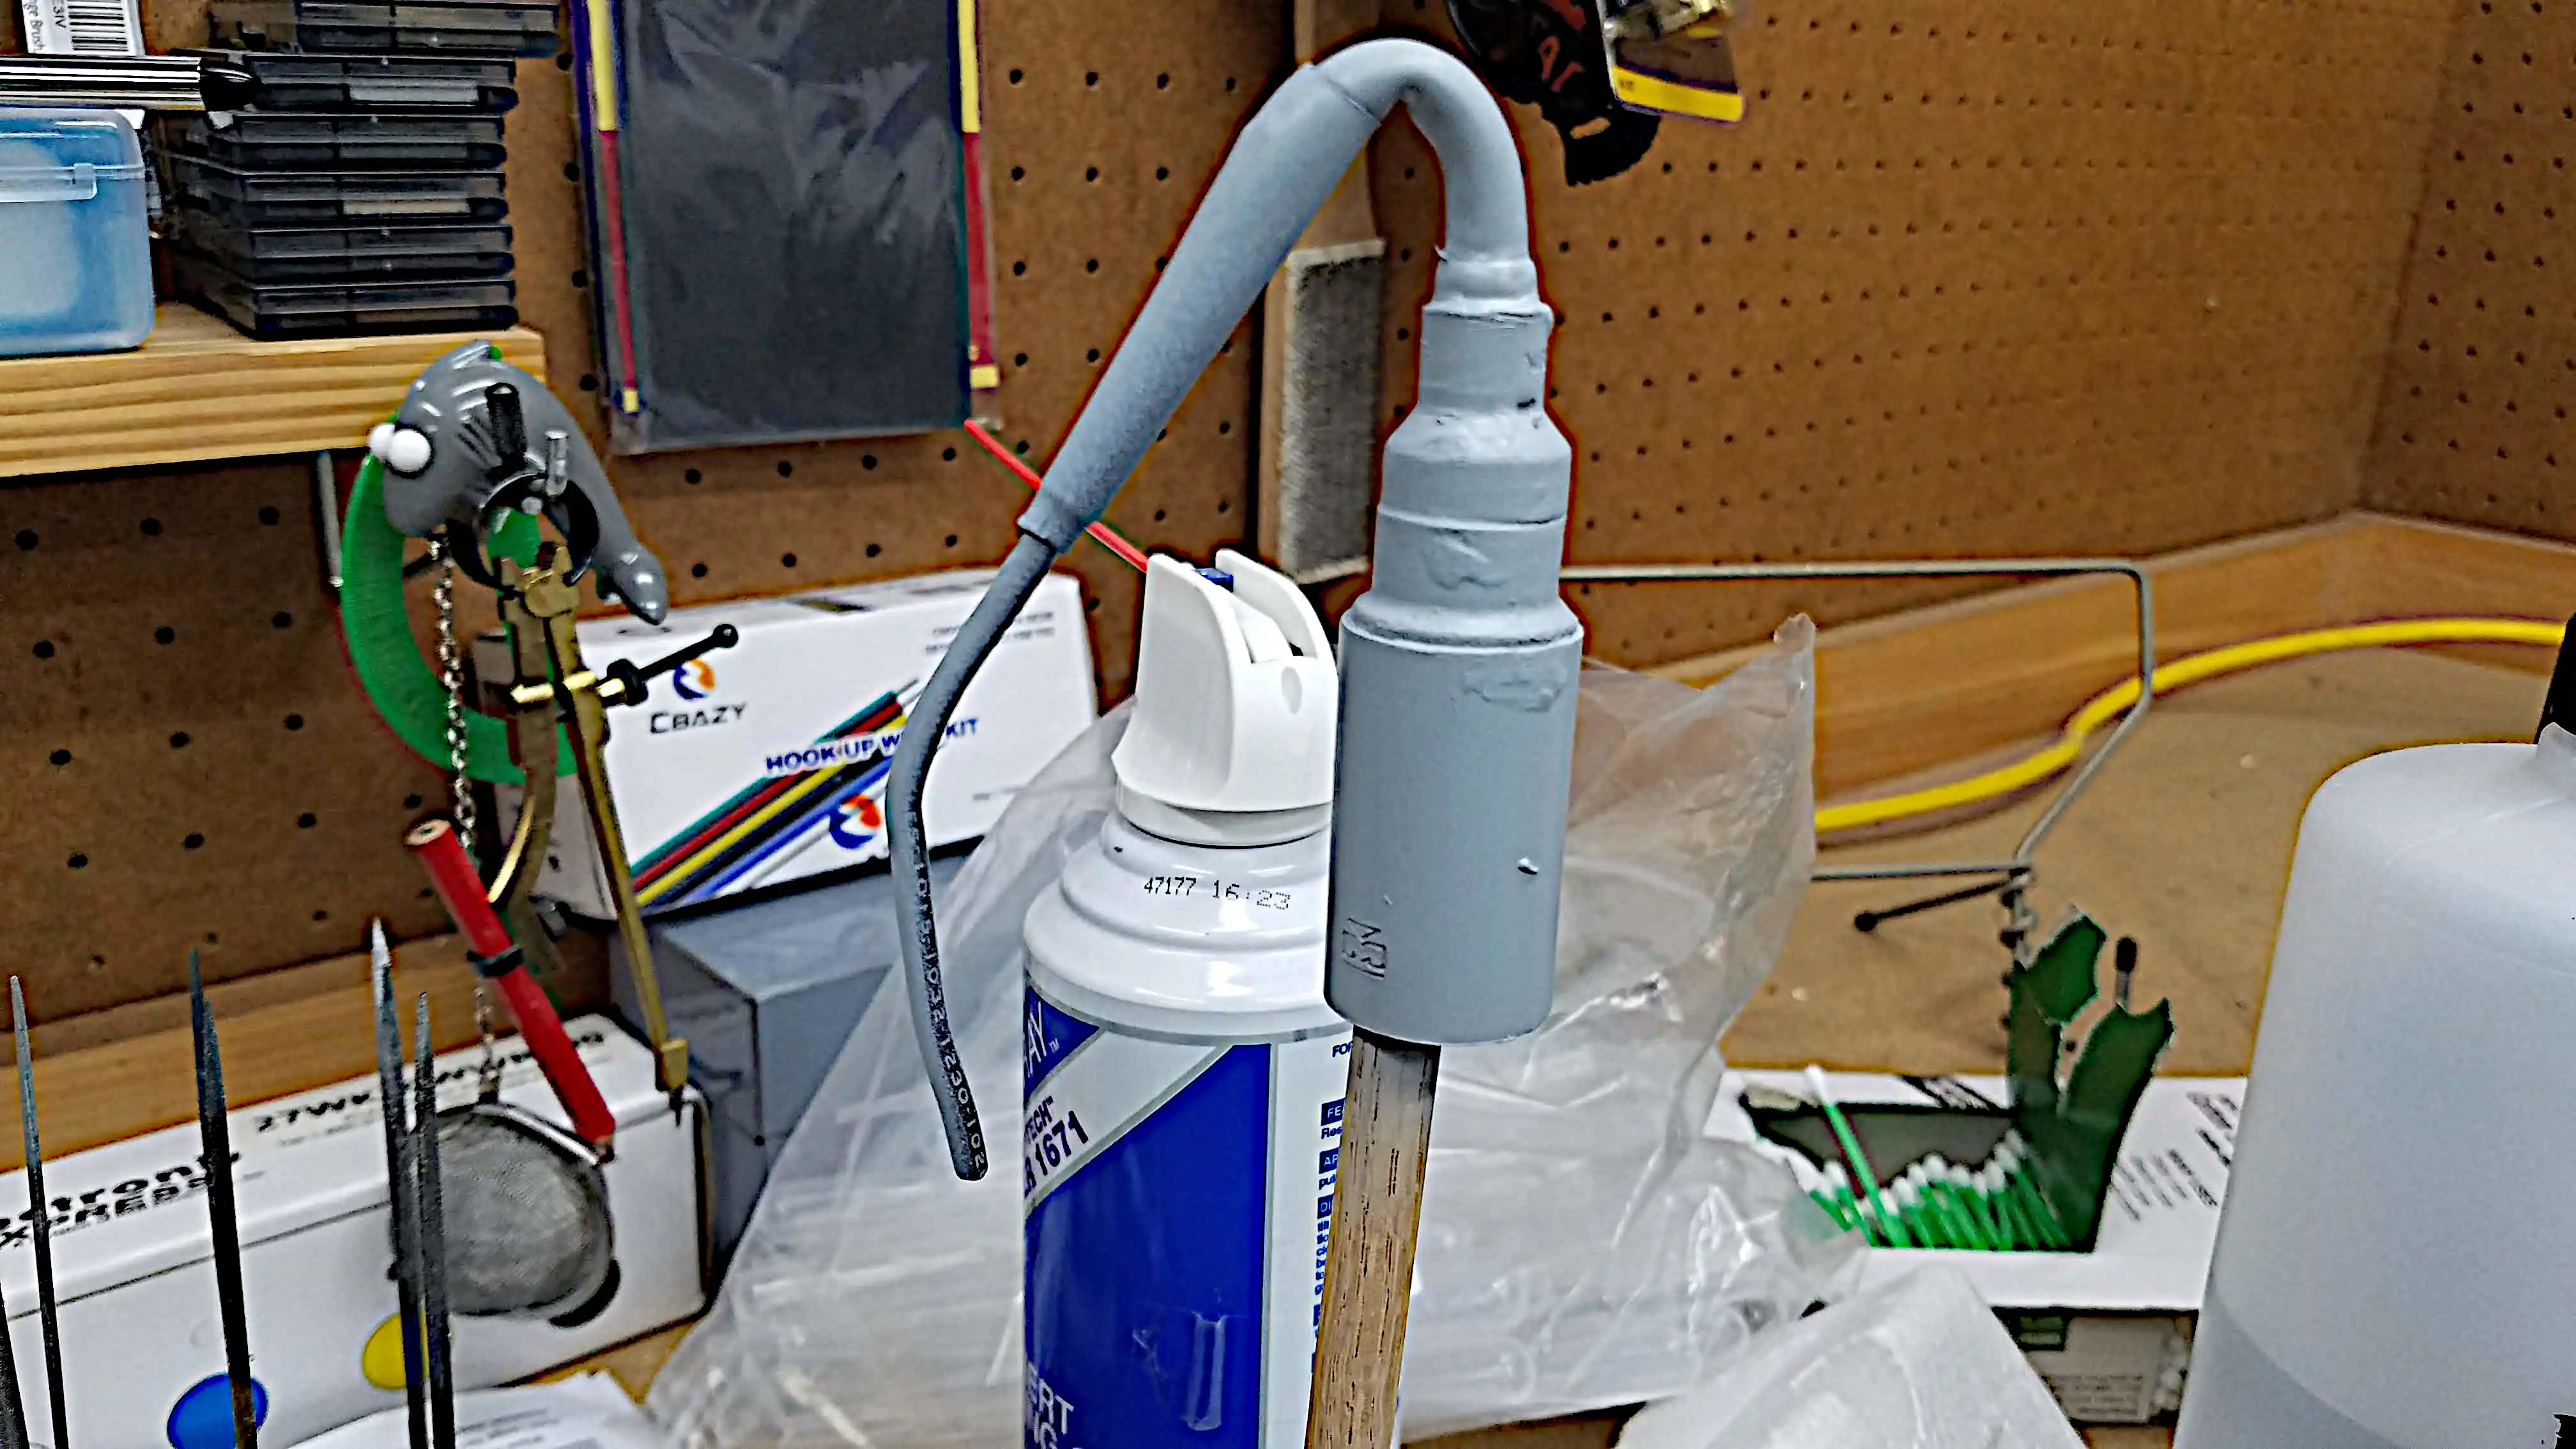
 Burner to heat the still
 Scratch built table with burner mounted on the bottom
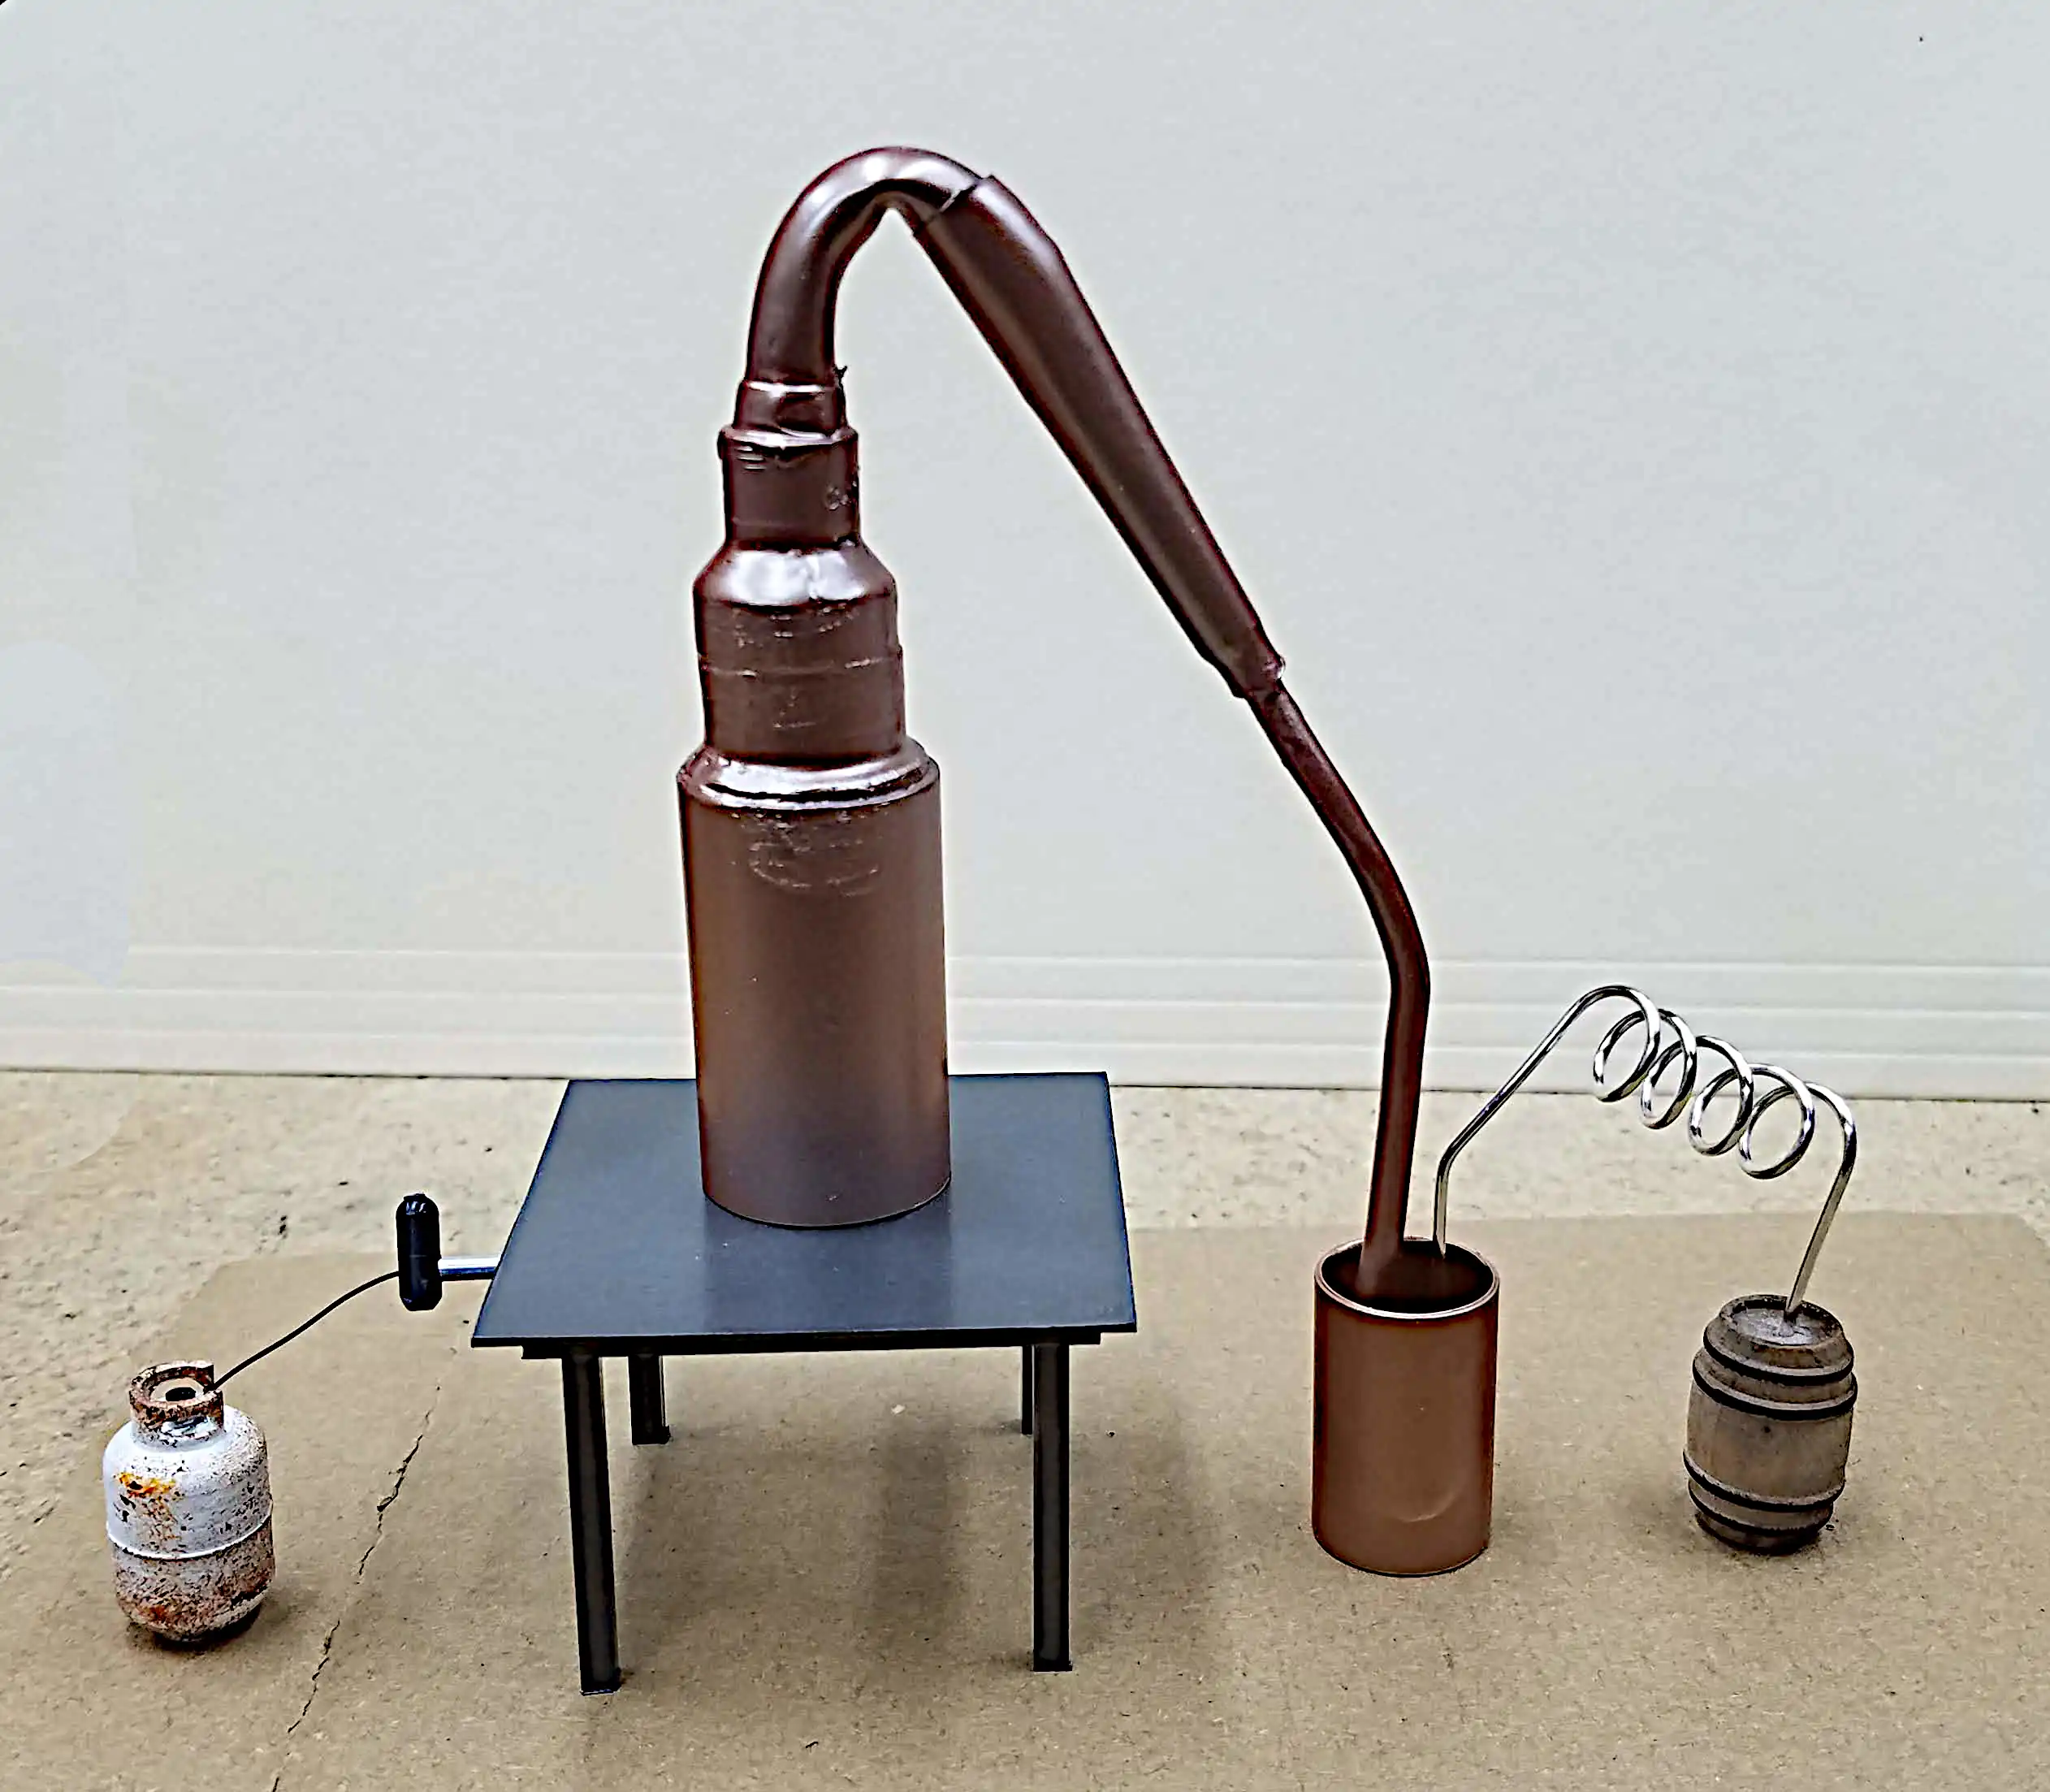 The completed still

