Opening
Click/tap photo to enlarge
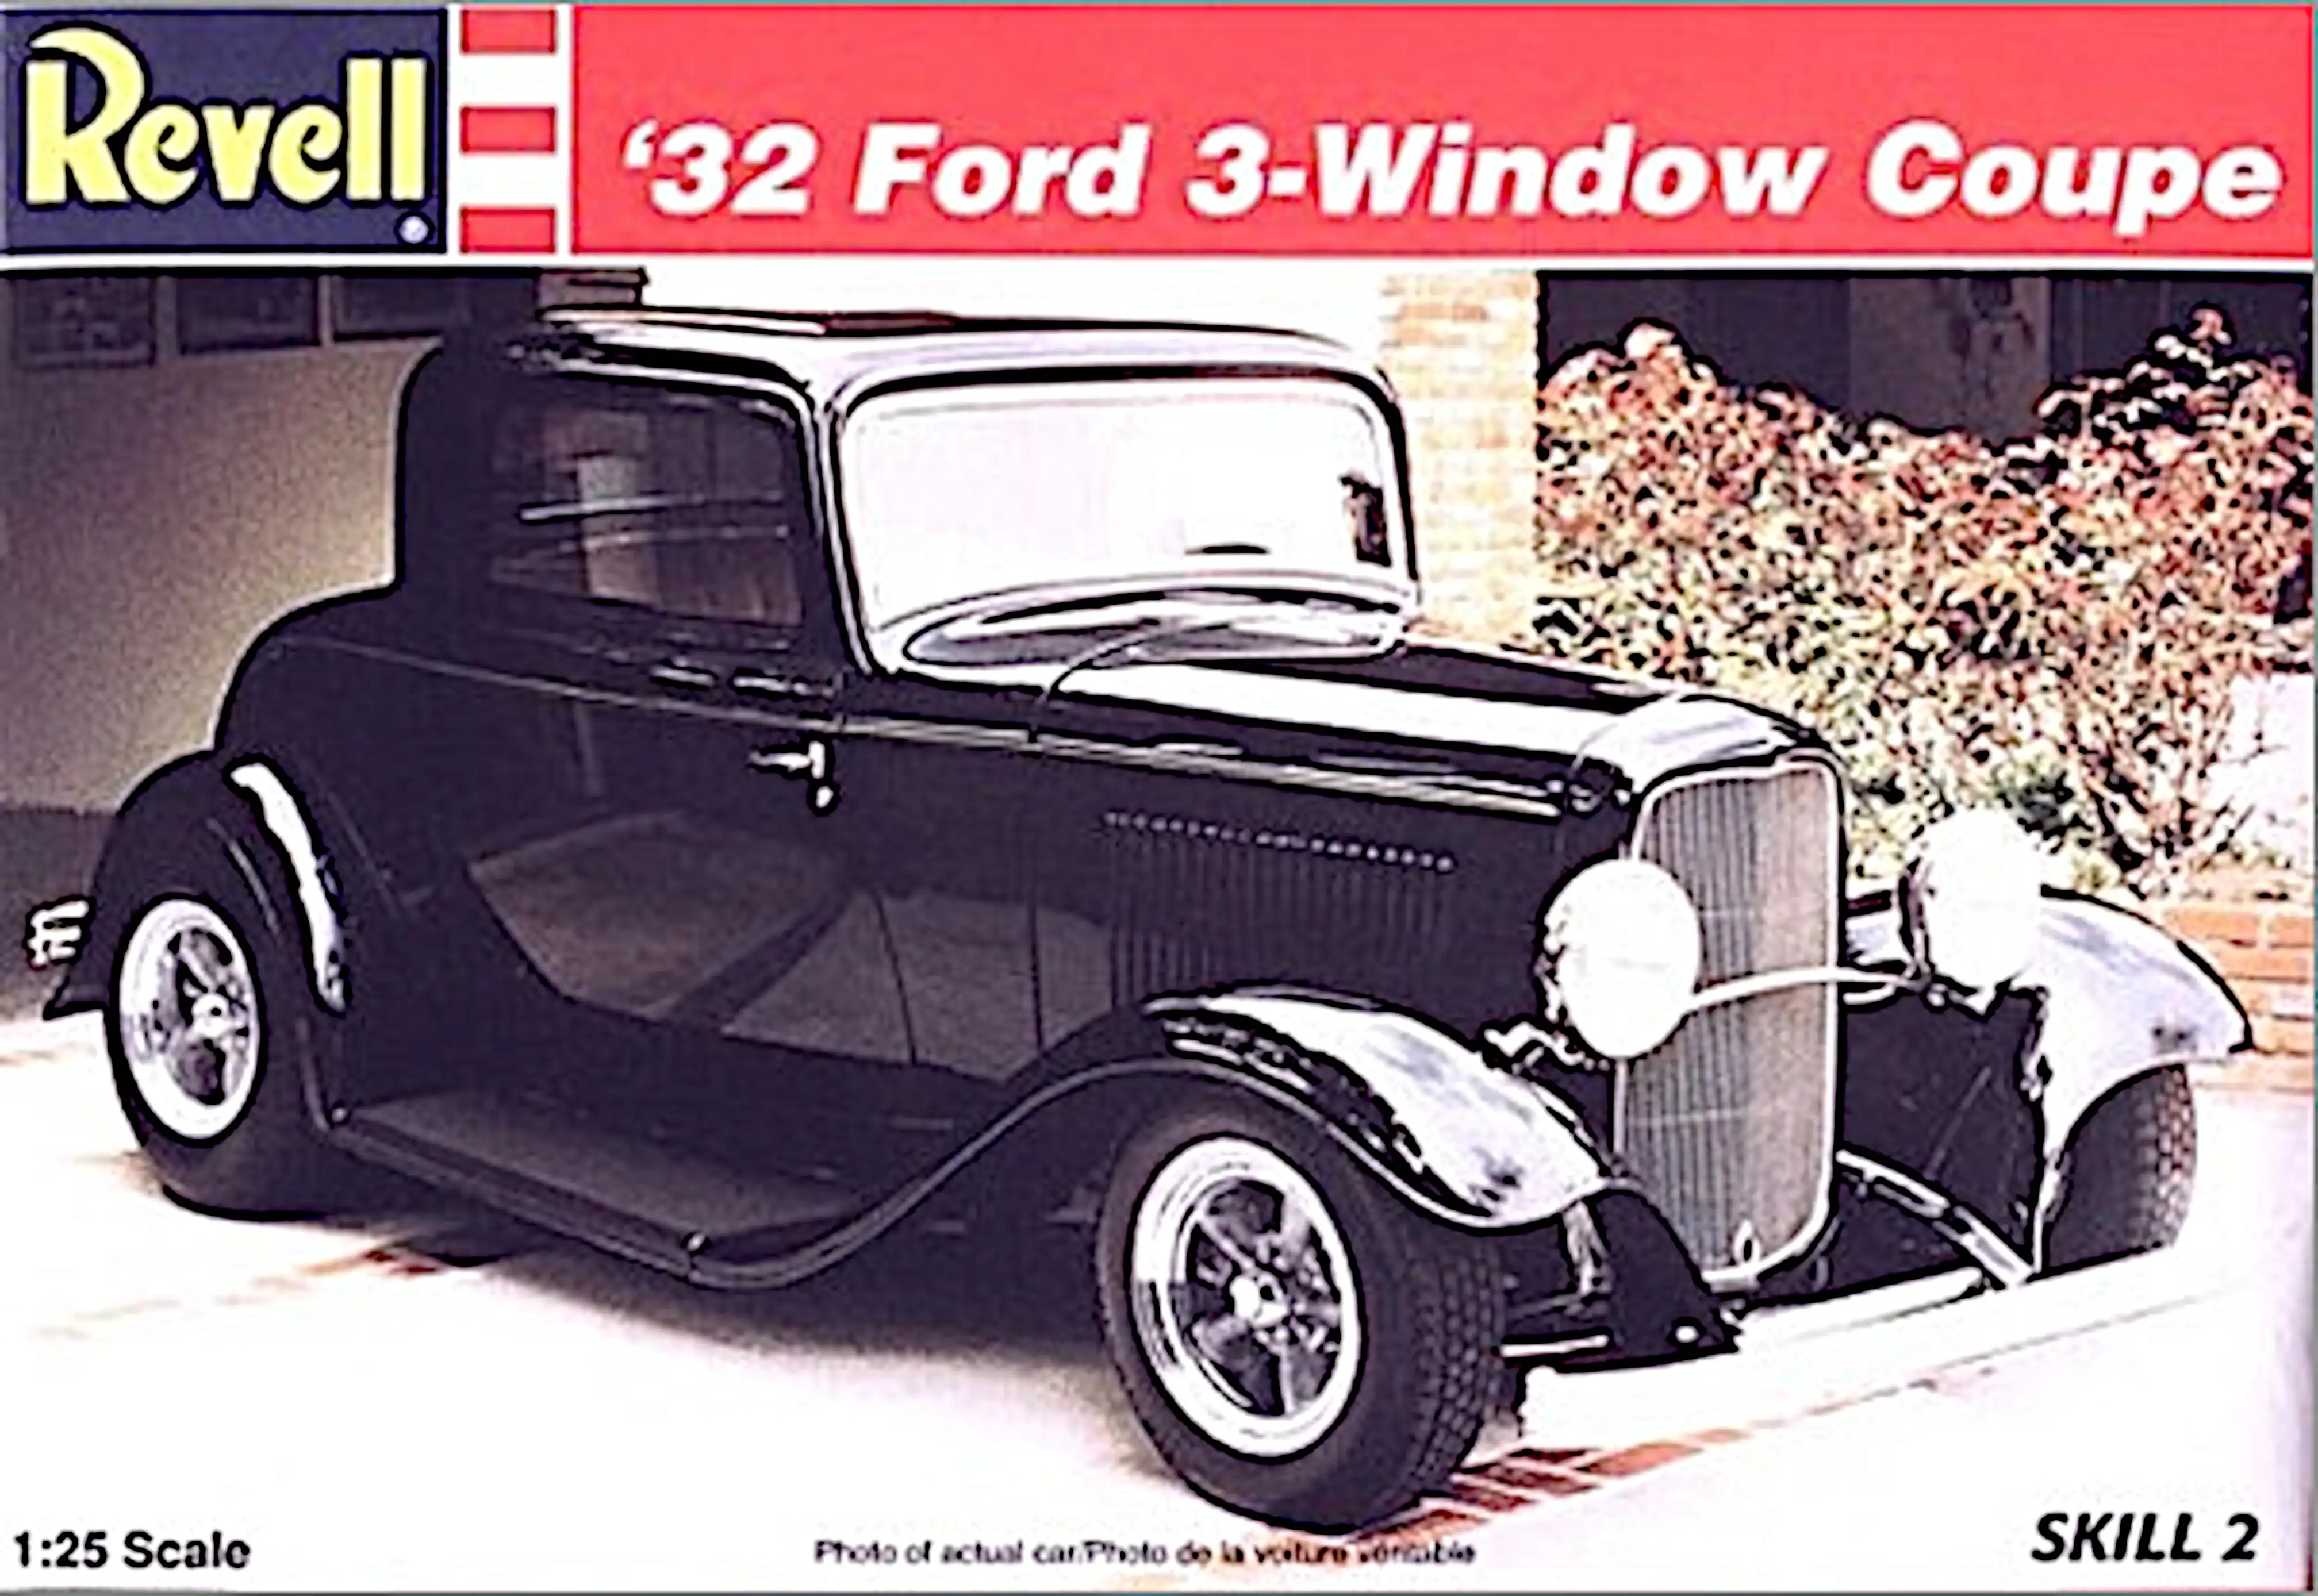 1932 Ford 3-Window Coup Box Art
This is the box art for the 32-Ford 3-Window Coup I'm building. It is the Revell 85-7605, 1:25 scale. It can be viewed on Scalemates.

This build is sponsored by: Kim's Kustom Garage YouTube Channel. It is an appreciation build for the 90th anniversary of the 32-Ford.
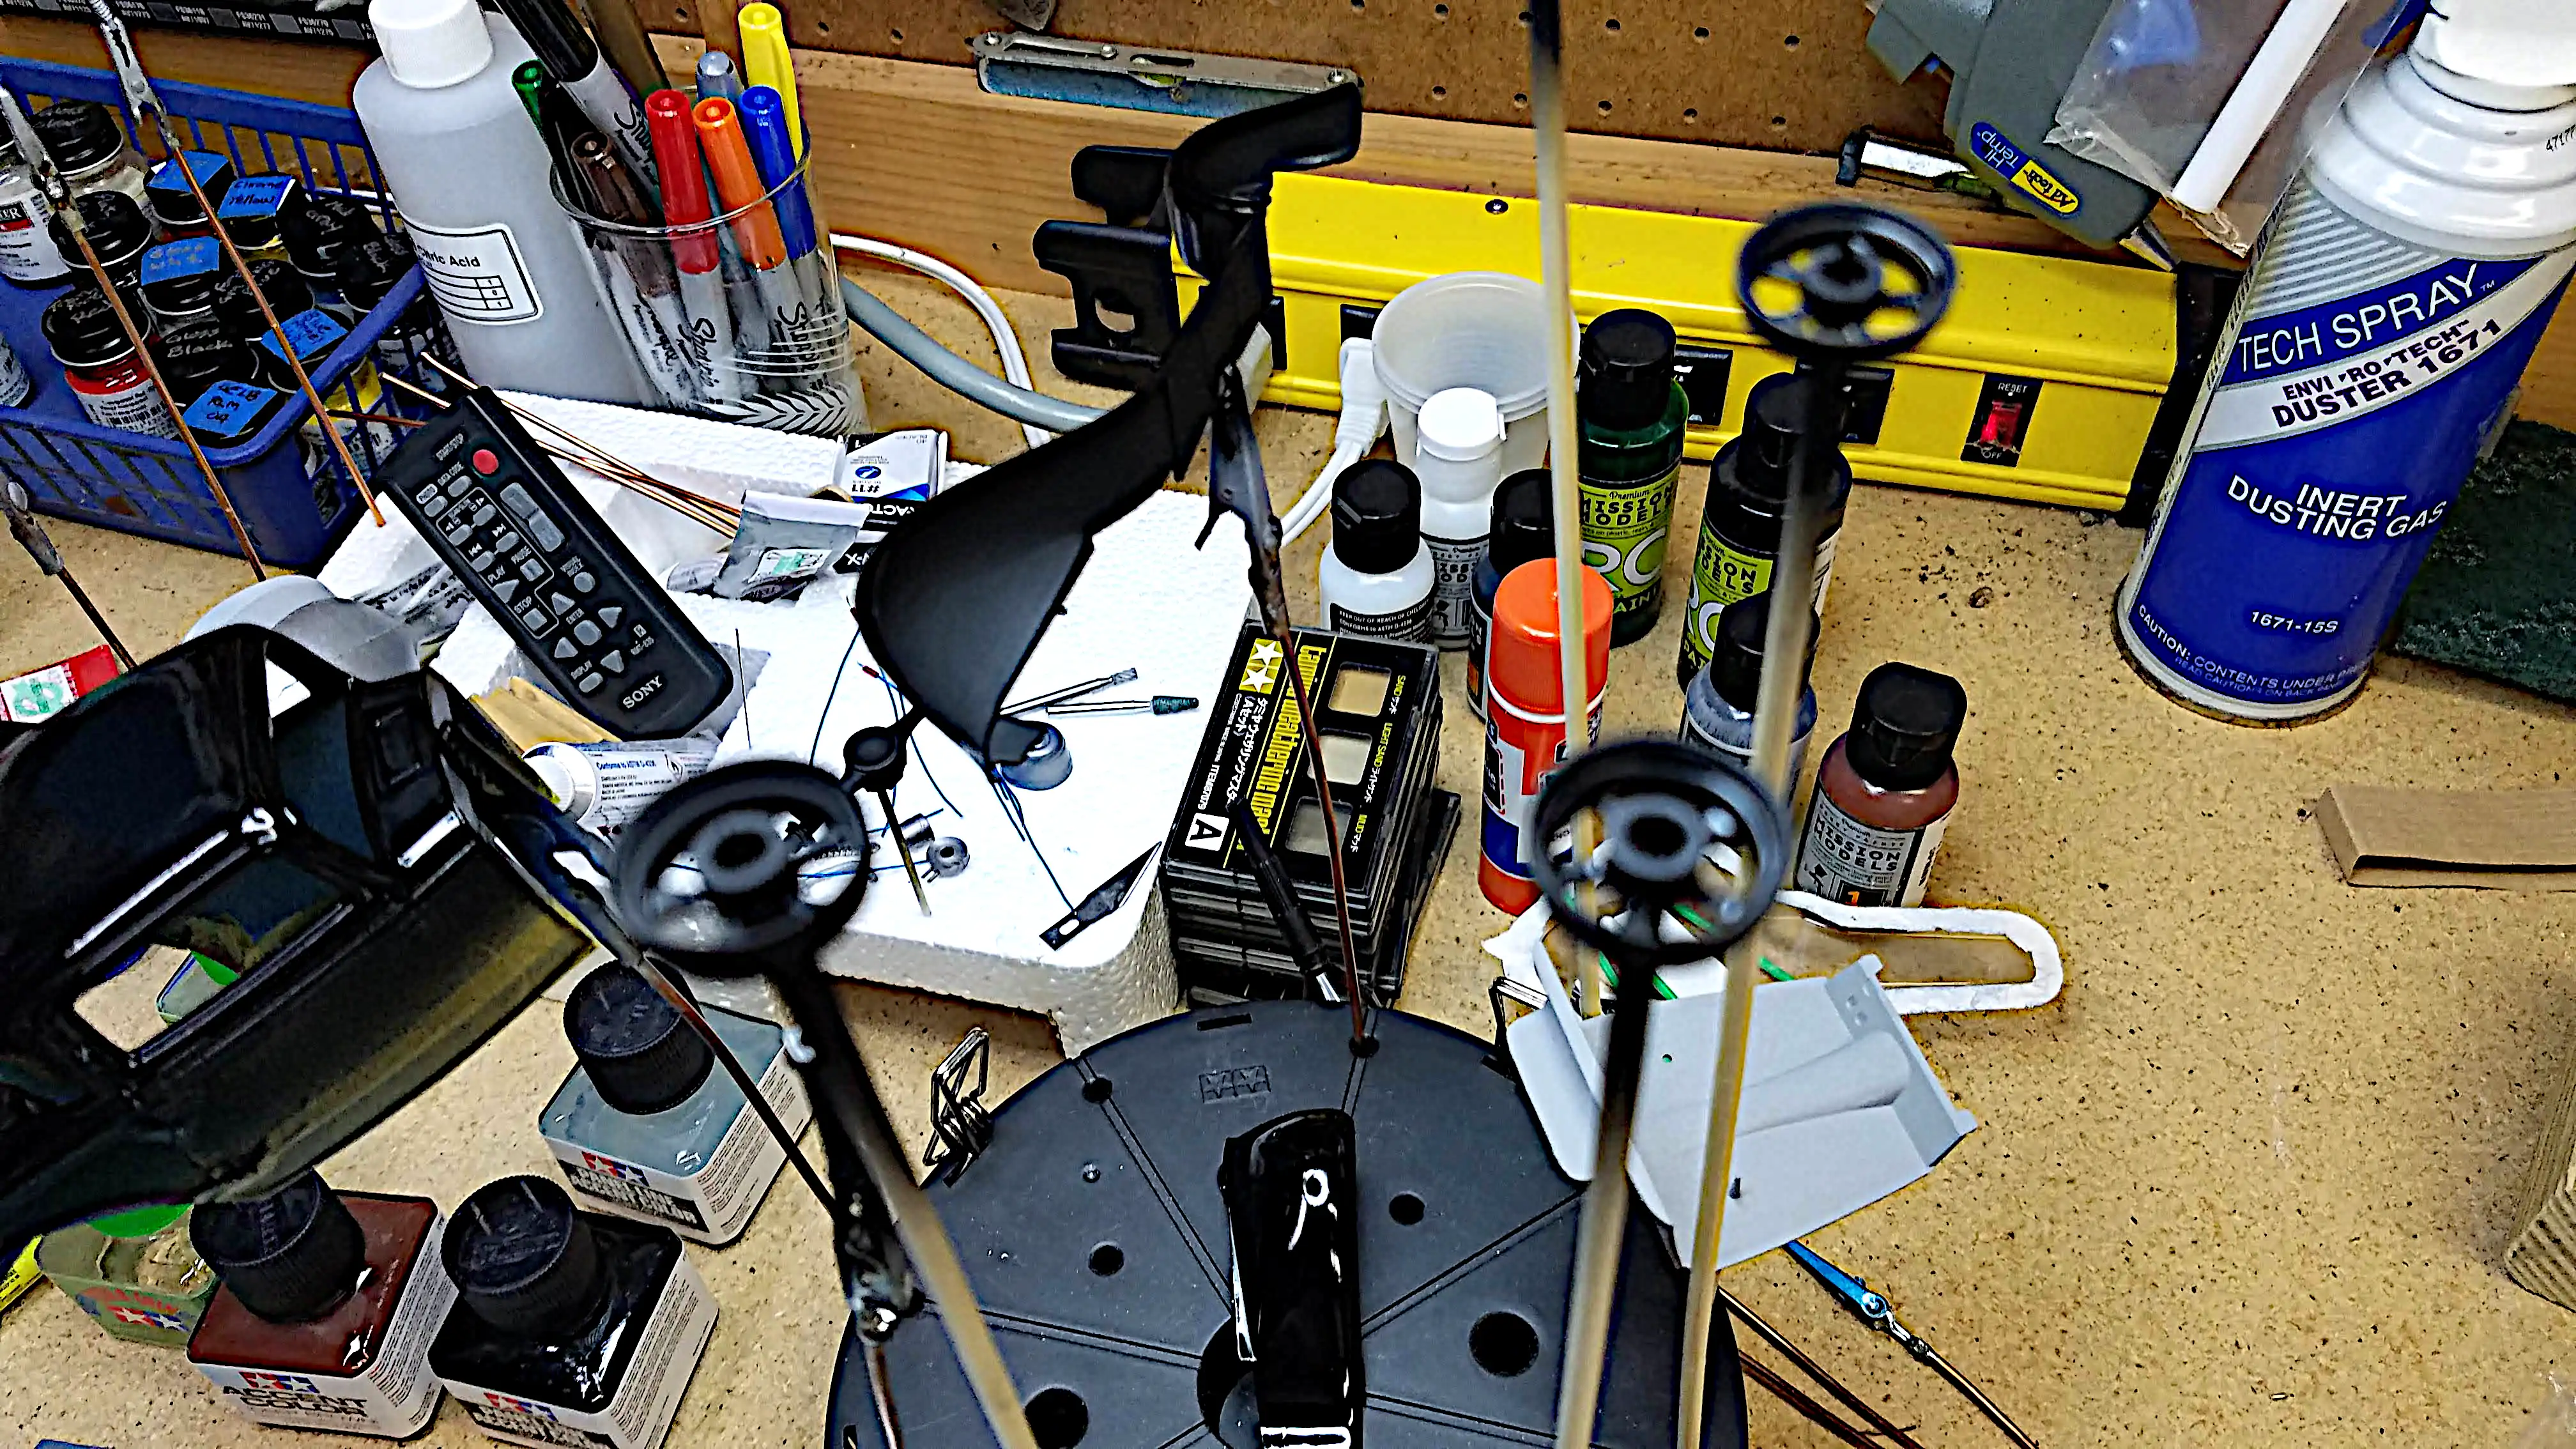
As of May 1, 2022 I've started the appreciation build. Time is running short for a June 15th deadline, but it shouldn't be too bad. The part count is low and I have a good idea of the color scheme and style of car that I want to build.
There are some techniques that I want to try that I have never tried before. One of them is a three-tone body. I'm also going to try for one of those very glossy, shiny finishes using Acrylic paints; we'll see. My plan is to have: Black Fenders, Metallic Blue sides and a Cream or off white roof. I'm also planning to use the custom wheels that were part of the AMT 1934 Ford Pickup kit. I know there will be problems using them, however, I really like the wheels and I'm going to try making them work.
Opening
Click/tap photo to enlarge
1932 Ford 3-Window Coup Box Art
This is the box art for the 32-Ford 3-Window Coup I'm building. It is the Revell 85-7605, 1:25 scale. It can be viewed on Scalemates.
Photo 001
Click/tap photo to enlarge
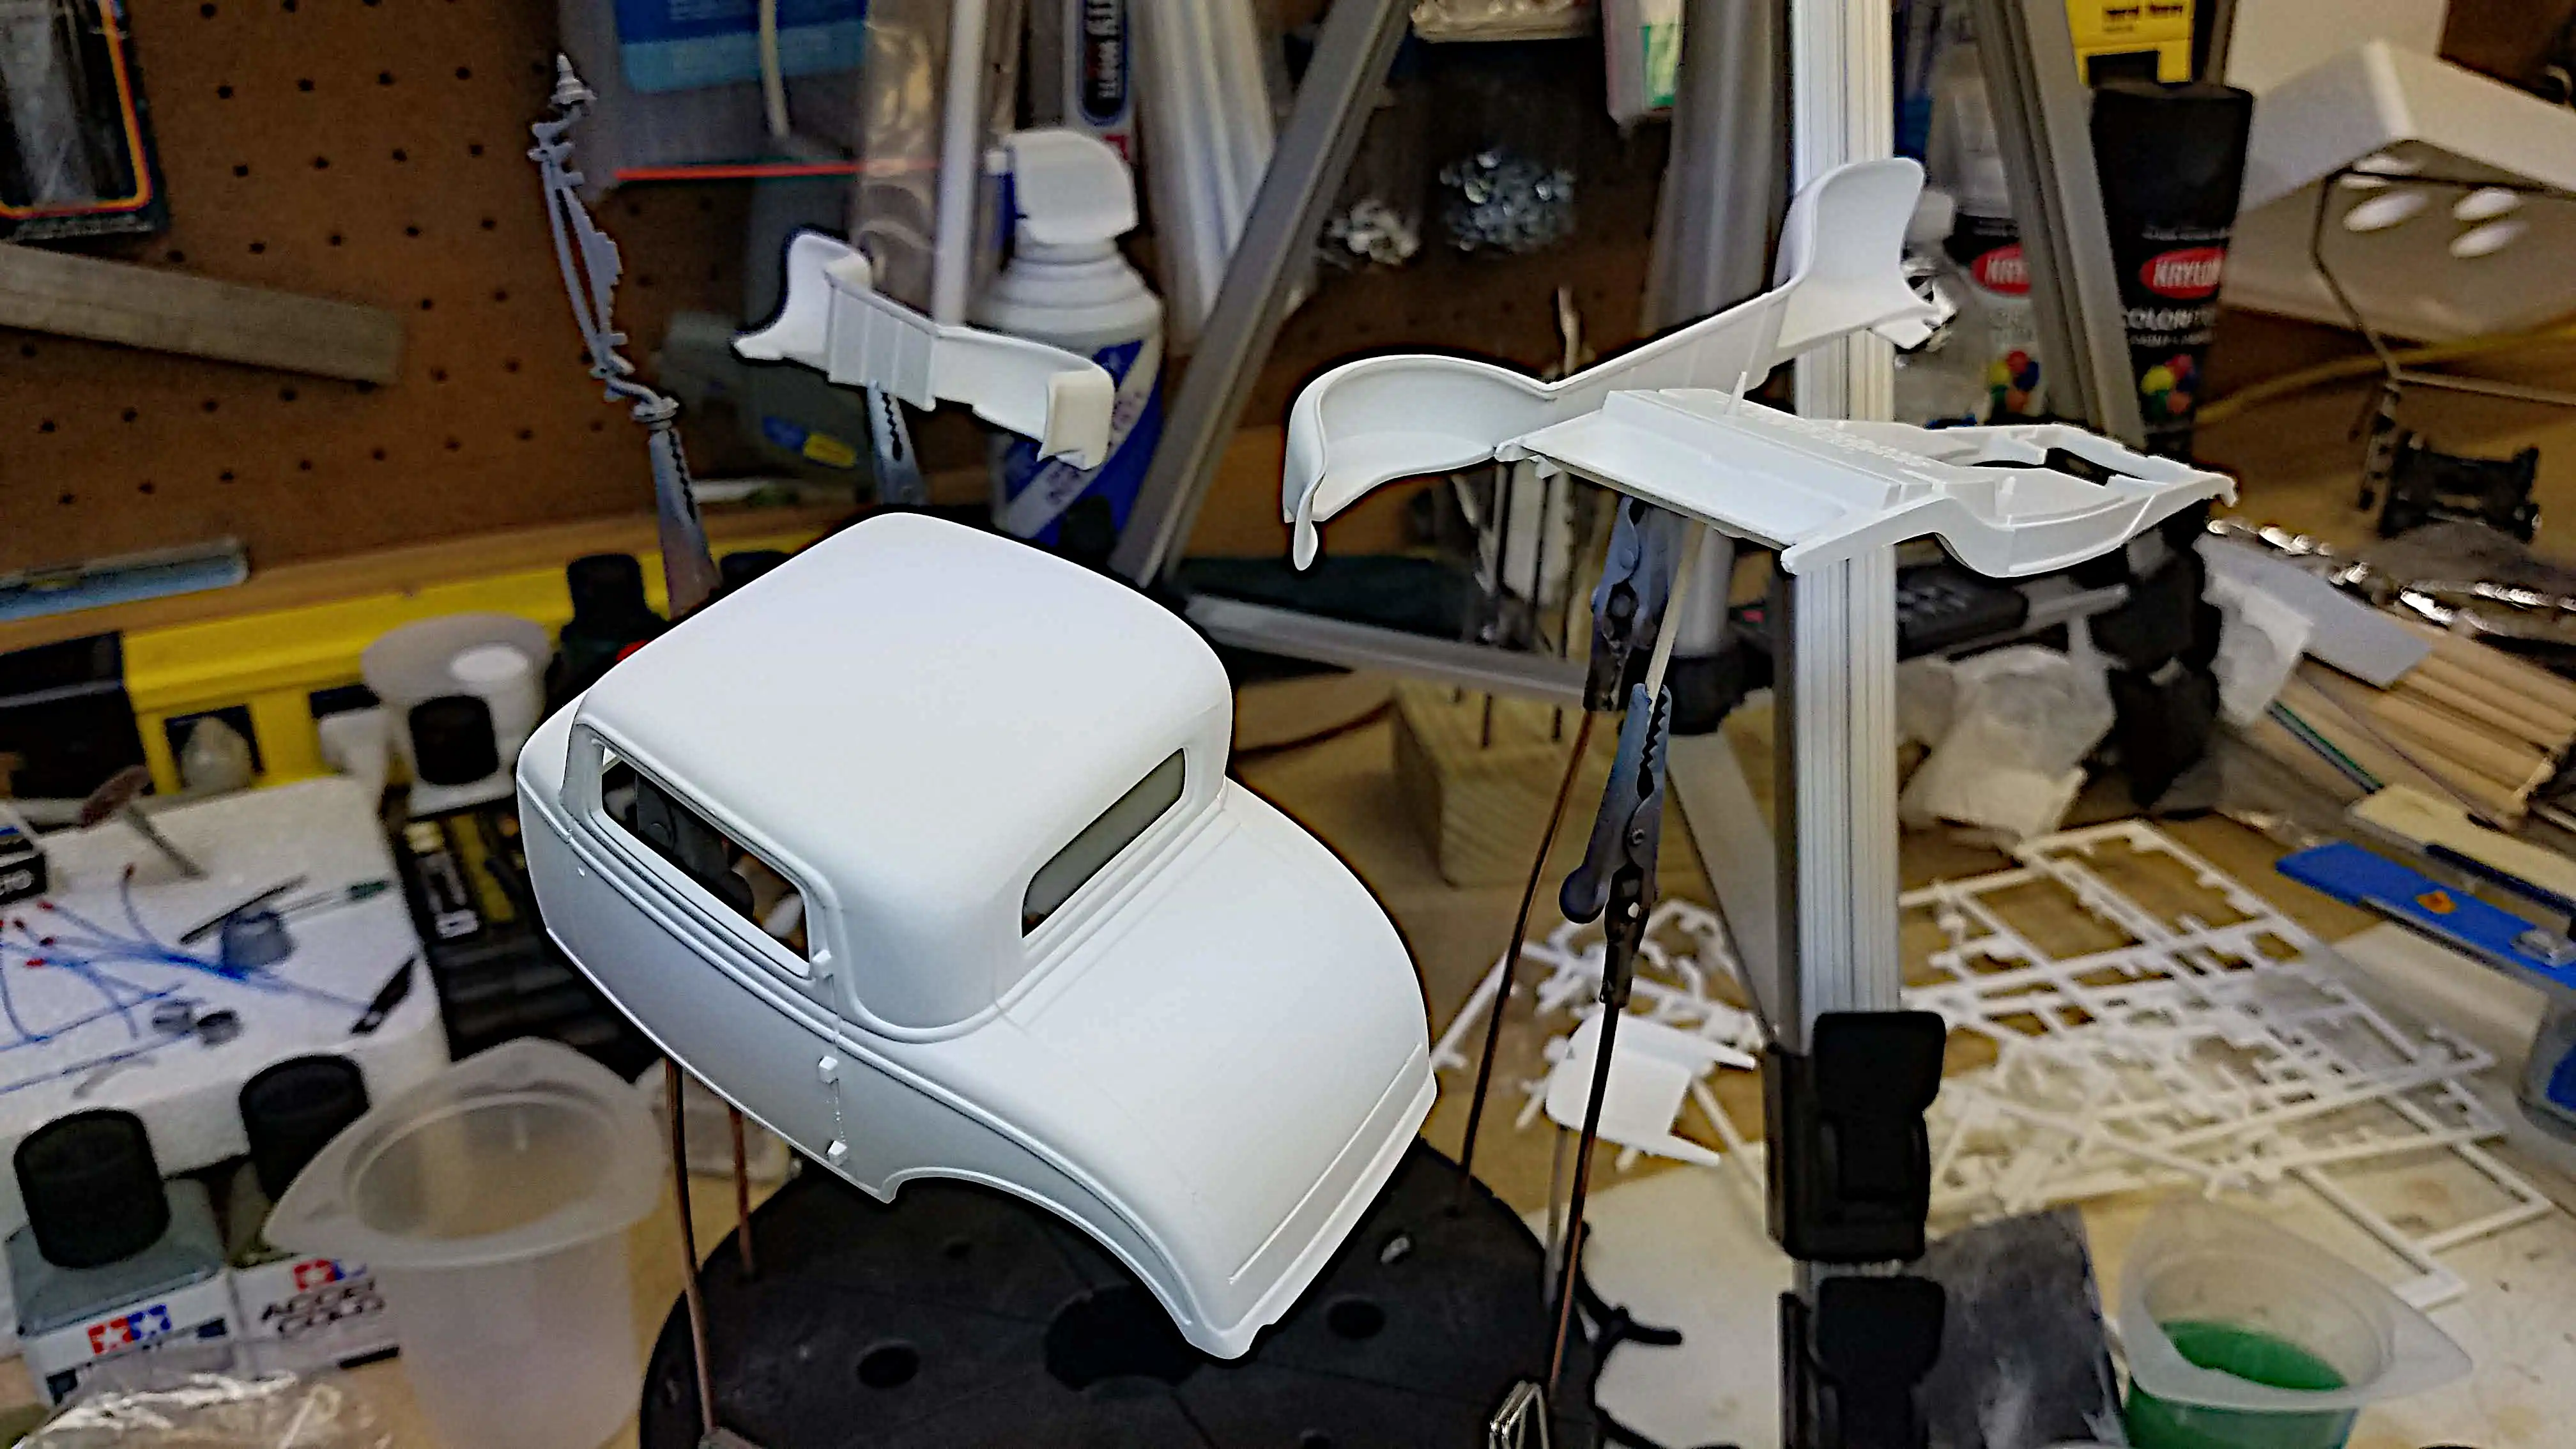
 Most parts have been removed from the sprues
Most of the parts have been removed from the sprues and cleaned. There wasn't much to clean up on this kit. The parts were very crisp and clean.
Photo 002
Click/tap photo to enlarge
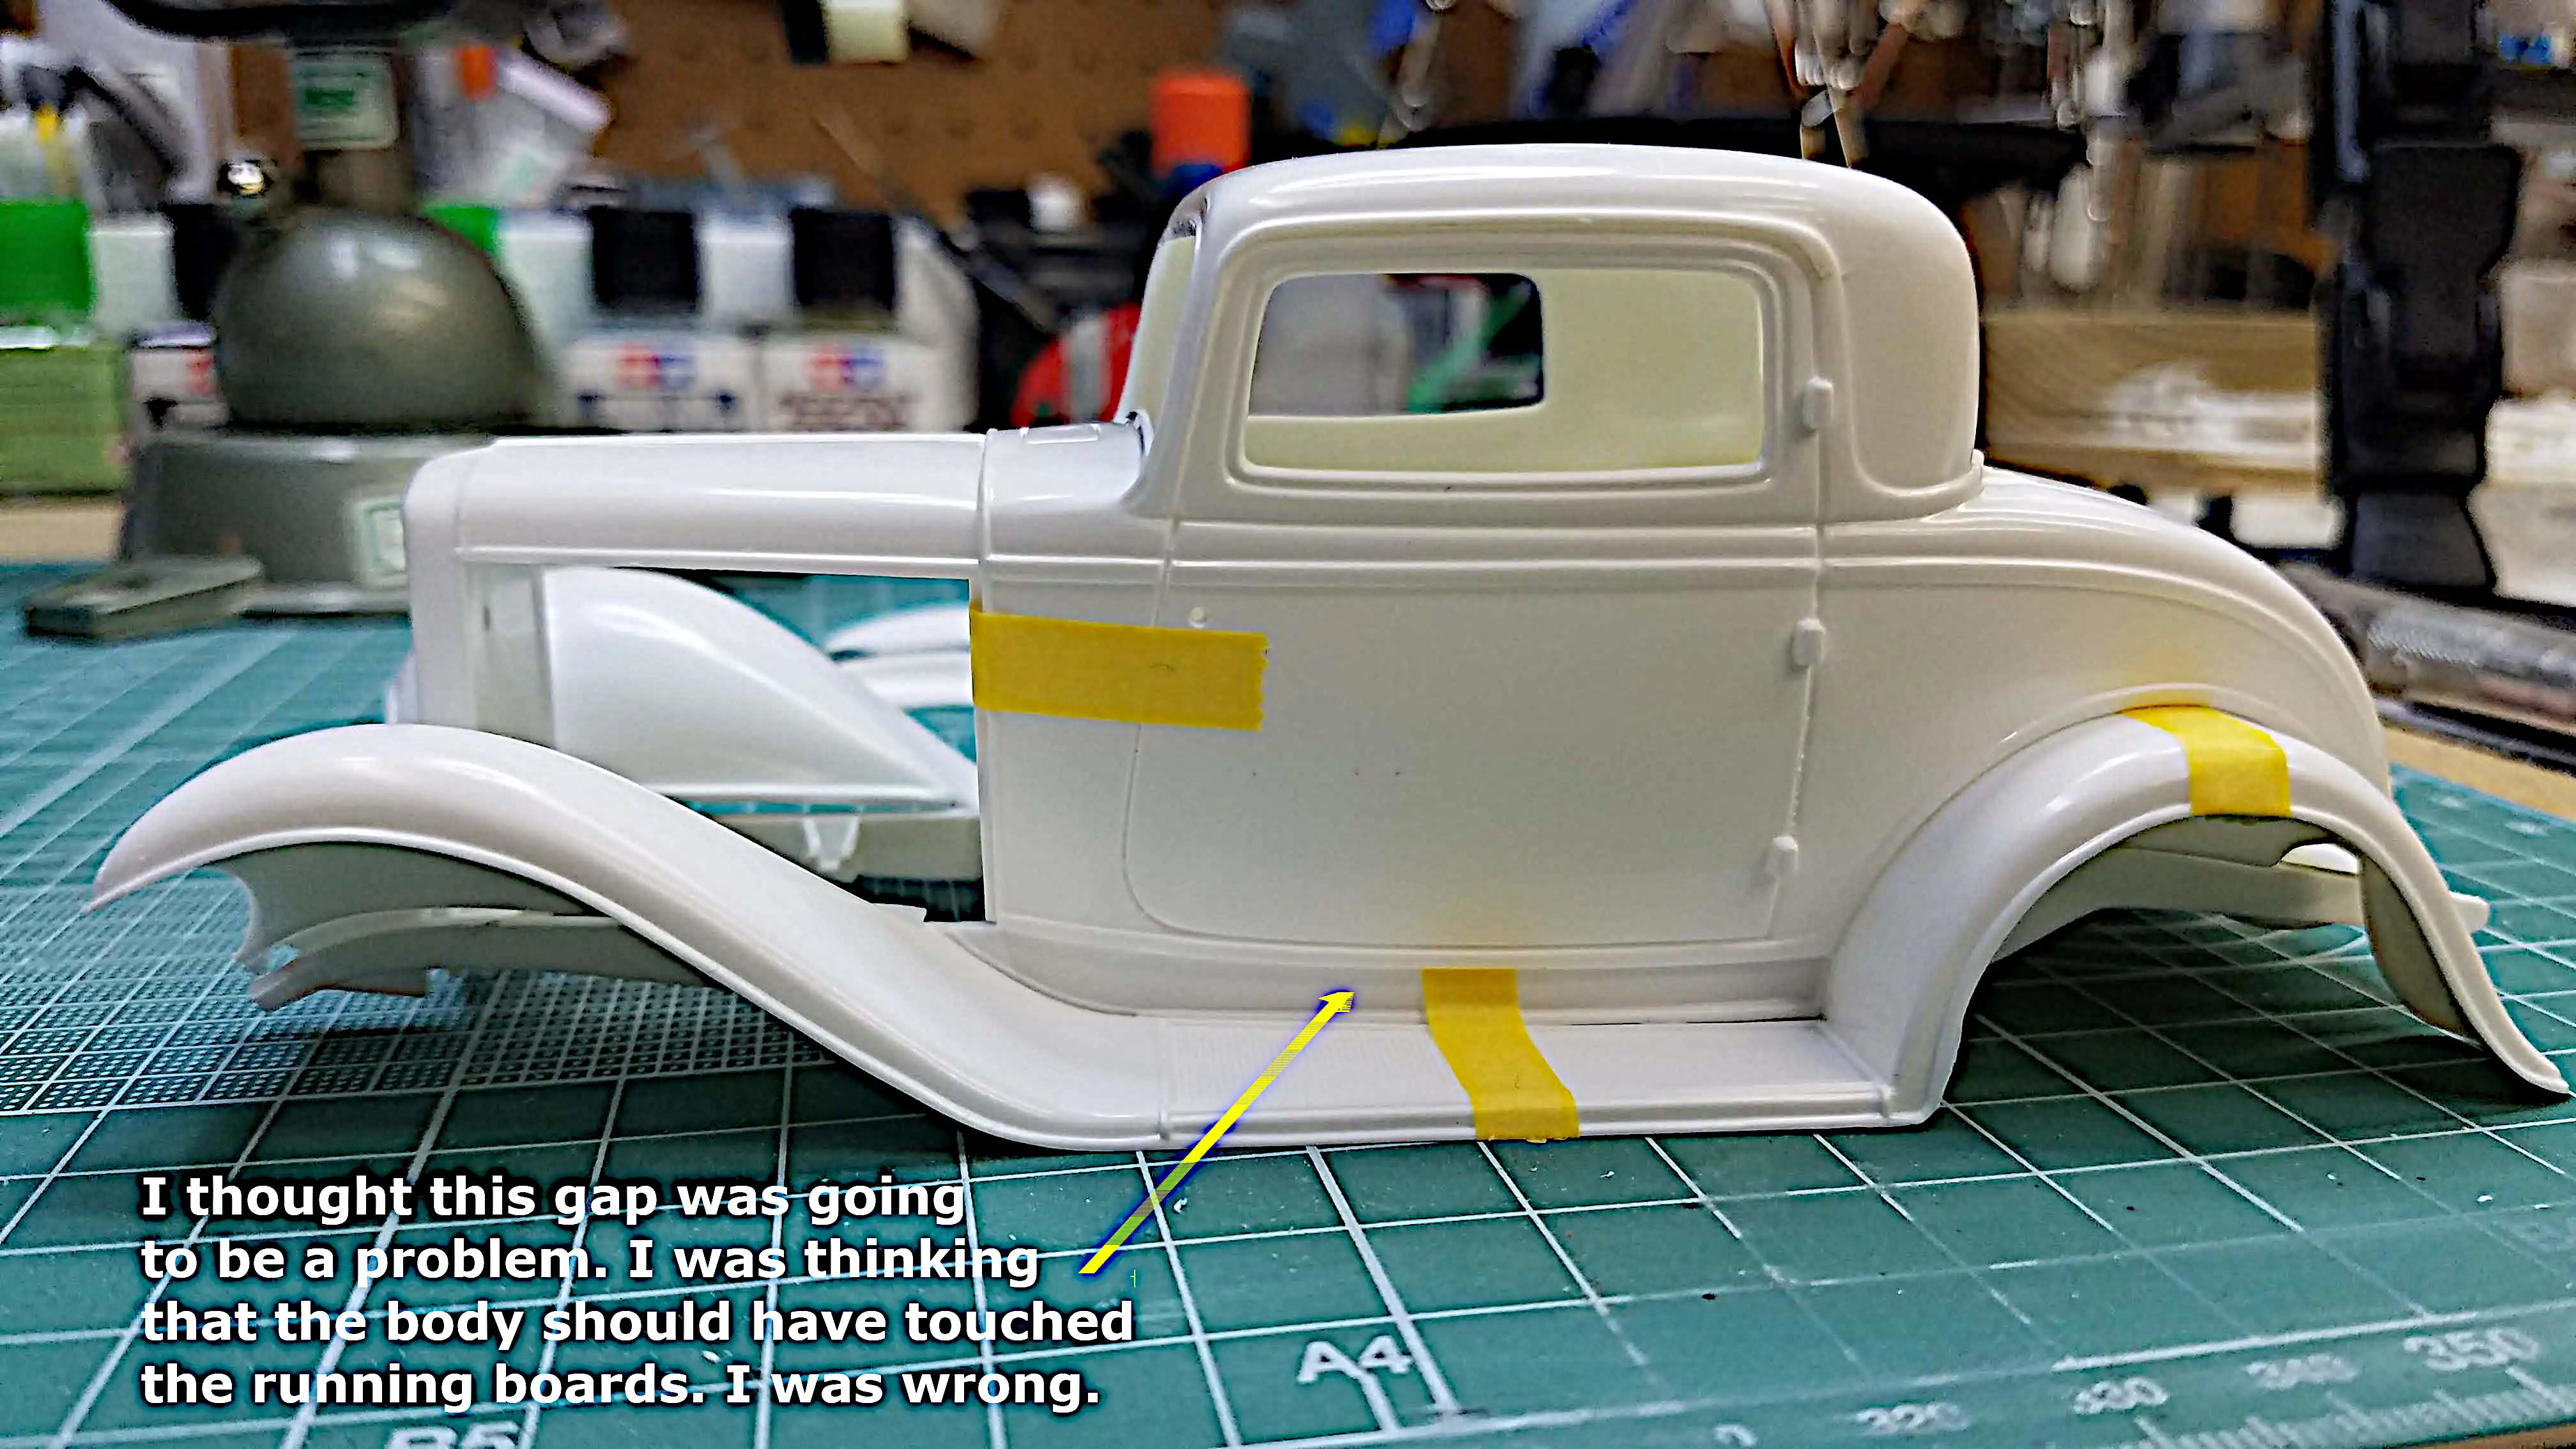 Dry fitting the body parts
While dry fitting the body parts, I discovered the gap between the body and the running boards. I thought, oh no! Was I going to have to cut the fender wells so that the body fits properly? I couldn't believe this was such a bad fit, so I did some research and found that this is how the body actually sets on the chassis. I'm so glad I don't have to do some major modifications.
Photo 003
Click/tap photo to enlarge
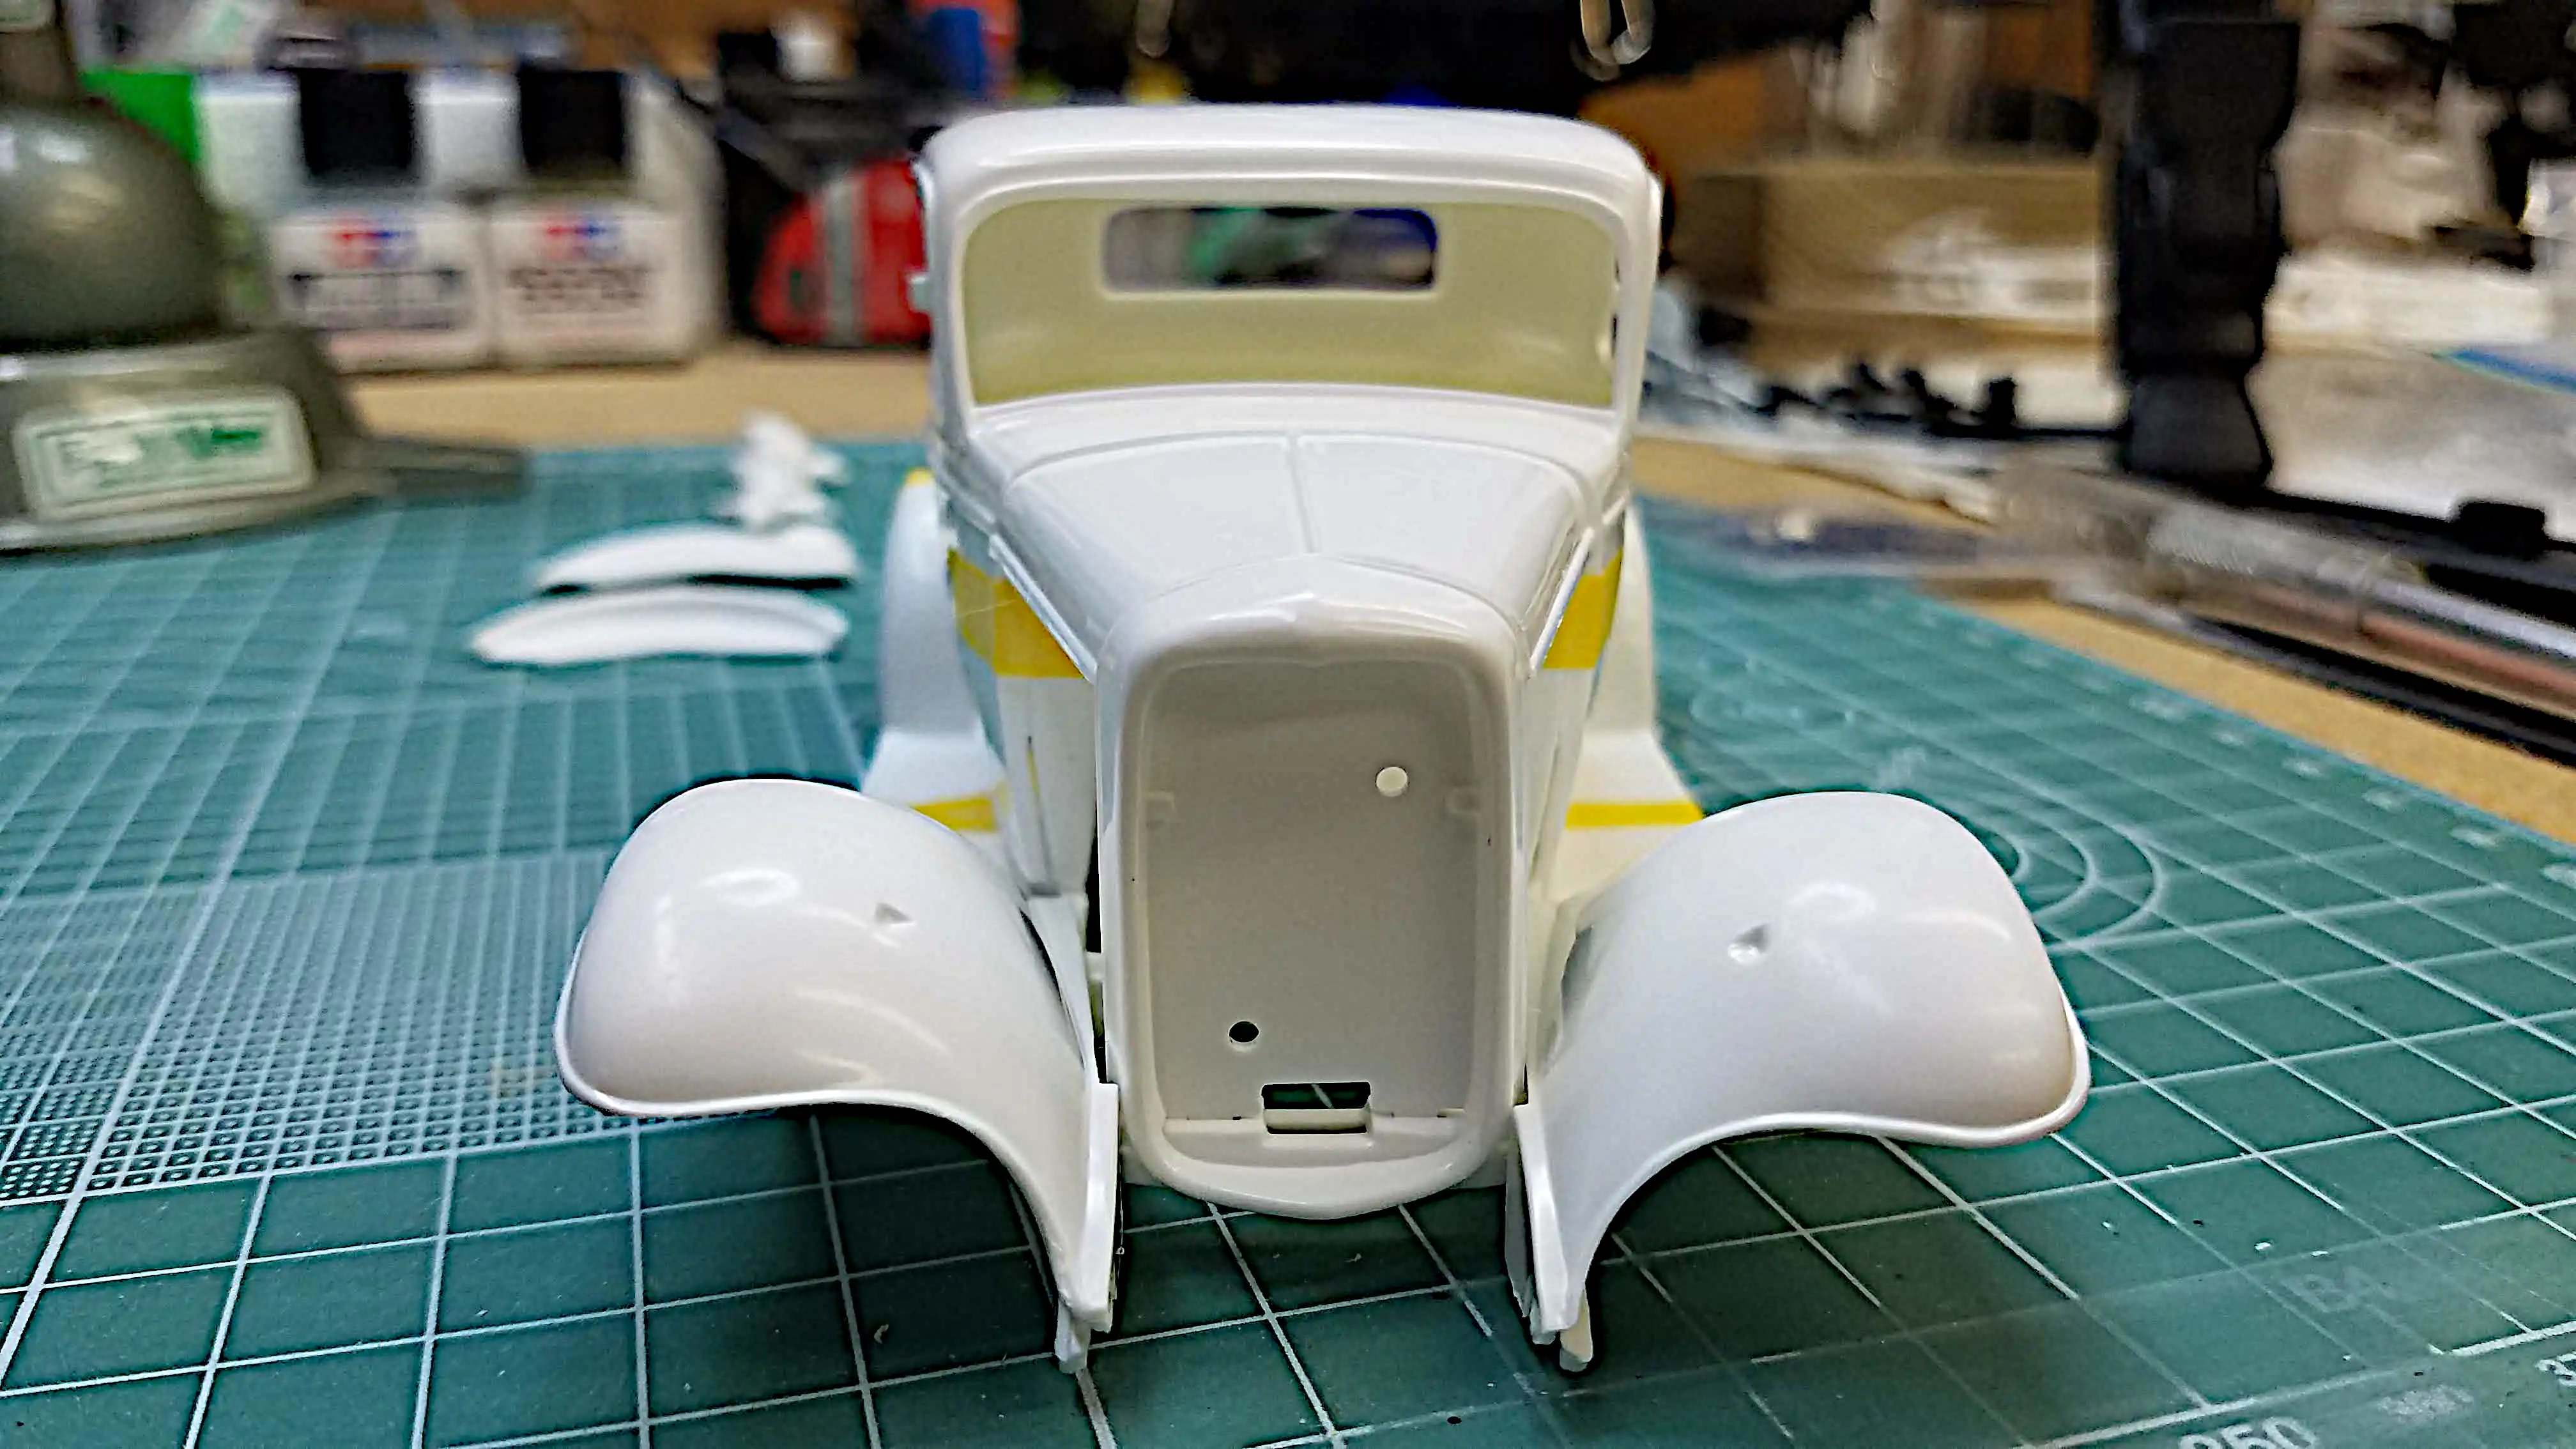 Dry fitting the body parts
This photo is another view of the dry fitted body.
Photo 004
Click/tap photo to enlarge
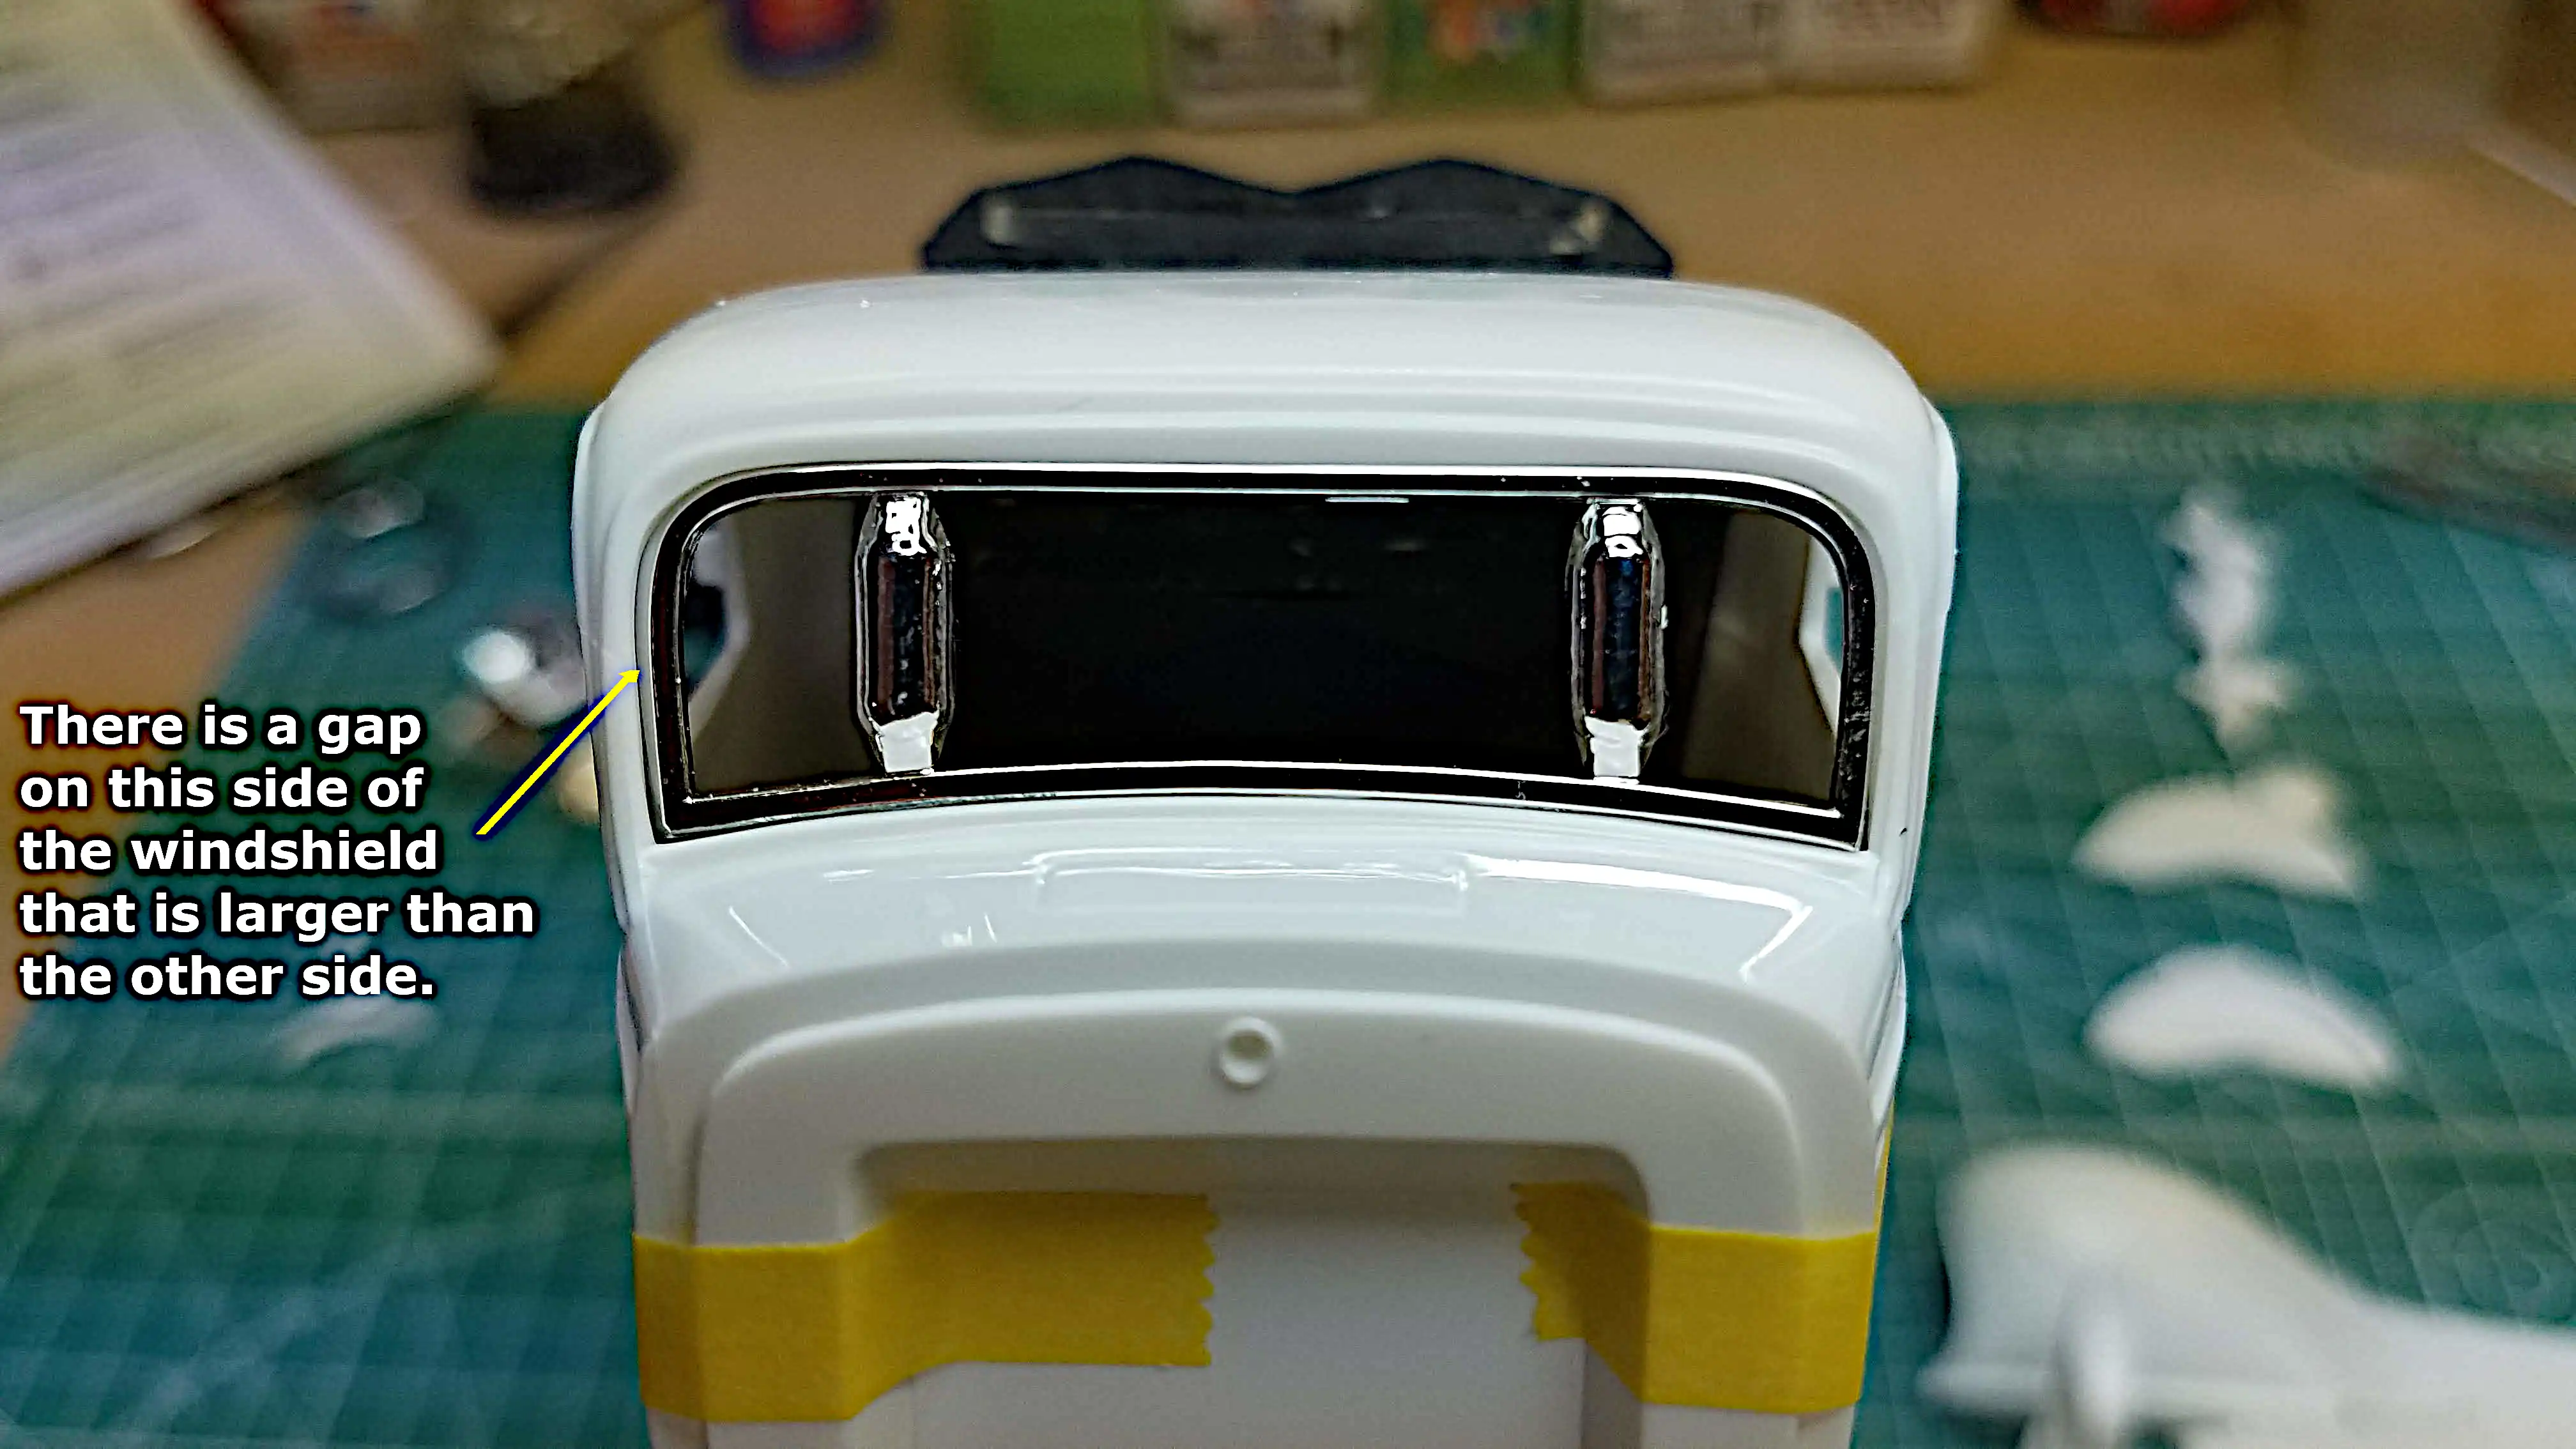 Problem with windshield fit
After watching a video on BG Model Workshop YouTube Channel and the problems that Bryan was having with the trunk on his '32 and then the problem he was having with the windshield, I took more time dry fitting. The windshield on my Revell '32 will be Okay. There is a slightly larger gap on the right side then there is on the left, but that can easily be fixed.
Photo 005
Click/tap photo to enlarge
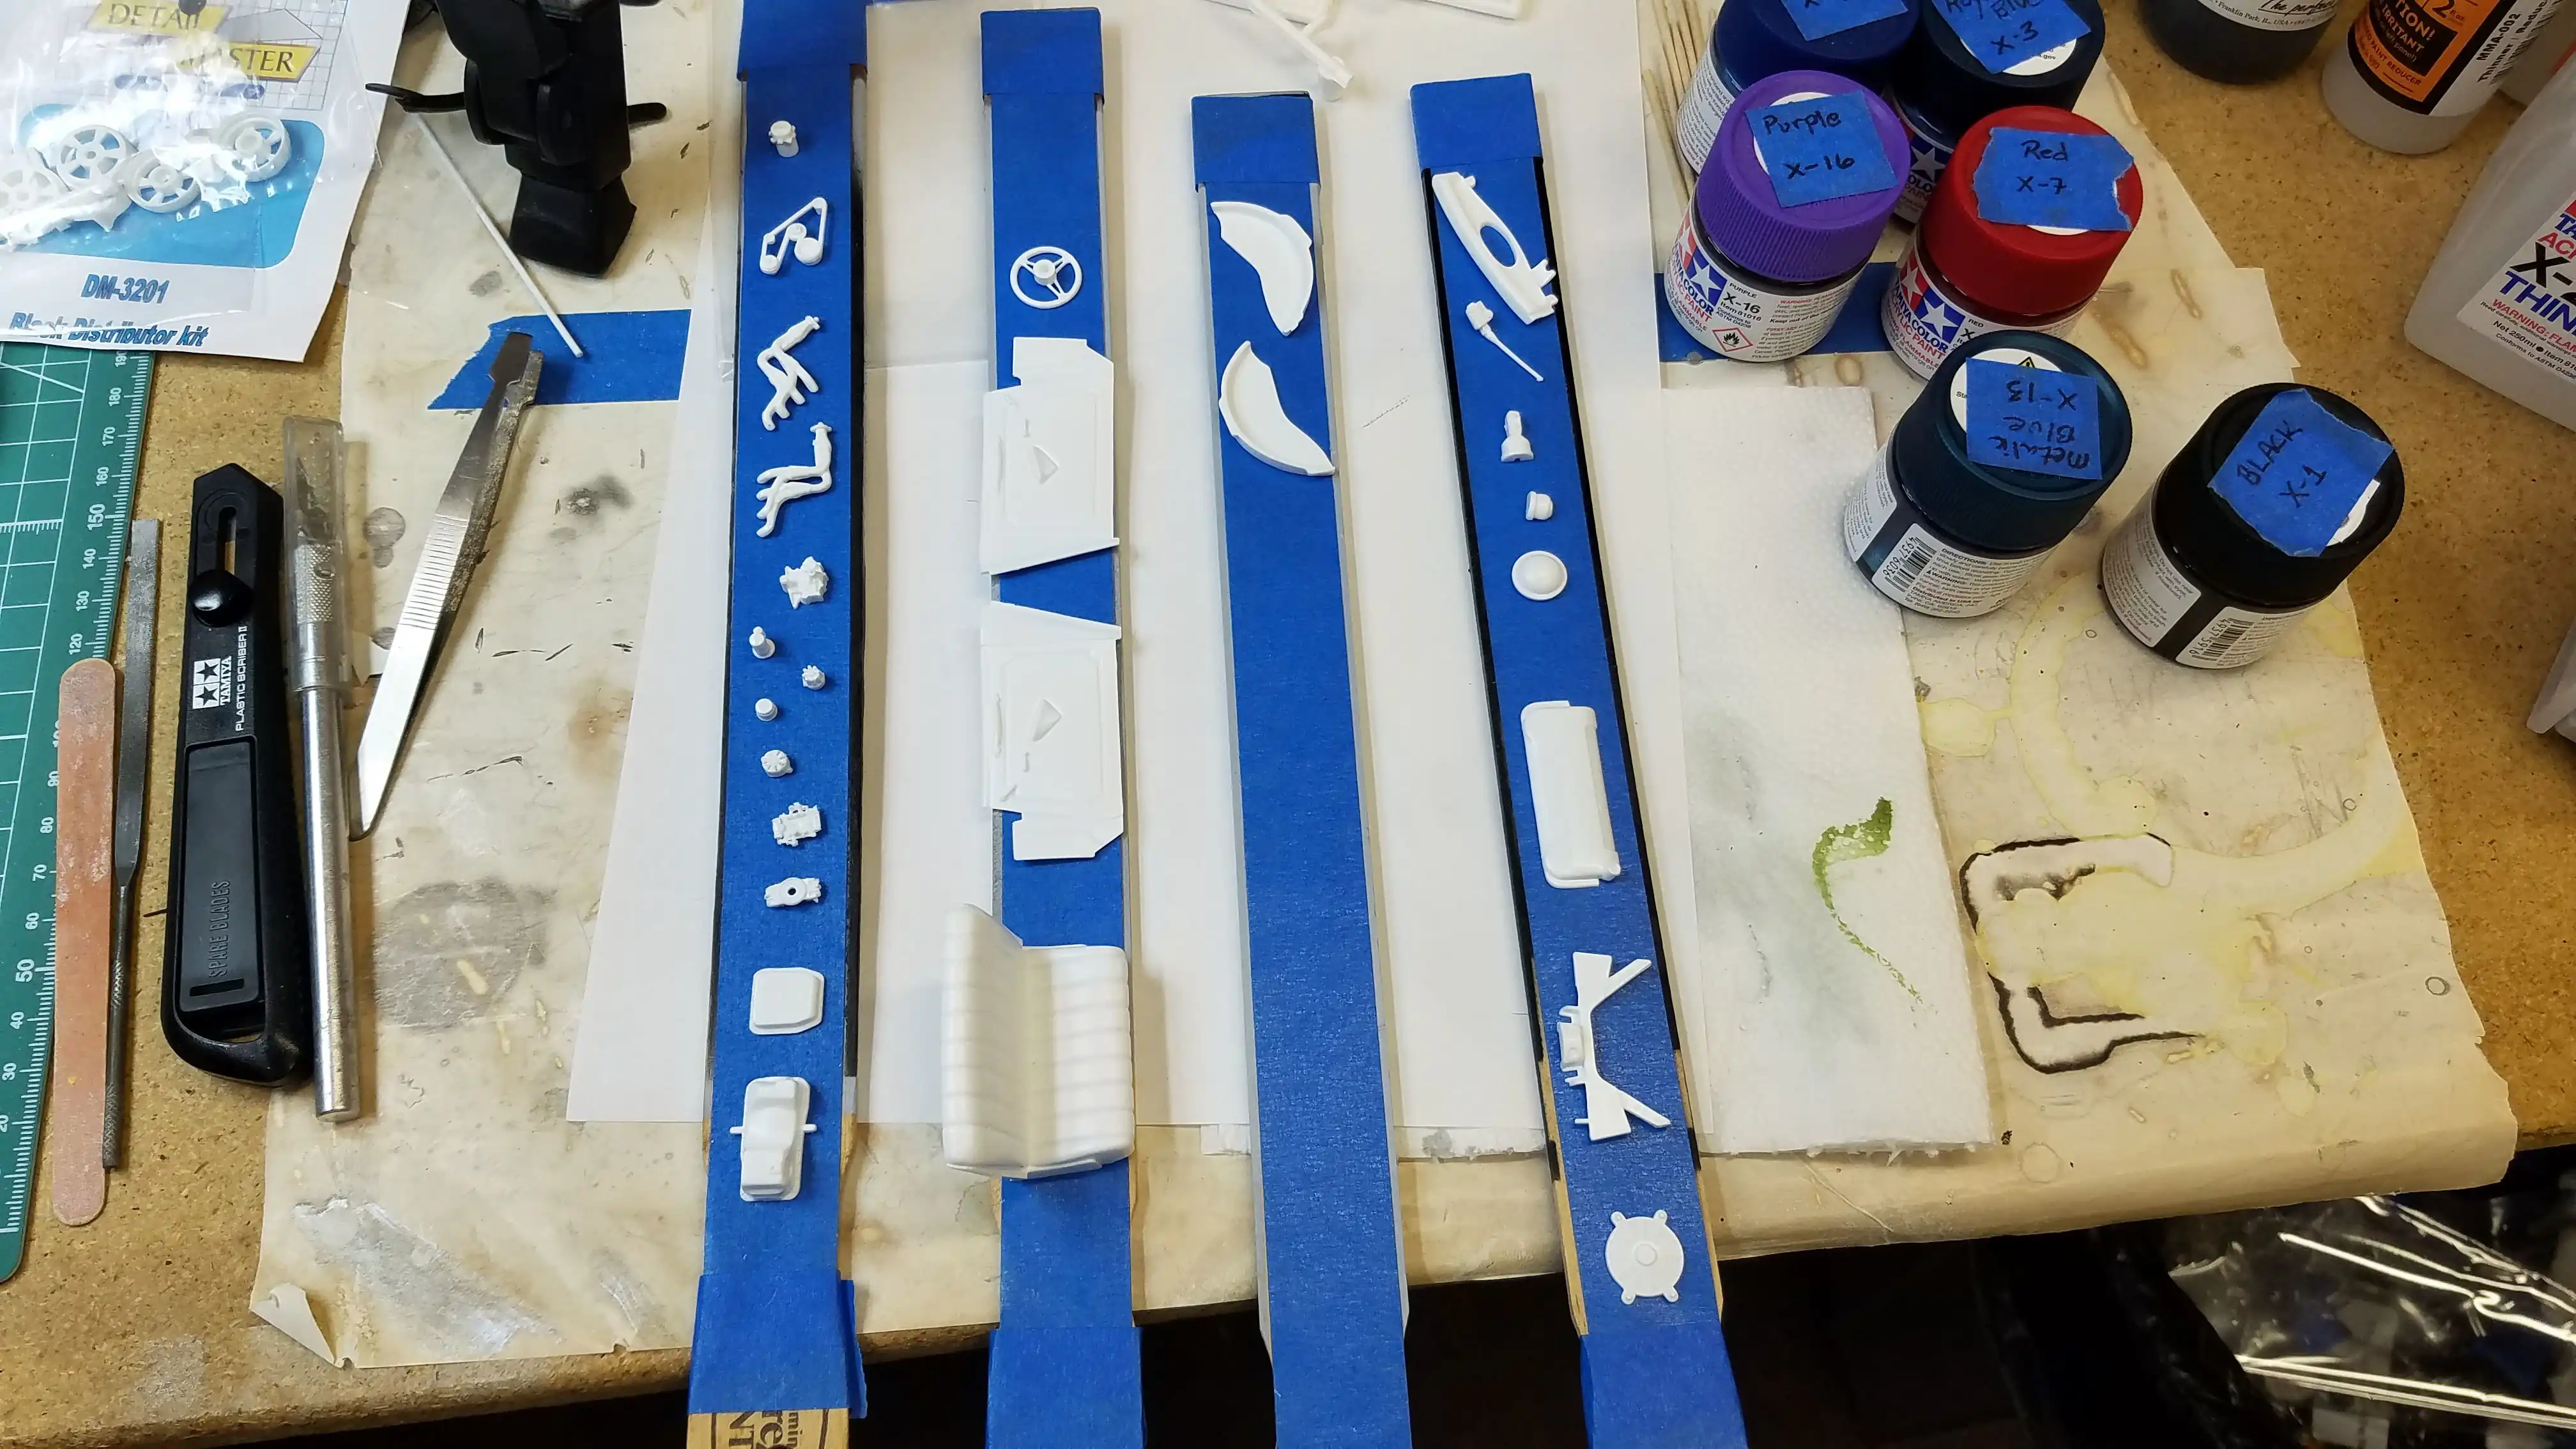 Getting the small parts ready for primer
The small parts have been placed on some tape and getting ready for primer.
Photo 006
Click/tap photo to enlarge
 Getting the small parts ready for primer
Some small parts and some larger parts are held with alligator clips and are ready for primer
Photo 007
Click/tap photo to enlarge
 Primed the body parts
I primed the body, fenders, hood shroud, etc. with white primer. It's the first time I've ever used white primer on white styrene - not fun! As usual, now that the primer is on, I can see a few small areas that need a-bit of work, but nothing major.
Photo 008
Click/tap photo to enlarge
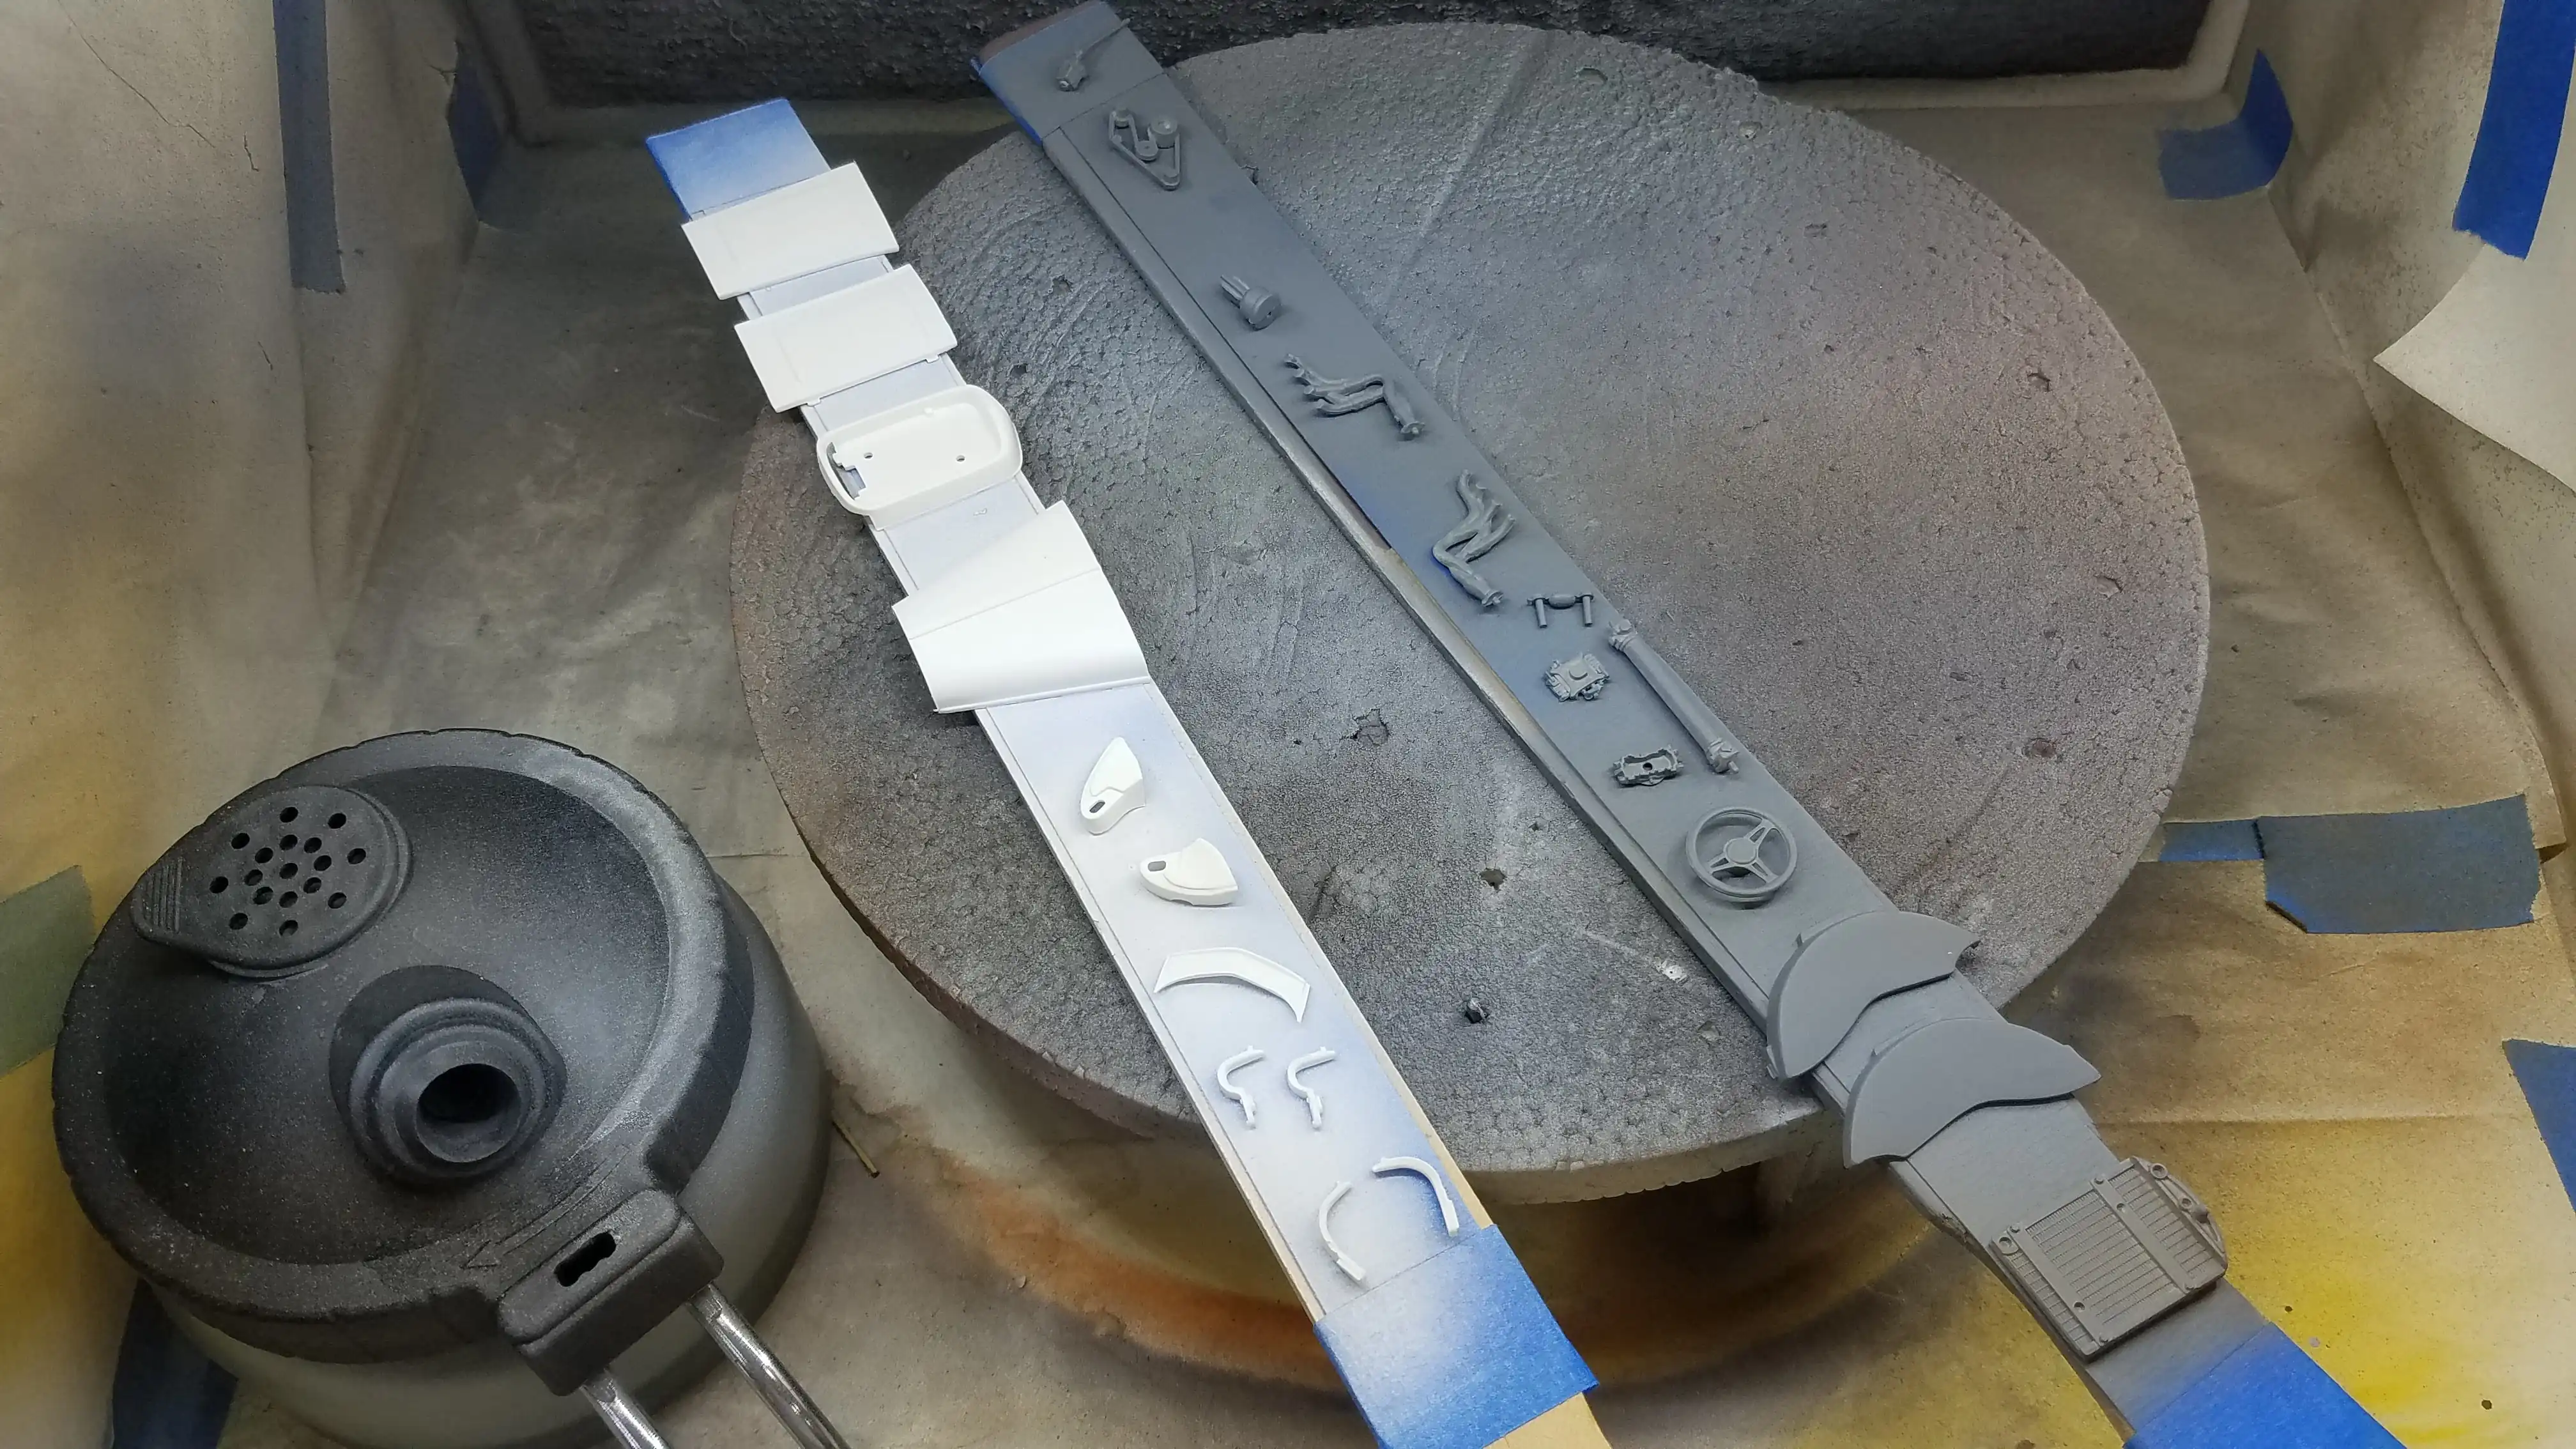 Small parts primed
More small parts are primed with white and gray primer.
Photo 009
Click/tap photo to enlarge
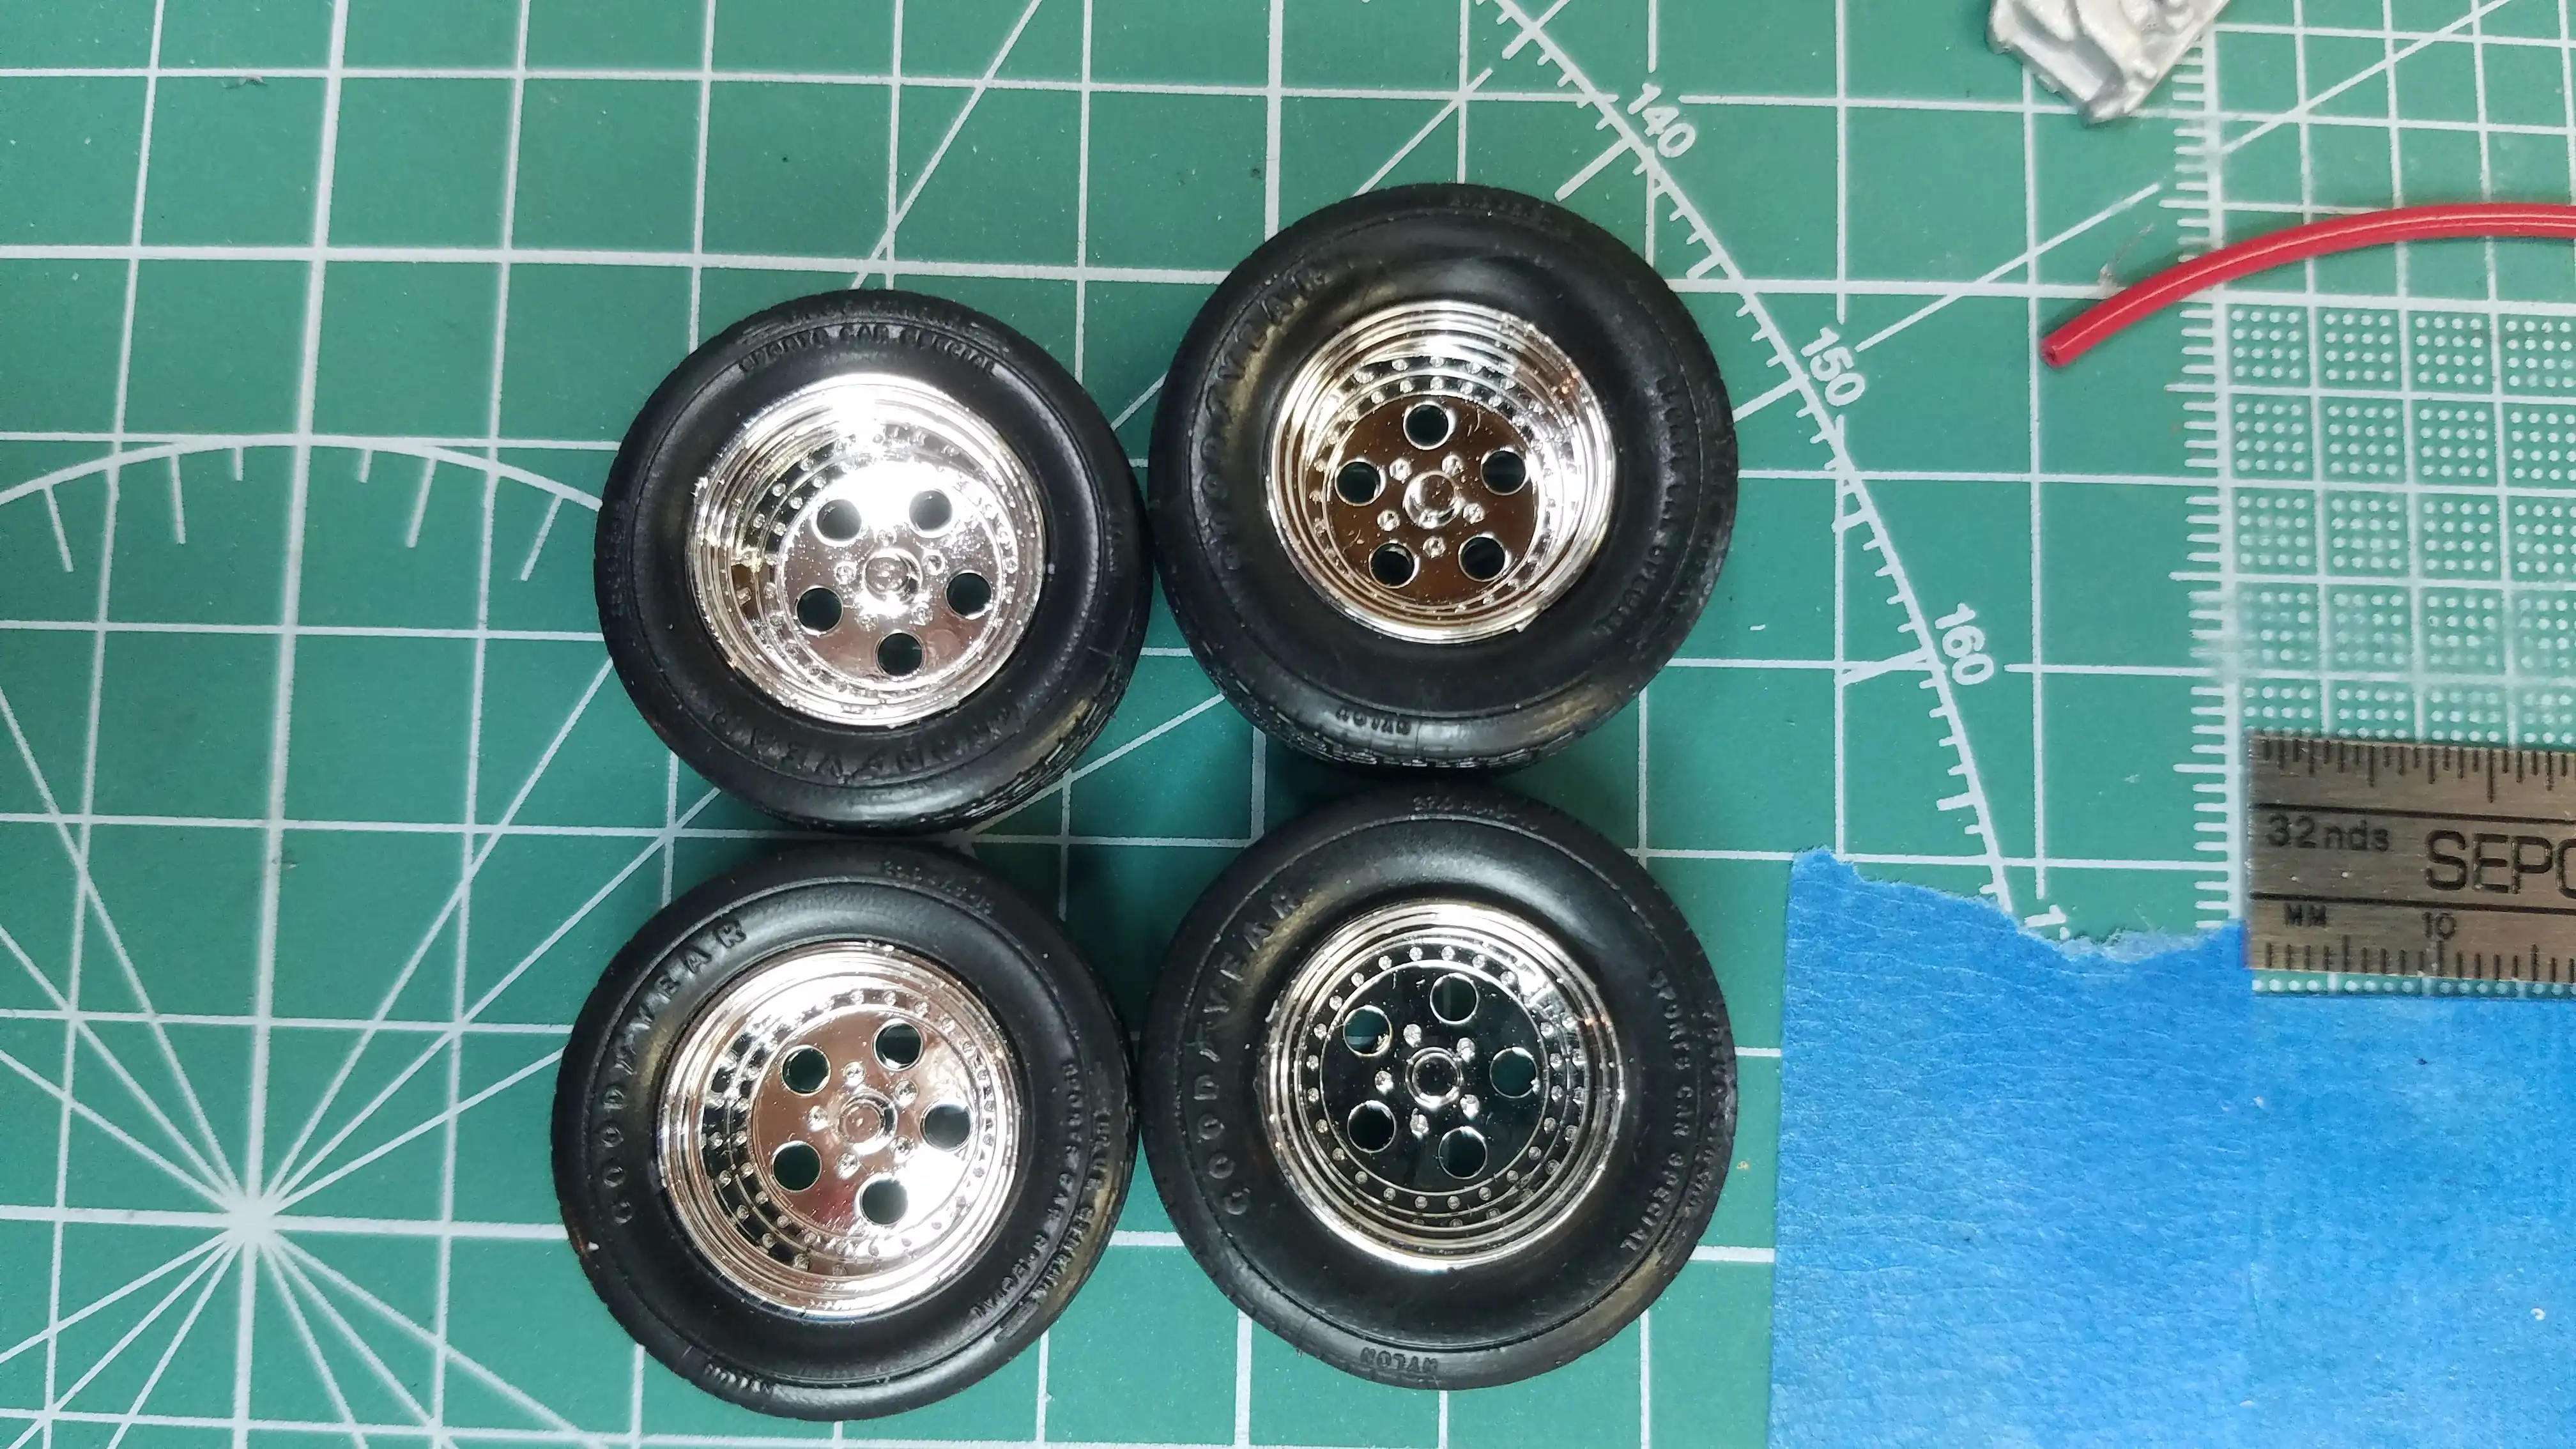 Attempt using custom wheels
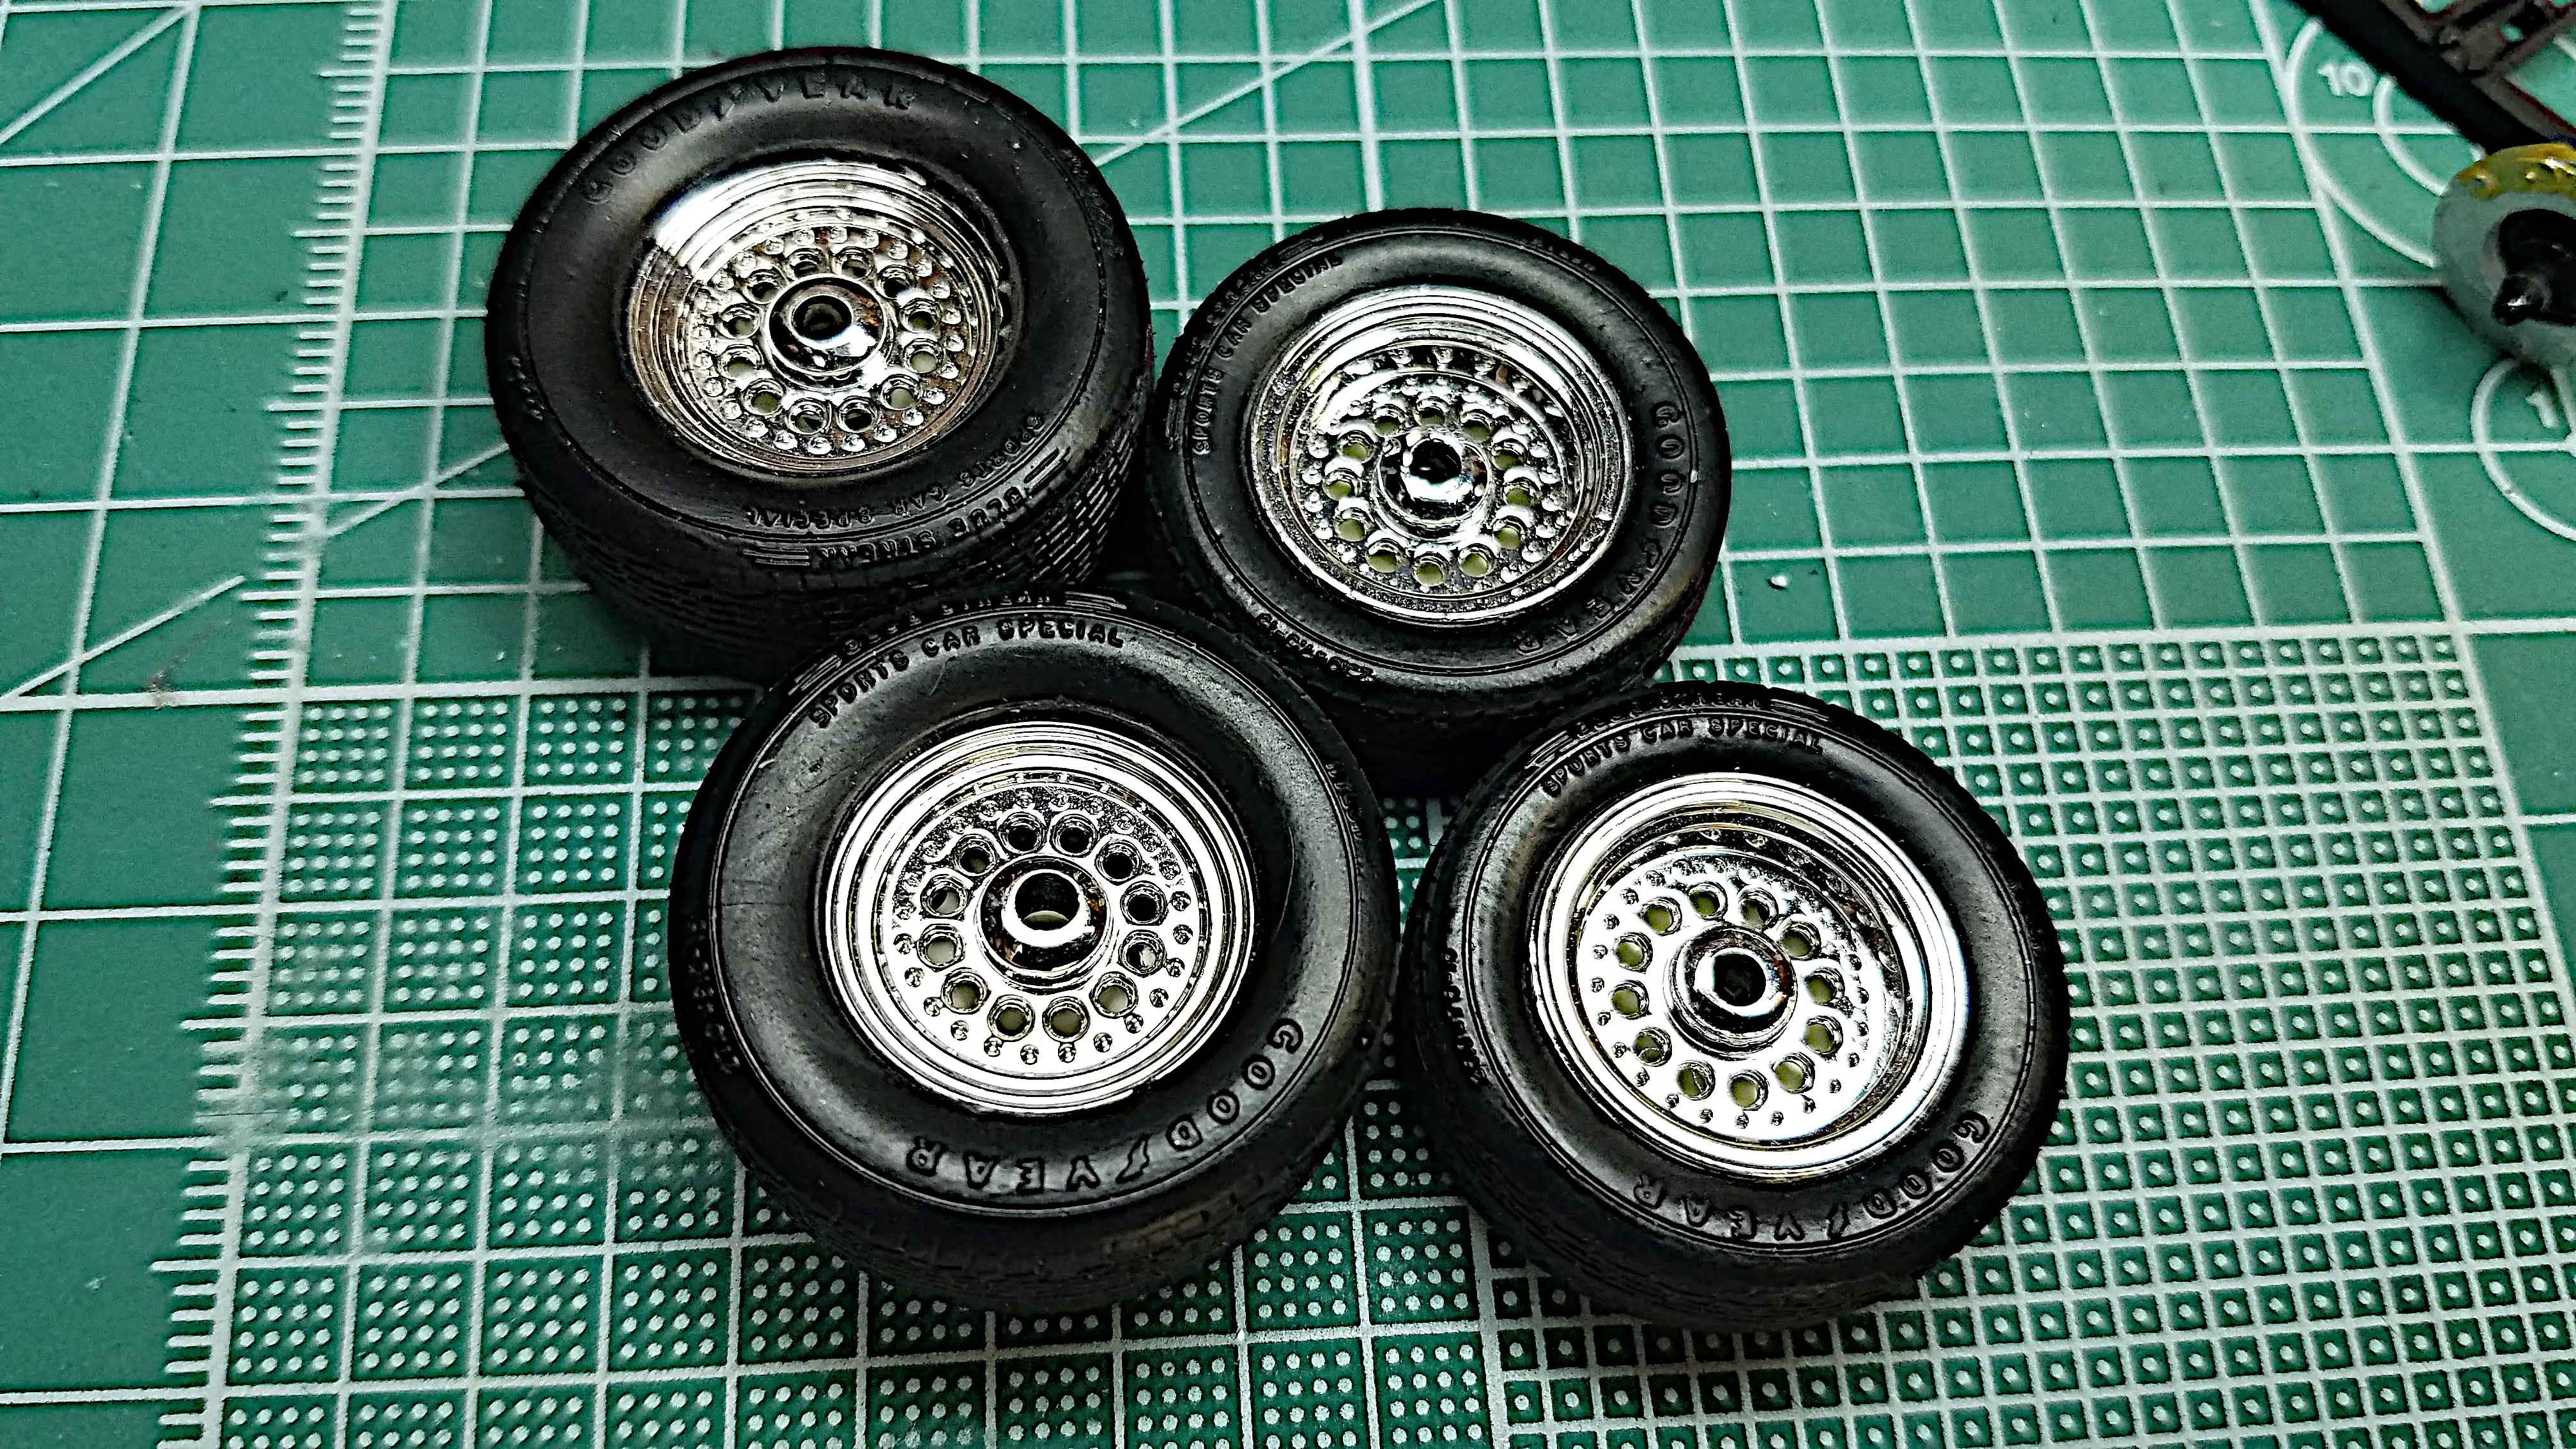
I'm going to attempt using the custom wheels that came with an AMT 1934 Ford Pickup and the tires that came with the '32 Ford 3-window. I really like these wheels, but I'm not sure I can make it work. I ordered some wheels from eBay today, May 2, 2022, just in case.
Photo 010
Click/tap photo to enlarge
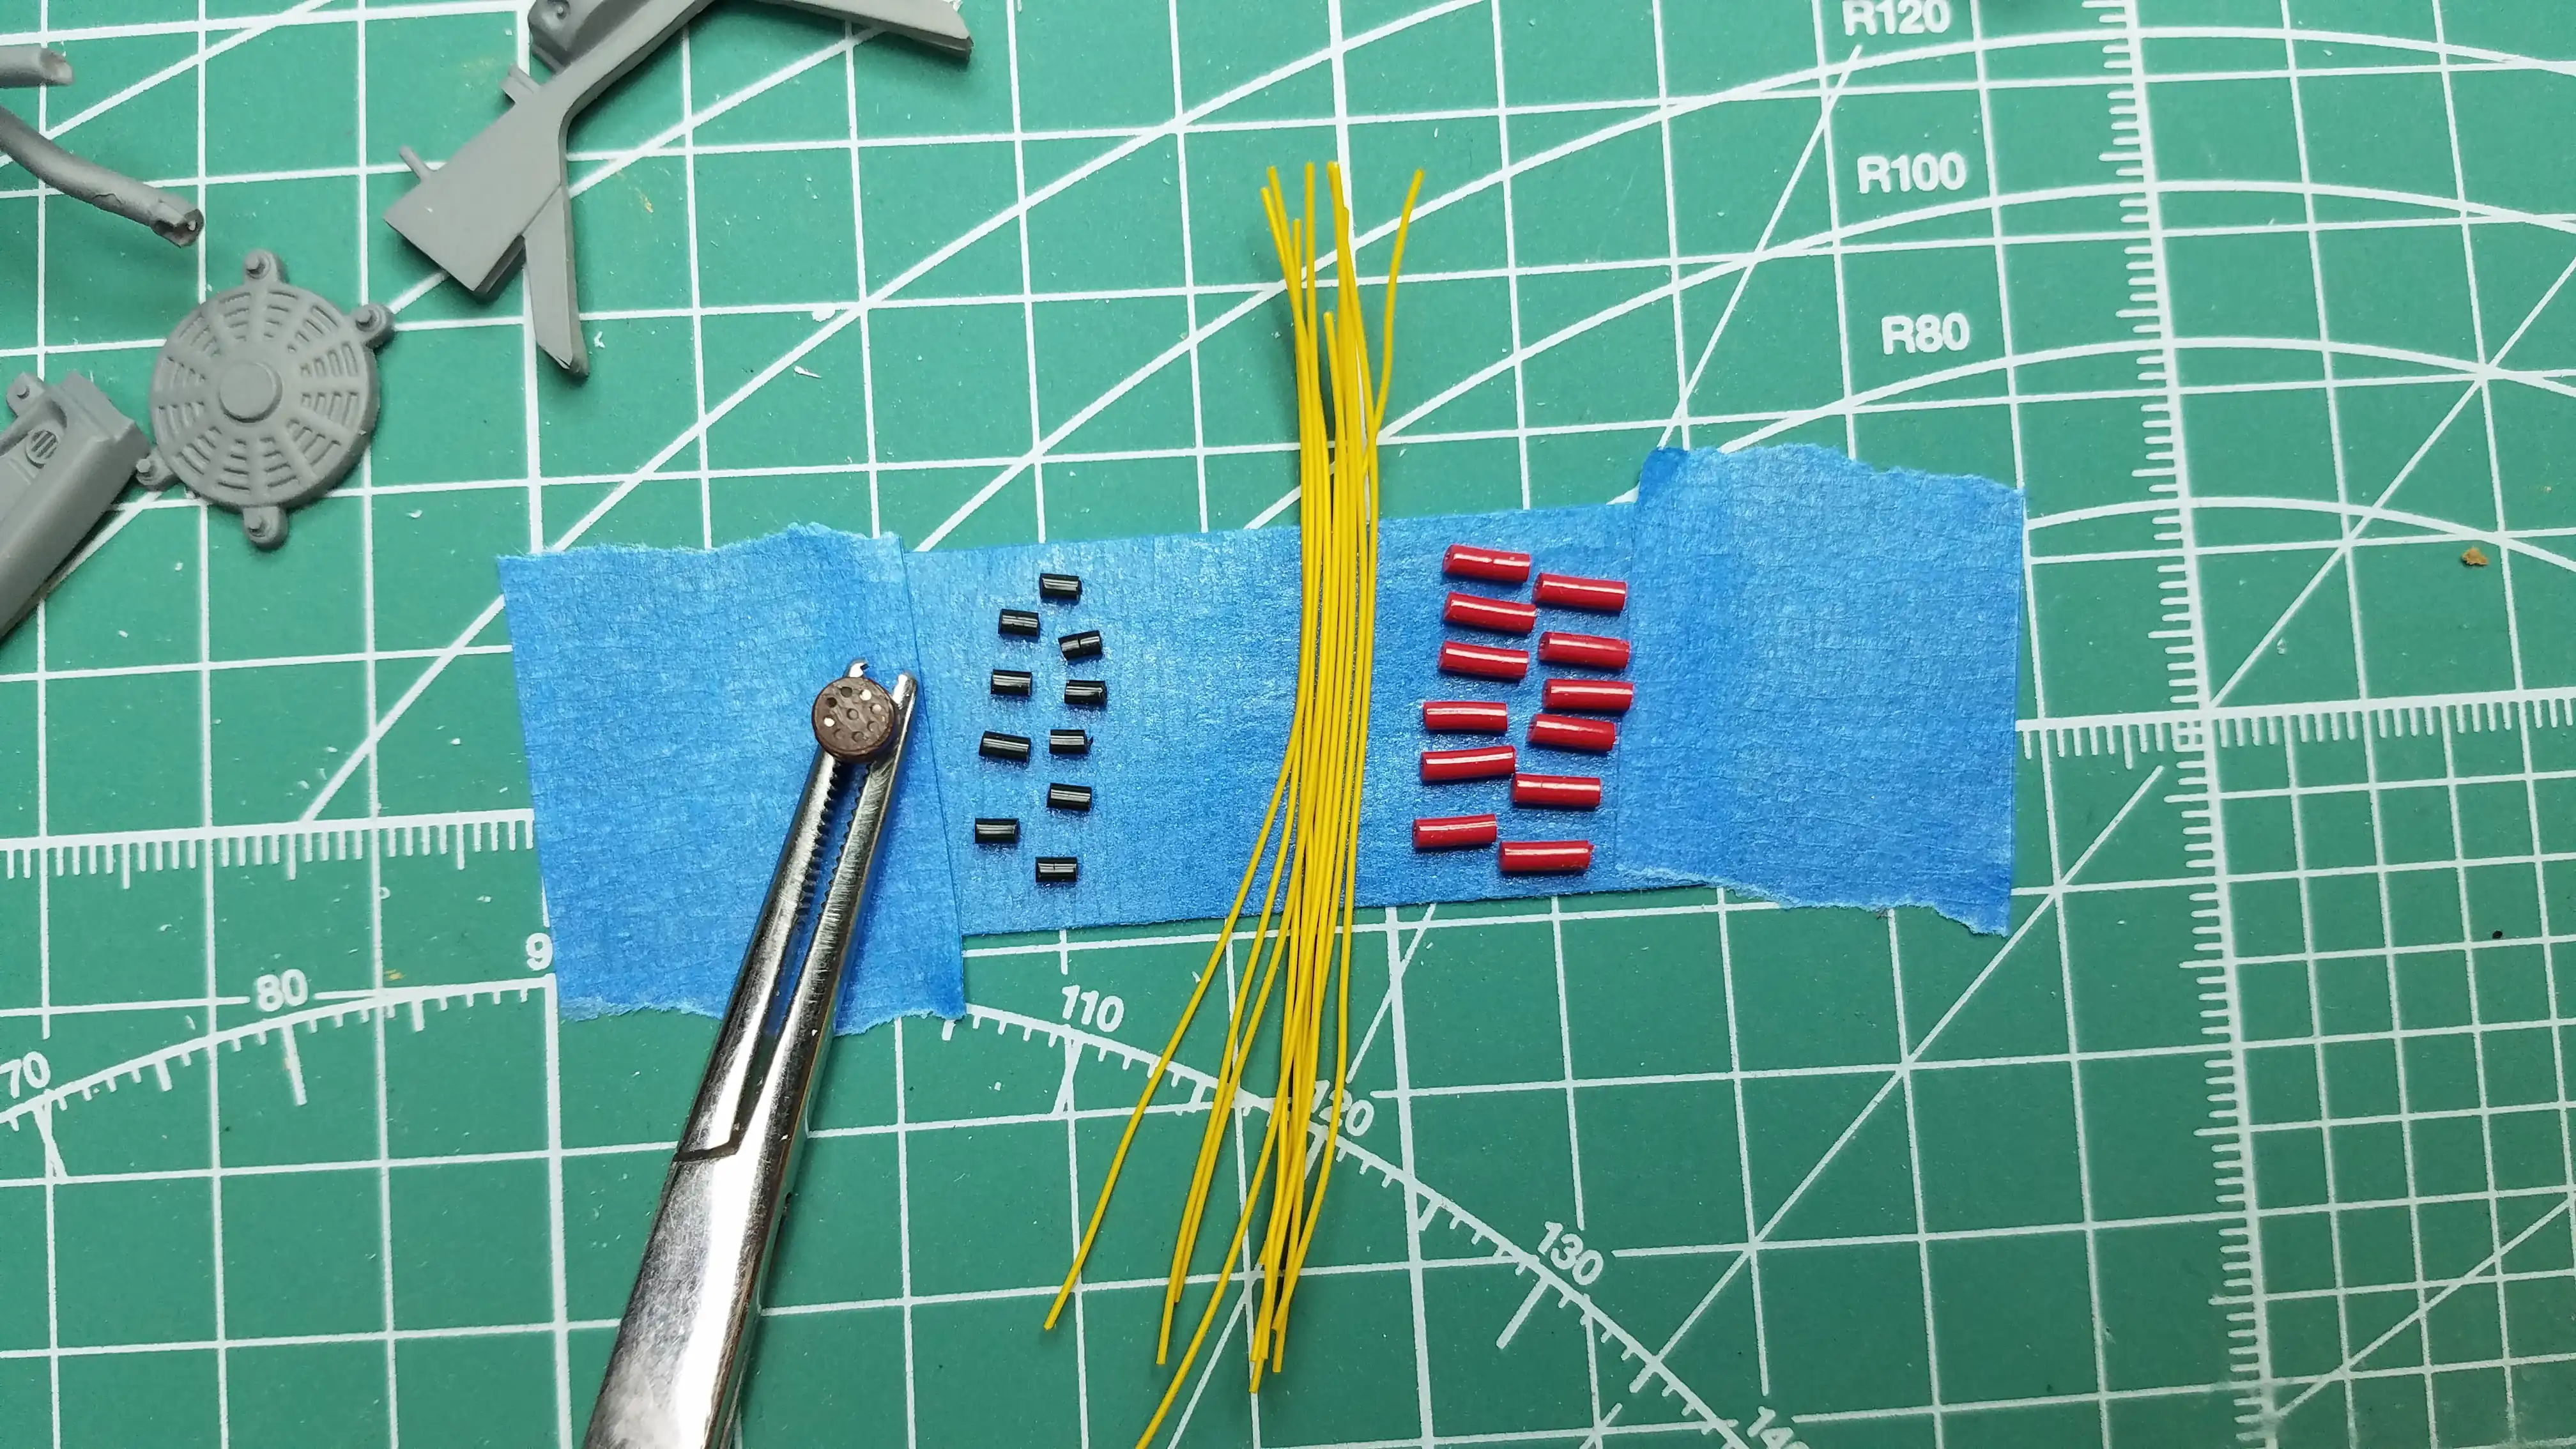 Preparing the distributor for wiring
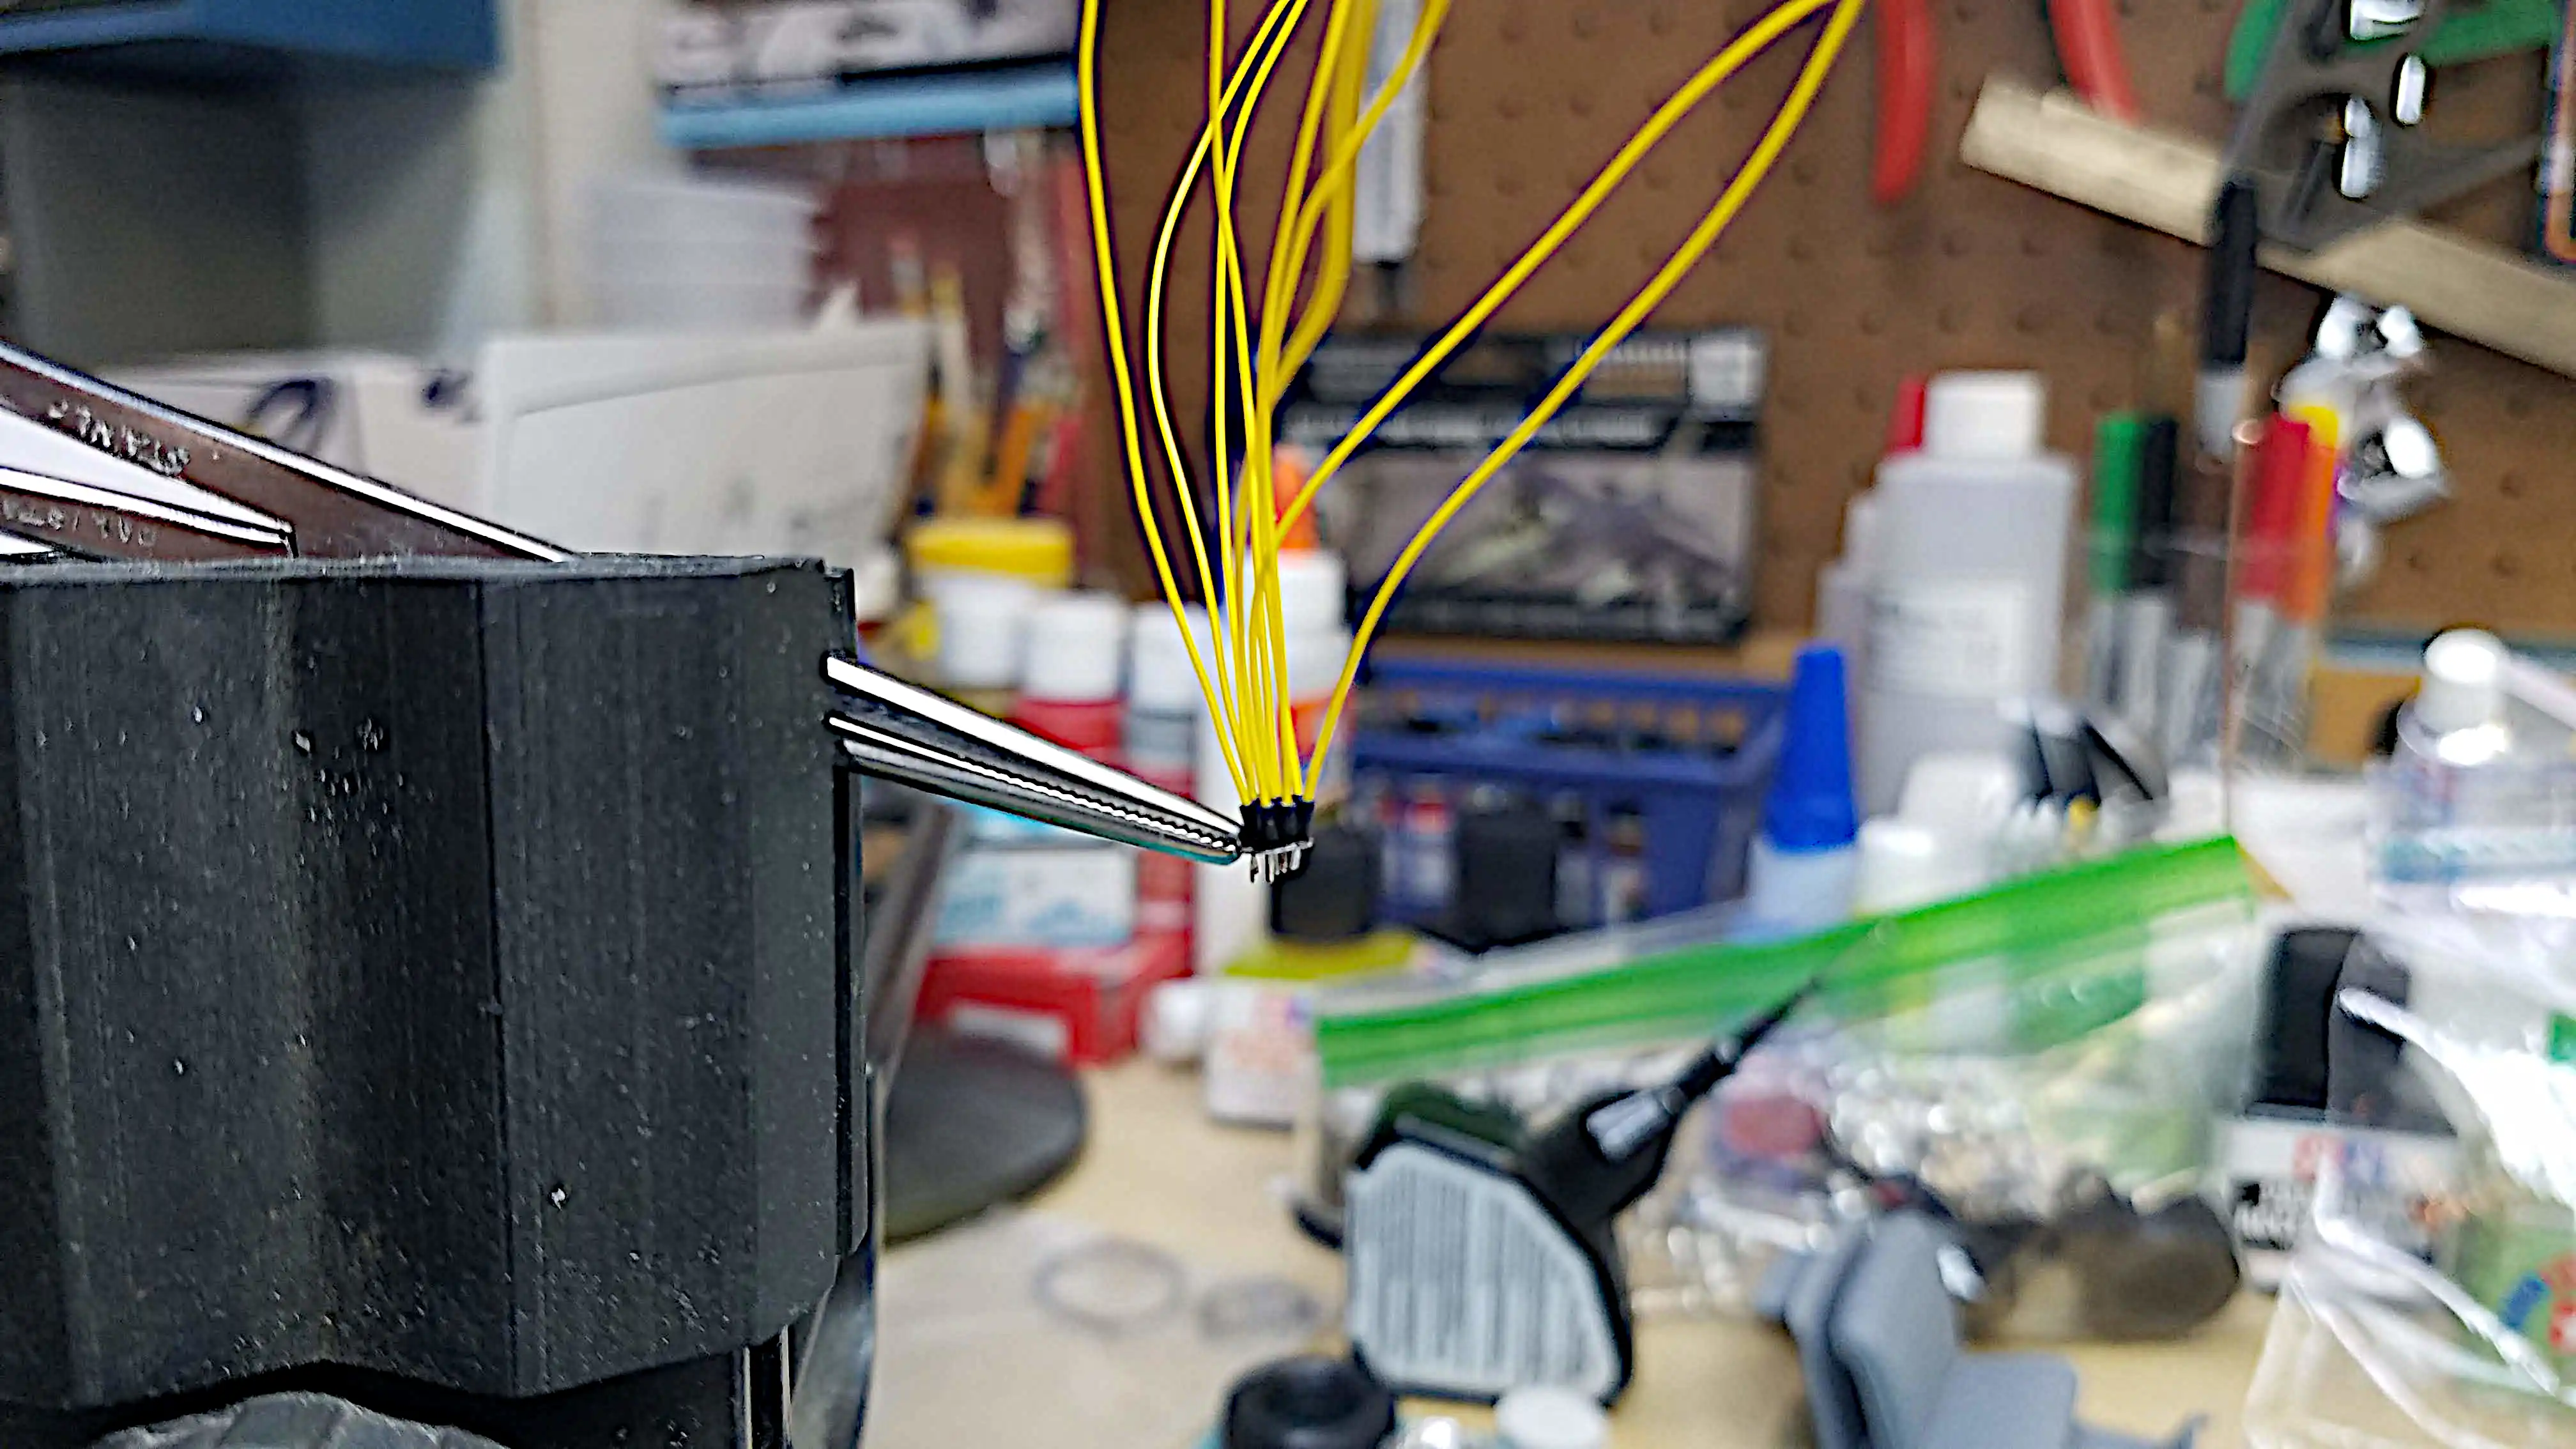
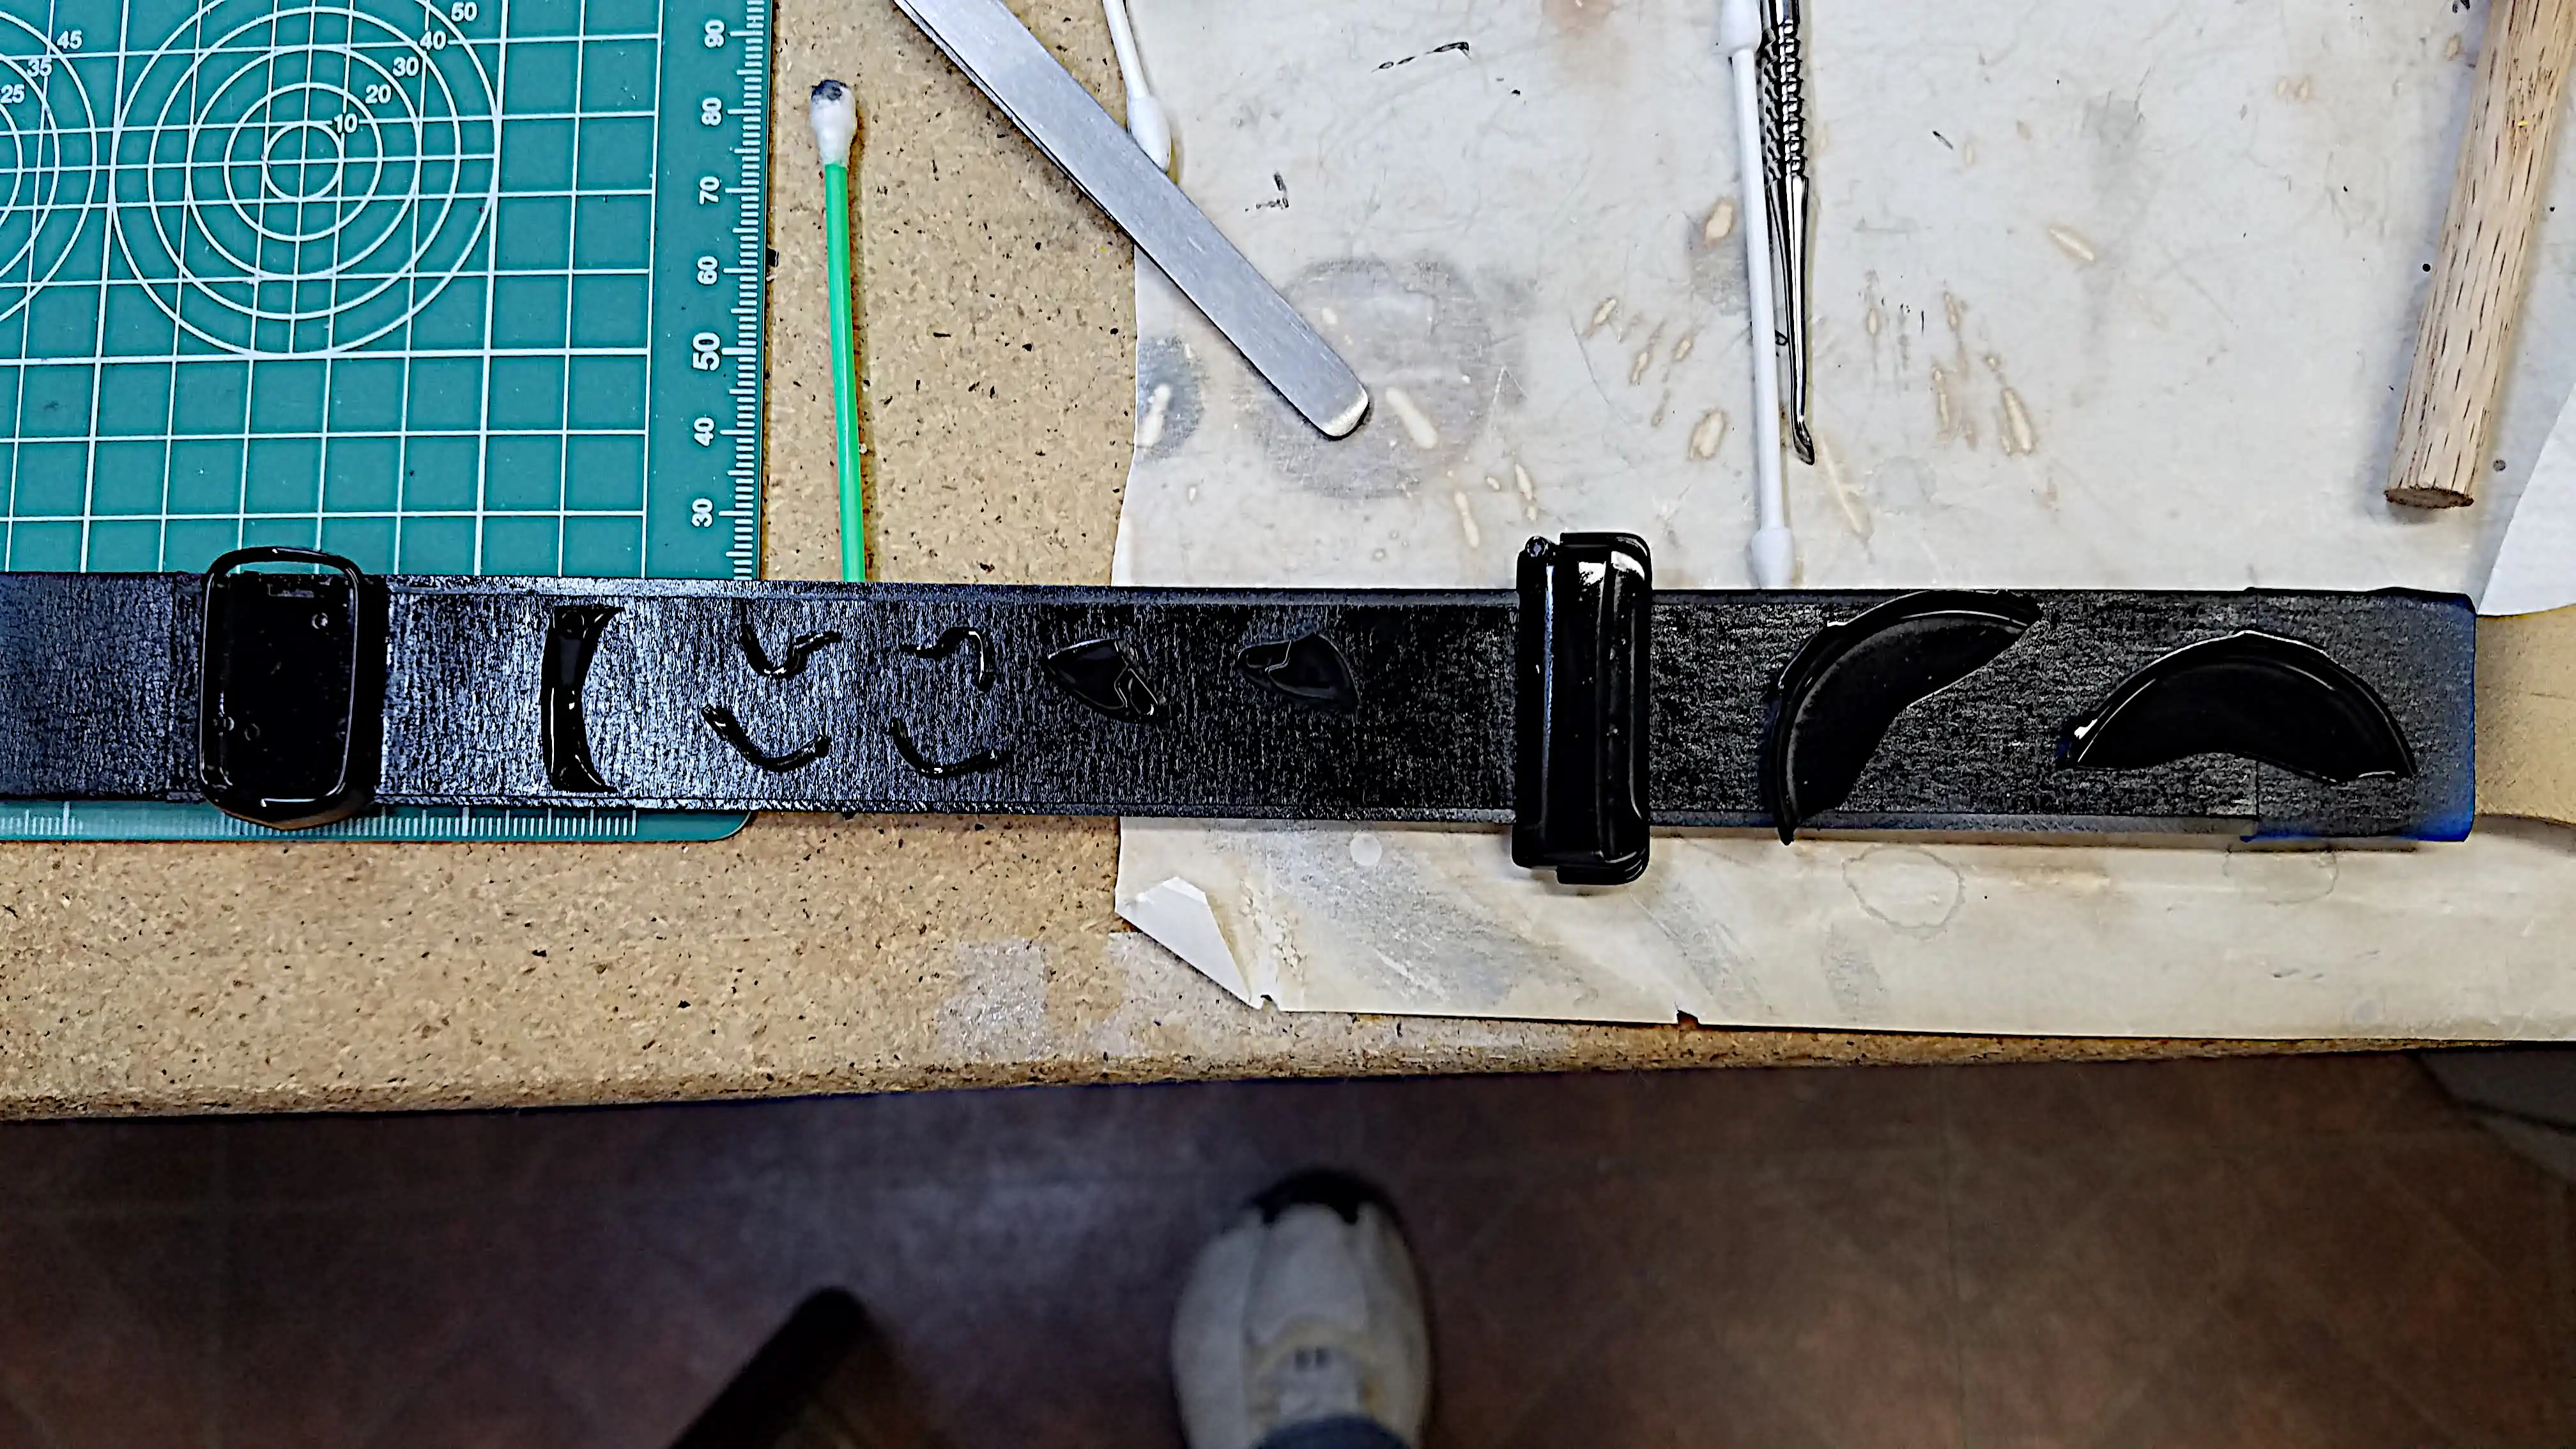
I'm getting the distributor ready to wire. I'm using an aluminum distributor from Detail Master, D#M-3201 distributor kit. This is the black distributor kit; however, I want to use yellow wire. I'm using 30AWG (American Wire Gauge) wire-wrap wire. It's actually cheaper to buy it by the spool through an electronics supplier. The wire-wrap wire comes in: Red, Black, White, Blue, Yellow and Green. The boots for the distributor are made with the insulation off of 22AWG hookup wire and 24AWG hookup wire for the spark plugs.
If you're interested in this alternative, here is a link to Amazon, where it can be purchased: 30AWG Wire Wrap Wire being used for spark plug wiring
Clicking this link will show a picture of the wire
spools:
Photo of wire spools
Photo 011
Click/tap photo to enlarge
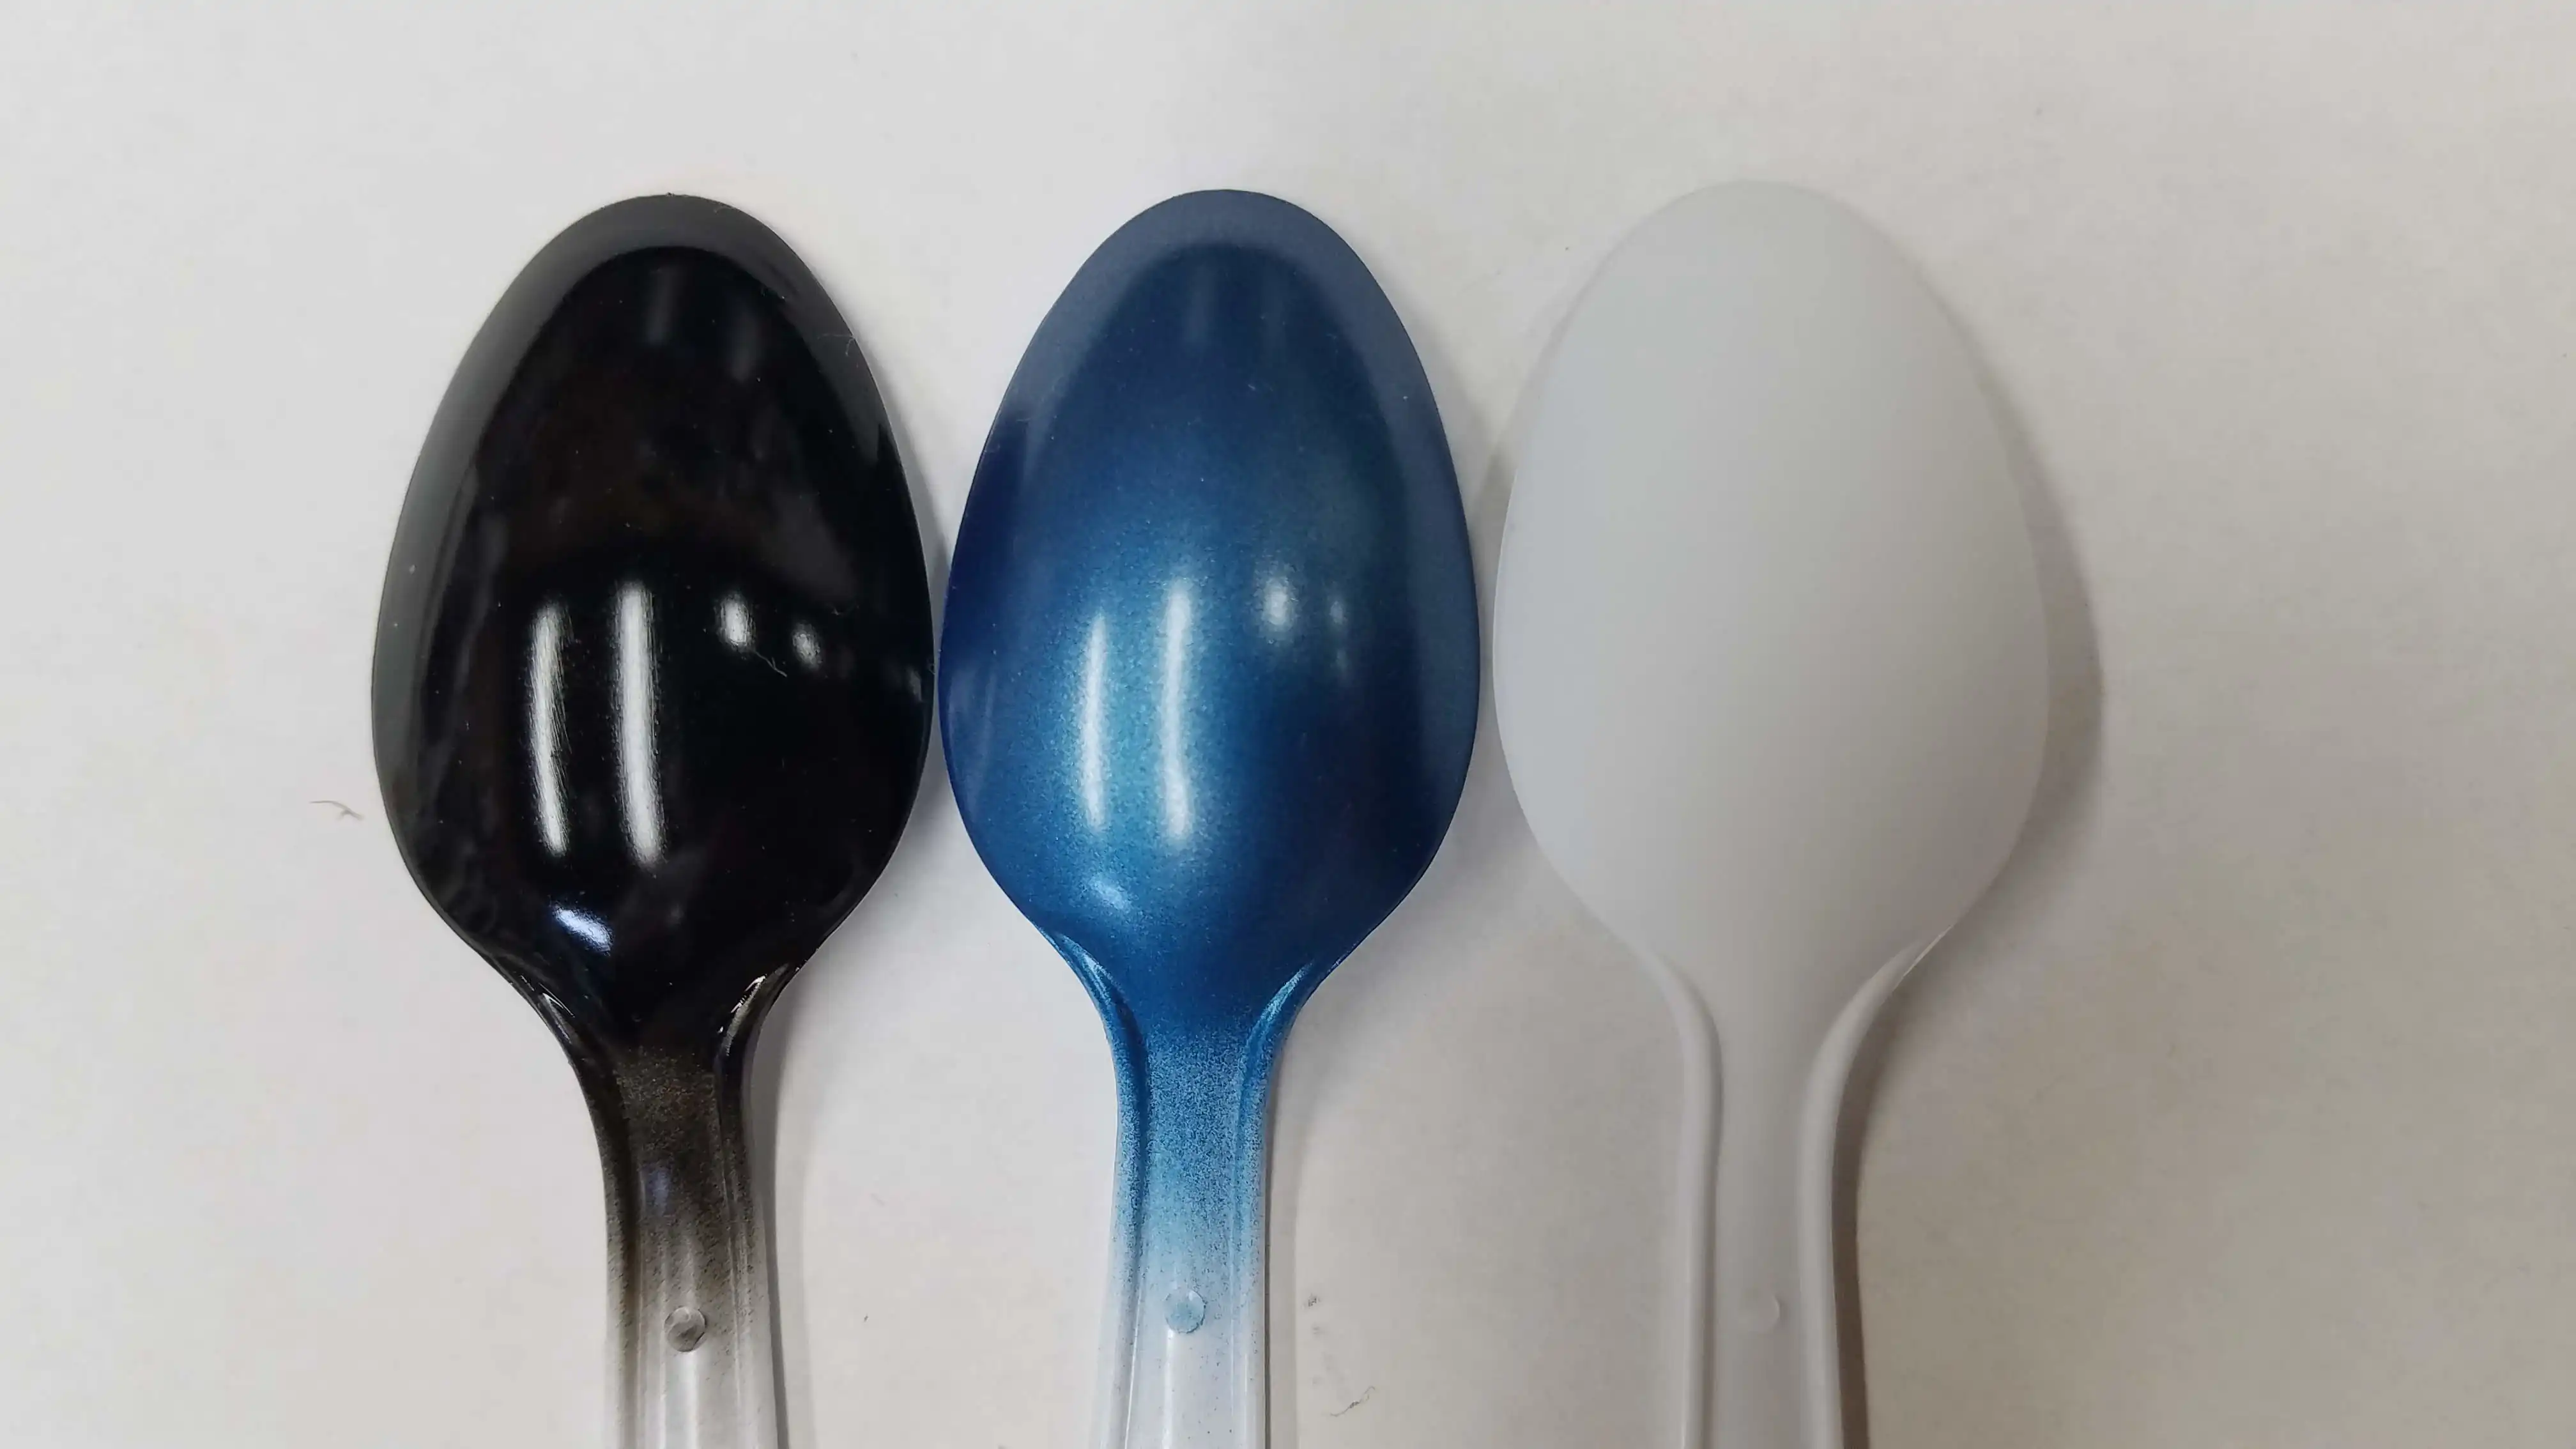 Test spoons of body color
I'm planning to paint the coupe a tri-color as follows:
Photo 012
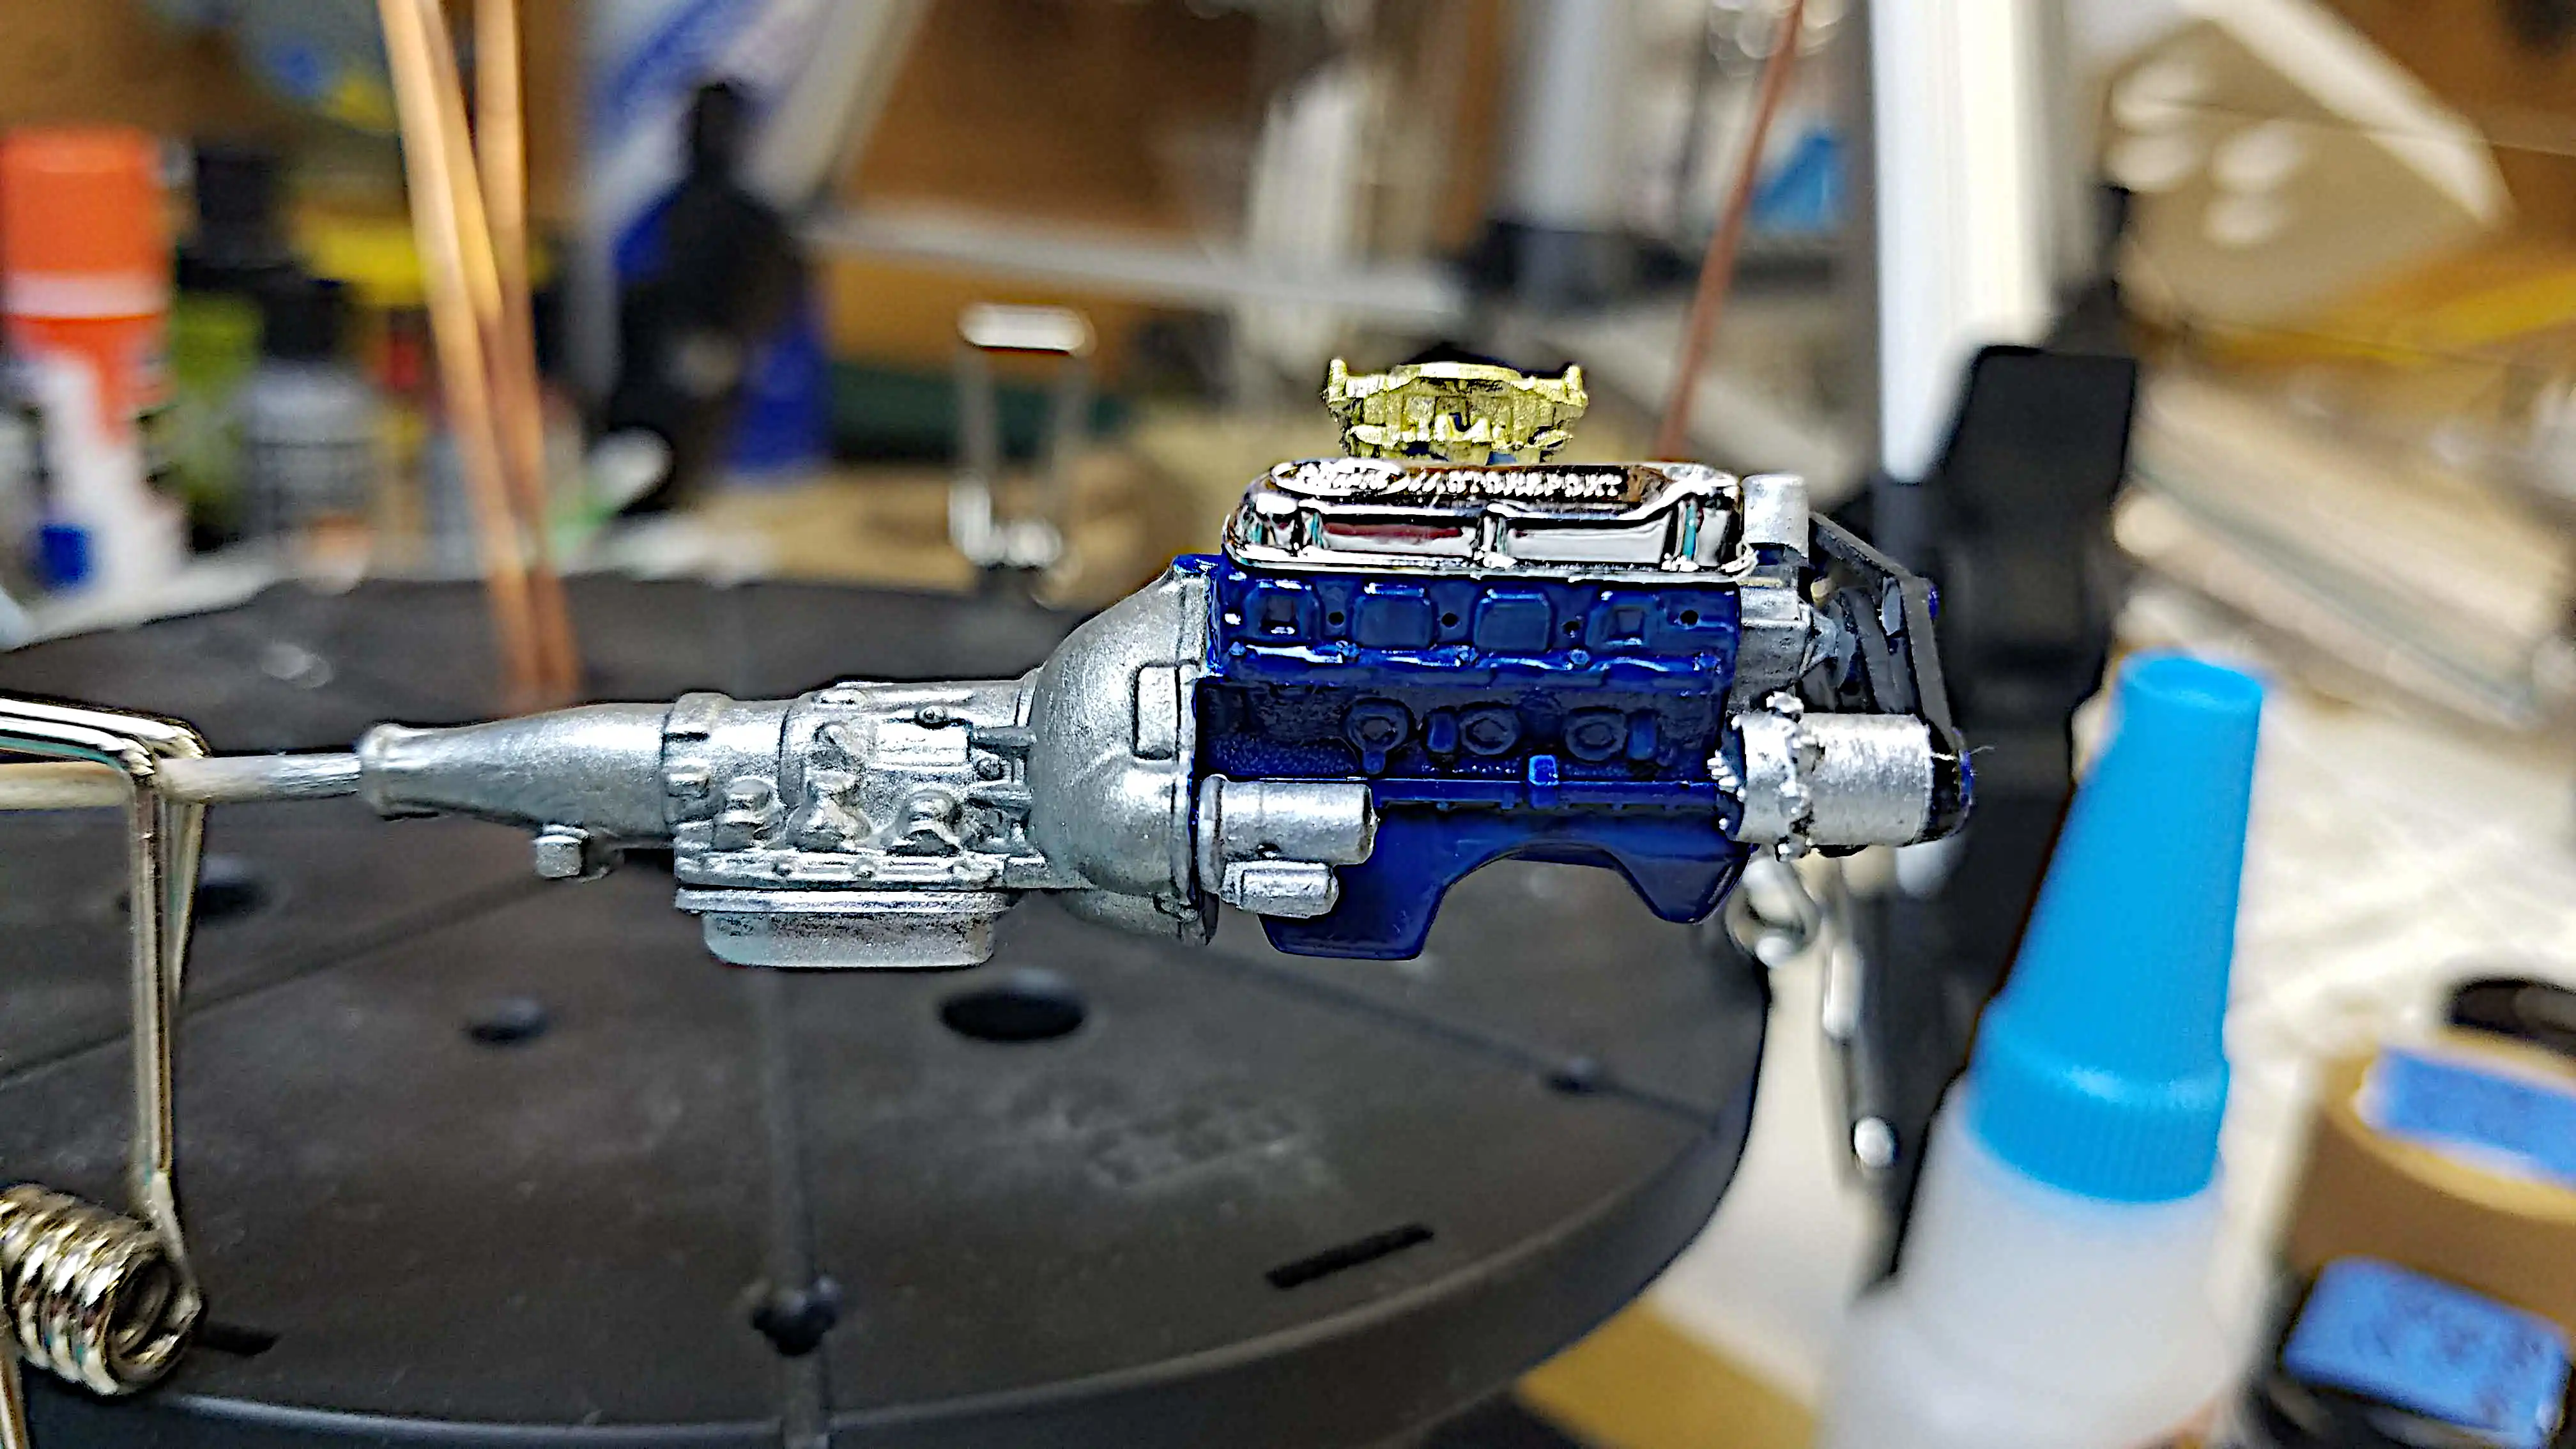
Click/tap photo to enlarge
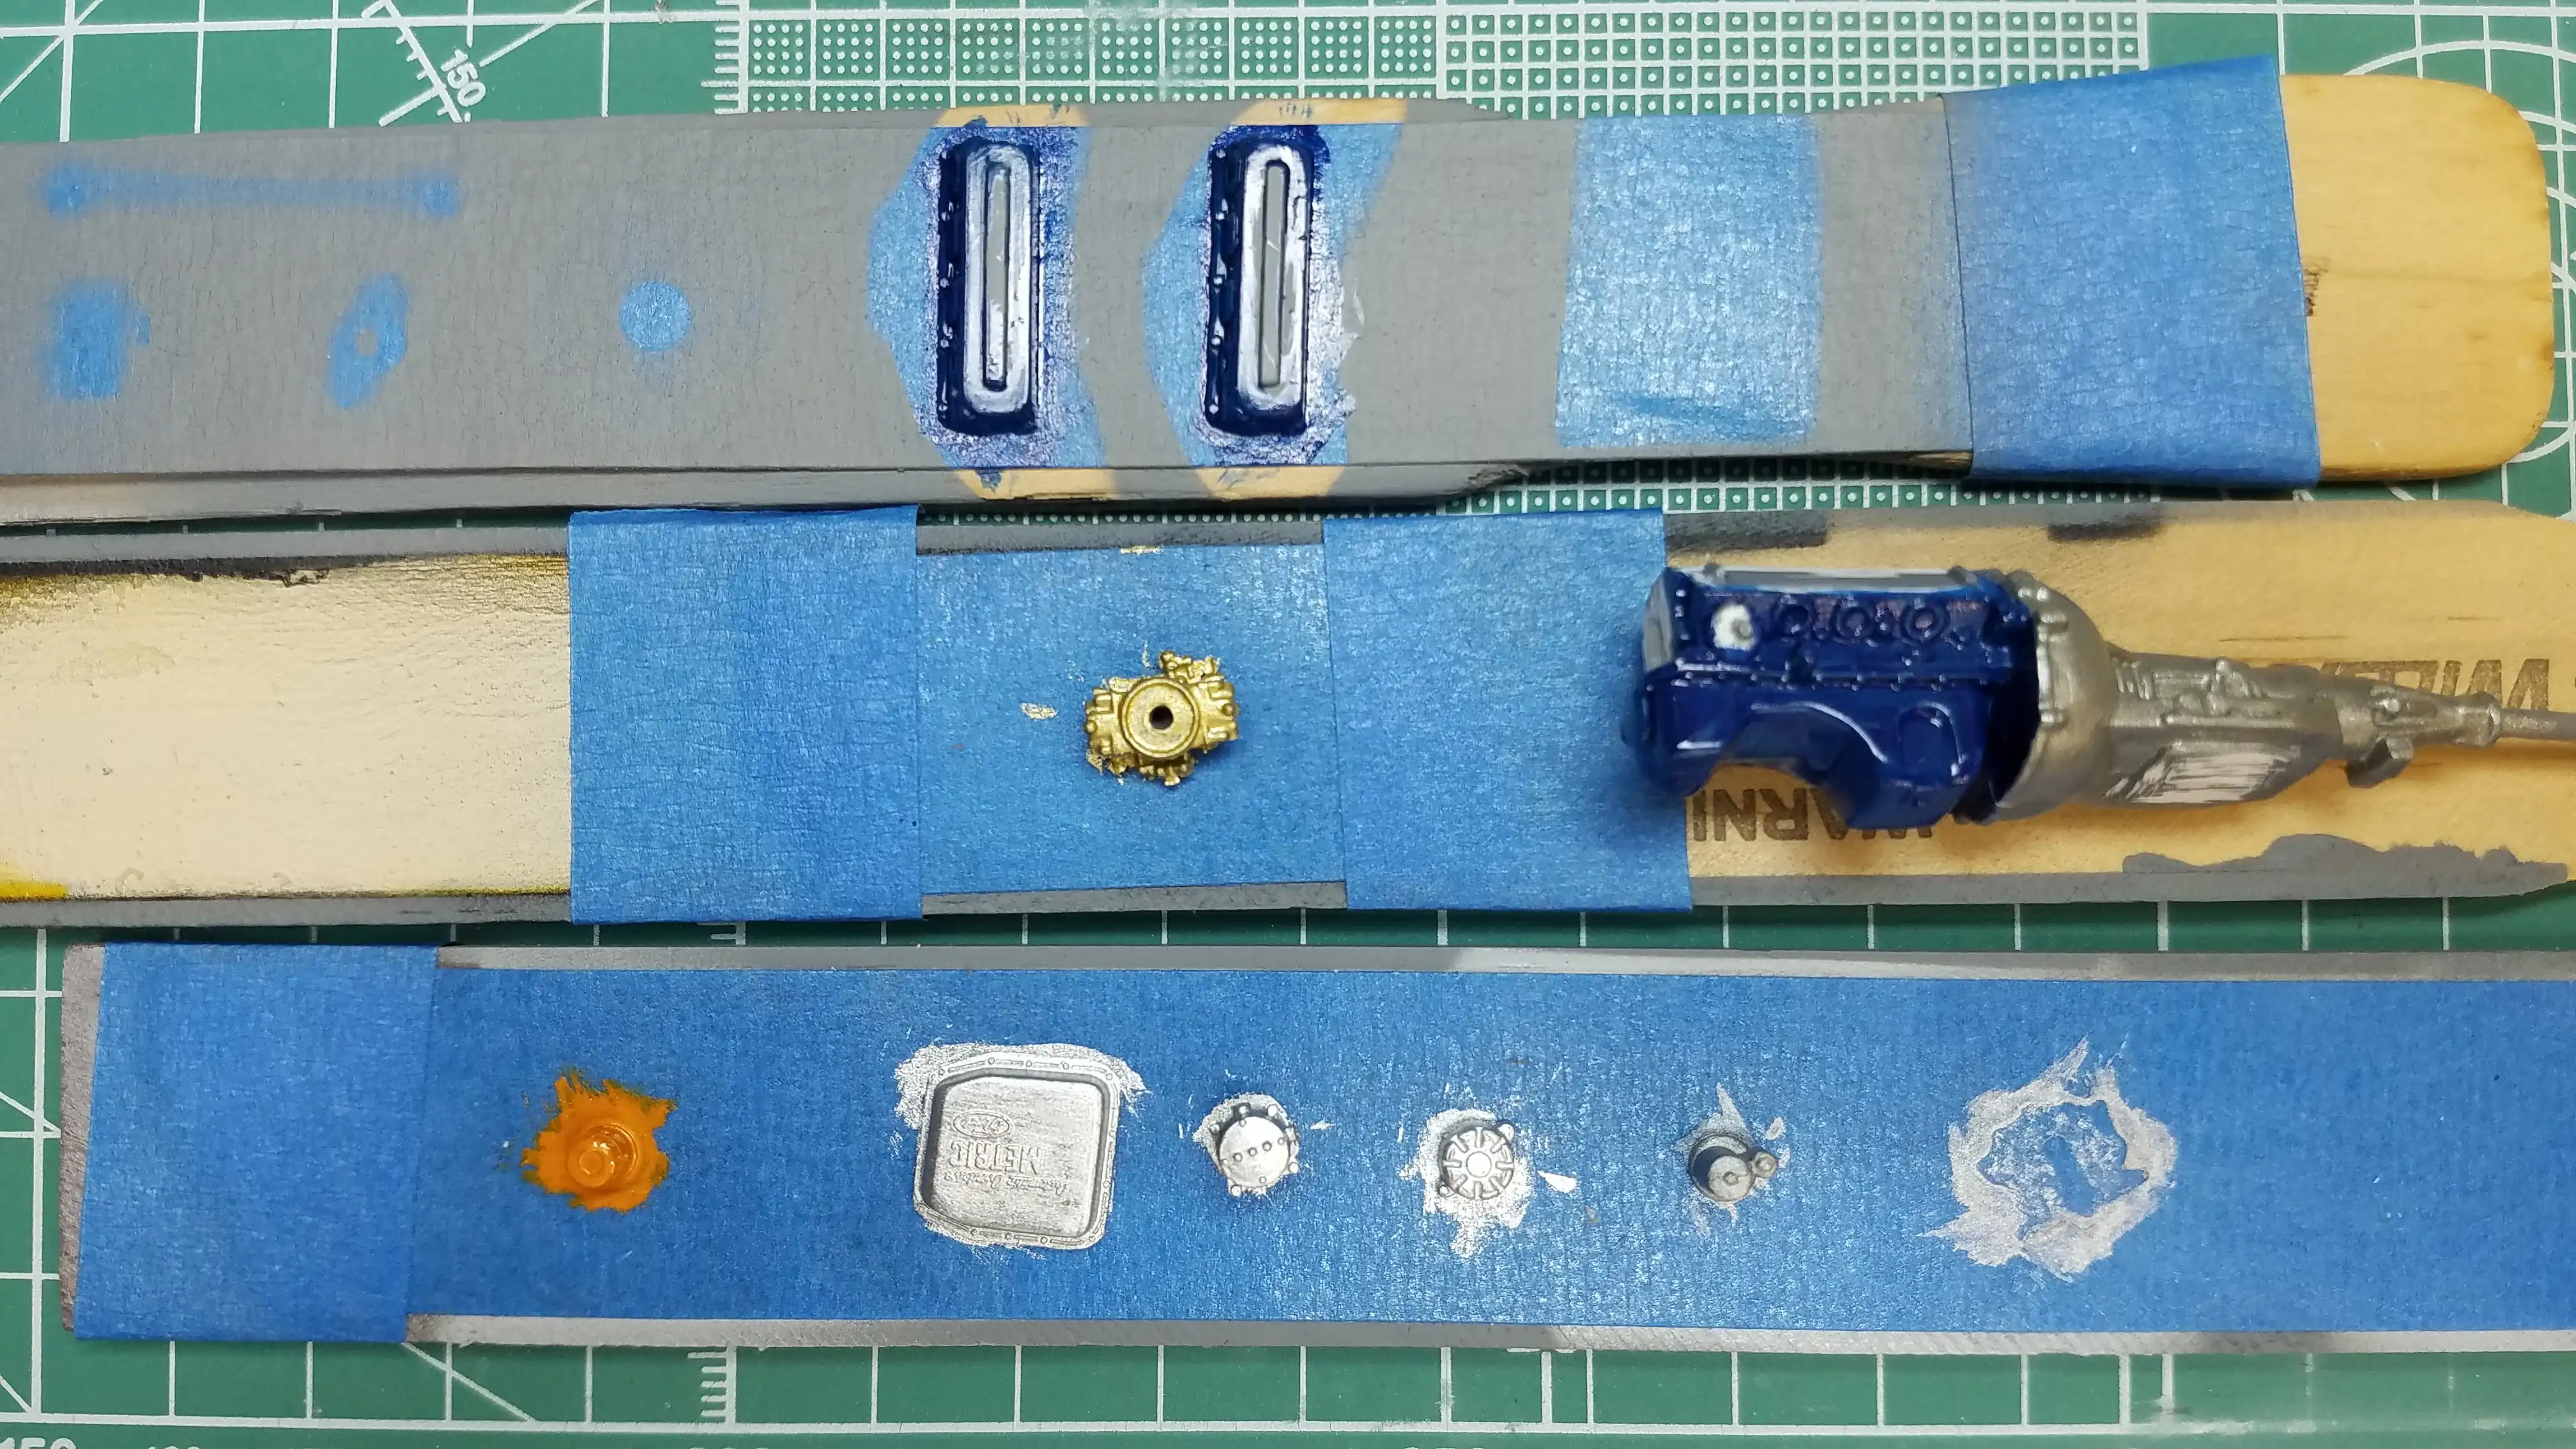 Painting the engine
I've started painting the engine. I decided to use Testors Model Master GP00473 Ford/GM Blue for the block and heads, Testors Model Master 4679 Steel for the transmission. The oil filter is Tamiya X-6 Orange (I guess it's a Fram filter). Before painting I stripped the chrome from many of these parts. For stripping chrome I use Dettol Antiseptic Liquid.
Dettol is available on eBay at: Dettol Antiseptic Disinfectant Liquid 750ml Pack of 1
Using Dettol is none toxic and smells nice. It strips the chrome from parts, depending on size, in approximately 24-hours. I then use warm water and a toothbrush to clean the parts.
The transmission fluid Cover, Steering pump and alternator is painted with Tamiya X-11 Chrome Silver. The starter is Testors Model Master 4679 Steel and the water pump (not on this picture) is in Tamiya XF-16 Flat Aluminum. I decided to do the carburetor in Tamiya X-12 Gold Leaf.
Photo 013
Click/tap photo to enlarge
 Distributor is assembled
The spark plug wires and boots have been glued to the distributor top plate of the Detail Master DM-3201 distributor kit.
Photo 014
Click/tap photo to enlarge
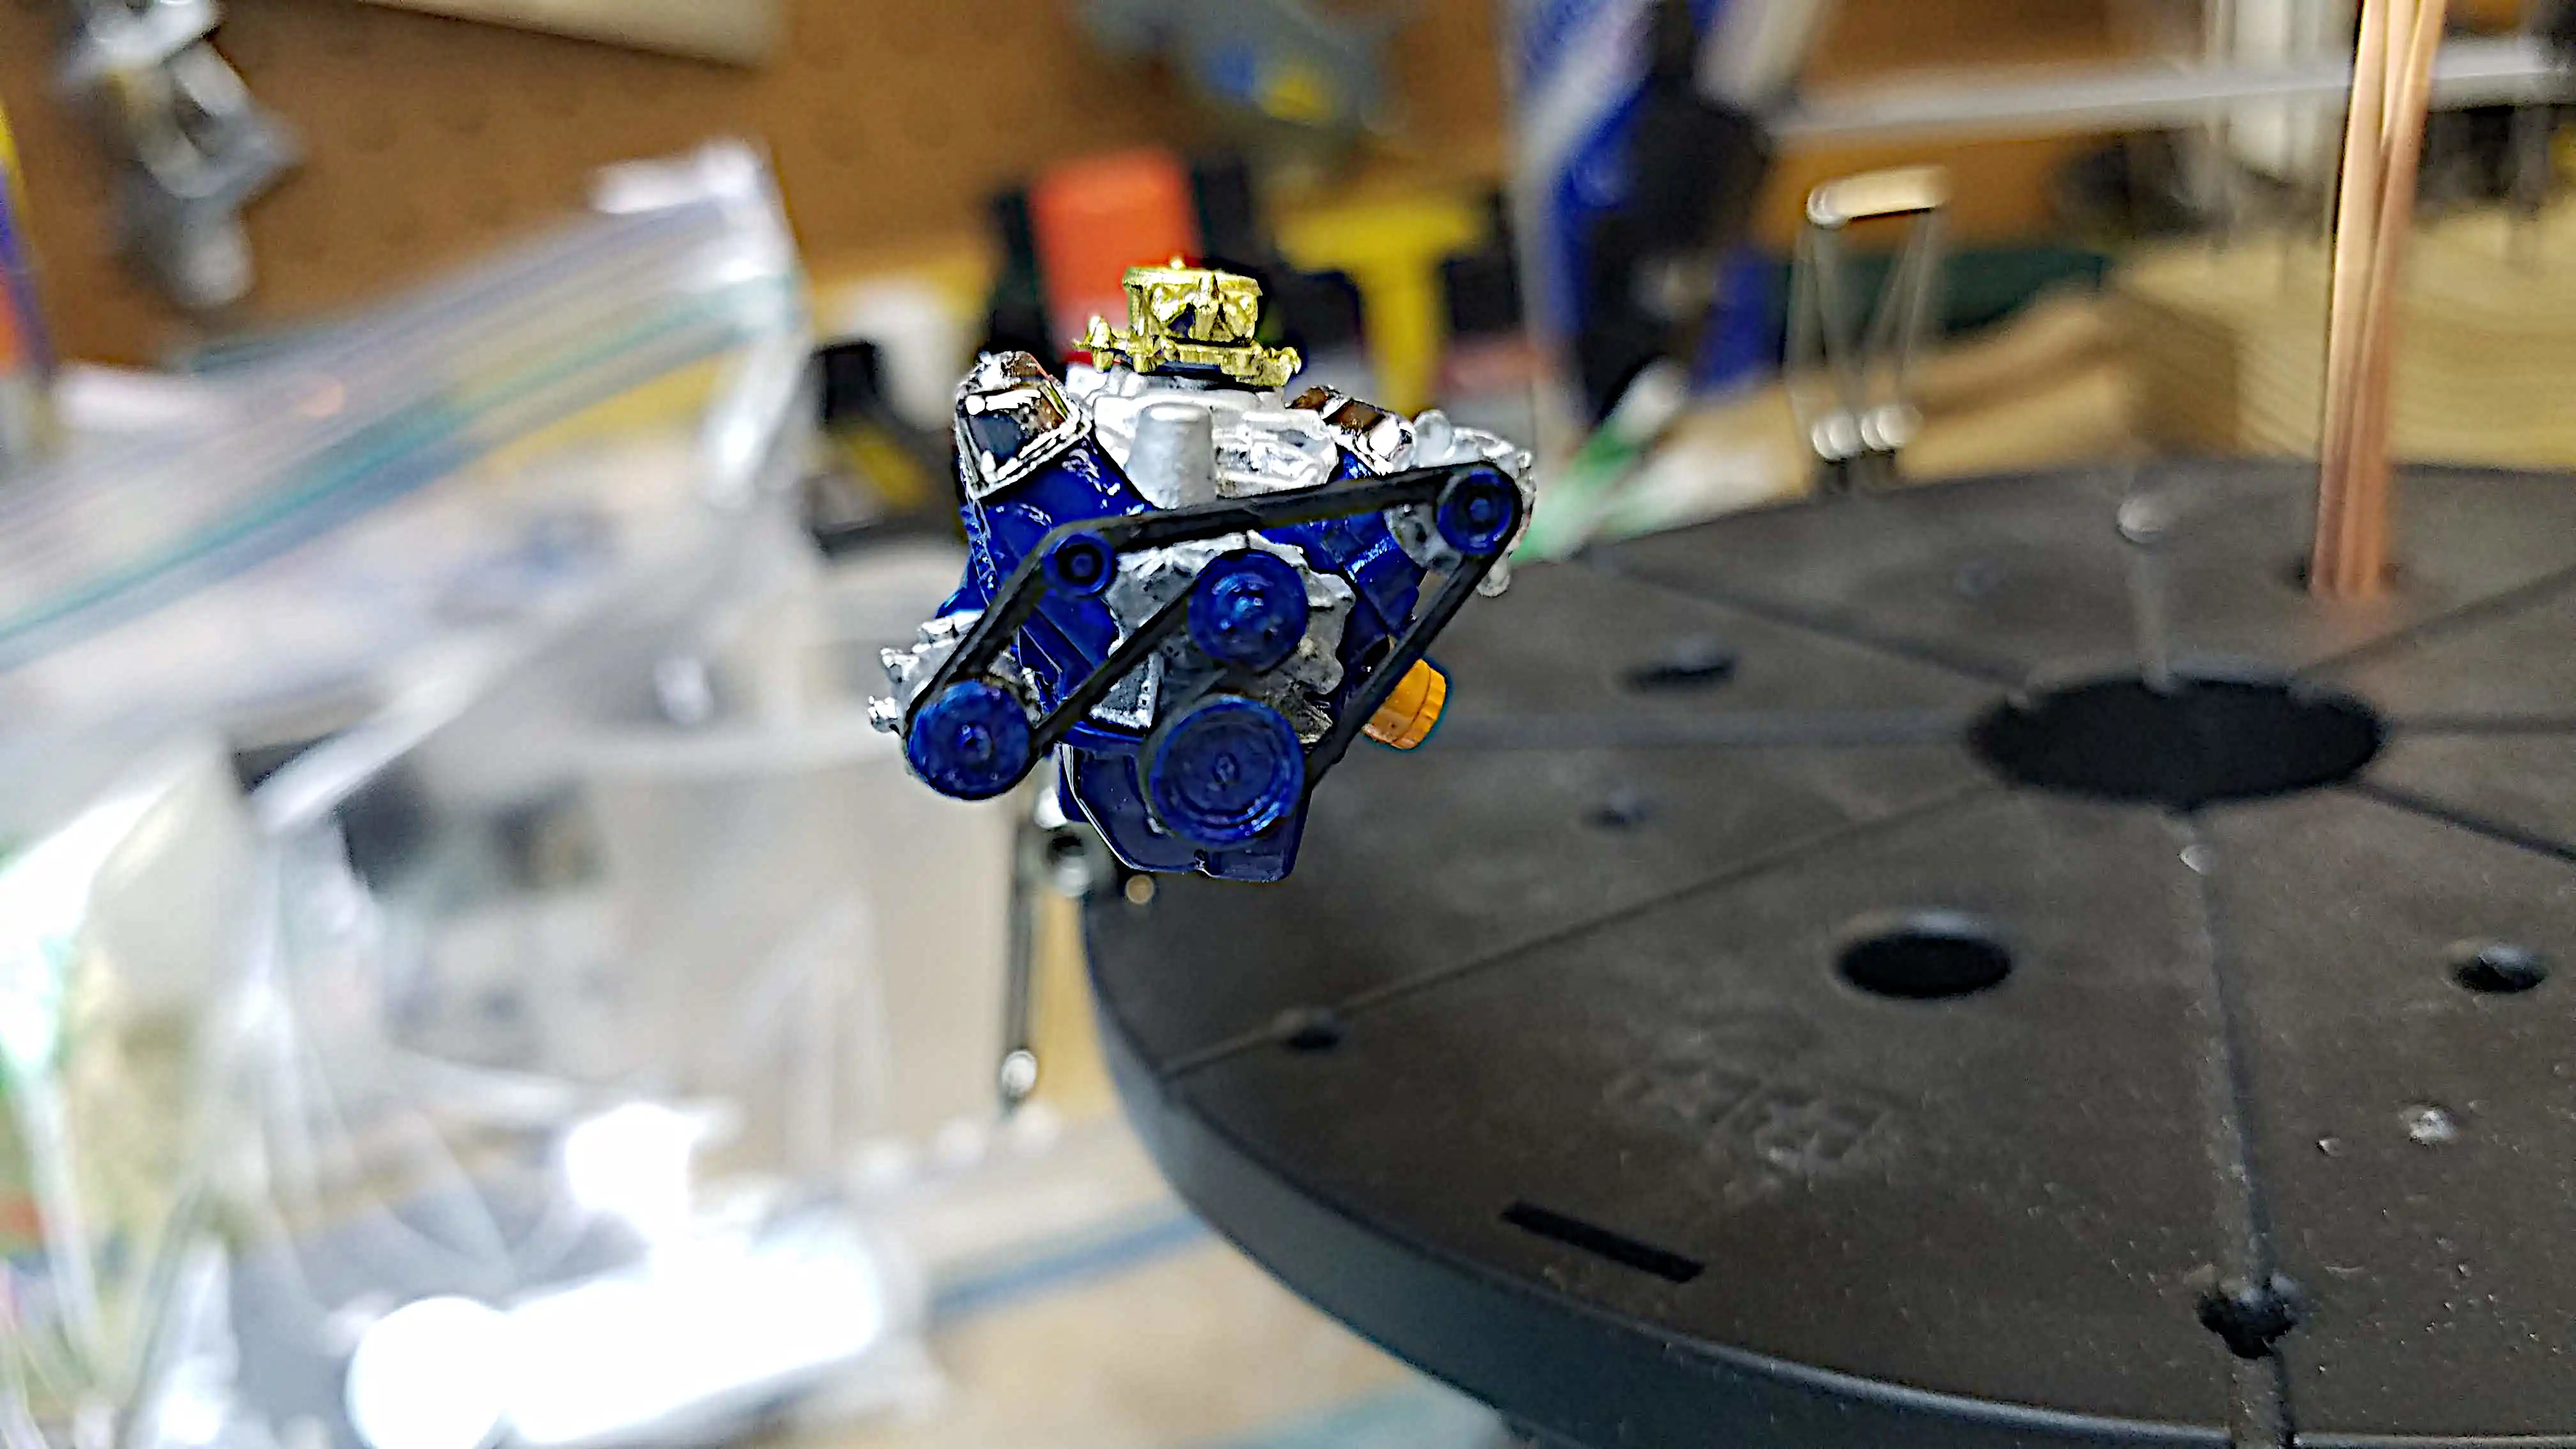
 Engine almost finished
The next several photos are of the almost finished engine. The starter, the steering pump, the valve covers and the carburetor is glued in place.
Photo 015
Click/tap photo to enlarge
 Engine almost finished
The fan belt and pulleys have been installed.
Photo 016
Click/tap photo to enlarge
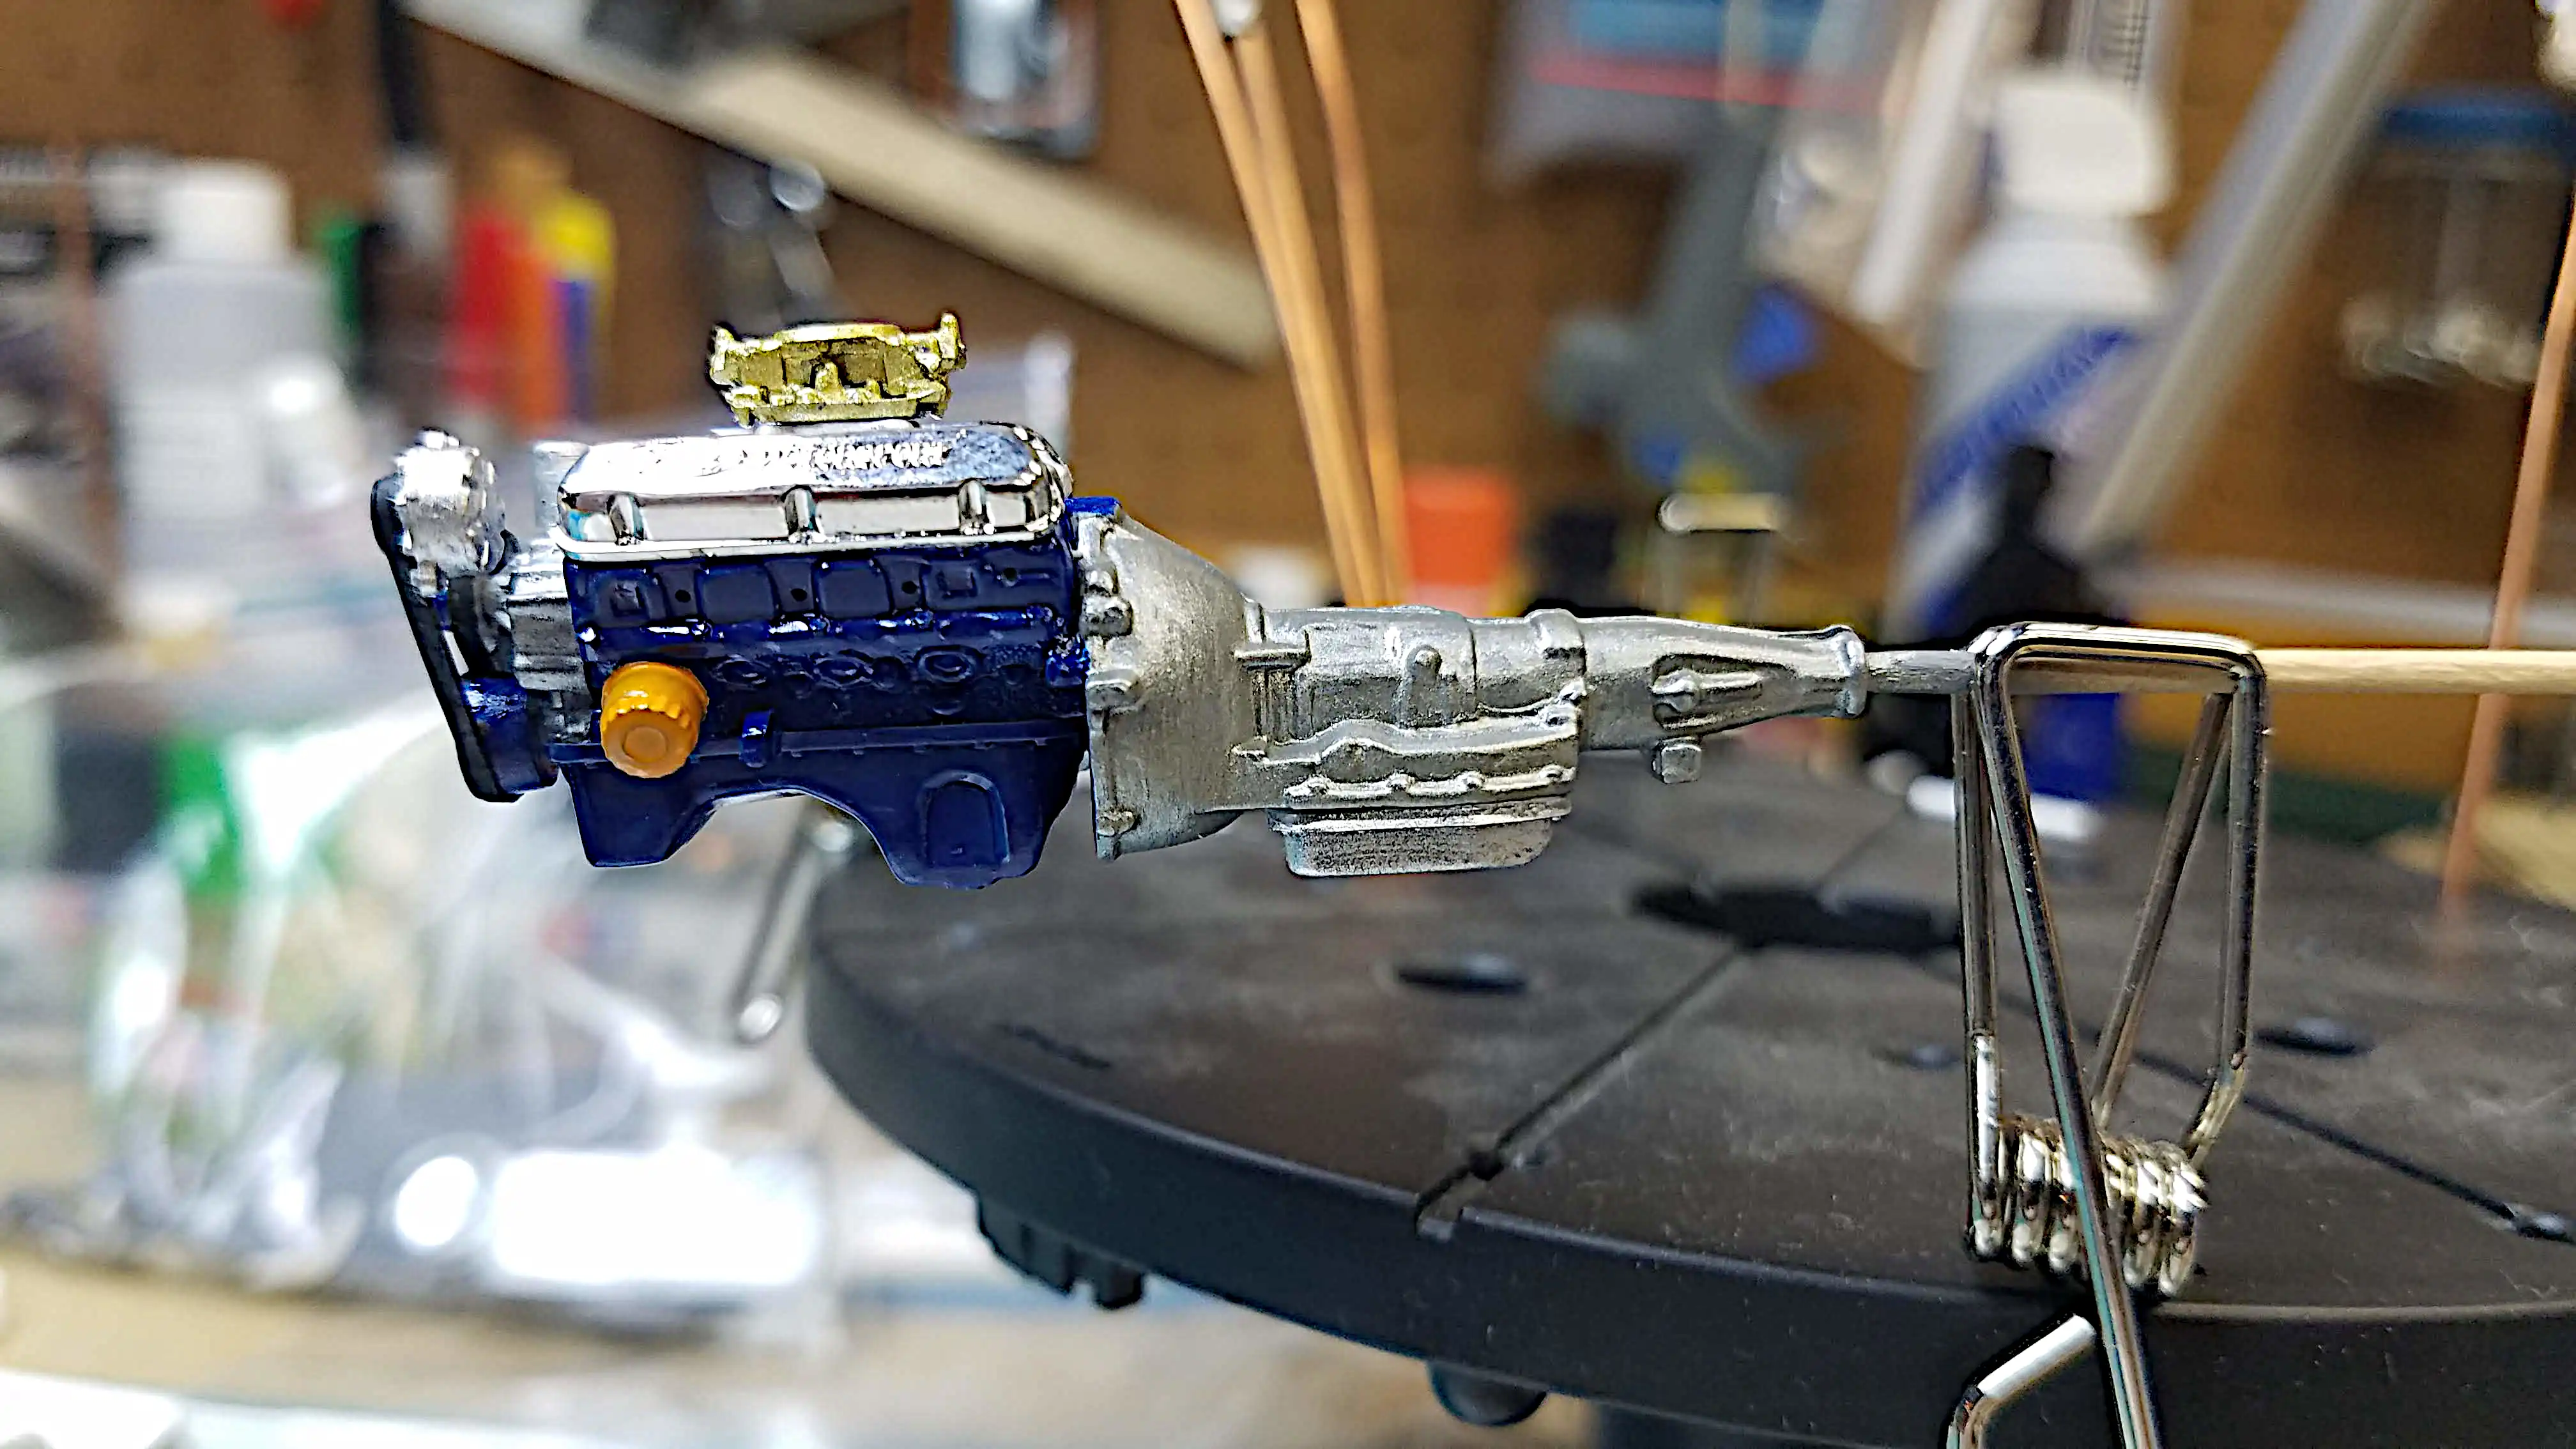 Assembling the engine
The alternator and the oil filter are glued in place. As mentioned before, I did the oil filter in orange, only to add some color to the engine. Since Fram Filters are orange, and I believe the current Fram filters have a black top where the filter wrench knurls are; however, I'm leaving this one totally orange. I need to find a decal from Fram to put on the filter. (It may surprise you, but I'm not a fan of Fram filters. I prefer Bosch with a backflow valve). But that's another story.
Photo 017
Click/tap photo to enlarge
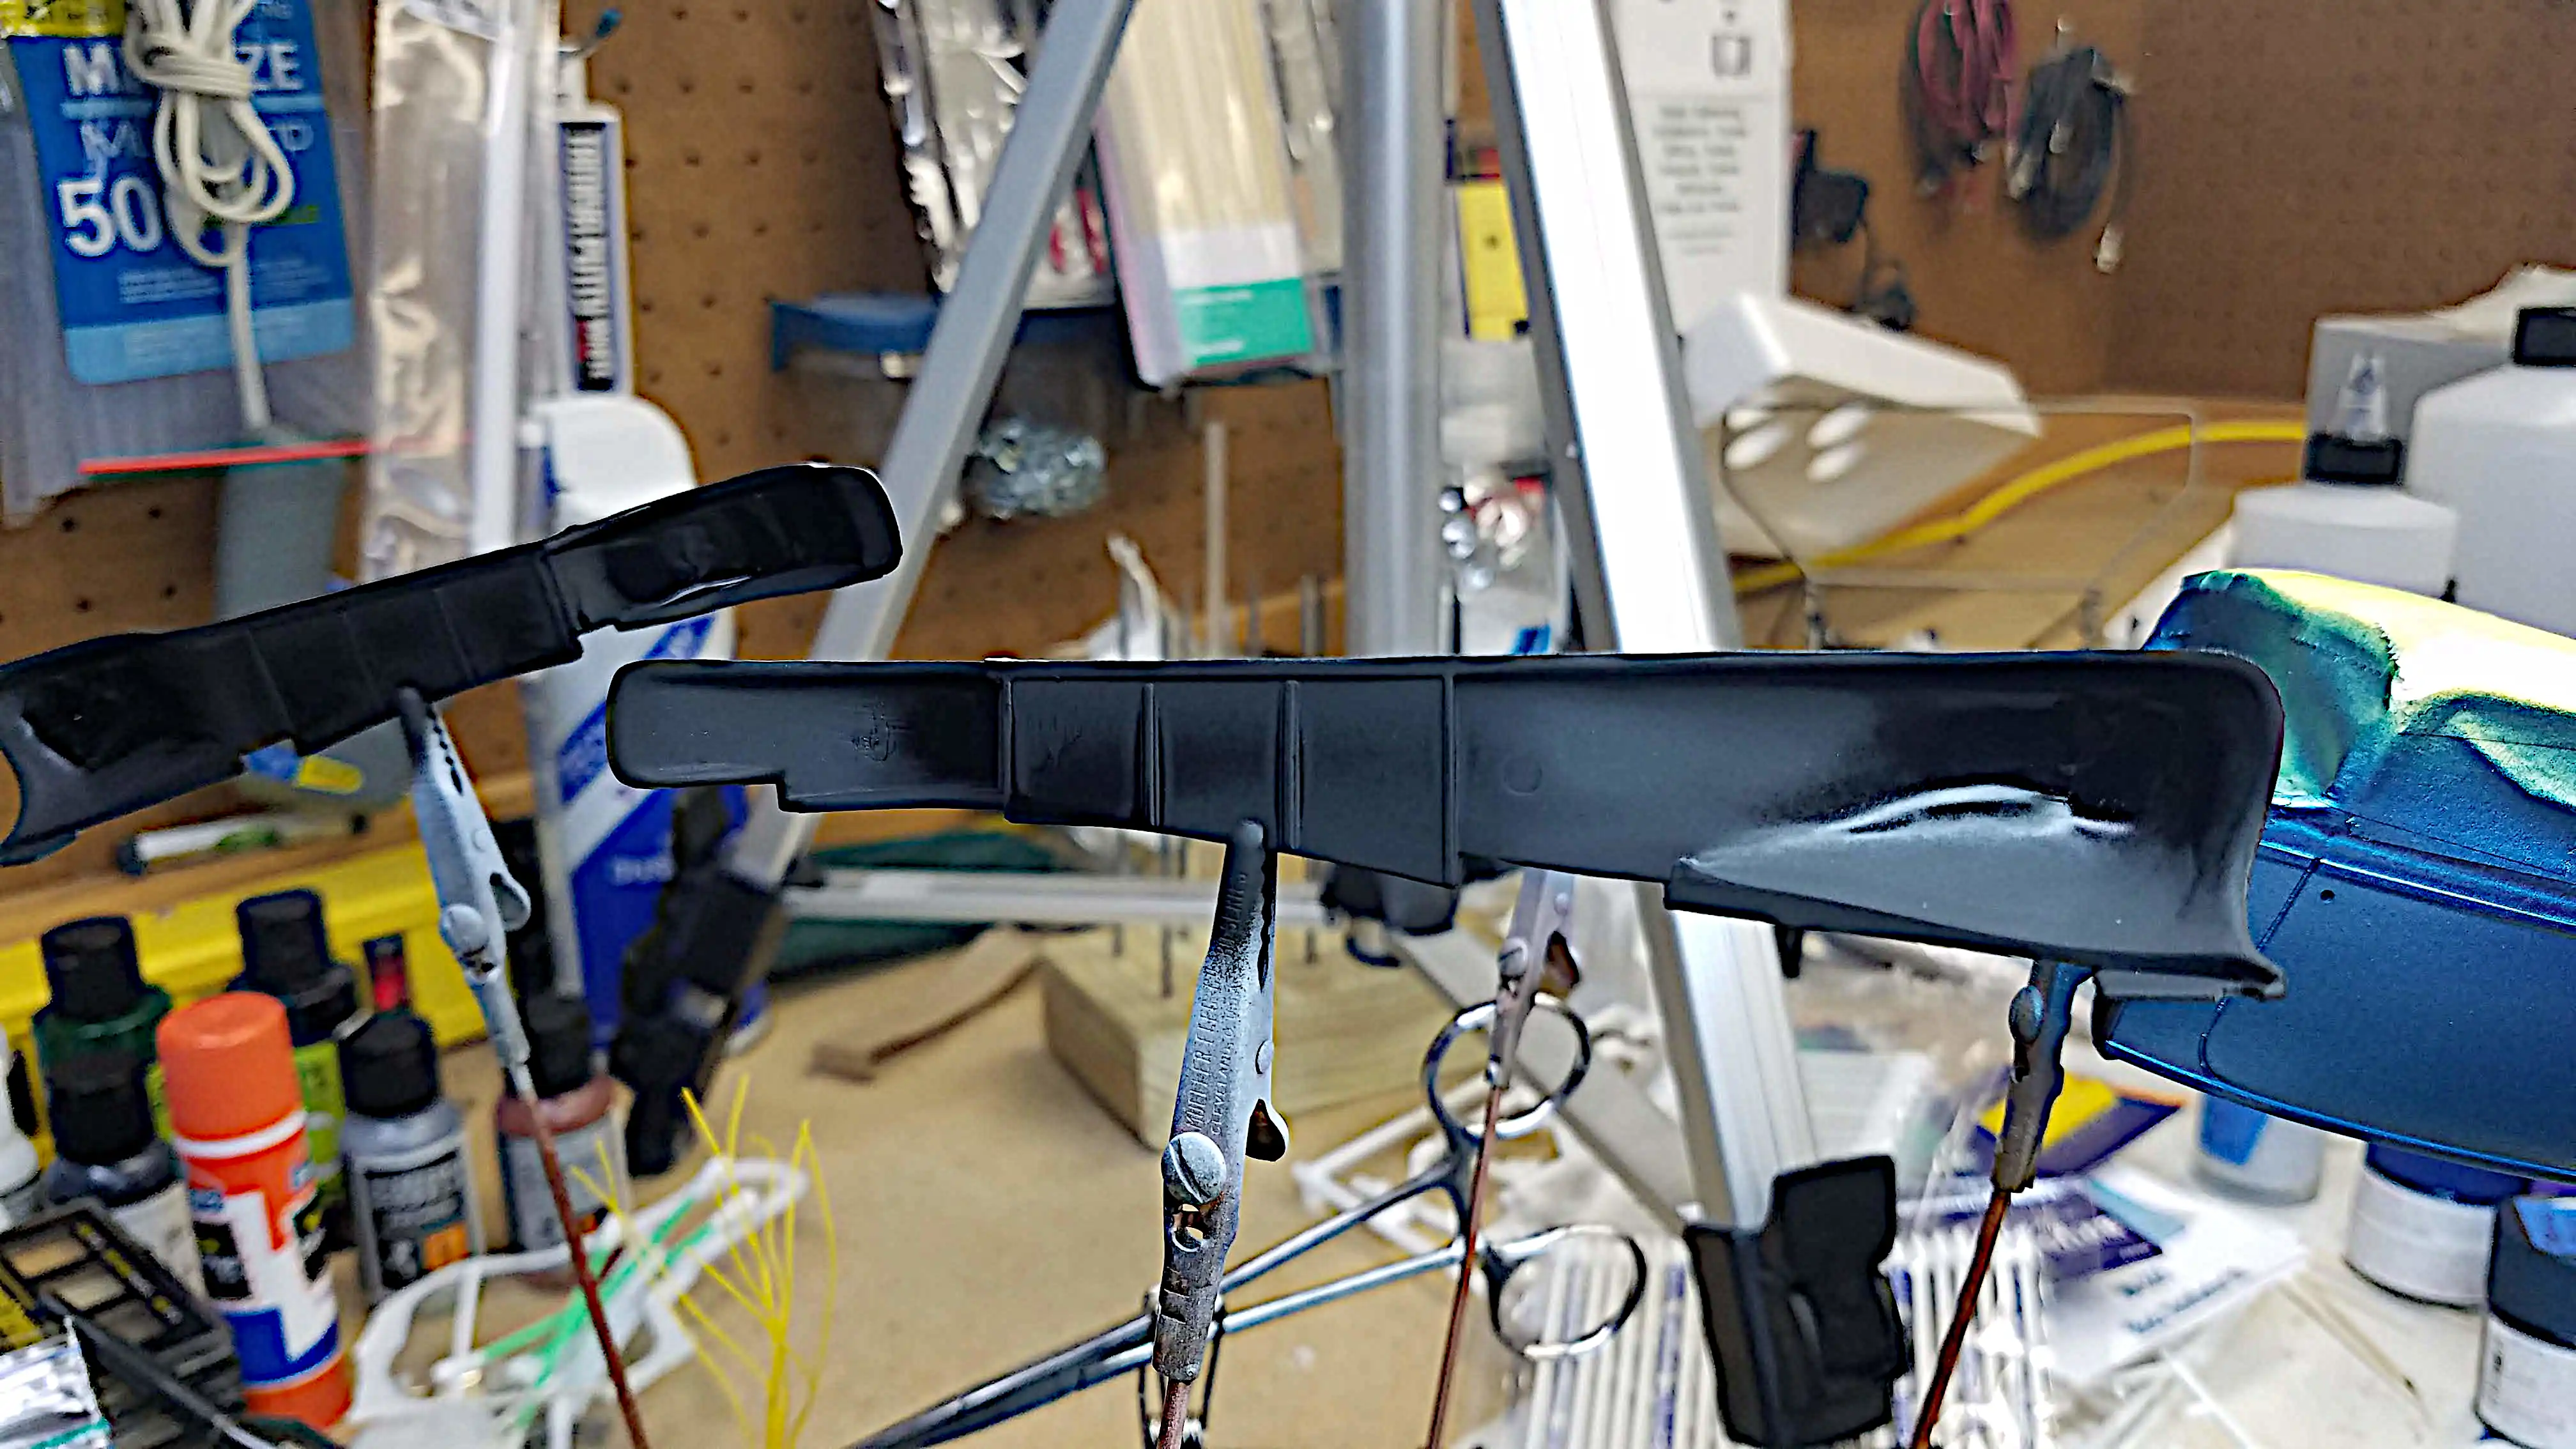
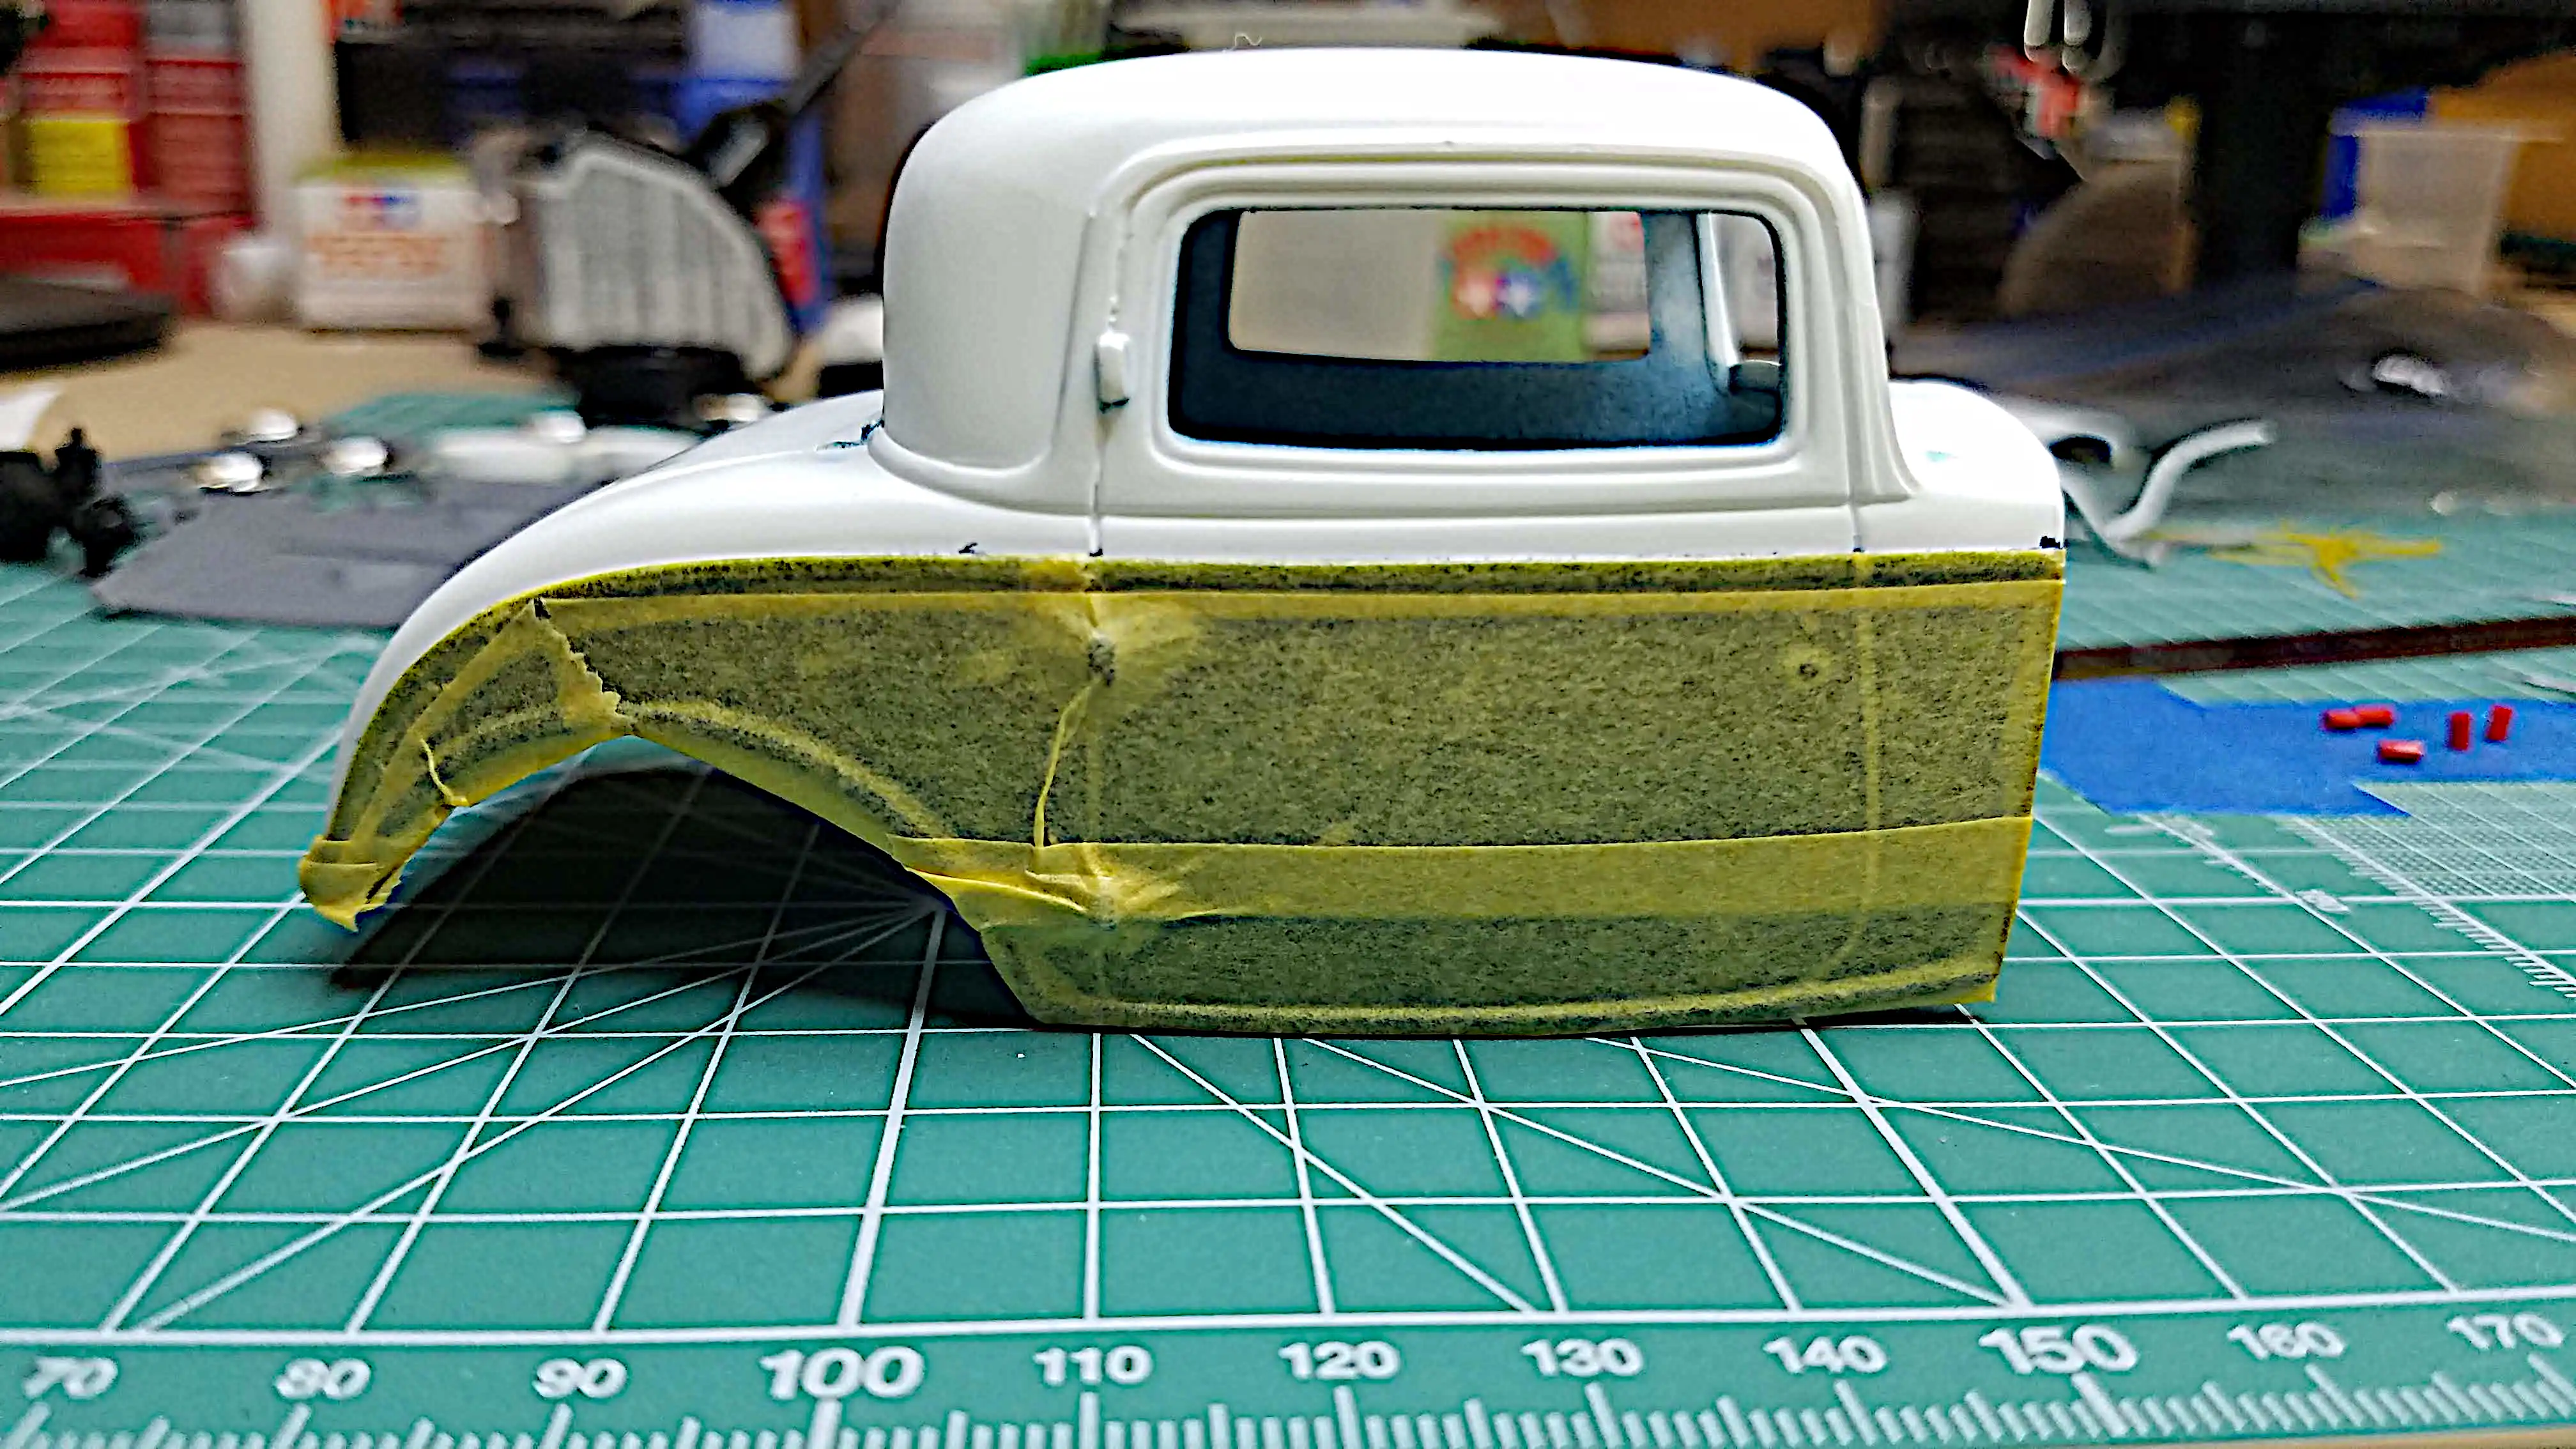
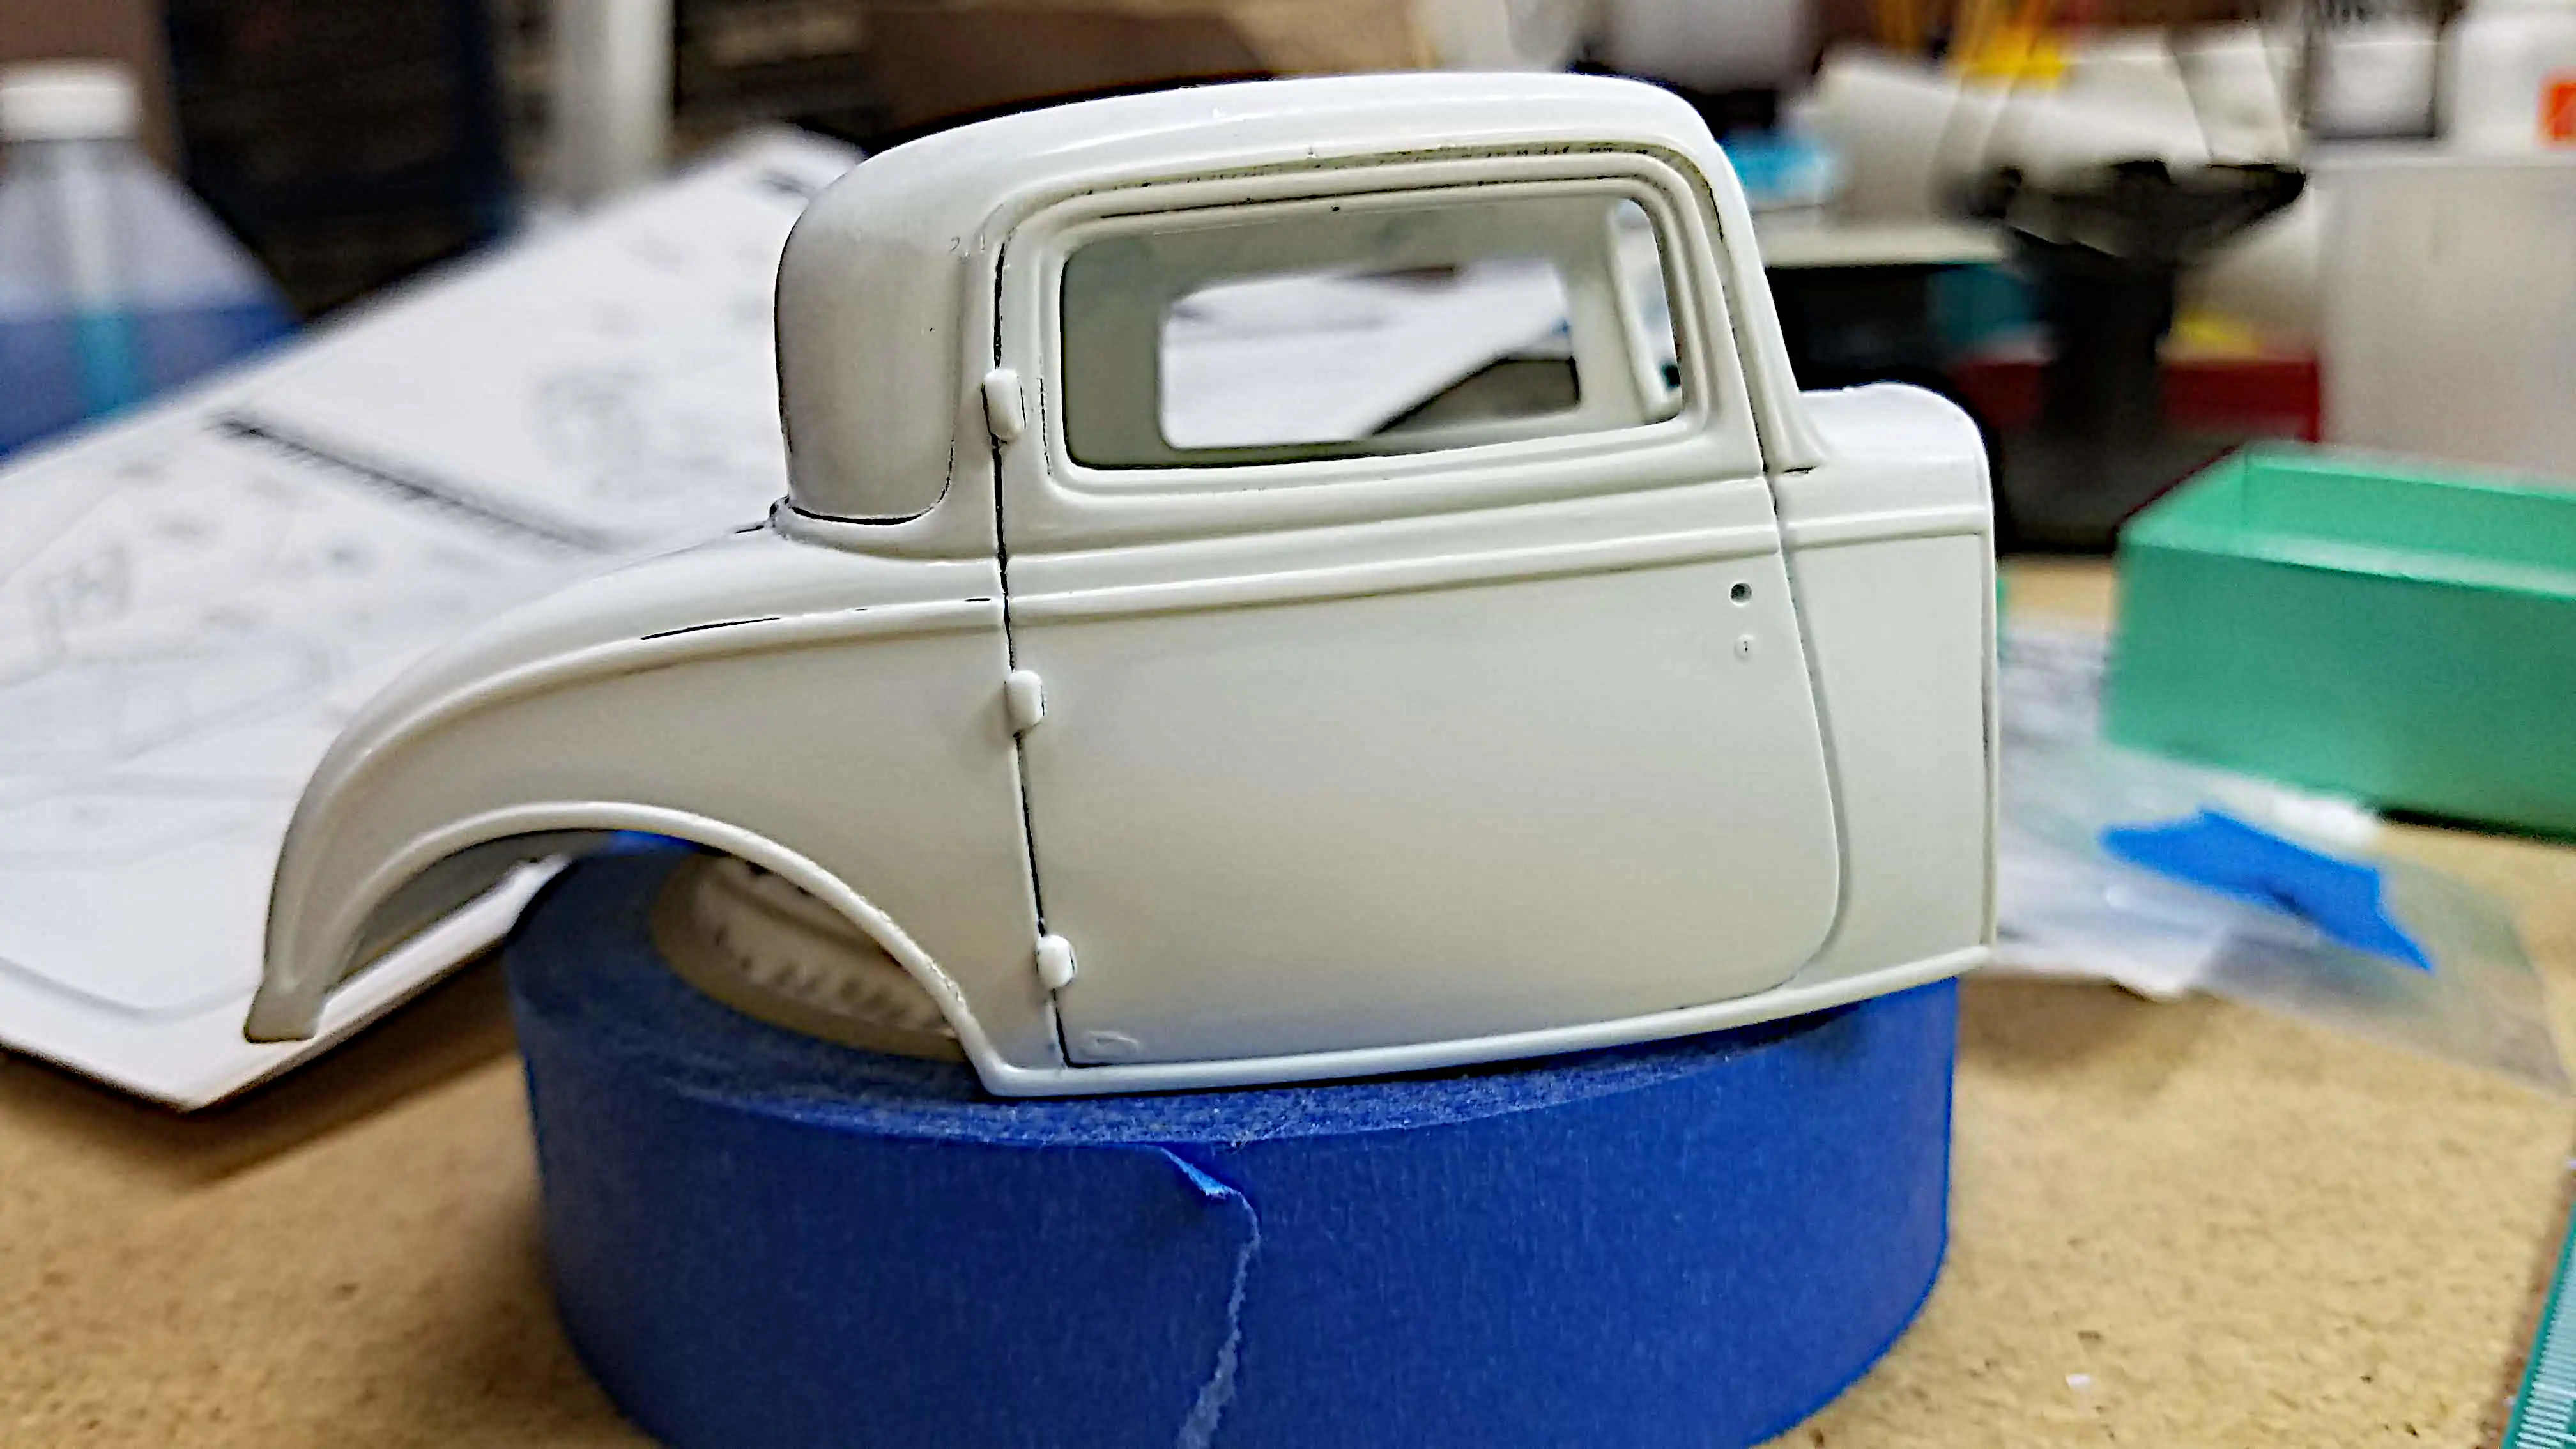
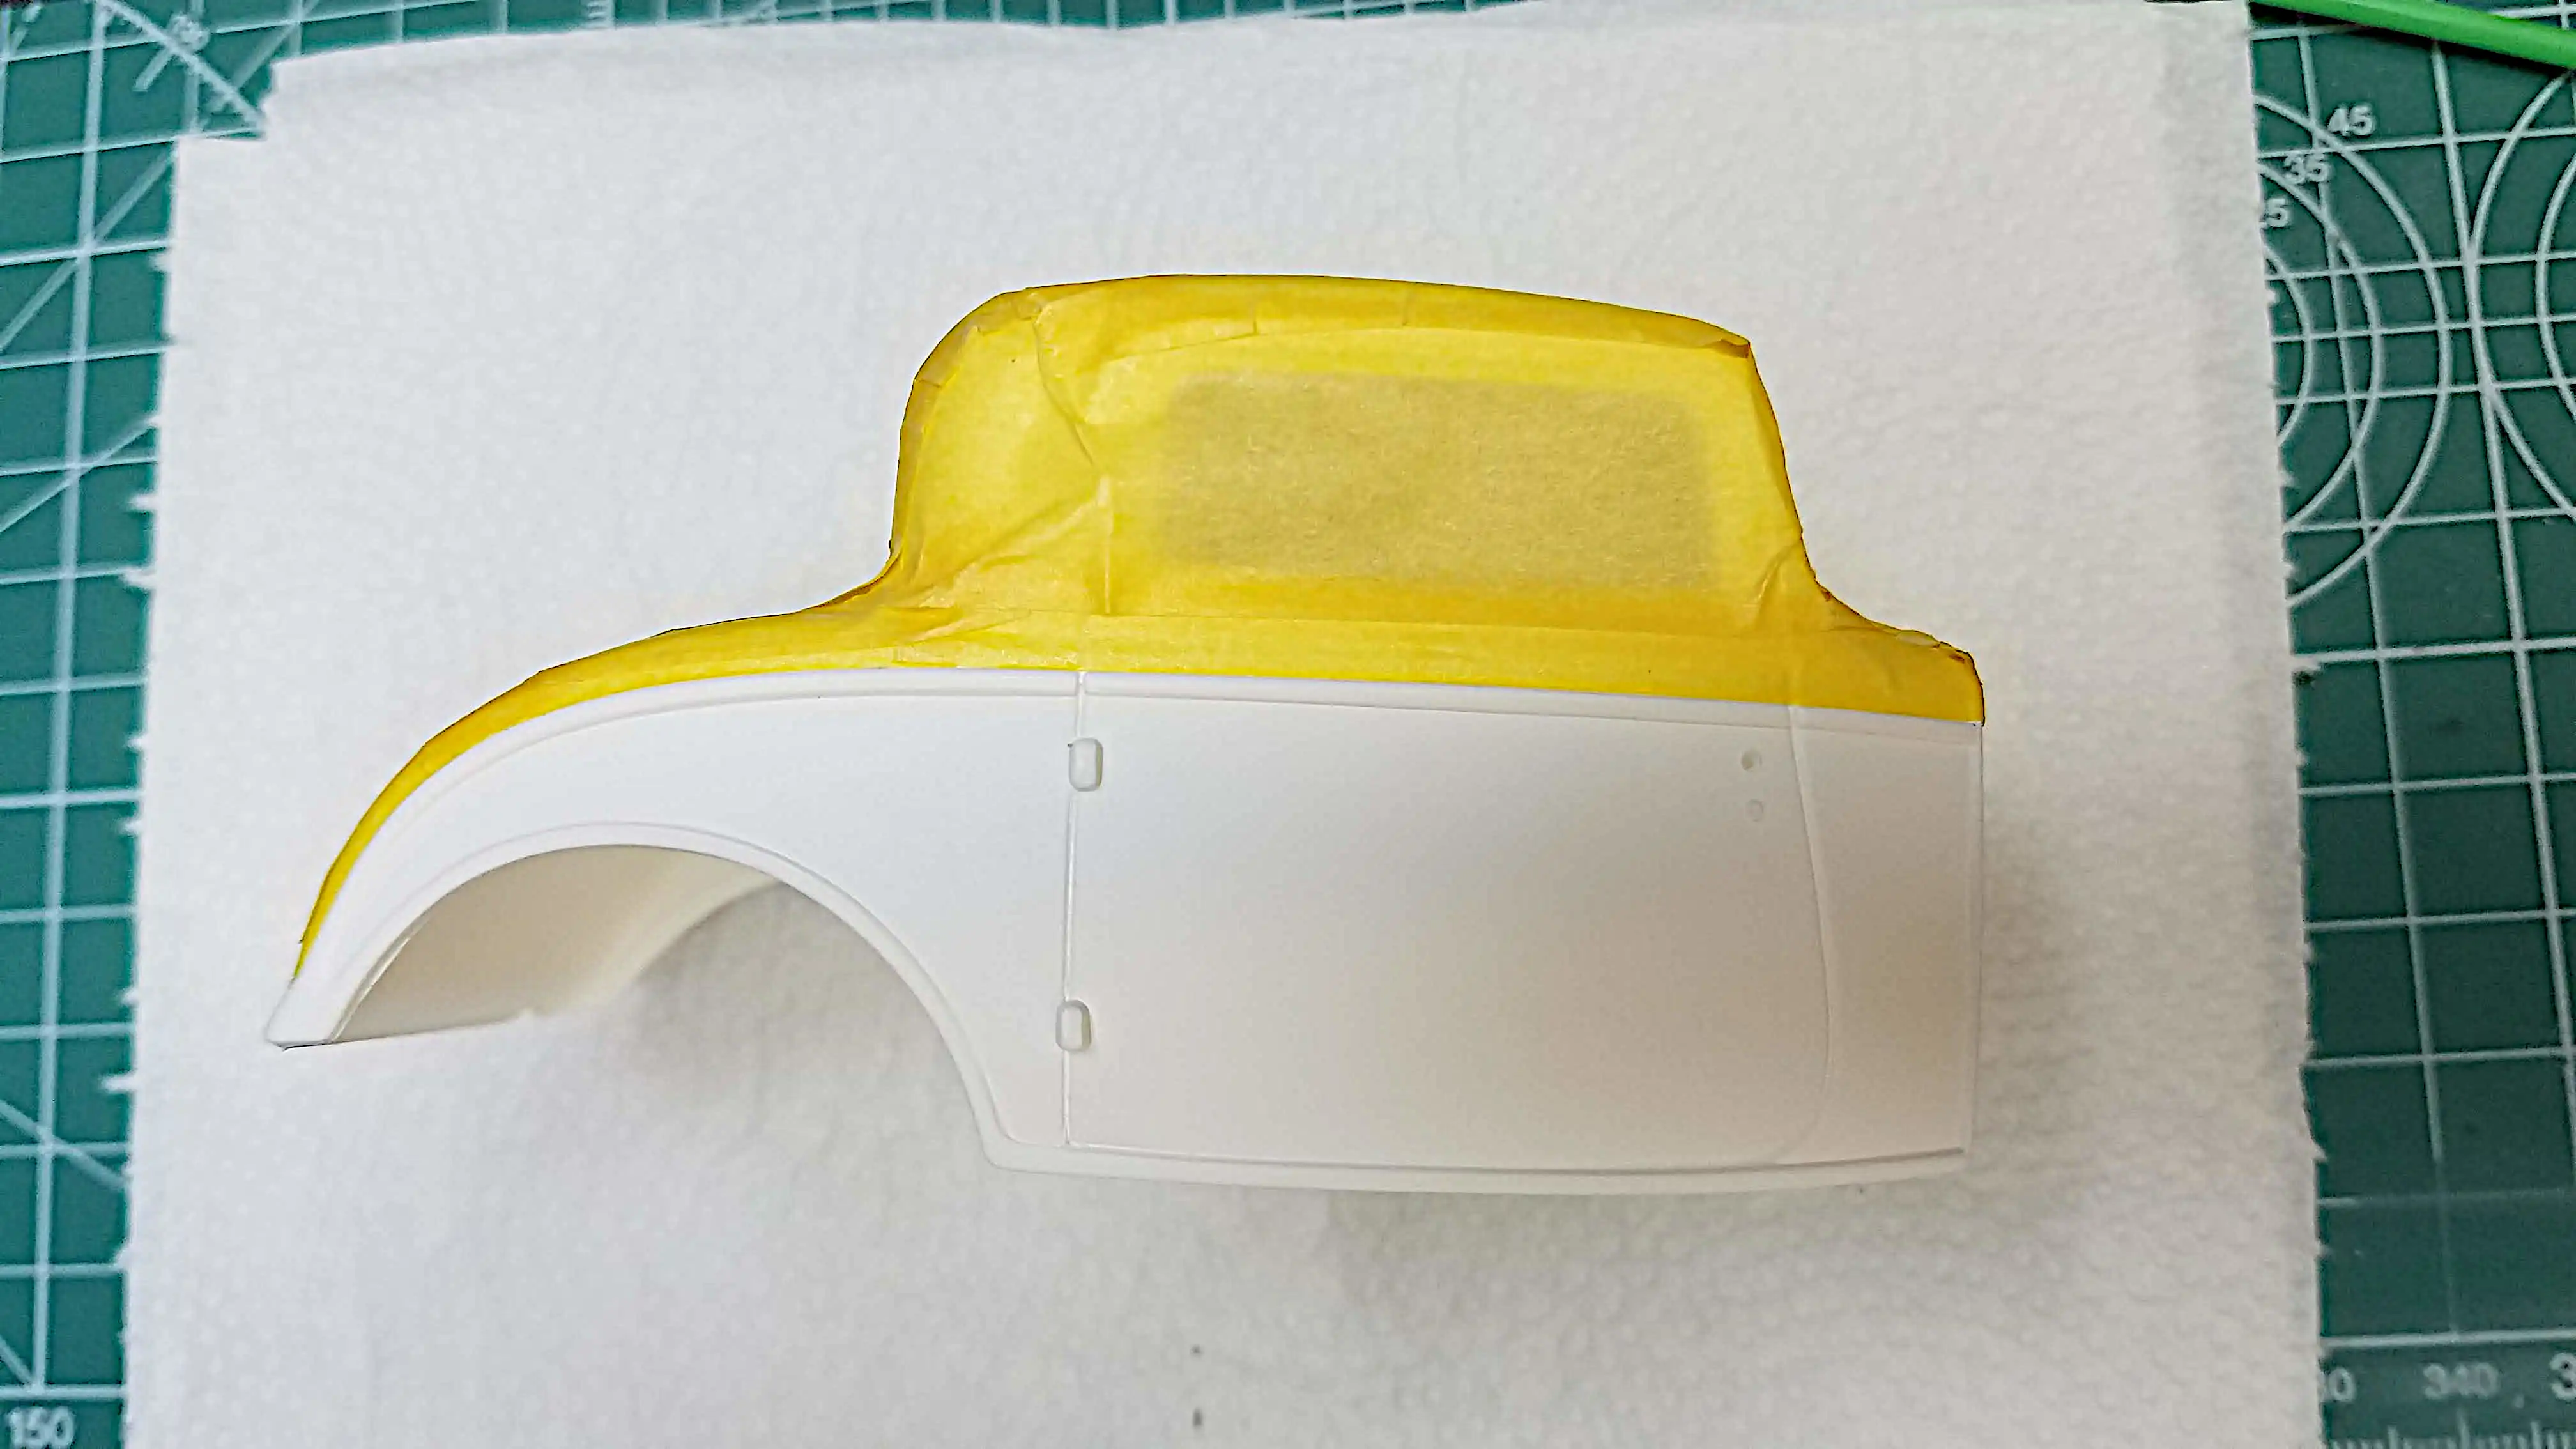 Body is masked for painting
The body is masked for painting the bottom portion.
Photo 018
Click/tap photo to enlarge
 Body is masked for painting
The rear of the body is masked except for a strip along the bottom edge.
Photo 019
Click/tap photo to enlarge
 Body is masked for painting
The other side (left side) of the body is masked.
Photo 020
Click/tap photo to enlarge
 Bottom half of body painted
The bottom half of the body is airbrushed with Tamiya X-13 Metallic Blue.
Photo 021
Click/tap photo to enlarge
 Bottom half of body painted
The bottom half of the body is airbrushed with Tamiya X-13 Metallic Blue.
Photo 022
Click/tap photo to enlarge
 Bottom side of fenders painted
The bottom side of the fenders is airbrushed with Tamiya XF-1 Flat Black. The top of the fenders will be Tamiya X-1 Gloss Black, and the running boards will be Tamiya XF-85 Rubber Black.
Photo 023
Click/tap photo to enlarge
 Exhaust pipes and mufflers painted
The exhaust pipes and mufflers are airbrushed with Tamiya XF-16 Flat Aluminum.
Photo 024
Click/tap photo to enlarge
 The frame is painted
The frame is airbrushed with Tamiya XF-1 Flat Black.
Photo 025
Click/tap photo to enlarge
 Hood edges get 2nd coat
The hood edges received a 2nd coat of Tamiya X-13 Metallic Blue.
Photo 026
Click/tap photo to enlarge
 Body receives a 2nd coat
The body received a 2nd coat of Tamiya X-13 Metallic Blue. Before applying the 2nd coat, a small run that occurred during the 1st coat was sanded and smoothed.
Photo 027
Click/tap photo to enlarge
 Mask removed from the top half of the body
The masking on the top half of the body is removed. There is a small amount of bleeding under the tape, but nothing concerning.
Photo 028
Click/tap photo to enlarge
 Mask removed from the top half of the body
The masking on the top half of the body is removed. There is a small amount of bleeding under the tape, but nothing concerning.
Photo 029
Click/tap photo to enlarge
 Mask removed from the back of the body
The masking is removed from the rear of the body.
Photo 030
Click/tap photo to enlarge
 Top of fenders receive 1st coat
The fenders received a 1st coat of Tamiya X-1 Gloss Black. It looks fairly good on the photo; however, there will need to be a-bit of wet sanding and then a 2nd coat.
Photo 031
Click/tap photo to enlarge
 Spark plug wires being installed
I started installing the spark plug wires and boots.
Photo 032
Click/tap photo to enlarge
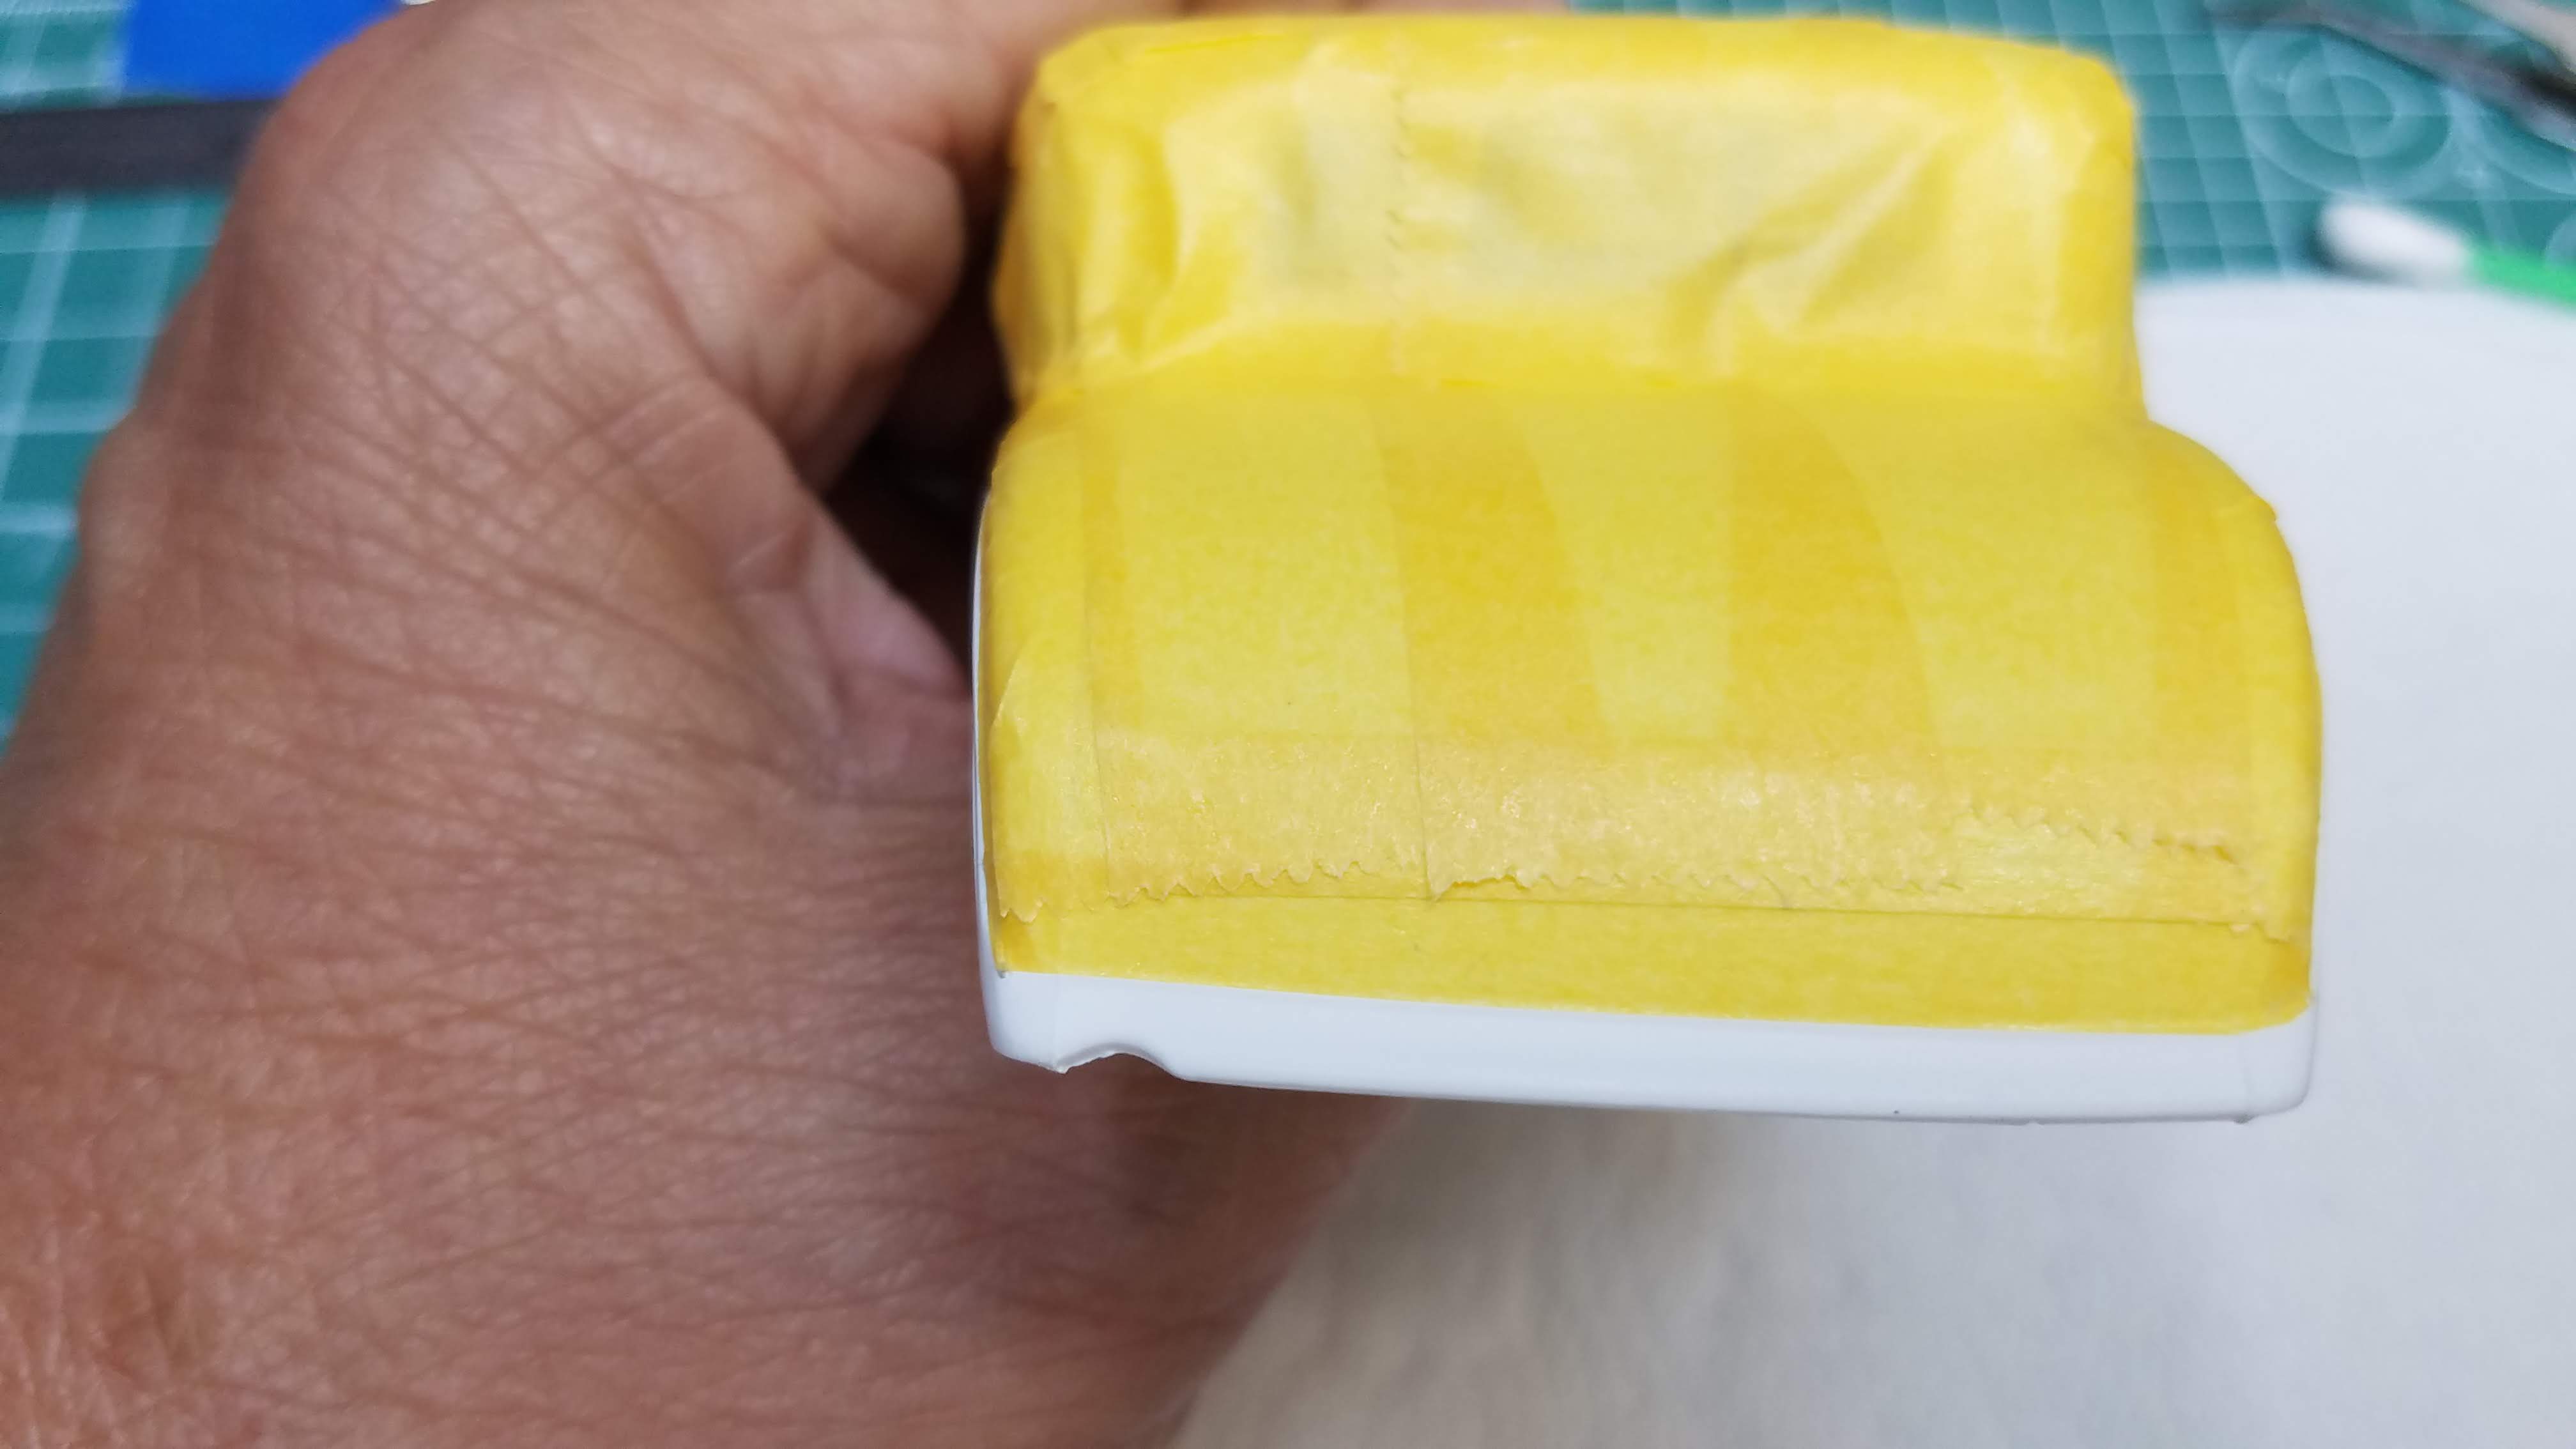
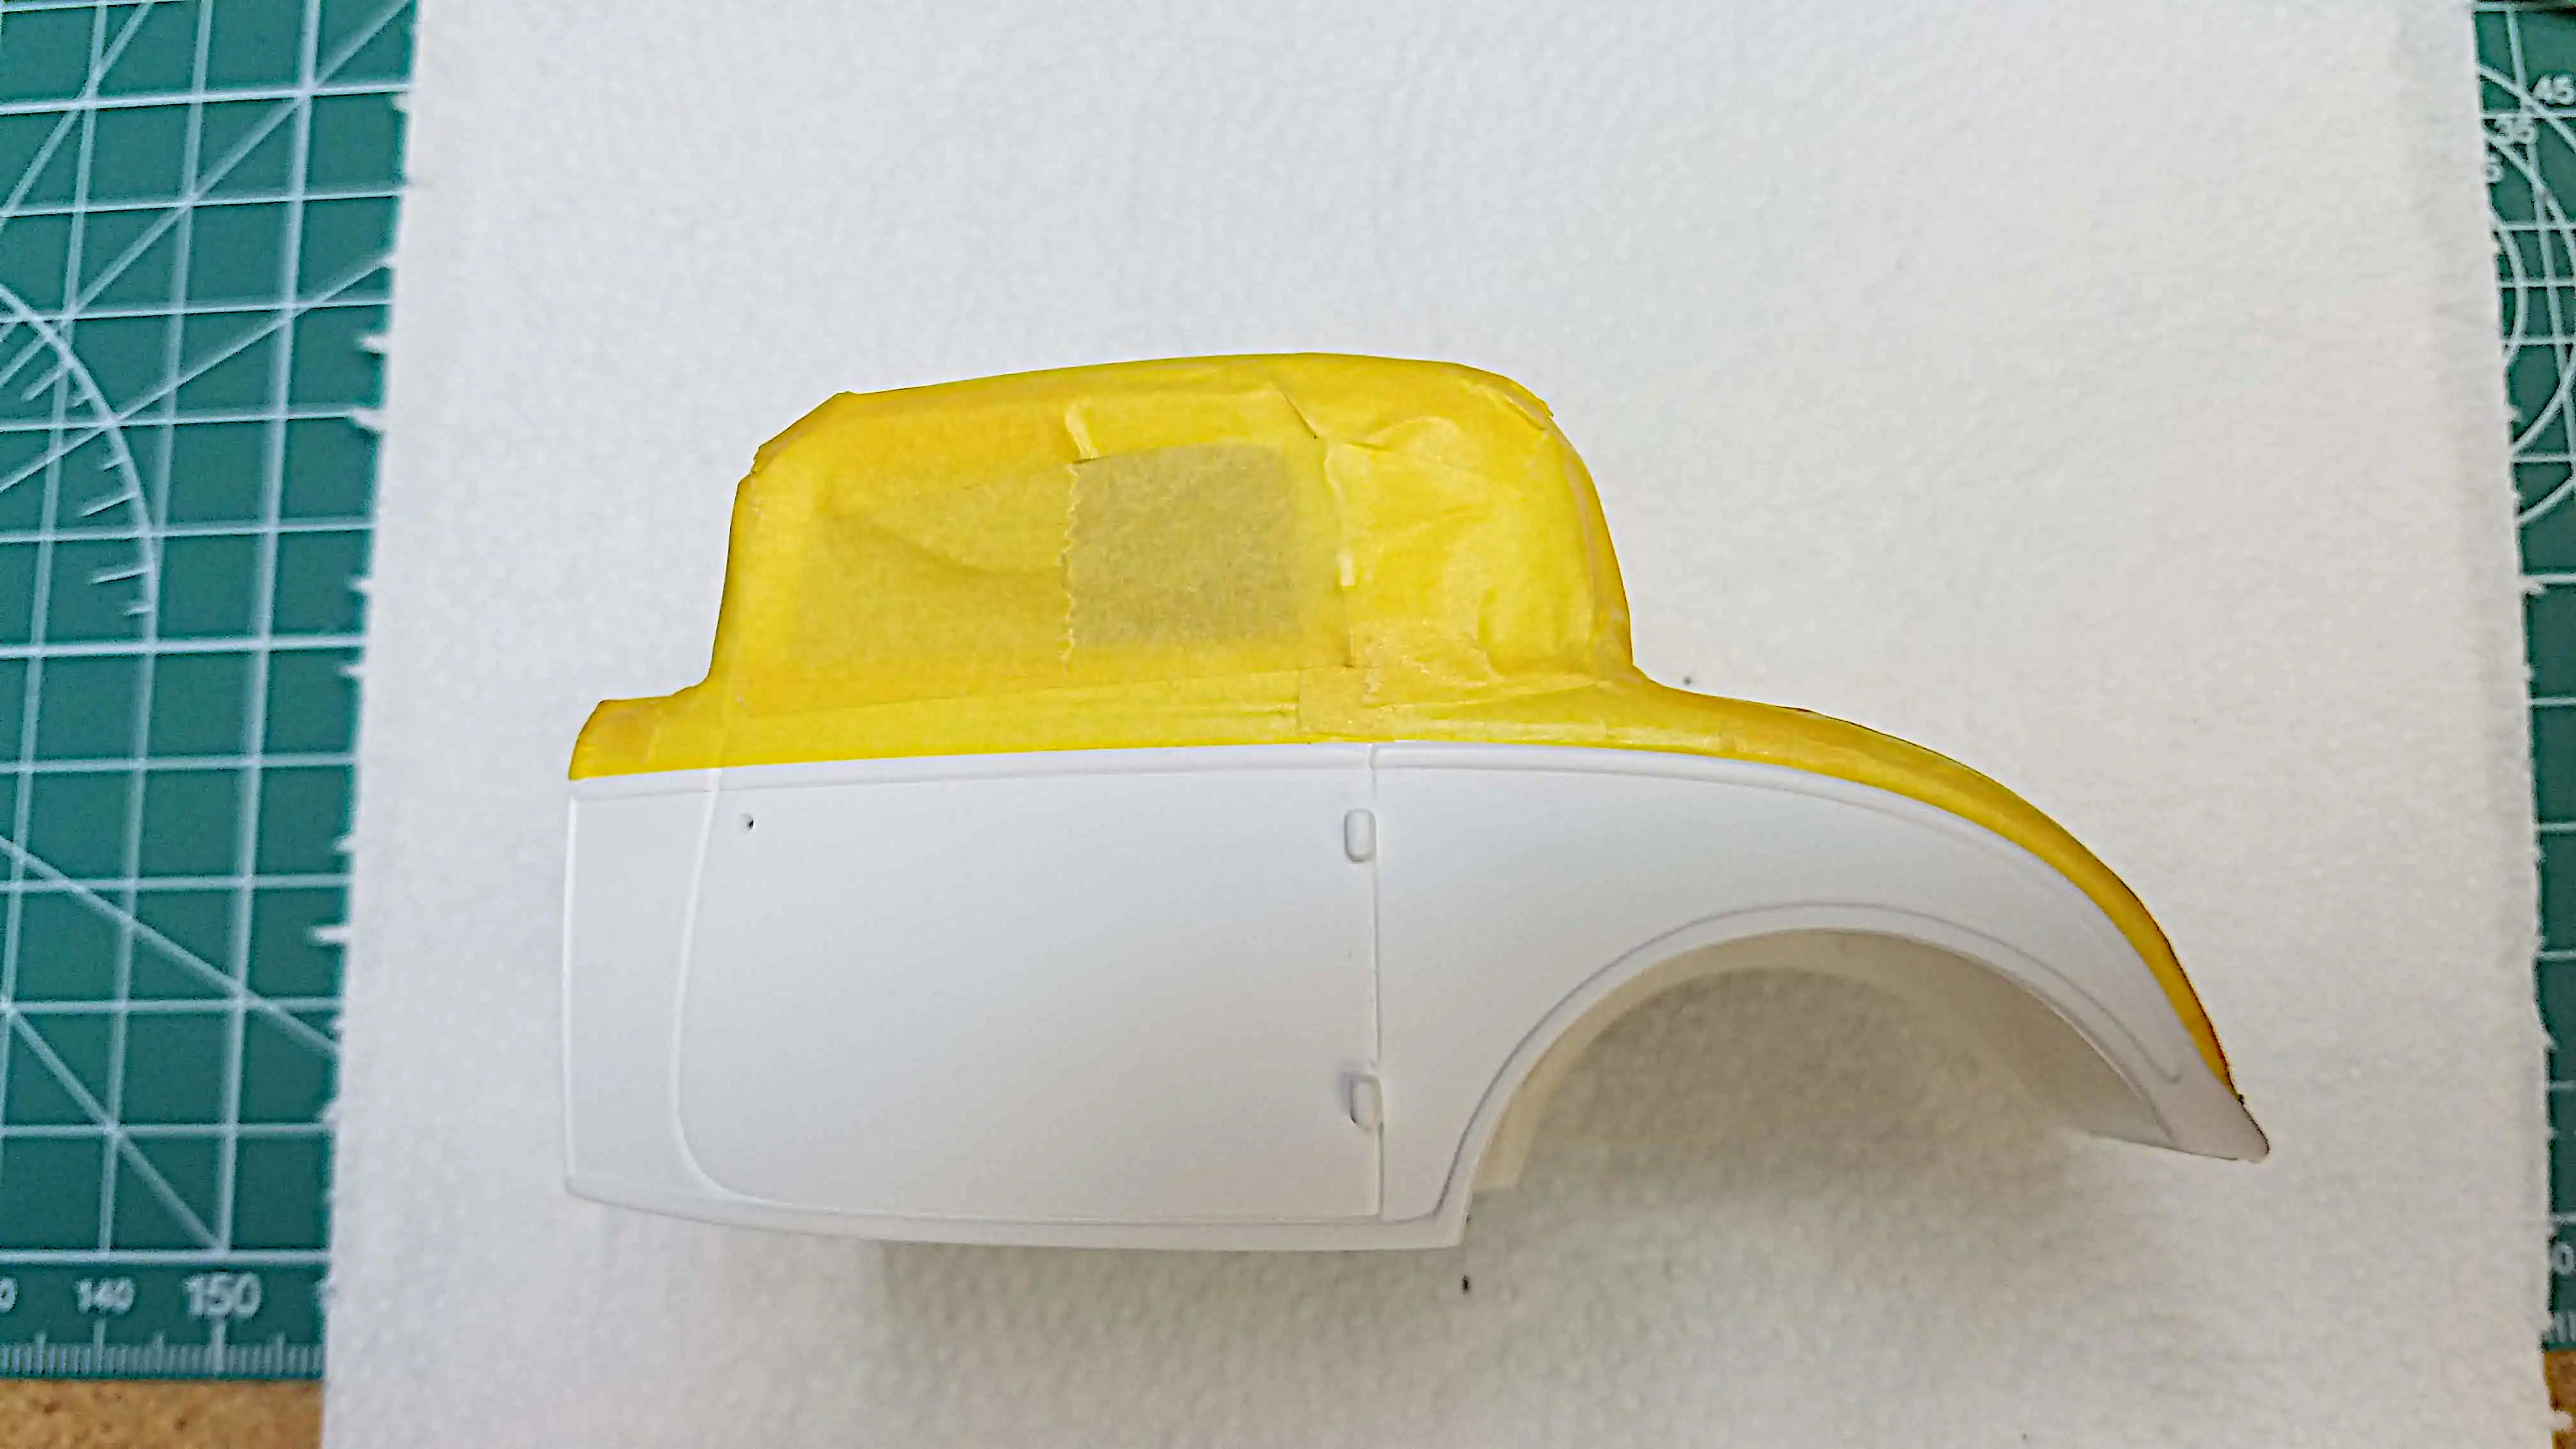
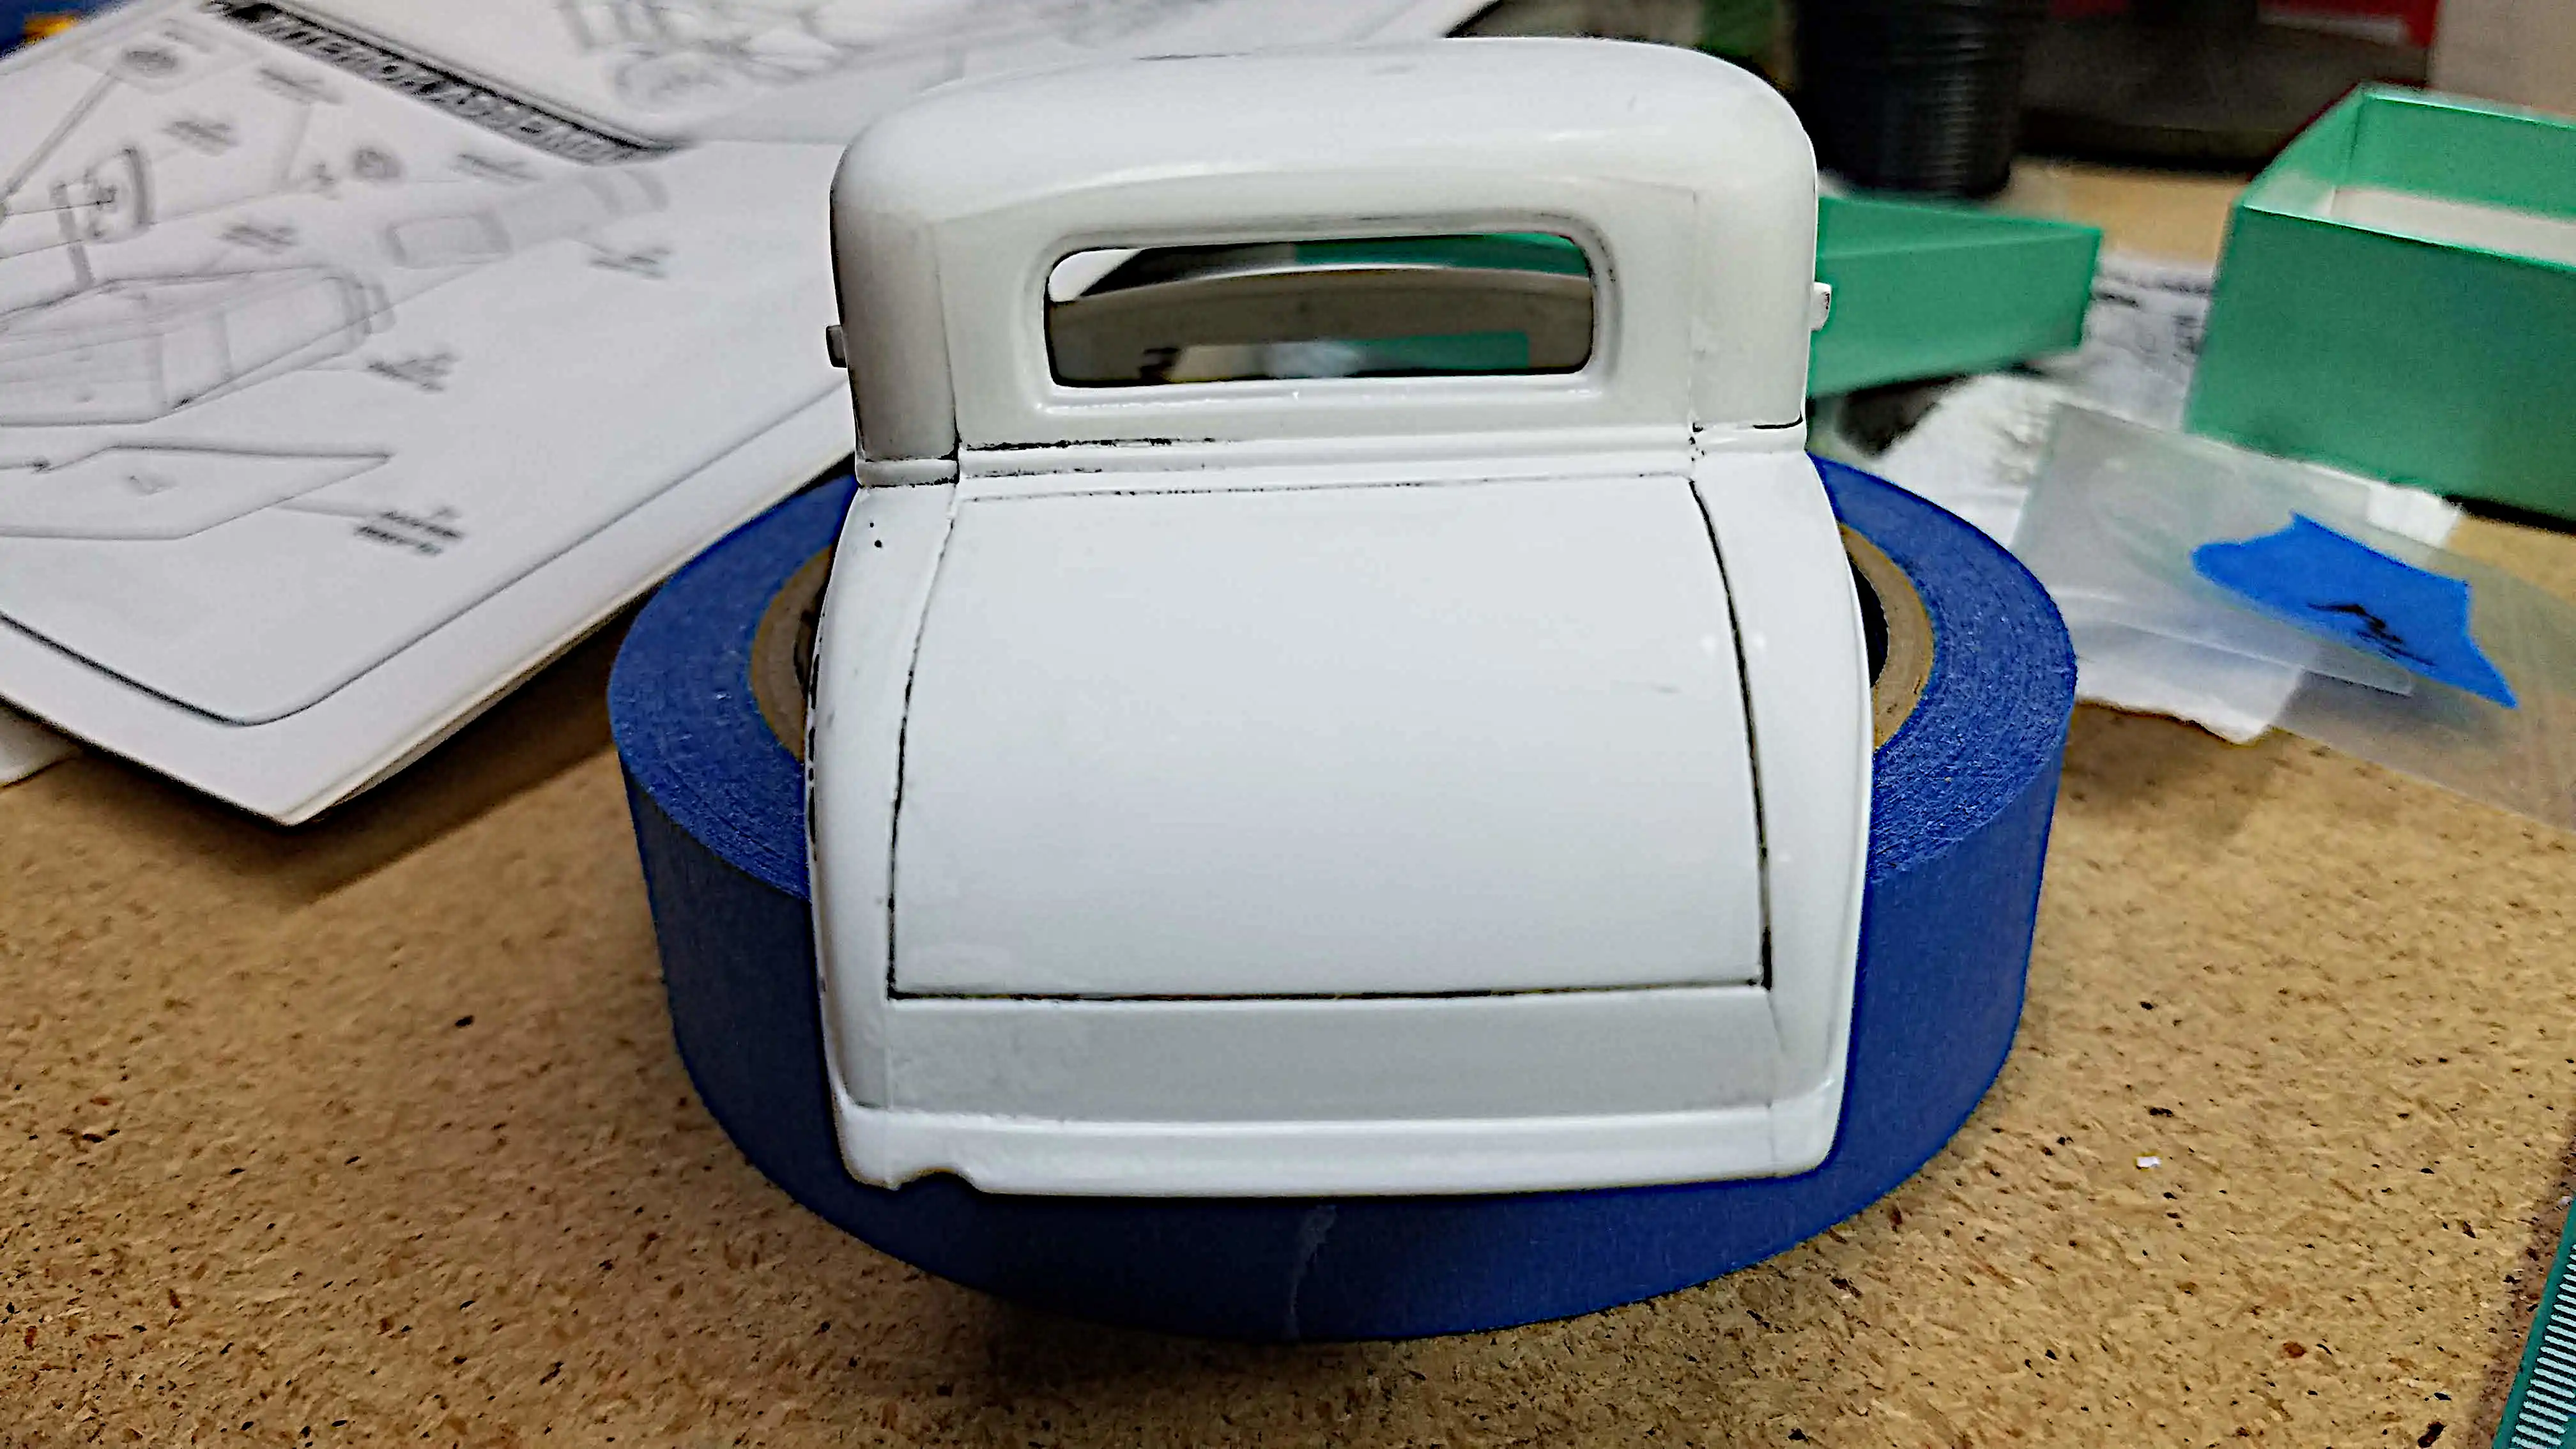
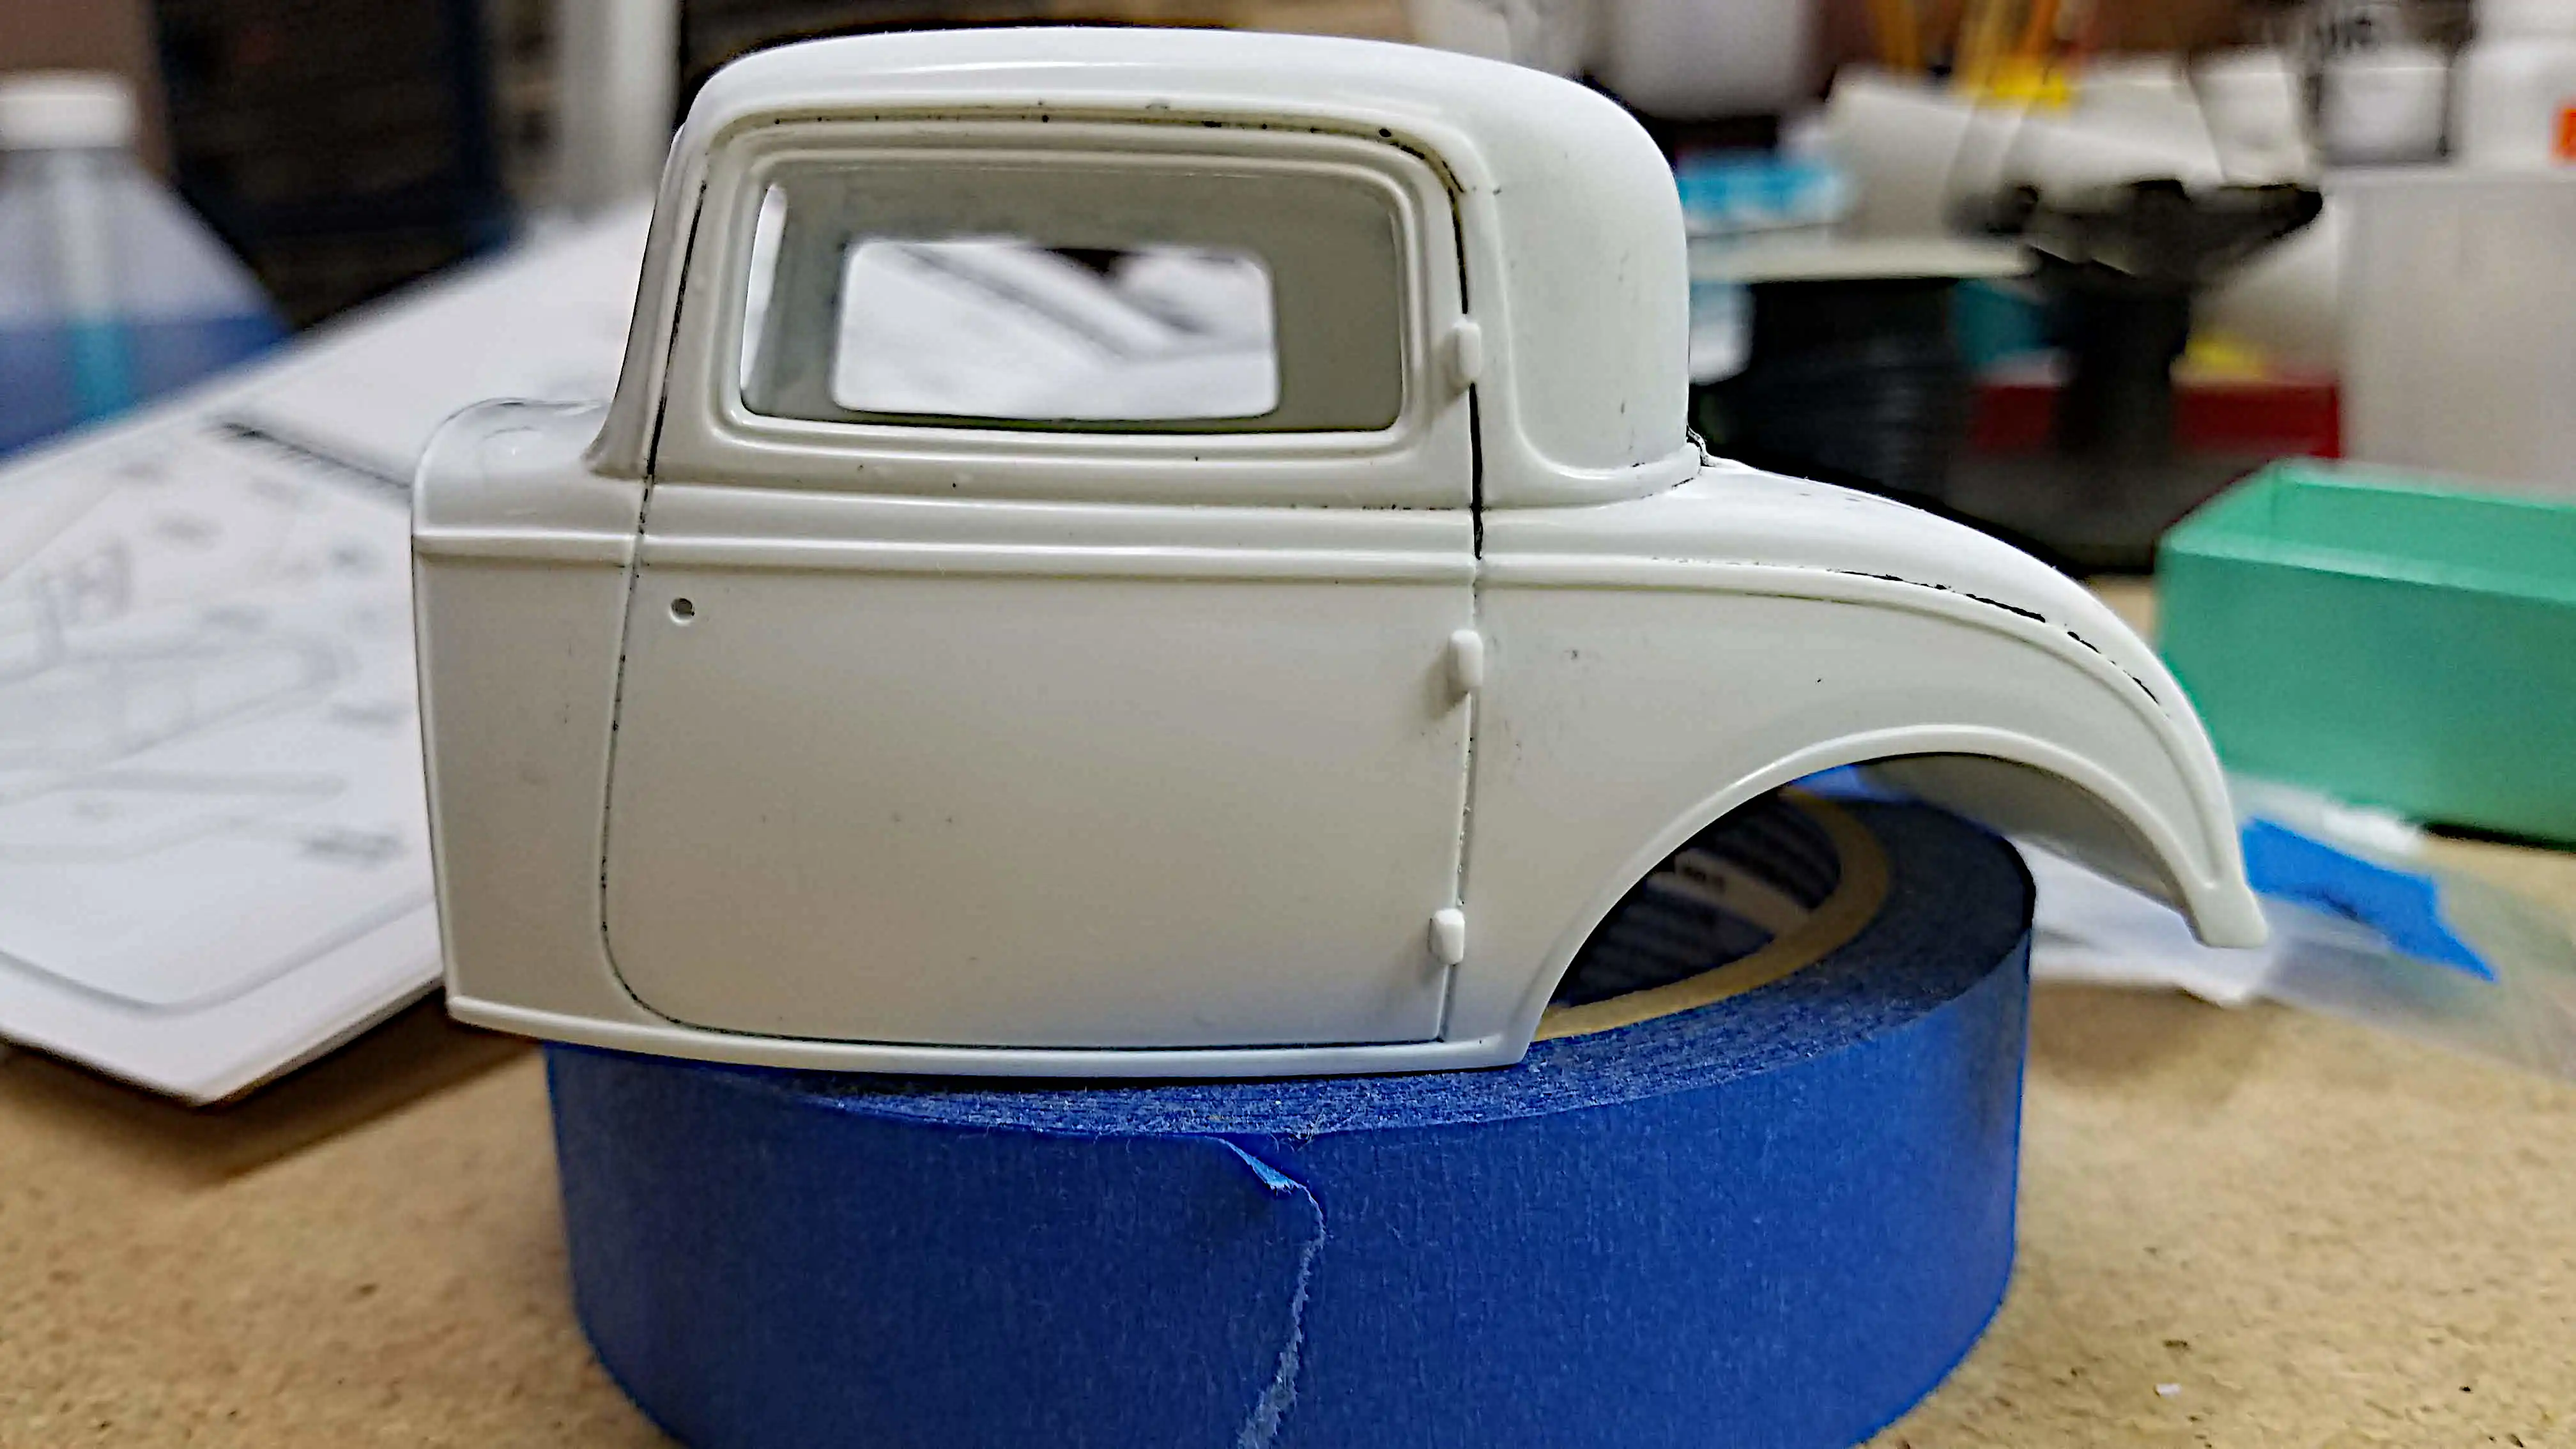
 Bottom half of body masked
While the glue was drying on the spark plugs, I masked the blue portion of the body getting the roof and trunk ready for paint. I decided to paint the top of the body gloss black.
Photo 033
Click/tap photo to enlarge
 Bottom half of body masked
The other side of the body was also taped, getting the roof and trunk lid ready to paint. Not shown here, the edges of the hood were also masked so that the top of the hood can be painted gloss black.
Photo 034
Click/tap photo to enlarge
 Spark plug wires are installed
The spark plug wiring is installed, but need to be adjusted.
Photo 035
Click/tap photo to enlarge
 Floor pan is painted
I did the floor pan in Tamiya X-19 Sky Grey. I'm still not sure what color the seat will be; however, I'm fairly sure the door panels, not shown, will be two tone with one of the colors being Tamiya X-13 Metallic Blue and not sure what the other color will be.
Photo 036
Click/tap photo to enlarge
 Top half of body painted
The top half of the body has been airbrushed with Tamiya X-1 Gloss Black. It's a first coat and still wet in this photo.
Photo 037
Click/tap photo to enlarge
 Top half of body painted
The roof of the body, after the first coat of Tamiya X-1 Gloss Black. I can see some orange peel, but the paint is still wet in this photo, and it is only the first coat.
Photo 038
Click/tap photo to enlarge
 Wheel backs painted
Difficult to see in this photo, I did the wheel backs in Tamiya XF-1 Flat Black.
Photo 039
Click/tap photo to enlarge
 Other parts painted Gloss Black
The inner fender wells, the gas tank bottom, rear bumper supports, front dress panel and radiator shroud are painted with Tamiya X-1 Gloss black; first coat.
Photo 040
Click/tap photo to enlarge
 Top of hood painted
The hood top is painted with Tamiya X-1 Gloss Black. This is a first coat and in this photo I can see some orange peel, but as before, the paint is still wet.
Photo 041
Click/tap photo to enlarge
 Radiator and firewall painted
The radiator and firewall have been painted with Tamiya XF-1 Flat Black.
Photo 042
Click/tap photo to enlarge
 Installing exhaust pipes and mufflers
Did you ever have one of those days? Today, Saturday, May 21, 2022, was one of those days. My head told me not to work in the shop today, but I did anyway. Everything I touched turned to do-do. The next three photos are proof.
What you're not going to see is that when I checked the gloss black paint on the body there was a small spot where a particle of dust must have settled. when I tried to remove it, I placed a large scratch on the roof. I tried to polish it out; however, all it did was dull the surface. I surrender. I have to repaint the gloss black. 😲 😢
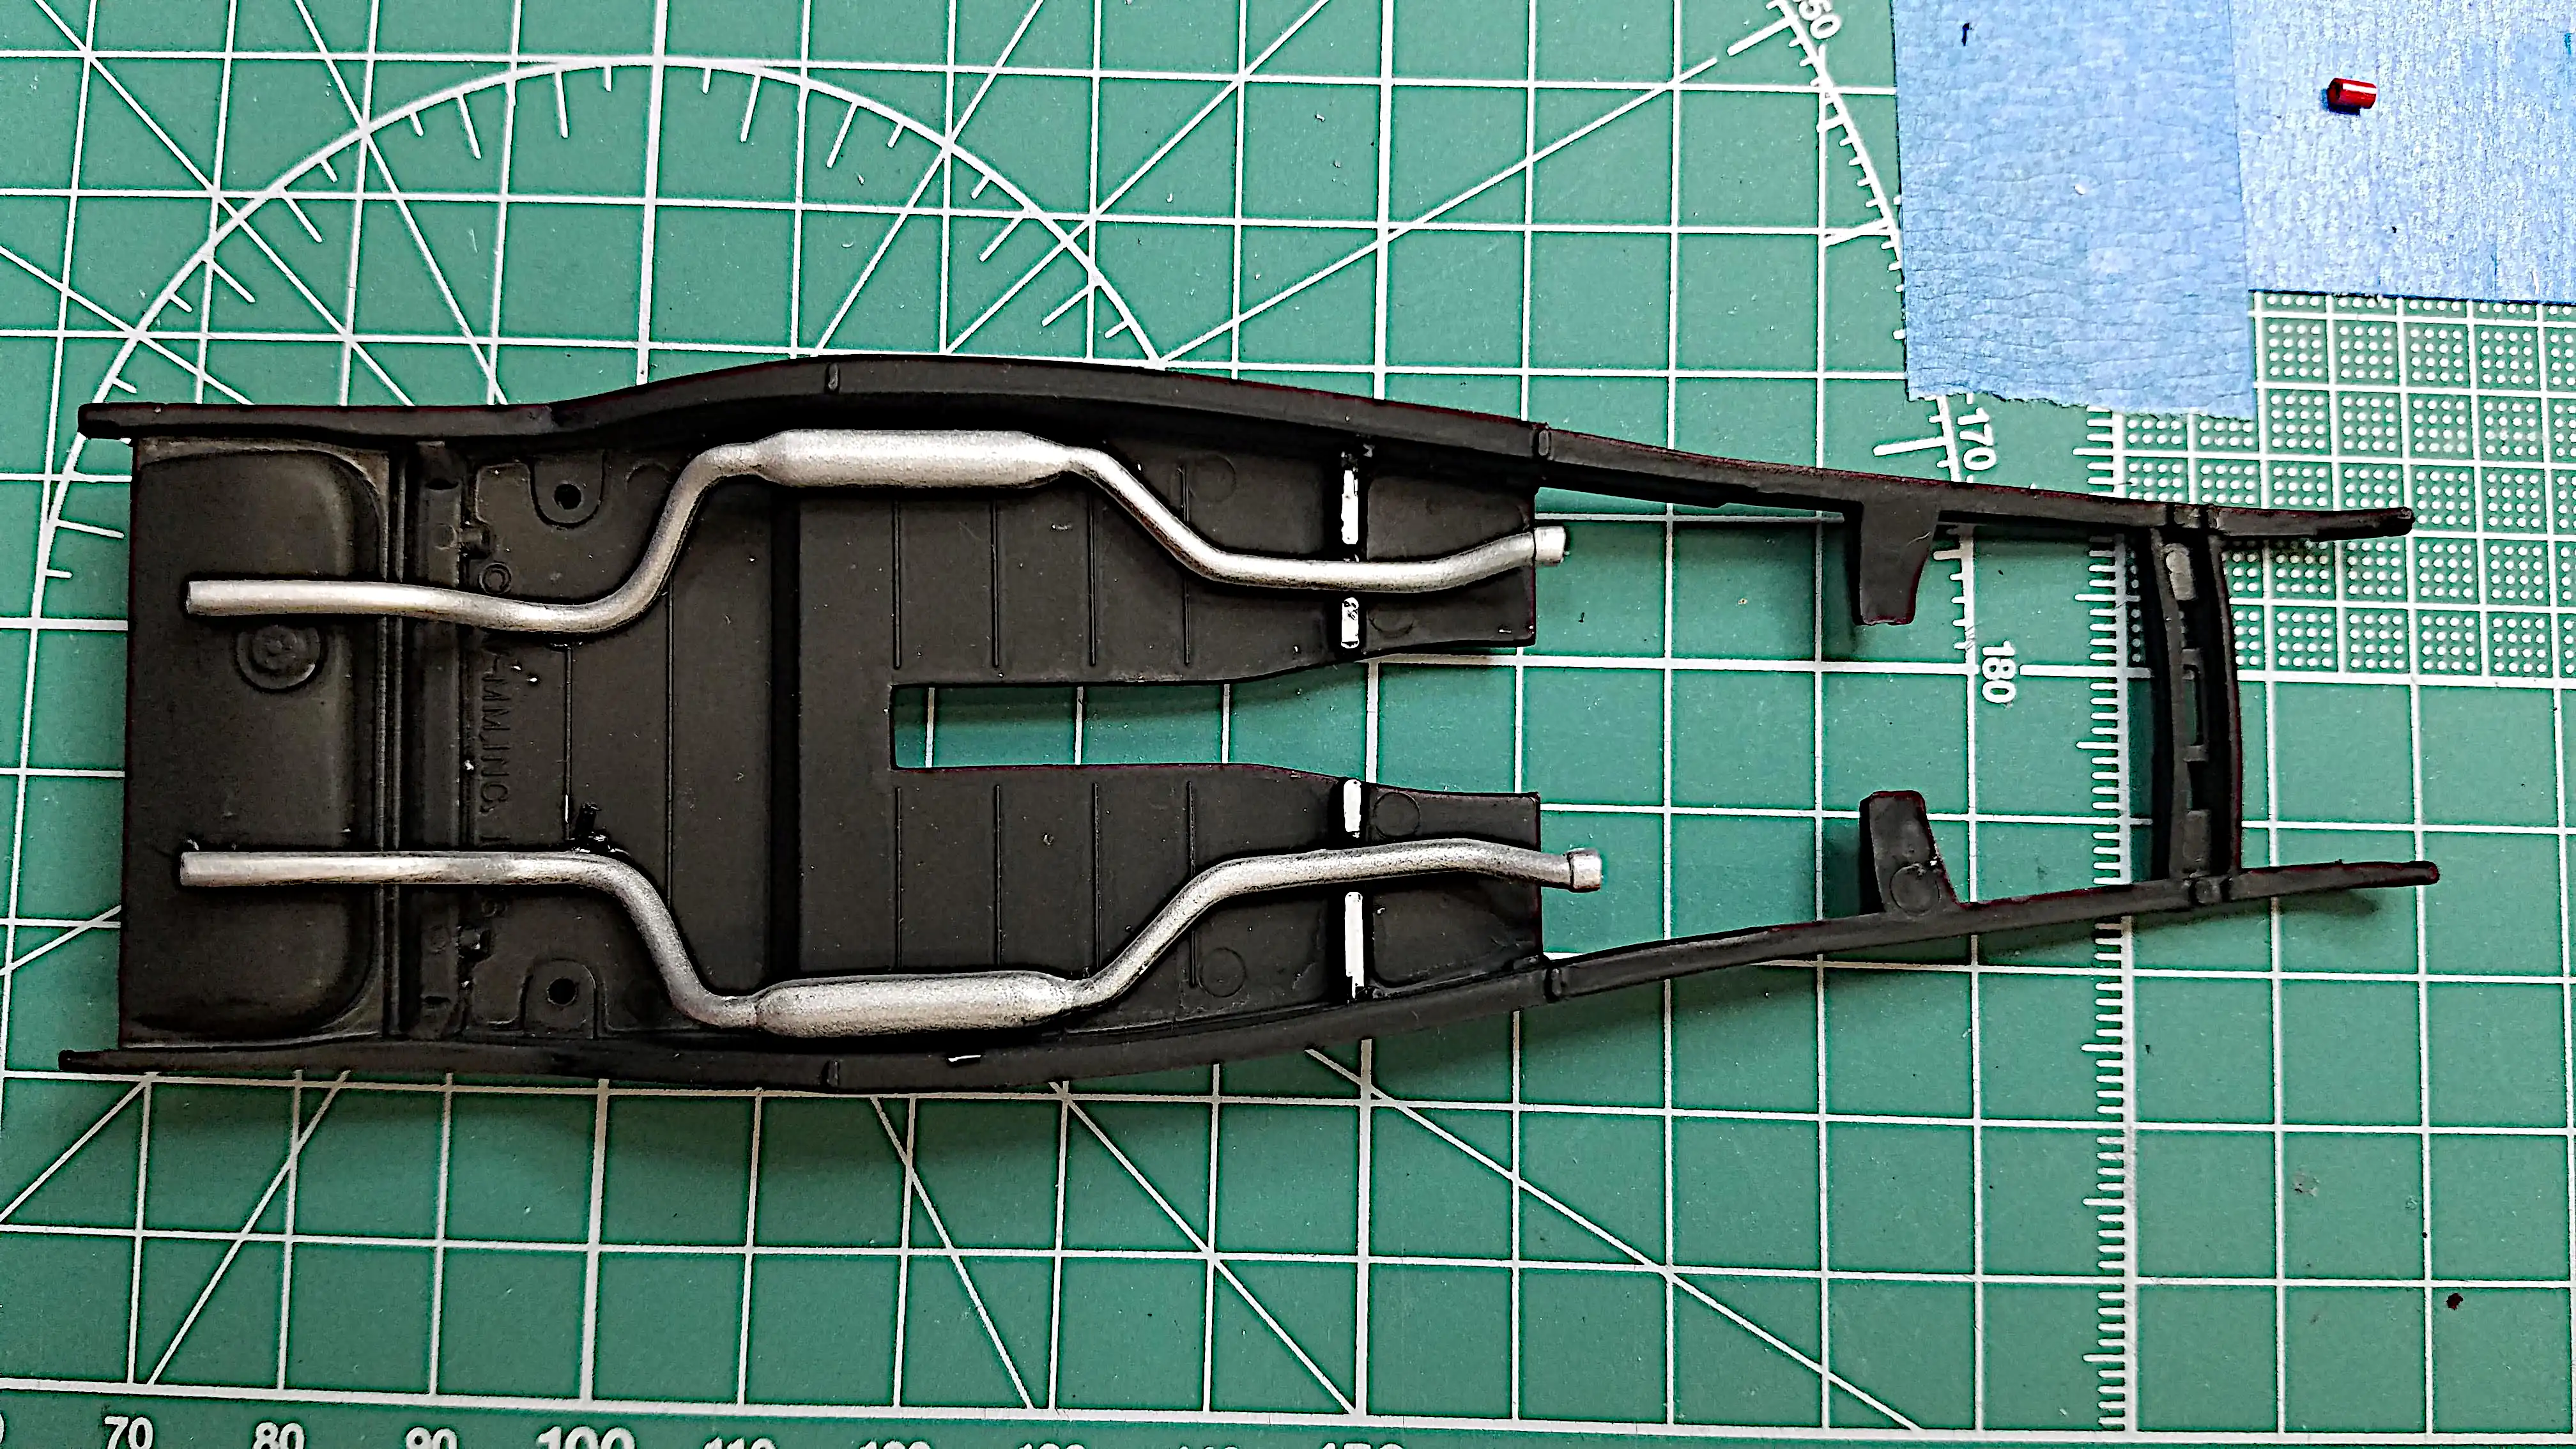
I decided to install the exhaust pipes and mufflers. They went in quite well; however, there is a cross member that has the brake master cylinder mounted to it that is supposed to be installed where you can see the paint has been scrapped. I had it in and out at least three times trying to get it to properly sit on the cross member. Then the master cylinder fell off. So...it is setting off to the side off camera waiting for the glue to dry.
Photo 043
Click/tap photo to enlarge
 Mounted the disc brakes and rotors
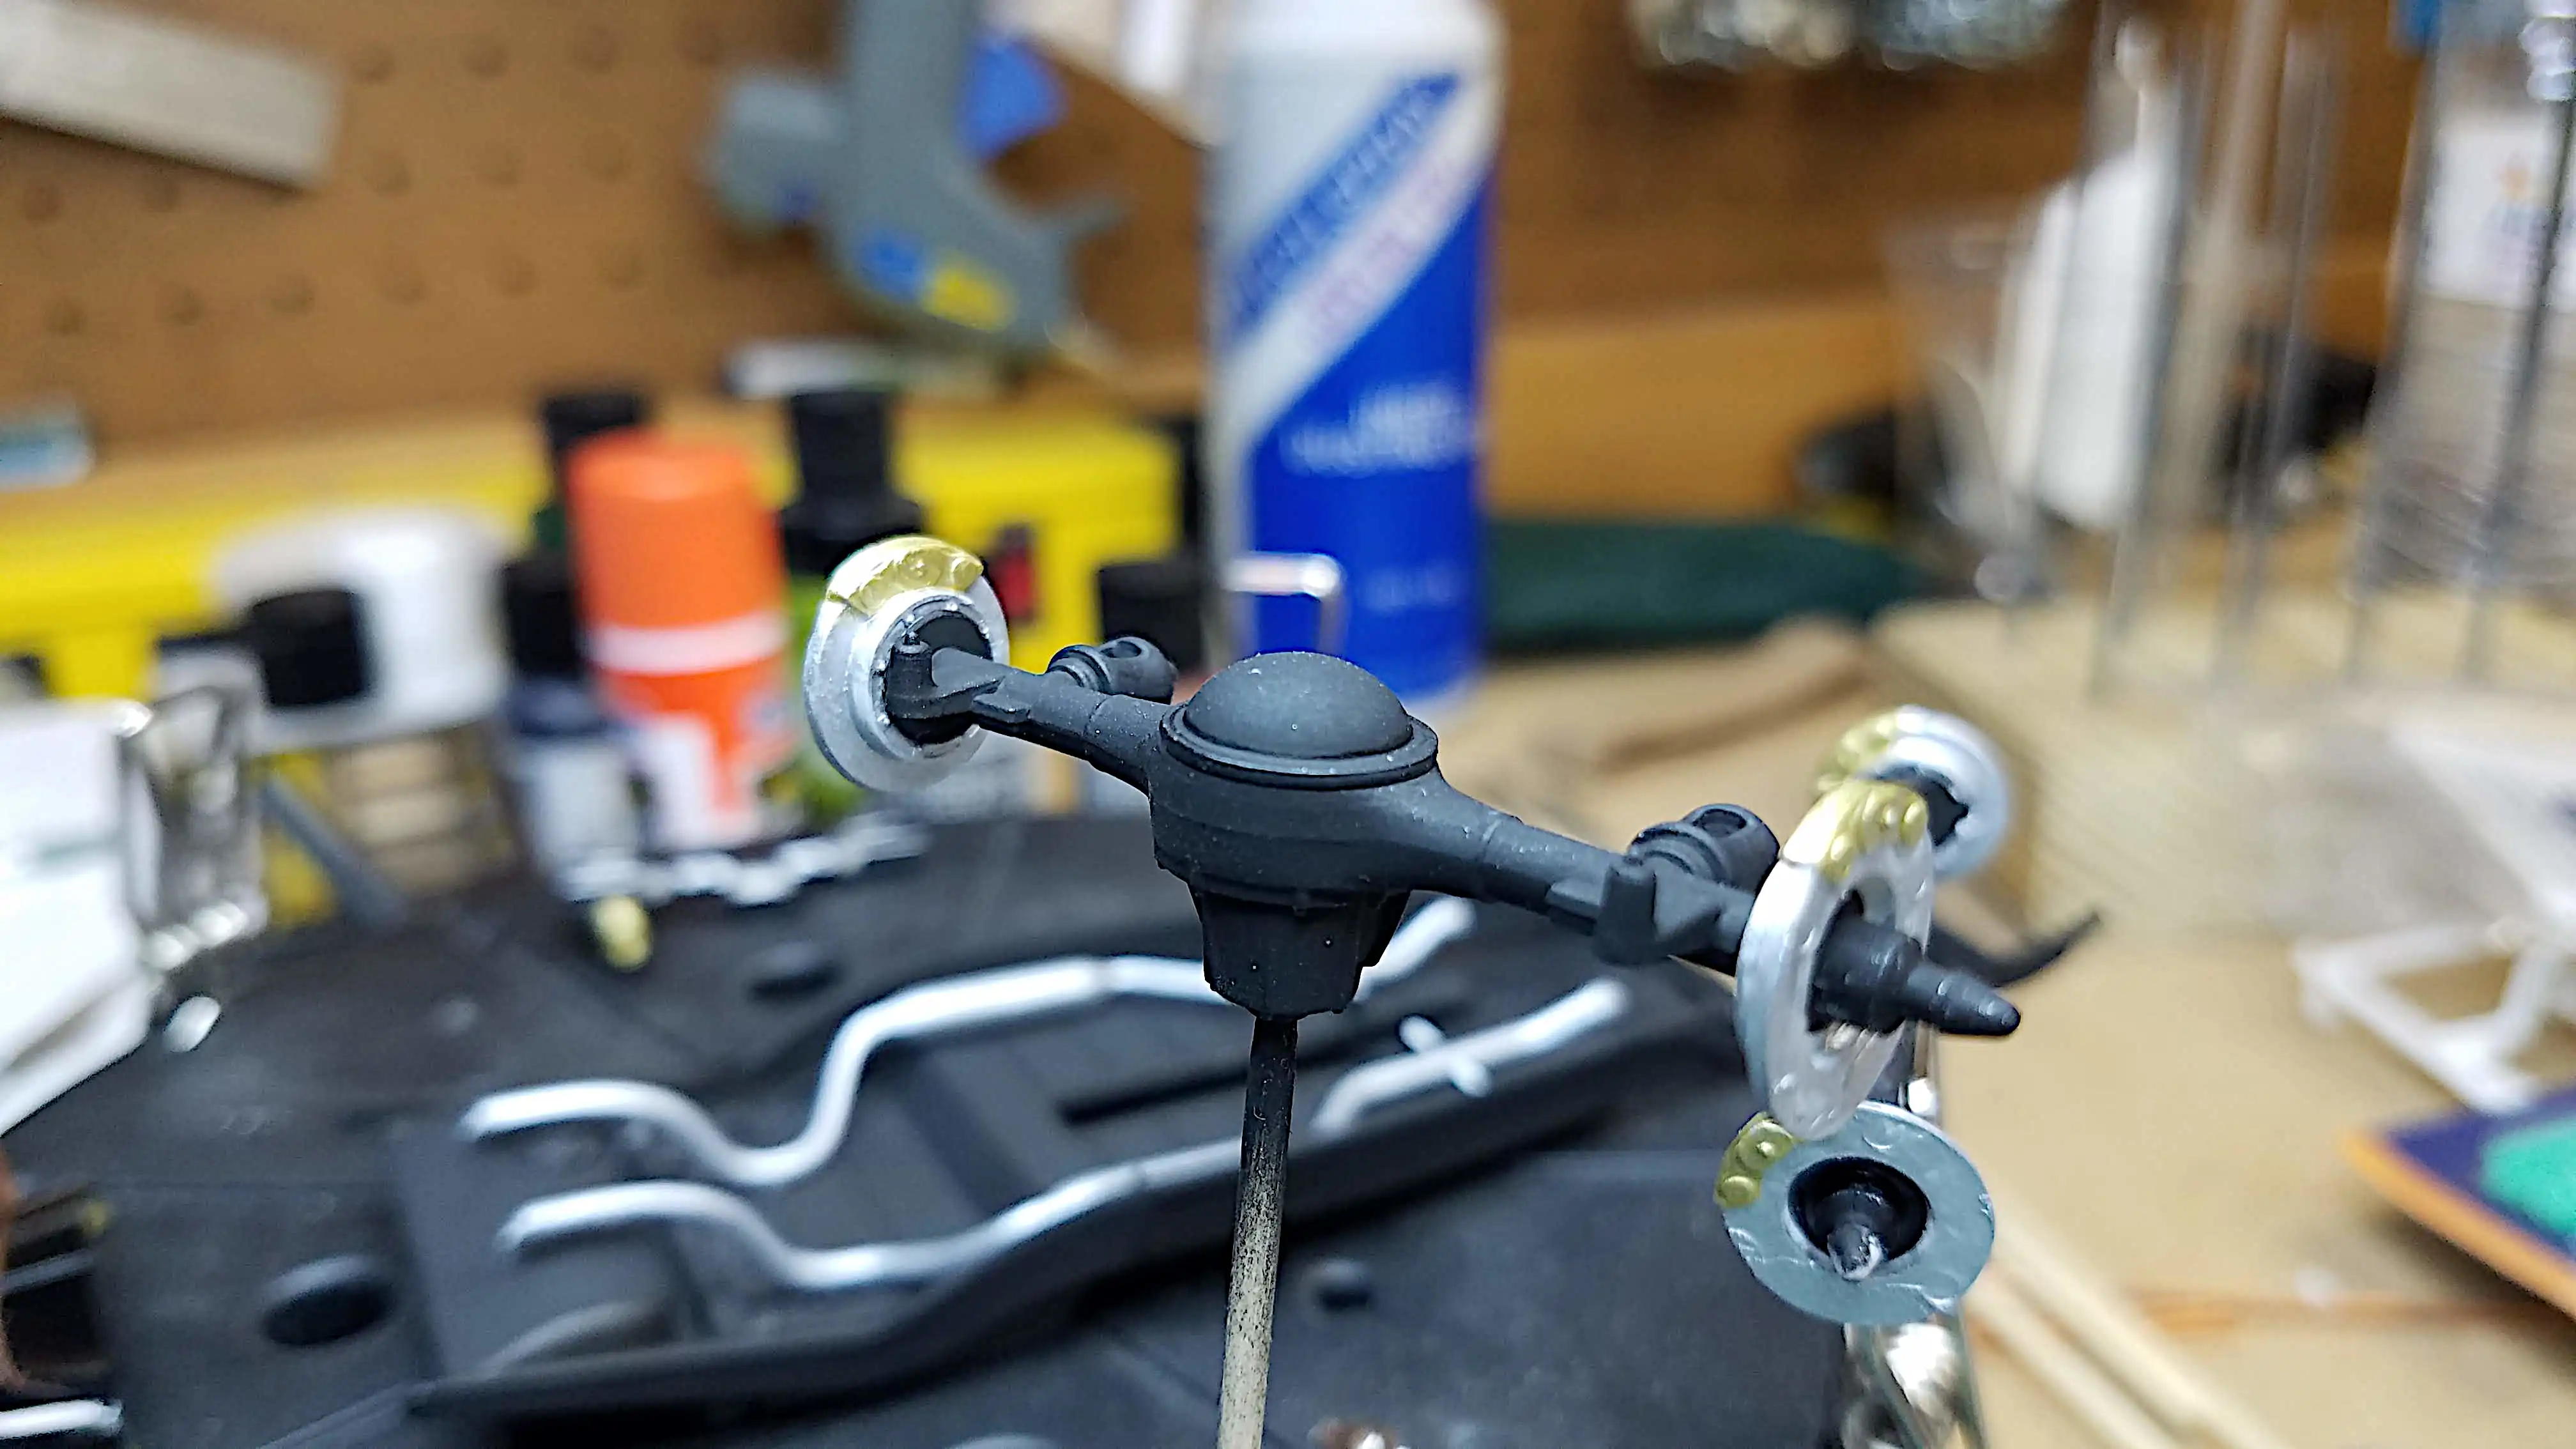
I mounted the disc brakes and rotors to the front and rear axle. They look Okay, but what a hassle to get them and keep them straight.
Photo 044
Click/tap photo to enlarge
 Mounting wheels in the tires
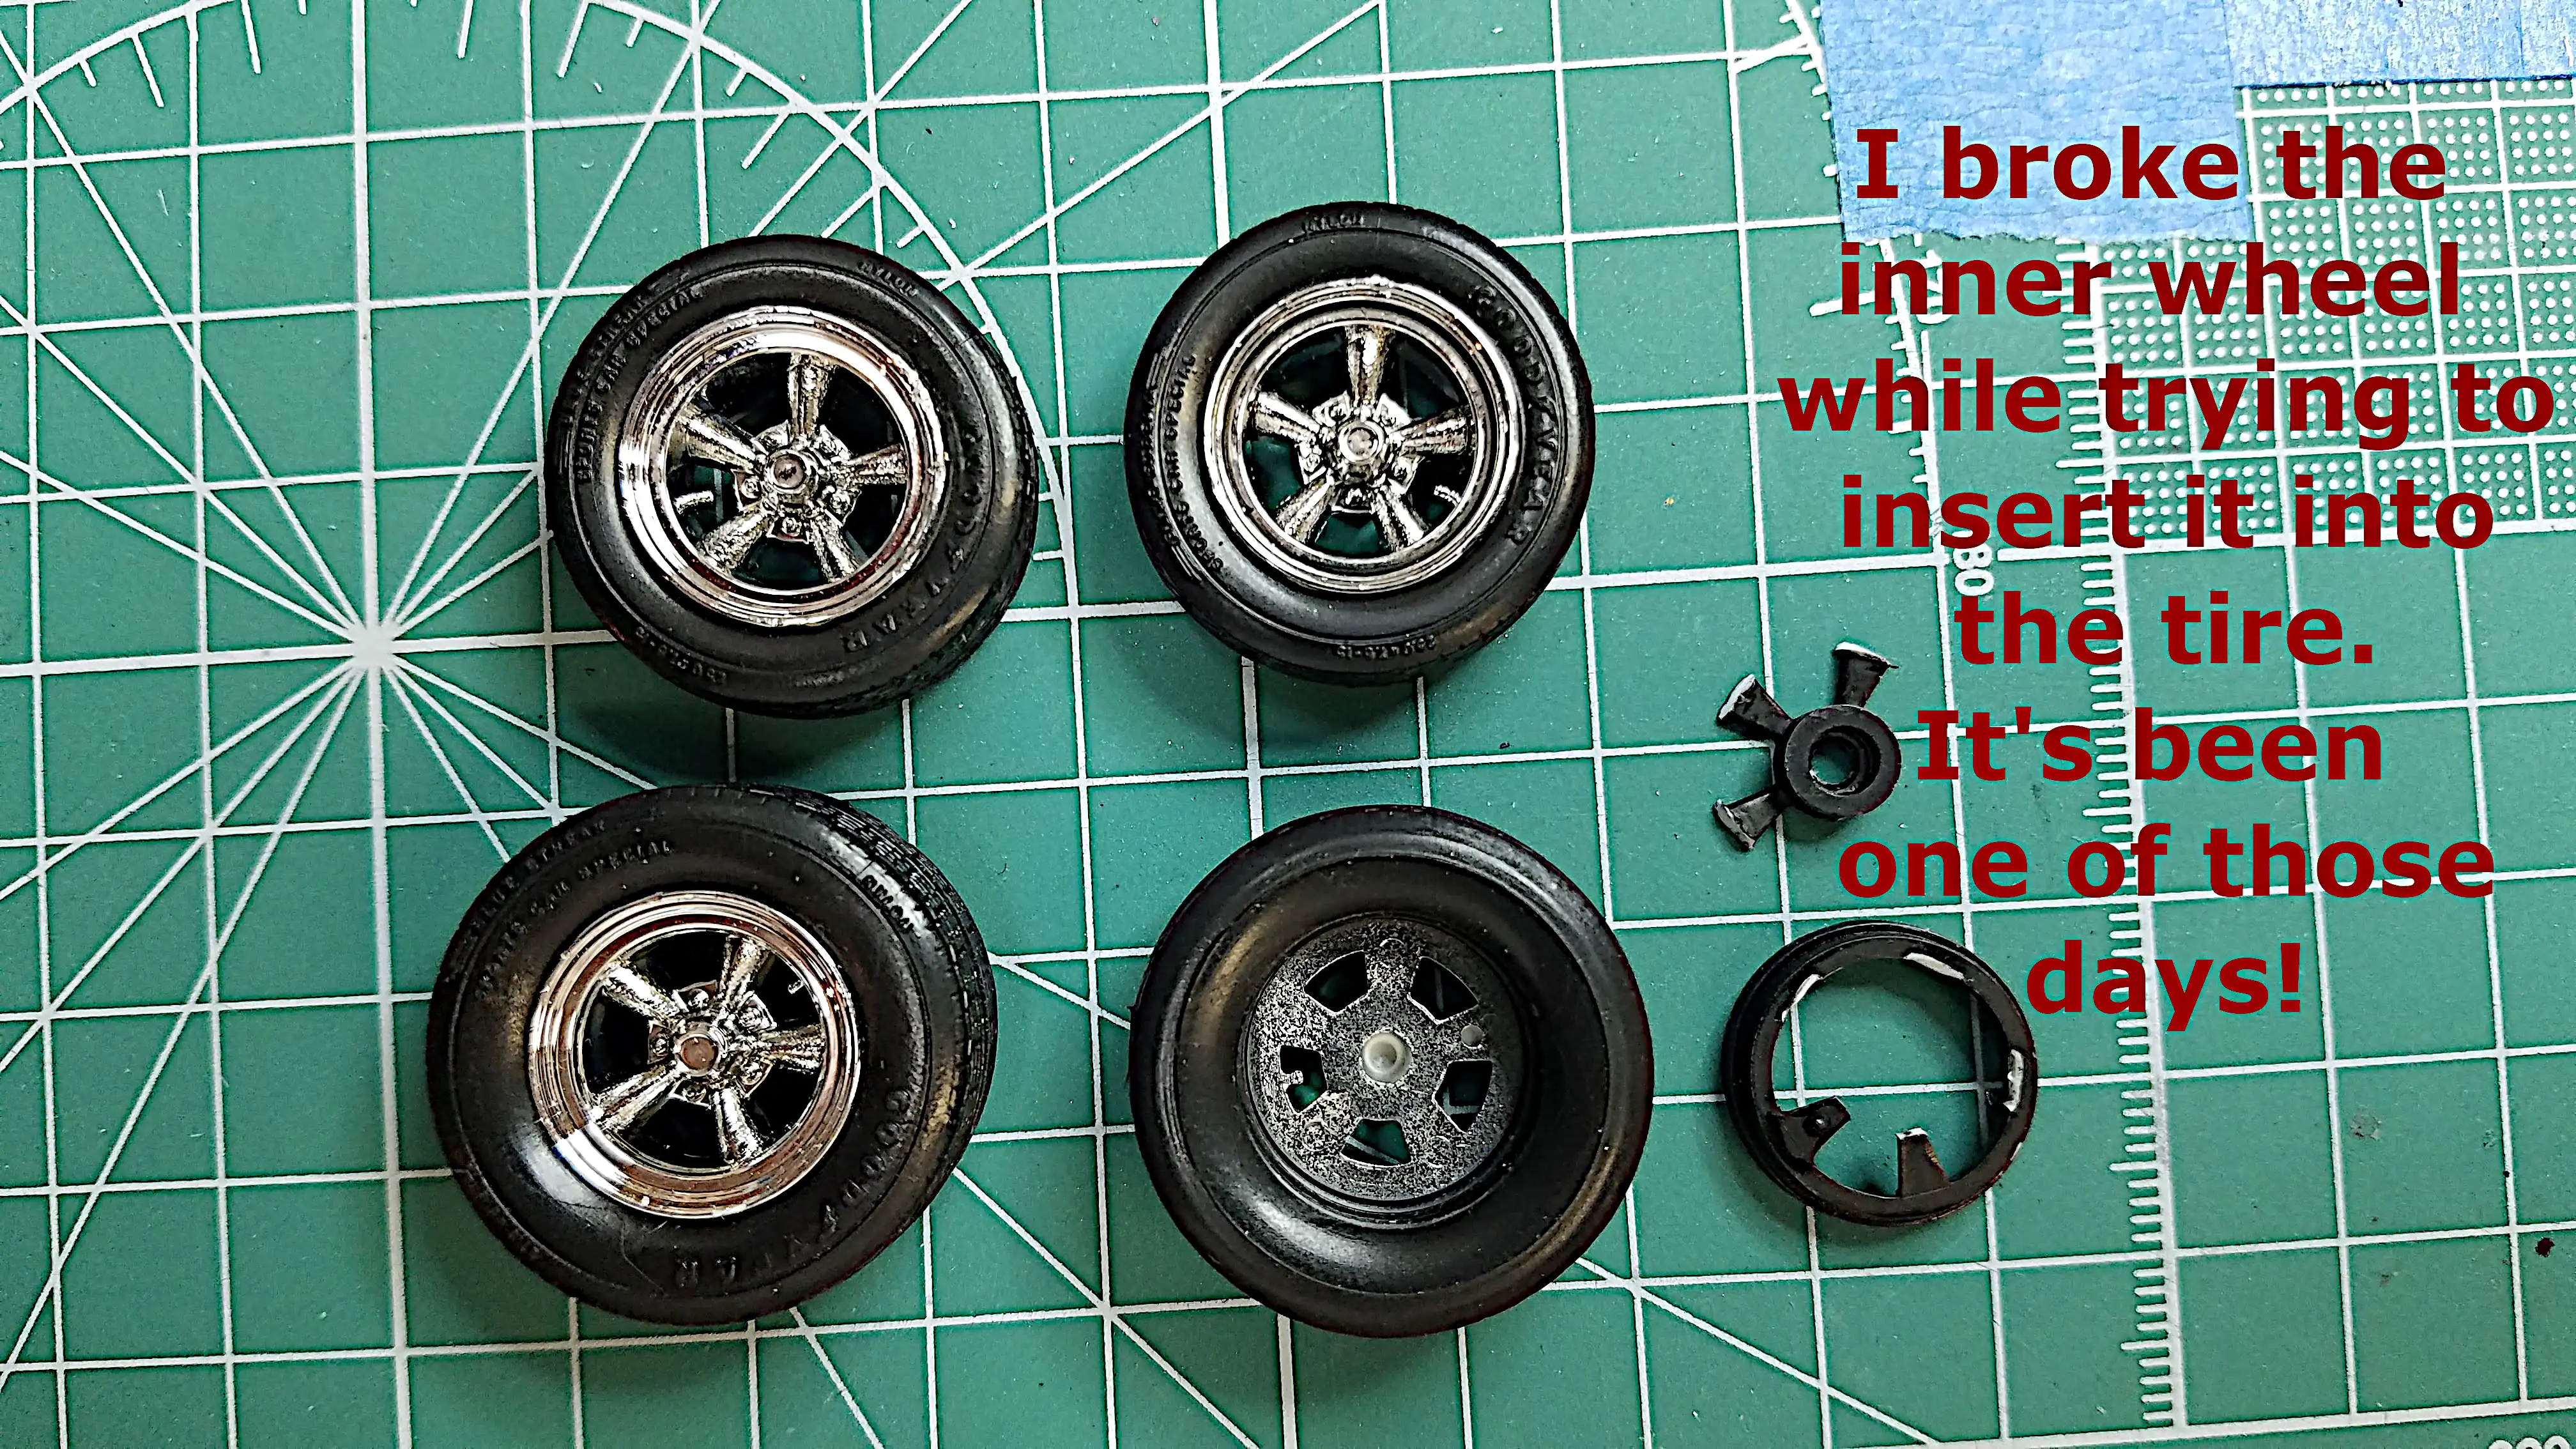
Finally, I thought I'd mount the wheels in the tires. The wheels were extremely tight, and the rubber was very stiff. My head told me to boil some water and place the tires in the hot water to soften them, but I didn't listen to myself and forced the wheels into the hard rubber tires. While forcing the last wheel back, in the last rear tire, I broke the inner wheel! I think I'll be able to fix it, but that will be on another day.
I SURRENDER!!! I called it quits for the day.
Photo 045
Click/tap photo to enlarge
 Recovering from broken wheel
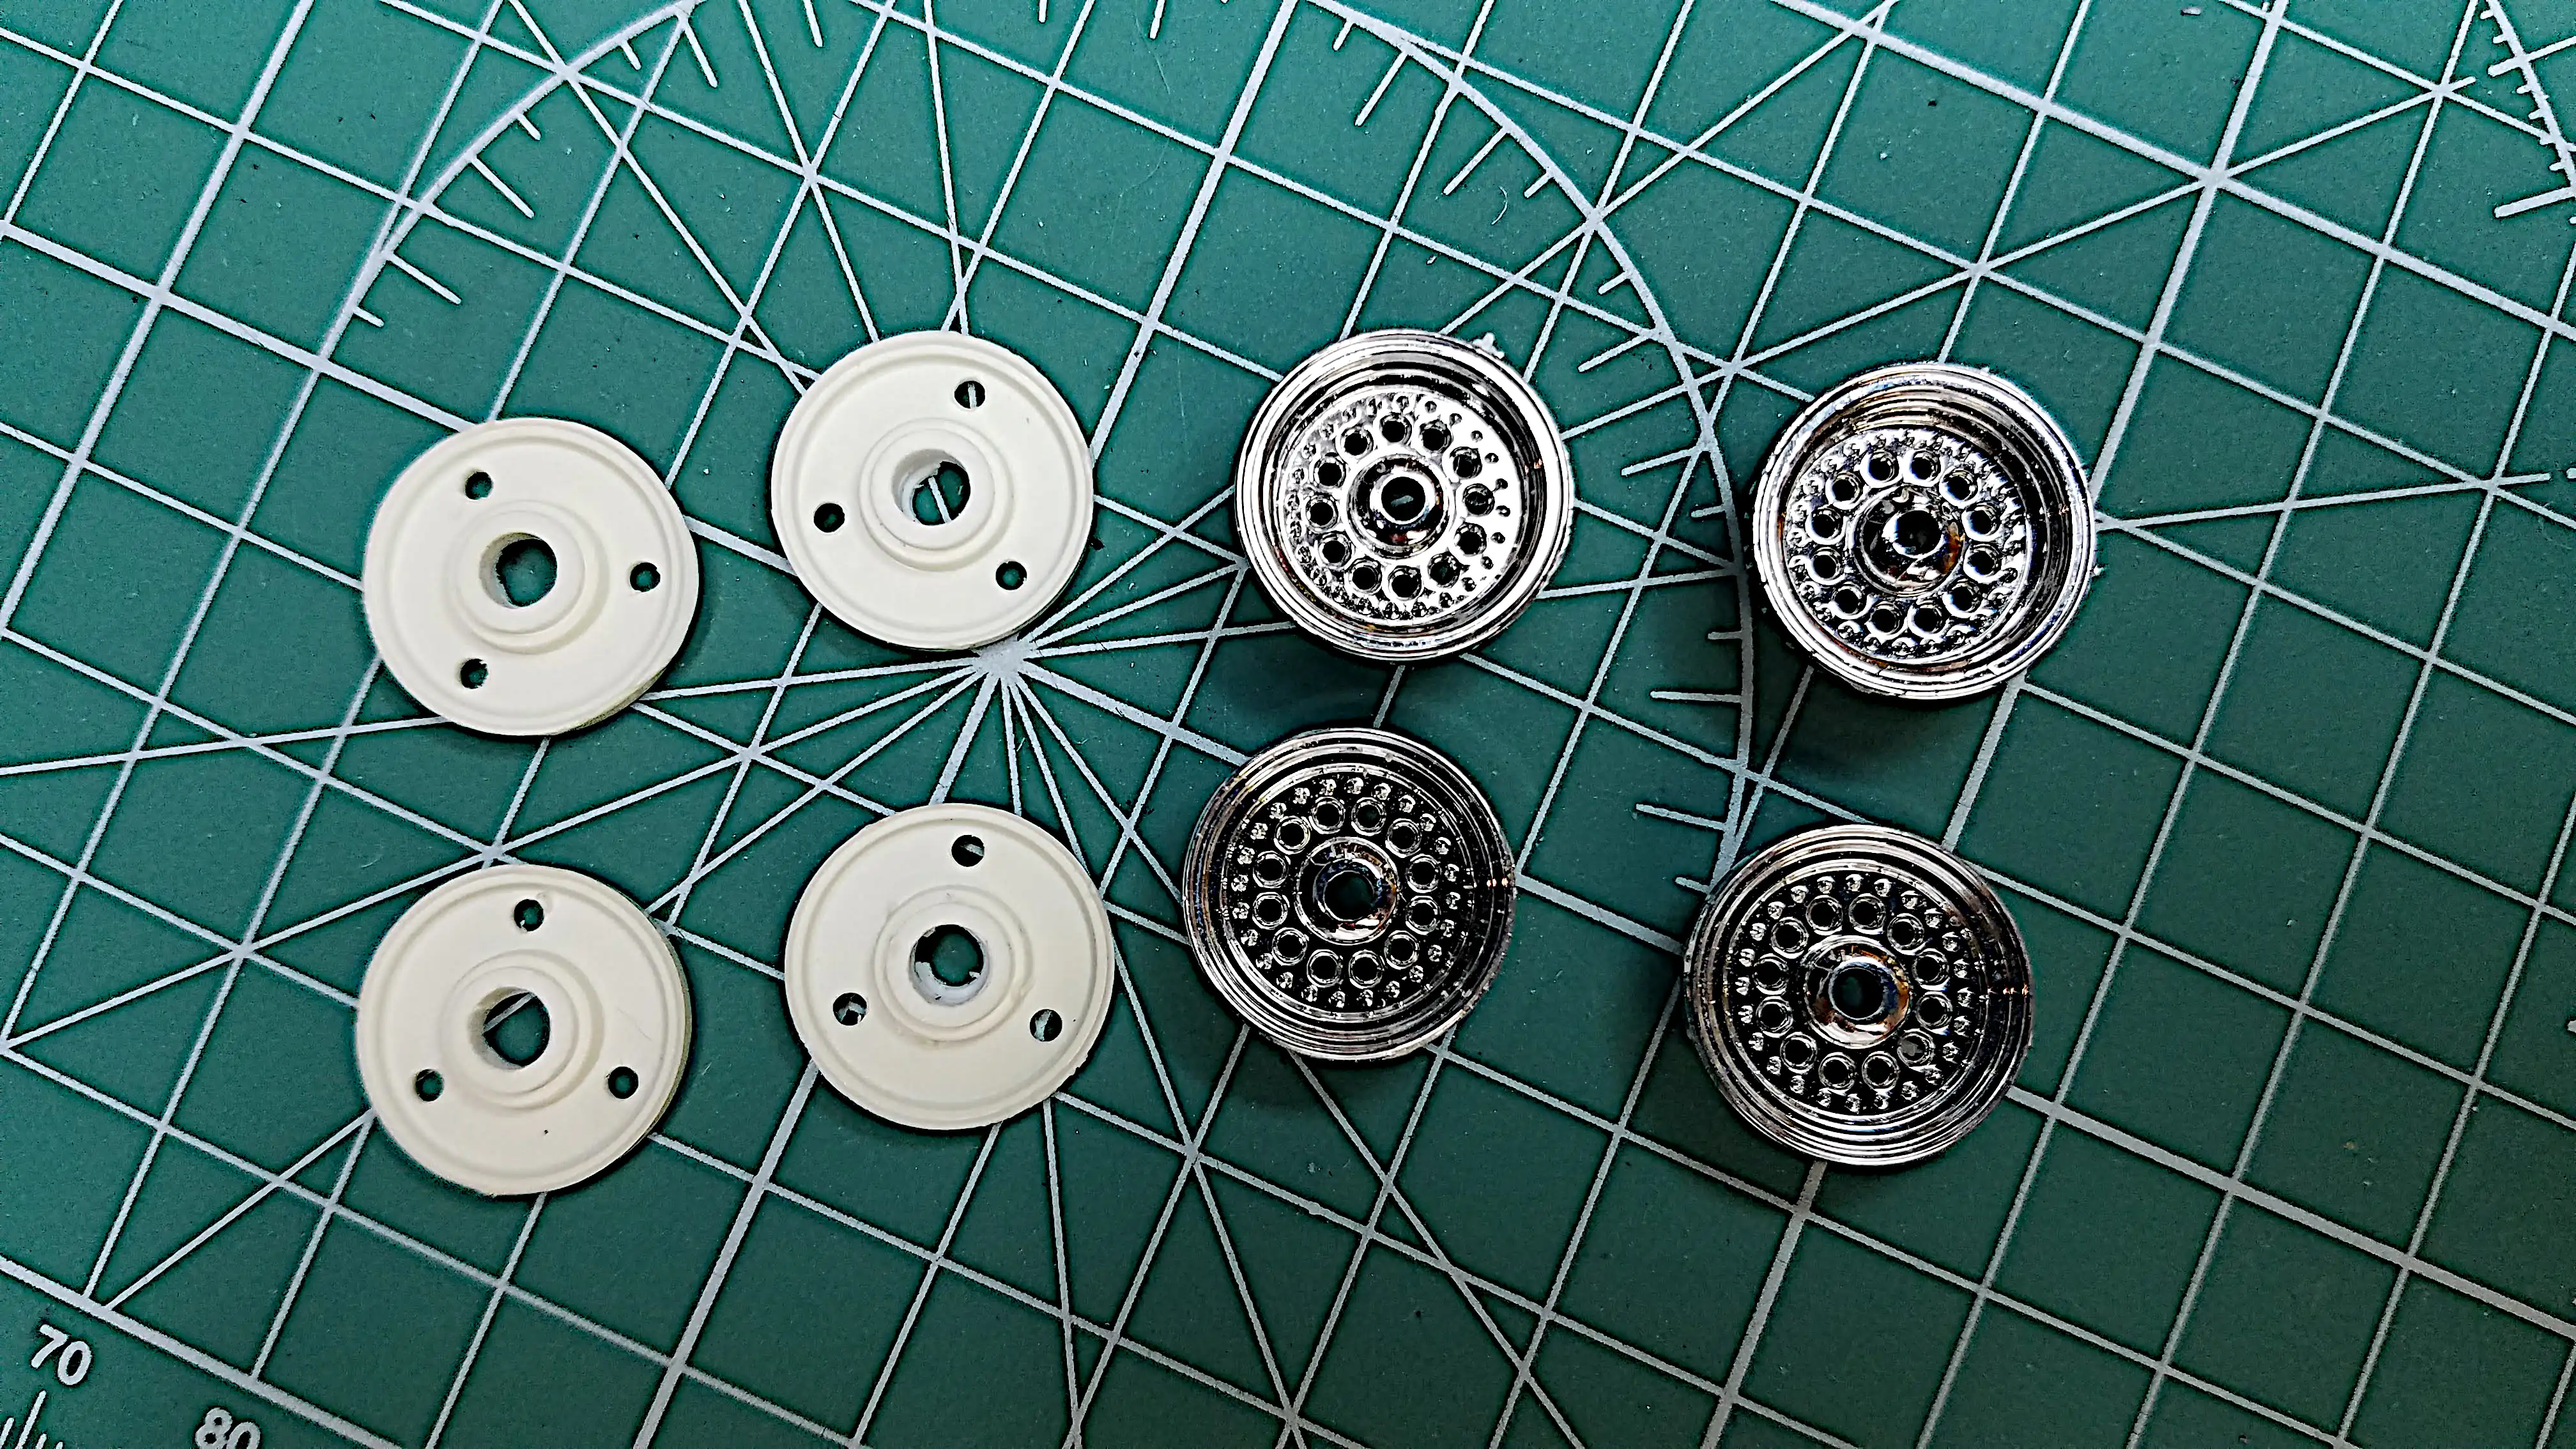
After breaking the wheel back shown in the previous photo and unable to fix it in a way to keep the hub centered, and the fact that I marked up the chrome with a wooden dow attempting to mount them into the tires, (the marks are better seen in the Part 04 Video that you can watch by clicking here.) I decided to use the wheels shown in this photo. I purchased these wheels on eBay awhile back, not for any reason other then I kinda liked them and thought I might have a use for them on some future build. I had to make a minor modification to them by drilling the center hub of the wheel backs a bit larger to fit the '32 Ford axle, and I had to drill out the alignment holes on the wheel backs to allow the wheel fronts to align and fit properly. I have not mounted the wheels on the tires as of this post (May 24, 2022) because I painted the wheel backs Tamiya XF-1 Flat Black and I'm waiting for that paint to dry.
Photo 046
Click/tap photo to enlarge
 New wheels are mounted
After my day of disasters, I had a good day today, Wednesday, May 26, 2022. I had bought these wheels from Ebay for future project. Since I damaged the other set of wheels, I decided to use these. Actually, I think they're going to look really good.
Photo 047
Click/tap photo to enlarge
 Test fitting front and rear axle
The next two photos are test fitting the front and rear axles. Everything looks good so far.
Photo 048
Click/tap photo to enlarge
 Test fitting the front and rear axle
Test fitting the front and rear axle.
Photo 049
Click/tap photo to enlarge
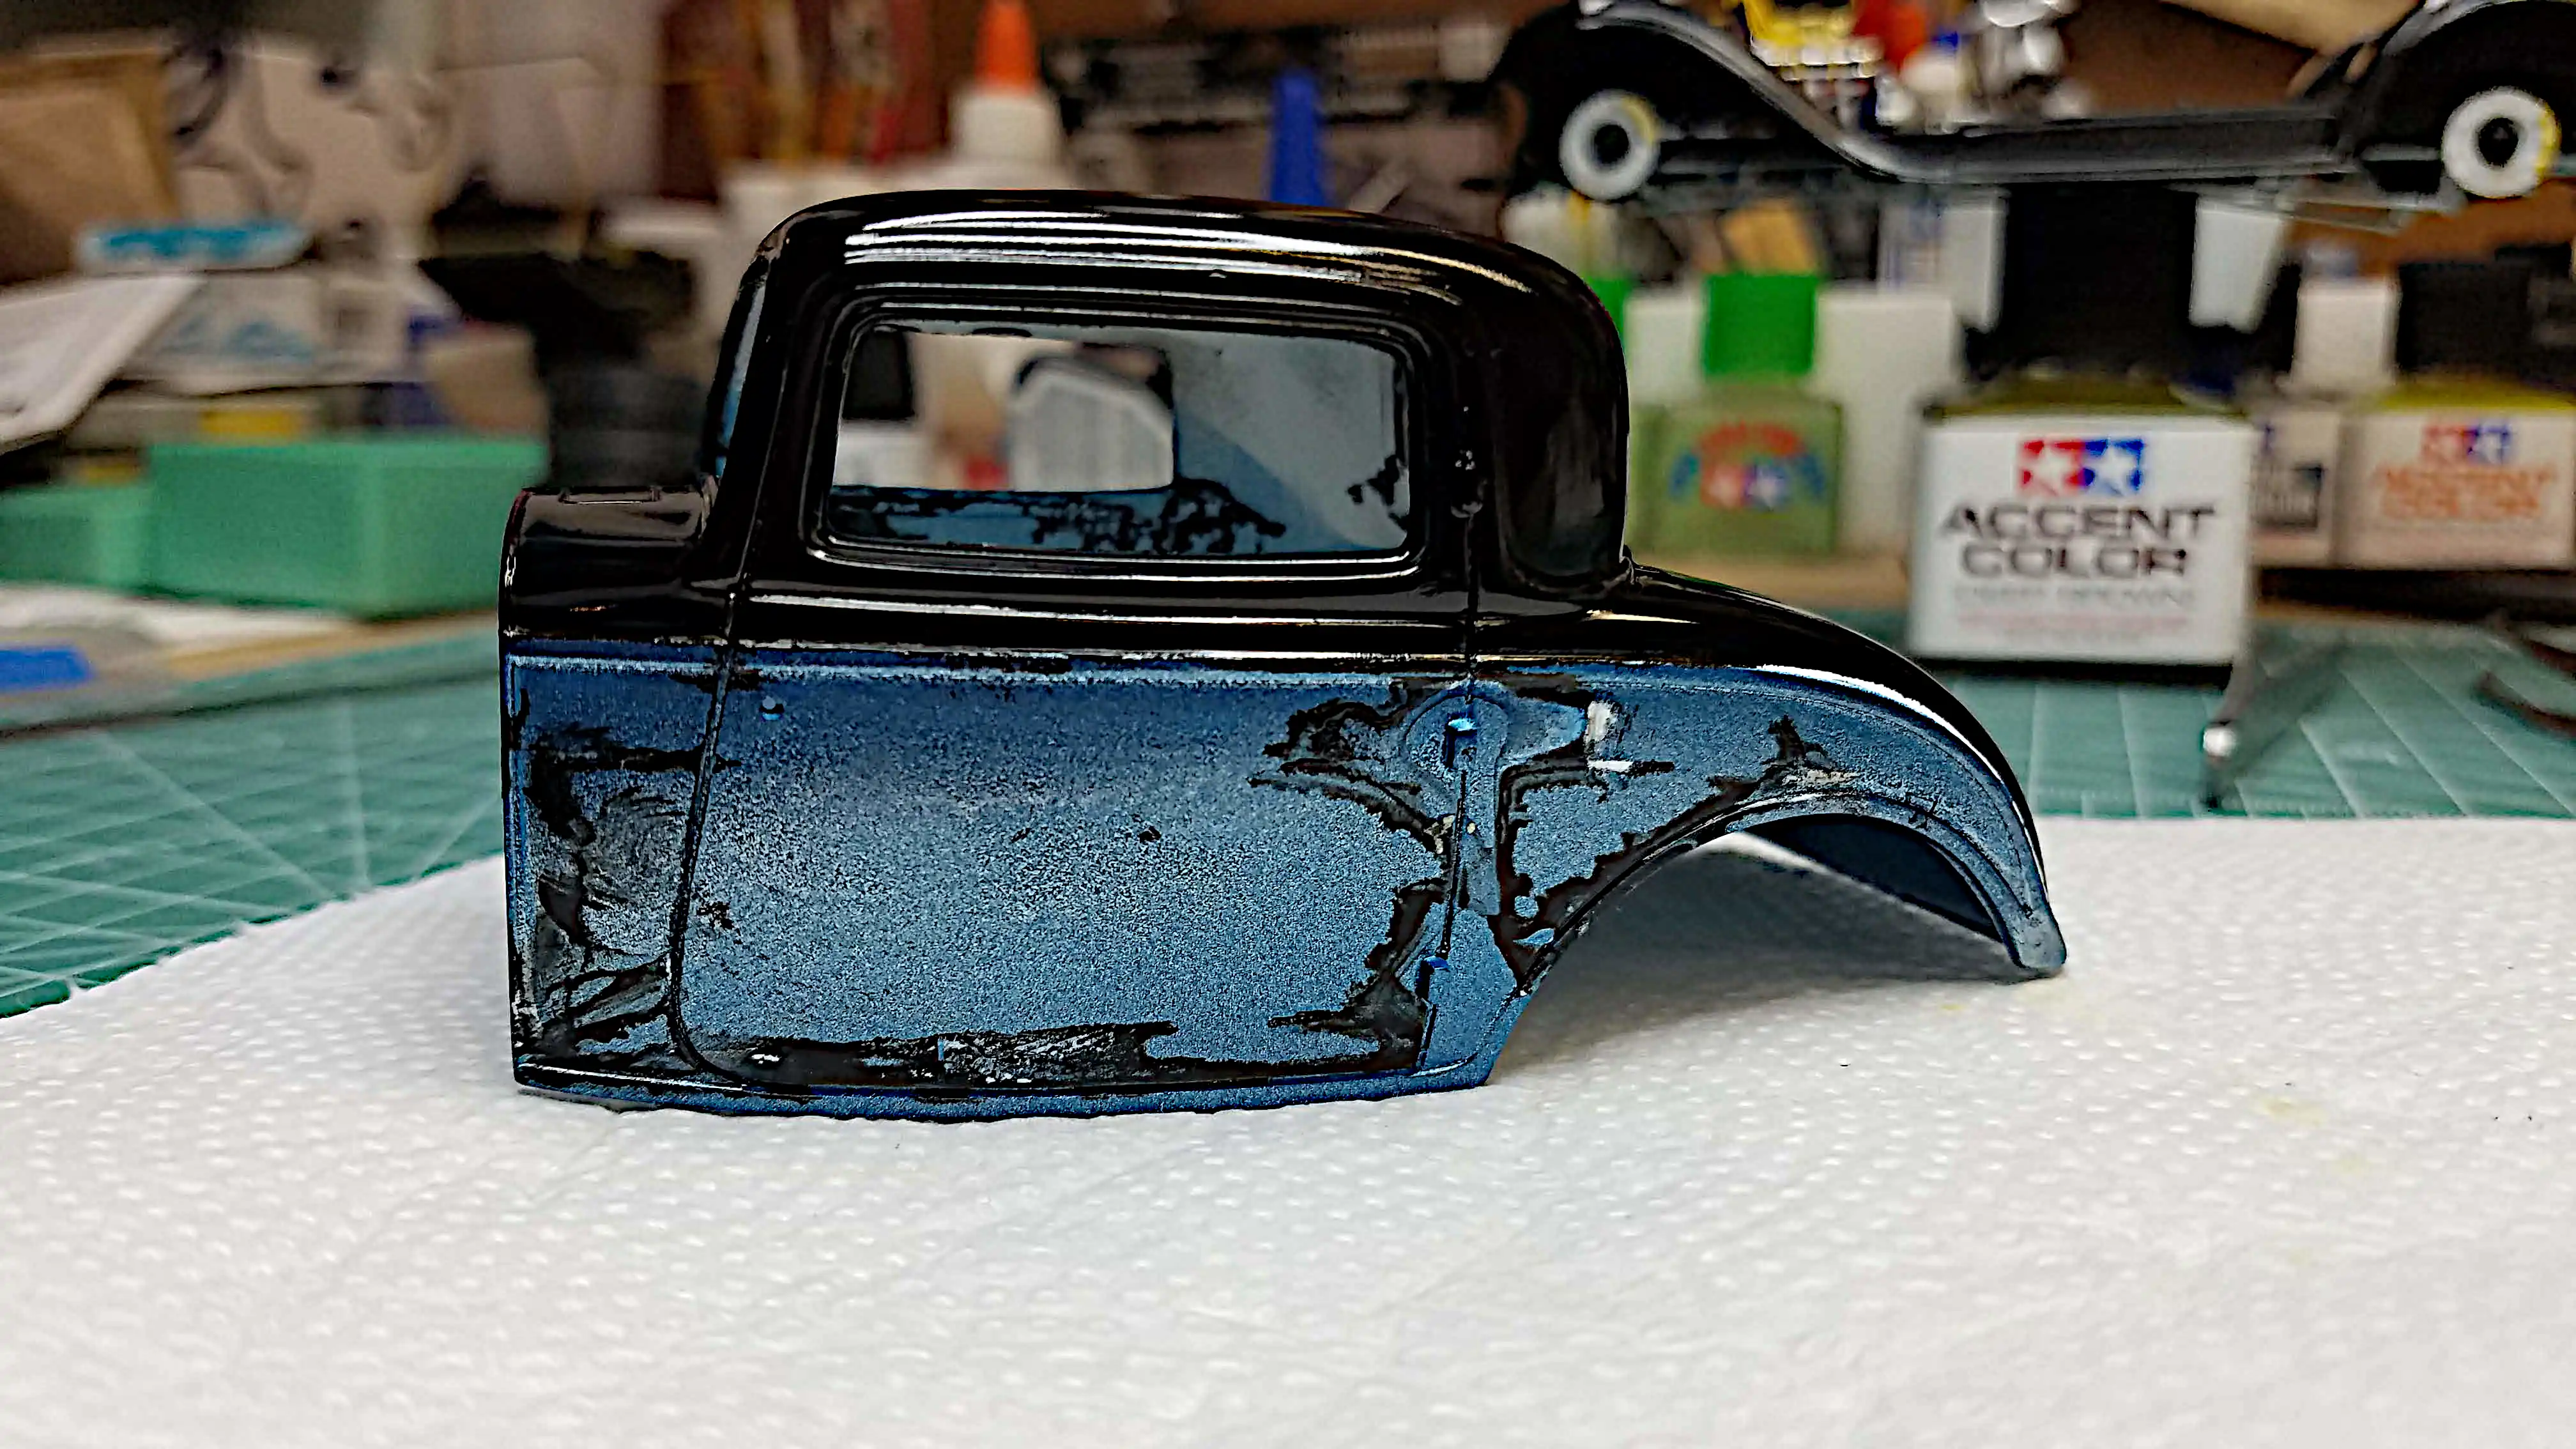
 Having a bad time with the body paint
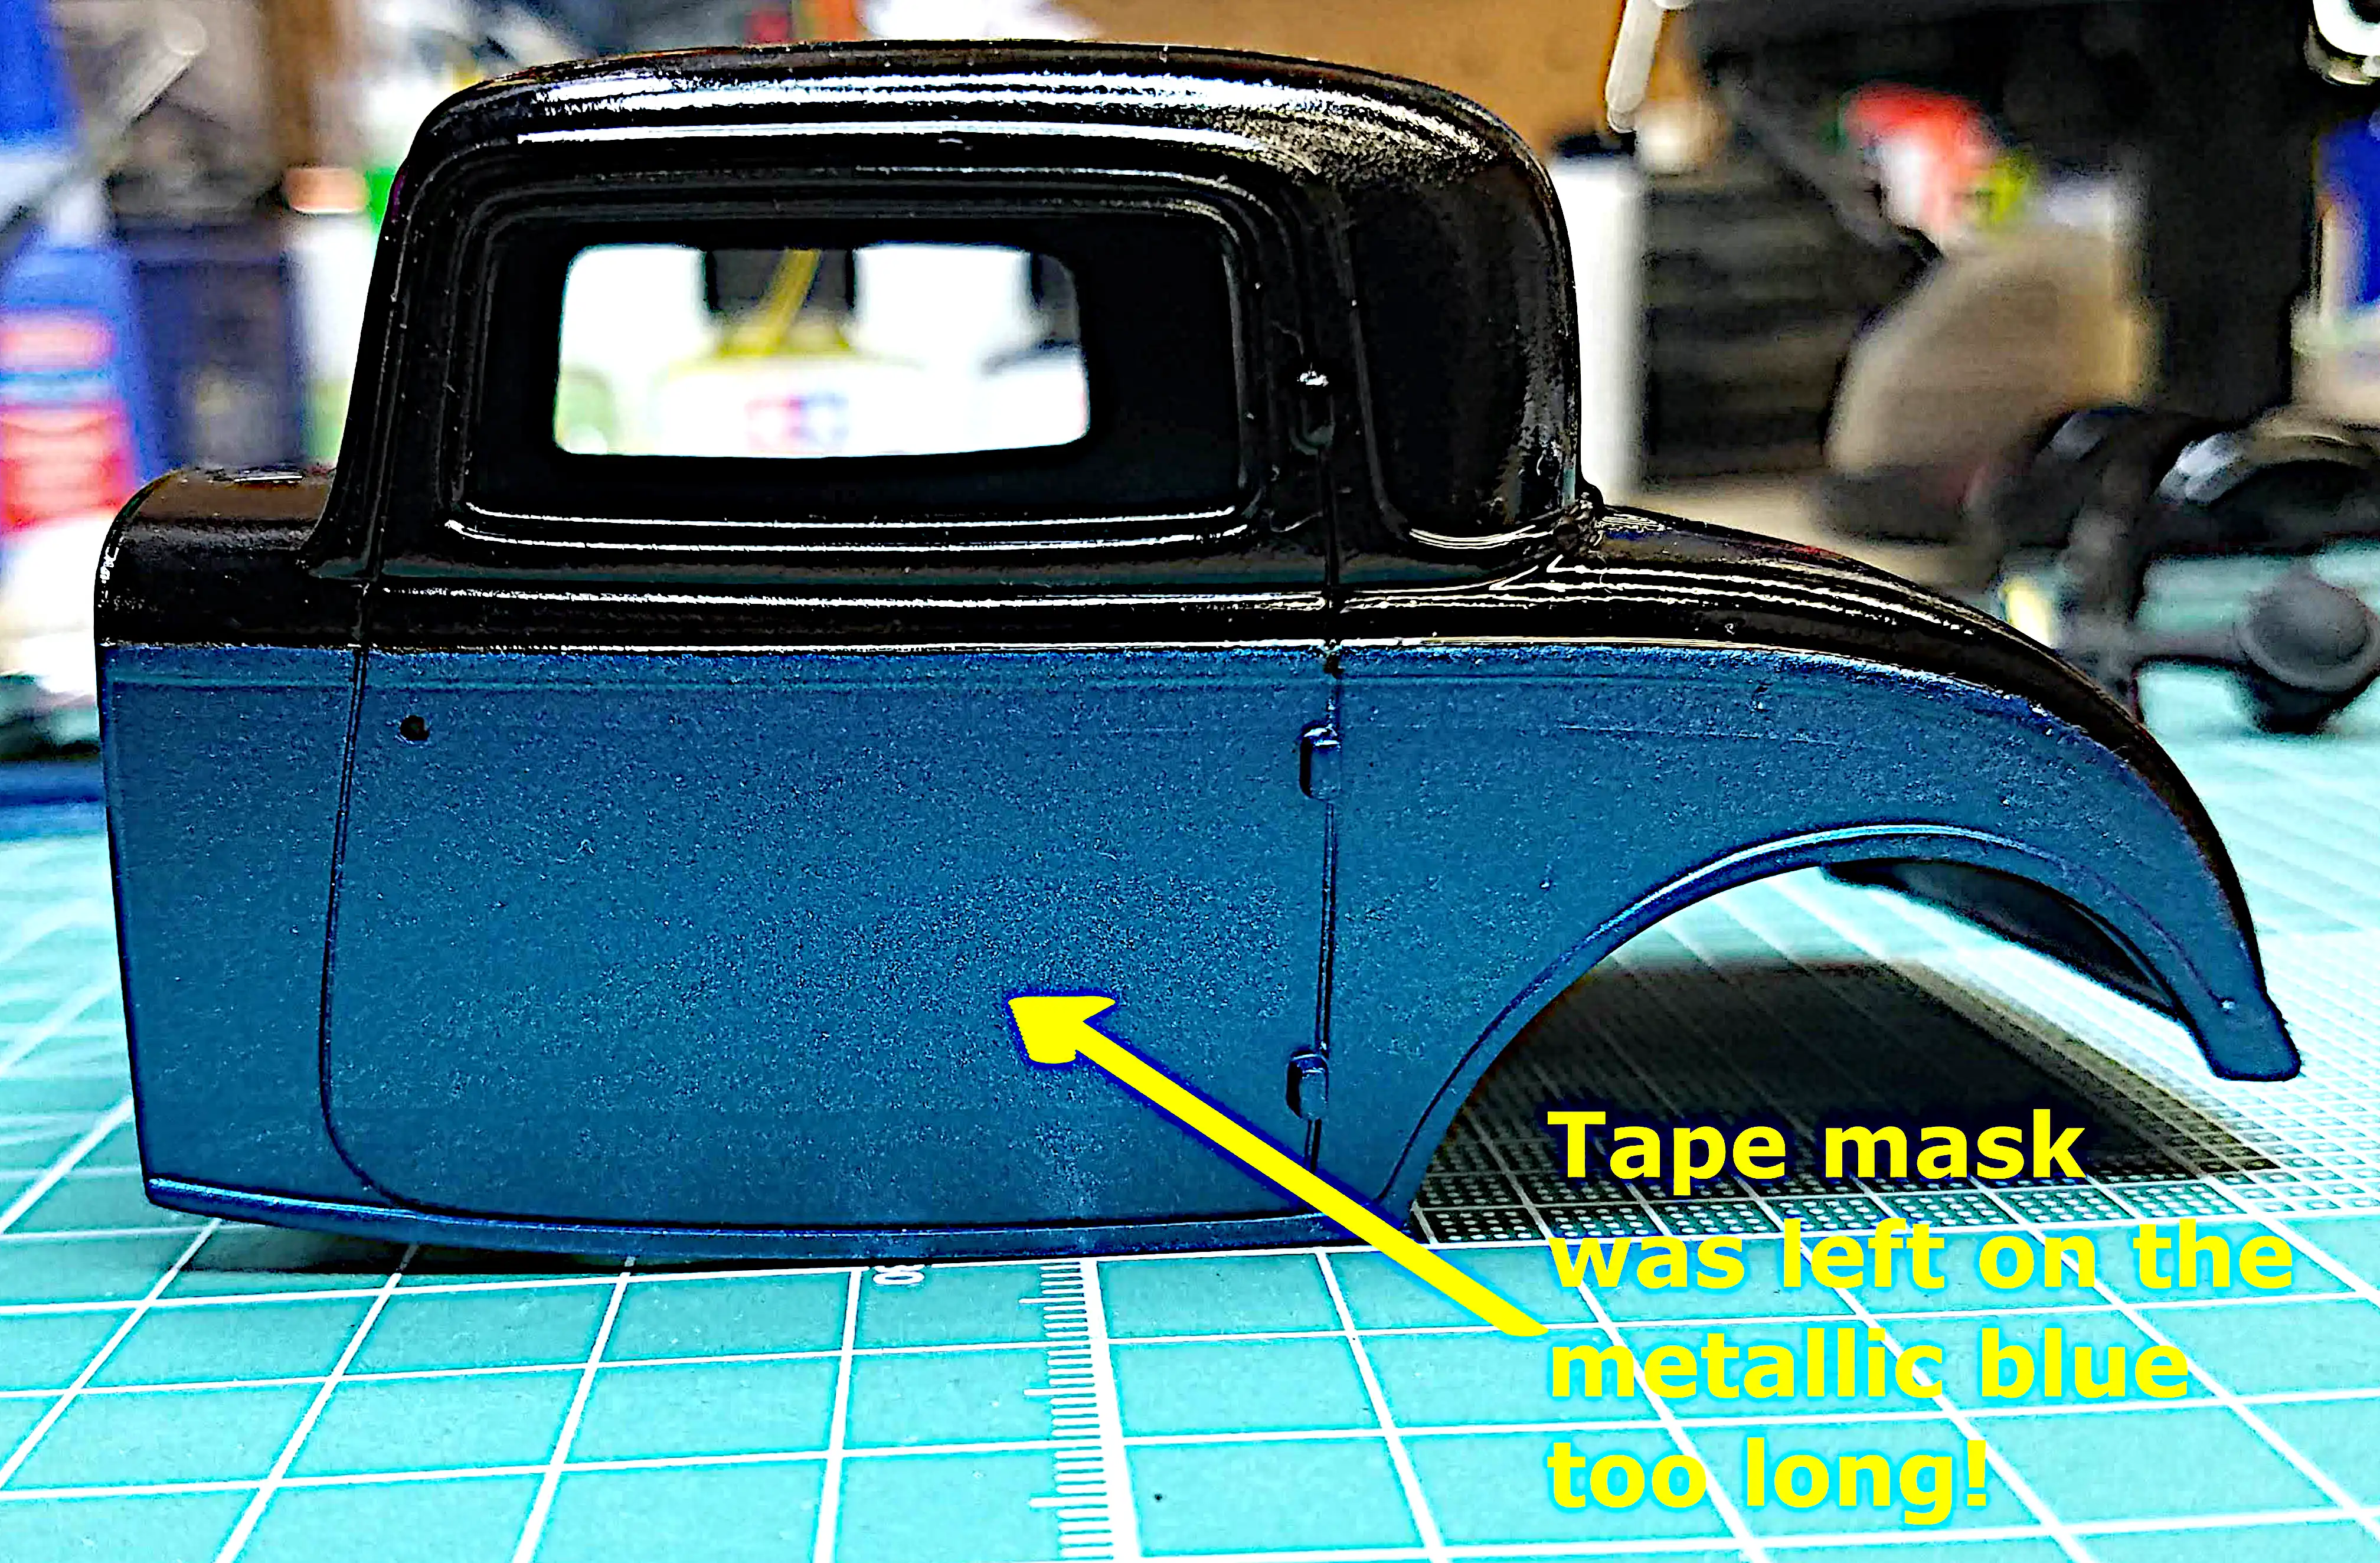
I've had a bad time with the body. It's the first time I ever used masking to separate two colors. One of my YouTube subscribers gave me some very helpful tips about masking and painting. My thanks to that subscriber. One of the tips is to remove the tape as soon as possible. This photo shows that tip to be absolutely correct. The tape had been masking the metallic blue for about 2-weeks. When the tape was finally removed, it left a hazy coating on the metallic blue paint. I attempted to buff it off; however, I burned through to the primer in a few small area. Lesson learned.
Photo 050
Click/tap photo to enlarge
 Gloss black portion of body has major orange peel
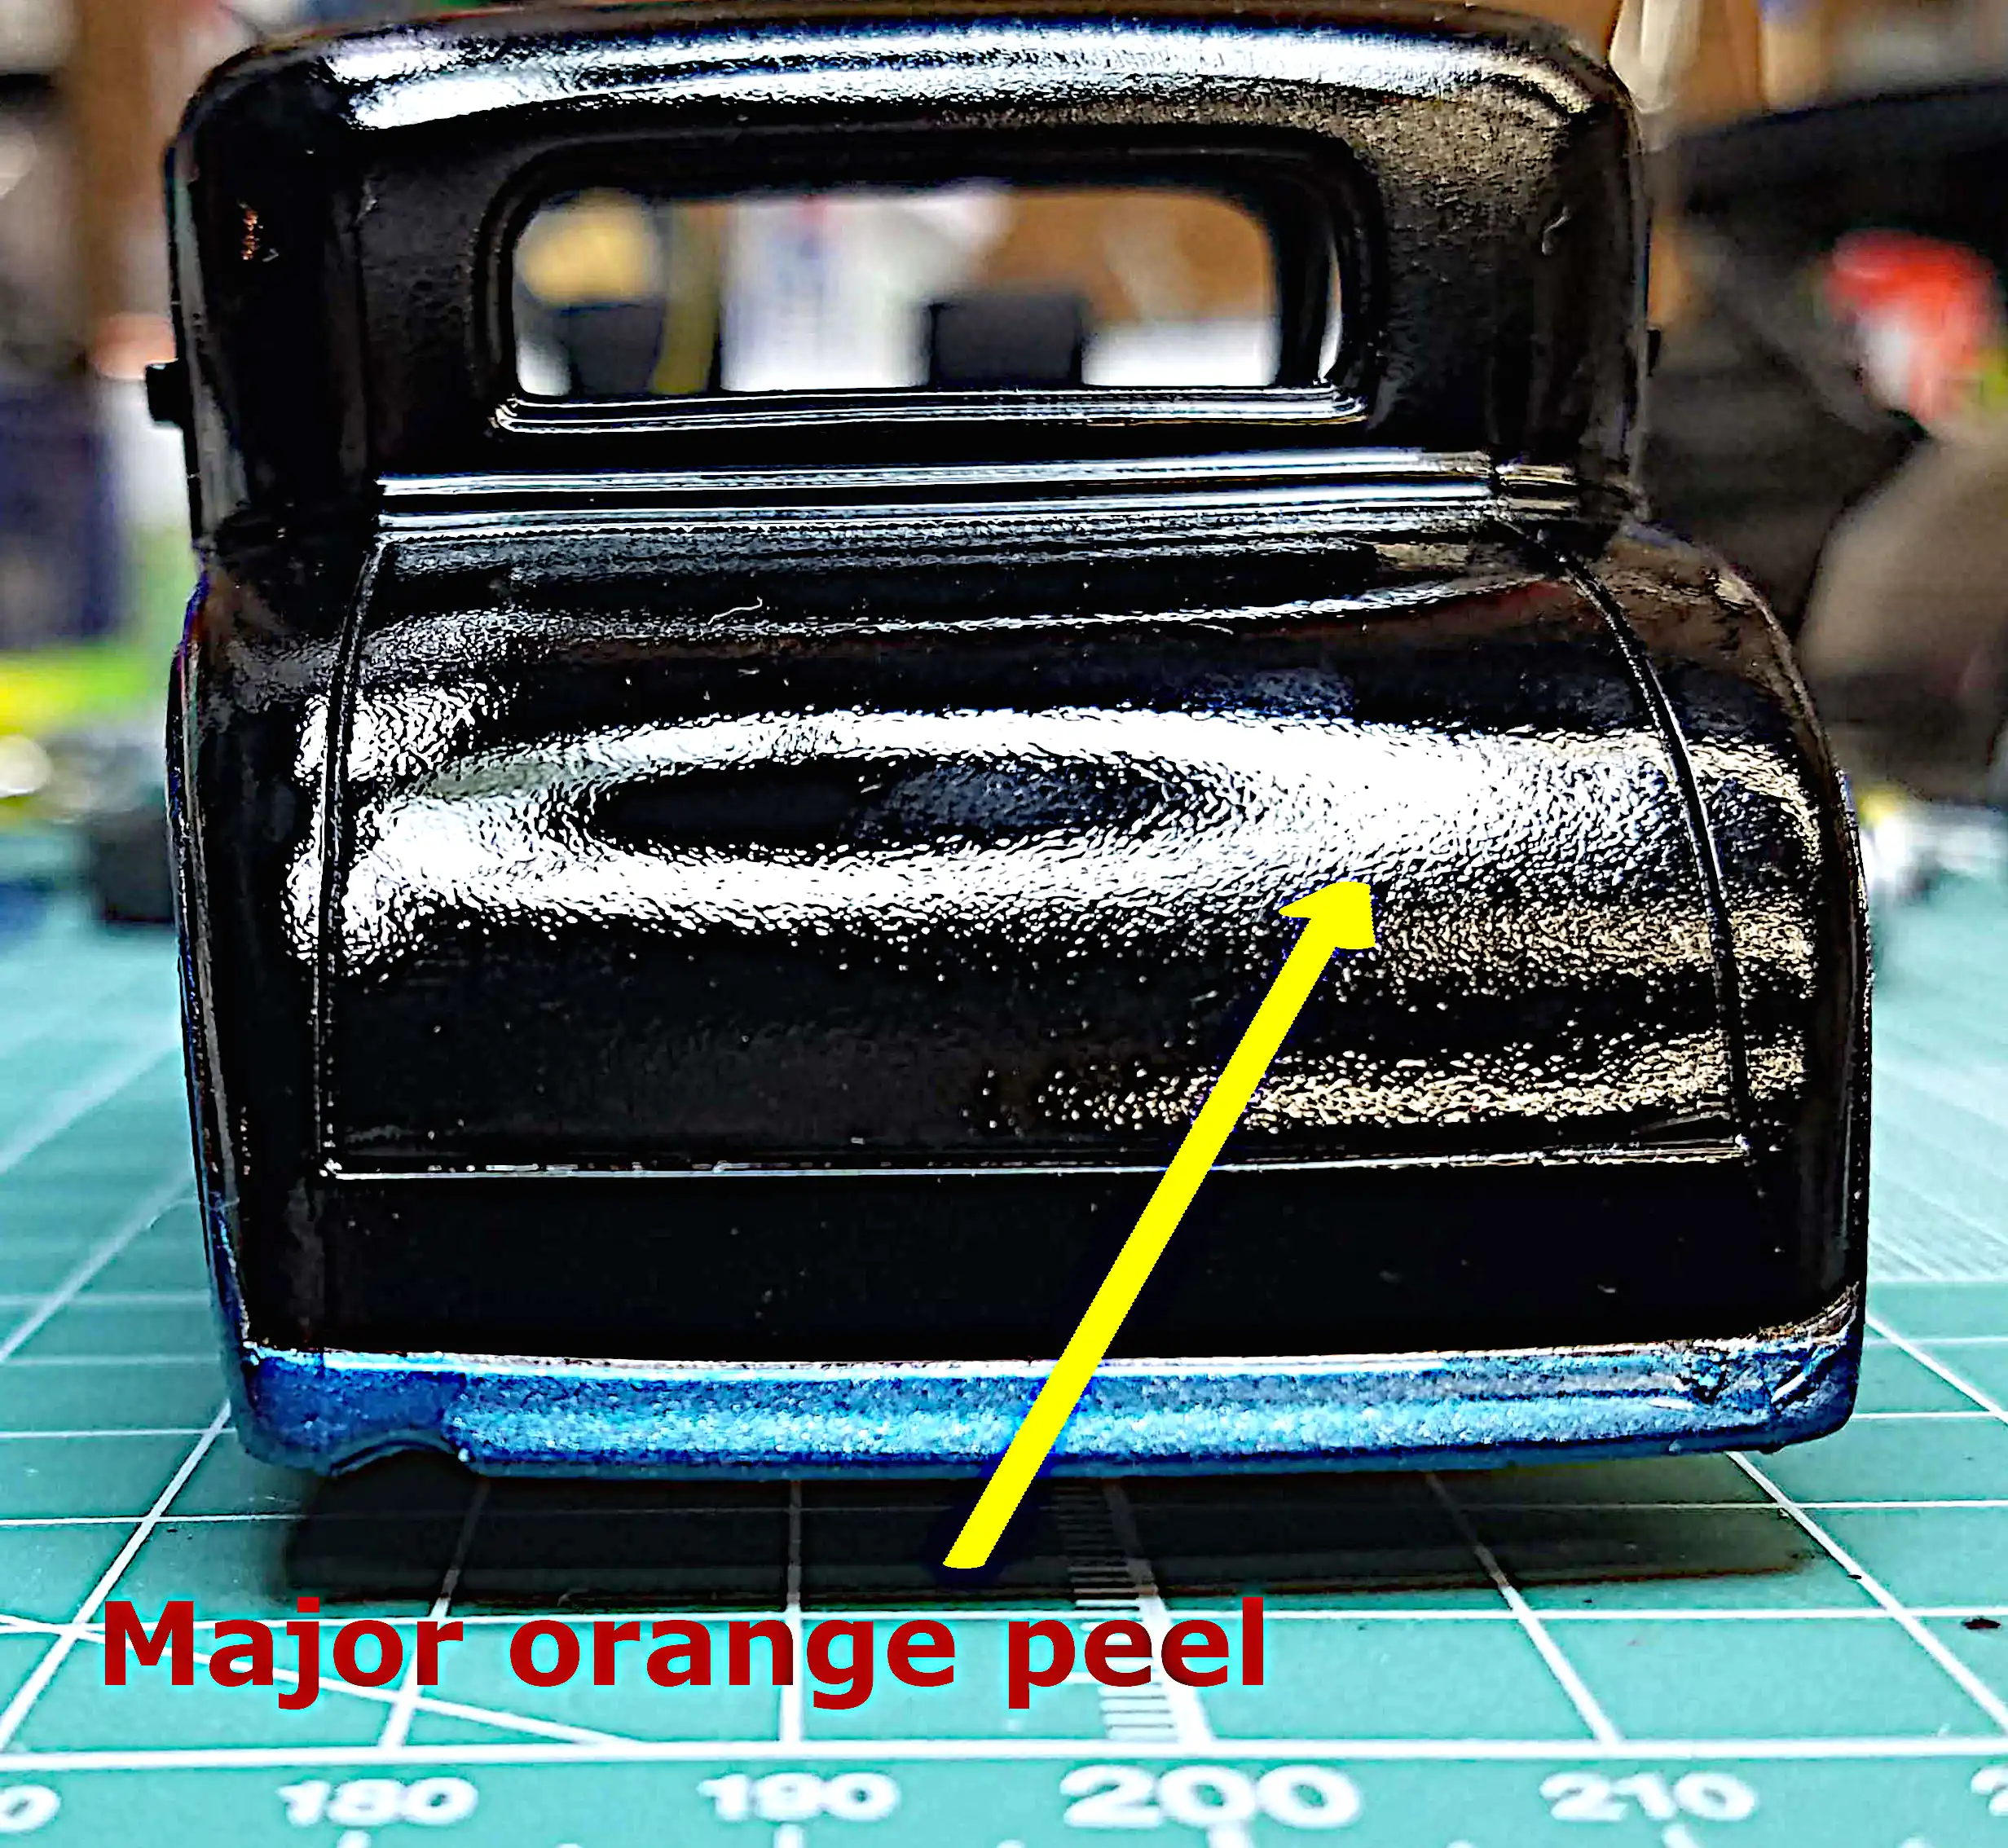
After respraying the gloss black I had major orange peeling. The worst is on the trunk. It's actually the worst I've ever experienced. Everything was the same...same paint, same airbrush, same air pressure, same spray booth, same airbrush to surface distance. The only variable I can determine is that the paint was not thin enough this time.
Photo 051
Click/tap photo to enlarge
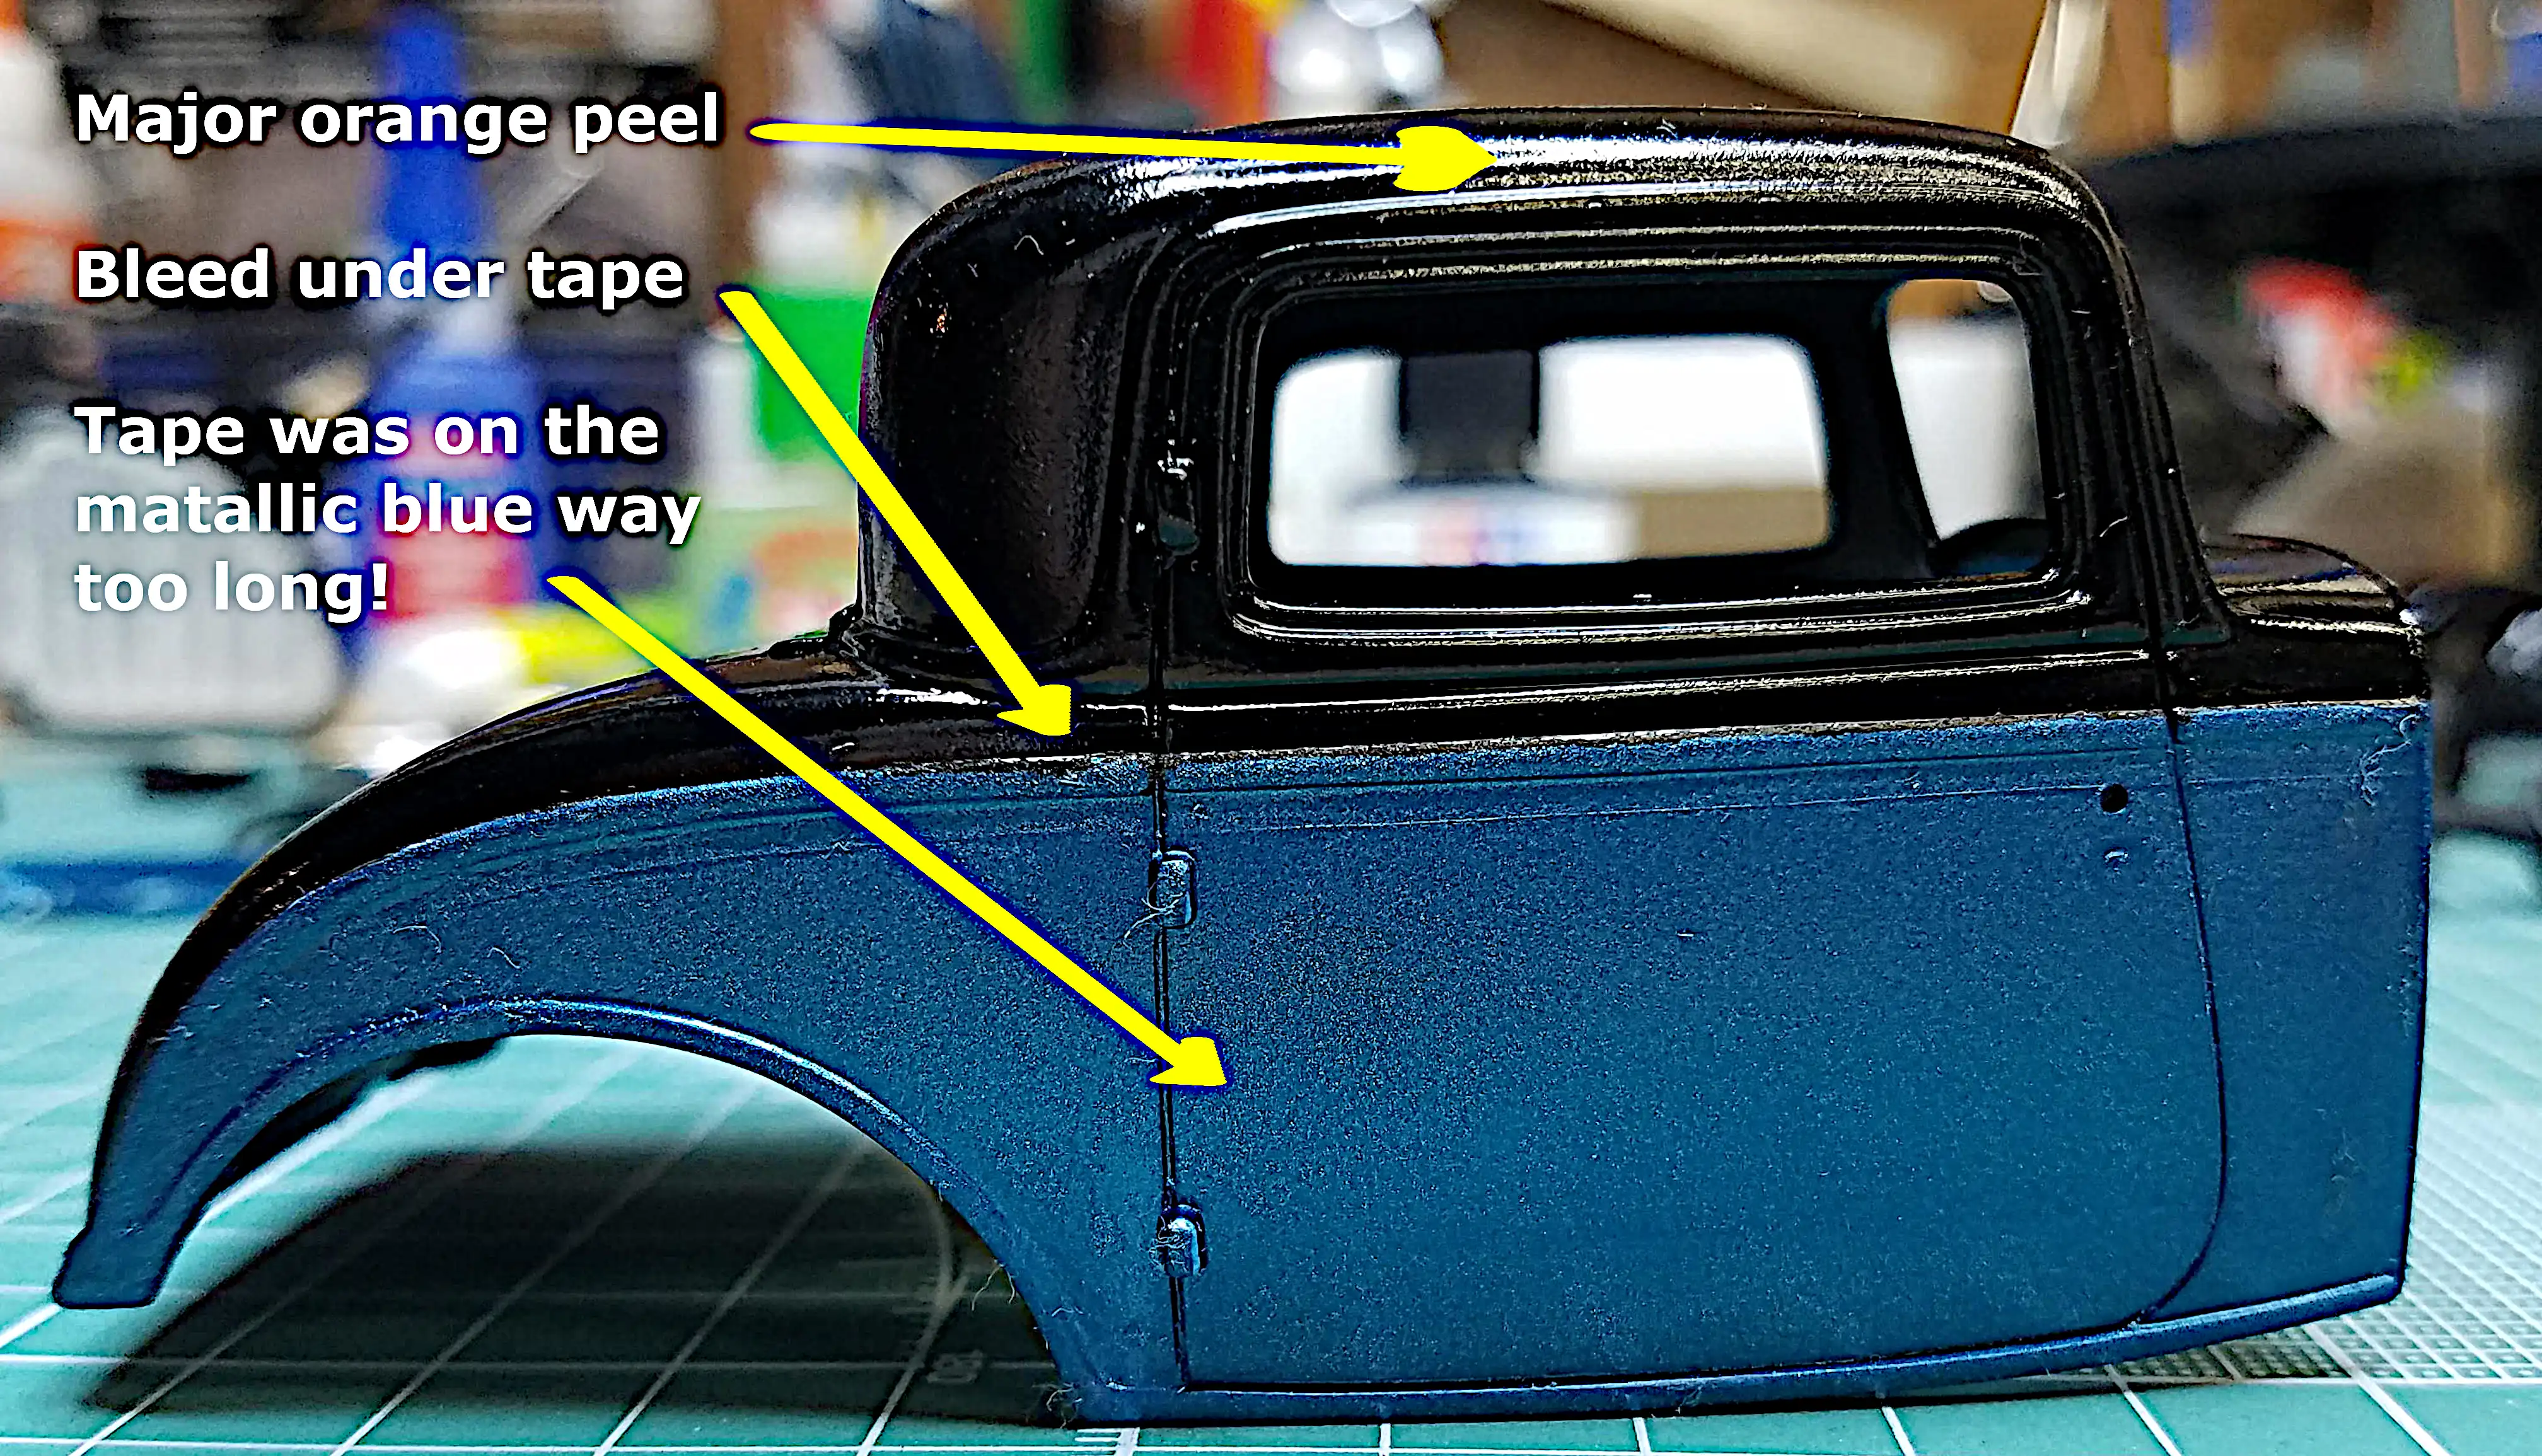 Orange peel on other parts of the gloss black
The left side of the body also shows orange peeling and tape residue. I had some bleed under the tape on this side; however, that is something easily fixed.
I'm not planning to fix any of these problems. I plan on either giving the body a bath in the purple pond and starting over...or...I find that 91% Isopropyl Alcohol also strips the Tamiya Acrylic paints and then repainting the entire body.
Photo 052
Click/tap photo to enlarge
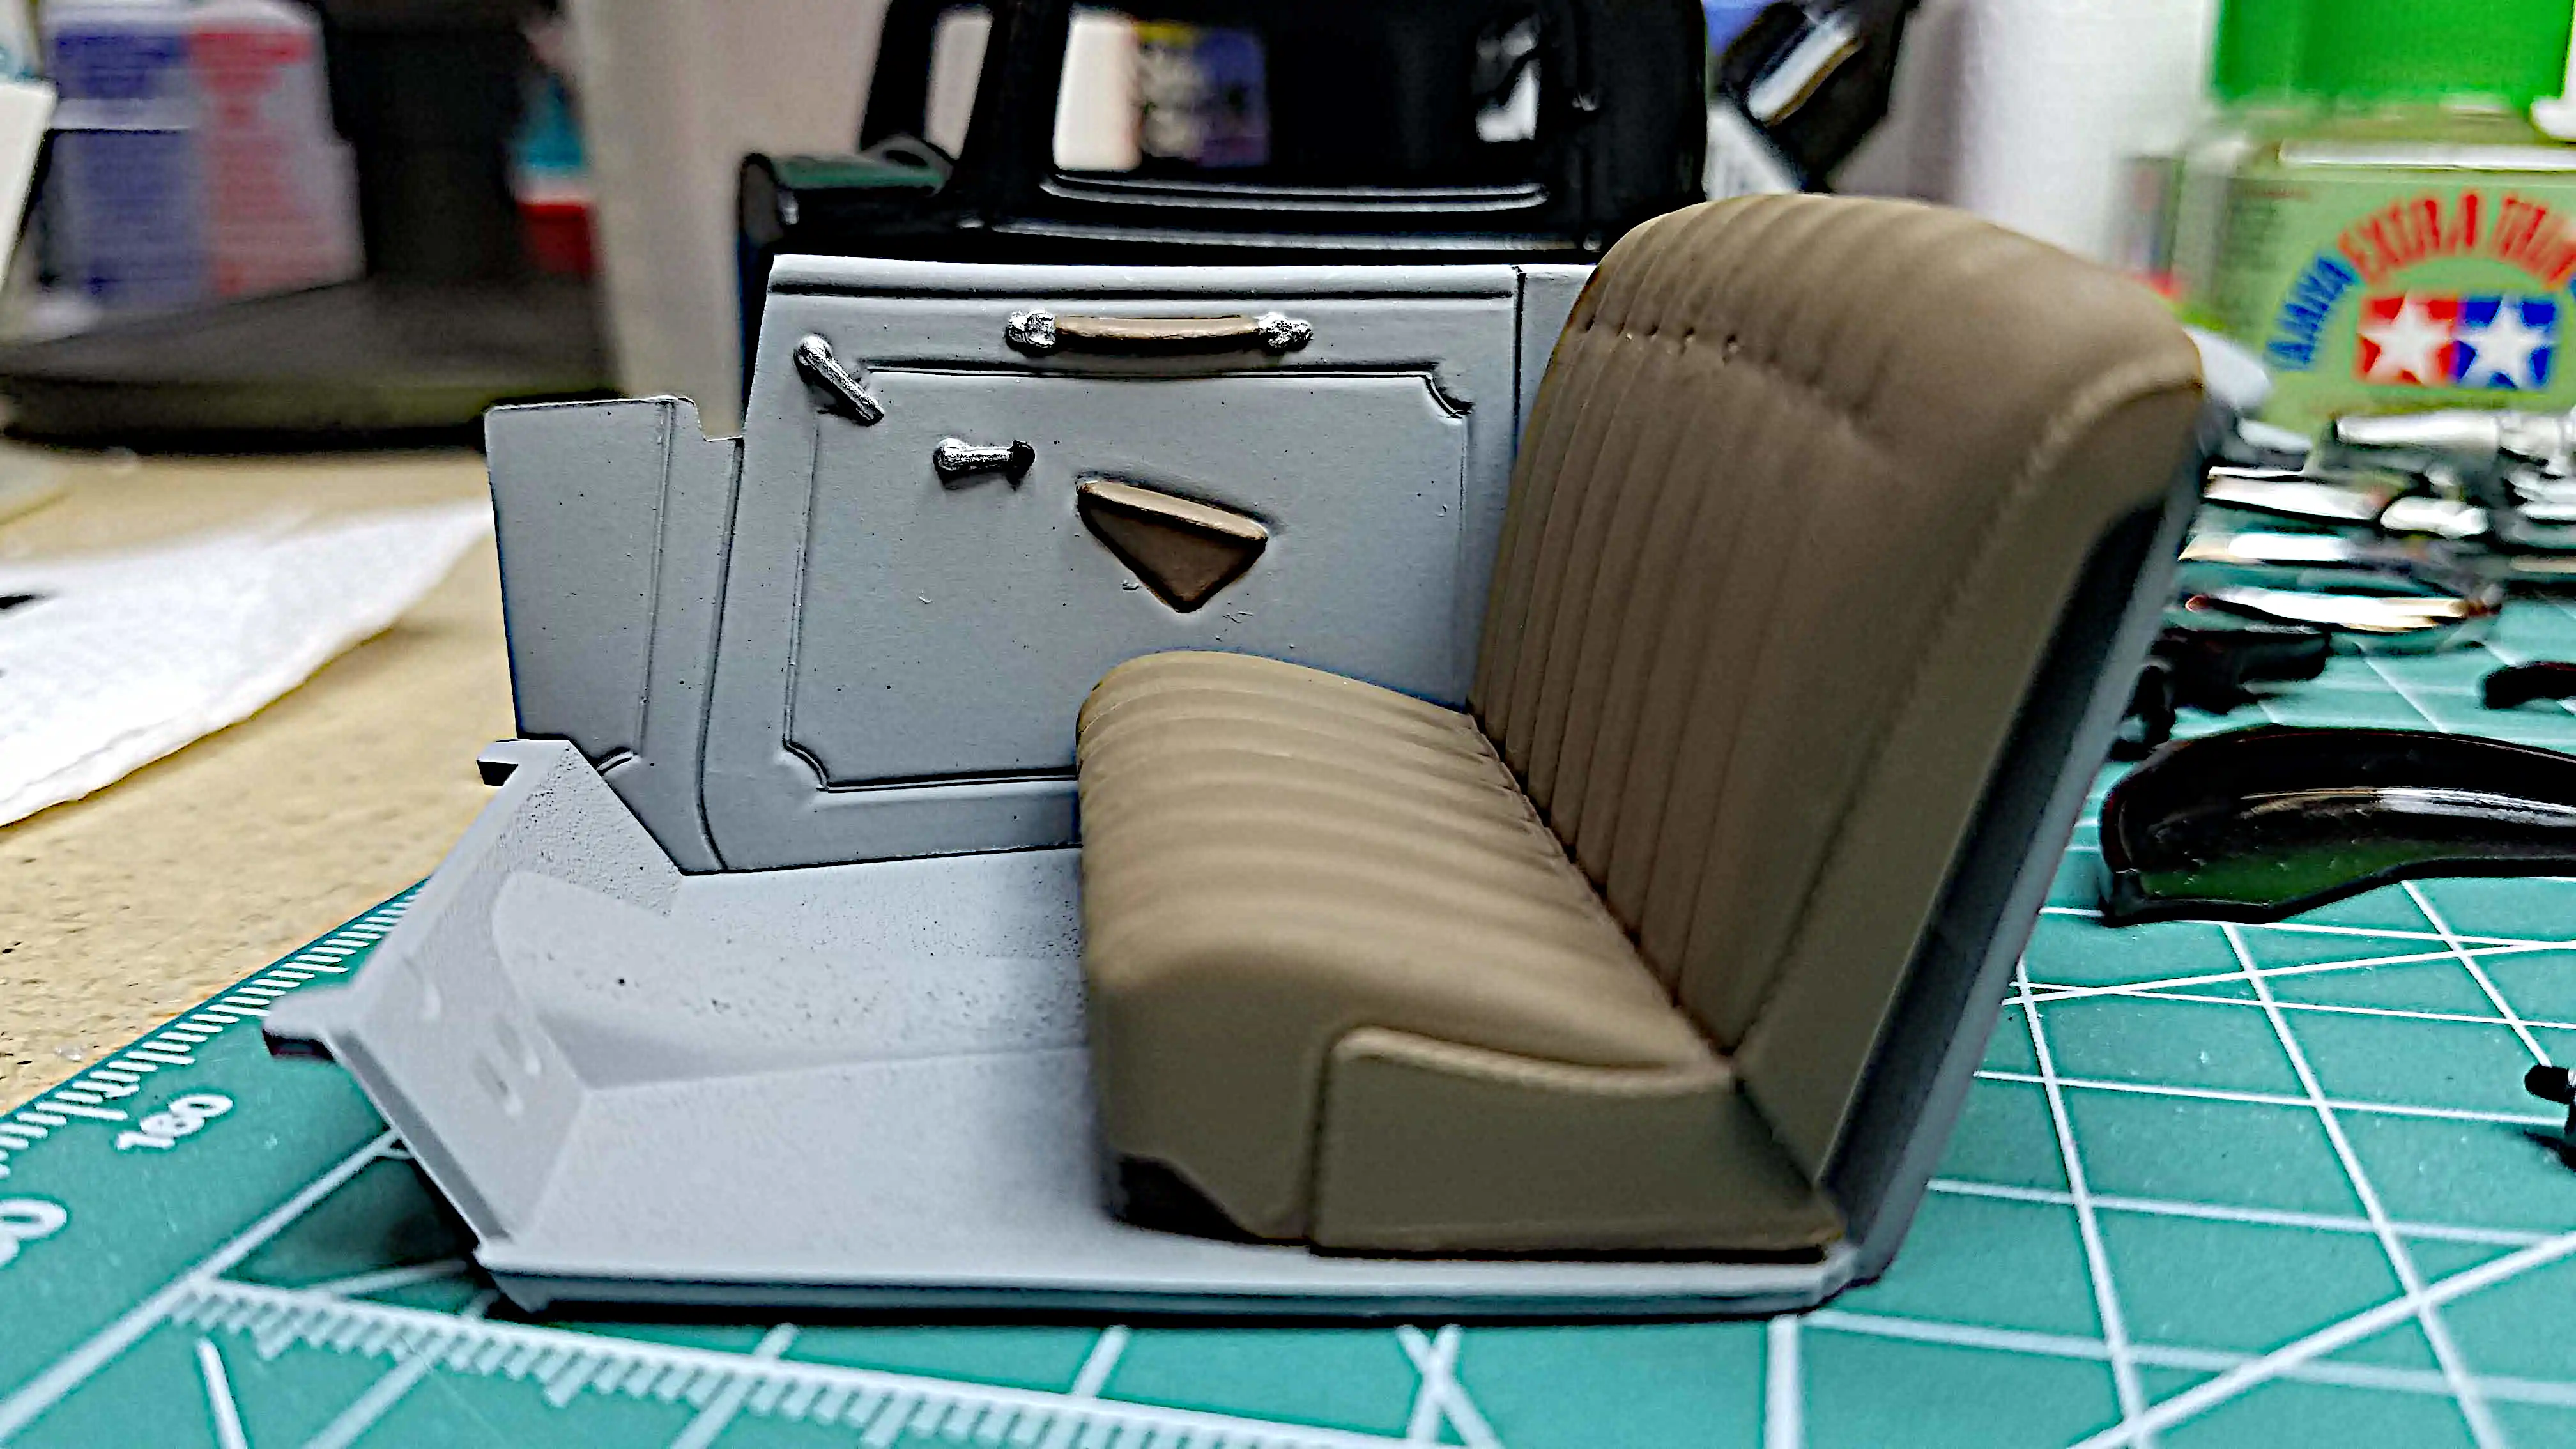
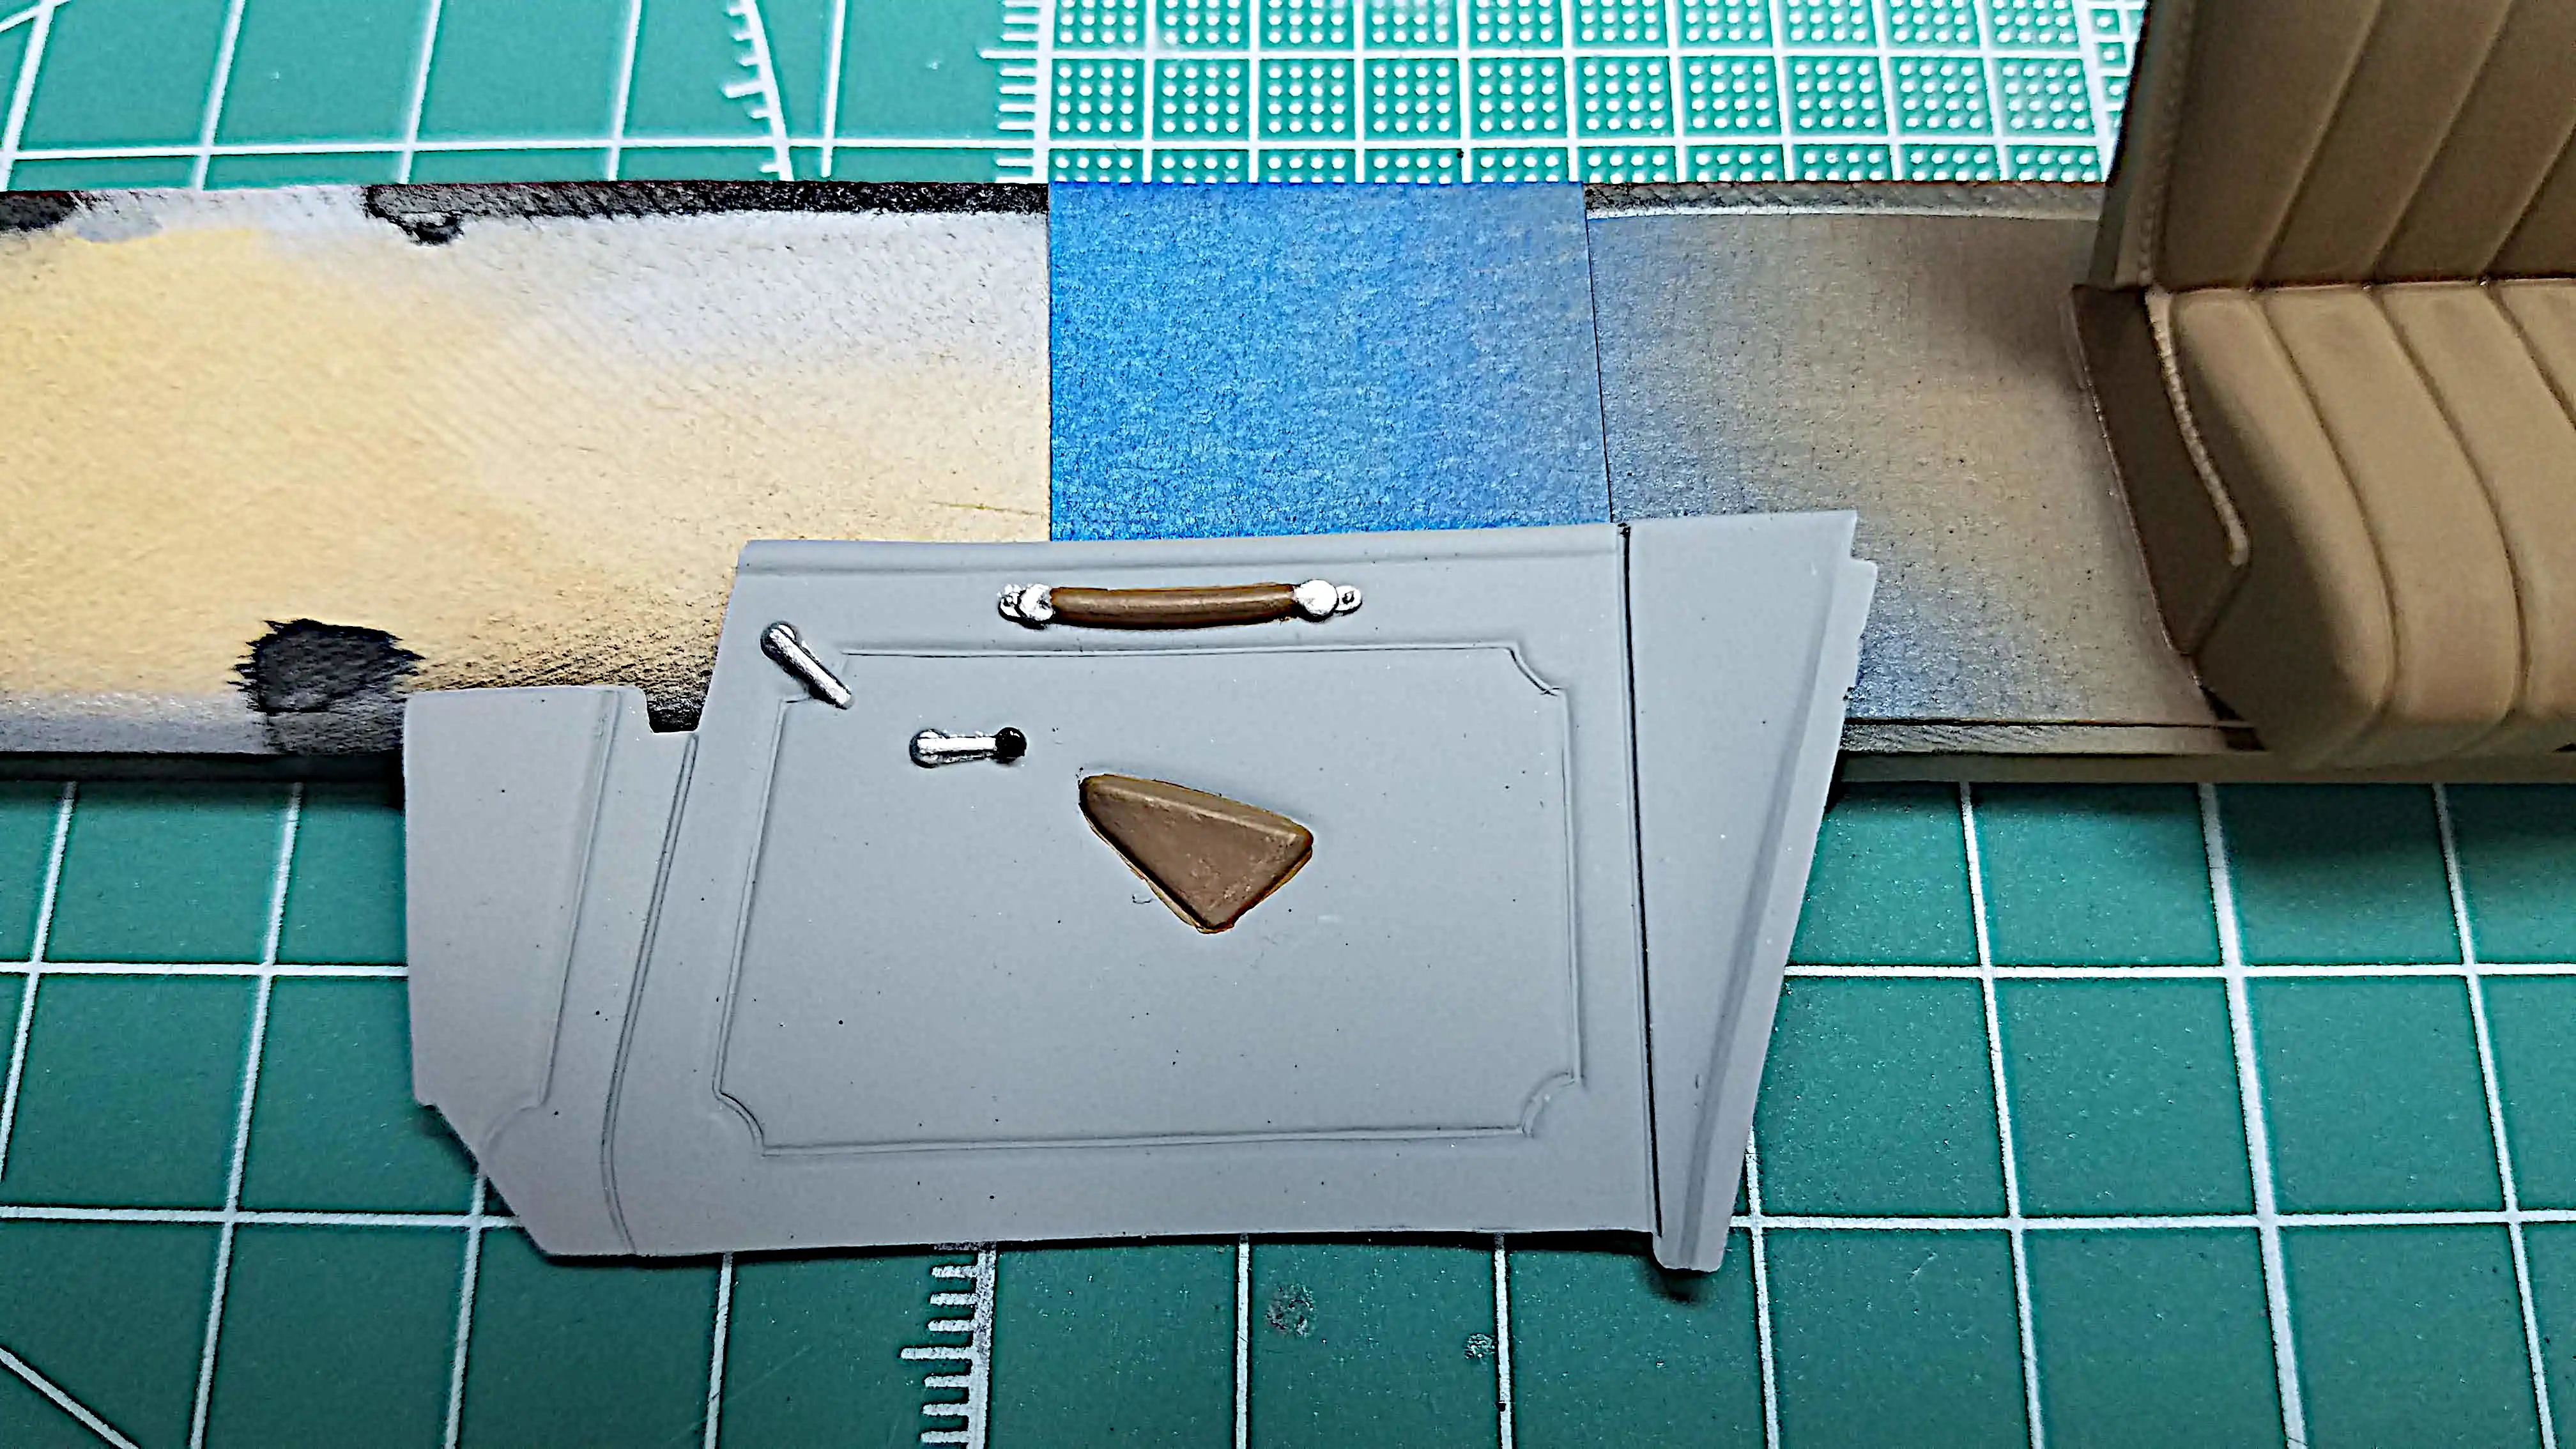 Interior door panels are detailed
I did some detailing on one of the interior door panels. The other door panel had to be stripped and I'm waiting for the primer to dry on it. I used Tamiya XF-52 Flat Earth on the arm rest and the pull handle strap. The window crank, door handle and pull handle mounts are painted in Tamiya X-11 Chrome Silver. The window crank handle is Tamiya X-1 Gloss Black.
Photo 053
Click/tap photo to enlarge
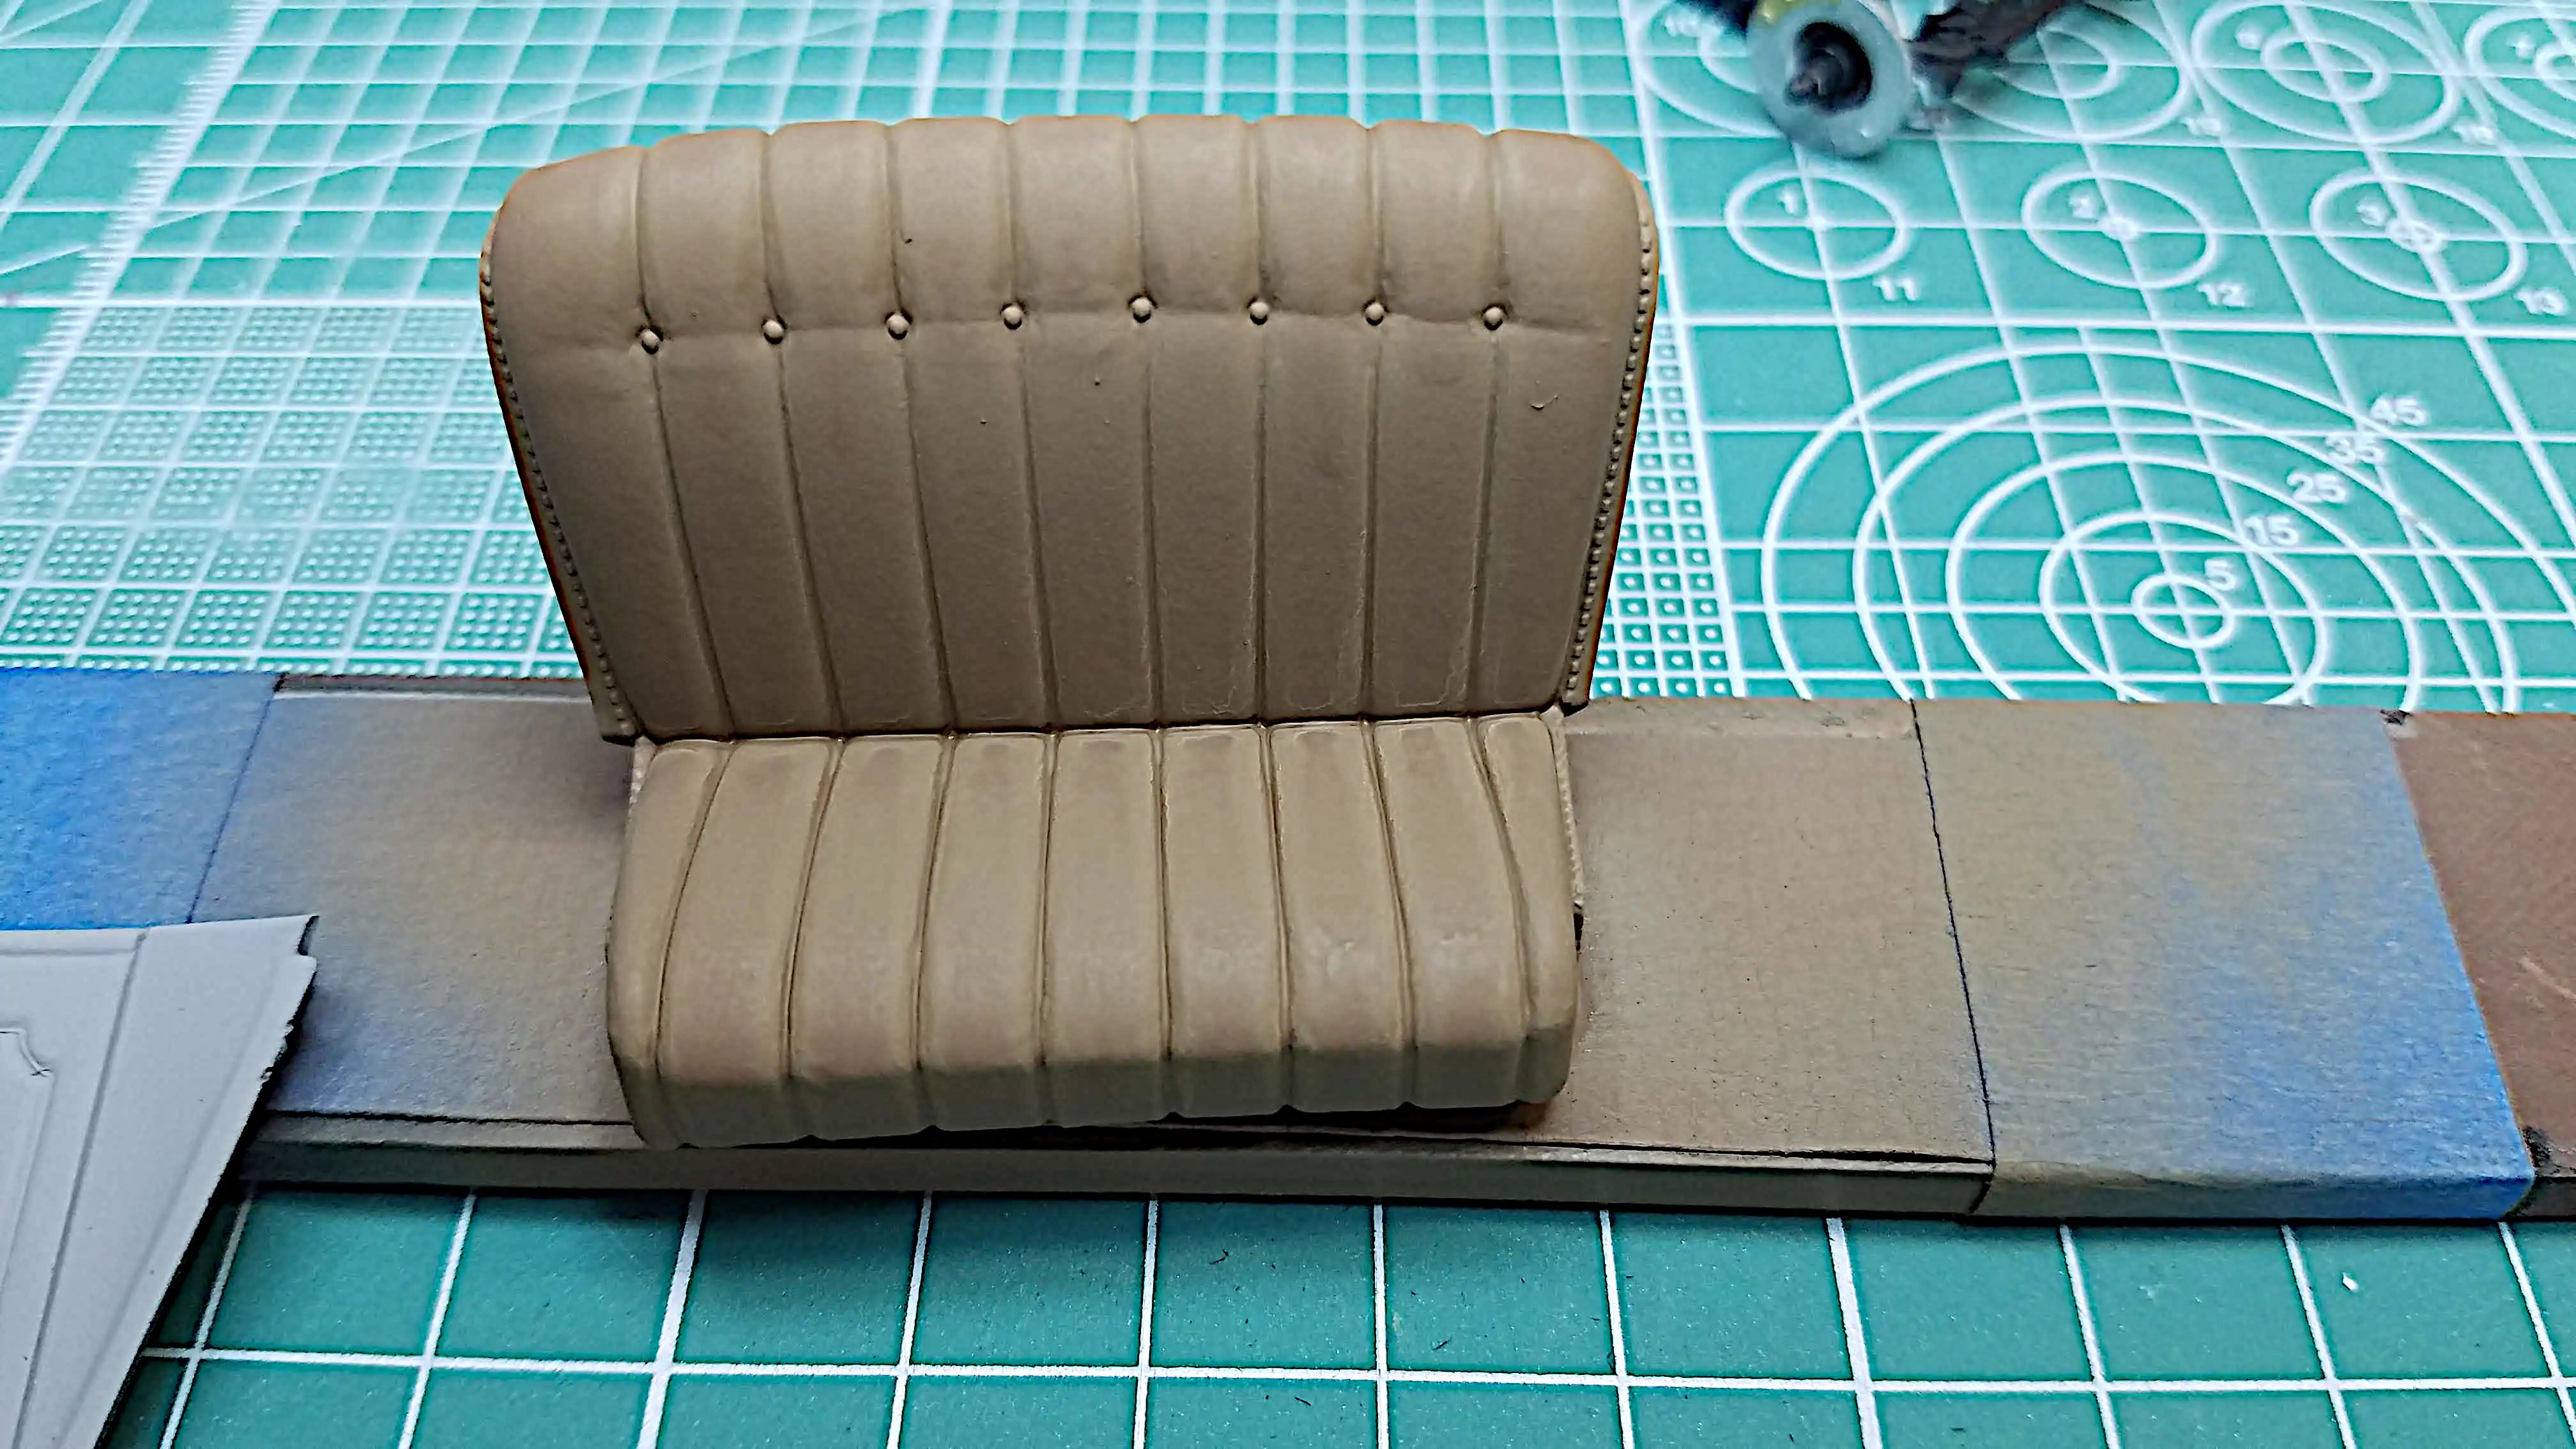 Bench seat is painted
The bench seat is painted with Tamiya XF-52 Flat Earth. The paint in this photo is still a-bit wet.
Photo 054
Click/tap photo to enlarge
 Steering linkage is painted
The steering linkage is painted with Tamiya X-10 Gun Metal.
Photo 055
Click/tap photo to enlarge
 Steering column is painted
The steering column is painted in Tamiya X-13 Metallic Blue to match the side panels of the body. The dash board (not shown here) is also done in X-13 Metallic Blue. The column levers are Tamiya X-11 Chrome Silver and the lever handles are Tamiya X-1 Gloss Black.
Photo 056
Click/tap photo to enlarge
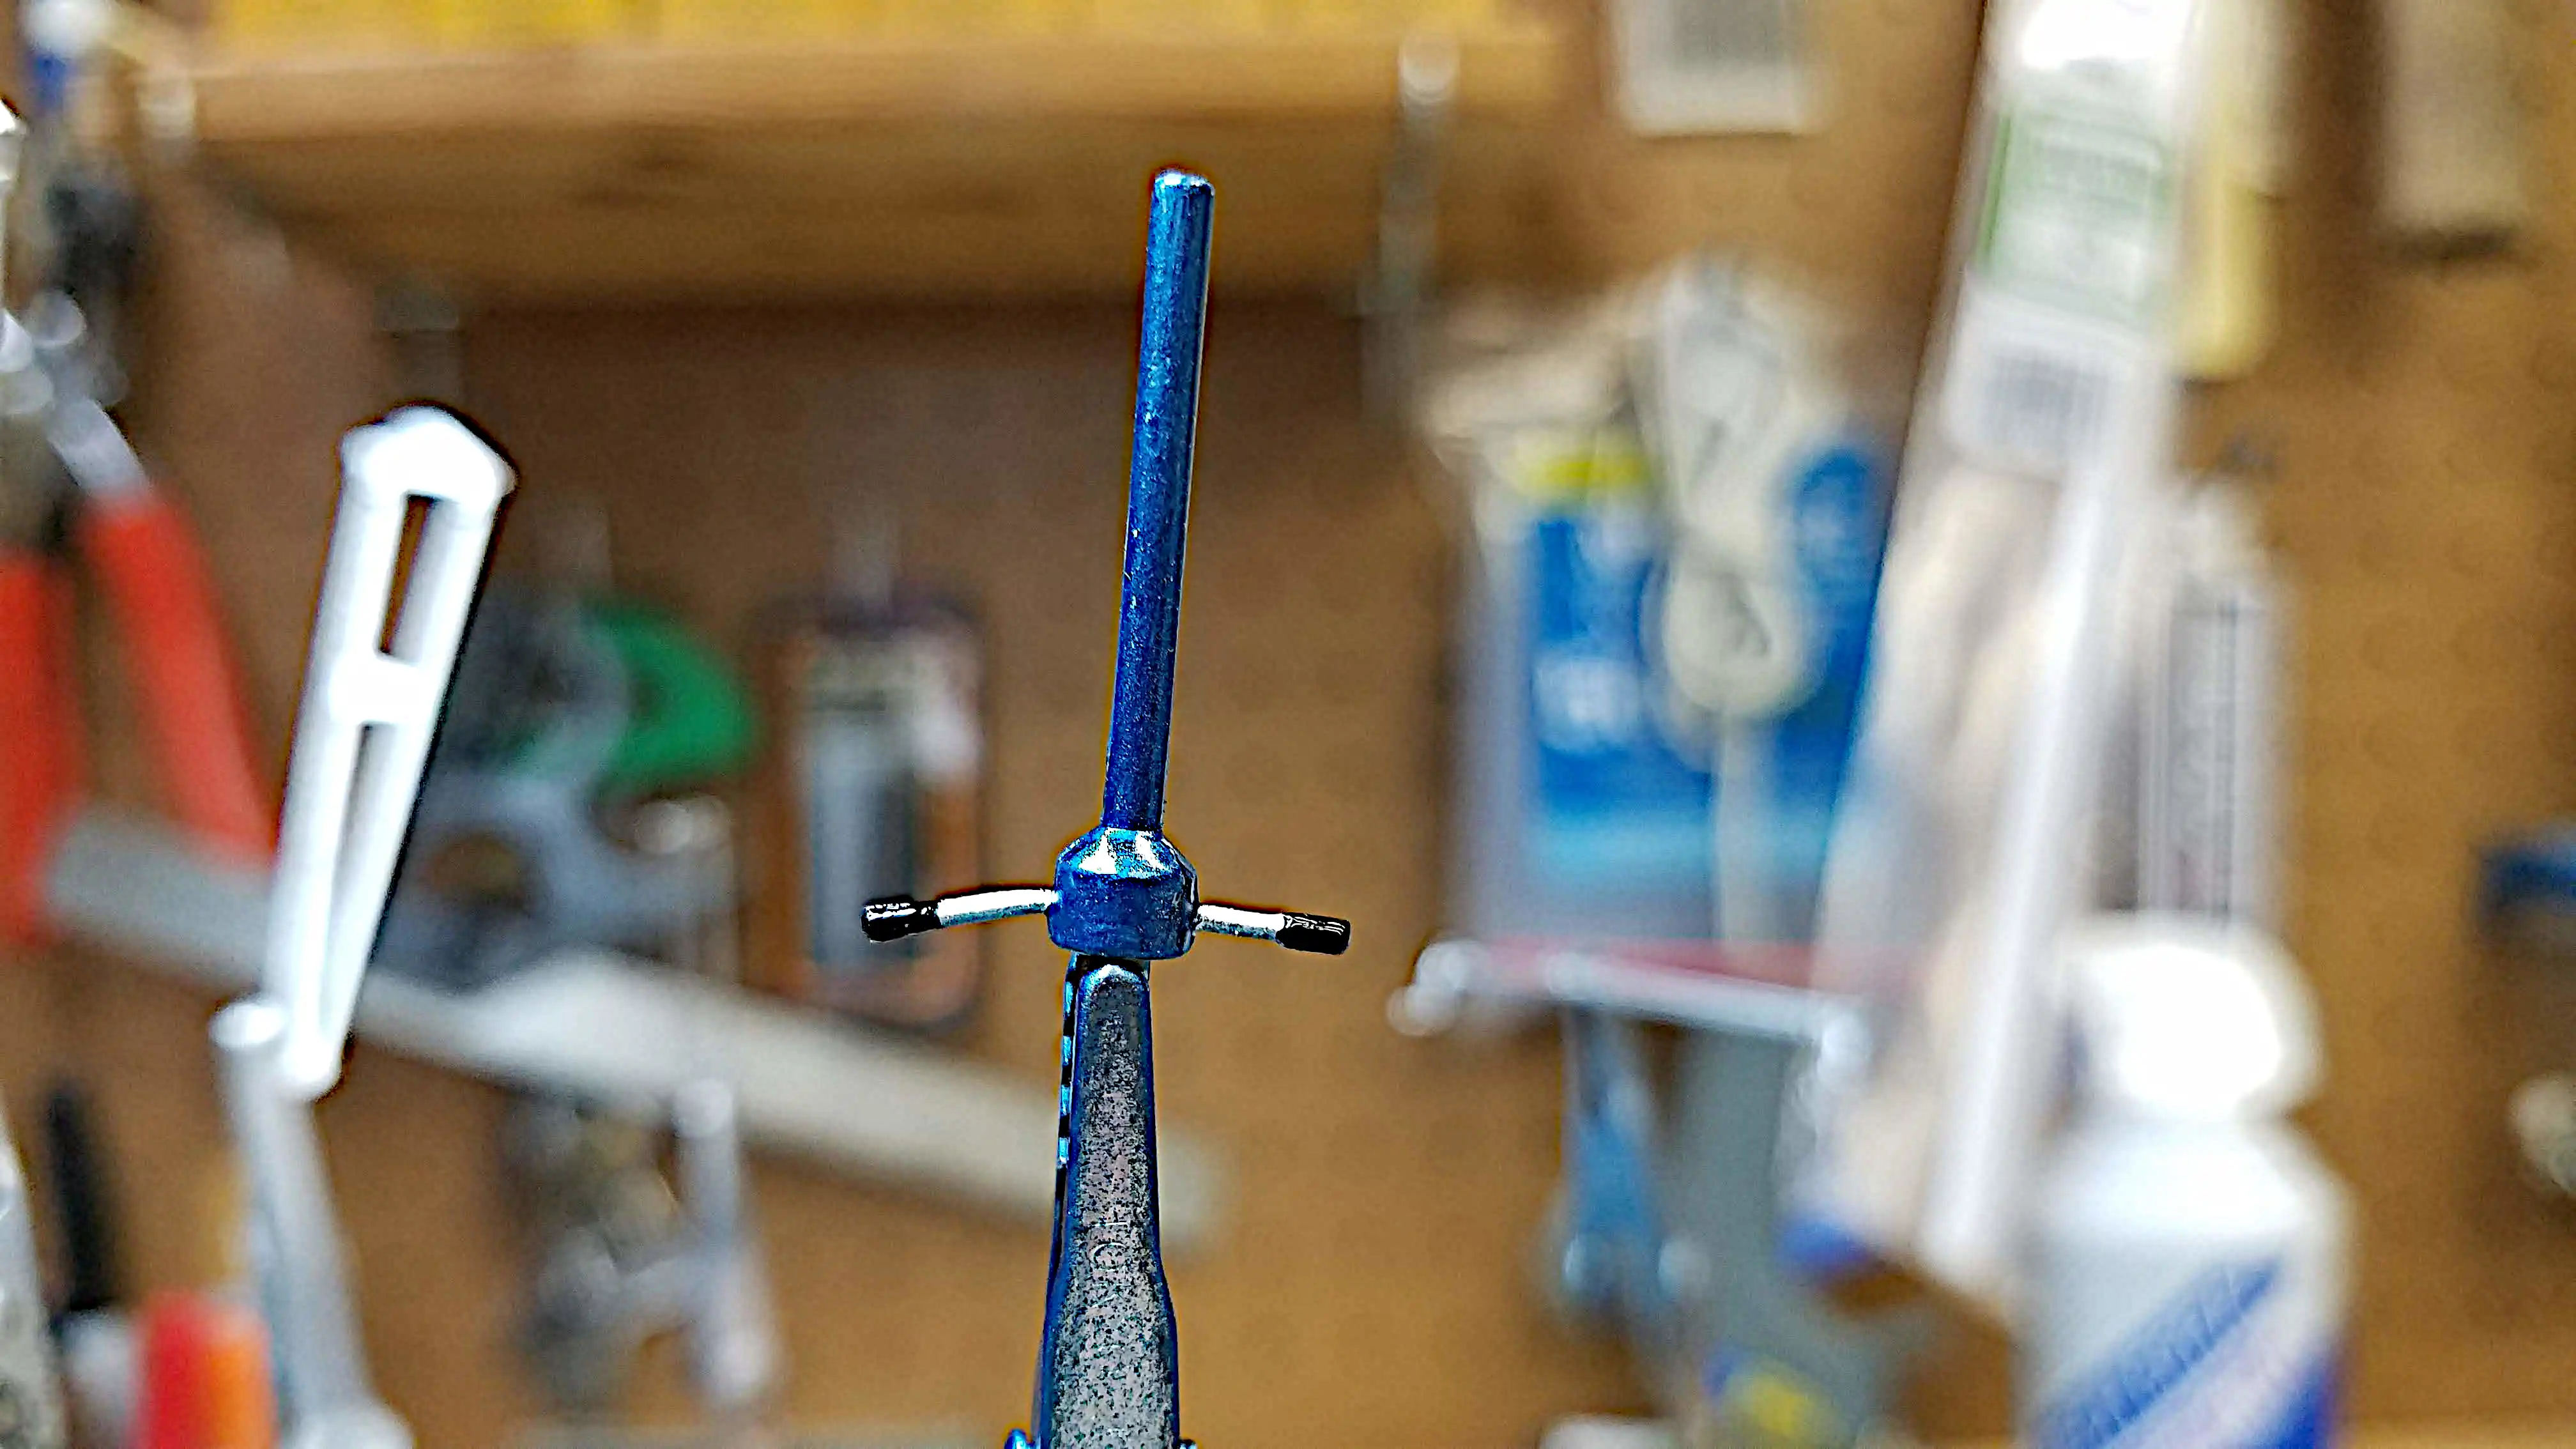
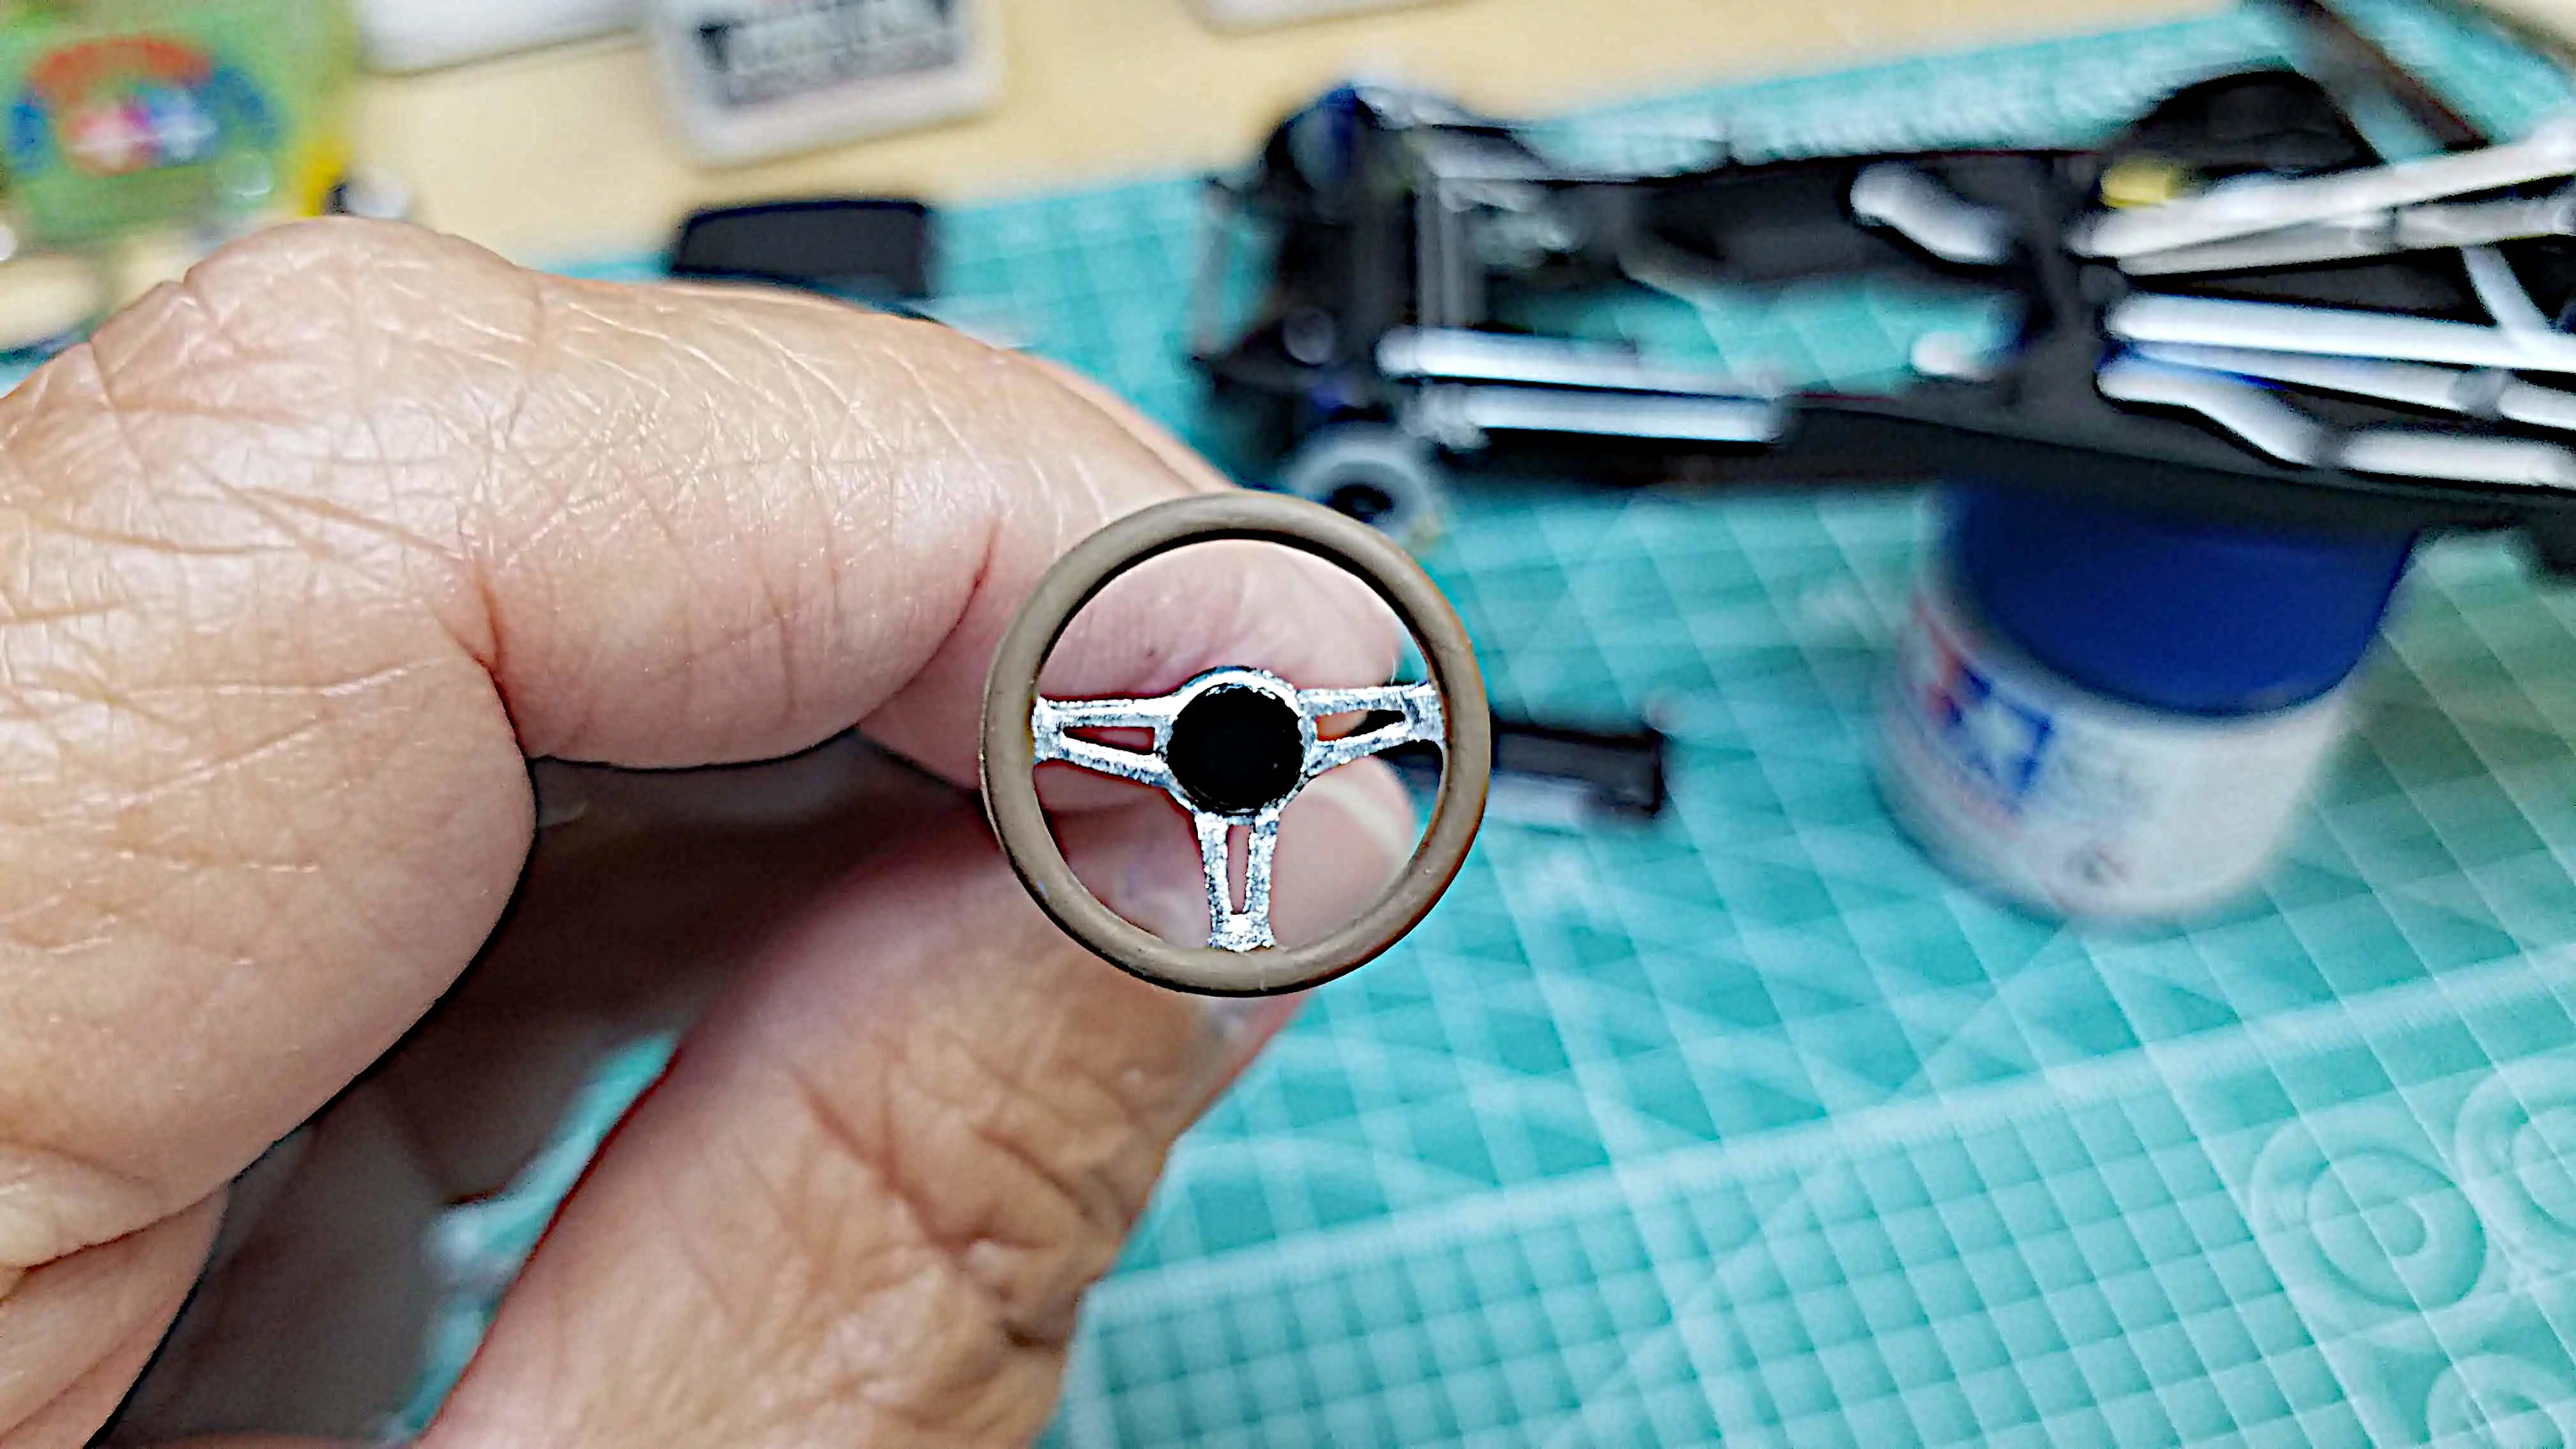 Steering wheel is detailed
The steering wheel has been detailed with a wooden look wheel, chrome spokes and black horn button.
Photo 057
Click/tap photo to enlarge
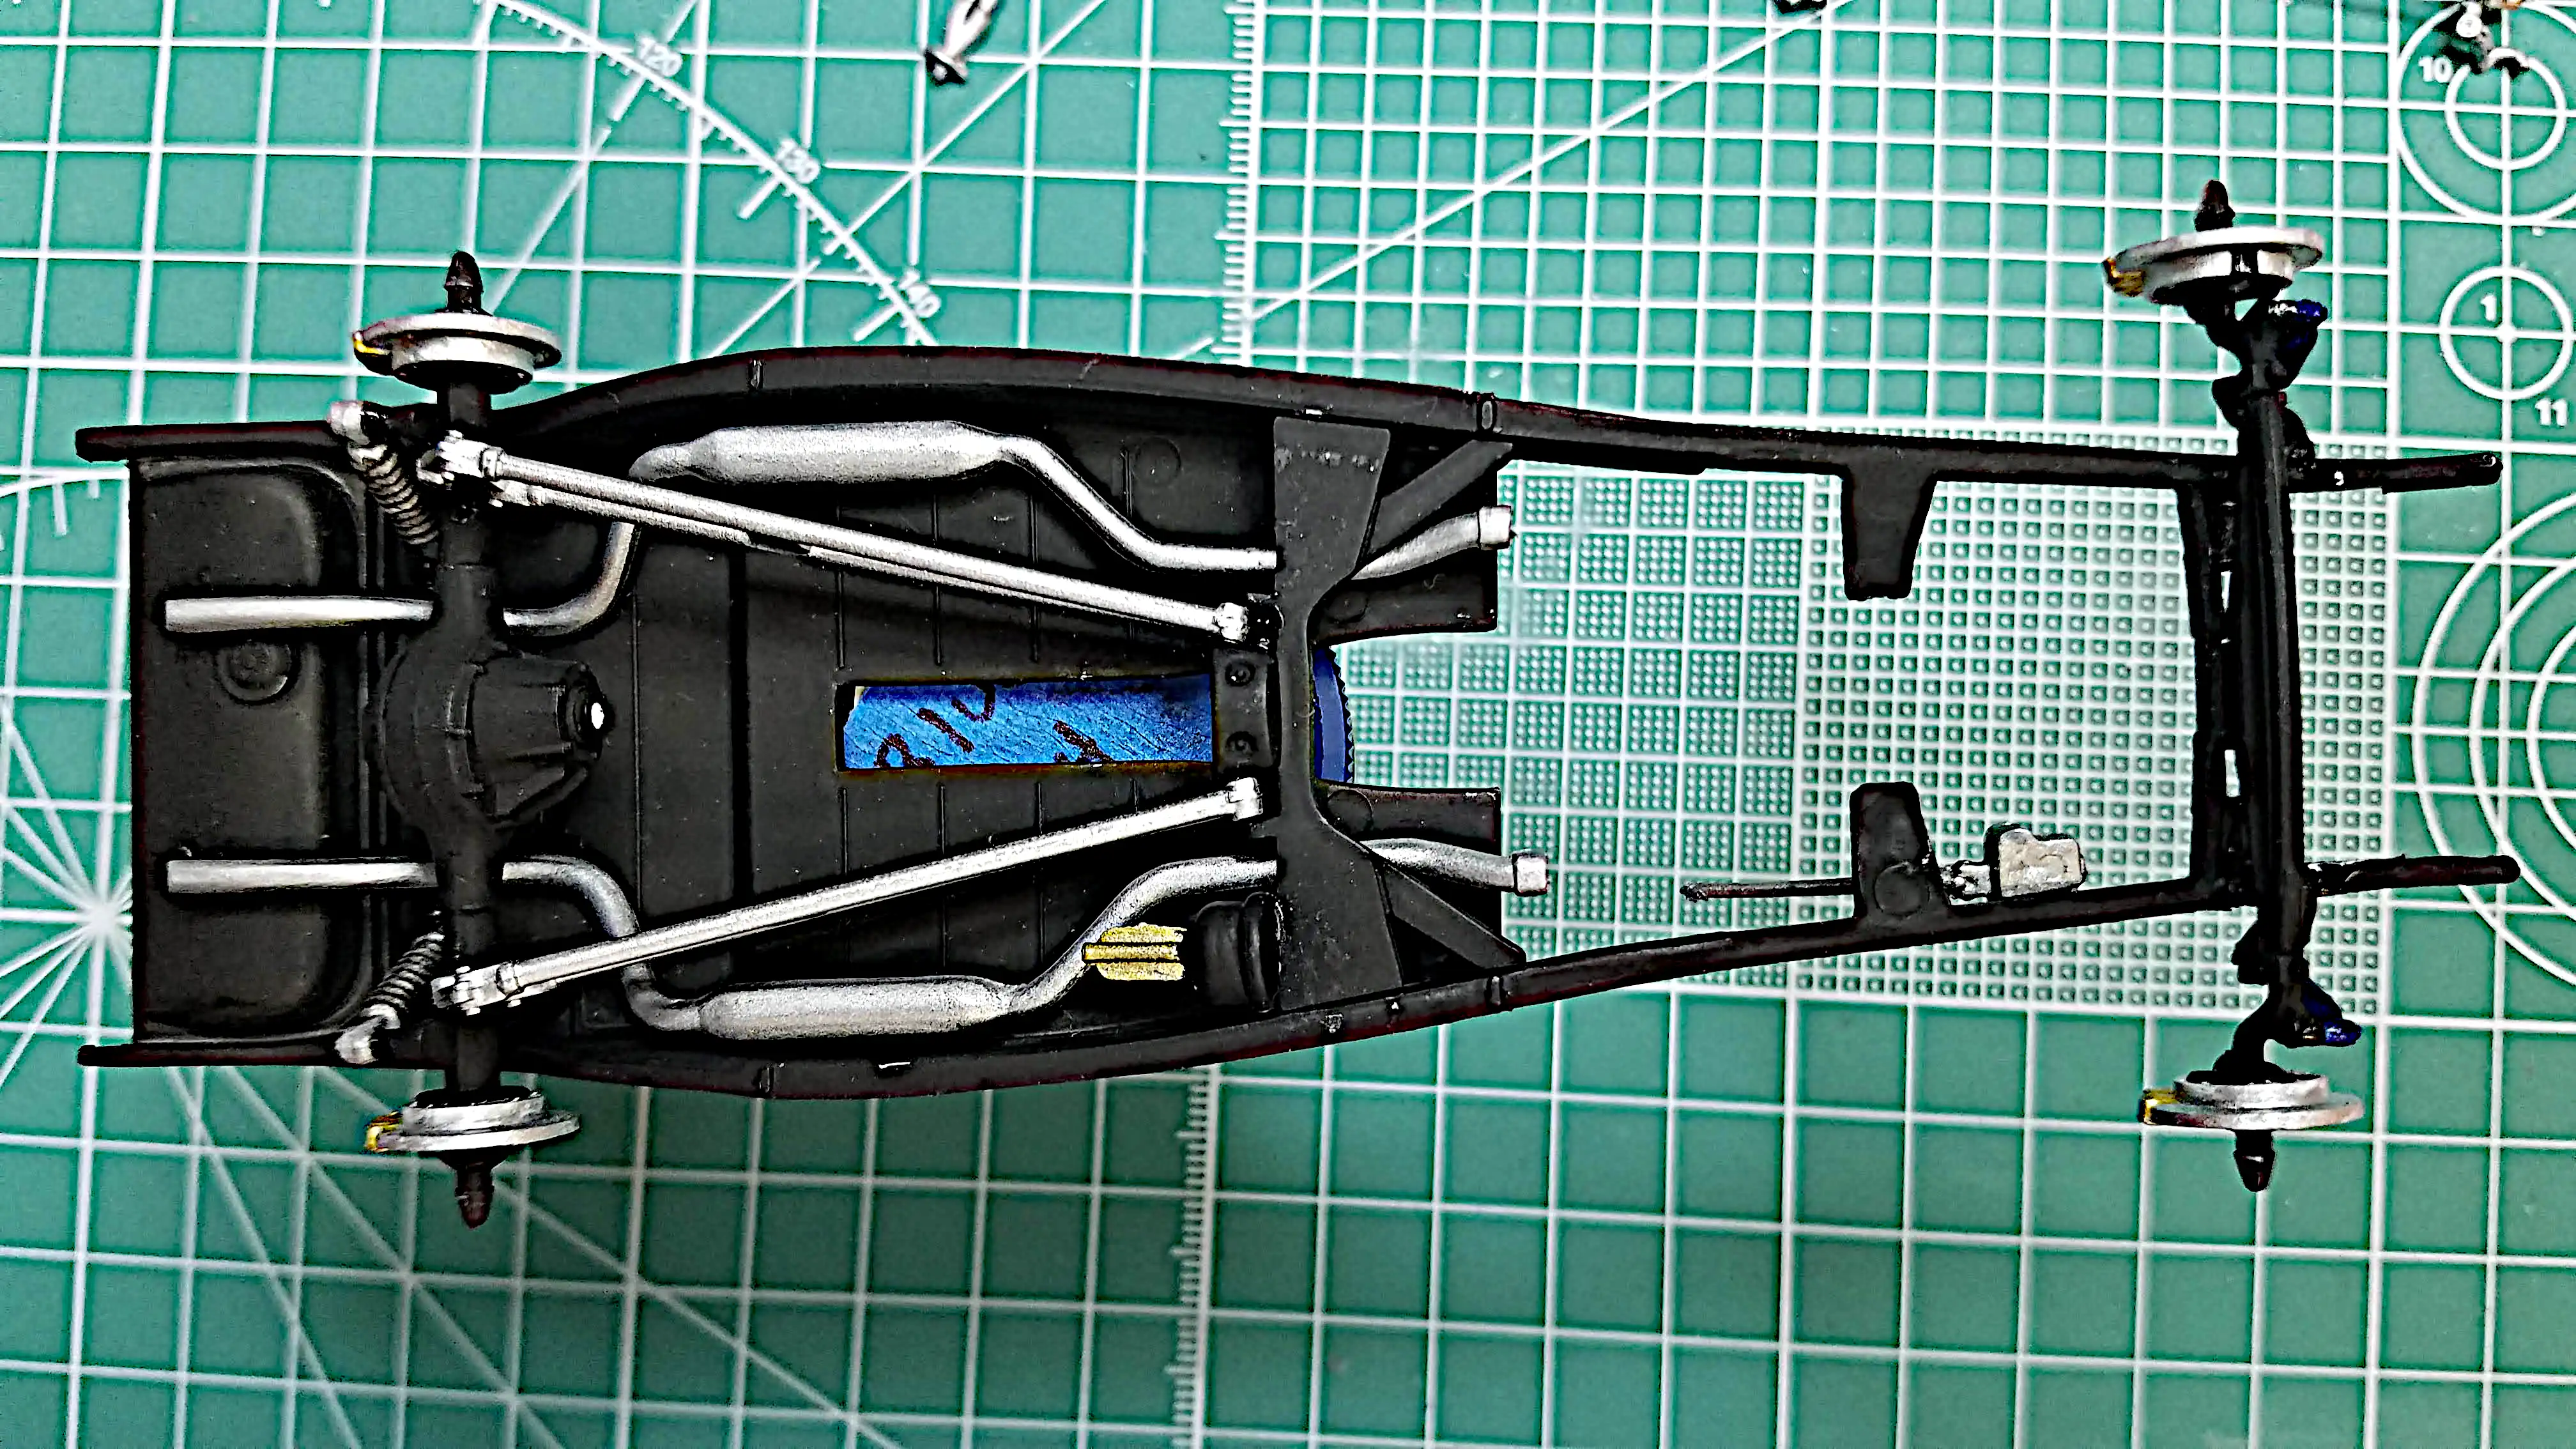 Undercarriage has more parts installed
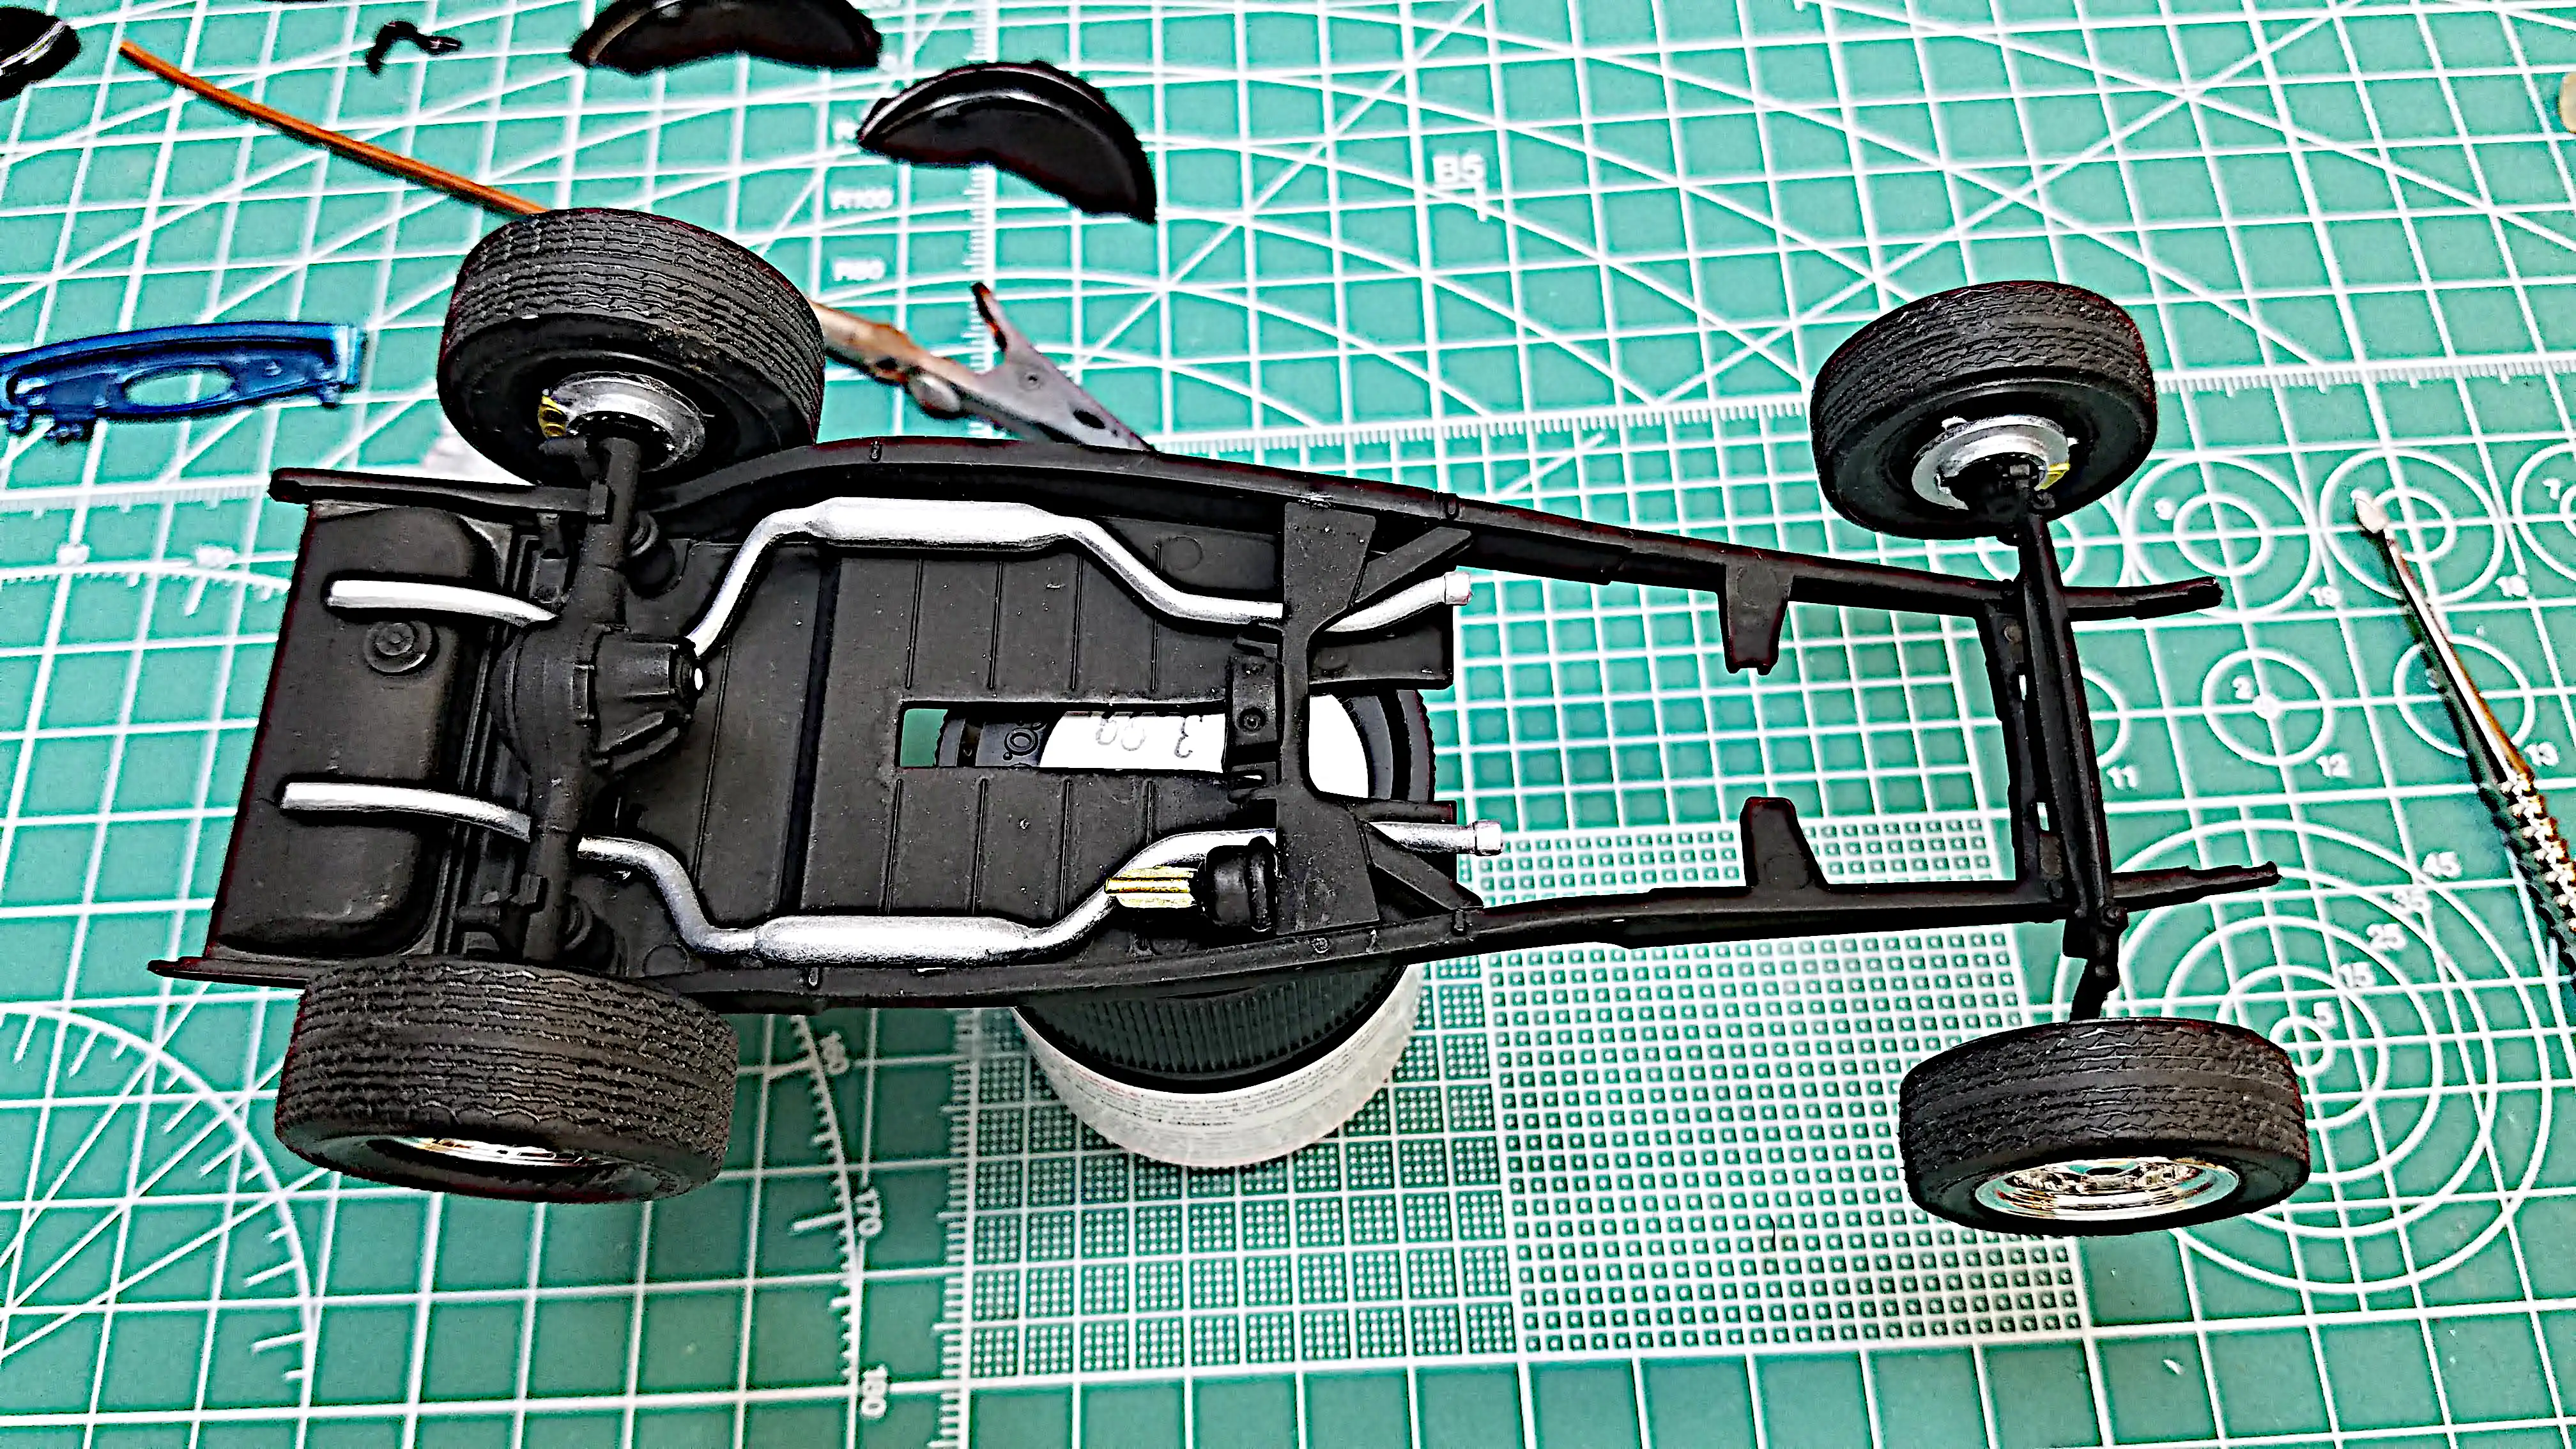
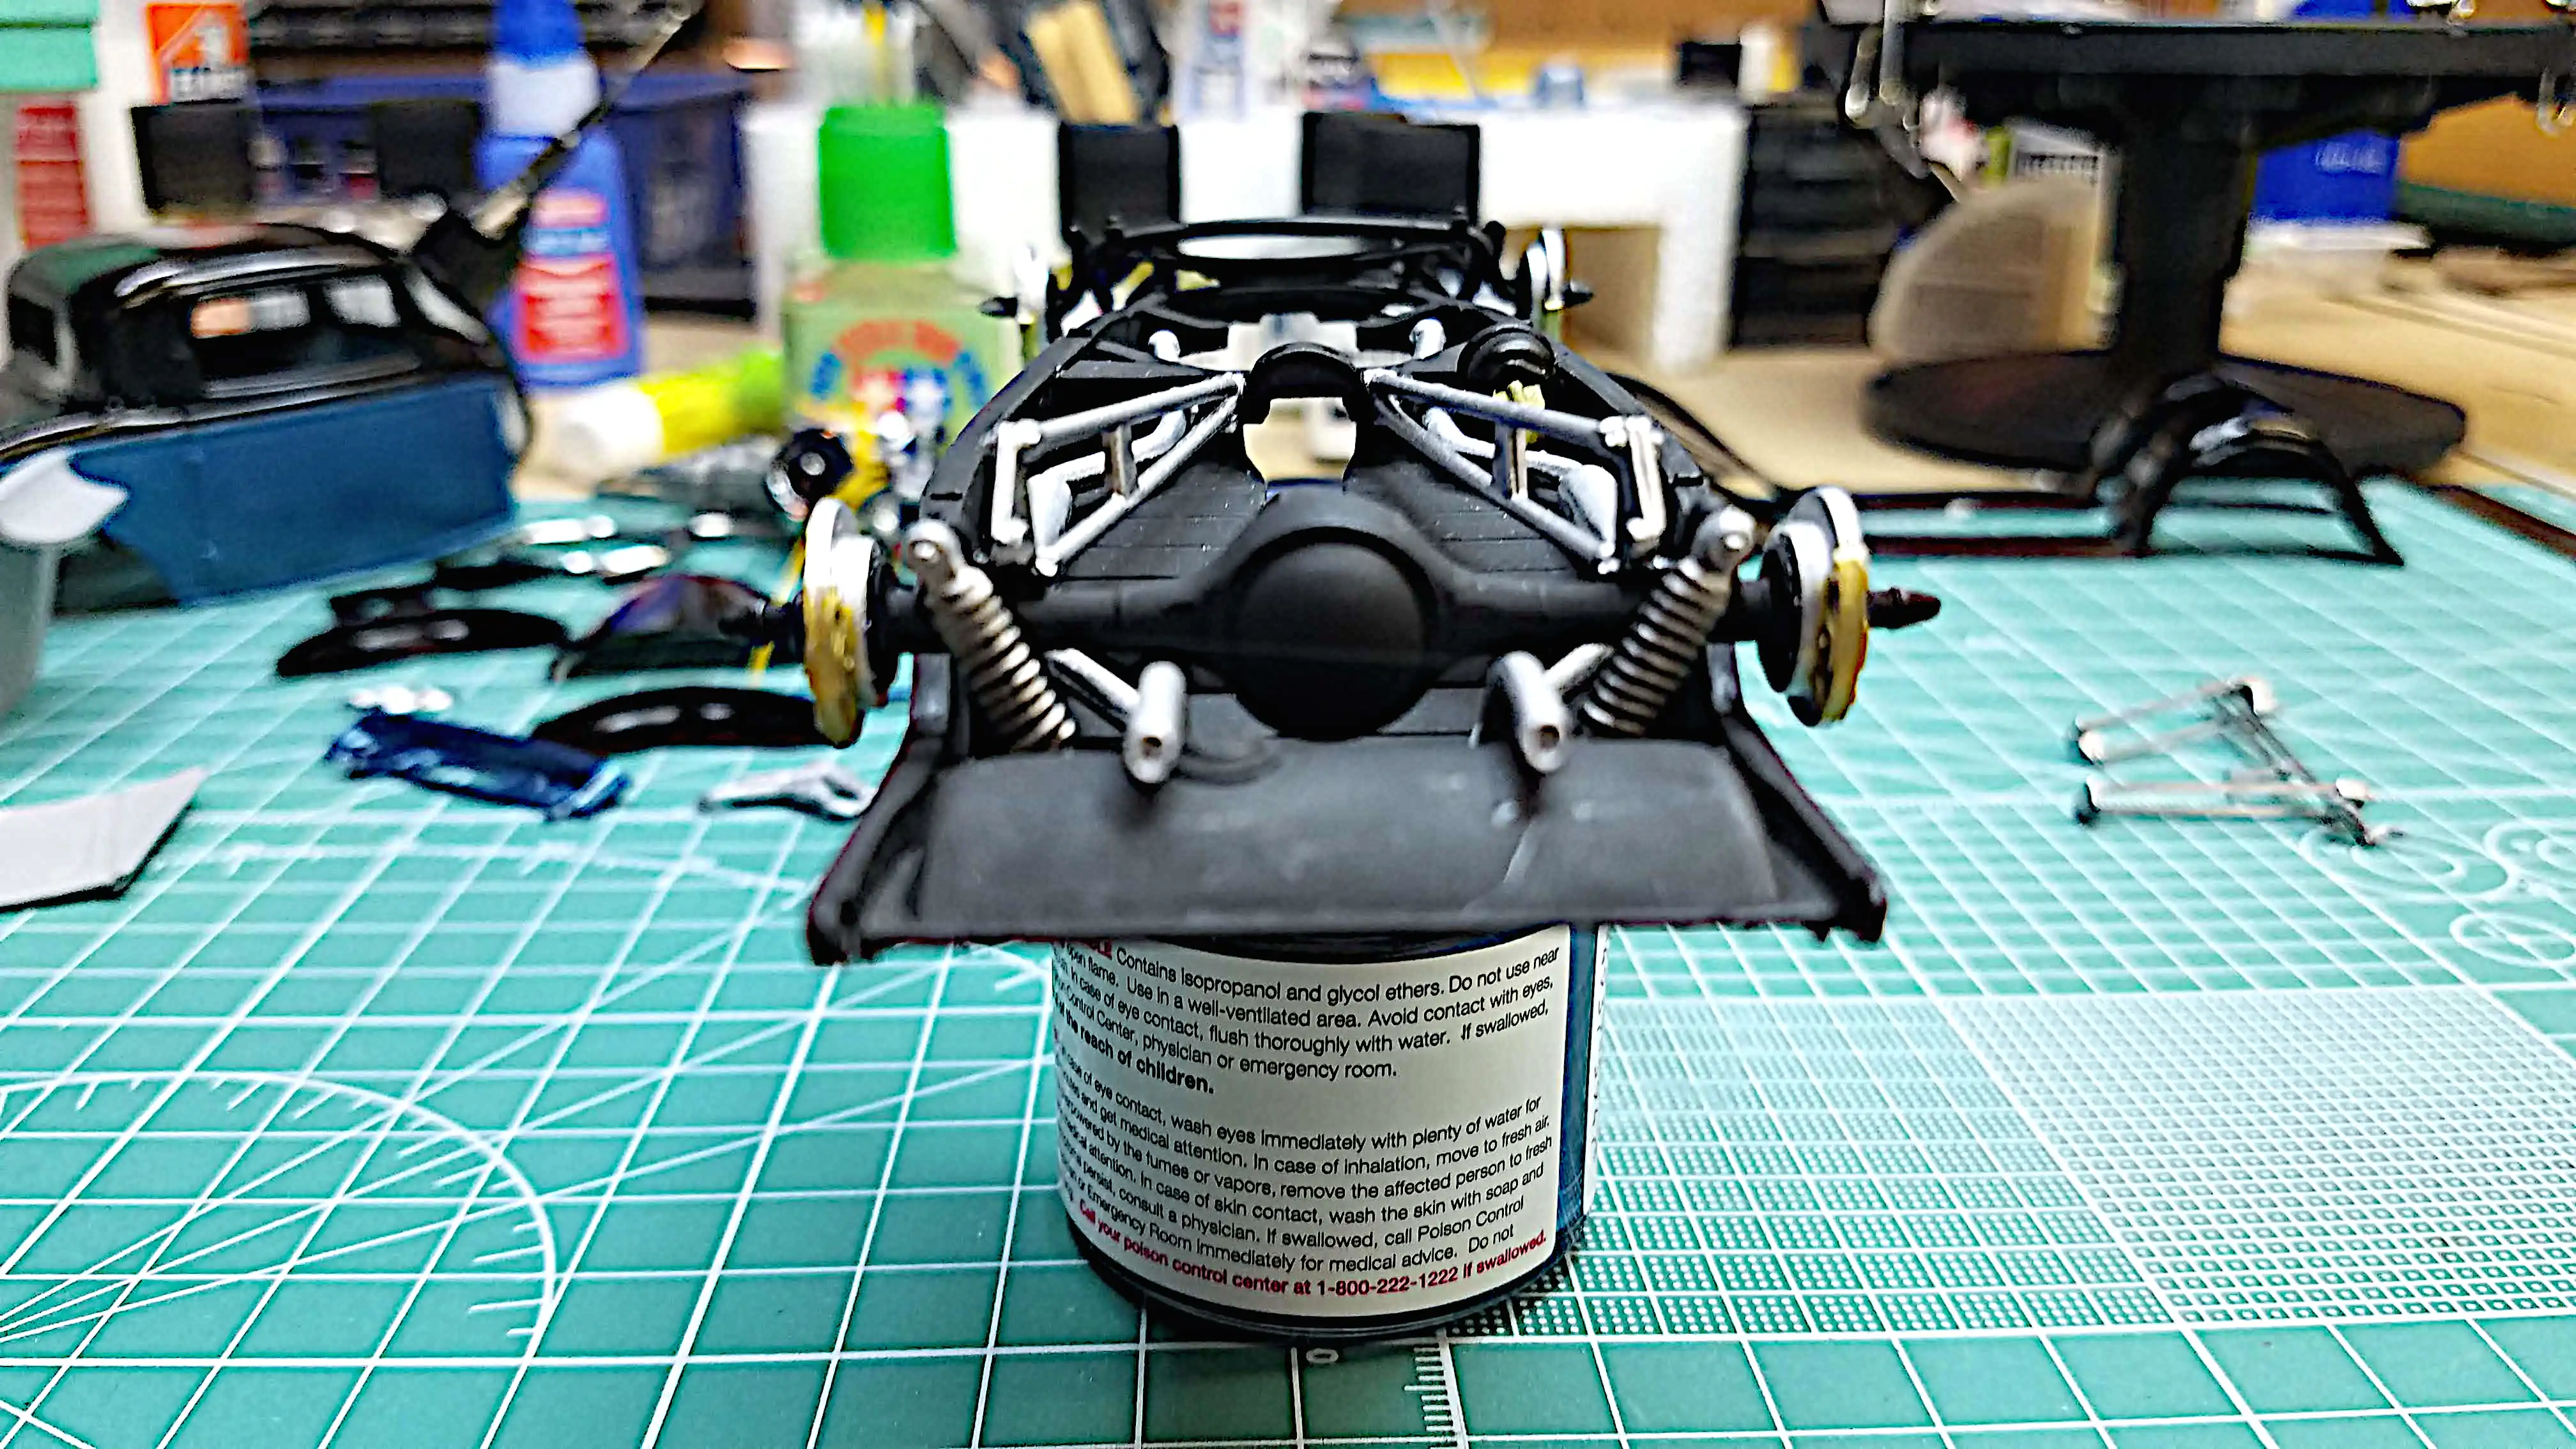
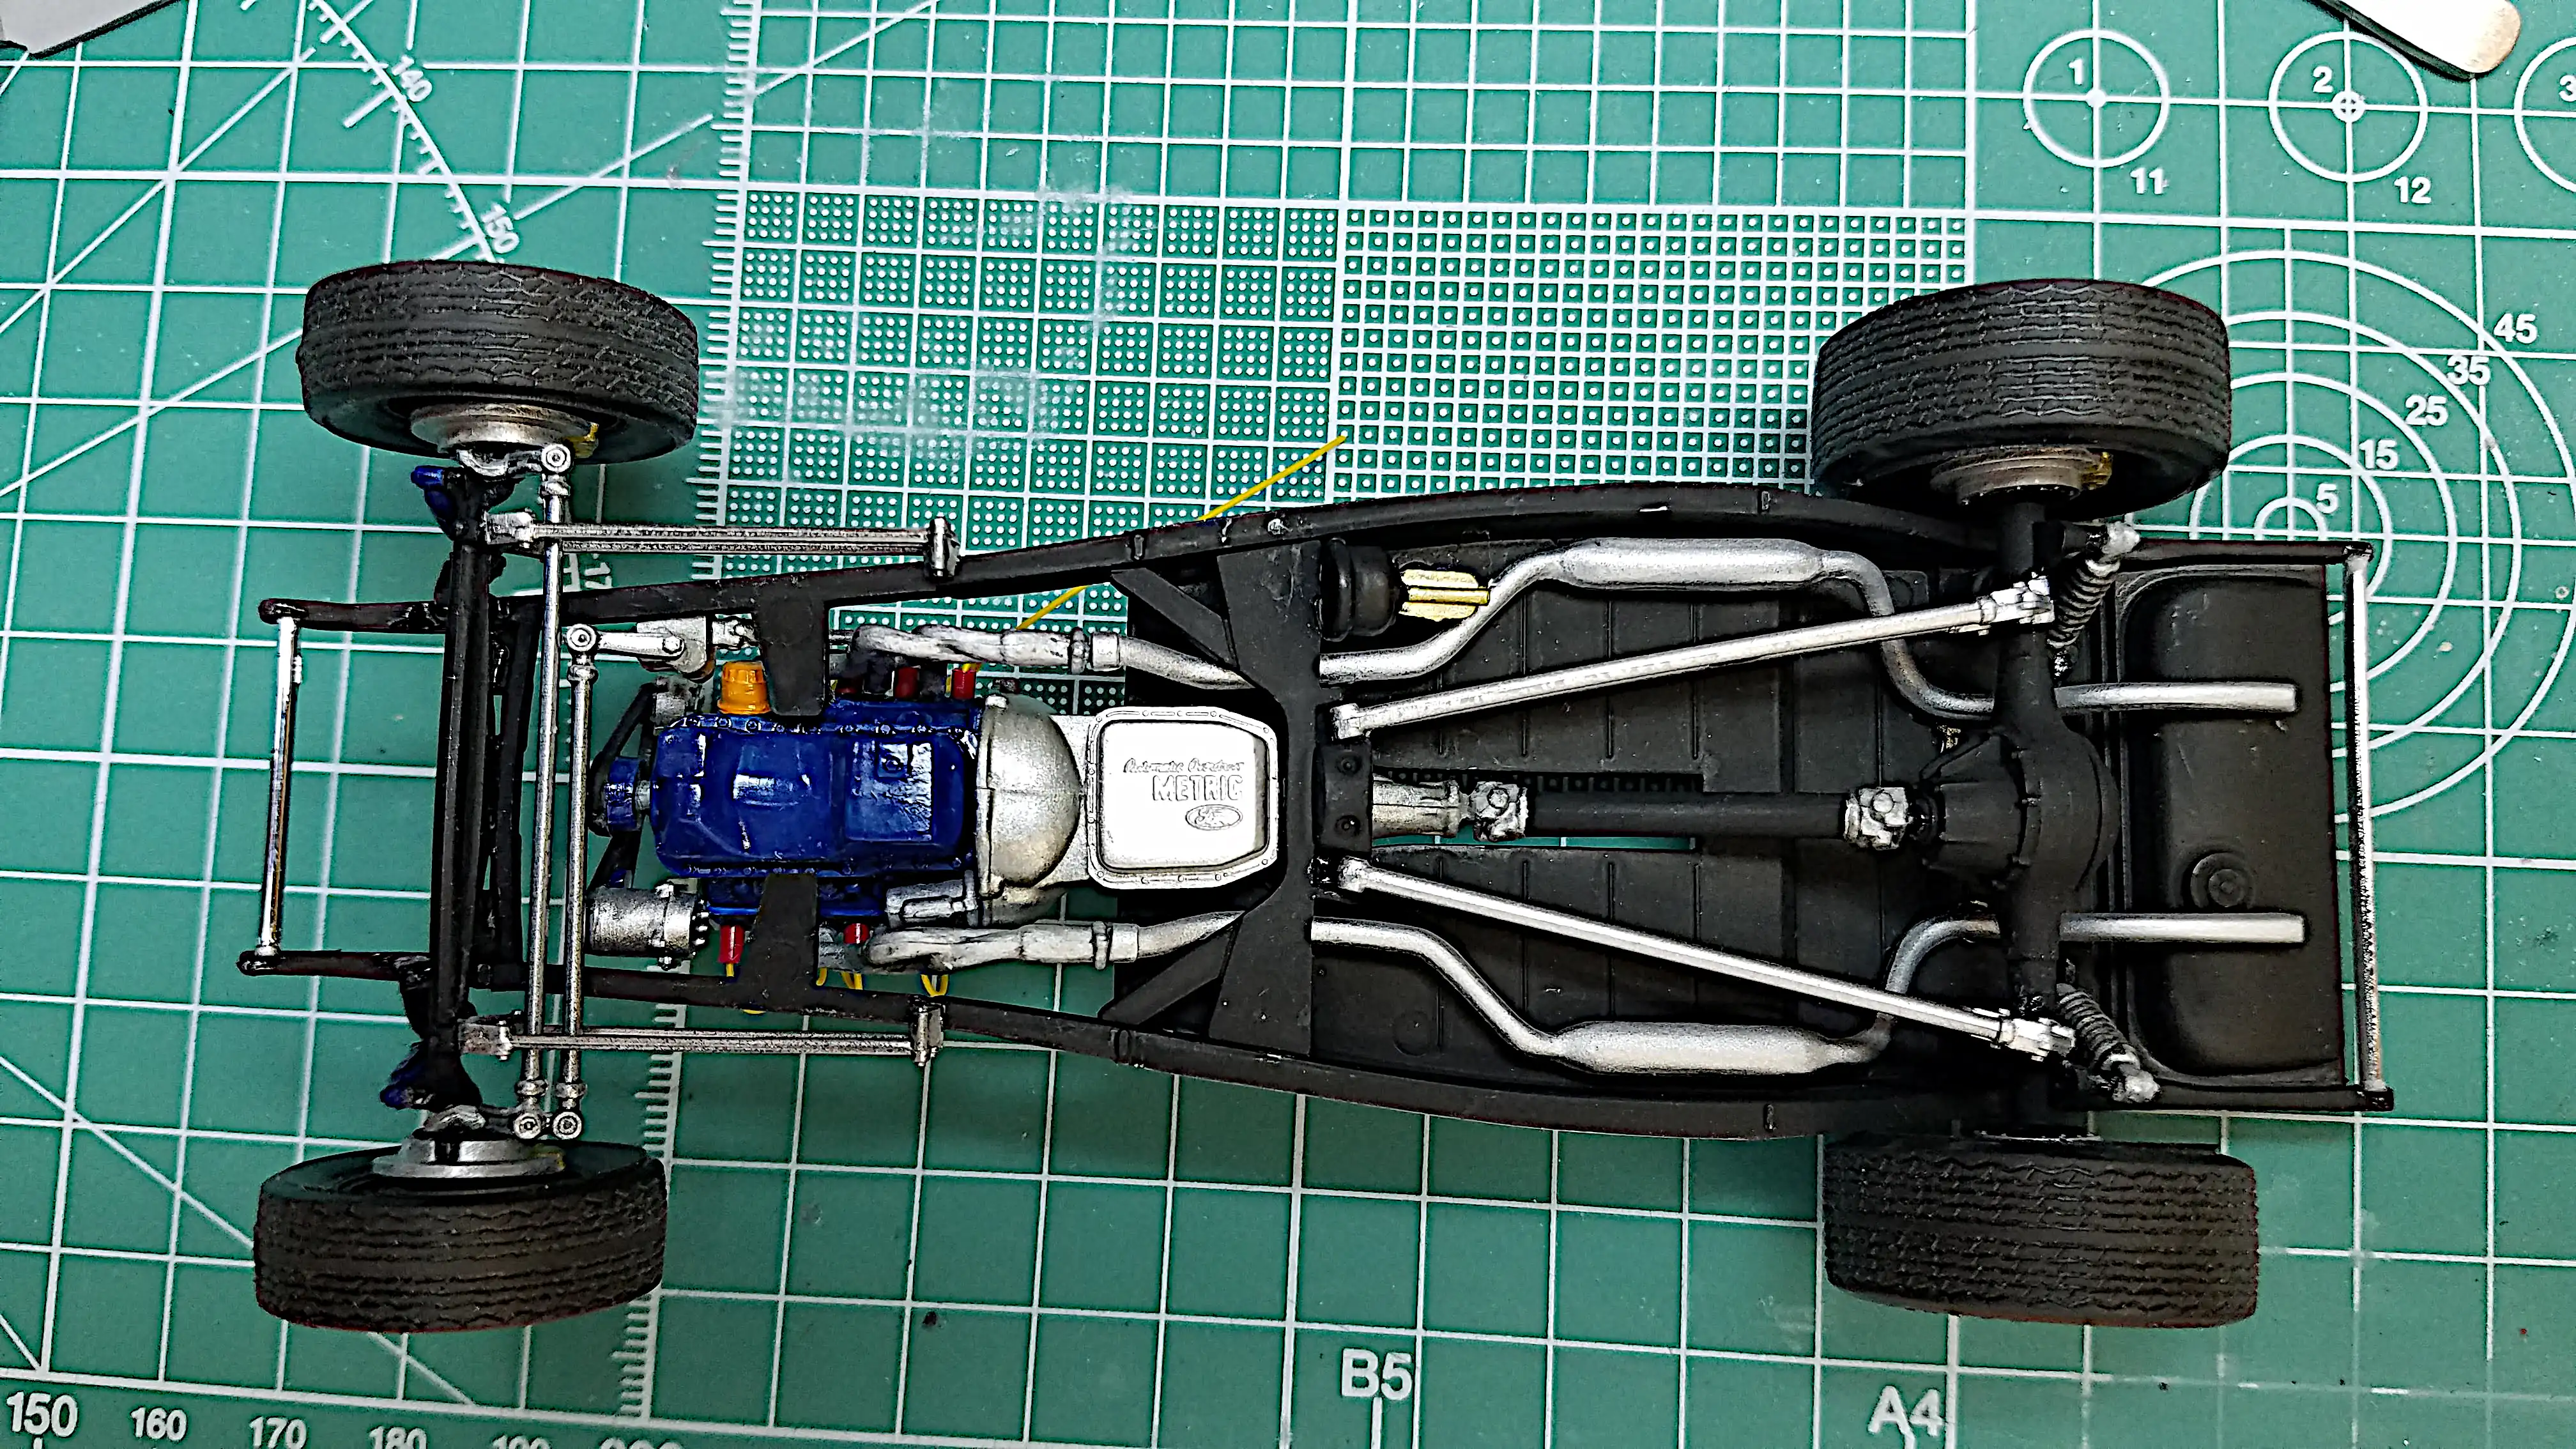
Bottom view of the frame. The front and rear axle, the front and rear shocks, the rear stabilizer bars and the steering box are installed.
Photo 058
Click/tap photo to enlarge
 Another view of the chassis
Another view of the frame with the stabilizer bars installed.
Photo 059
Click/tap photo to enlarge
 Rear view of the frame
Rear view of the frame bottom showing the rear shocks.
Photo 060
Click/tap photo to enlarge
 Front view of the frame
Front view of the frame bottom showing the front shocks.
Photo 061
Click/tap photo to enlarge
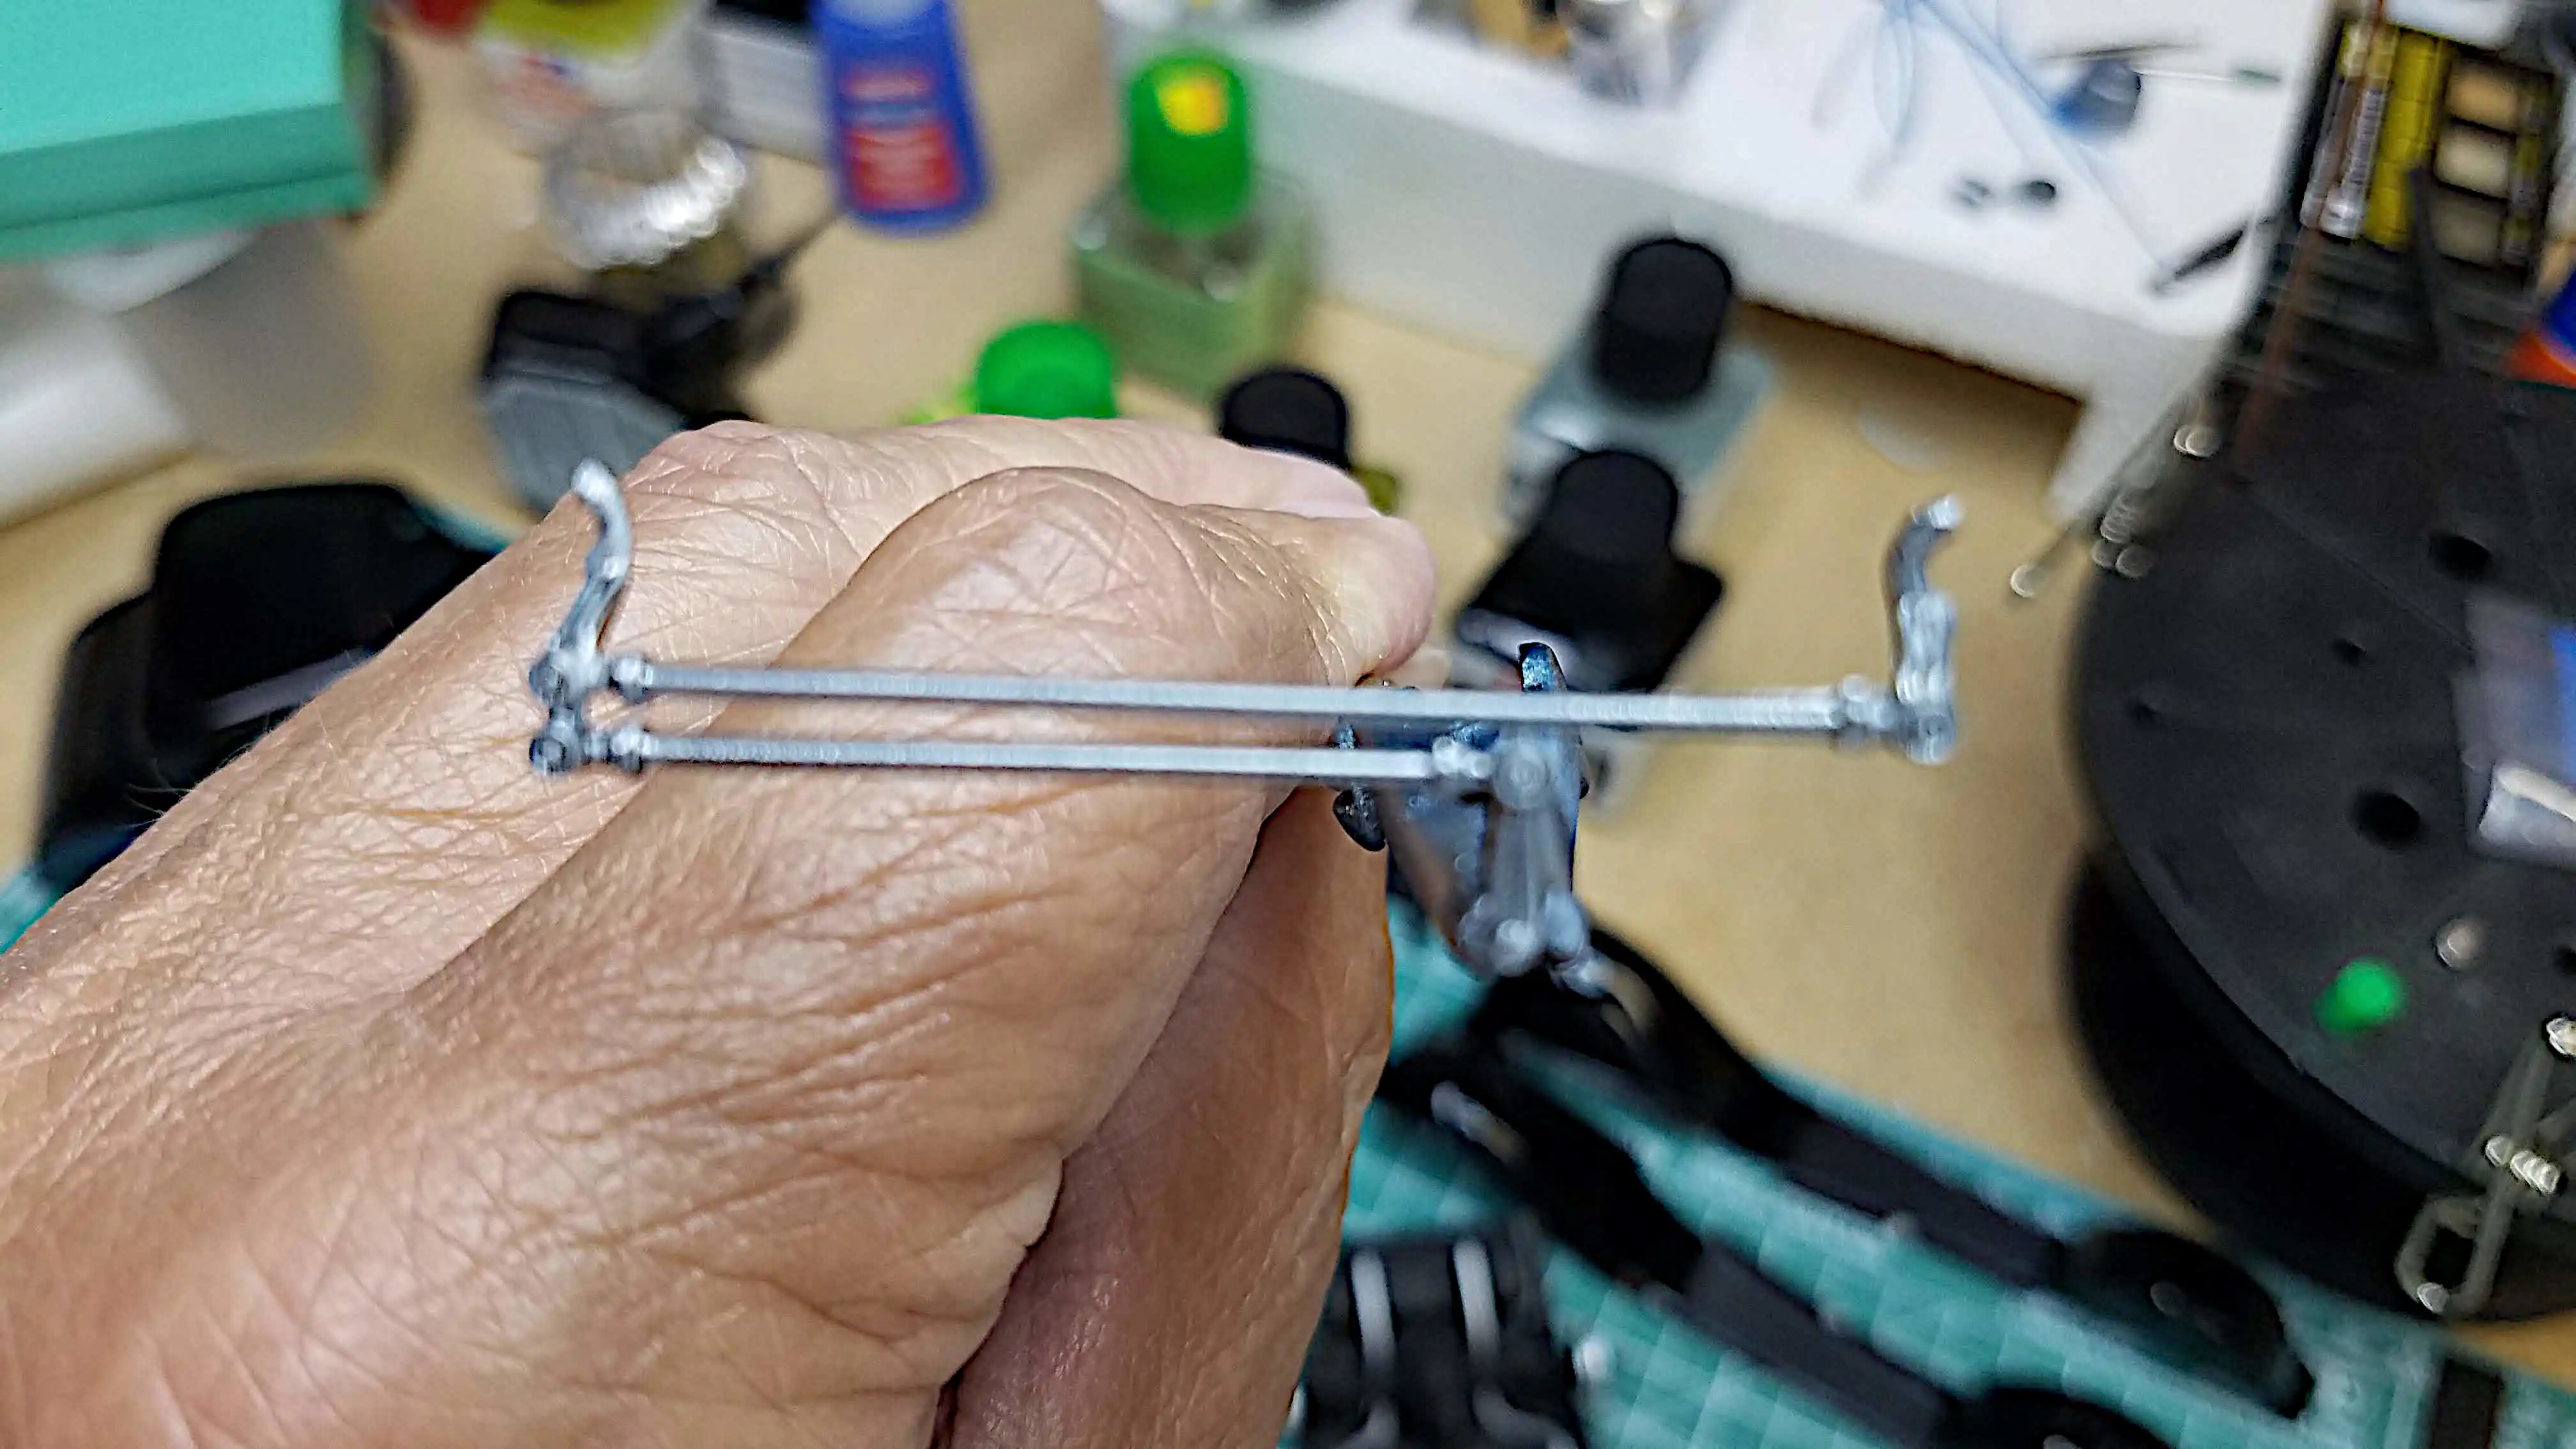
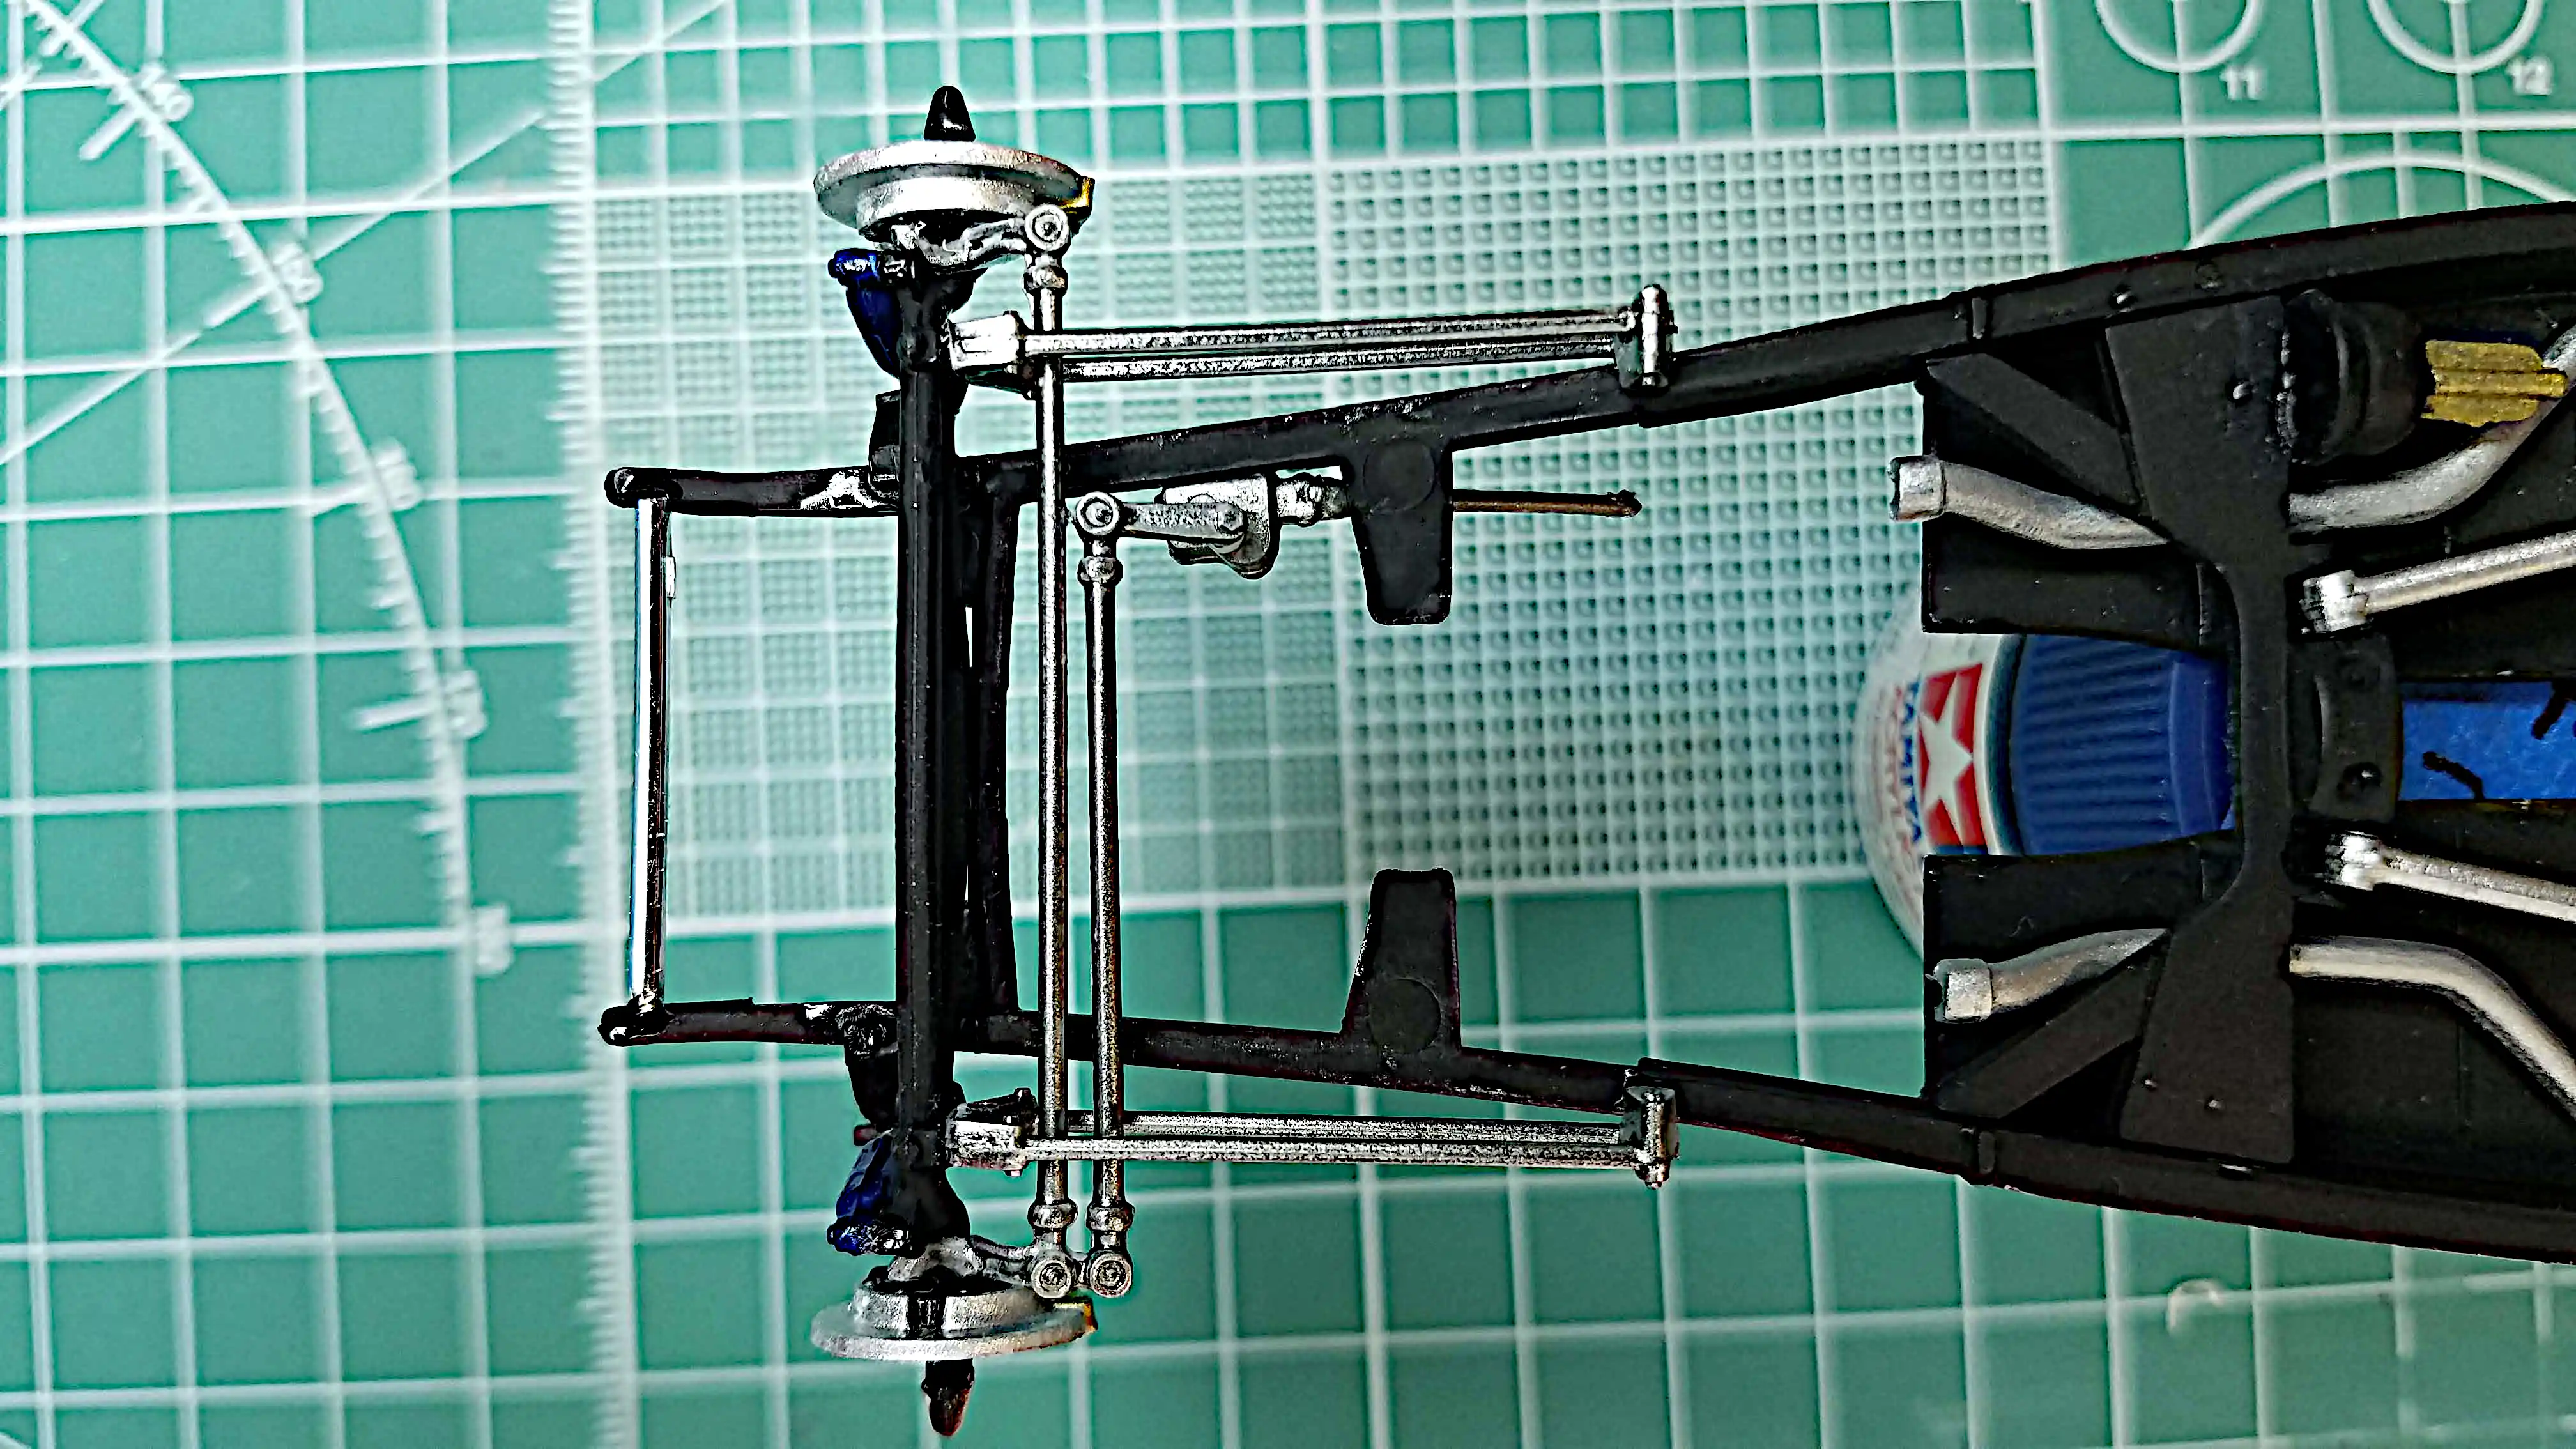 Radius rods and steering linkage installed
Bottom view of the chassis with the radius rods and steering linkage installed. This shot also shows the chrome front frame bar installed.
Photo 062
Click/tap photo to enlarge
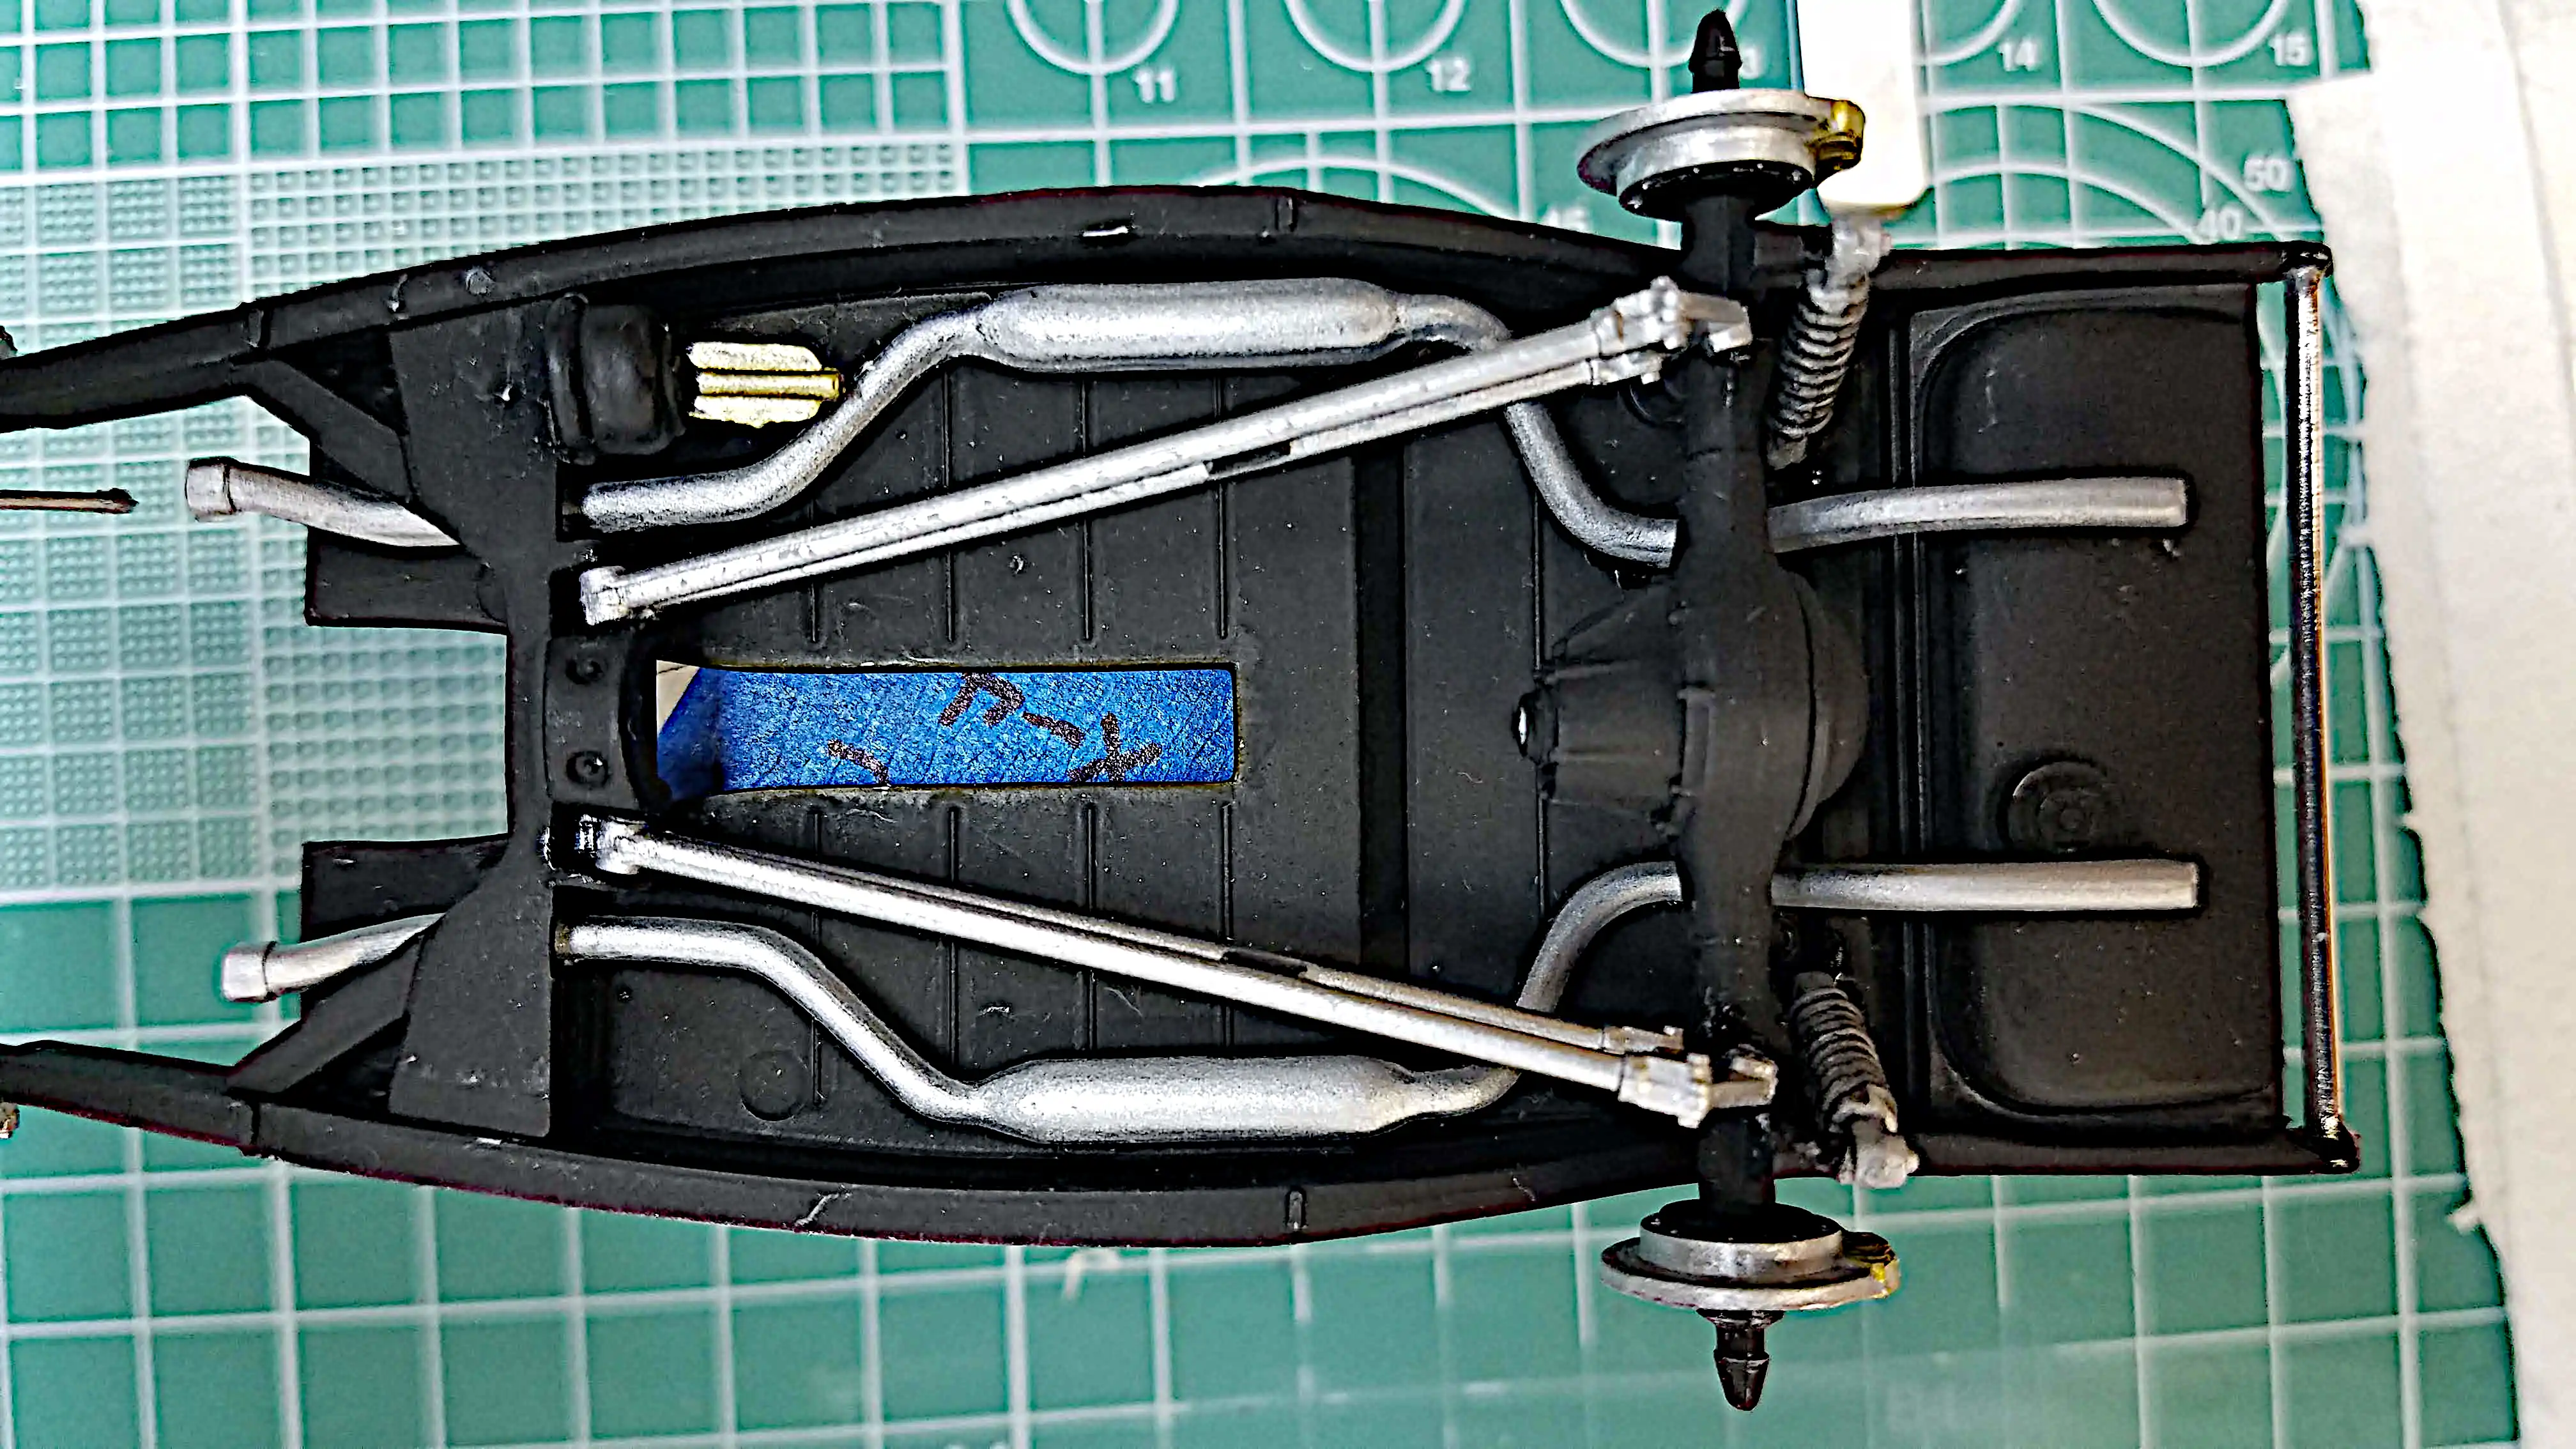 Another view of the chassis bottom
Another view of the bottom back of the chassis. This shot also shows the chrome frame rear bar installed.
Photo 063
Click/tap photo to enlarge
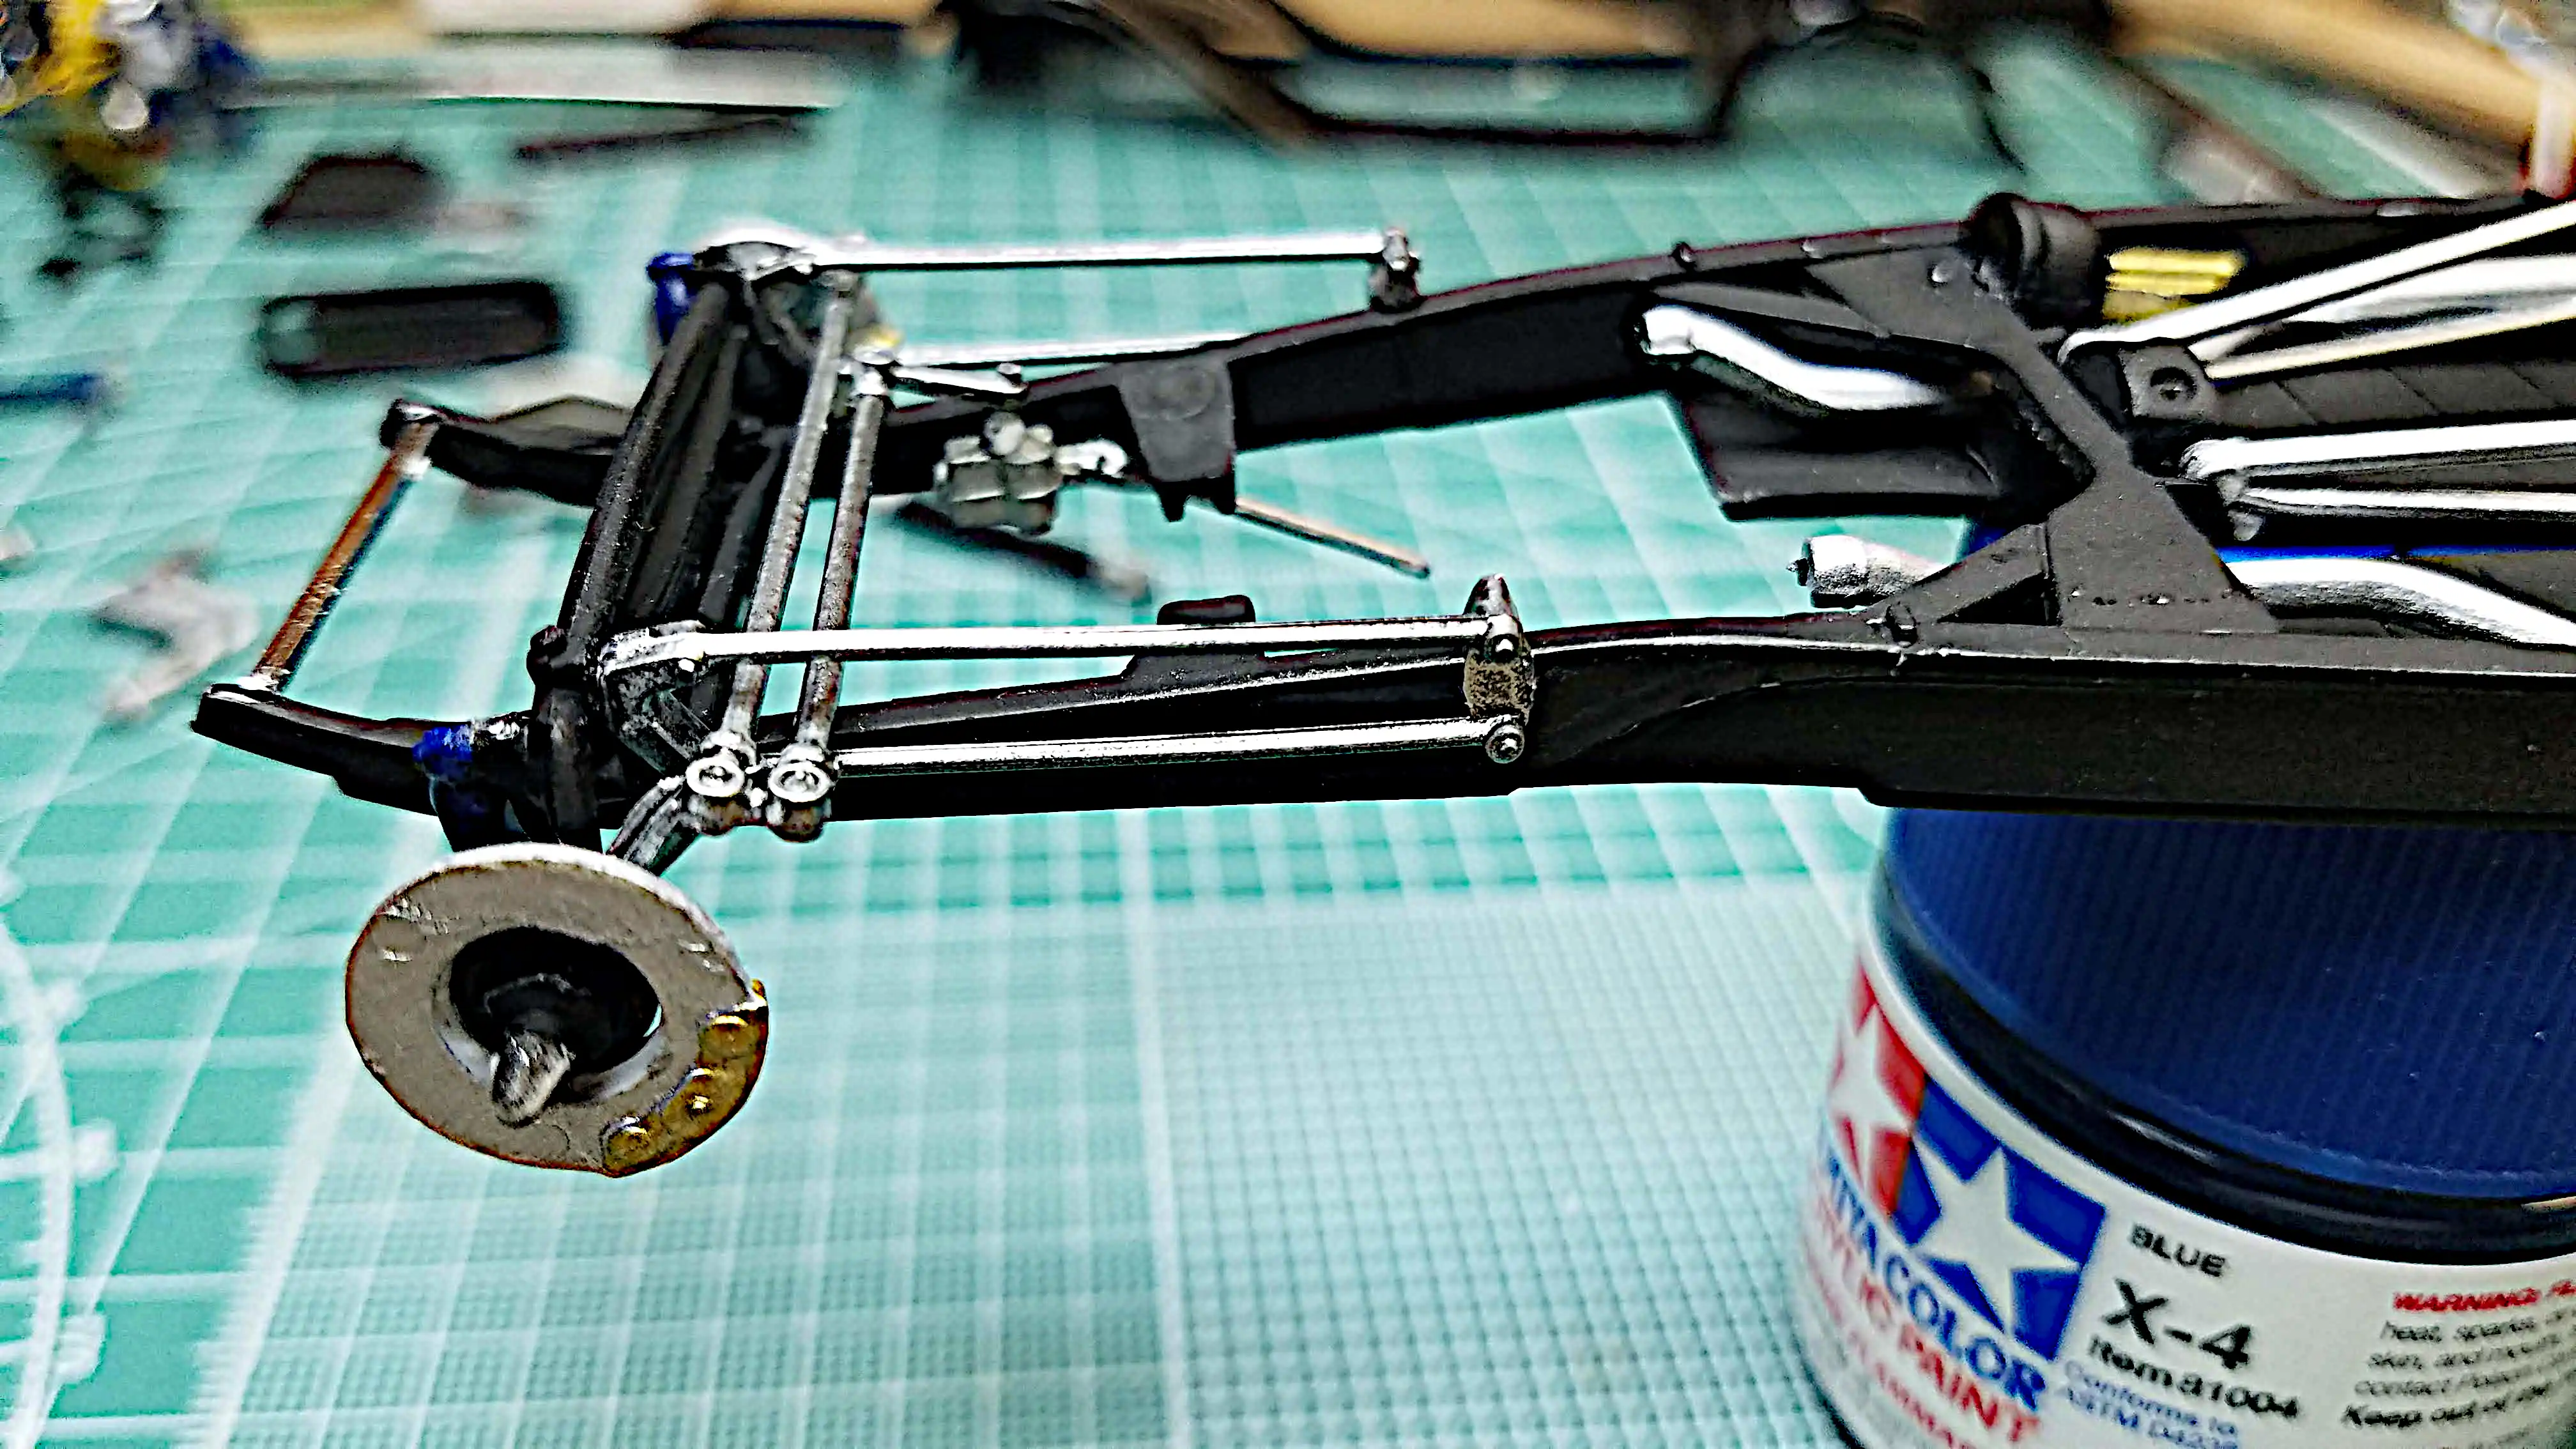 Another view of radius rods and front end
Another view of the radius rods, steering linkage, steering box, front shocks and front bar installed.
Photo 064
Click/tap photo to enlarge
 Preview of the interior
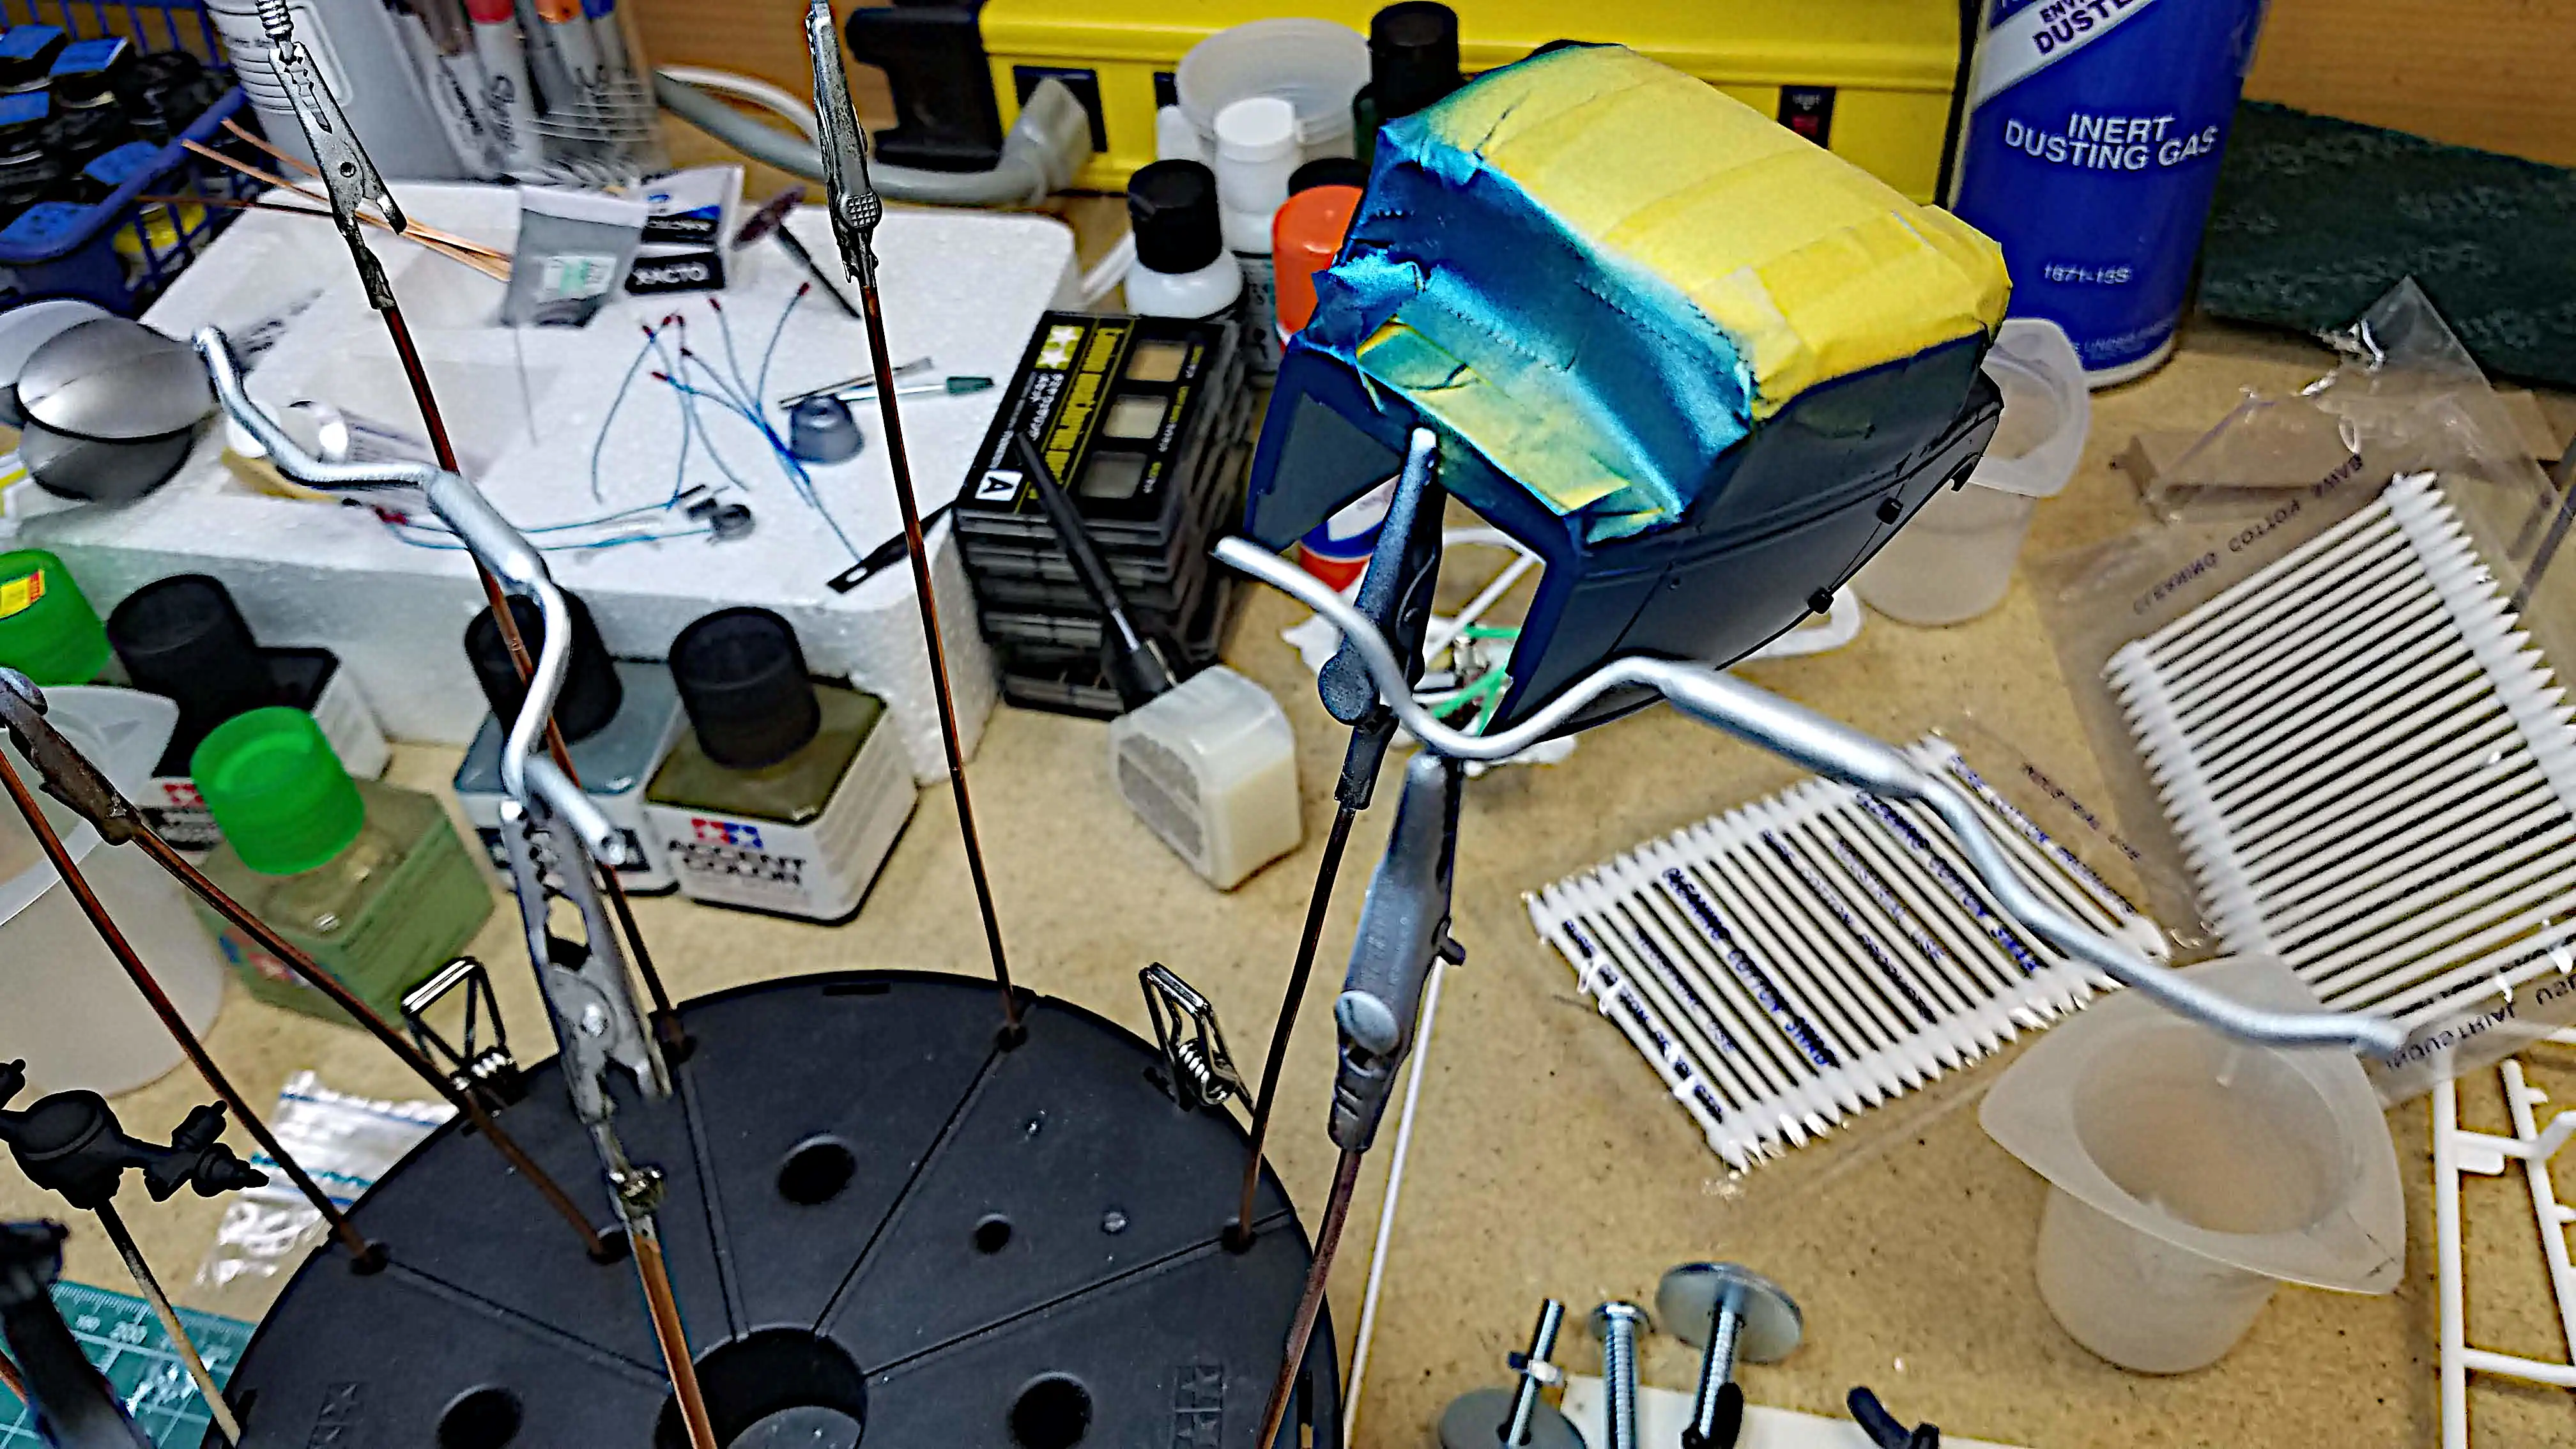
This photo is a preview of the interior. It is not glued yet because the driver side door is not detailed as of this post.
Photo 065
Click/tap photo to enlarge
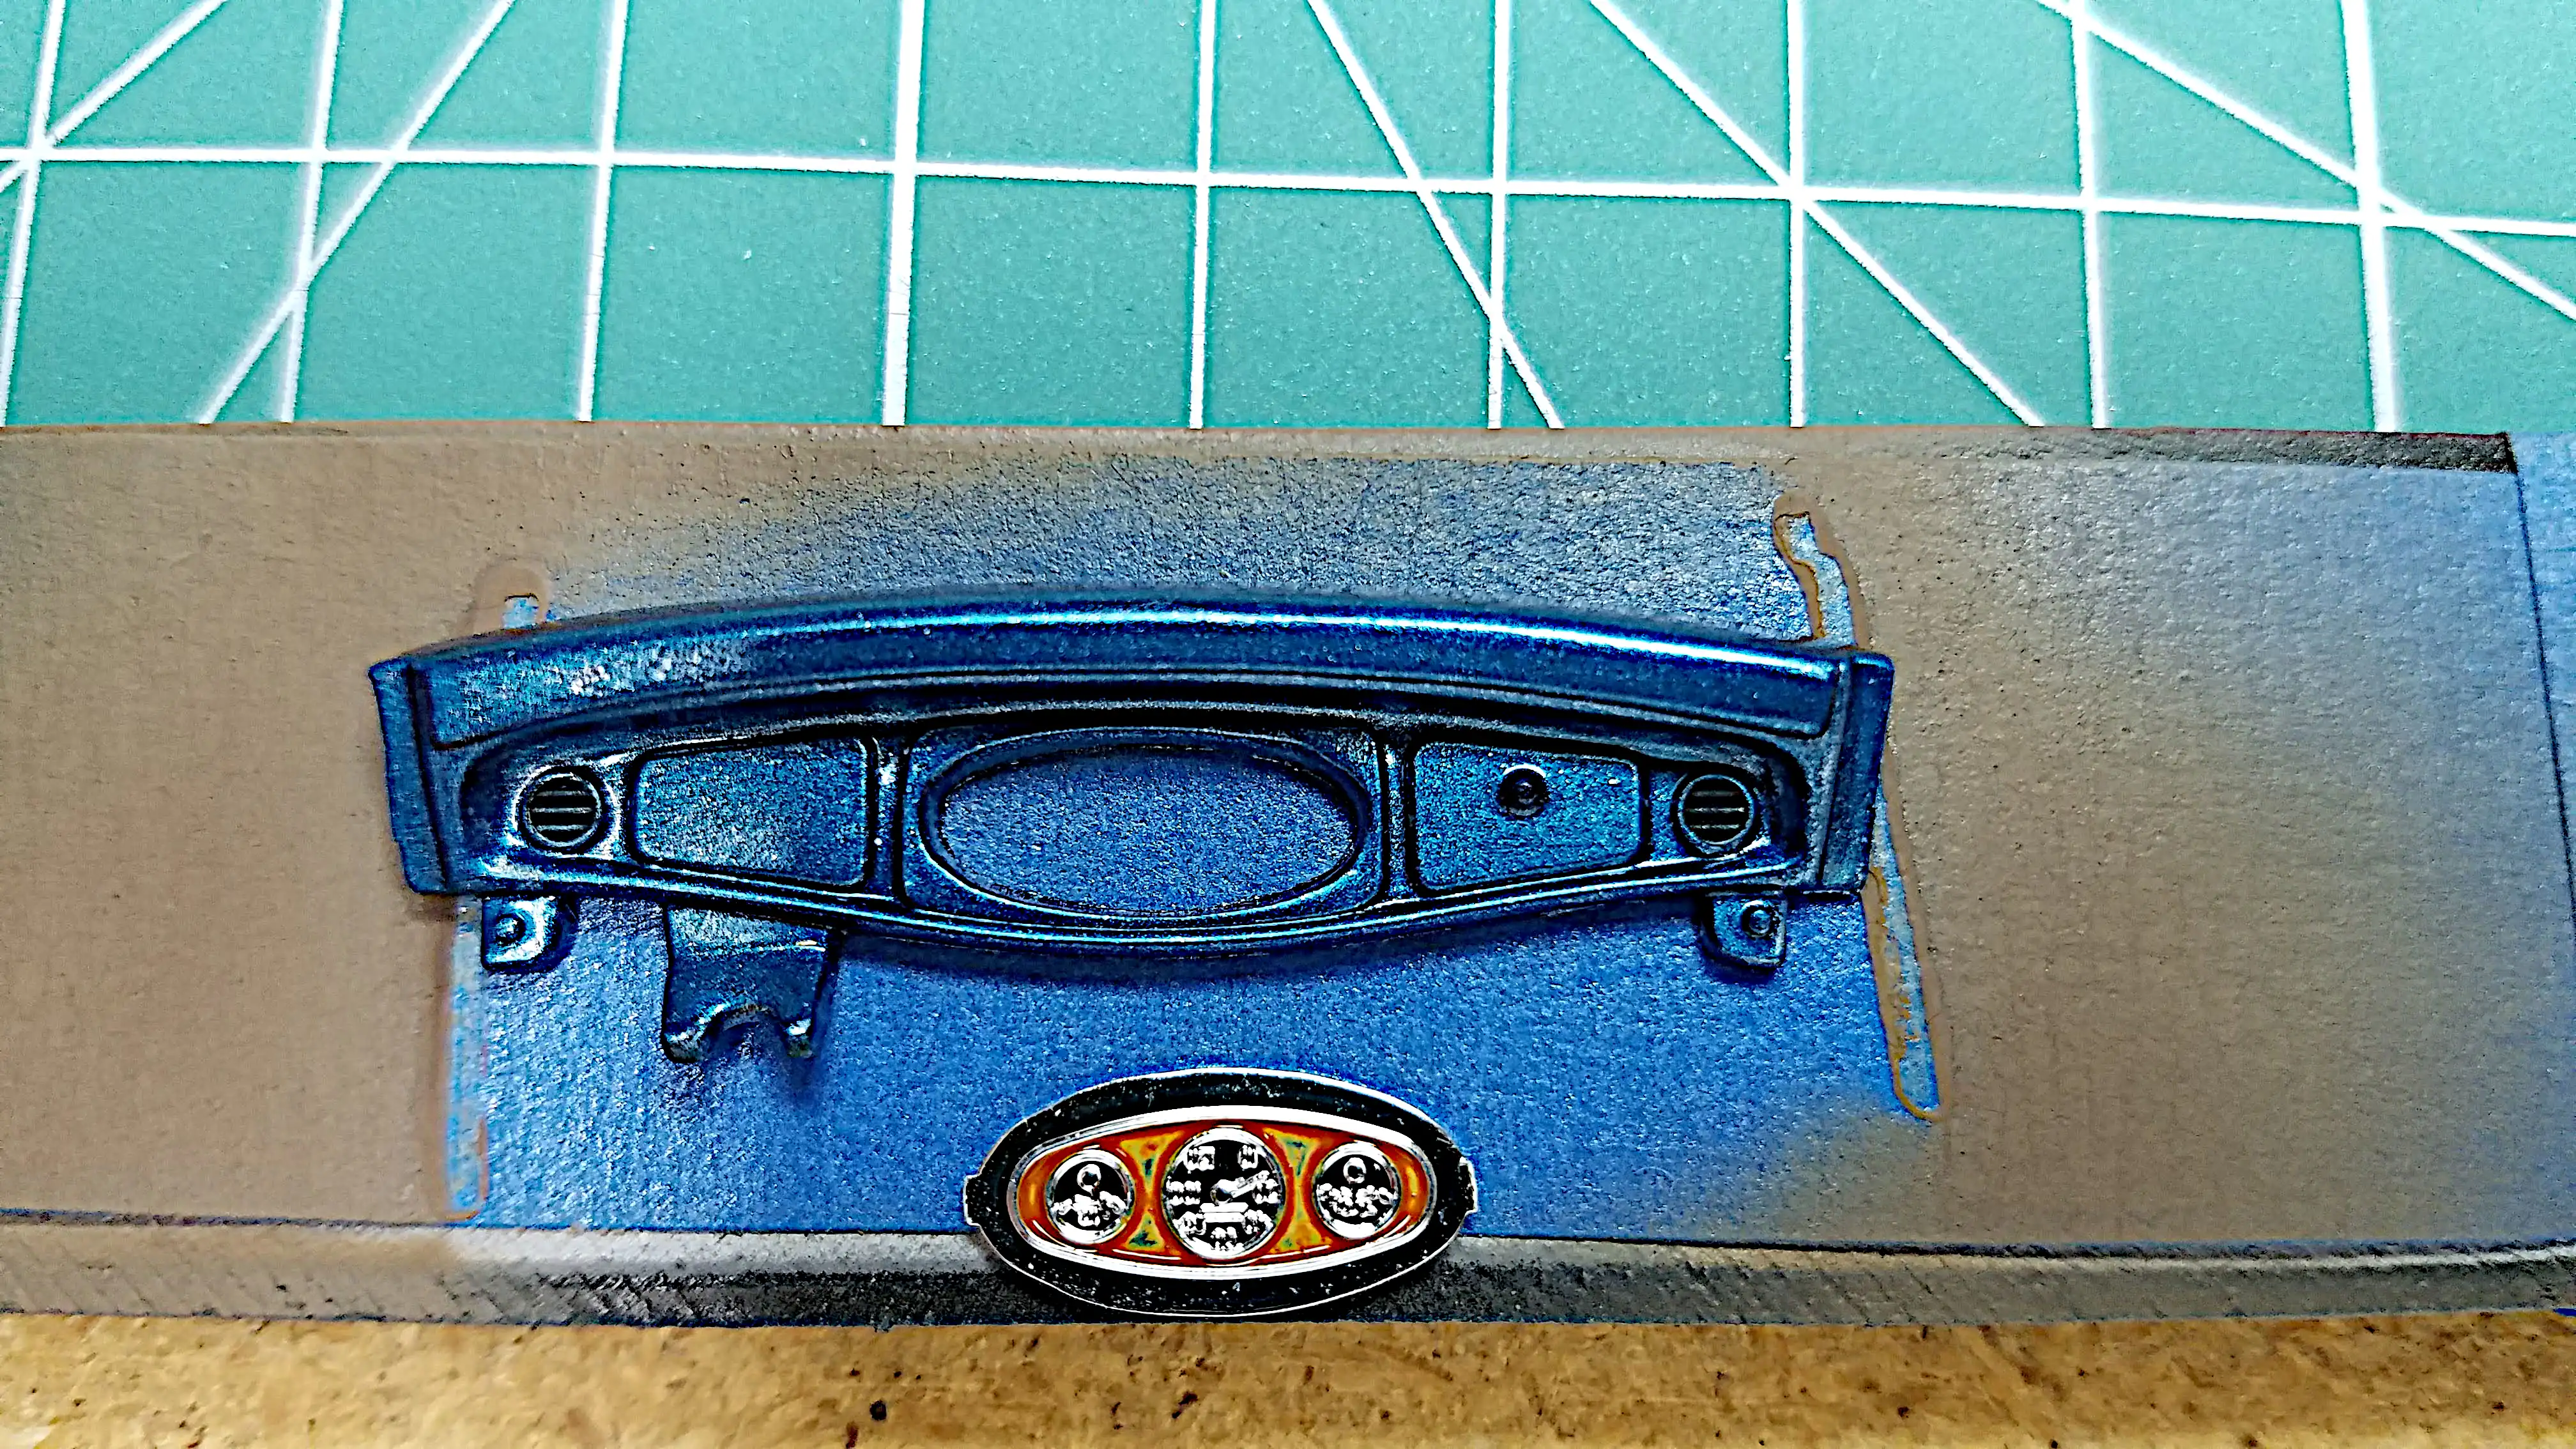 Started detailing the dashboard
I started detailing the dash and gauge cluster. There isn't much detailing on the dash. The air vents were black washed and the glove compartment door handle is black. The background of the gauge cluster has the first coat of a red/brown wash applied. I'm not sure what to do with the gauges themselves. I don't want to leave them chrome.
Photo 066
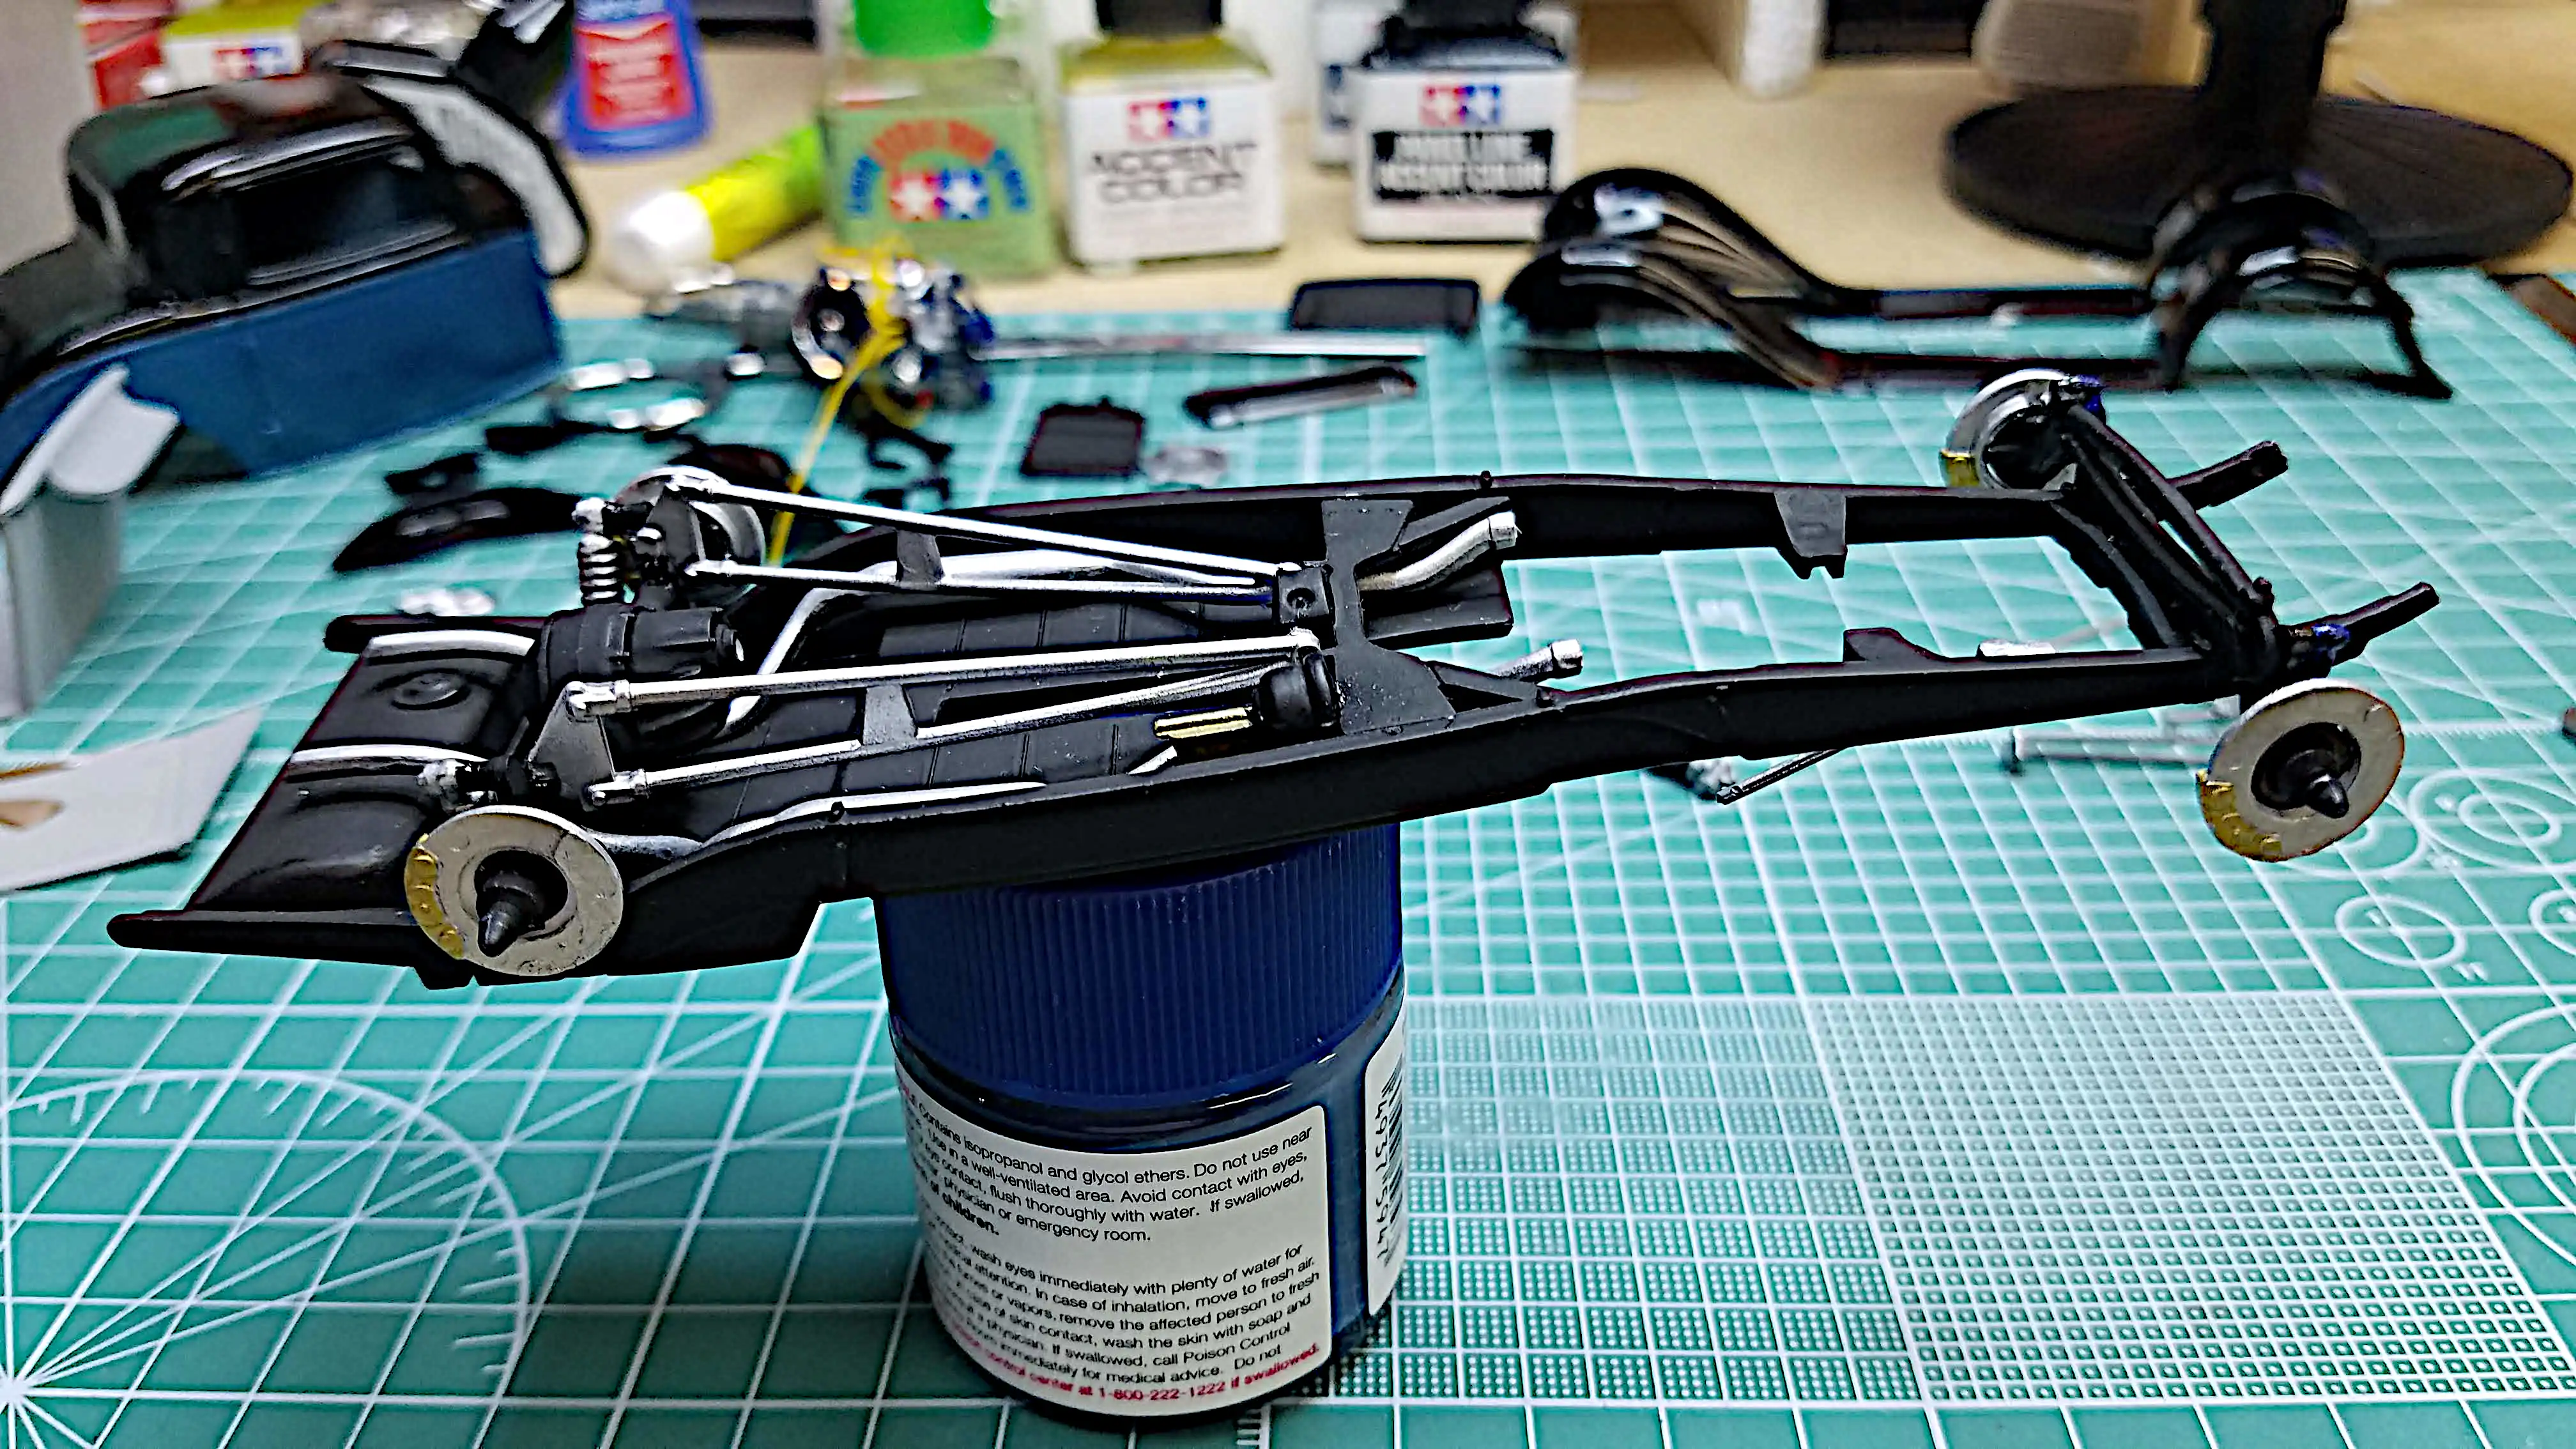
Click/tap photo to enlarge
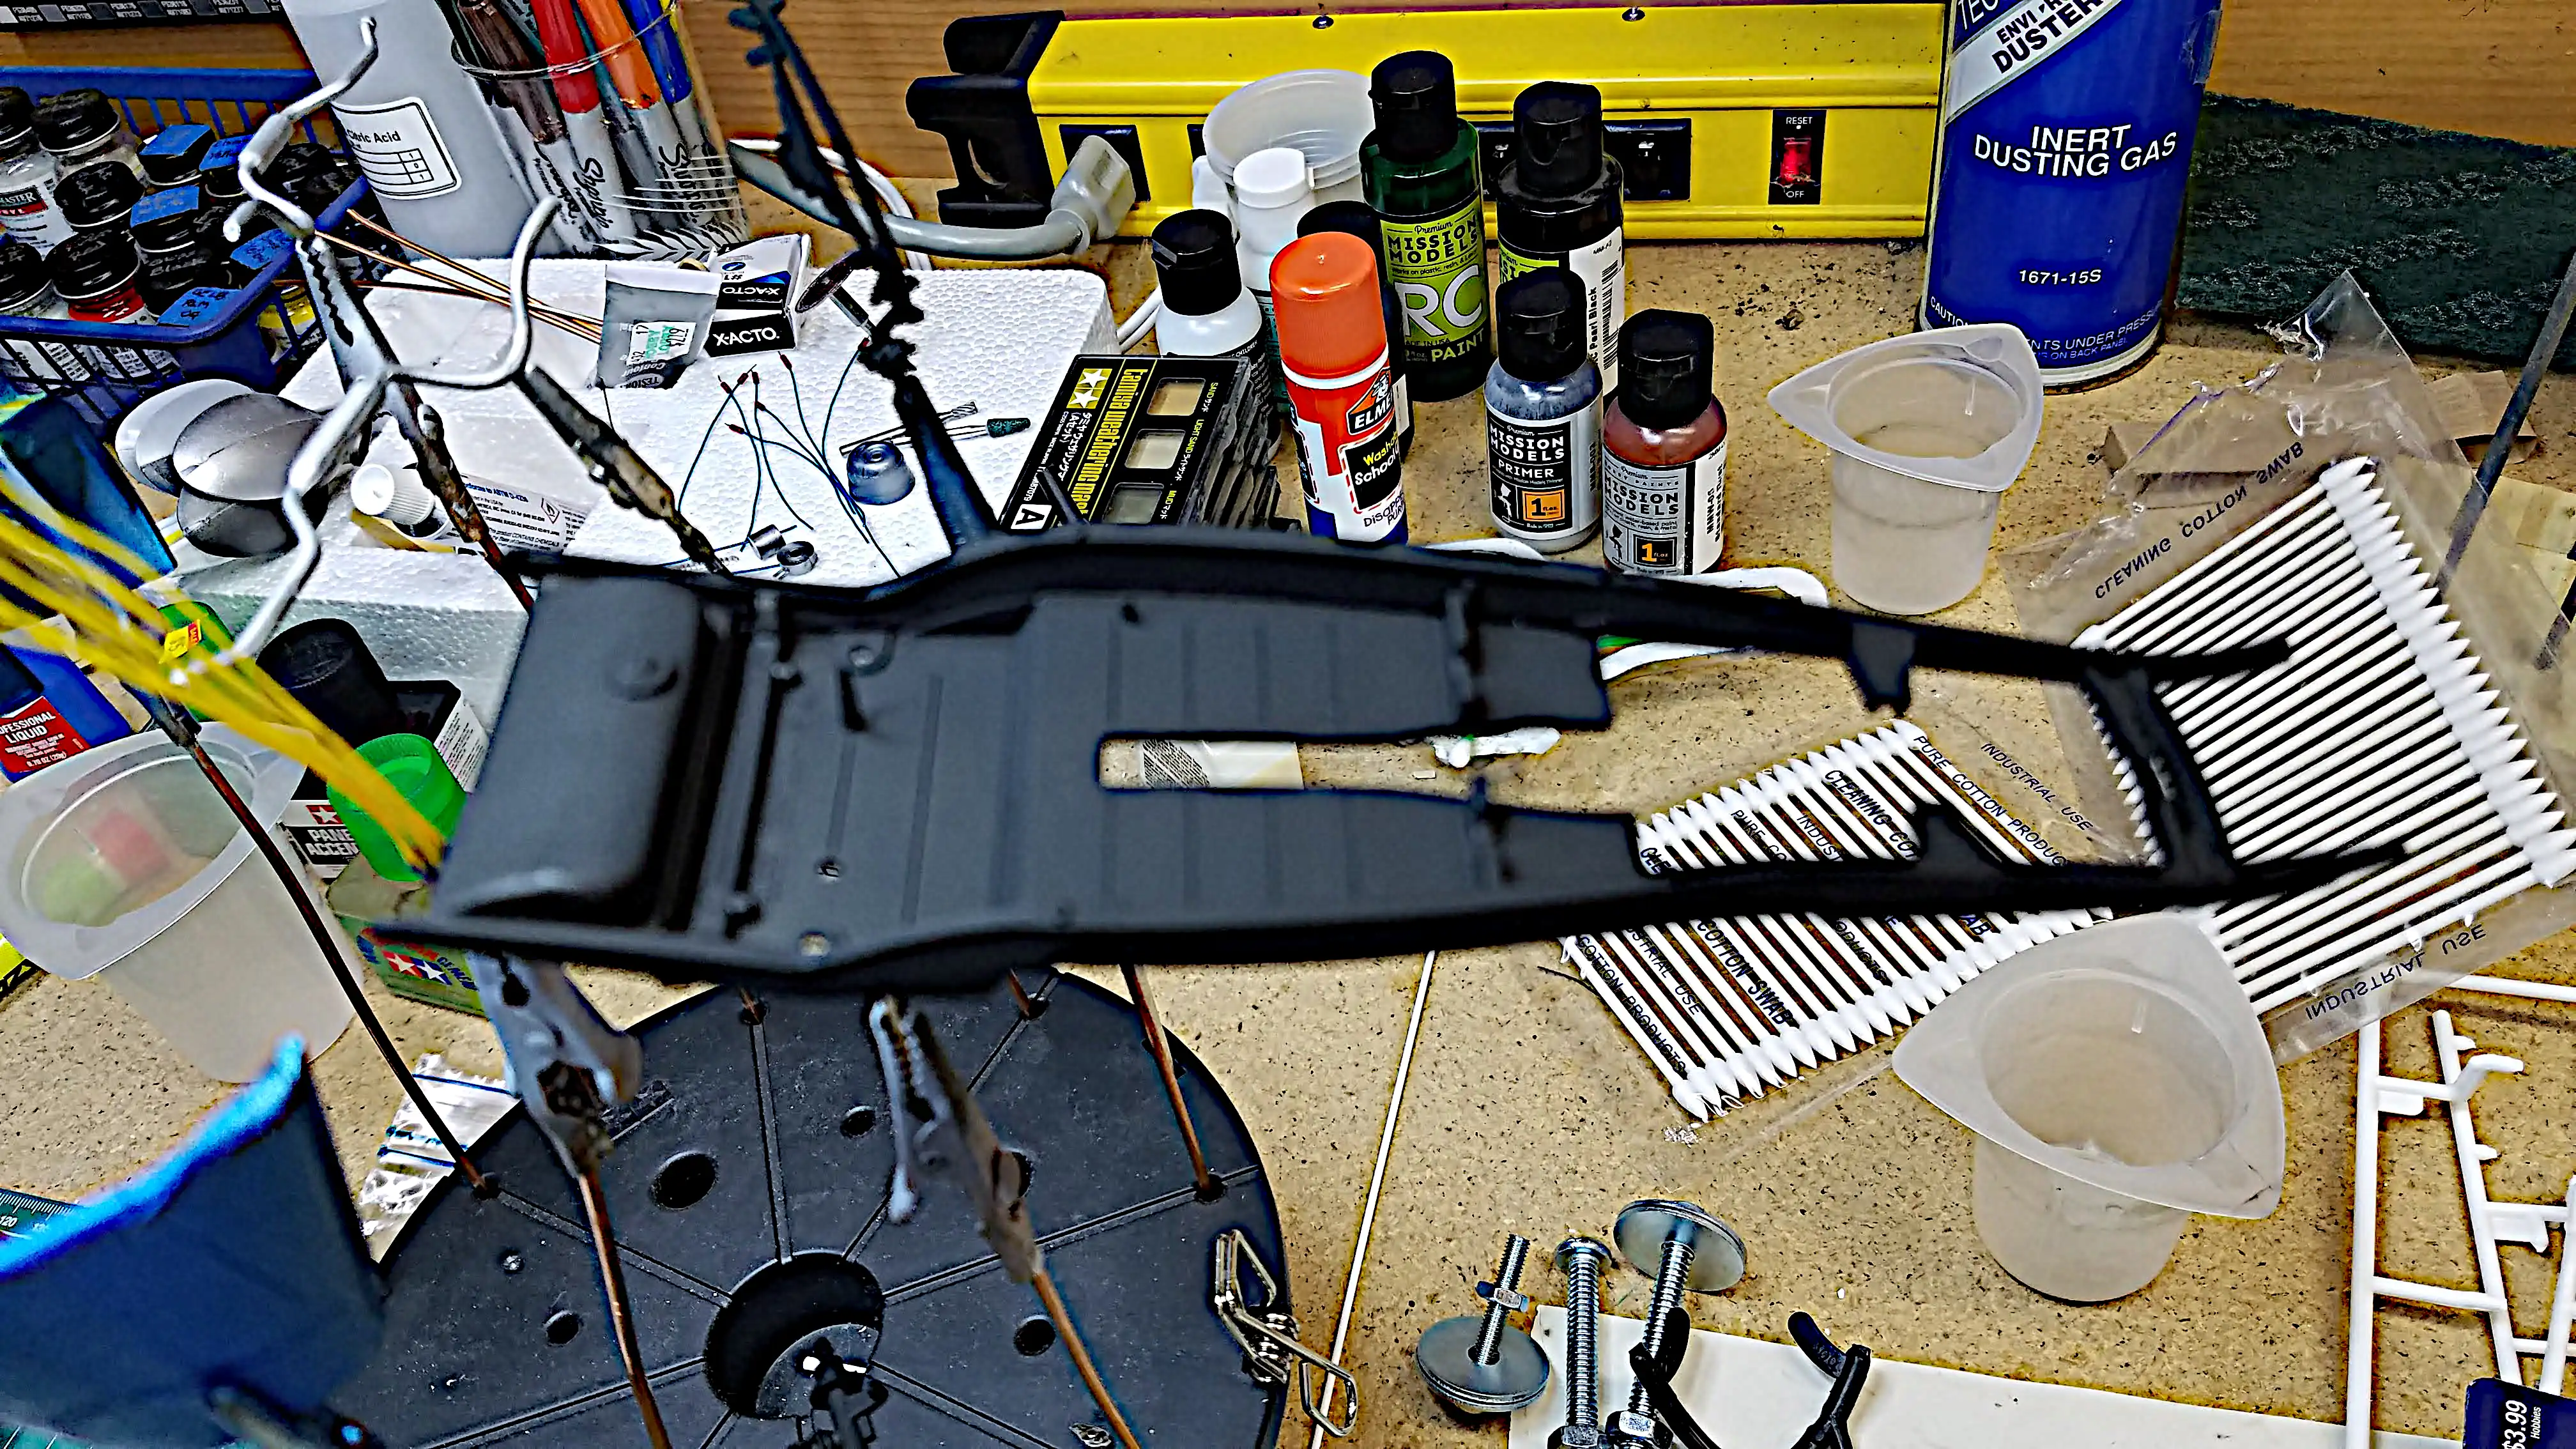
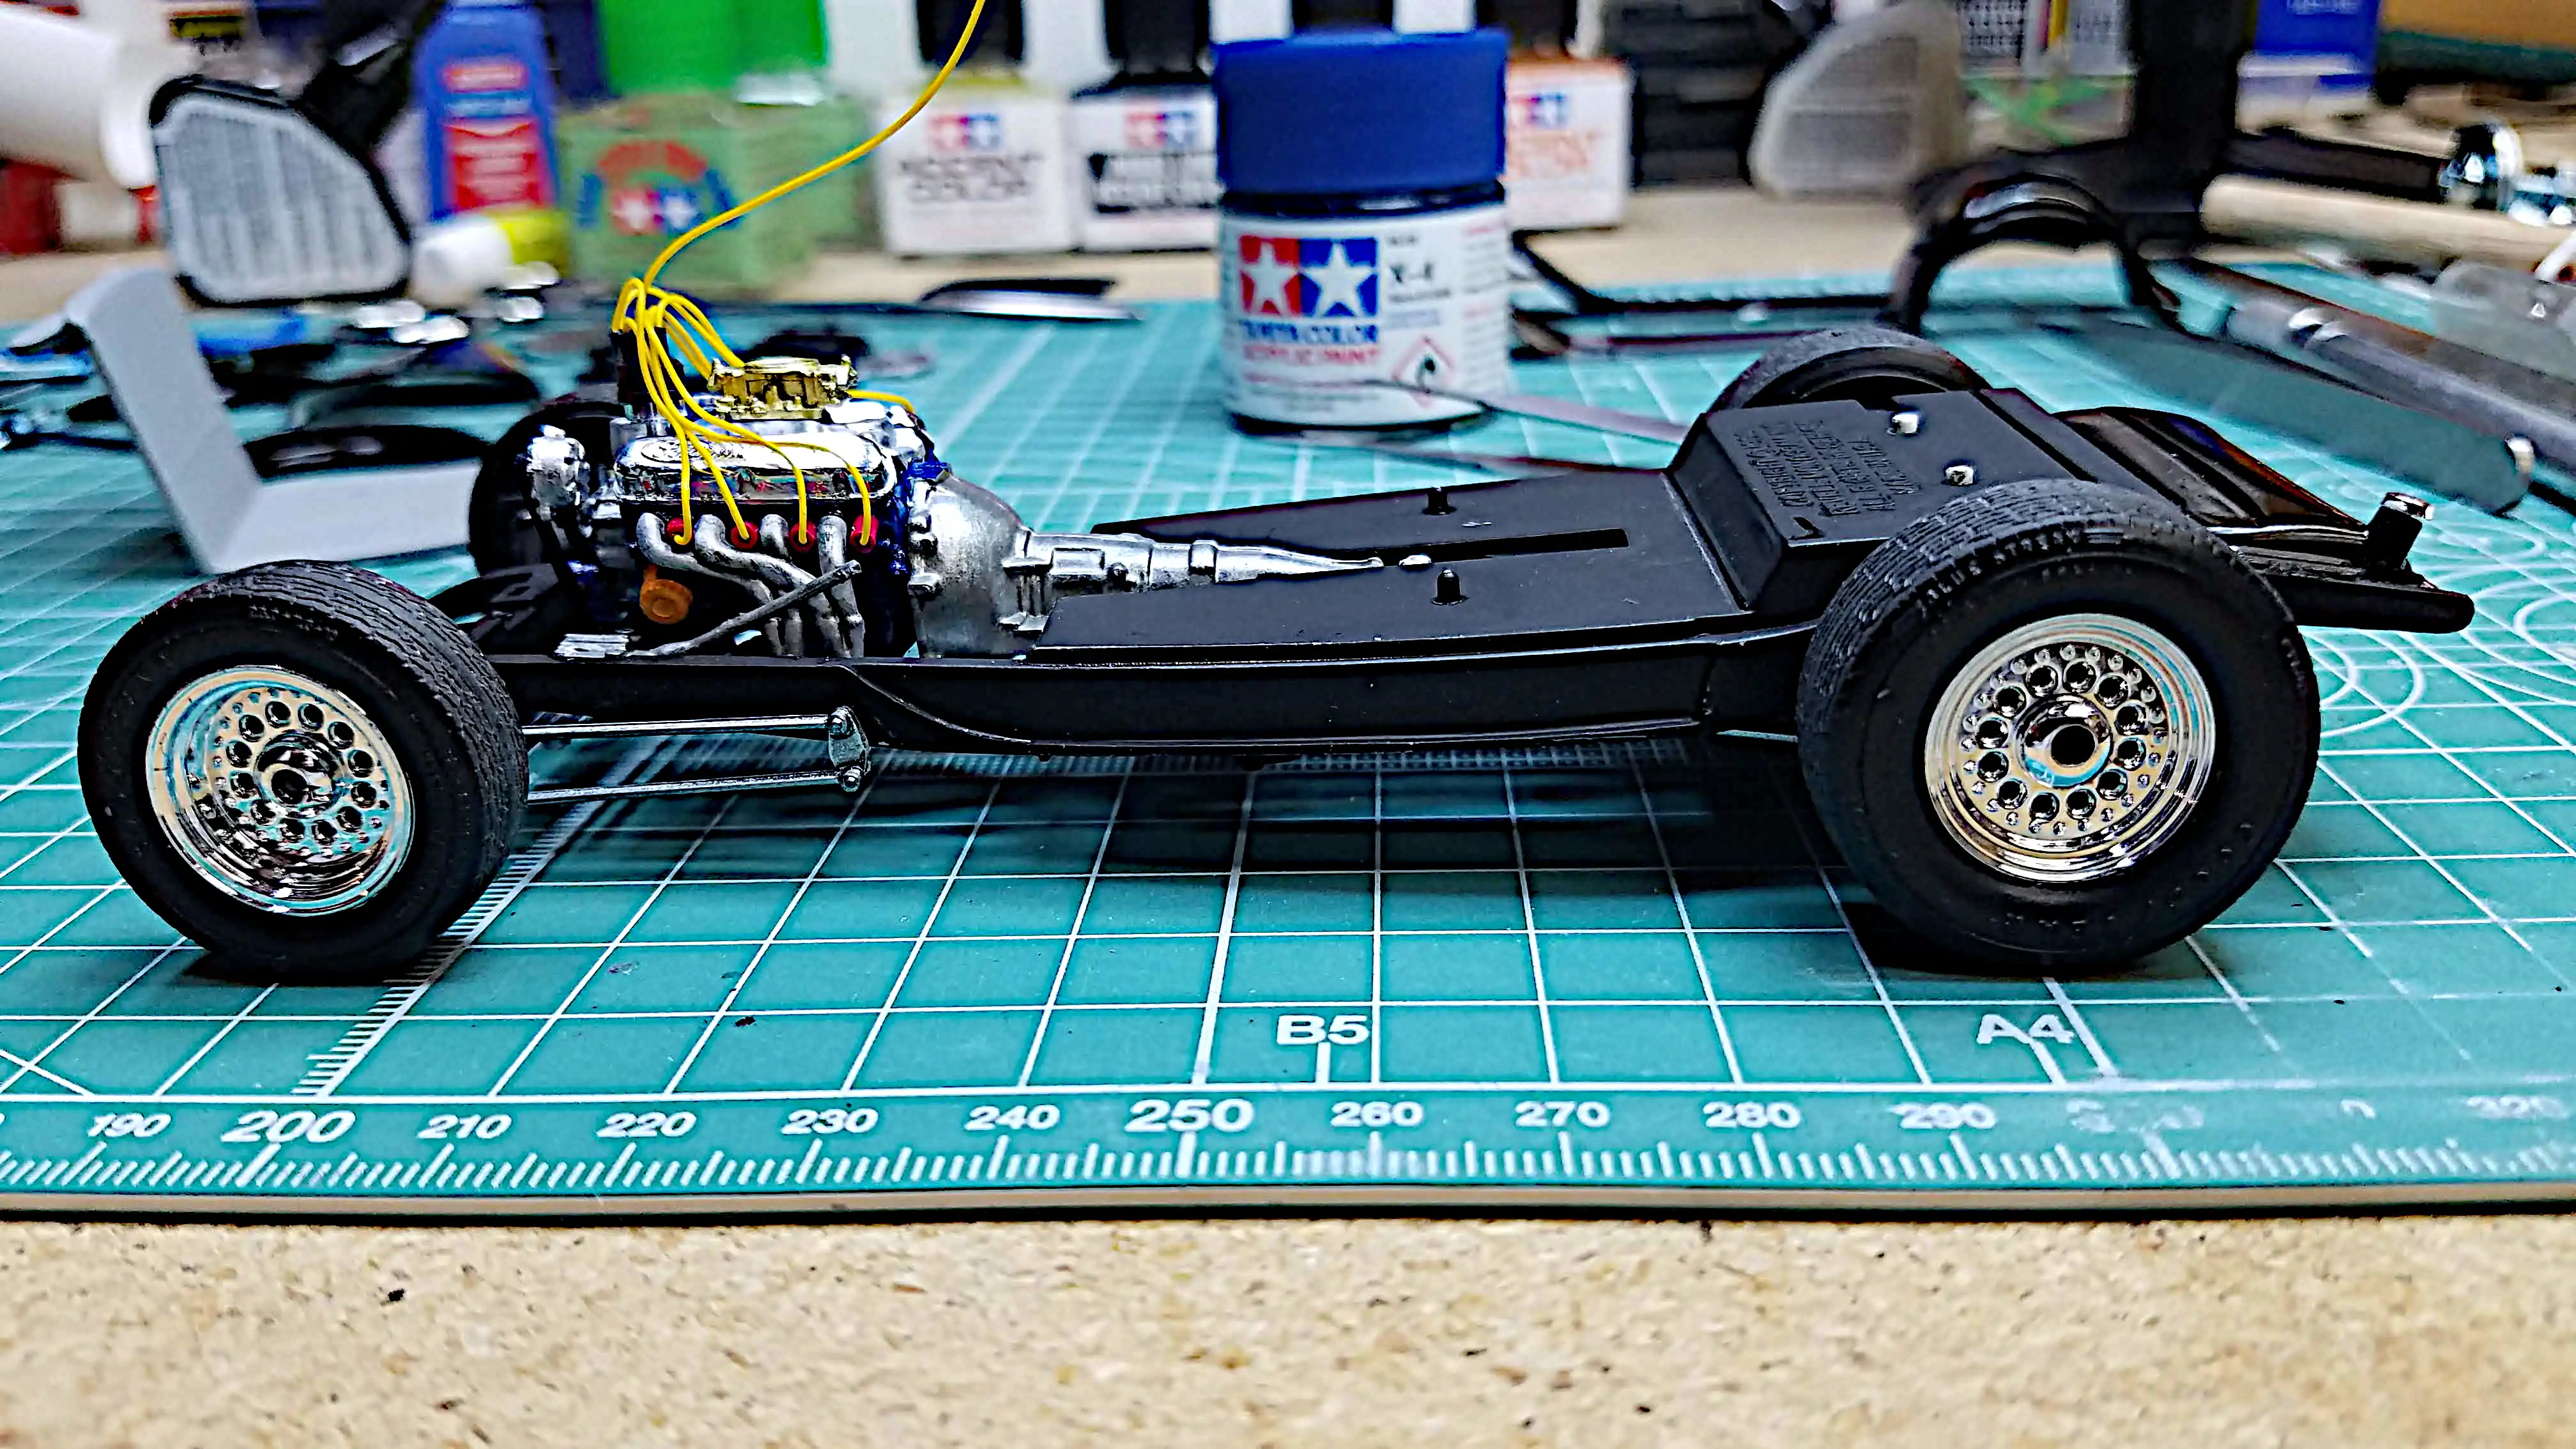 Frame and chassis is almost finished
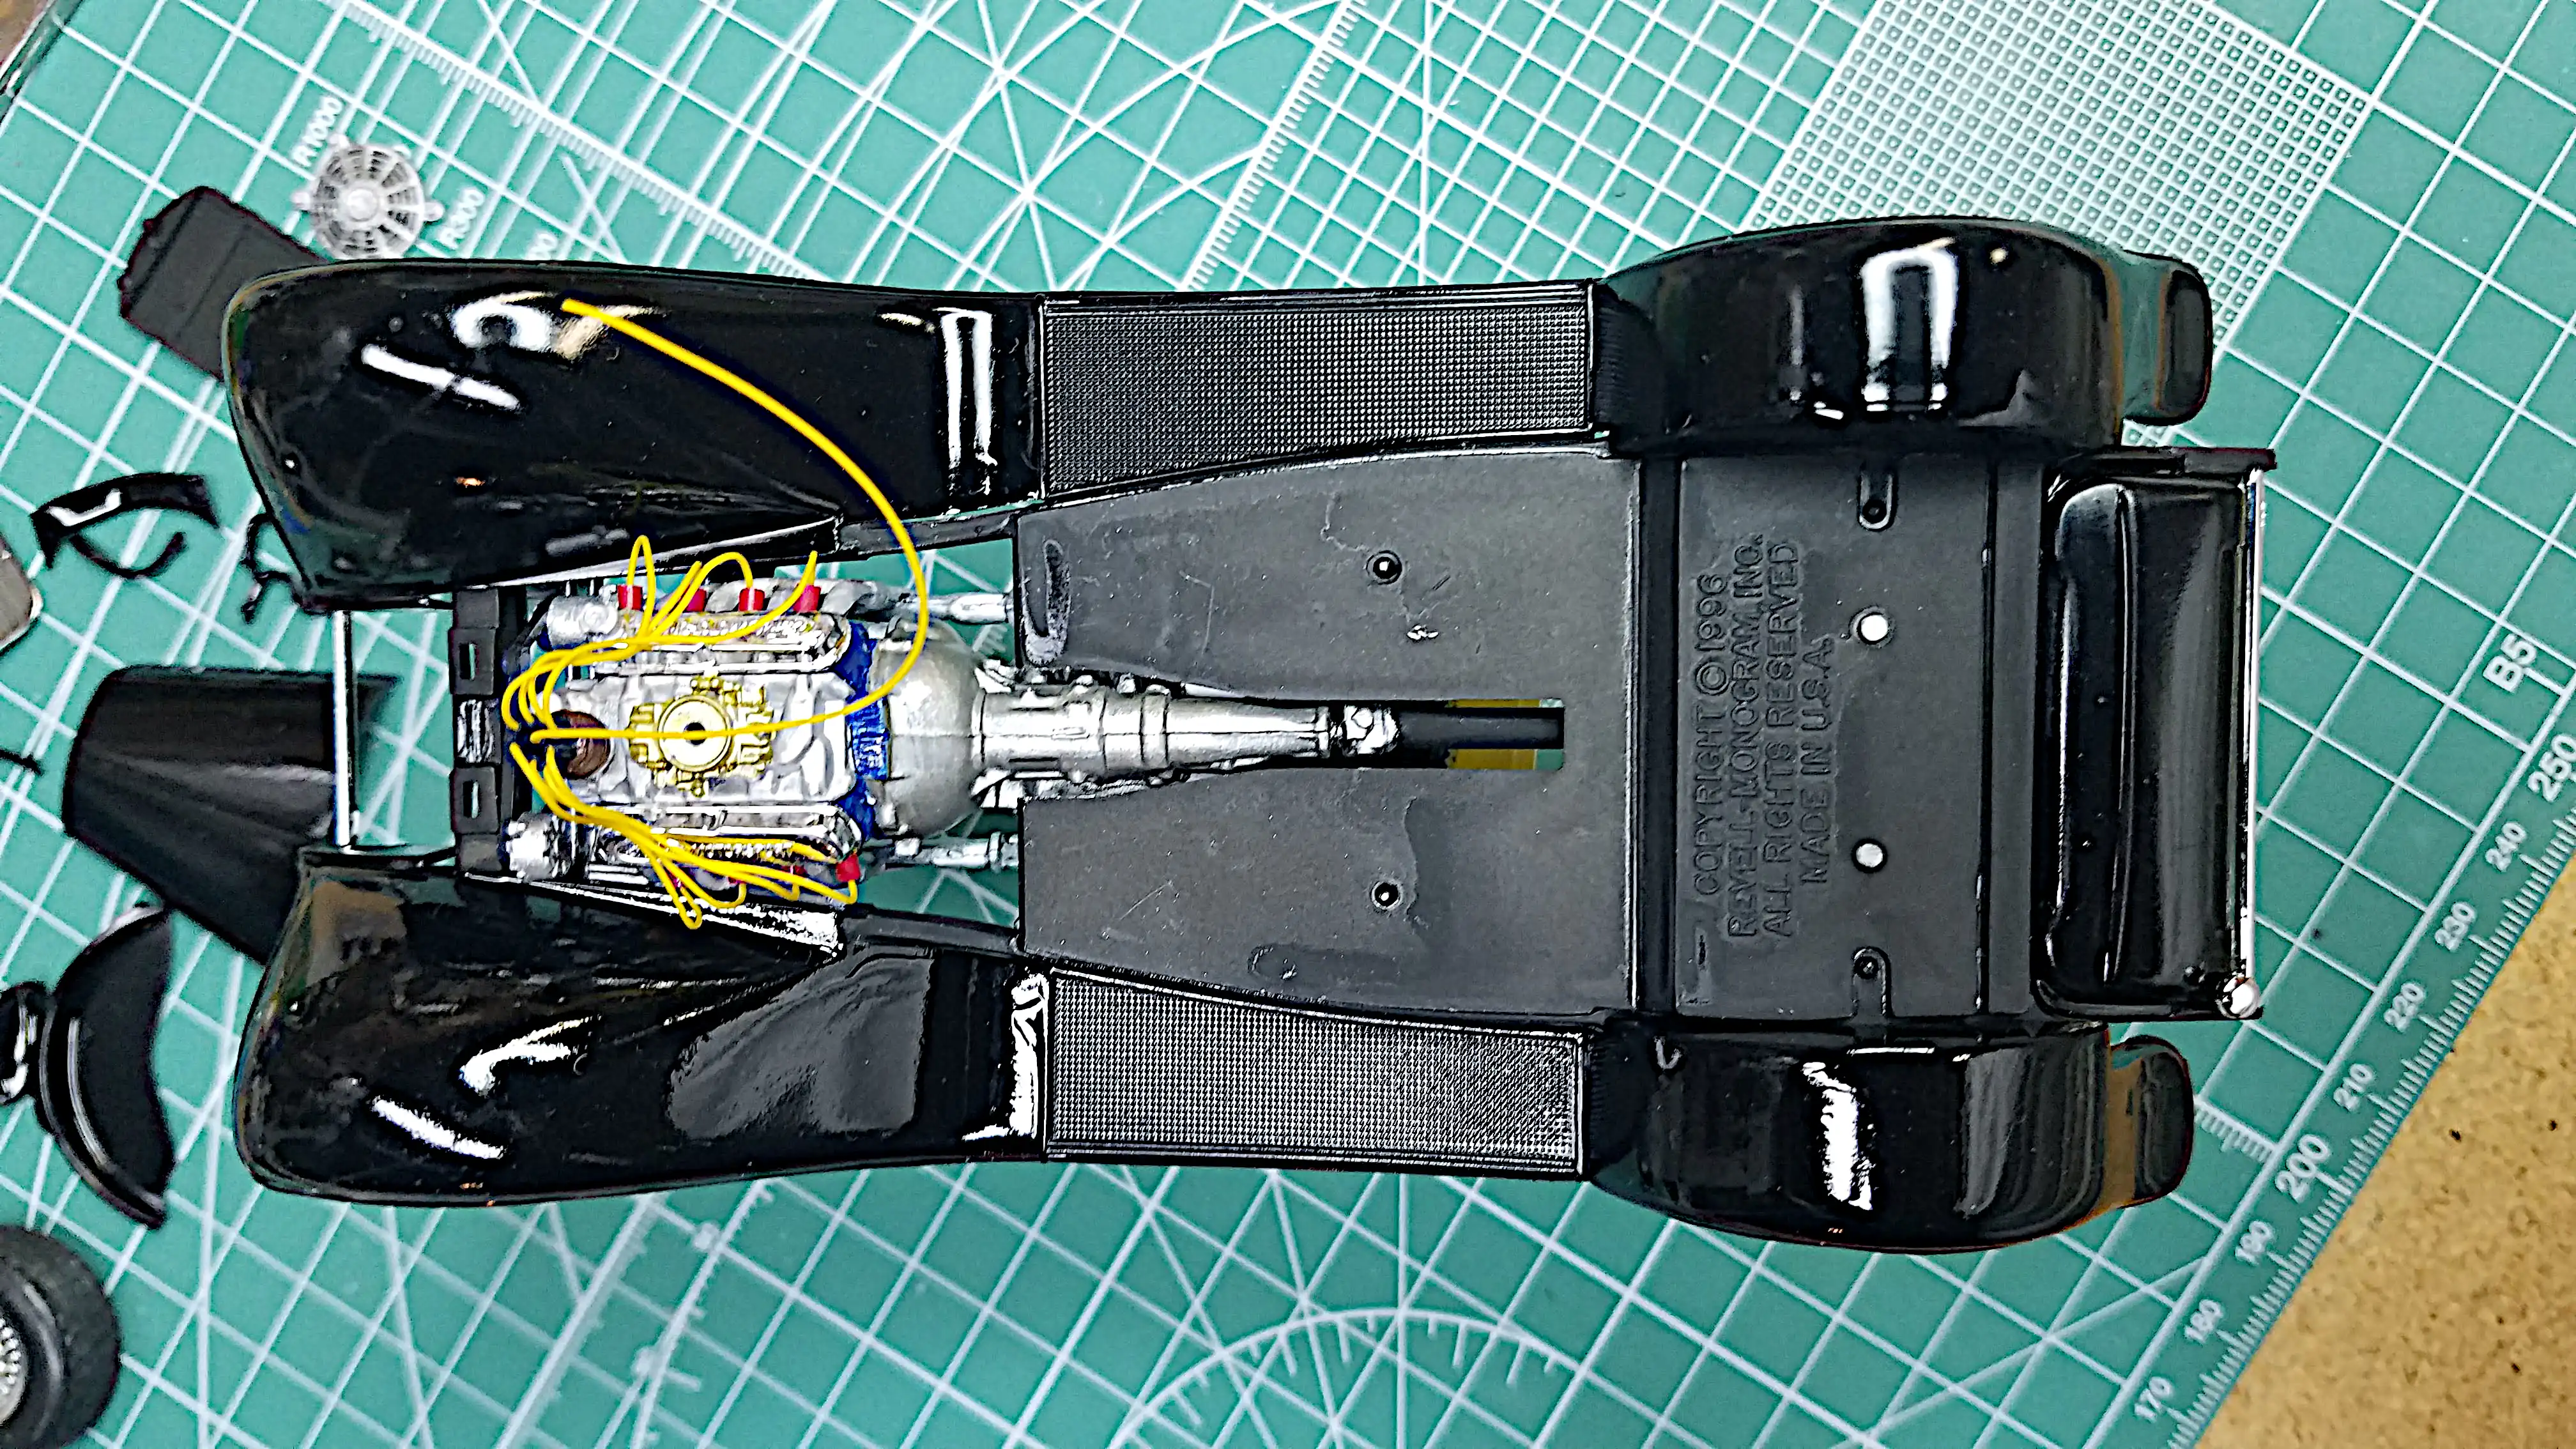
The frame/chassis is almost finished. The wire sticking up in the air will eventually connect to the ignition coil.
Photo 067
Click/tap photo to enlarge
 Frame and chassis is almost finished
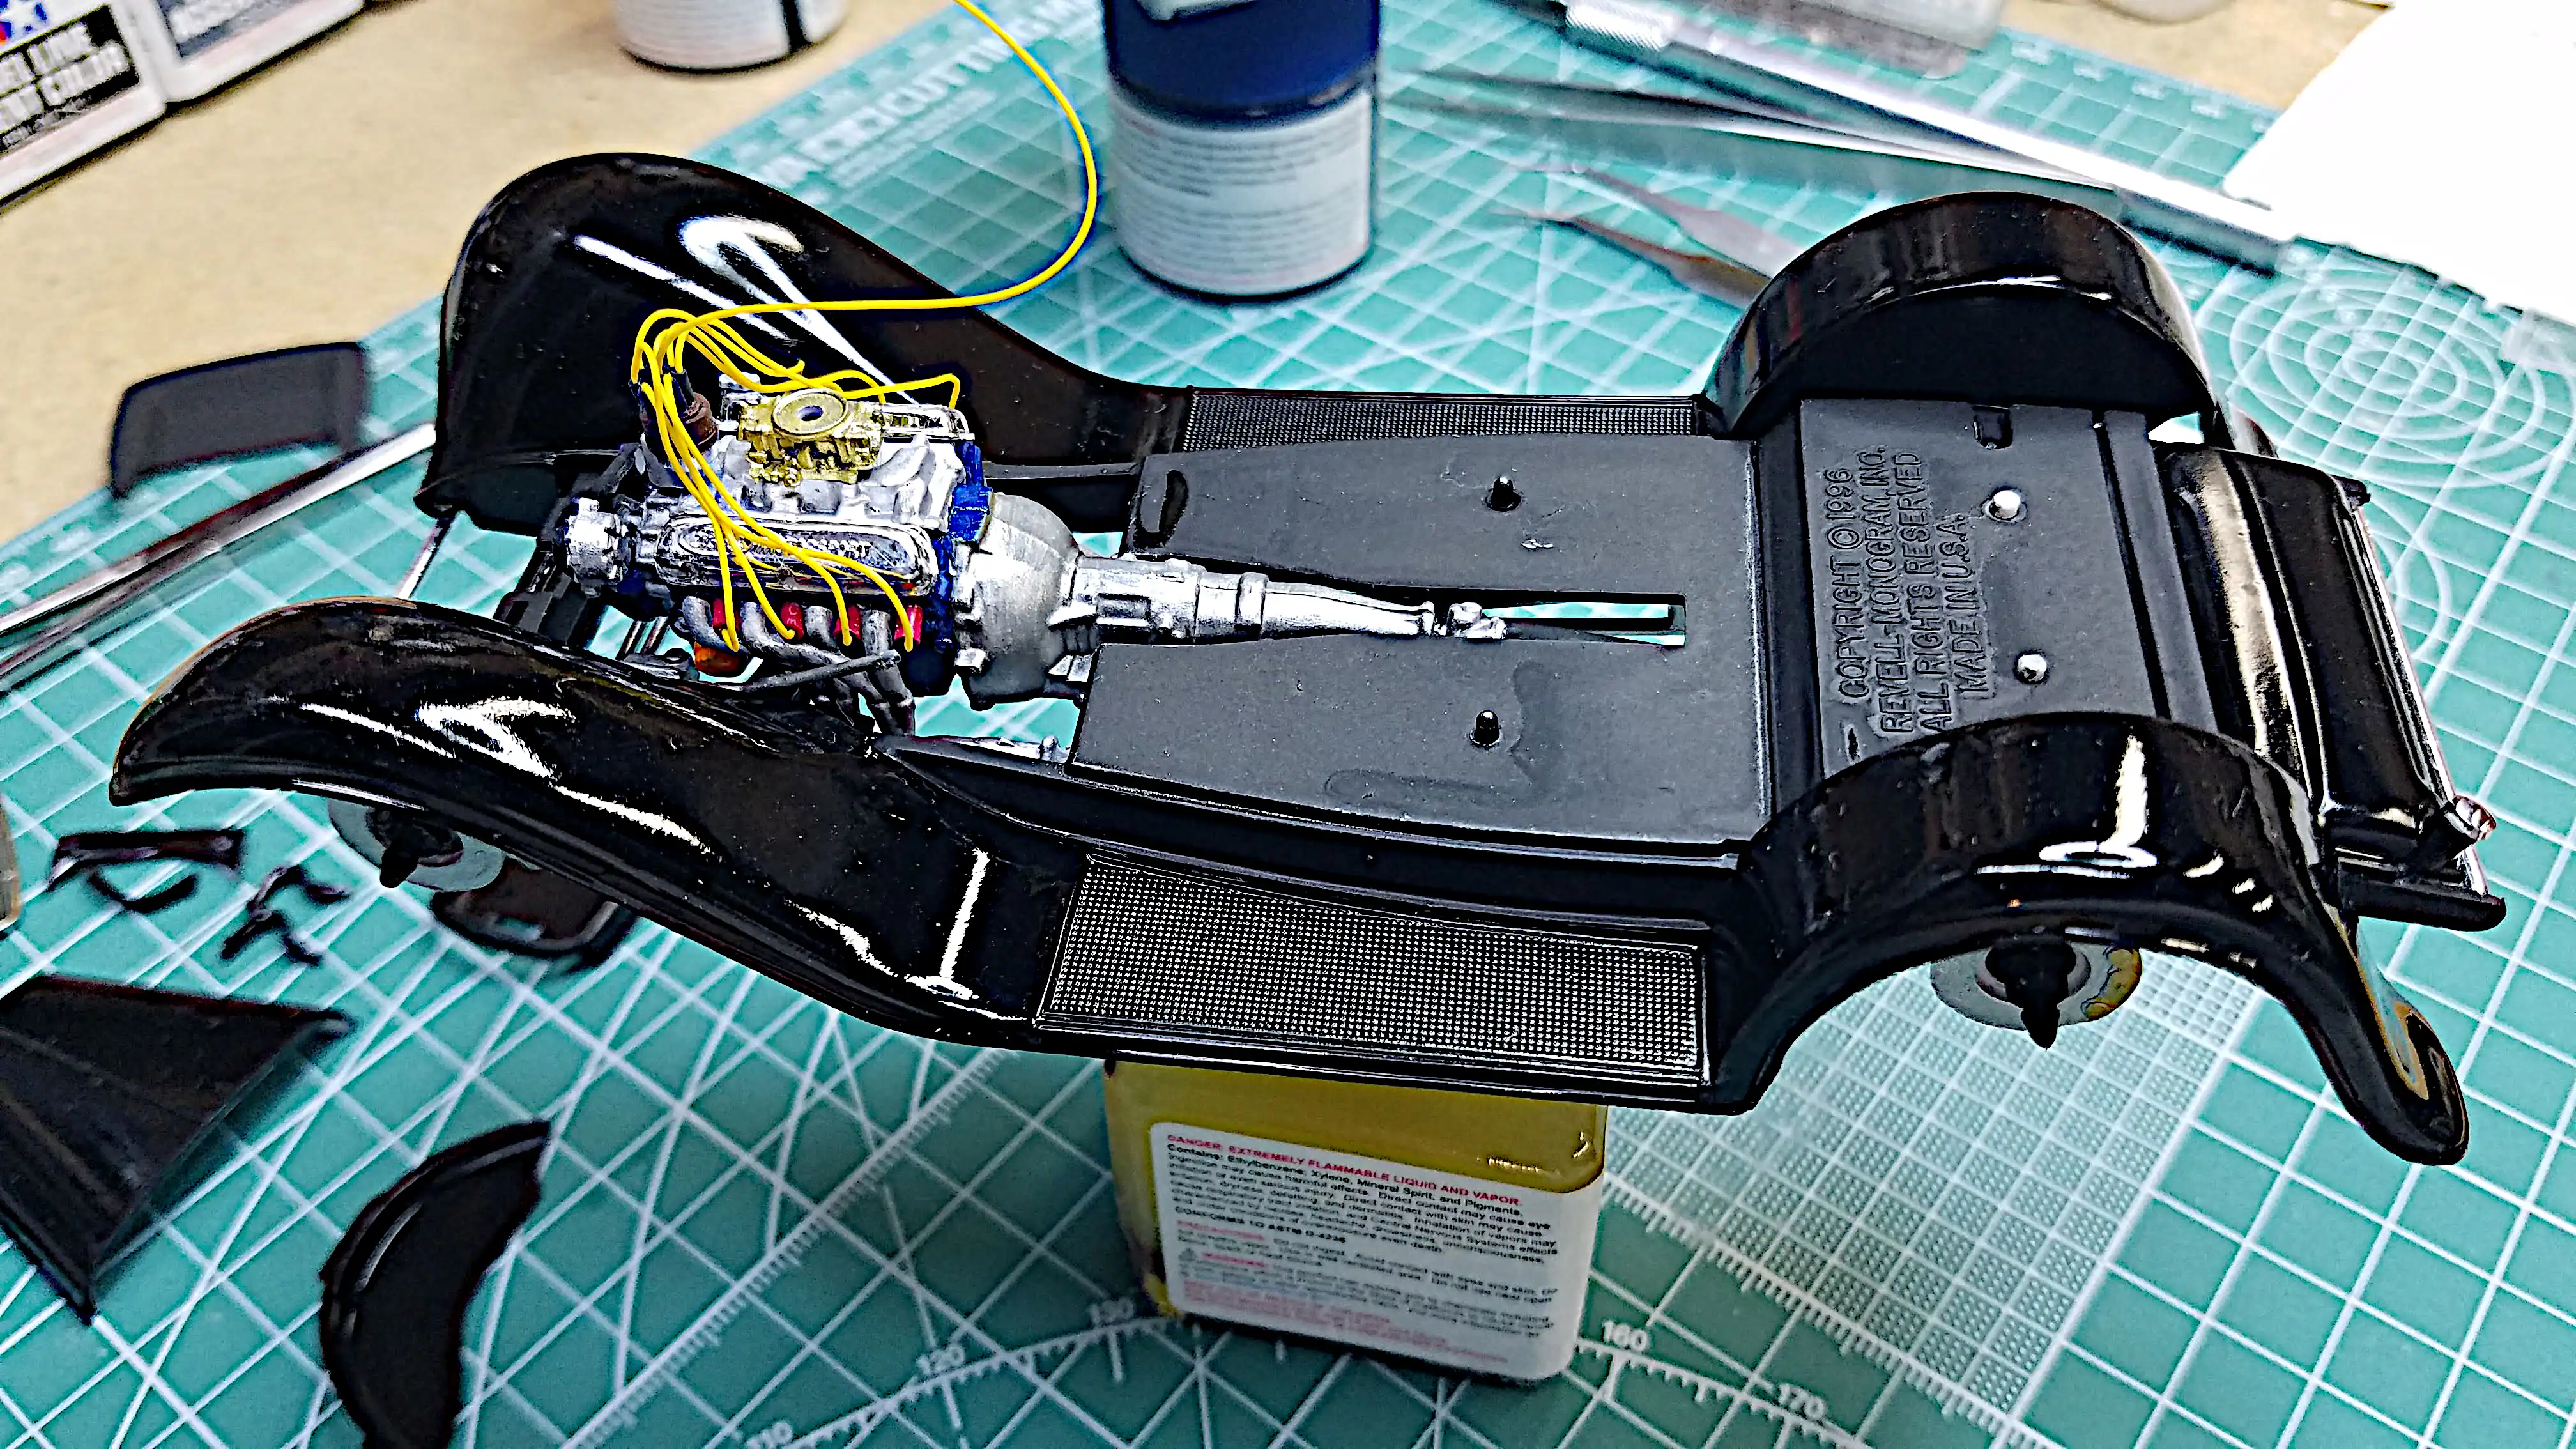
Another view of the almost finished frame/chassis. The air cleaner is not installed, but is ready to go.
Photo 068
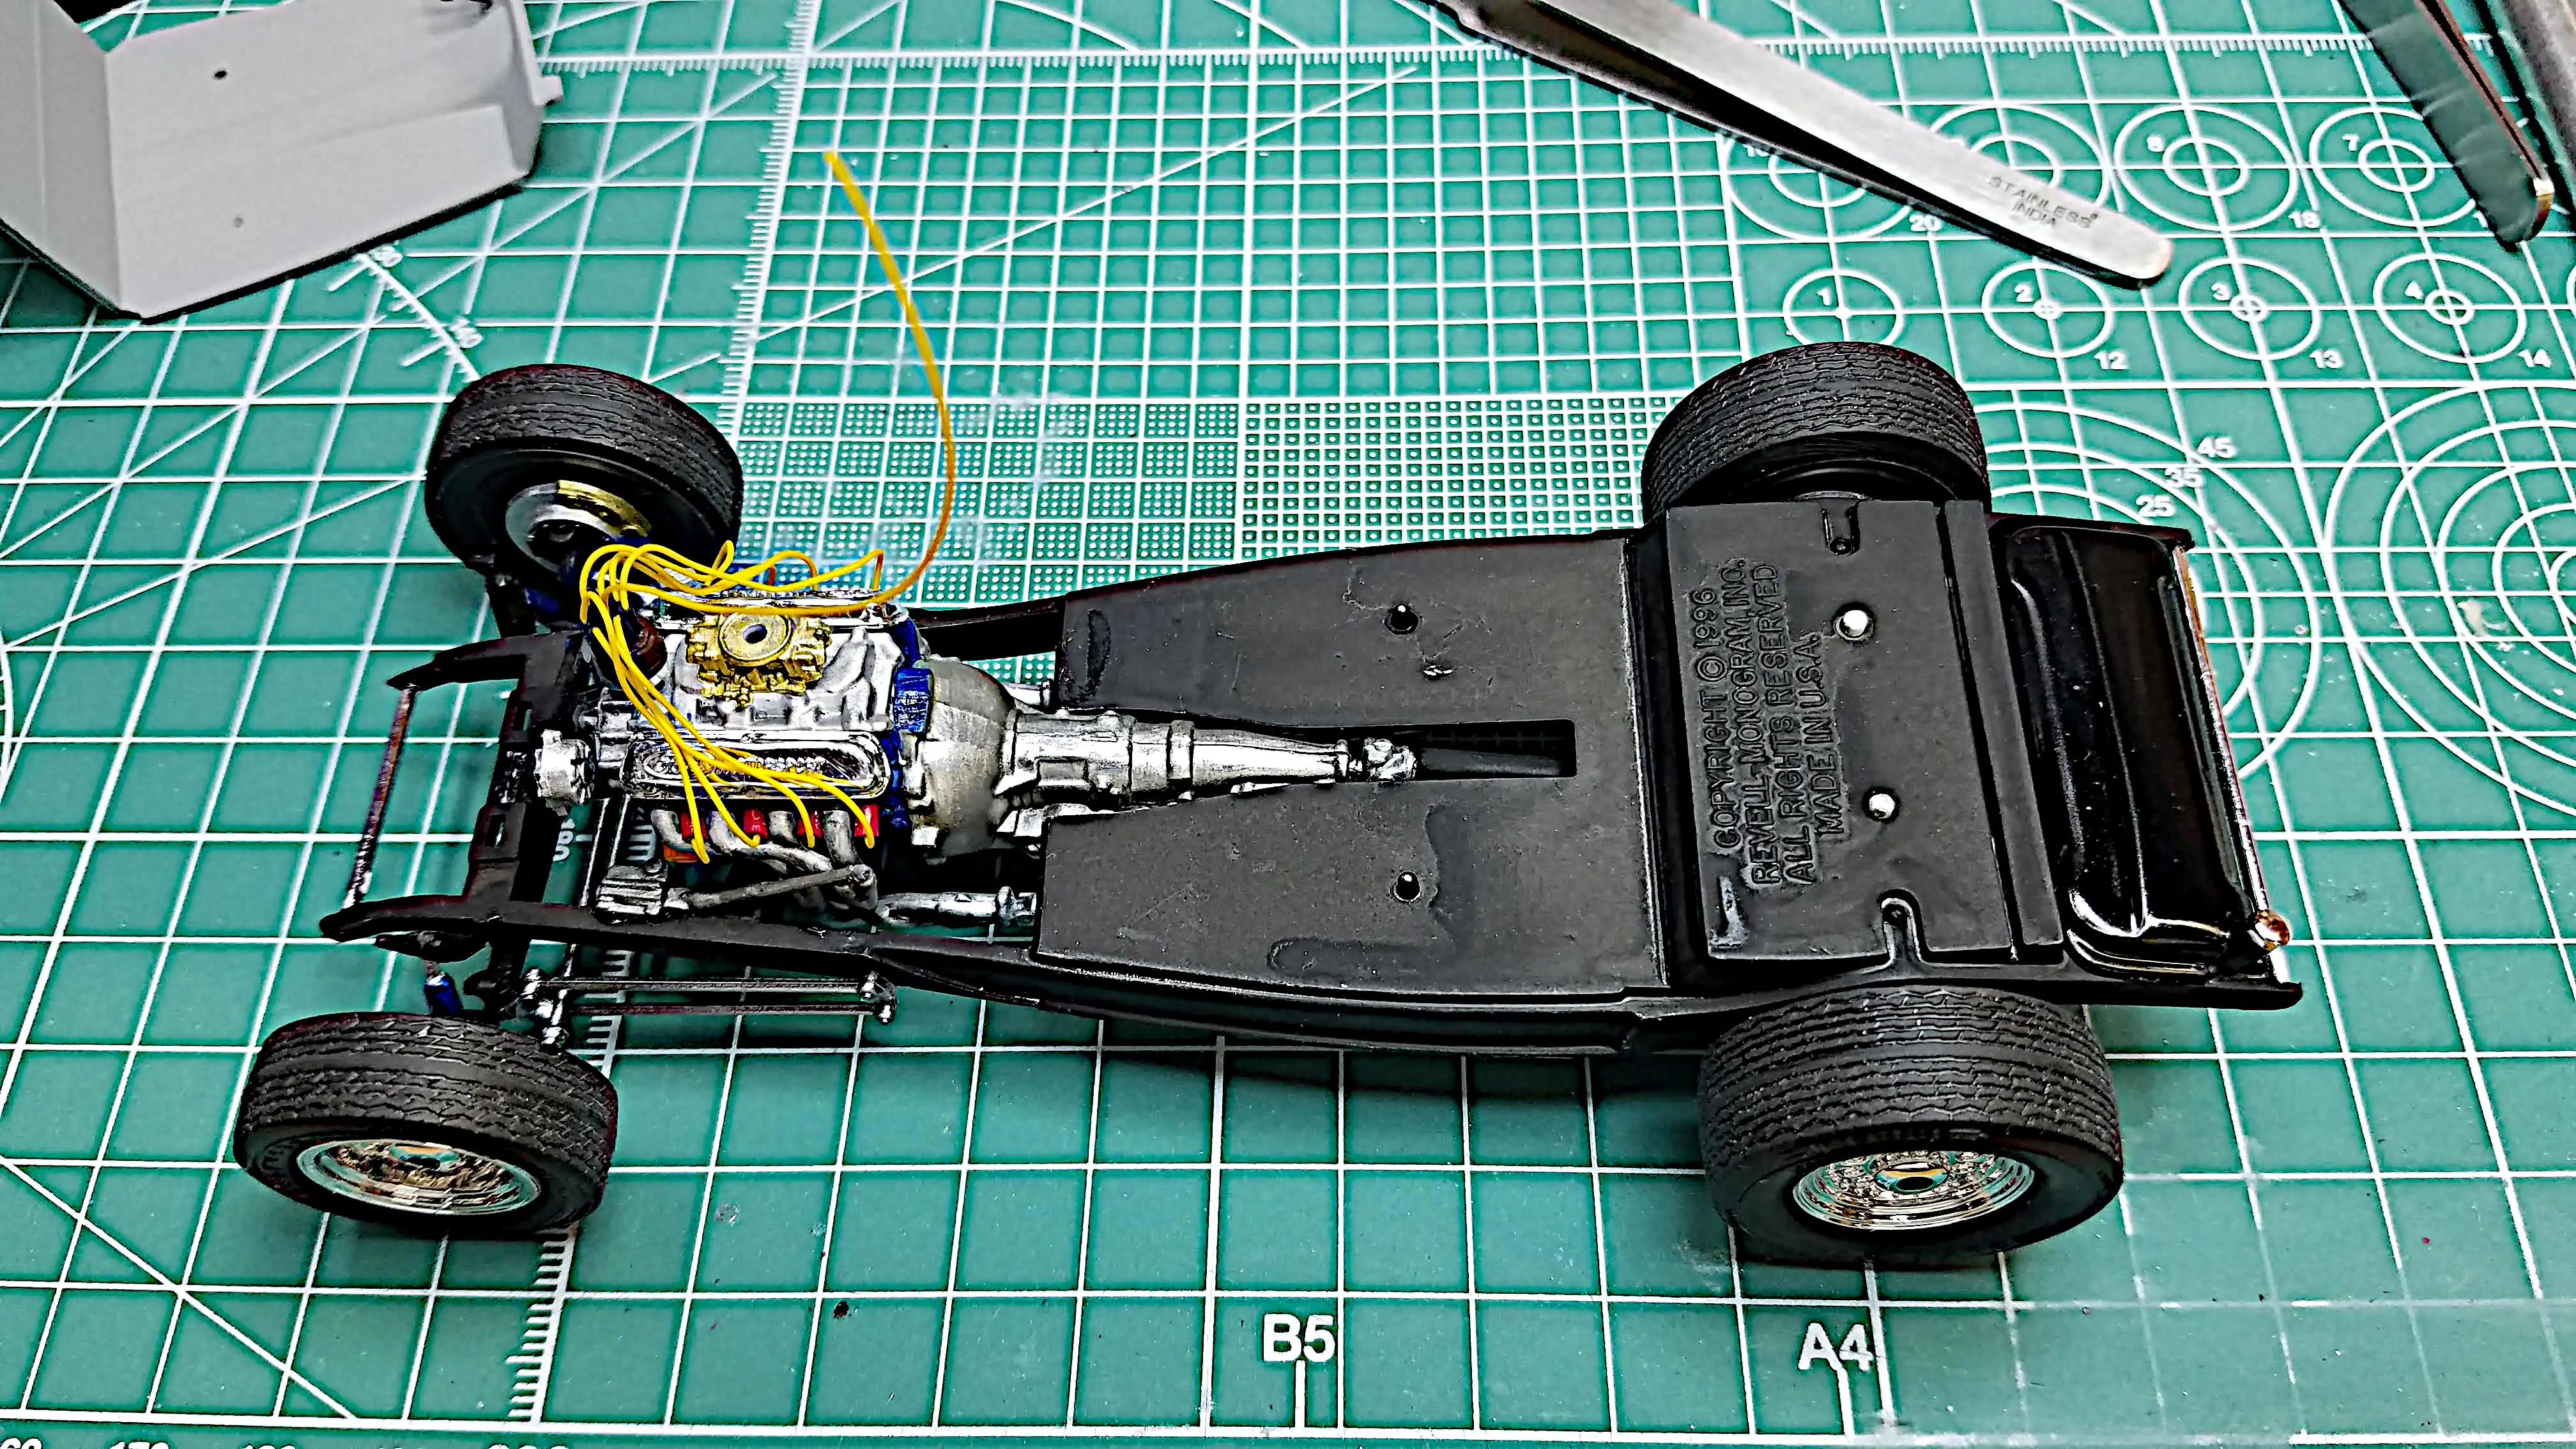
Click/tap photo to enlarge
 Bottom view of frame/chassis
Bottom view of the frame/chassis. Everything is mounted and installed.
Photo 069
Click/tap photo to enlarge
 Body paint is stripped off
This photo and the next two photos are of the body after the paint was stripped. I attempted to fix the major orange peel, and I was almost successful. Wet sanding with 3000 grit sandpaper and then polishing with Novus #2 and #3 scratch remover made most of the surface smooth and shiny; however, there were some areas that were still bad and the metallic blue would not polish out from the tape residue.
So...I gave the body a bath in 91% Isopropyl Alcohol (IPA). Within 15-minutes, all three layers of the Tamiya paint was stripped. I did a light brushing with a toothbrush and an acid brush, then washed the body with Dawn dish soap, rinsed it in clear water and it is now setting off to the side drying. I'll attempt painting again this week (week of May 30, 2022).
Photo 070
Click/tap photo to enlarge
 Body paint is stripped off
Back of the body after the paint has been stripped off.
Photo 071
Click/tap photo to enlarge
 Body paint is stripped off
Right side of the body after the paint has been stripped off.
Photo 072
Click/tap photo to enlarge
 Fenders are mounted on the frame
I put a coat of white primer on the stripped body and it did not go well. I guess we'll see...
While be primer on the body was drying, the fenders were mounted to the frame. This is a top view.
Photo 073
Click/tap photo to enlarge
 Fenders are mounted on the frame
Another view of the fenders mounted to the frame.
Photo 074
Click/tap photo to enlarge
 Testing tires and stance
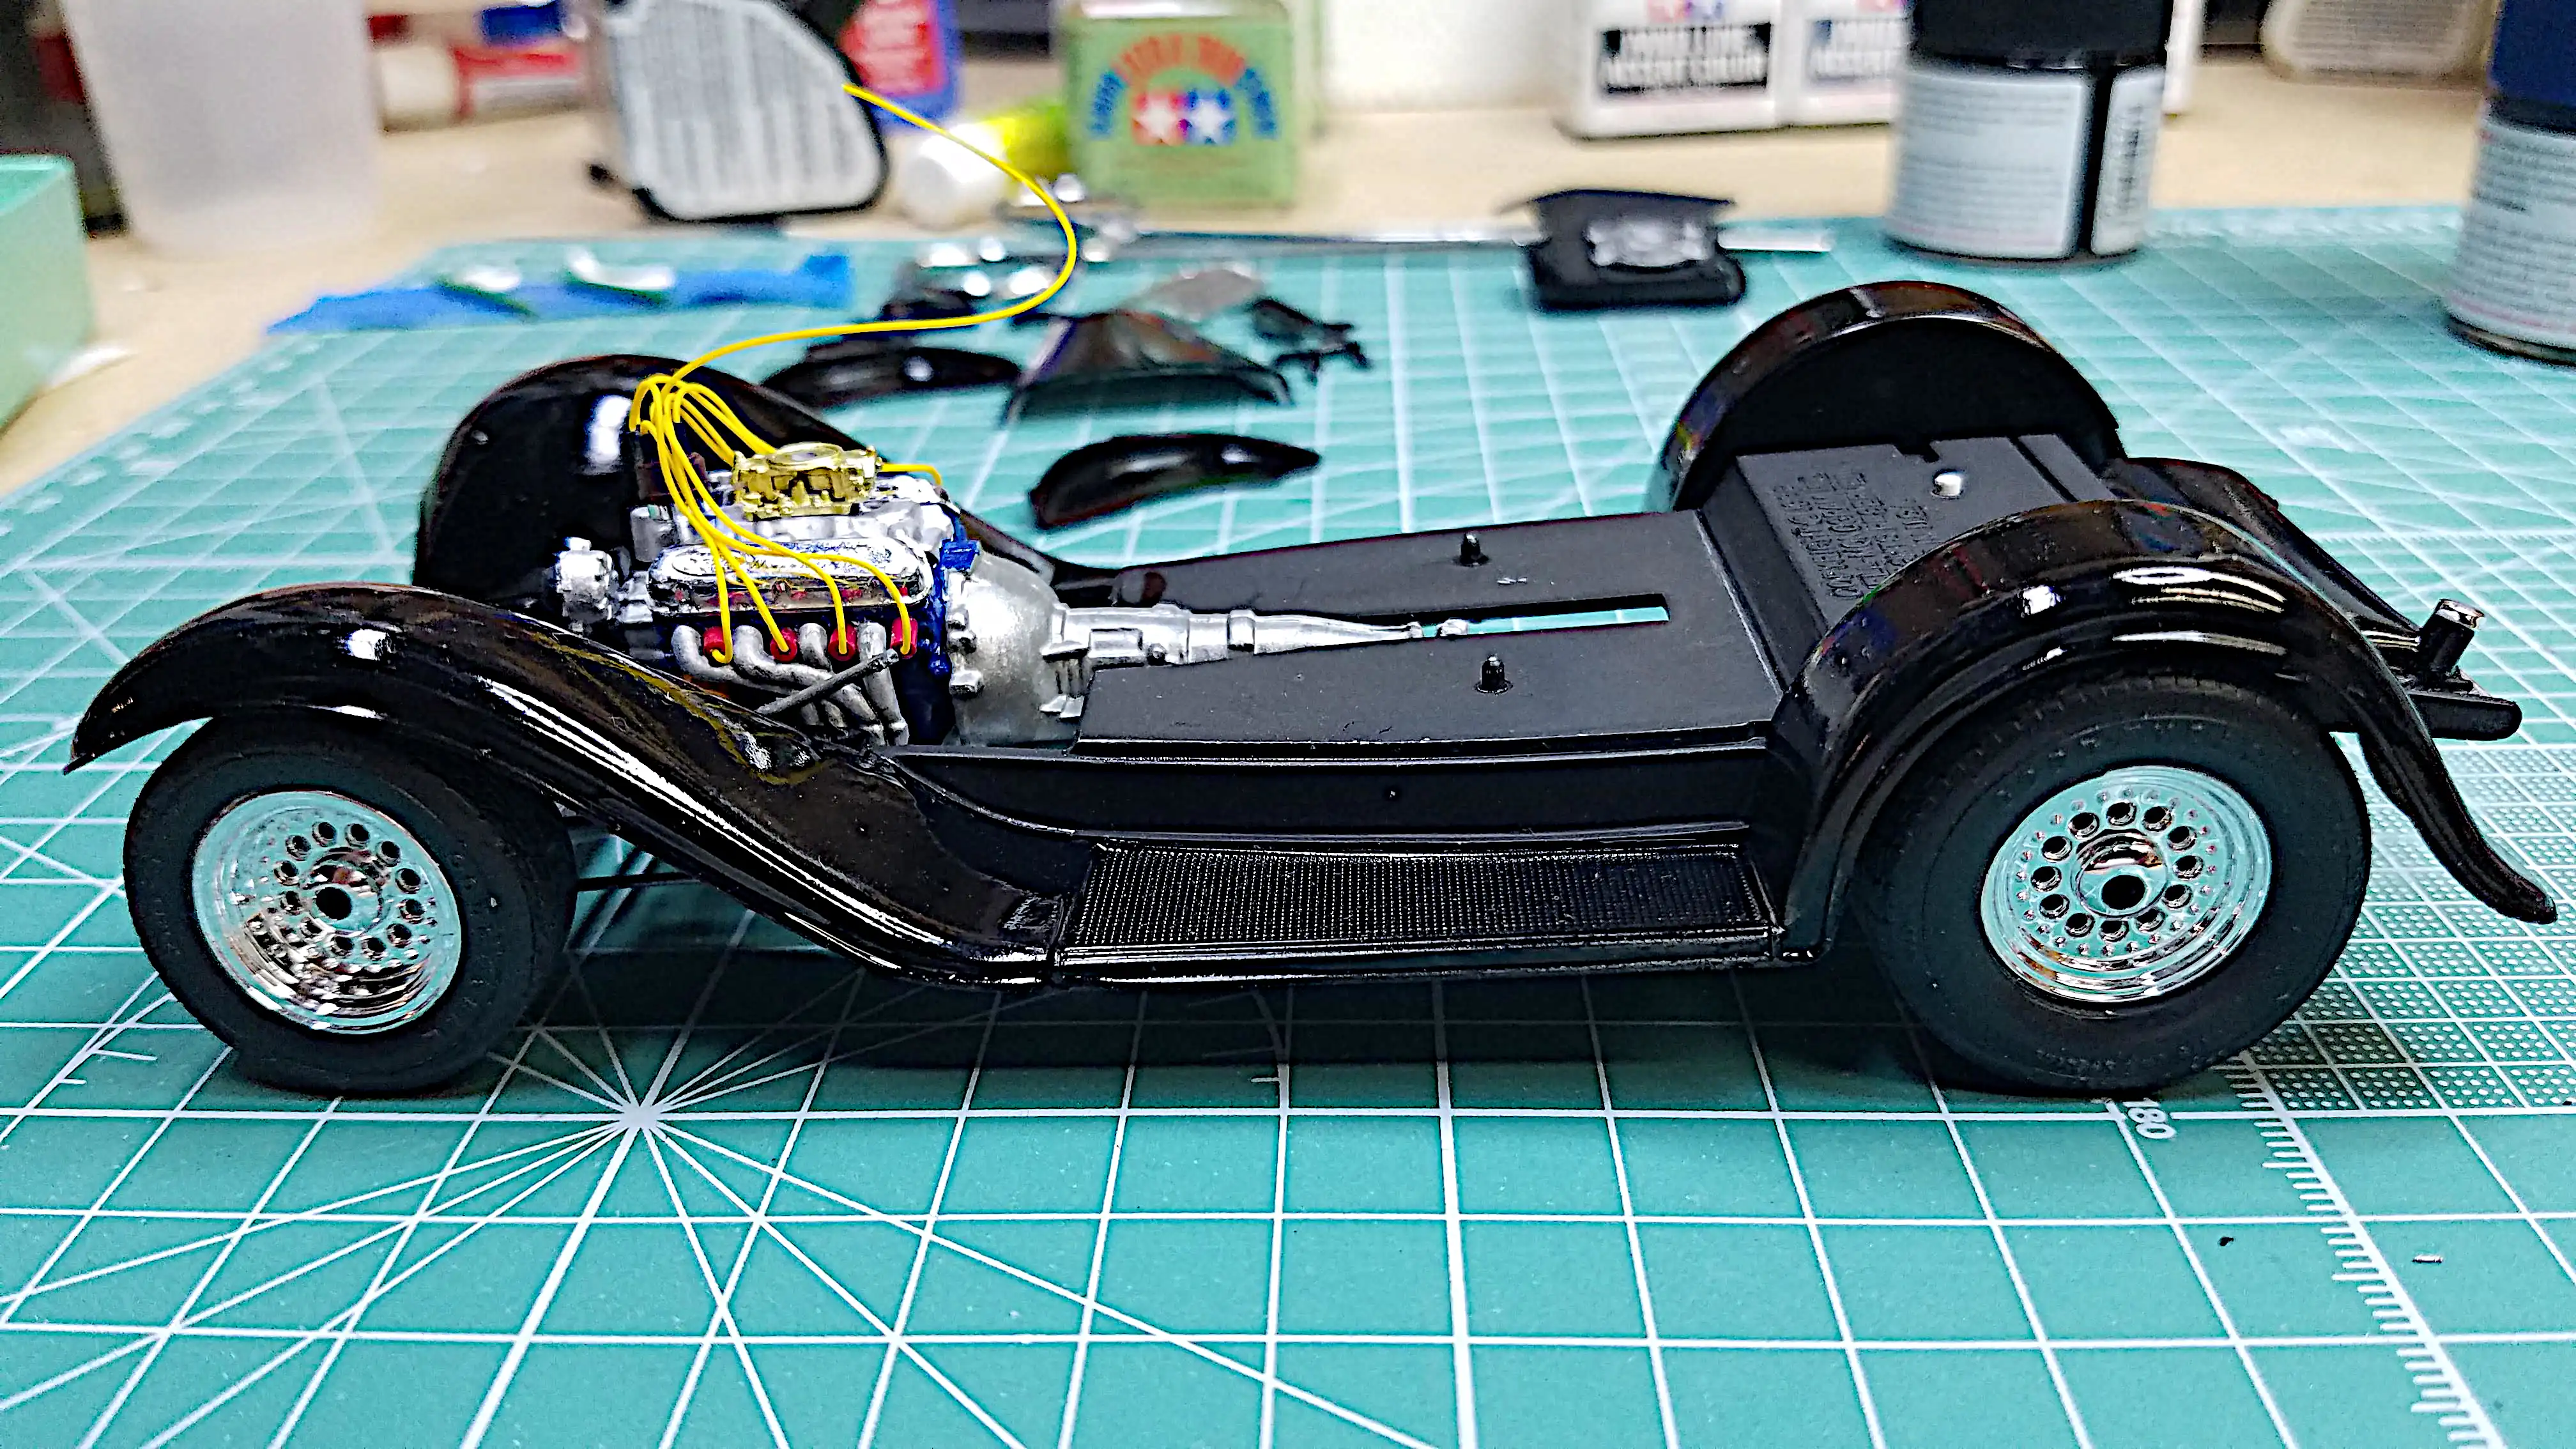
I tested the tires and the way the car will sit (stance), and I'm happy with the stance. I love the look of these wheels!
Photo 075
Click/tap photo to enlarge
 Interior tub is assembled
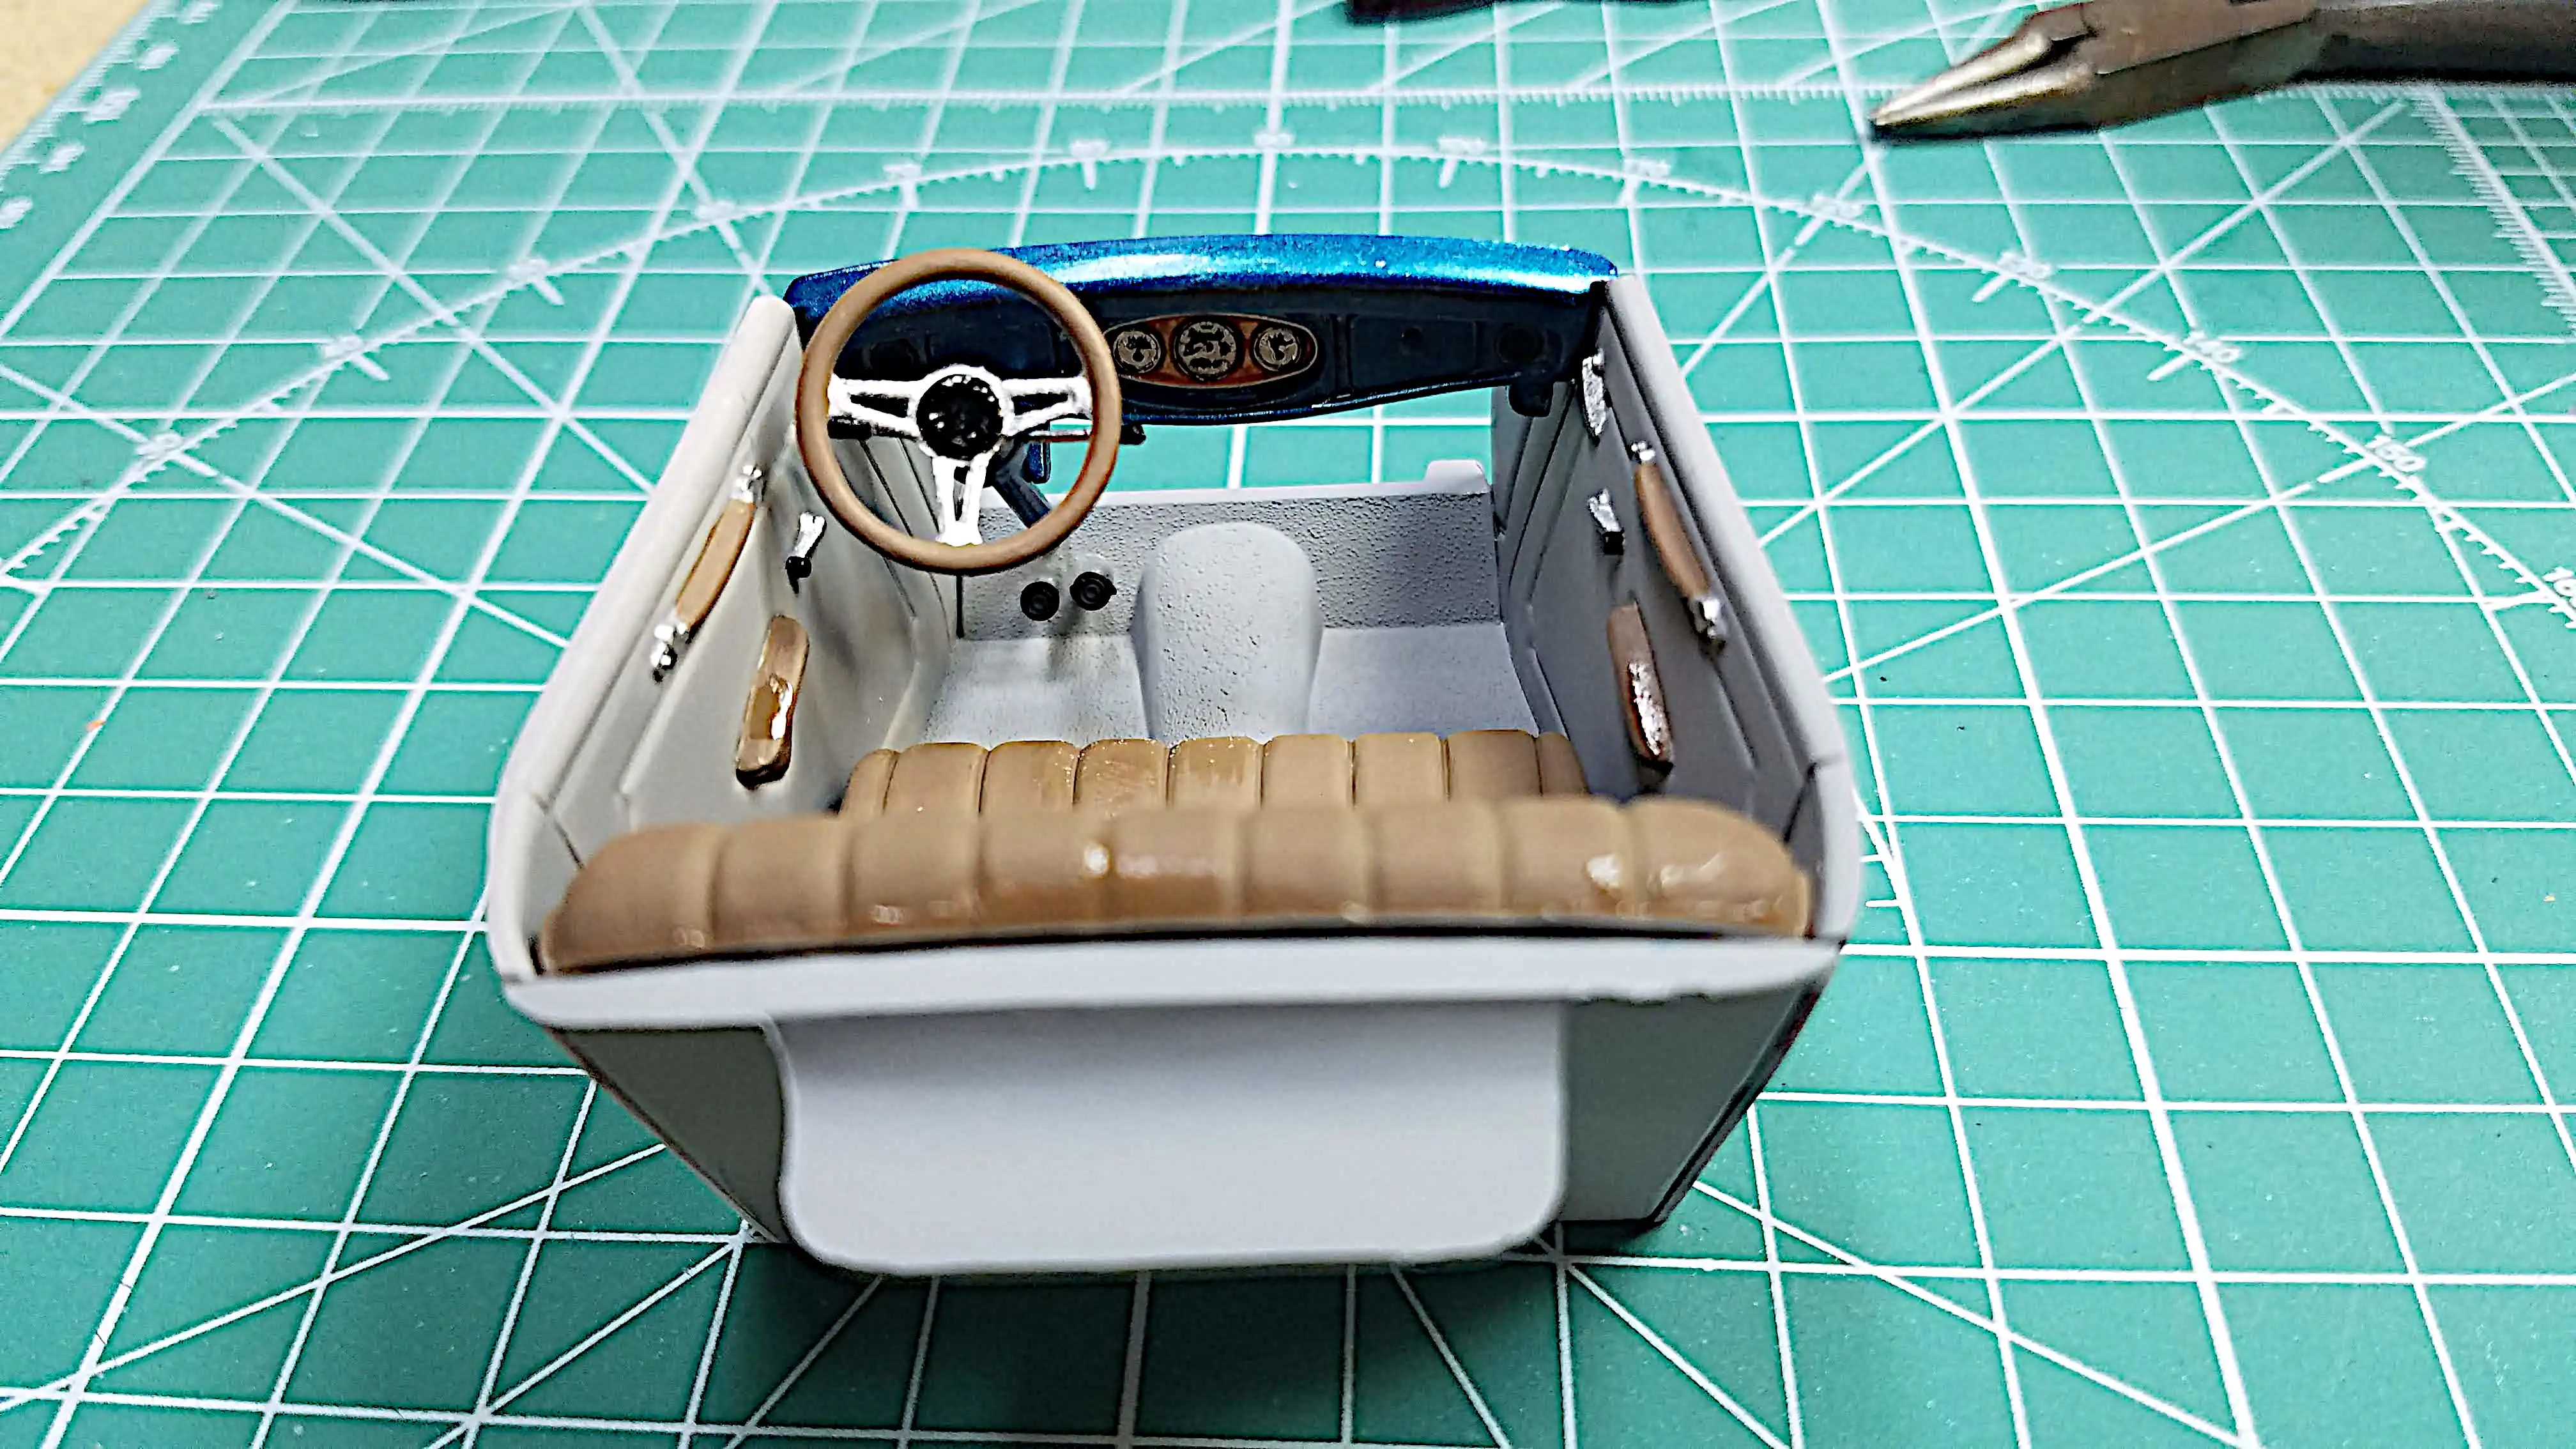
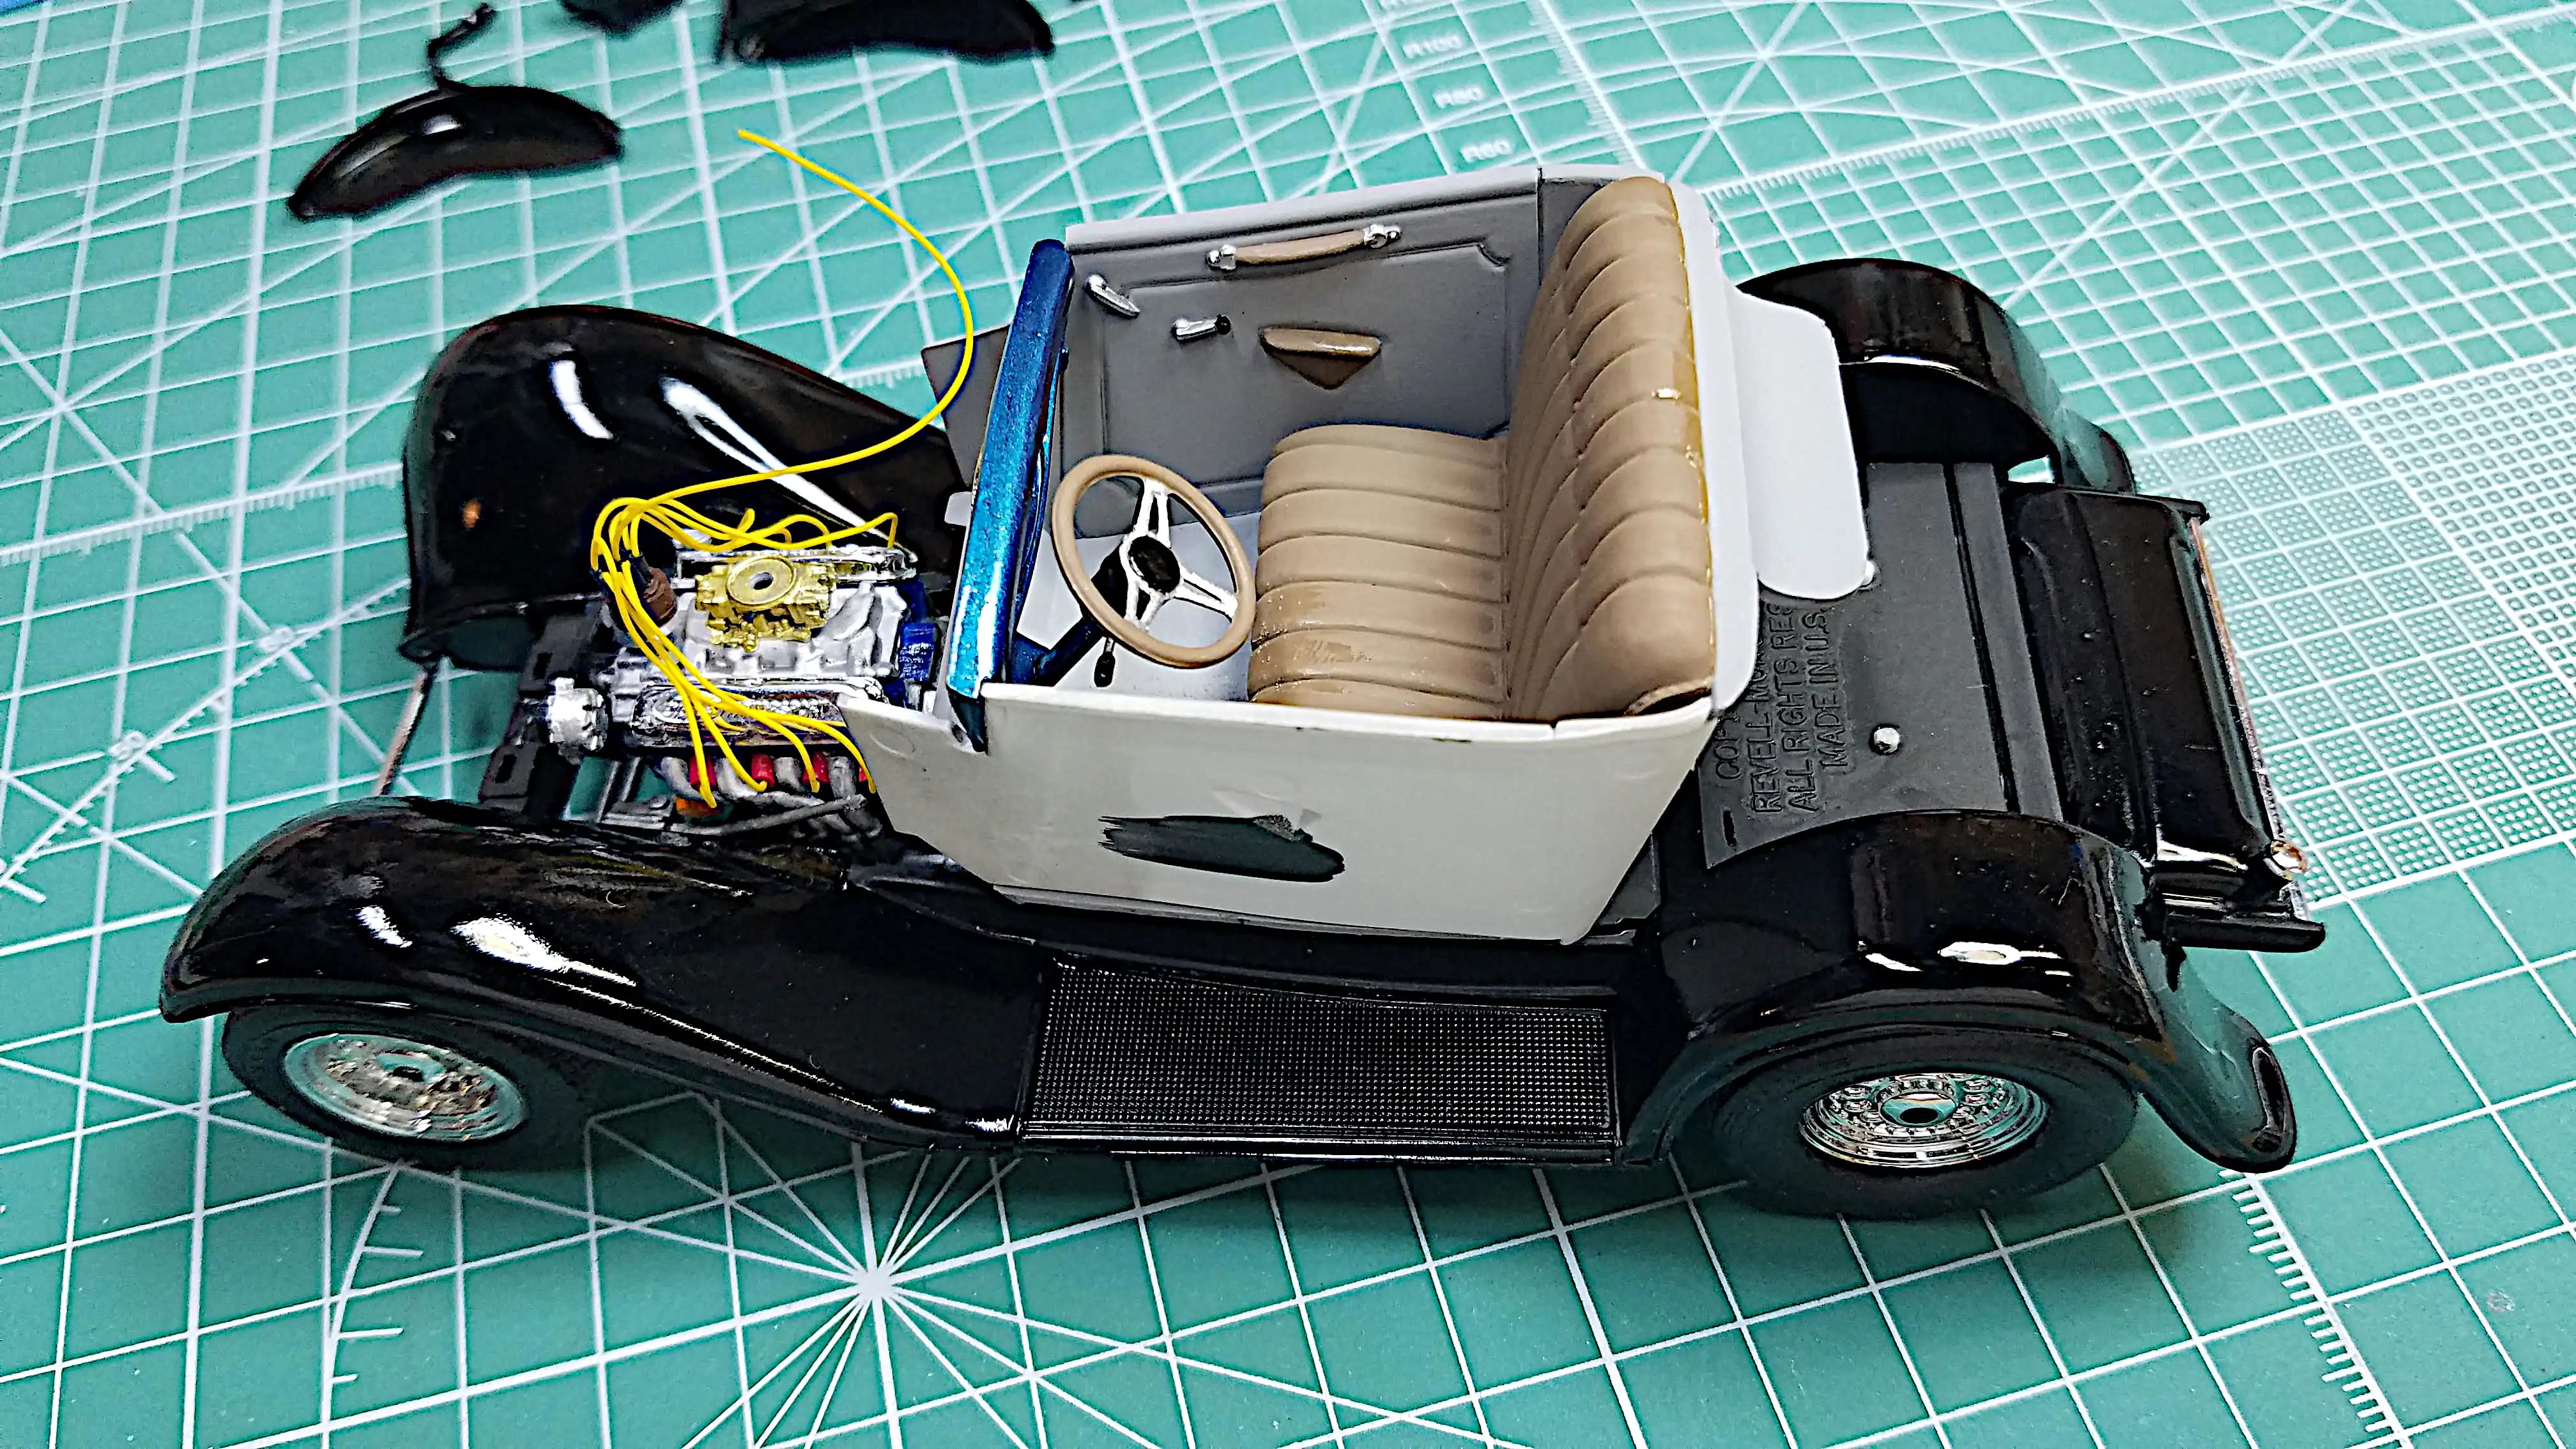
The interior tub is assembled. I have a-bit of cleanup to take care of a few shiny spots on the seat back and the arm rests. I don't know Where the shine came from? The dashboard is painted with Tamiya X-13 Metallic Blue to match the body.
Photo 076
Click/tap photo to enlarge
 Another view of the interior tub
Another view of the interior tub. There is some shiny spots on the seat and arm rest that need to be cleaned up. It almost looks like glue; however, I wasn't anywhere near those spots with glue? The dashboard is painted with Tamiya X-13 Metallic Blue to match the bottom half of the body.
Photo 077
Click/tap photo to enlarge
 Test fitting the interior tub to the frame
I did another test fit of the interior tub to the frame and fenders.
Photo 078
Click/tap photo to enlarge
 Repainting the body
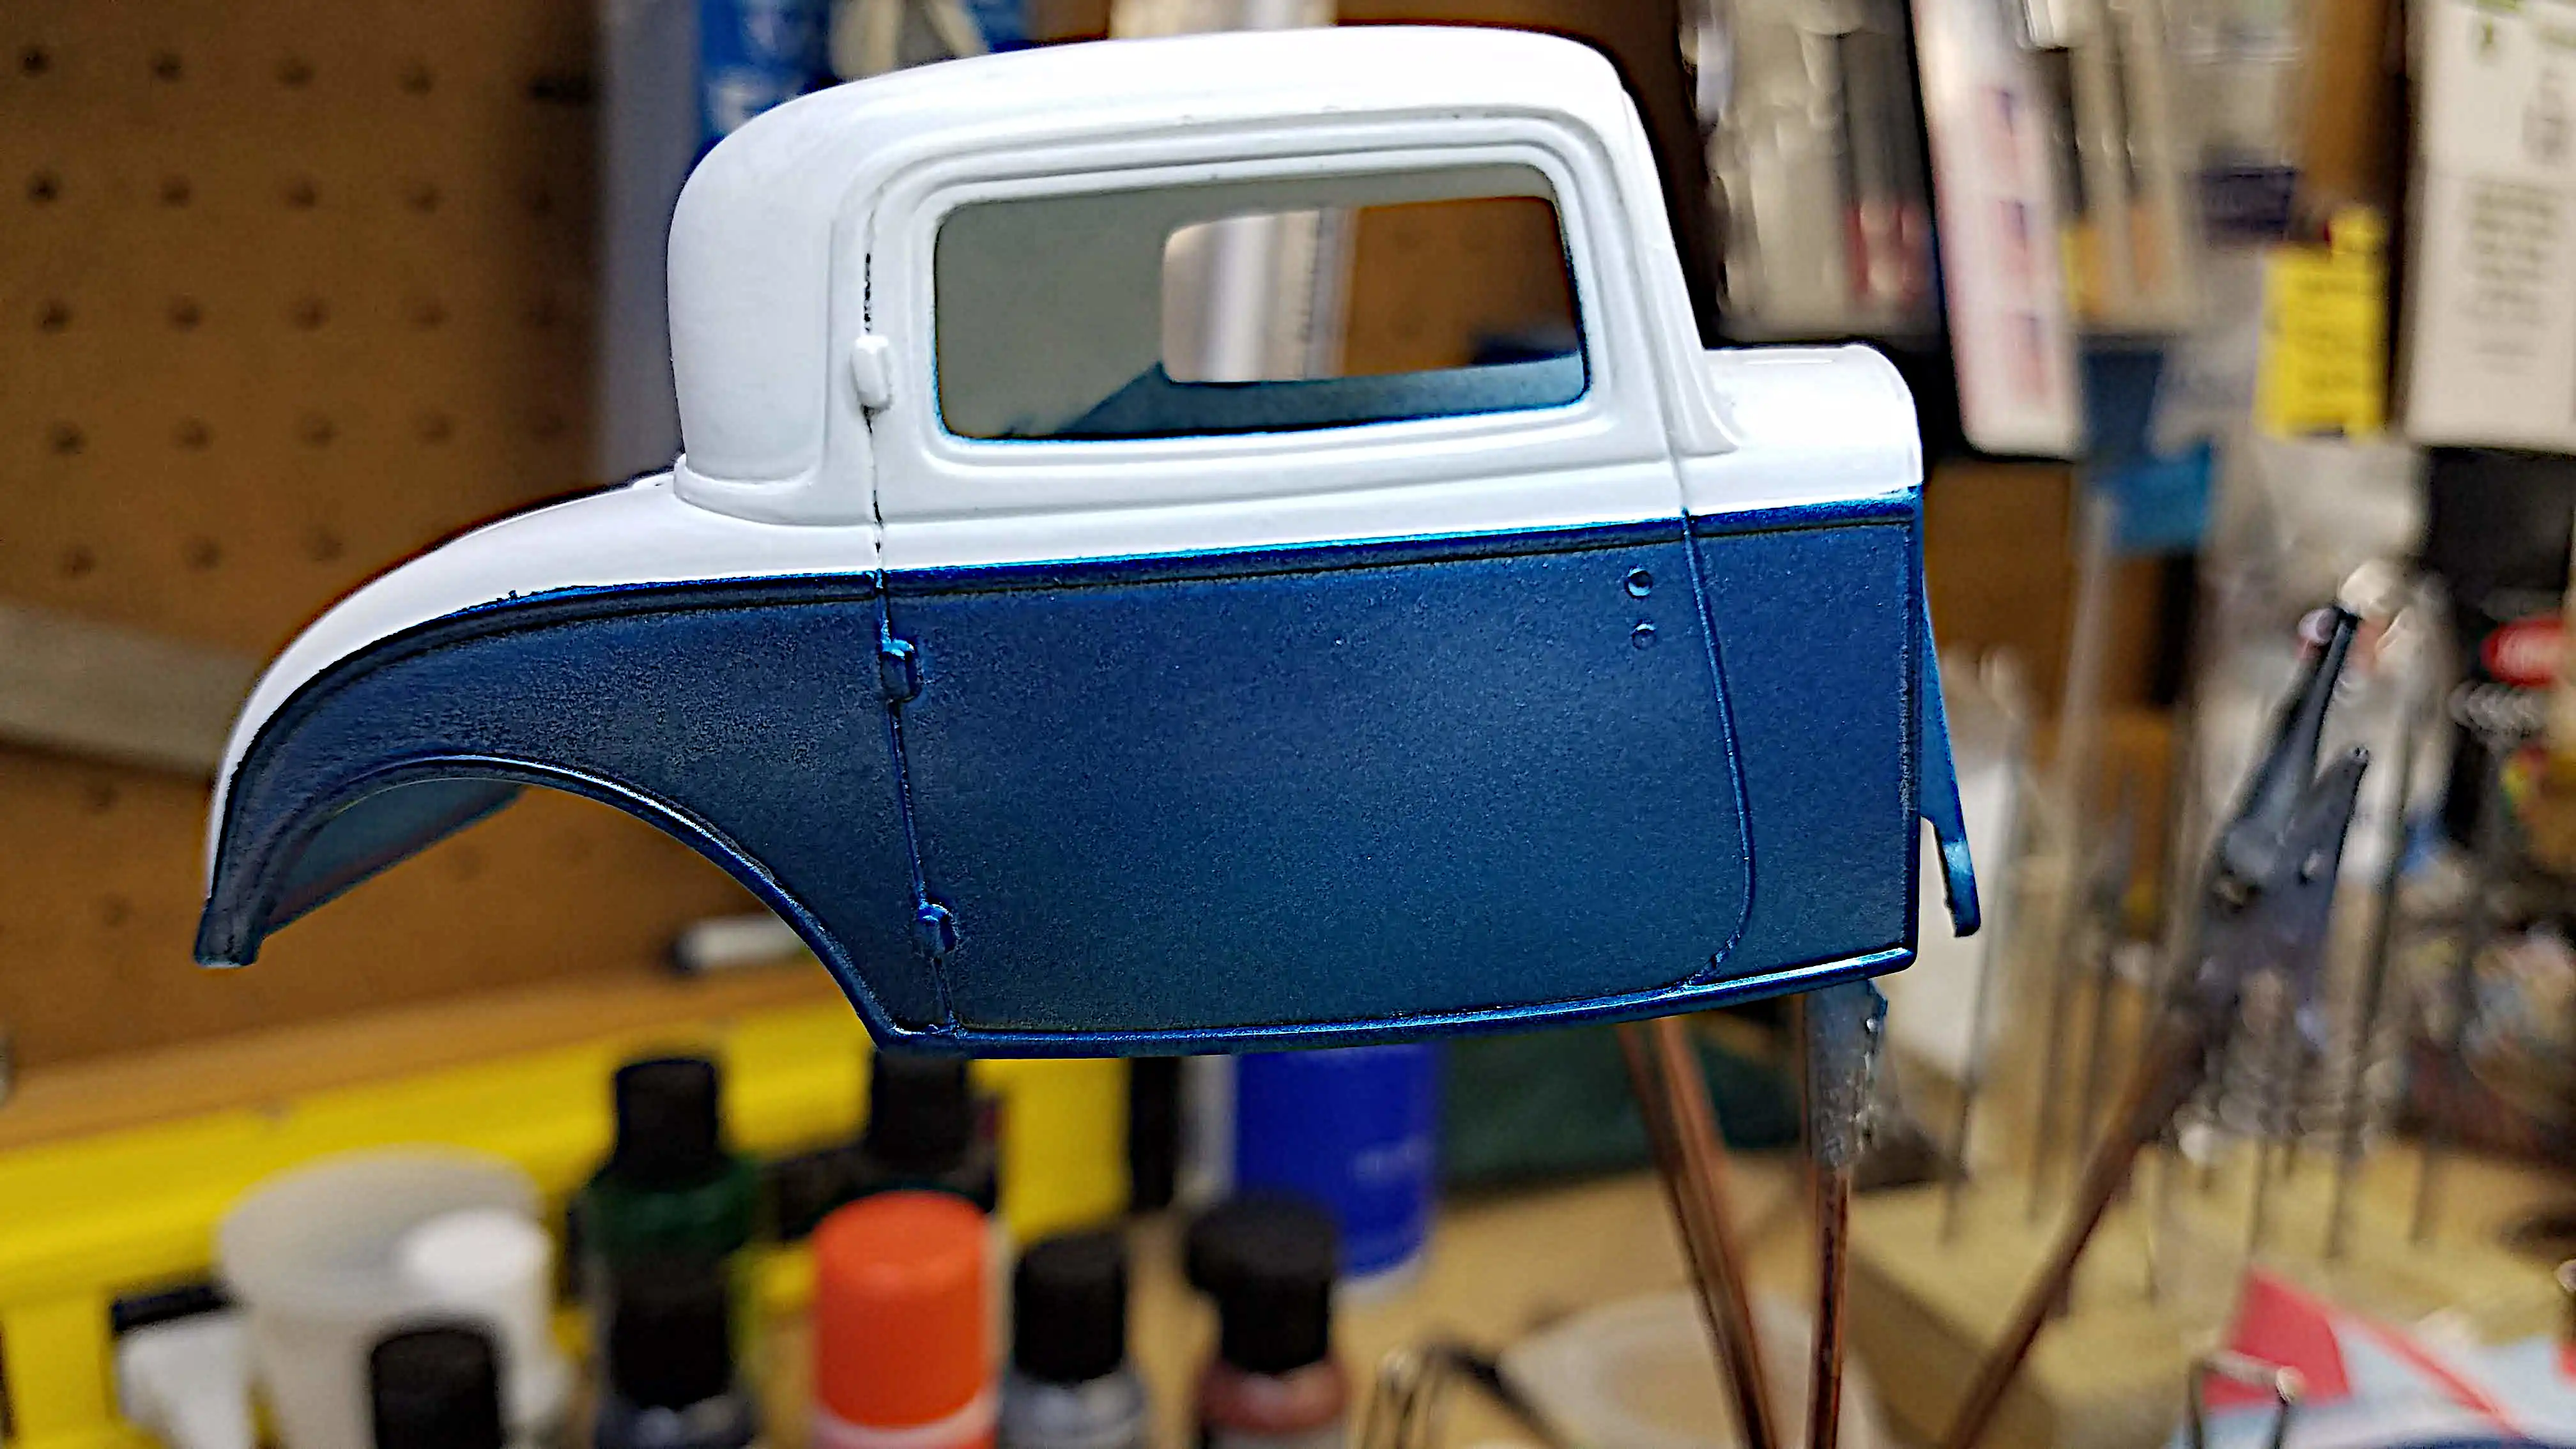
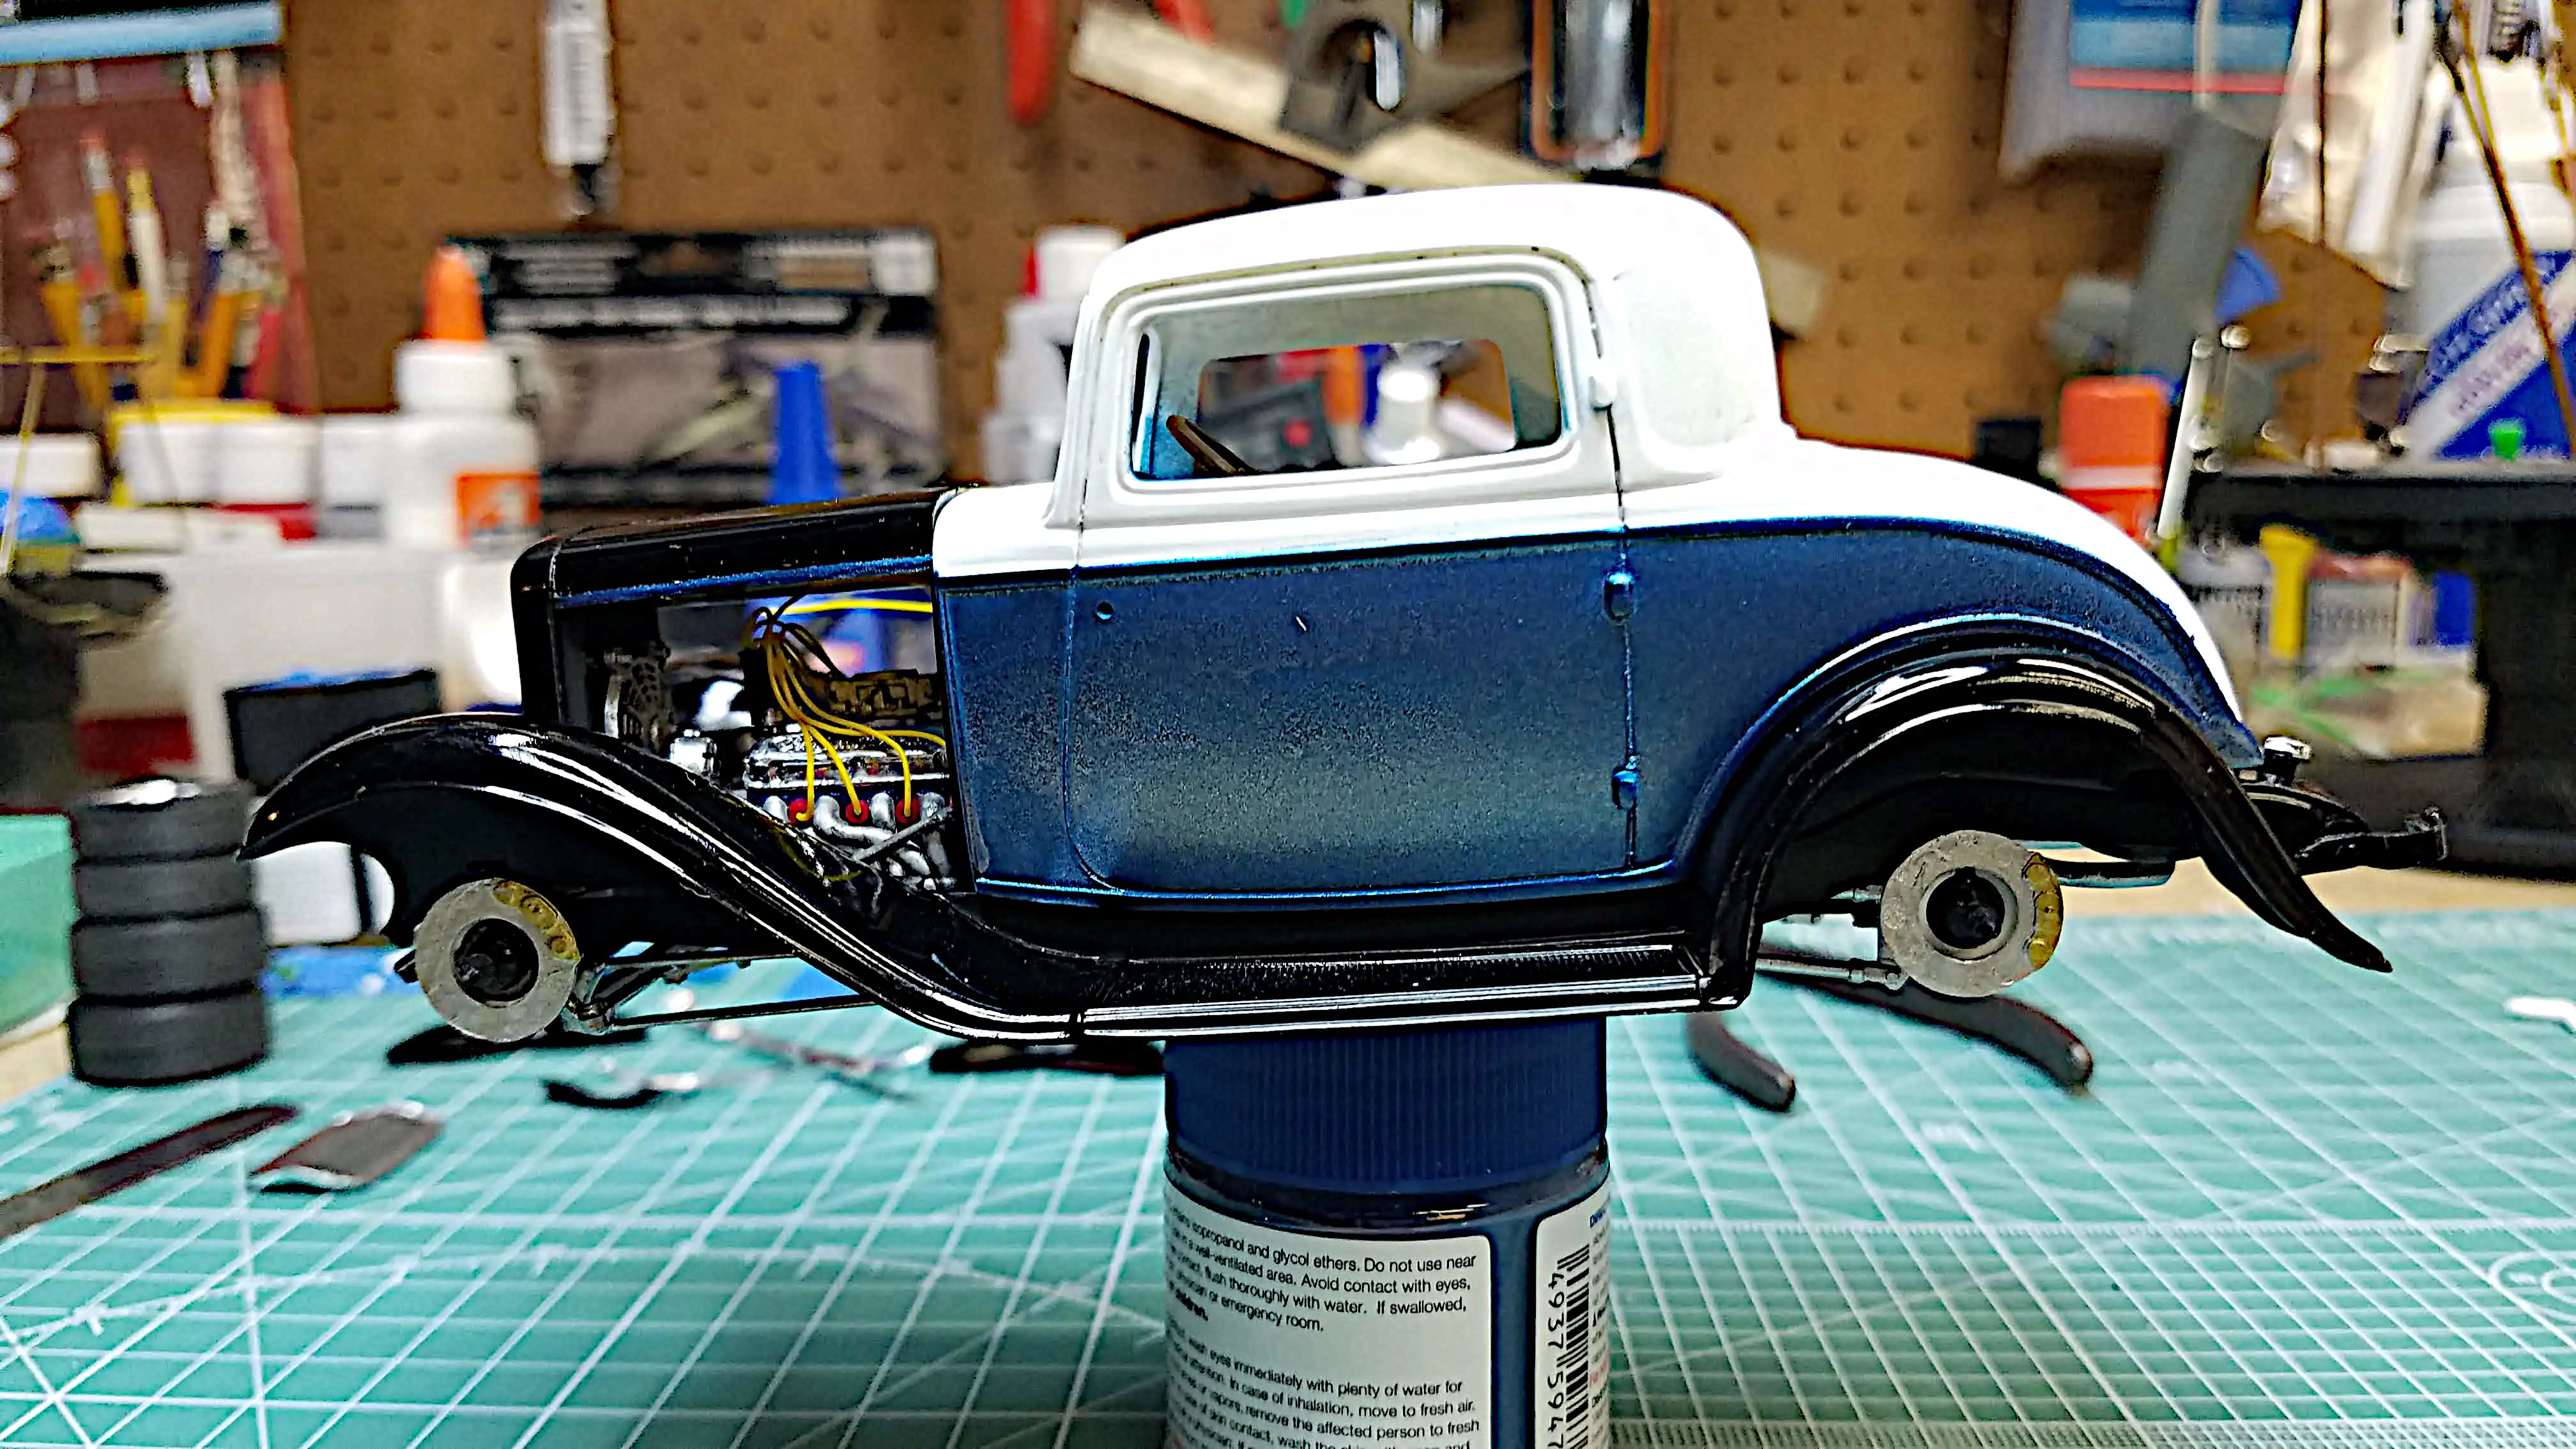
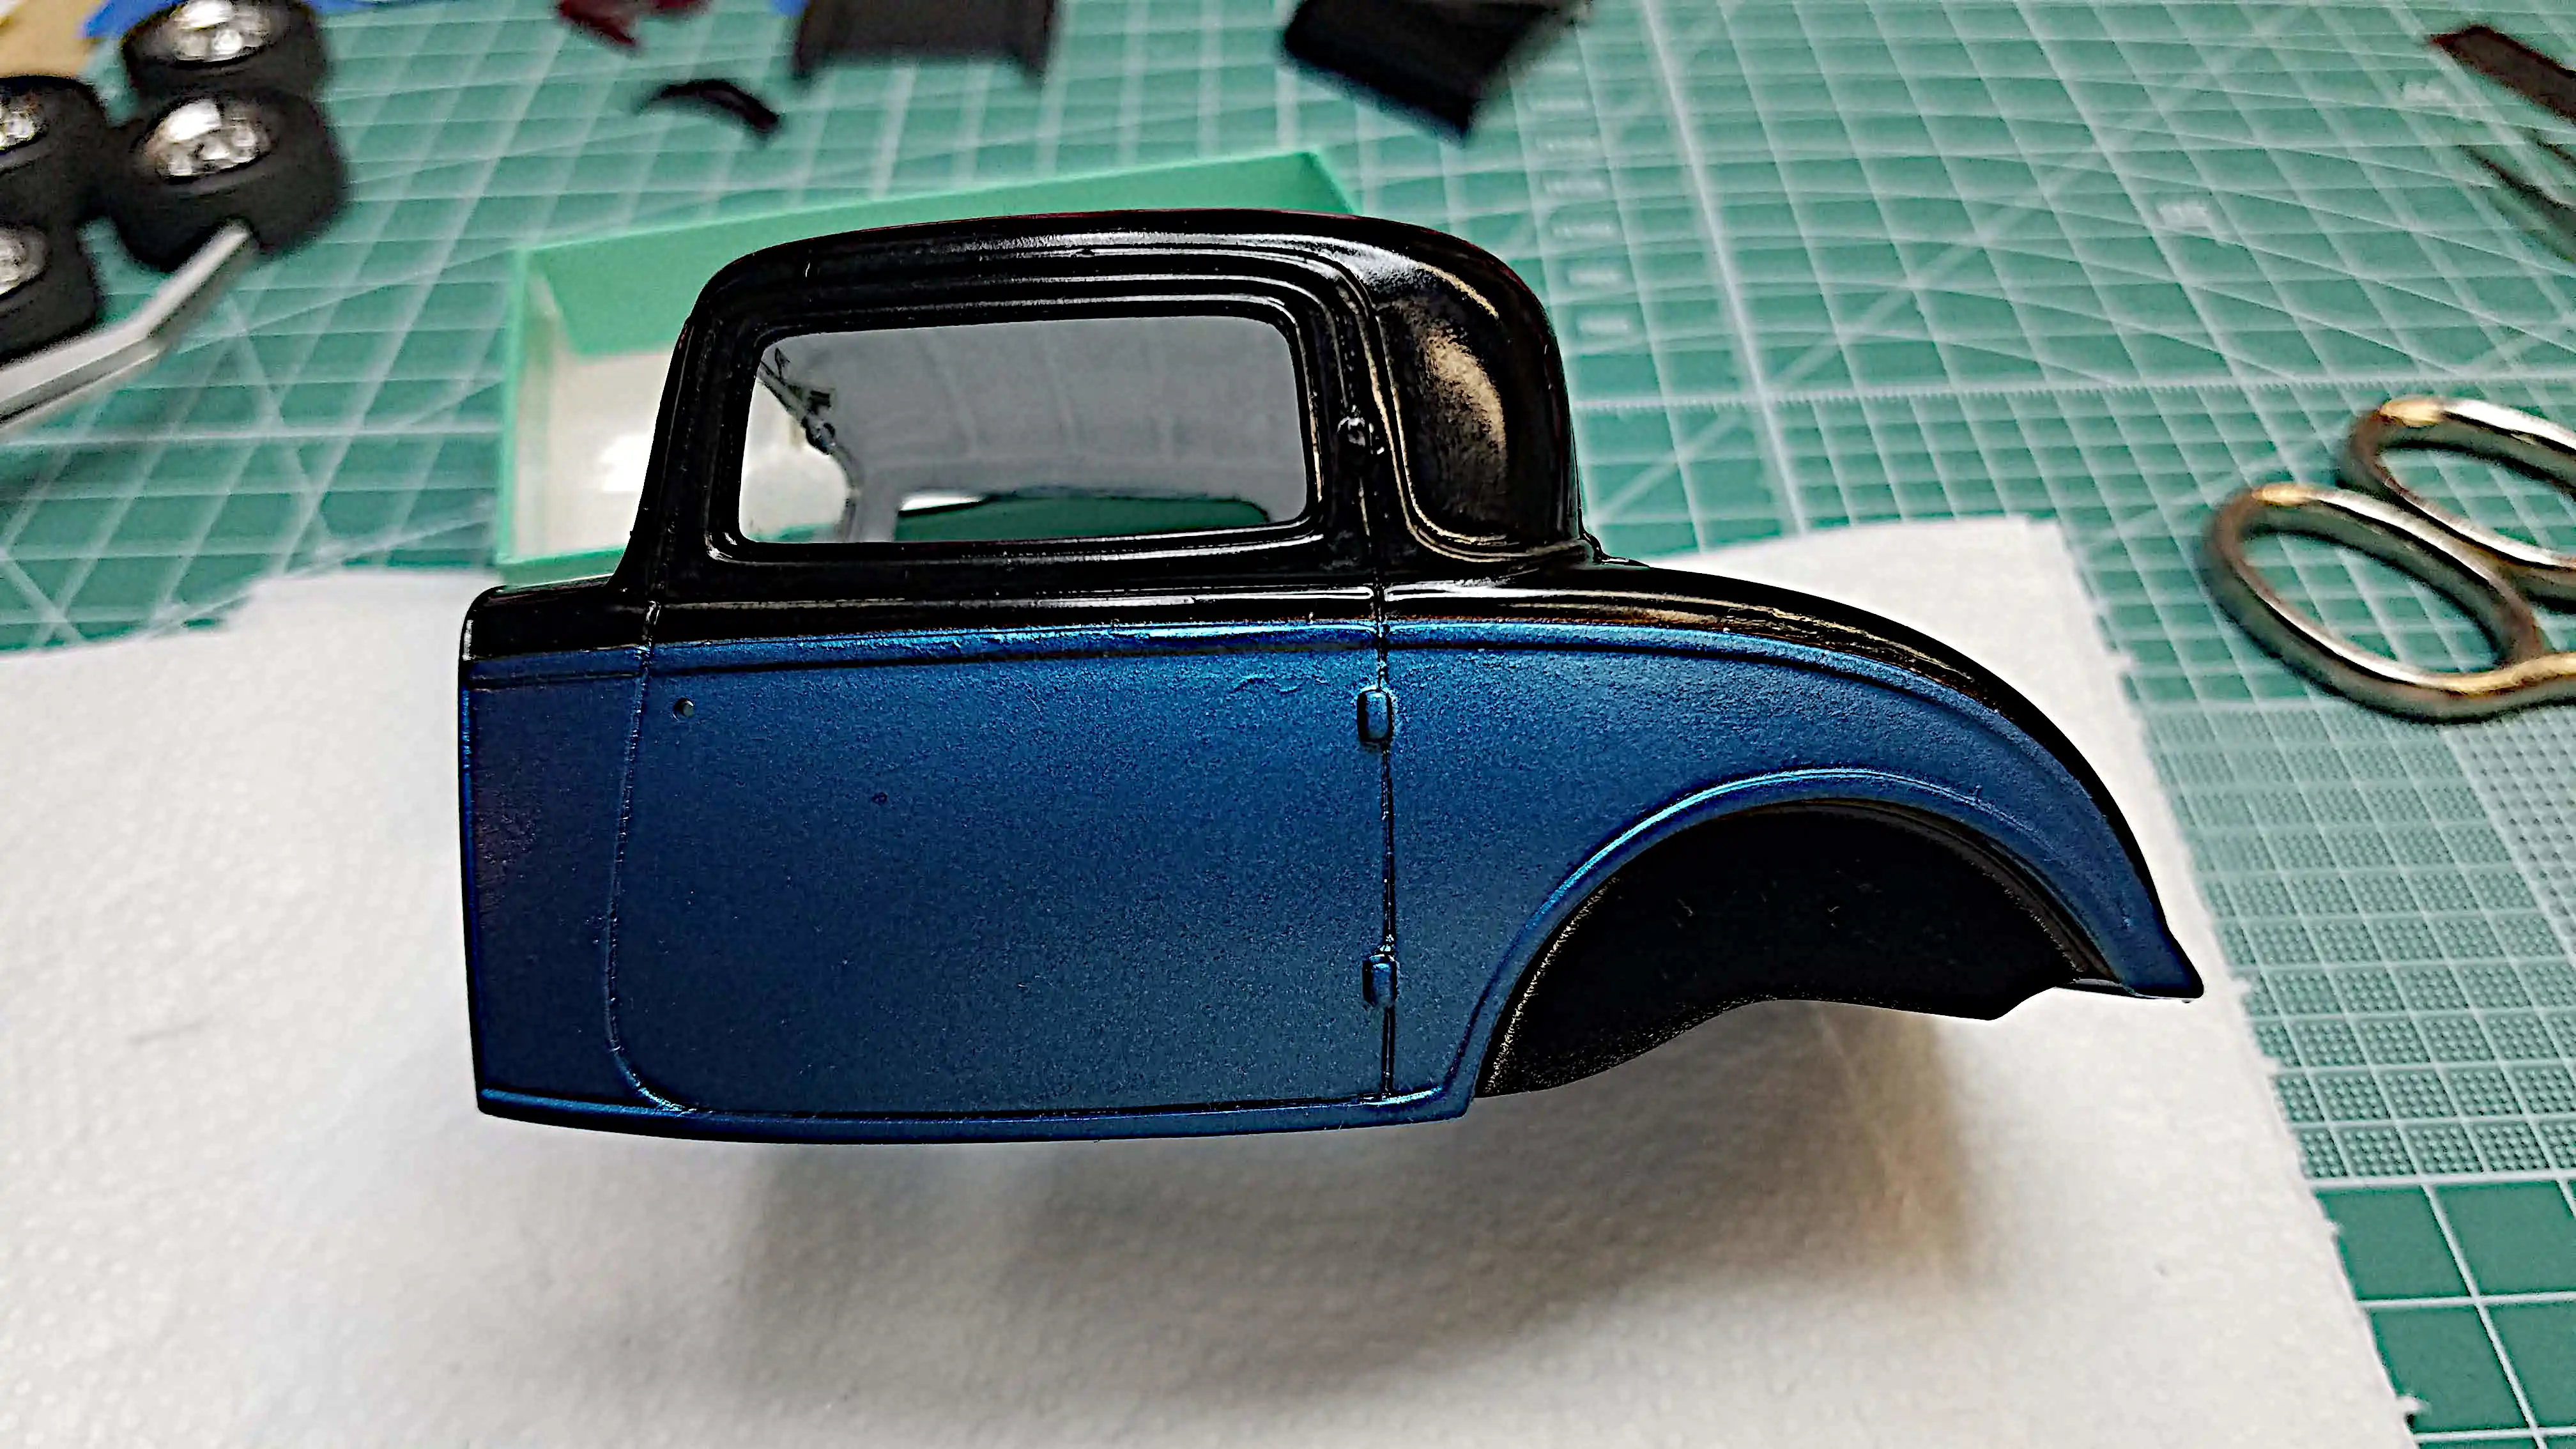
Learning my lesson from the last painting disaster, I masked the area of the body that will be gloss black and sprayed the bottom half of the body with Tamiya X-13 Metallic Blue. I then cleaned my airbrush and removed a load of wash from the washing machine. After those tasked I pulled off all the masking tape. The paint job is not perfect; however, this is a learning process for me.
Photo 079
Click/tap photo to enlarge
 Installing bumper supports
While the Metallic Blue was drying I glued the bumper supports on the car.
Several day later (Sunday, June 05, 2022) I dry fitted the interior to the body, the body to the chassis and then with the hood in place adjusted and glued the radiator in place. My plan is that while the gloss black on the top of the body is drying and with the radiator glued in place, I can get the radiator hoses installed and the ignition coil located and wired.
While I was gluing the radiator in place, two of the bumper mounts fell off, 😢 one in the front and one in the back. They didn't break, they simply fell off. I guess Gorilla Glue isn't strong enough? I'll put them back on later.
Photo 080
Click/tap photo to enlarge
 View of radiator installed
Just another view of the radiator installed. The Metallic Blue strip on the hood does not line up with the body because the hood is not properly setting in place. It can also be seen that the right bumper mount has fallen off. I don't like the way the front bumper mounts mount to the cars frame. I might end up drilling some small holes and pinning them in place?
Photo 081
Click/tap photo to enlarge
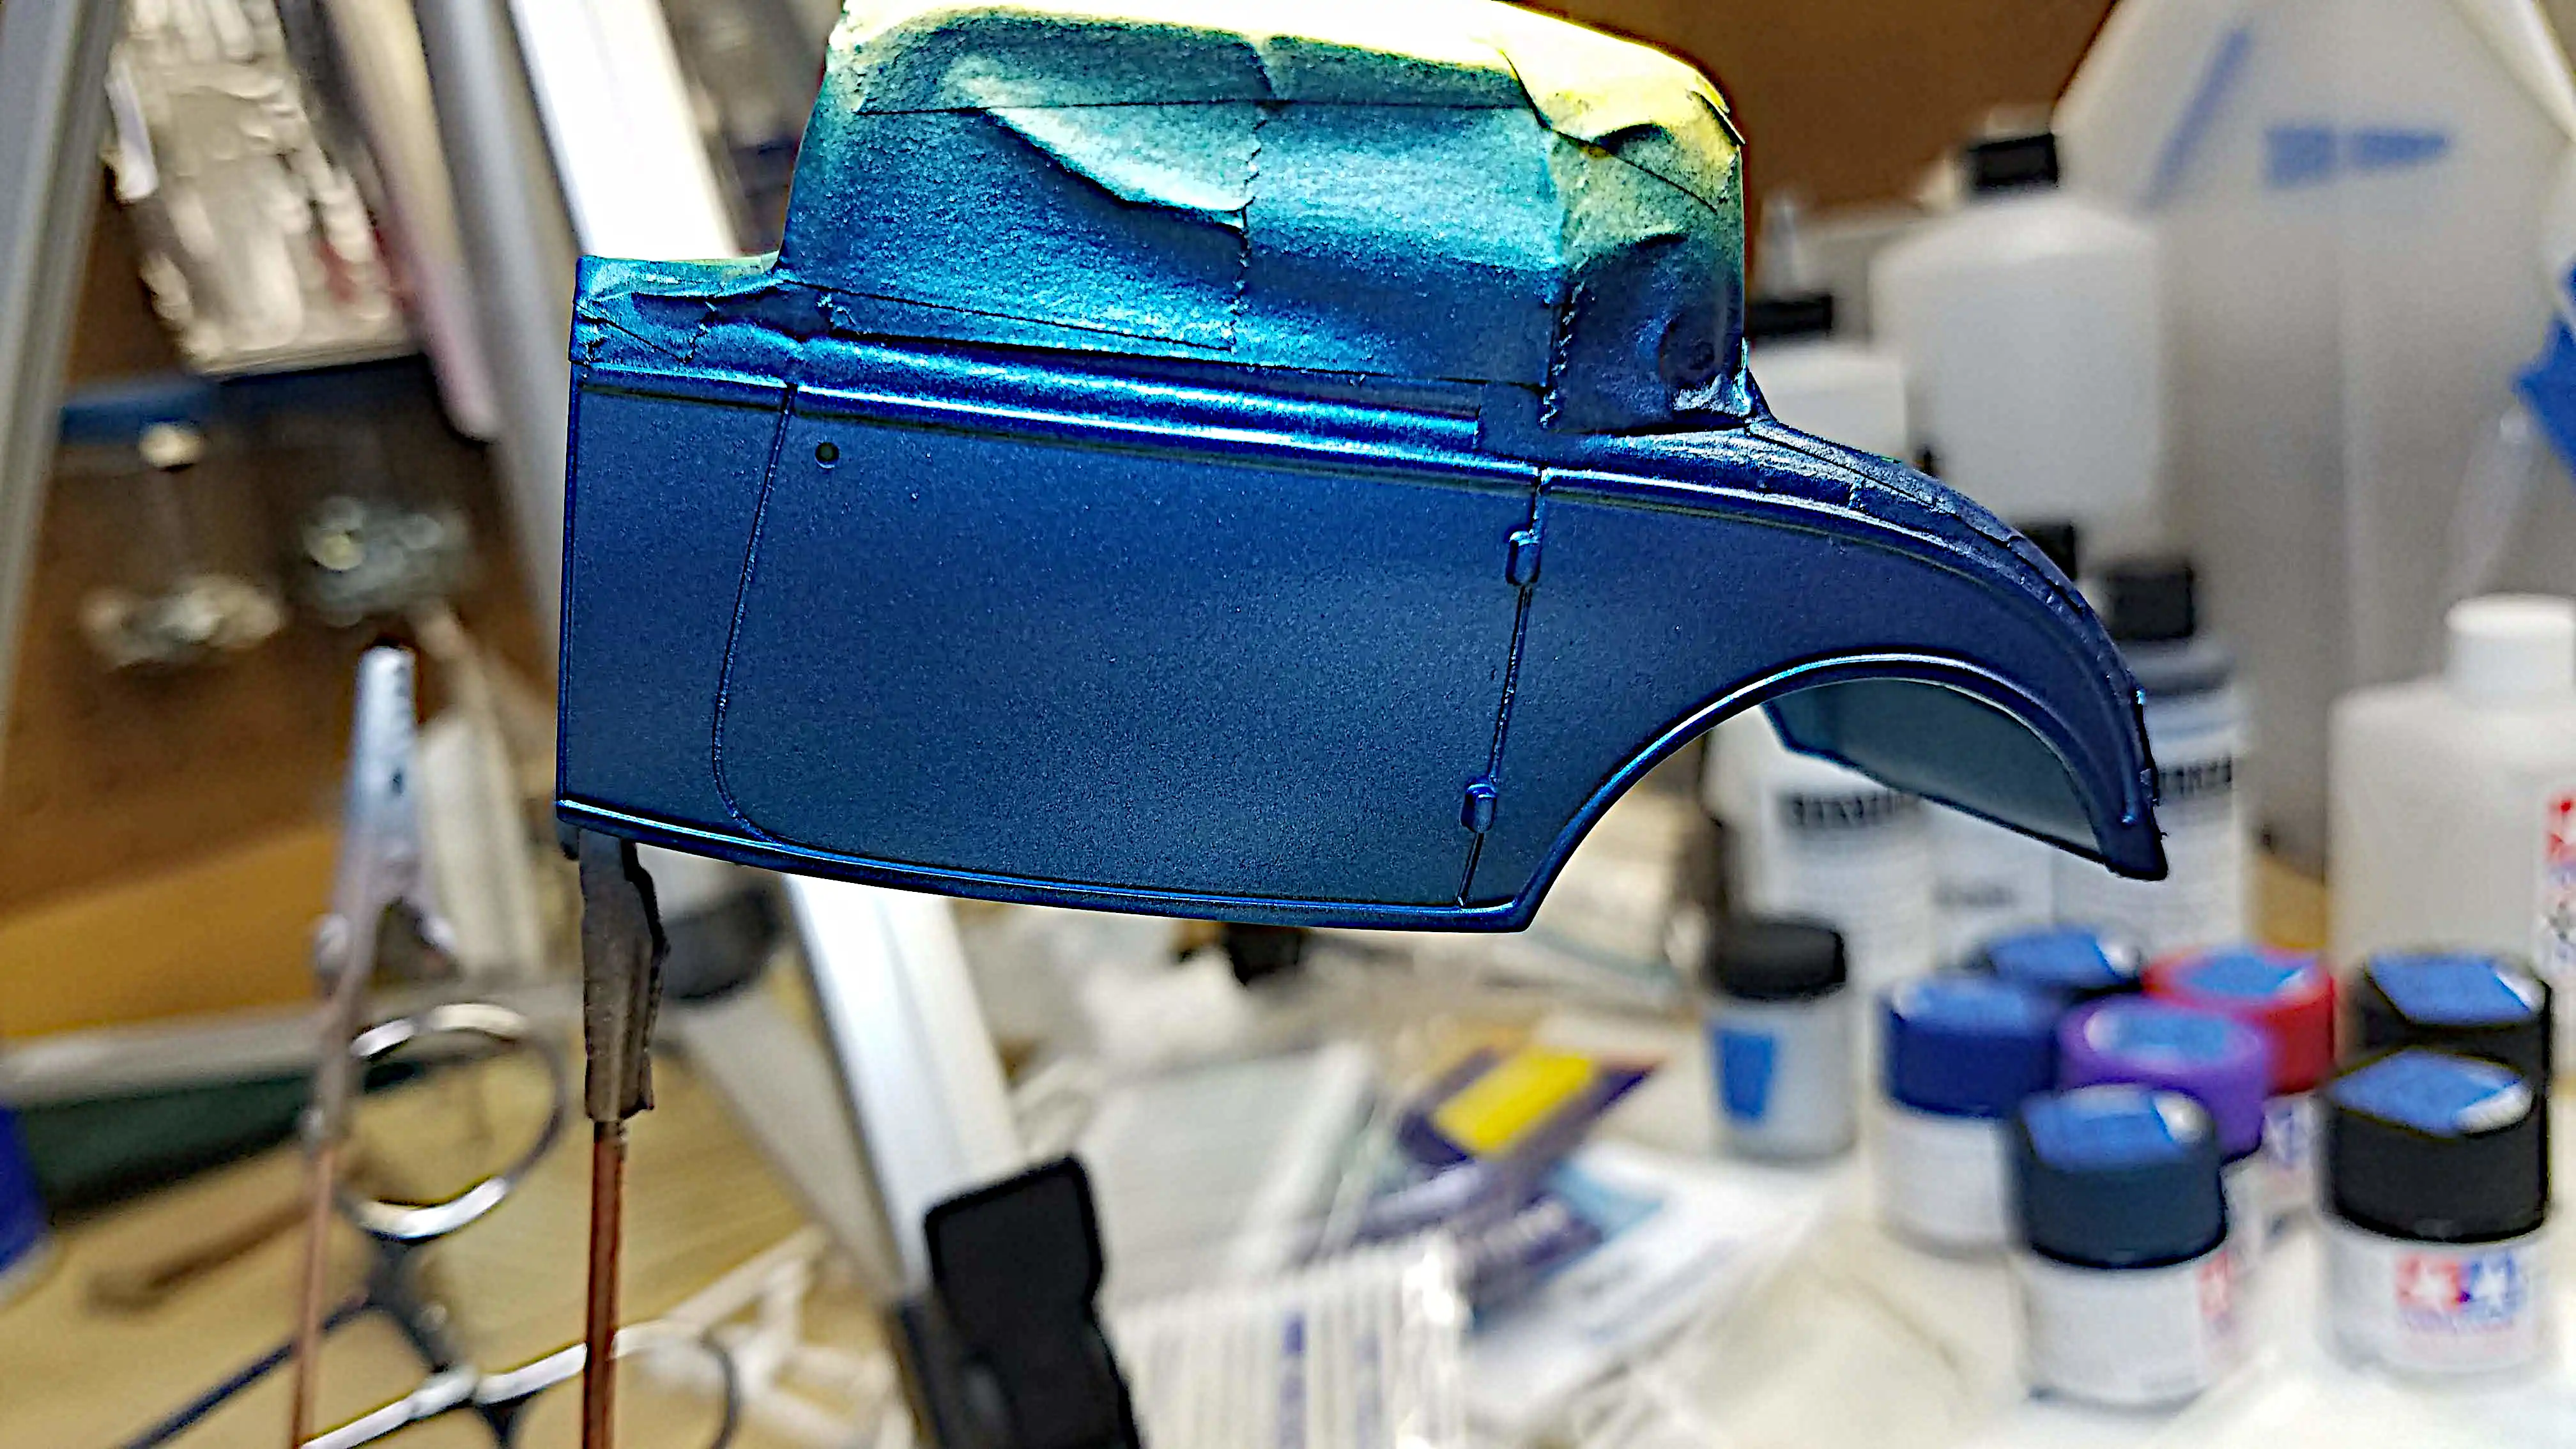
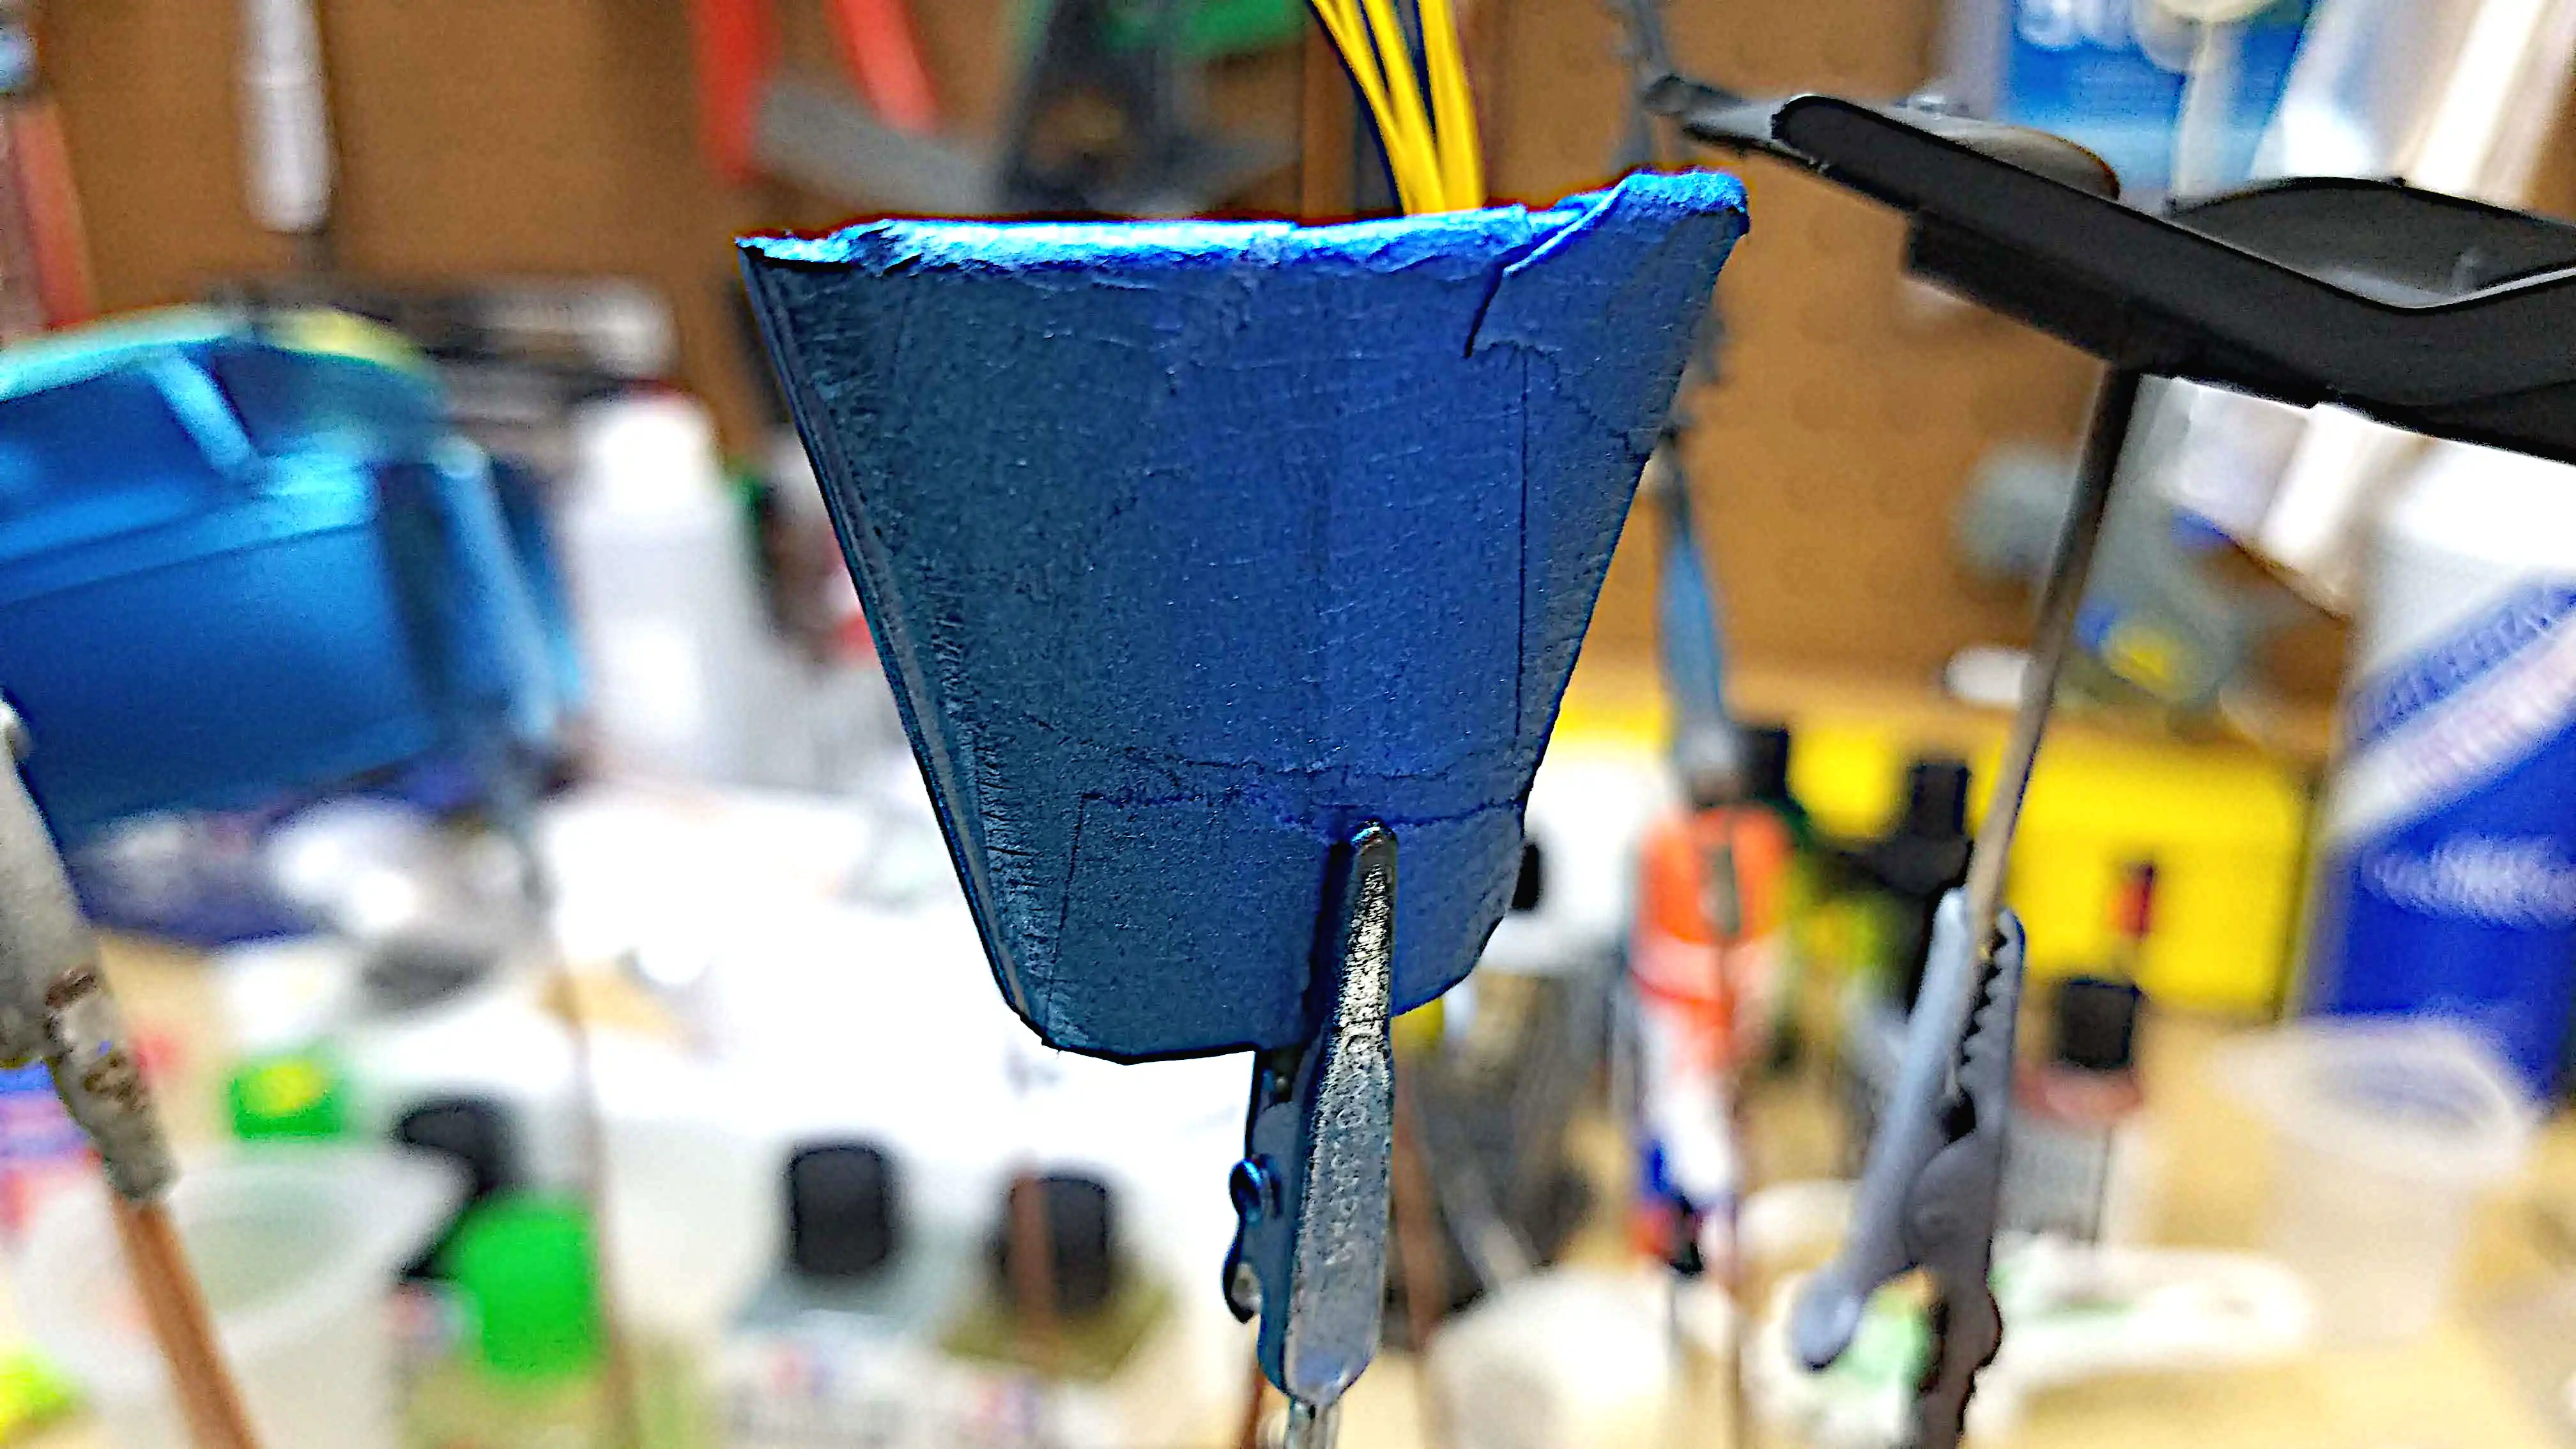
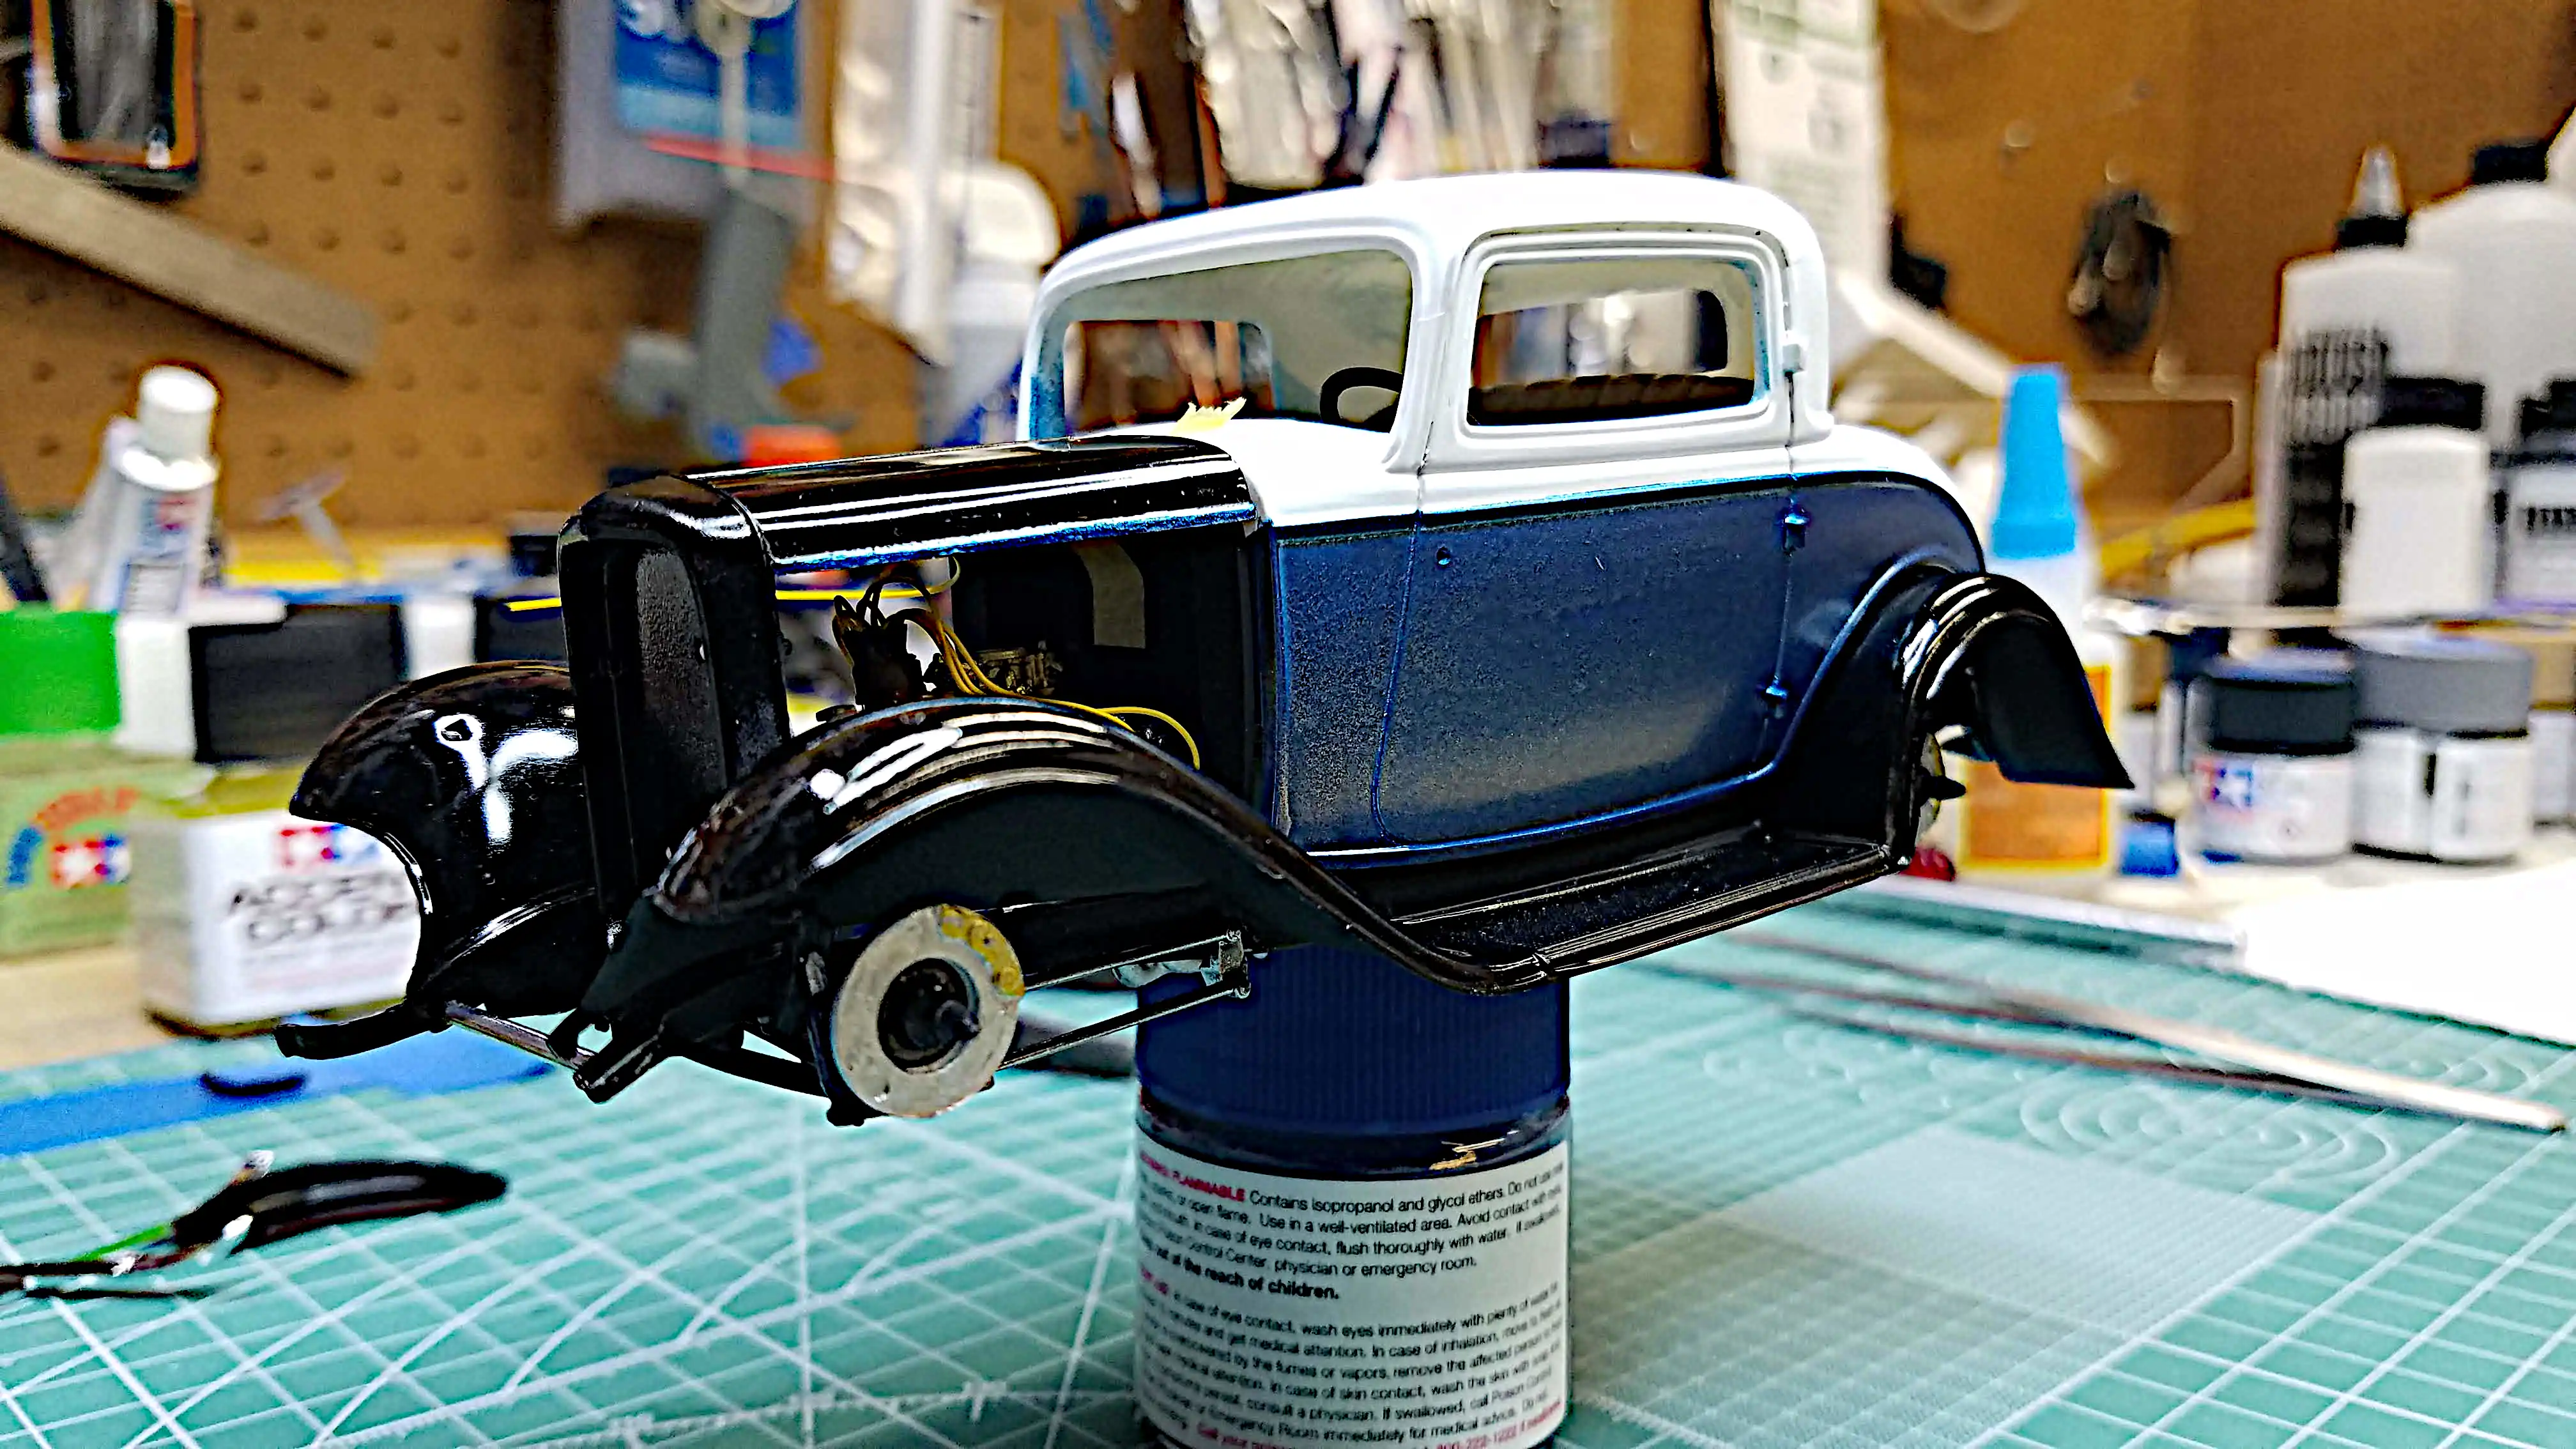
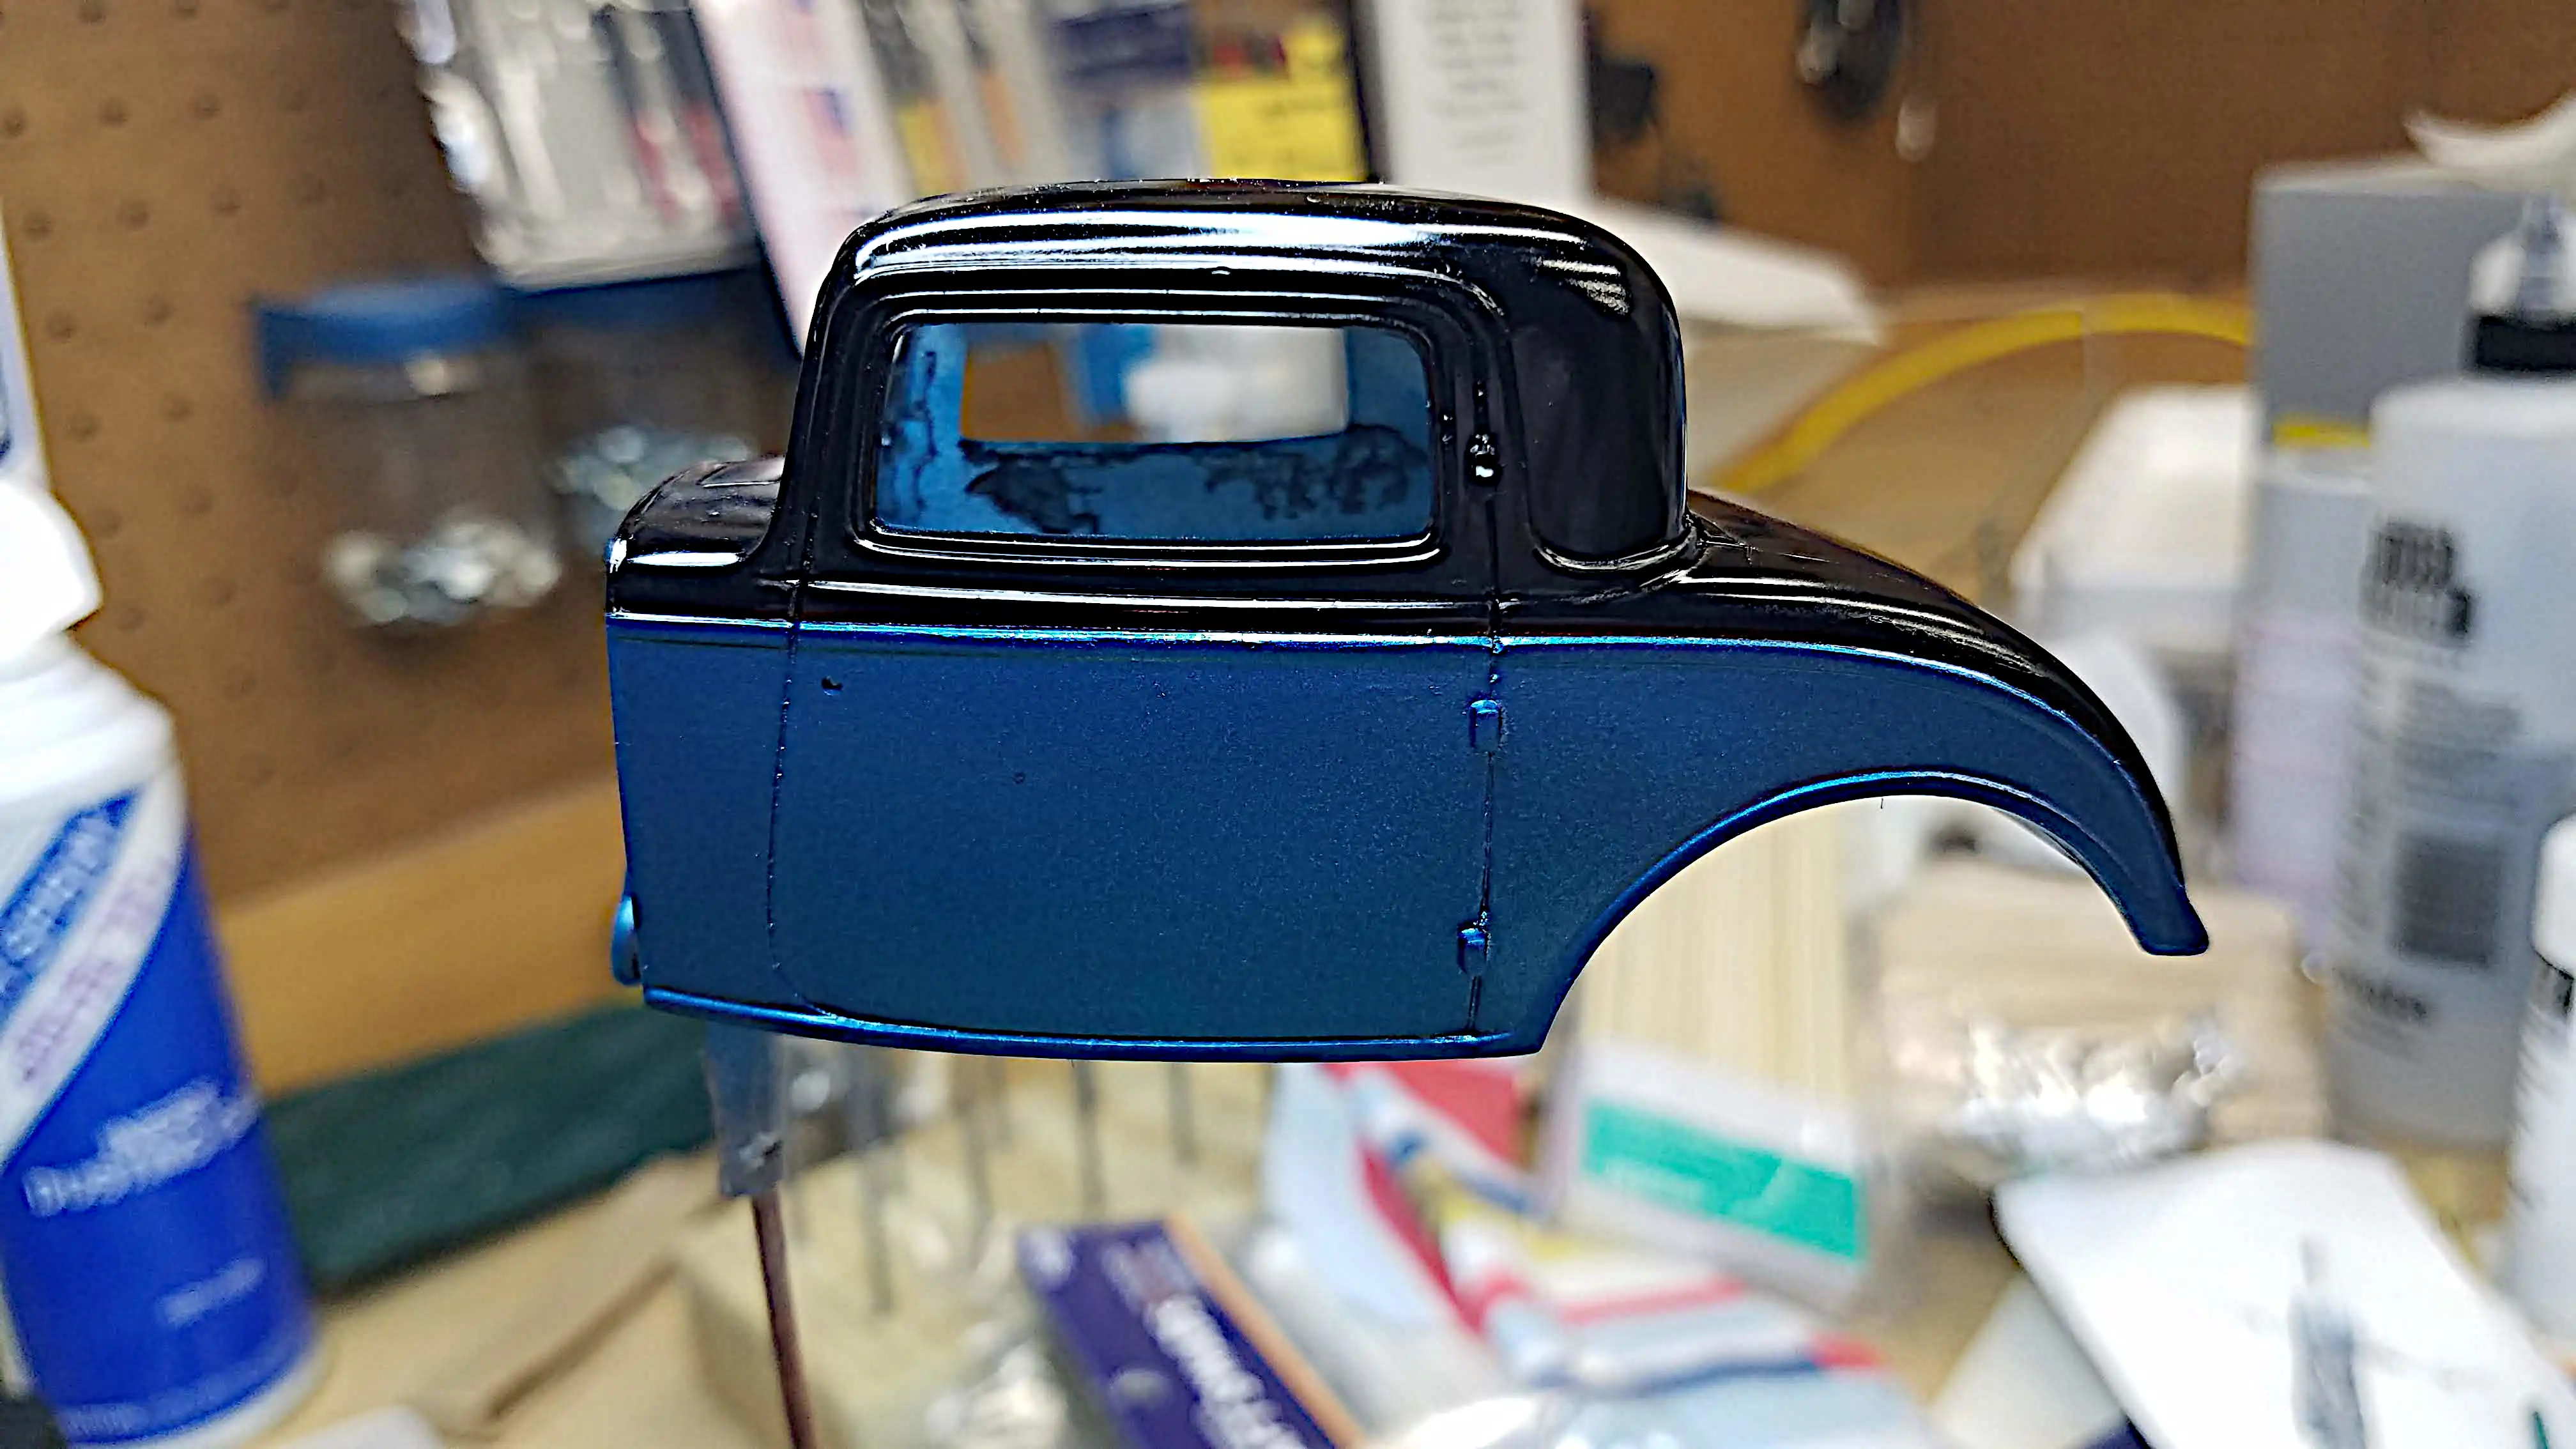
 Another painting disaster
I had another painting disaster on the body! I'm starting to think that I'm not supposed to use the color scheme that I selected. The rest of the car is 98% done, but the body!!!
I masked the Metallic Blue to paint the Gloss Black top of the body. This time the Black came out fine; however, I don't understand the massive amount of seepage on the Metallic Blue. The tape was firmly pressed in place with no wrinkles. I used the same Tamiya masking tape as before. My airbrush pressure was 15psi. The Tamiya paint was thinned with Tamiya thinner using a 50:50 ratio. I really don't get it? I understand bleed along the edge between the Gloss Black and Metallic Blue. That can be easily repaired and touched-up. But now what to do?
So...
Photo 082
Click/tap photo to enlarge
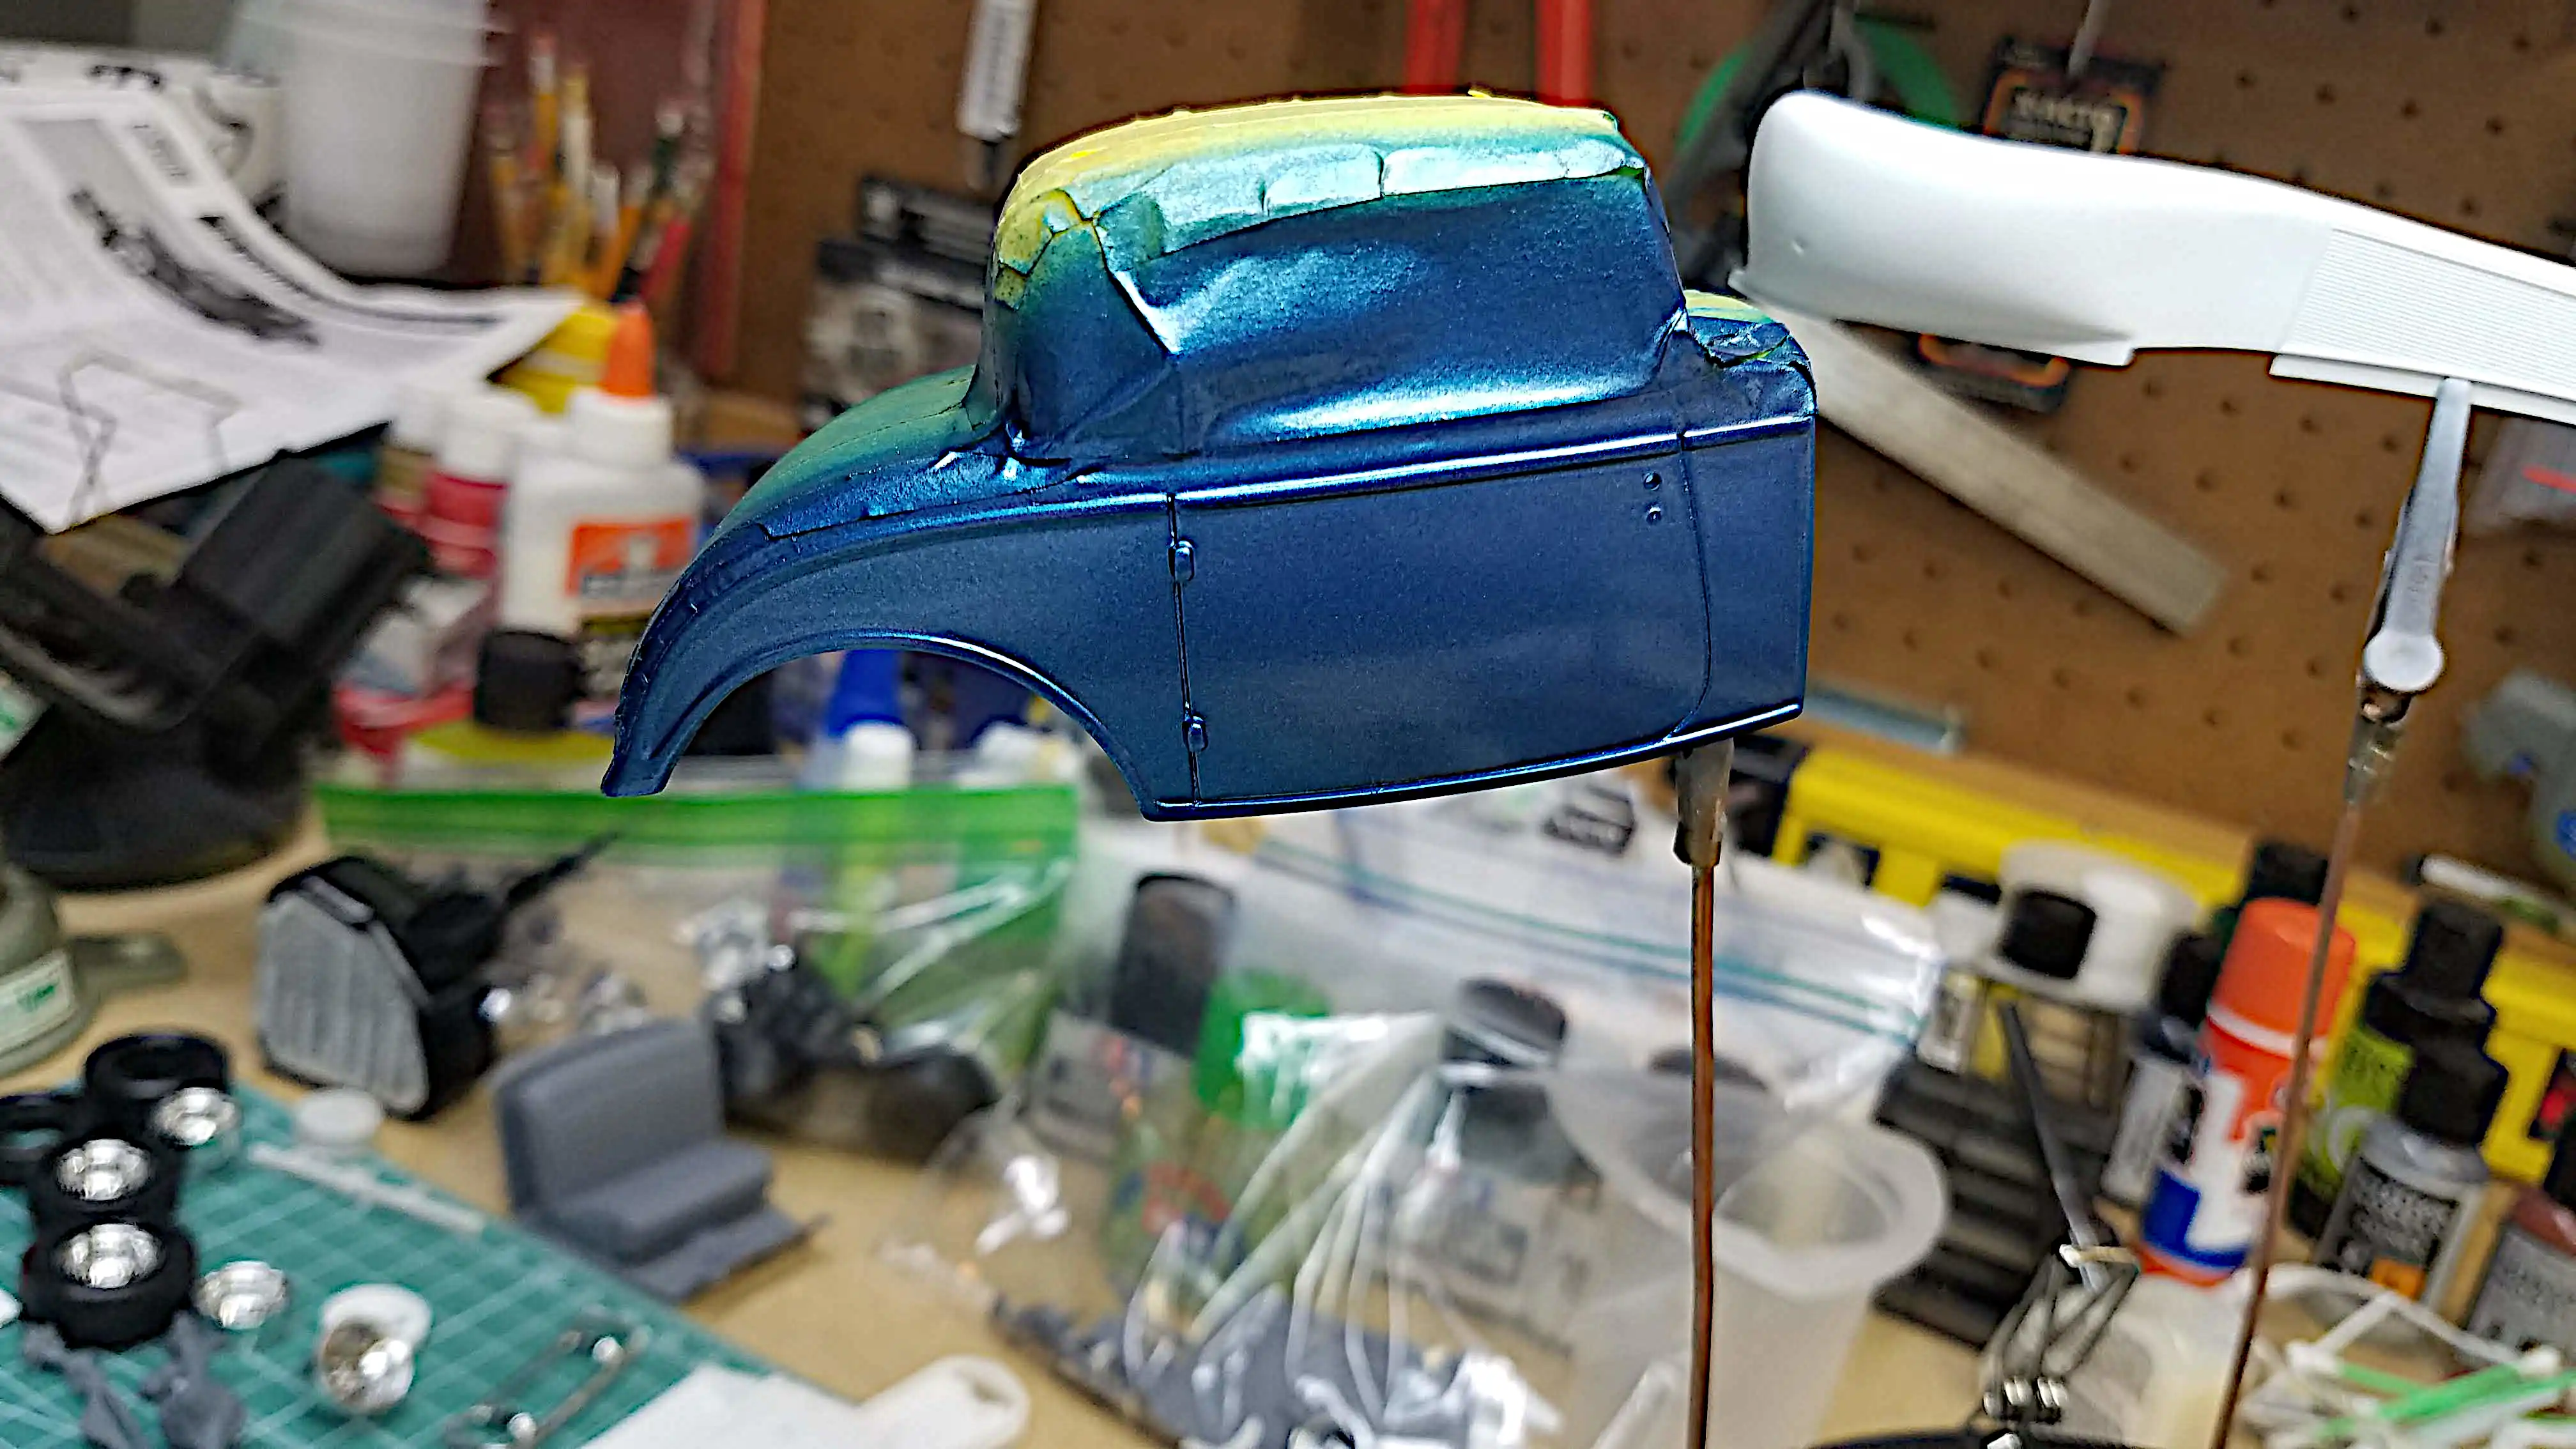
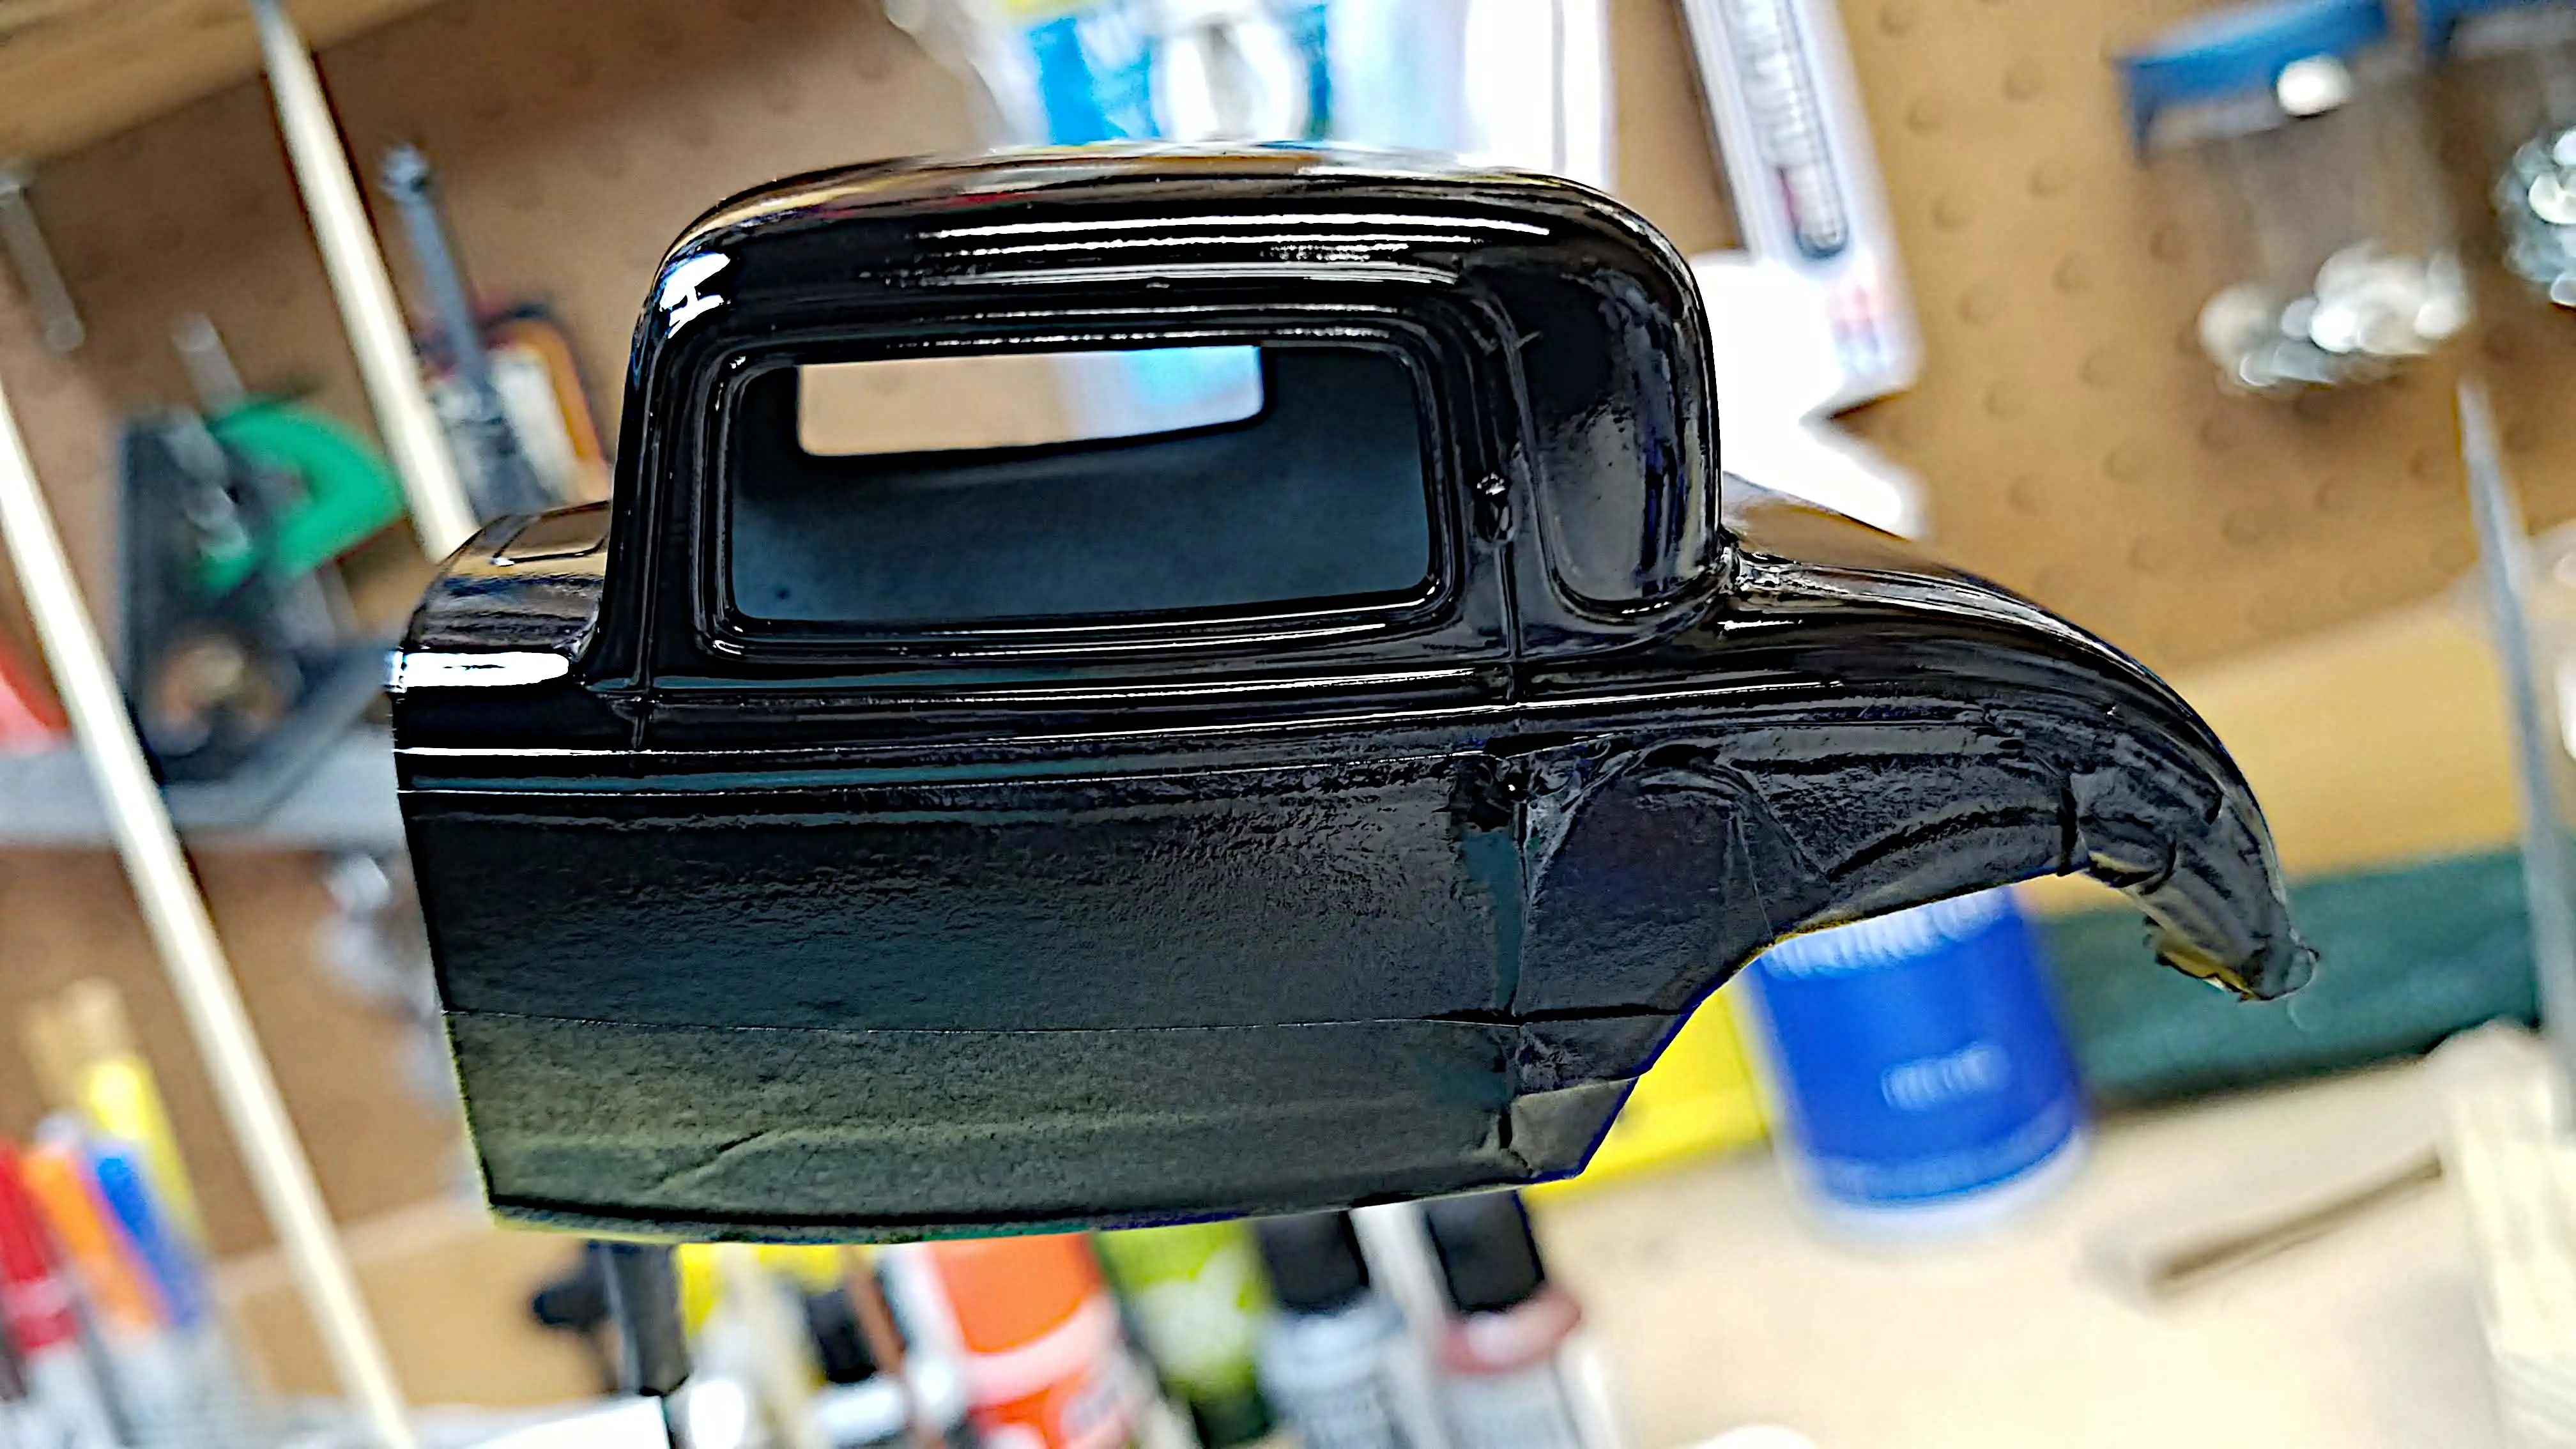
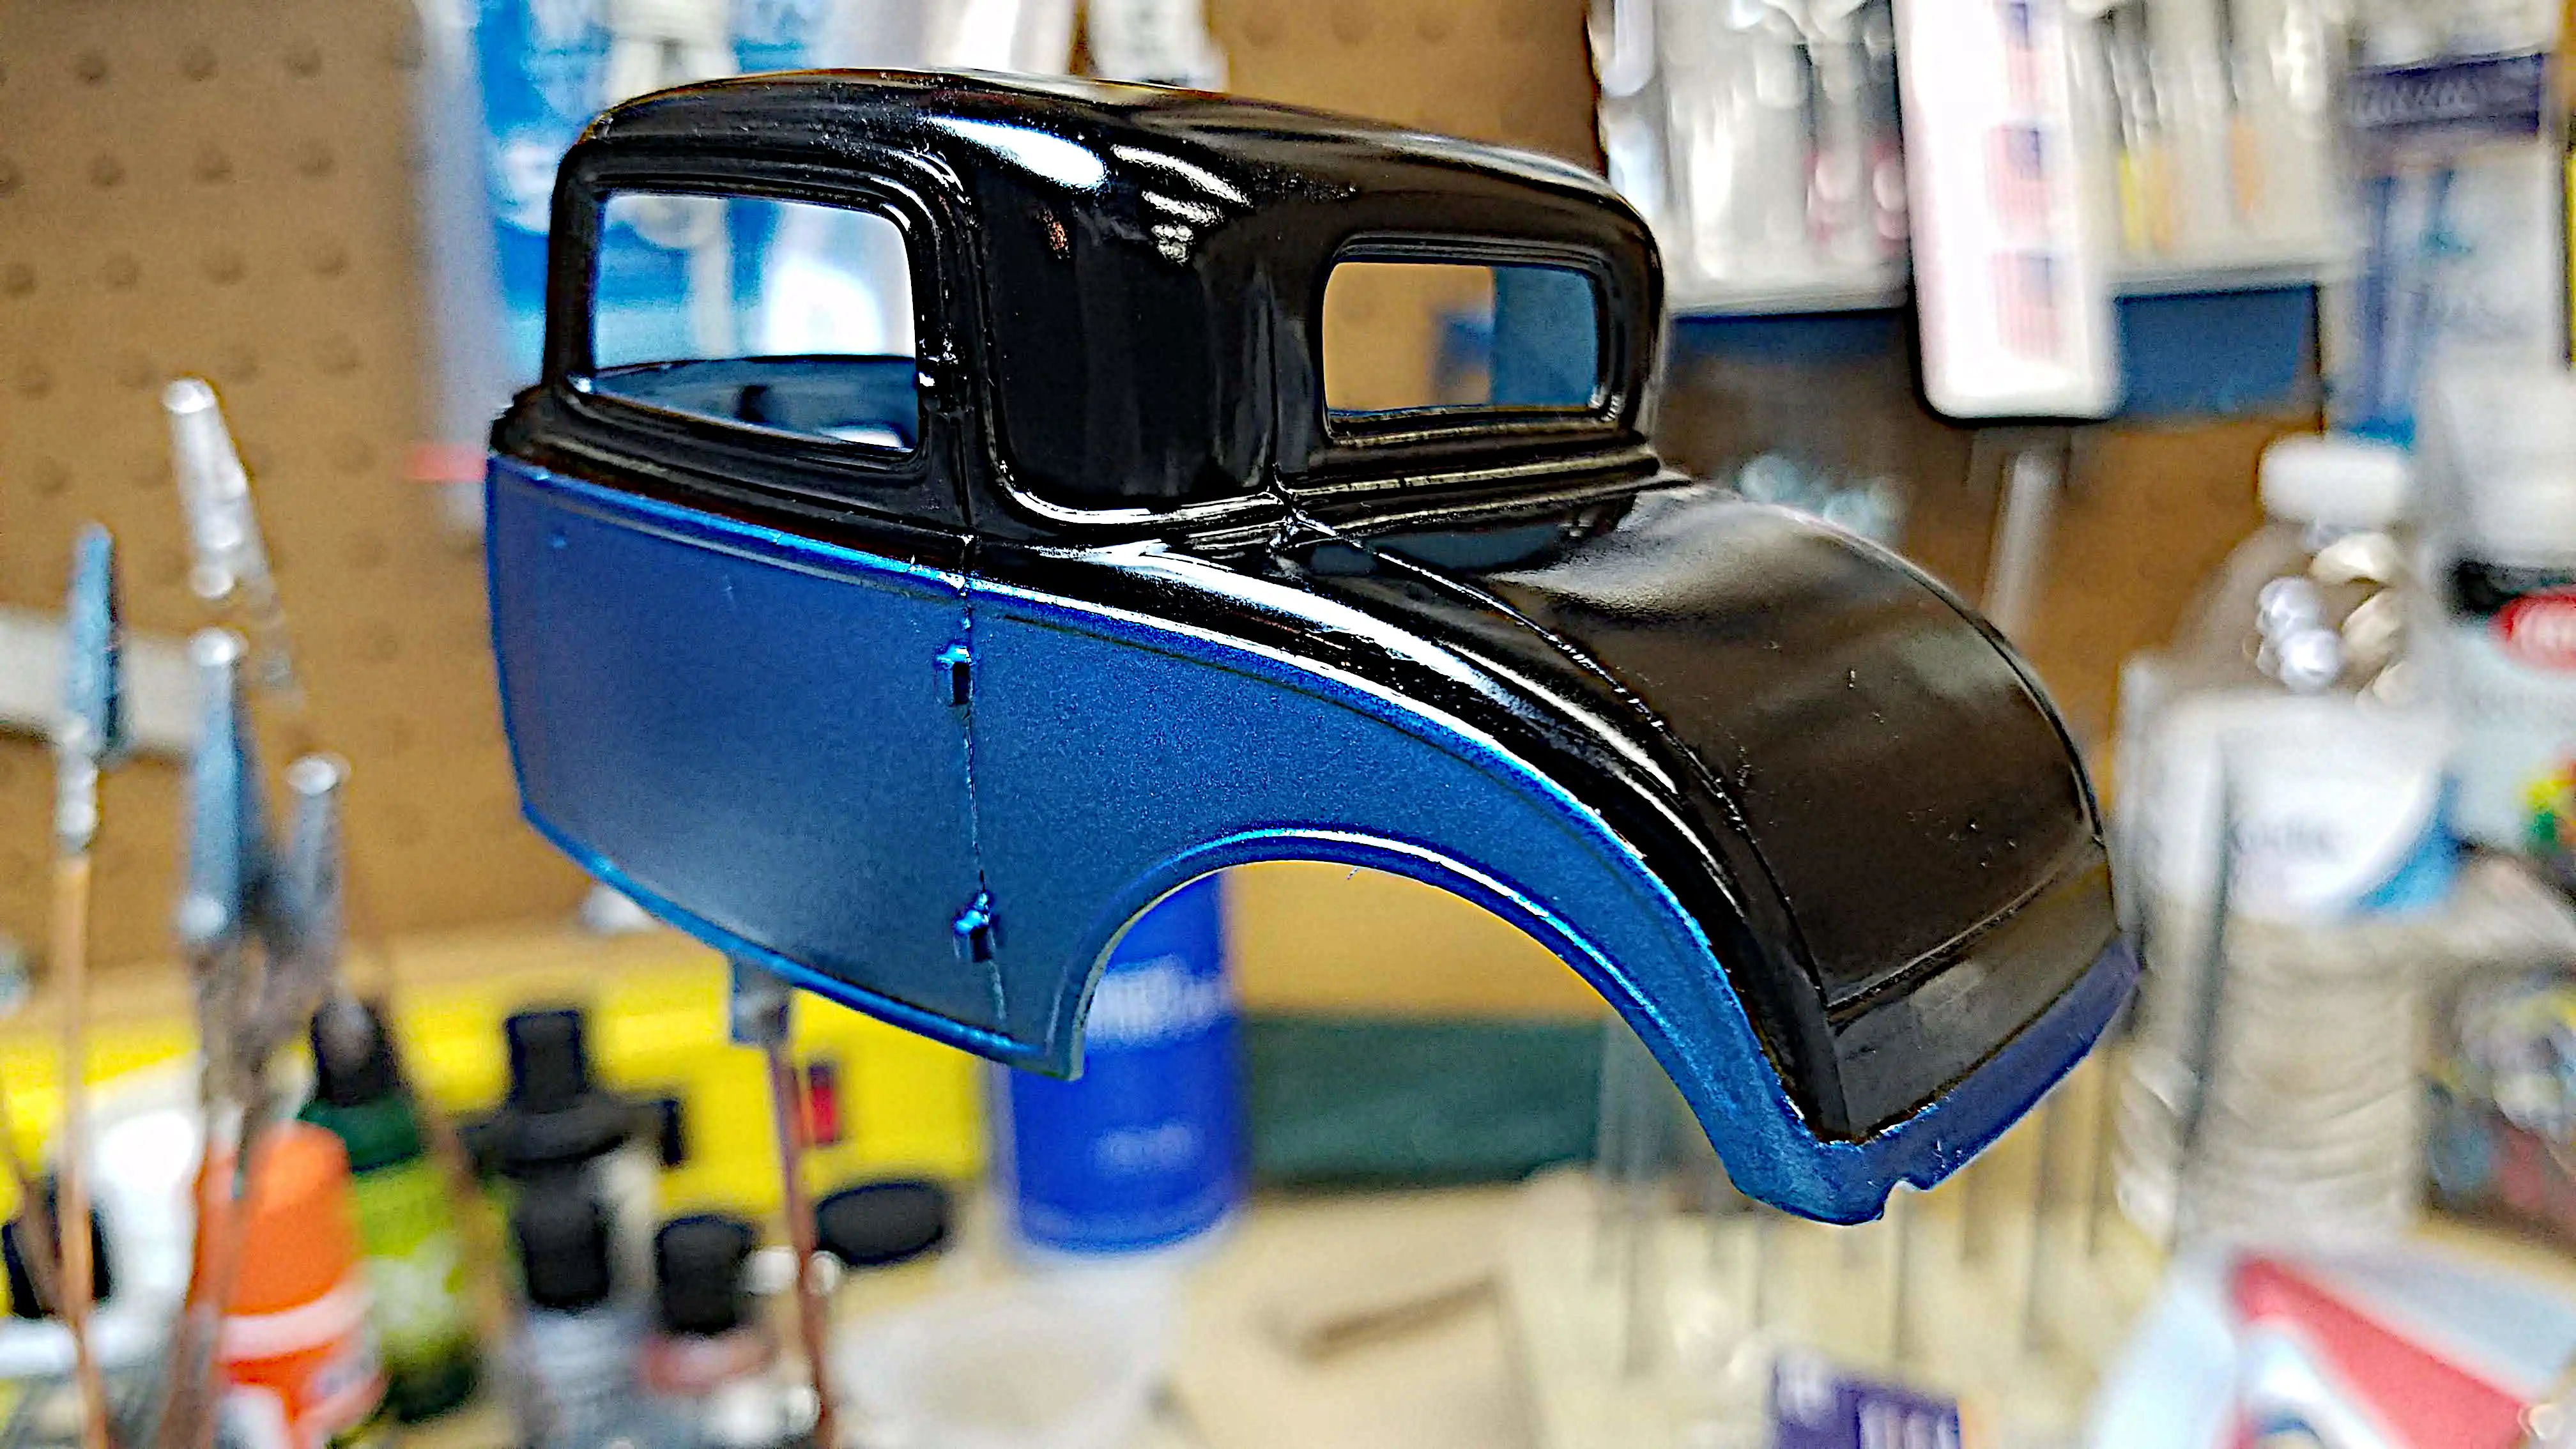
 The painting disaster was repaired
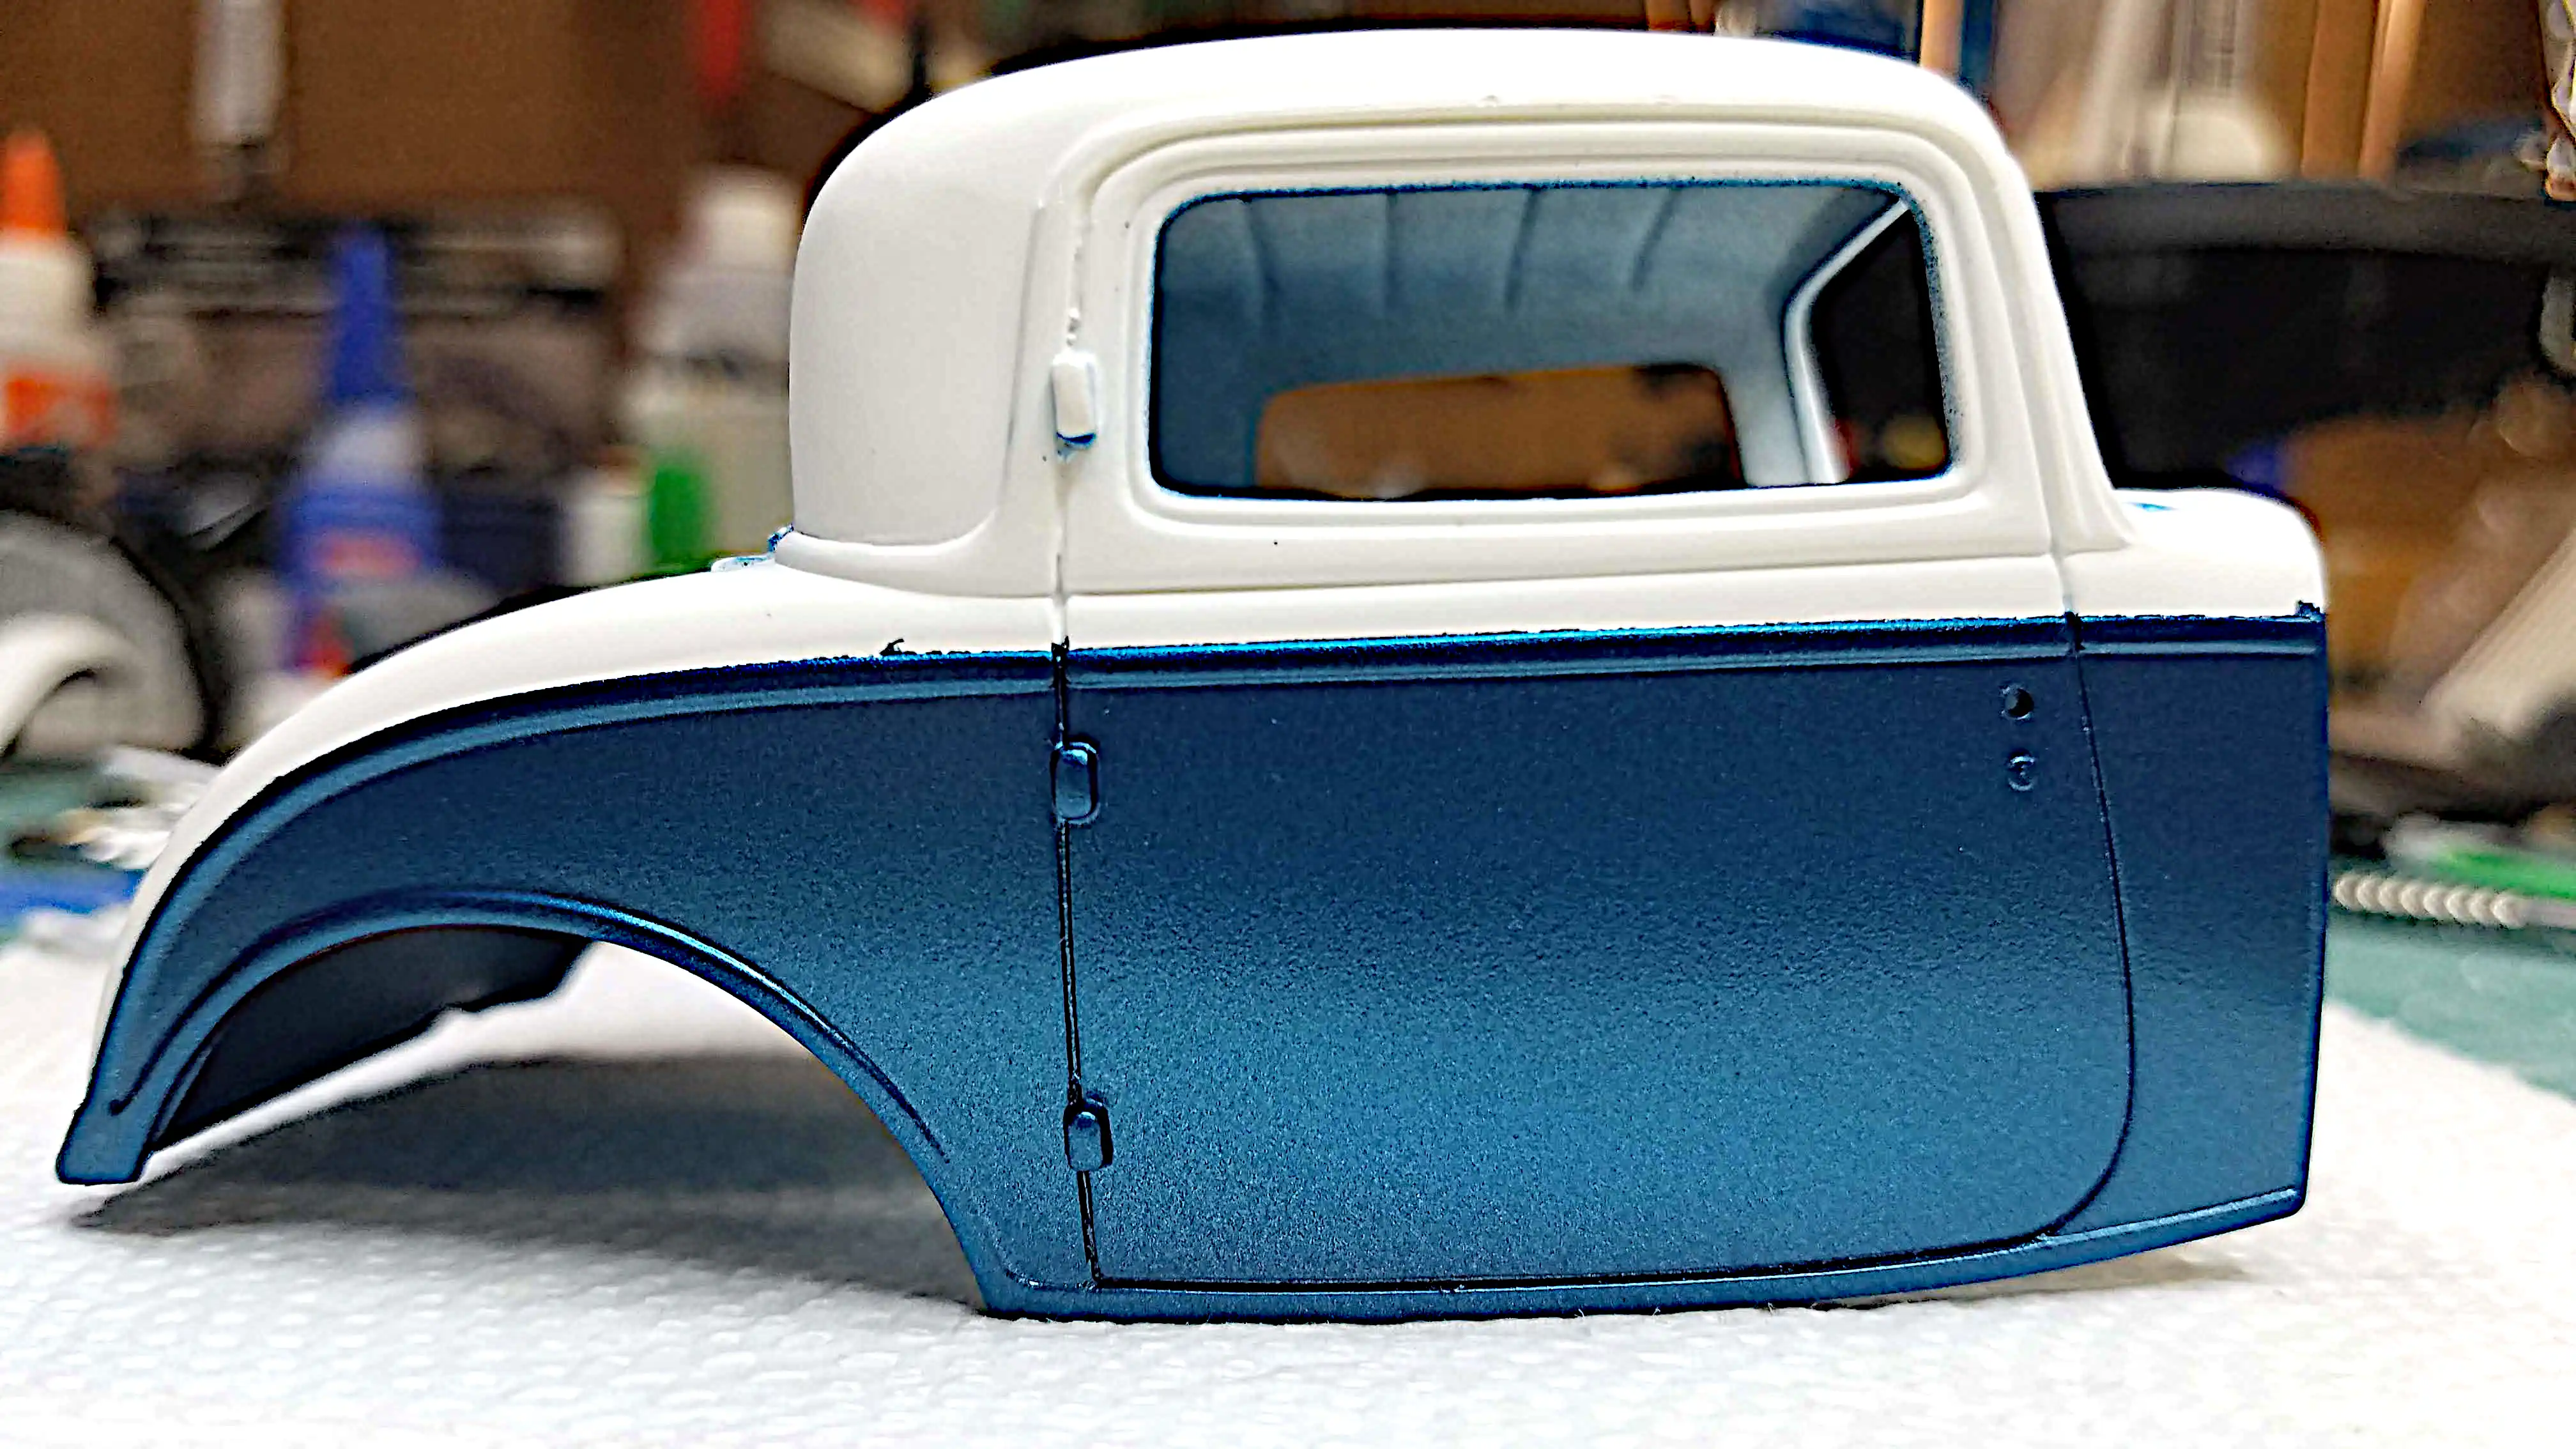
Wednesday, June 08, 2022. I was able to repair the painting disaster I had on the '32 Ford body yesterday (June 07, 2022). Alleluia!!! The next couple of photos show the results. There is a very small amount of touch-up to do along the paint line; however, that's nothing.
The way I fixed it was by accident. I started by thinking I would try brushing on a coat of Metallic Blue. I wet a 5mm wide broad brush with Tamiya Acrylic thinner and removed enough from the brush so that it was just damp. I than dipped the brush in the Metallic Blue and did a test pass on a spot near the bottom of the body where there was a large amount of black. When I moved the brush, the black paint lifted off. I continued wetting the brush with thinner and adding a bit of Metallic Blue and brushed over the rest of the black seepage. There was some black being blended in with the Metallic Blue and some of the Metallic Blue was coming off down to the primer. I removed the worse of the black seepage using this method. I then wet sanded the Metallic Blue sides with 3,000 grit sandpaper.
After wet sanding, I washed the body and thoroughly
dried it. I then masked off all of the Gloss Black with
Tamiya masking tape. After I was absolutely sure the
tape was pressed firmly against the body I airbrushed
two light coats of the Tamiya X-13 Metallic Blue.
After cleaning my Airbrush and doing a-bit of work on
the chassis, I removed the tape and wa-la...
This is the result!
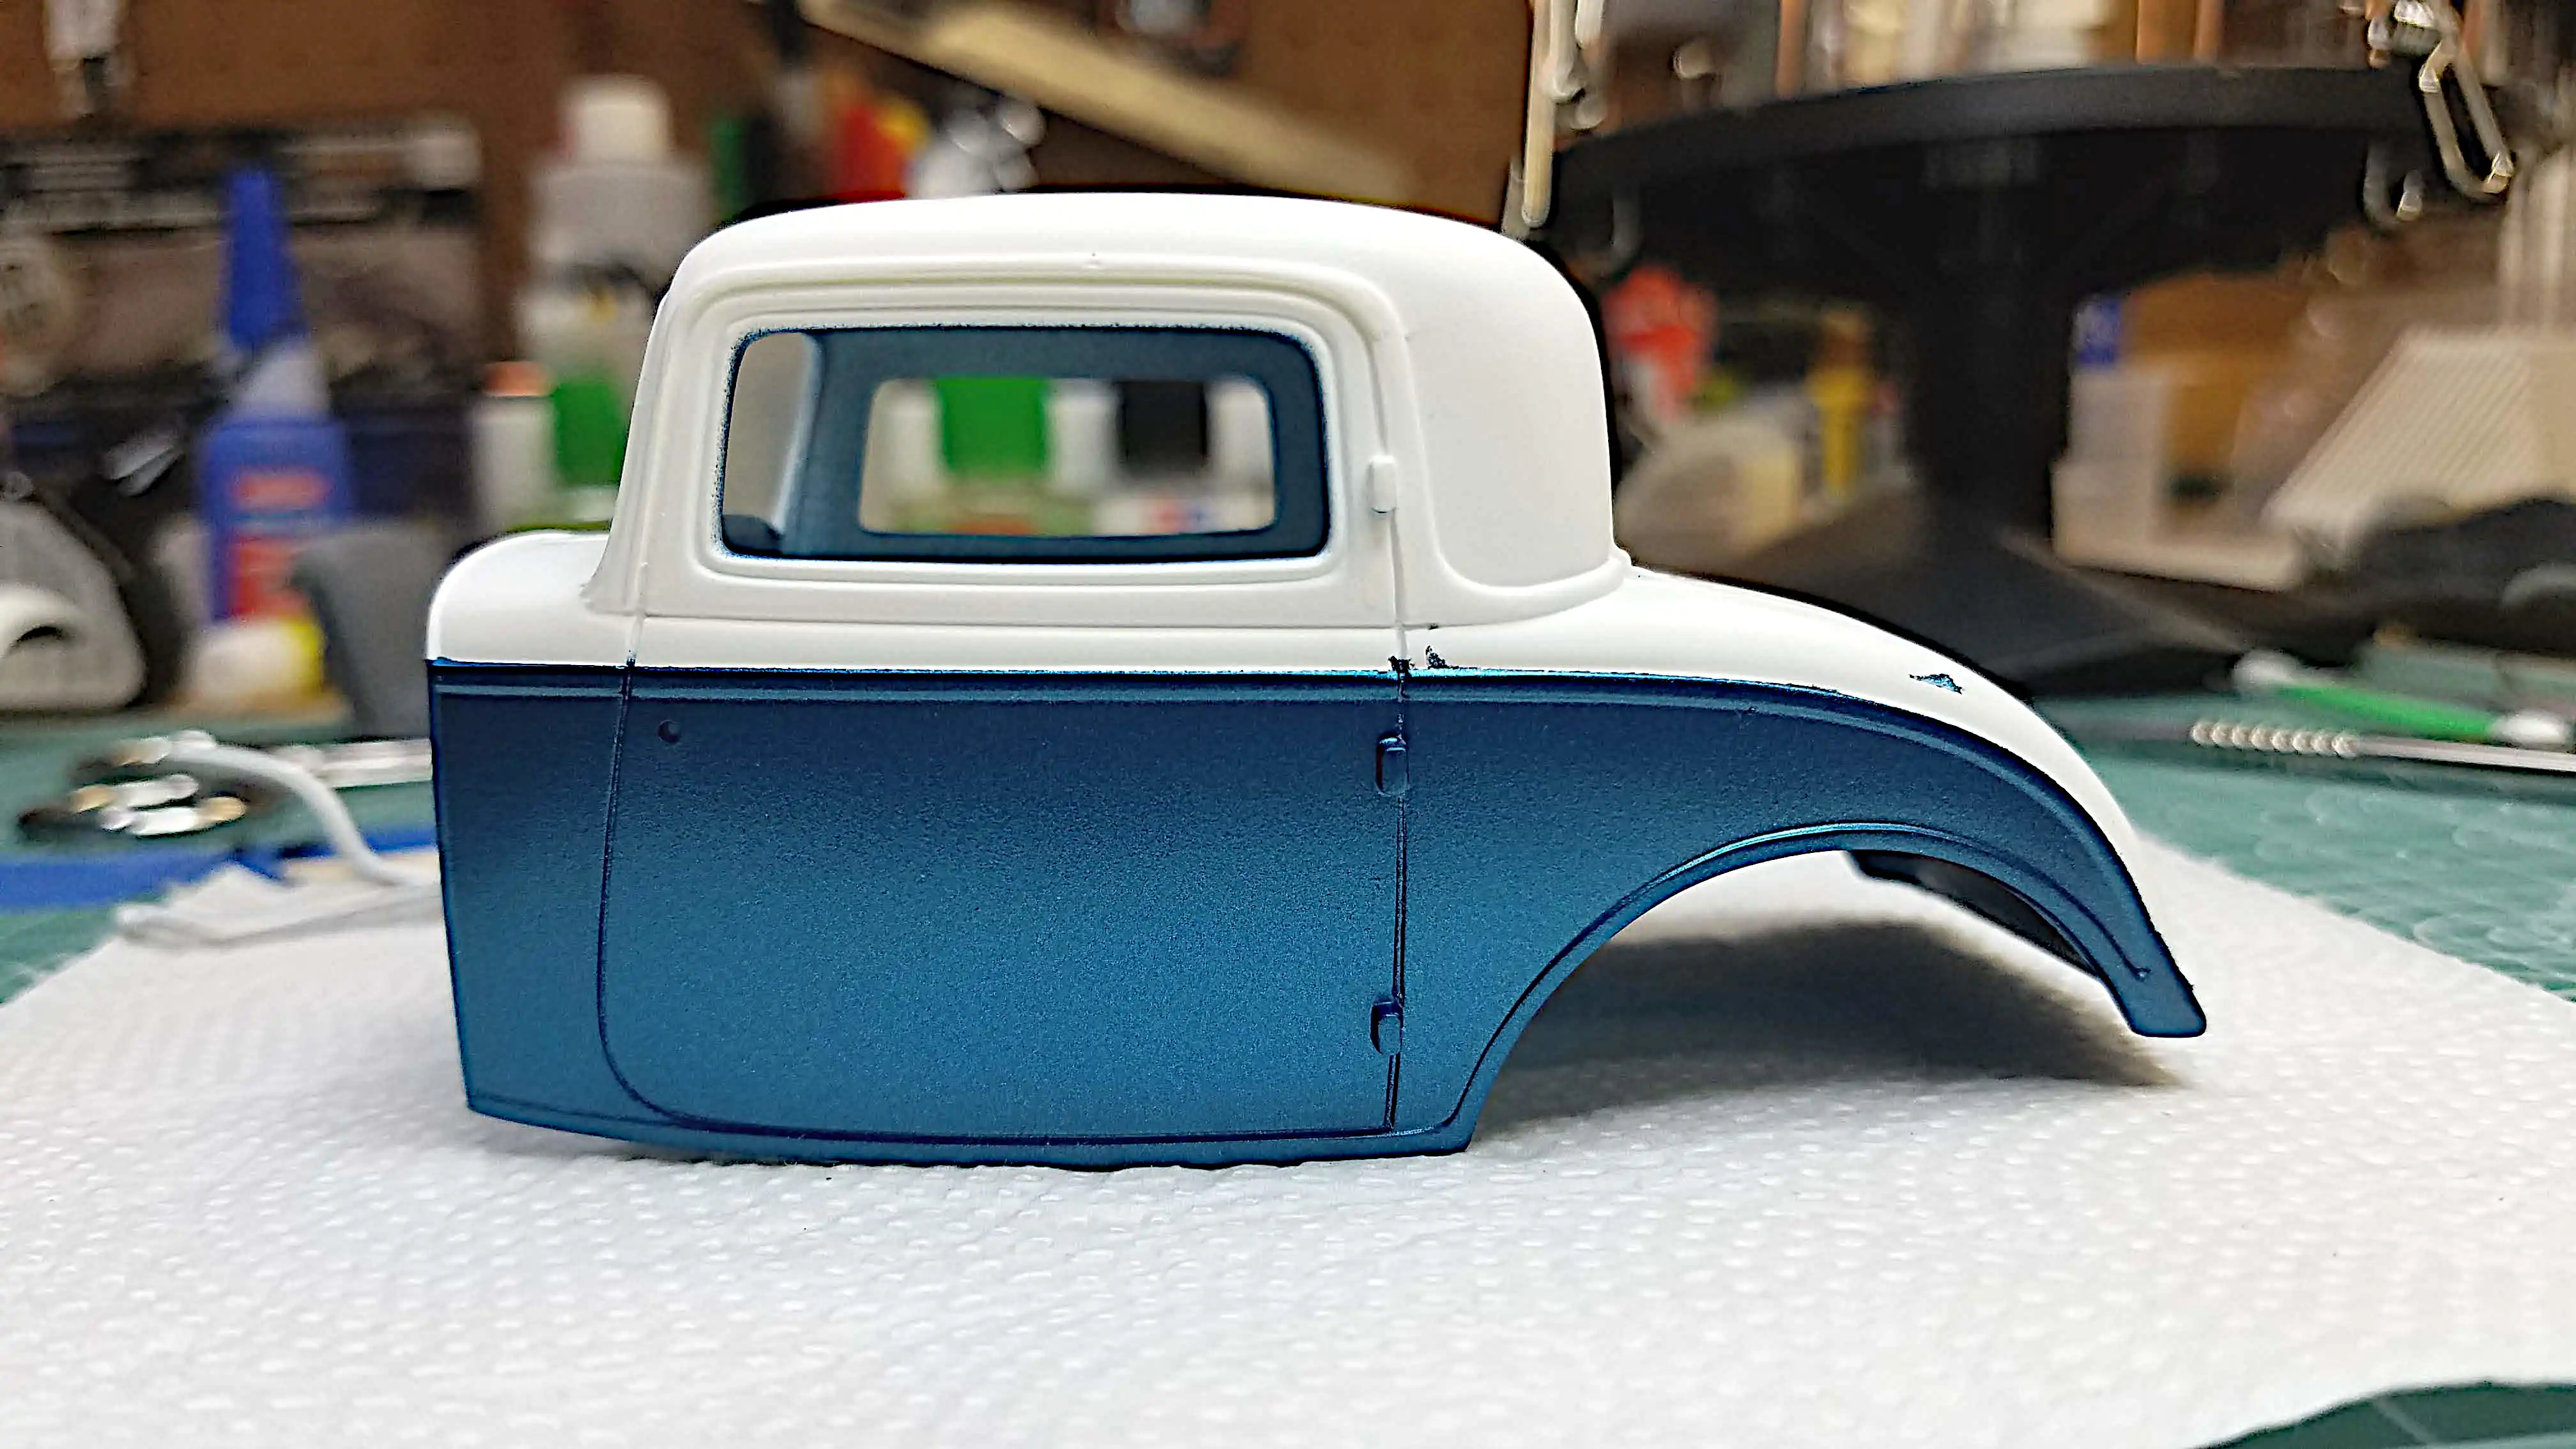
Photo 083
Click/tap photo to enlarge
 Just a small amount of touch up required
There is a minor amount of touch-up to do on the body after recovering from the painting disaster.
Photo 085
Click/tap photo to enlarge
 Upper and lower radiators hoses installed
The upper and lower radiator hoses have been installed. I did not use the hoses that came with the kit. I went through all the wire I have in my shop and could not find a wire gauge that had the right outside diameter. I then went to my box of scrap wire and found a length of what we in the electrical field call spaghetti. spaghetti is flexible tubing used to slide over bare wire to become the insulation for that wire. The outside diameter was perfect. The spaghetti was green, so I used Tamiya Rubber Black and painted it. I then placed a piece of solid bus wire into the tubing to make it more rigid, formed it to the correct length and bends and glued it in place. I still have a-bit of clean up to do at the hose joints as of these photos.
Photo 086
Click/tap photo to enlarge
 Upper and lower radiators hoses installed
The upper and lower radiator hoses have been installed. I did not use the hoses that came with the kit. I went through all the wire I have in my shop and could not find a wire gauge that had the right outside diameter. I then went to my box of scrap wire and found a length of what we in the electrical field call spaghetti. spaghetti is flexible tubing used to slide over bare wire to become the insulation for that wire. The outside diameter was perfect. The spaghetti was green, so I used Tamiya Rubber Black and painted it. I then placed a piece of solid bus wire into the tubing to make it more rigid, formed it to the correct length and bends and glued it in place. I still have a-bit of clean up to do at the hose joints as of these photos.
Photo 087
Click/tap photo to enlarge
 Windshield frame installed
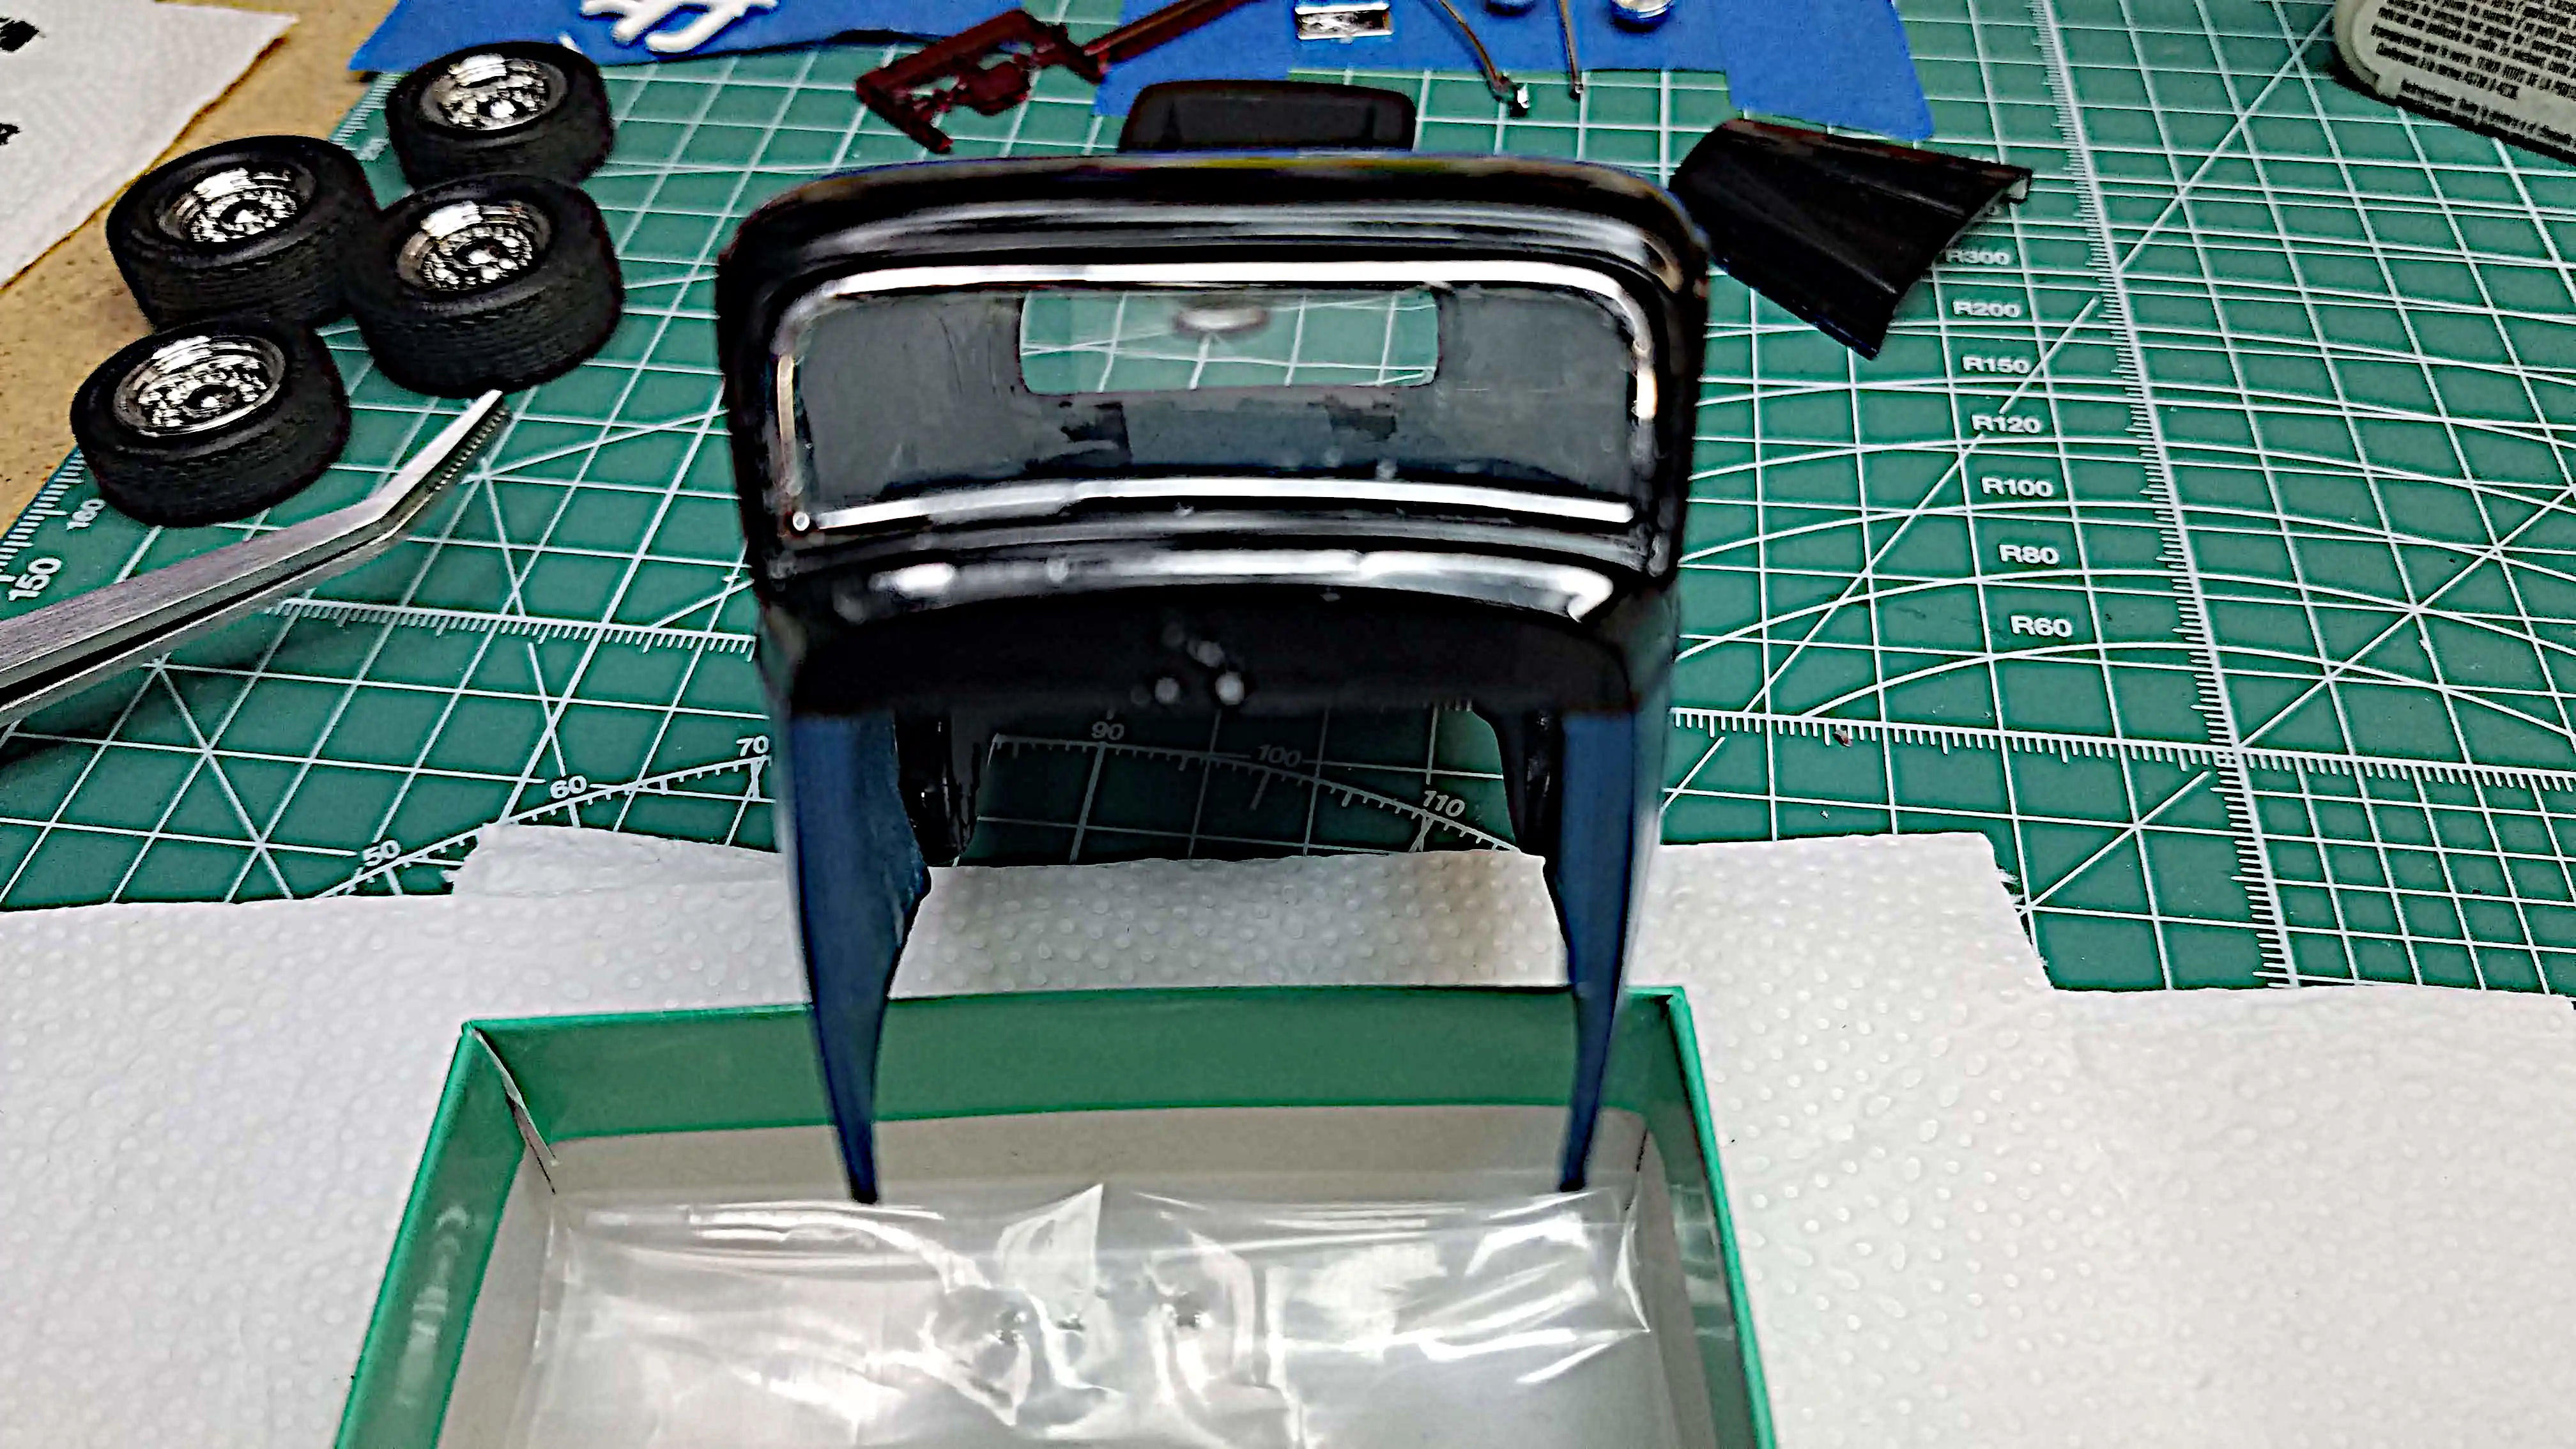
Sorry for this photo being a-bit blurry. The rear window (no picture), the windshield frame and the windshield was installed. I was wondering why there was no rear view mirror shown on the instruction sheet? However, I found one on the chrome tree. I installed the rear-view mirror as you might be able to see in this picture.
Photo 088
Click/tap photo to enlarge
 Failed shot of rear view mirror
I tried to get a shot of the rear-view mirror and the white ceiling; however, the lighting is horrible and the white looks dirty. It's really not. Also, on this photo it can be seen that I mounted the inside wheel backs in the back fender opening. The next day I had to remove them. The instruction sheet showed them installed for both versions of the build, with and without fenders. Well...they only need to be installed for the without fenders version.
Photo 090
Click/tap photo to enlarge
 Interior is installed in the body
This and the next photo are of the installed interior. I apologize for my horrible lighting.
Photo 091
Click/tap photo to enlarge
 Interior is installed in the body
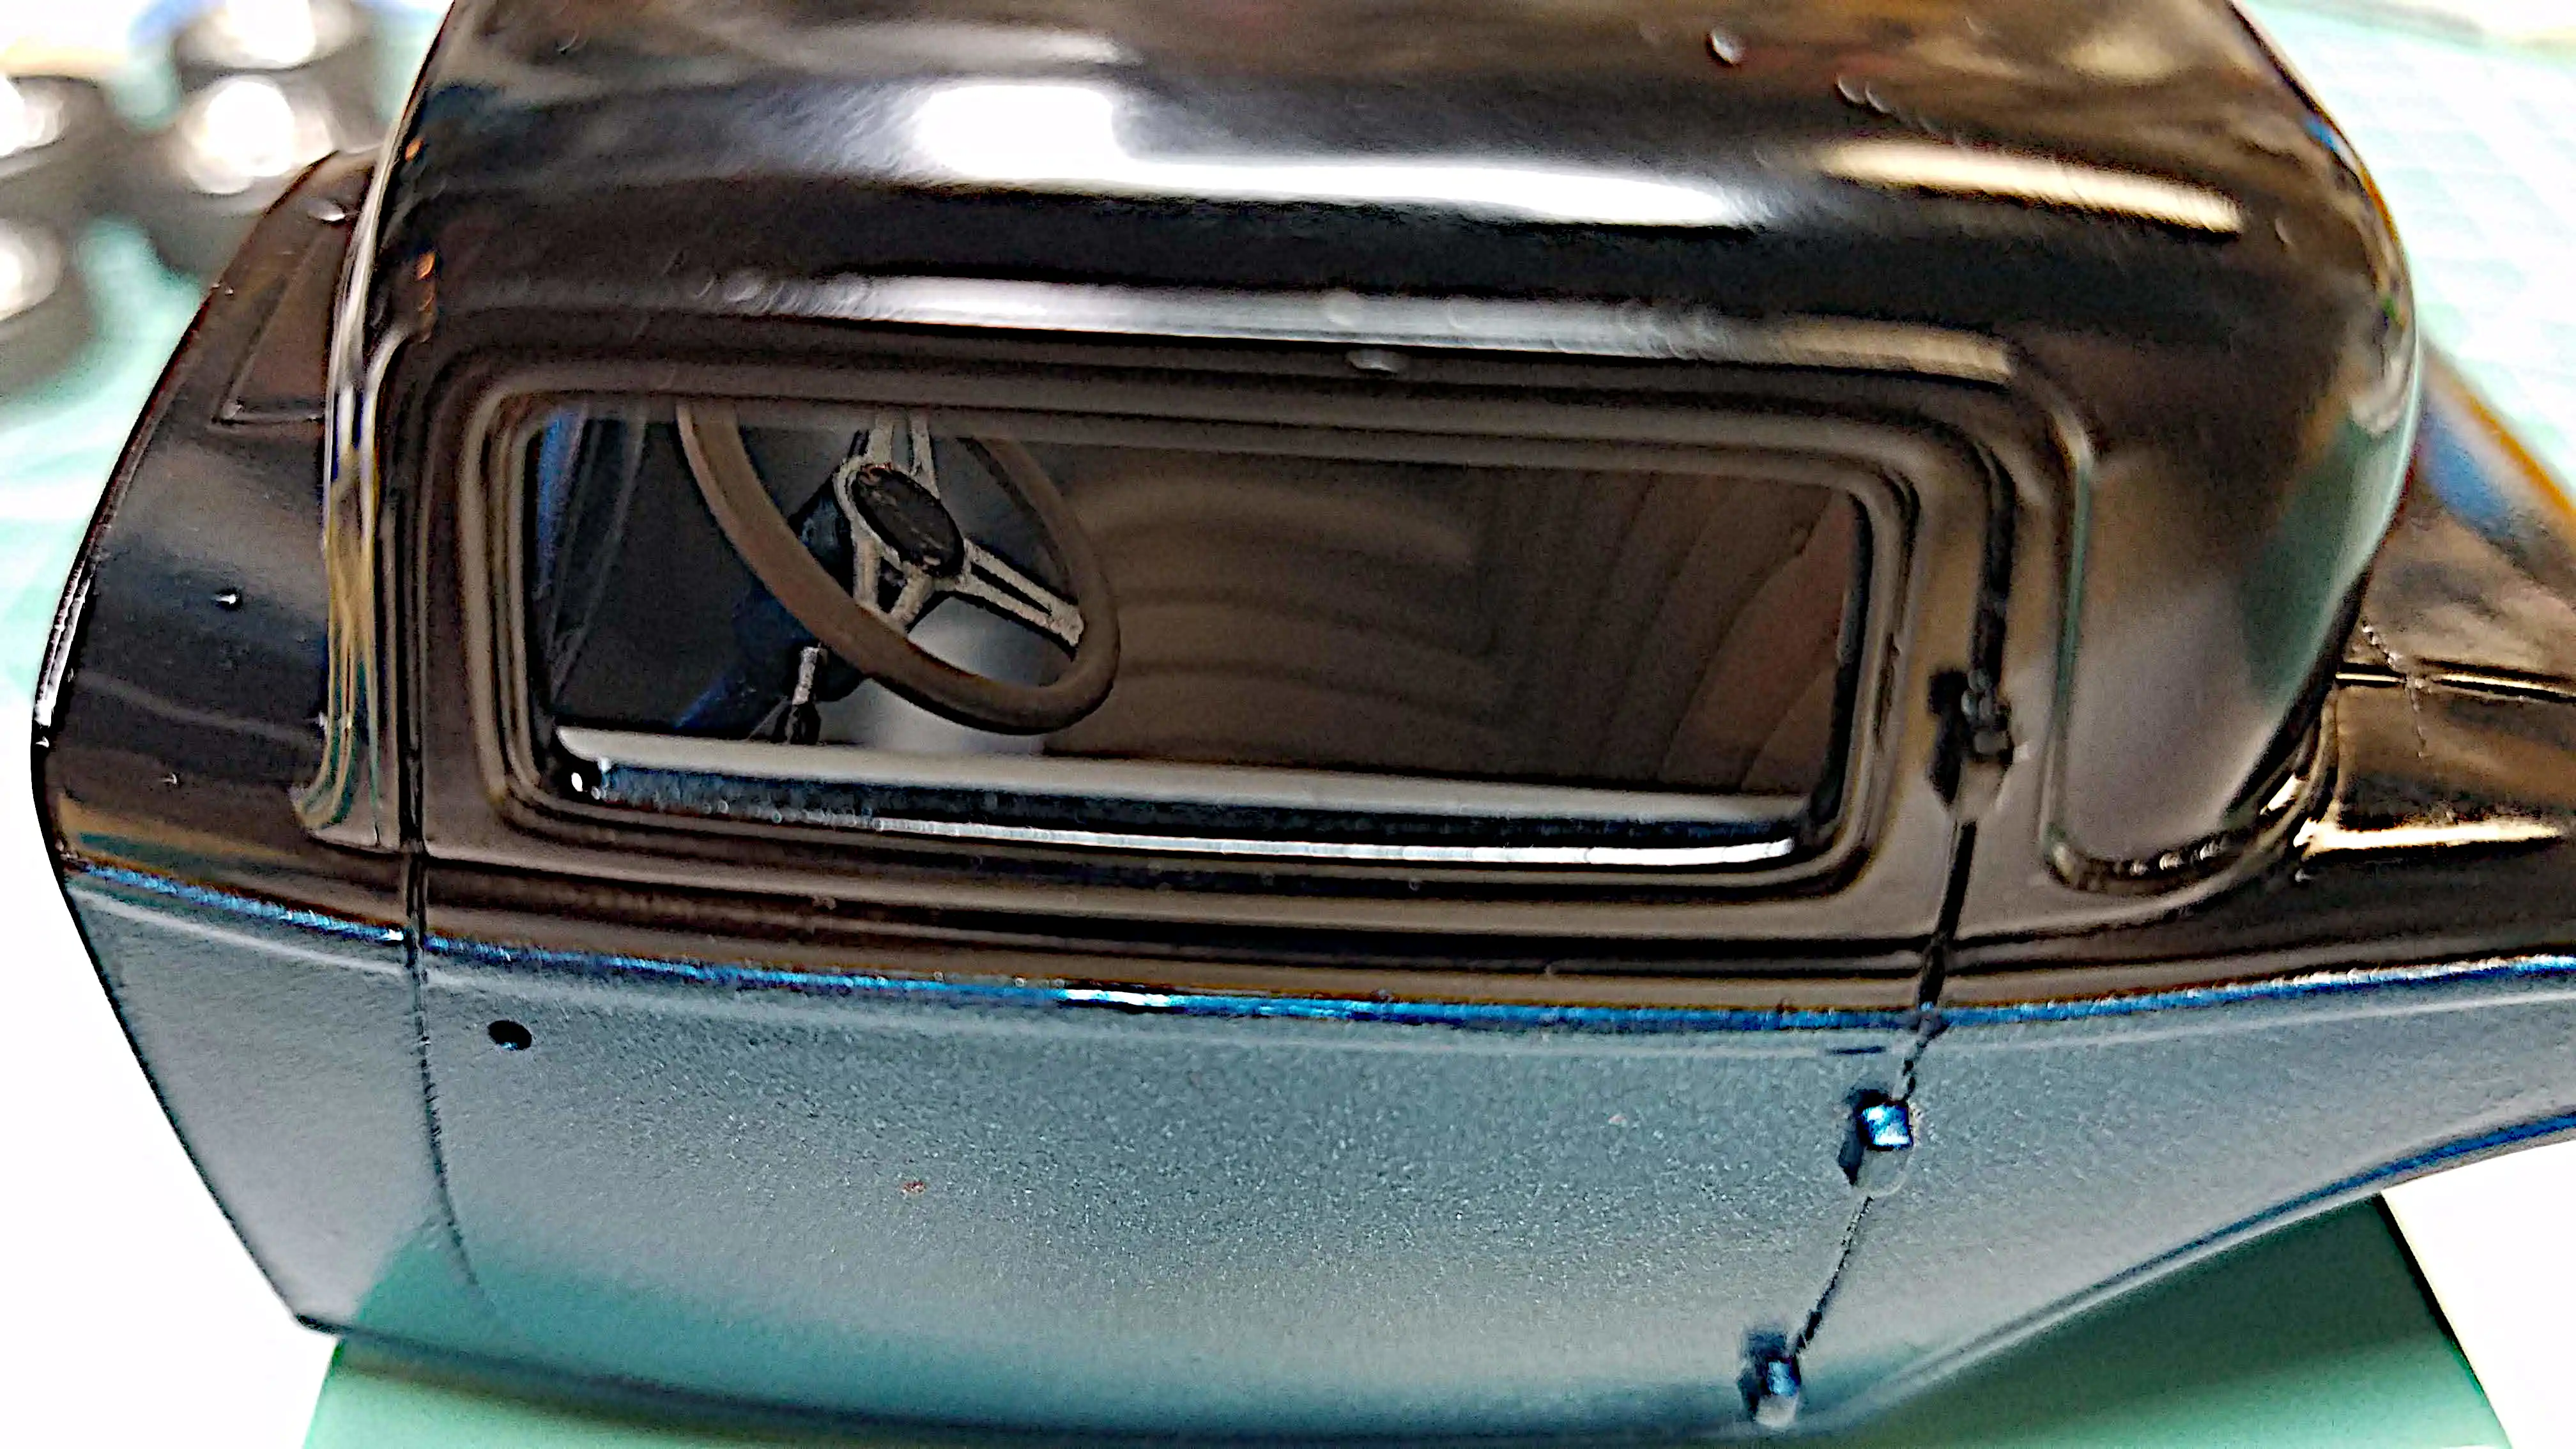
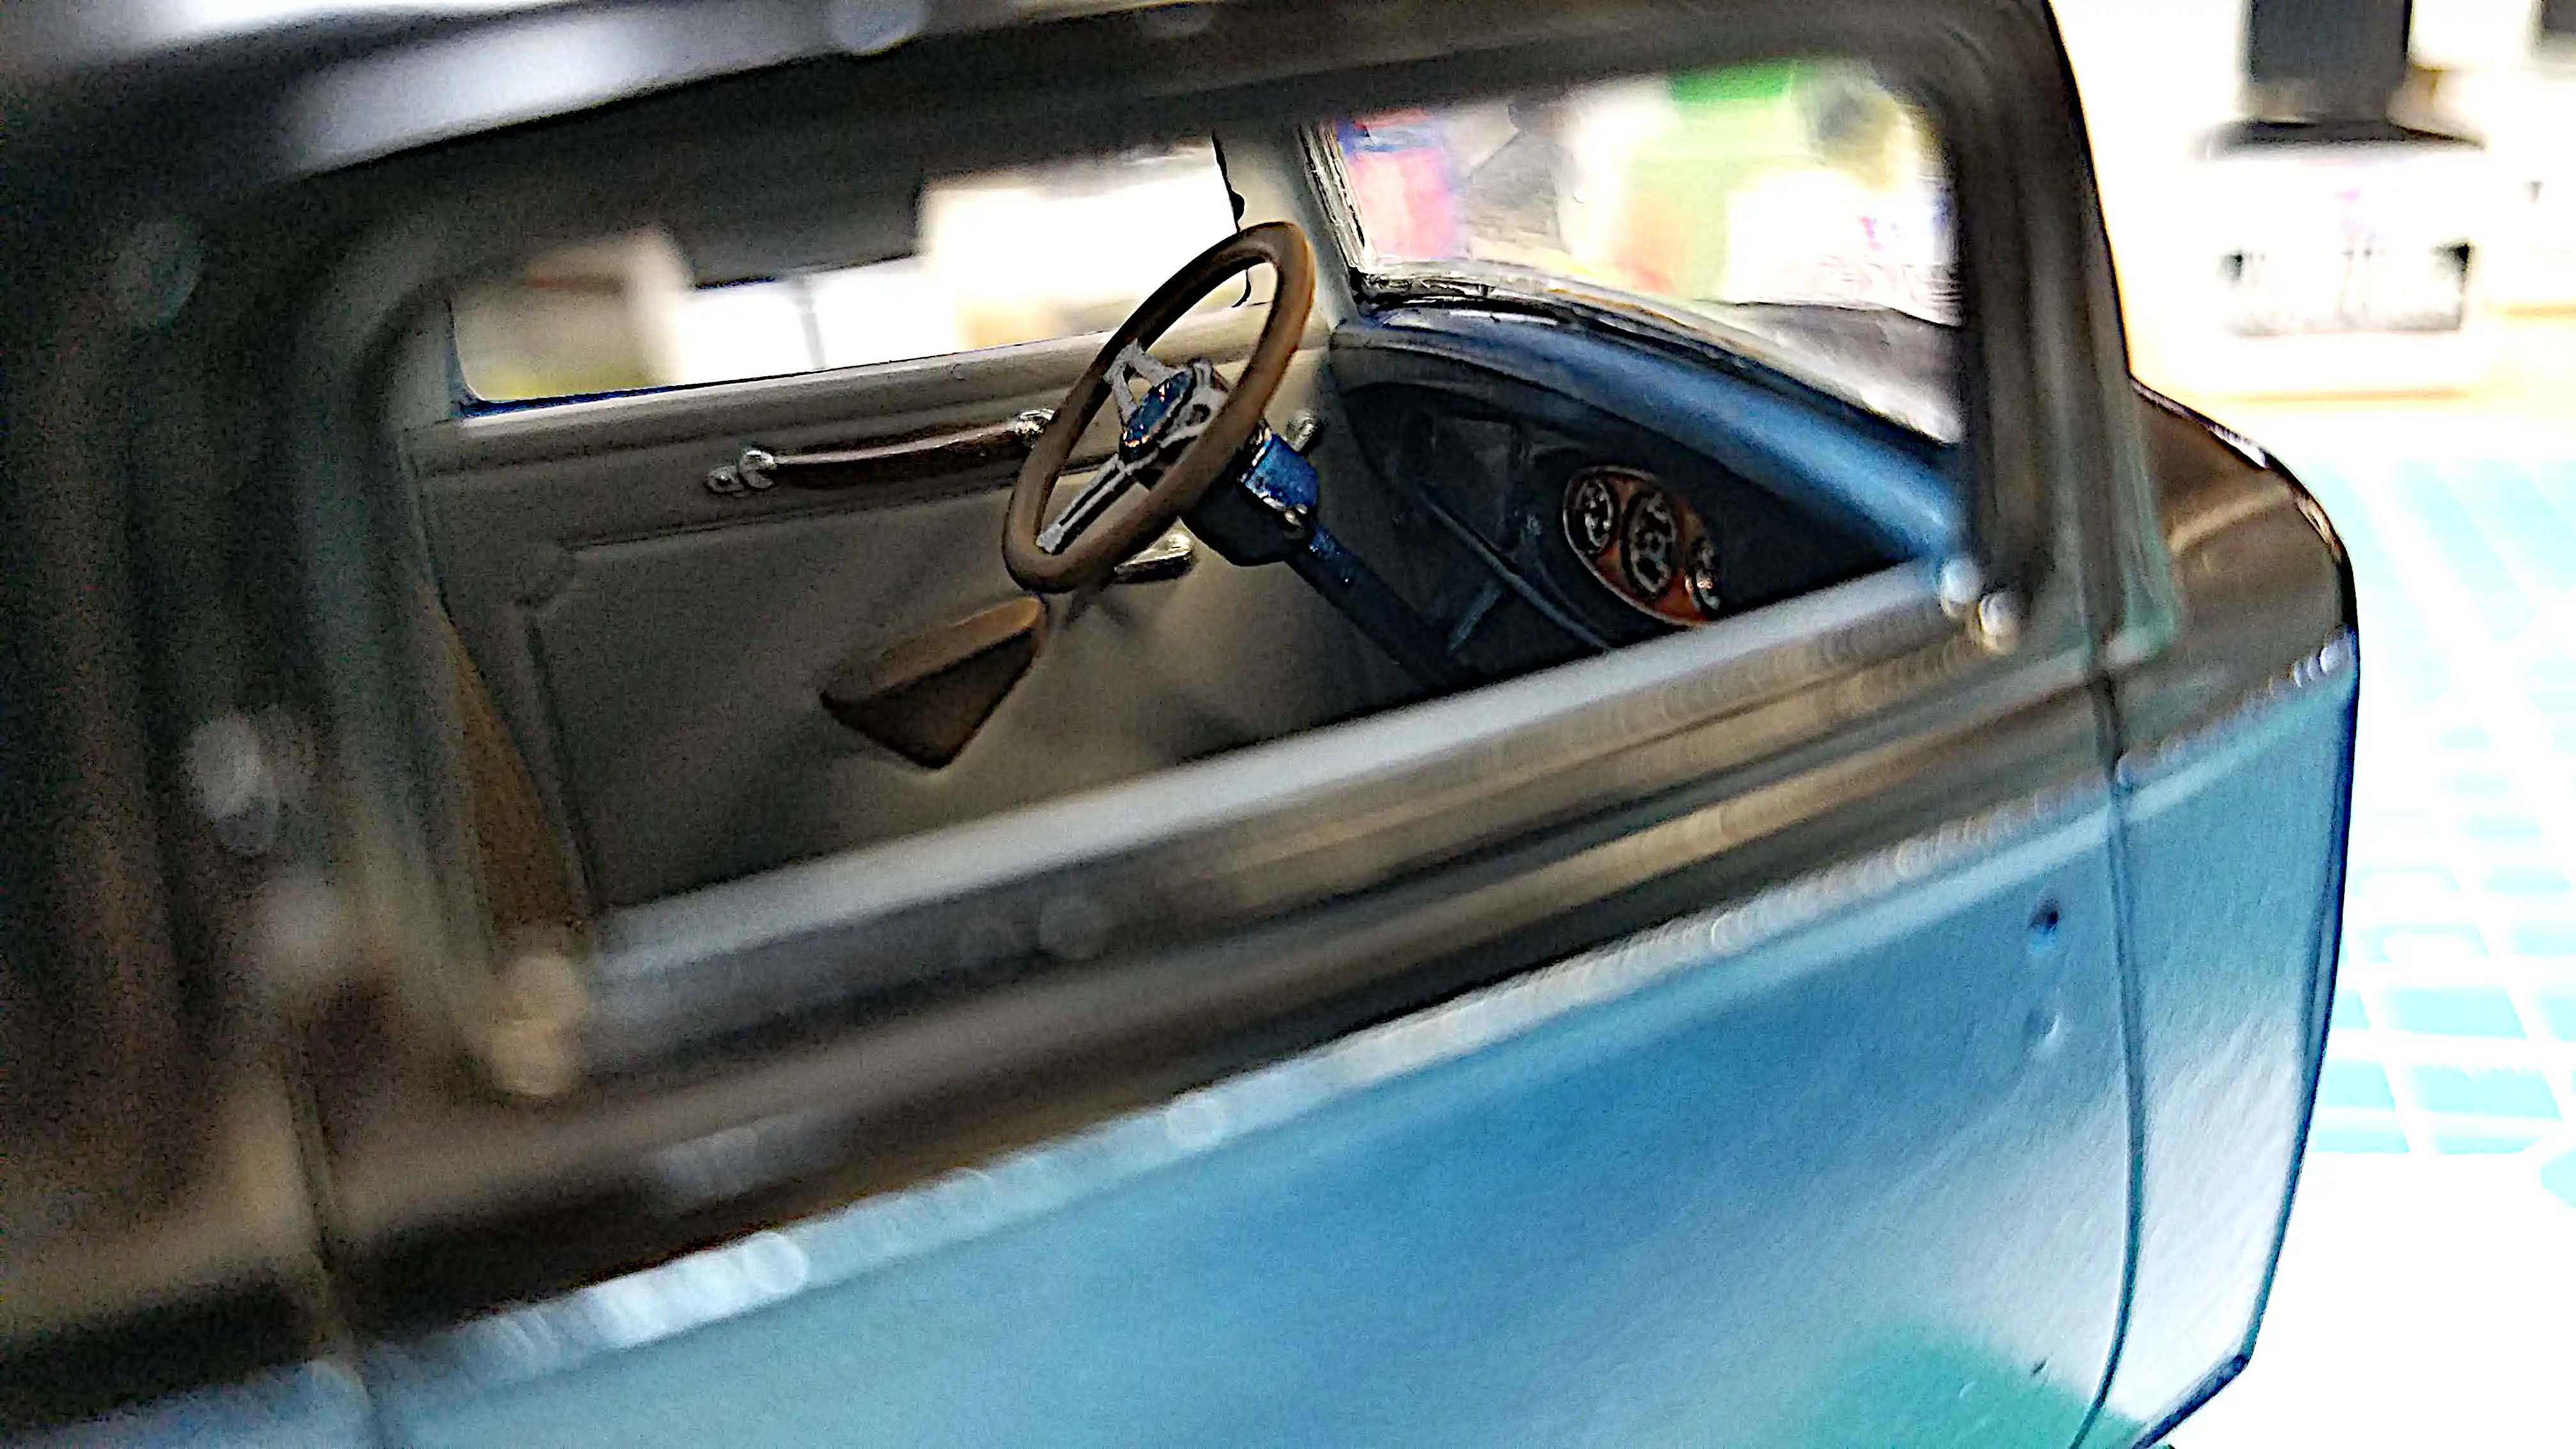
The interior is installed in the body. I'm not sure why the windshield looks so distorted; it's really not. As before, I apologize for the poor lighting.
Photo 092
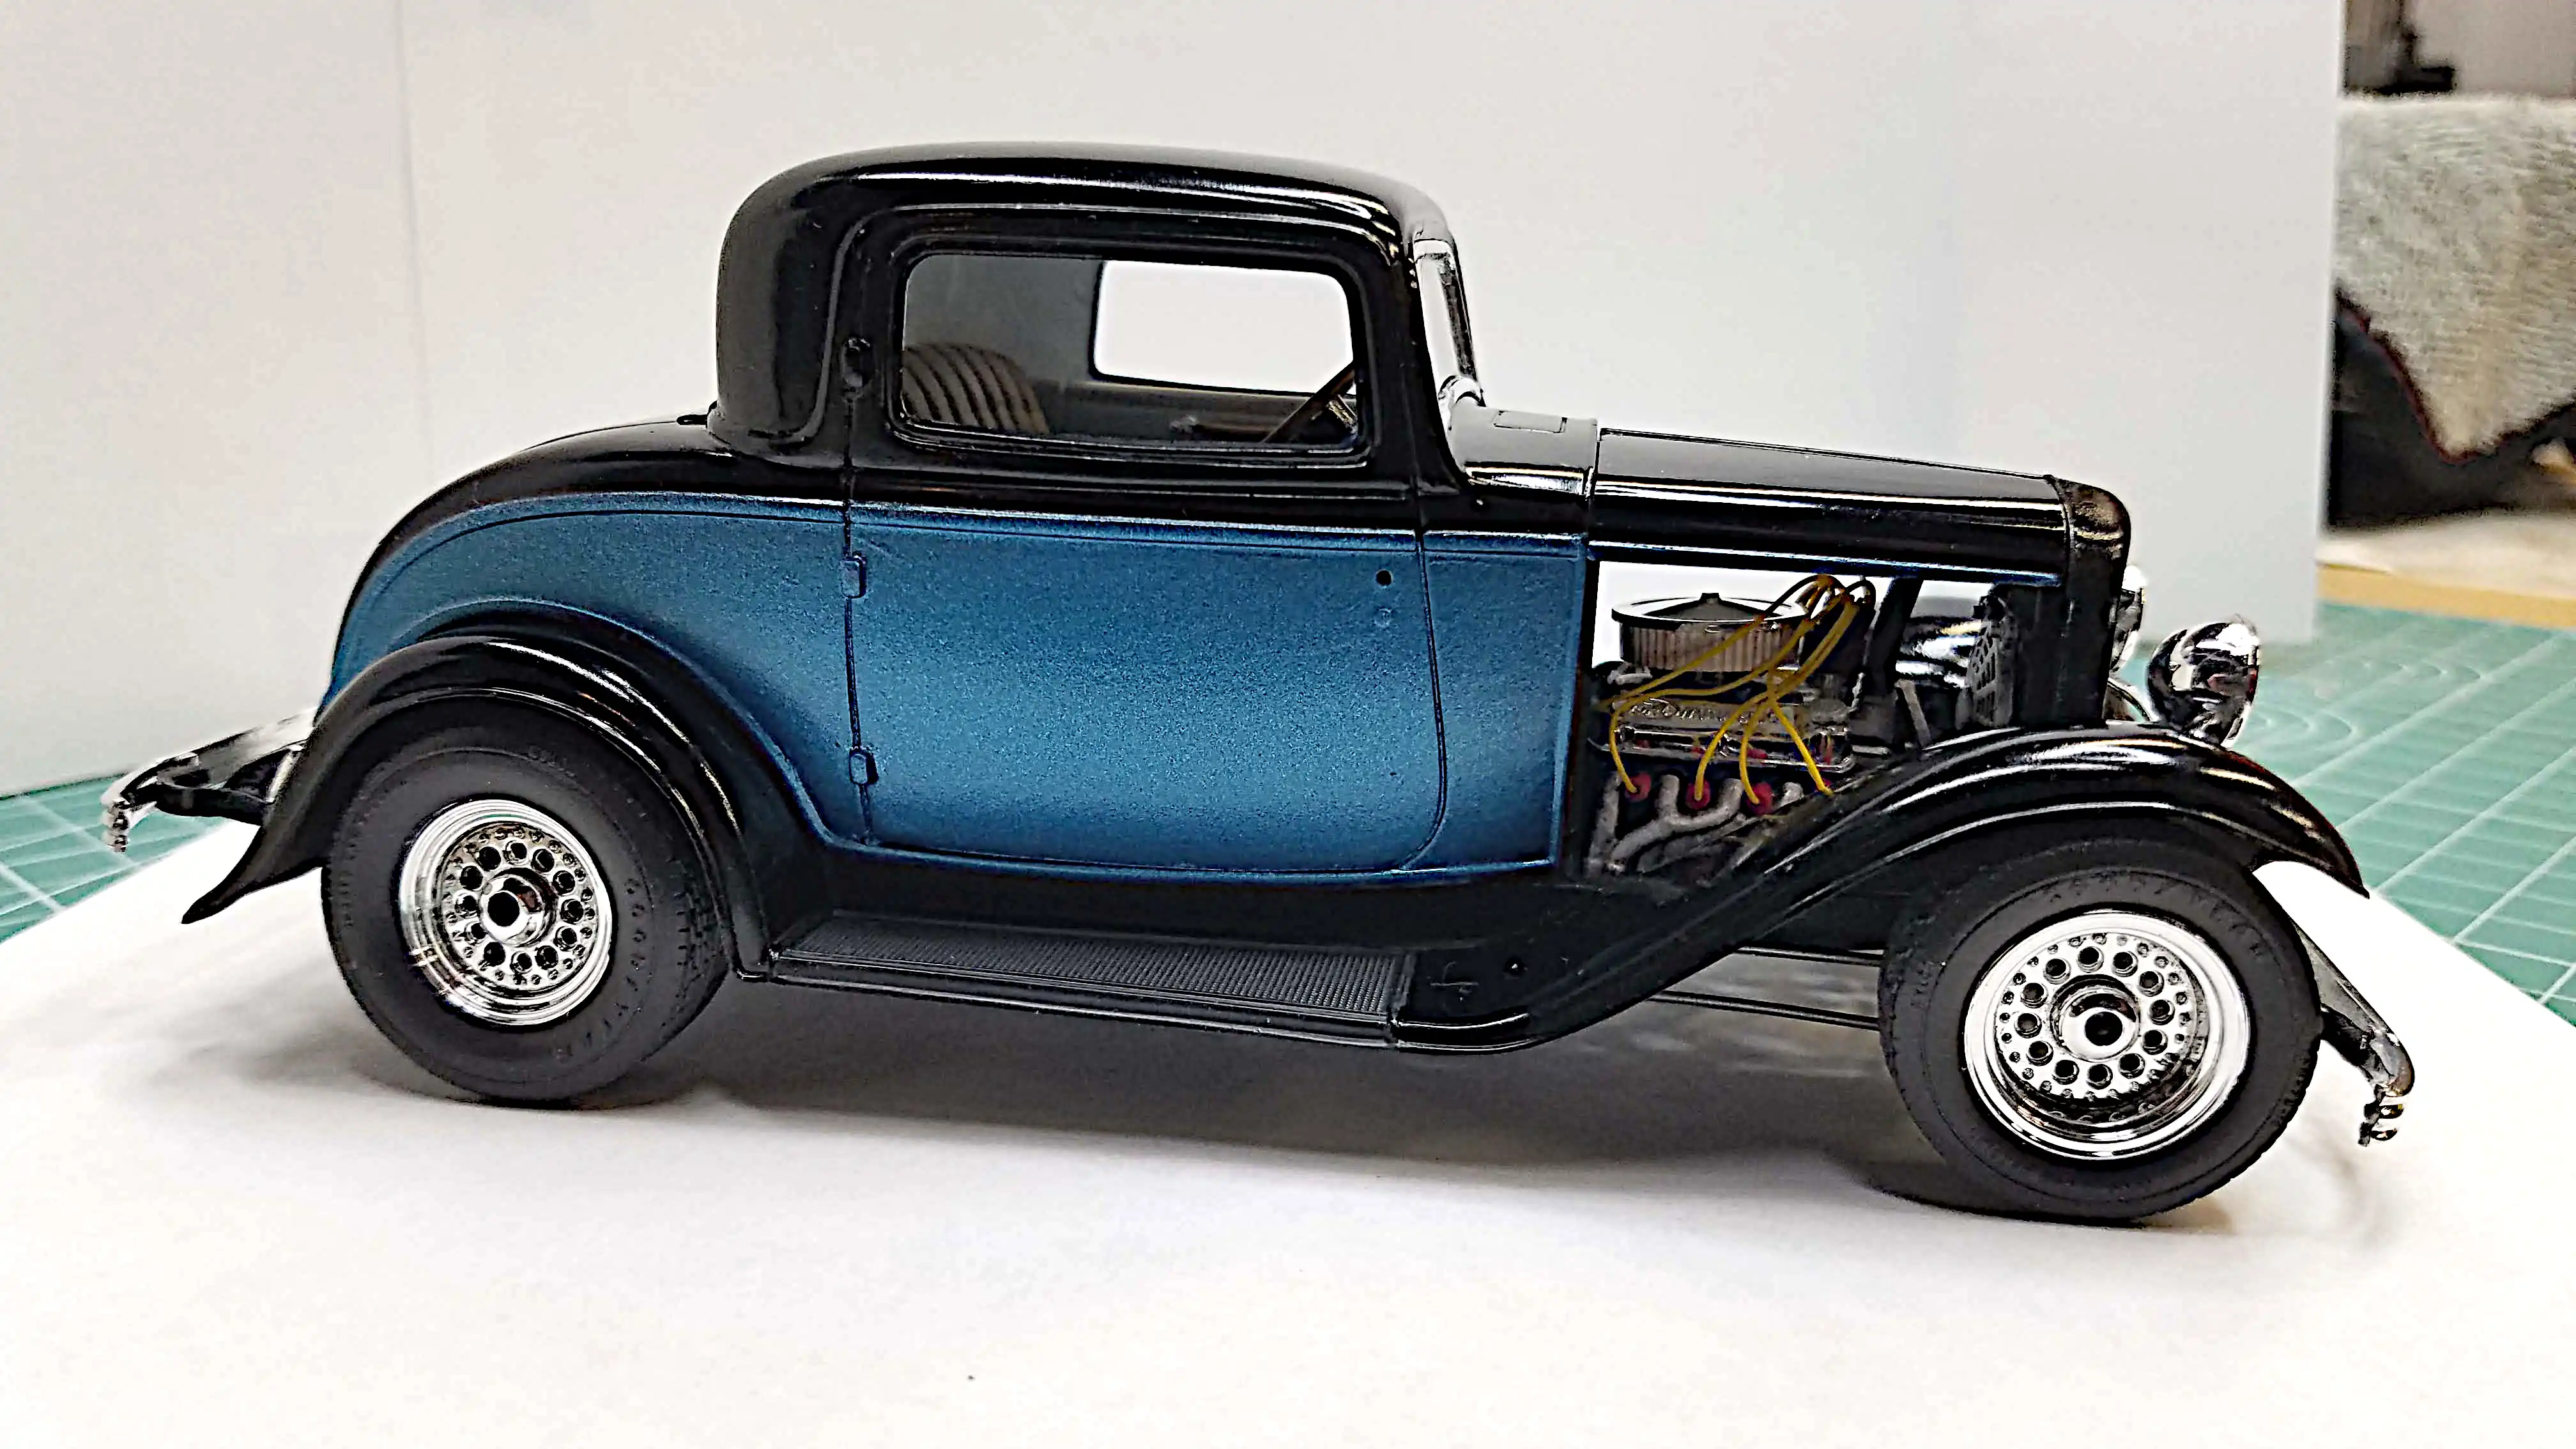
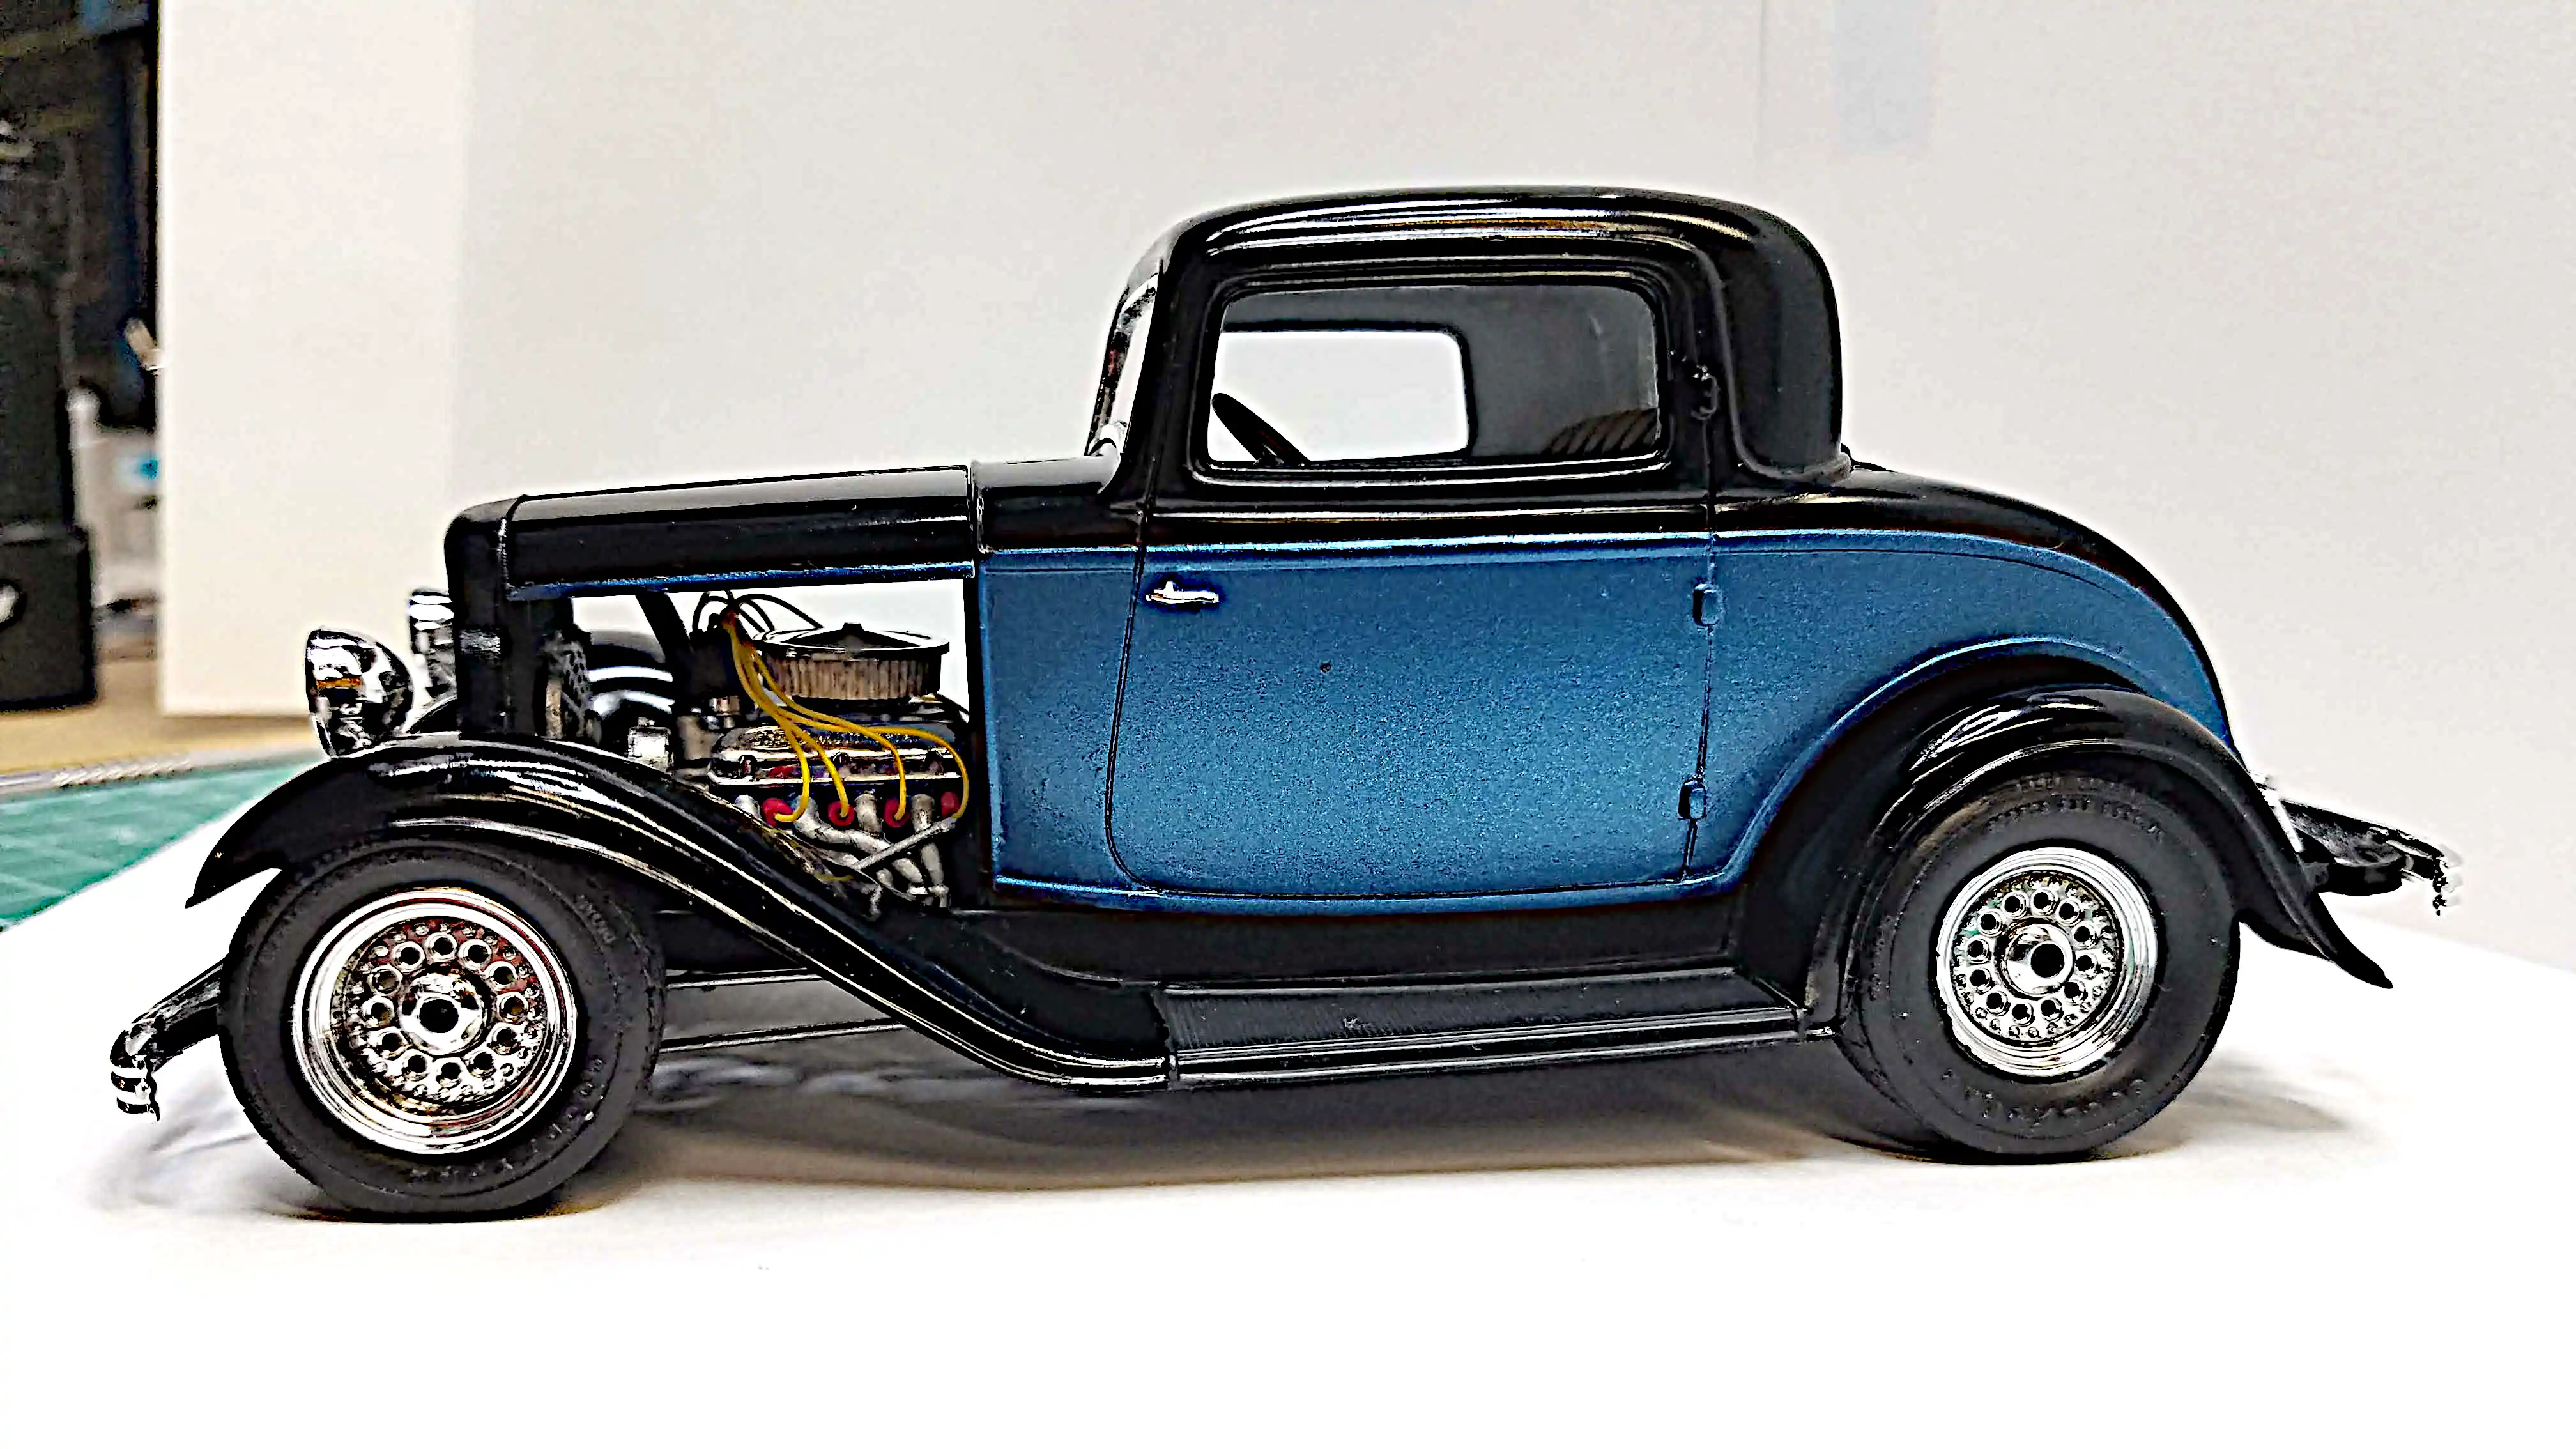
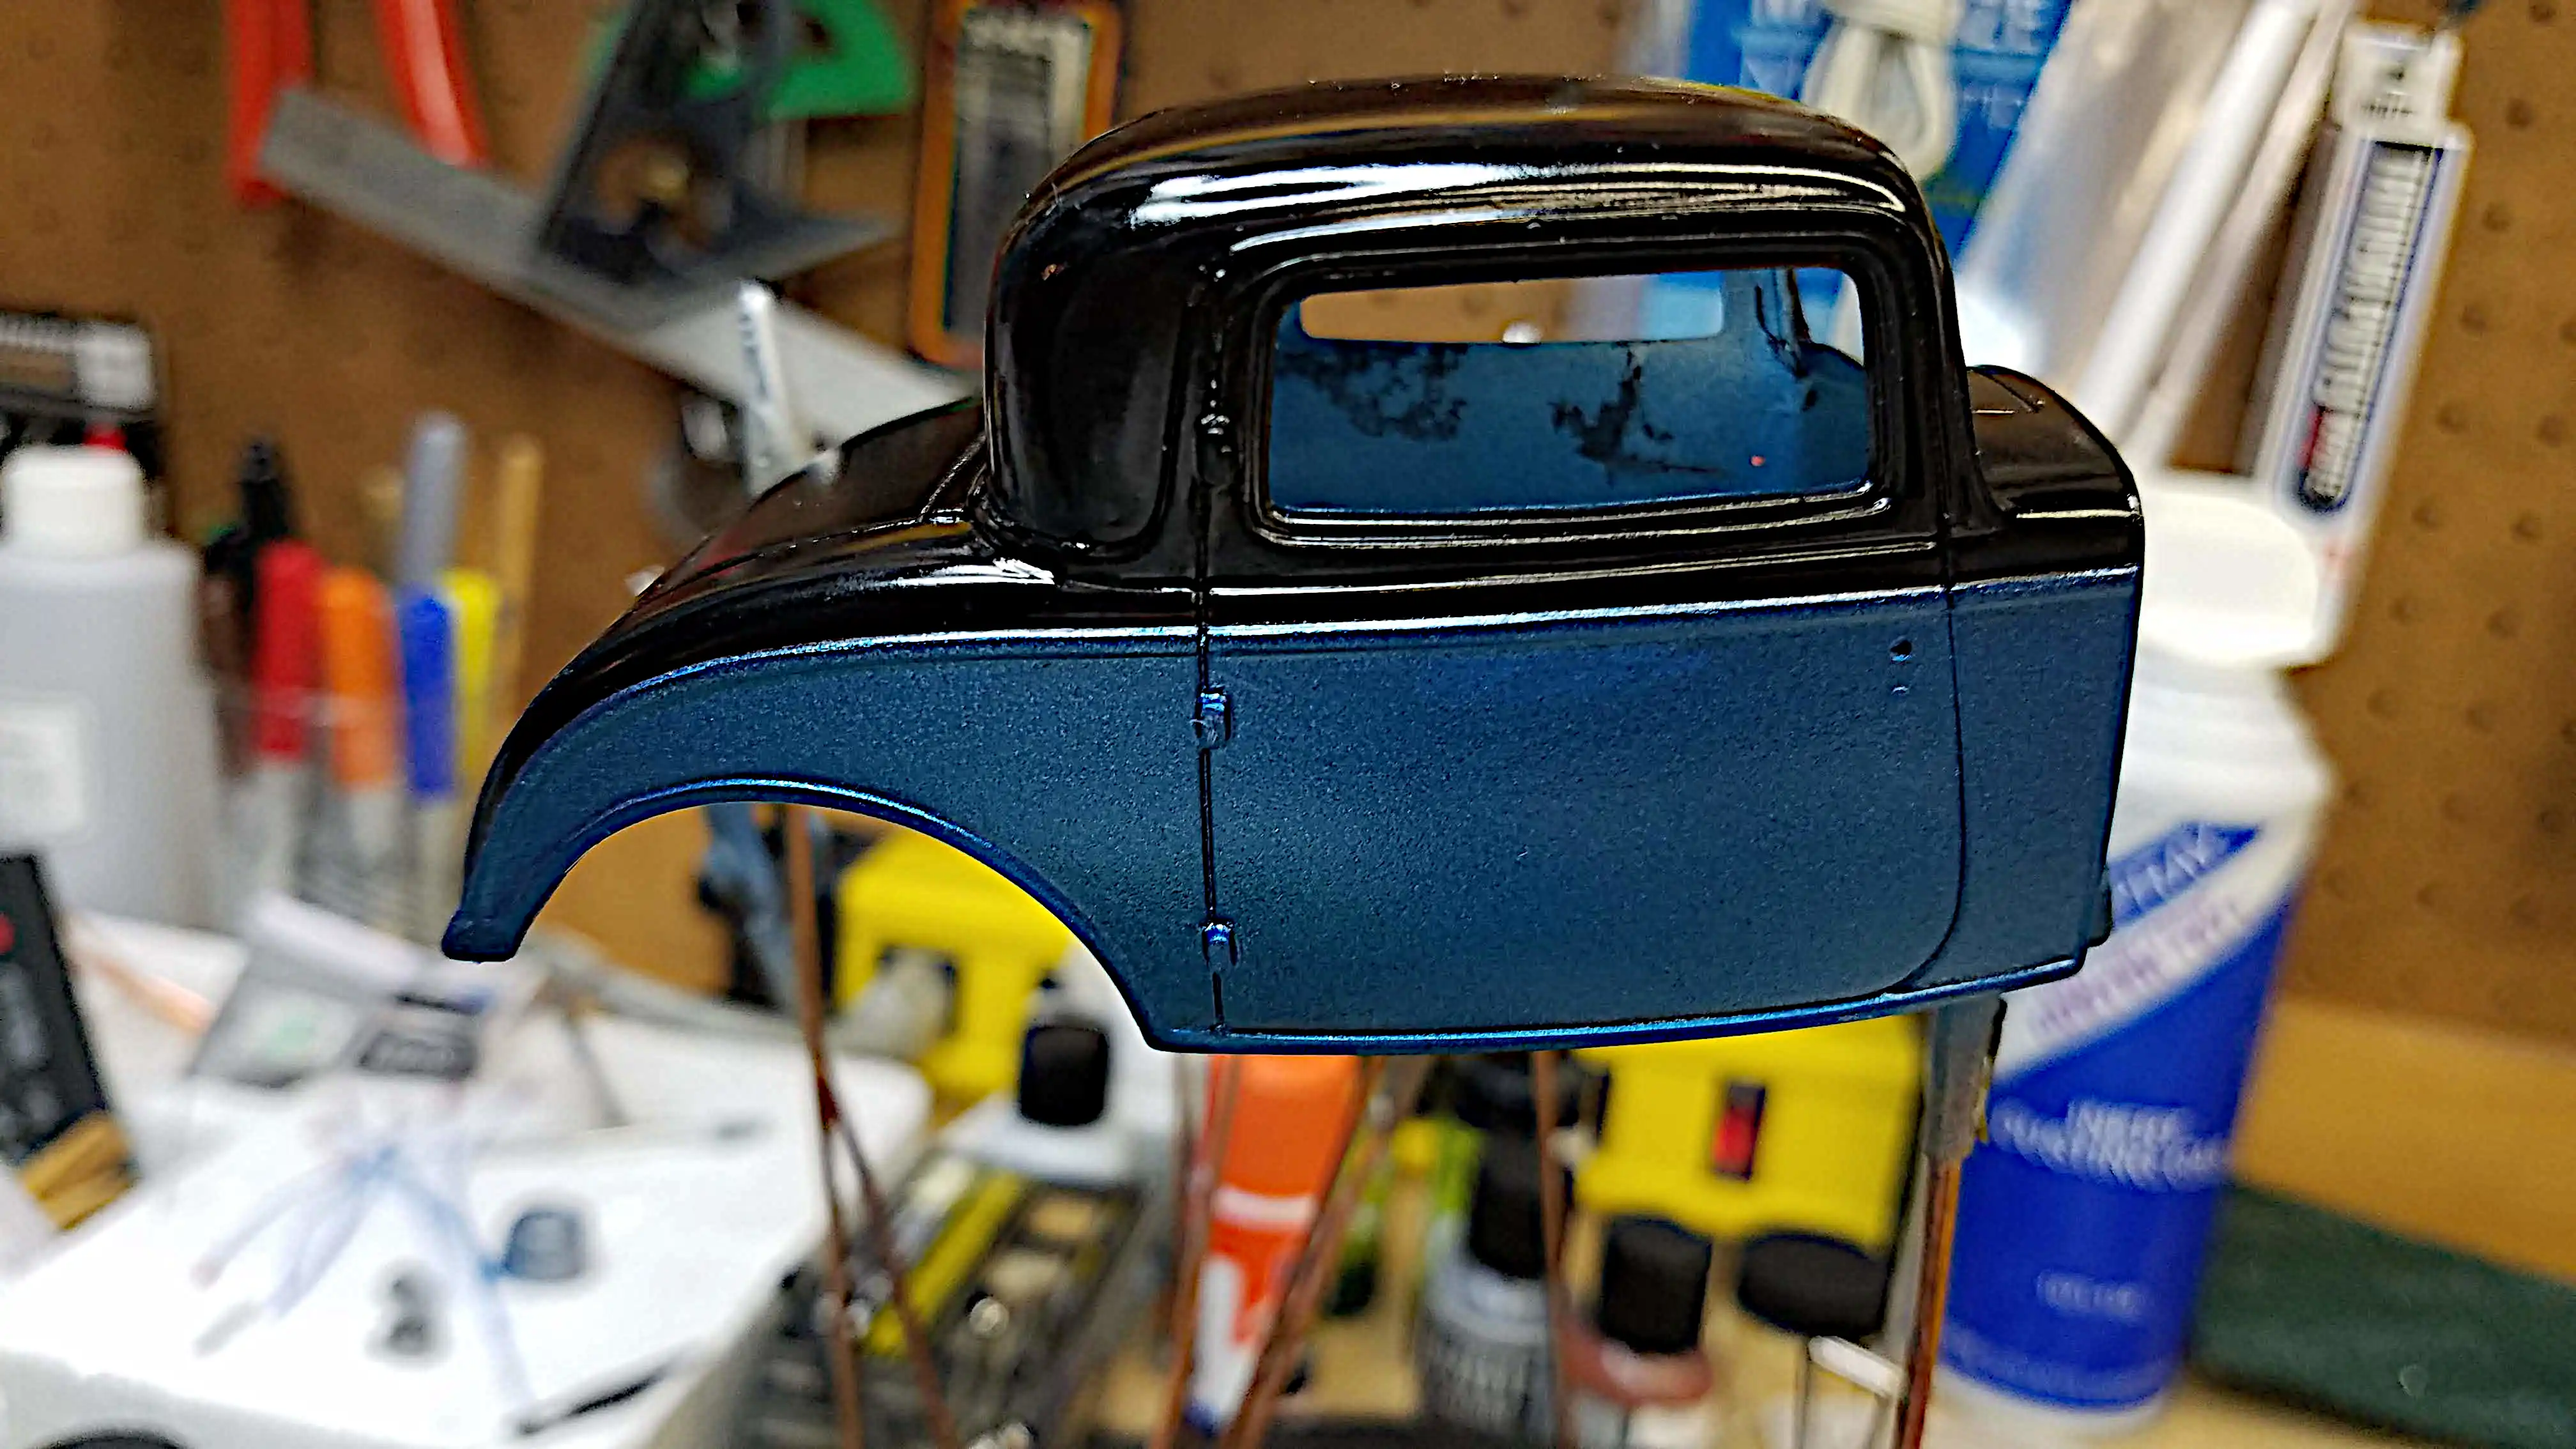
Click/tap photo to enlarge
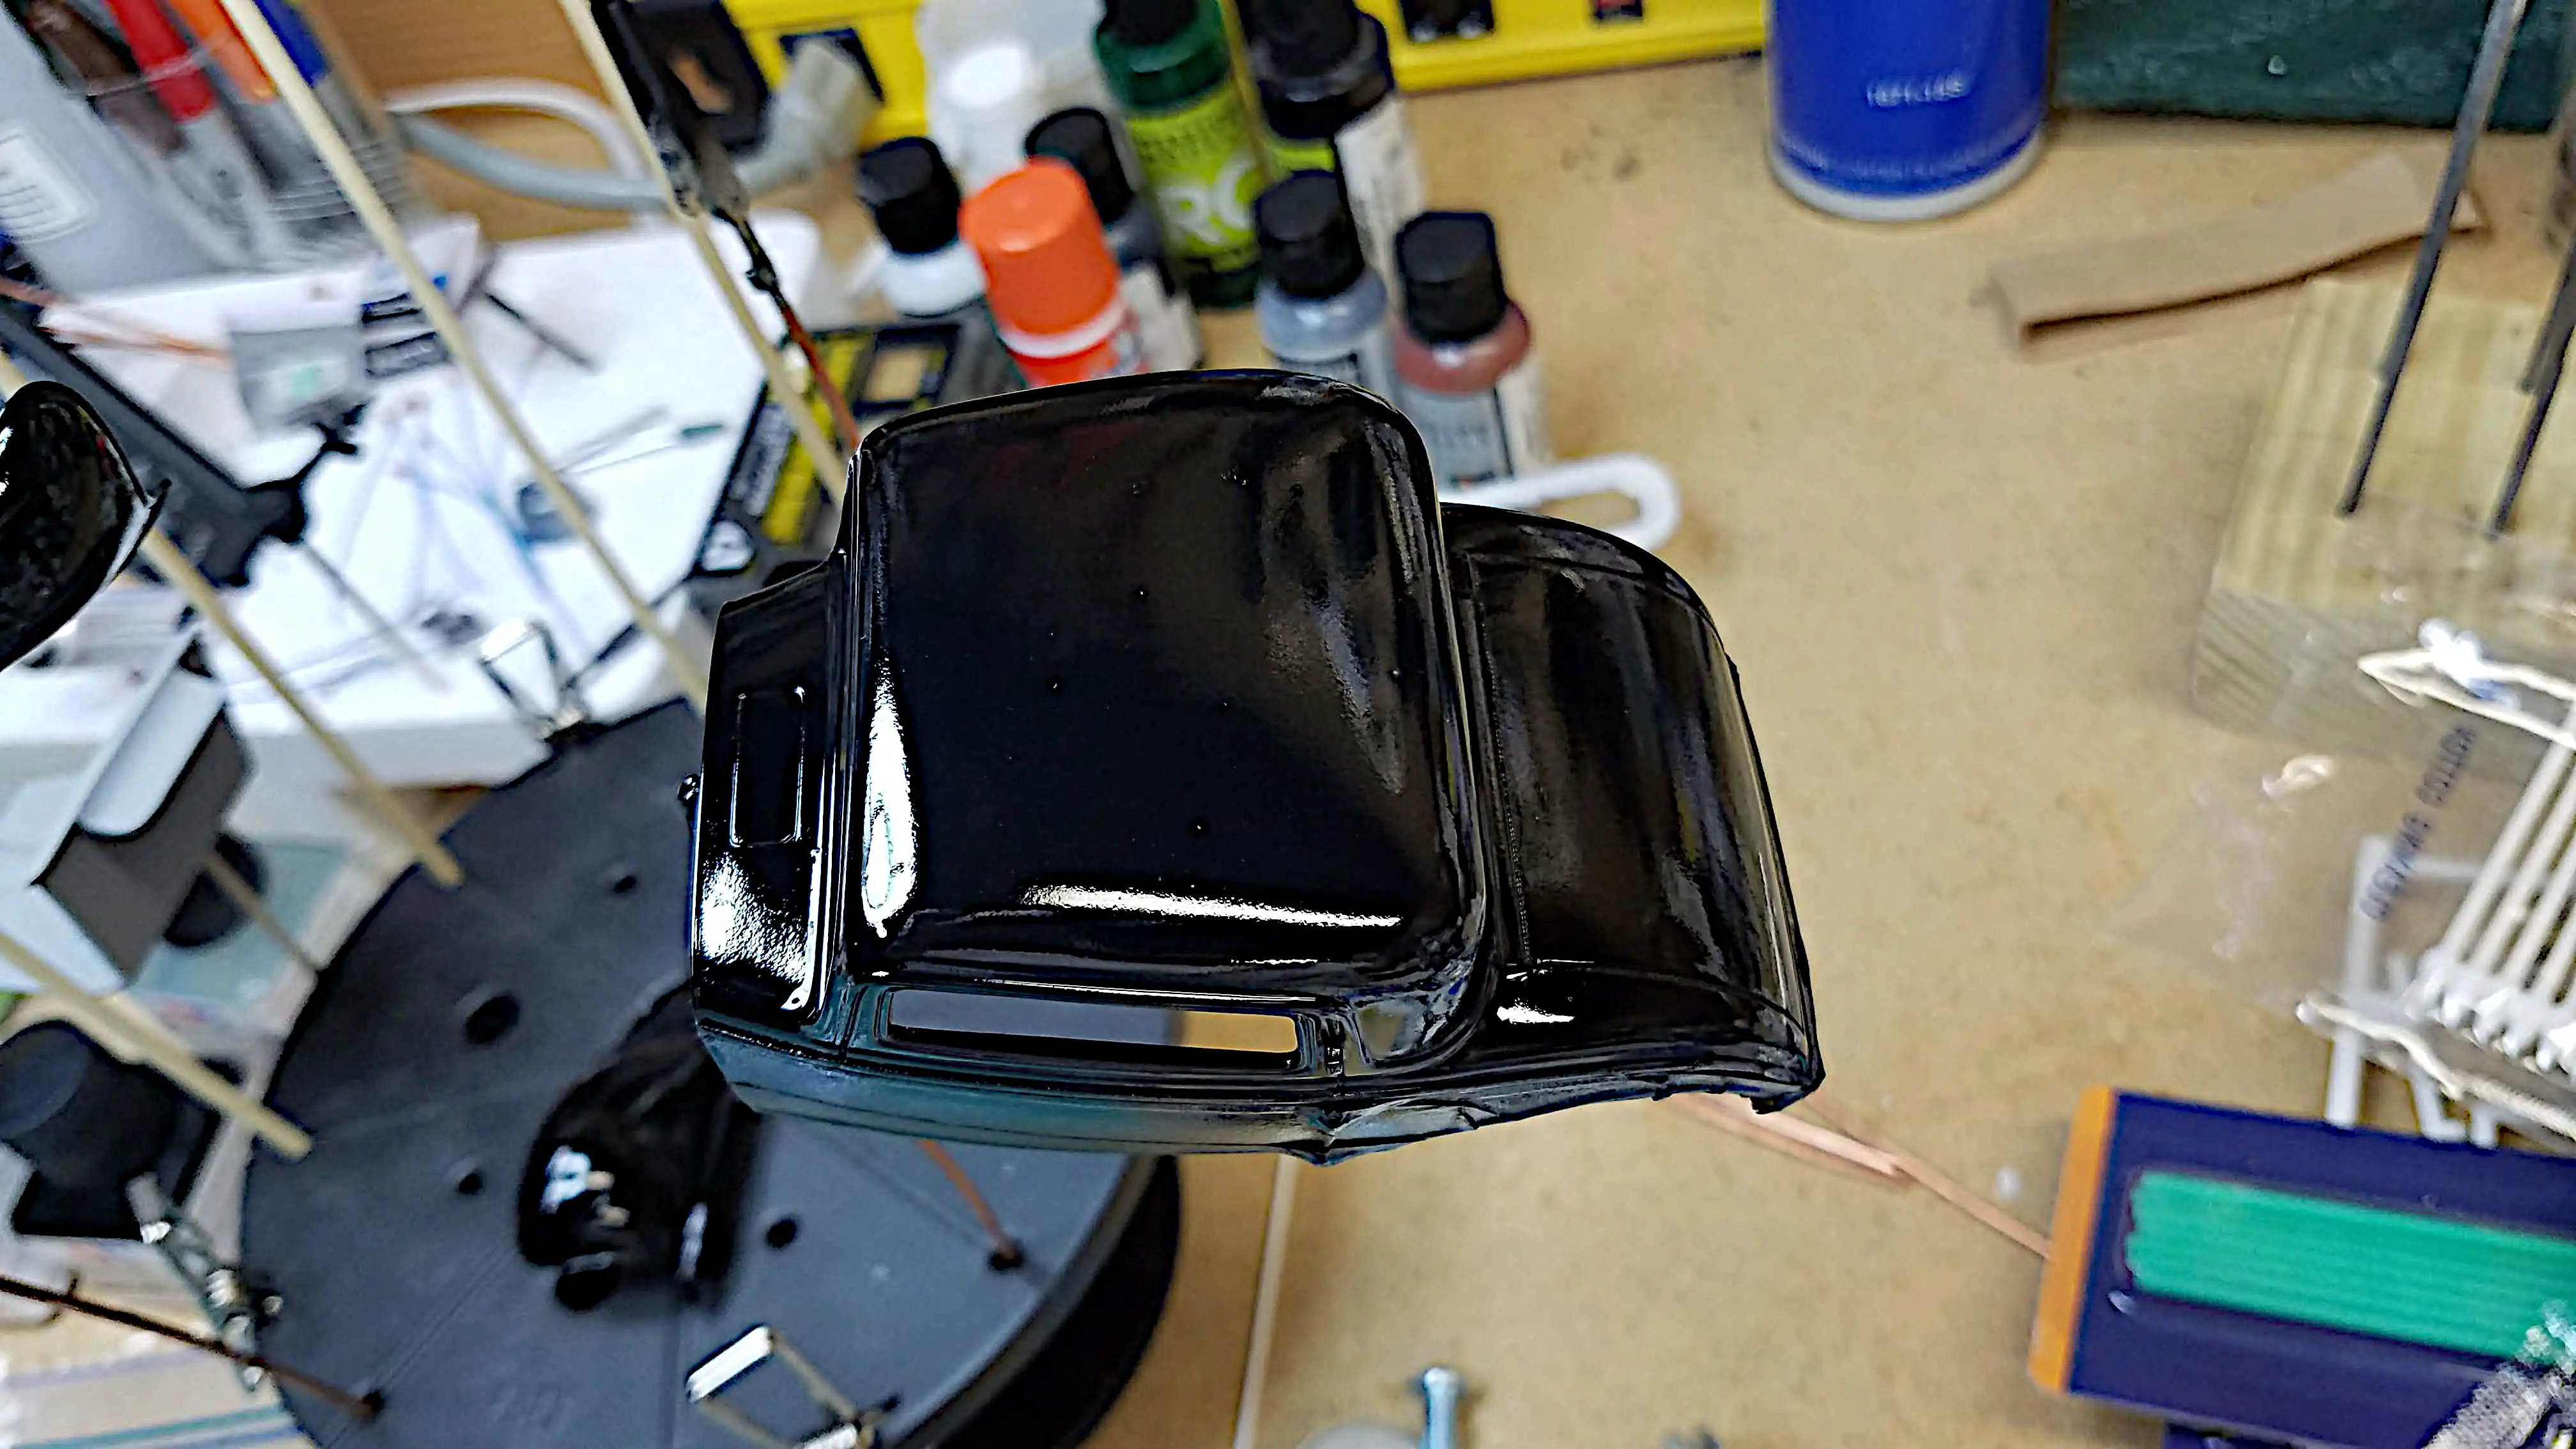
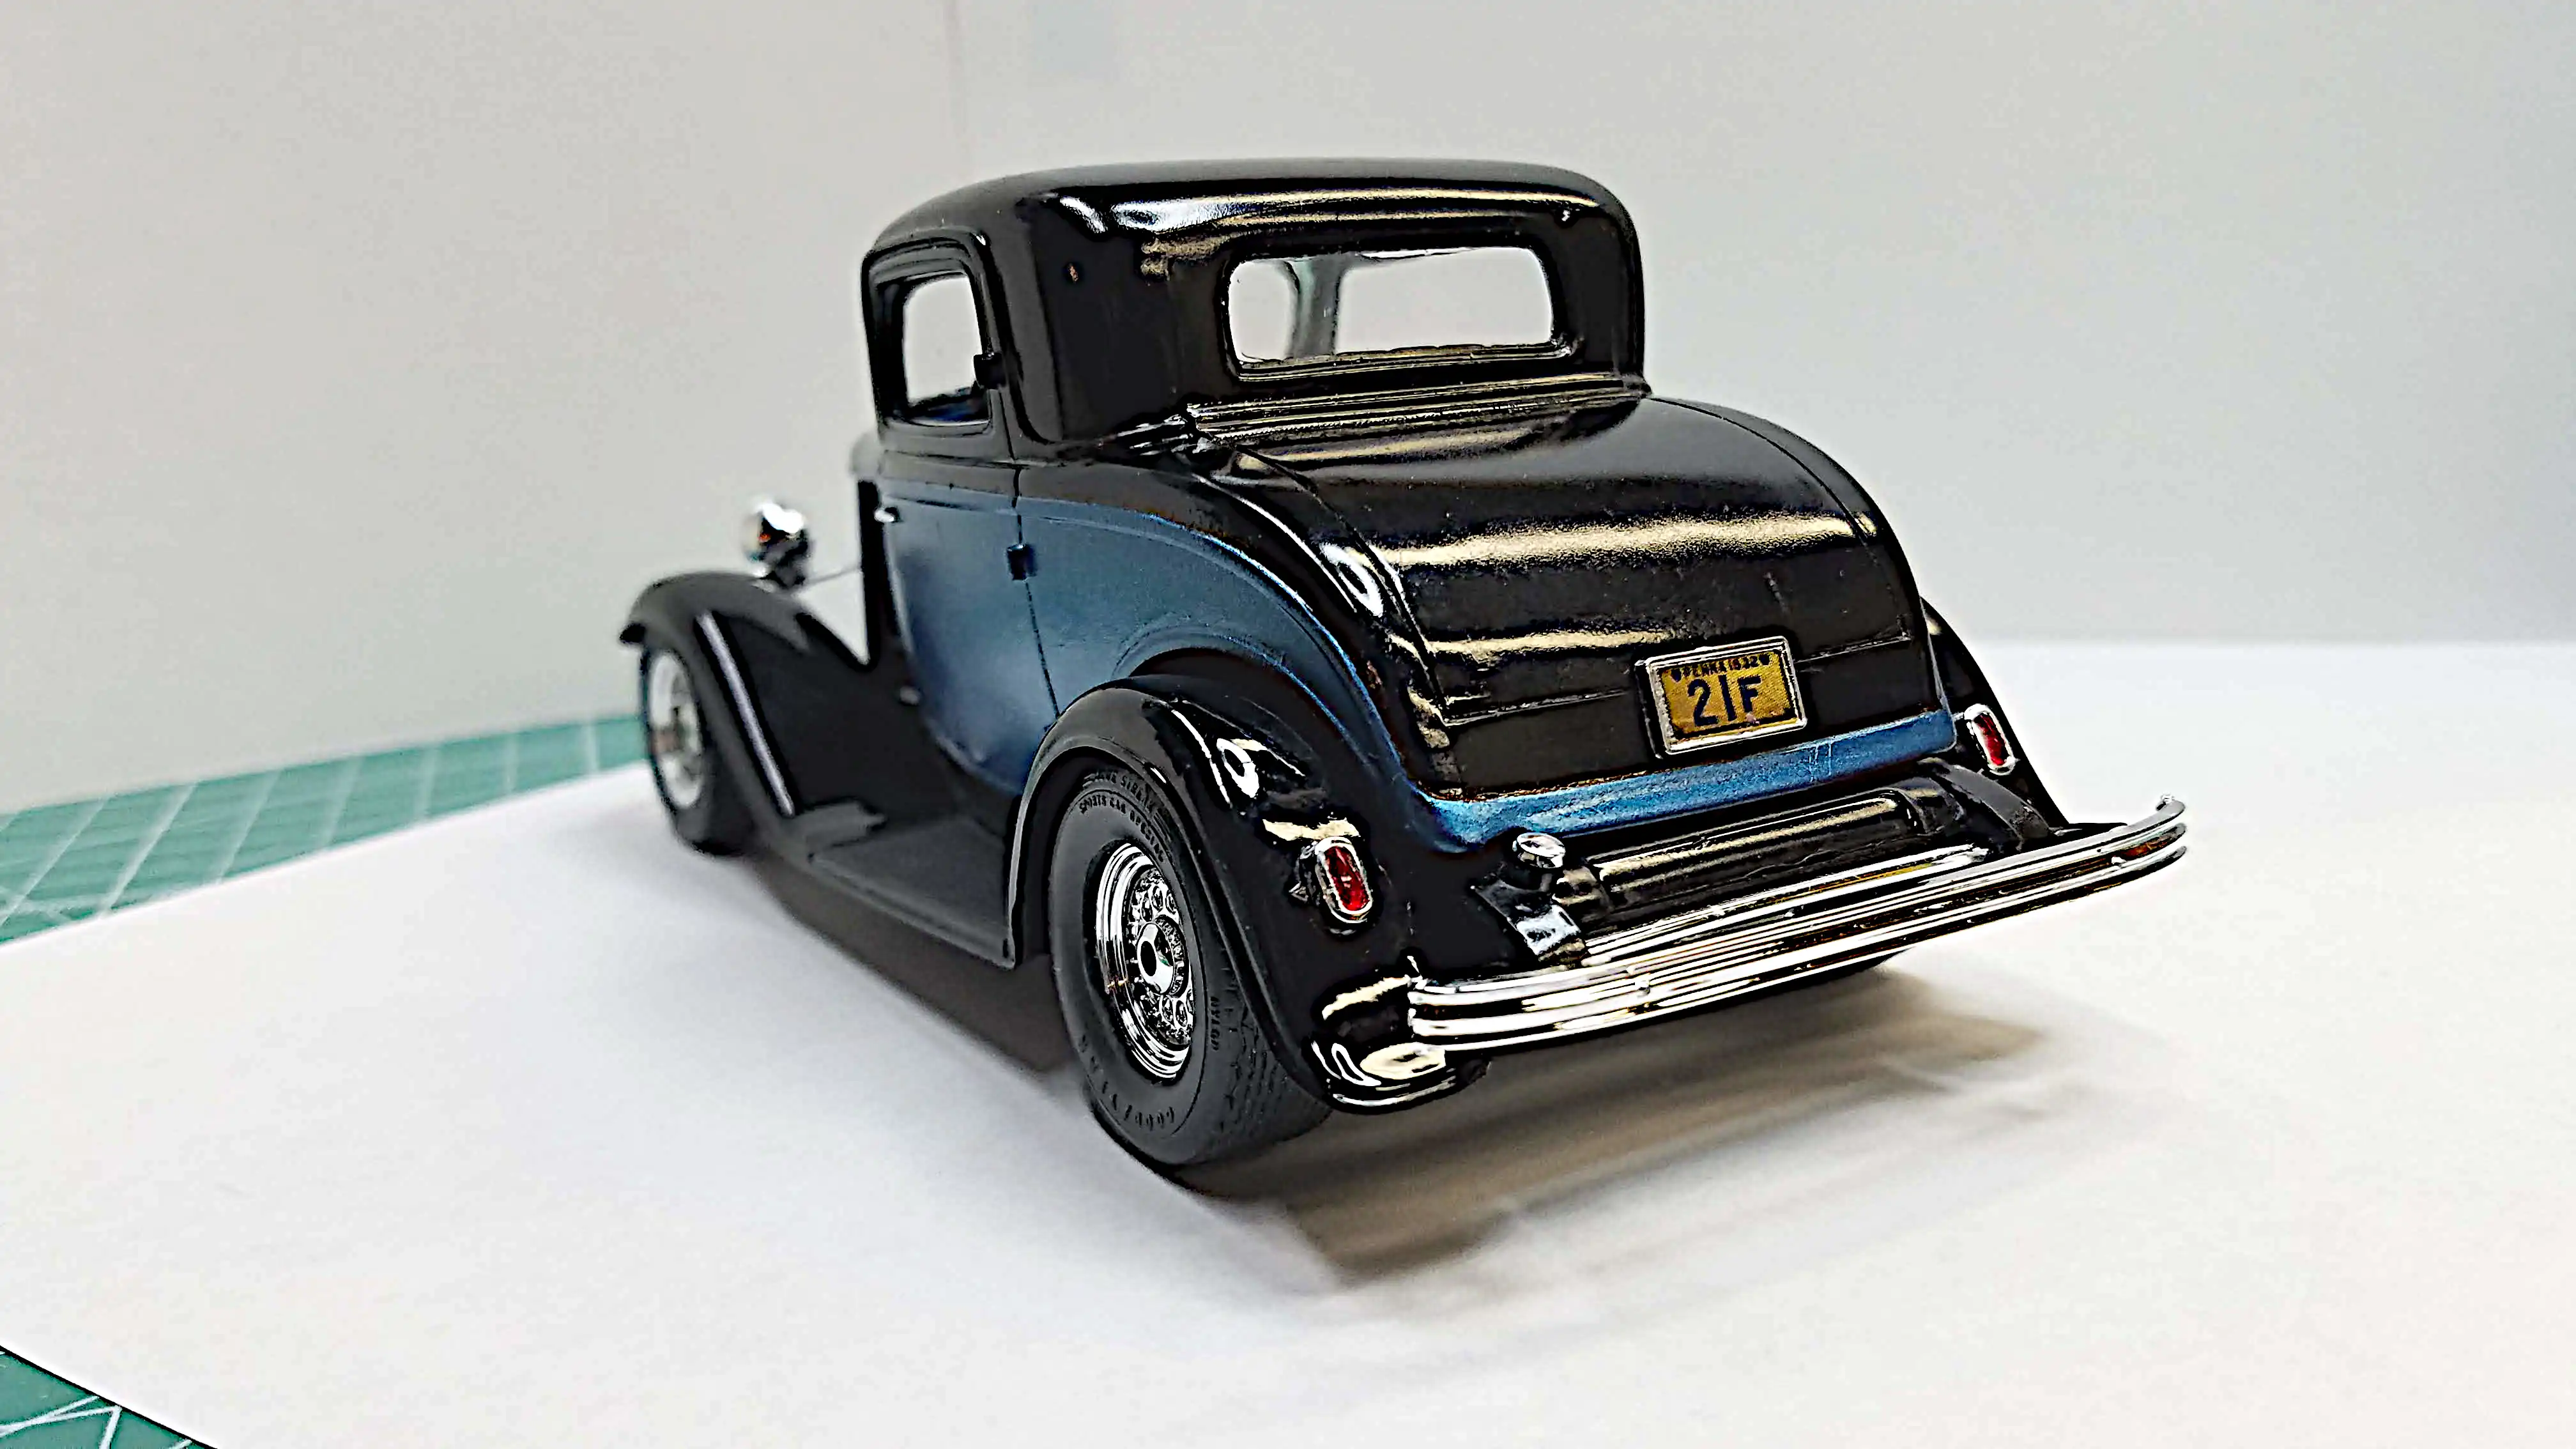
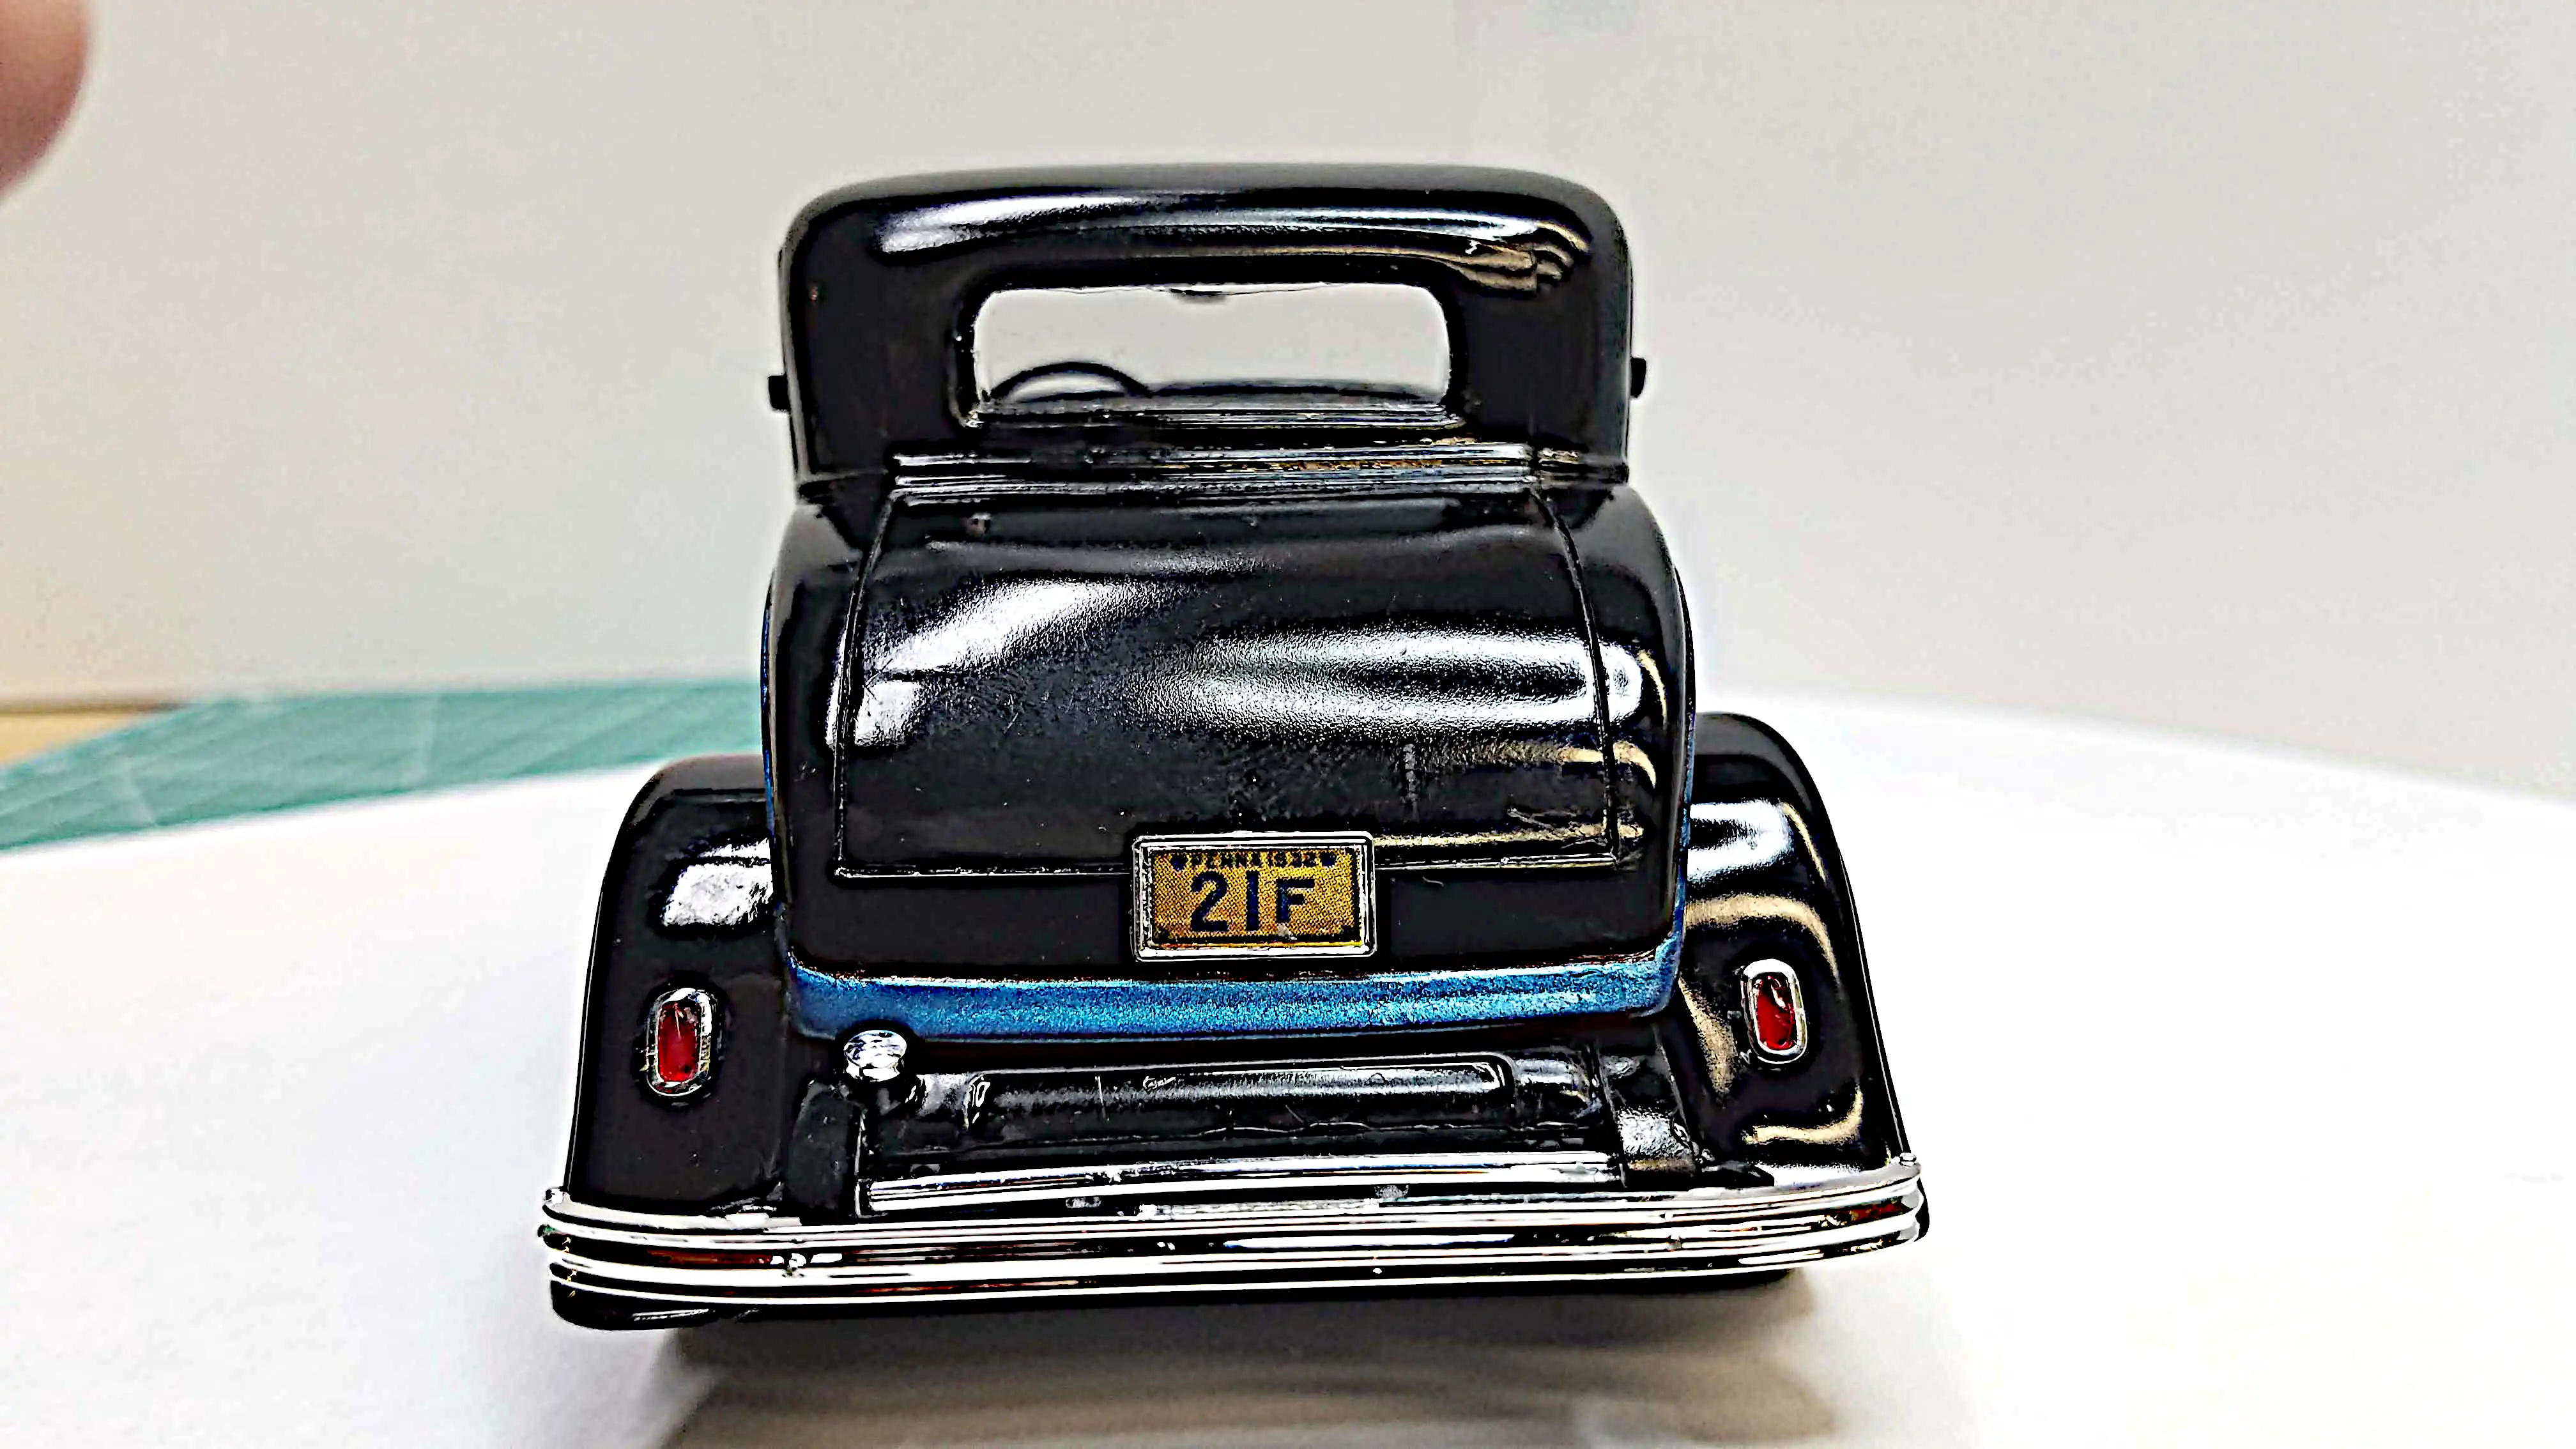
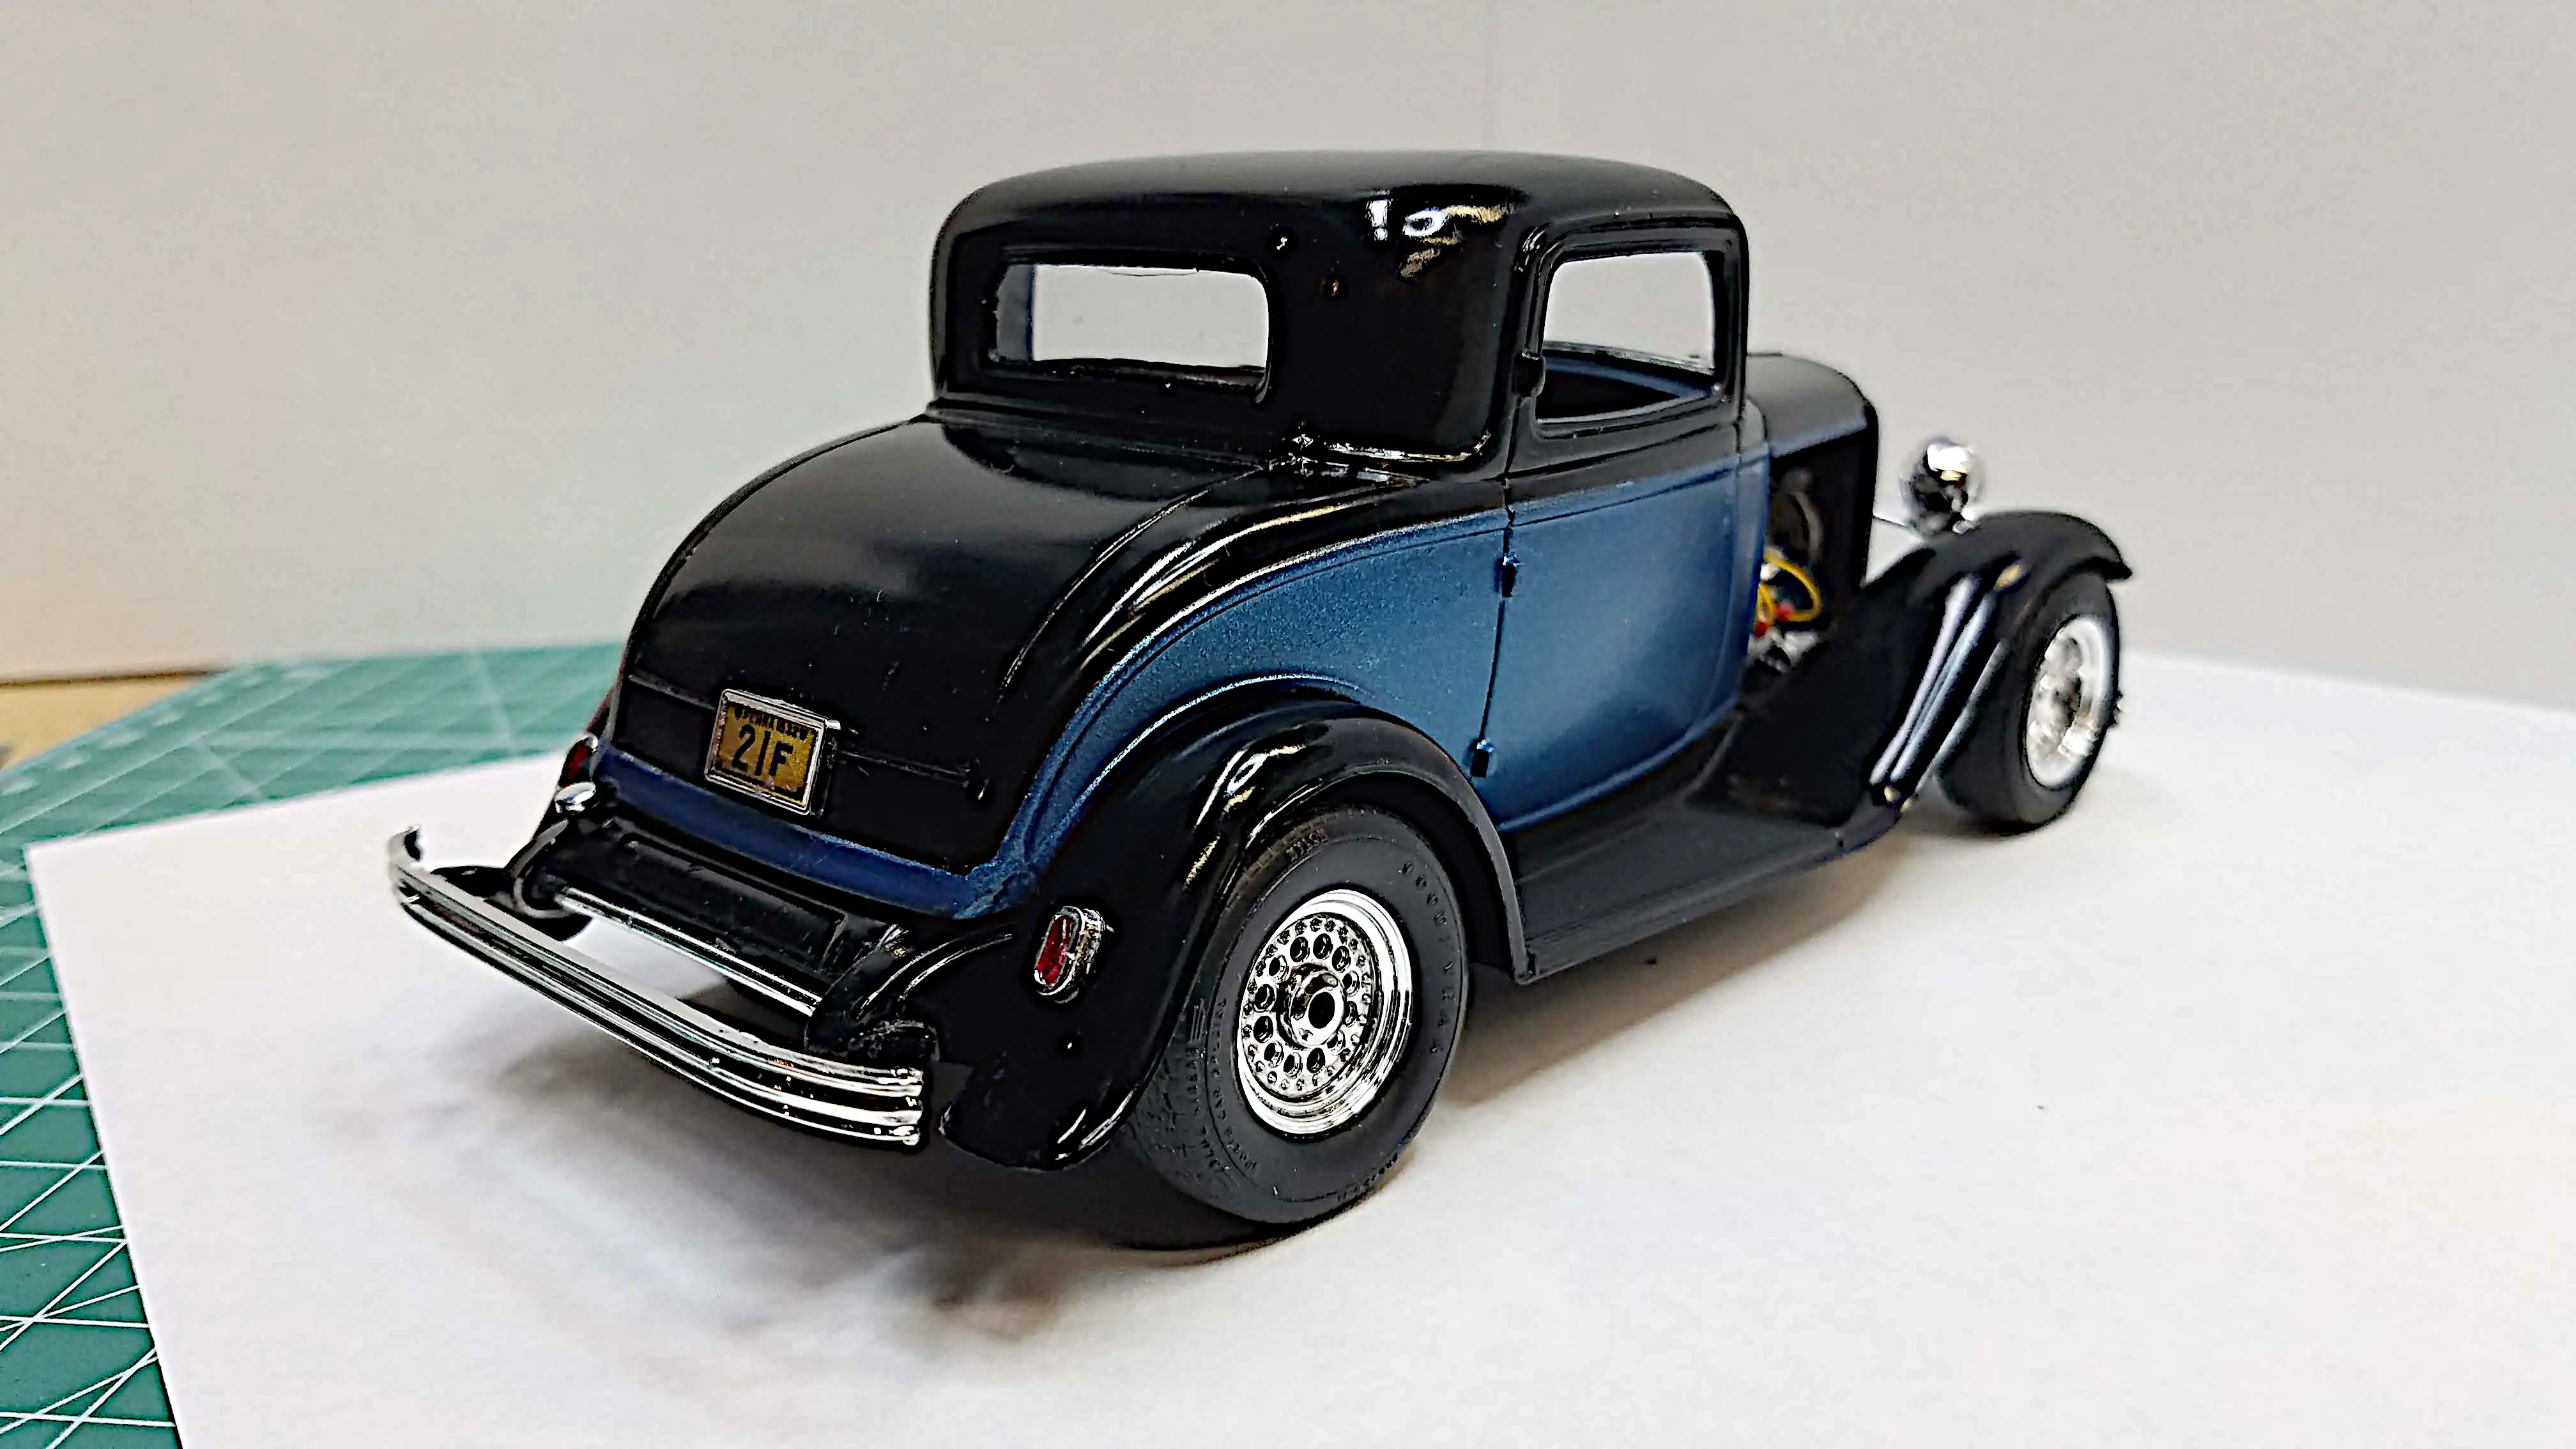
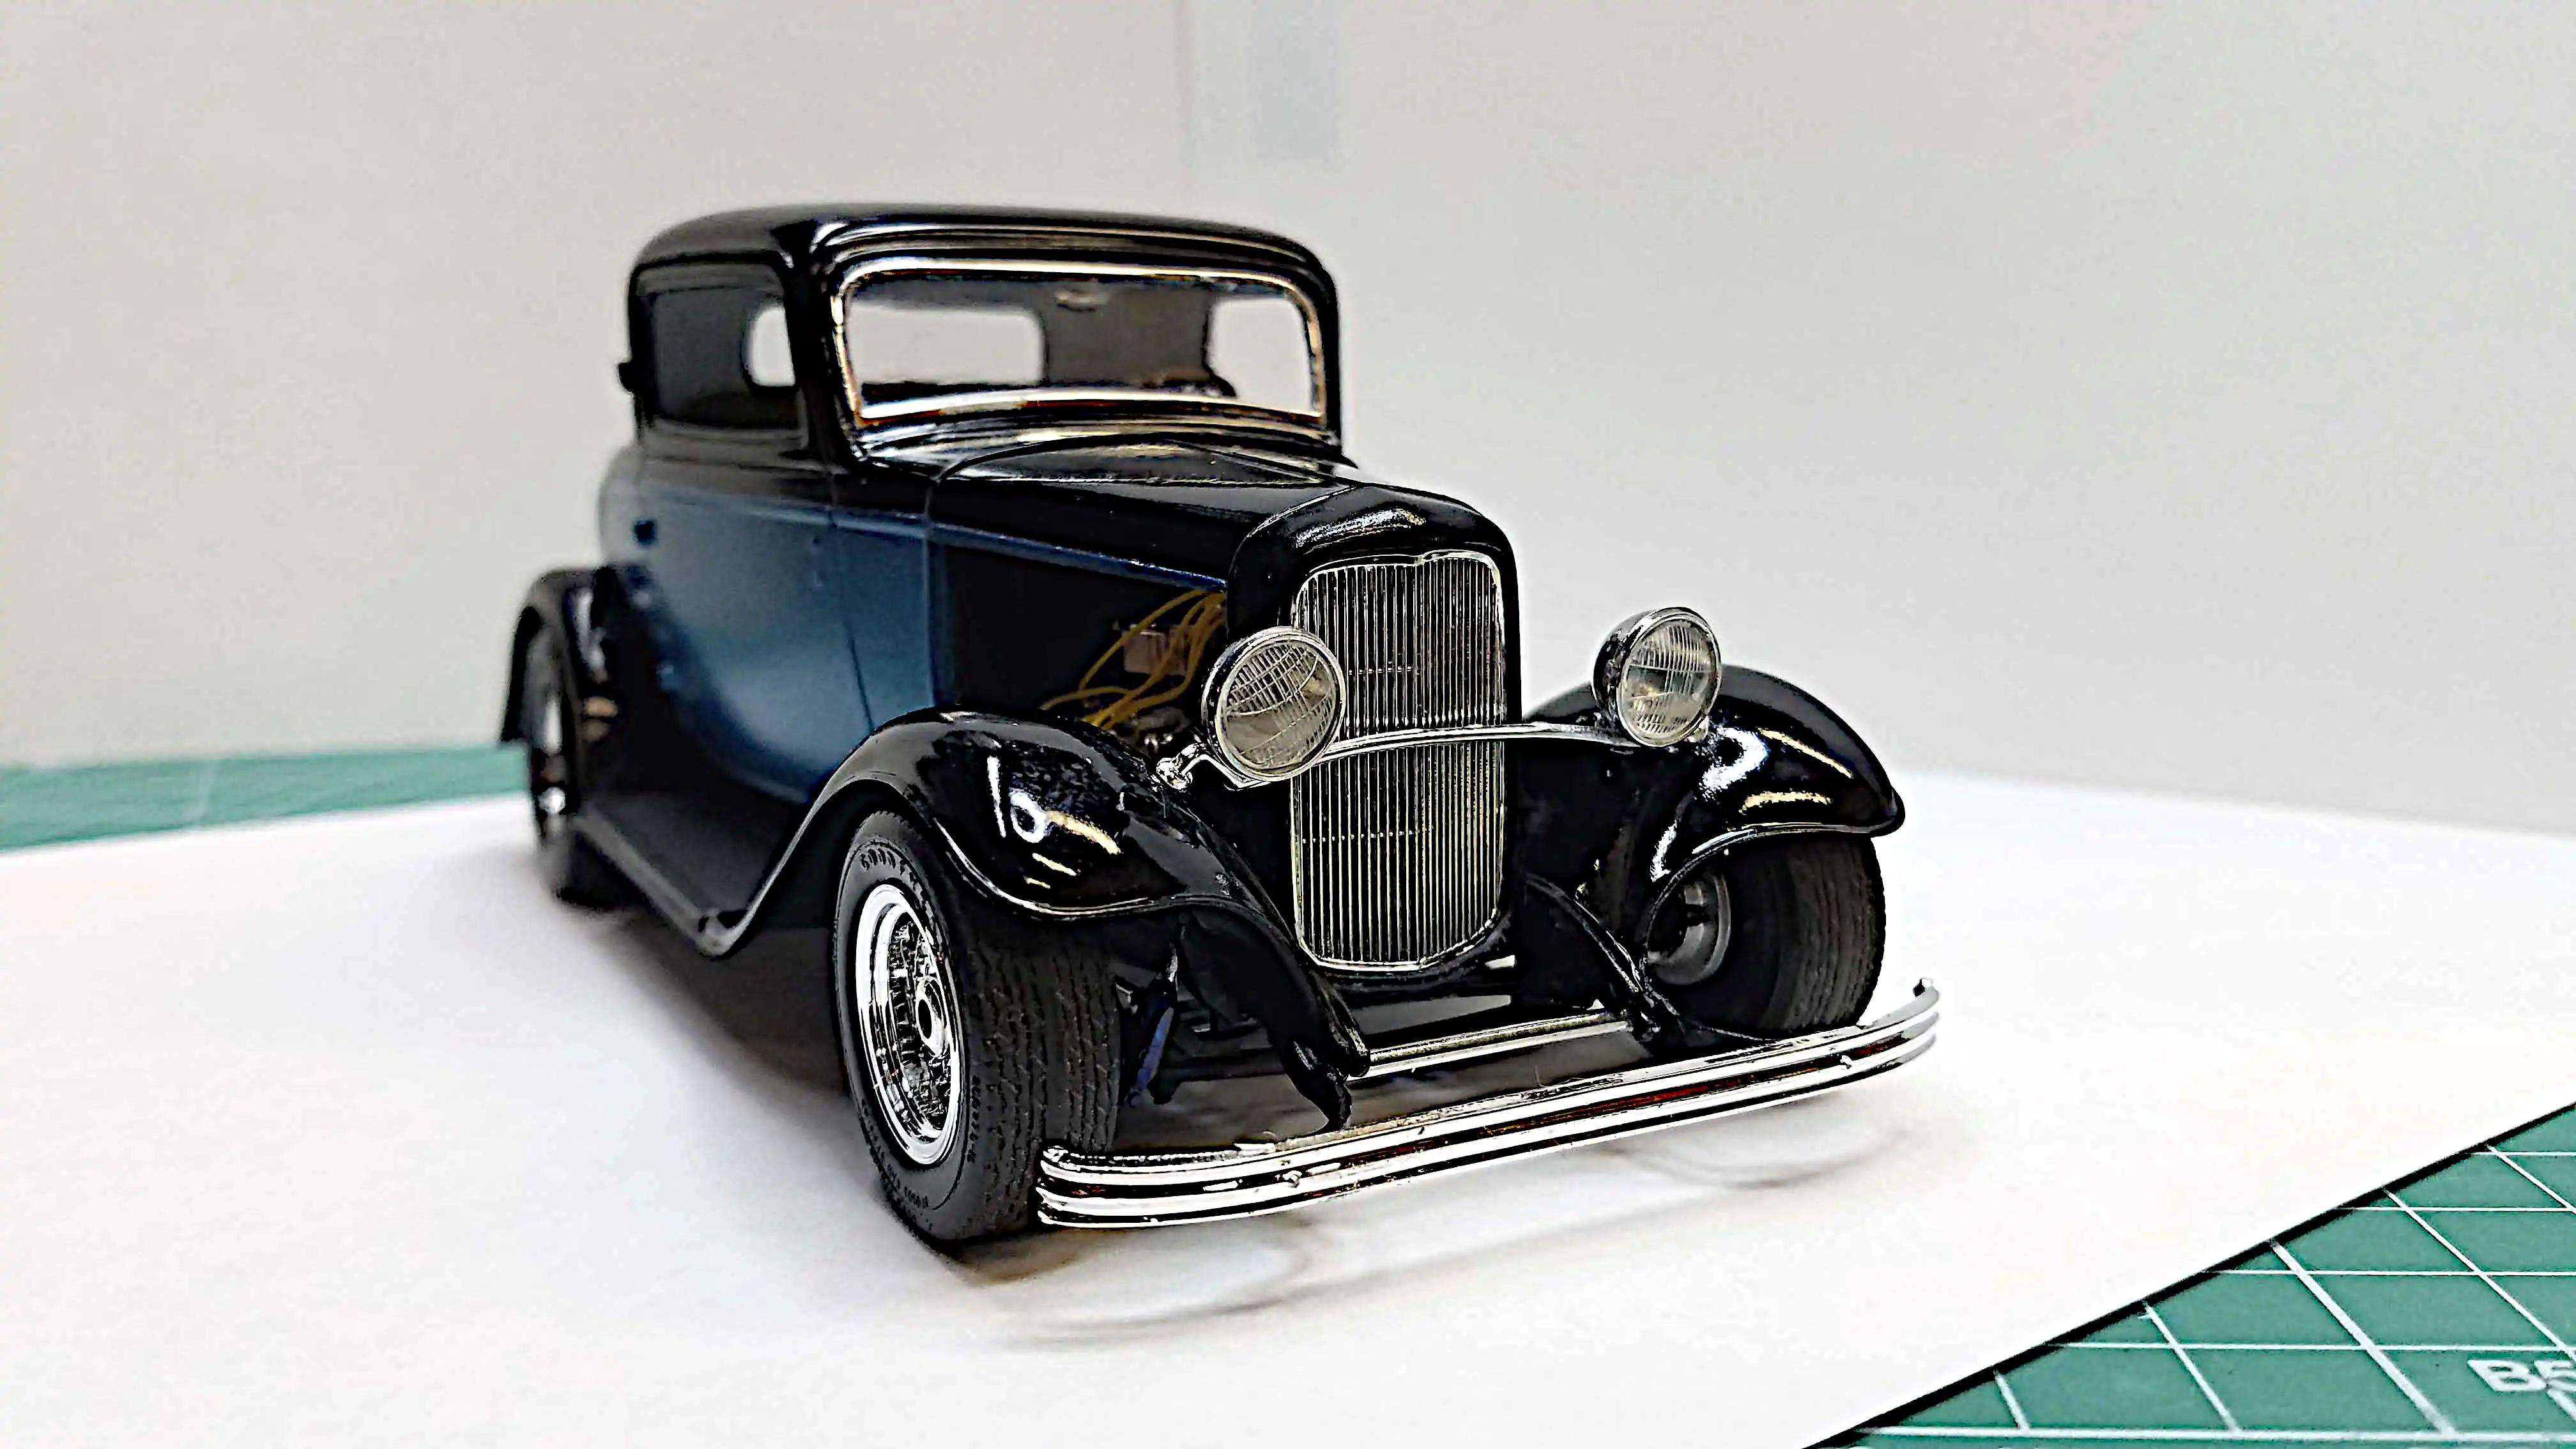 Finished build
I finally finished this build. Although I had build and paint disasters with this build, I think it turned out fairly well.
Photo 093
Click/tap photo to enlarge
 Finished build
I finally finished this build. Although I had build and paint disasters with this build, I think it turned out fairly well.
Photo 094
Click/tap photo to enlarge
 Finished build
I finally finished this build. Although I had build and paint disasters with this build, I think it turned out fairly well.
Photo 095
Click/tap photo to enlarge
 Finished build
I finally finished this build. Although I had build and paint disasters with this build, I think it turned out fairly well.
Photo 096
Click/tap photo to enlarge
 Finished build
I finally finished this build. Although I had build and paint disasters with this build, I think it turned out fairly well.
Photo 097
Click/tap photo to enlarge
 Finished build
I finally finished this build. Although I had build and paint disasters with this build, I think it turned out fairly well.
Photo 098
Click/tap photo to enlarge
 Finished build
I finally finished this build. Although I had build and paint disasters with this build, I think it turned out fairly well.
Photo 099
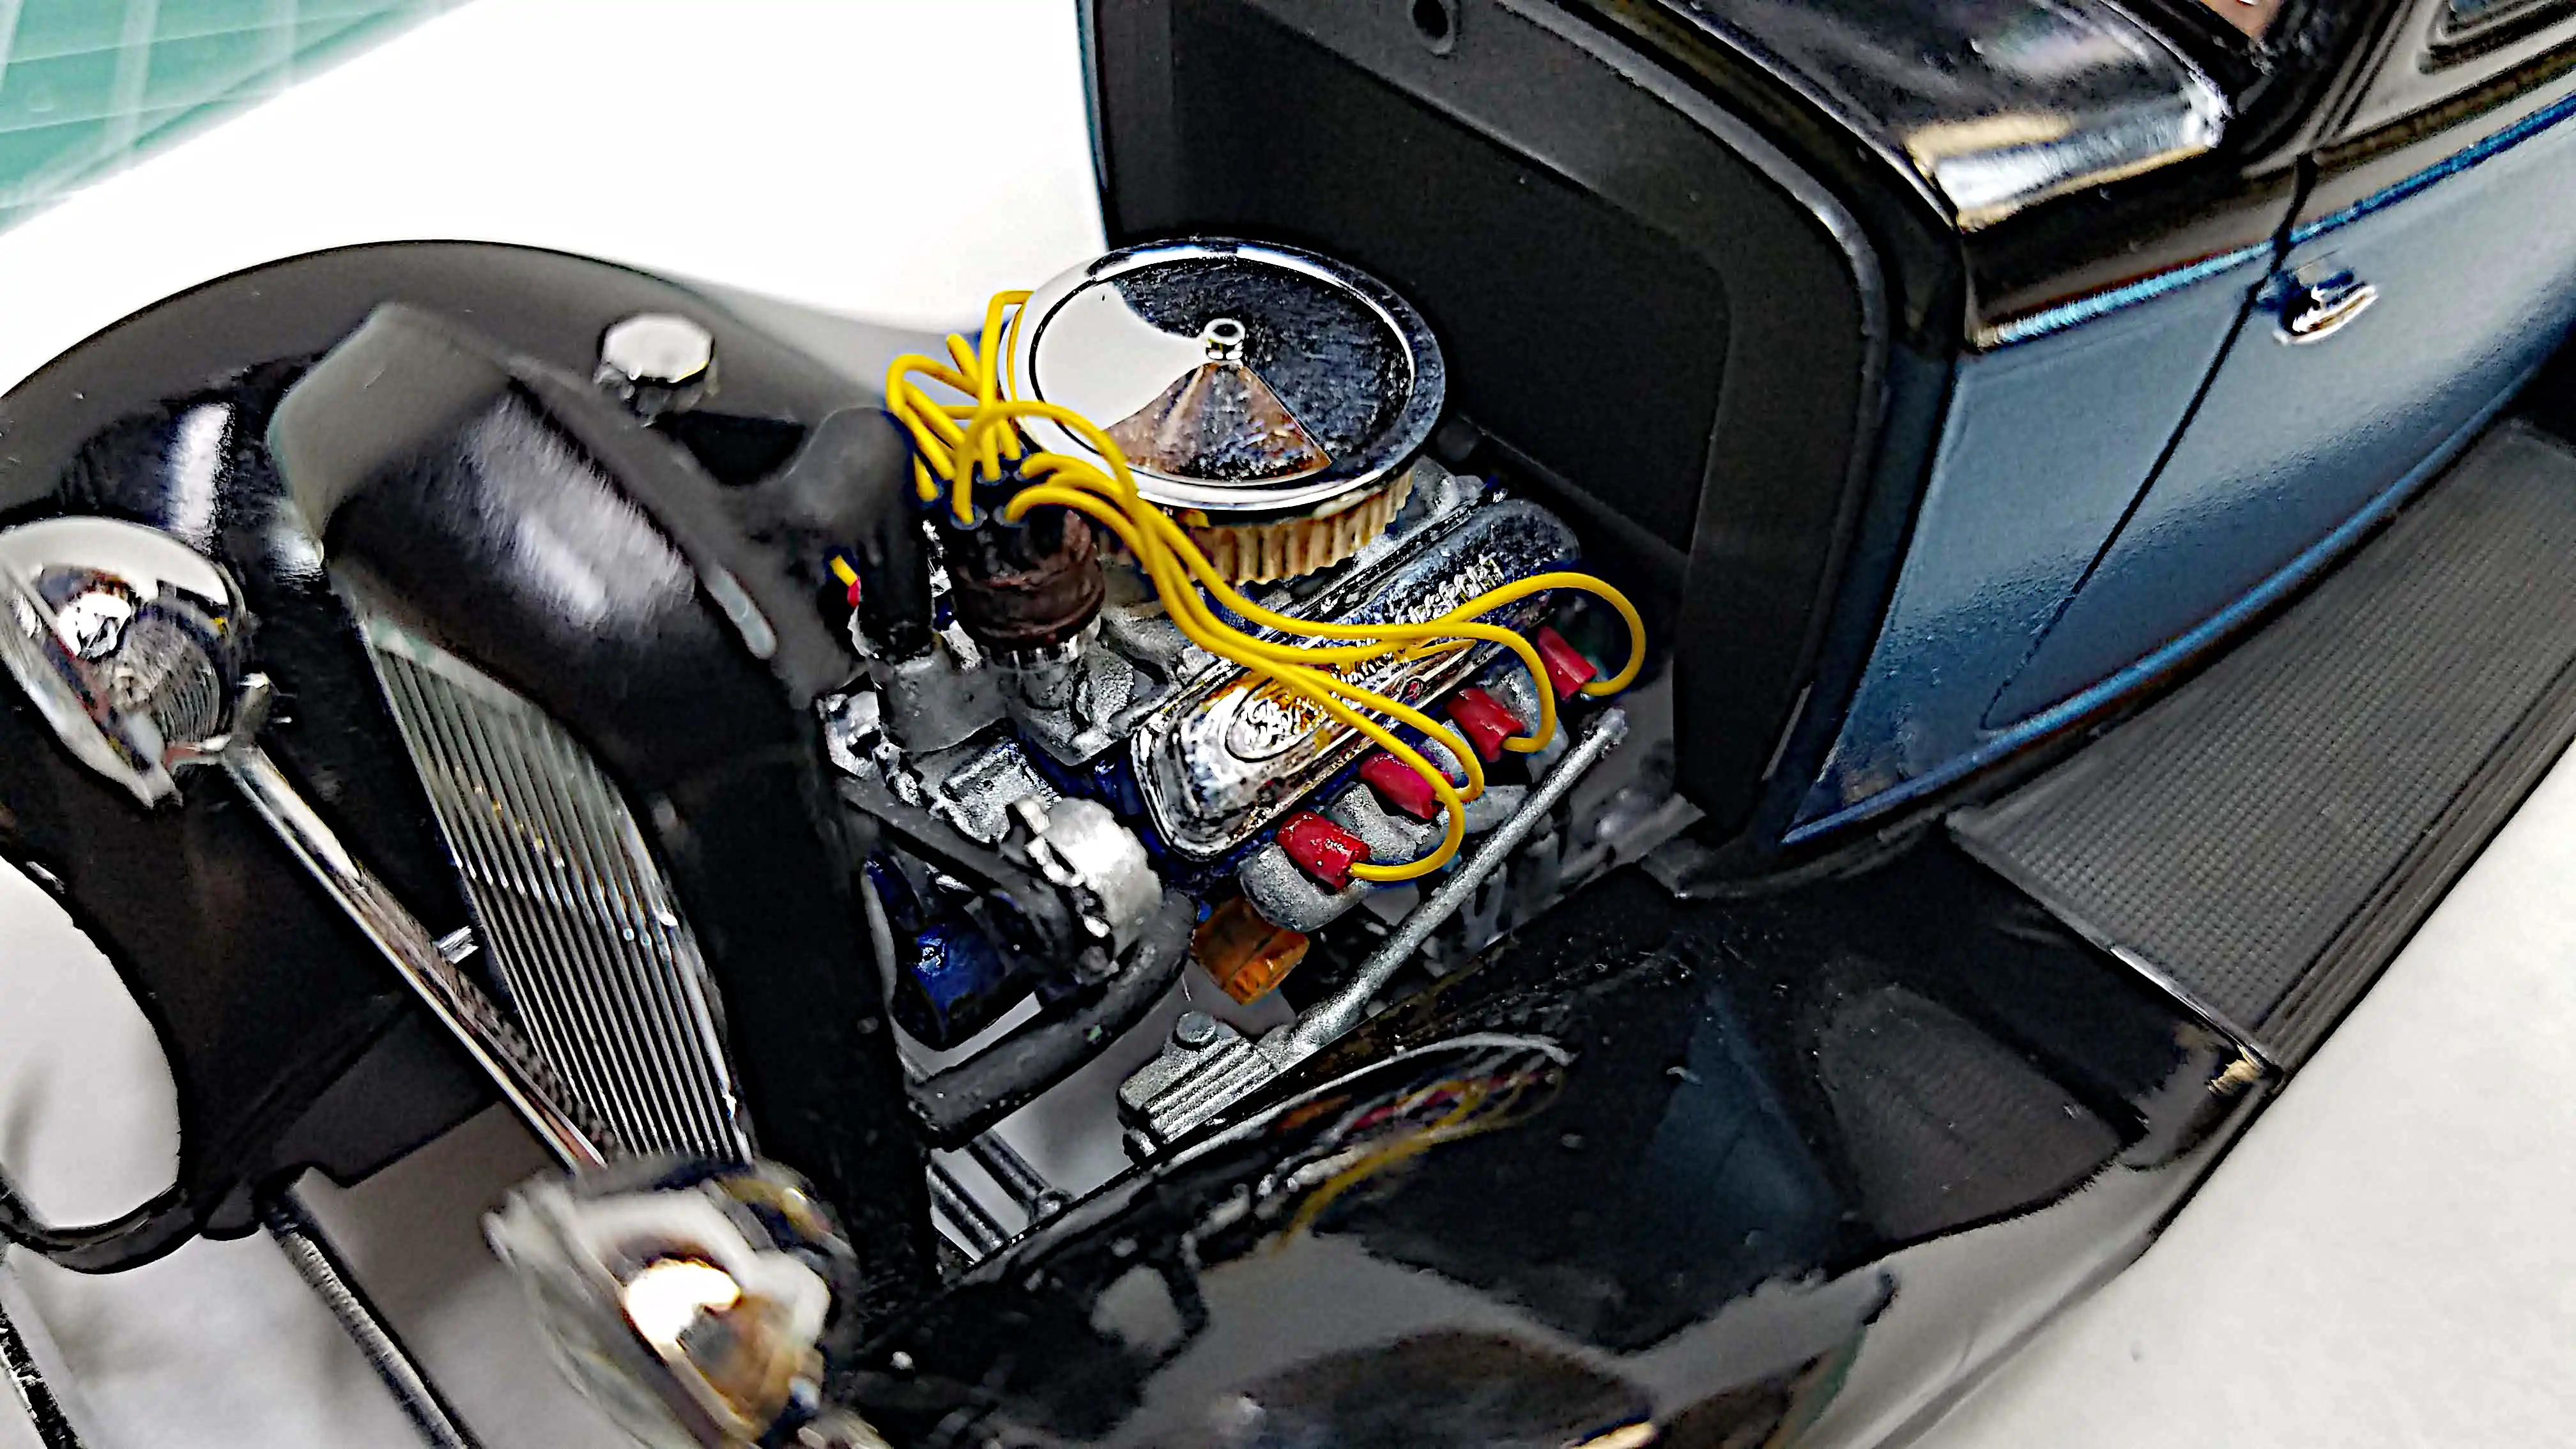
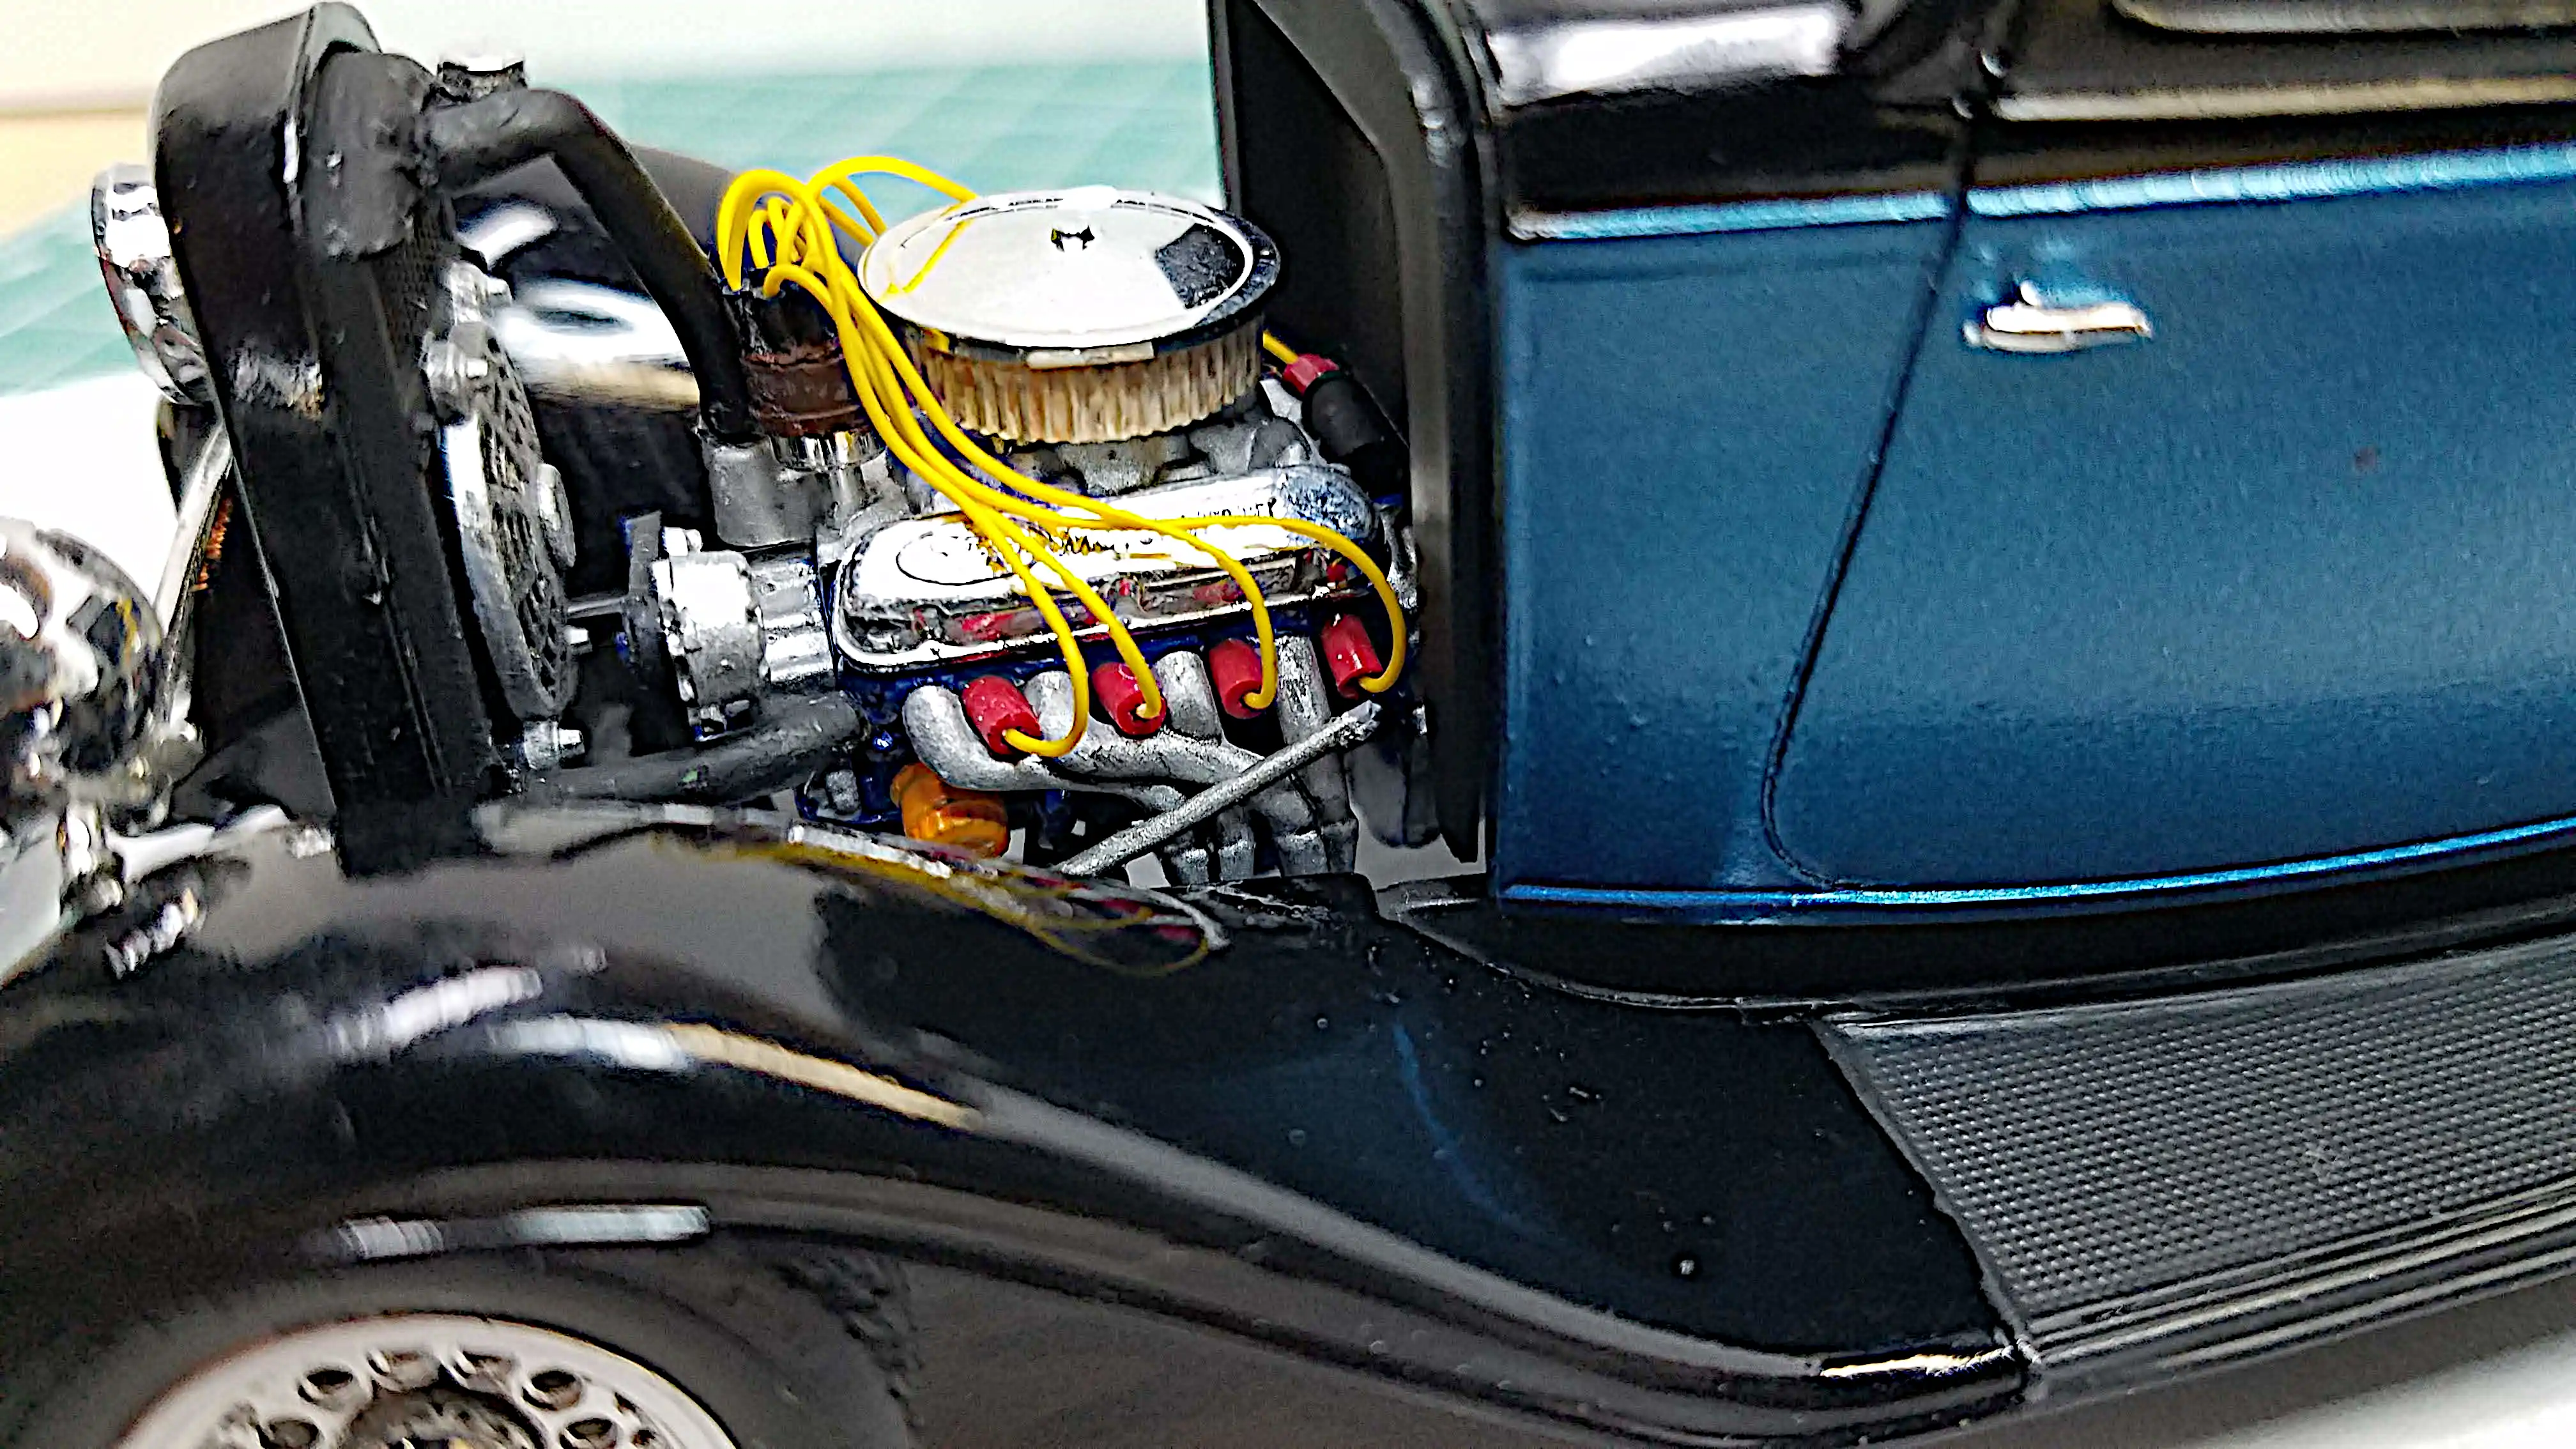
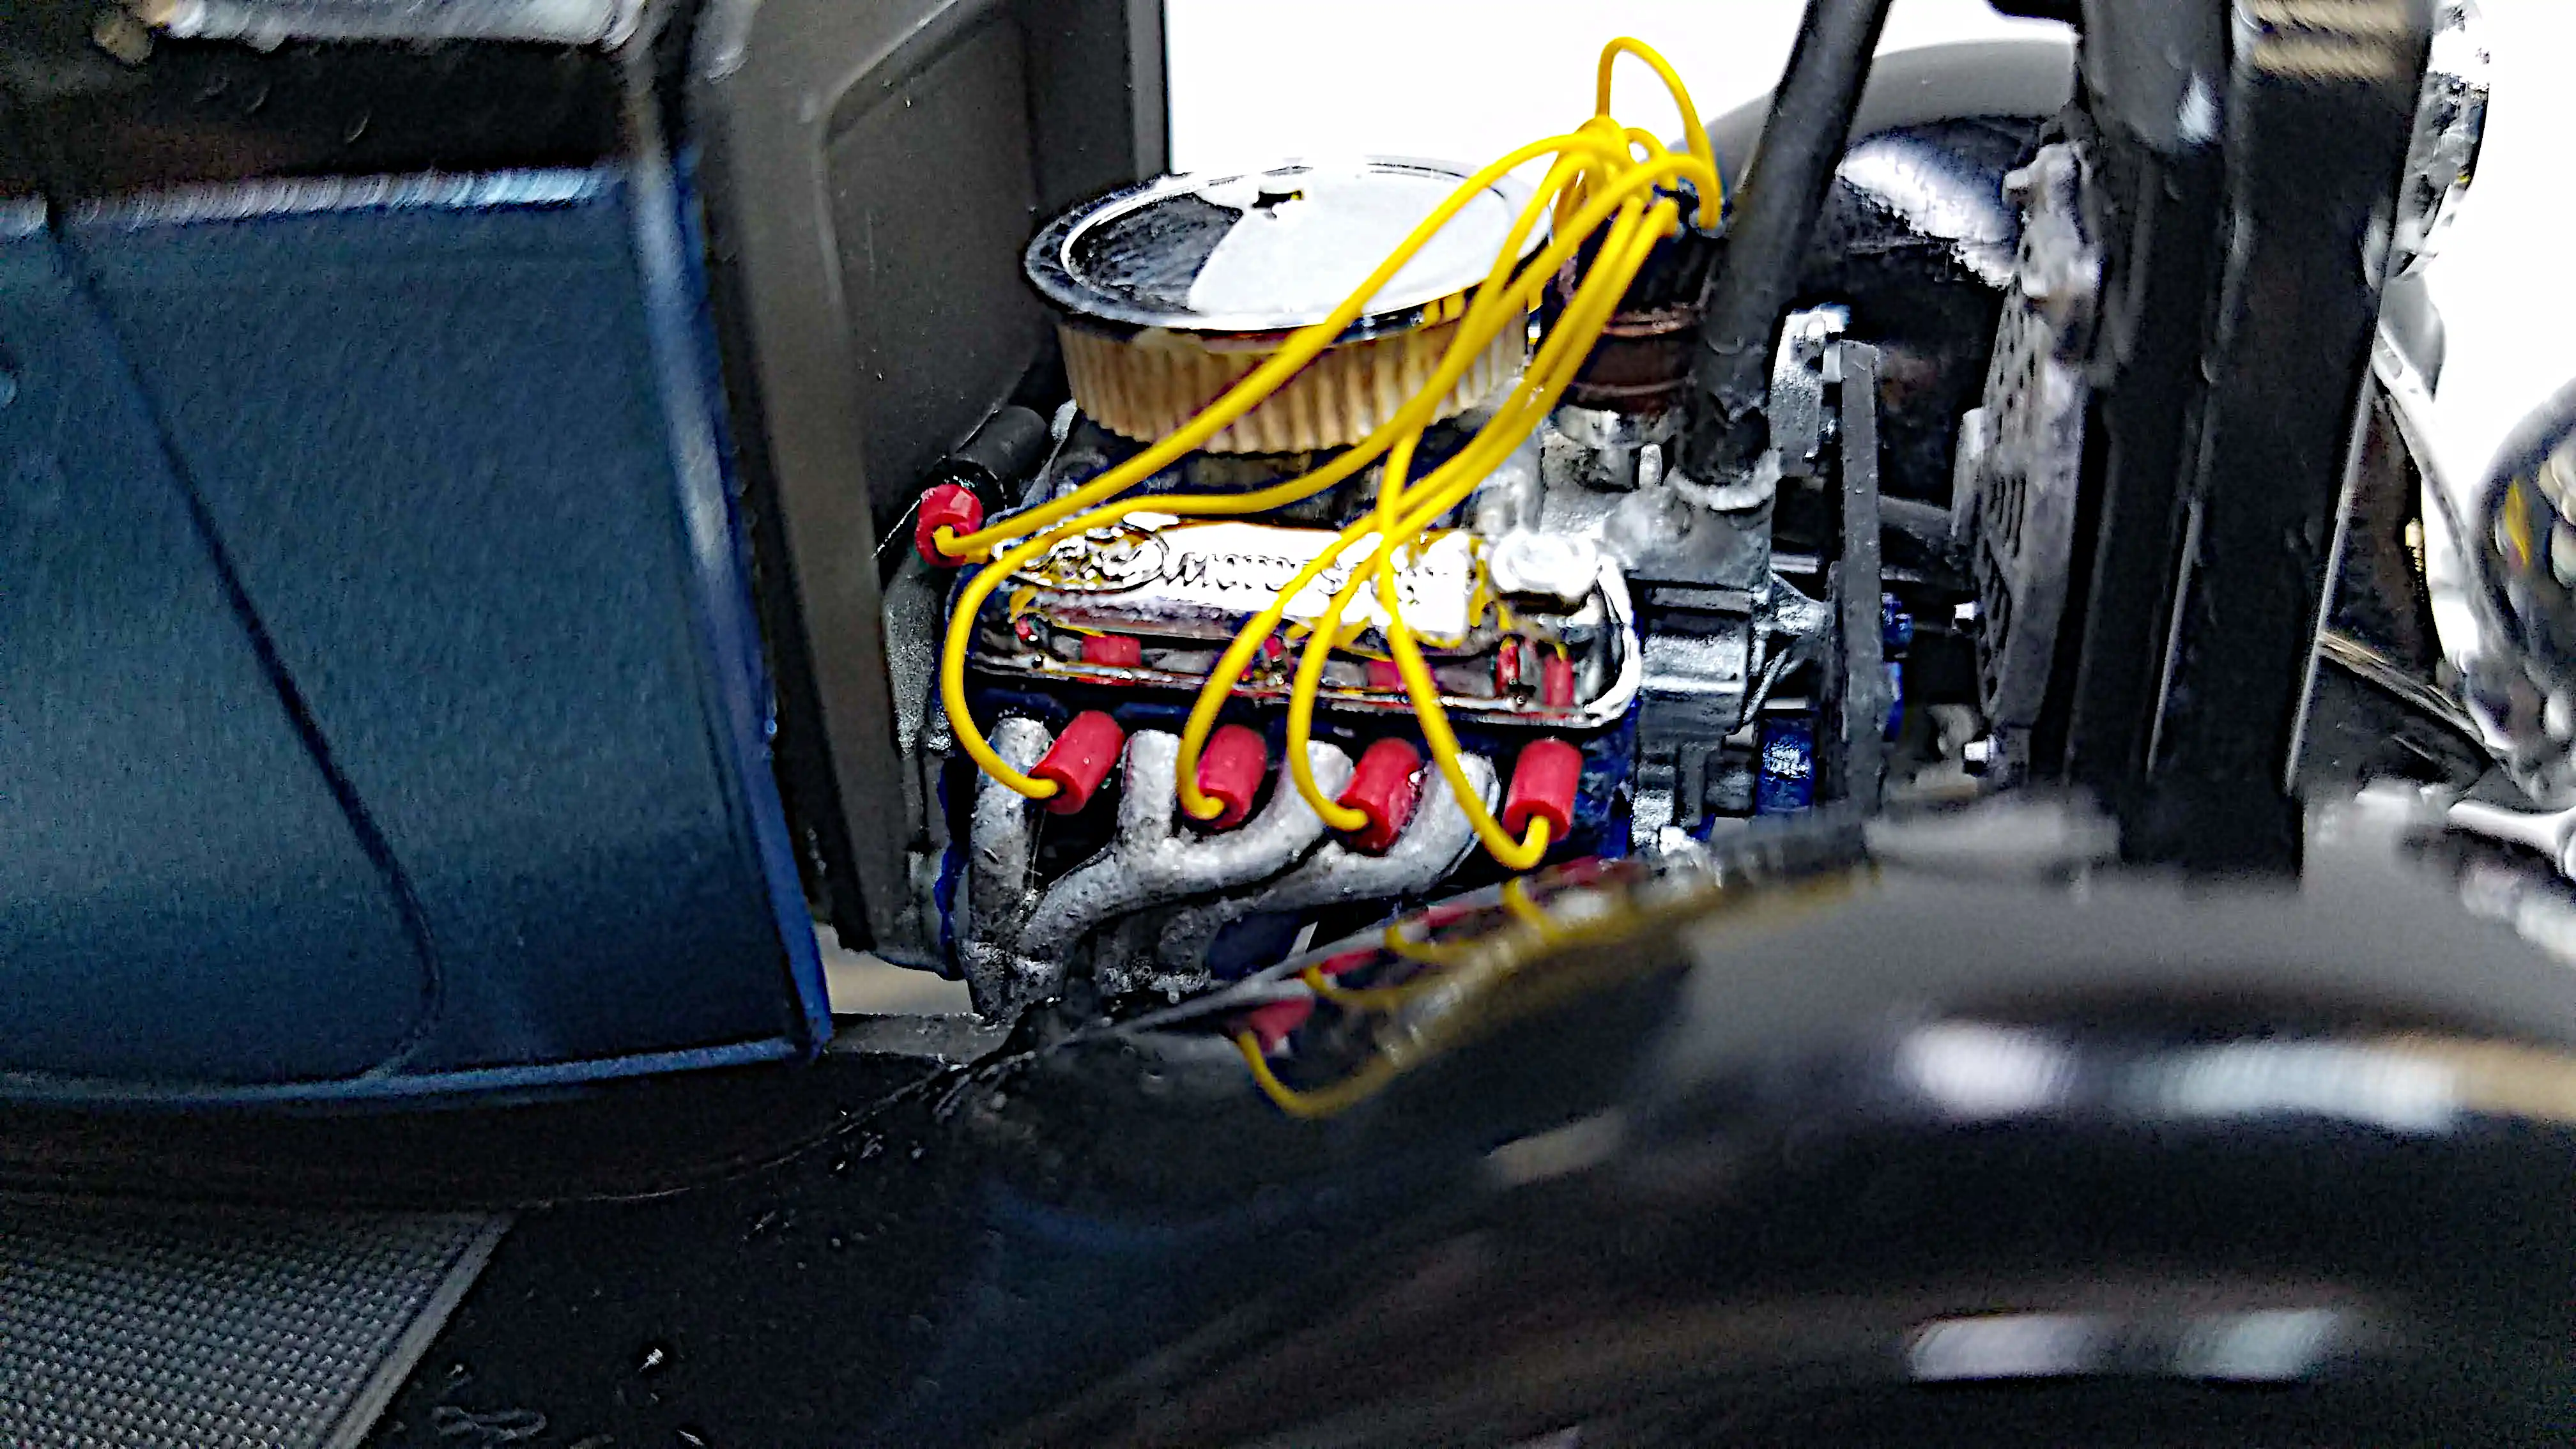
Click/tap photo to enlarge
 Finished build
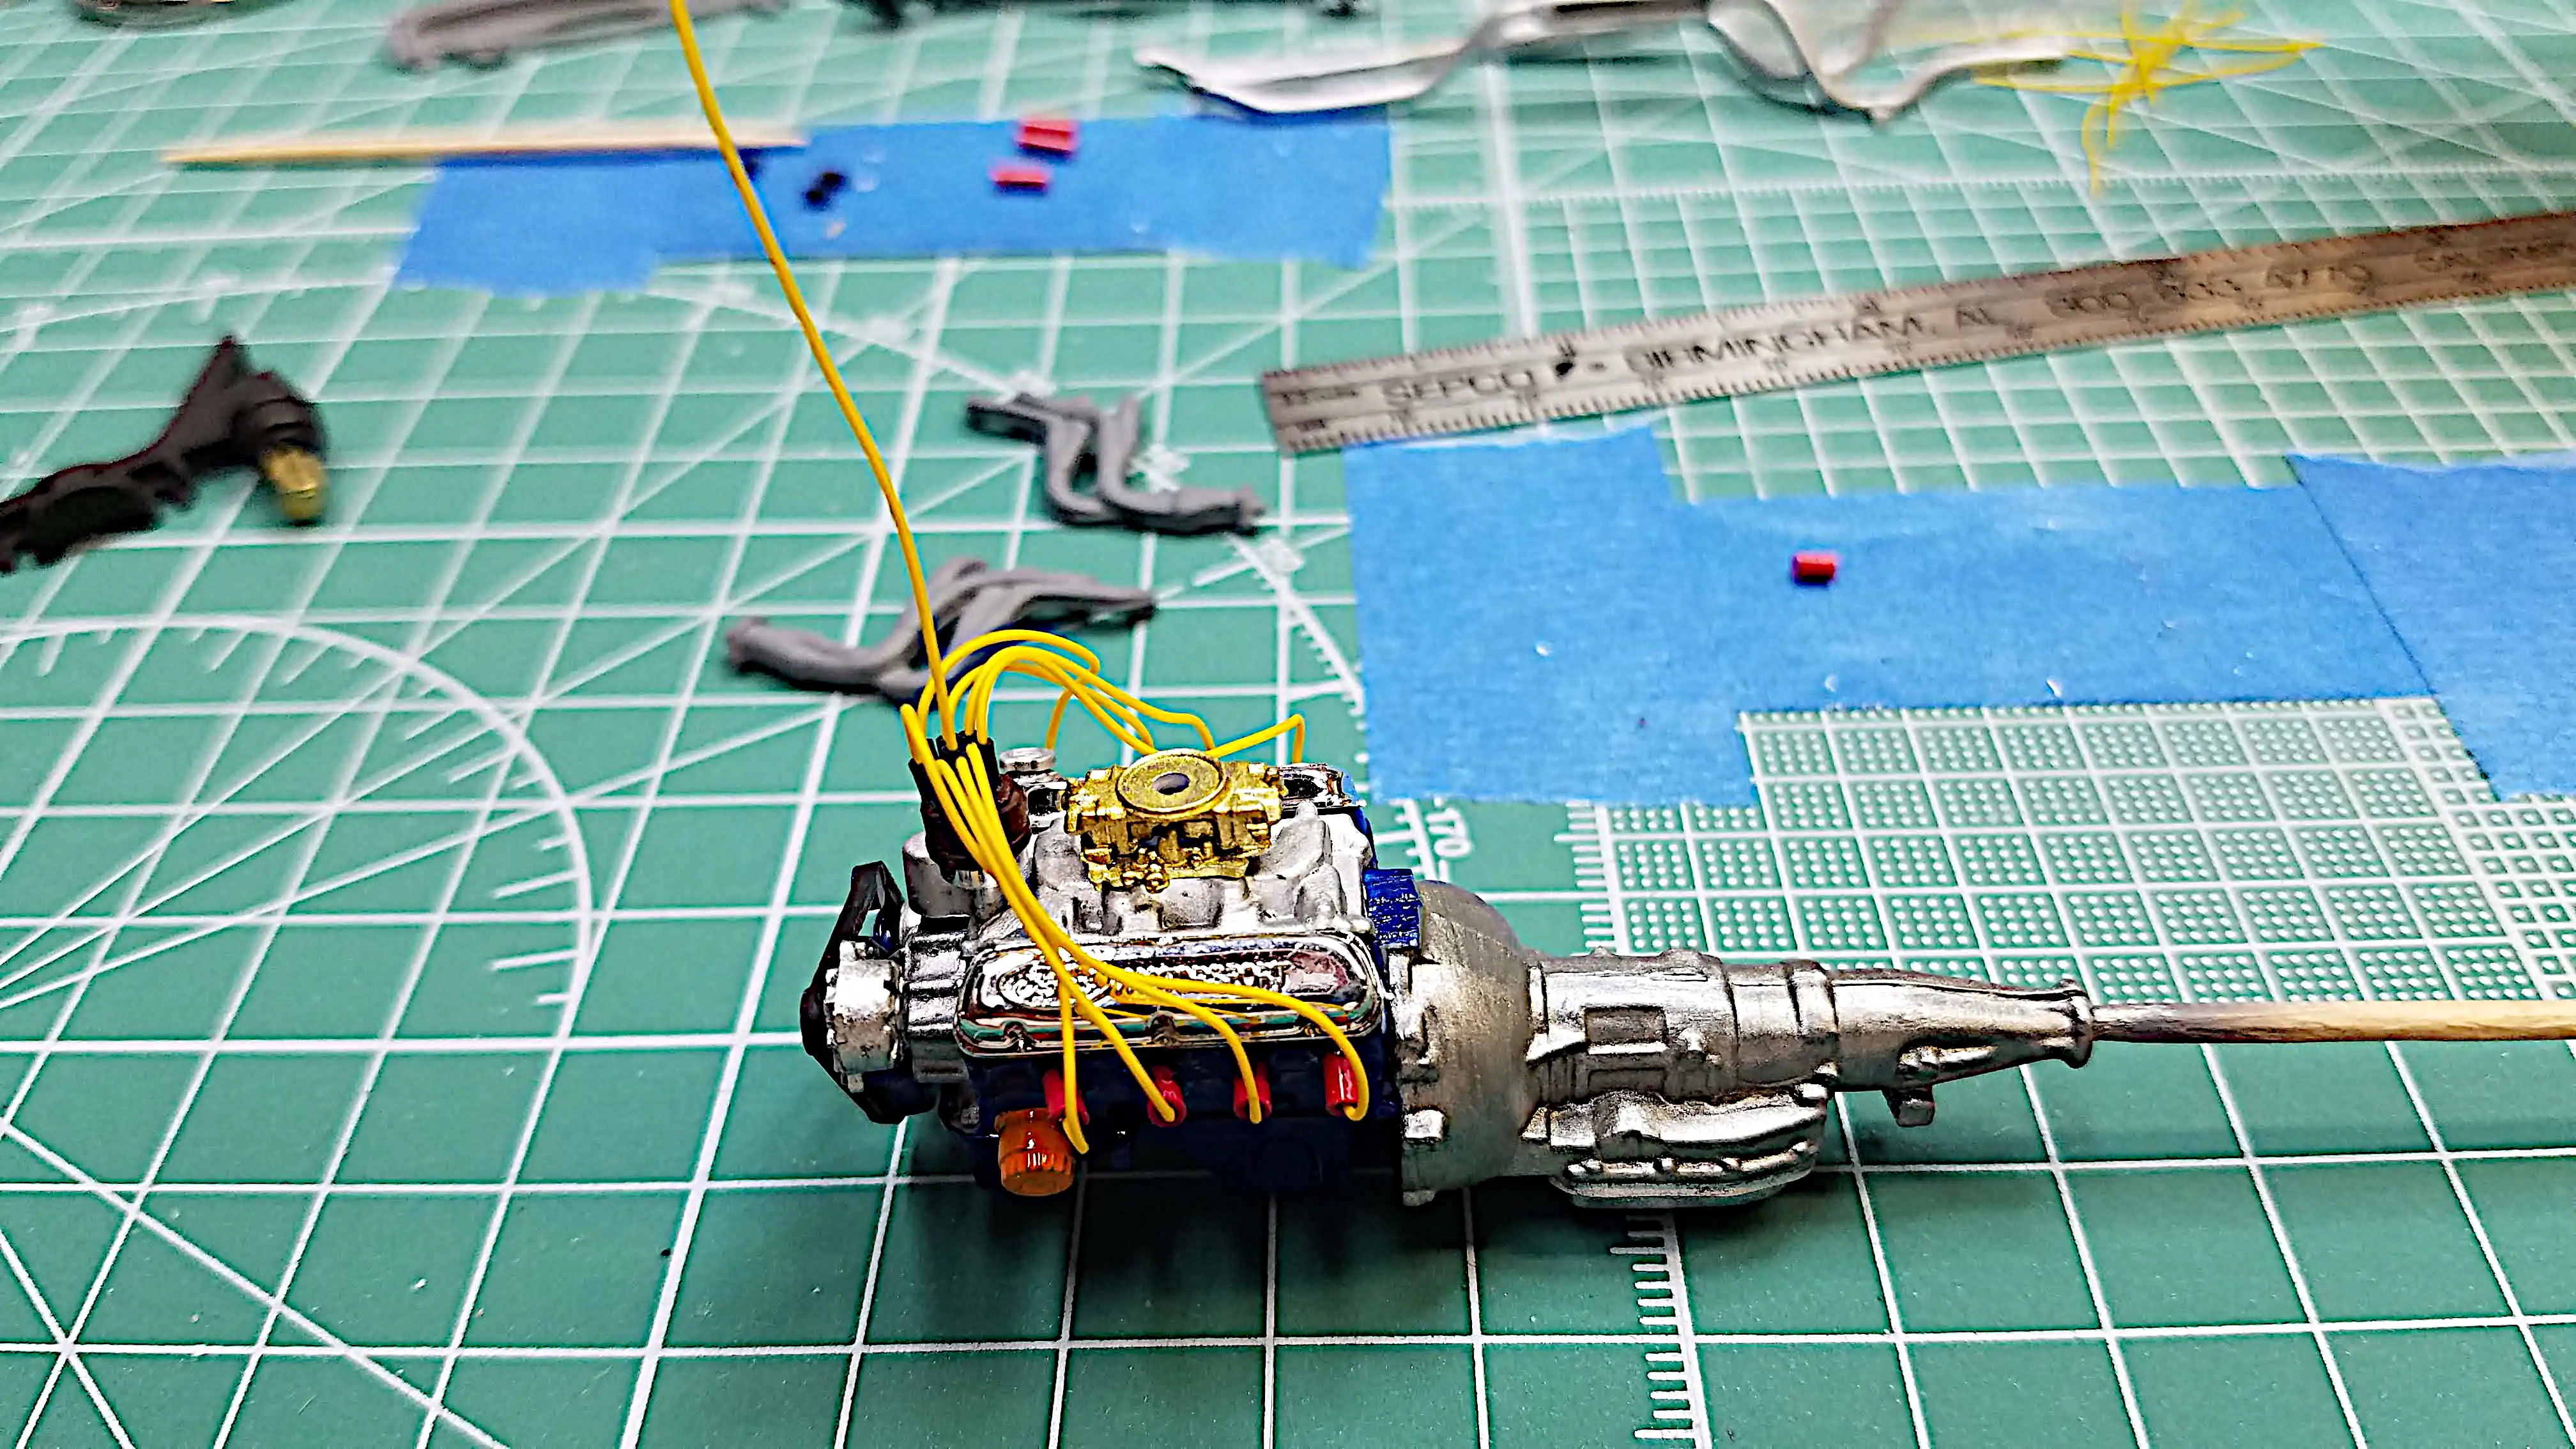
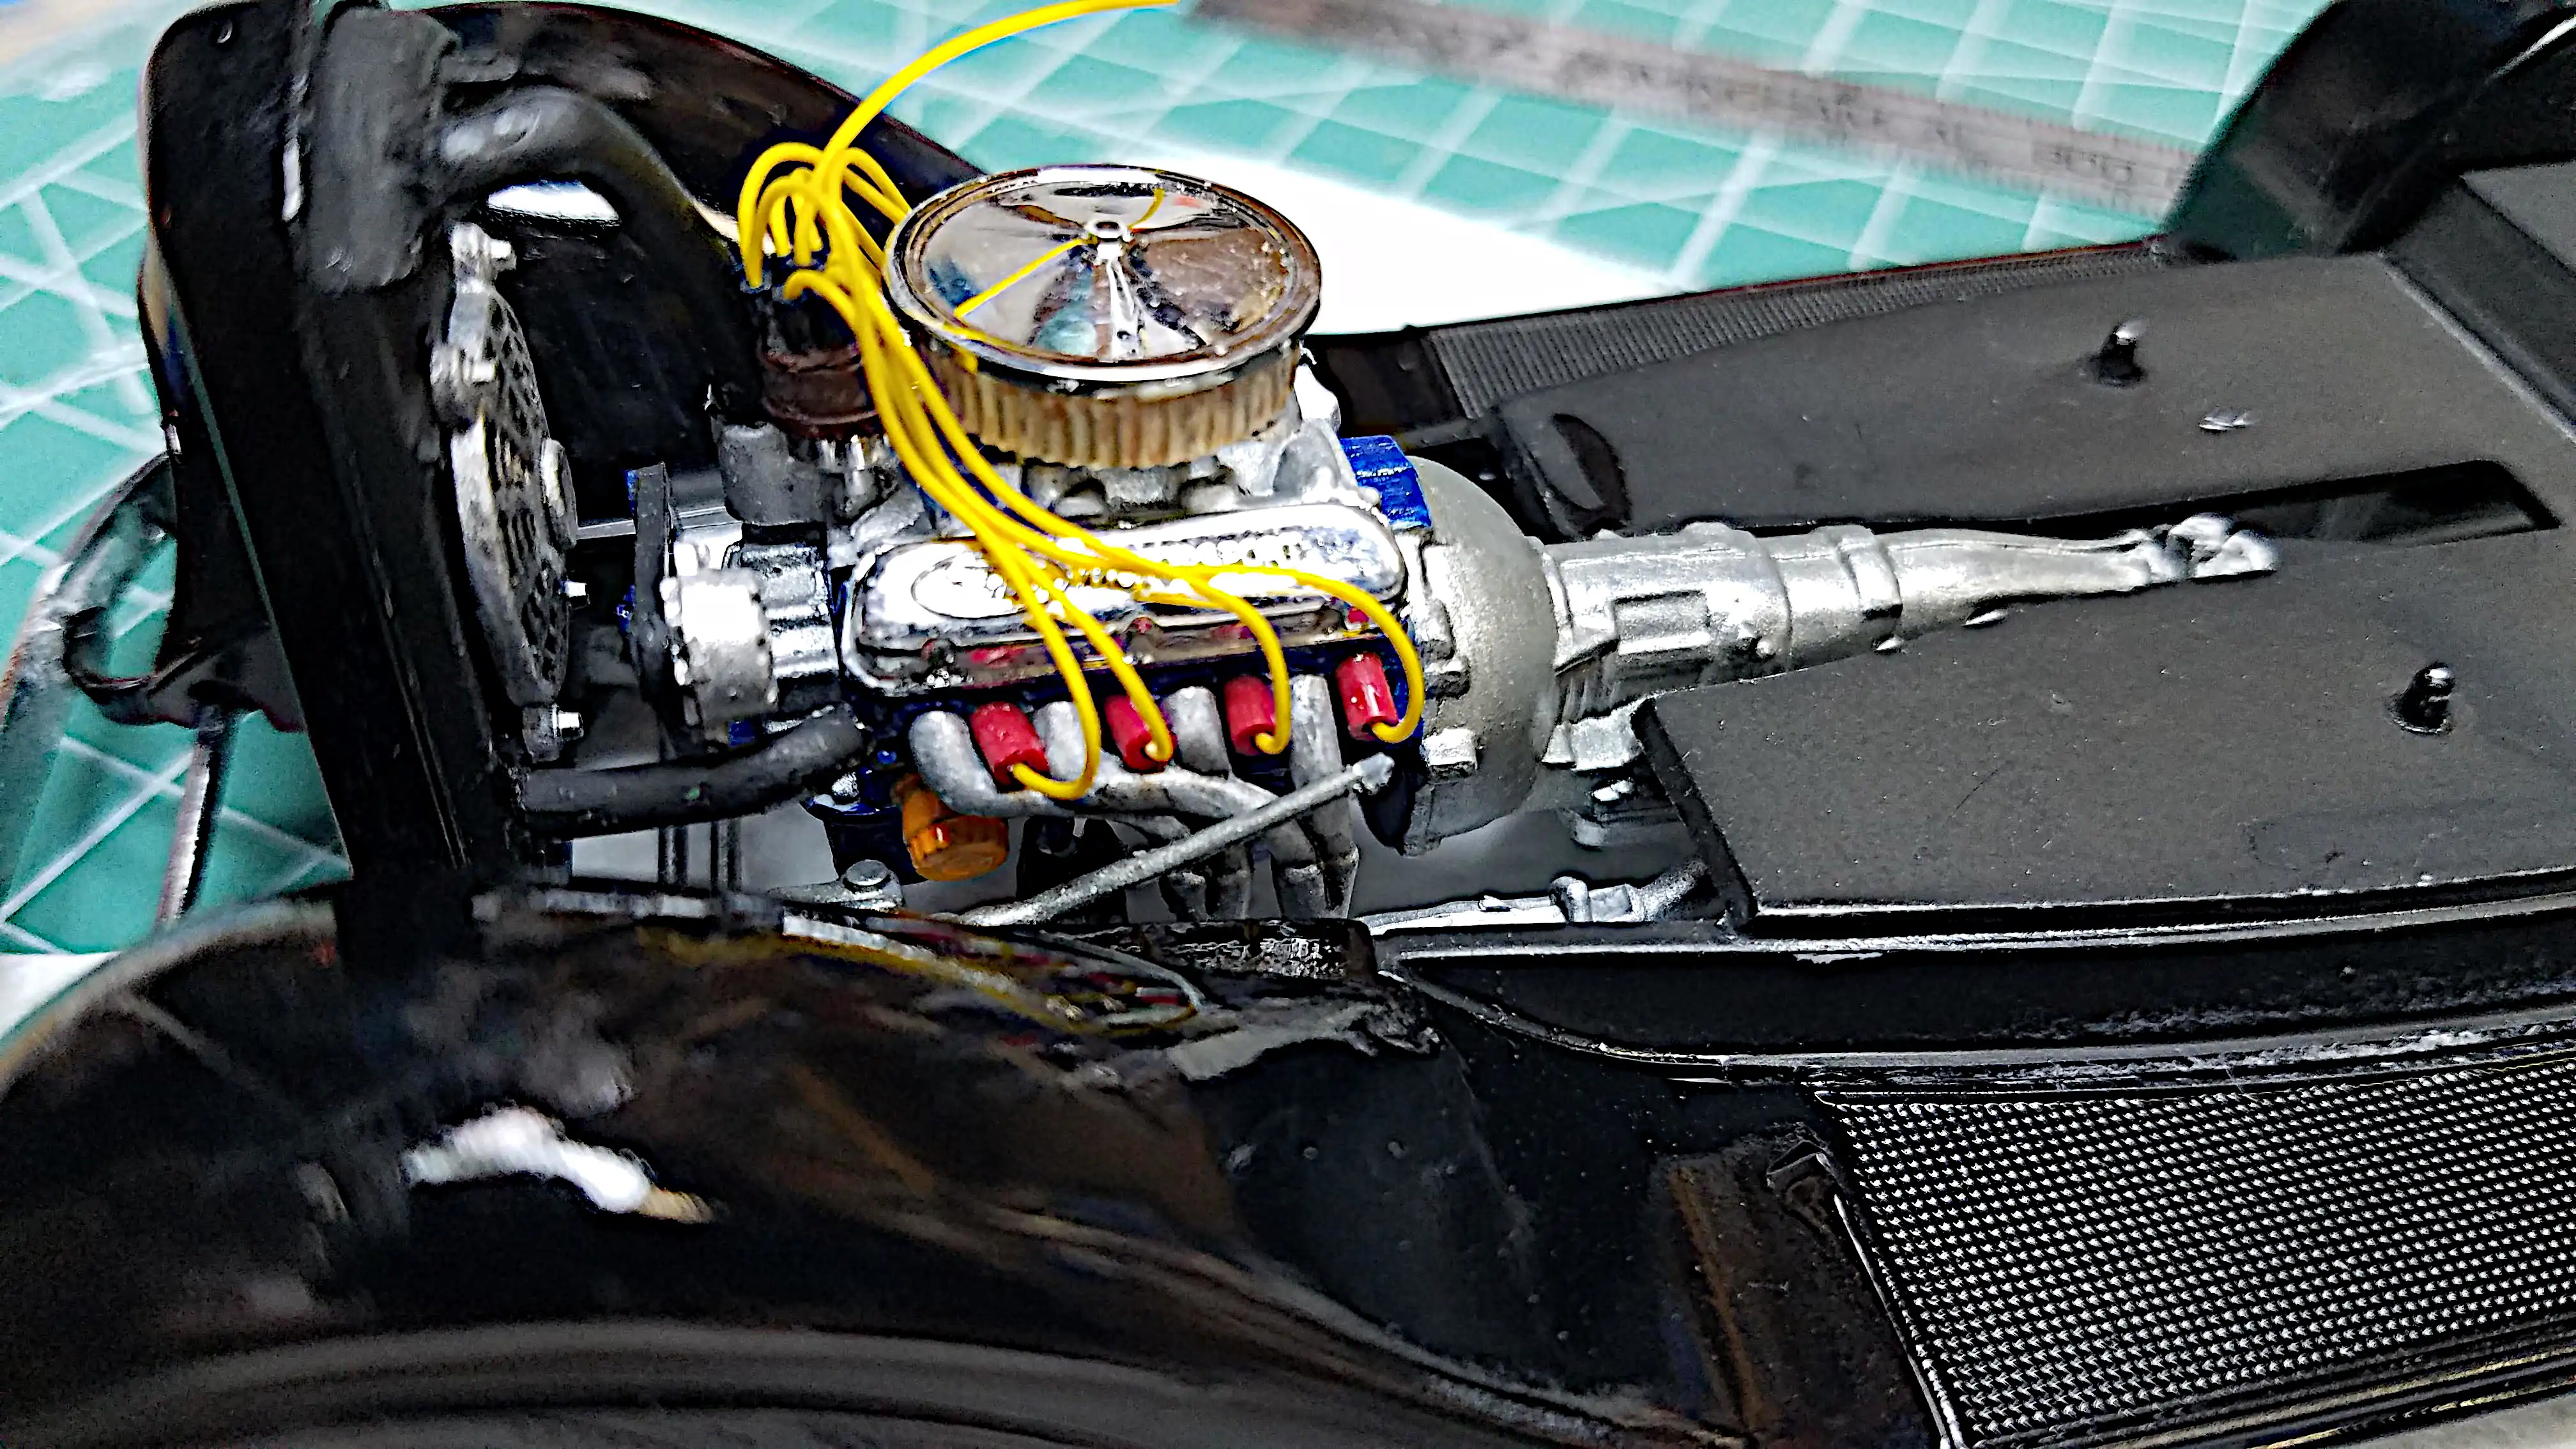
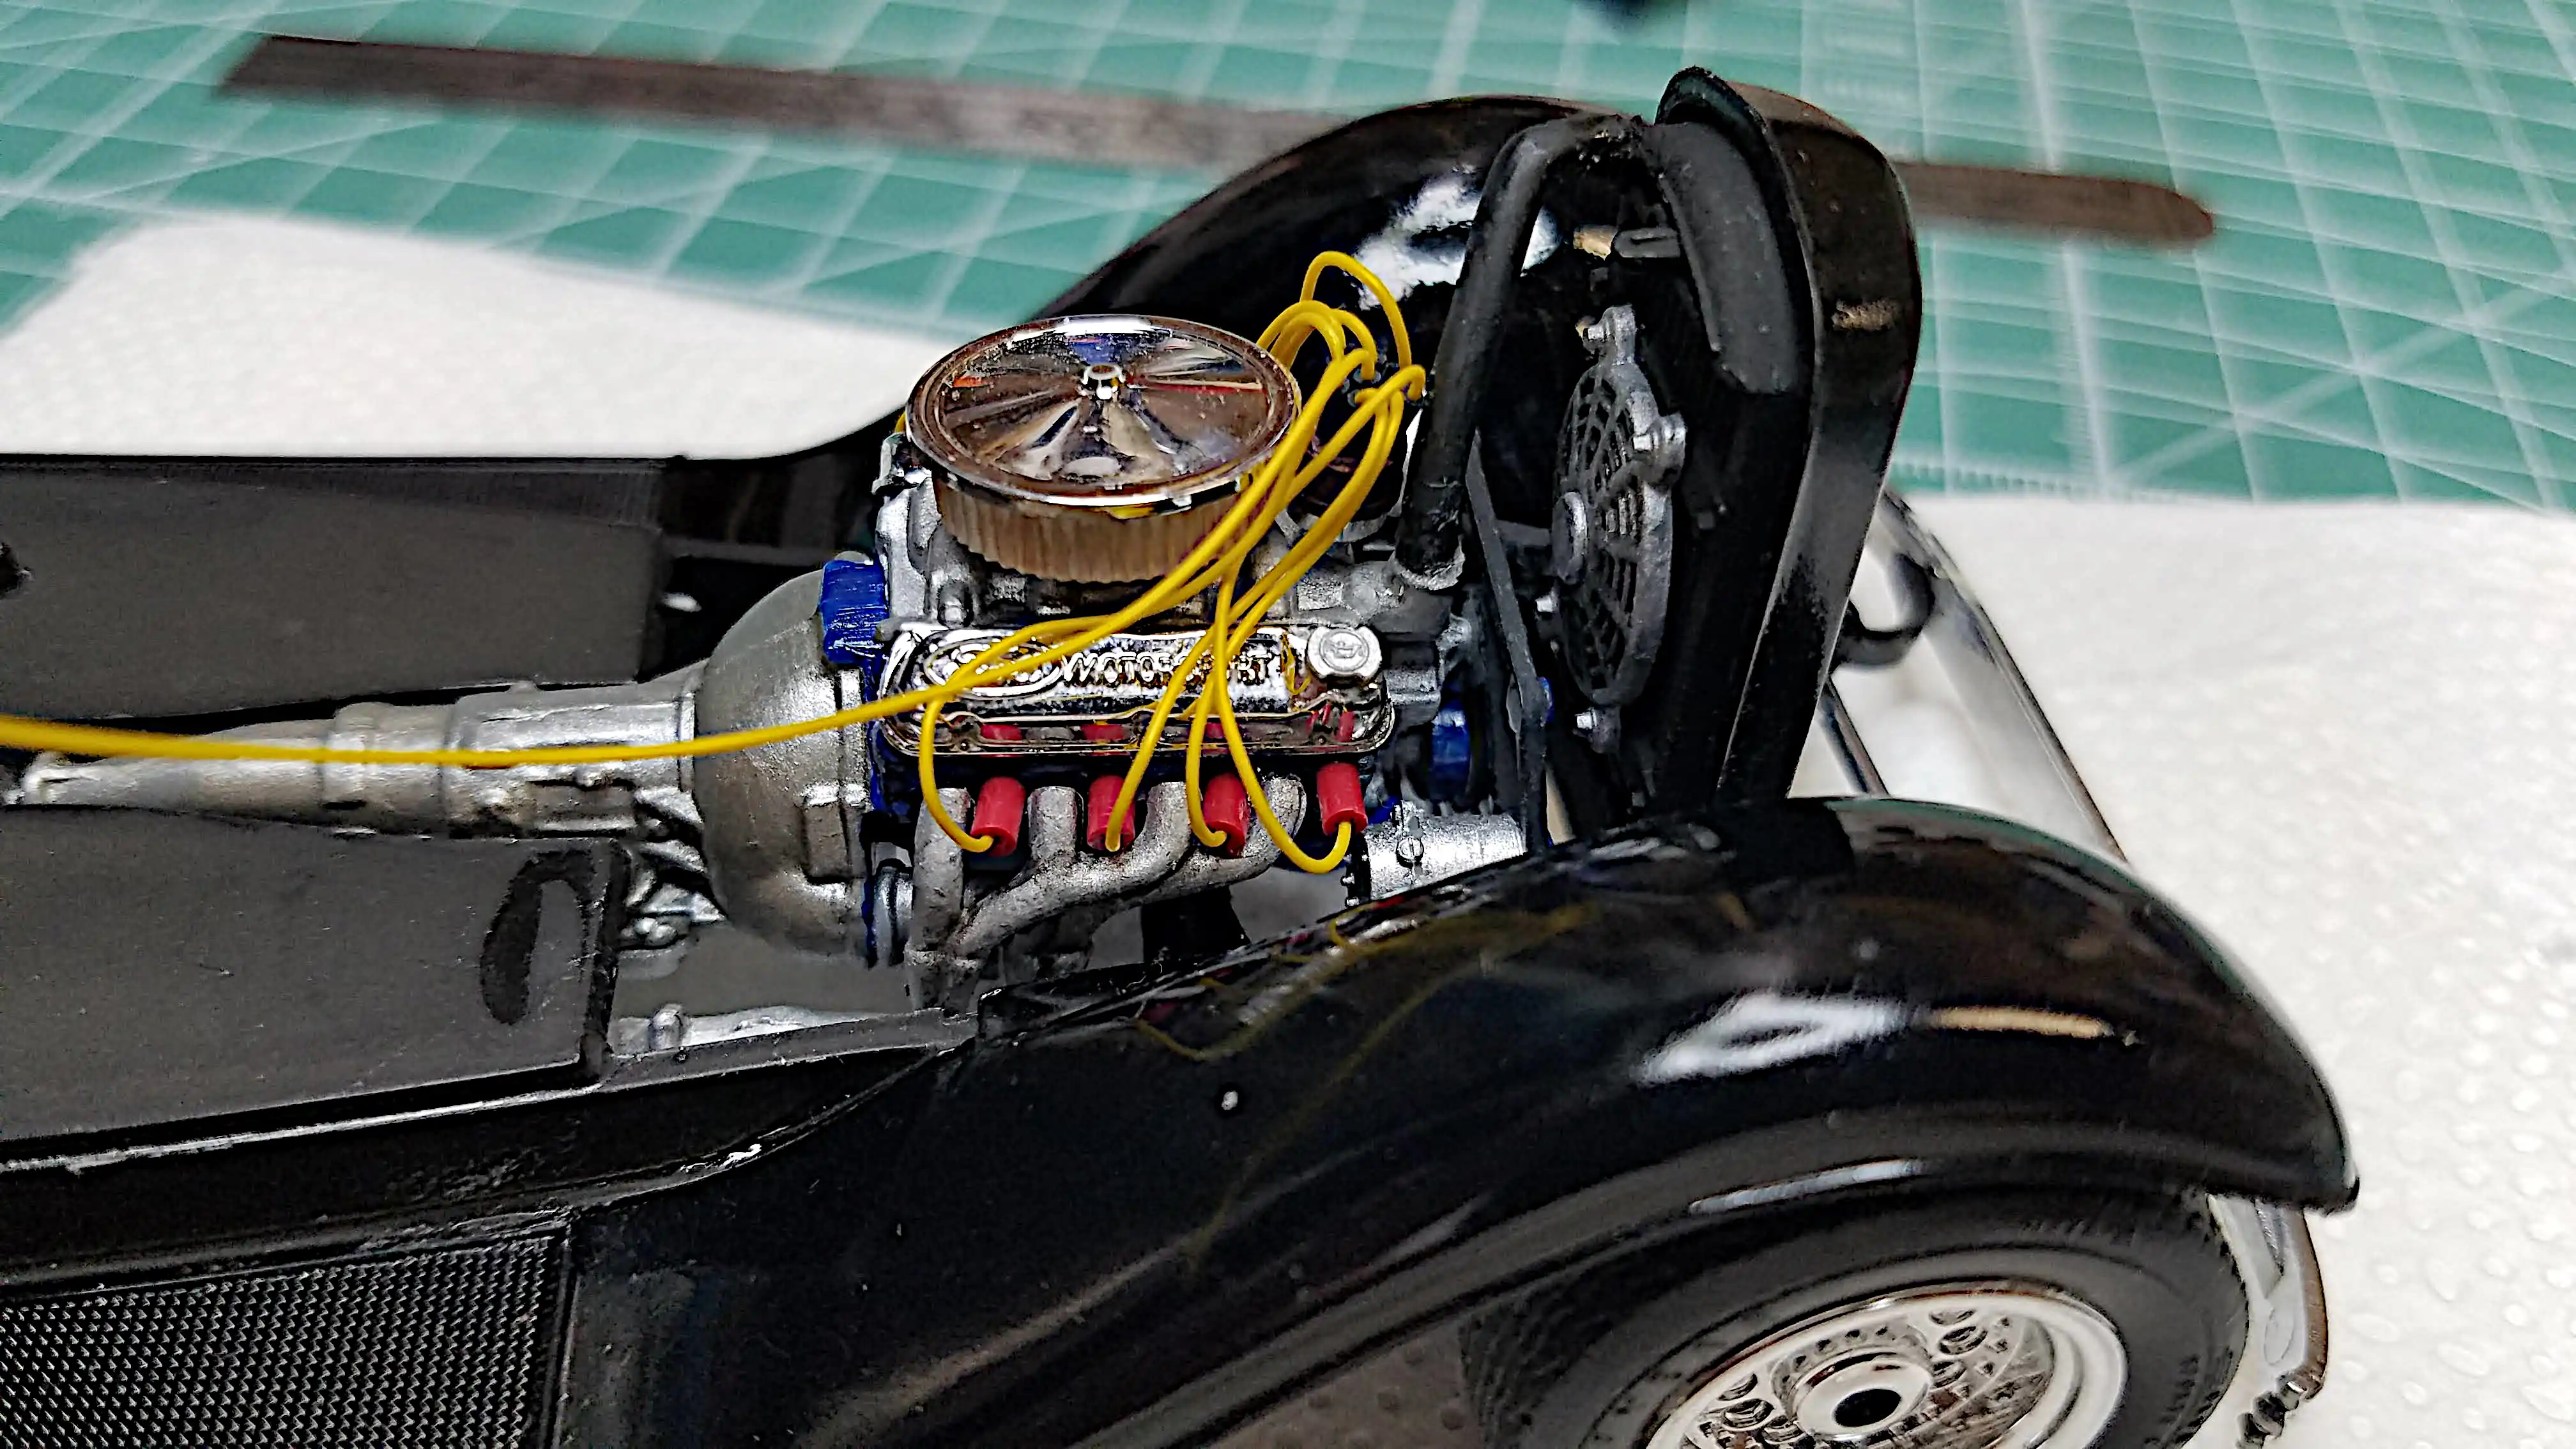
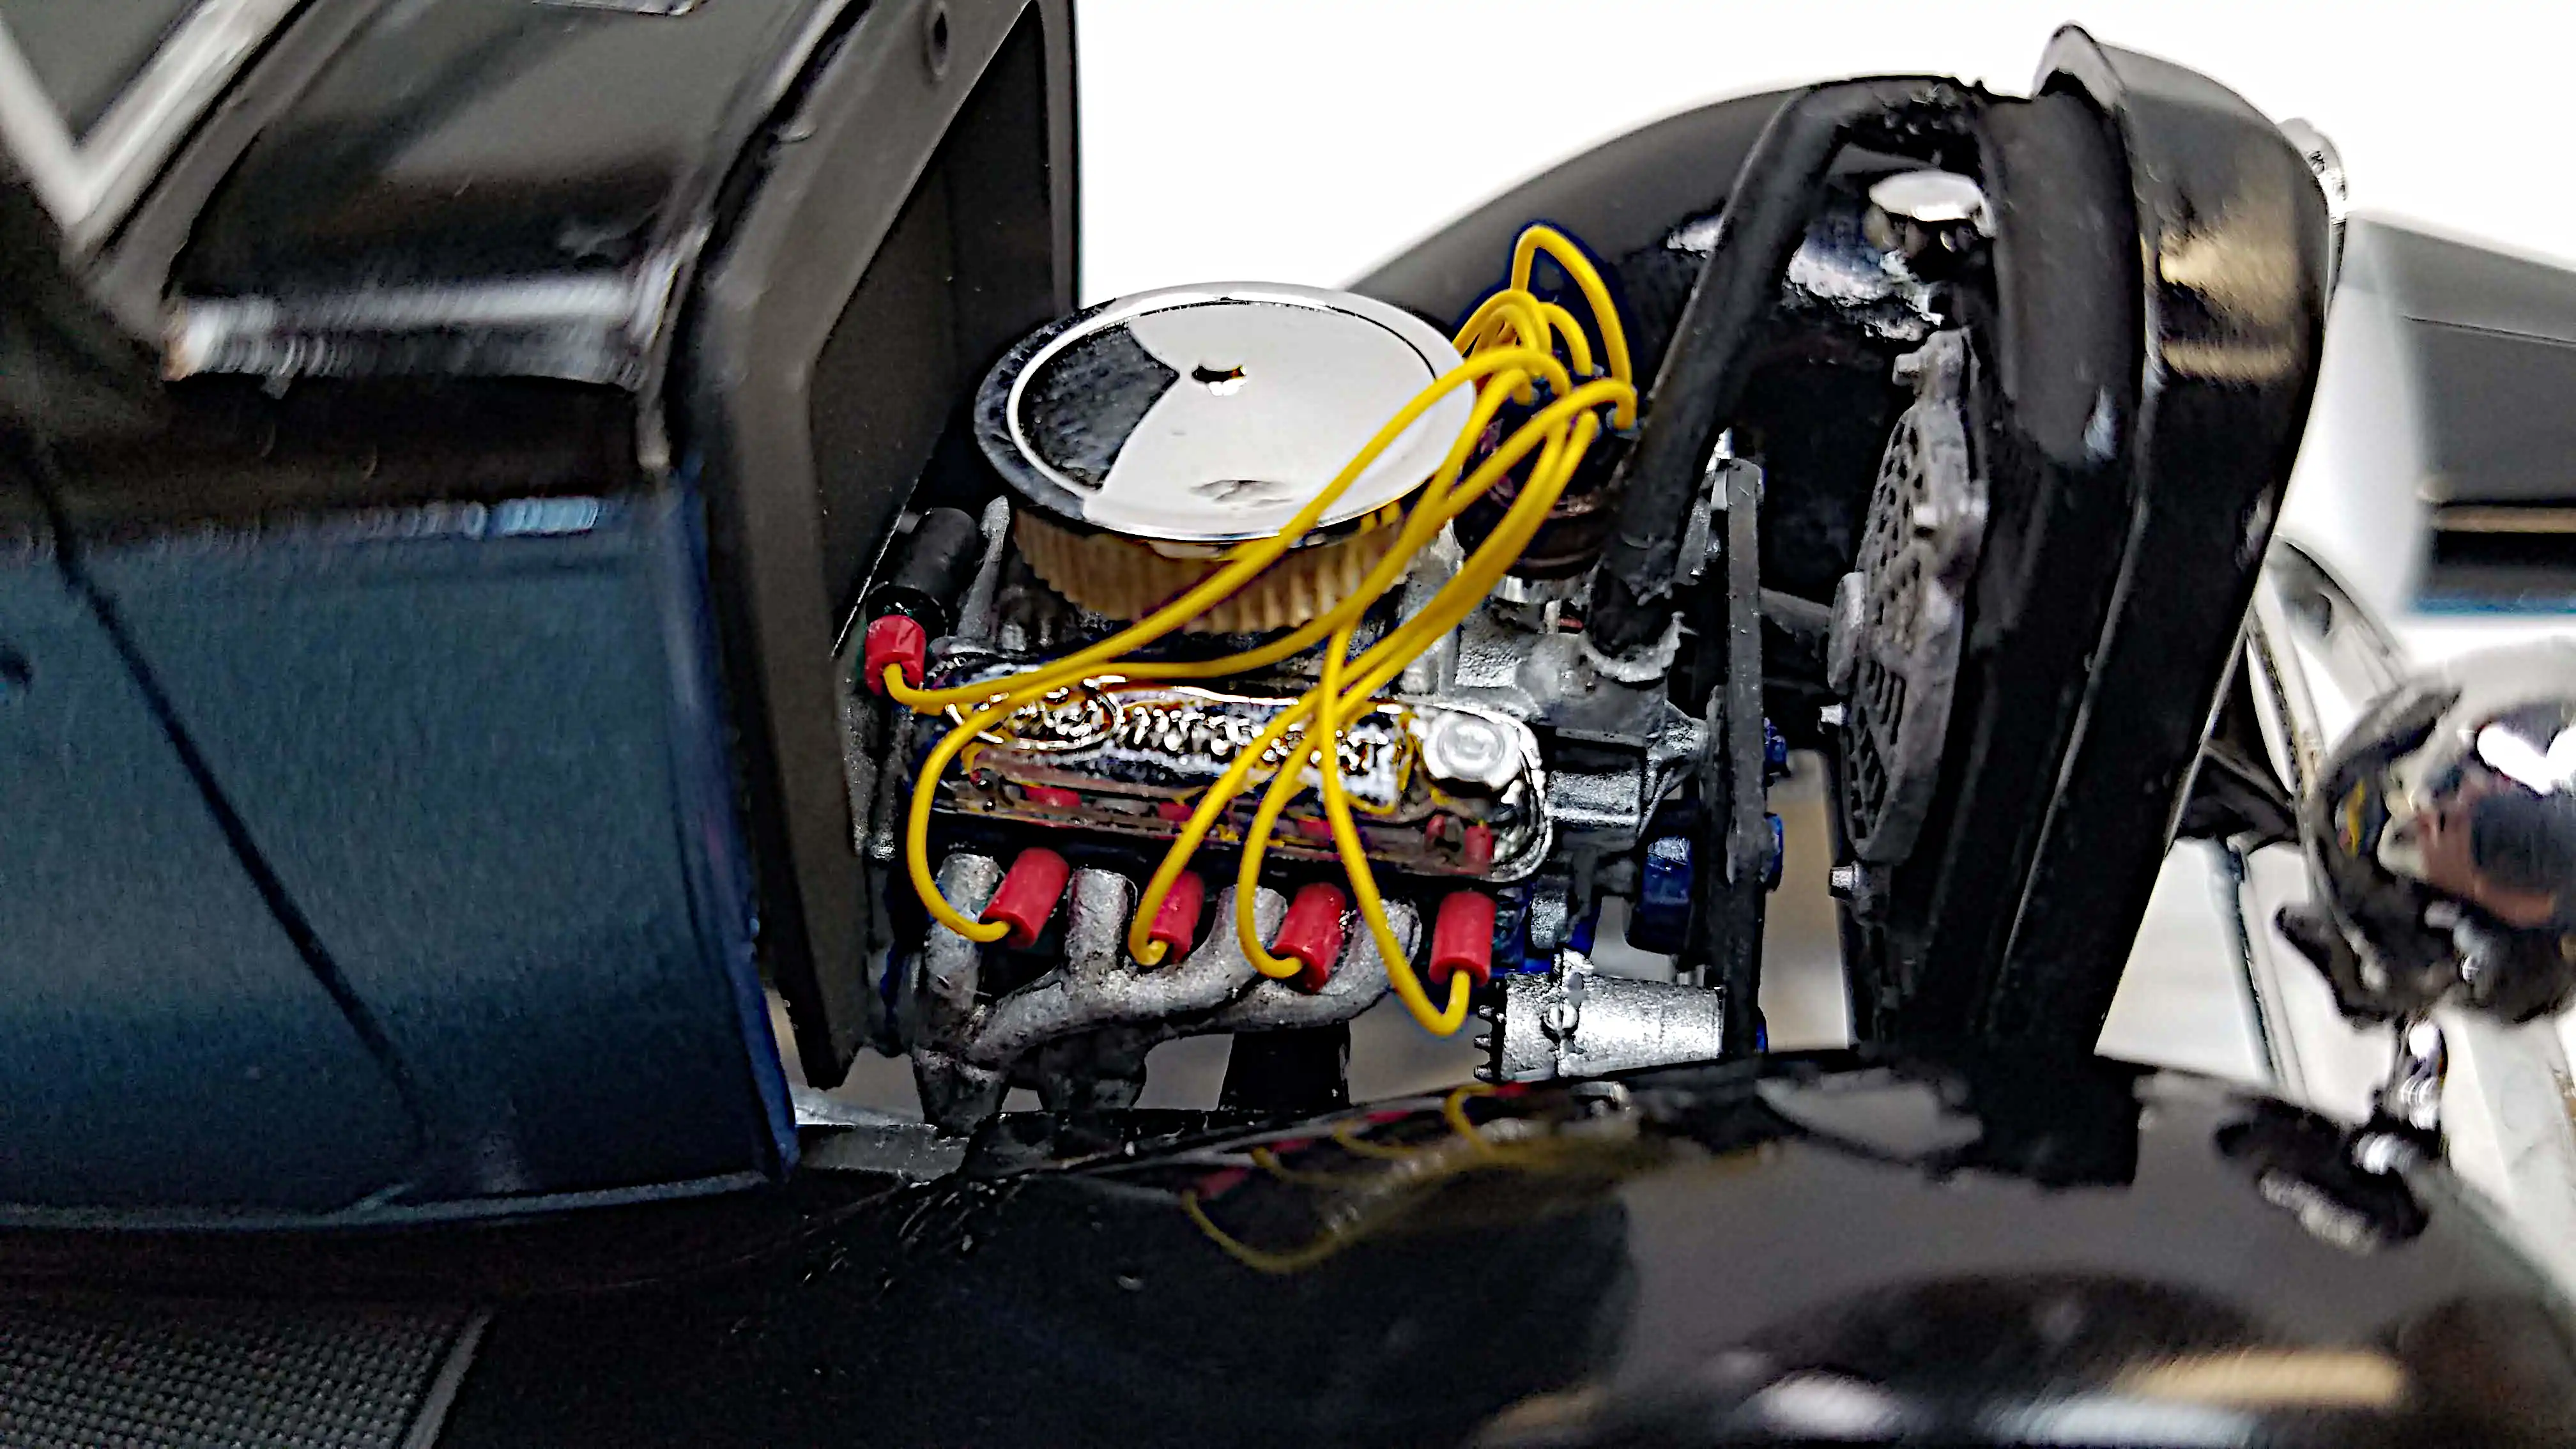
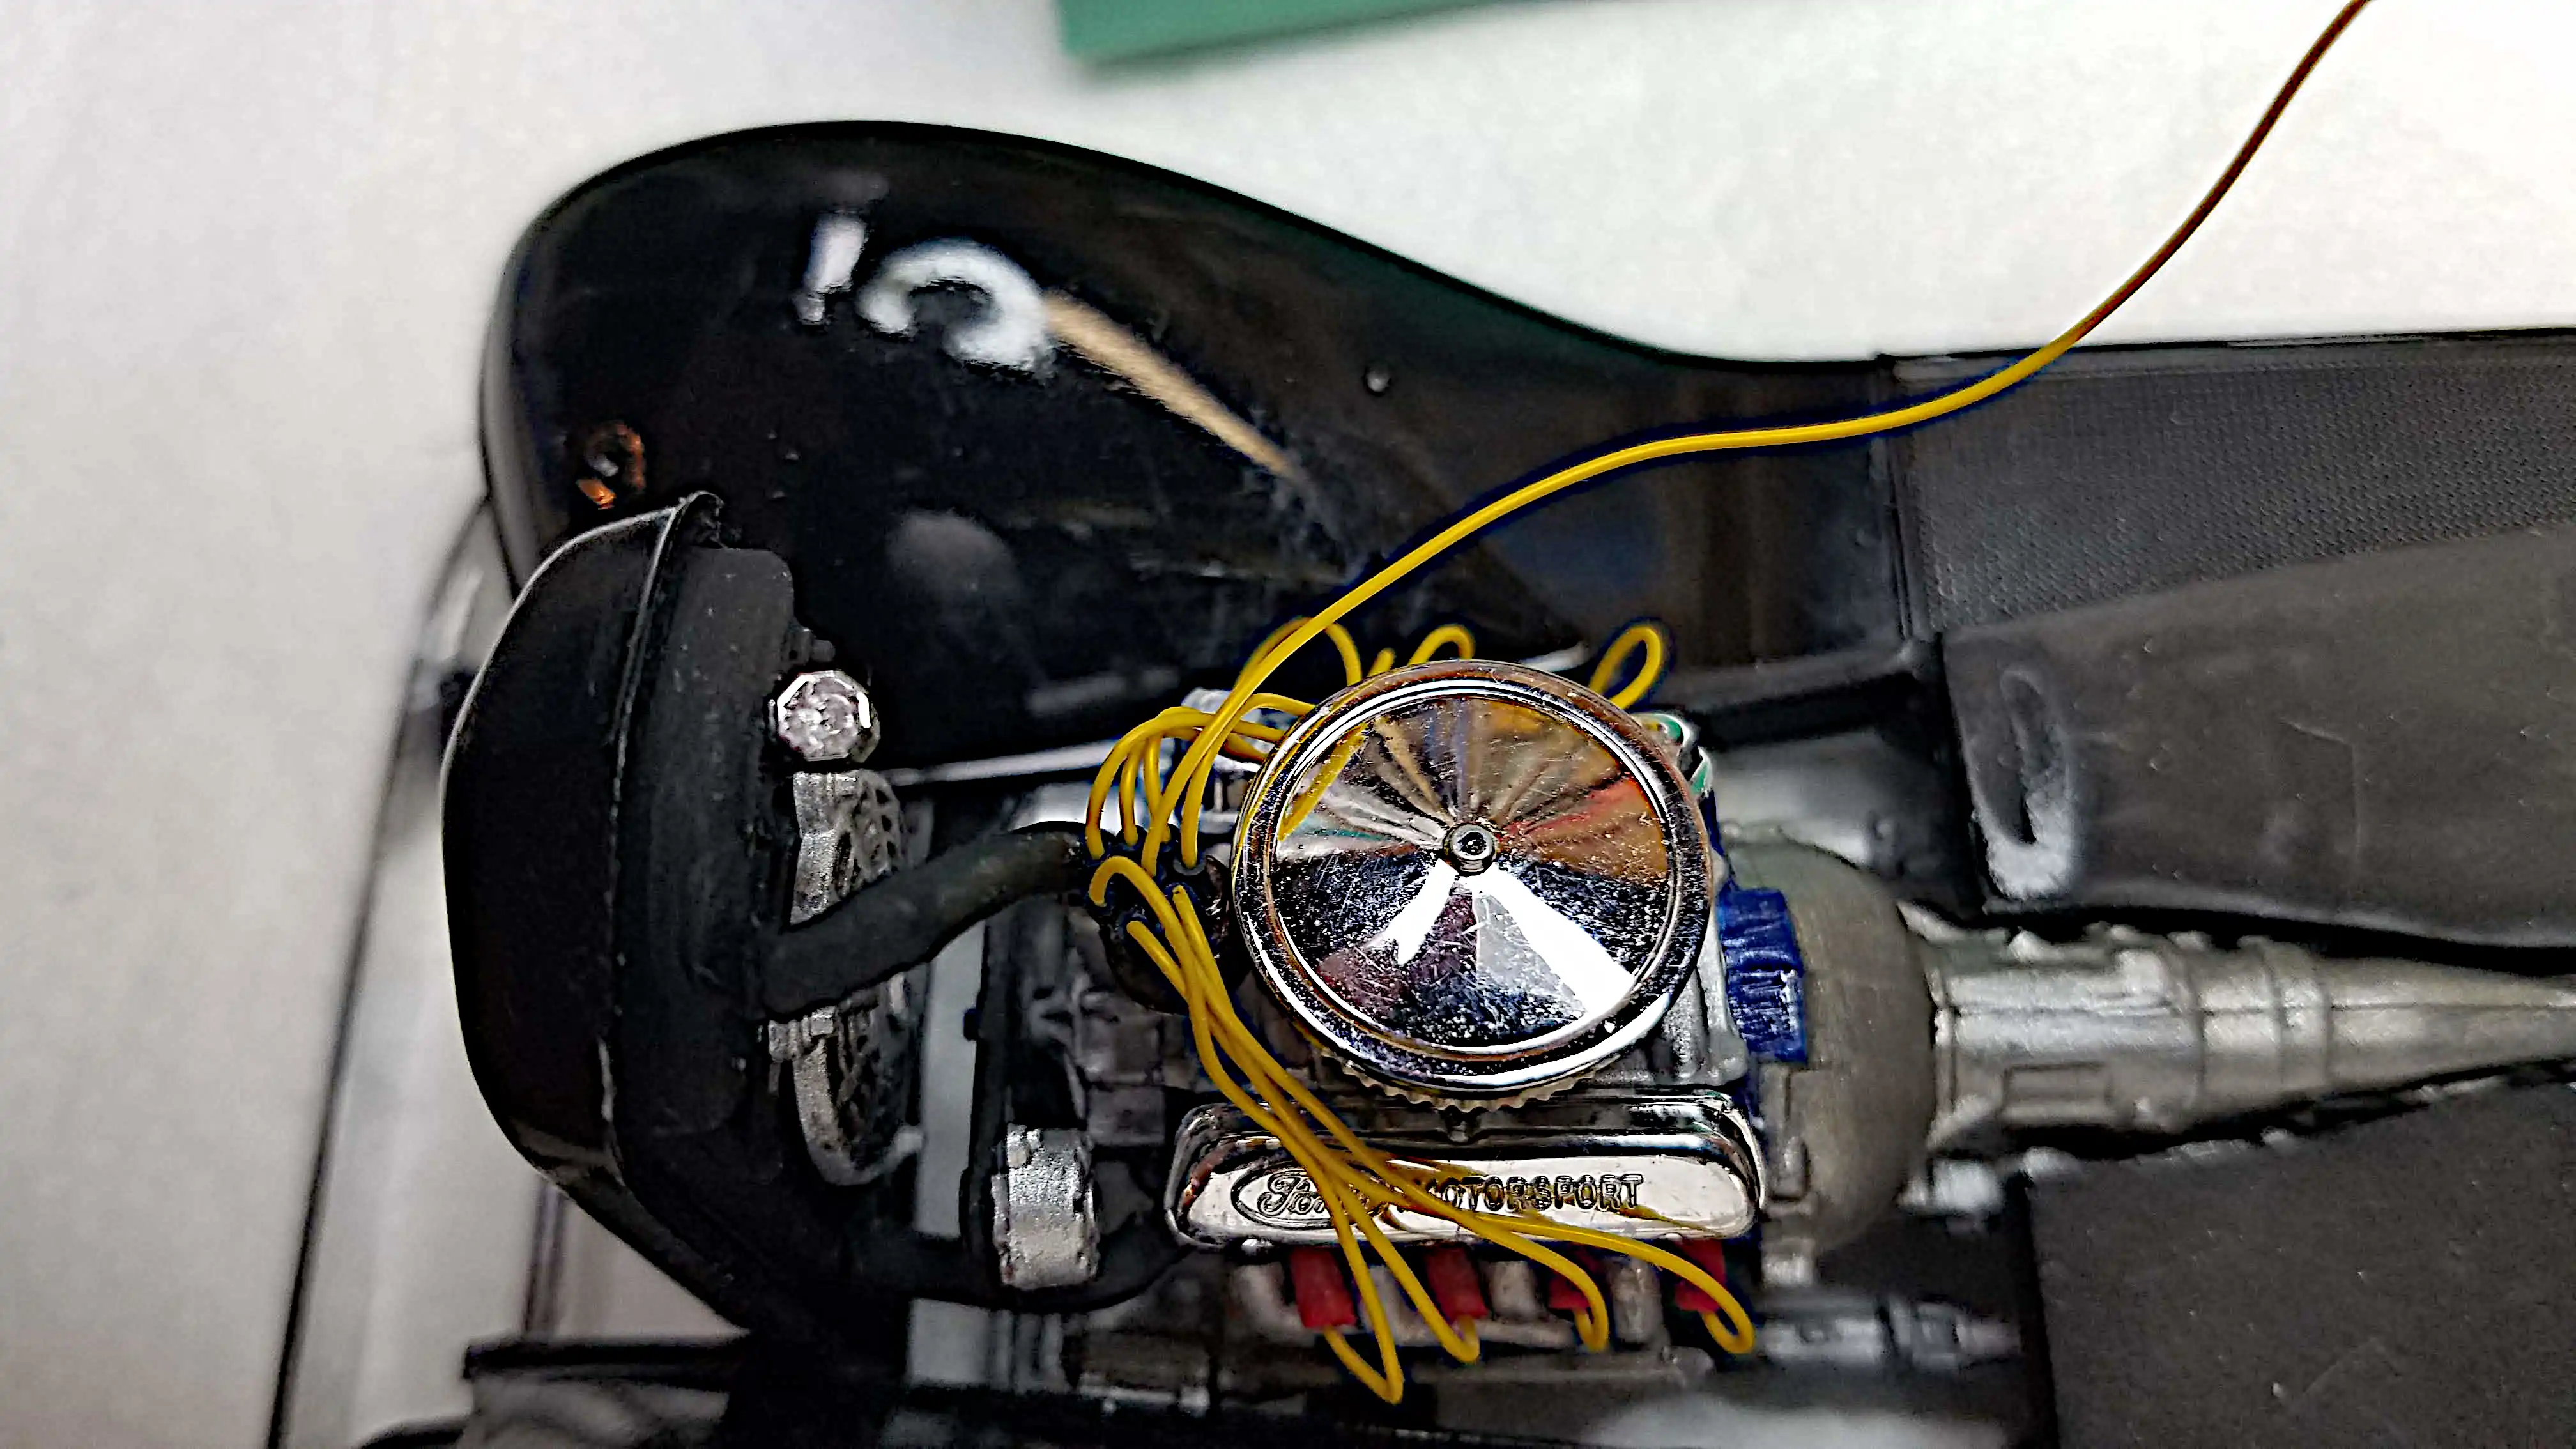
The distributor and the ignition coil are from Detail Master. The distributor was not pre-wired, therefore, all the wiring had to be added. I wanted to keep the firewall clean. Therefore, I mounted the ignition coil behind the intake manifolds. The radiator hoses are wire insulation from wire that has the correct outside diameter (OD) for the hoses. I placed a solid wire core in the insulation, bent the house according to an actual '32 Ford engine and then painted the wire insulation with Tamiya Rubber Black XF-85.
Photo 100
Click/tap photo to enlarge
 Finished build
The distributor and the ignition coil are from Detail Master. The distributor was not pre-wired, therefore, all the wiring had to be added. I wanted to keep the firewall clean. Therefore, I mounted the ignition coil behind the intake manifolds. The radiator hoses are wire insulation from wire that has the correct outside diameter (OD) for the hoses. I placed a solid wire core in the insulation, bent the house according to an actual '32 Ford engine and then painted the wire insulation with Tamiya Rubber Black XF-85.
Photo 101
Click/tap photo to enlarge
 Finished build
The distributor and the ignition coil are from Detail Master. The distributor was not pre-wired, therefore, all the wiring had to be added. I wanted to keep the firewall clean. Therefore, I mounted the ignition coil behind the intake manifolds. The radiator hoses are wire insulation from wire that has the correct outside diameter (OD) for the hoses. I placed a solid wire core in the insulation, bent the house according to an actual '32 Ford engine and then painted the wire insulation with Tamiya Rubber Black XF-85.
Photo 102
Click/tap photo to enlarge
 Finished build
The distributor and the ignition coil are from Detail Master. The distributor was not pre-wired, therefore, all the wiring had to be added. I wanted to keep the firewall clean. Therefore, I mounted the ignition coil behind the intake manifolds. The radiator hoses are wire insulation from wire that has the correct outside diameter (OD) for the hoses. I placed a solid wire core in the insulation, bent the house according to an actual '32 Ford engine and then painted the wire insulation with Tamiya Rubber Black XF-85.


 Repaired painting disaster
 Radiator cap installed
 Finished build
 Finished build
 Finished build